


duffymahoney
Free Member
-
Joined
-
Last visited
Everything posted by duffymahoney
-
-
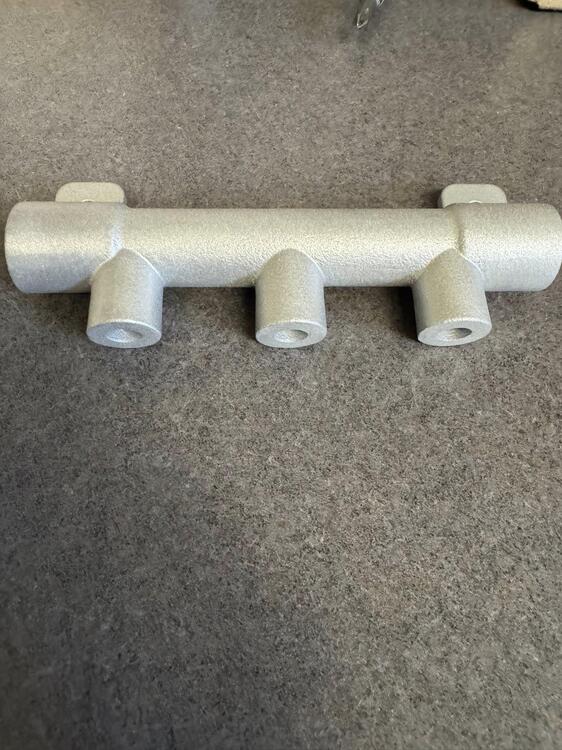
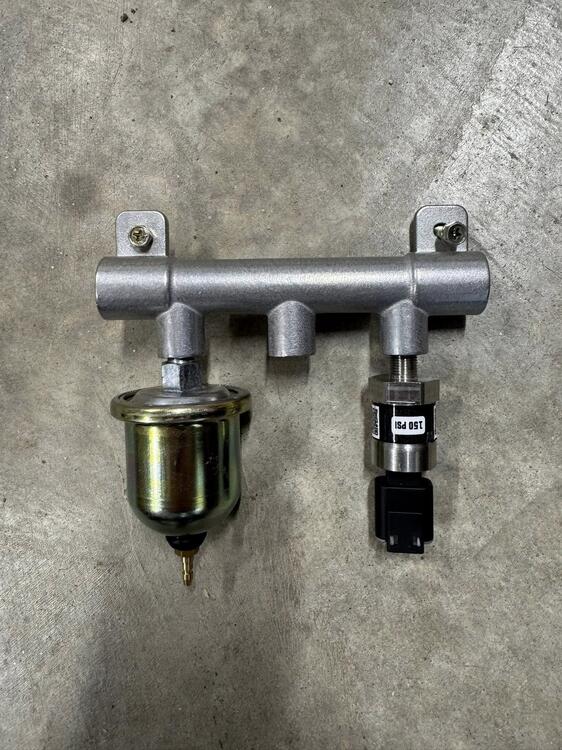
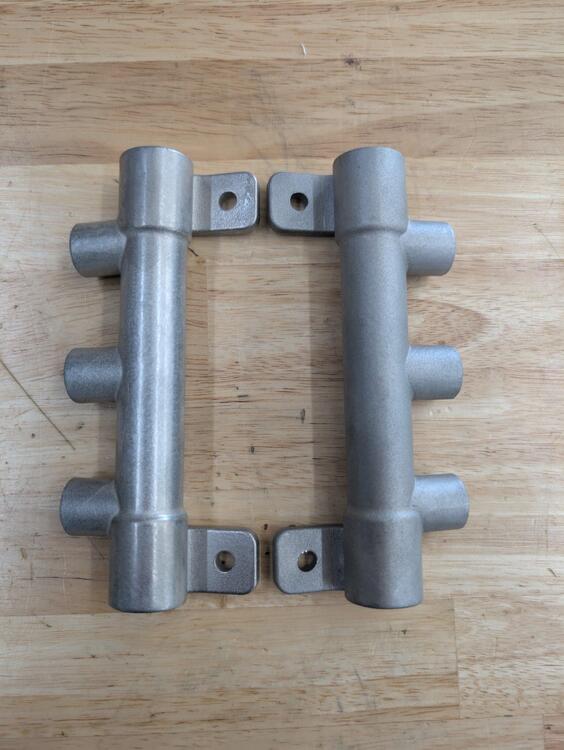
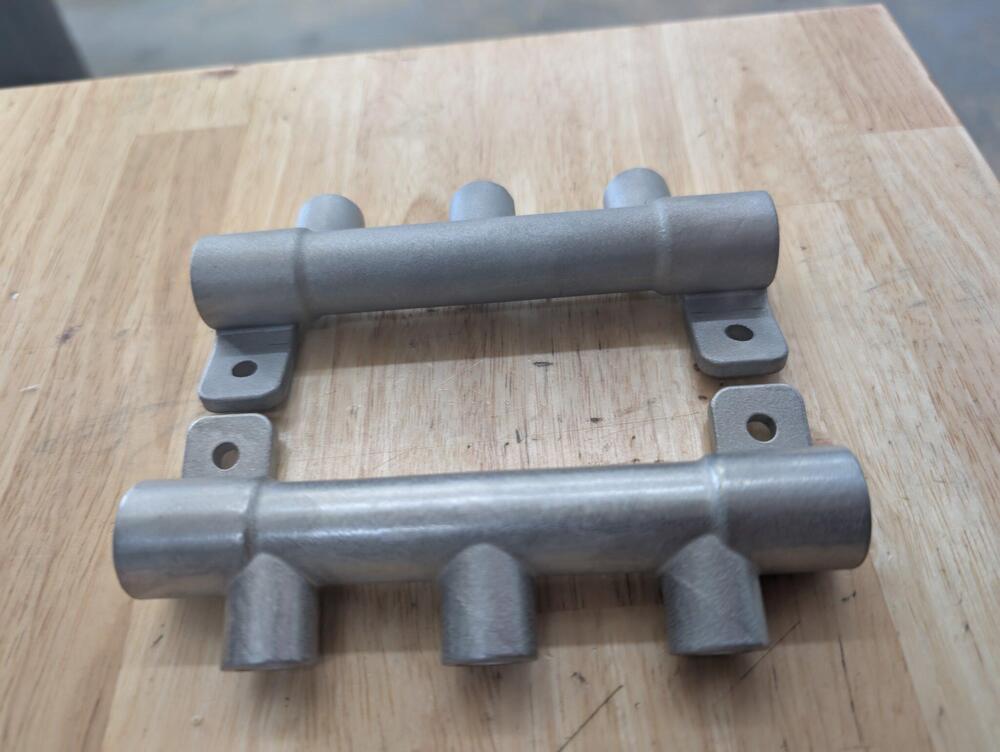
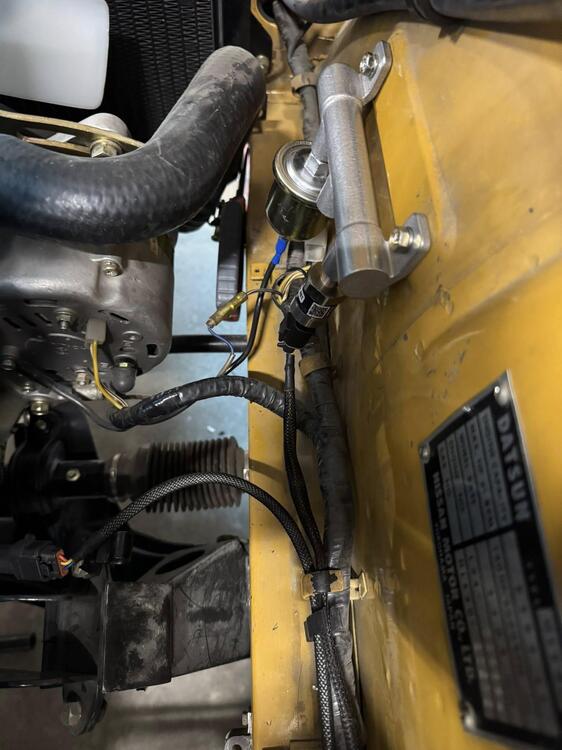
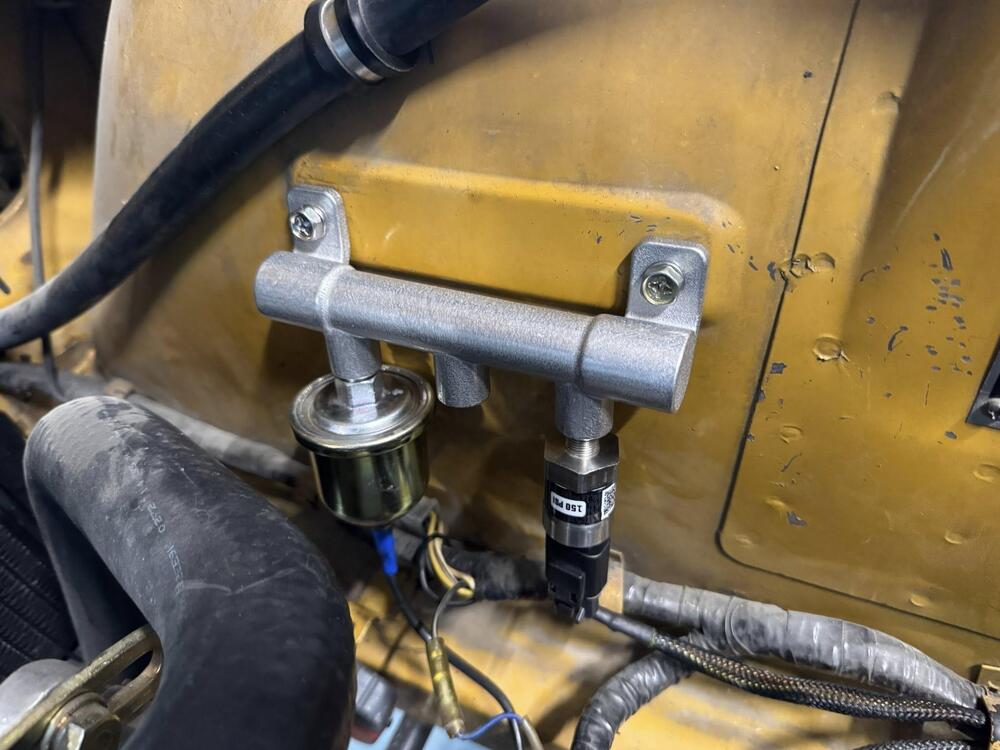
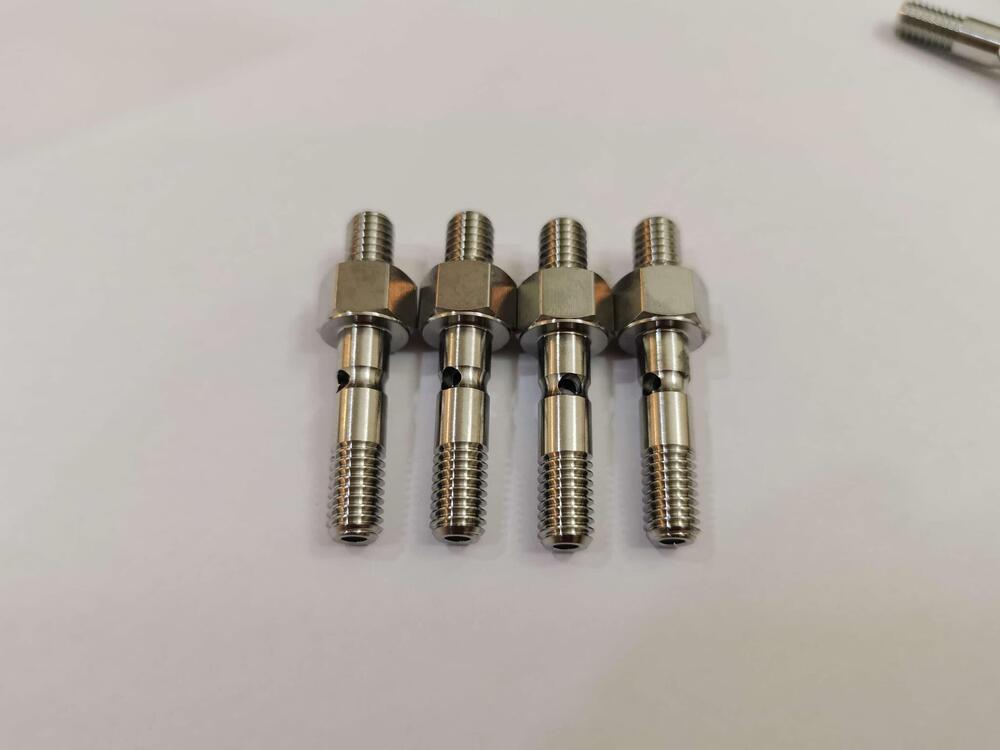
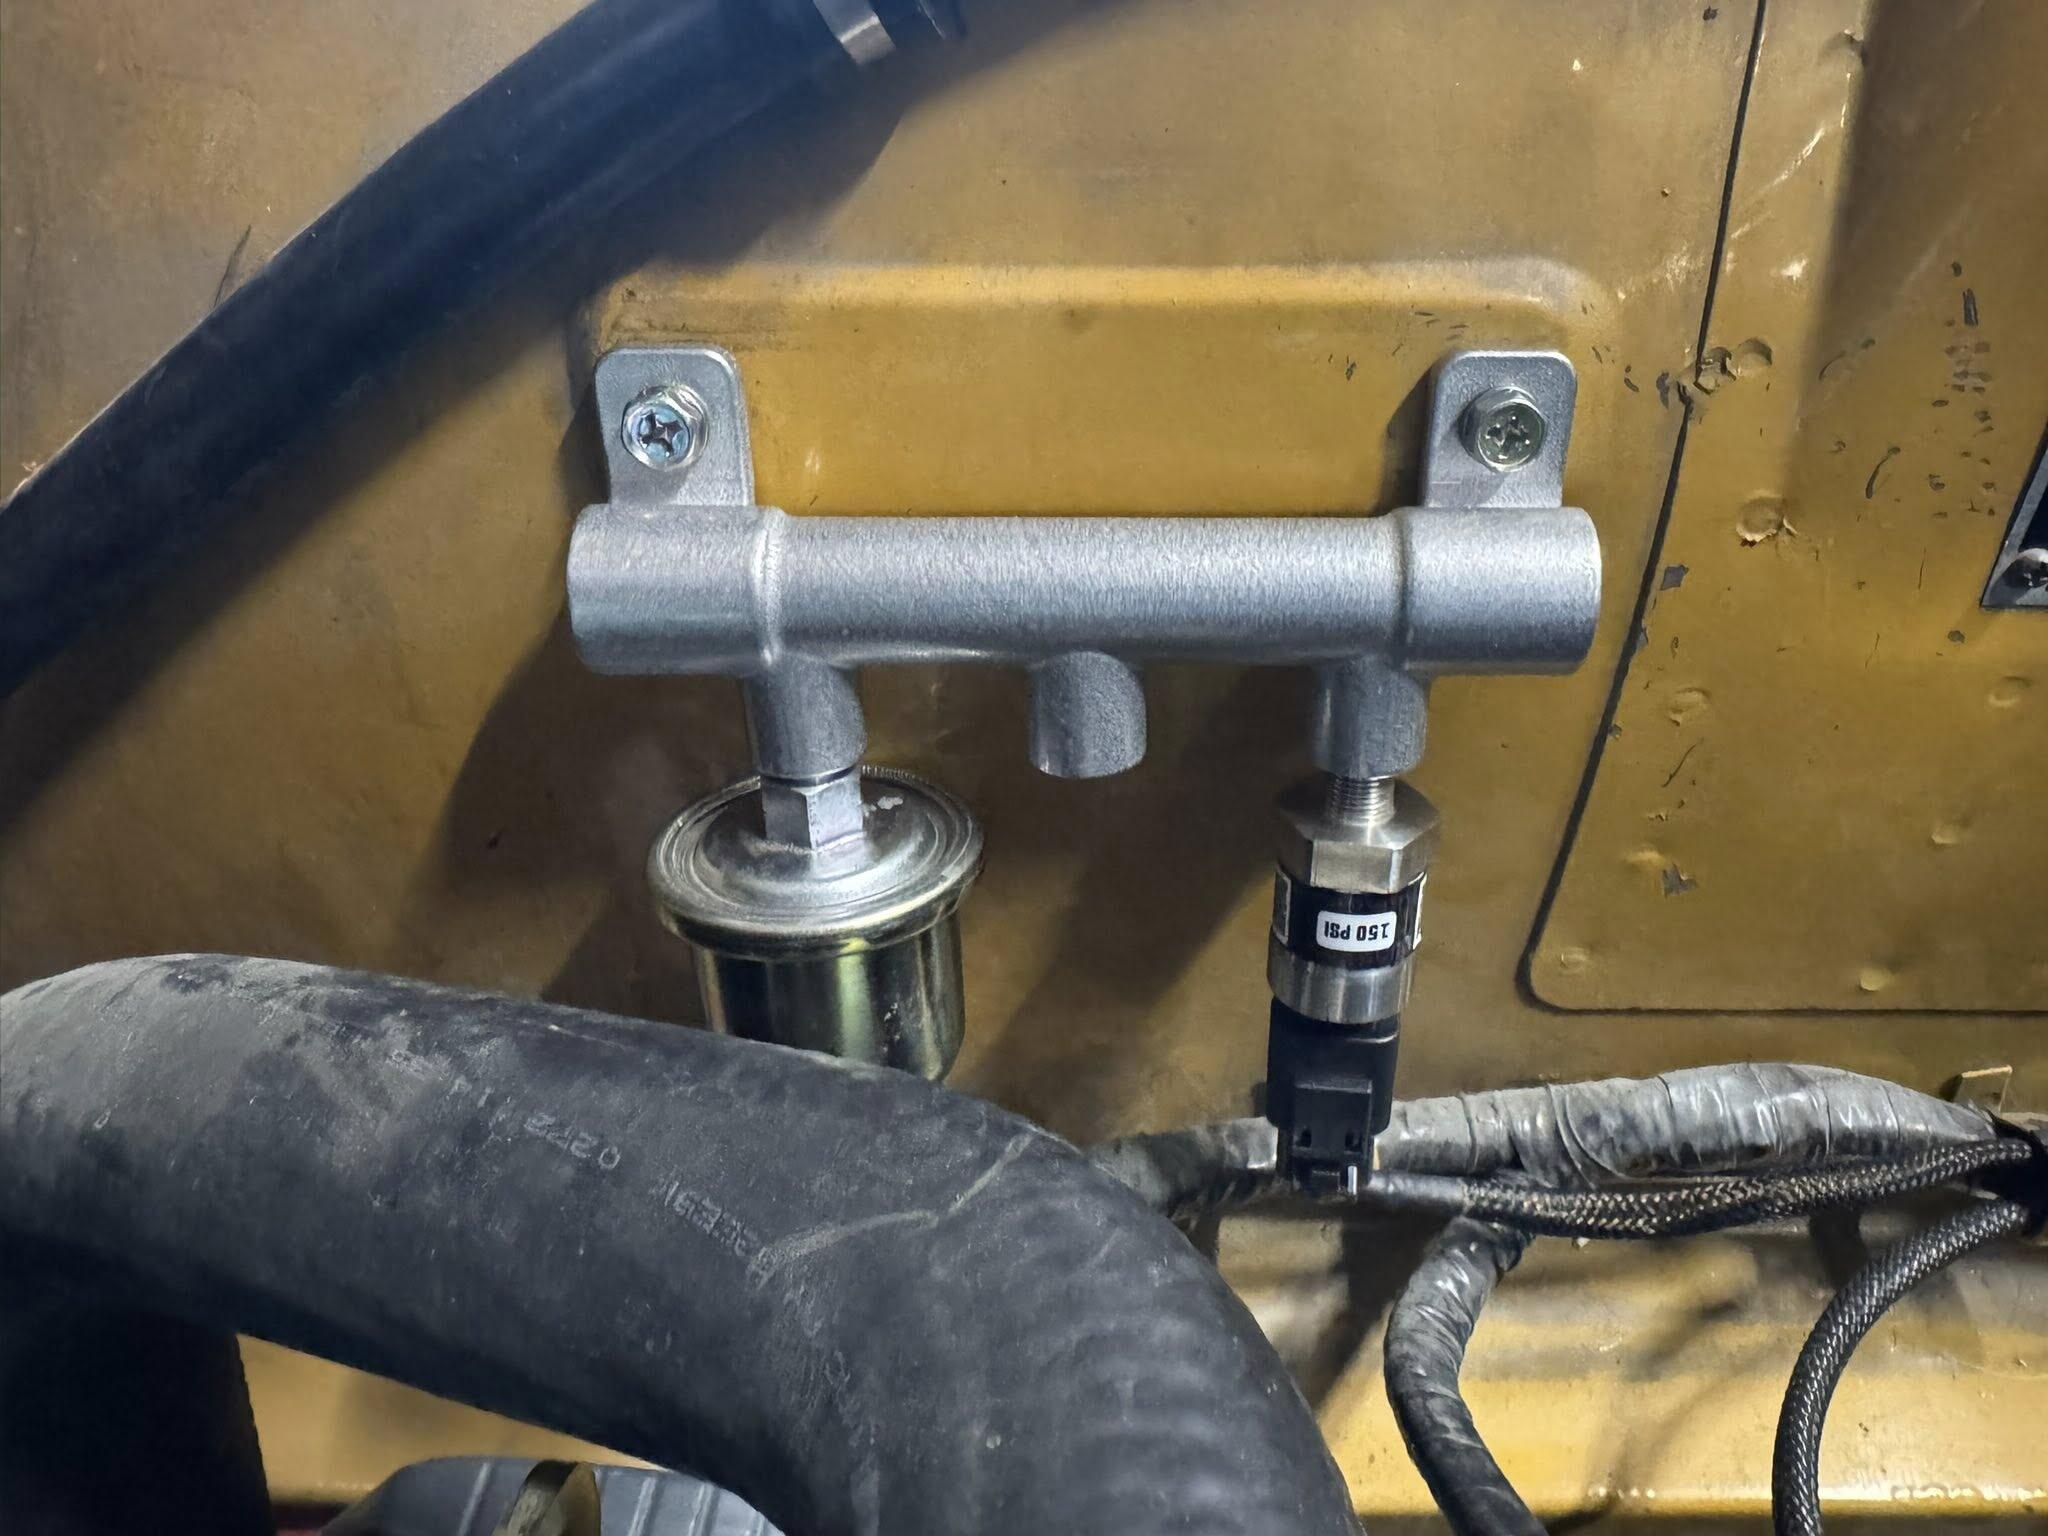
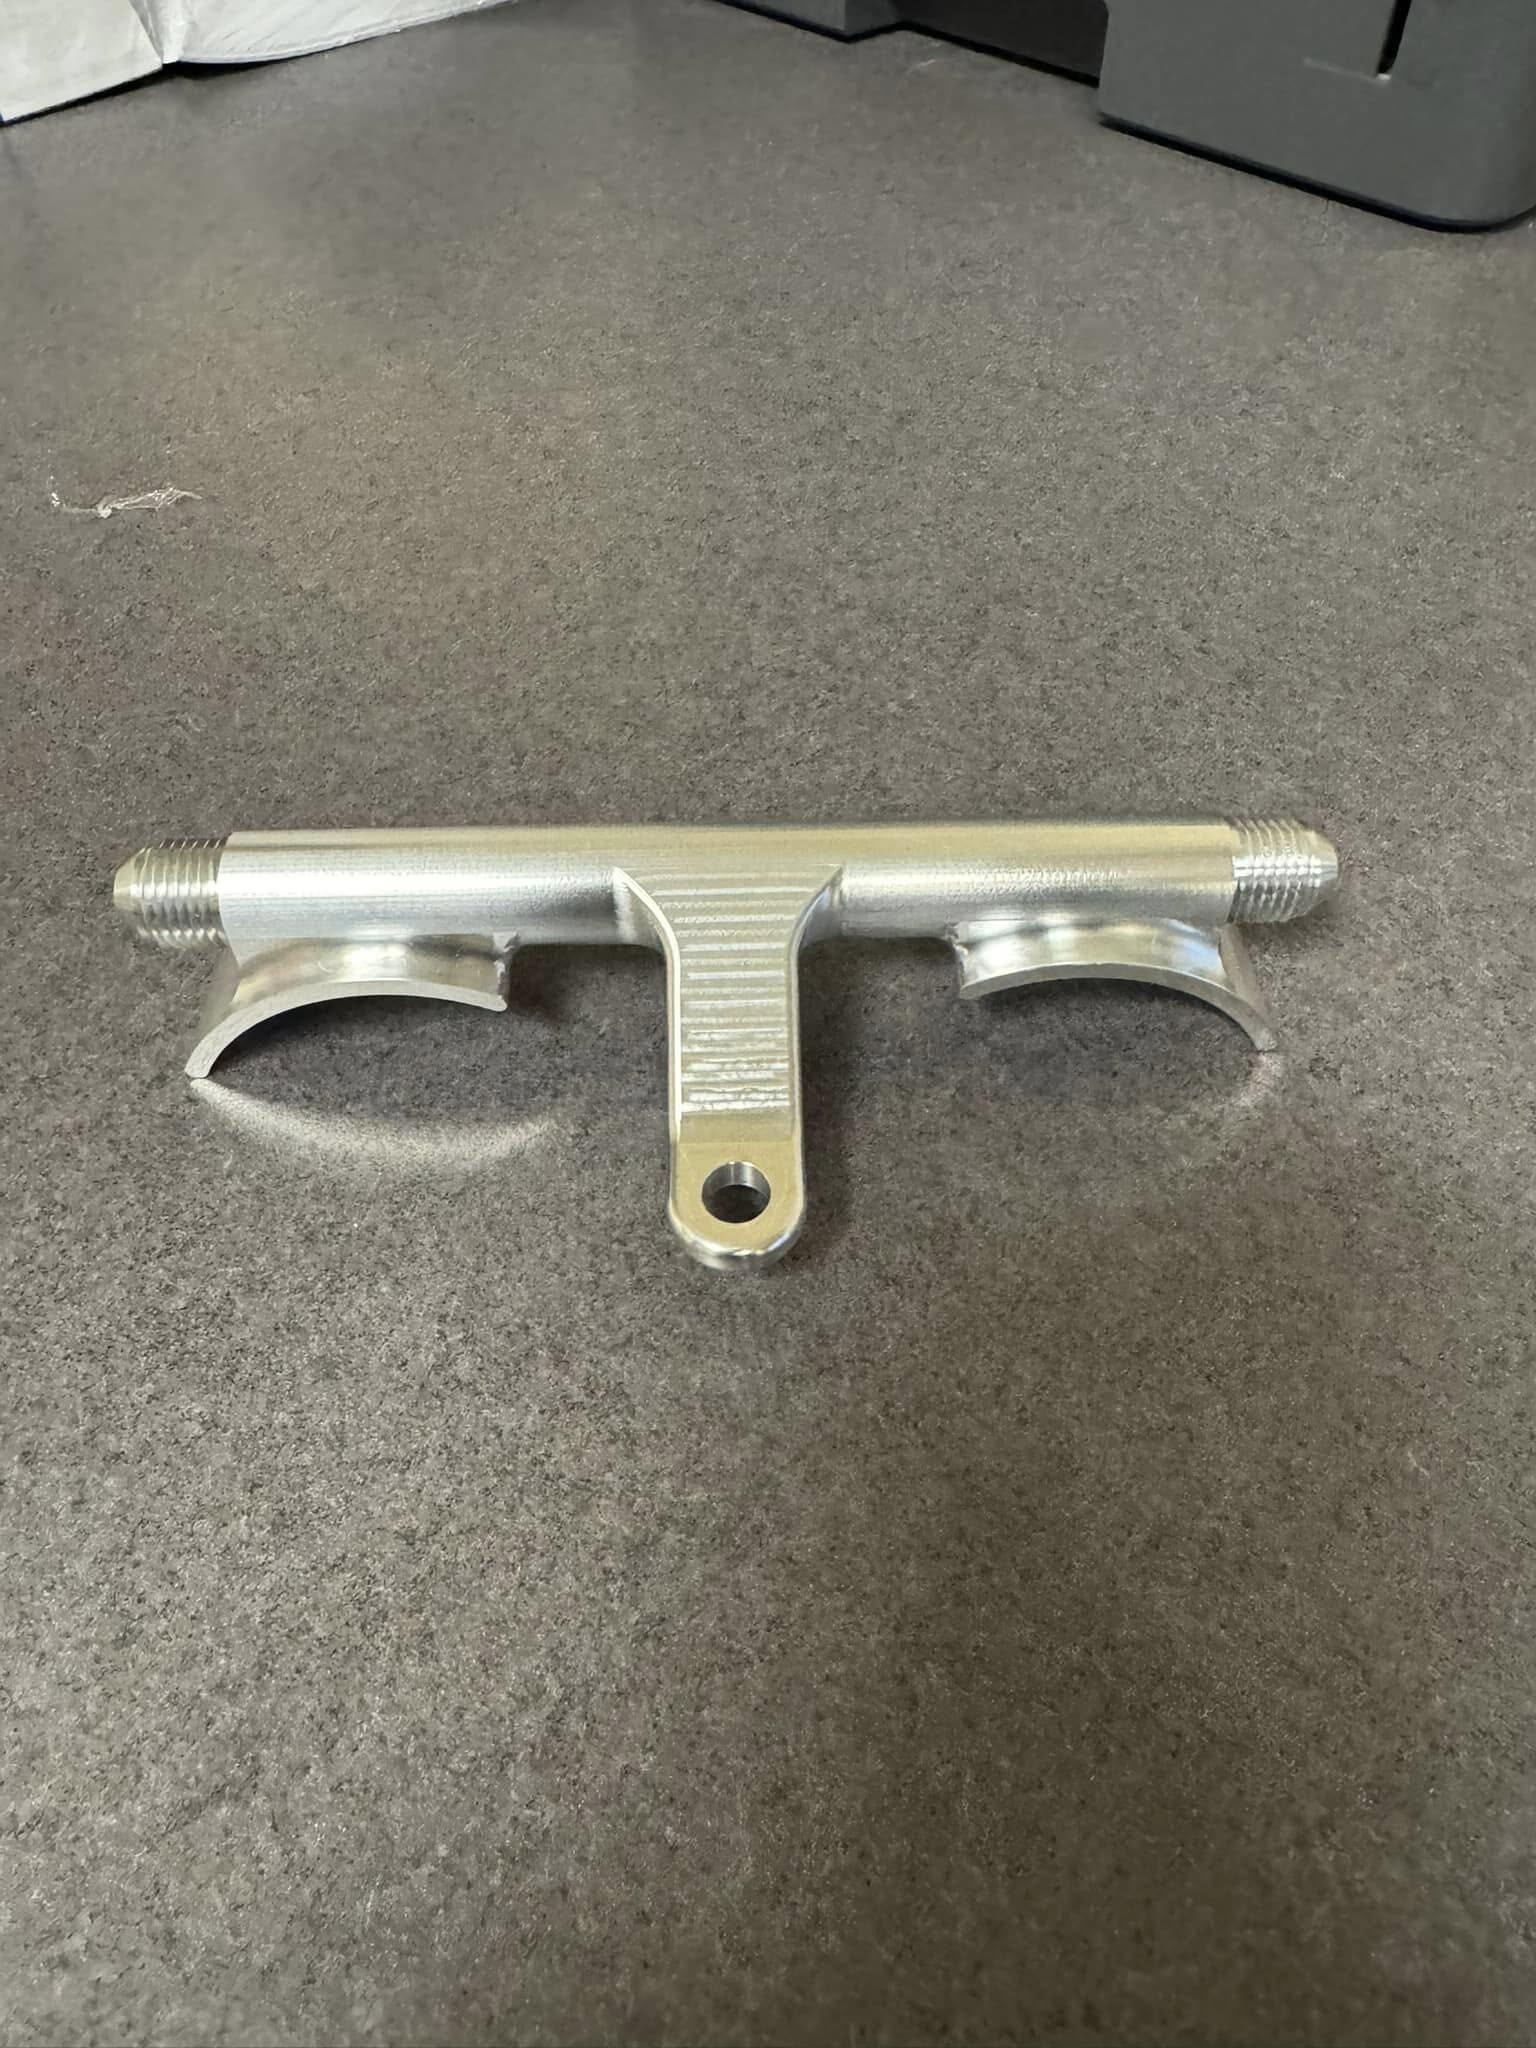
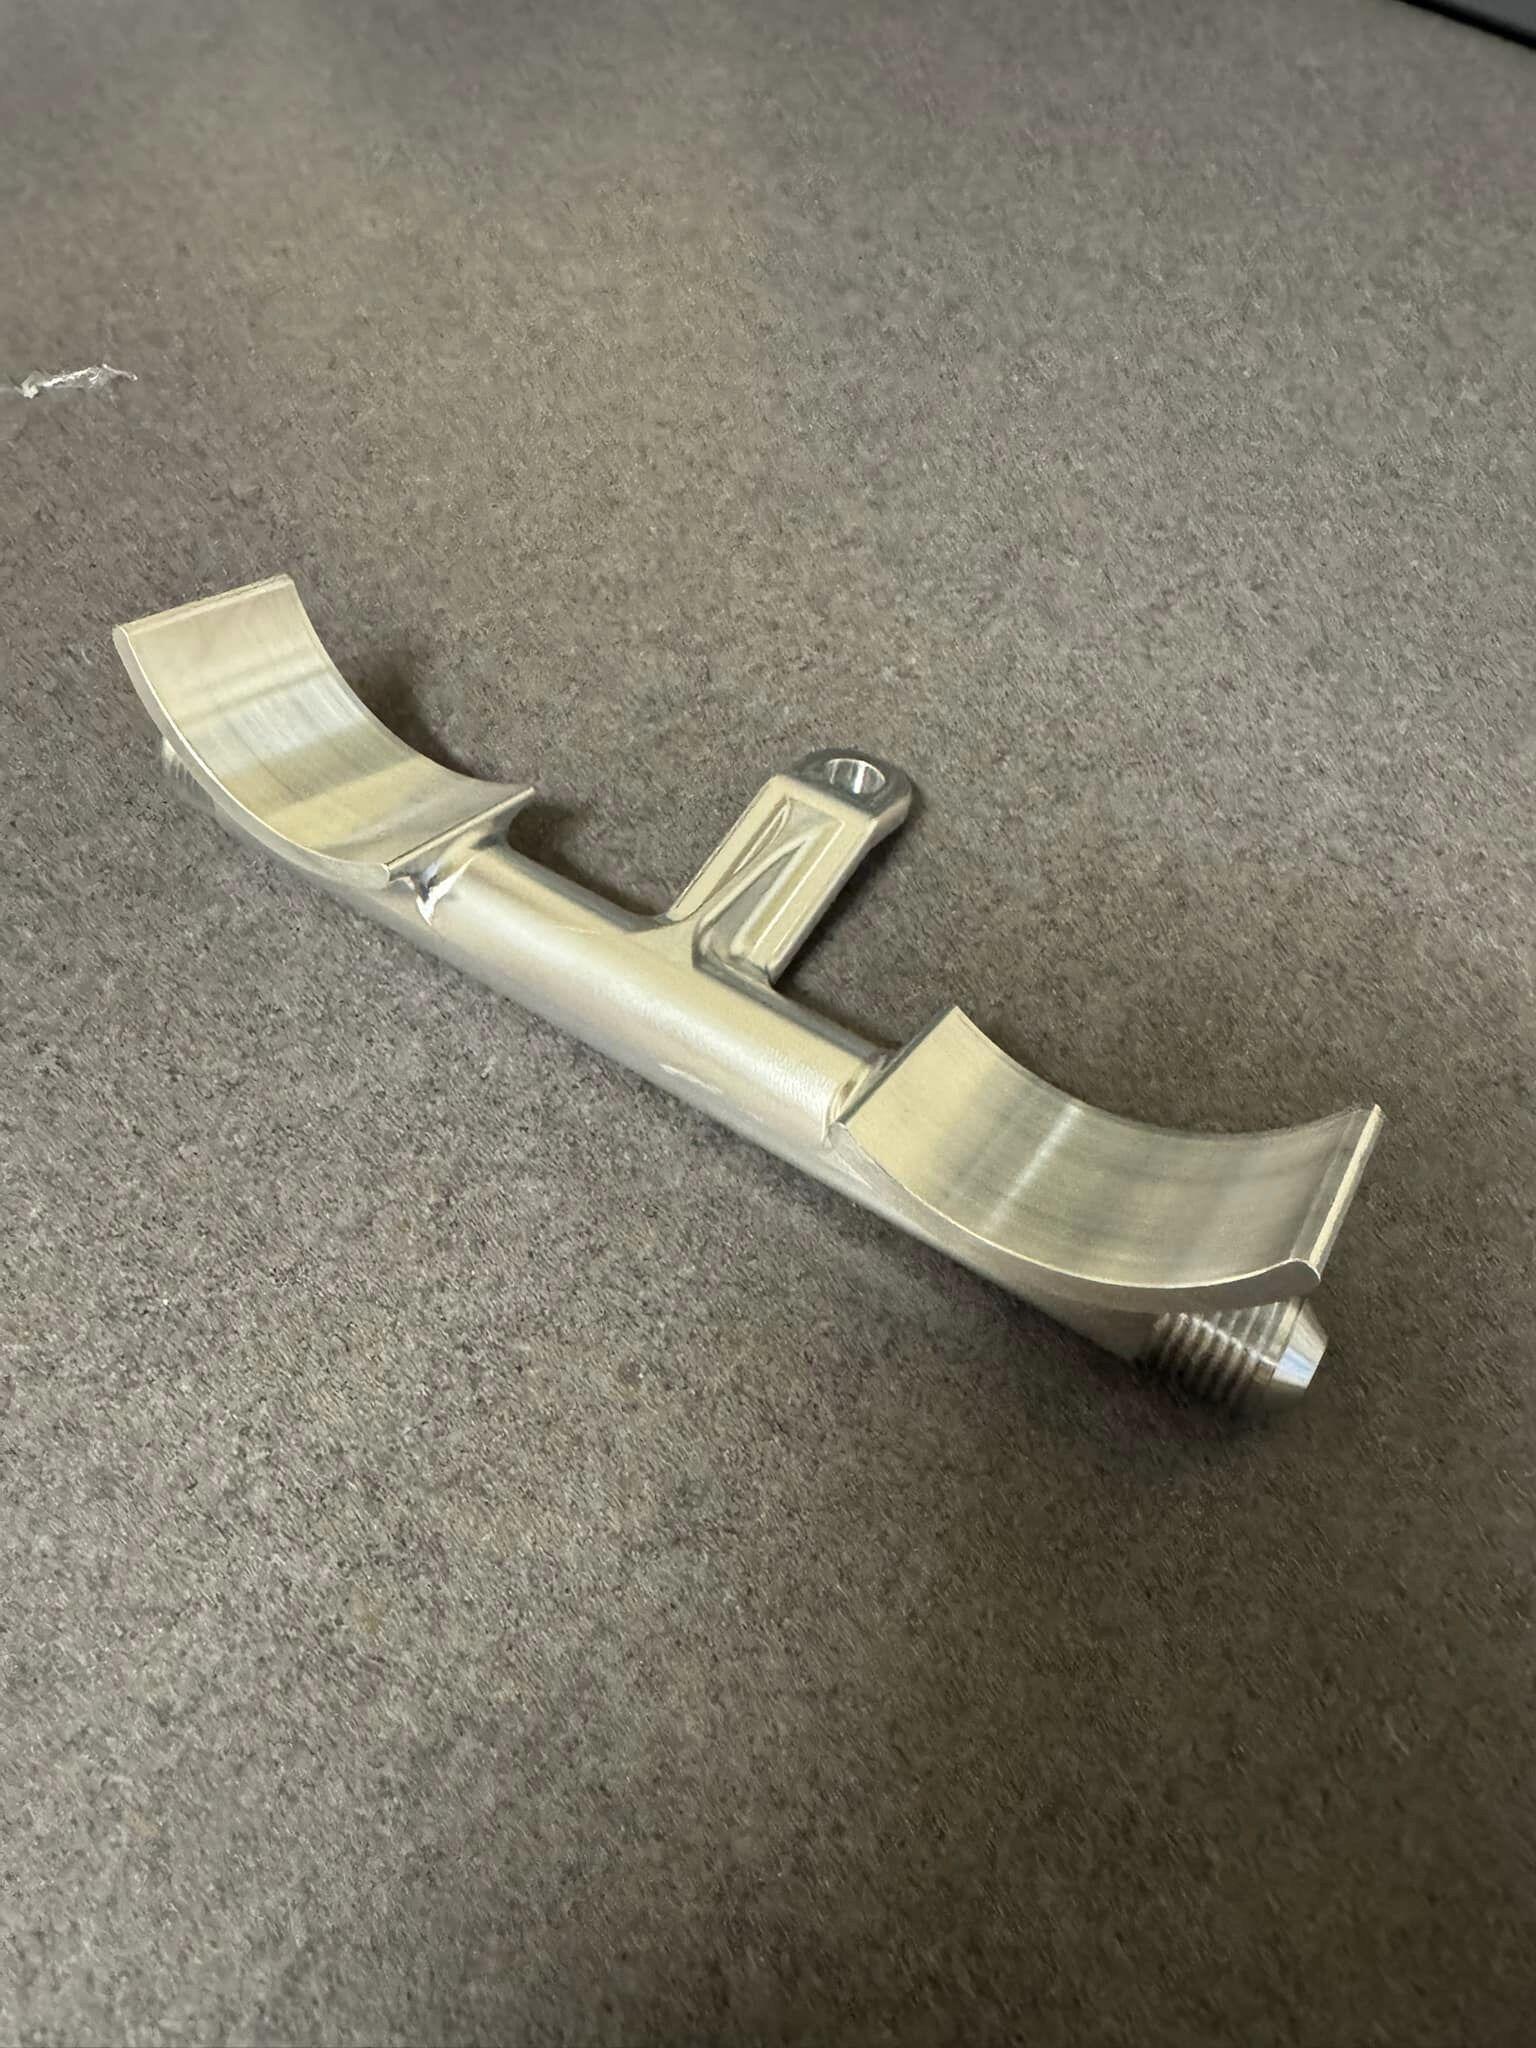
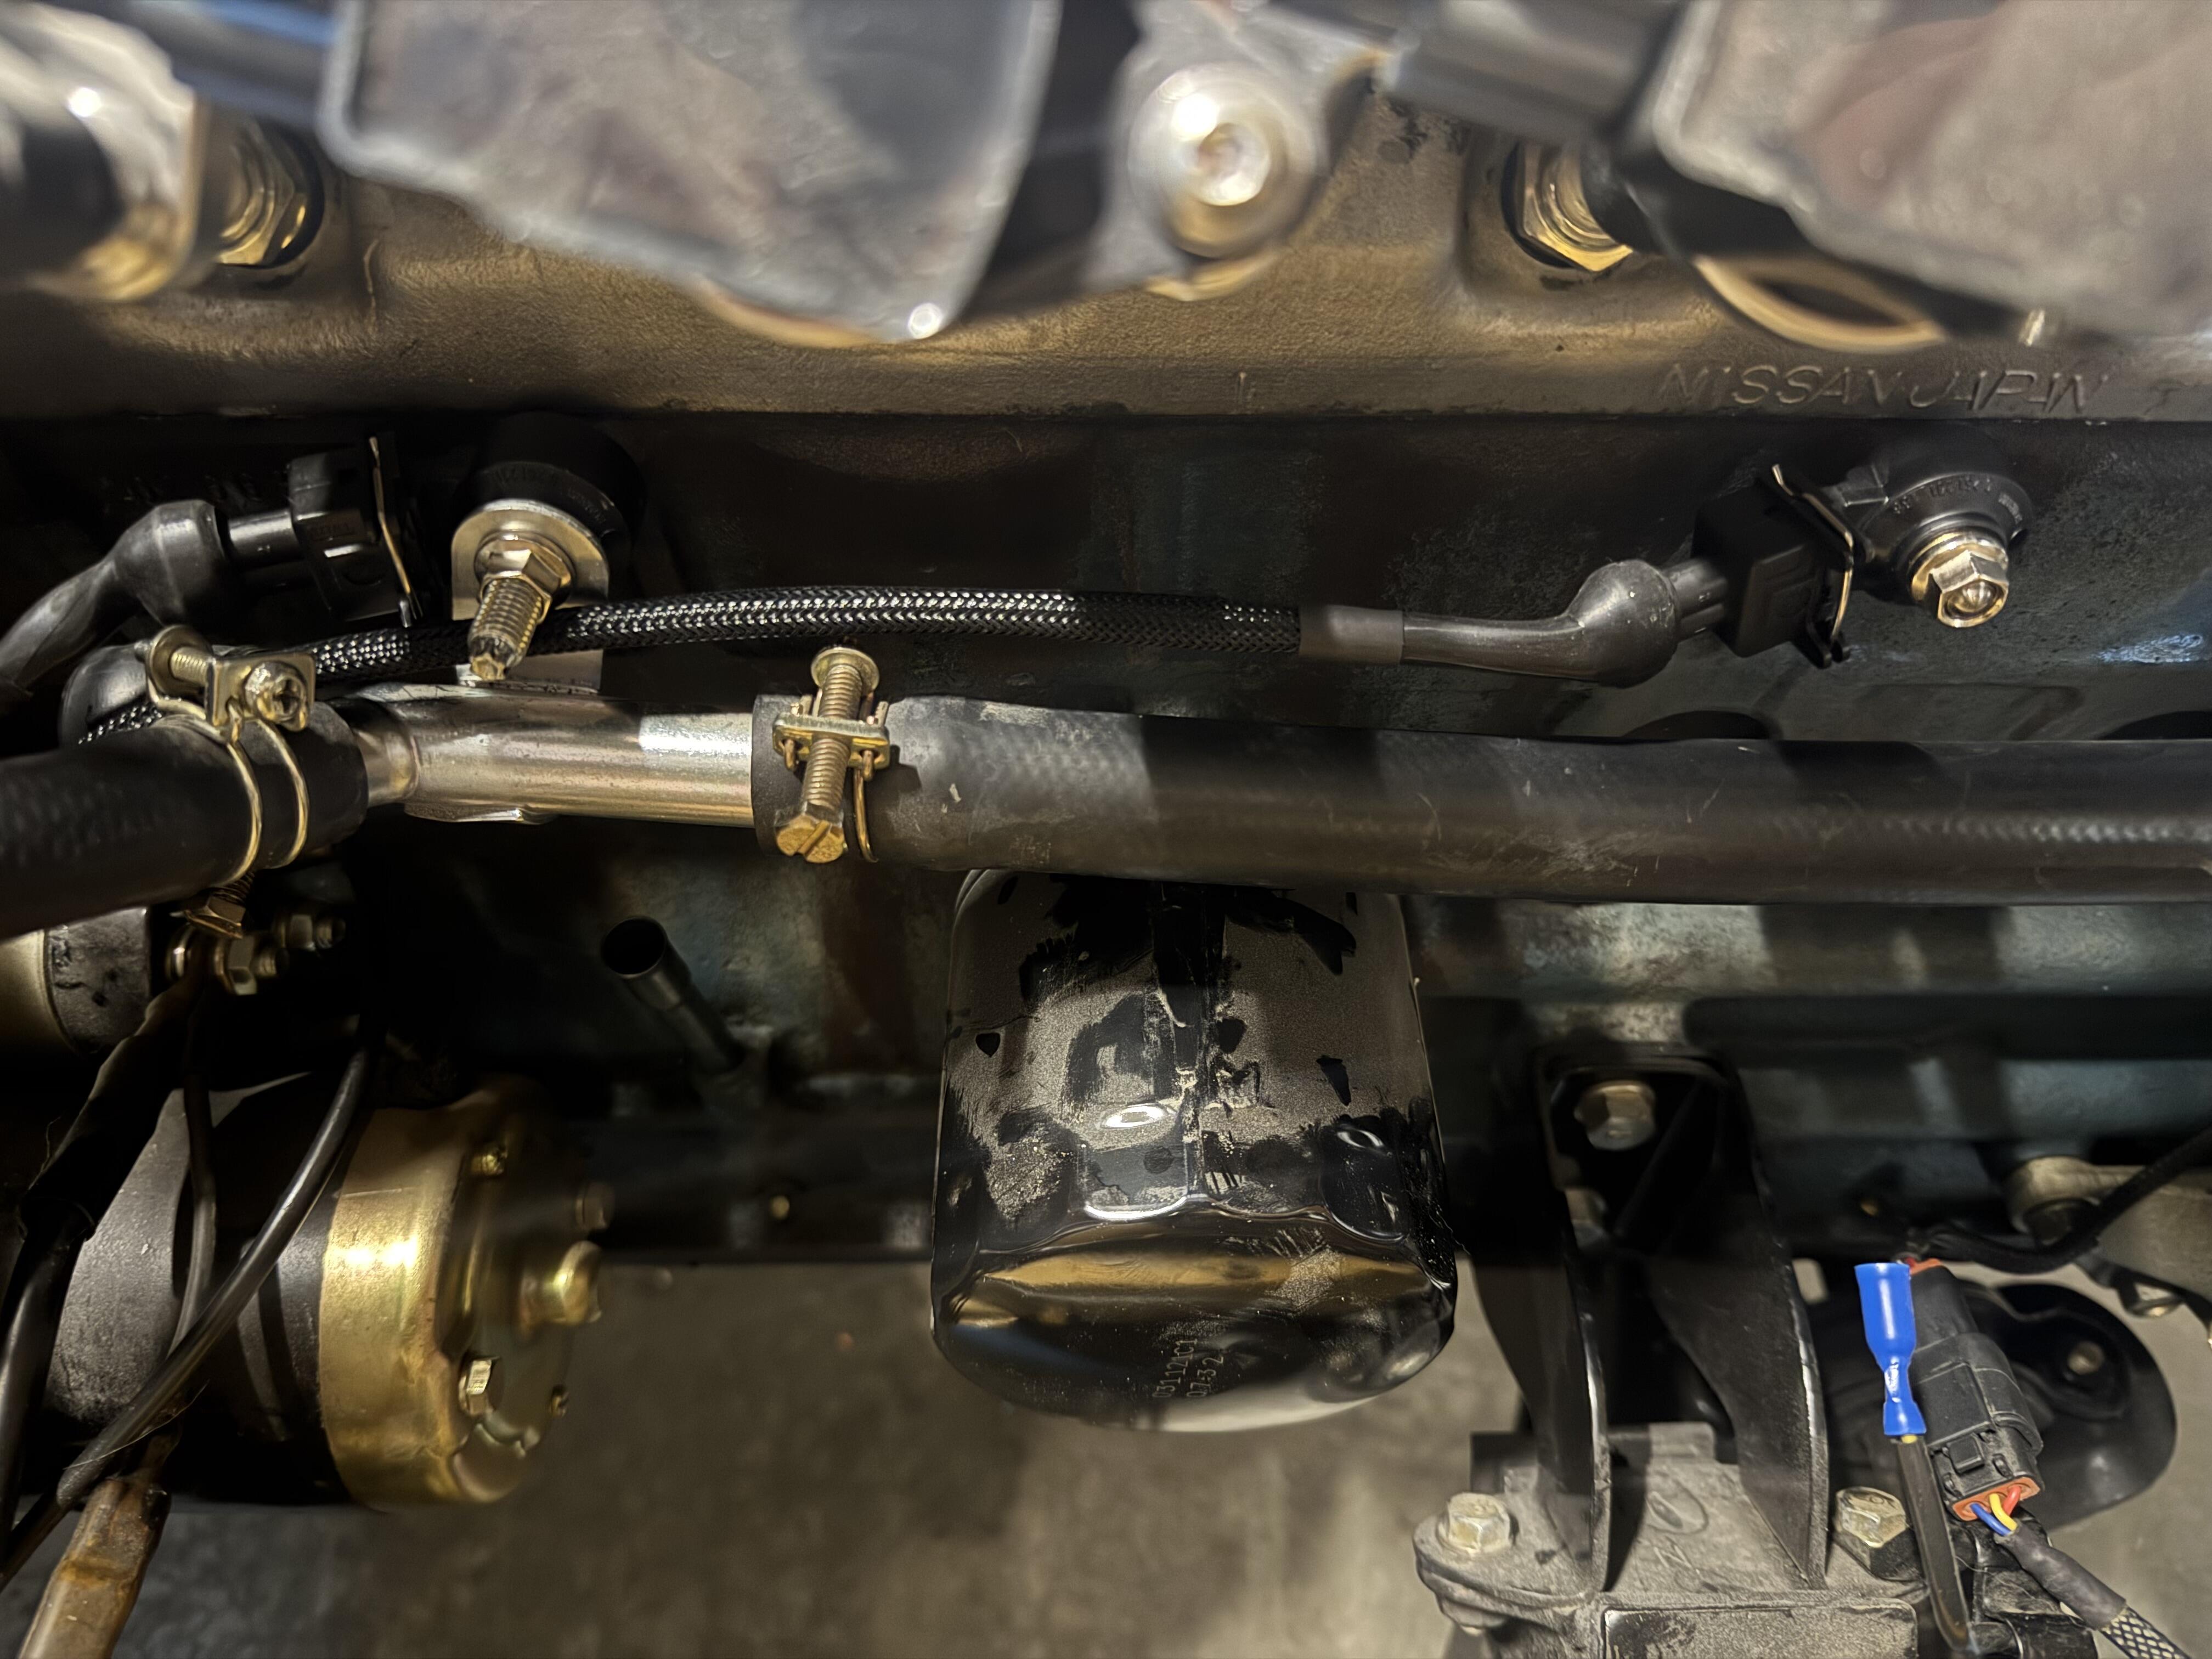
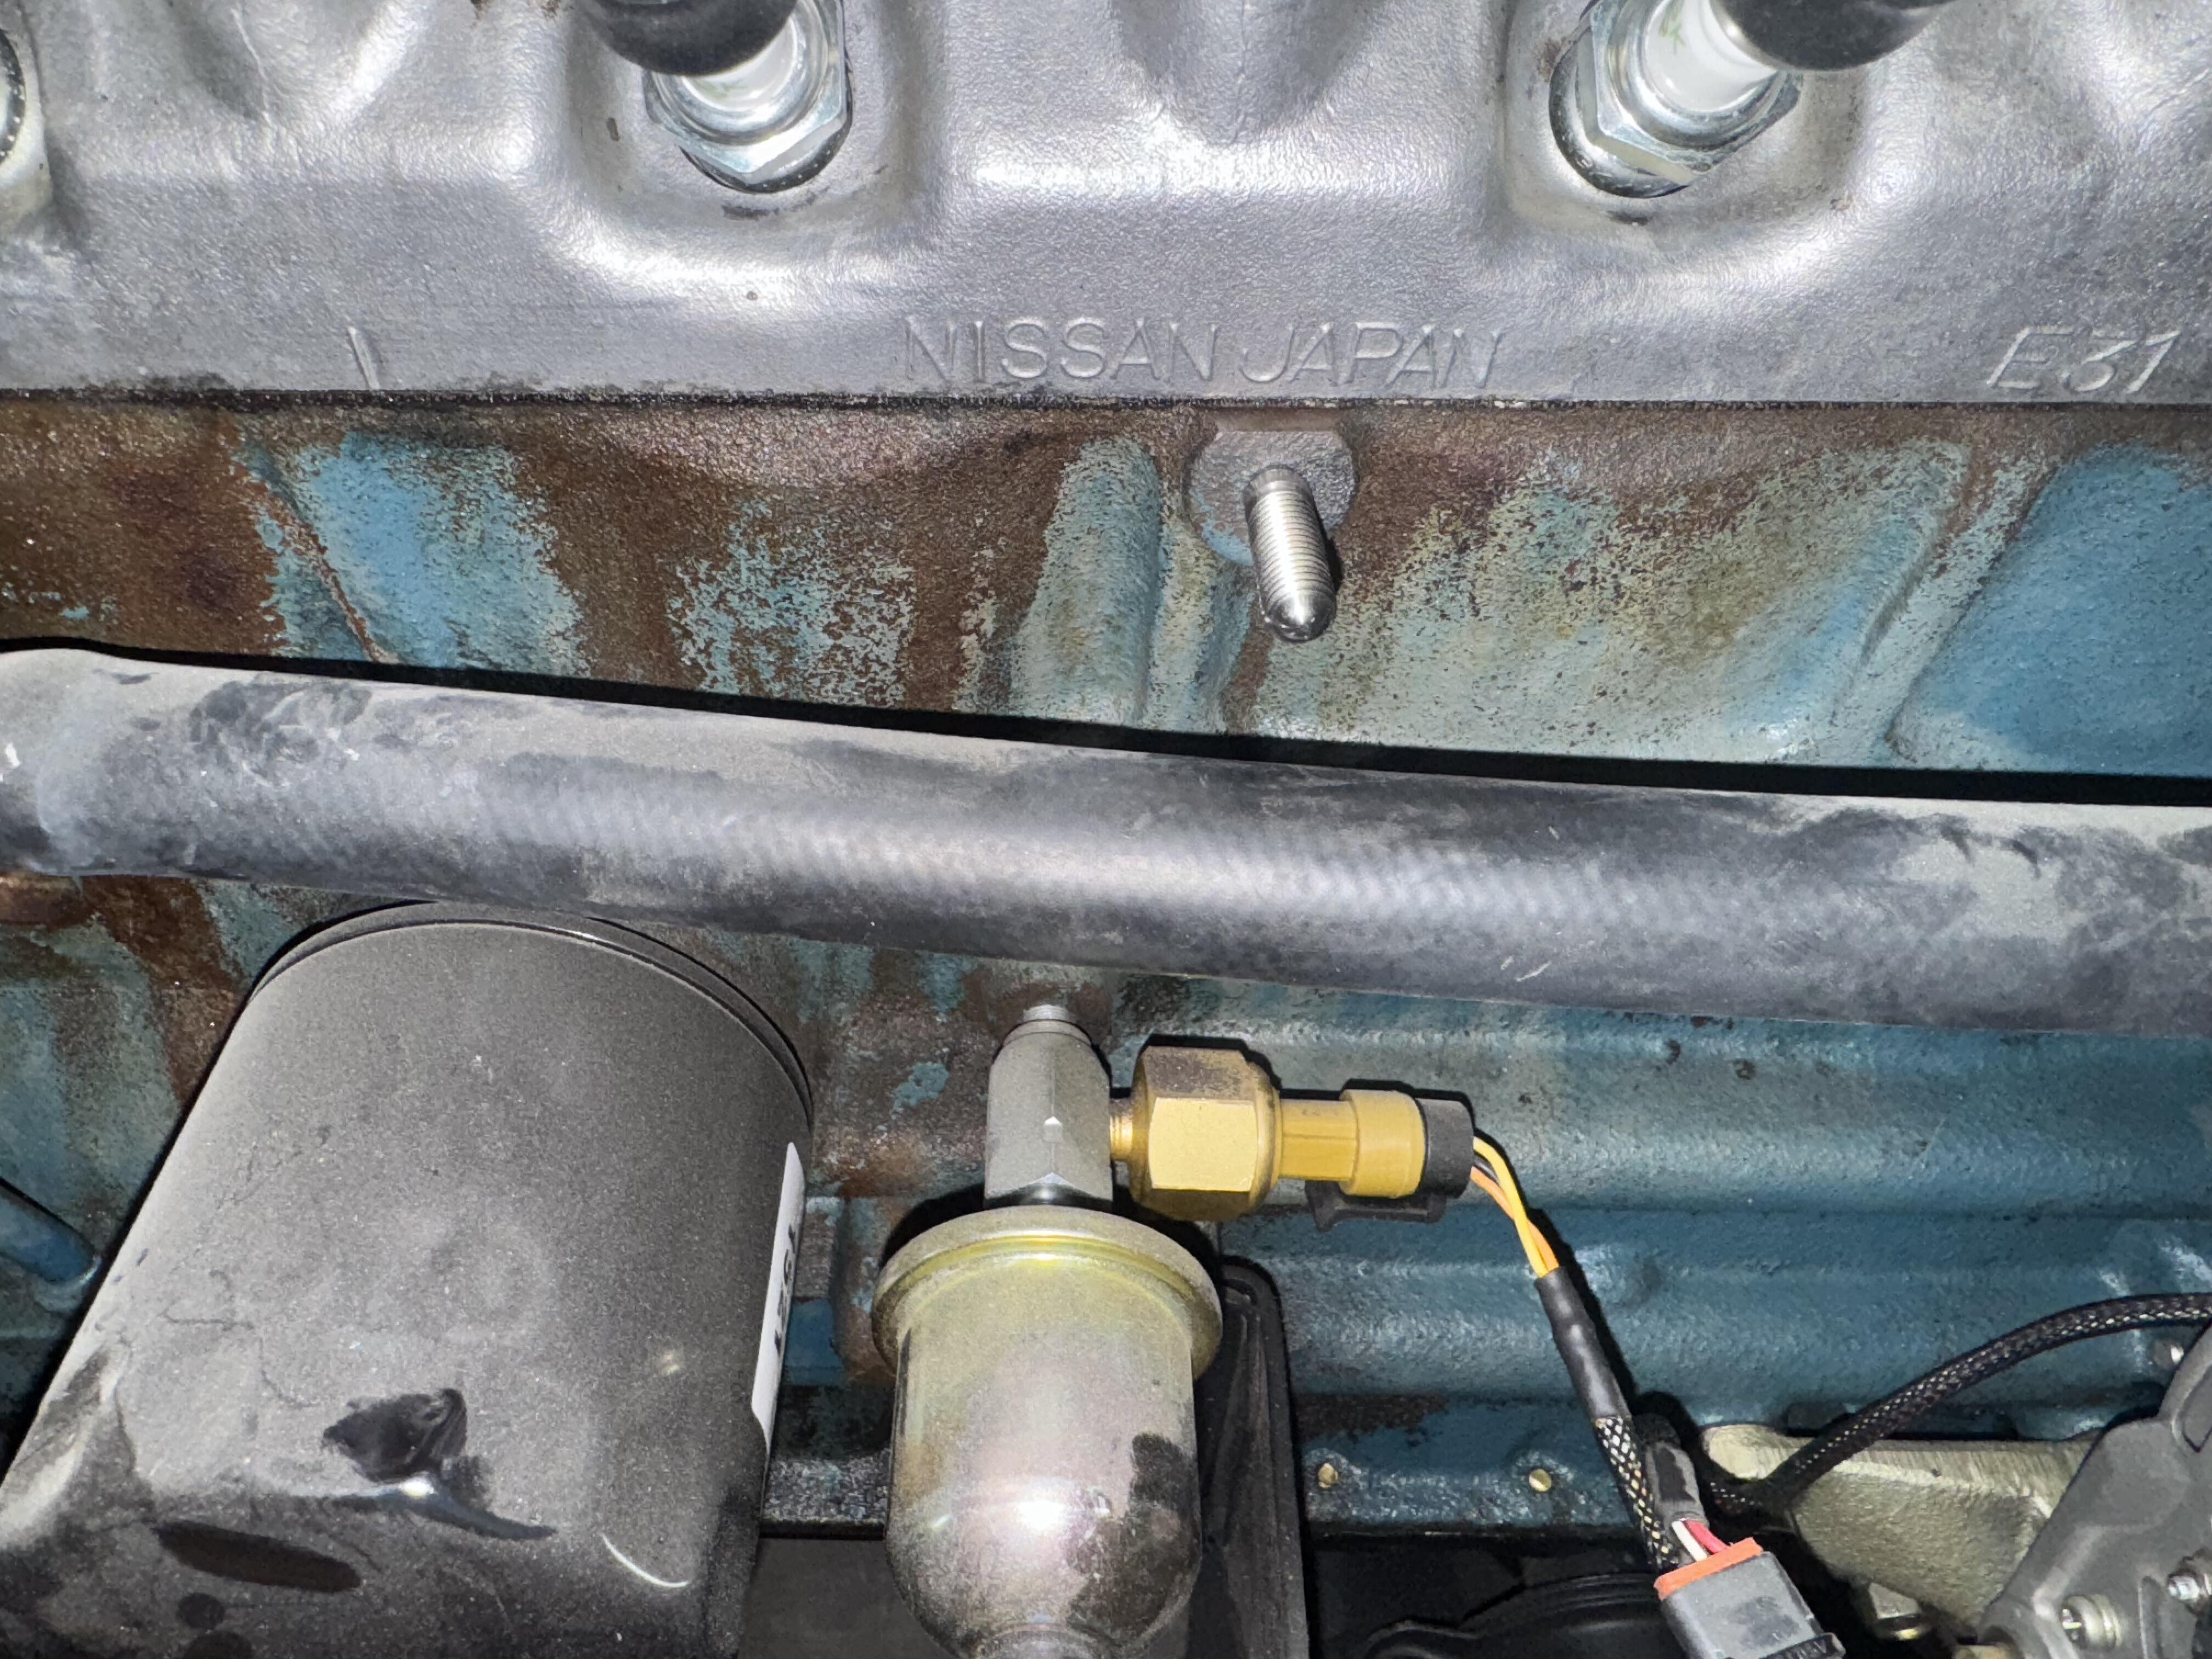
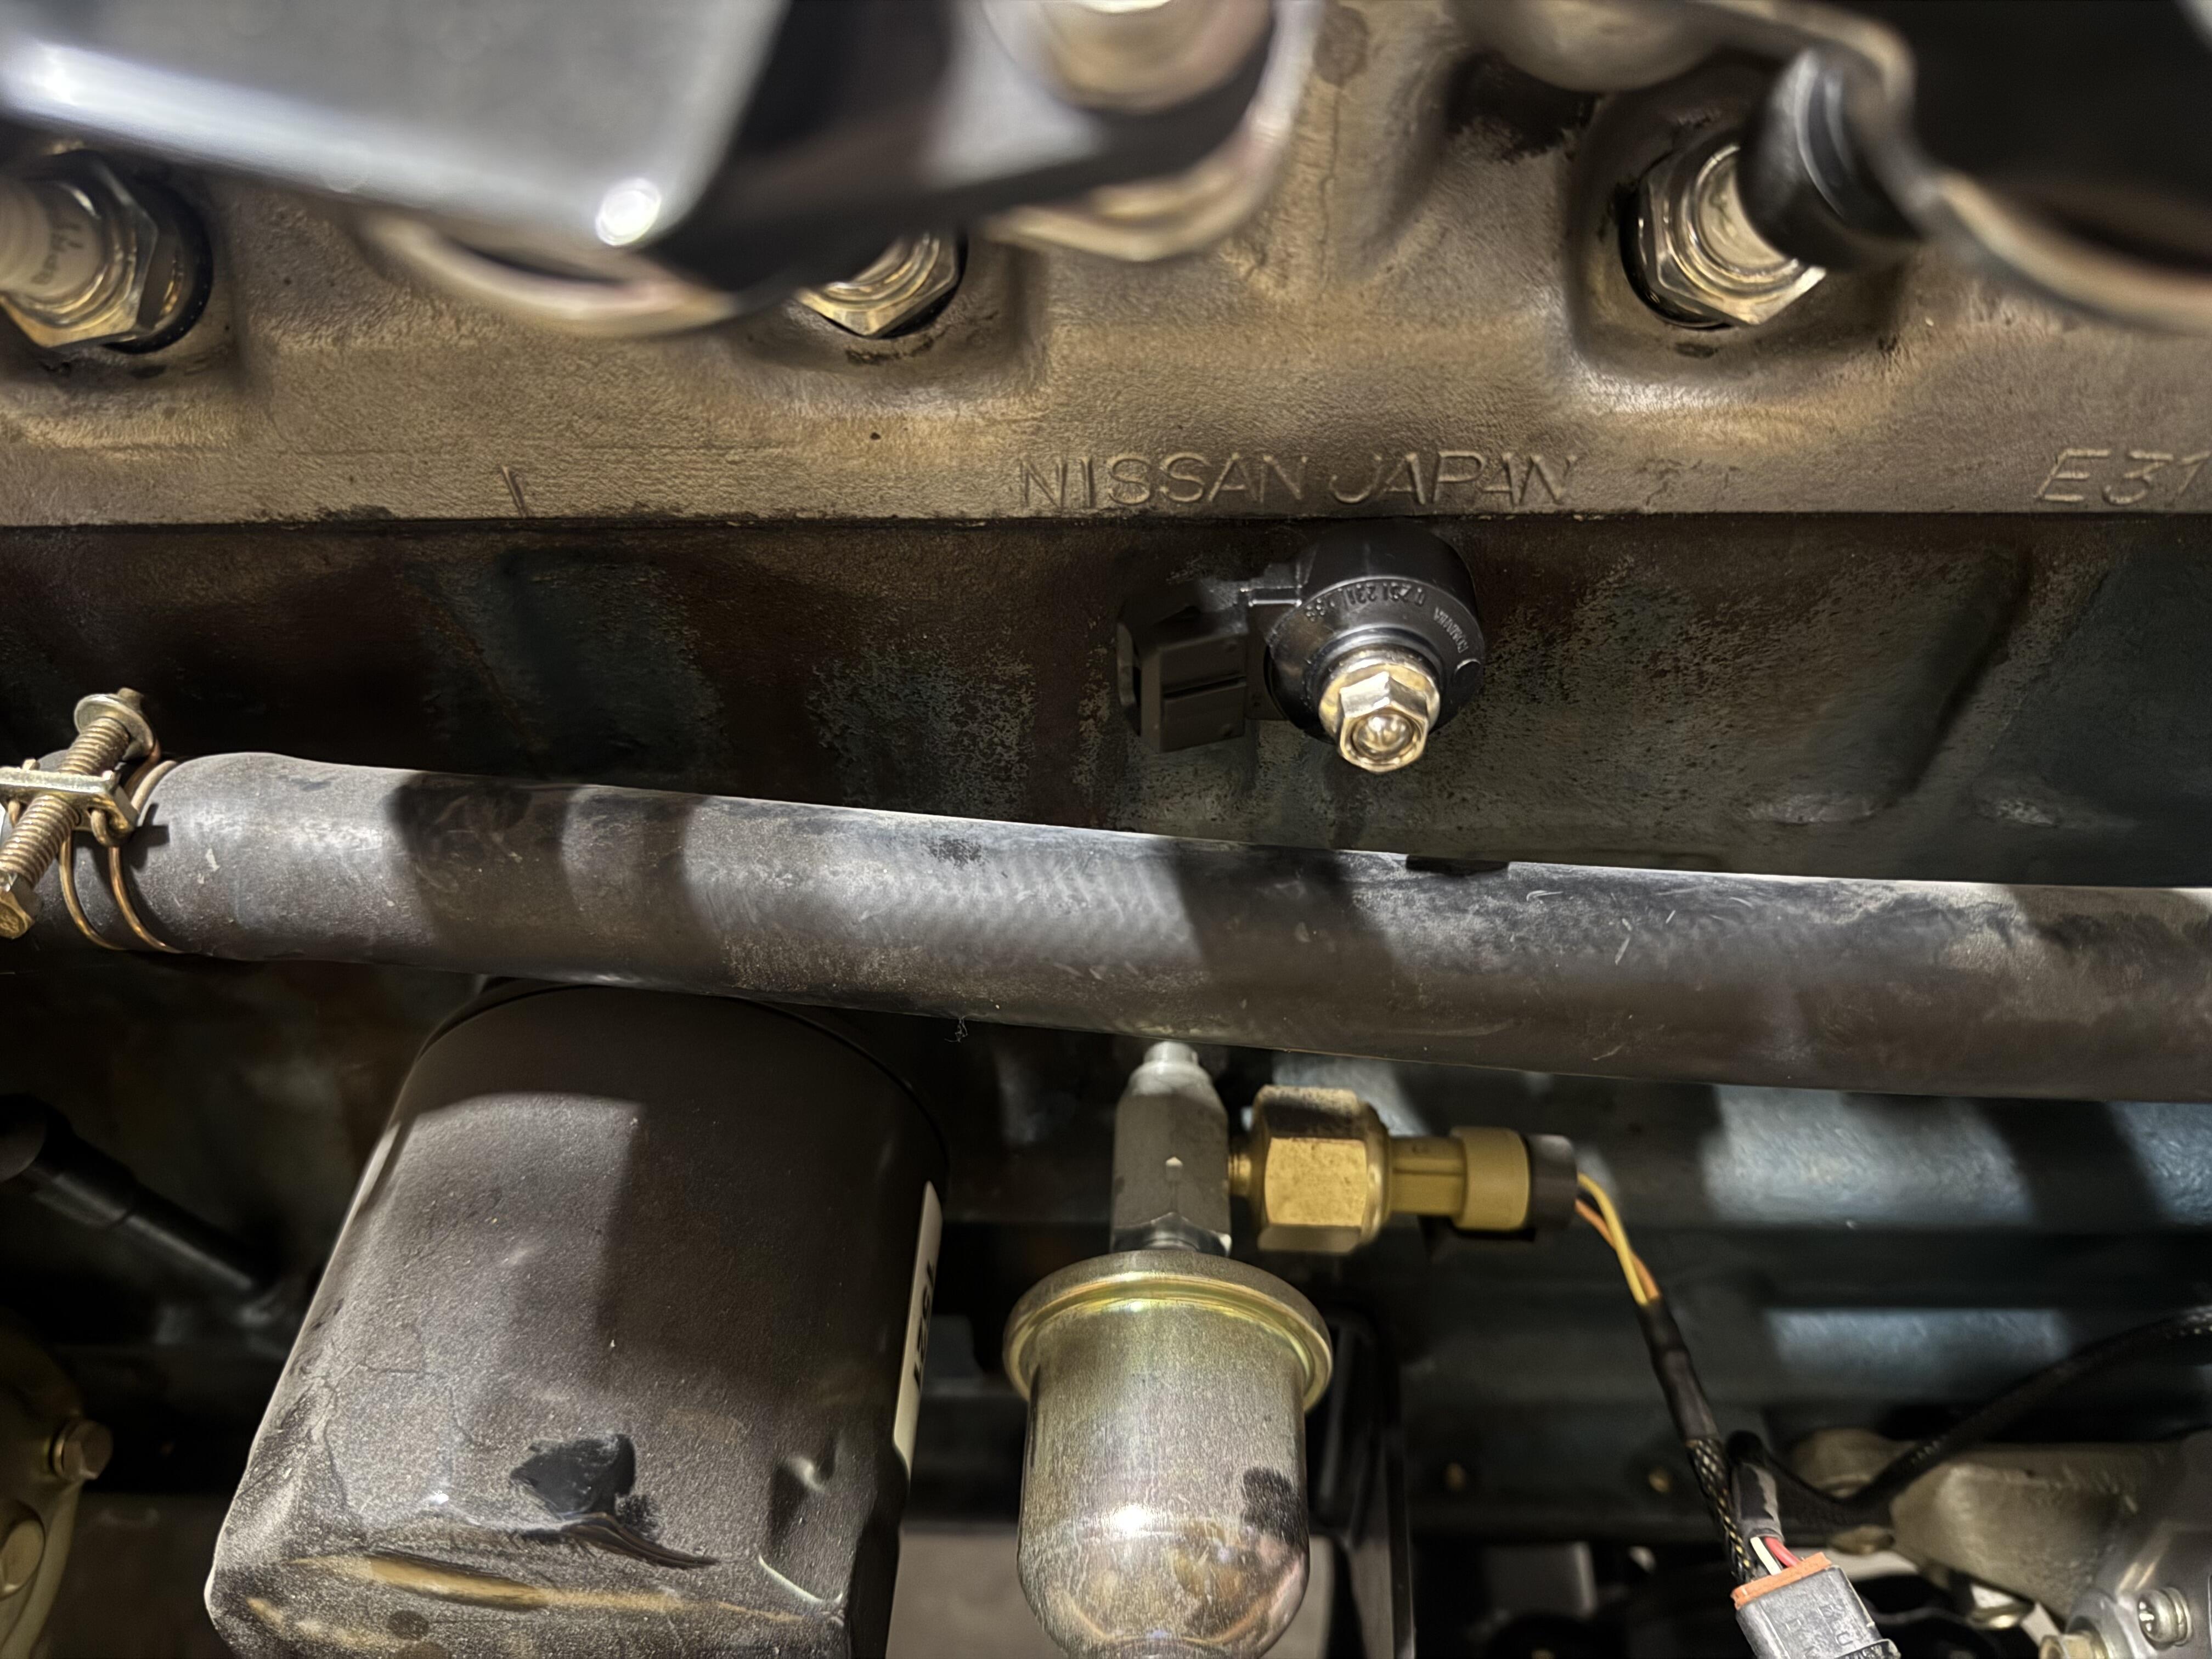
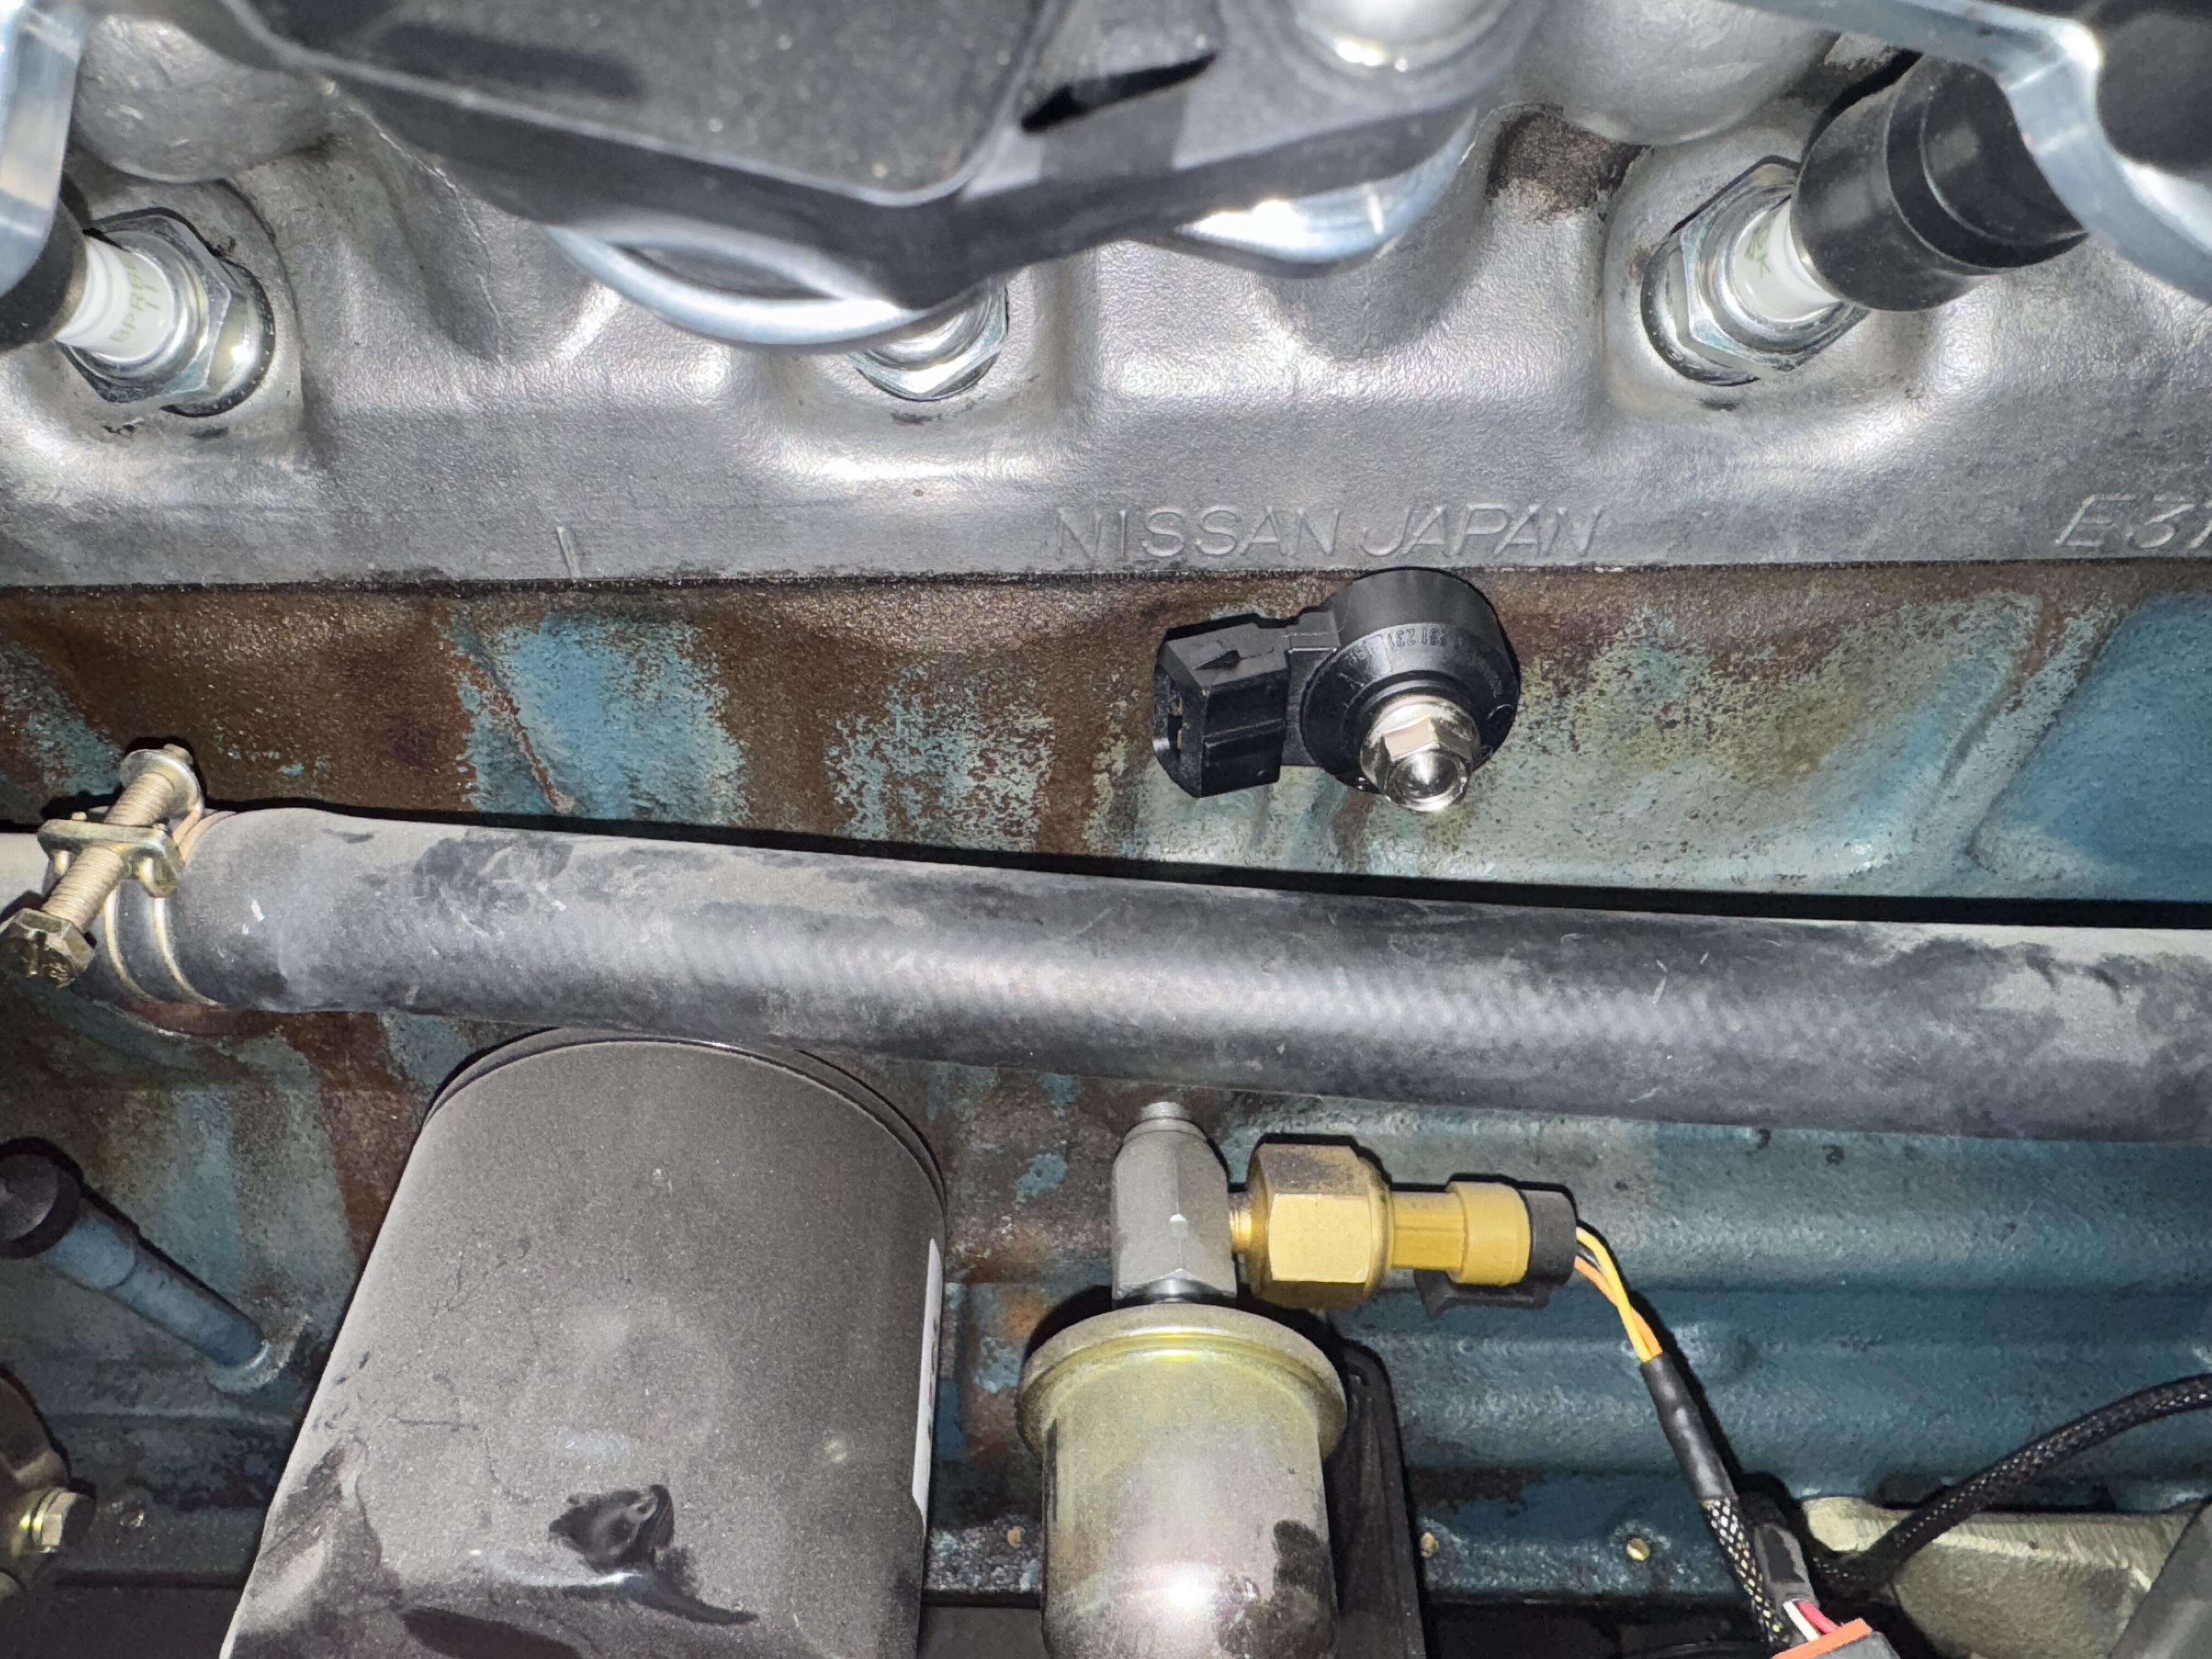
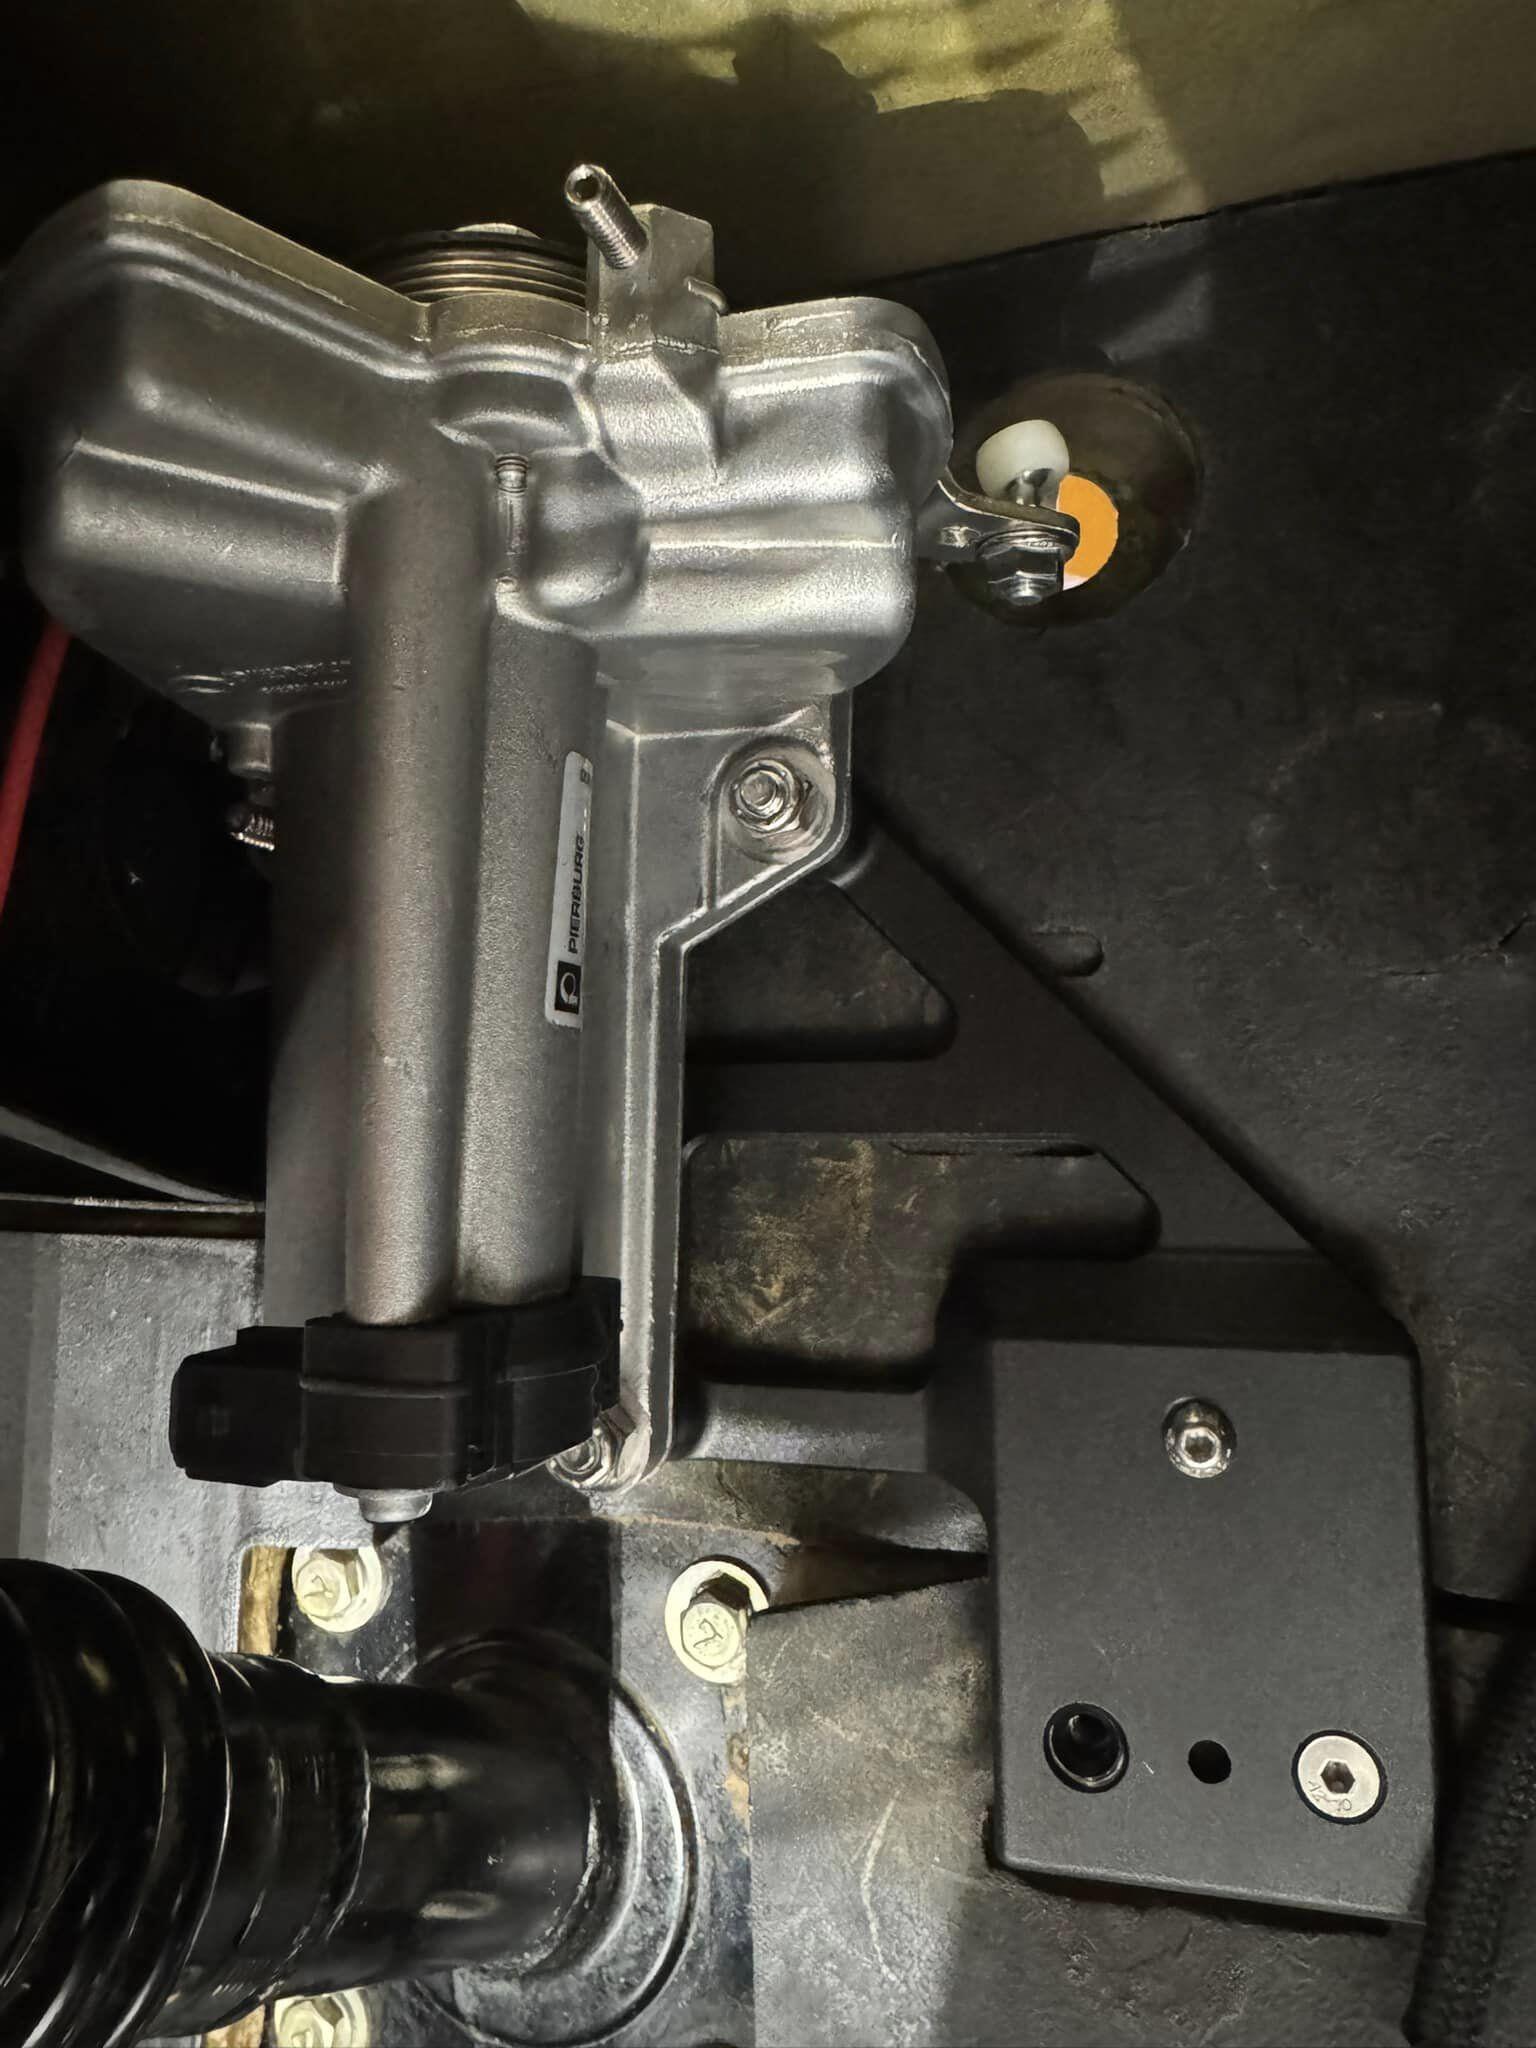
Here is something fun/ silly I have been thinking of and finally made. It’s a remote oil pressure distribution block made to look like the stock 240z brake prop valve. I previously had a steel T In the block, that broke off and then when I was using an easy out I cracked my stock block bung. I said never again! 3D metal printing is neat stuff. I had it tumbled to look even more cast. I run stock gauges and my ecu needs its own signal. This location allows stock wiring to also work.


-
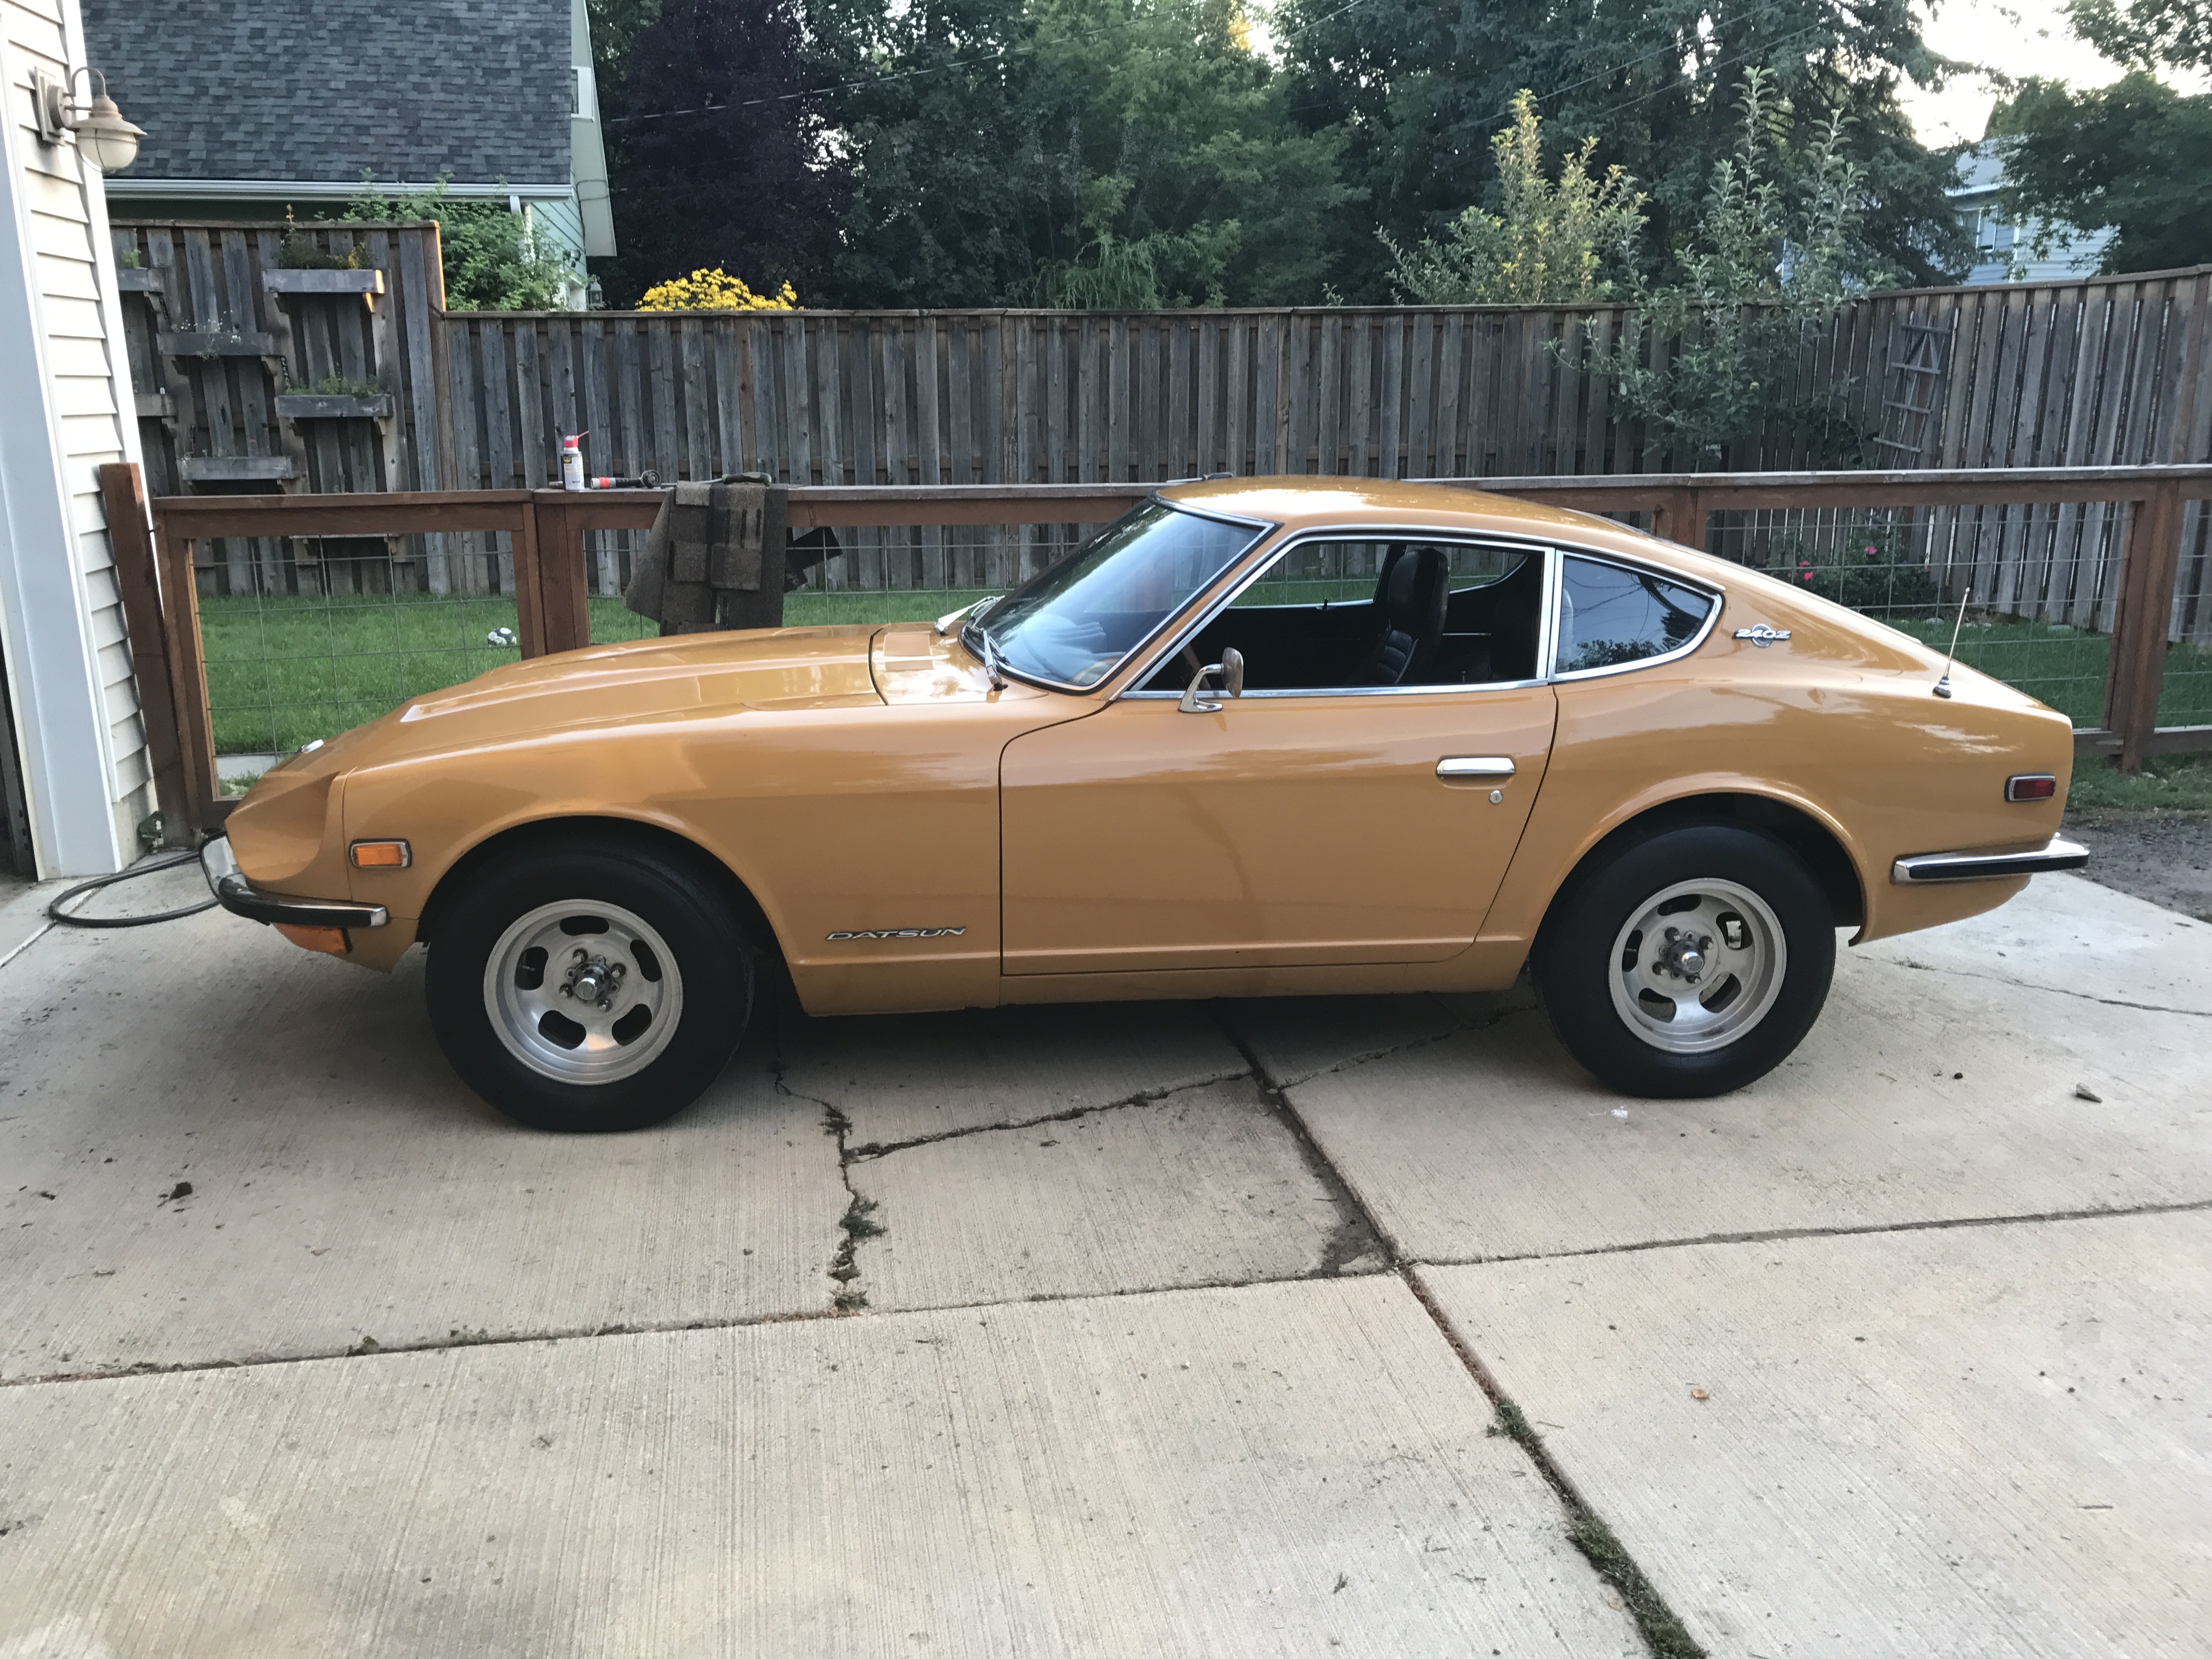
Man that is a sexy z car
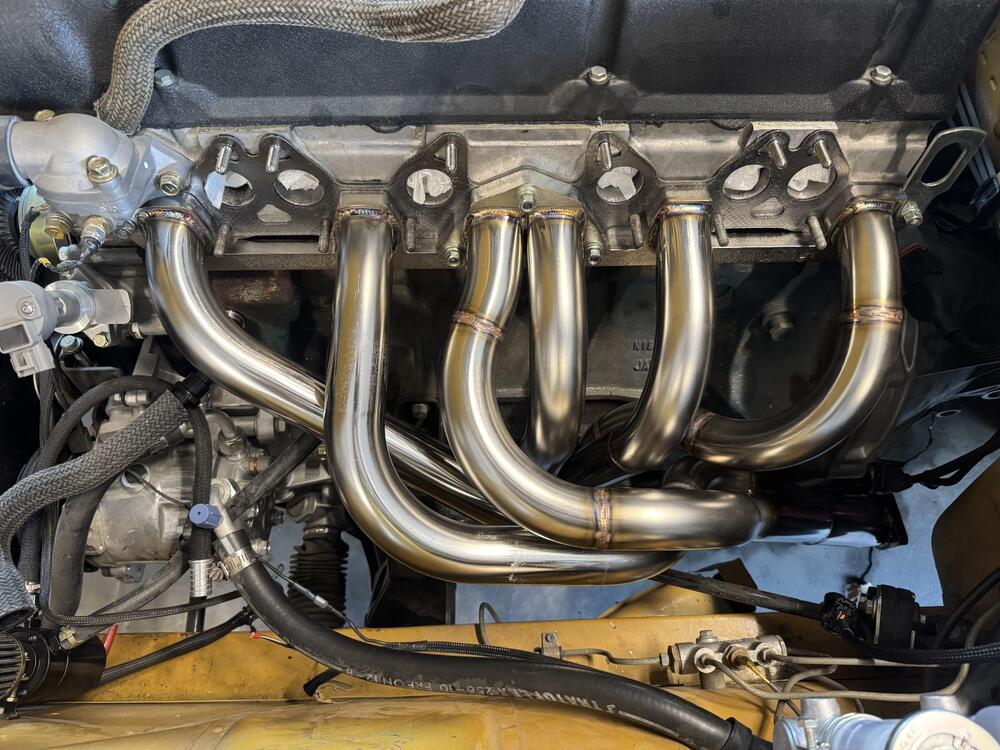
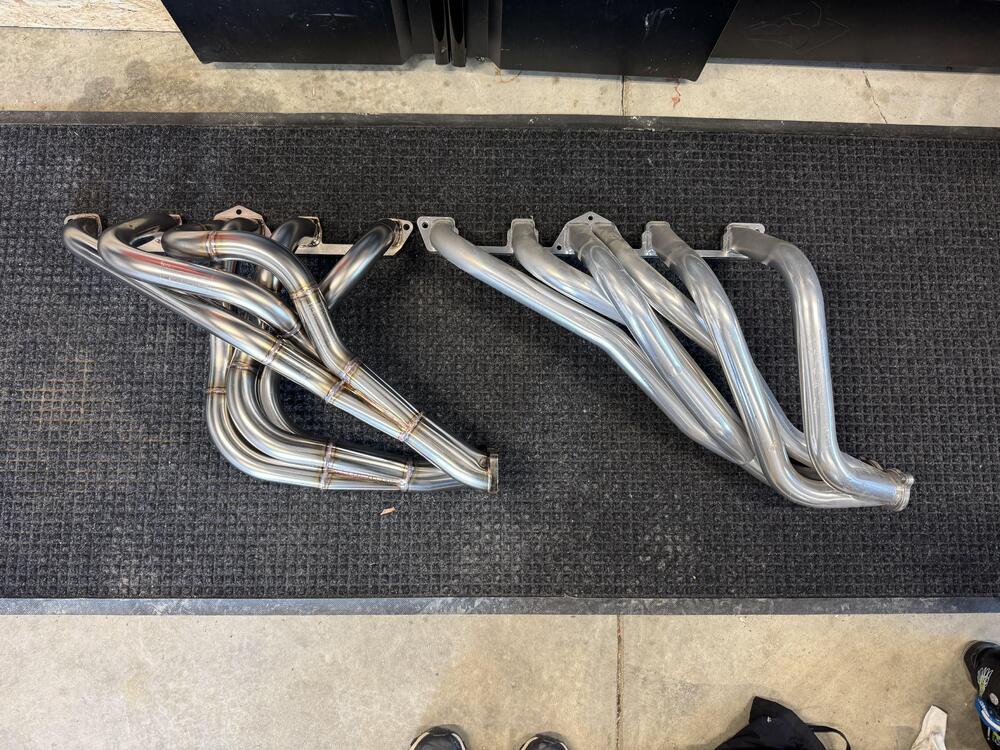
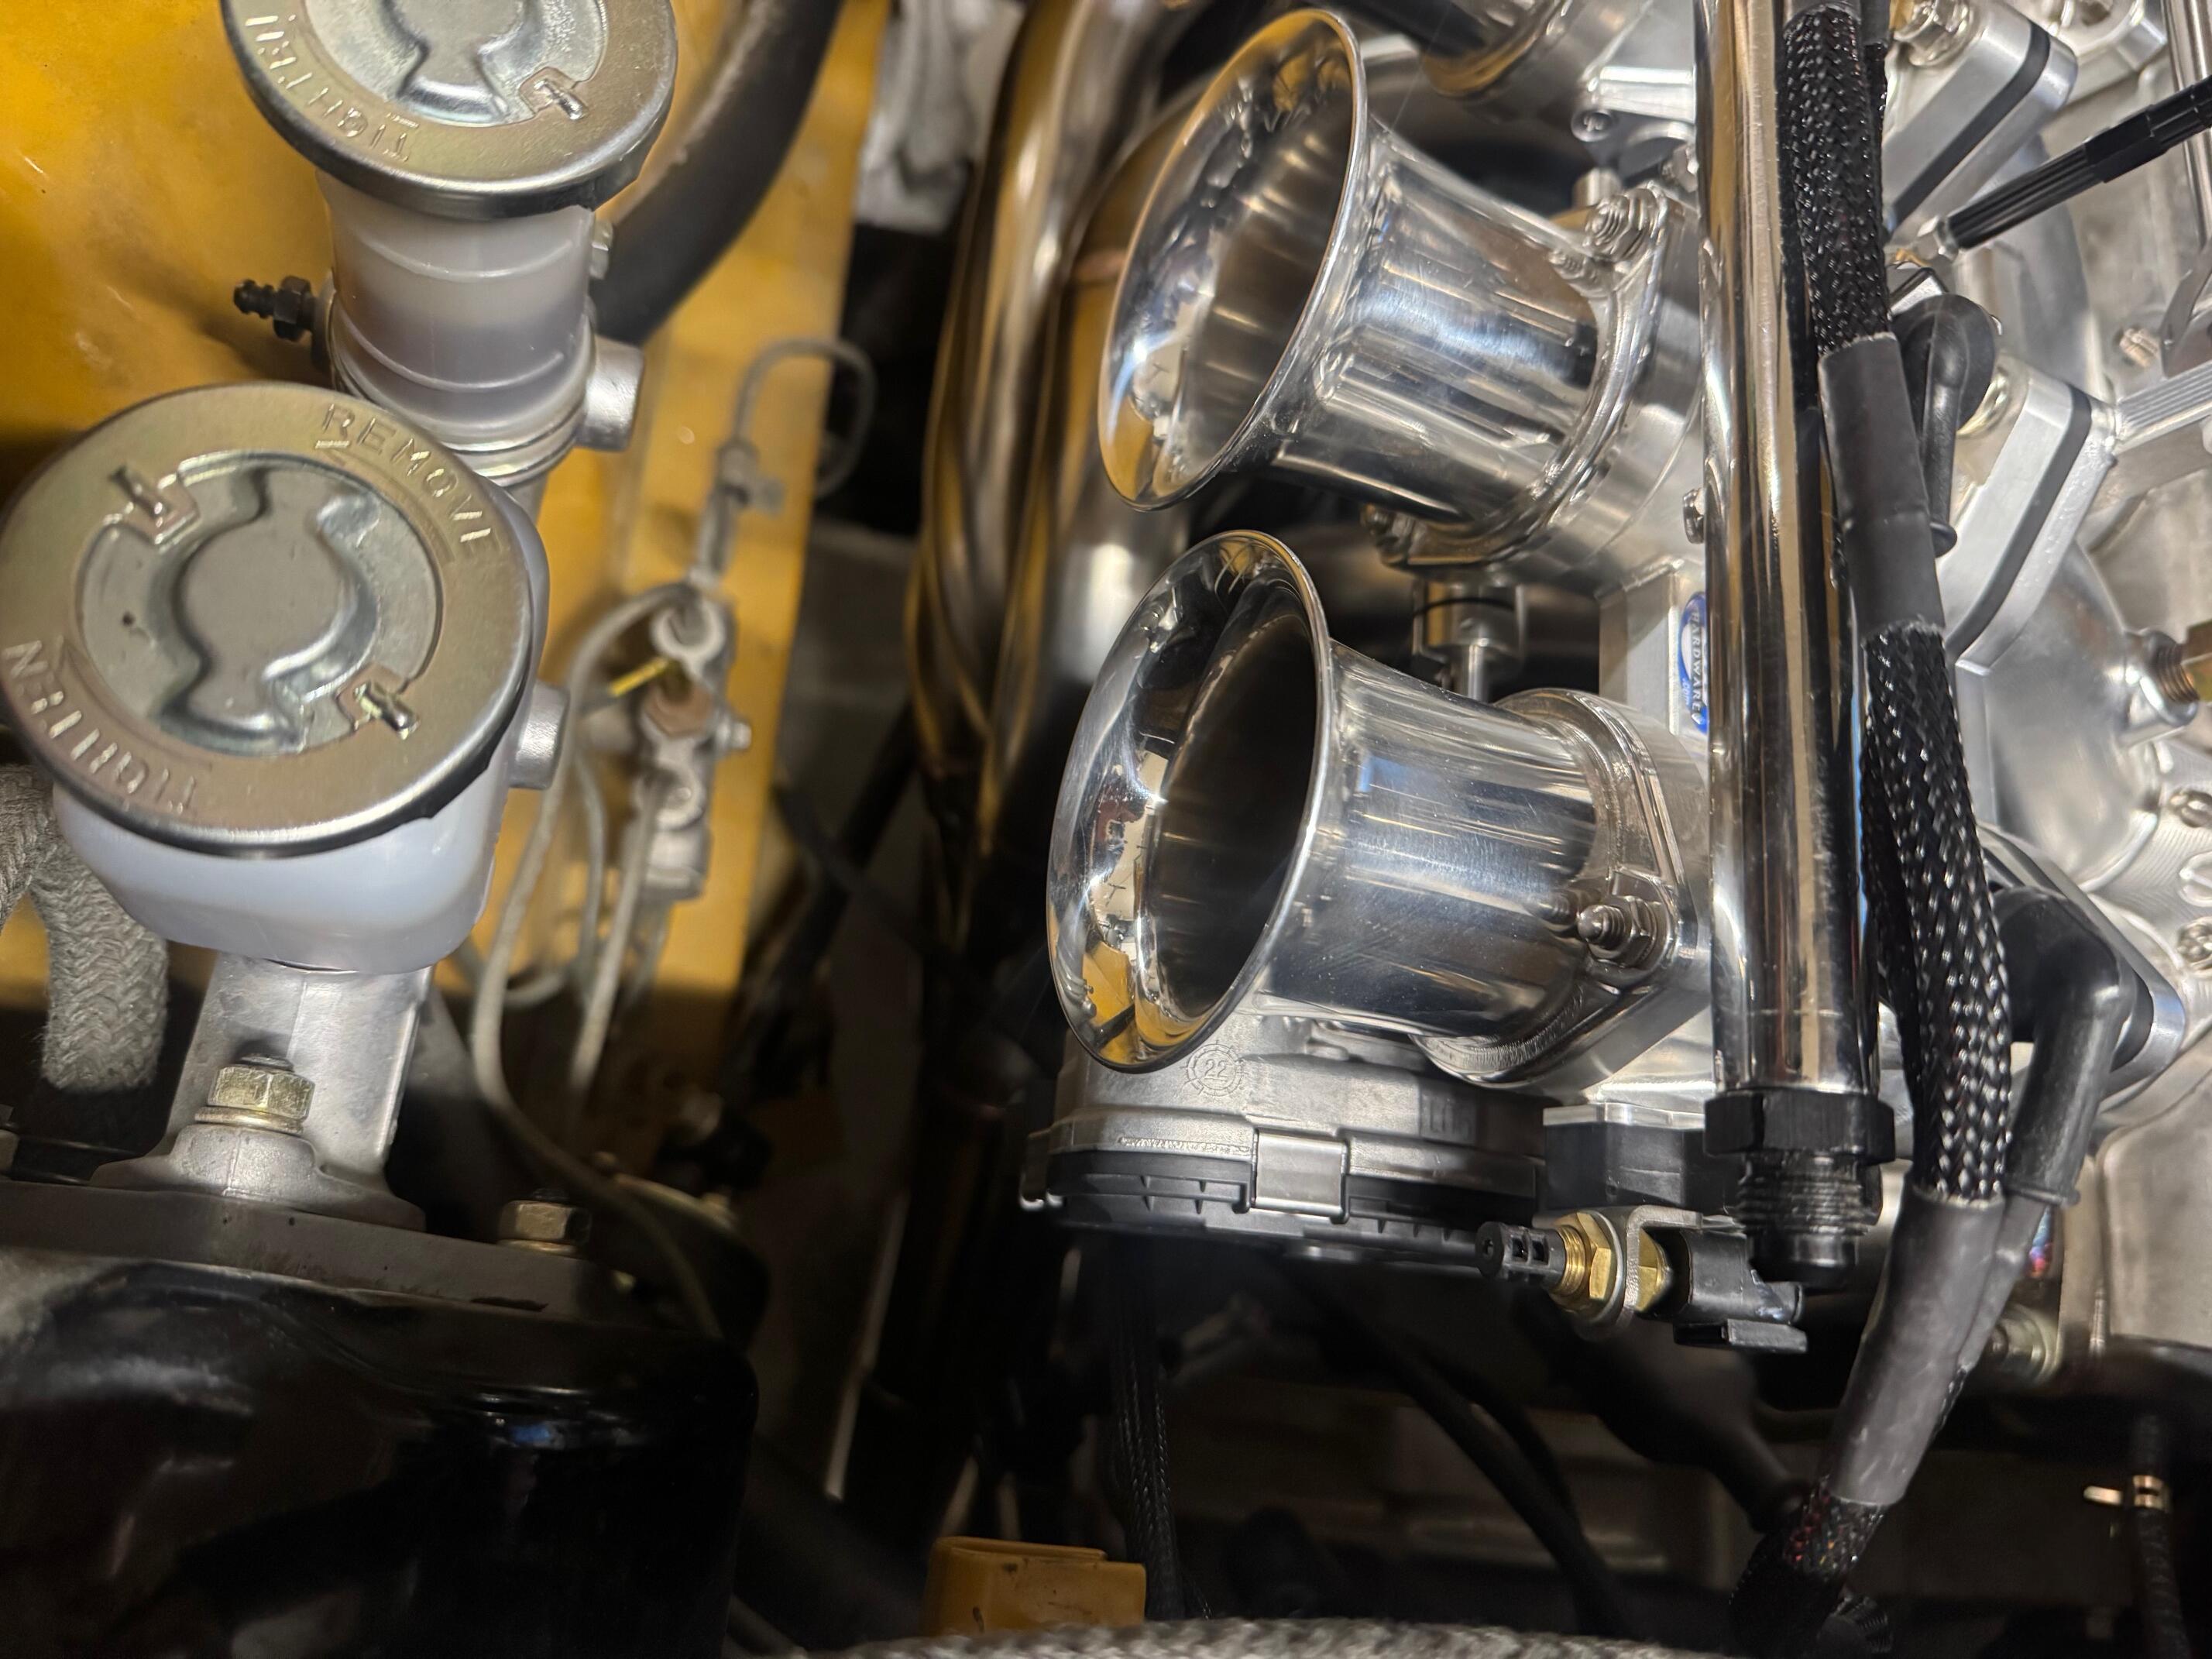
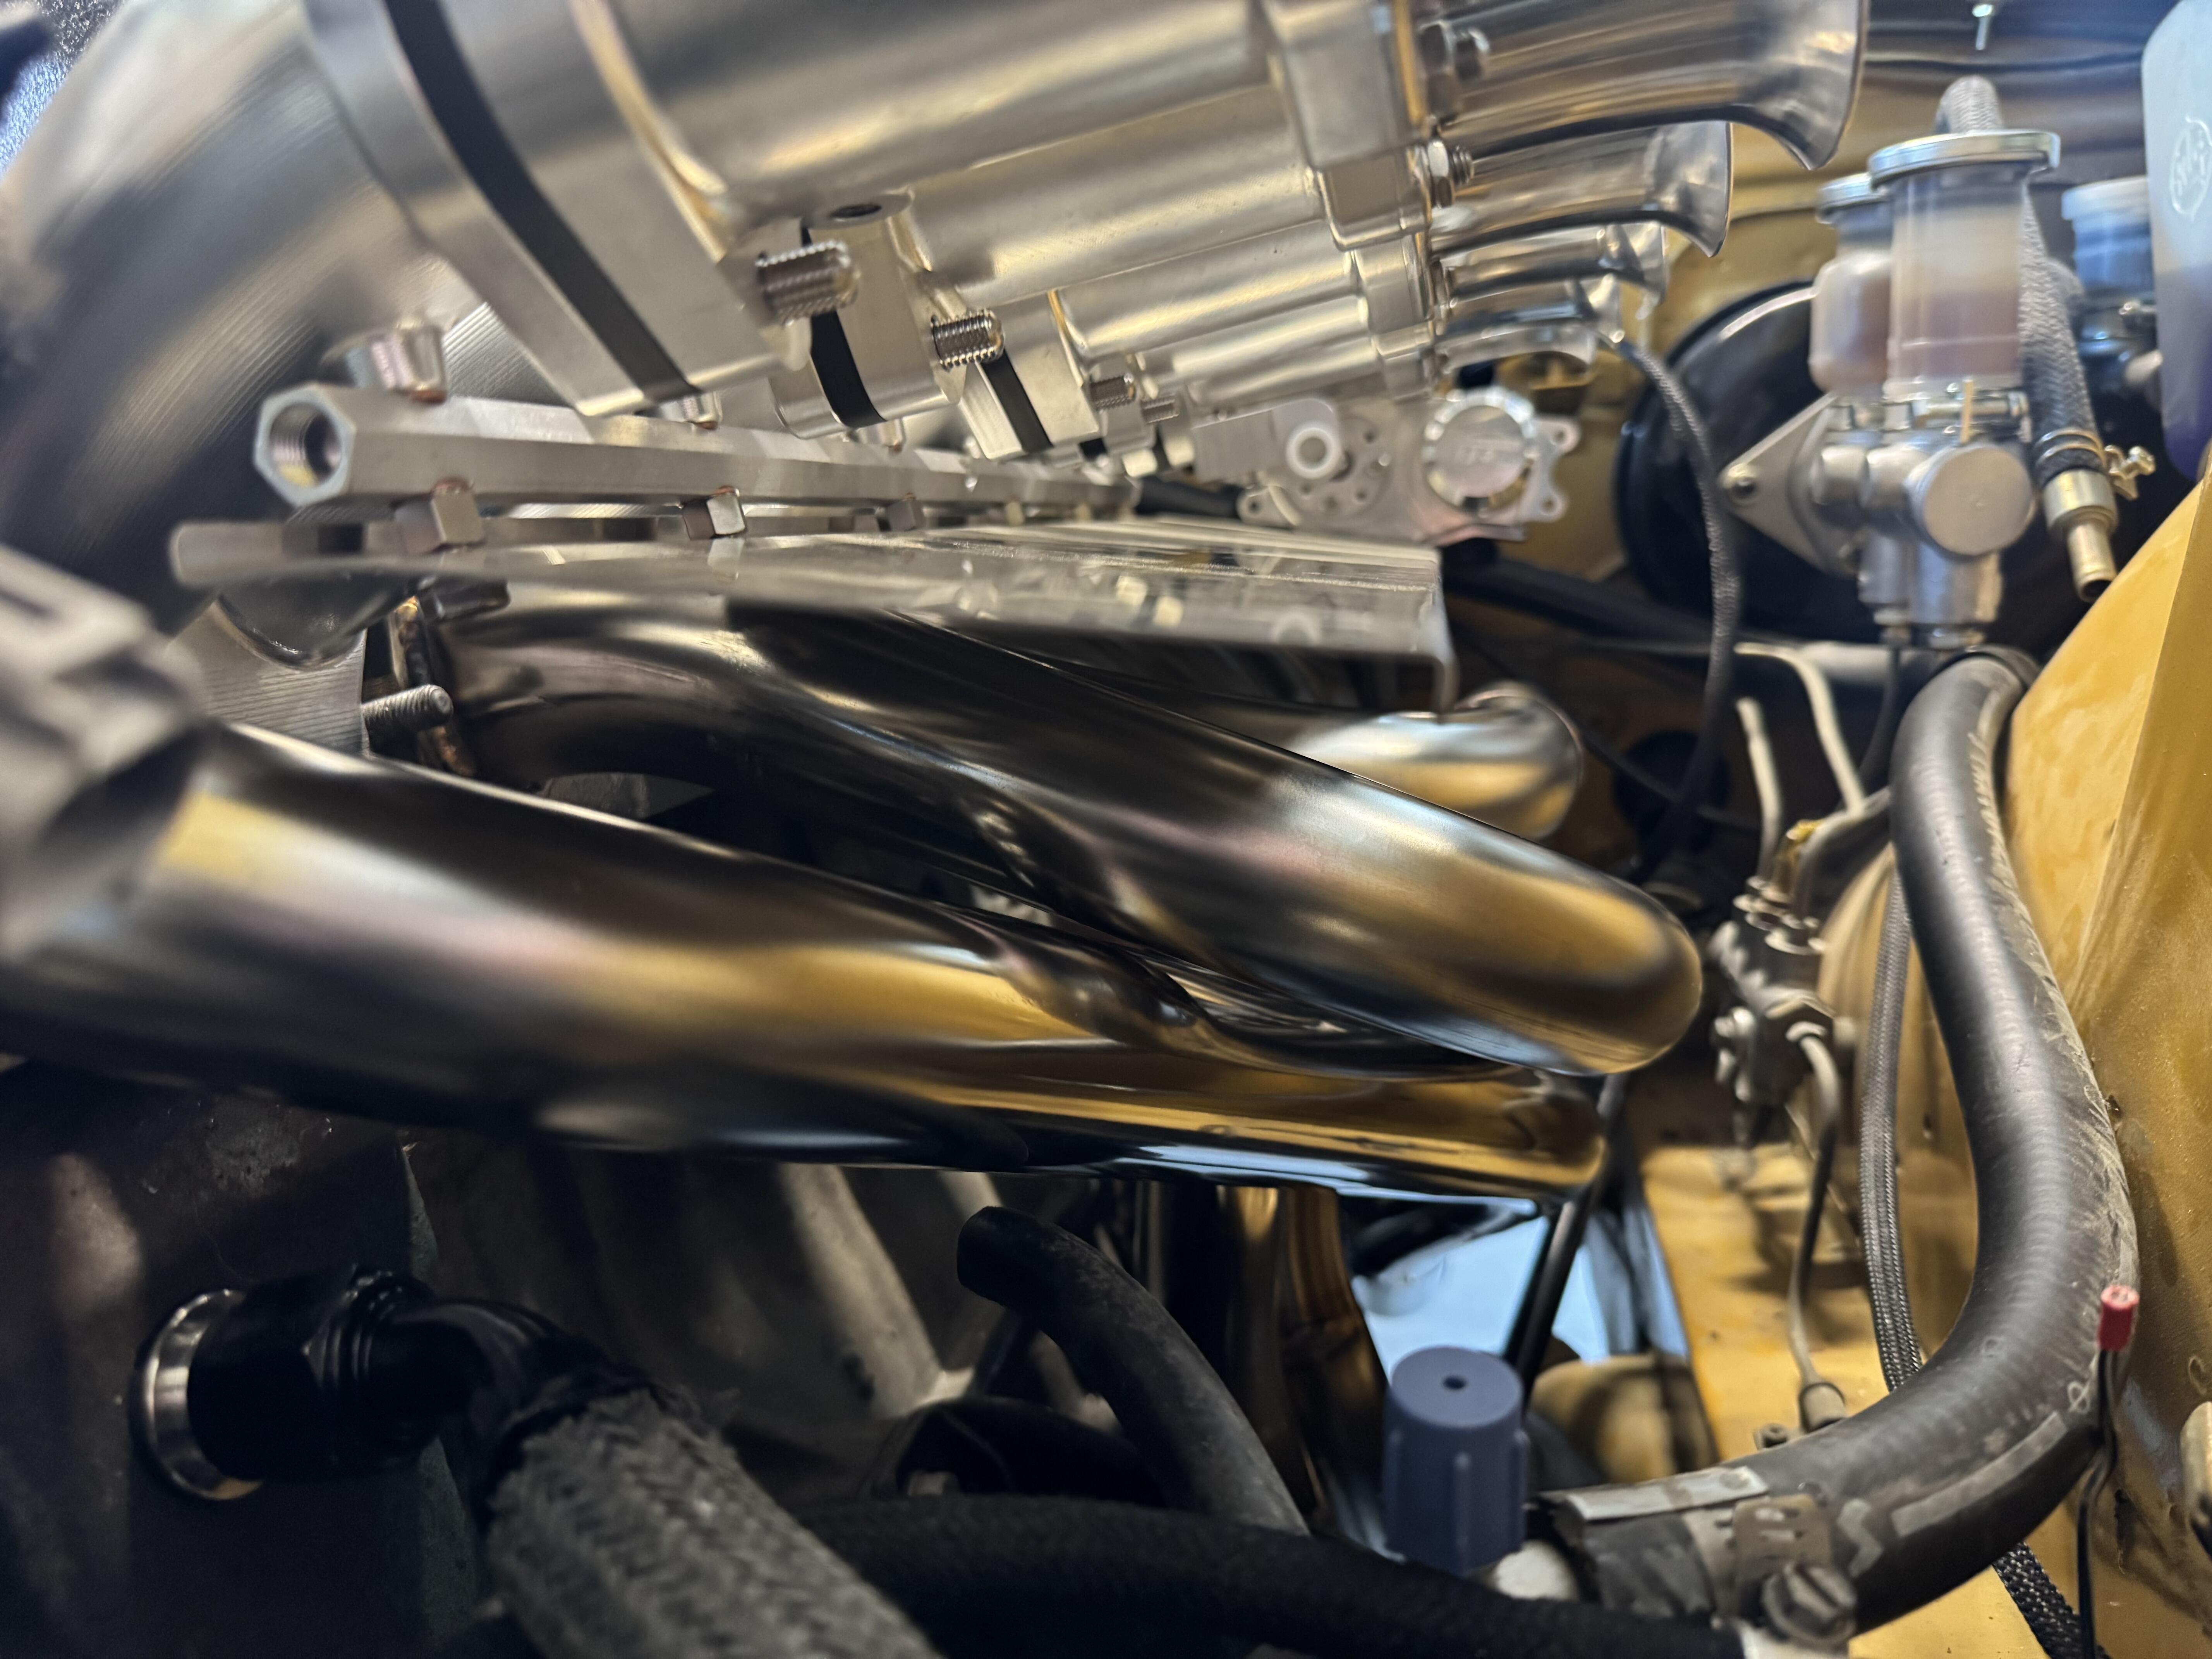
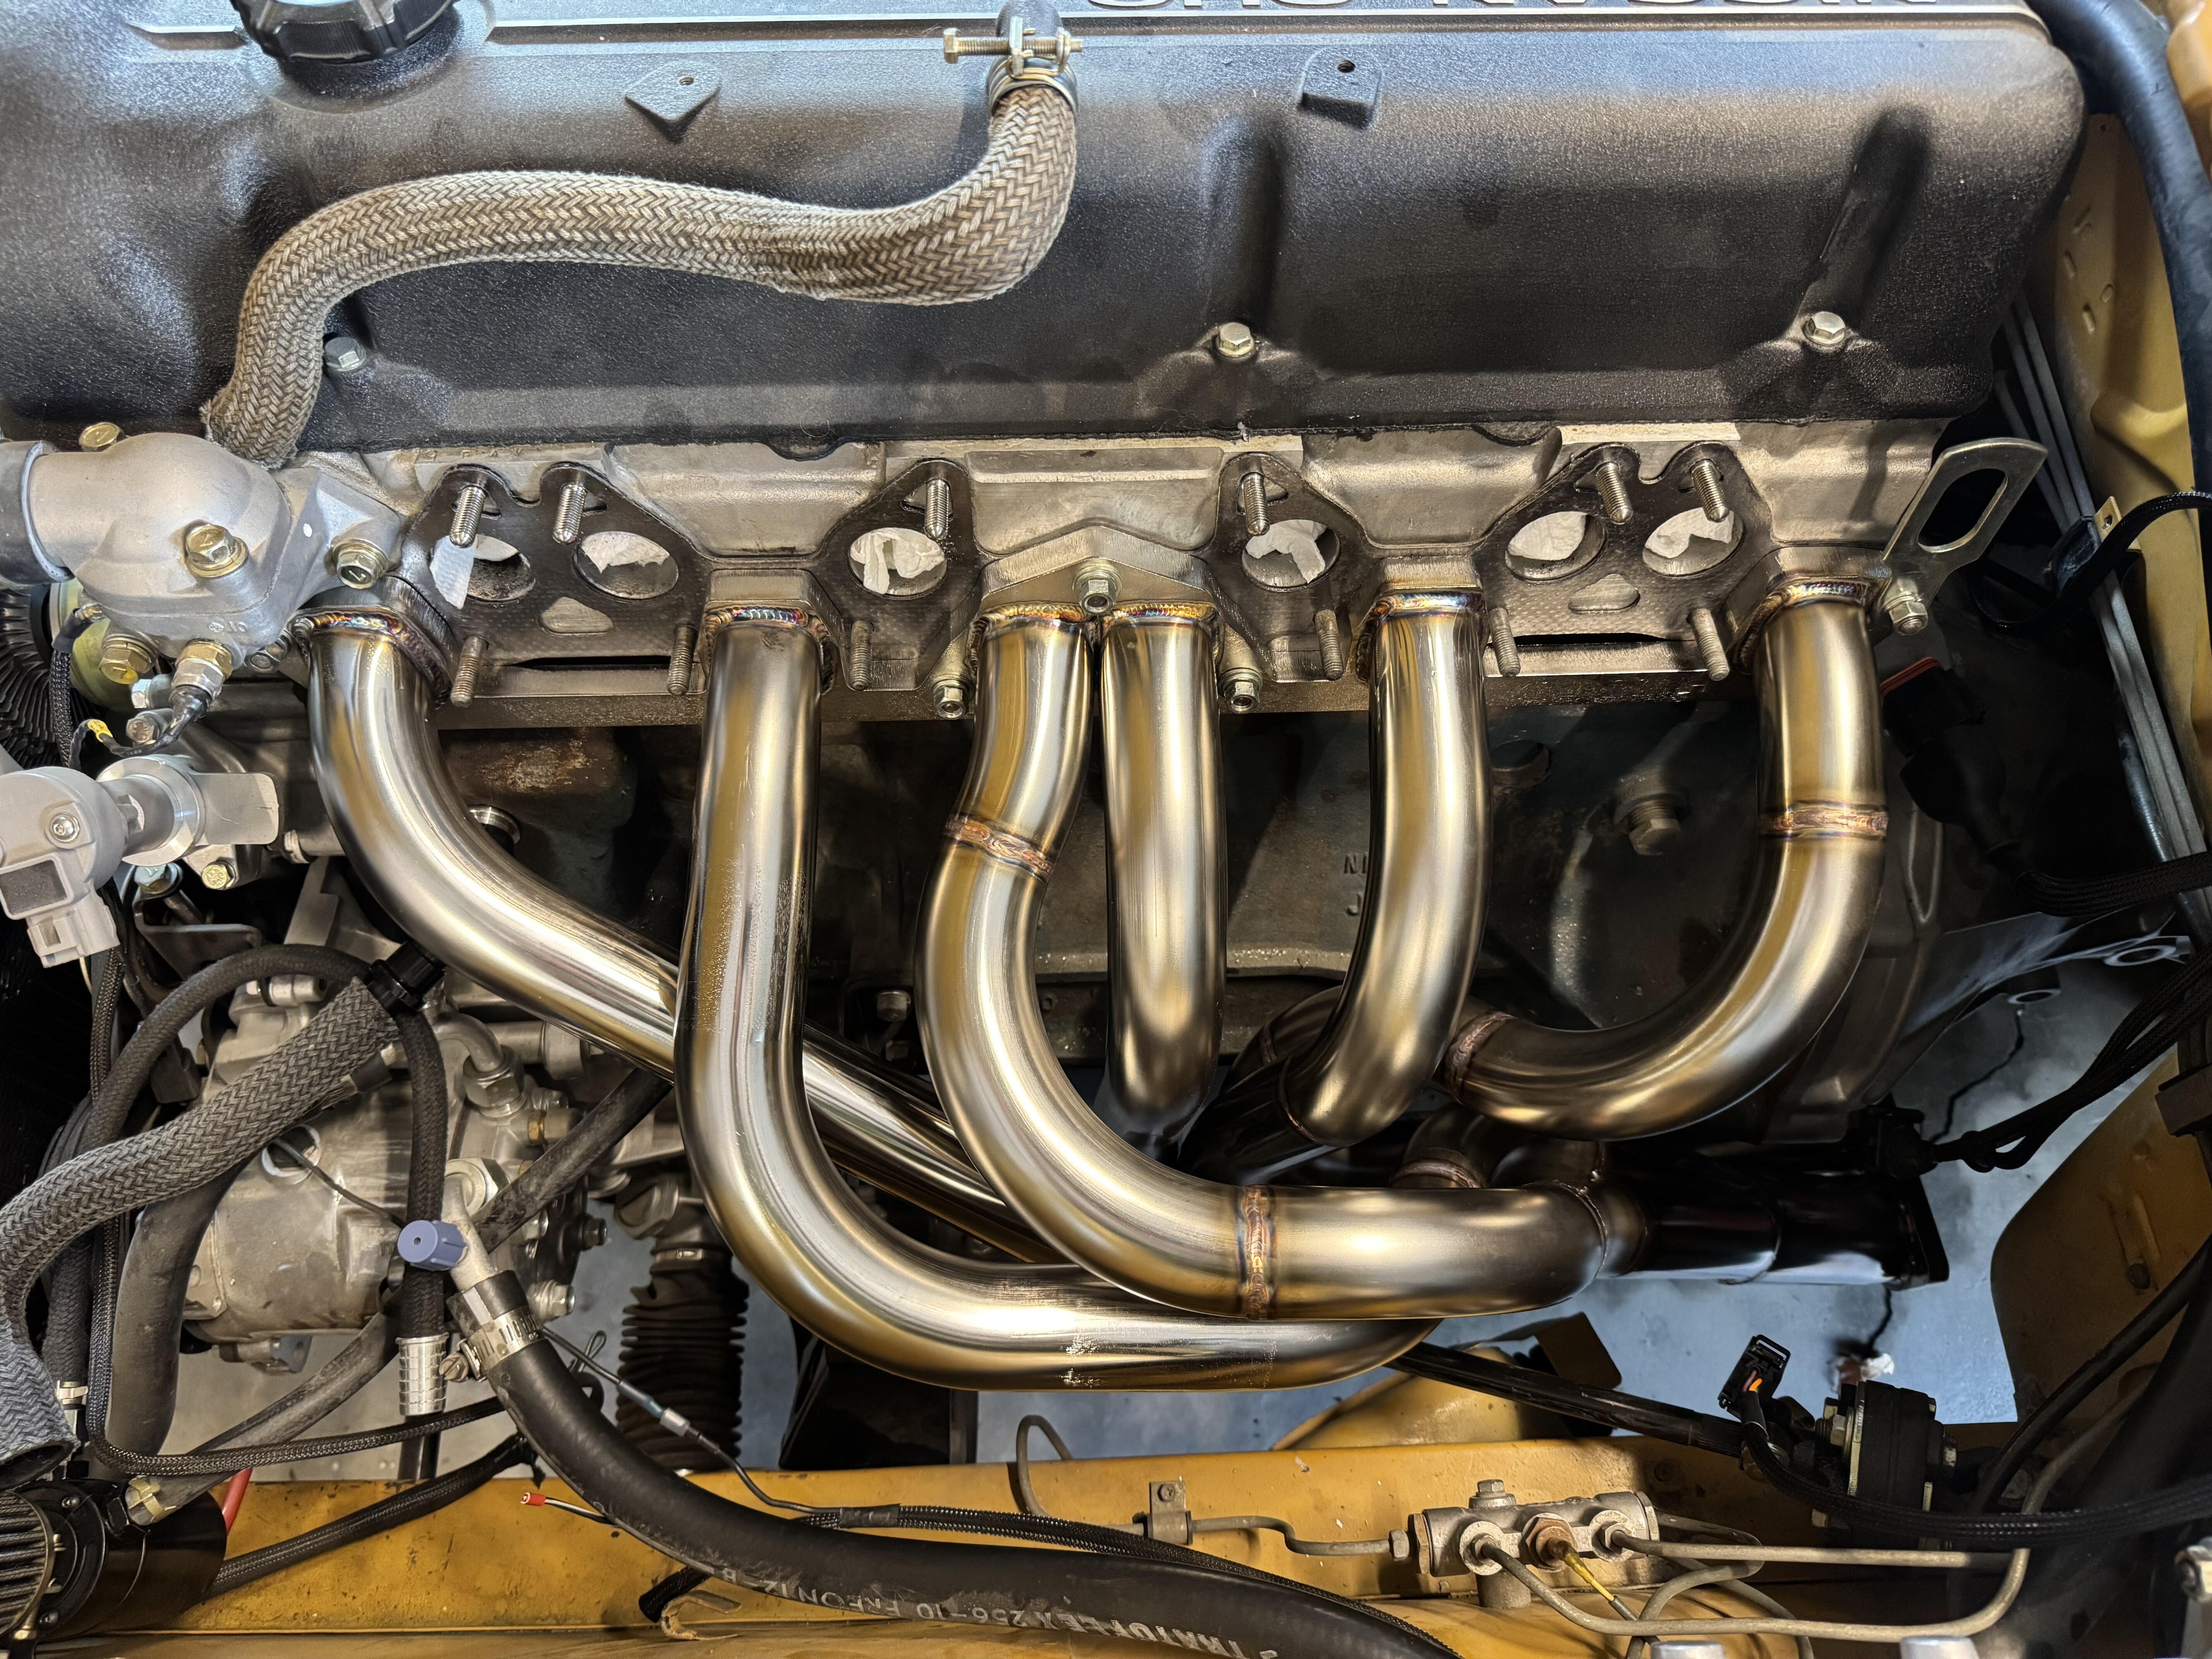
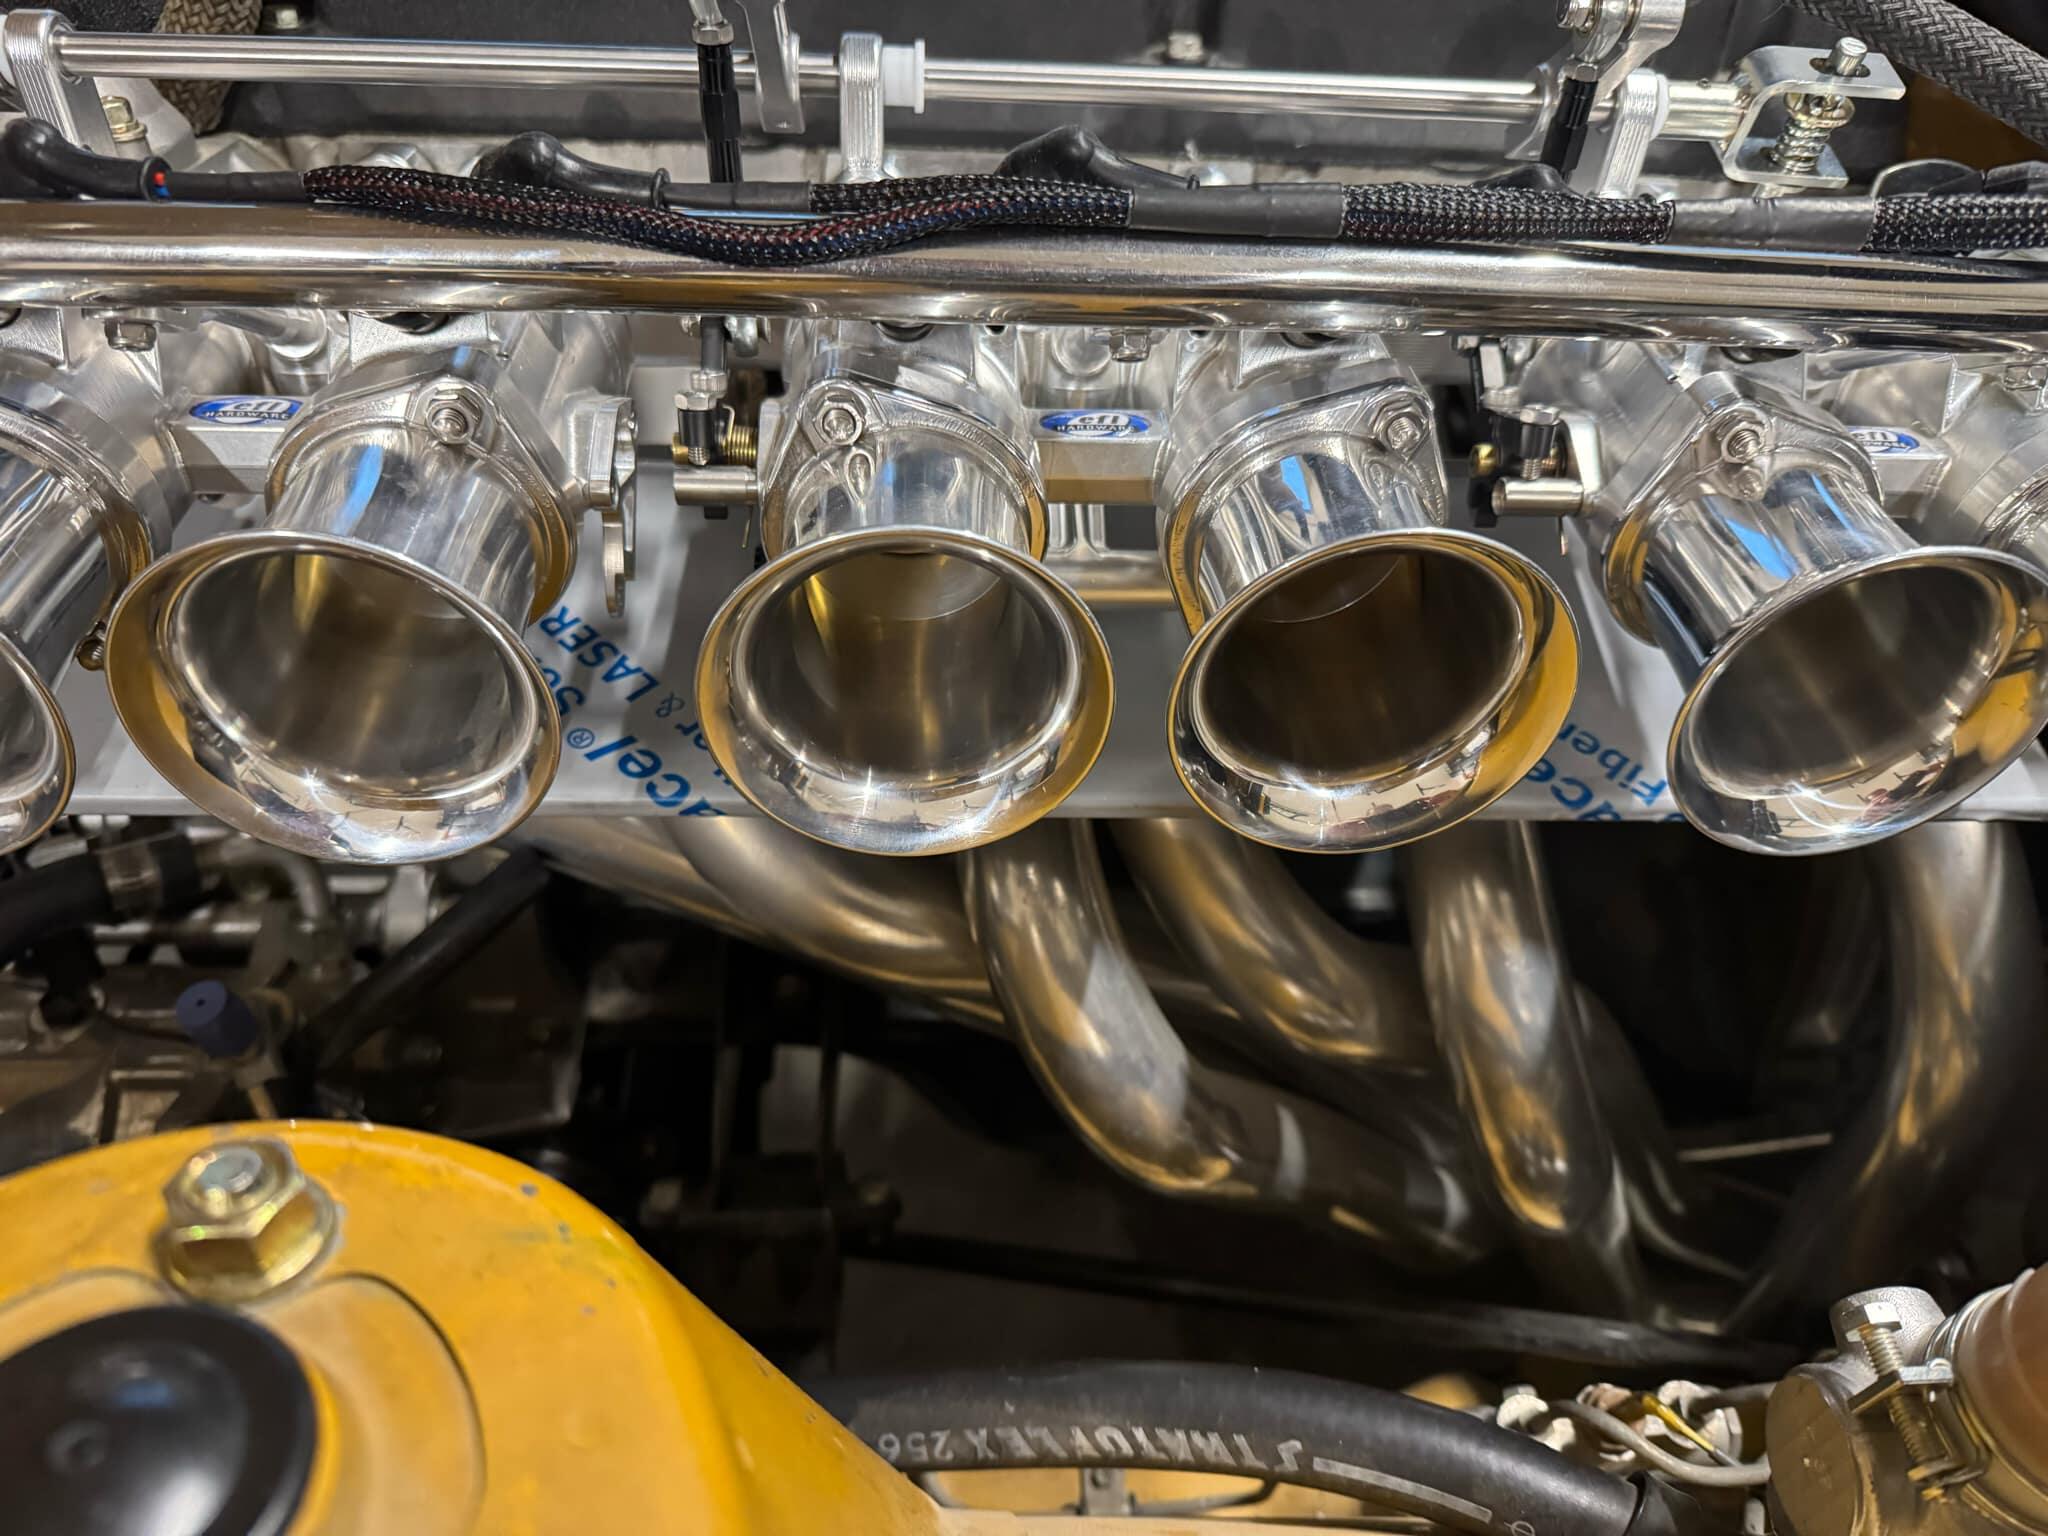
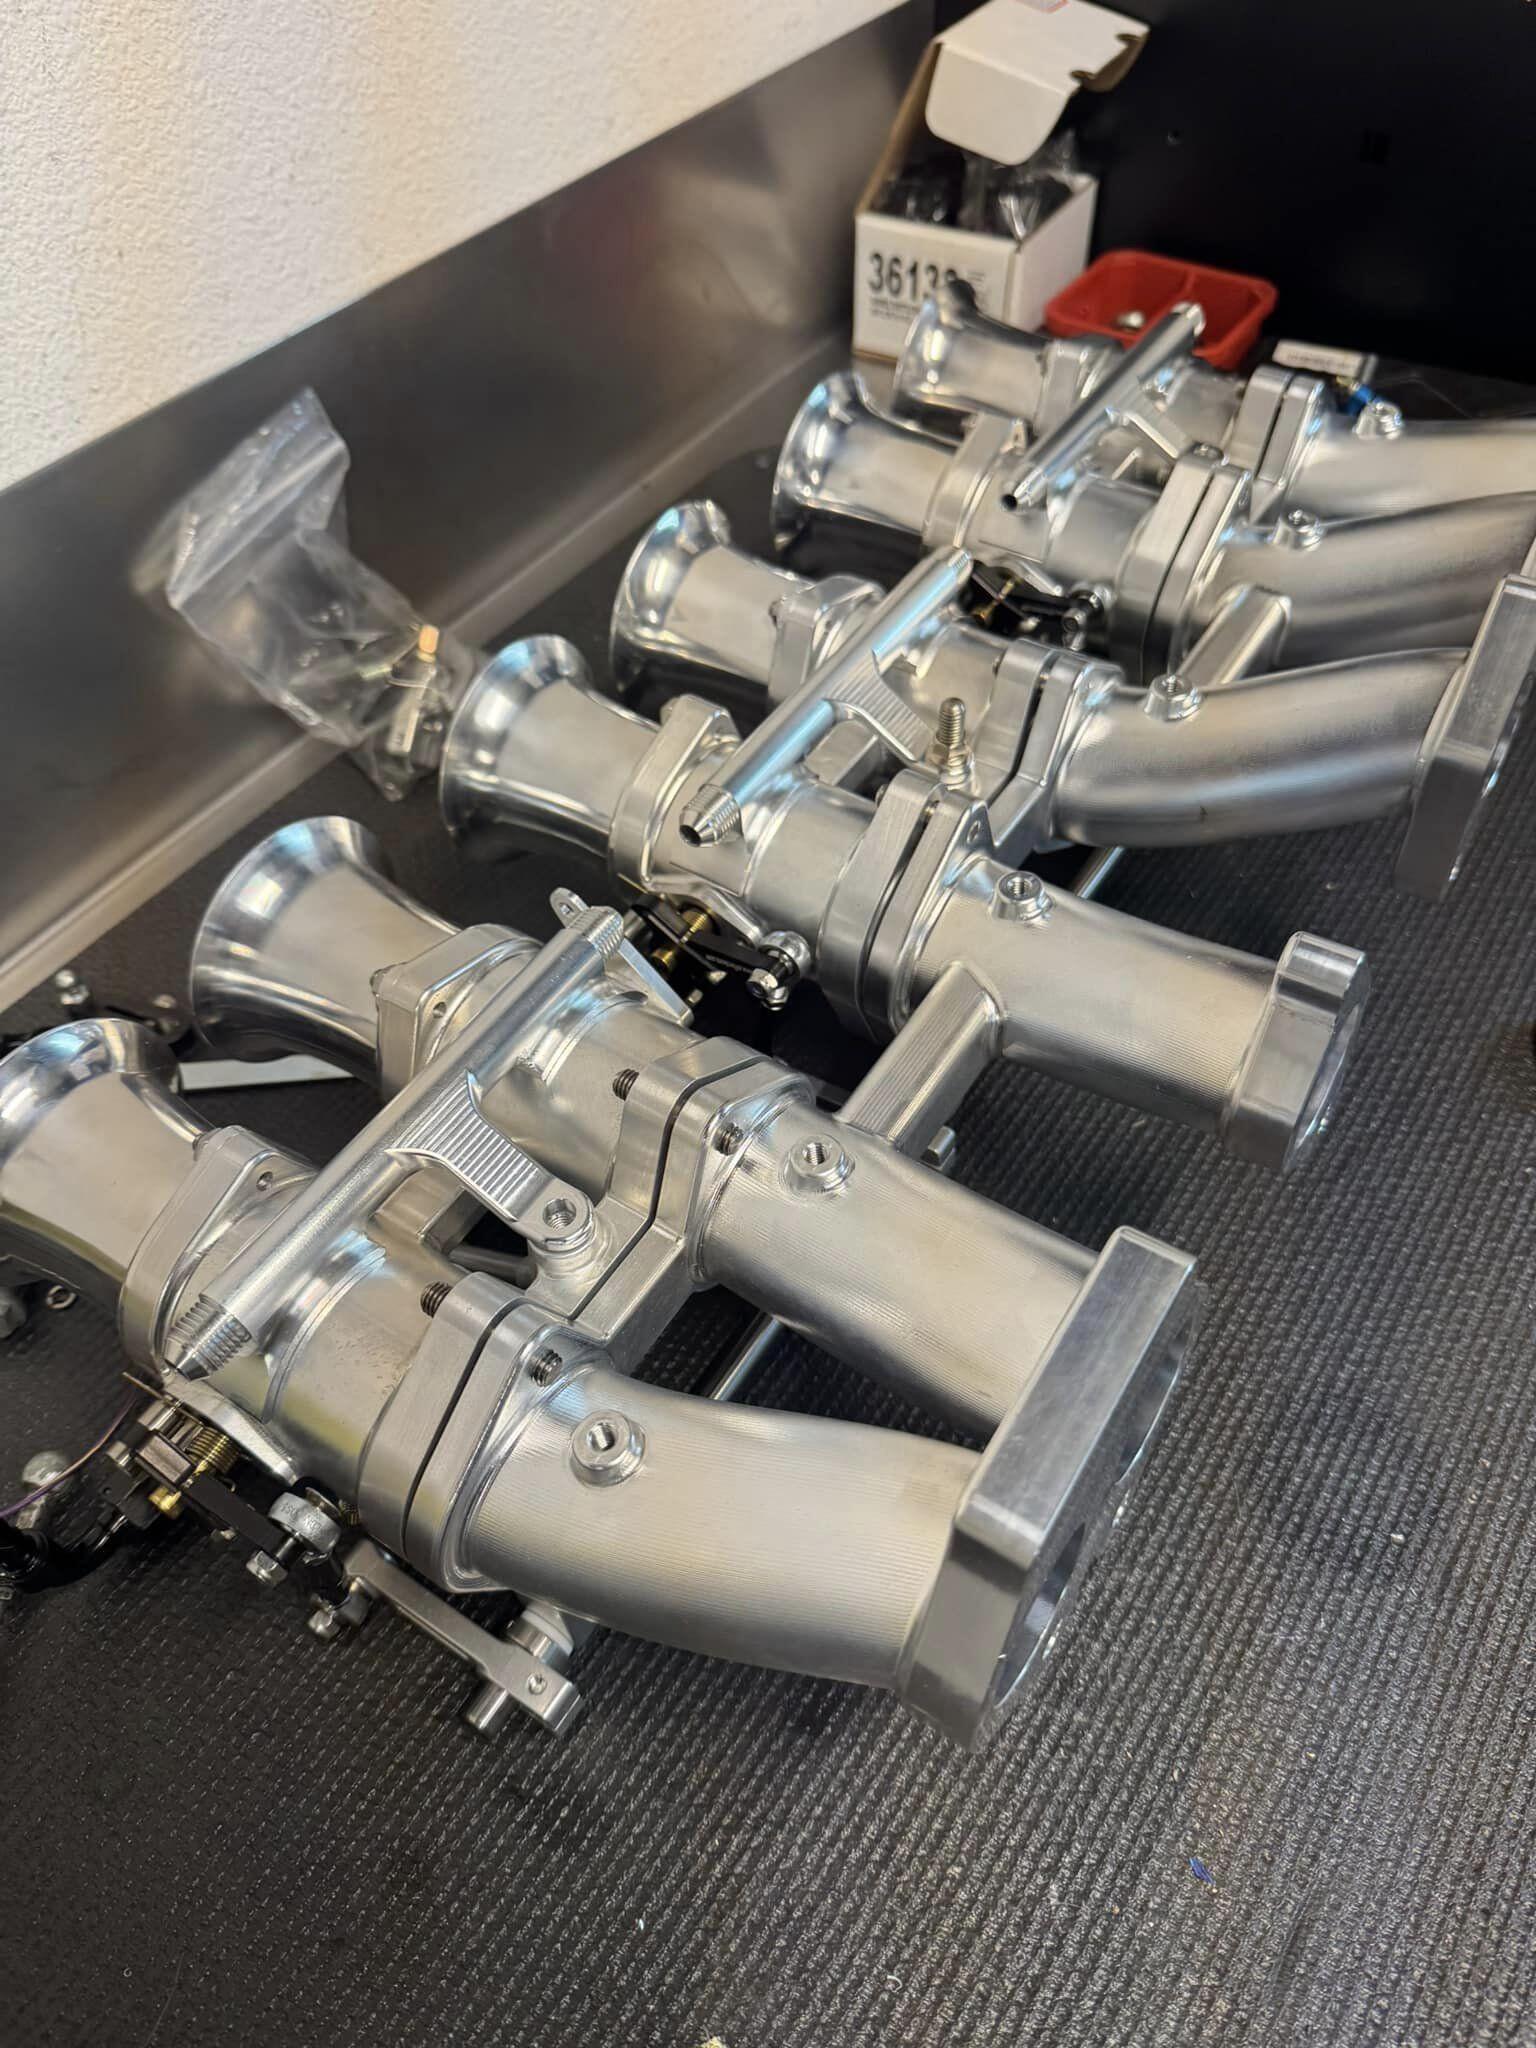
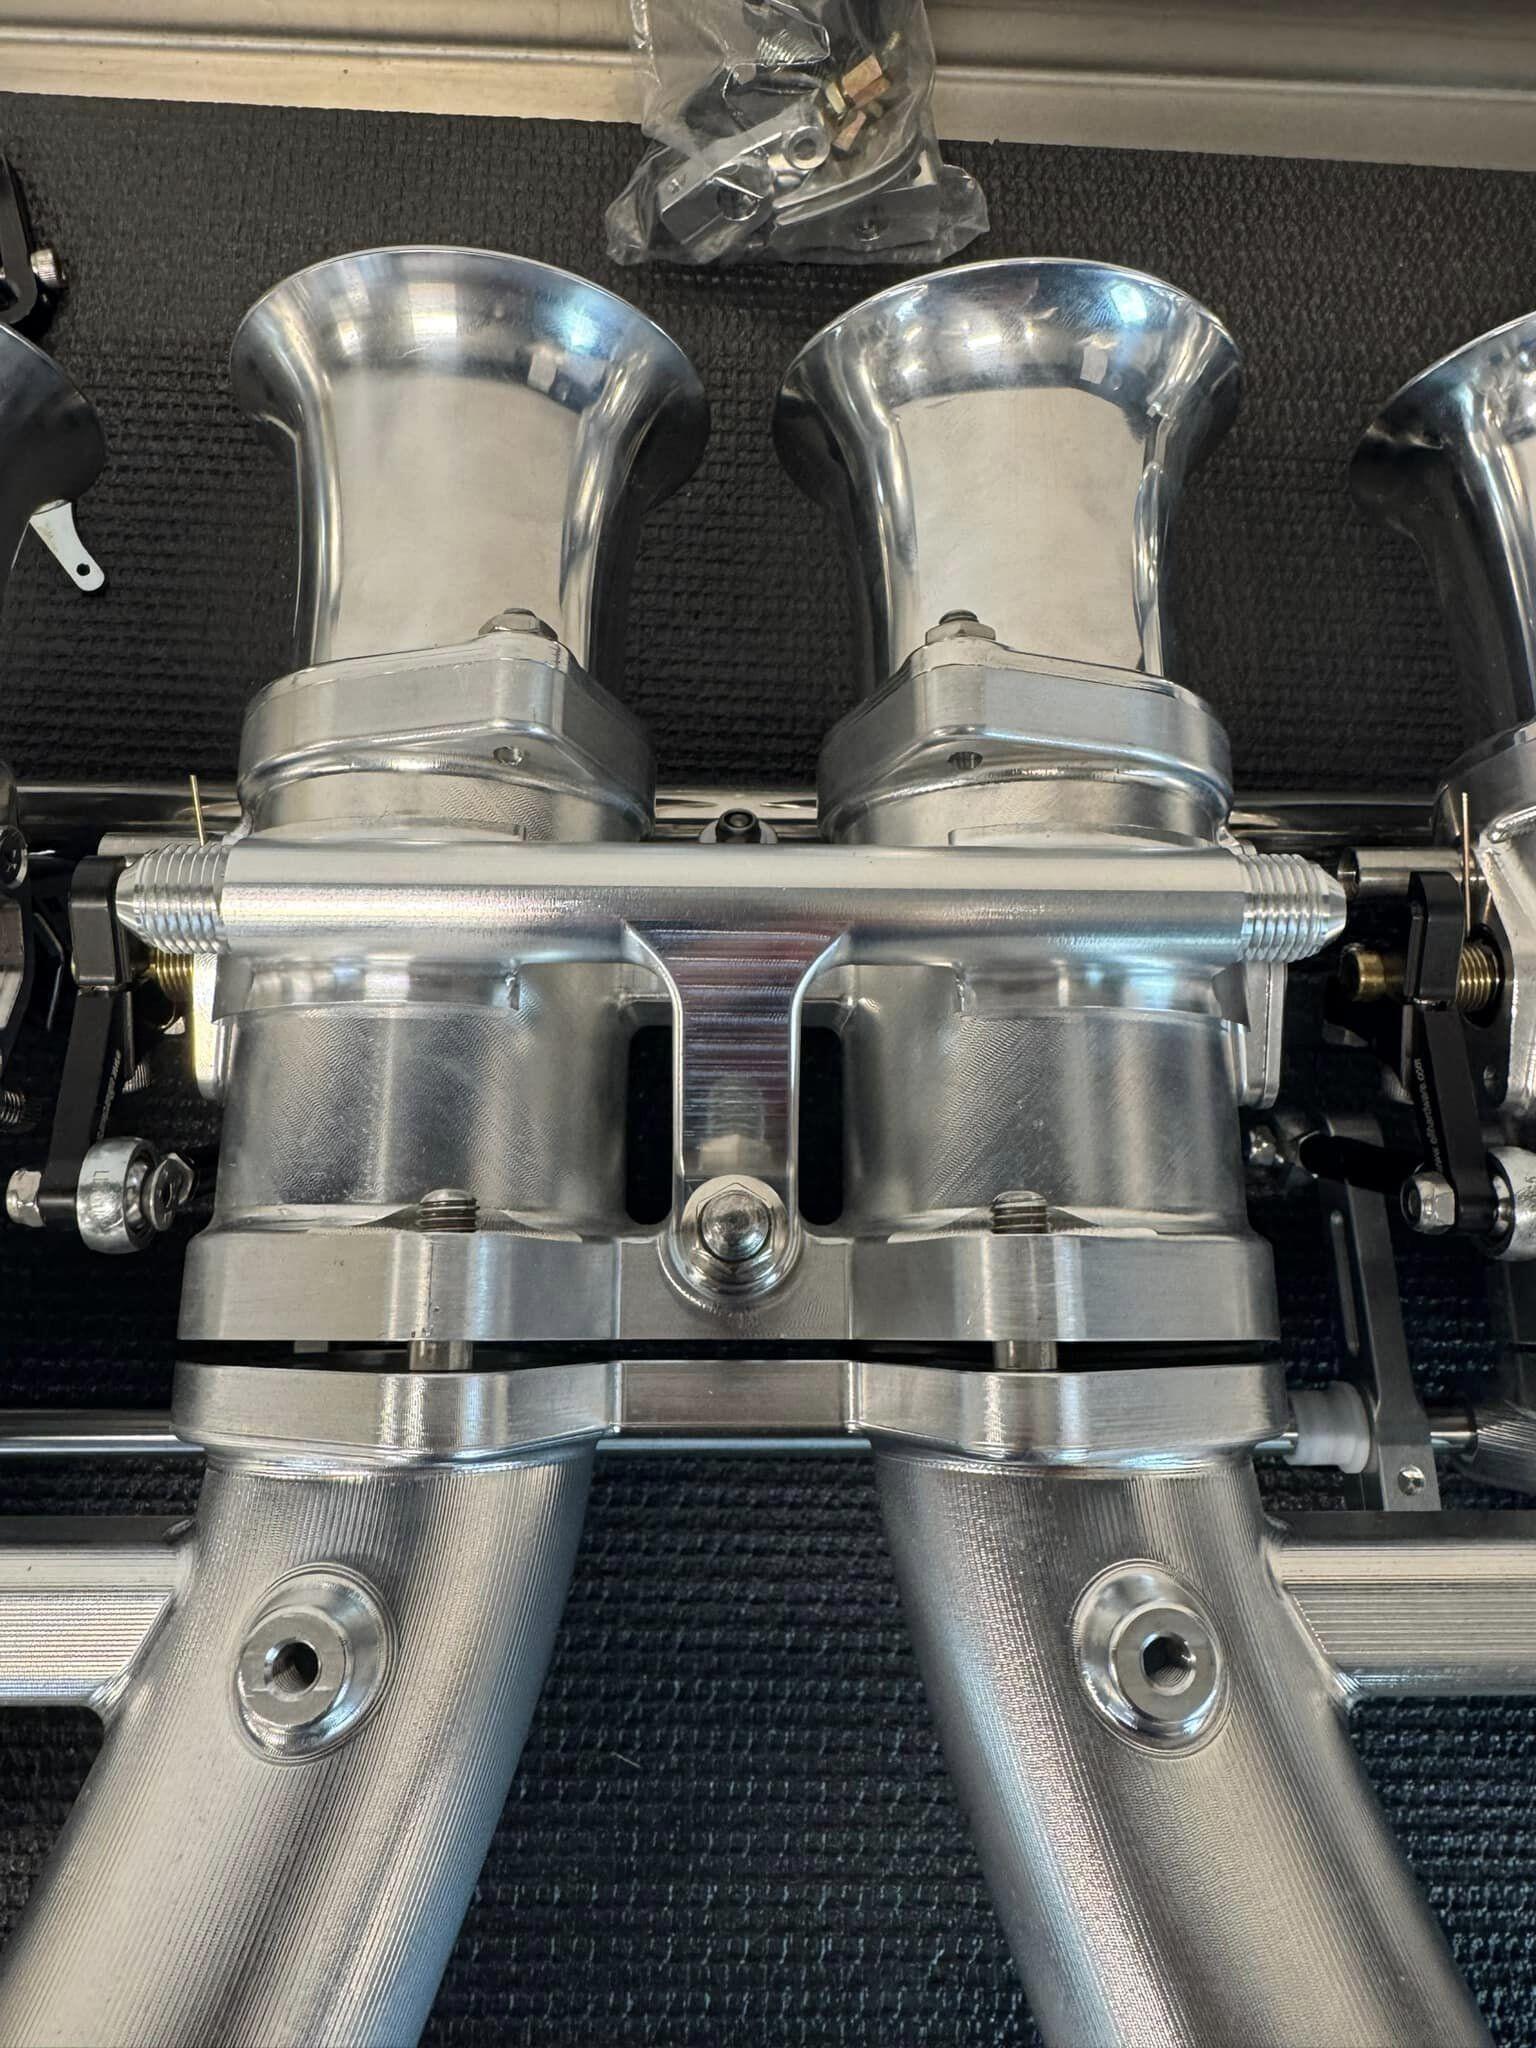
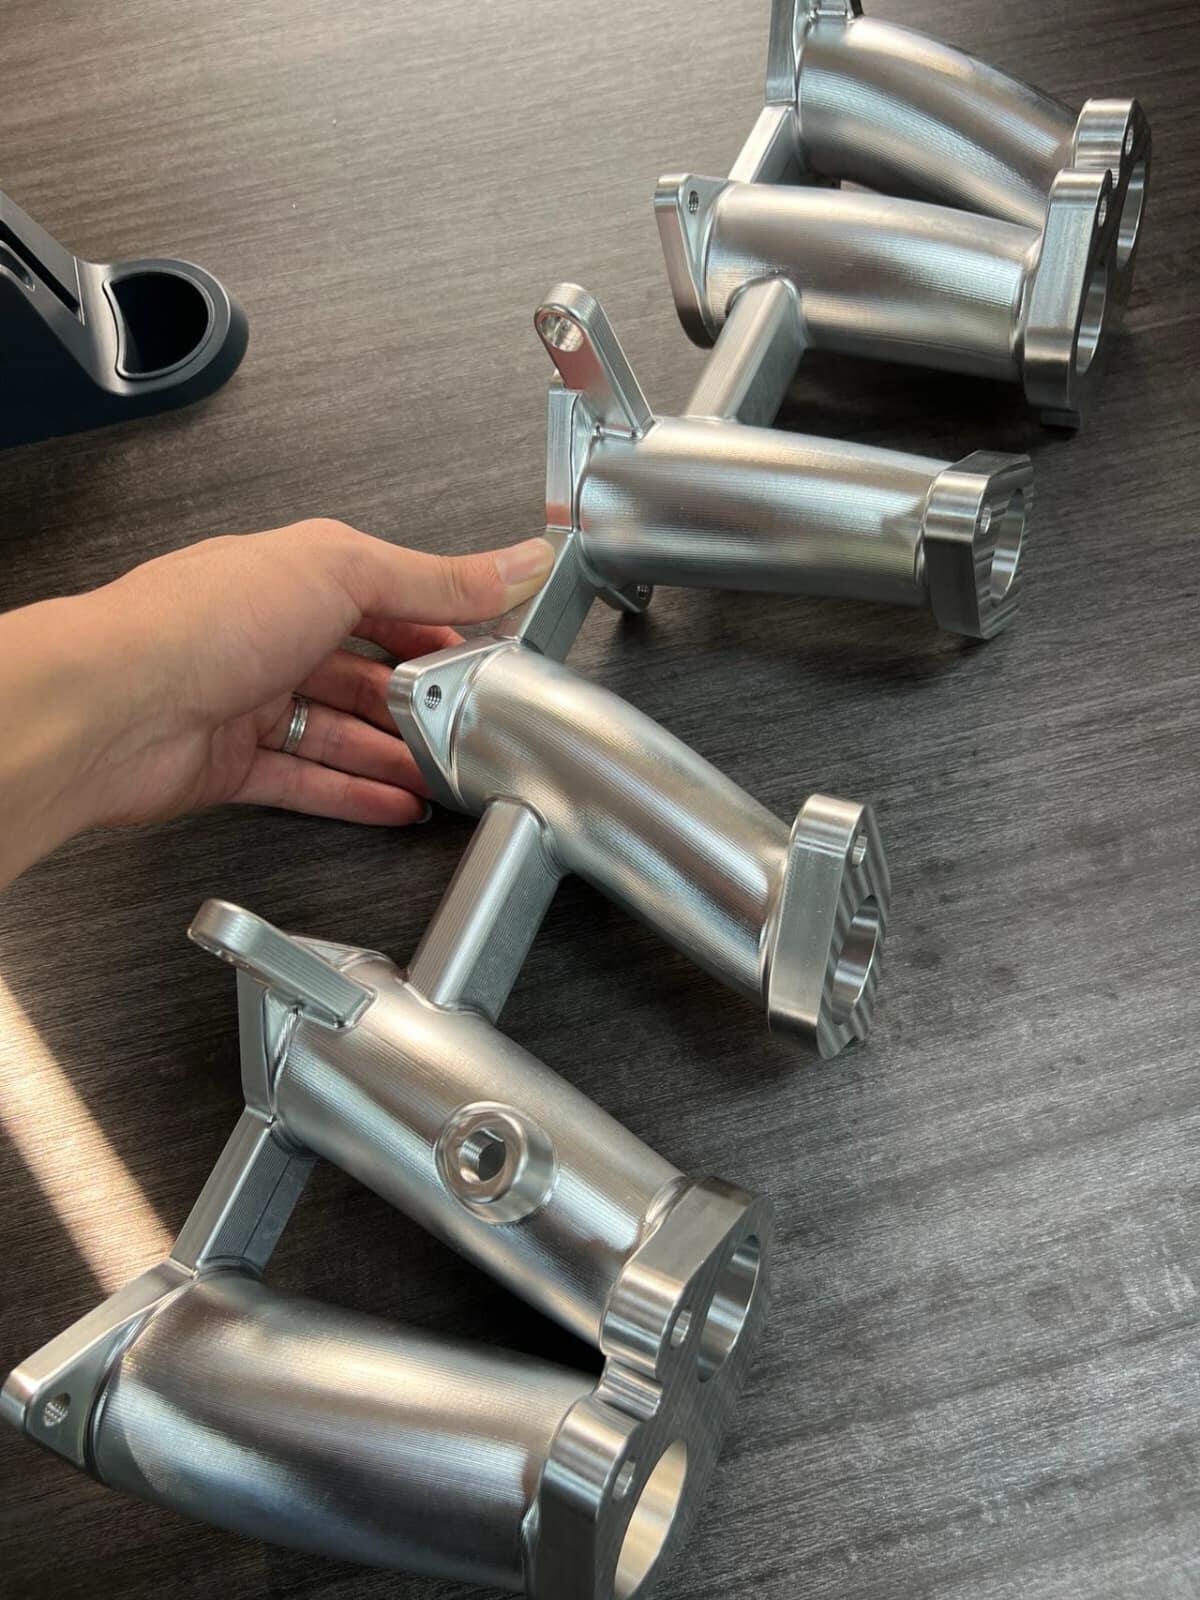
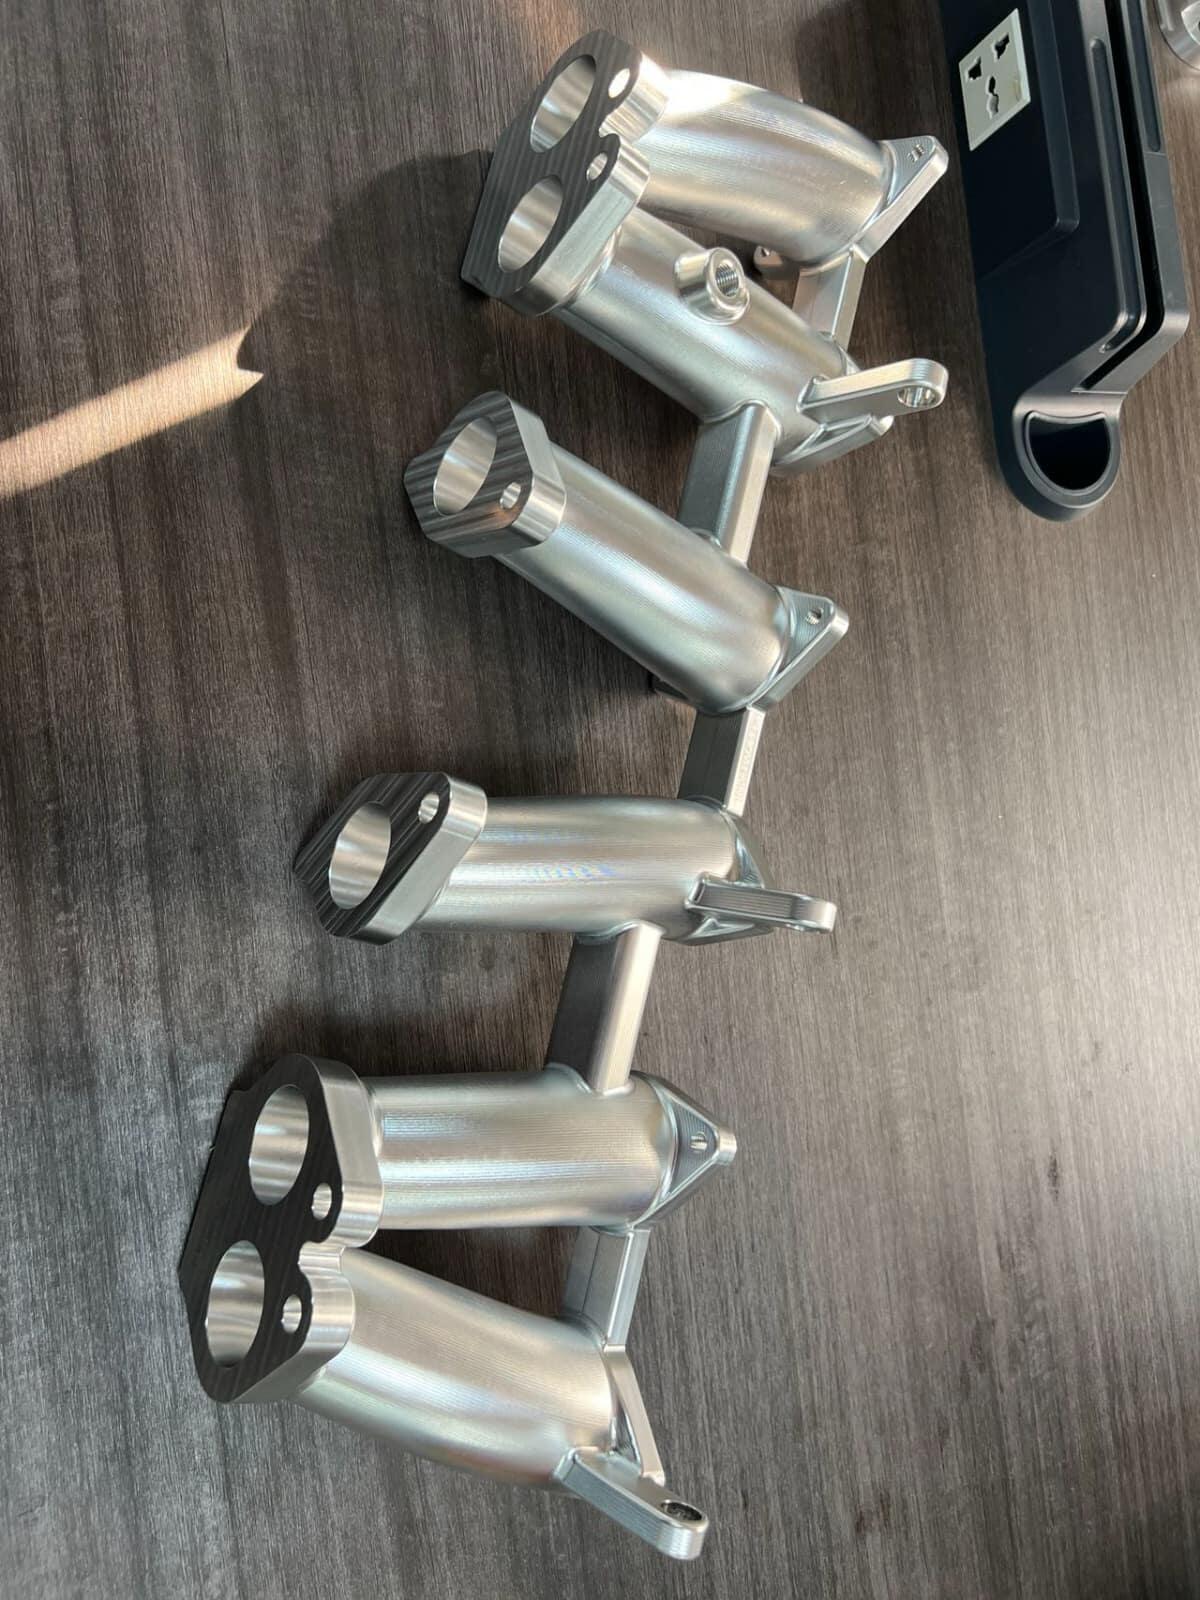
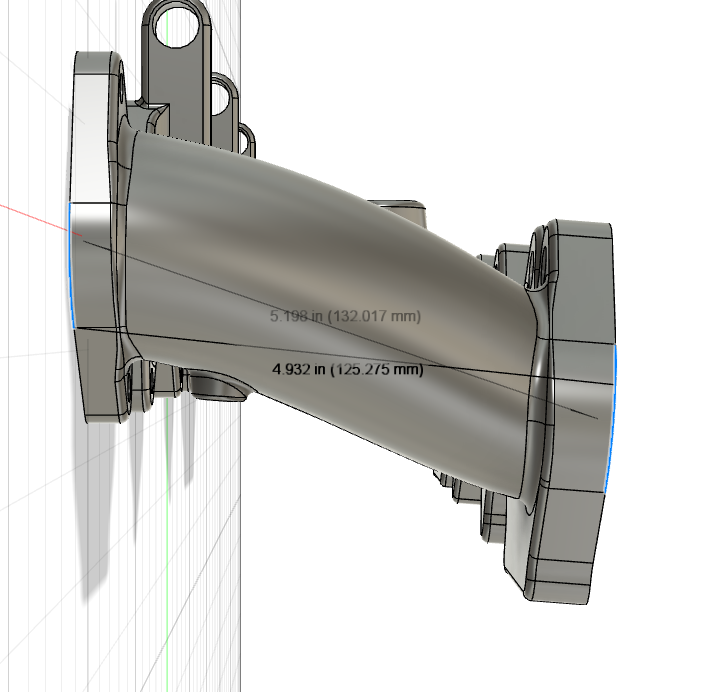
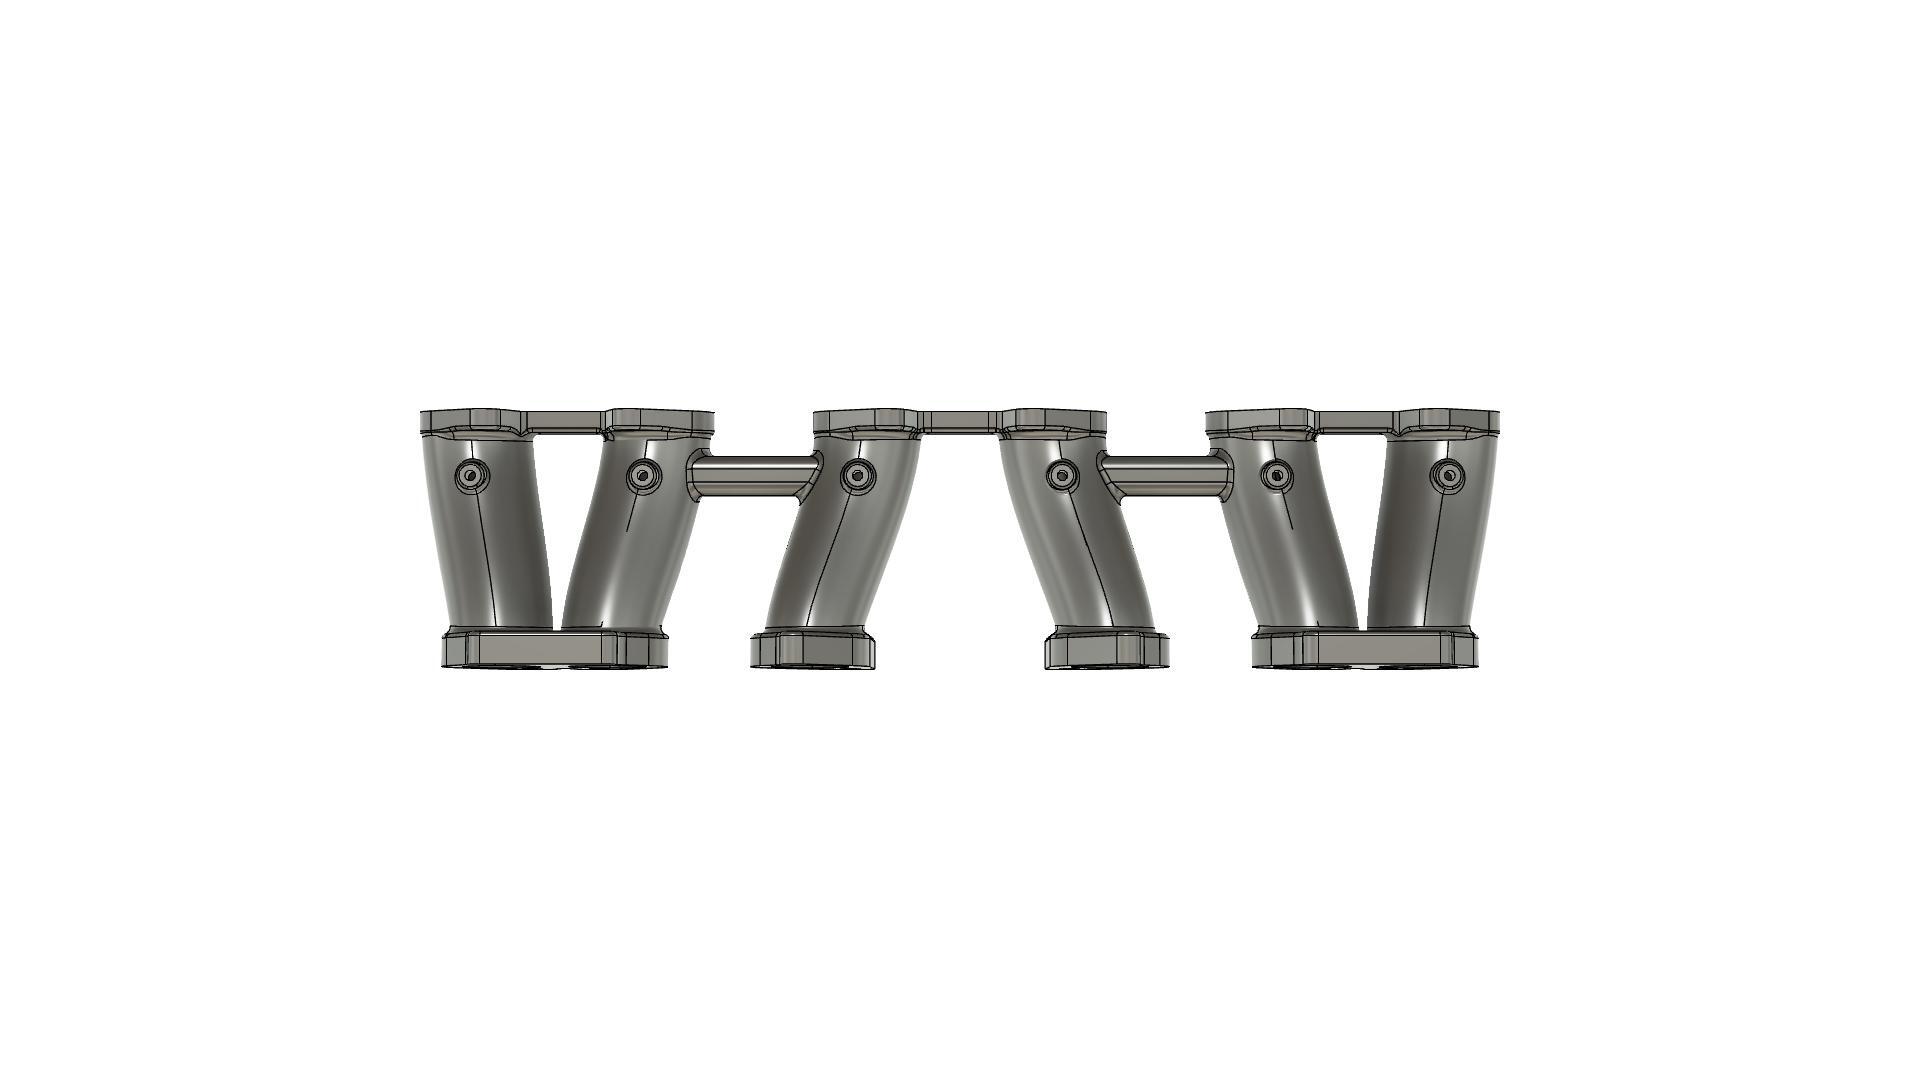
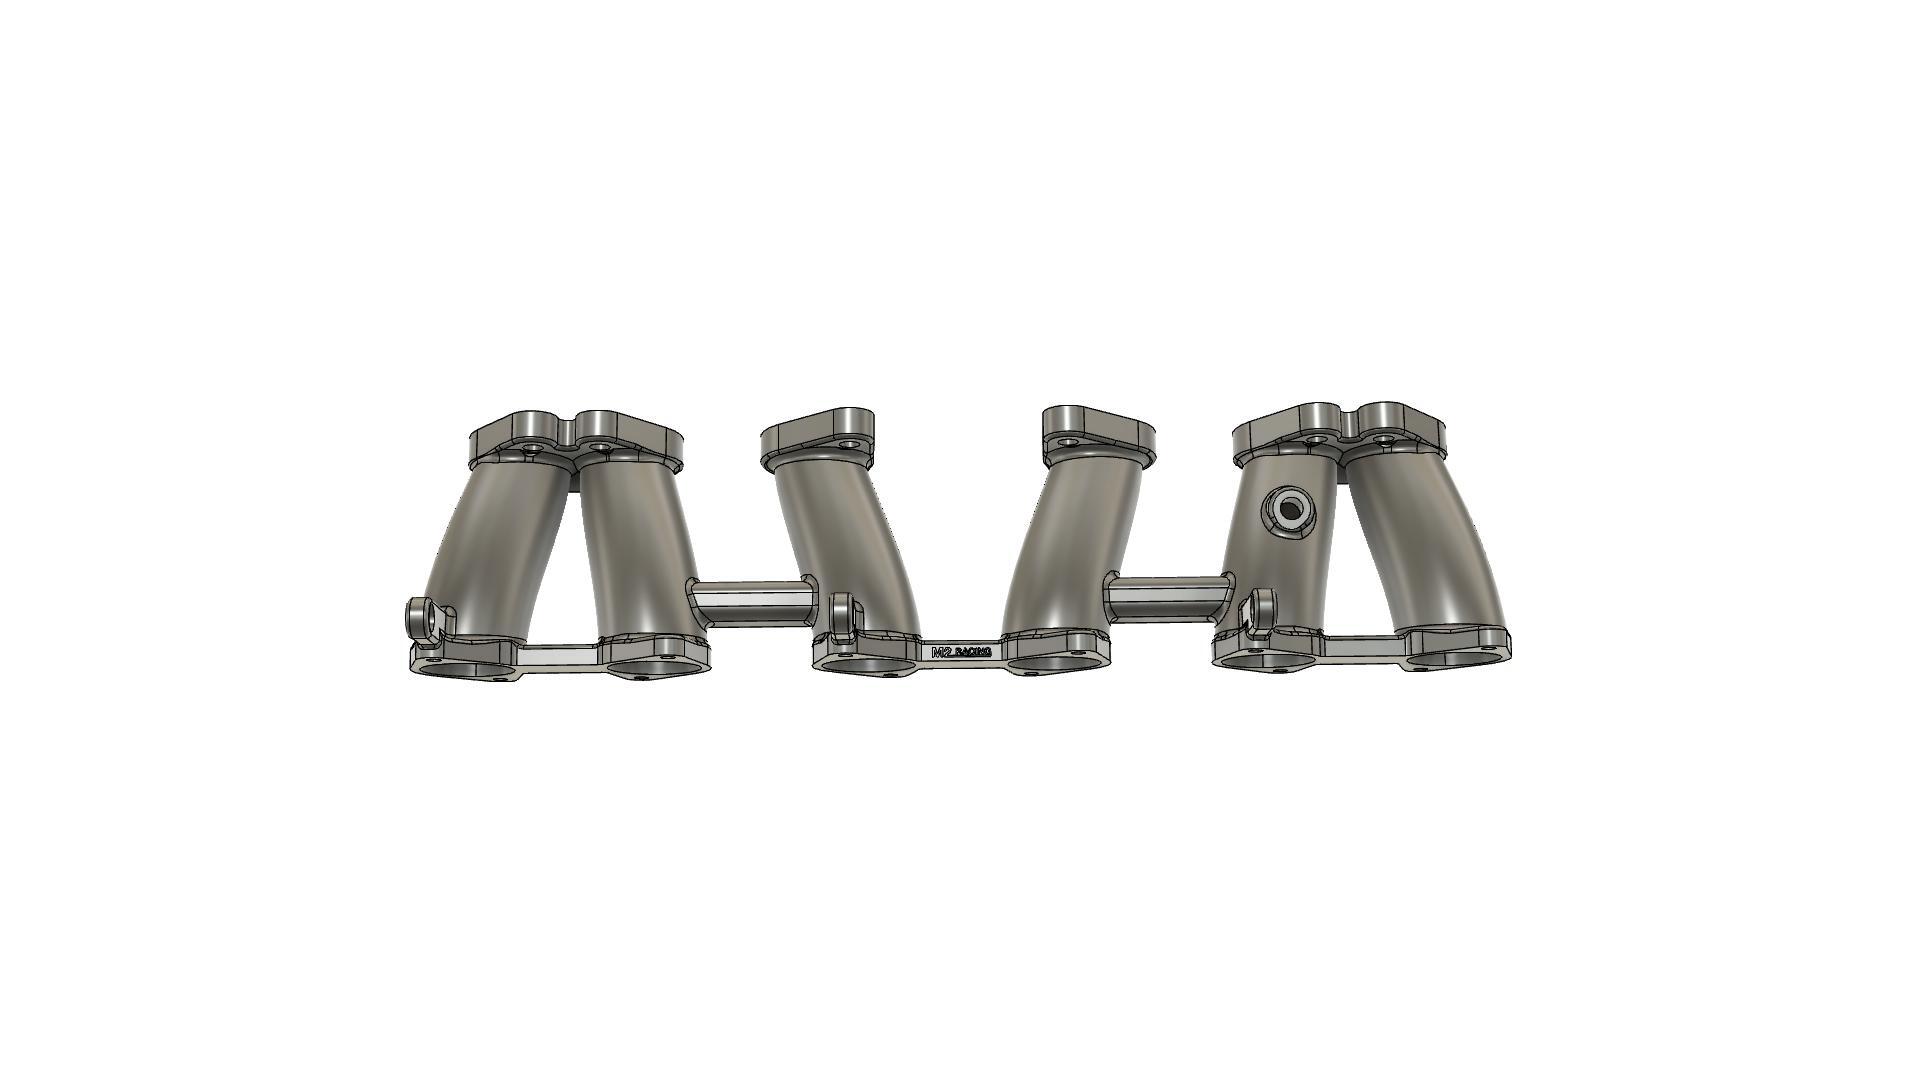
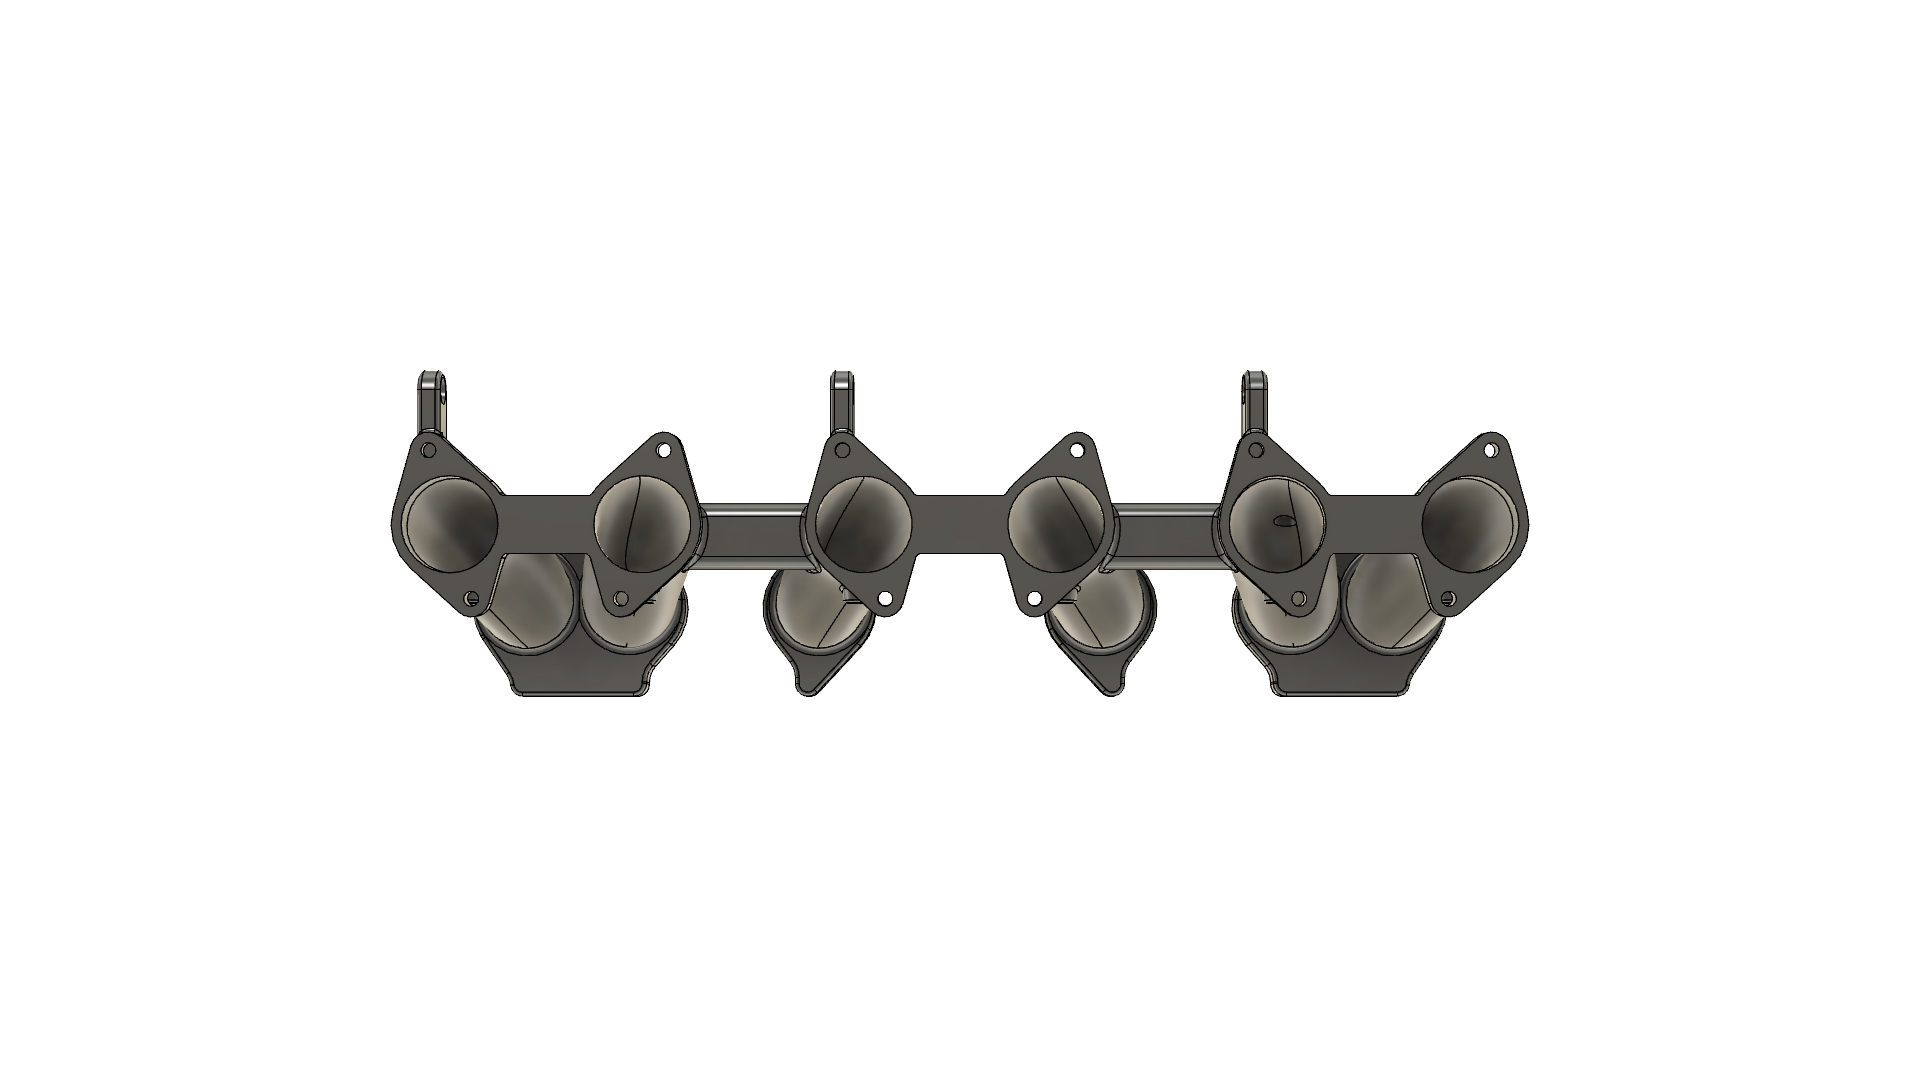
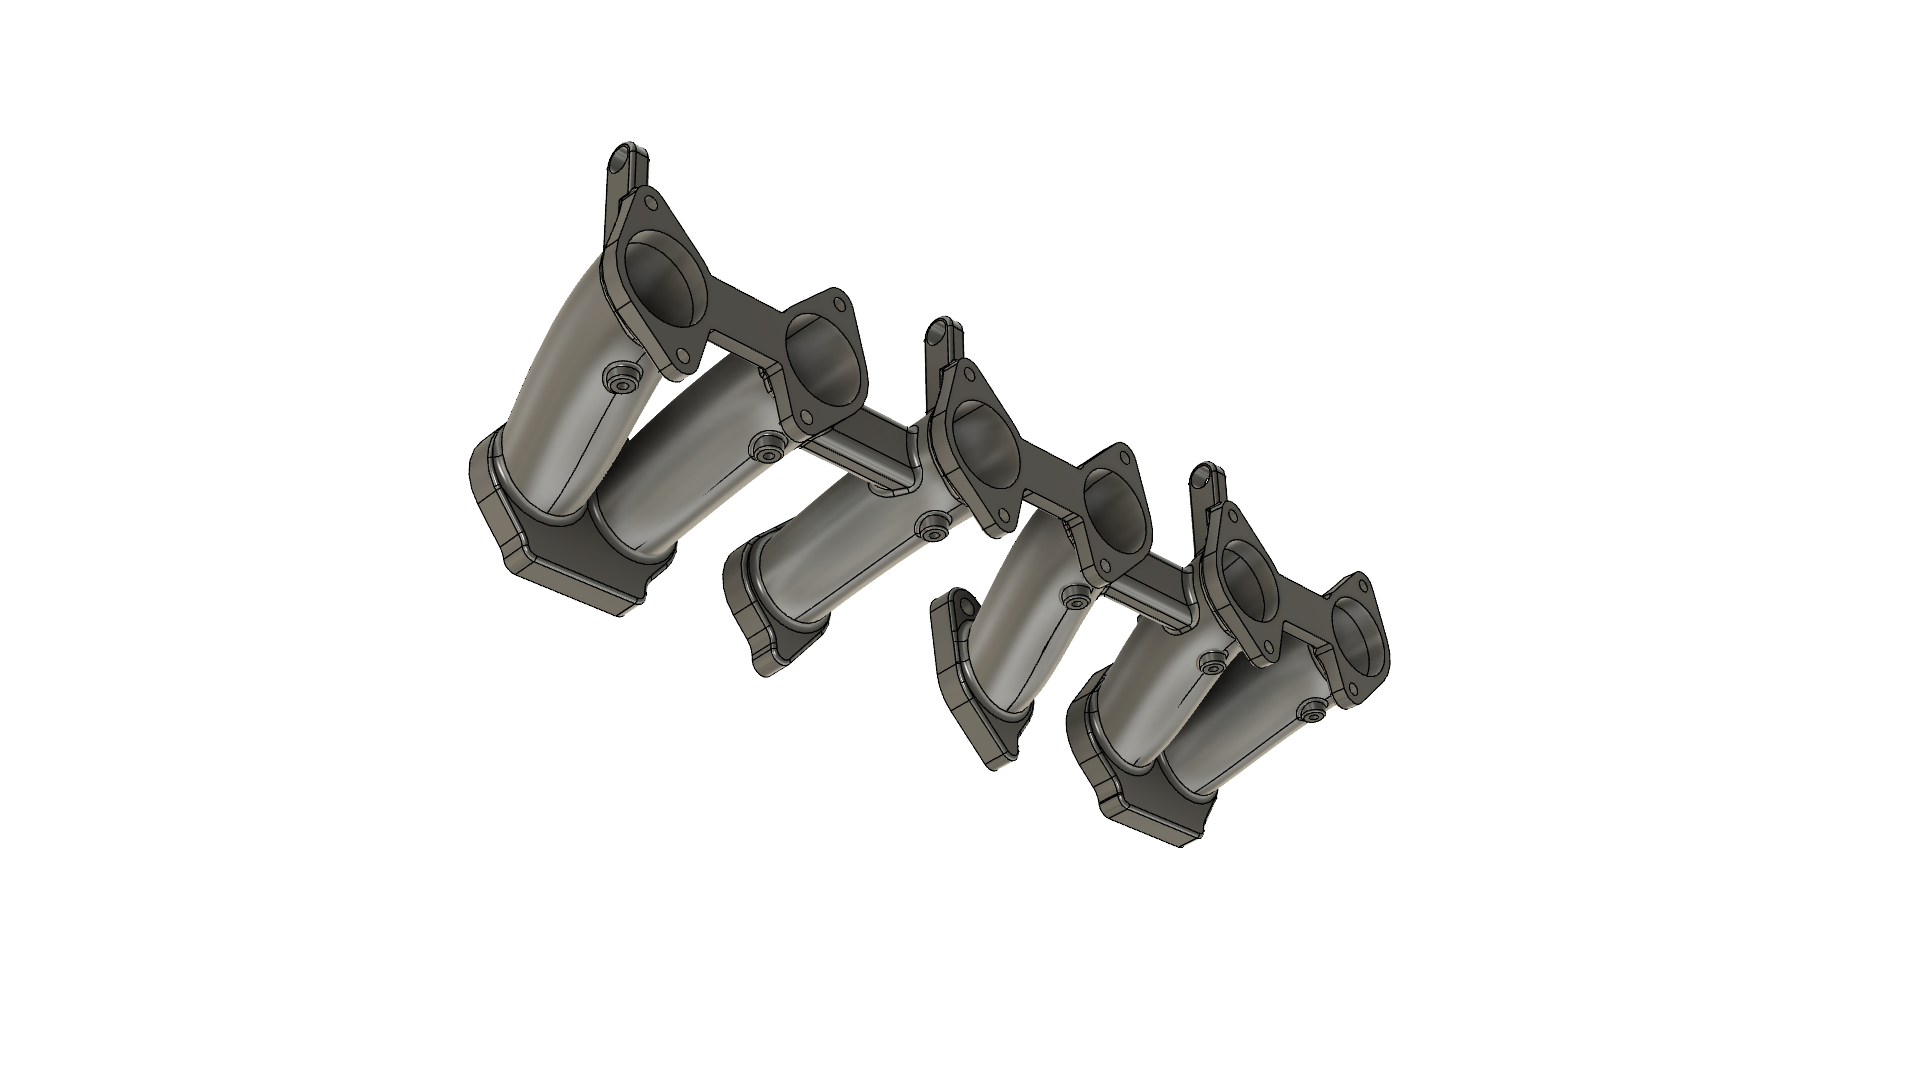
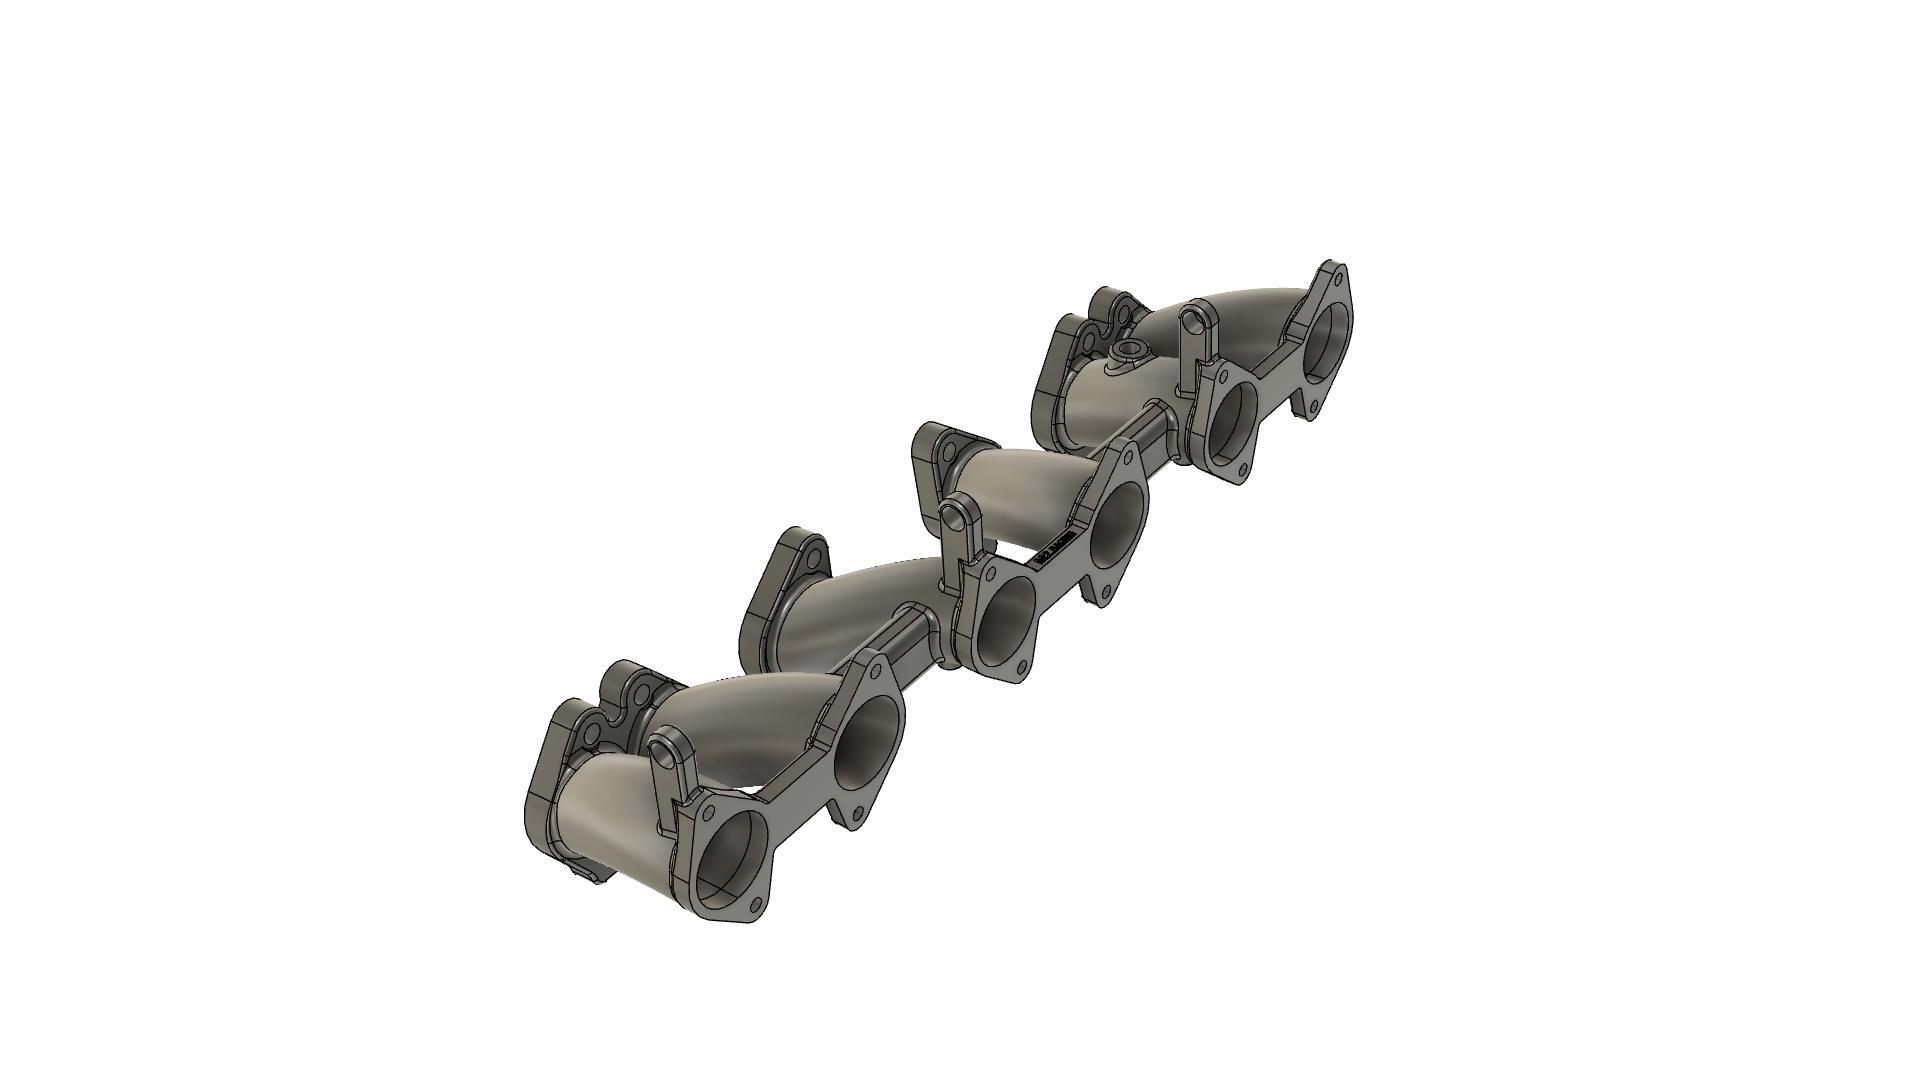
Well I decided to pick a new header. I wanted the header to give my room on port 5-6 for my lower mounted actuator and also get out of the way of the throttle bodies a little more. I decided on the Kameari drag 45mm. Which I purchased through Binh Nguyen. The header design gives me plenty of clearance for my actuator and throttles! Pretty darn happy with it overall. Prior I had a now moth balled Fujitsubo header. Which had a terrible runner design for a lower actuator.
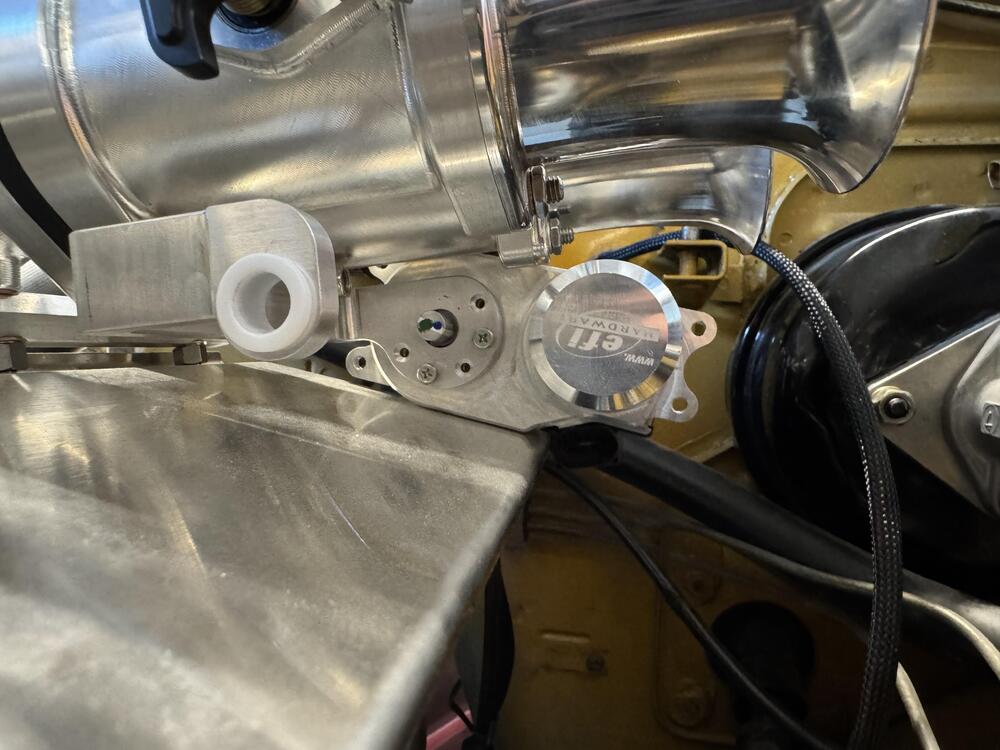


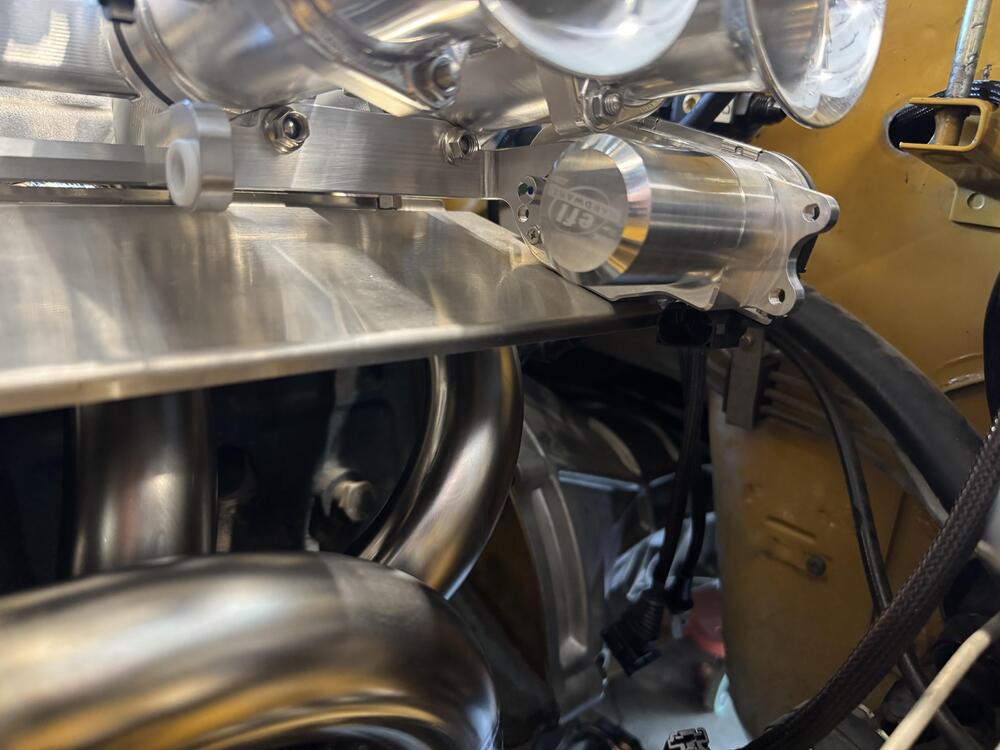


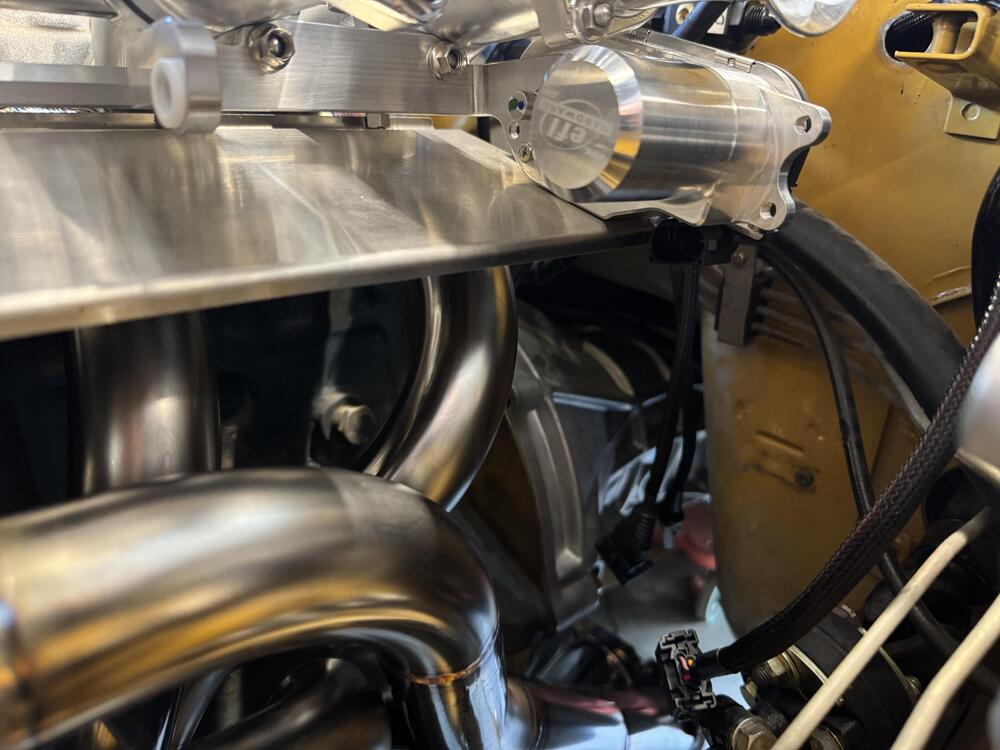

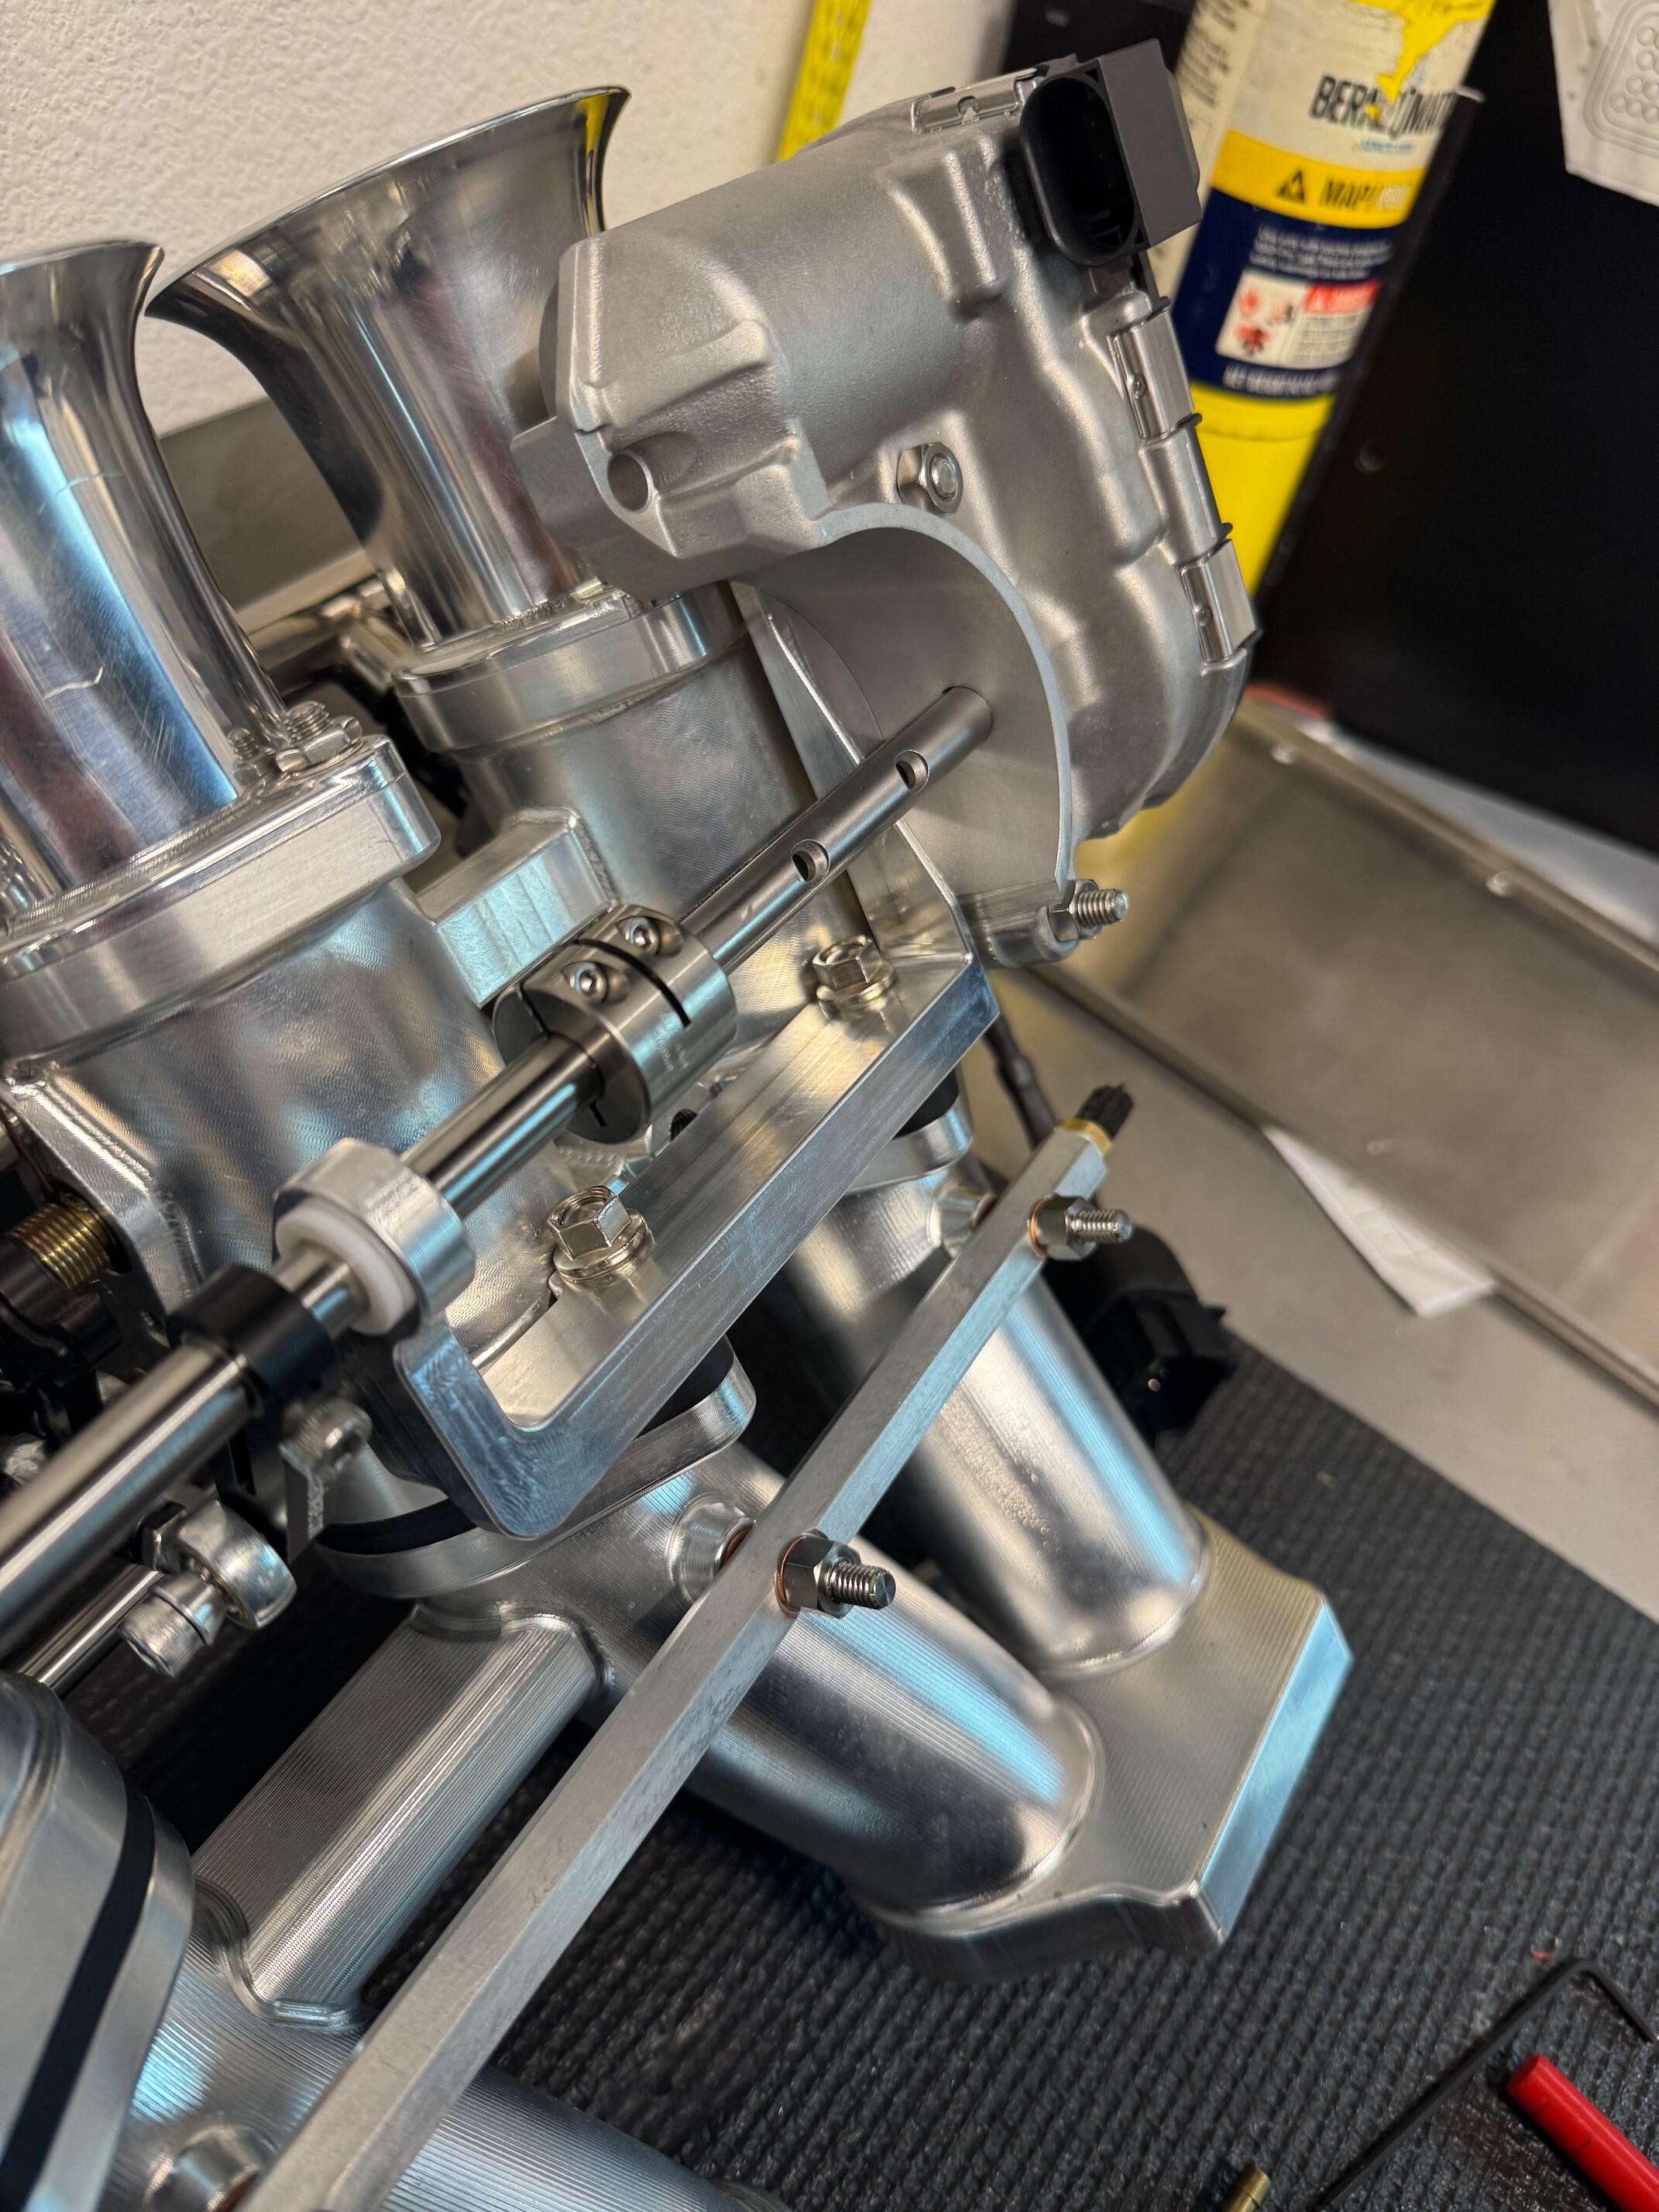
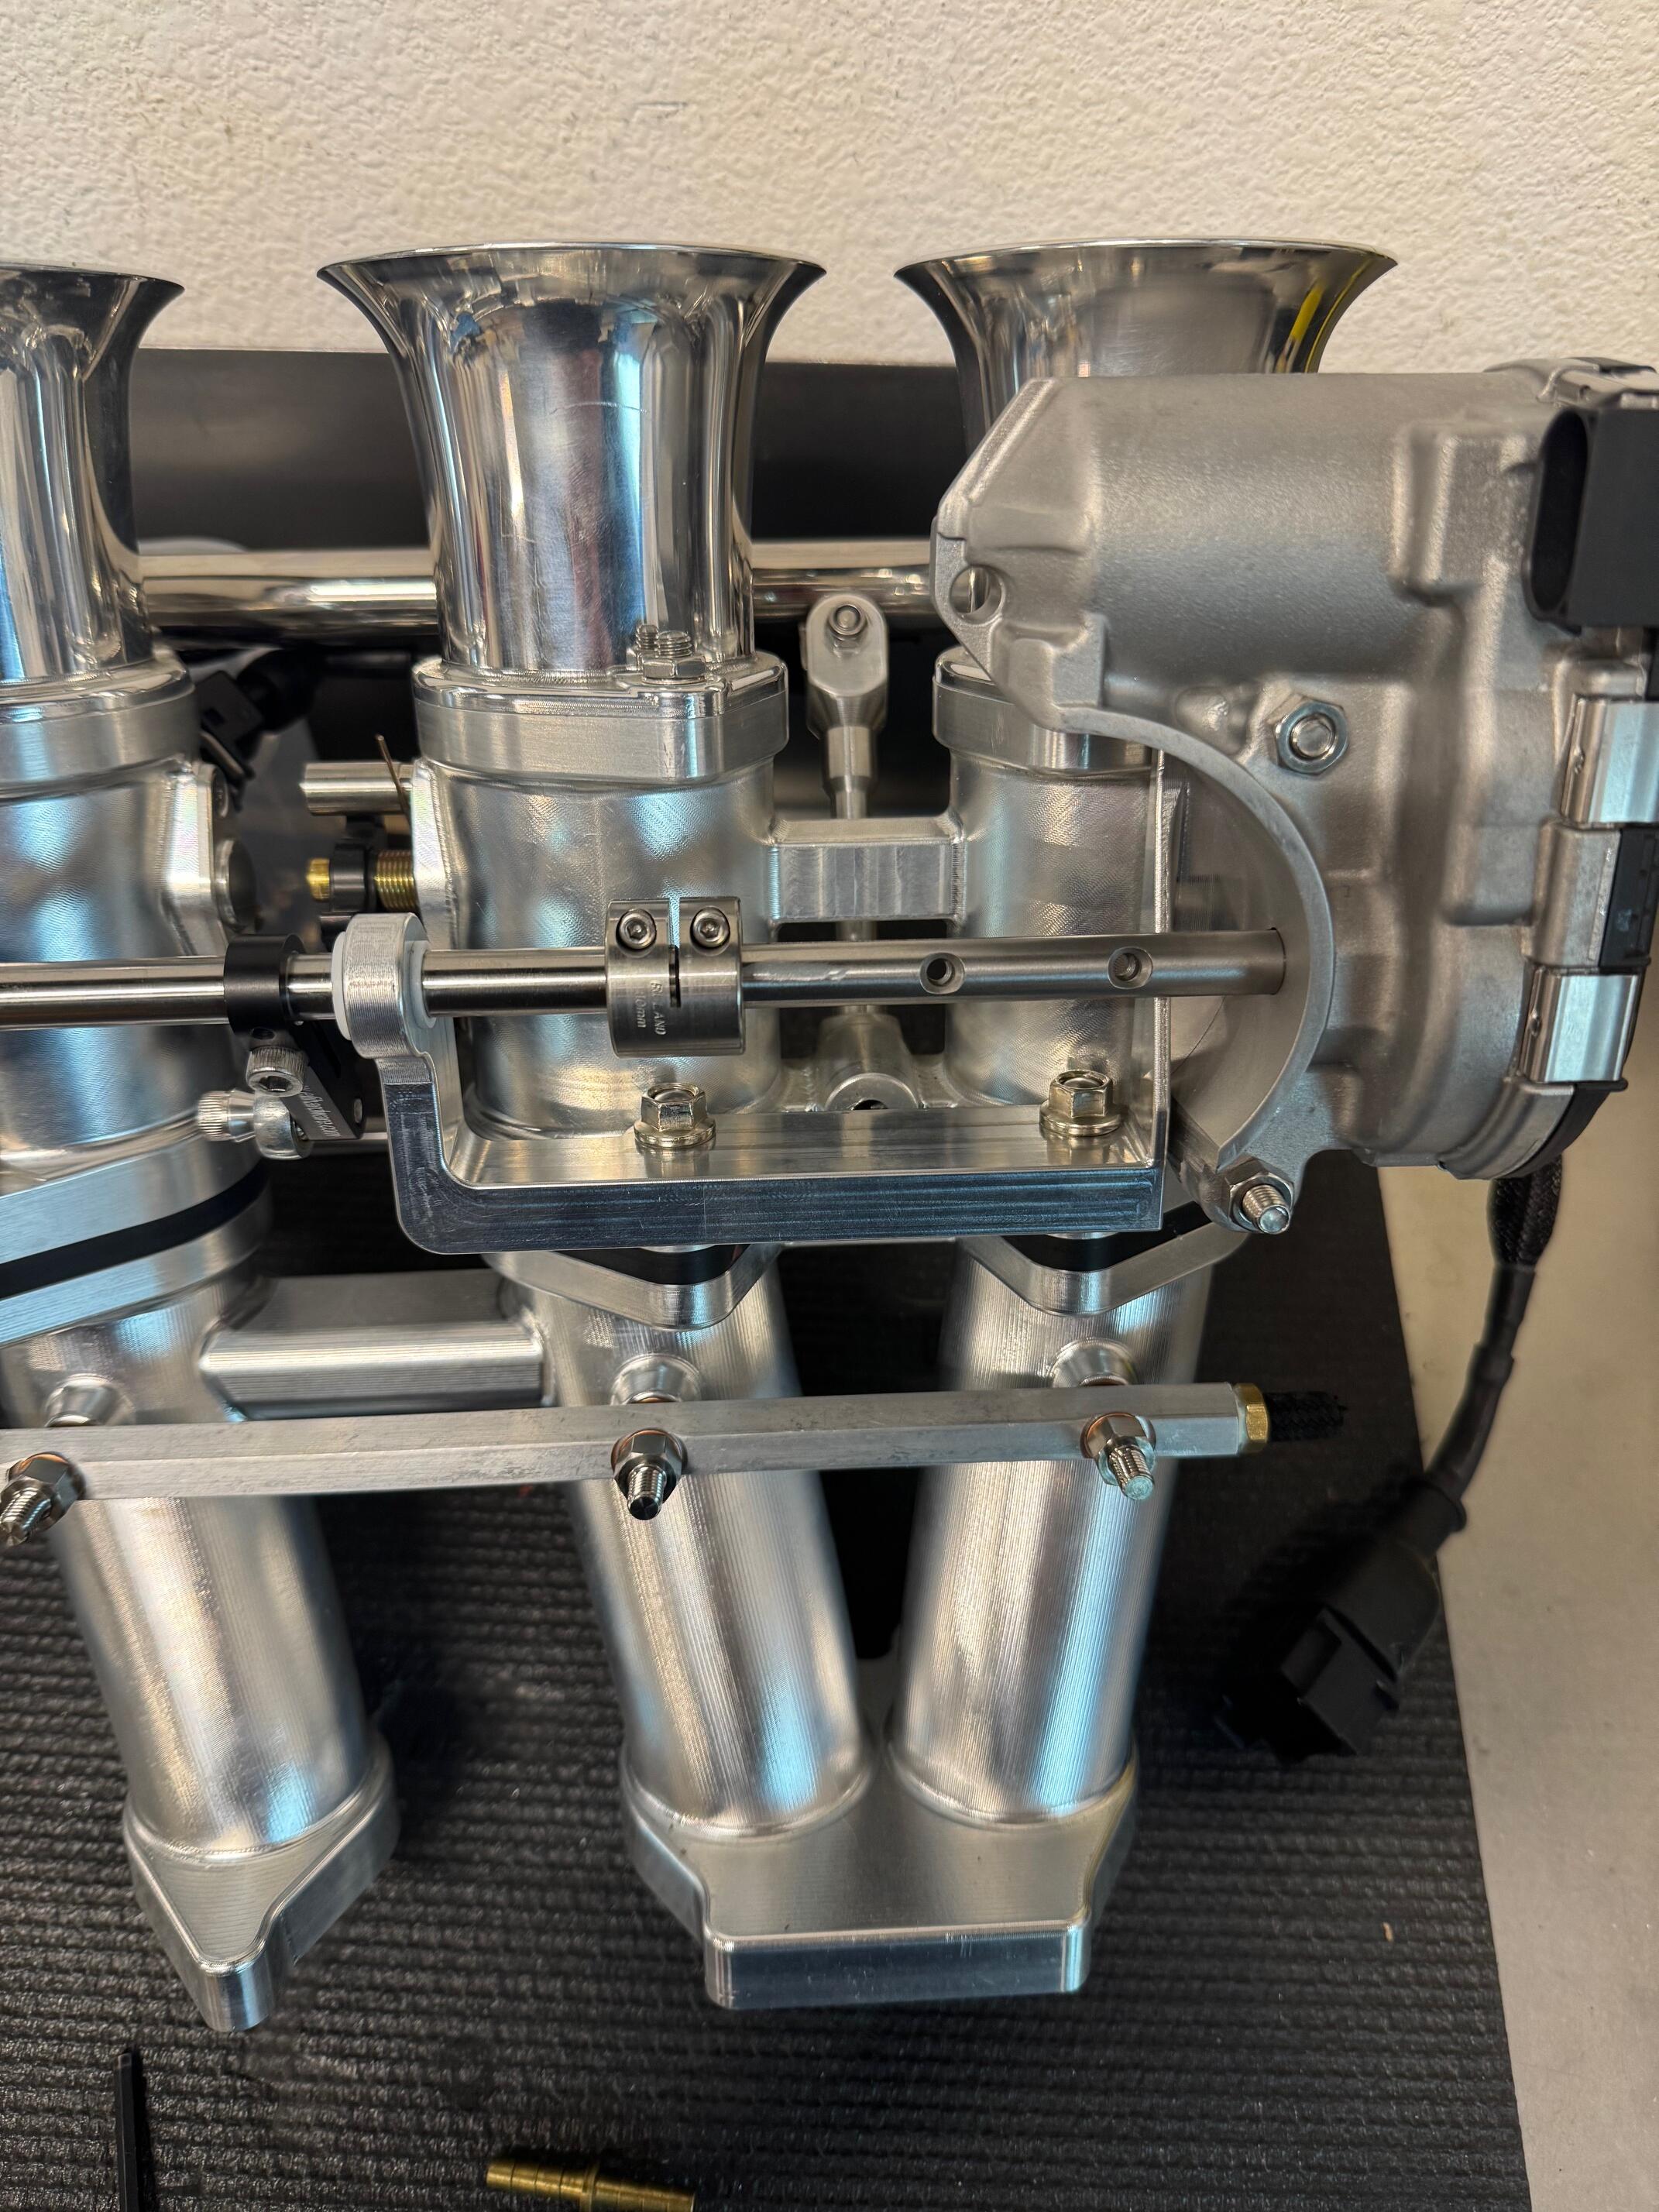
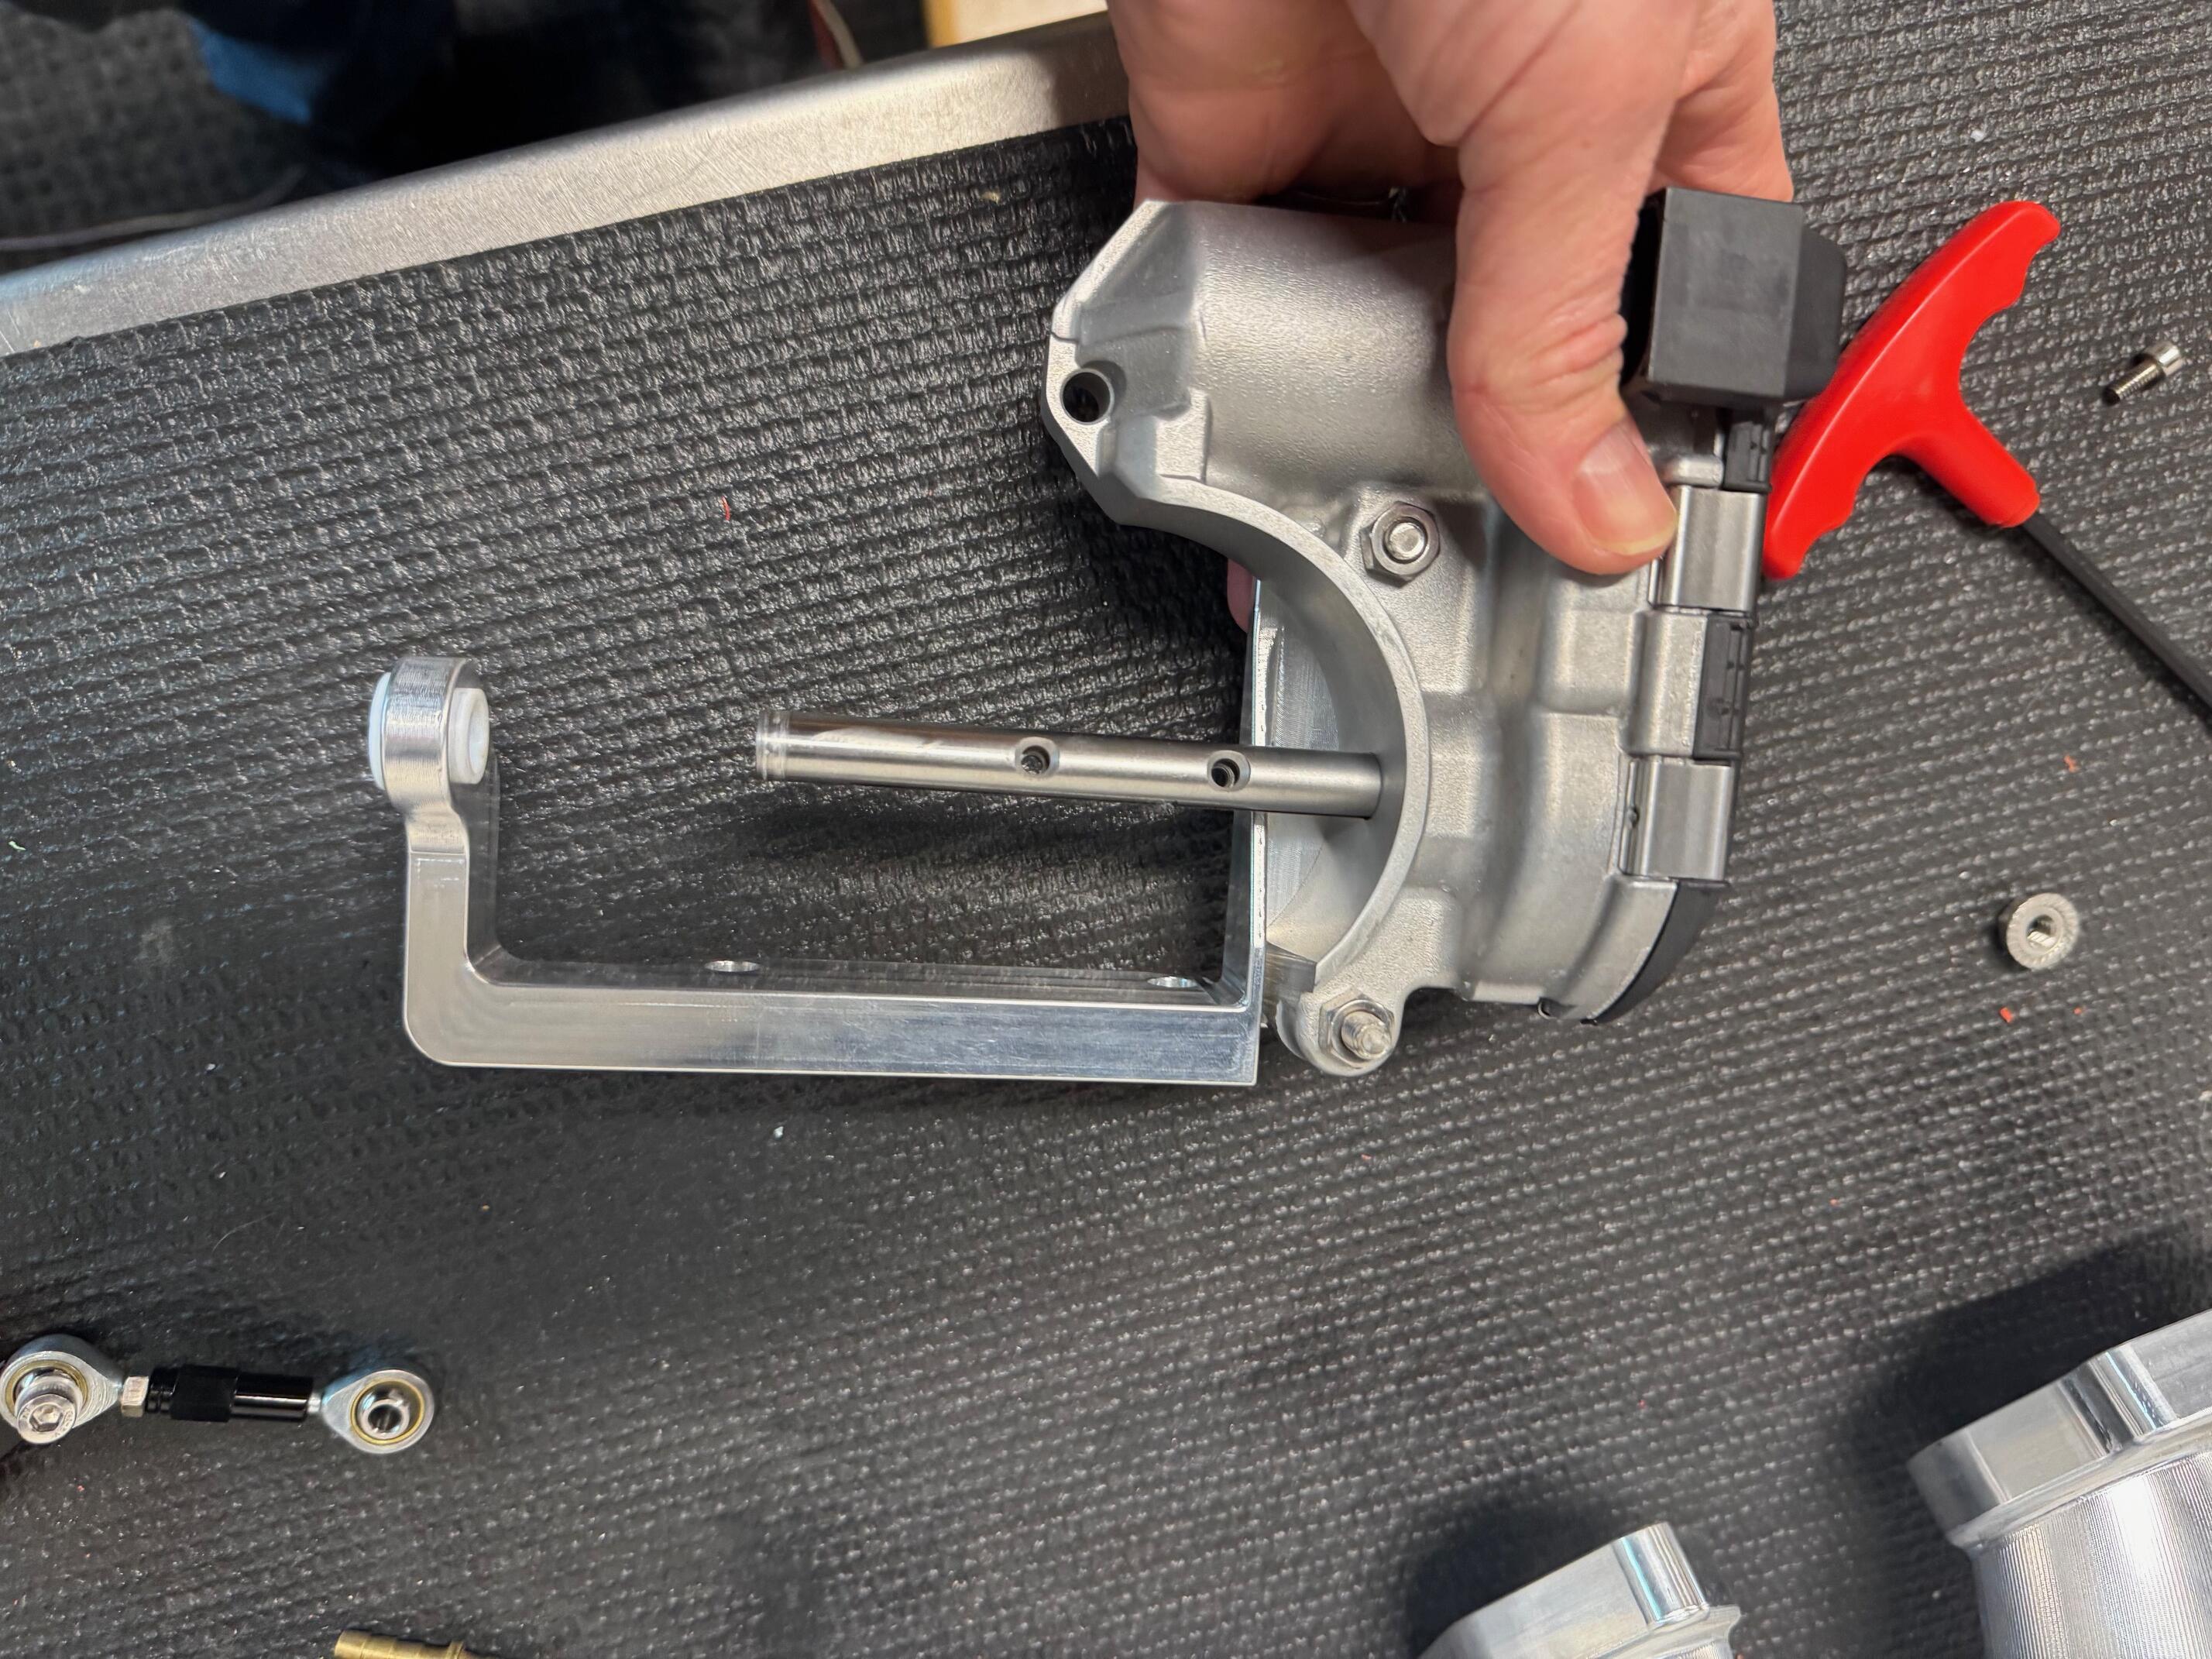
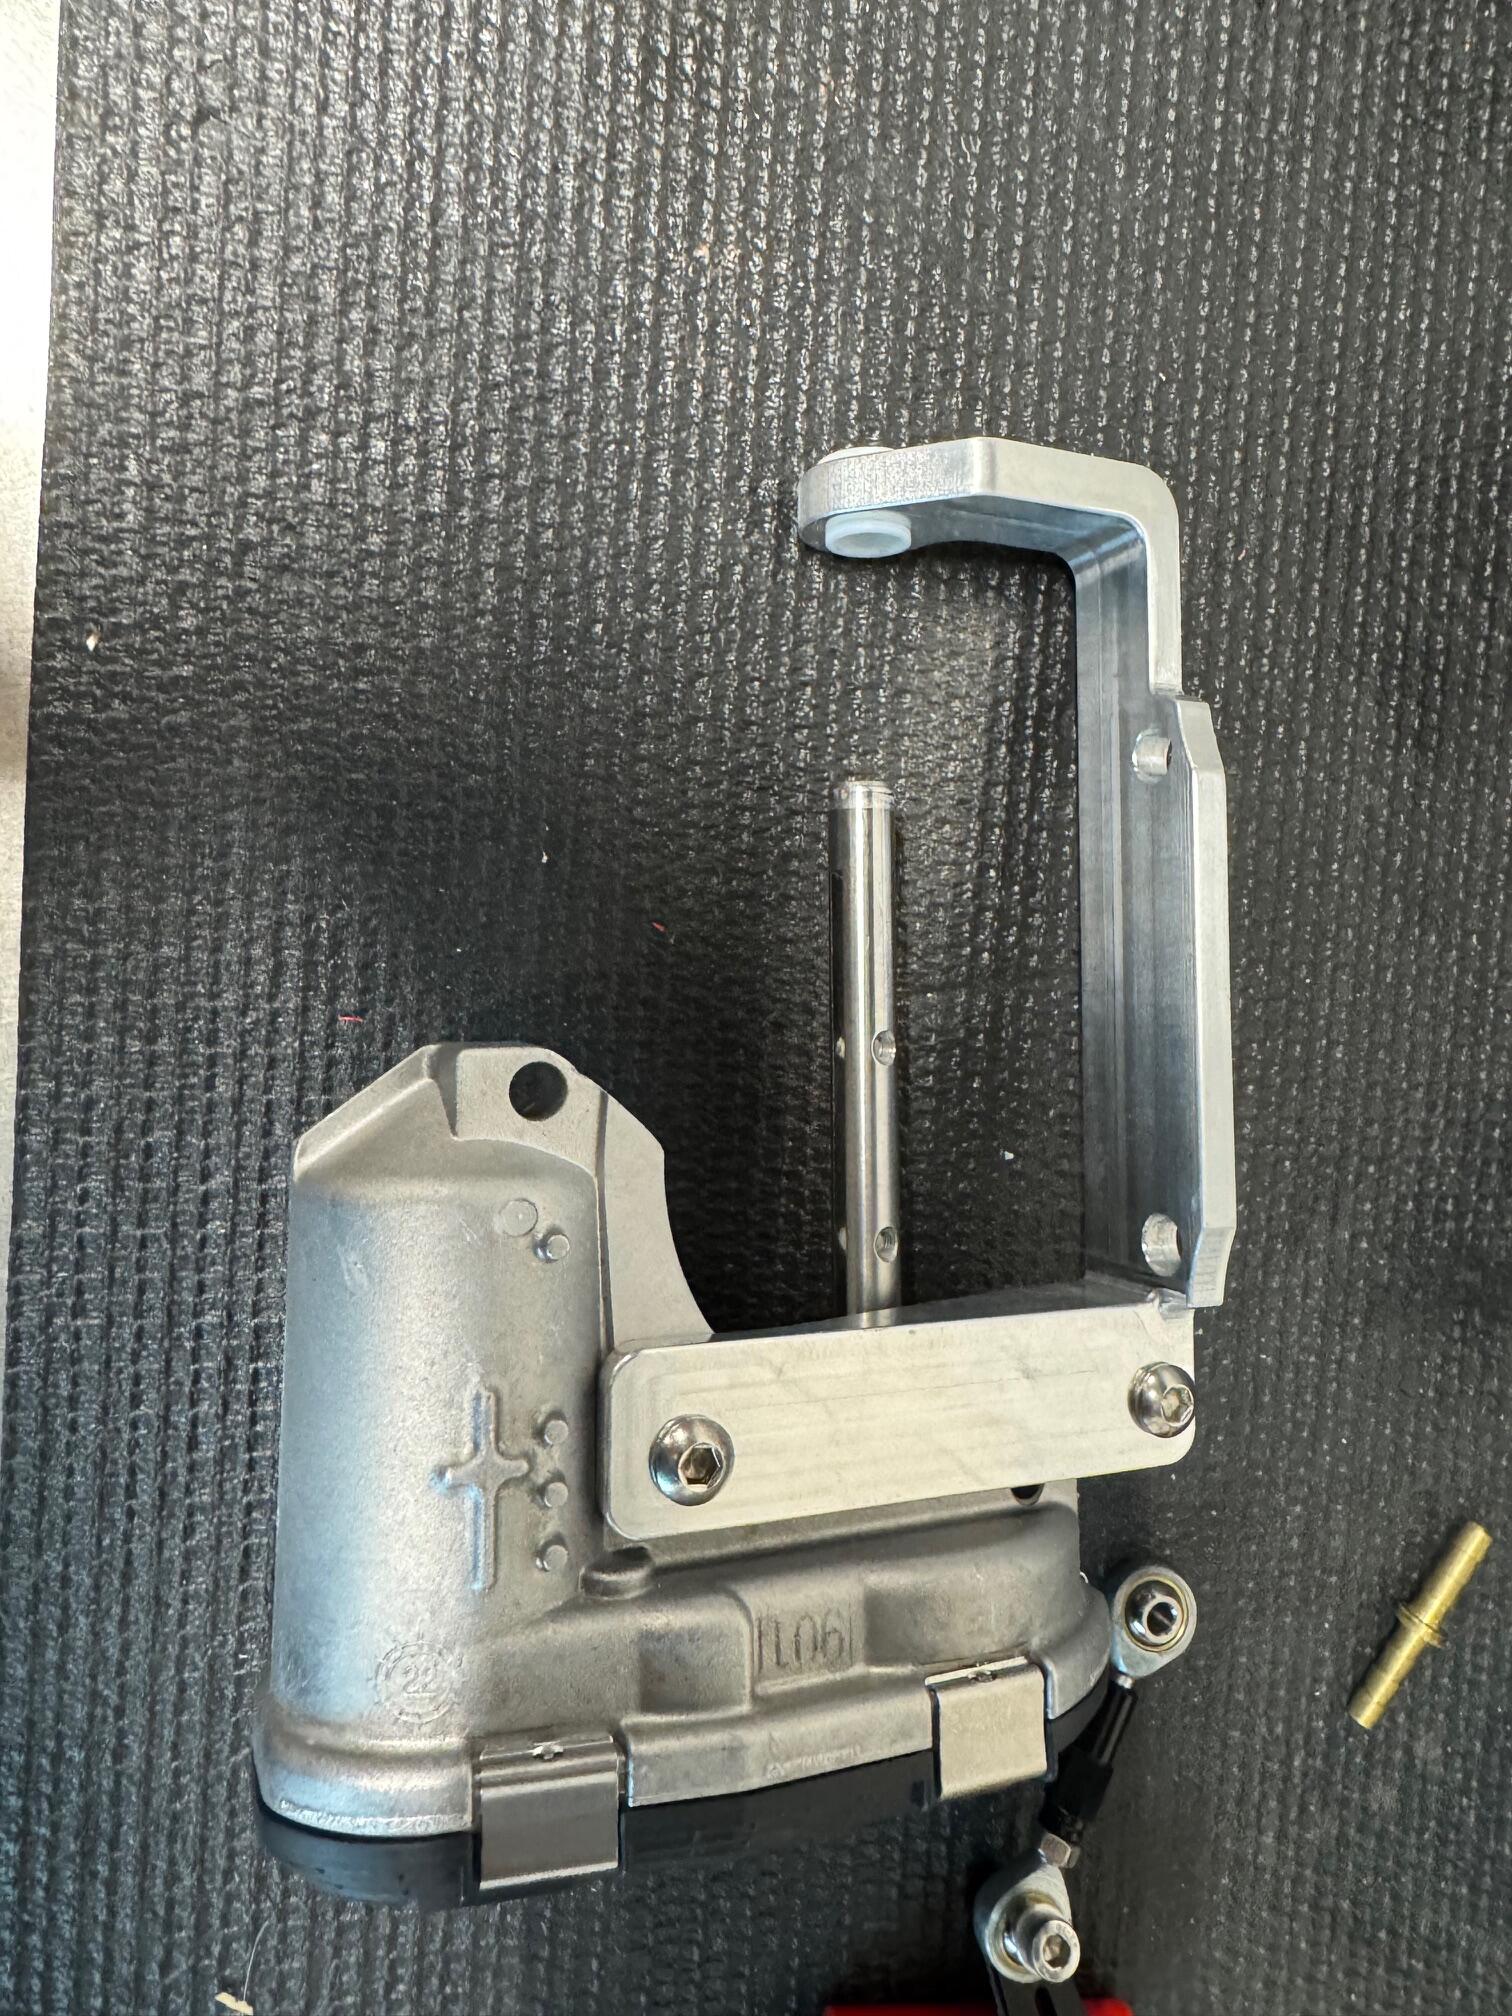
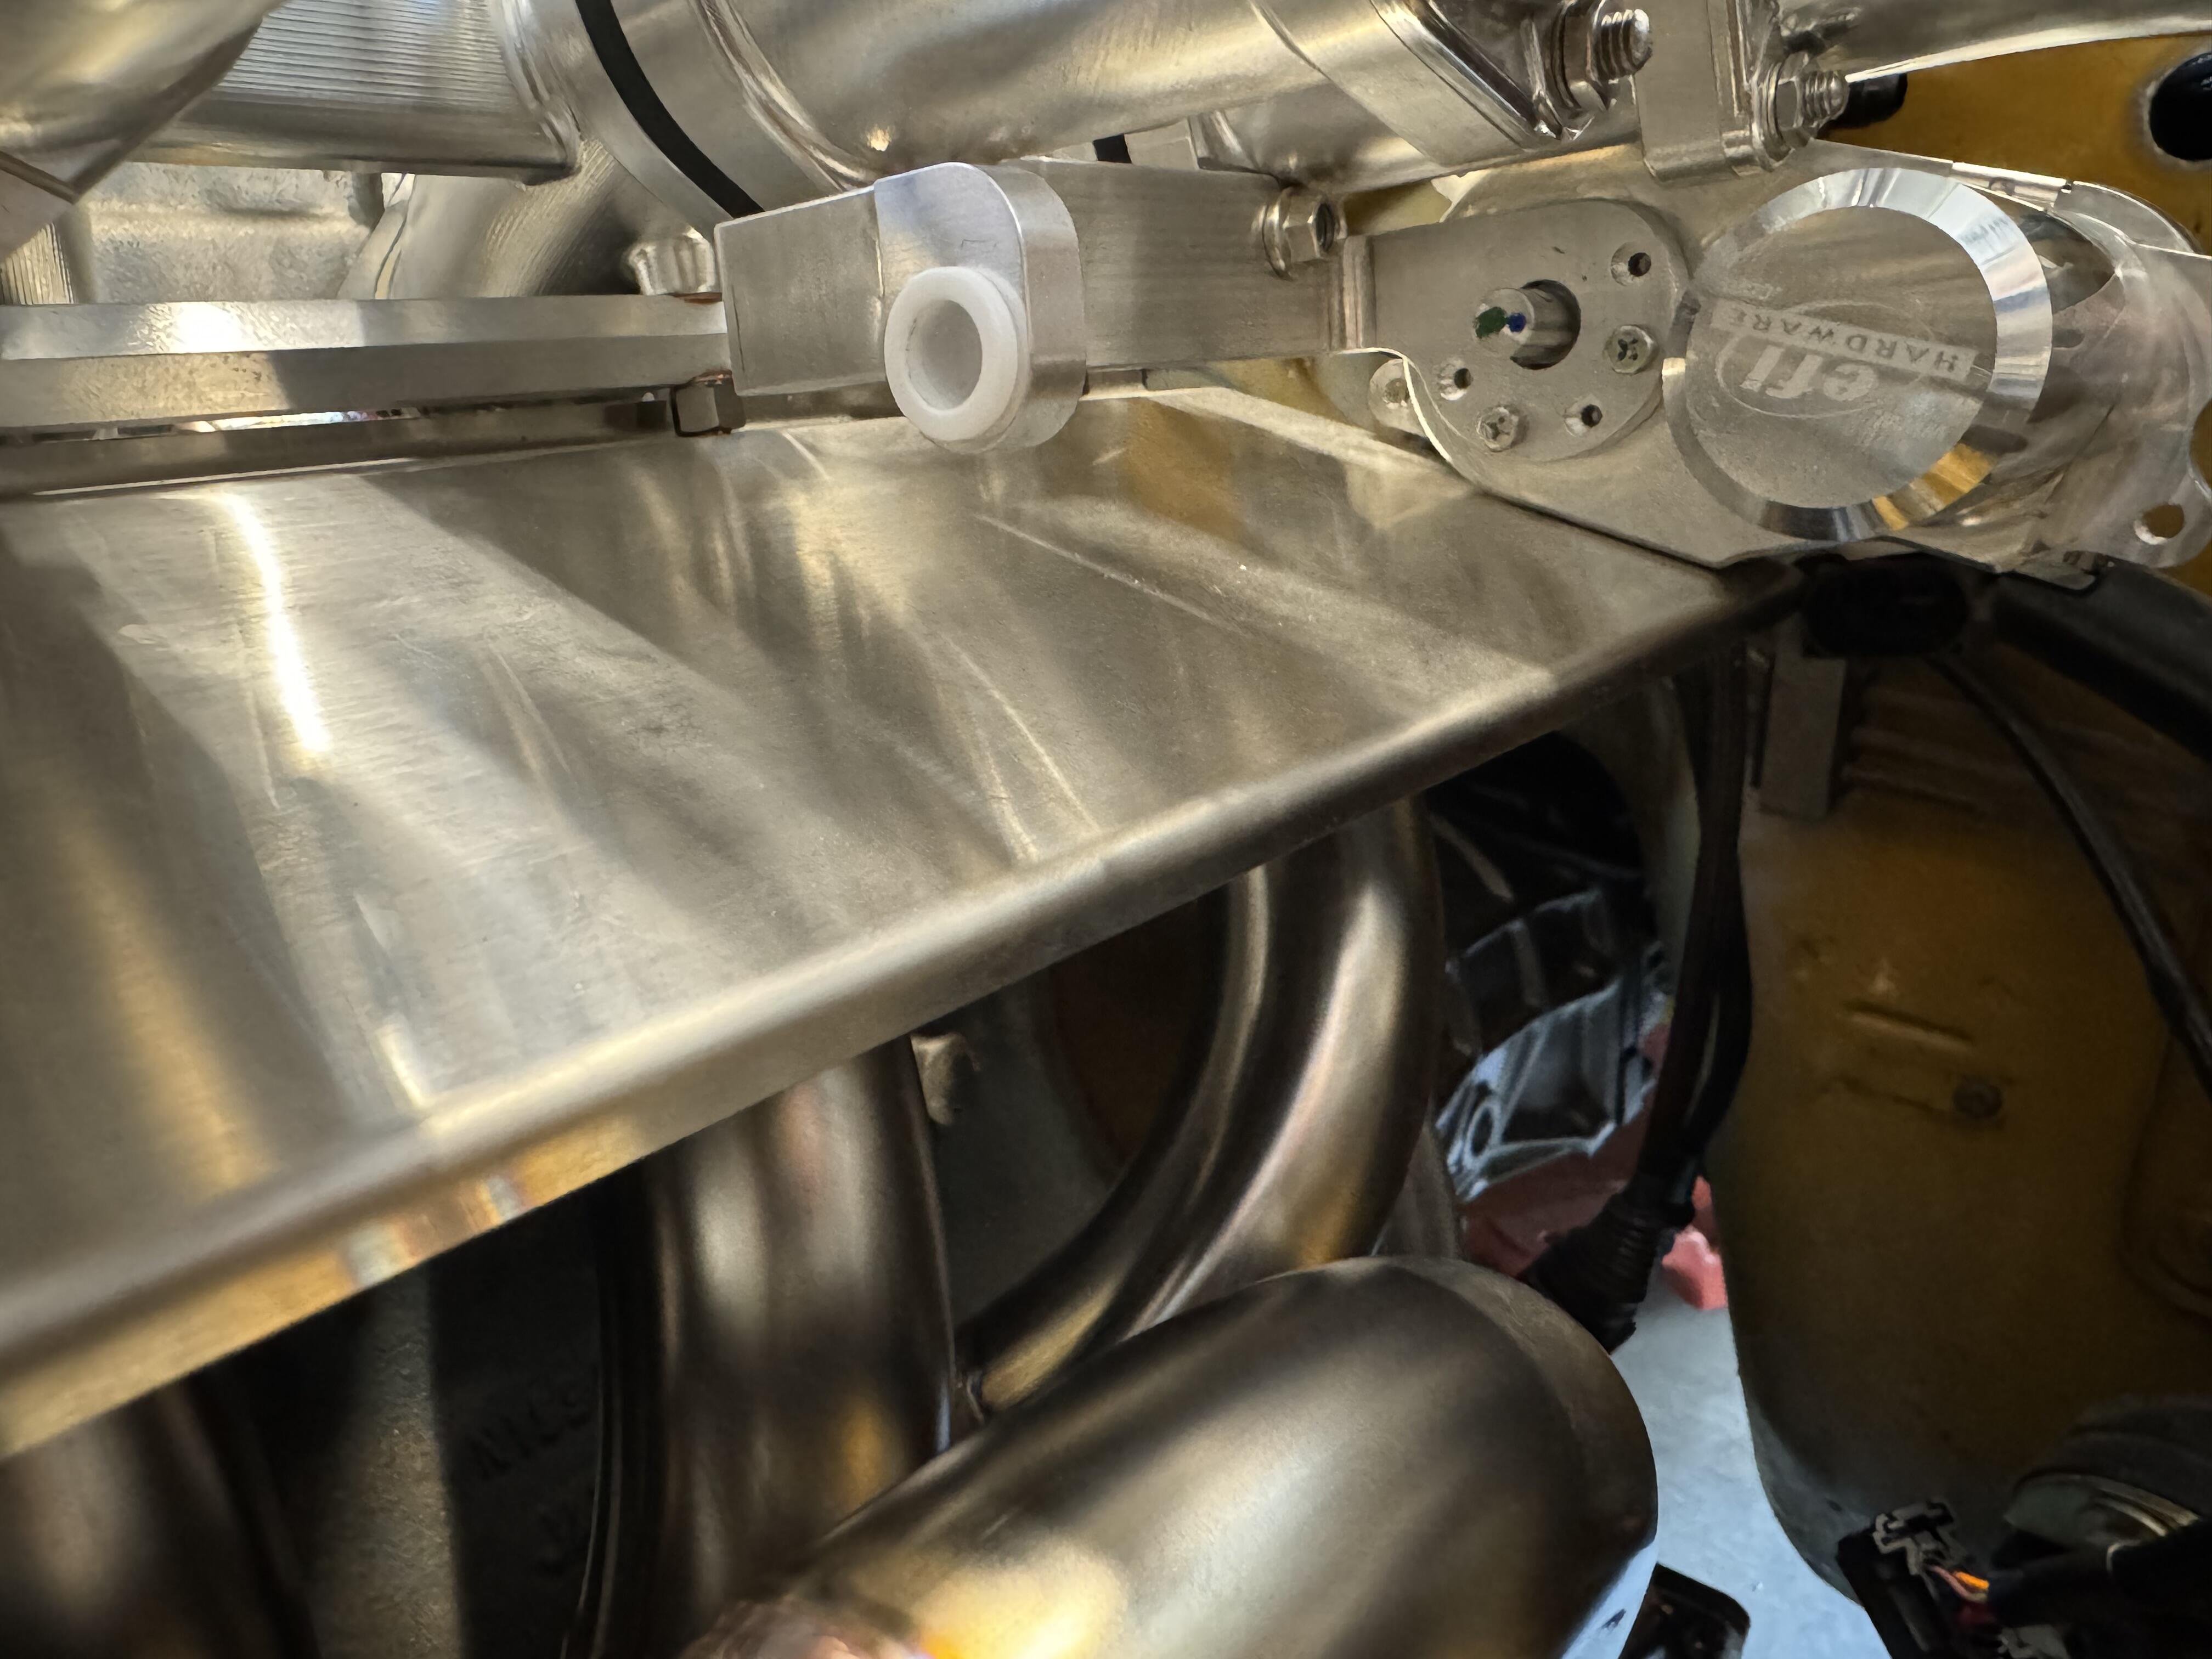
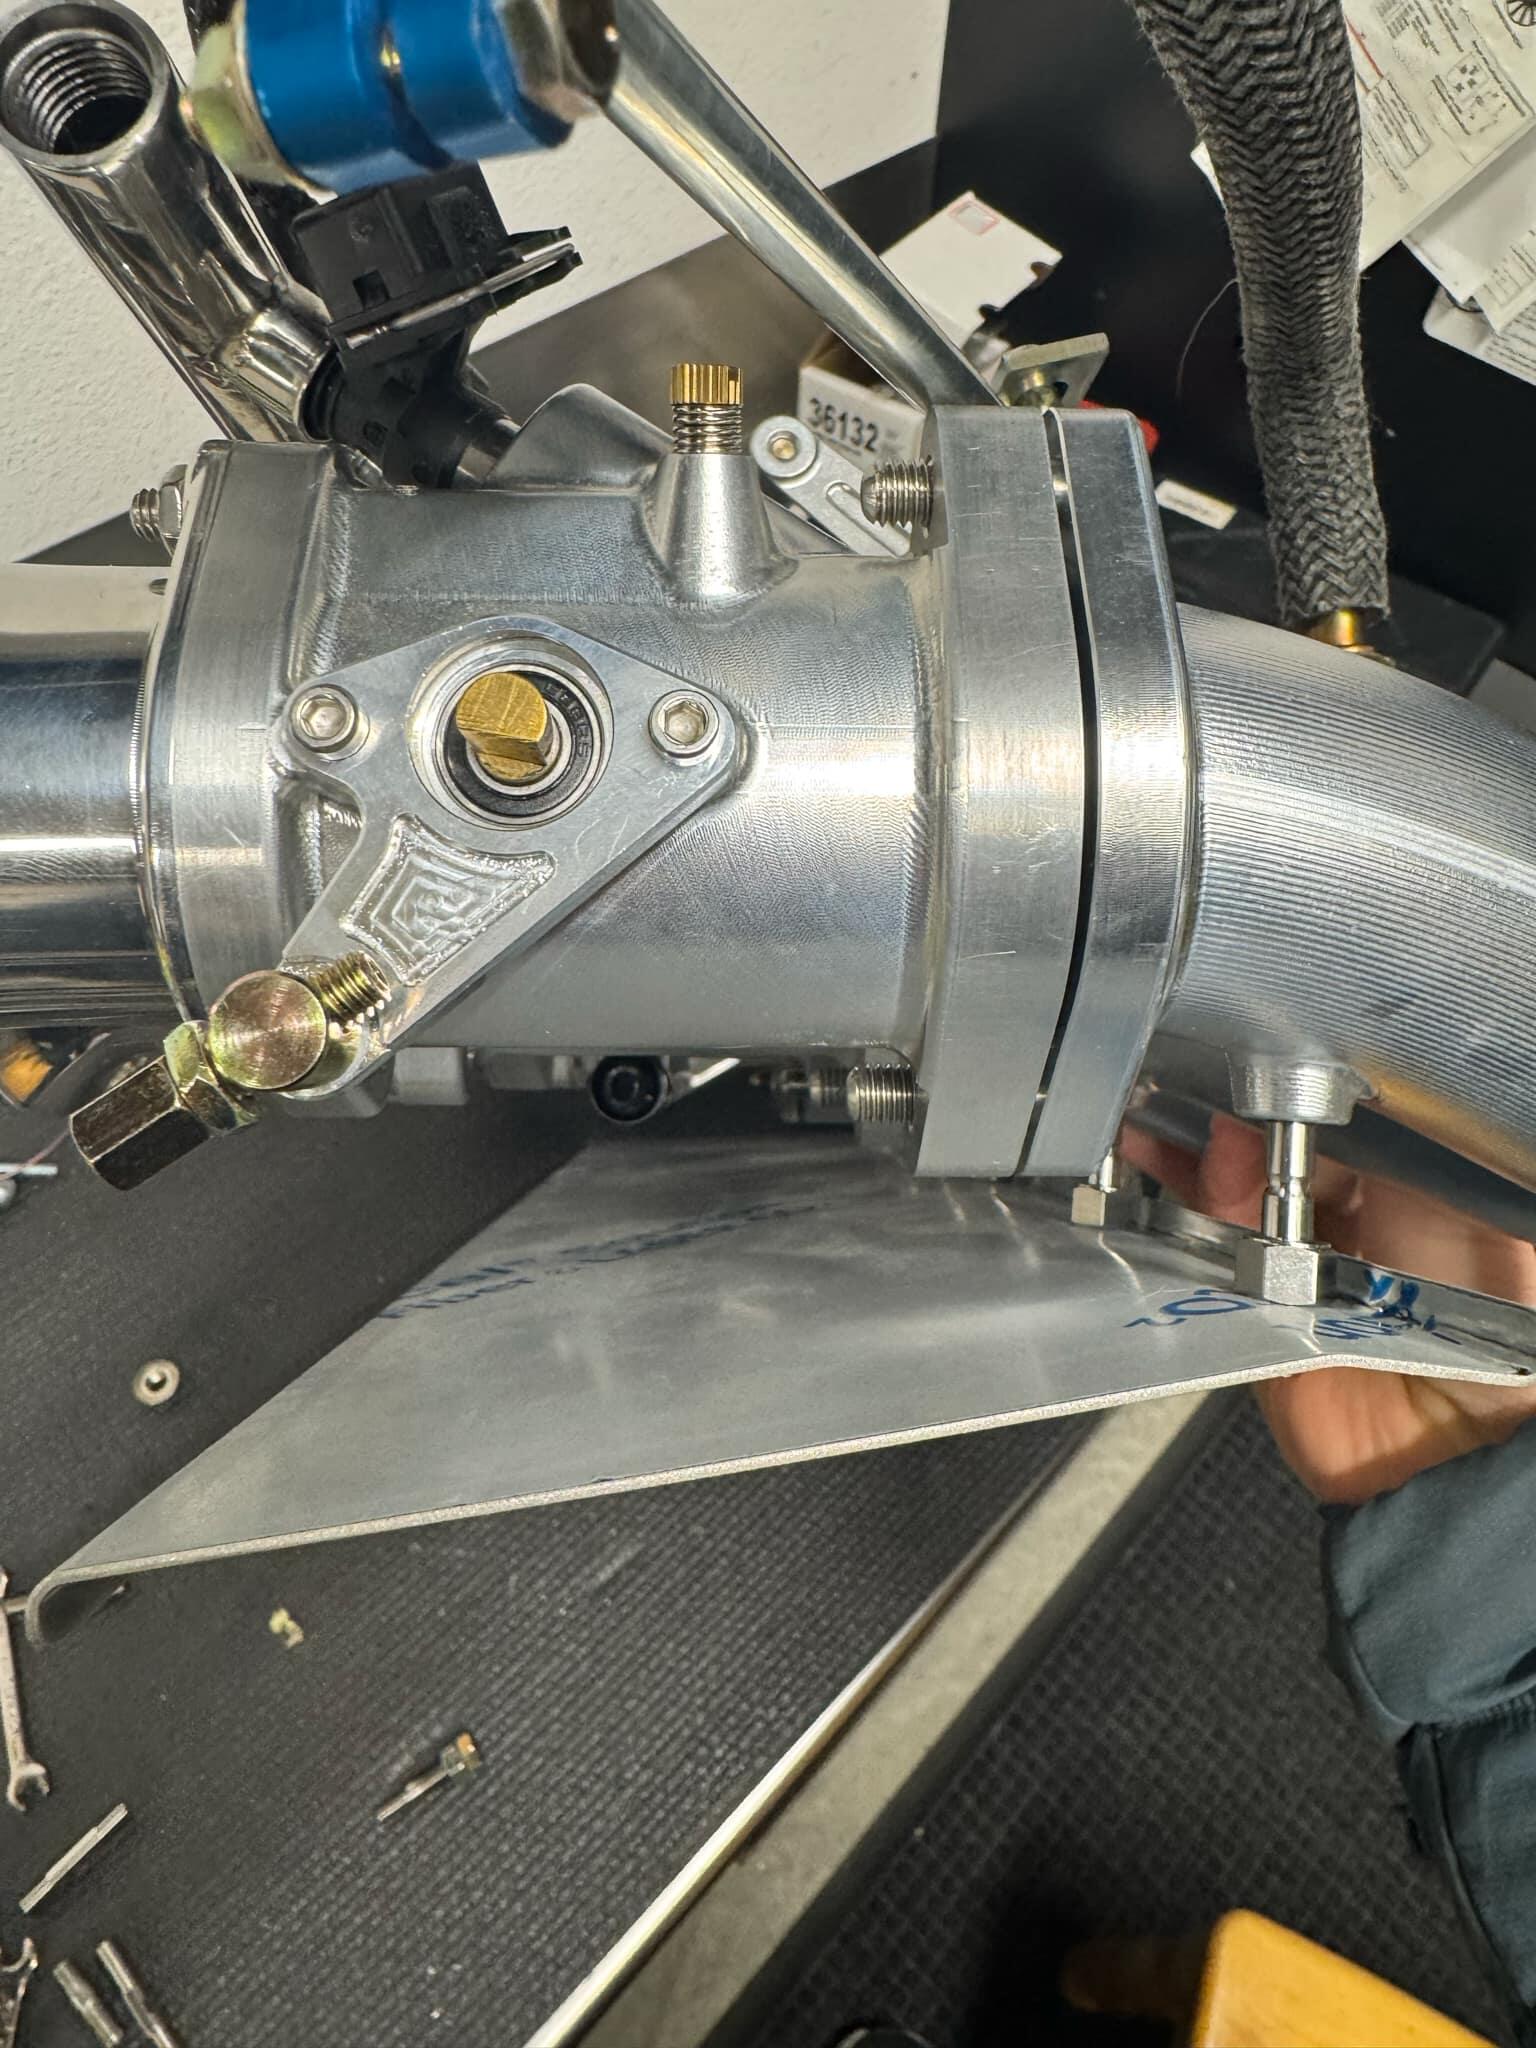
 240z hidden drive by wire actuator for my ITB setup. This is design number 4. This plan utilizes a Efi hardware actuator. The goal is the same length arm to the bell crank and distances from shafts and the rod. So the rod passes through the firewall evenly and doesn’t walk from left to right. This will mount to the pedal plate and the steering box mounts. So behind the firewall Prior designs walked too much in the hole and I don’t want that.
.thumb.jpg.fc9fa577ec0dd7b86a8d8c2dd3b15c3b.jpg)
.thumb.jpg.6cdaf3a735afb76b7e1cabd00dff4386.jpg)
.thumb.jpg.048b065474bd741a20714c0bc85426bb.jpg)
 I bought them as well!
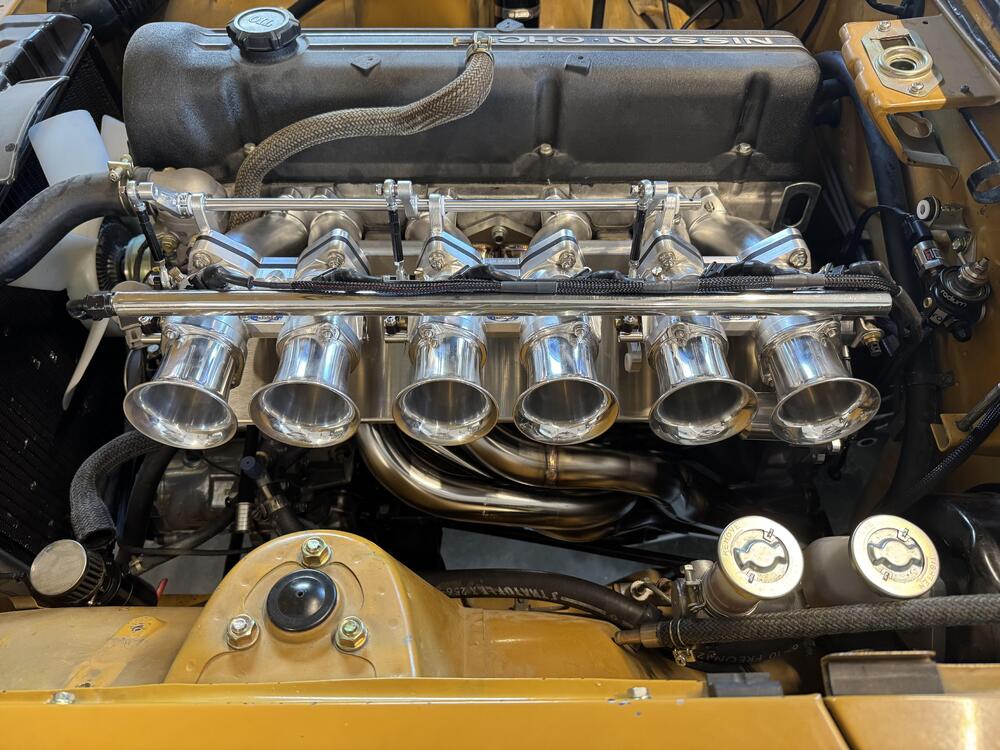
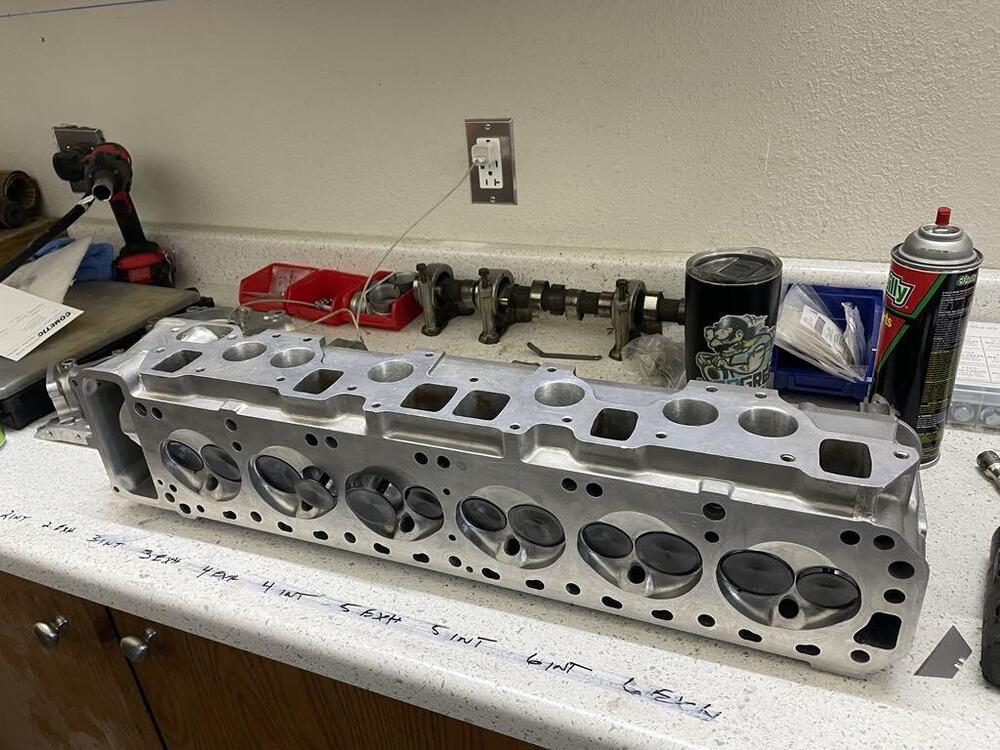
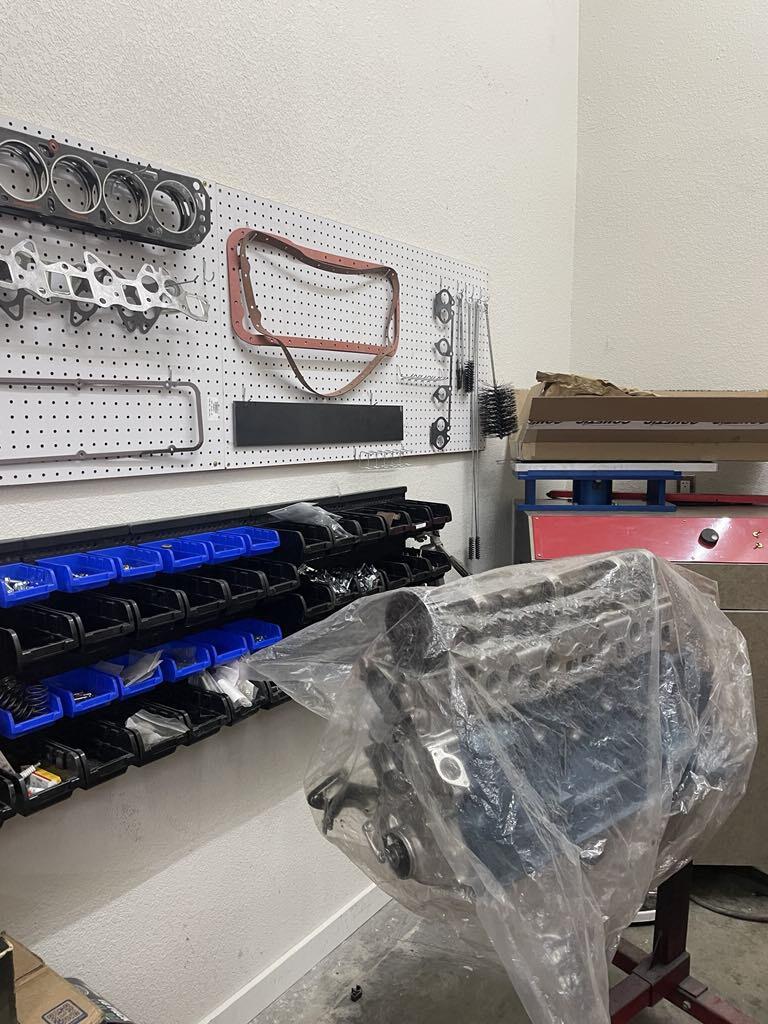
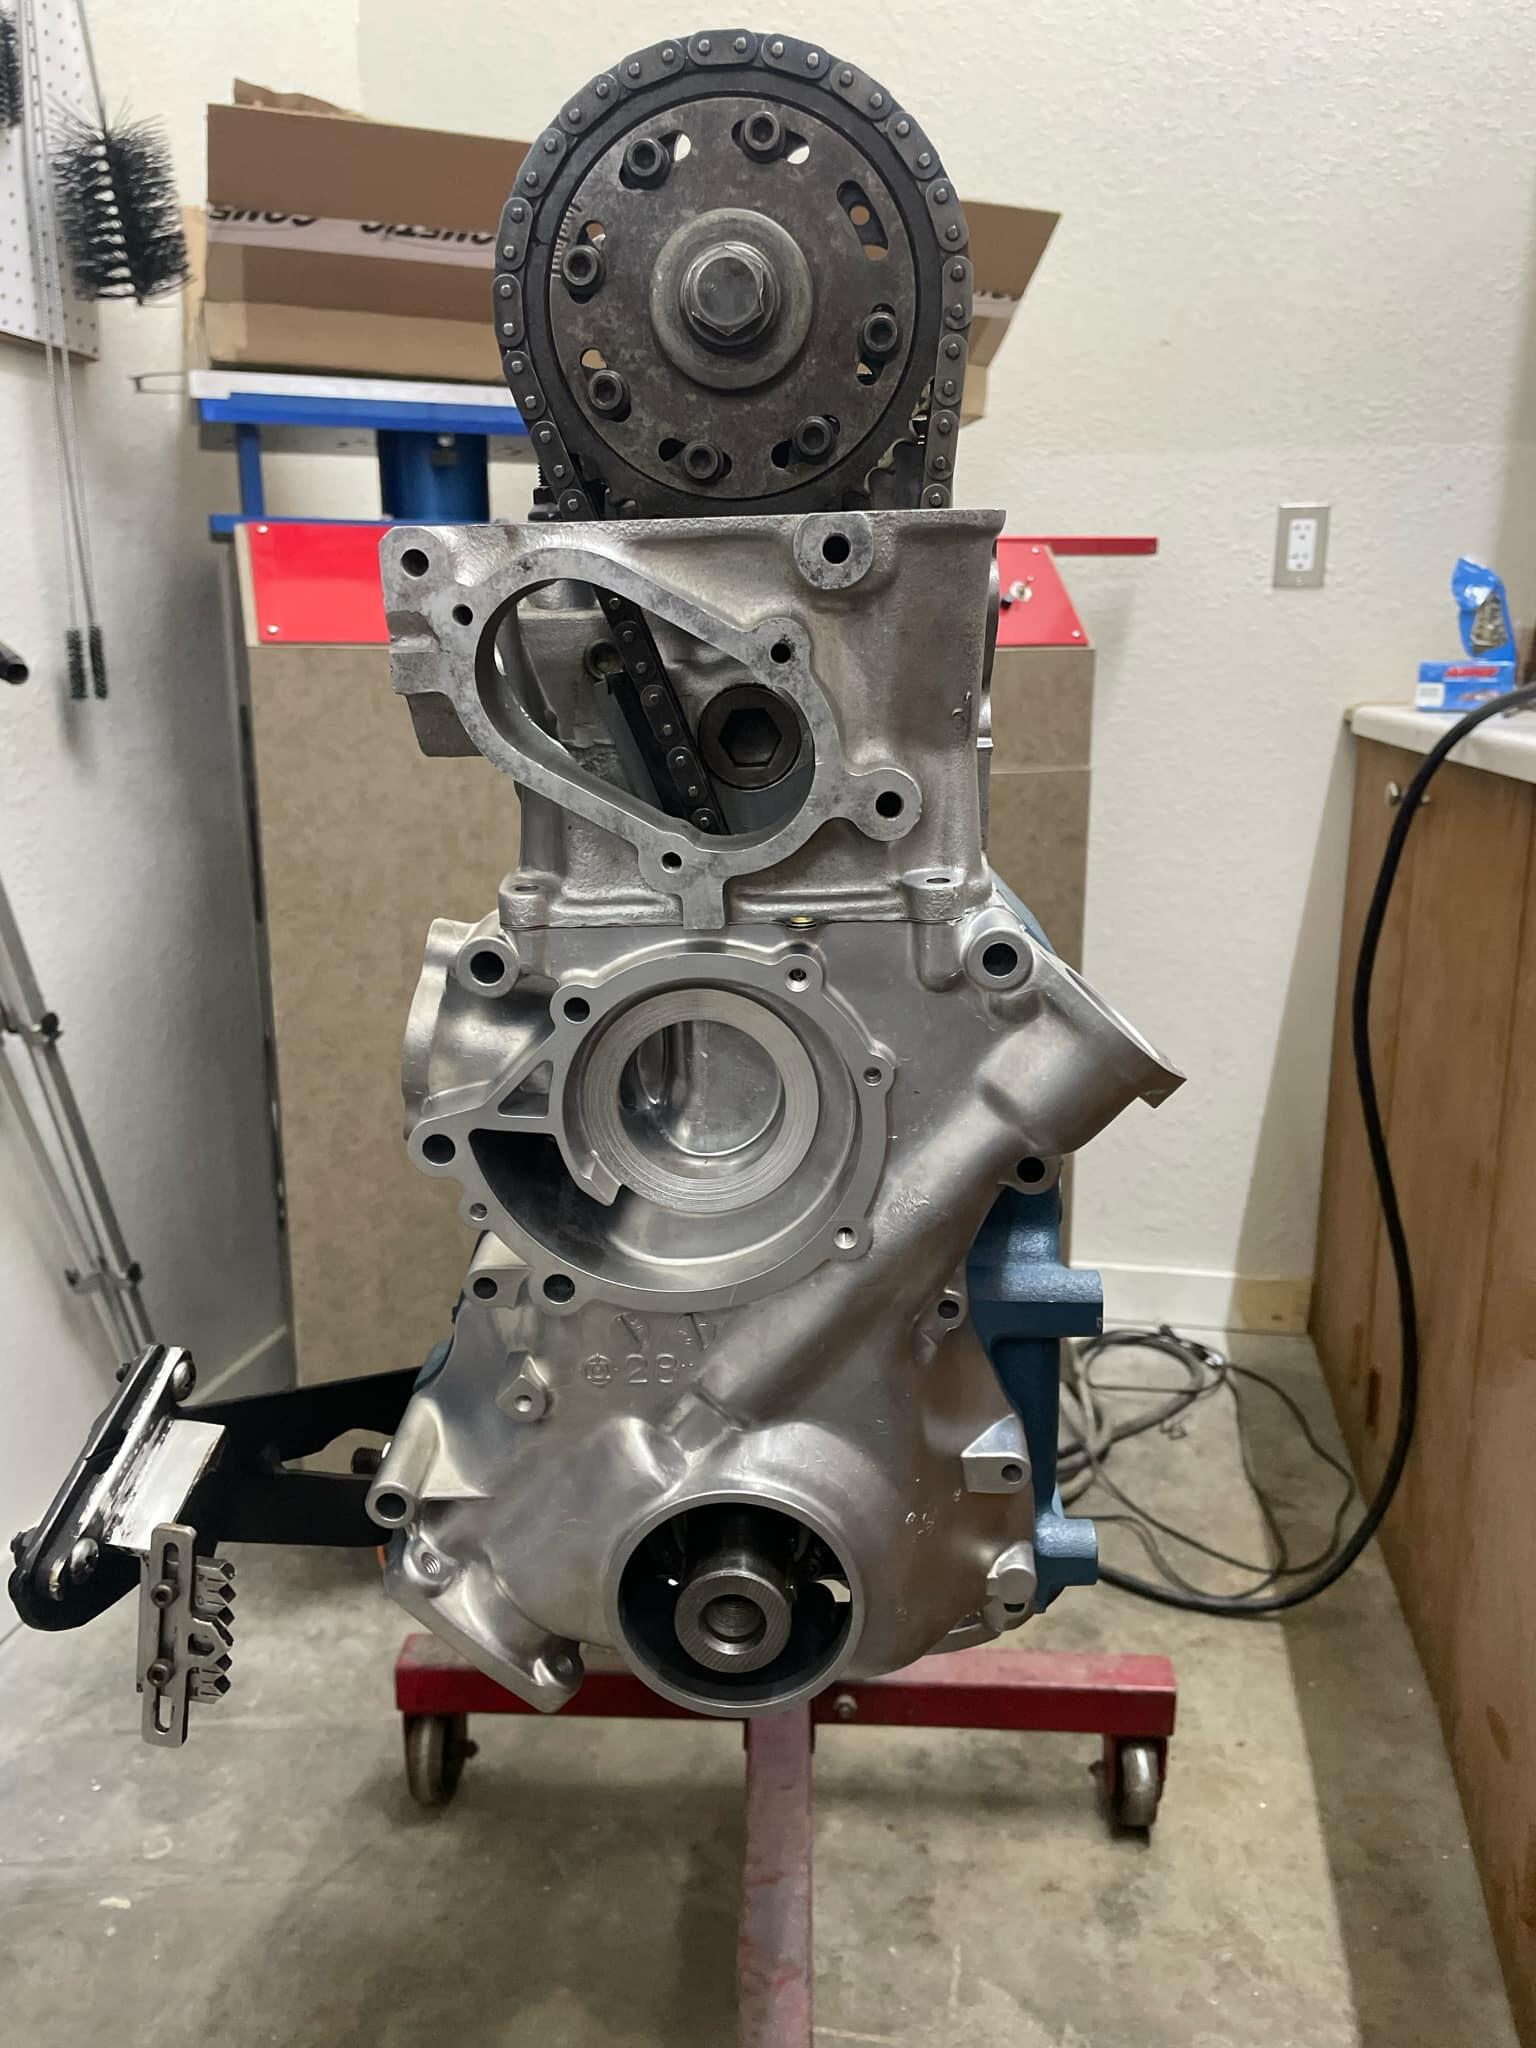
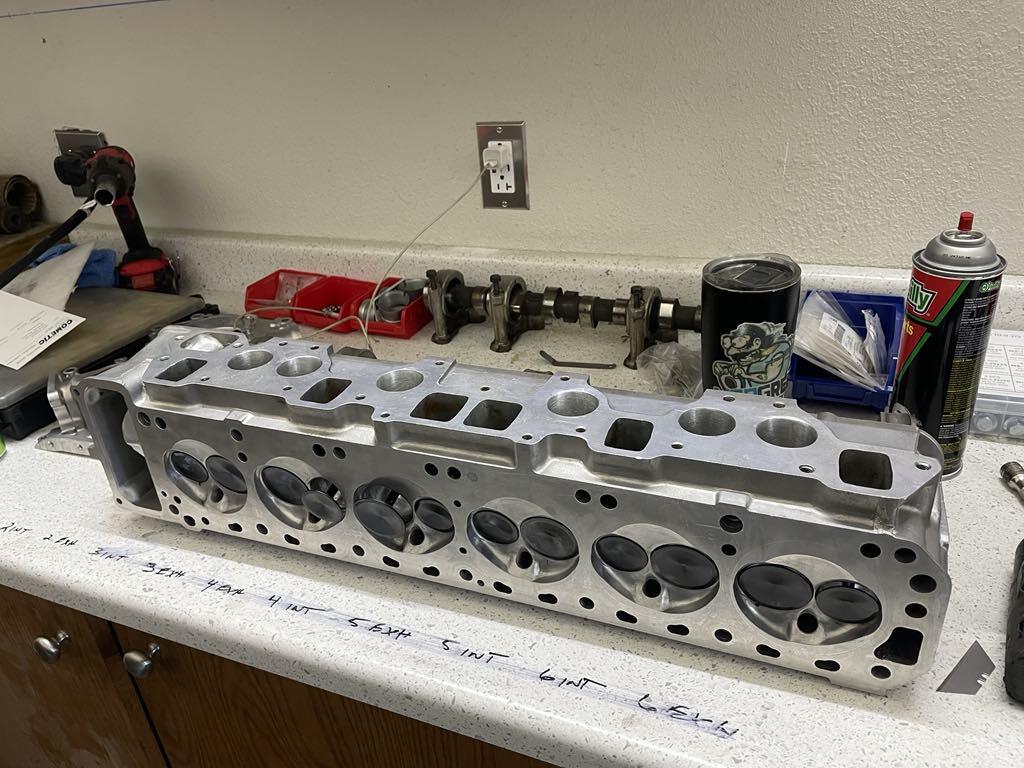
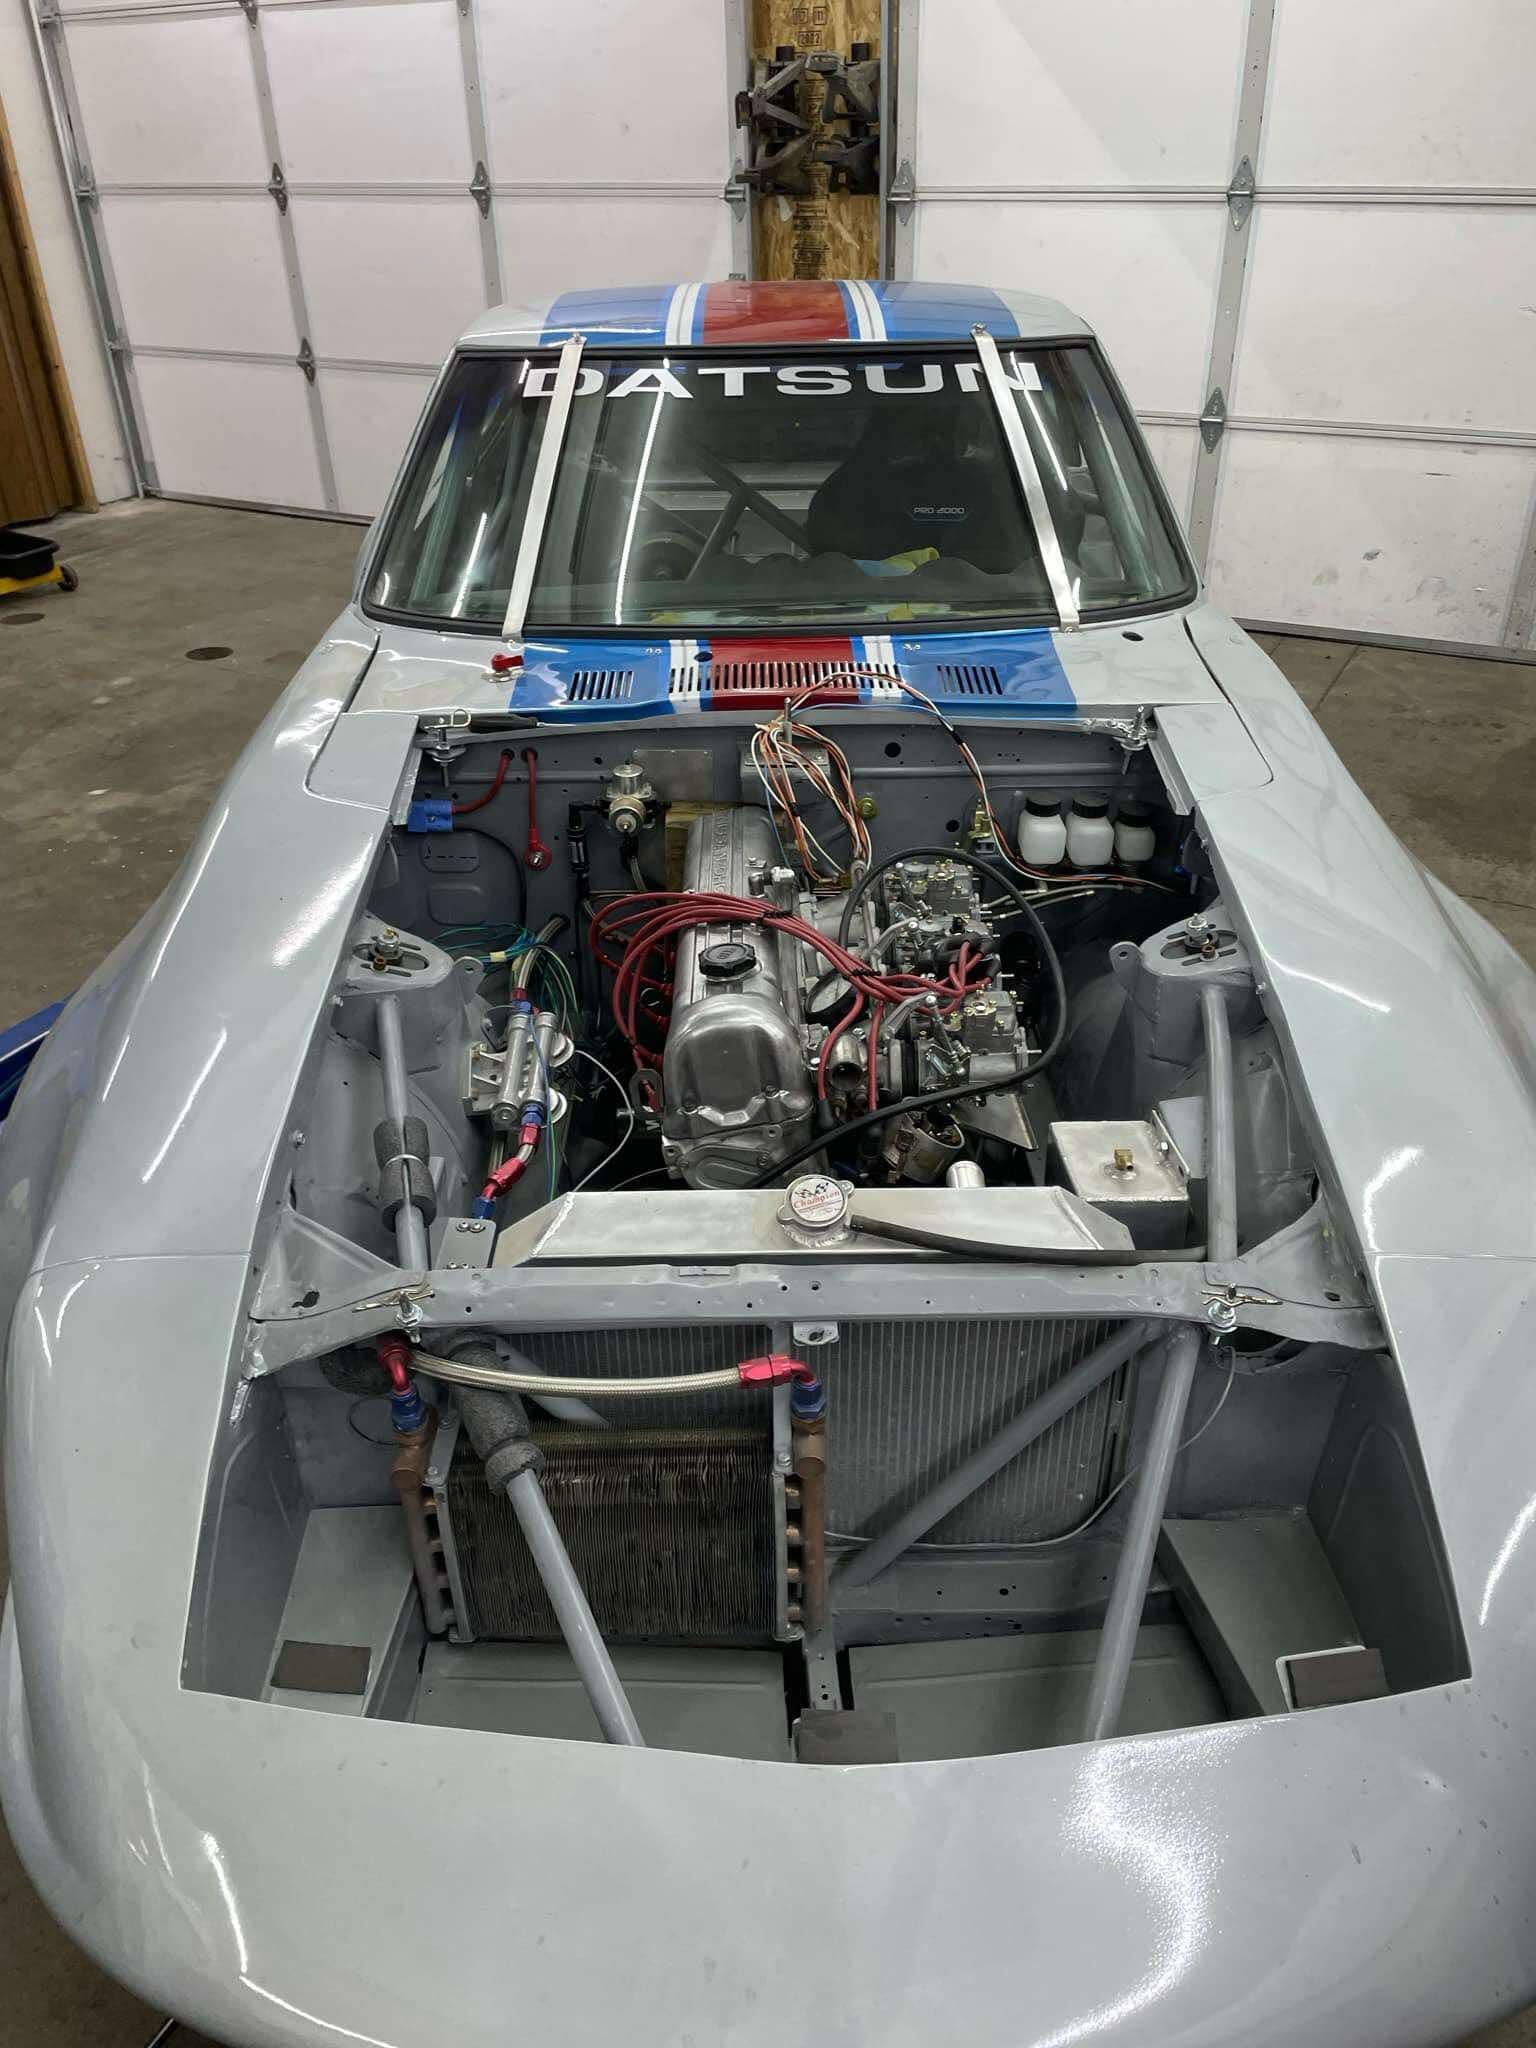
A little update on my 3.1L! This motor was actually finished 3 years ago, but was tragically in a shop fire. Luckily the engine wasn’t too close to the flames and it was spared. It’s getting close to finished and then going into my 1971 240z! My 3.1L 10.2:1 compression ratio 88.5mm bore. N42 block. Sonic tested. LD crank by marine crankshaft. Crank Off-set grind to 84.6 stroke. Finish rod journals @ 1.8889" Thrust Finish 1.27”R & R plugs with threaded plugs Dynamic Balance Ion-Plasma nitride, straighten & micro-Micro polish all journals E31 head. Port work by Andrew Kazanis Dsi valves, titanium retainers. Isky springs. Bonk cam. I got it in NOS or near new condition prior to porting. Rebello JE Eagle pistons and toyota rods 221 CFM flow at .45-.5 lift. With rougAndrew Kazanis sizes. Mine is 88.5x88.5x.25x3.14159x 84.6x6 /1000 = 3122cc Thank you Andrew Kazanis for all the help and your magically porting work.
I bought them as well!
A little update on my 3.1L! This motor was actually finished 3 years ago, but was tragically in a shop fire. Luckily the engine wasn’t too close to the flames and it was spared. It’s getting close to finished and then going into my 1971 240z! My 3.1L 10.2:1 compression ratio 88.5mm bore. N42 block. Sonic tested. LD crank by marine crankshaft. Crank Off-set grind to 84.6 stroke. Finish rod journals @ 1.8889" Thrust Finish 1.27”R & R plugs with threaded plugs Dynamic Balance Ion-Plasma nitride, straighten & micro-Micro polish all journals E31 head. Port work by Andrew Kazanis Dsi valves, titanium retainers. Isky springs. Bonk cam. I got it in NOS or near new condition prior to porting. Rebello JE Eagle pistons and toyota rods 221 CFM flow at .45-.5 lift. With rougAndrew Kazanis sizes. Mine is 88.5x88.5x.25x3.14159x 84.6x6 /1000 = 3122cc Thank you Andrew Kazanis for all the help and your magically porting work.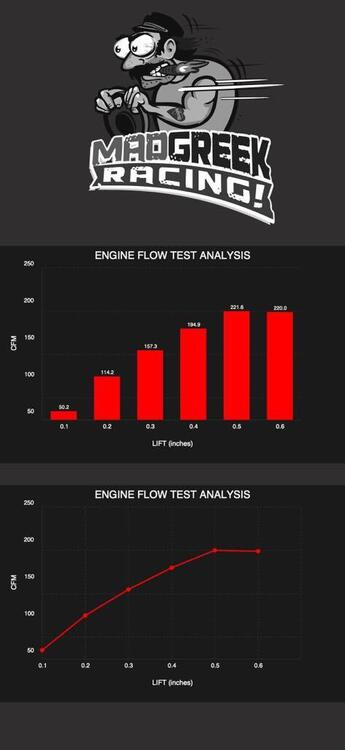


 Sweet! Working on the actuator, I am now trying the efihardware one.
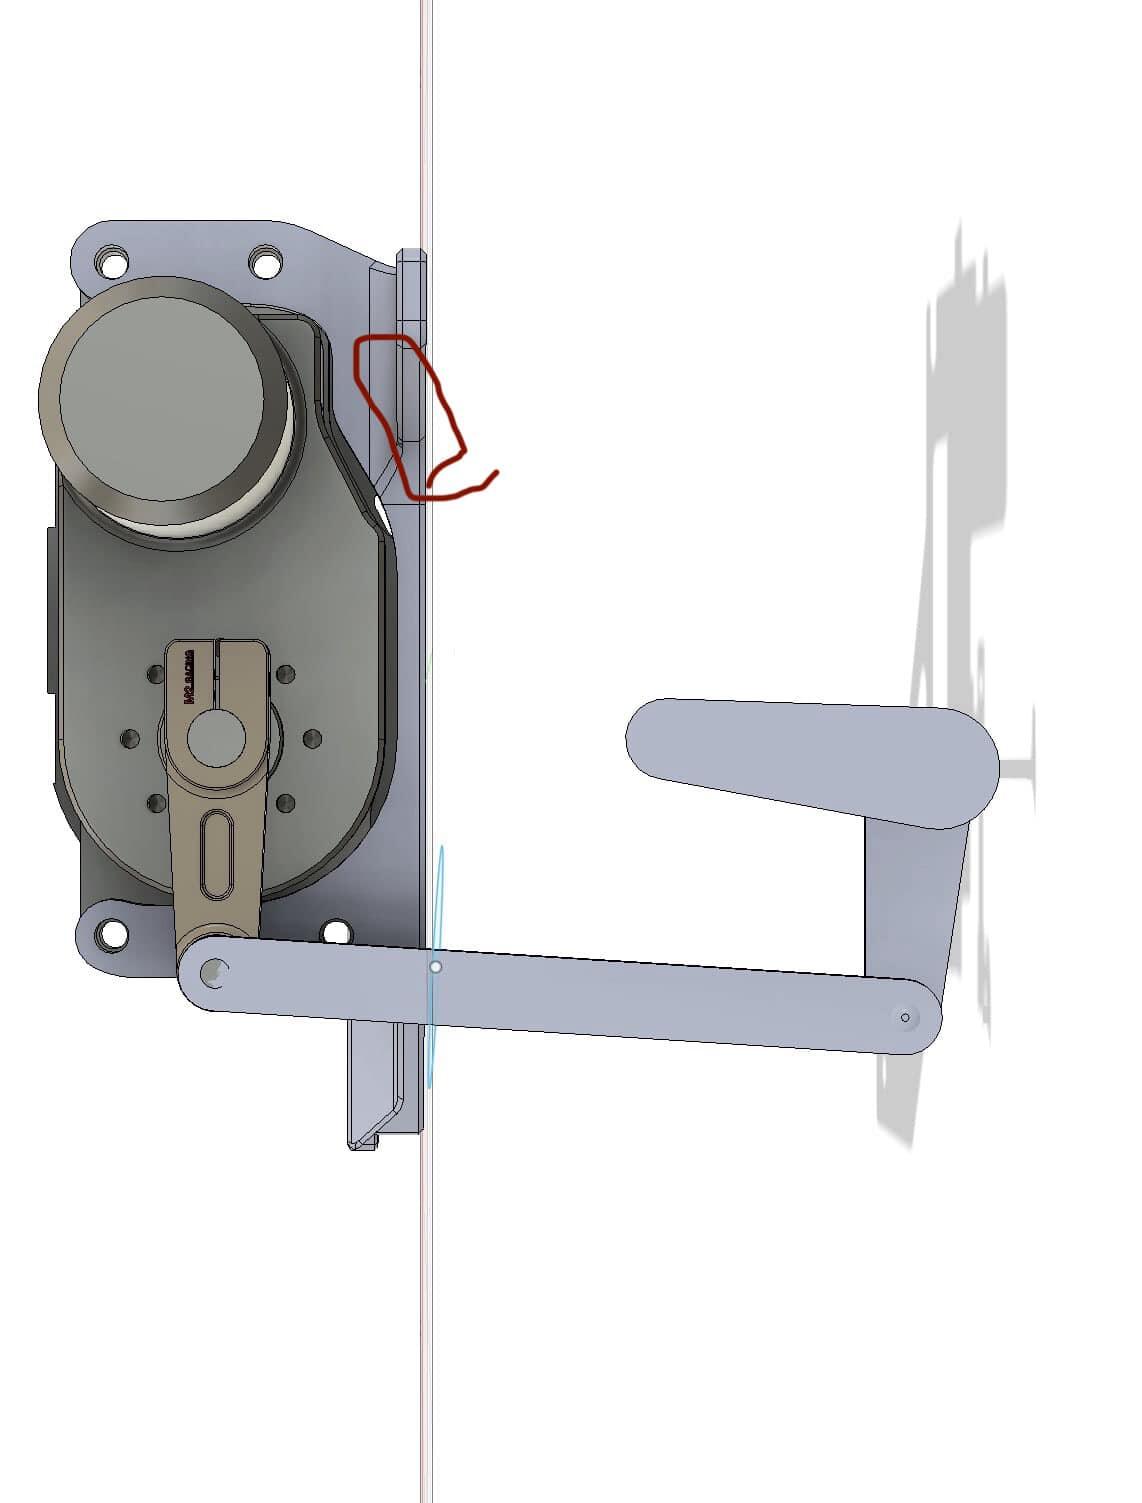
Could it be tie rod roll?
My friend Andrew just rebuilt this motor and has been working on this historic Z race car. Pretty epic
Sweet! Working on the actuator, I am now trying the efihardware one.
Could it be tie rod roll?
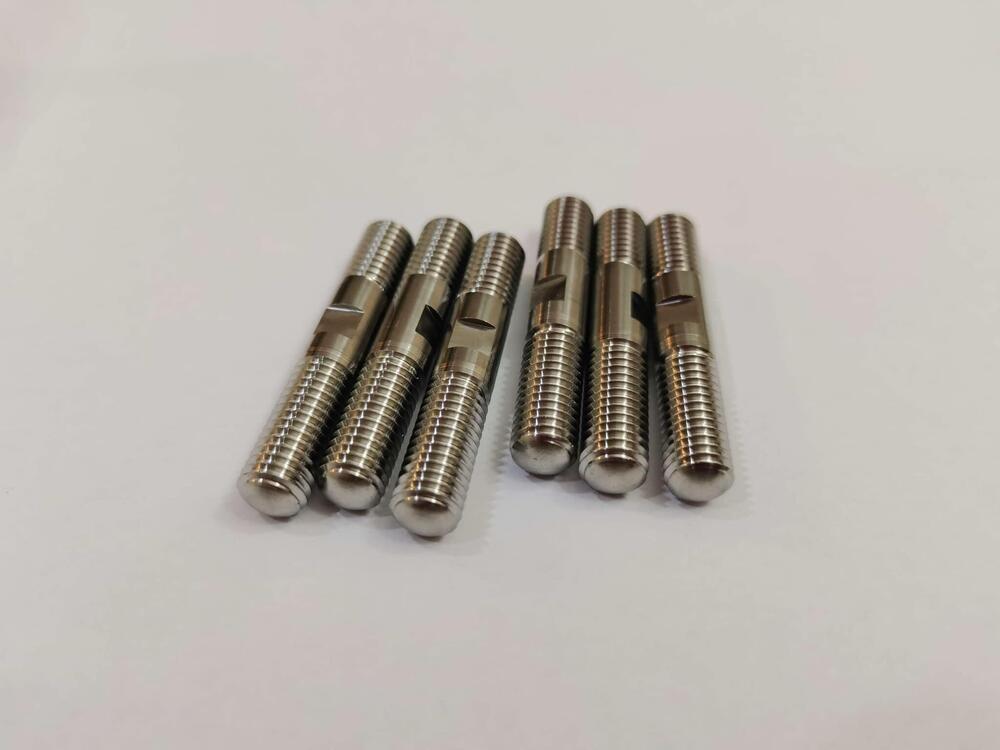
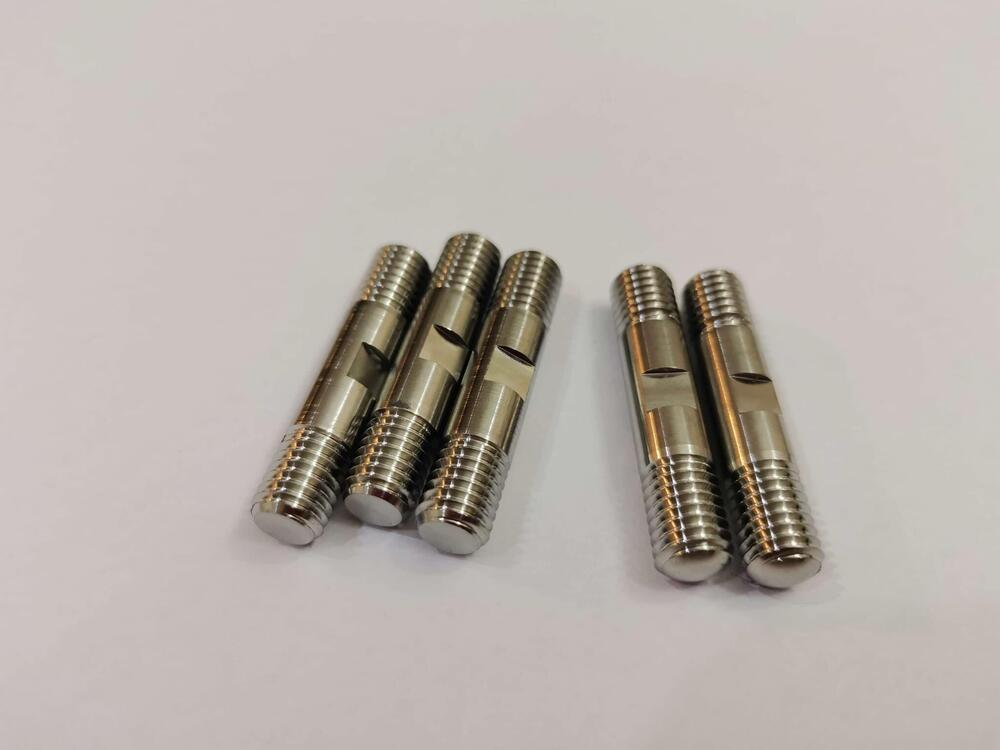
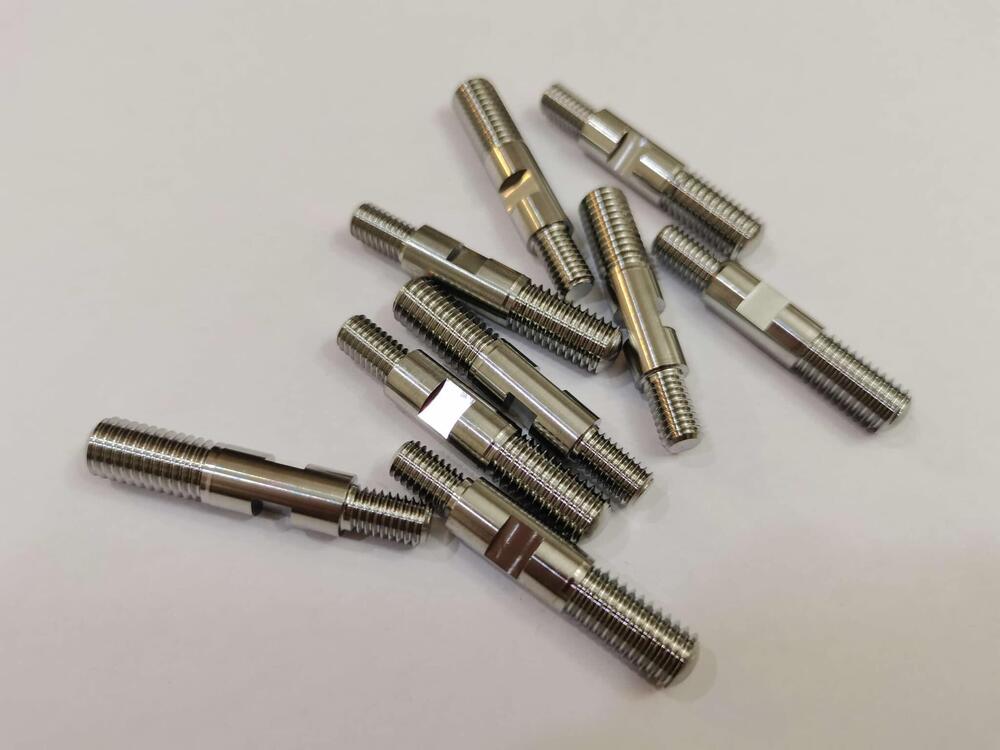
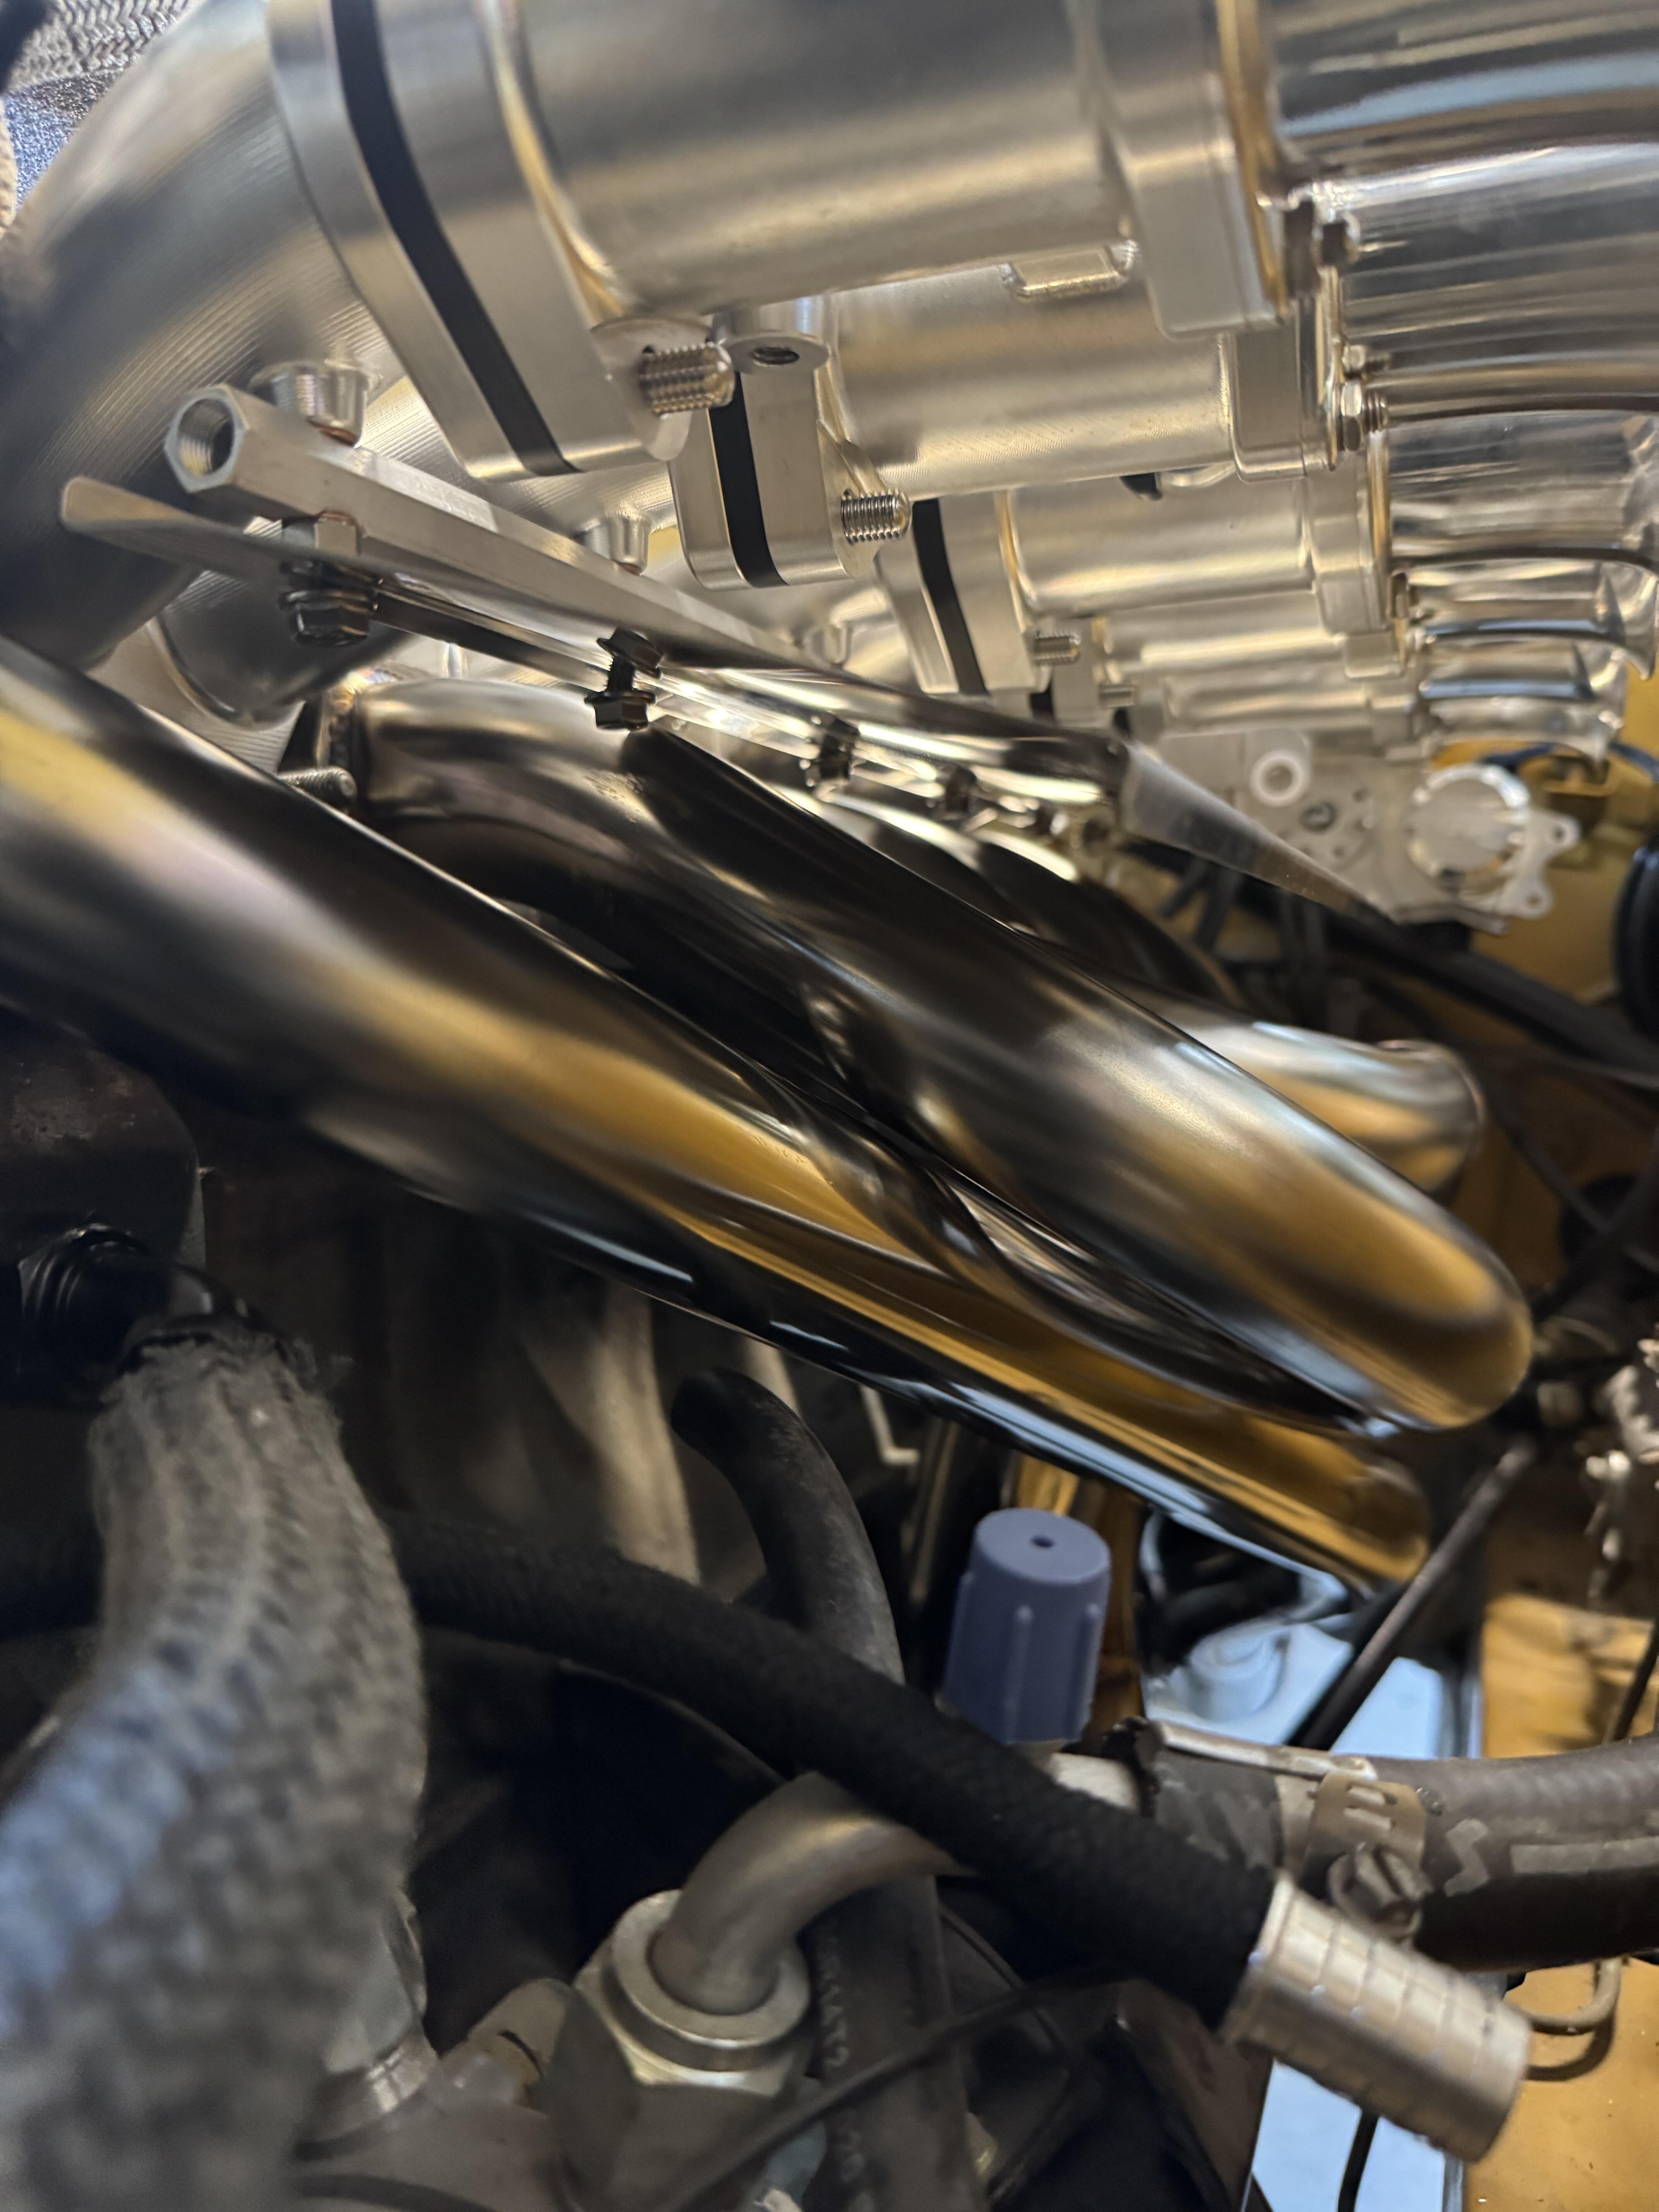
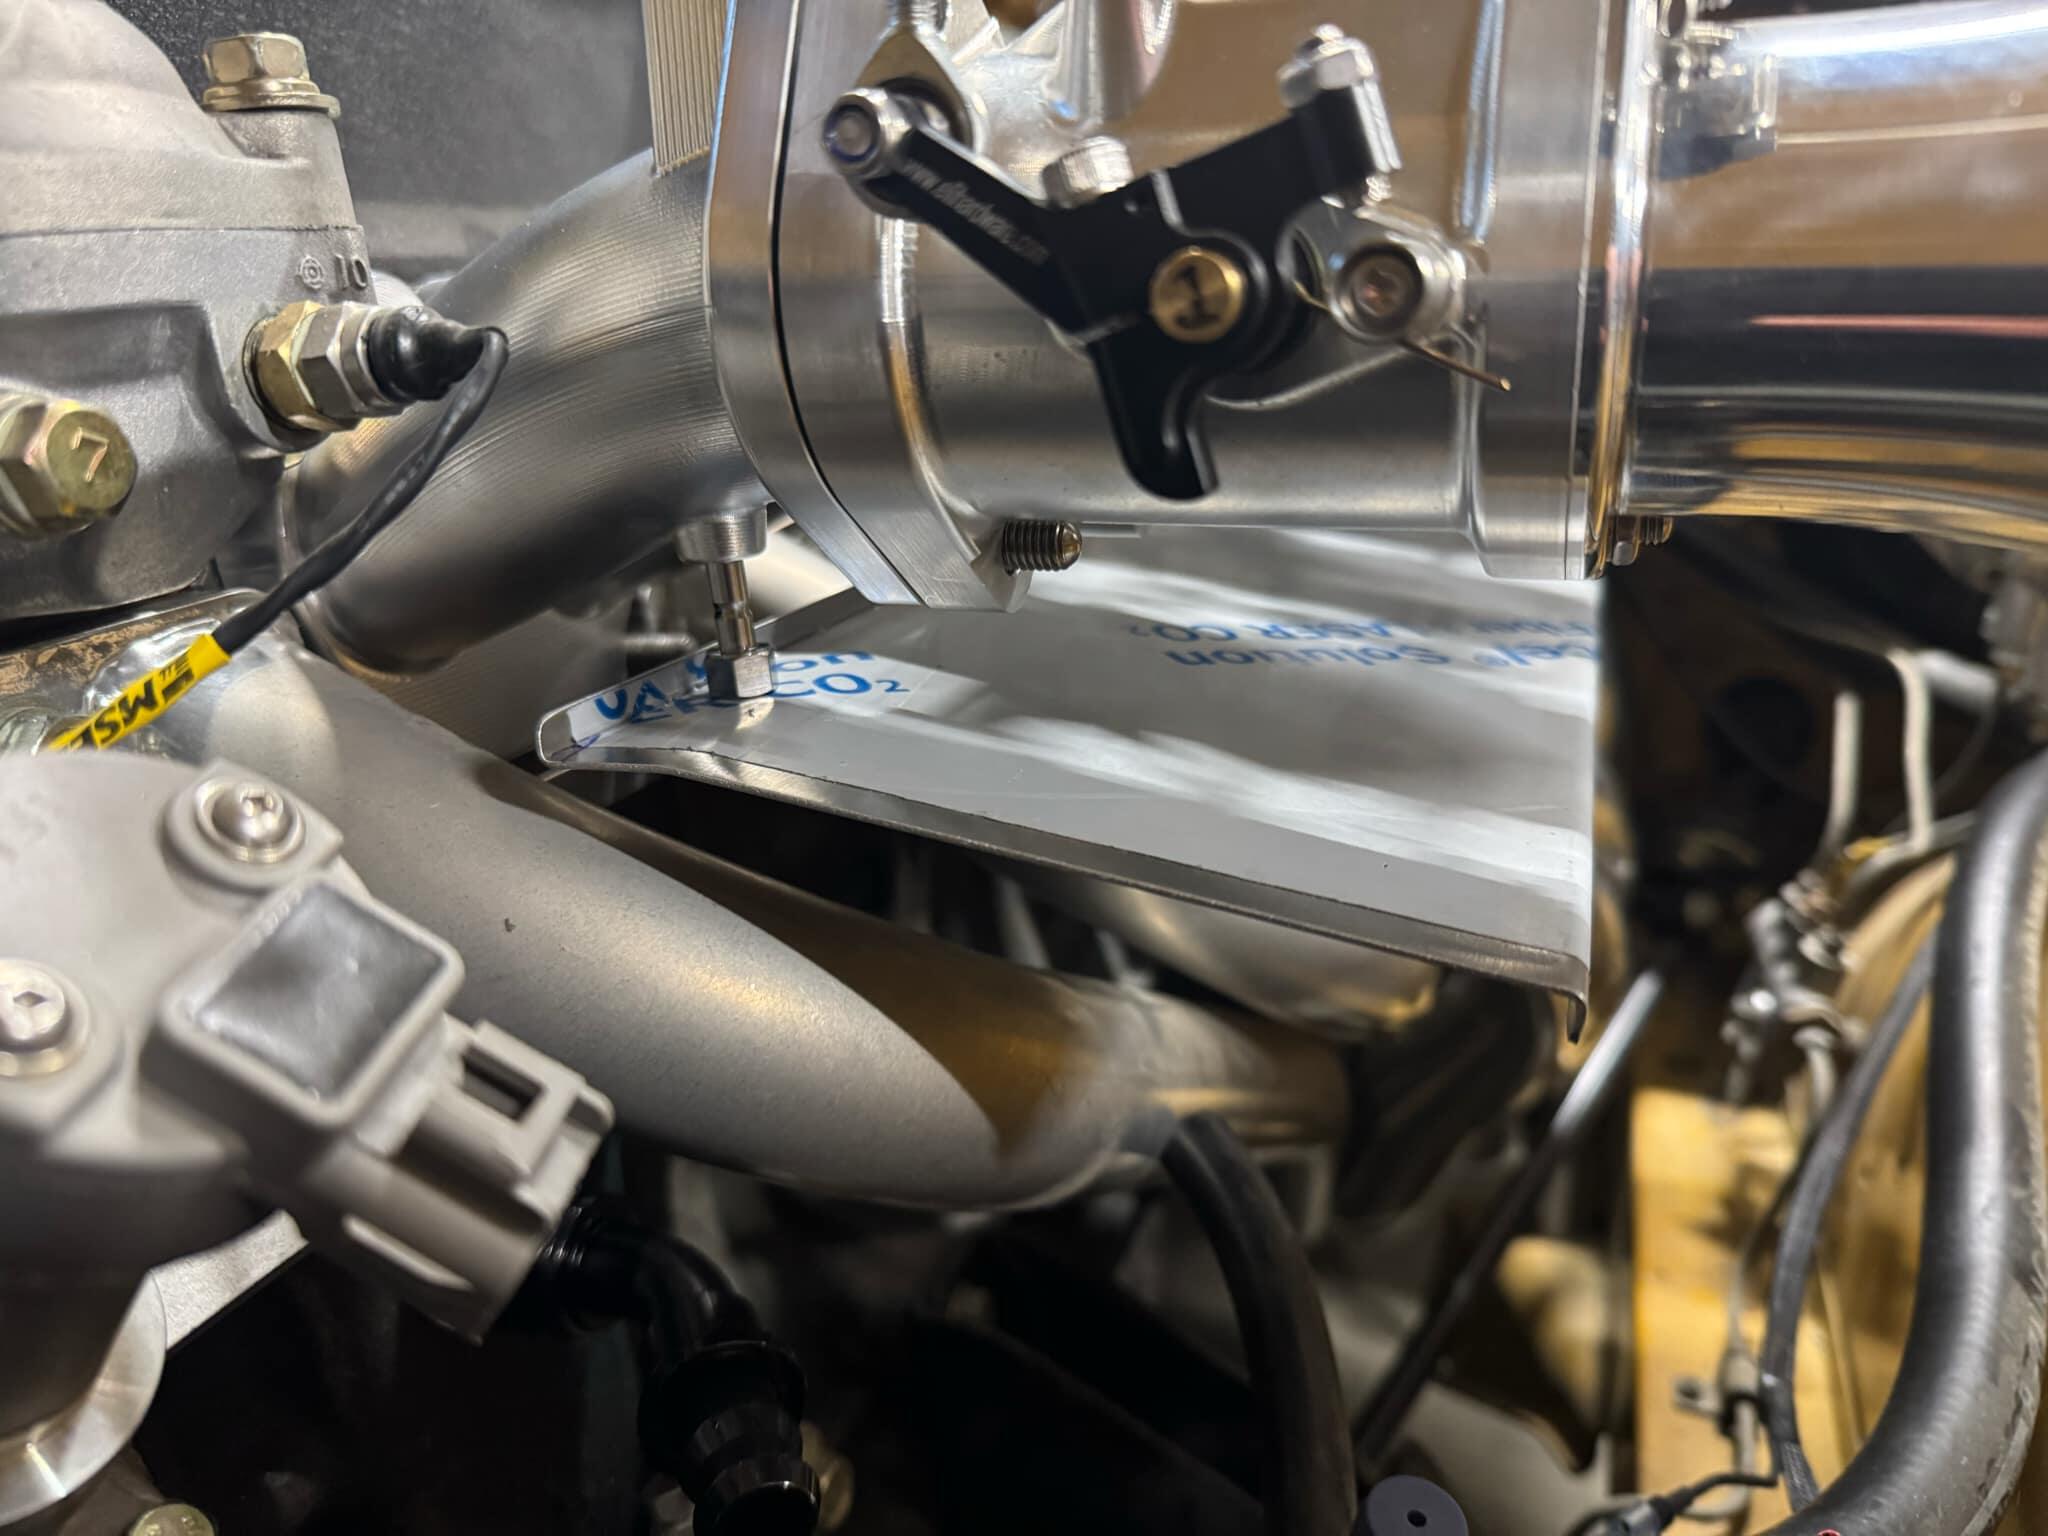
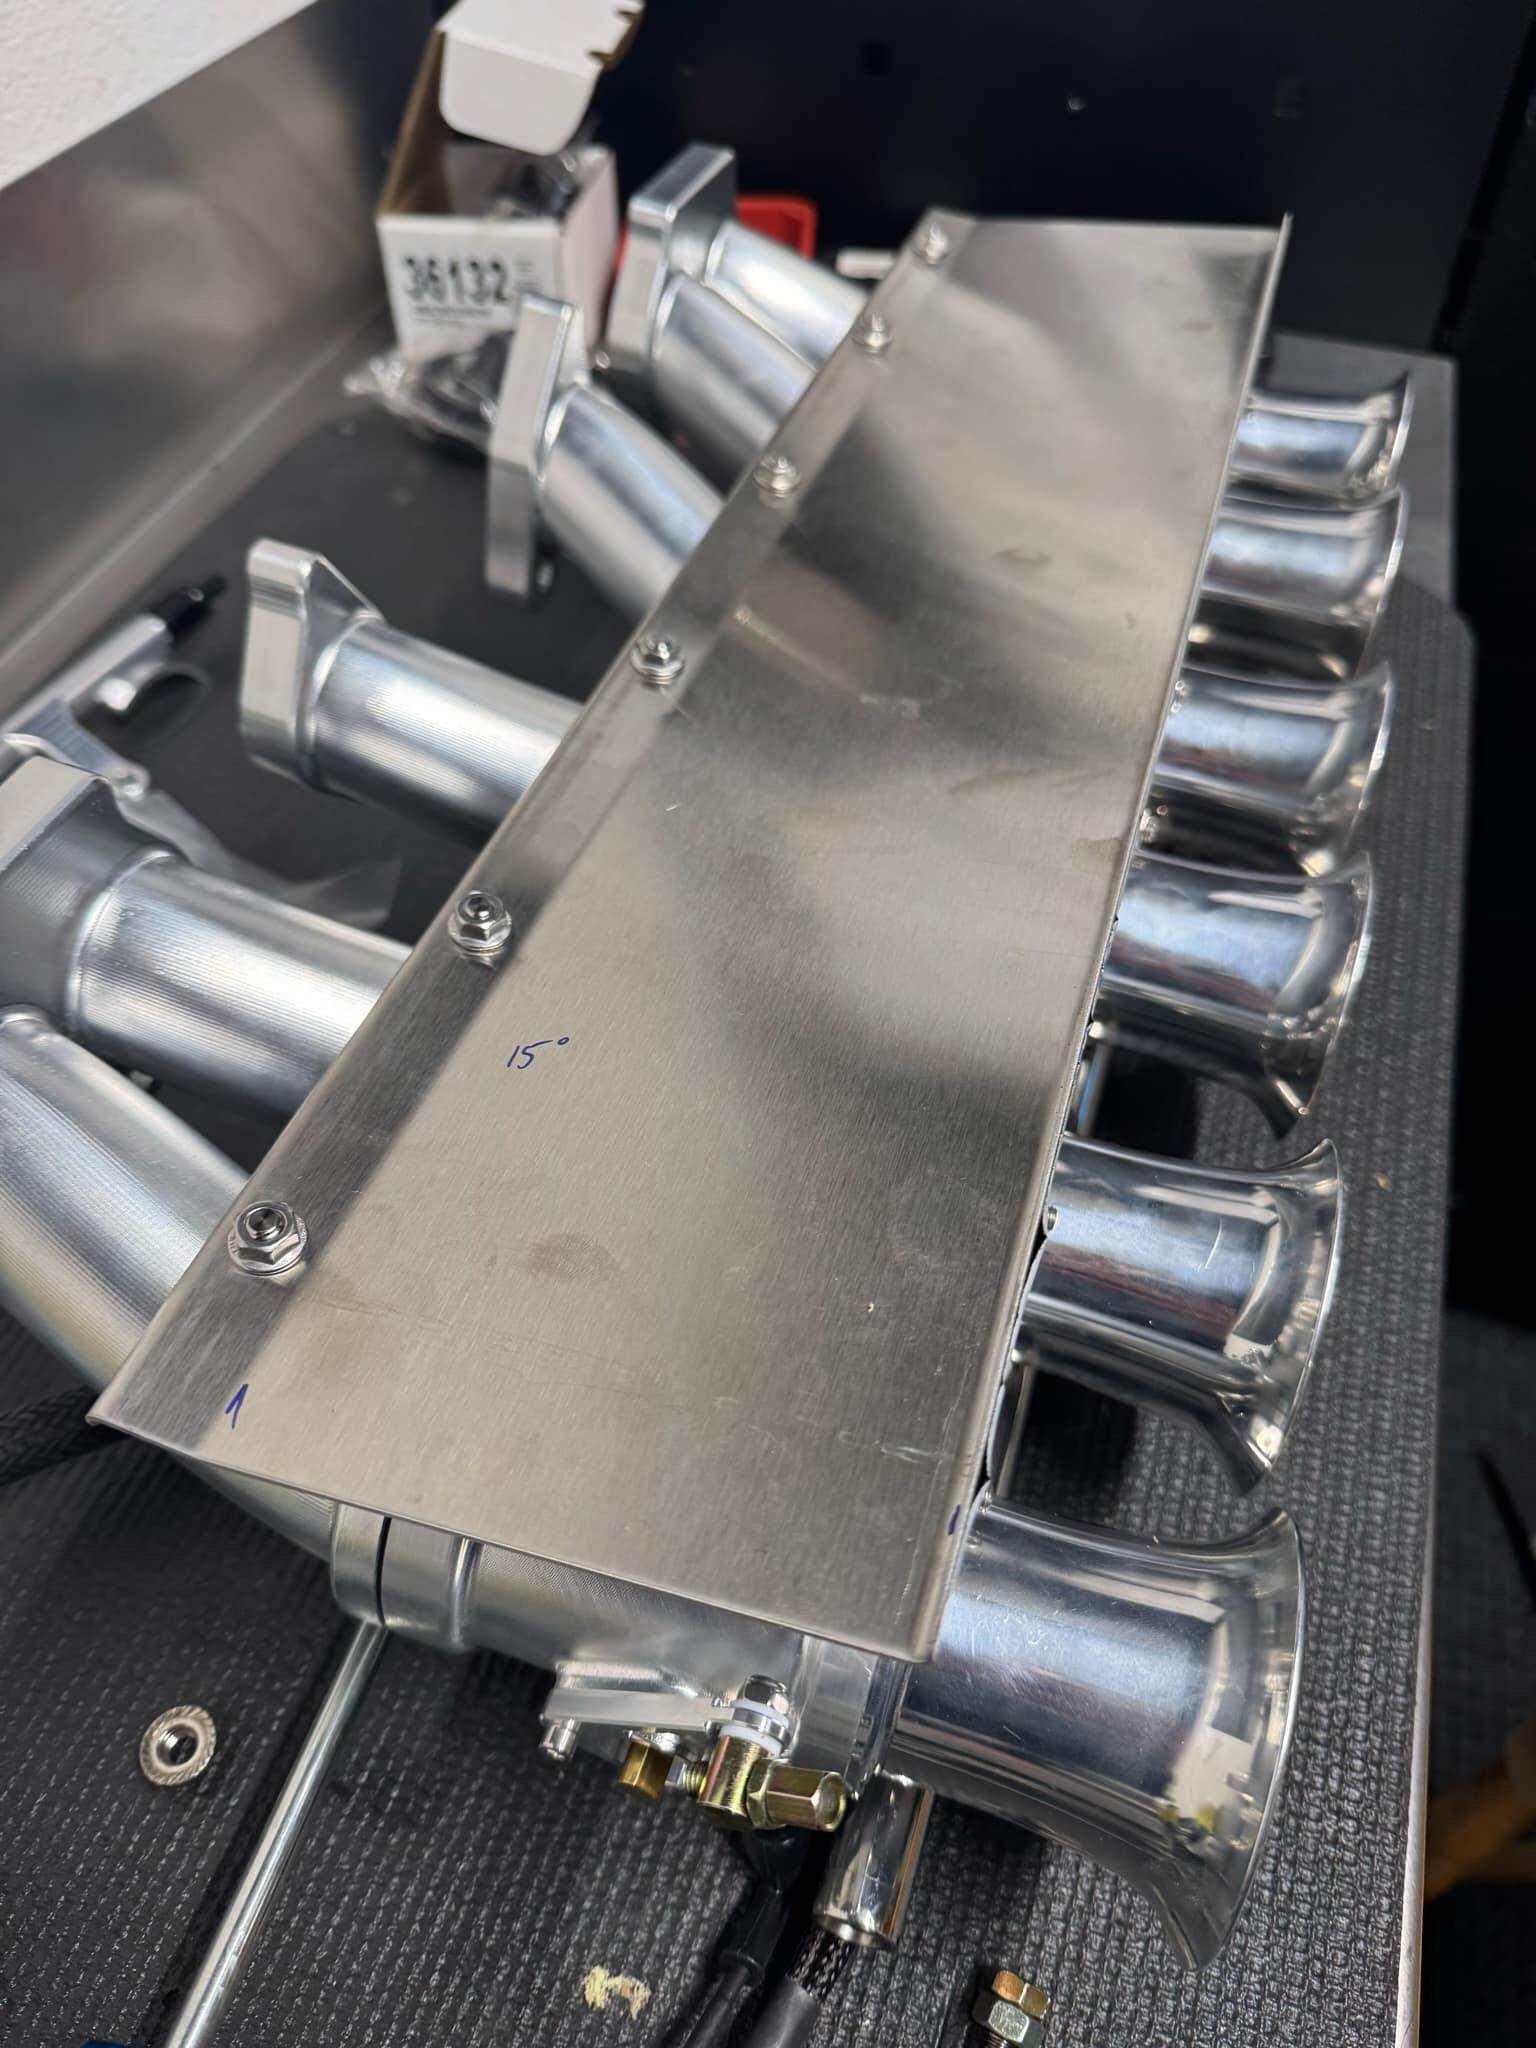
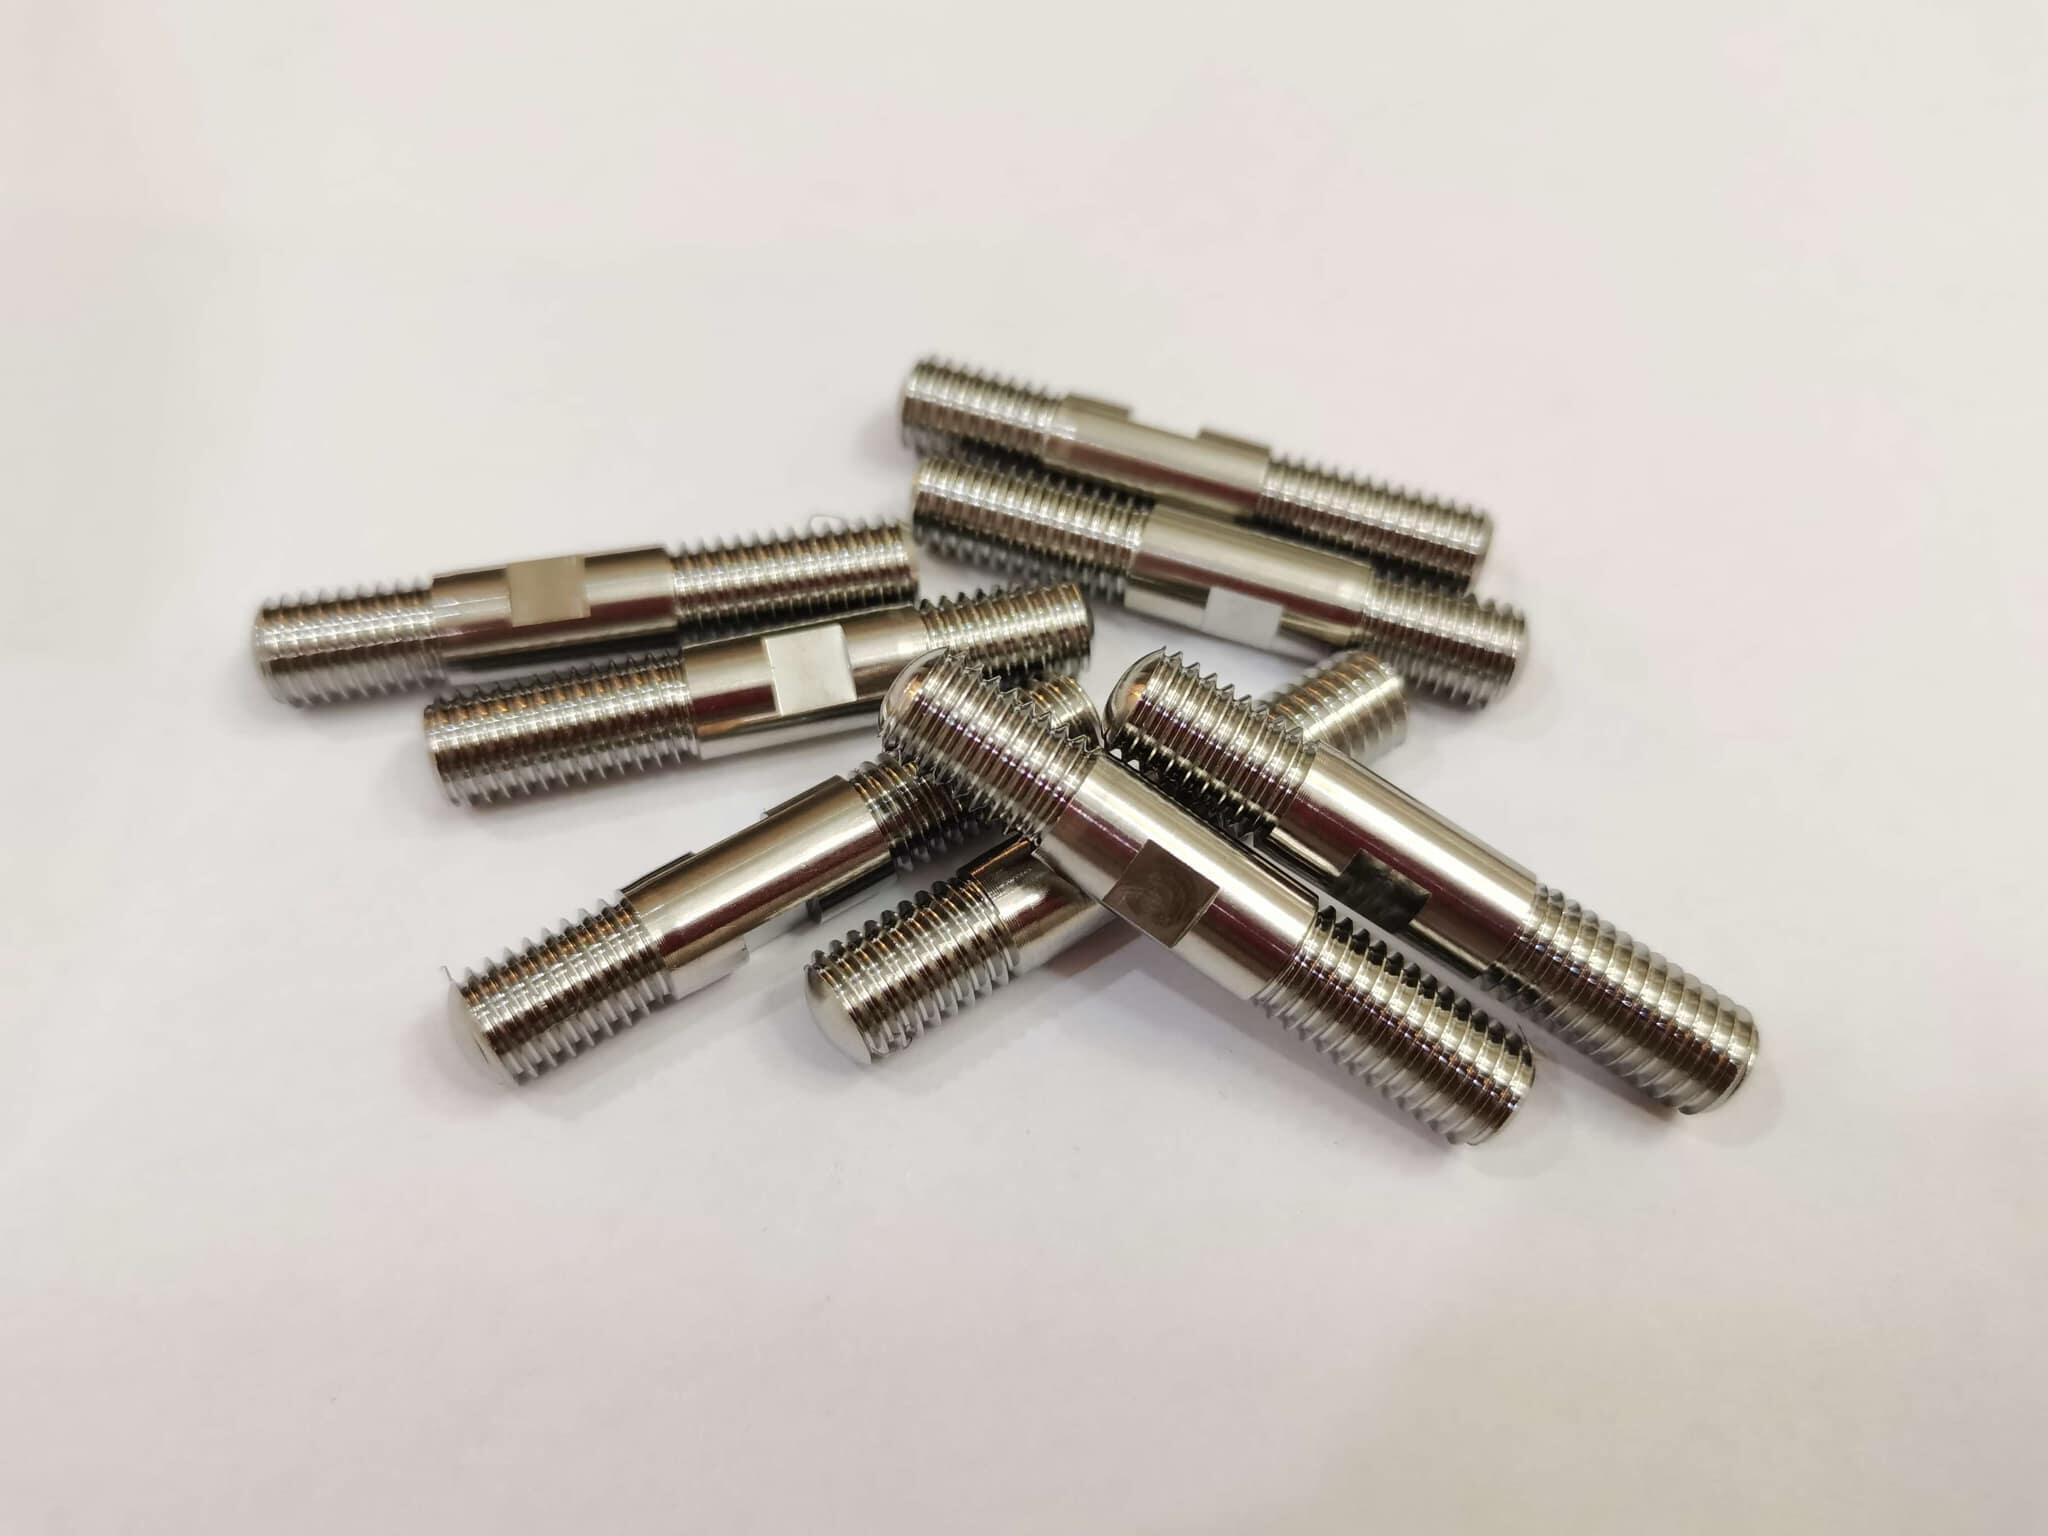
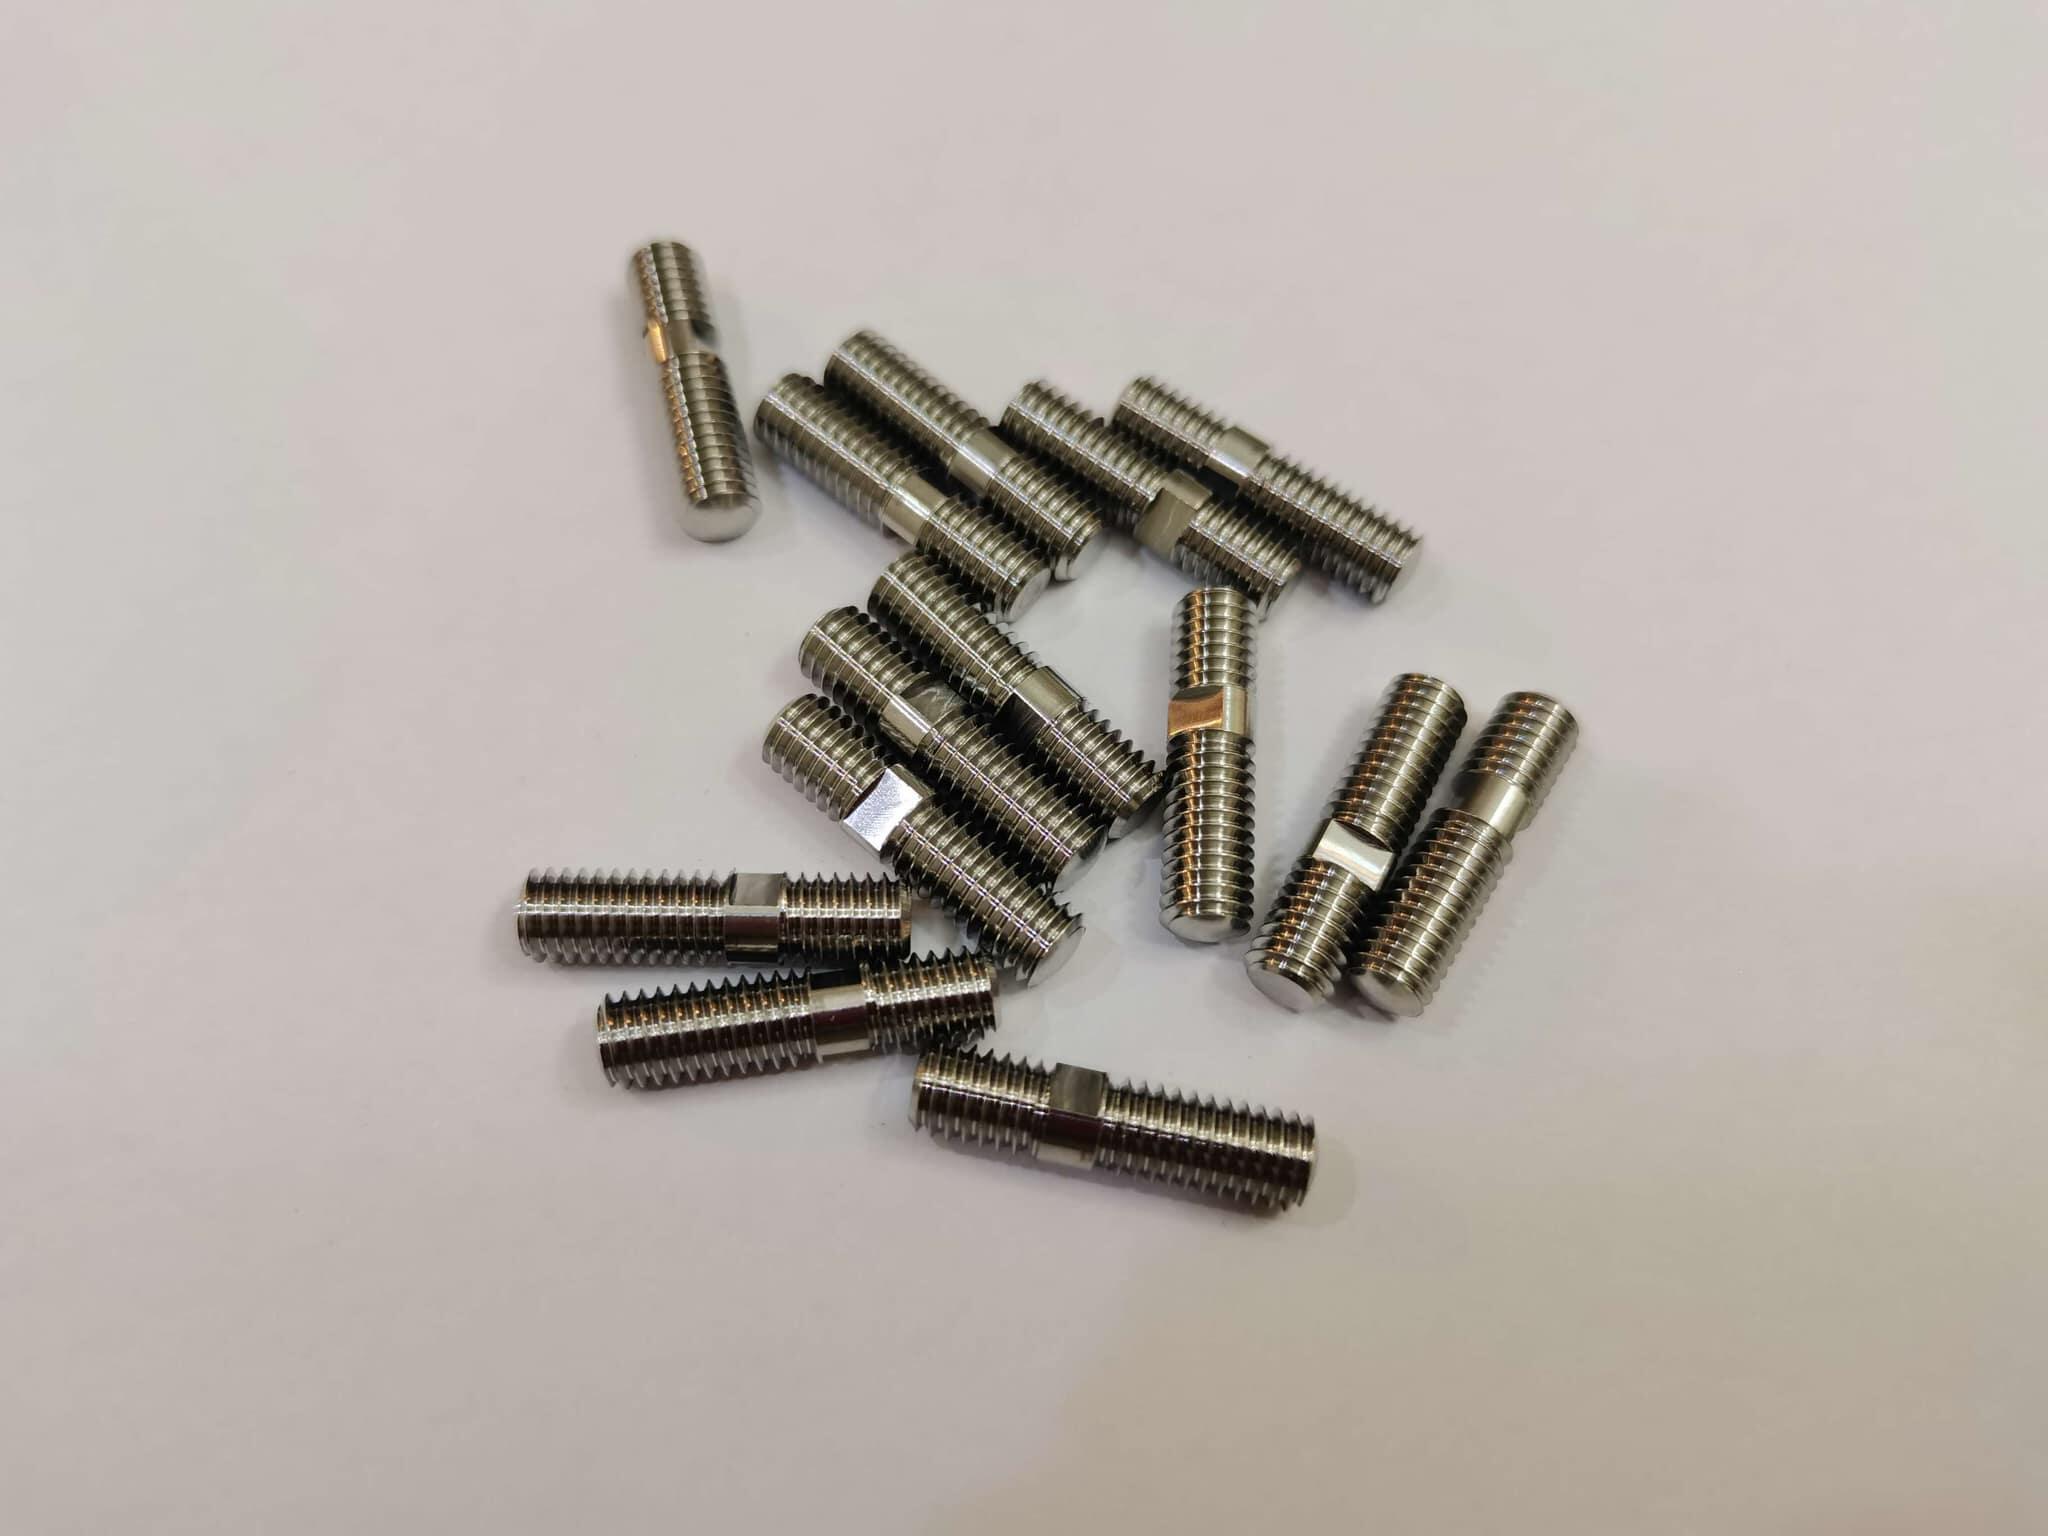
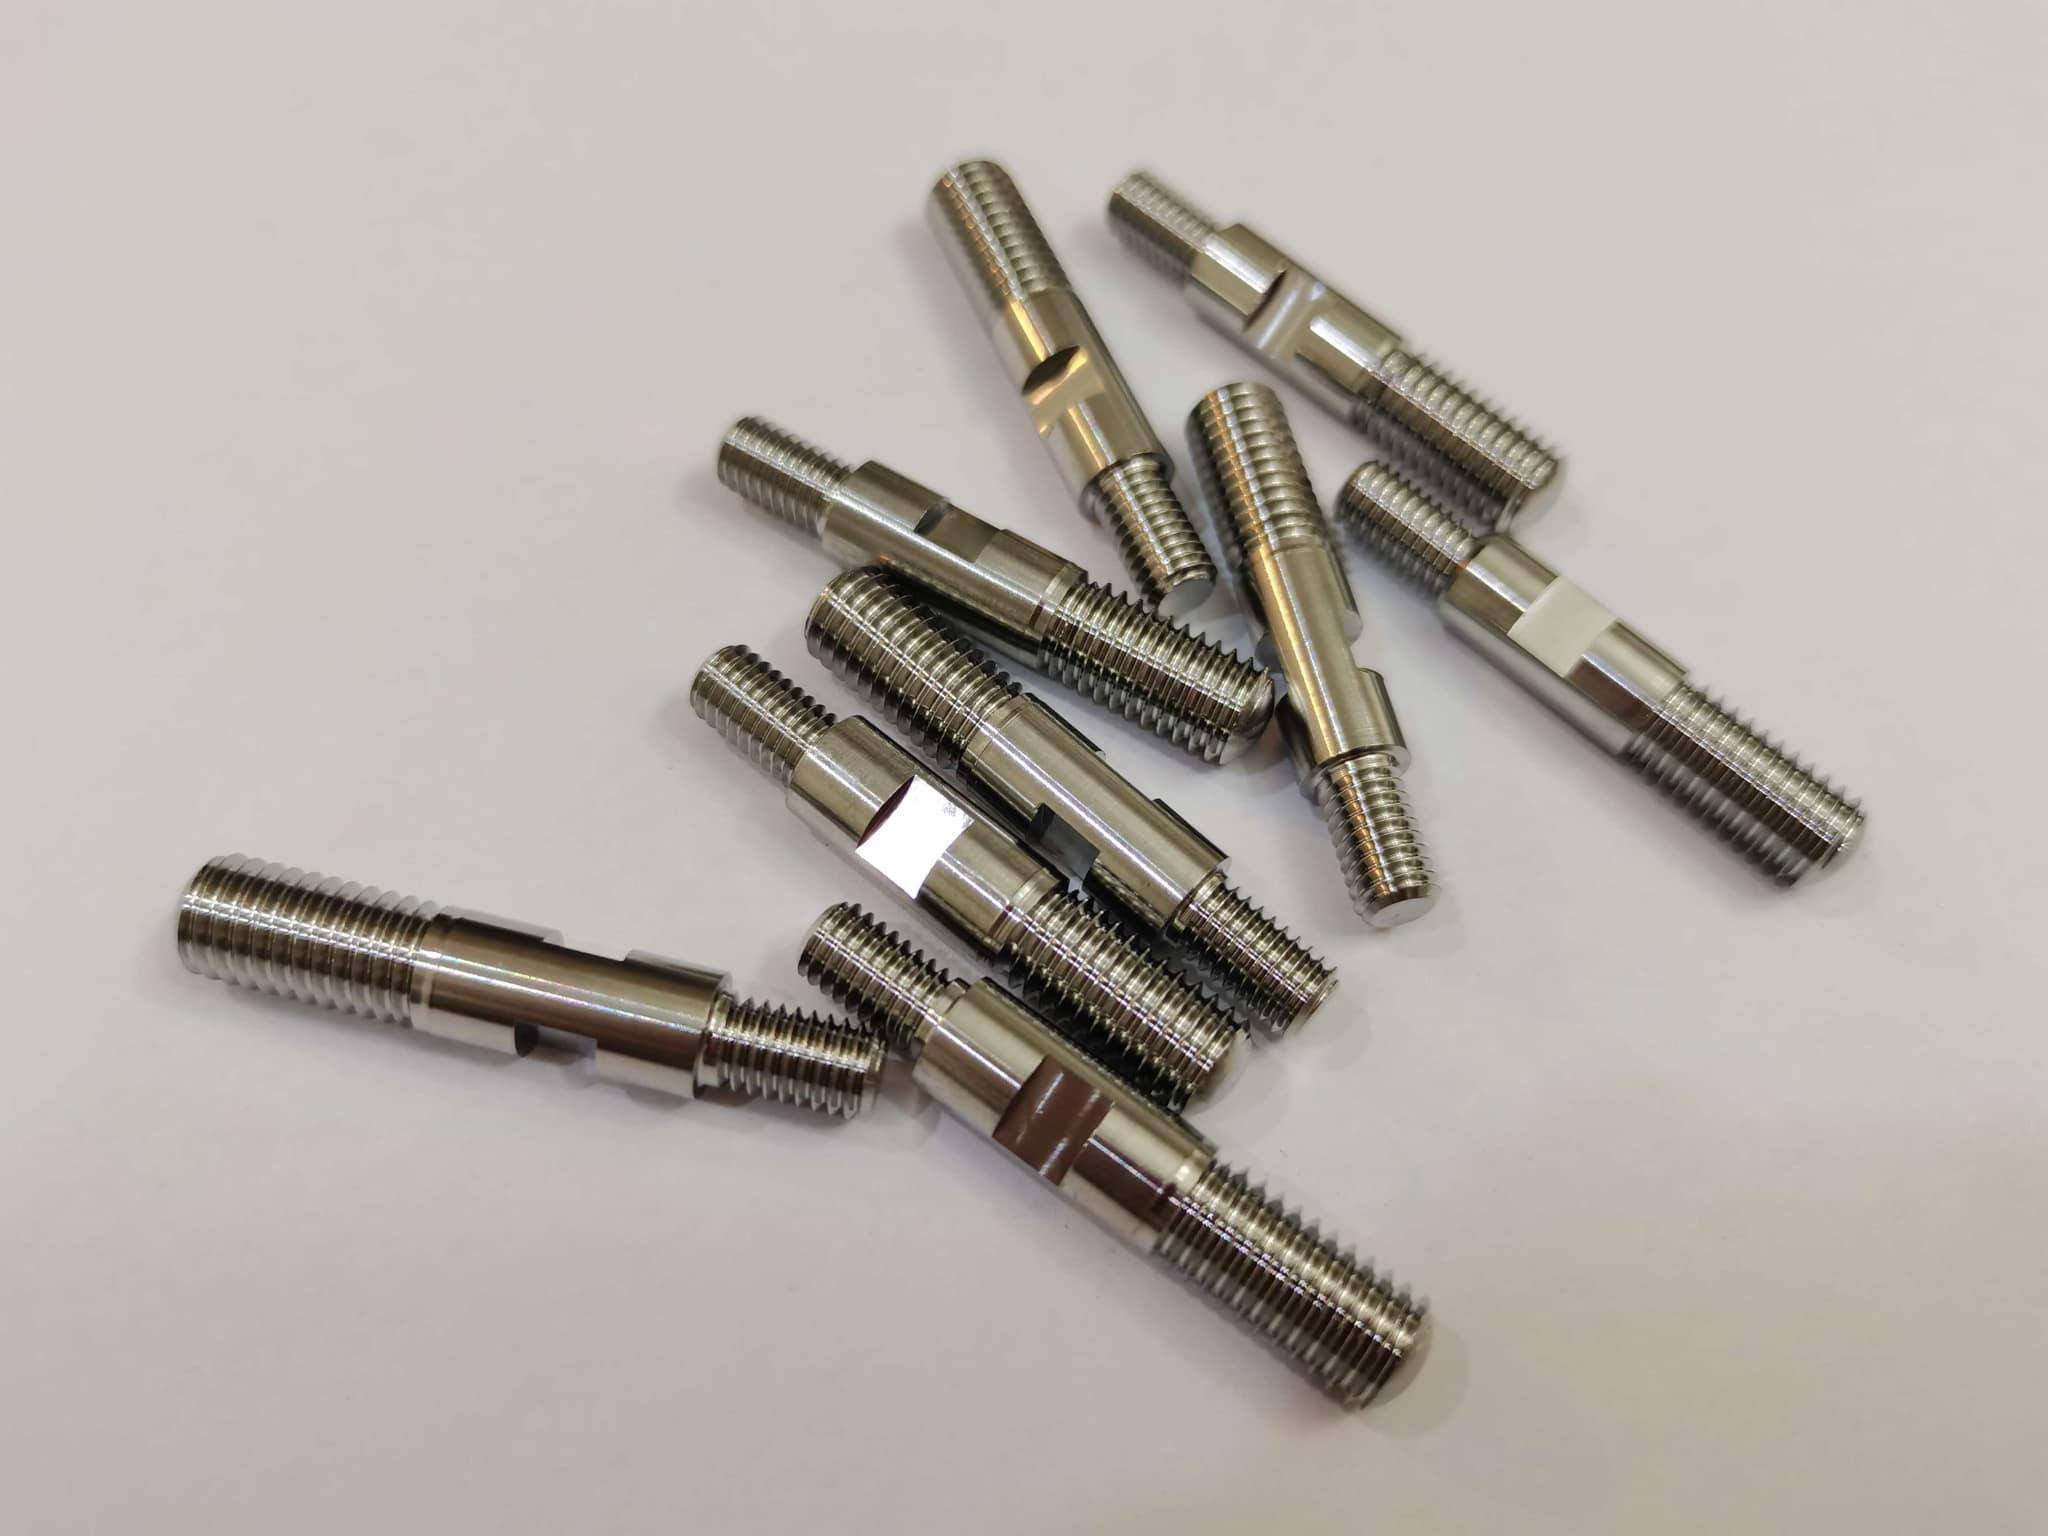
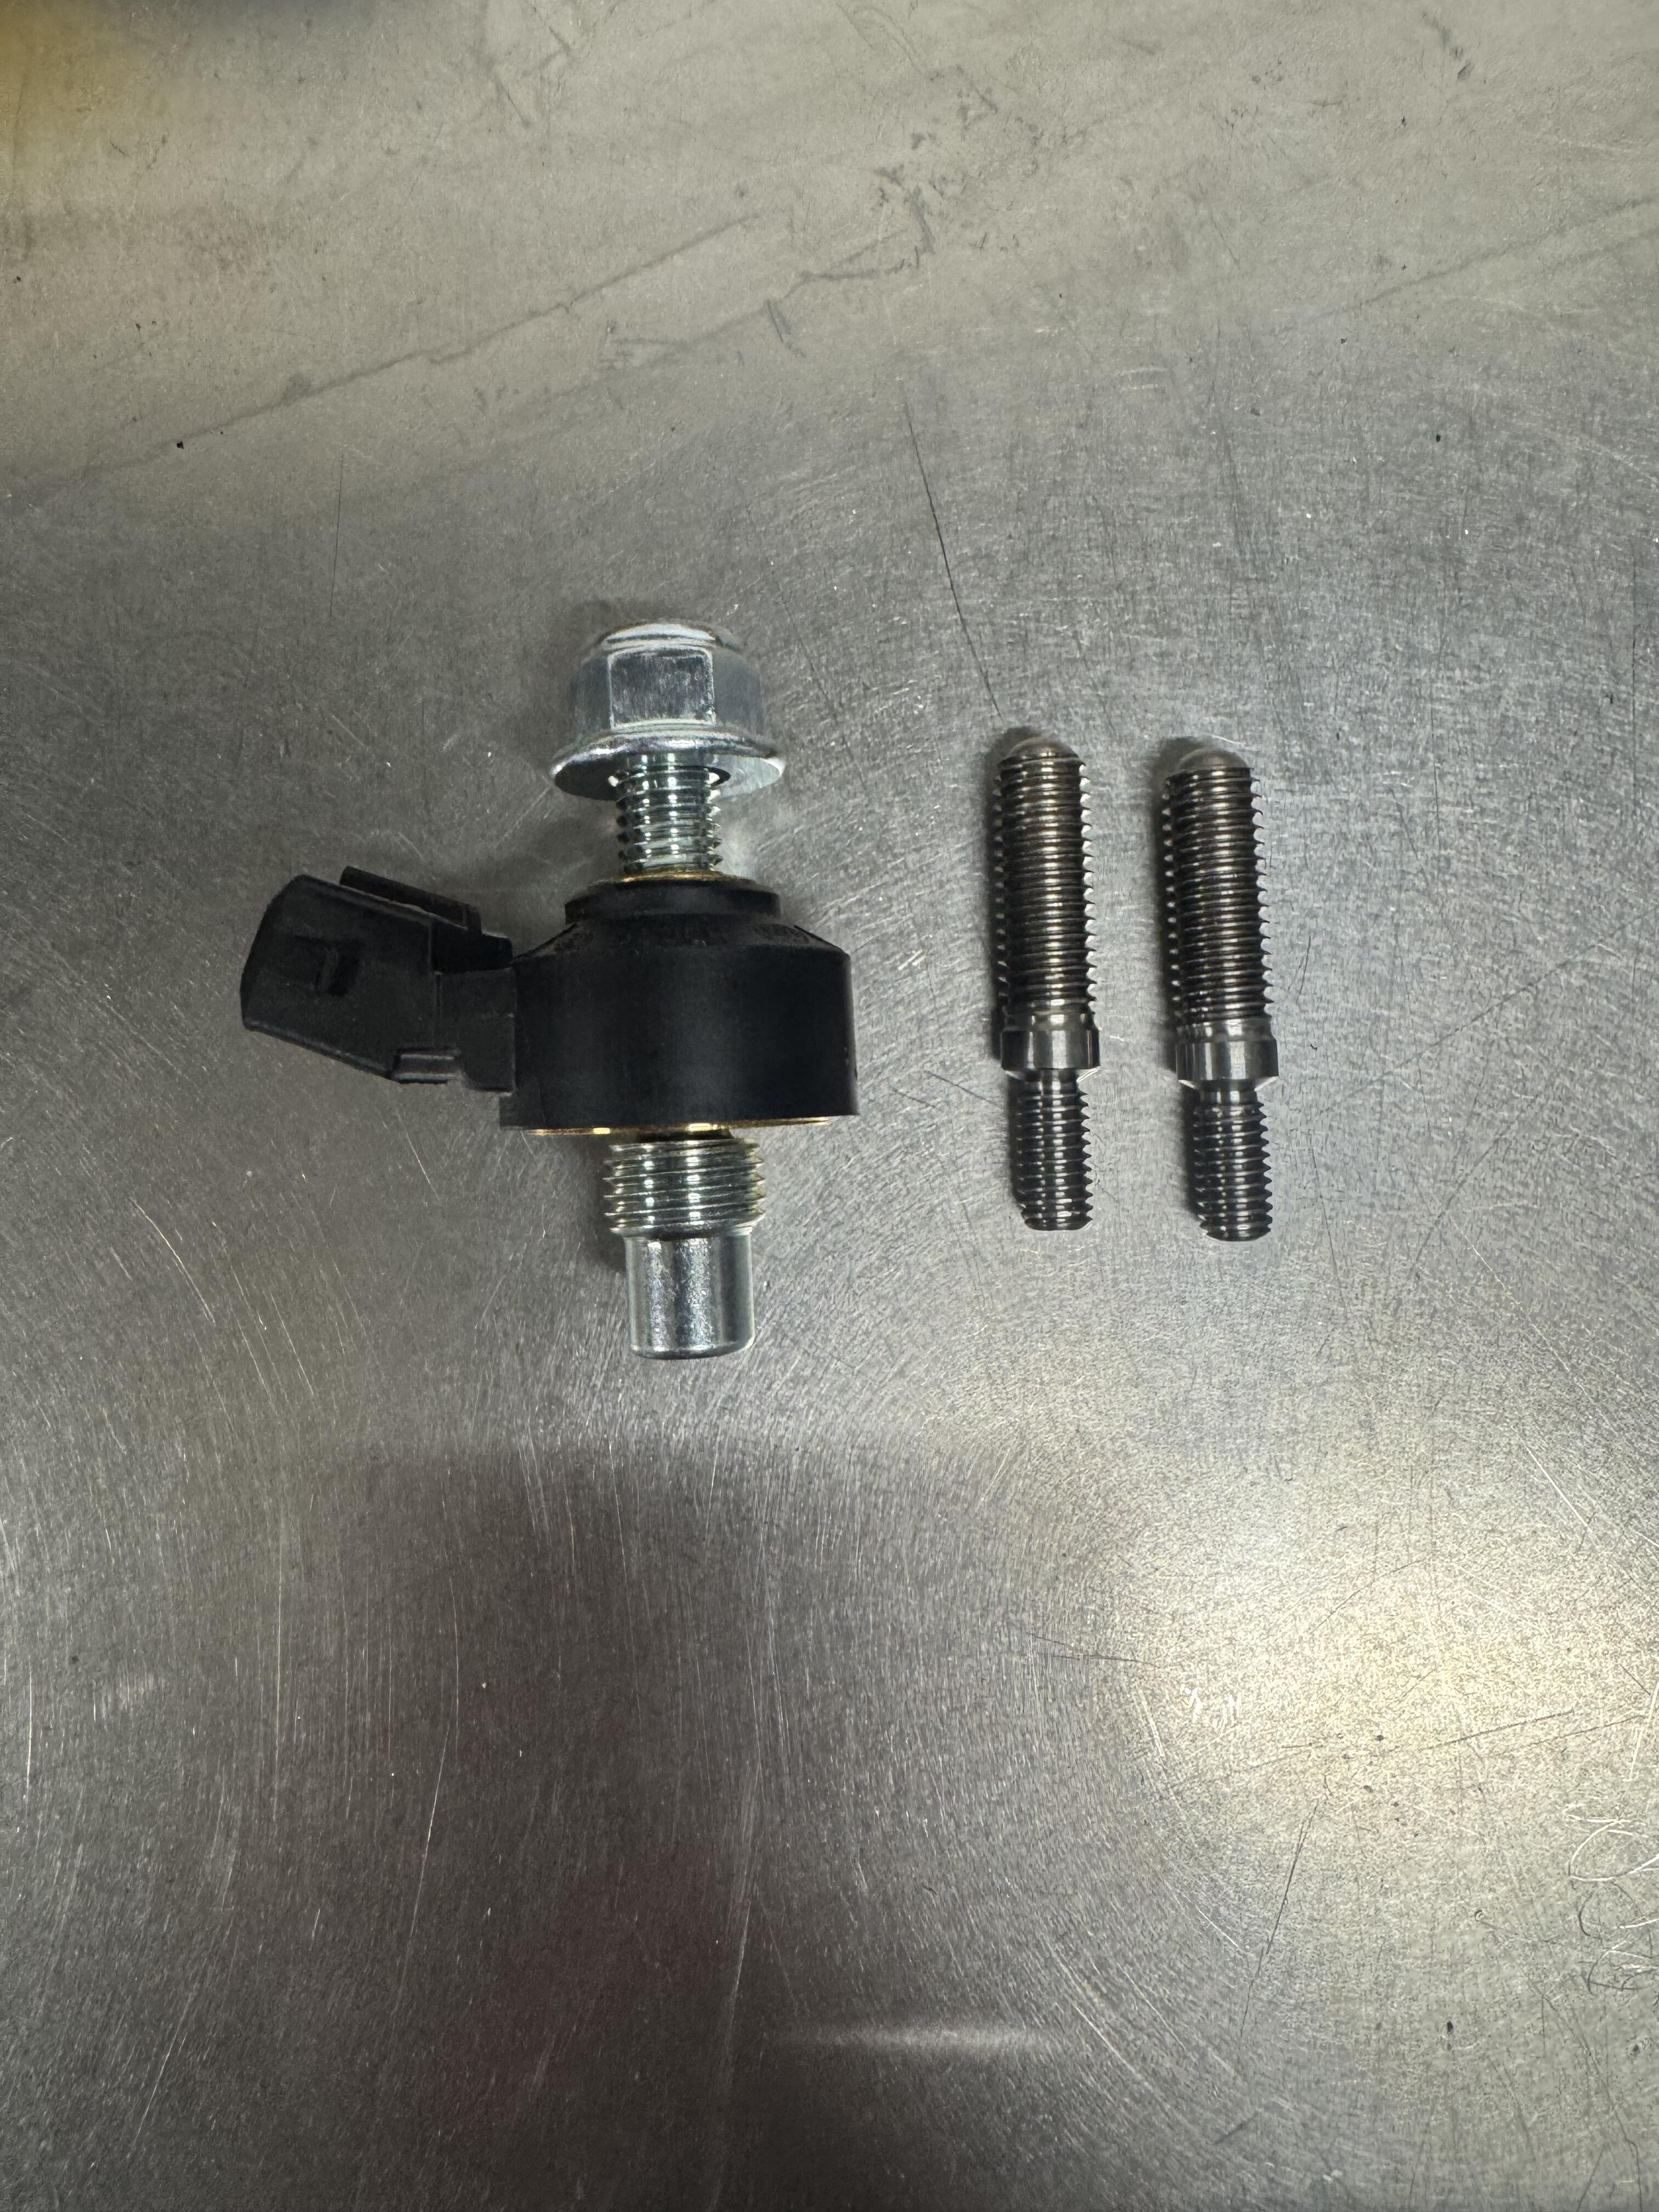
My friend Andrew just rebuilt this motor and has been working on this historic Z race car. Pretty epic Custom grade 5 titanium studs of my design. I am so tired of installing the old studs and I hate the look of the allen ones. I designed intake, exhaust, my intake balance banjos, knock sensor stud, stack studs and my intake intake/ throttle studs! The flat spots work perfect with a box wrench. I also love the look of a rounded tip on a stud. I think they came out awesome, after testing I will be selling. I bought enough, that they should be fairly cost effective as well.

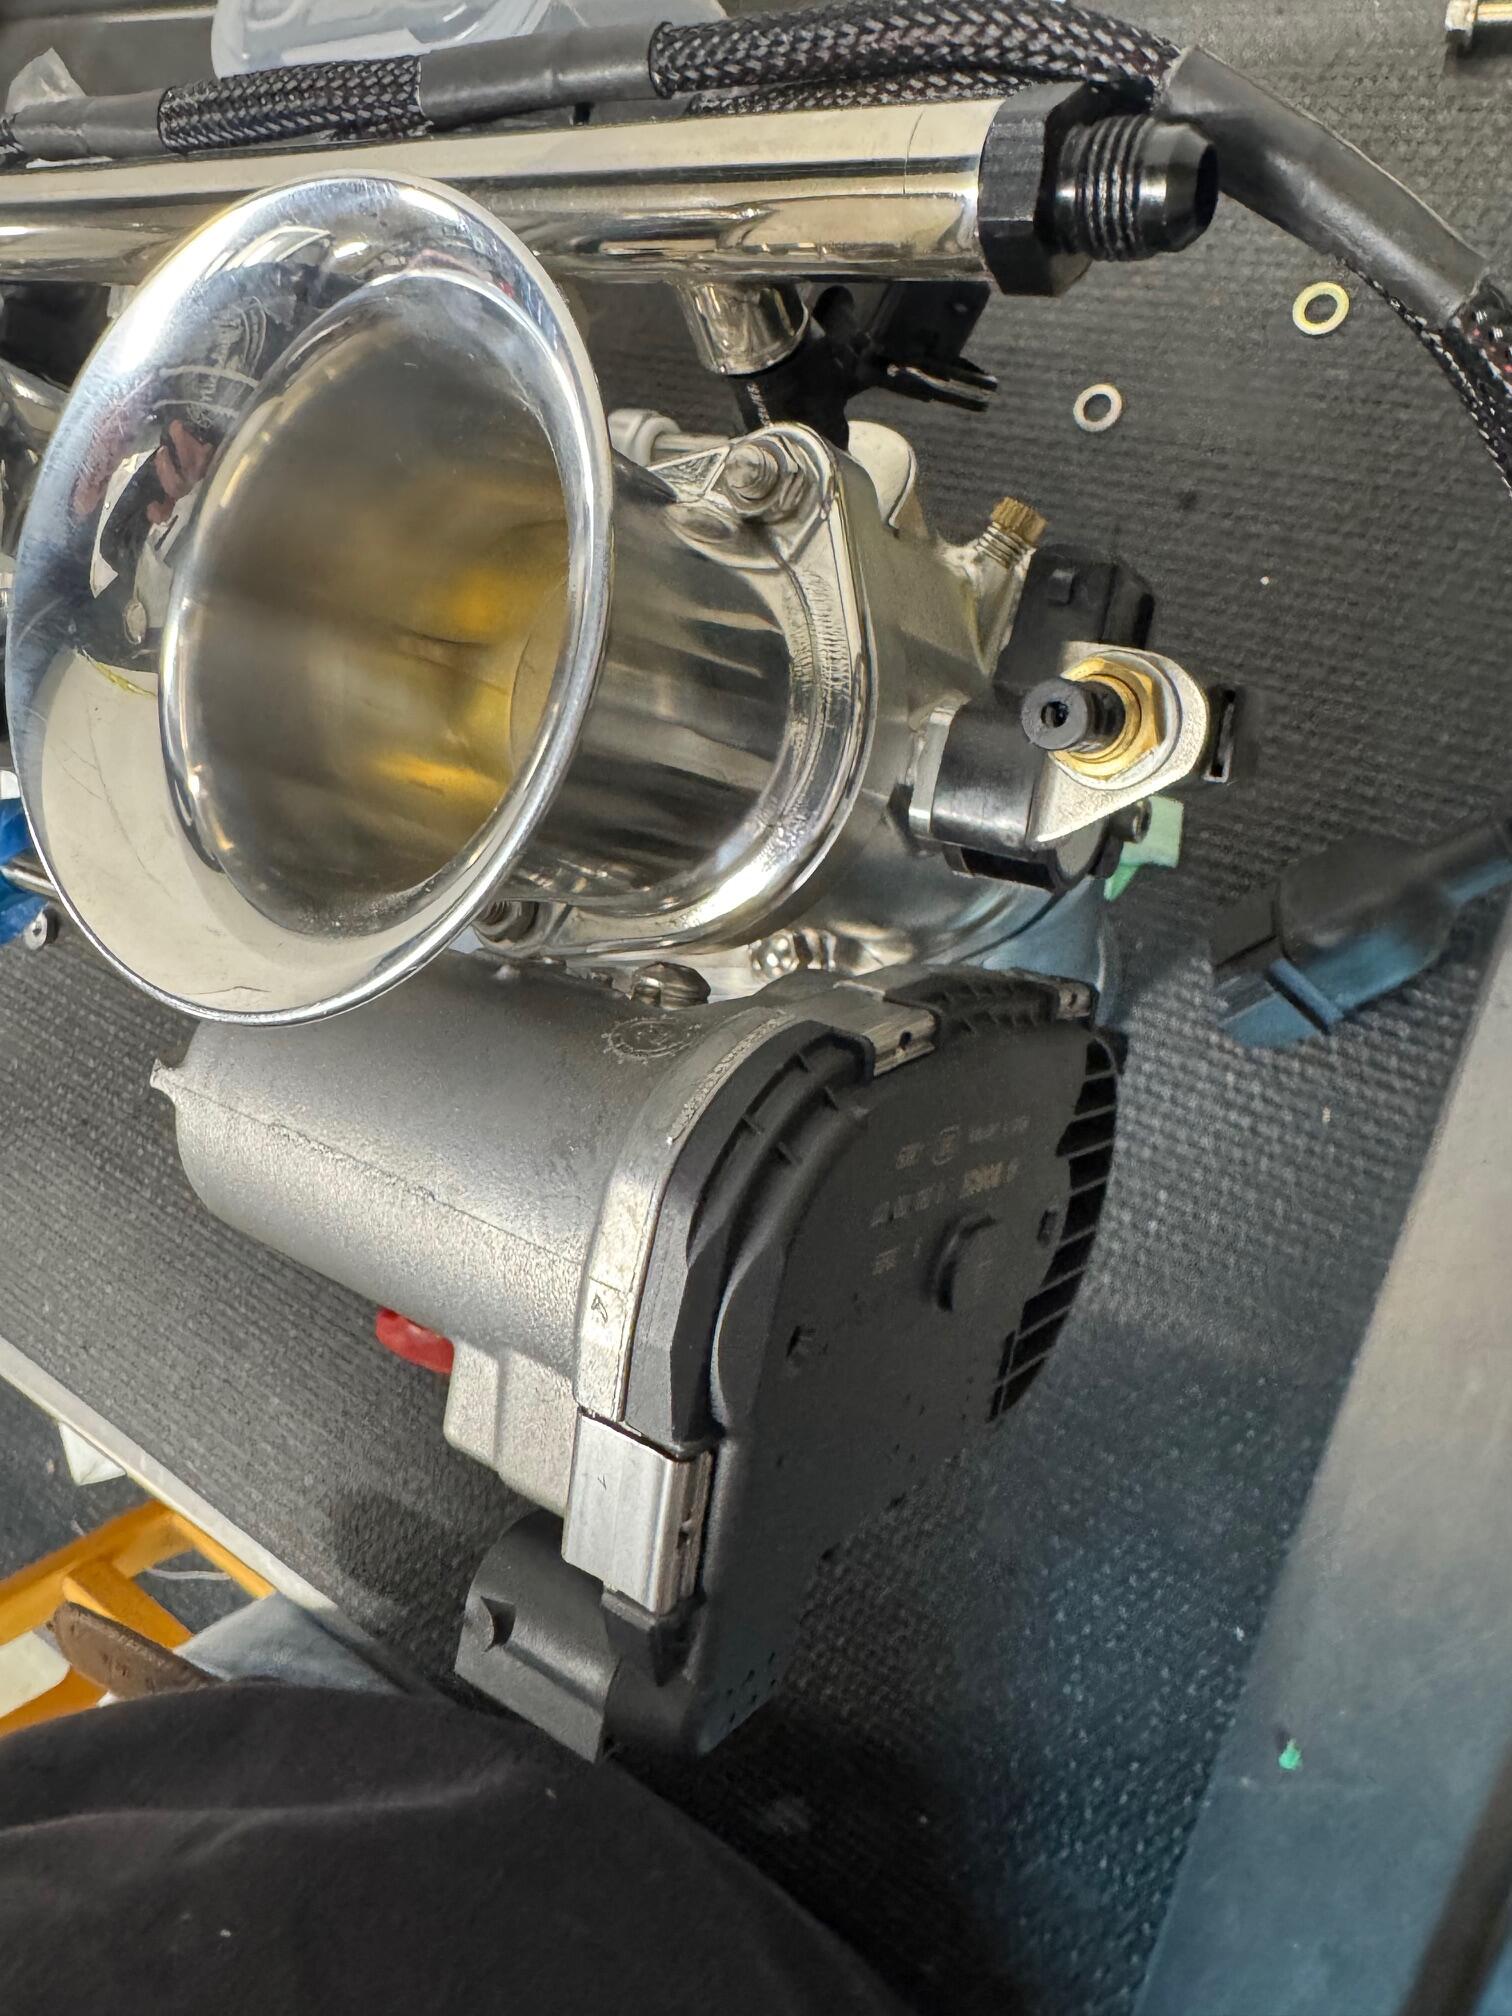
 Well drive by linkage is fast and accurate. Pretty darn stoked. I might try a few more actuators. Since the one I picked is being discontinued (BMW S54 13627840537) This should make anyone doing ITBs life much easier. Cold starts, traction, AC, intelligent throttle curves. This is just hooking it straight to a 12v source. So it’s just on or off. Actually when wired to the ecu, closing will be faster. This is returning via springs. When hooked up to the ecu. It’s powered open and closed.
 Juan Sanchez is a real dude, I have bought and sold stuff to him.
Rebuilding doesn't take that long. It really depends on how deep you go and how crusty they are. Are circuits need to be cleaned and checked, new seals. Most of the rebuilders vapor hone, new zinc hardware, new gaskets, new butterflies and shafts. I would guess its about 1 hour to dissemble all 3. Then around 1 hour to put them back together very well. The other steps would depend on a bunch of factors.
Juan Sanchez is a real dude, I have bought and sold stuff to him.
Rebuilding doesn't take that long. It really depends on how deep you go and how crusty they are. Are circuits need to be cleaned and checked, new seals. Most of the rebuilders vapor hone, new zinc hardware, new gaskets, new butterflies and shafts. I would guess its about 1 hour to dissemble all 3. Then around 1 hour to put them back together very well. The other steps would depend on a bunch of factors.


.jpg.862d22e935079351b0c4aa8794f63de5.jpg)


.jpg.ecd2b560e9040719b2bf13cf0ecbc791.jpg)
.jpg.6db2d22fe4bafaa7d30bfd9d60520708.jpg)
.jpg.af1a8871eebf2d7767bafbab68377f57.jpg)


Important Information
By using this site, you agree to our Privacy Policy and Guidelines. We have placed cookies on your device to help make this website better. You can adjust your cookie settings, otherwise we'll assume you're okay to continue.