Locke
Free Member
-
Joined
-
Last visited
-
Fuel delivery was the issue. Replacing the filter fixed it for a while, but it’s back to having trouble starting. I’m guessing more gunk from the gas tank made it throughout the fuel lines and is choking it out, so I’m having a shop clean out the tank and clear the lines. That being said, it looks like all electrical issues are resolved. I’m very grateful to everyone for their comments and helping me fix the issues!
-
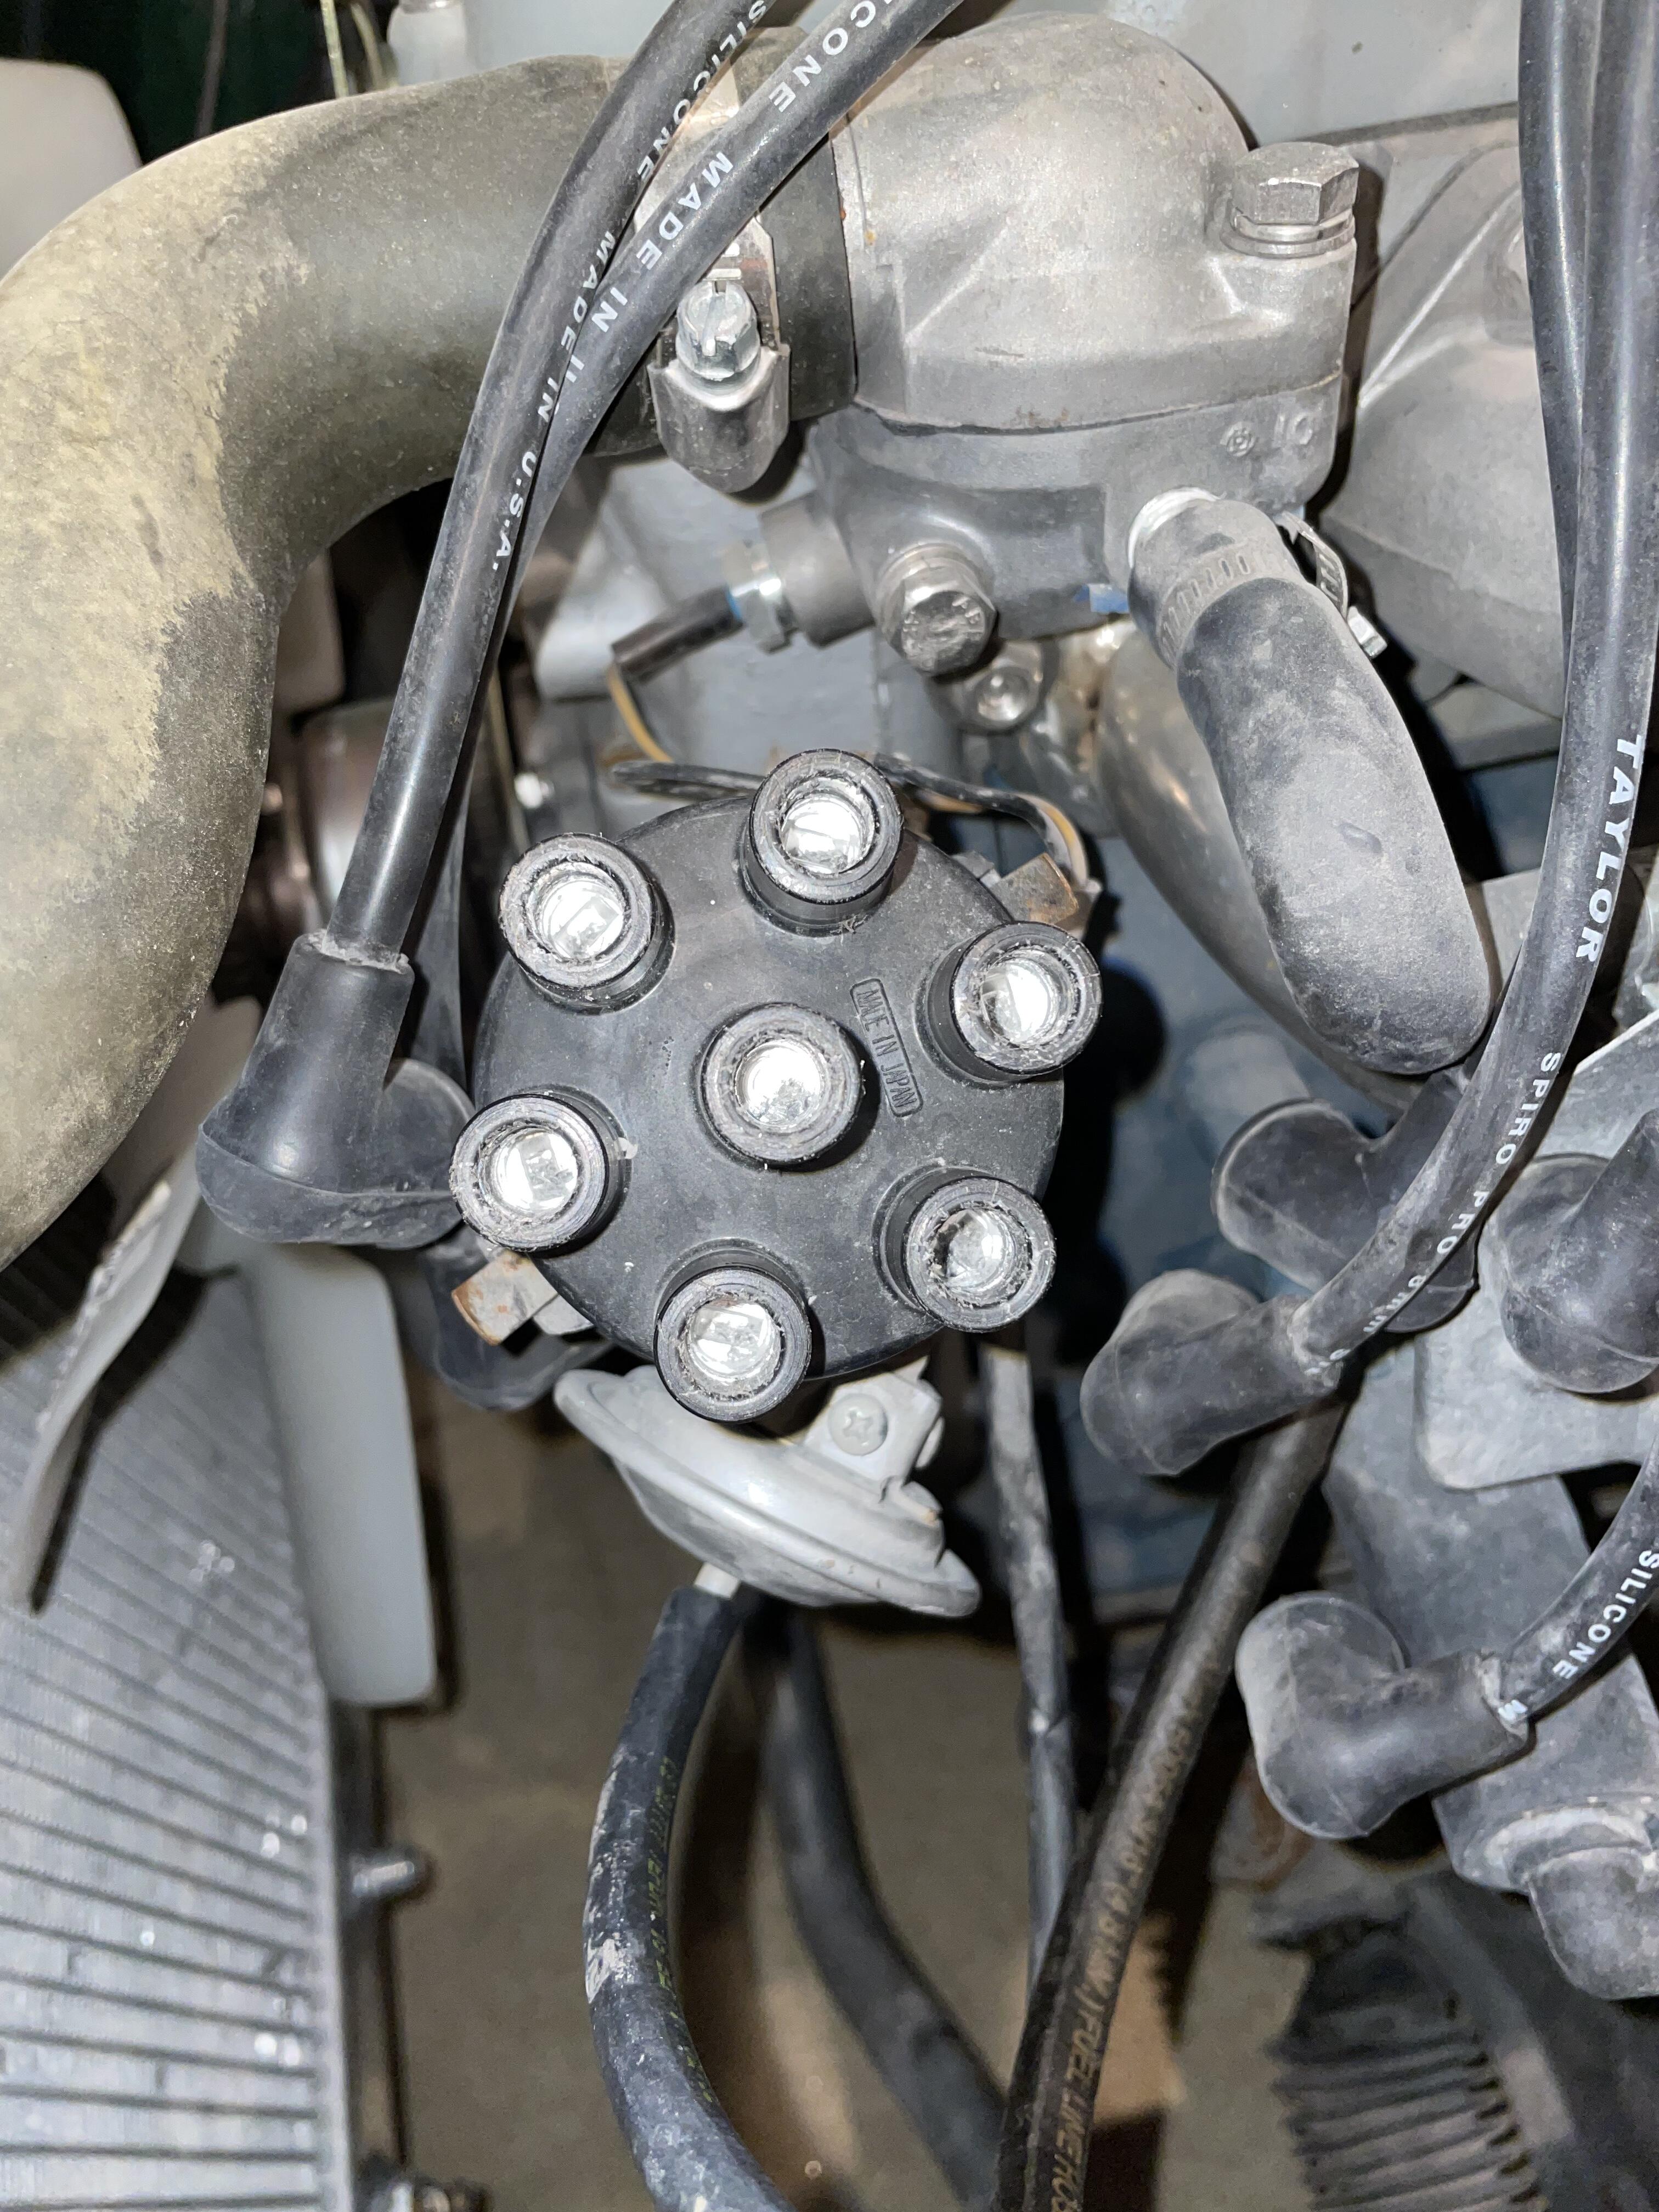
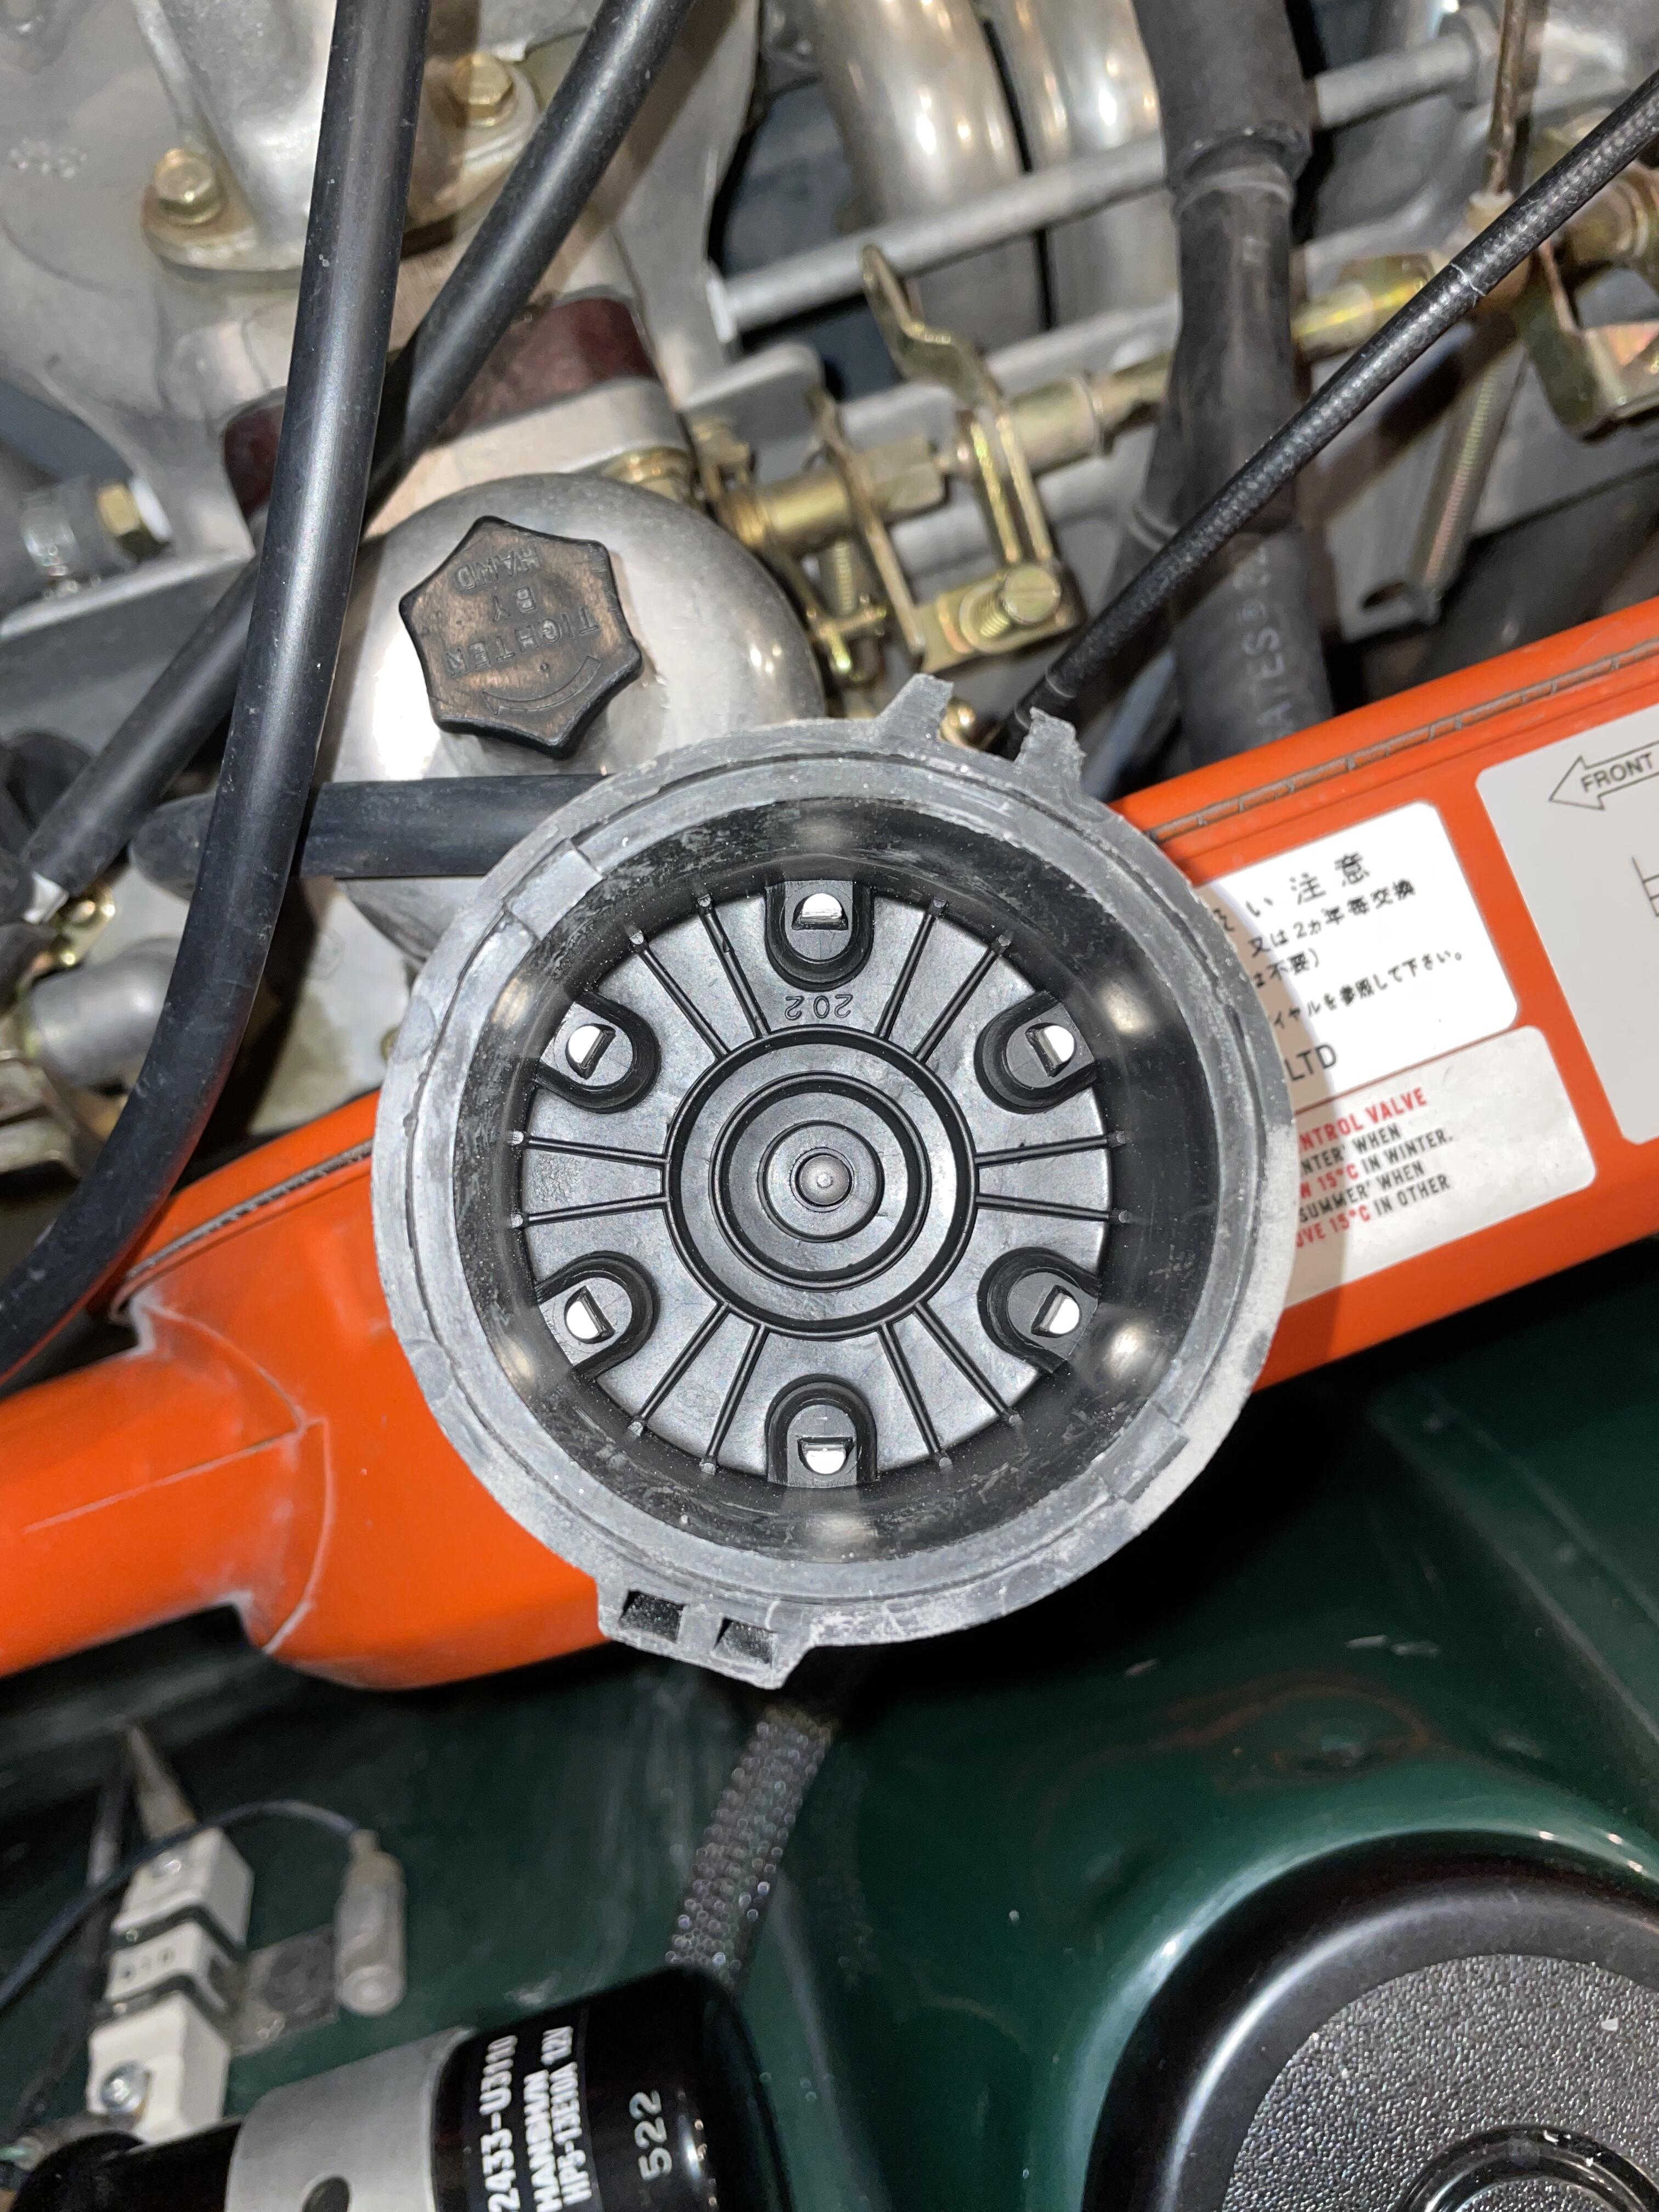
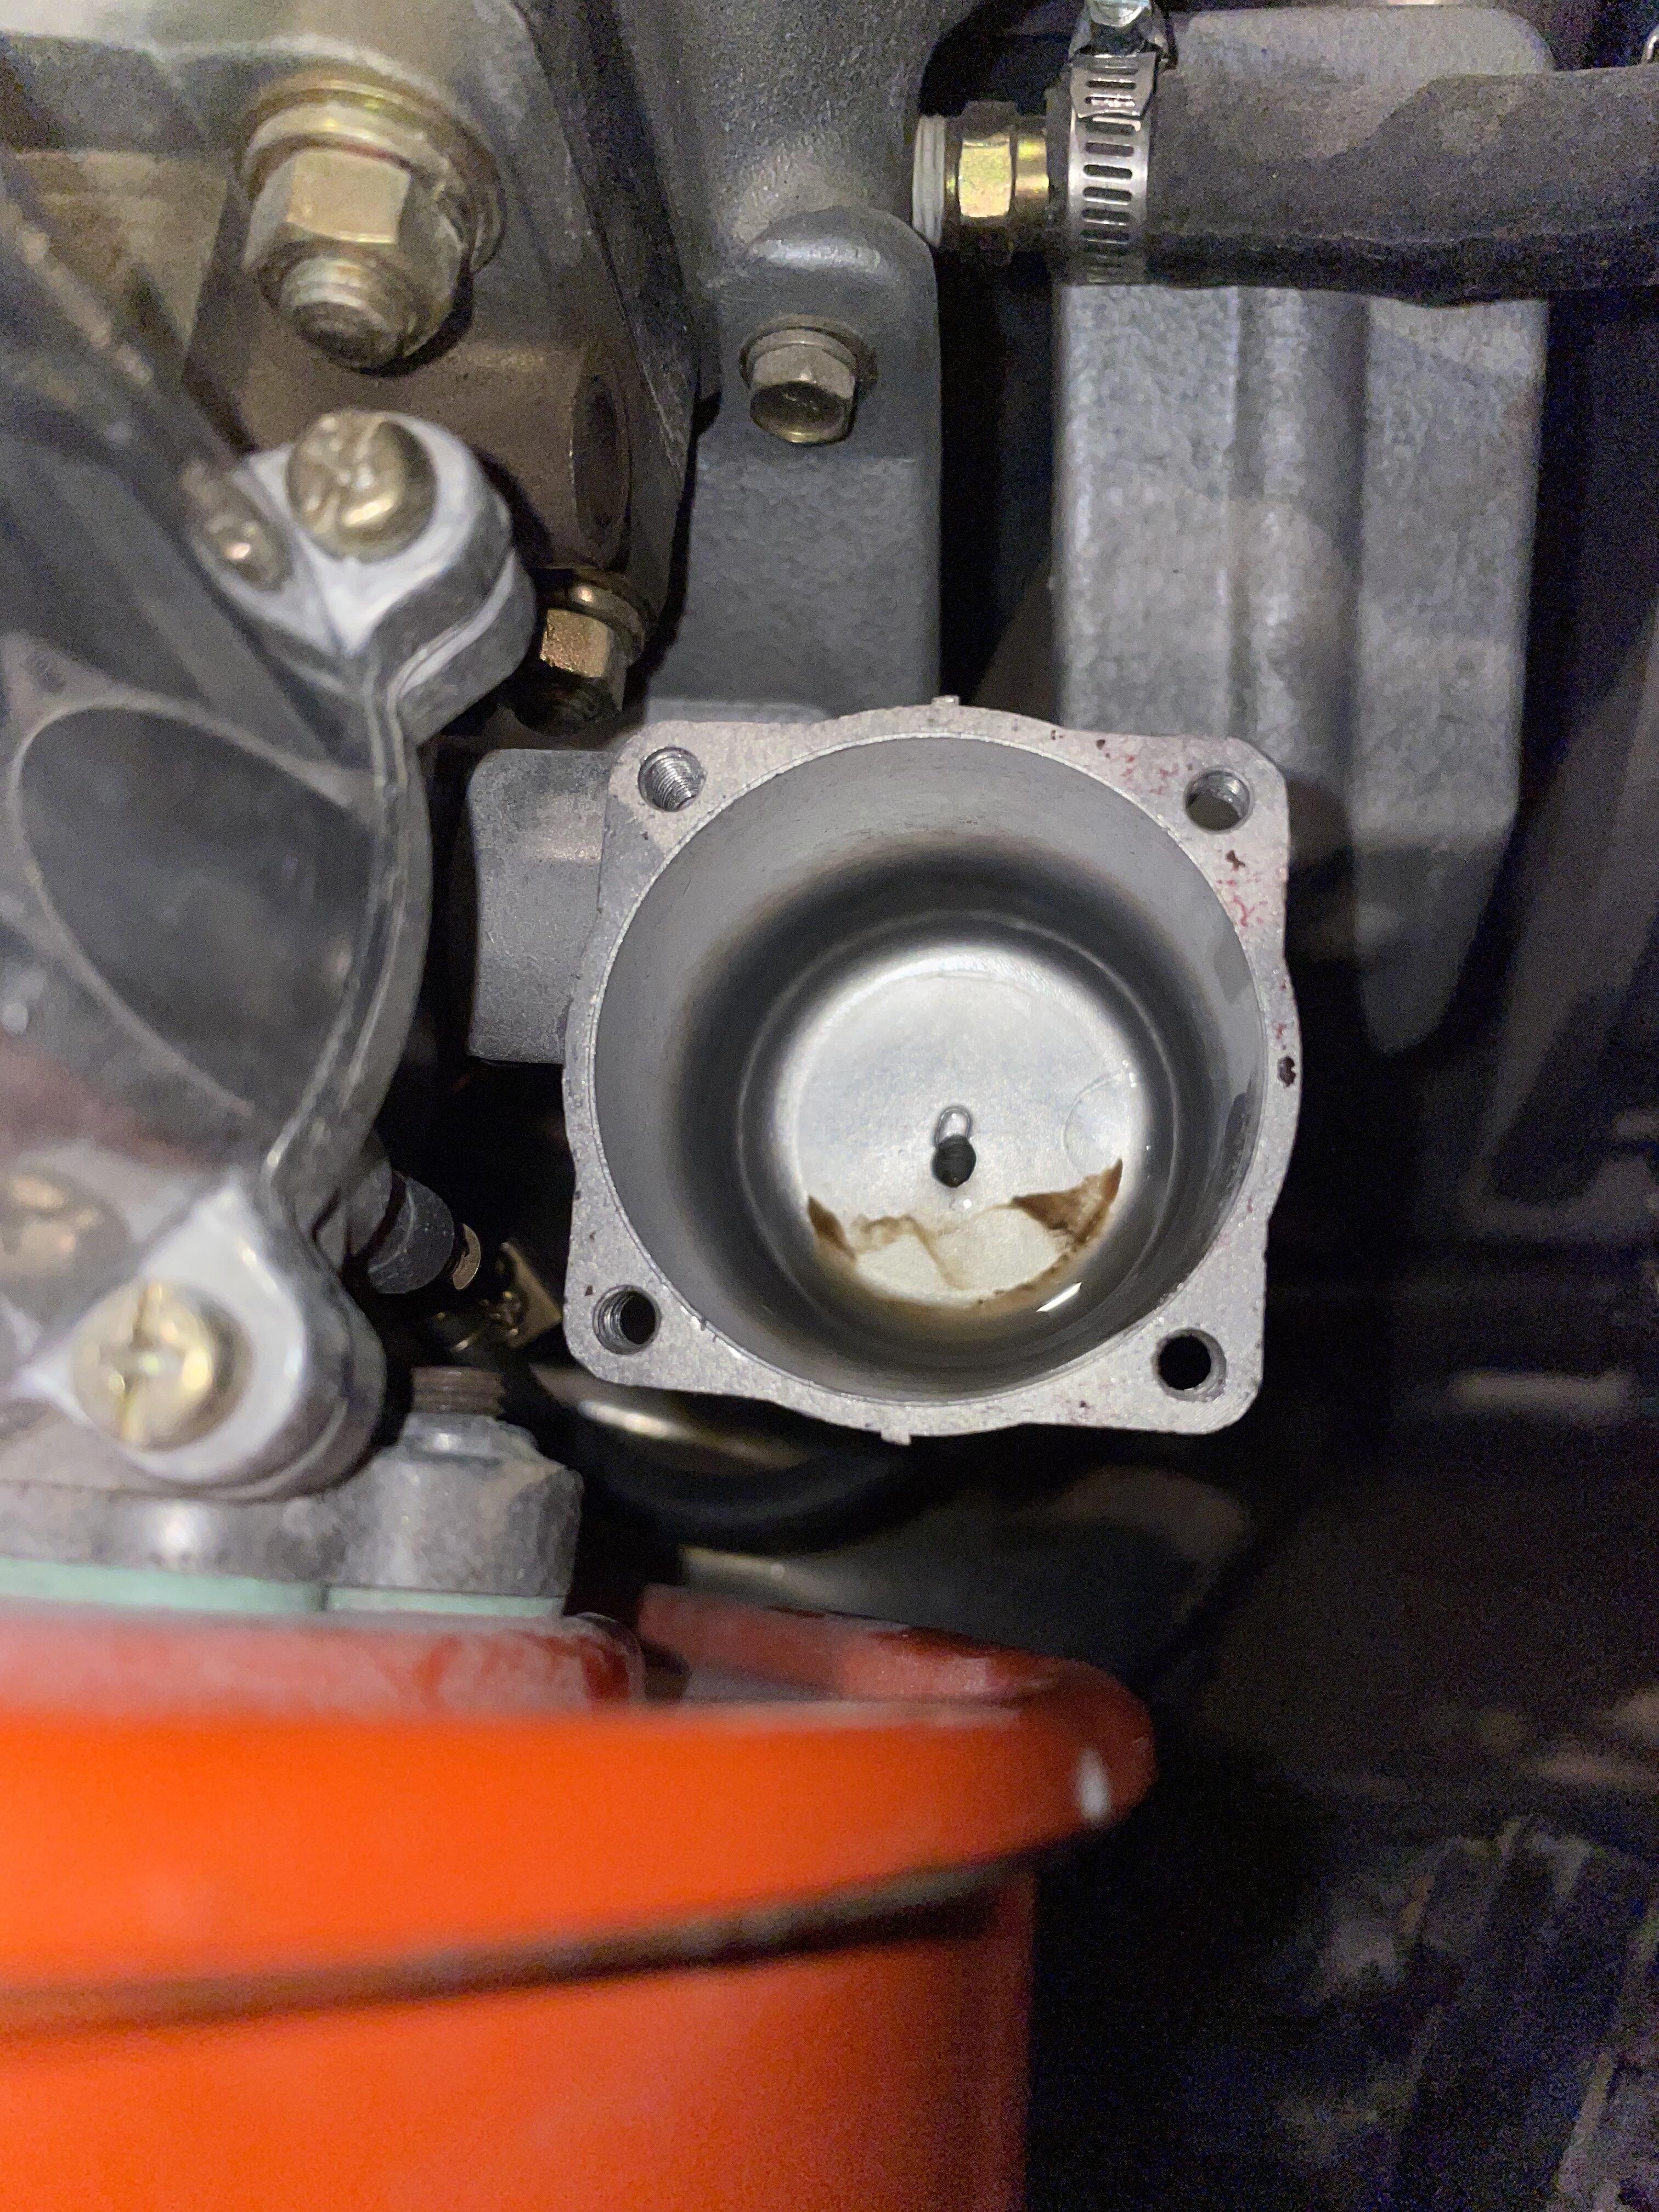
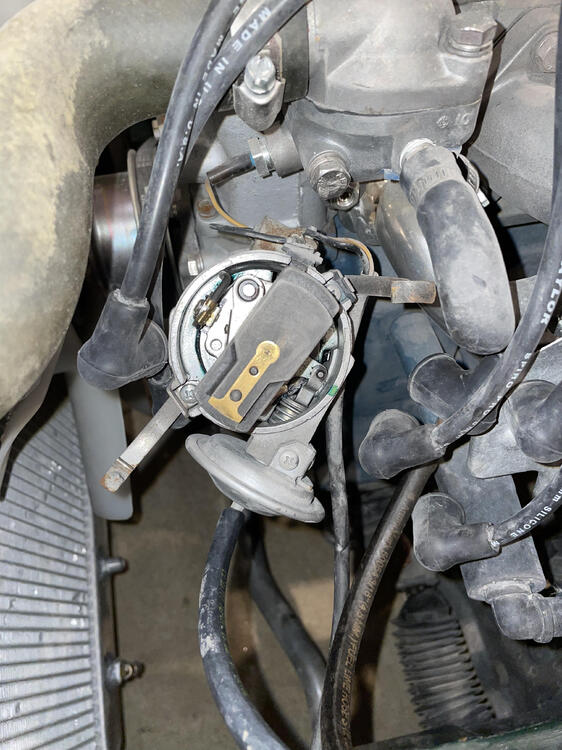
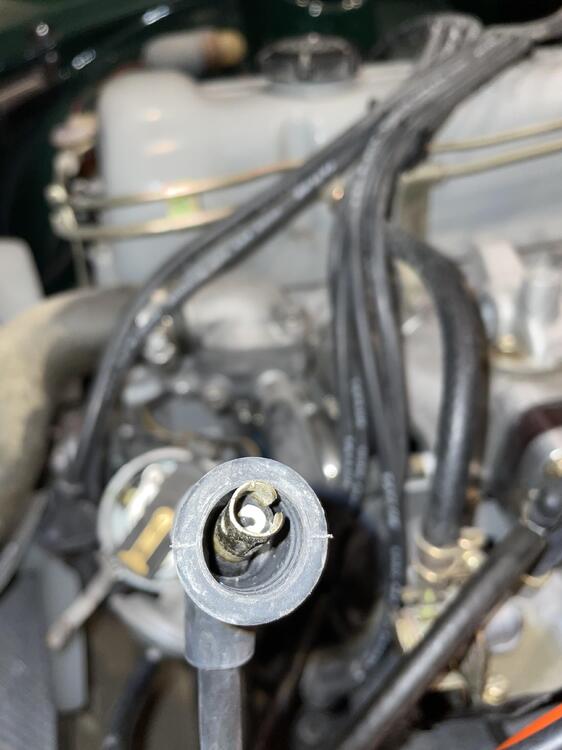
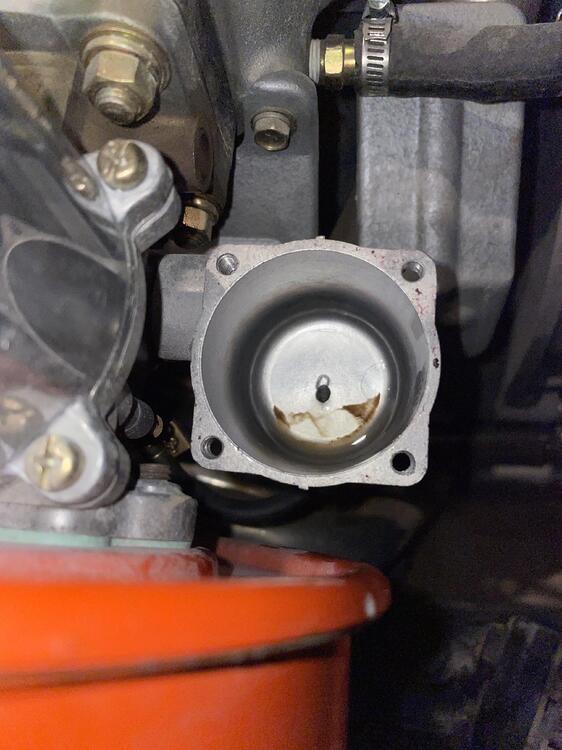
Sorry for not including this earlier, I have the original points system. When I remove the wire from the negative post on the coil, the reading on the positive post while the key is turned to ON is 12.4VDC. Putting the negative wire back on brings the reading to 5VDC again. Here’s a couple of pictures of the cap and rotor: To my eye, everything looks relatively sound (i.e. no burnt contacts) but you may tell me otherwise. The only thing that concerns me are the weird plastic shavings inside the connectors on top of the distributor cap. Also, my wires looked a bit odd in my opinion: I don’t have any starting fluid on hand, so I haven’t tested that yet. When I removed the lid on both float chambers they were virtually empty with a tiny puddle of gasoline at the bottom of each: Should they always hold gas even when the car hasn’t been cranked recently? If so this may be the cause of the issue. I noticed that my fuel filter has a decent amount of debris at the bottom. I’ll try swapping it out and let you know if that changes anything.


-
2 steps forward, one step back… I spent the last few days ensuring the wiring throughout the car wasn’t corroded or broken. Everything looked alright. The new fuse box came in yesterday, and upon installing the brake lights worked perfectly. Great! Thanks to everyone for their help with solving the issue. Except now I have more problems— This morning I cranked the car and left it idling while I grabbed a few tools from the shed. When I came back, it had died. I thought maybe I had let the choke back in a bit too much and tried to crank it again. Now the car will not start, and just cranks repeatedly. I’ve done a few diagnostics to try and narrow it down, but my knowledge of the ignition system is admittedly limited. With the key in the “On” position, I only get about 5VDC between the positive post of the coil and ground on the chassis. I’ve read that this should be 12VDC. I also tried a test I found on another forum post. I pulled the coil to distributor wire on the distributor side and laid it on the intake manifold. I then used a small wire with one end on the positive post of the coil and tapped the other end to ground. I read that this should create spark at the end of the coil to distributor wire, but I saw none. While turning the key to start, I tested for spark along all my wires using a timing light. Each of the wires (including from coil to distributor) made the light flash, but not at a regular interval. It seemed like it was skipping a bit. I should probably make a new thread for this since the brake lights now work, but I wanted to check and see if it’s possible that these issues are related to the new fuse box? If not, what are the likely culprits for such low voltage going to the coil? Thanks again to everyone for their help. I’m happy to provide any more info I can.
-
Thanks so much, with your help I think I've narrowed down the issue to the fuse box. I measured and found that the resistance across the contacts of the fuse labeled "Flasher" is incredibly high (around 85 ohms). I'm guessing that flasher means the hazards (correct me if I'm wrong). In the above pic of the back of the fuse box, you can see a huge black glob on the other side of the contact for that fuse. It also looks like the green wire under that glob that supposedly connects to the contact isn't connected to anything. I've just ordered the MSA upgraded fuse box, so once it is delivered I'll install it and report back.

-
Quick update— I’ve measured and confirmed that there is 0 ohms of resistance between the white/black and green/yellow as well as white/red and green/yellow on the TS switch. With the TS switch unplugged, I again confirmed that I get 12v on the dash side of the green/yellow wire when the brake is depressed. I followed your suggestion and connected the pins from the green/yellow to the white/red using a piece of wire on the dash end of the 6-pin. When they are connected and I press in the brake pedal, neither tail light lights up and there is 0v across the wire connecting the two pins. I removed the white/red end of the wire and measured again and found that I still get 12v upon pressing the brake when it is only connected to the green/yellow (just to confirm that the wire is seated properly and works). I repeated this test with the pin for the white/black wire and got the same results. This leads me to believe that the issue is downstream of the TS switch in the brake light circuit. The only thing that confuses me about this is that the rear lights work perfectly when using the blinkers. Does this have something to do with the fact that the brakes use an additional bulb compared to the blinkers/running lights?
-
My apologies, I must be misunderstanding your first response. What other tests would you like me to report back on? Also, when I say that I get 12VDC on the green/yellow wire when the TS switch is unplugged and I press in the brake, I am measuring on the dash harness side. There is 0VDC on the switch side of the green/yellow when it is not plugged in (so it is not cross connected to anything). Thanks again for the help
-
Thanks for the reply and your help! I've just gotten the car back from the shop after a full restoration, so the brakes haven't worked since I've had it. I've also spent the past several days on that FiddlingWIthZcars post (love the diagram on there). When measuring the voltage, I'm putting one lead on the pin connected to the green/yellow wire in the 6-pin connector and the other on a bolt connected to the body (ground). Here's where it gets confusing: I do get a 12VDC reading on green/yellow when depressing the pedal if the 6-pin connector is not plugged into the TS switch (measuring through the front of the connector). When I plug the 6-pin into the TS switch and measure at the same spot (by back-probing the connector), I no longer get the 12VDC upon pressing the pedal. Additionally, I've cleaned the rocker for the brake lights and ensured there's no resistance-- and that they make proper contact with the leads for the rear lights in the combo switch (as your picture shows). I currently have the TS switch plugged into the car, but with the combo switch disassembled so that I can see the electrical contacts (as in your picture) and physically maneuver them. The blinkers still work in this configuration when I physically tilt the teeter-totter to contact the leads for a particular side. When I ensure that the brake rockers are contacting the rear light leads, I still get 0VDC across the rocker whether the pedal is depressed or not. However, when I use my fingers to pull back both sides of the brake rocker so that they don't contact the leads for the rear lights, I get a proper 12VDC across the rocker when the brake is depressed and 0VDC when it is not. TLDR: I am getting 12VDC on the green/yellow wire if the TS switch is unplugged and the brake is depressed, but get 0VDC on the wire once the switch is plugged in. If I don't allow the brake rocker in the combo switch to contact either plate connecting to the rear lights, I also get 12VDC when the brake is depressed. As soon as the brake rocker makes contact with the leads again the voltage drops to 0.
-
I've spent the past day cleaning the turn signal switch contacts on my 1970 240z to fix some electrical issues. The left/right blinkers now work, but I'm still having trouble getting my brake lights to work. After installing the cleaned TS switch, the brake lights worked initially but then stopped working-- so I tore it apart again to make sure that the contacts connecting the signal from the brake switch to the tail lights were clean. Upon reinstalling the switch they still do not work. I've confirmed that I get 12v on the green/yellow wire from the 6-pin connector that goes into the TS switch harness. I've also confirmed that when the TS switch is plugged in to the connector that I have continuity from the back of the green/yellow wire on the dash end of the 6-pin connector to the soldered end of the green/yellow wire on the combo switch. However, as soon as the combo switch is plugged in to the 6-pin connector I no longer get a 12v reading anywhere along the green/yellow wire. I then took the combo switch apart again and plugged everything in. I found that when the metal contacts in the switch from the brake signal to the tail lights were engaged that I always got 0 volts no matter if the brake is depressed or not-- and more interestingly, the brake signal has continuity to ground when these contacts are engaged. However, when I move the metal contacts off of the taillight connections, I get a proper 12v when the brake is depressed on the metal piece that the green/yellow wire is connected to. It appears that somehow the rear lights being connected to the brake signal somehow connects the brake signal to ground, meaning that the 12v coming from the brake switch never reaches the tail lights. I don't understand why this is happening when the rear lights function perfectly when using the left or right blinkers (so clearly the 12v from the TS flasher is successfully driven to the tail lights). Though the blinkers work, my hazard switch does not appear to work (I know that turn signals/brake lights are run through the hazard switch). Can anyone help me solve the issue with my combo switch before I give up and buy a new one? Thanks!
-
View Advert WTB Early ('70) Hazard Switch Looking for an early style hazard switch like the one pictured for my series one 240z. Advertiser Locke Date 05/19/2020 Price Category Parts Wanted Year 1970 Model 240z
-
The part number via a sticker on the gasket set is A0101-P142H (I assume that's what you mean by Stone number). On MSA where I purchased it, the code is 10-2401 Thanks for the info and recommendations everyone. As soon as the new gasket comes in and I swap it out, I'll take pics of what the head and block mating surfaces look like with all the sealer for the curious.
-
The gasket is made by Ishino Stone. I’ve ordered a new one and I think to be safe I’ll pull the head back off, clean up the sealer, and apply the new gasket dry. Or am I freaking myself out about a minor issue?
-
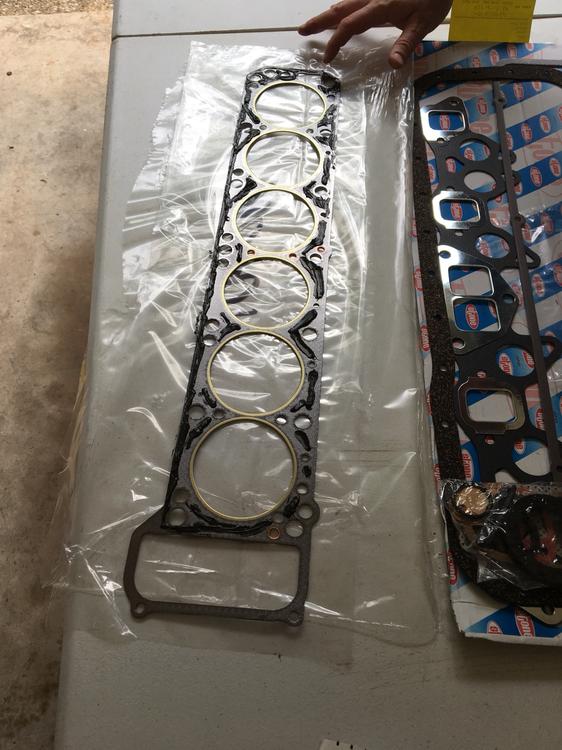
Yesterday I put my head on the block. The head gasket that I purchased from MSA didn’t have any notes about whether or not to use sealer, and after researching (briefly) online I seemed to find conflicting answers between those who apply head gaskets dry and those who use sealer. So, figuring it couldn’t hurt, I squeezed out some Permatex Non Hardening (no. 2) sealer onto both sides of my head gasket. Since then, I’ve been wondering if I screwed up by using this sealer on the head gasket in the first place or by applying too much. Here’s an image of how much I applied to the block side of the gasket. Is there a chance that this could cause issues by blocking oil passages or deteriorating the gasket itself? Any opinions would be greatly appreciated.
-
I'm interested. Sent a message
-
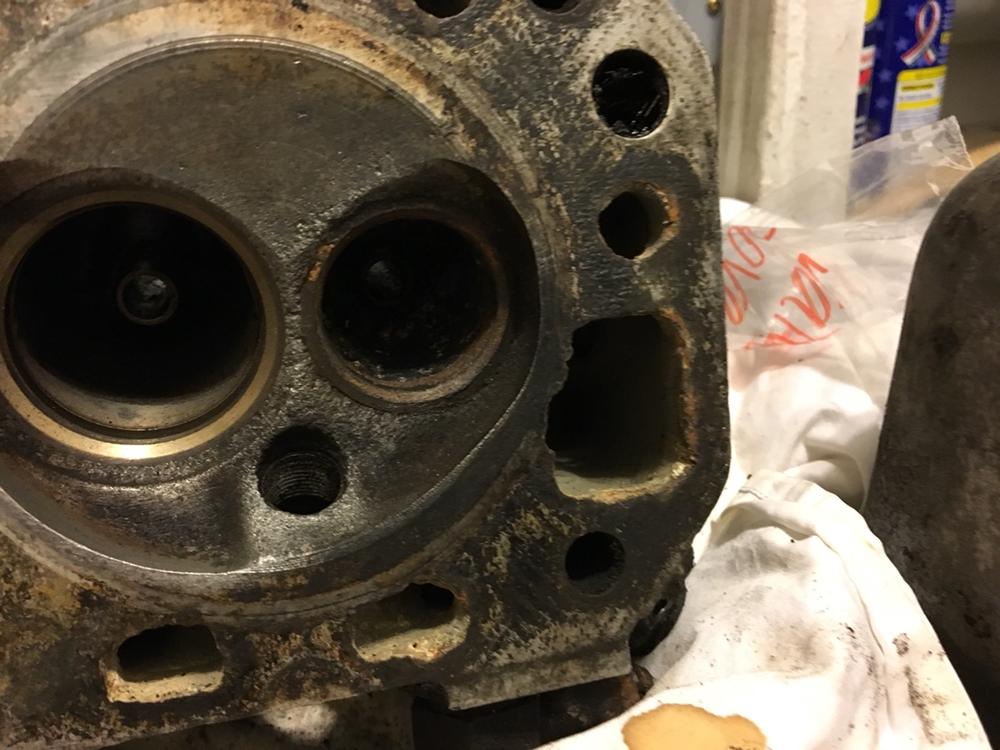
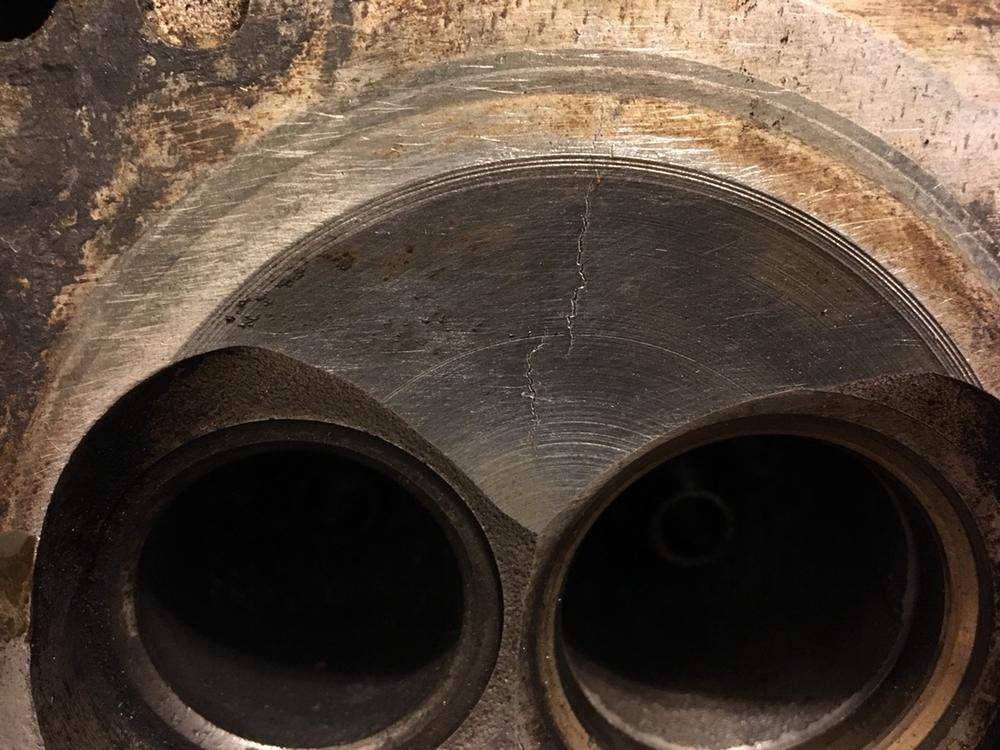
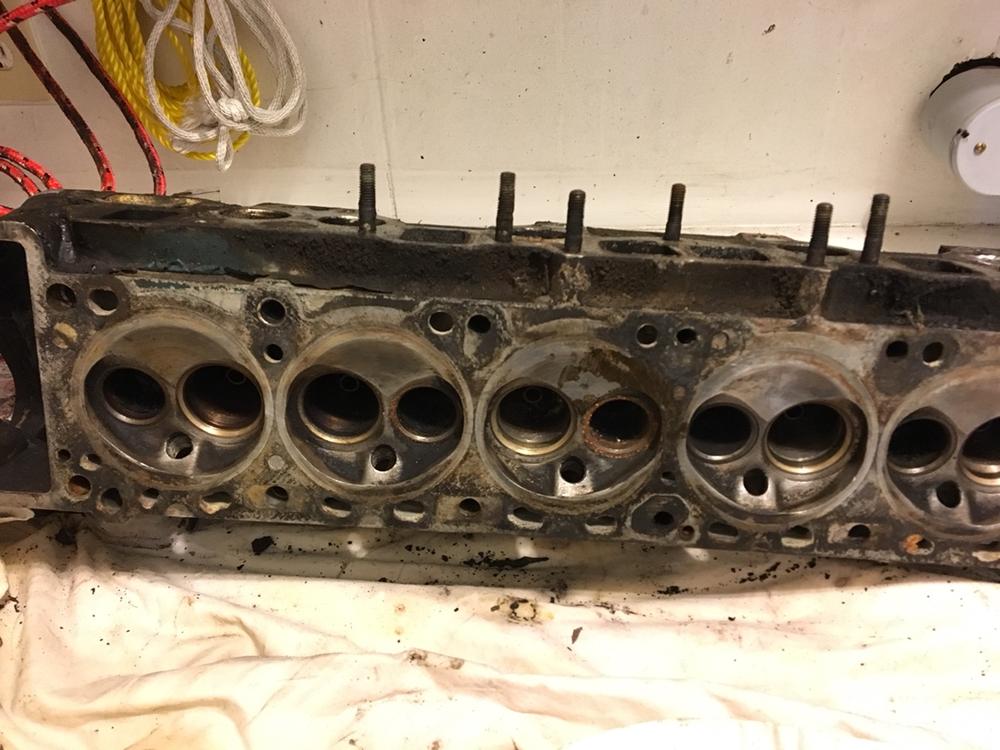
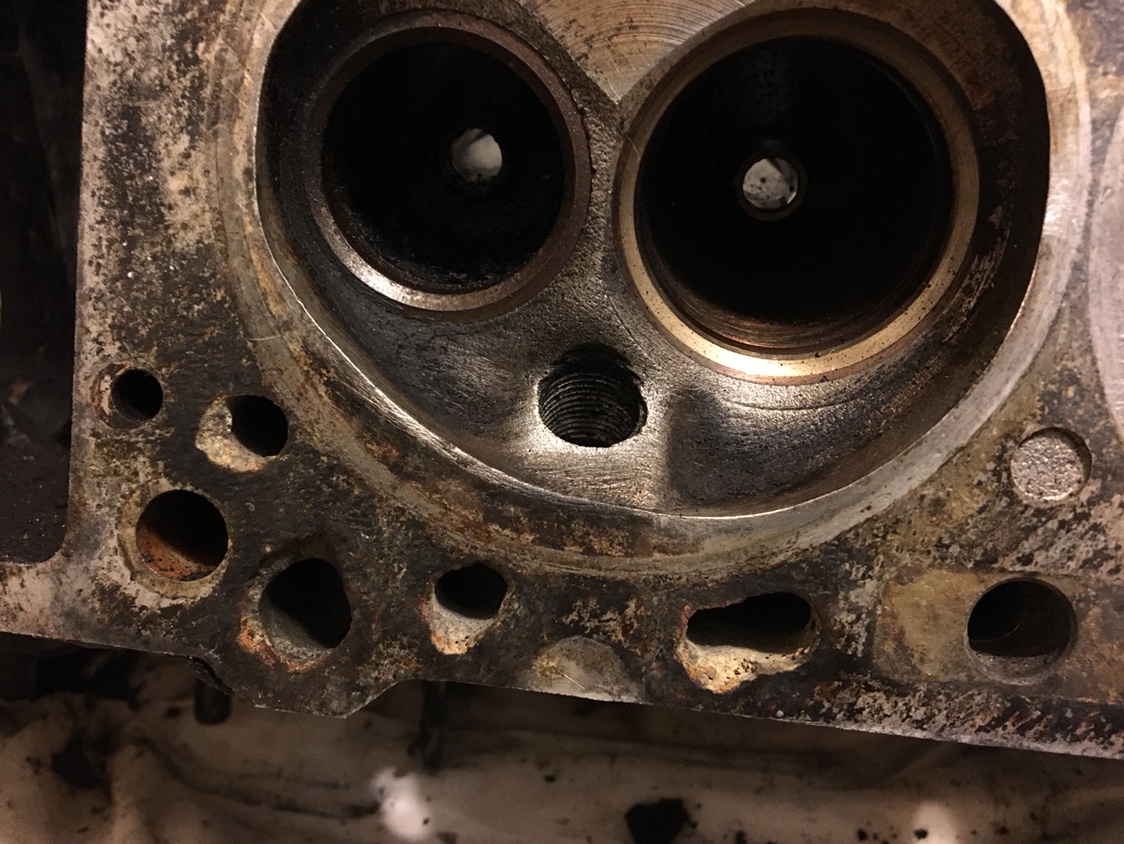
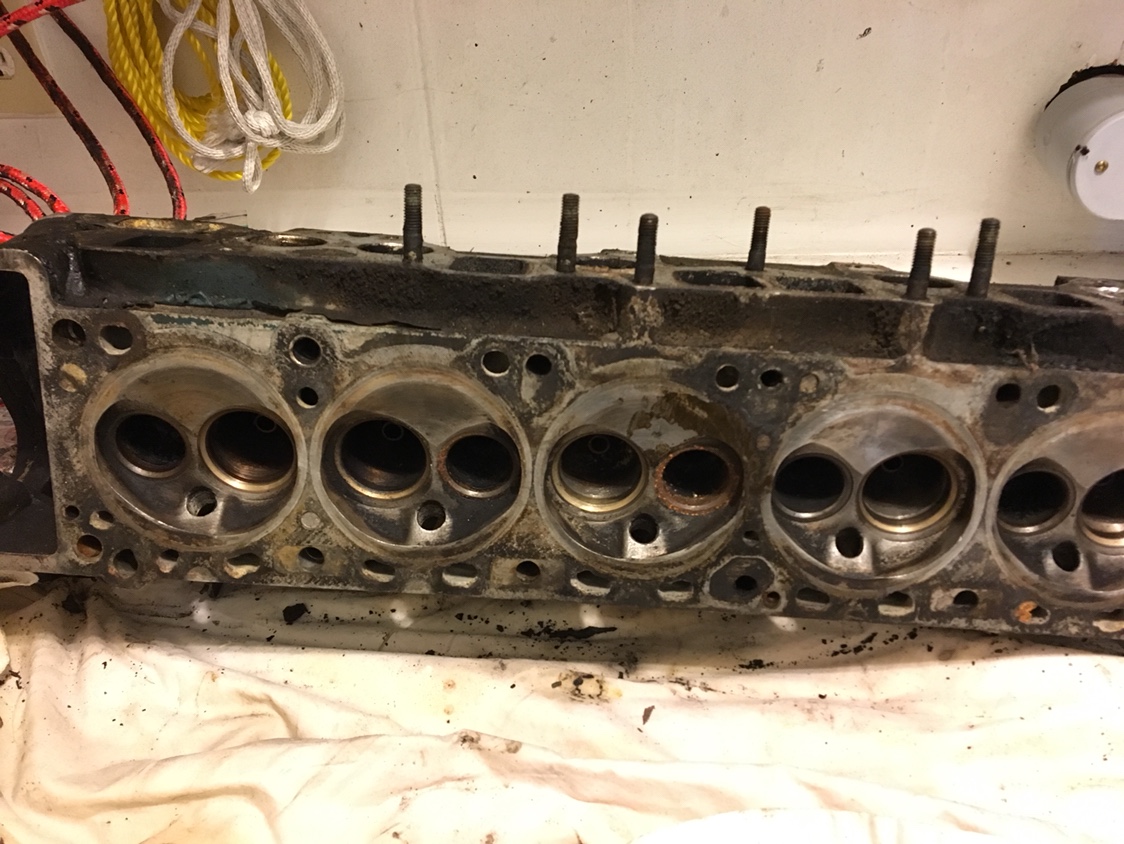
Yeah, I knew that the car had sat for nearly two decades and the seller said there was likely a blown head gasket but I never expected this kind of damage. Oh well. I've got a pretty clean N47 head that I may temporarily put on if I cannot find another E31 anytime soon.
-
Sorry for the delayed response. Here are a couple pics showing some of the damage.