


scotta
Free Member
-
Joined
-
Last visited
Everything posted by scotta
-
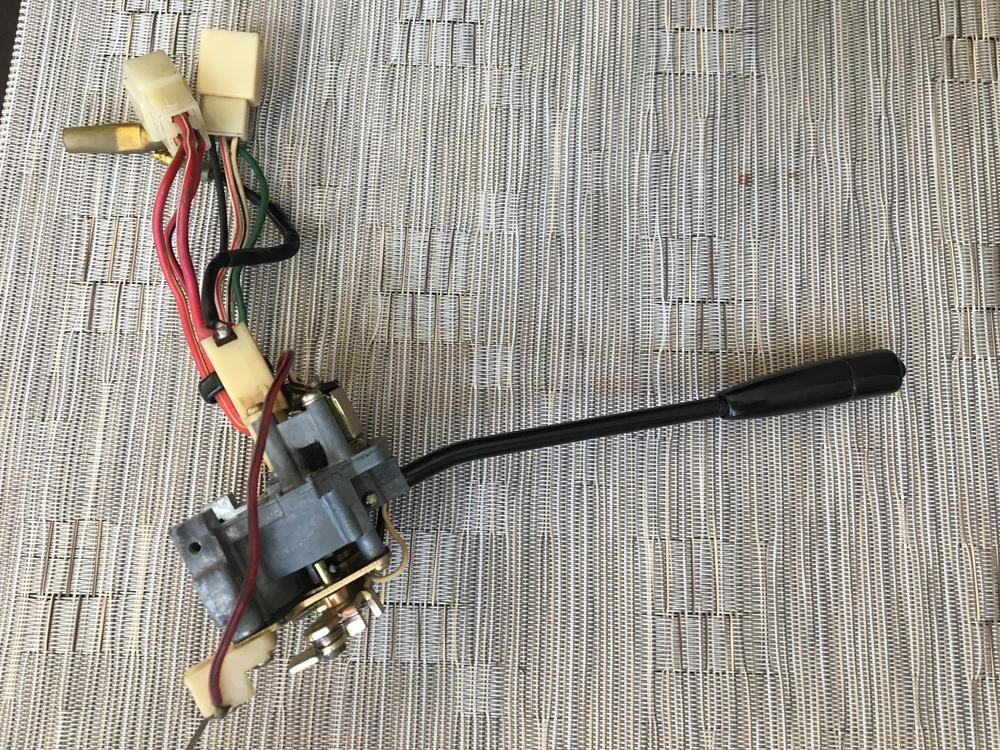
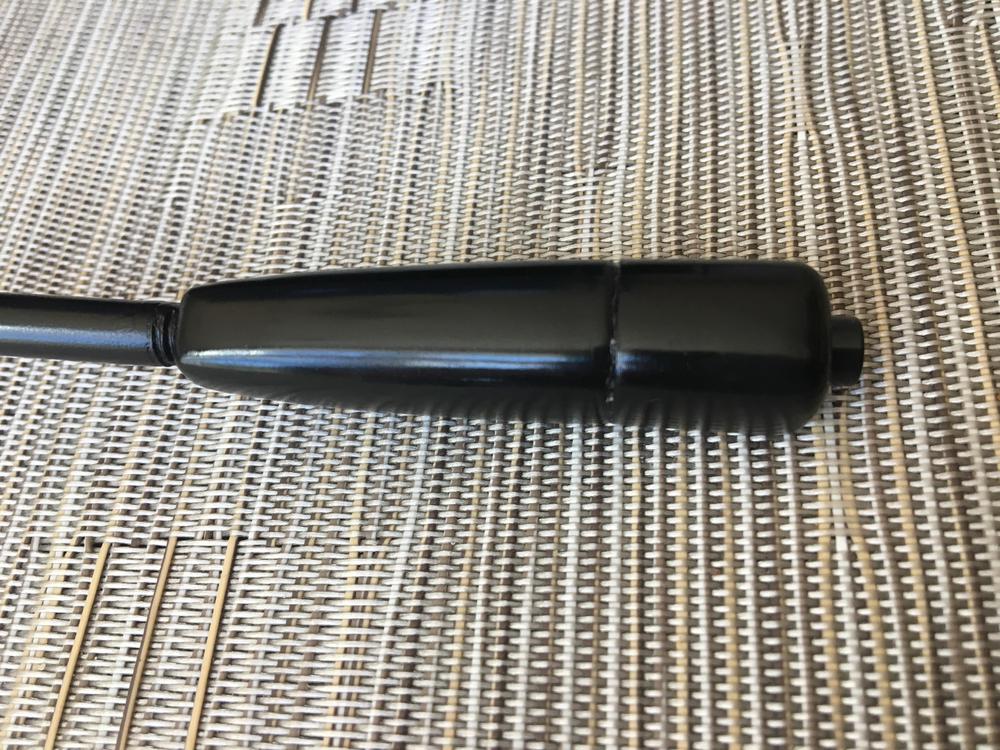
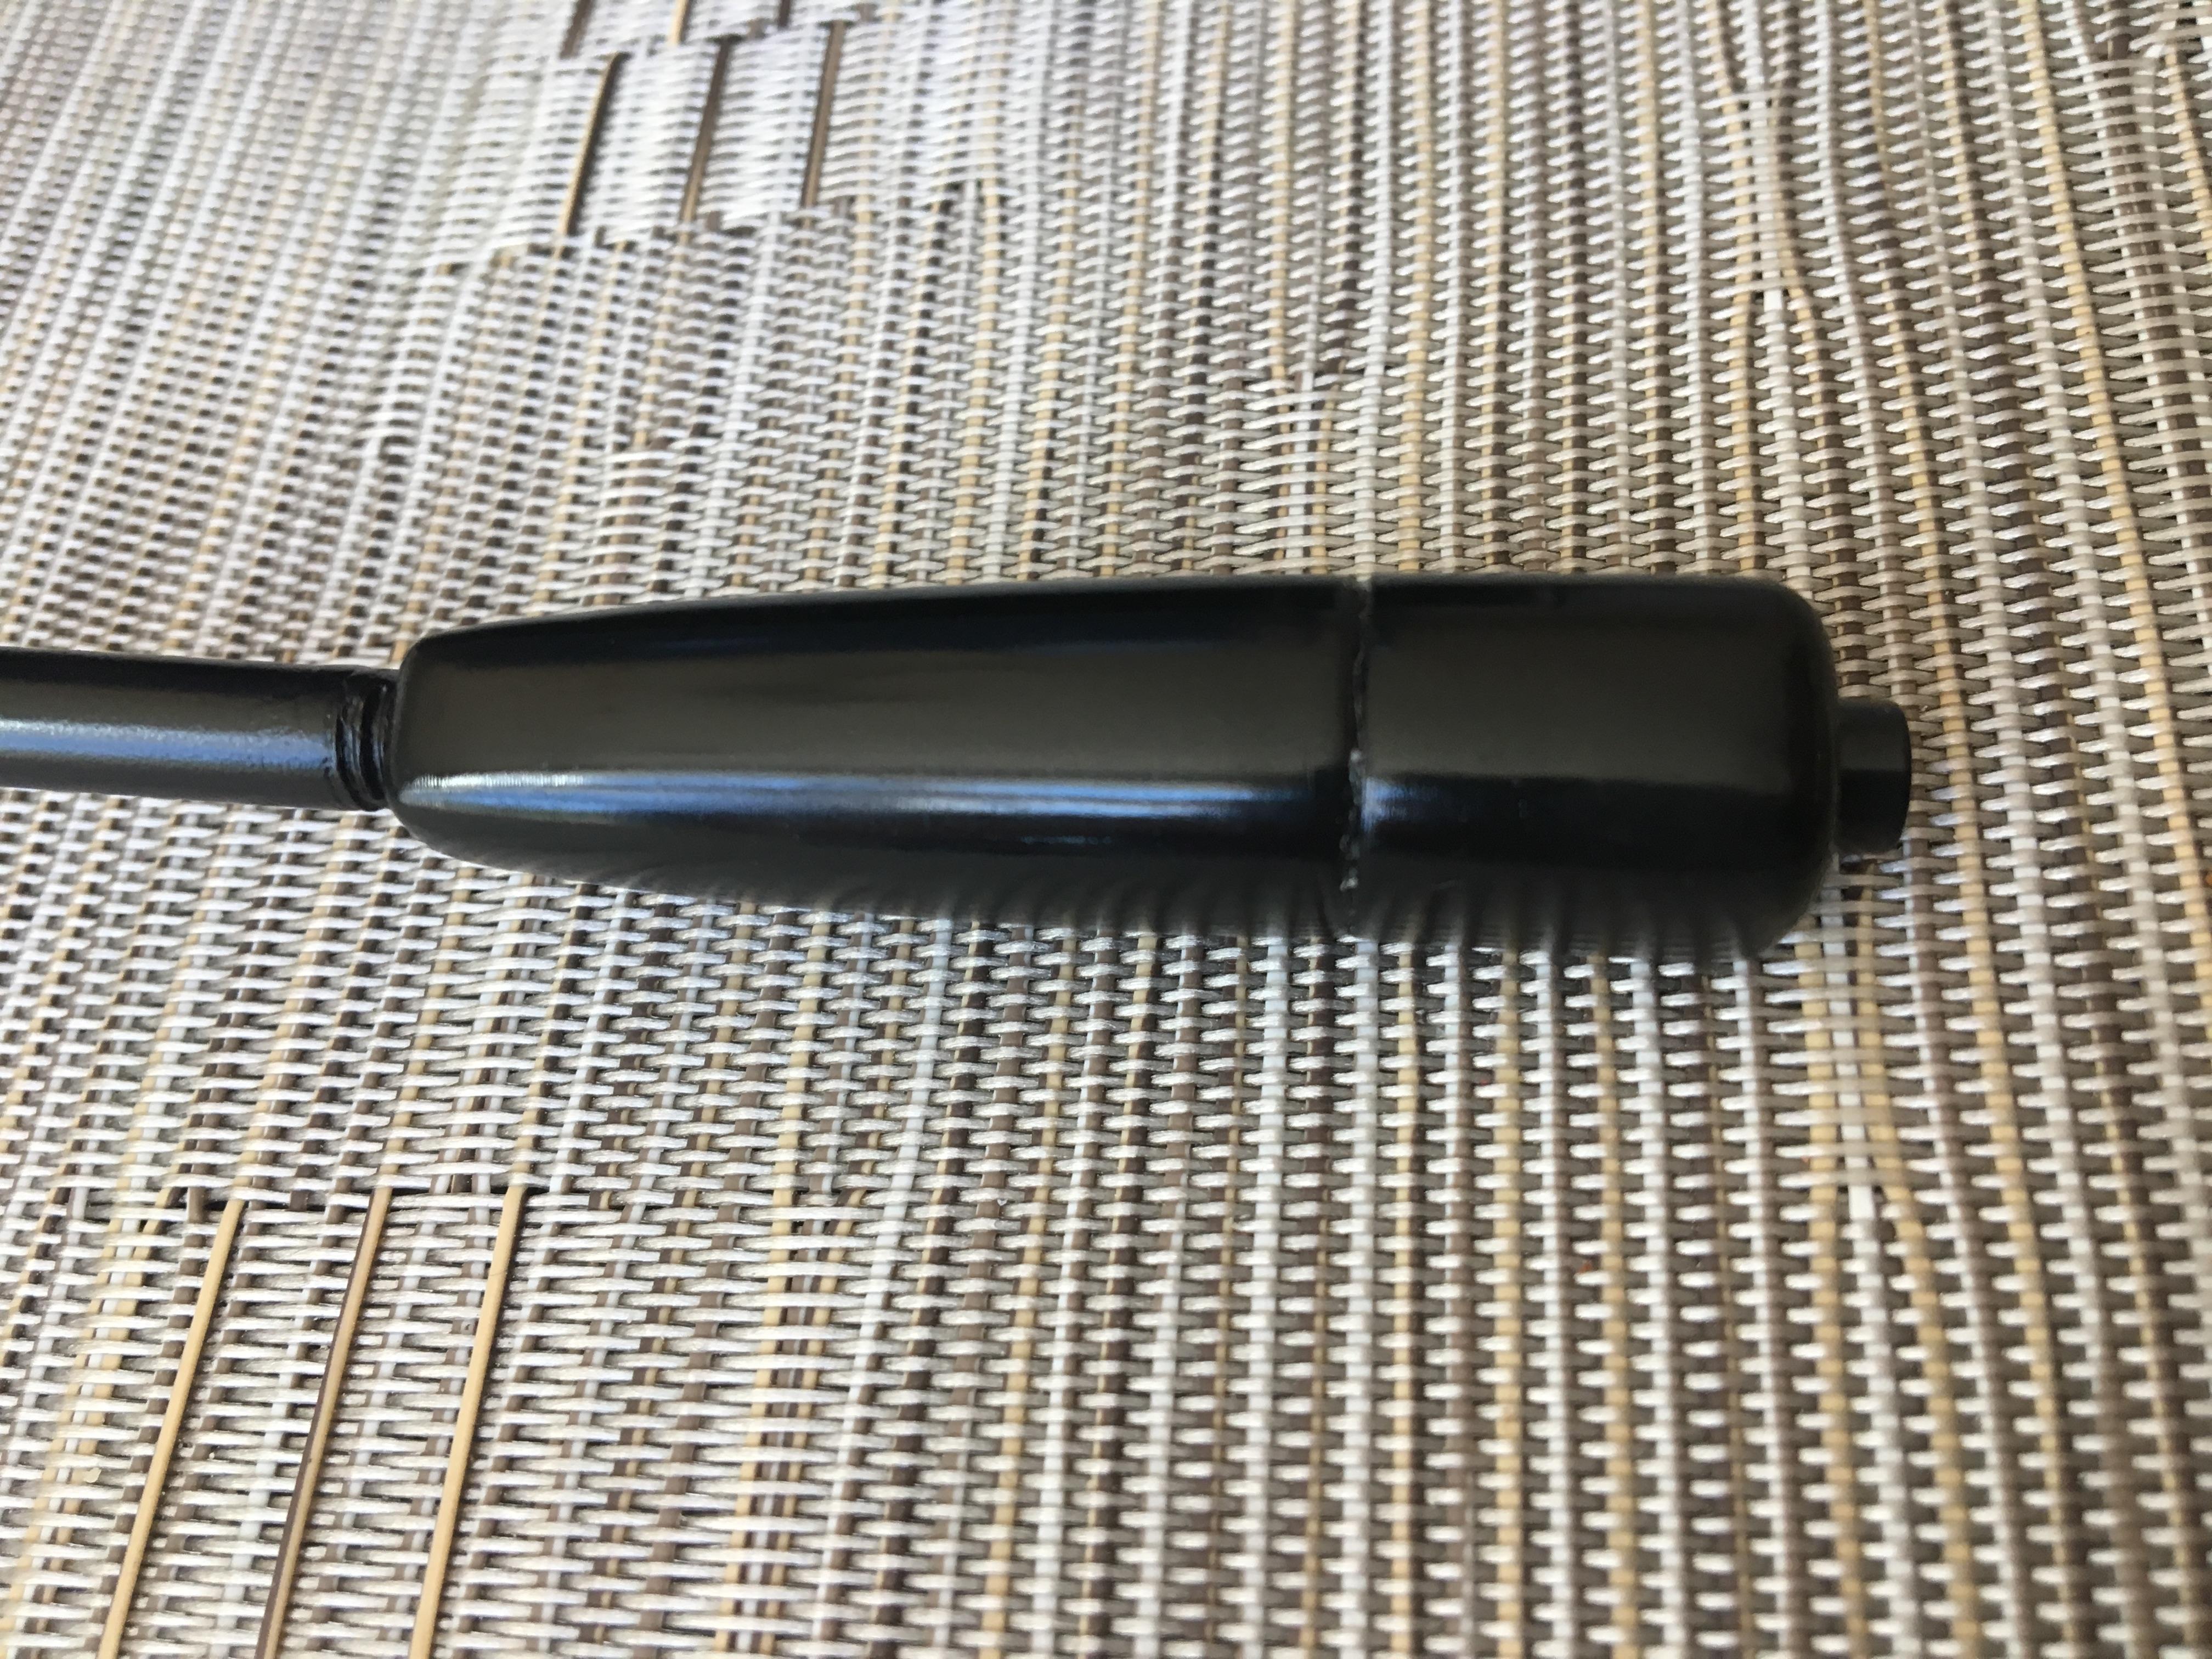
An update. The end of the indicator was missing the knob and the push to flash switch. I 3d modeled and printed a replacement complete with momentary switch for the lights. All wired up, relay and lights working well.

-
I spoke to the owner at the Larz Anderson cars and coffee the weekend before the auction. You are right, not the mechanical type. Sounded like he outsourced all the work. Was complaining that the body shop had not done the engine bay respray as requested plus not installed much of the new rubber and parts he supplied. Was selling the car so that he could buy out the Ferrari he was part owner of.
-
Did you get my message?
-
Bump. I have been watching japan yahoo for this item. Seen one, but missed out. any other suggested sources in Japan?
-
I am looking for a complete hood latch & catch mechanism (male / female) for my RHD 1972 Fairlady Z -L (Japanese Domestic Market Version ) I understand it is mirror image to the US version.
-
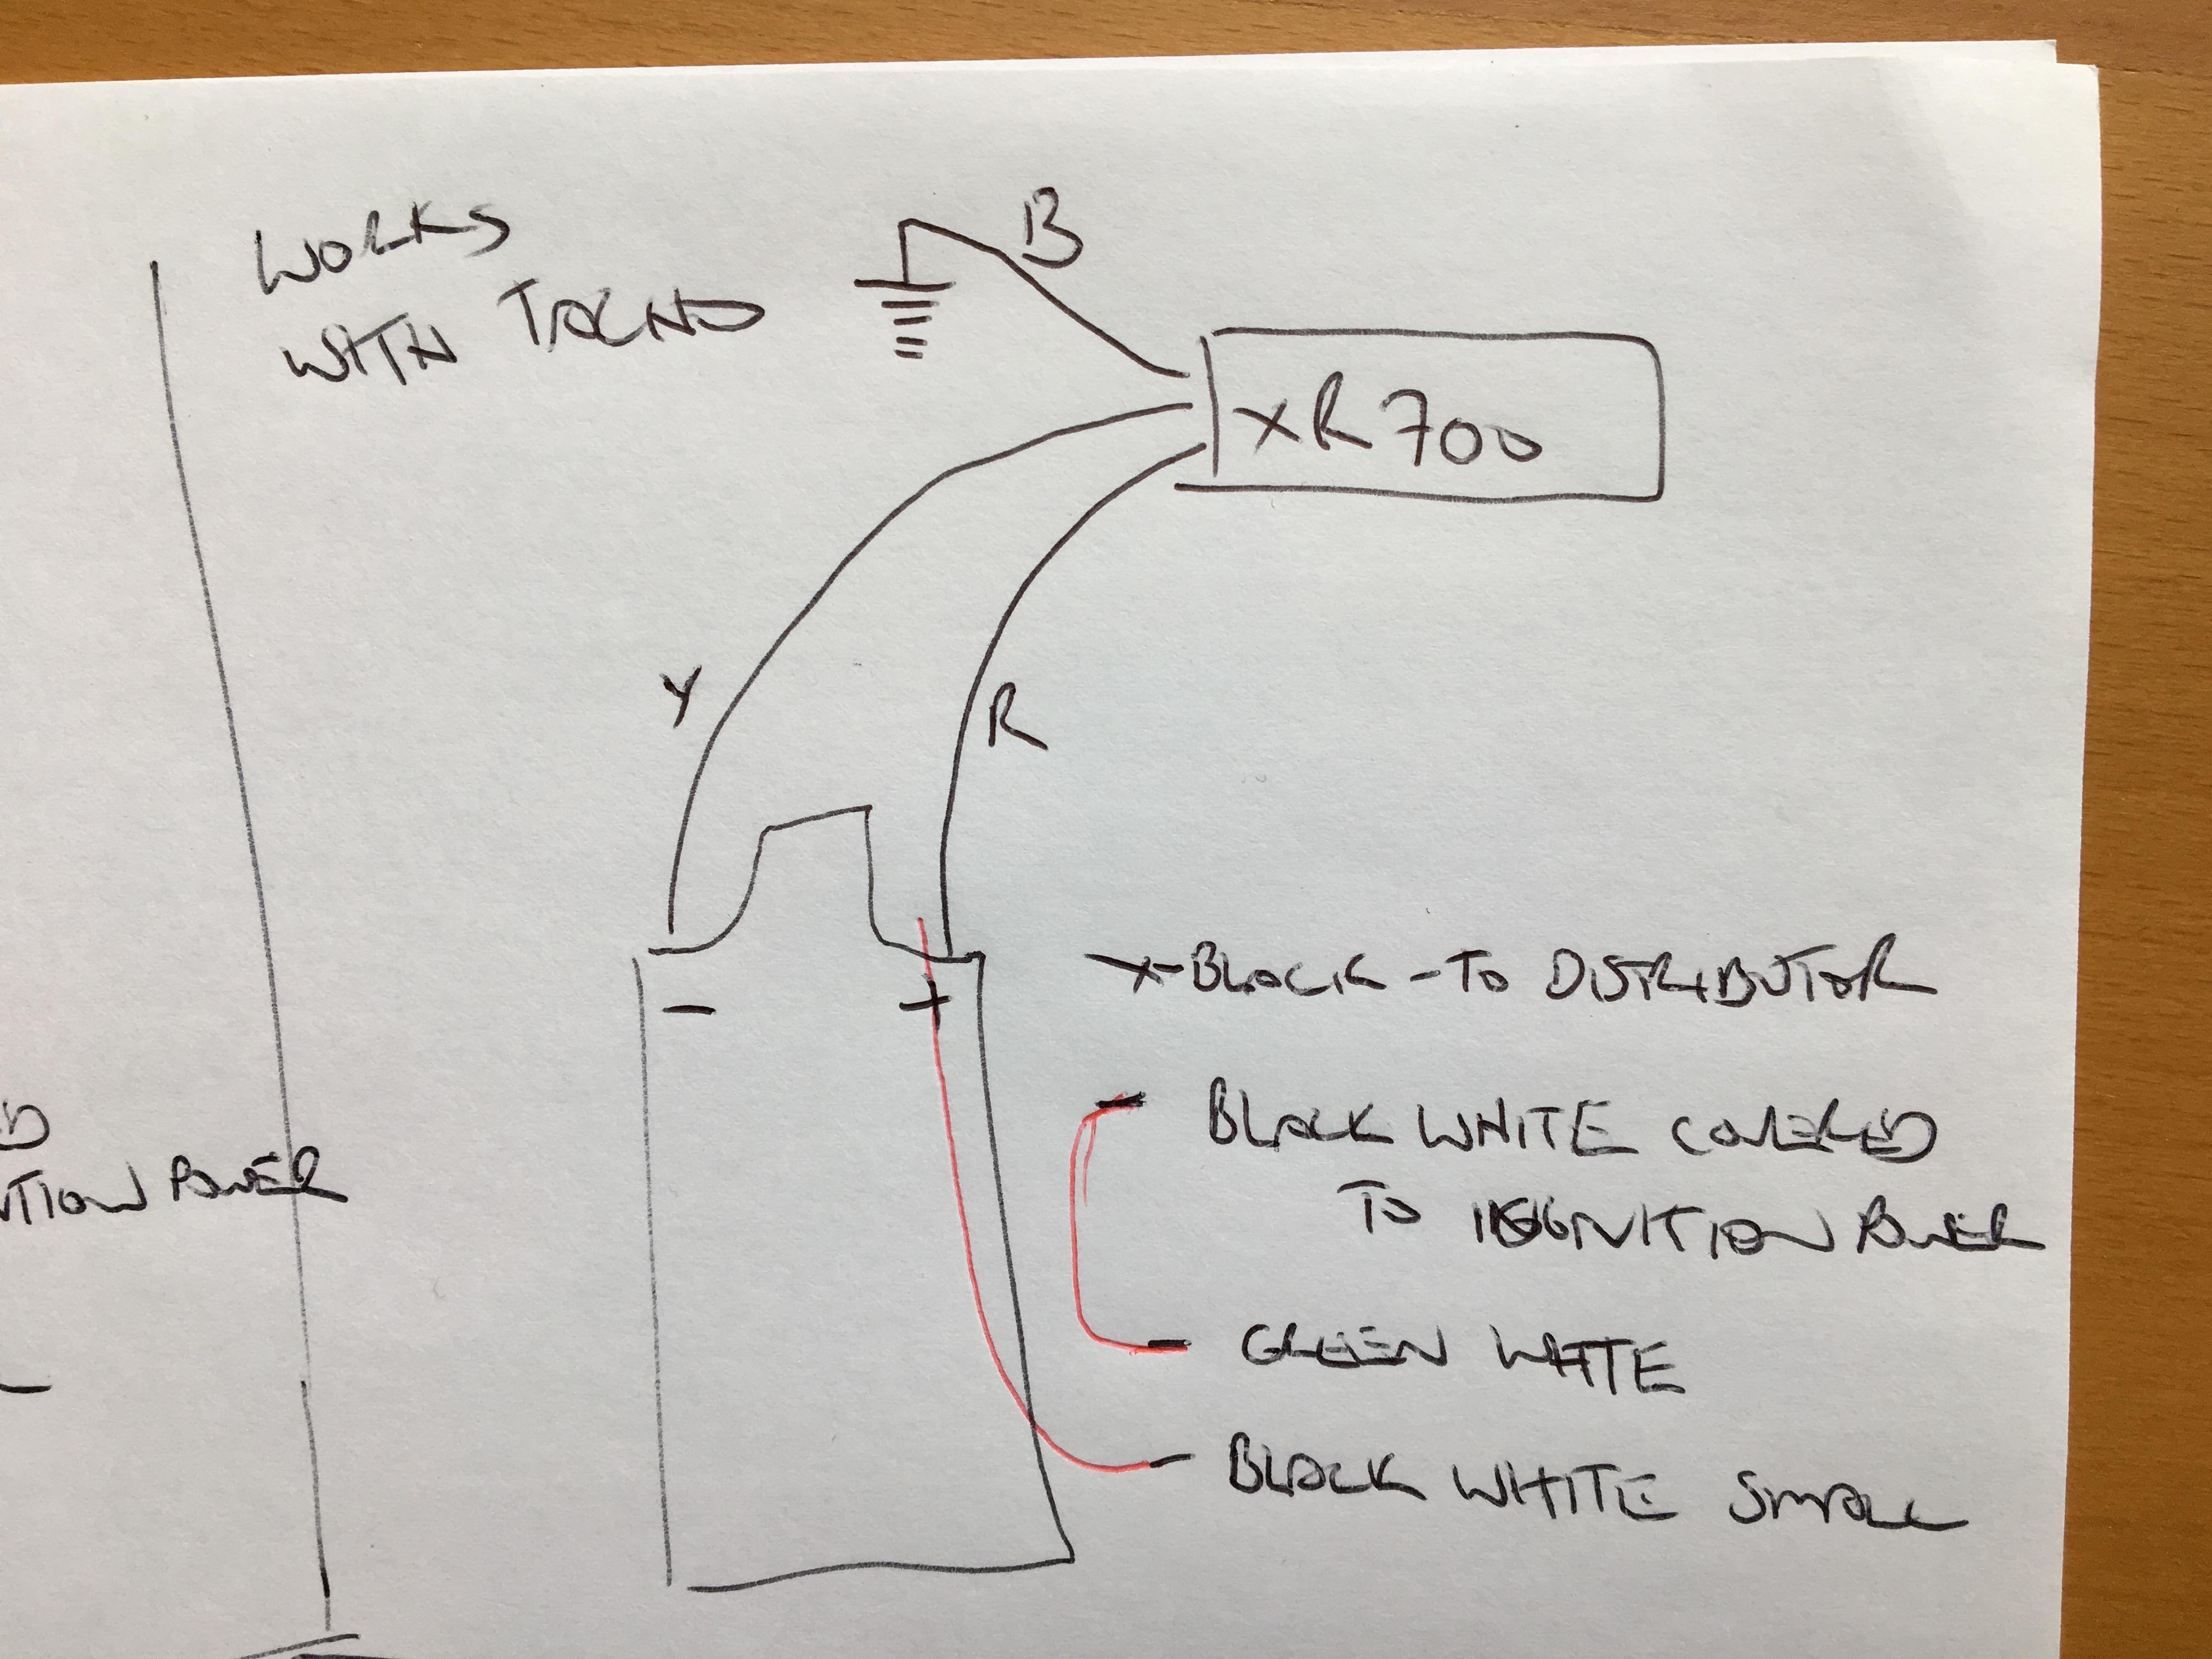
You are right about the advice being confusing and contradictory. I’ve not yet run it for any length of time to see if the coil heats up. I can try to add the ballast in between the ignition power and gauge and coil. But that will limit current to coil.
-
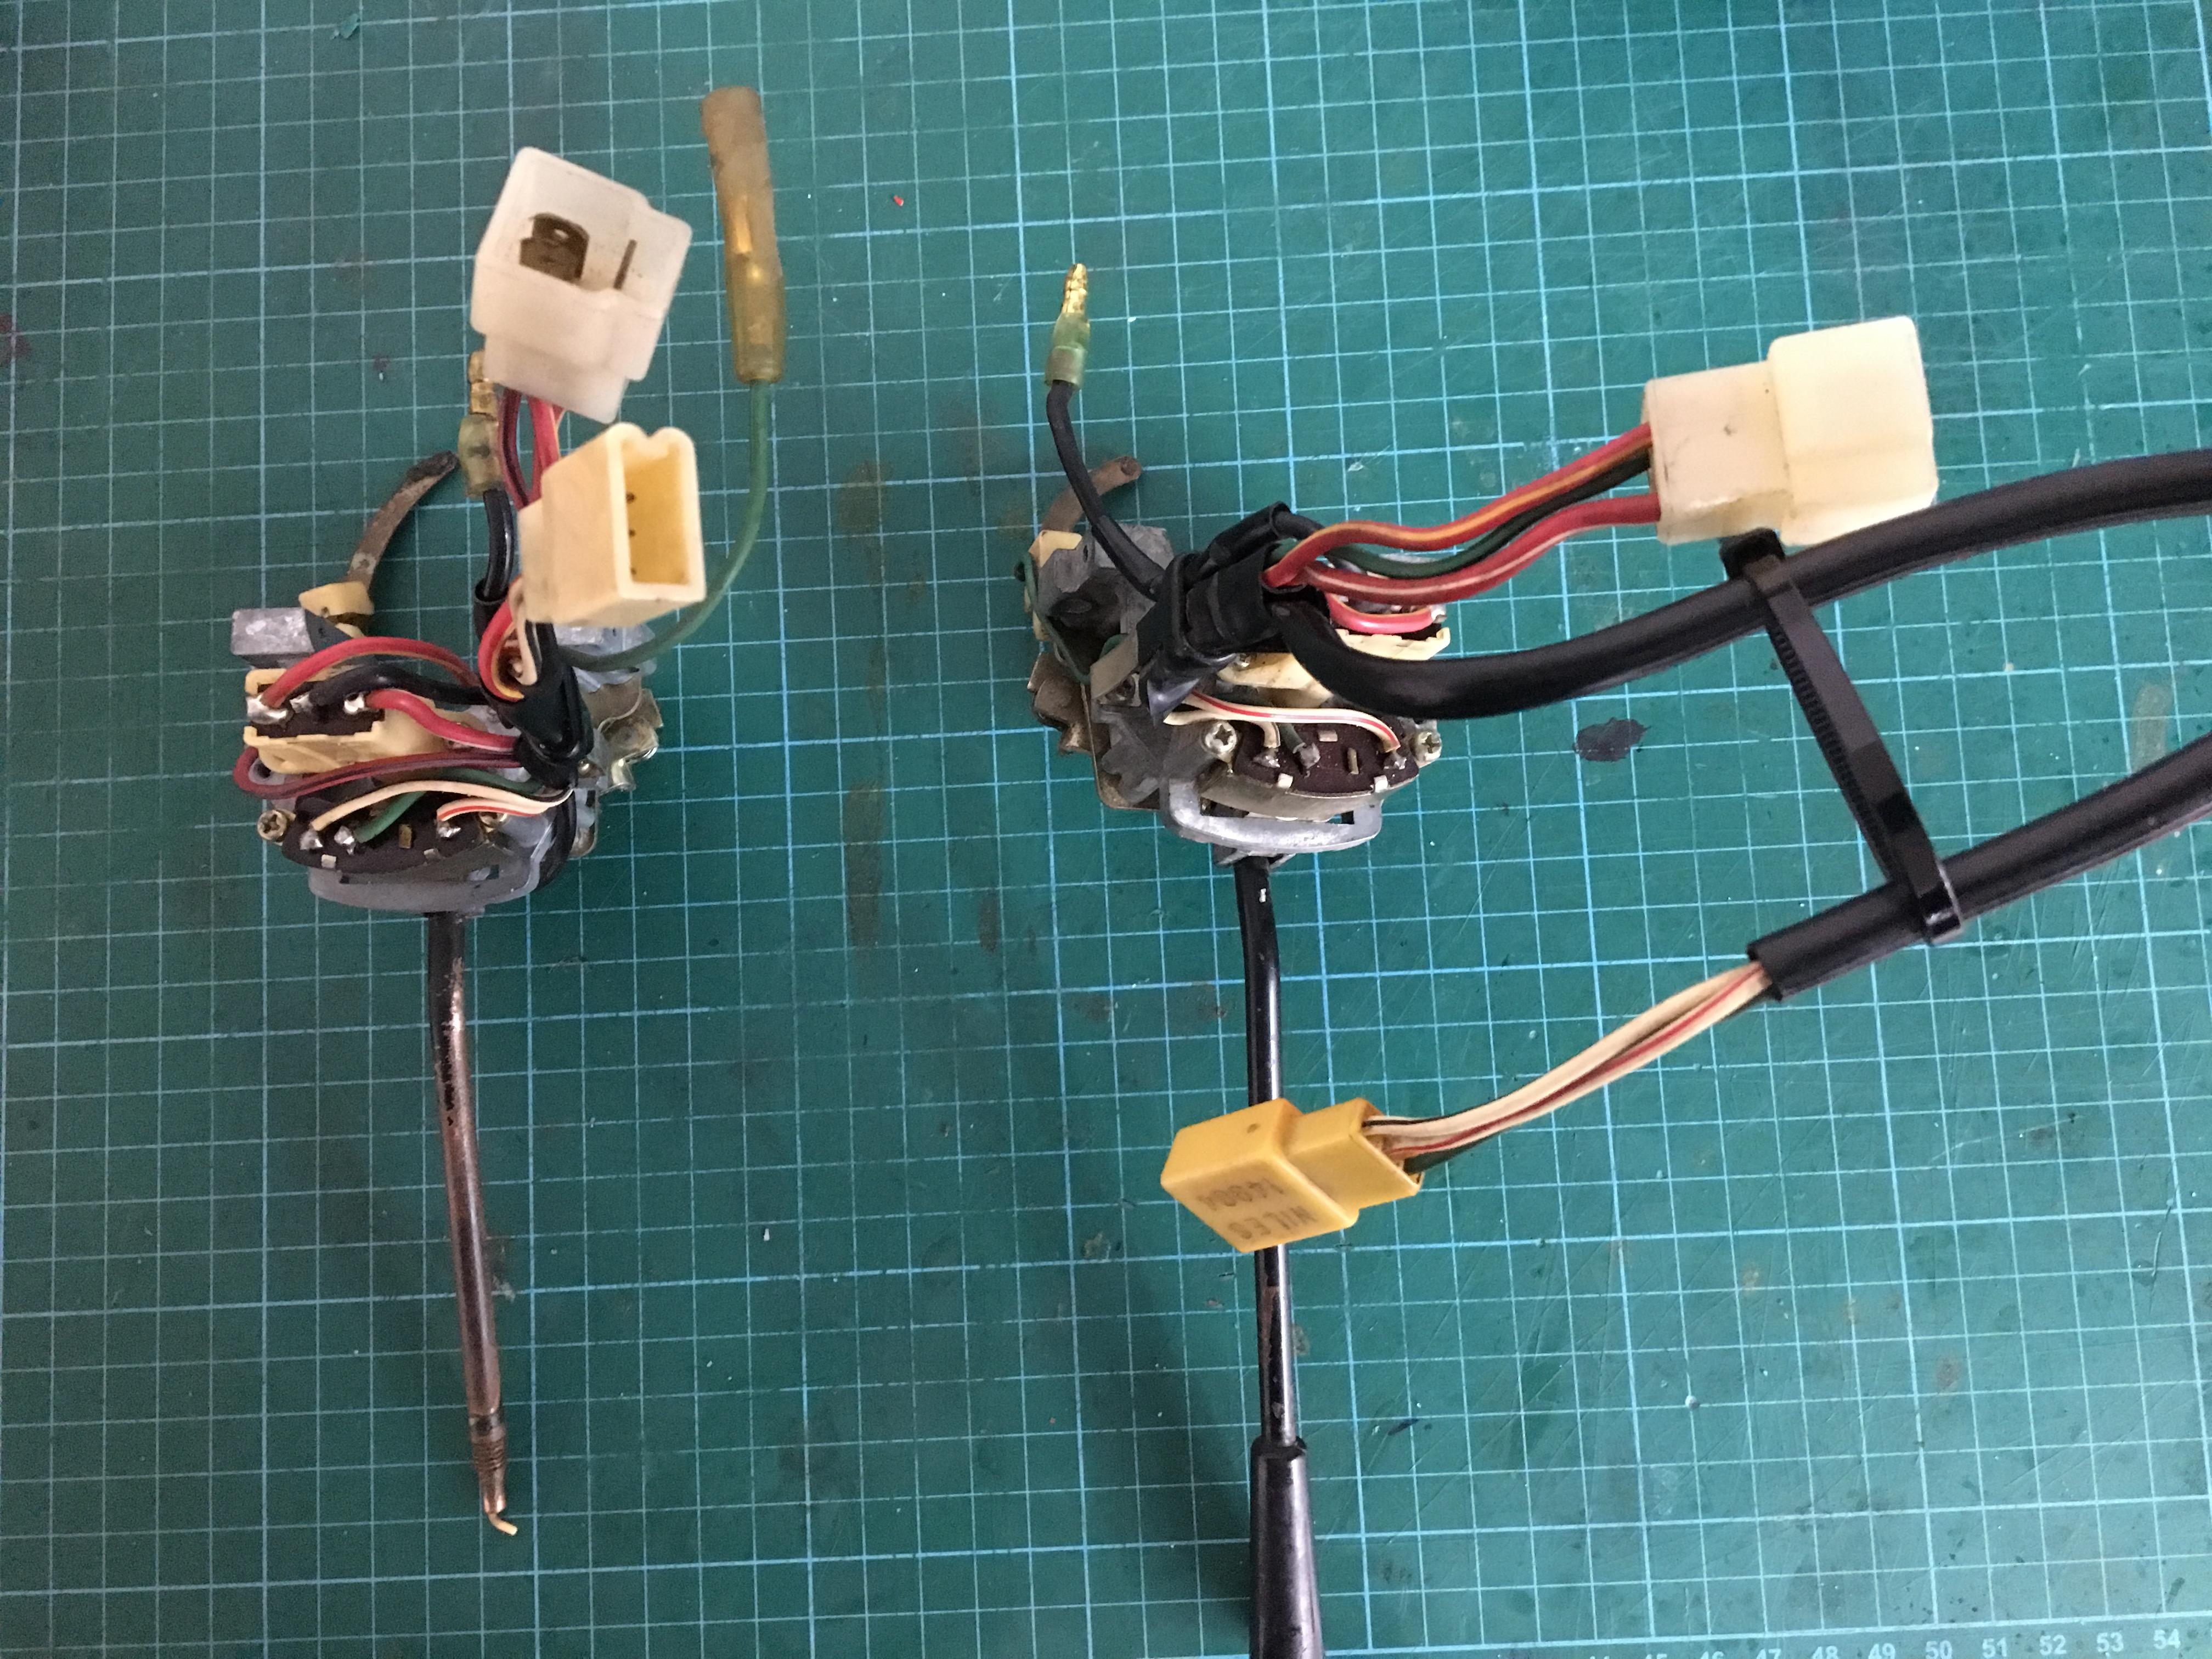
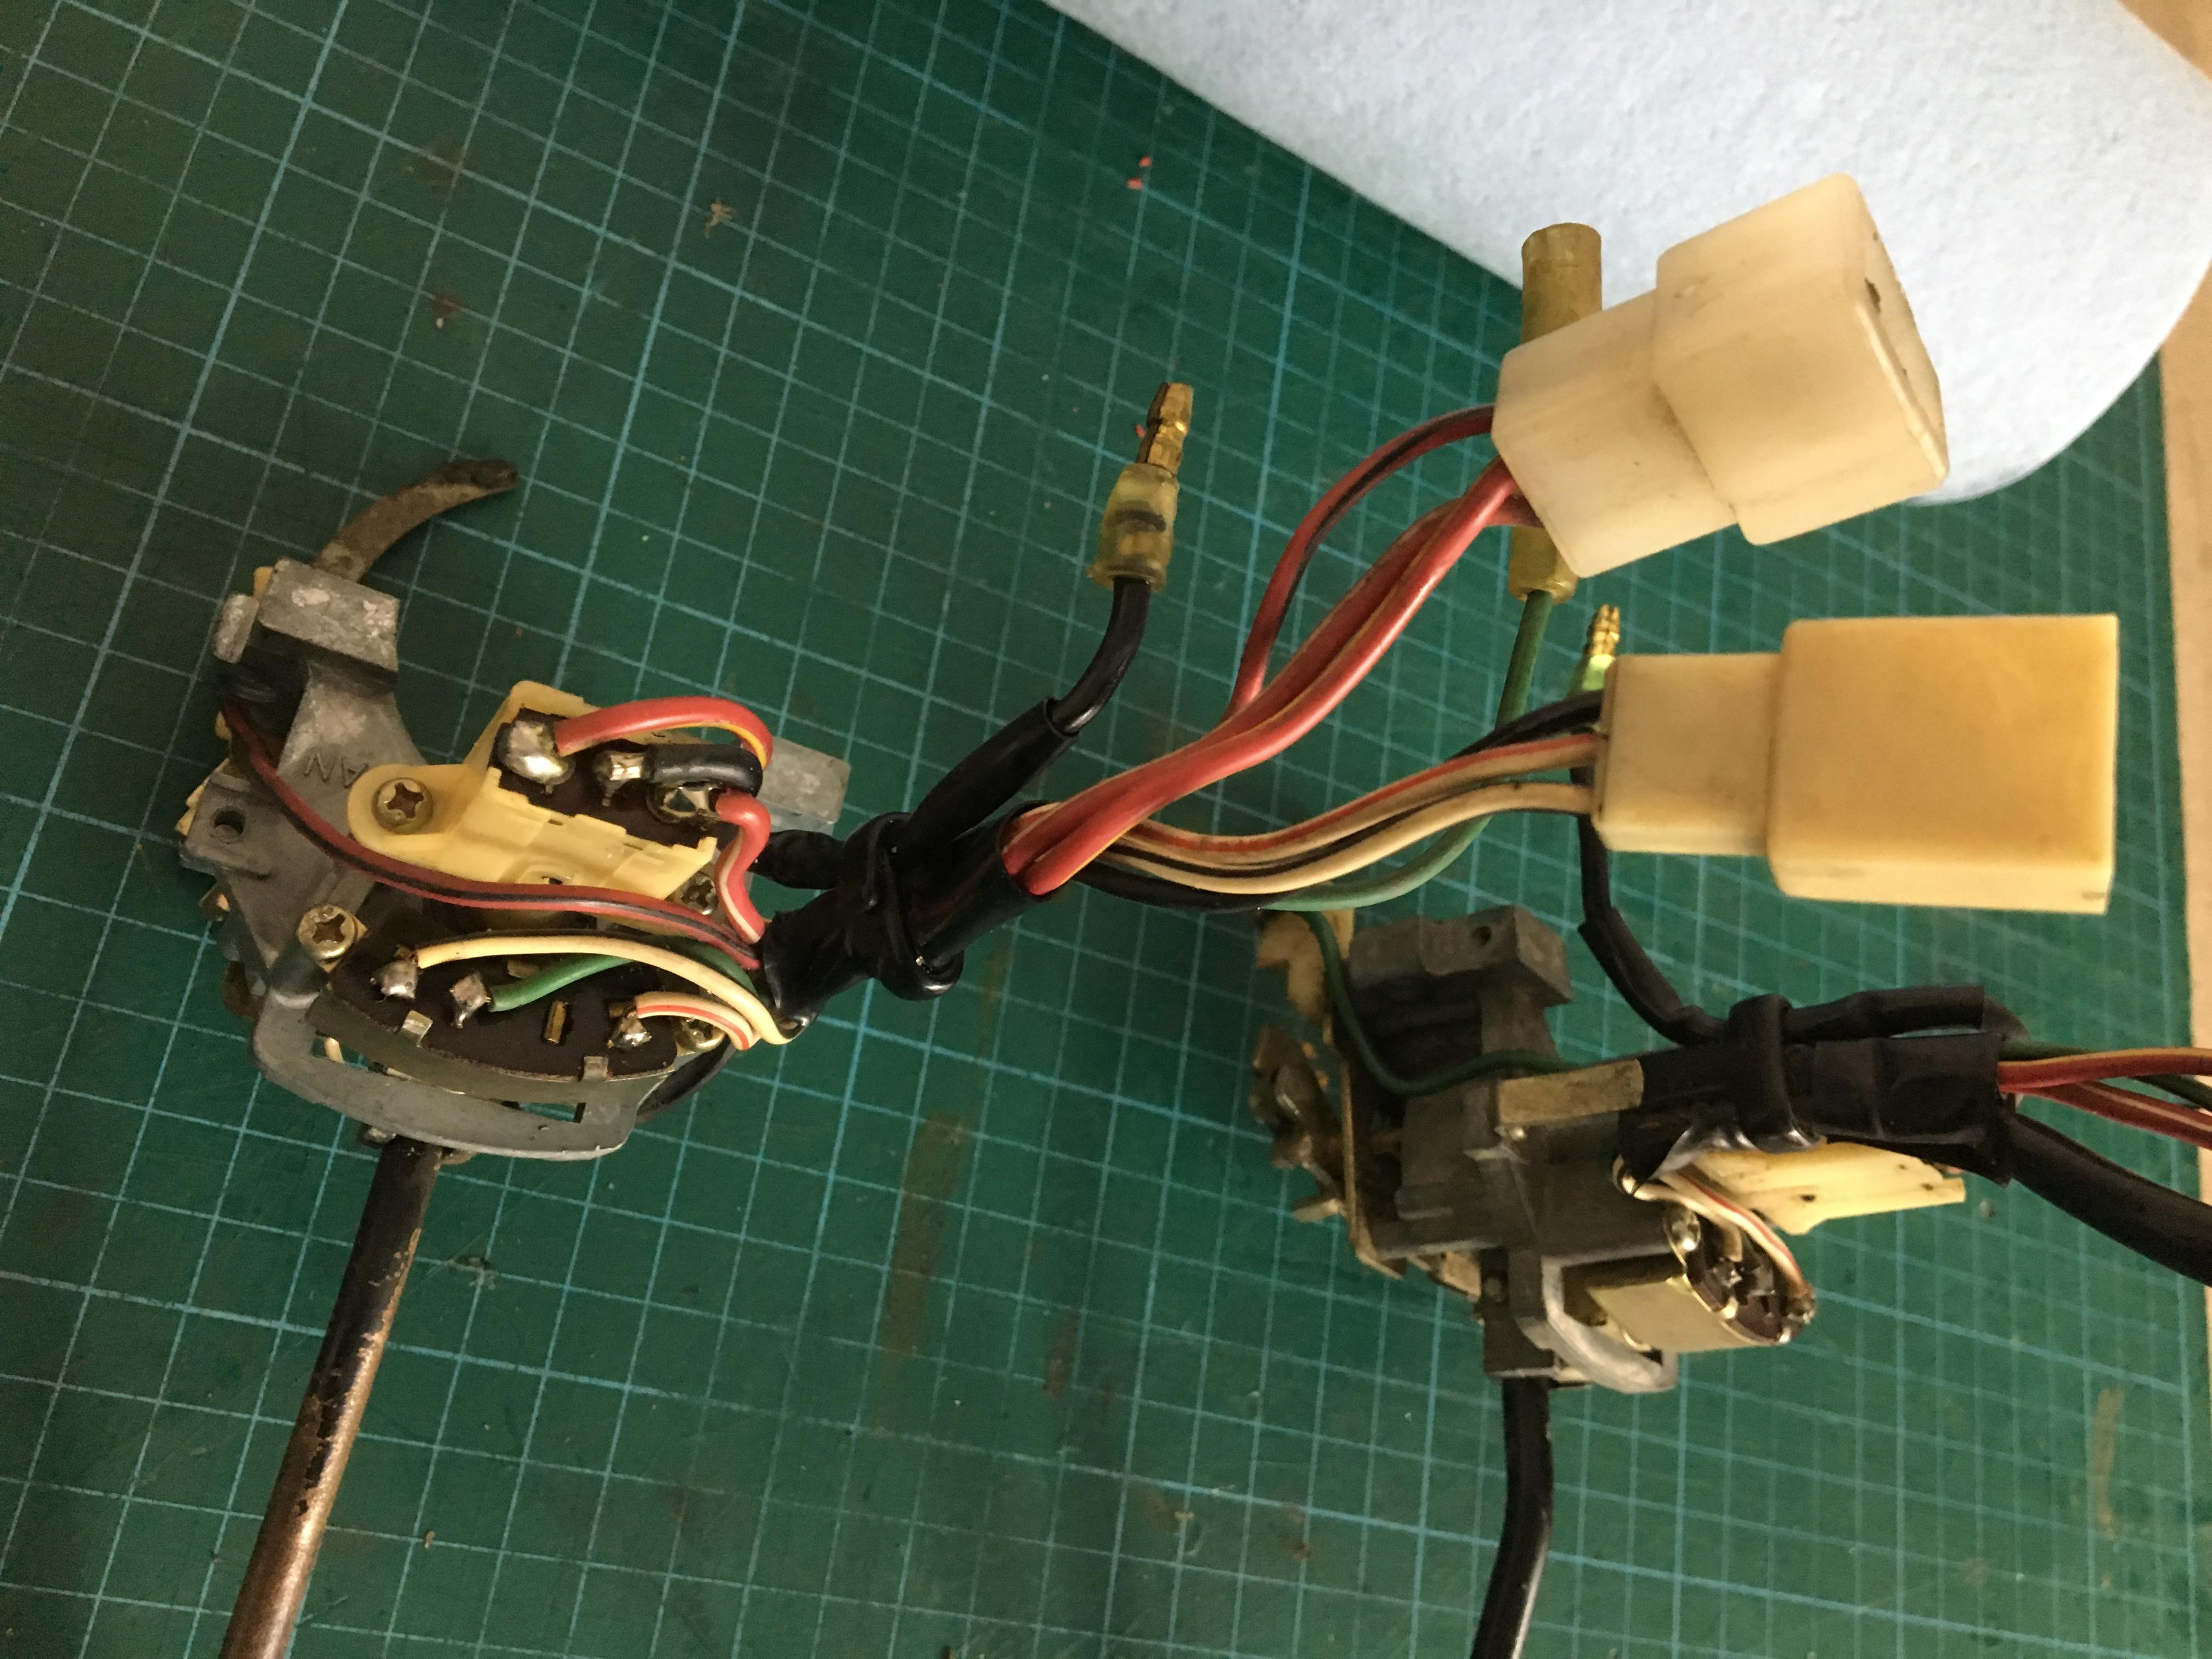
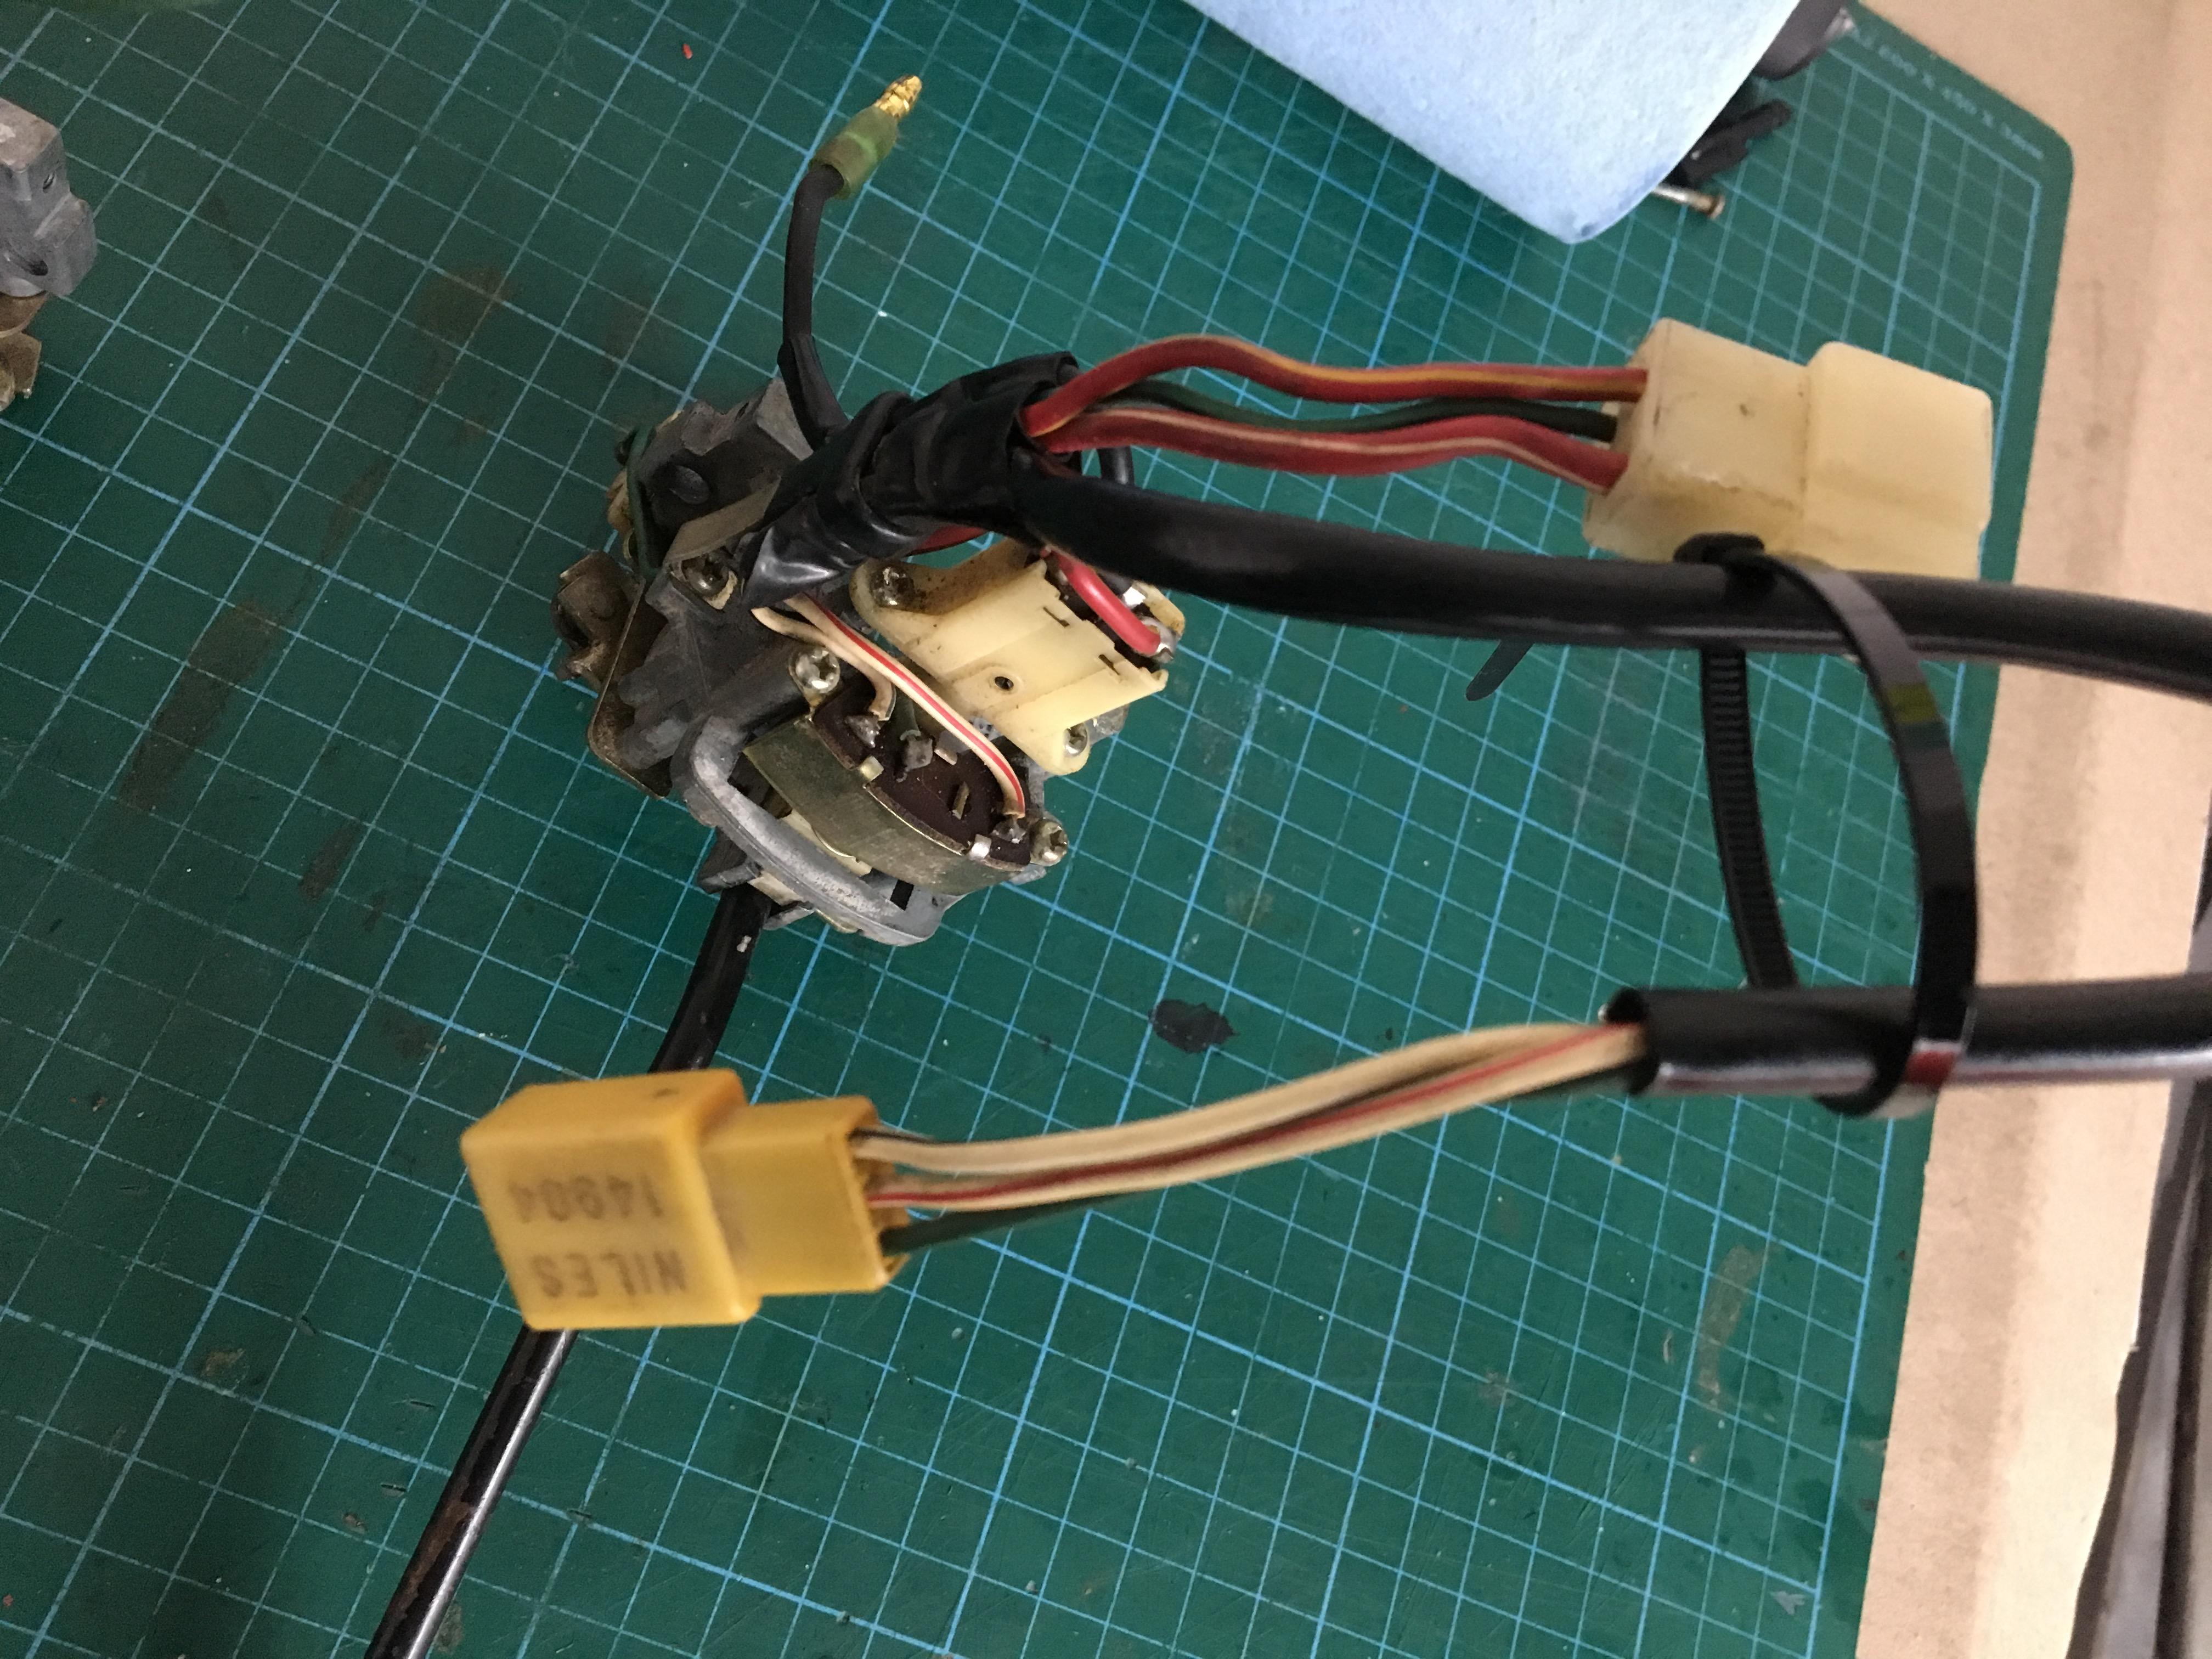
On my 72 Fairlady the PO had installed a XR700 electronic ignition combined with a Fireball PS200 coil. Works well however the tachometer was not working (it was not wired in). Wanted to share my solution and check if anyone knows if there might be issues with what I have done. There is a lot of differing advise out there on this. But this is what I believe; I have a tachometer that uses an induction coil to detect the revs. I think referred to as a 3 wire tach. I am assuming it works by detecting the current fluctuations every time the coil fires to determine the RPM. I figure that the coil and the tacho have to be wired in series. First diagram is the original setup without the tacho connected. Second is how I have wired it. I am not using a ballast resistor at is it not needed with this setup.
.thumb.JPG.4984408795cda5d828d537dfb6cdbbb2.JPG)

-
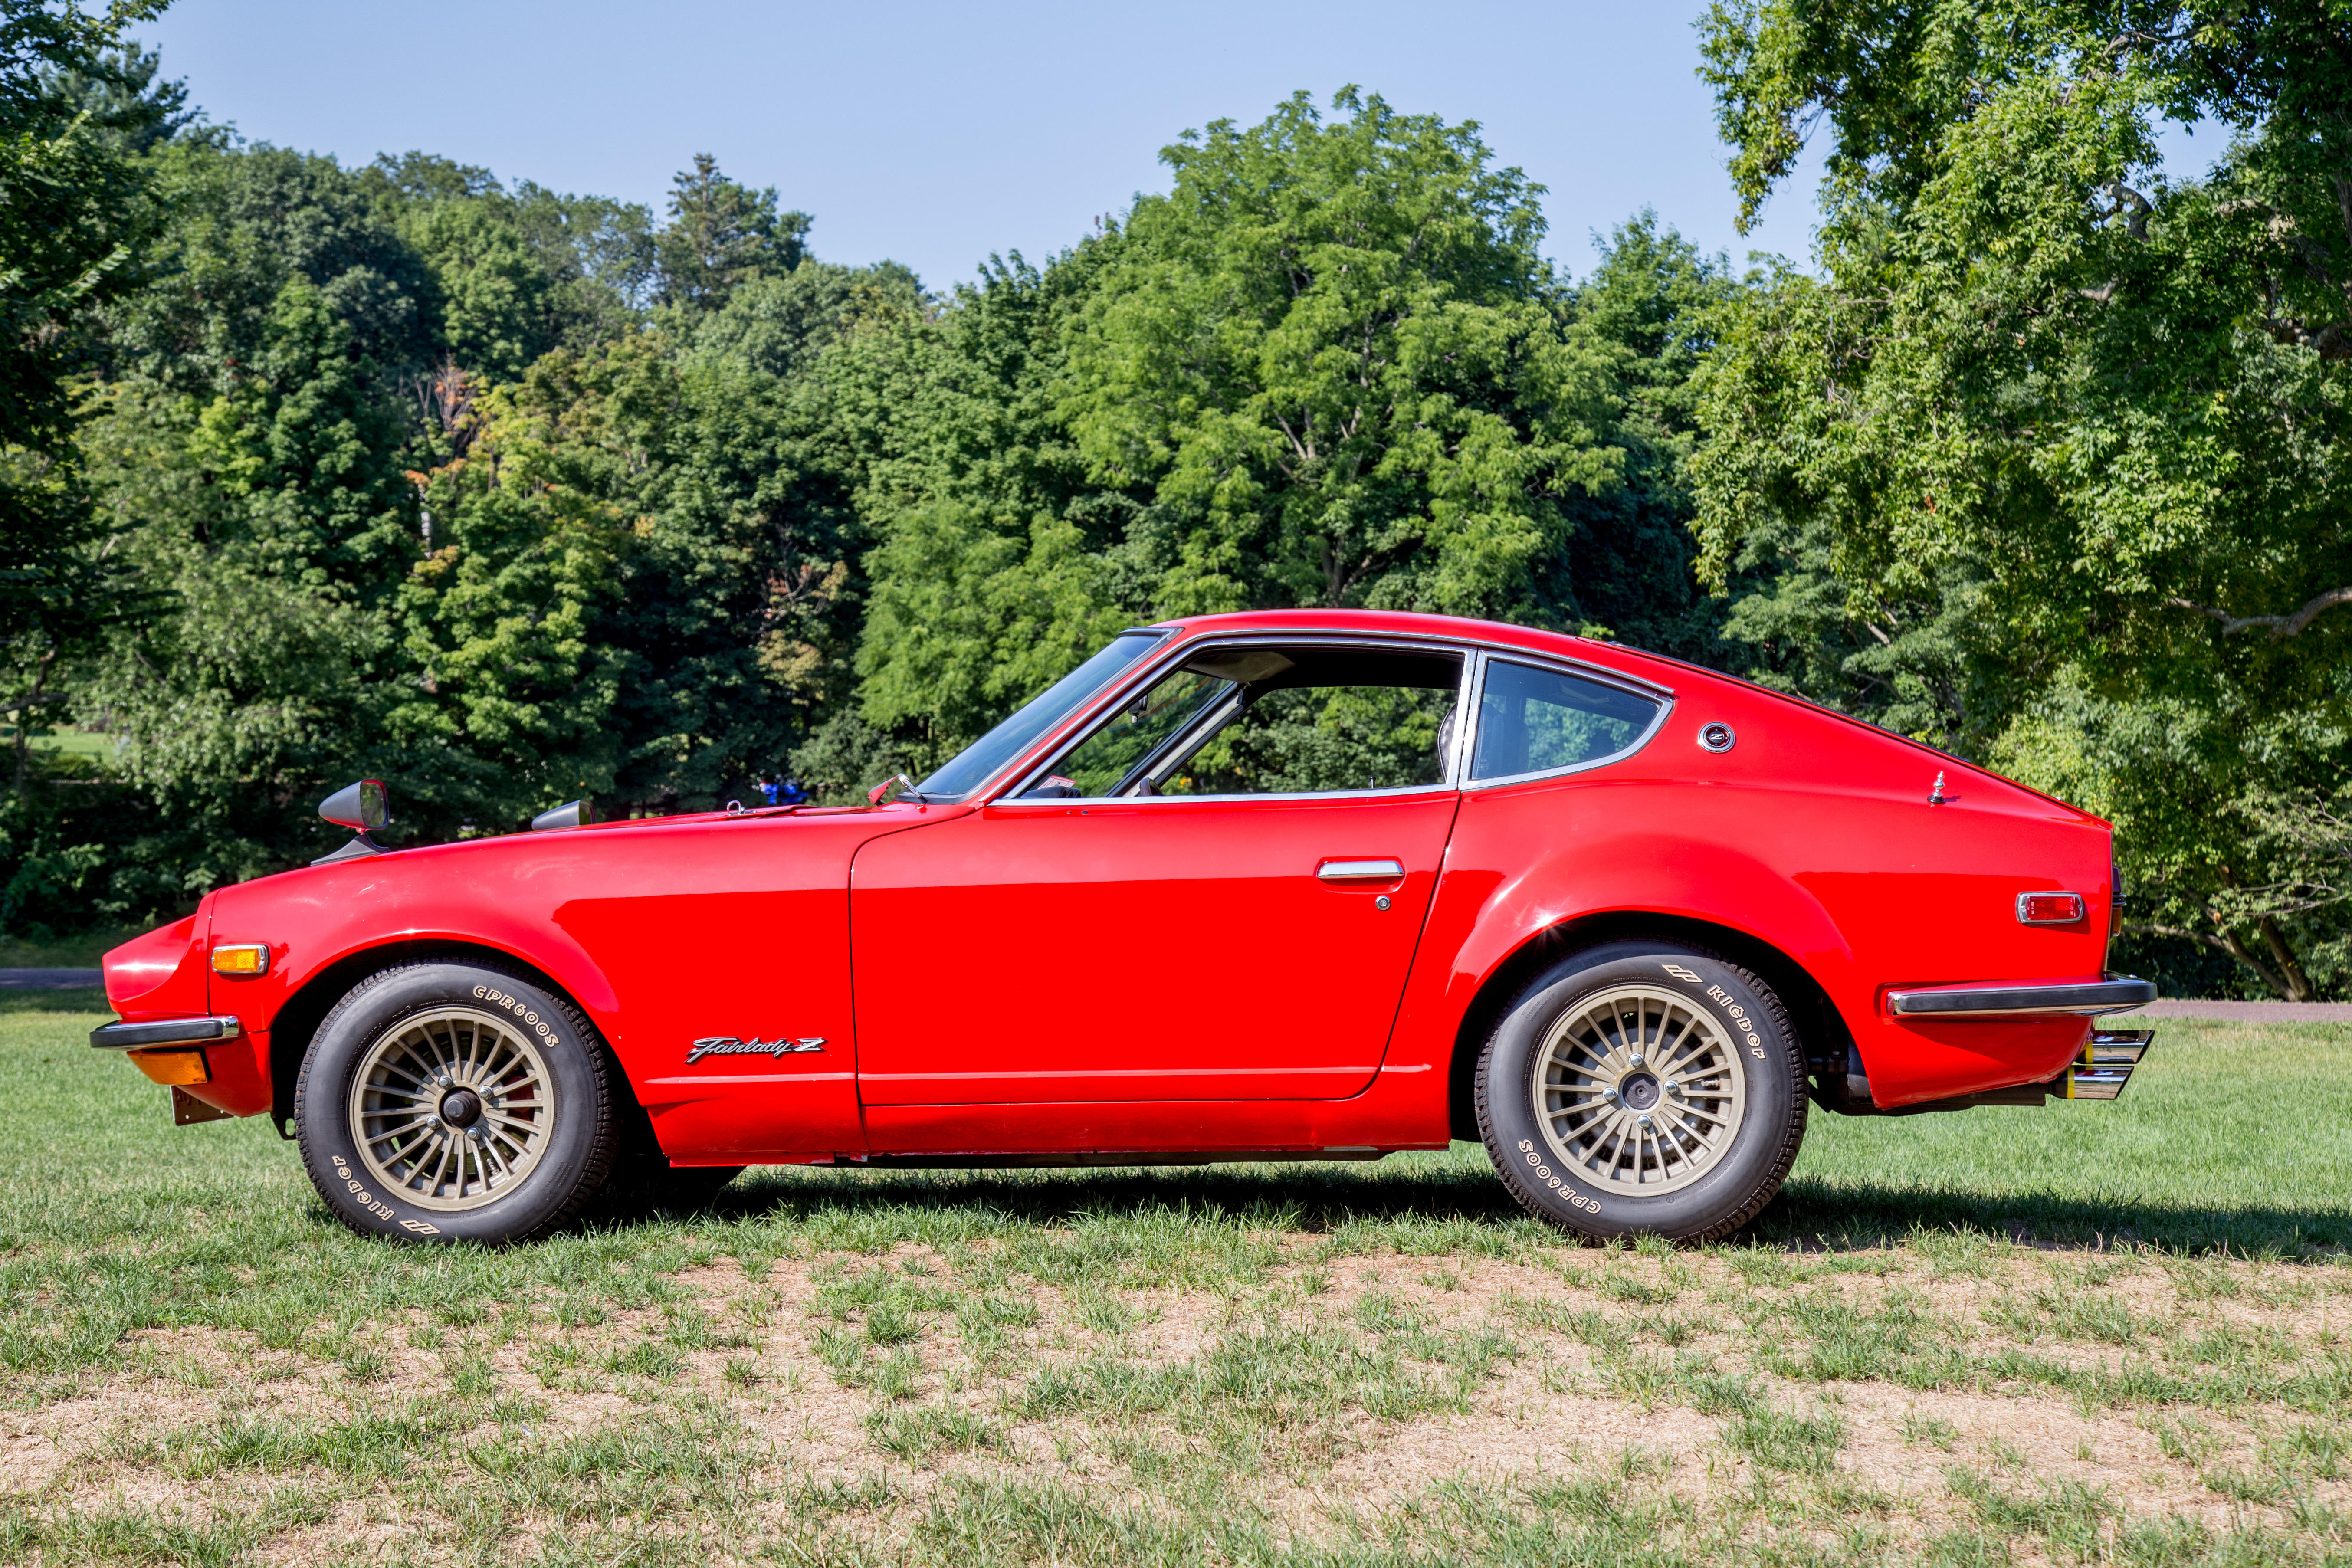
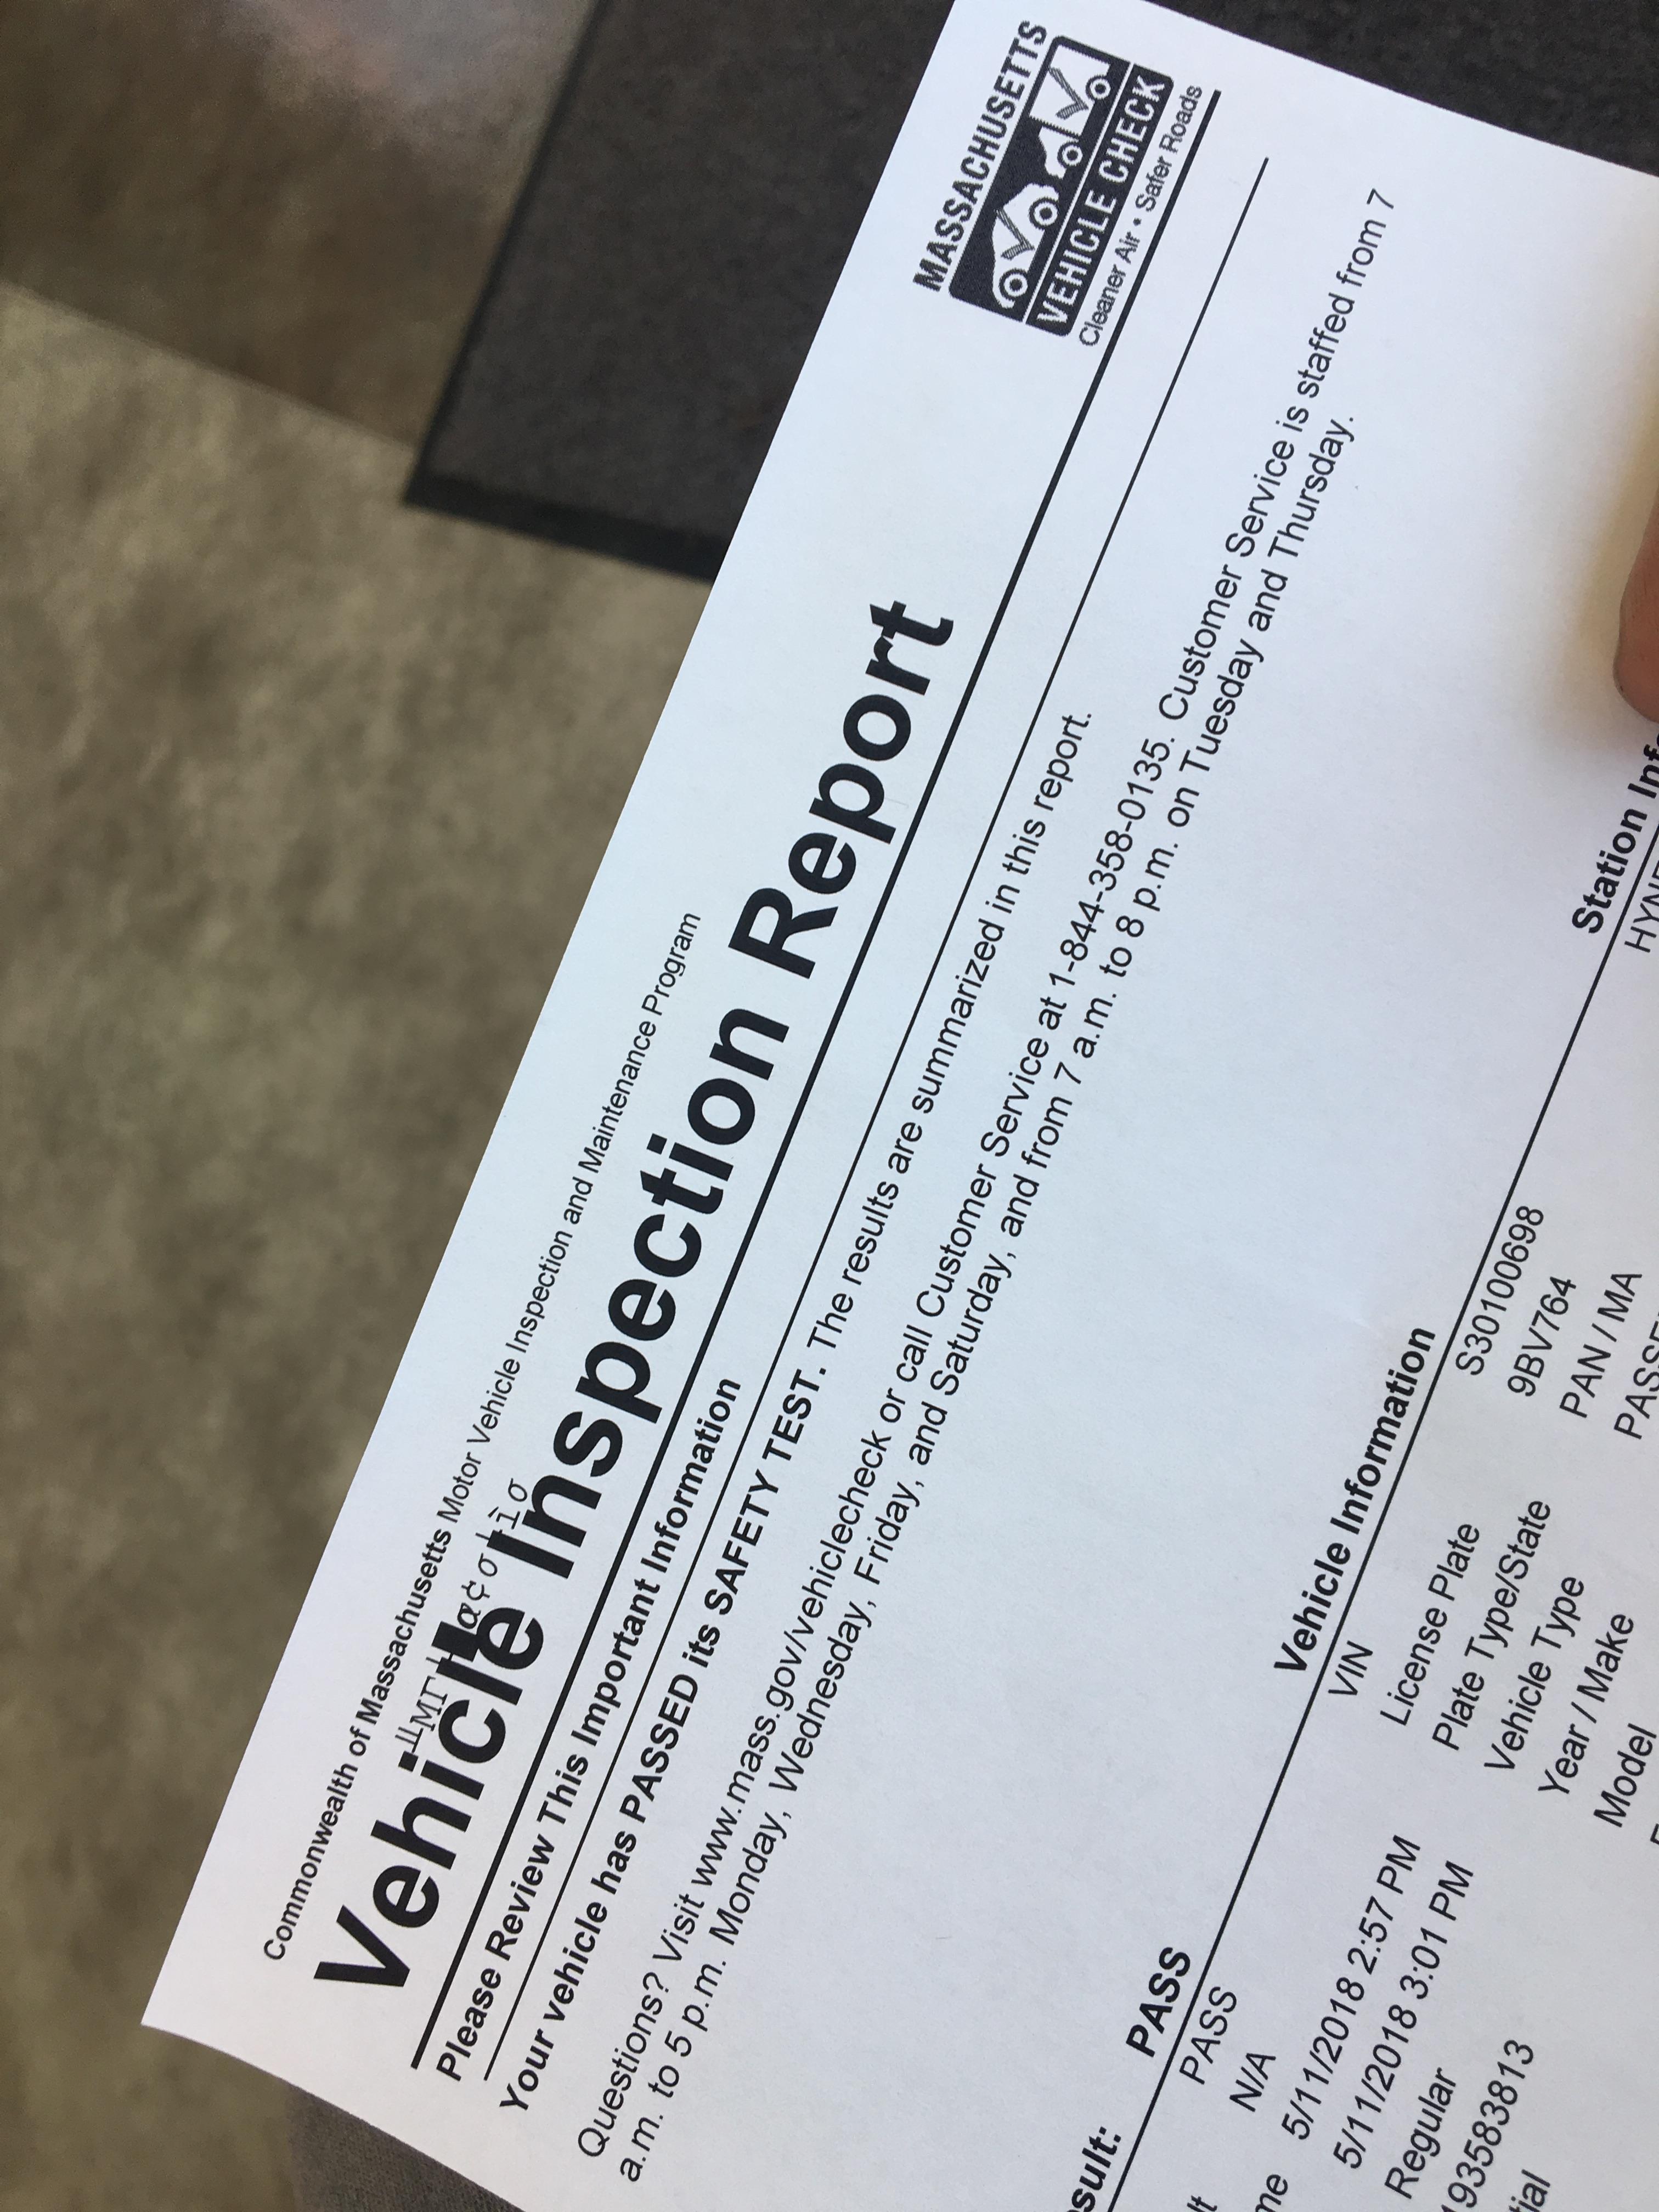
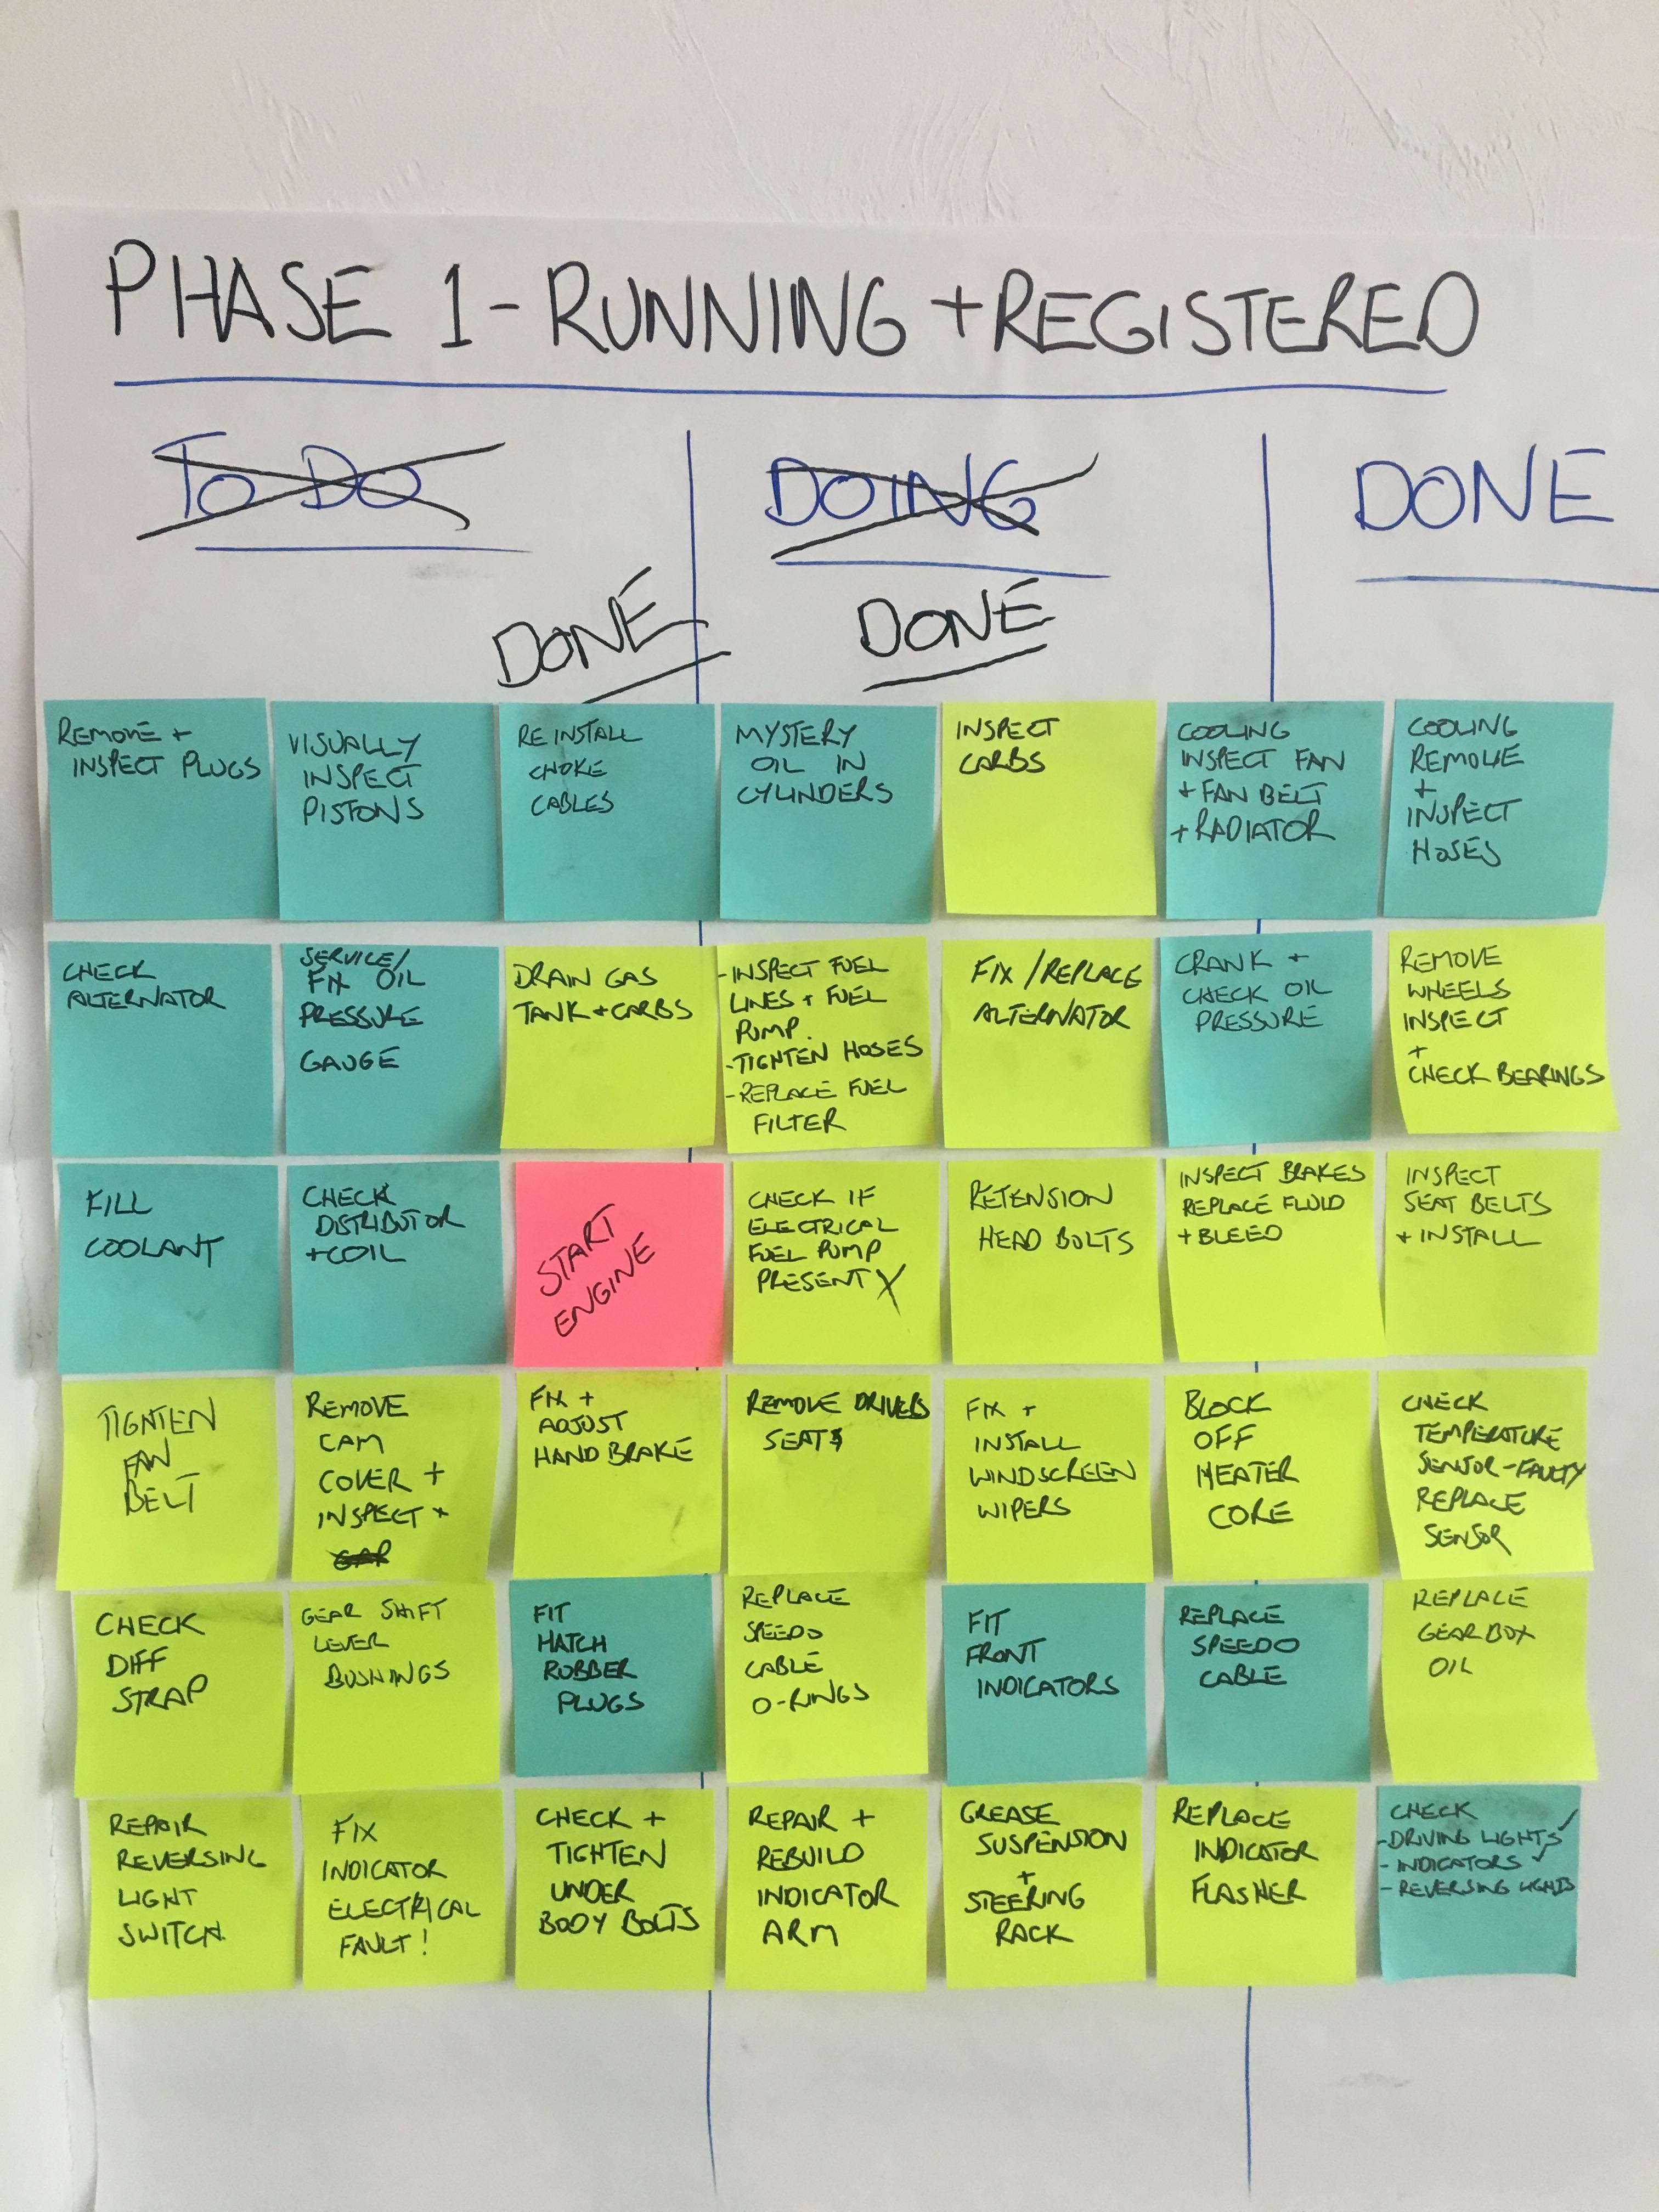
Month 2 - Running and Registered - completed Phase 1 plans. Today marks a major milestone for Looey. She is now running and registered (and passed DMV inspection in MA). Temperature gauge sorted; replacement sensor sorted the issues. Found out some interesting news. Looey is a 72 not a 73 as the PO thought - and what was on the papers. Information from Kats shows the chassis numbers clearly indicate a 72, likely build in Sept / Oct. The biggest challenge was diagnosing an electrical fault. When I turned on the indicators the headlights would light up. Turns out PO had installed a US 73 indicator arm, not realising the JDM Fairlady arm has a flash to pass circuit that means it is all wired differently. Took me some time to learn that and diagnose the issue. Ended up getting a Fairlady Z-L electrical diagram. A great help. There are a few differences in the circuits, including colours. As for the indicator, I had the old parts; so a clean and rebuild of the switches and all sorted. I replaced the speedo cable; it was missing. Bit of a pain to connect up at the gauge. Not much room there on the JDM Fairlady. Also took the opportunity to replace the gearbox speedo o-ring and seal at the same time. Printed myself a new battery hold down clamp Discovered a few other things; - discovered that the retaining clips for the hard lines to soft lines were missing. I put them in, however experienced minor leaks from the front lines. On inspection the mating faces are damaged. They will need to be cleaned and fixed. Good enough for now however. - discovered there were no bearing in the gearshift lever. One of the most satisfying job was installing them as it made the box feel much, much better and only an hours work. - discovered no rubber boot on the gearbox/ gearshift lever - easy fix. - discovered some dodgy wiring on the side running lights. Easy fix and luckly the only electrical mods i have found. - Discovered the hard way that the heater core had a leak. Lots of anti-freeze in the passenger footwell. Blocked off the heater for now. Another item added to the Phase 2 list. - Discovered reversing switch was broken - luckily not needed to pass inspection. replacement on order, will be a quick fix. - discovered the windshield washer pump and jets were missing. A local 240z club member came to the rescue. - discovered how much fun it has been to go through and progressively fix stuff. - discovered she runs remarkably well. Next is phase 2 - fixing high priority items + some fun distractions.


-
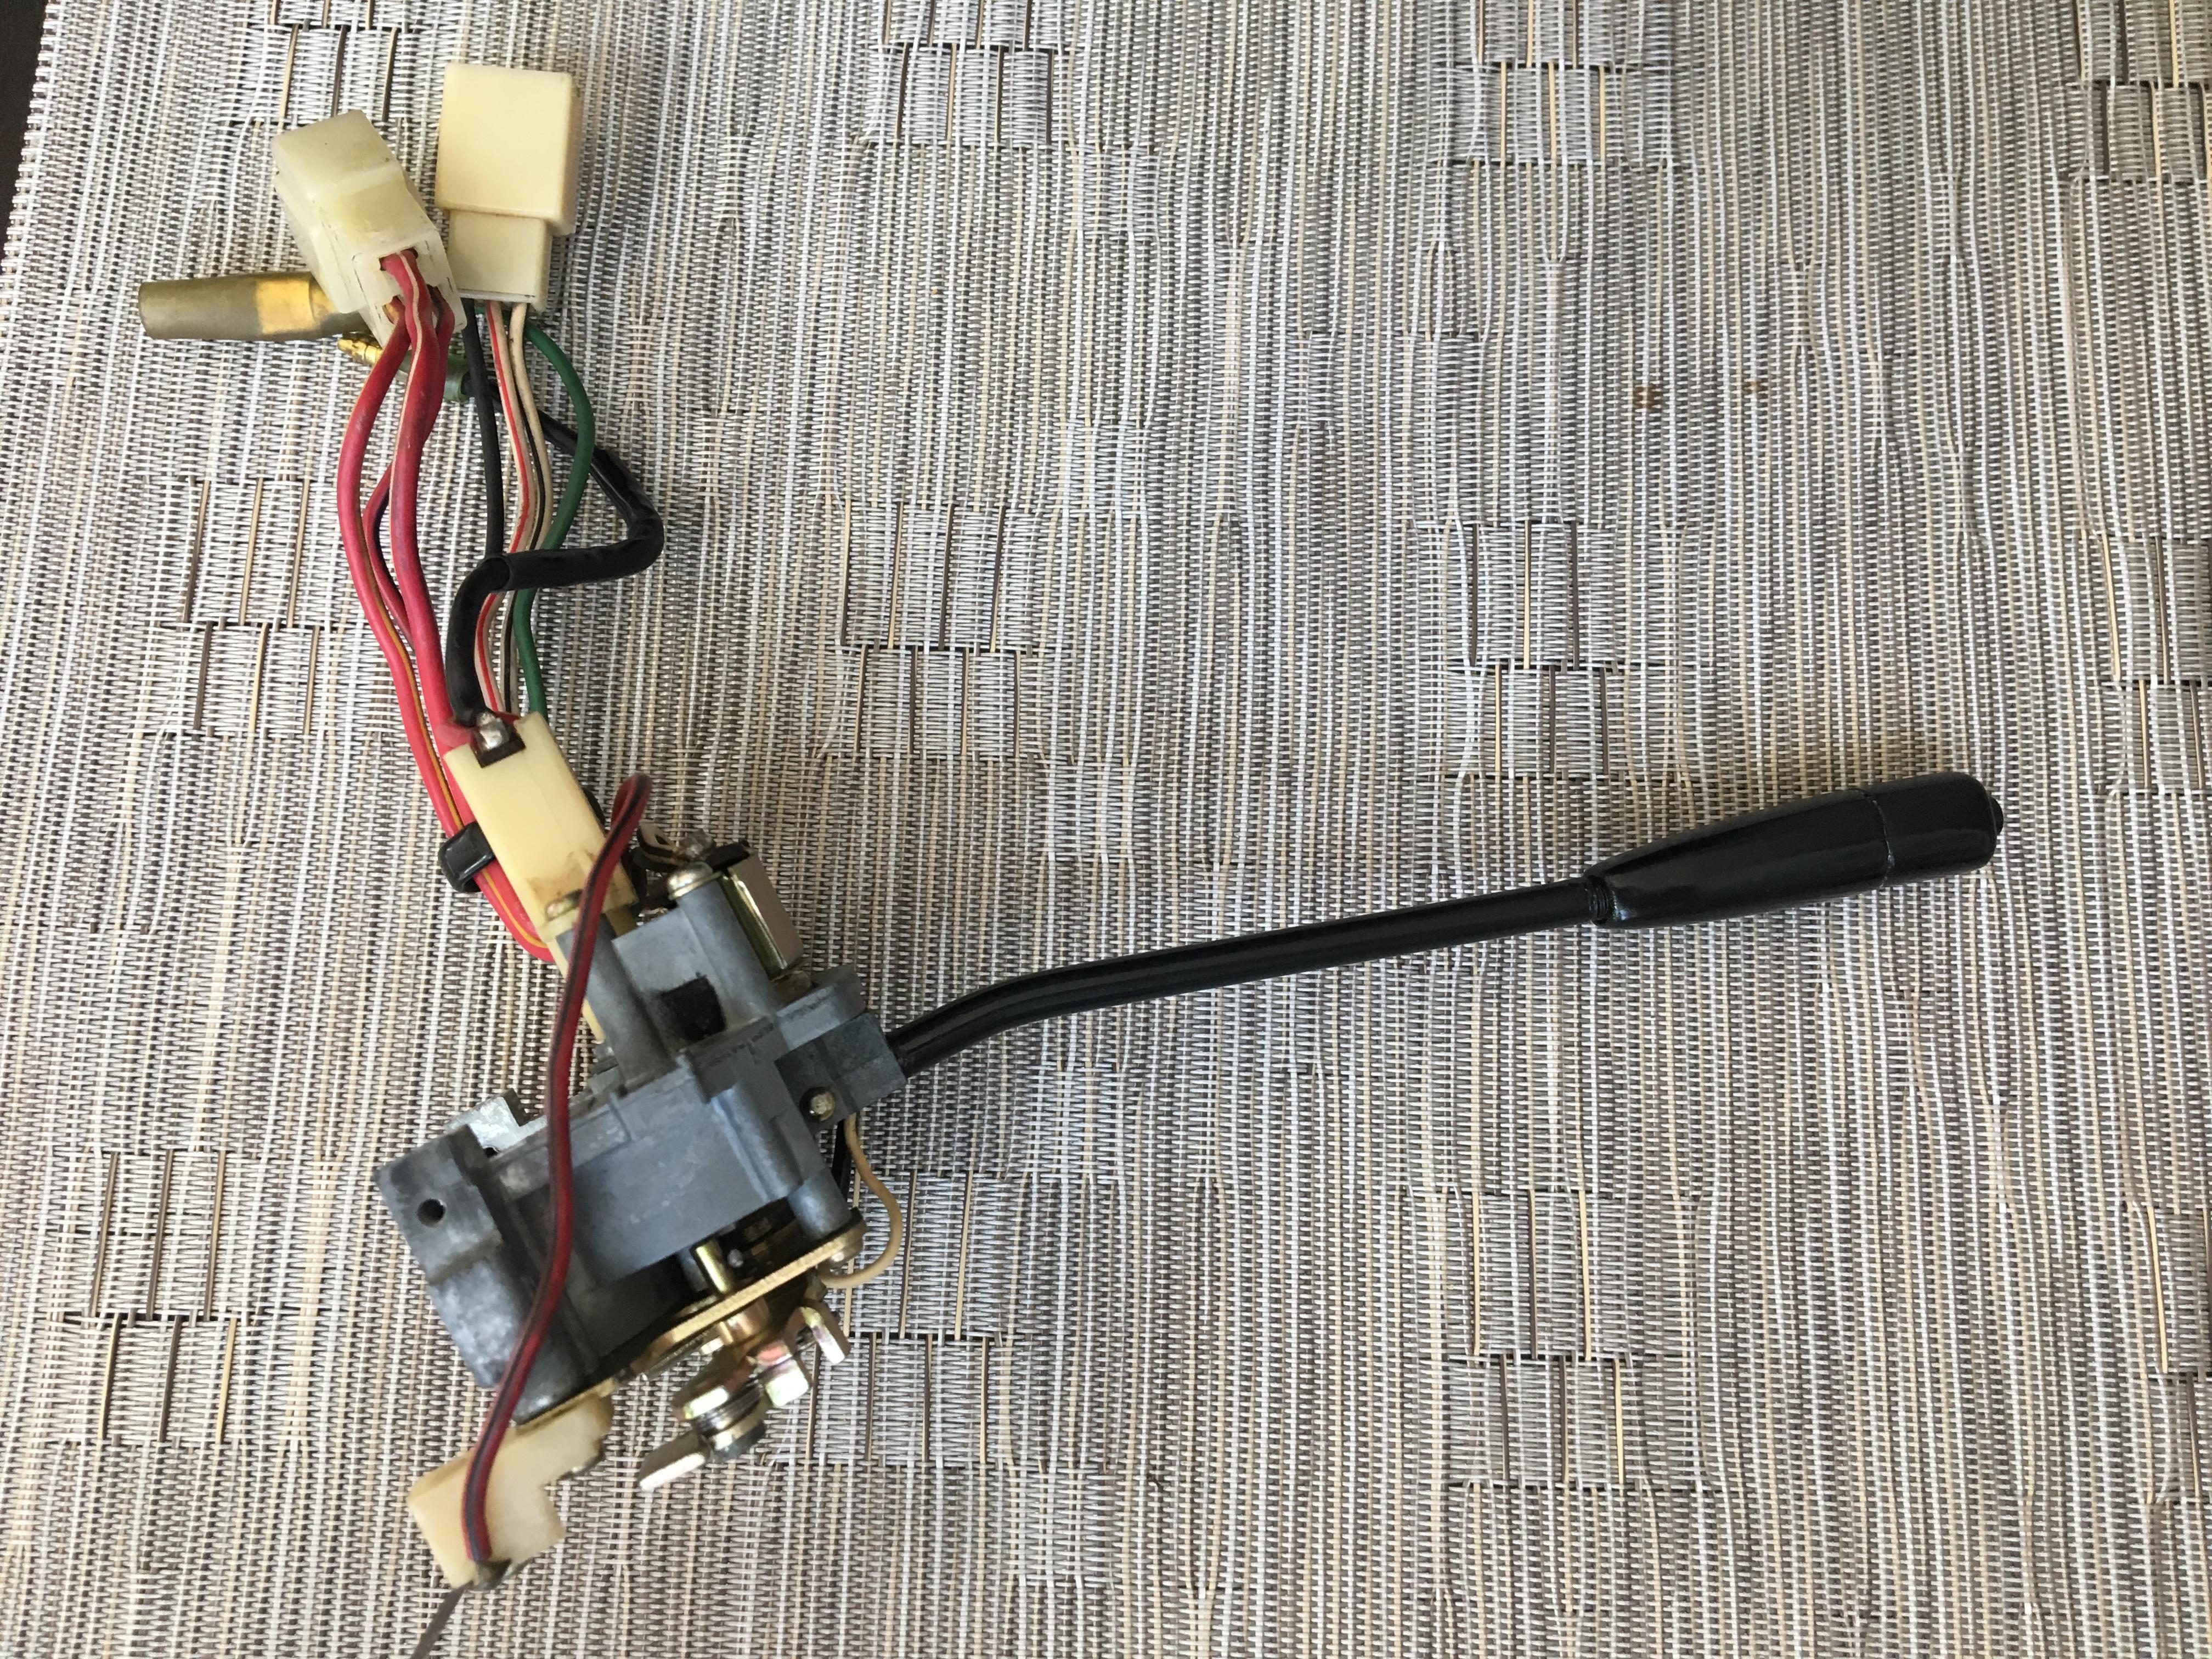
Problem solved. Thanks to the wiring diagram and the 'flash to pass' circuit nudge.(Thx Kats & cgsheen1) Turns out the previous owner had installed a 1973 US turn signal (he was using that as a parts car), and just plugged it in. Turns out the wiring is different between the US 240z and JDM Fairlady Z. Attached for reference is JDM version on left, US version on right. Note the turn signal plugs left and right wires are the same but the flash to pass wire is on the JDM one. A clean up of the JDM version, rebuild the switches and reinstalled and all working now. Other thing to note is the flasher in the JDM version is on the RHS of the car, with all the other electrics. Another problem solved, one more step to getting her road worthy.


-
FYI - Kats was kind enough to post the information I was after on another post. Some differences in wire colours from JDM to US markets.
-
Is this the resistance in ohms across the various sets of wires?
-
Kats San, doumo arigato gozaimasu. Not only will this help with the wiring. It has also confirmed my suspicions that it is a 1972 not a 1973 as believed by previous owner.
-
Does any one have a copy of the electrical diagram from Full Service Manual for the above. Or 1972?
headlights come on solid = not flashing even if I pull the two headlight fuses, the headlights sill come on when the indicator is used. Need to sit down with the FSM more. However the wire colors in the 73 Datsun 240 FSM do not match. Genuine RHD JDM Fairlady Z. 1973 - S30100698. but the electrics look like they are from 1972.
Any suggestions or ideas?
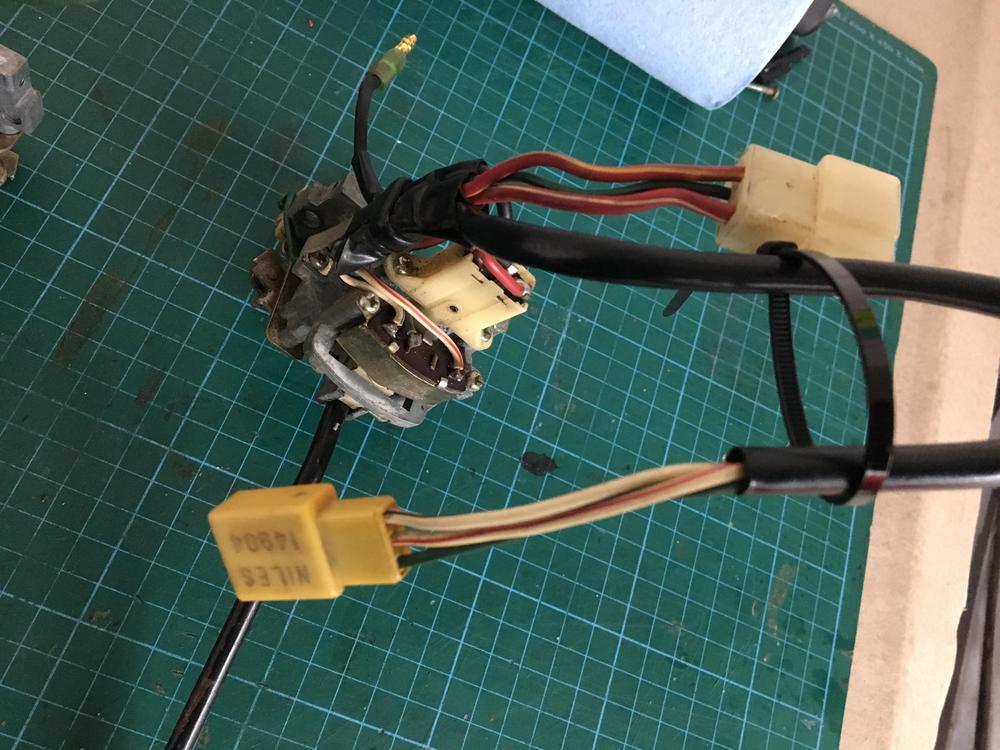
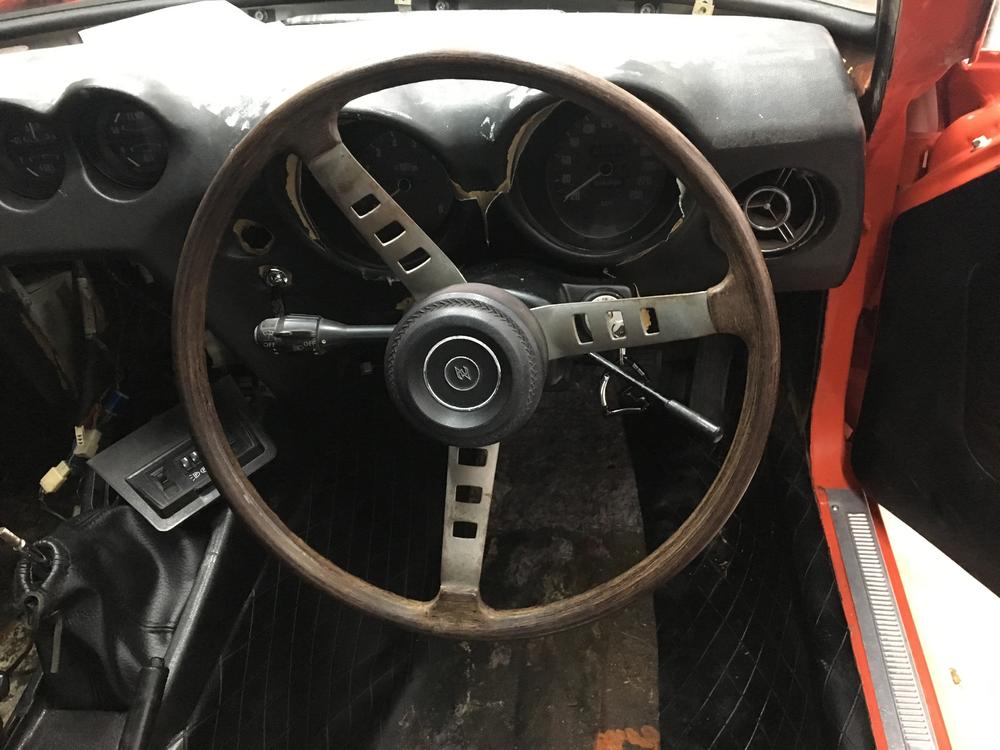
Thanks. A great source of info. Using his site it is an early two knob rally clock. The hum comes from the tuning fork in the oscillator box. Clock not working however. Another item to add to the list
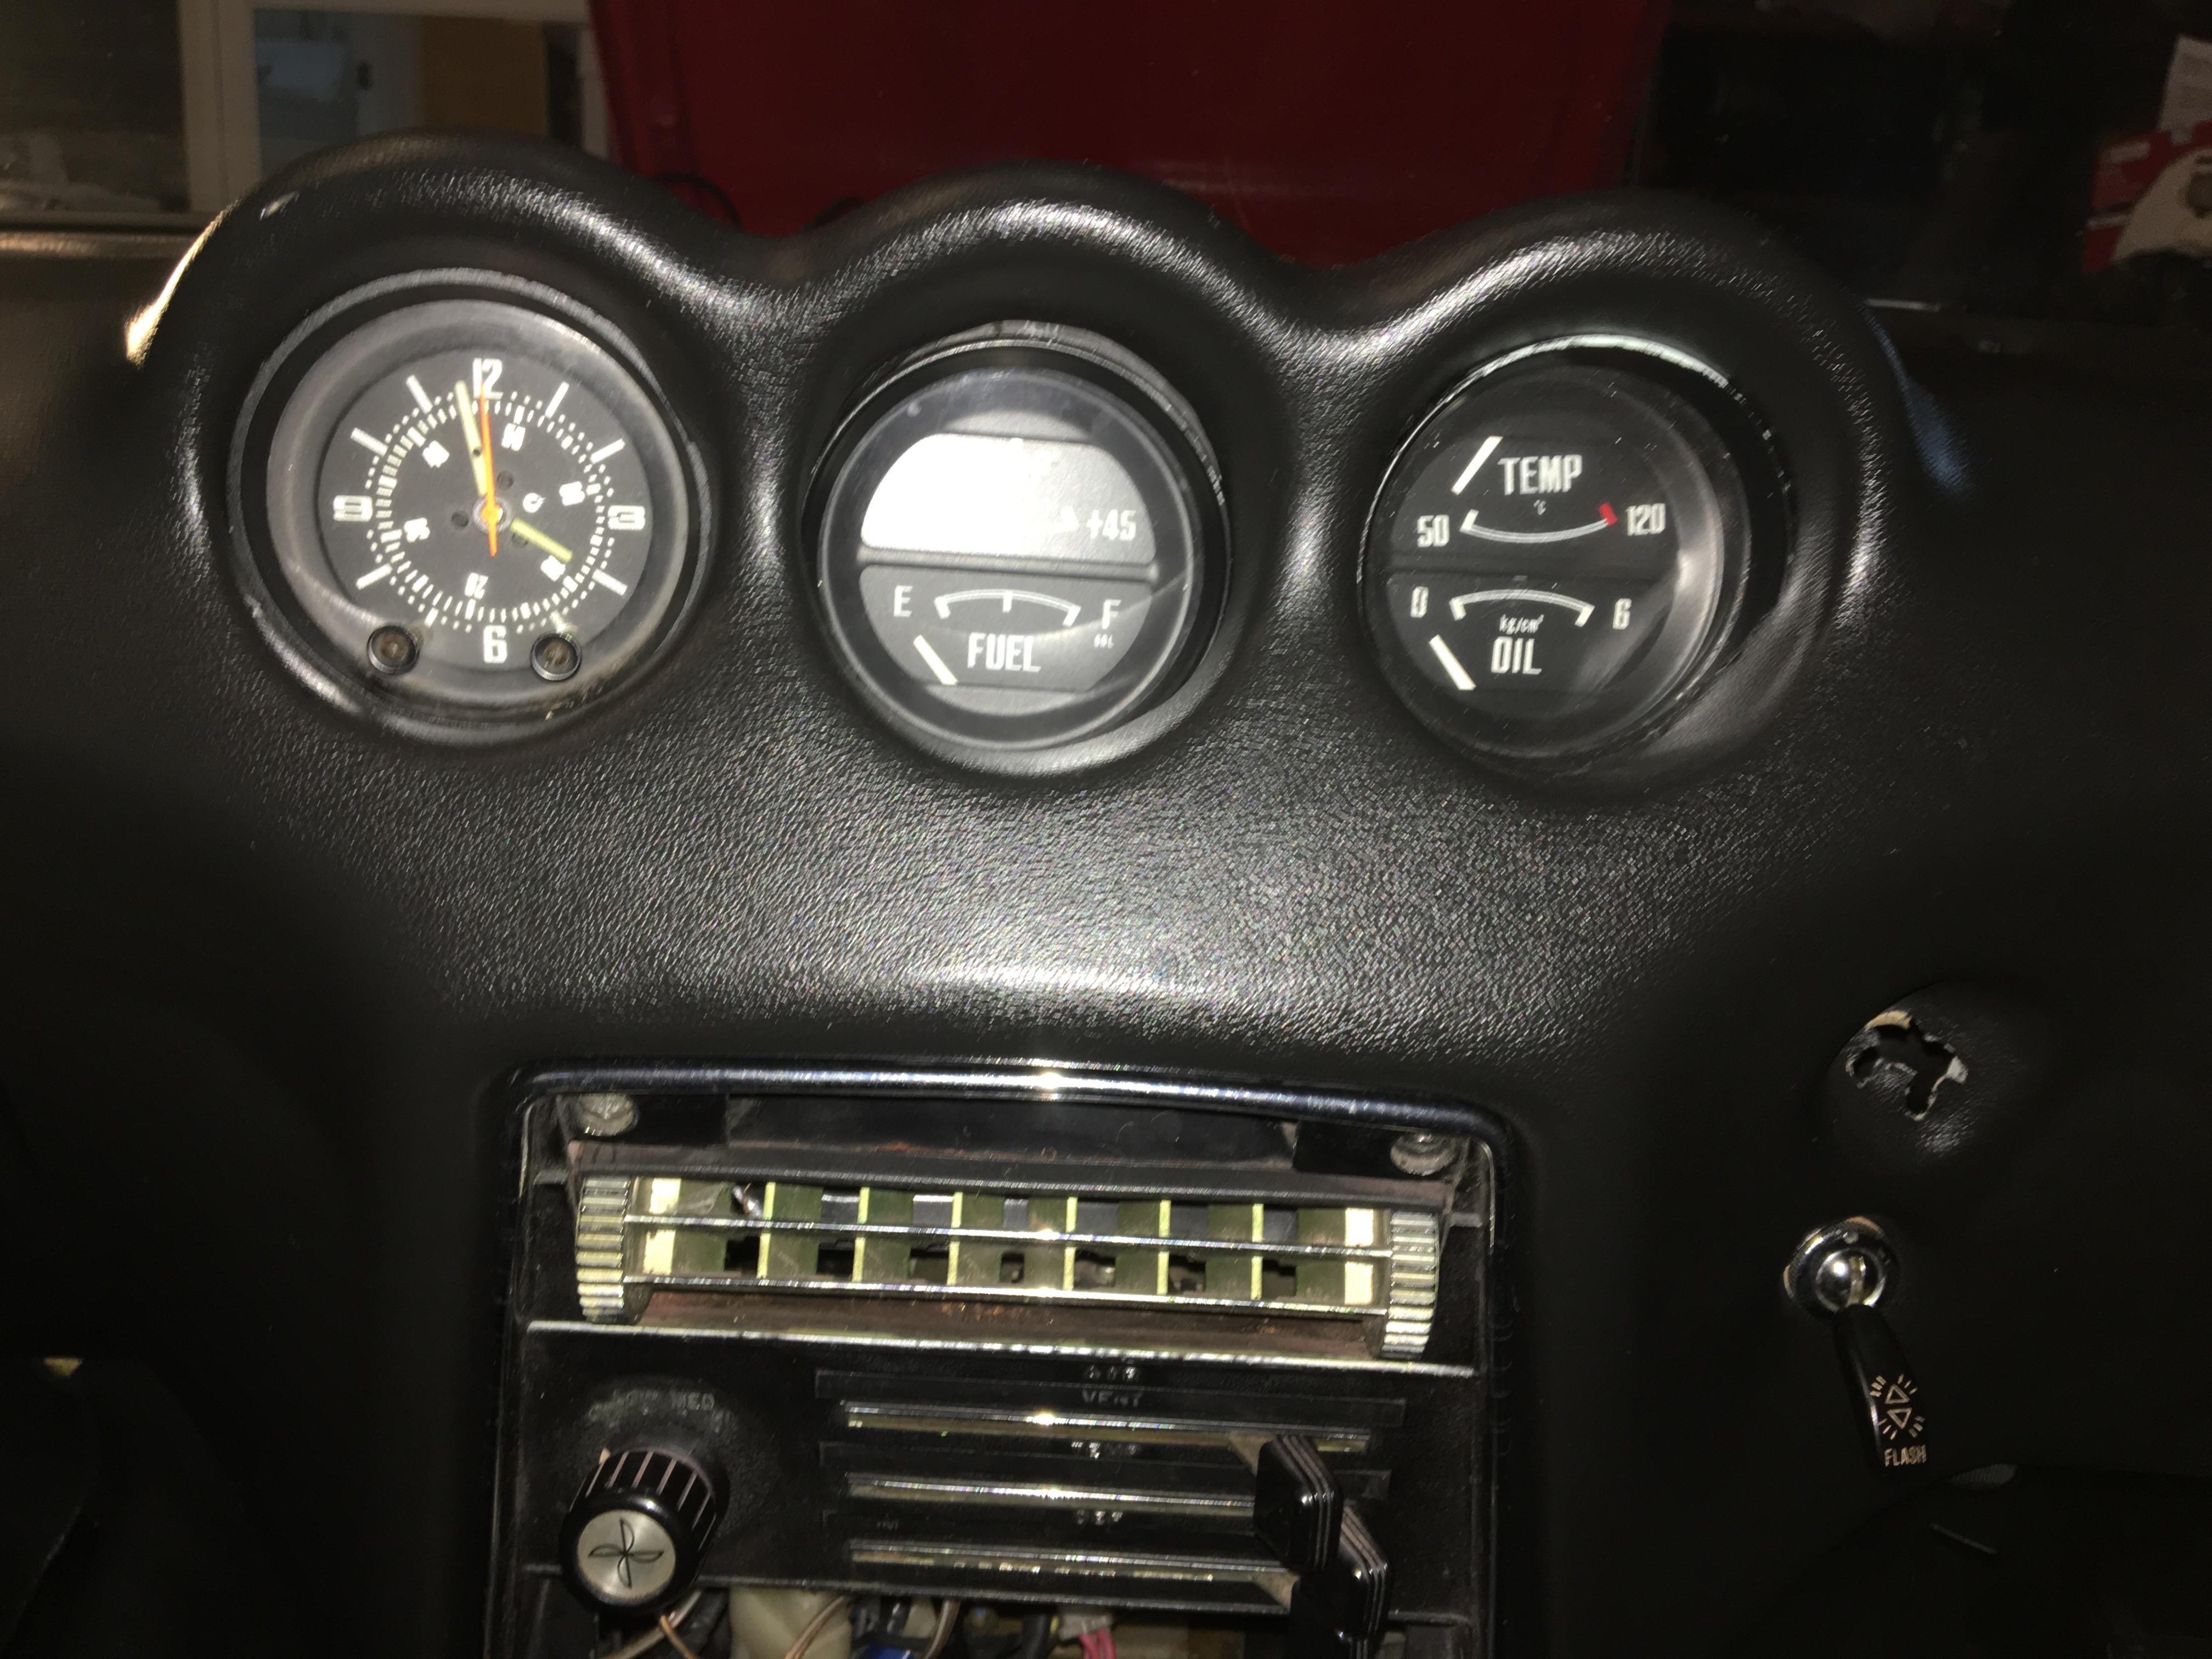
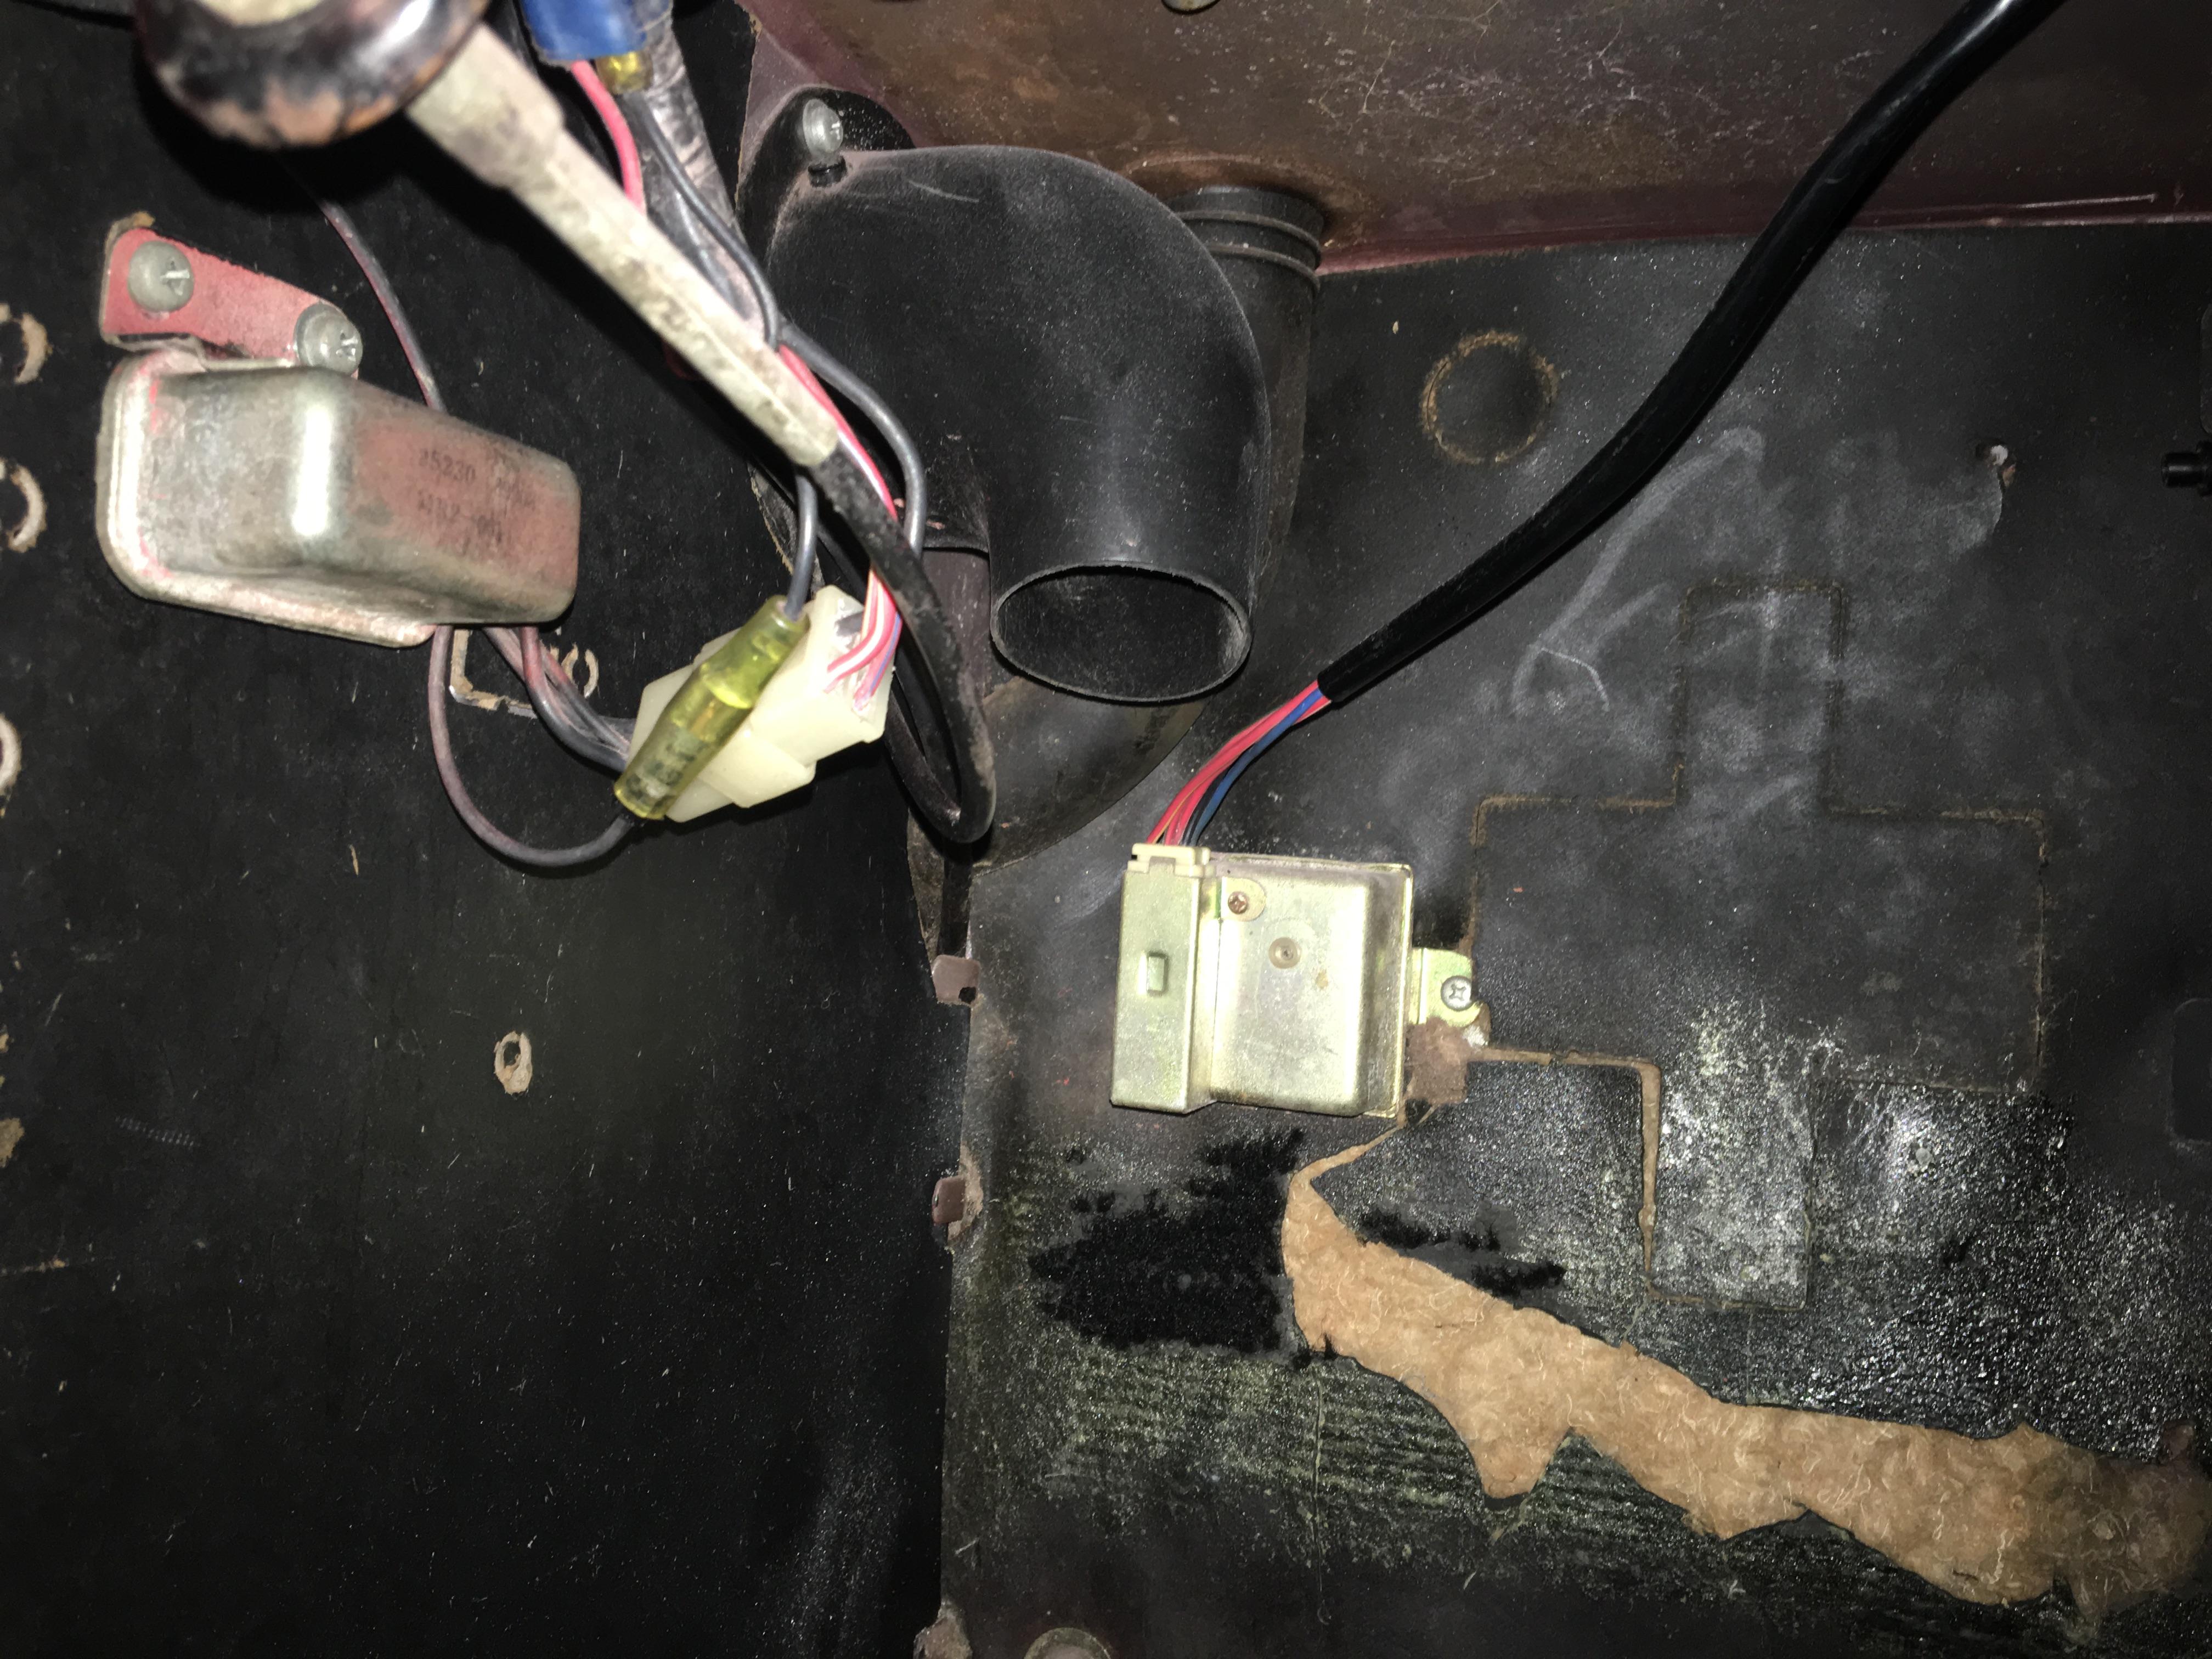
What is the box in the middle of the photo. LHS against firewall. It connects up to the clock (not working) and makes a humming noise whenever the battery is connected. Note car is a 73 JDM Fairlady Z / RHD. I know the unit on the left is the Flasher relay.
 I stumped, but working through problem solving. A nudge or ideas might help 73 Fairlady Z - recent purchase, just getting it road ready. PO has been restoring for 21 years, not run for at least 4 years. Headlights work; low beam & high beam + rear lights come on Hazard switch works with all 4 lights working If I use the indicators with the hazards on, I can hear the indicator relay also clicking on/off Brake lights work However when I go to use the indicators the headlights come on solid. Clearly something shorting or incorrectly wired.
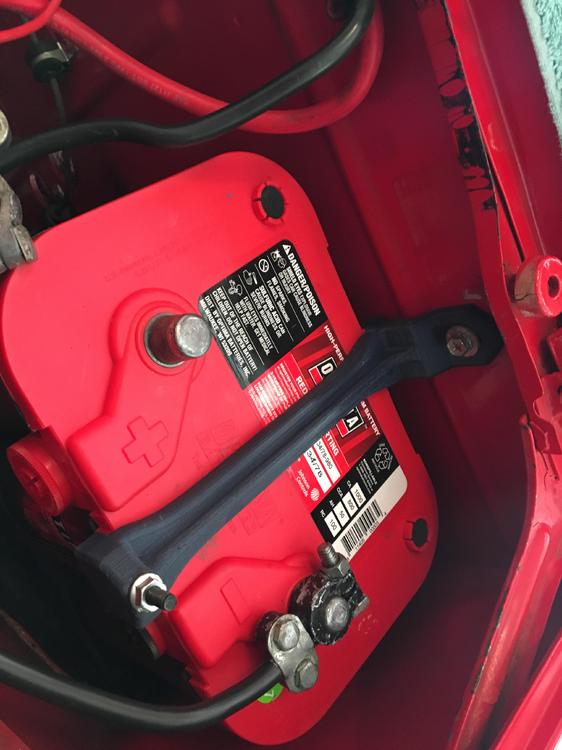
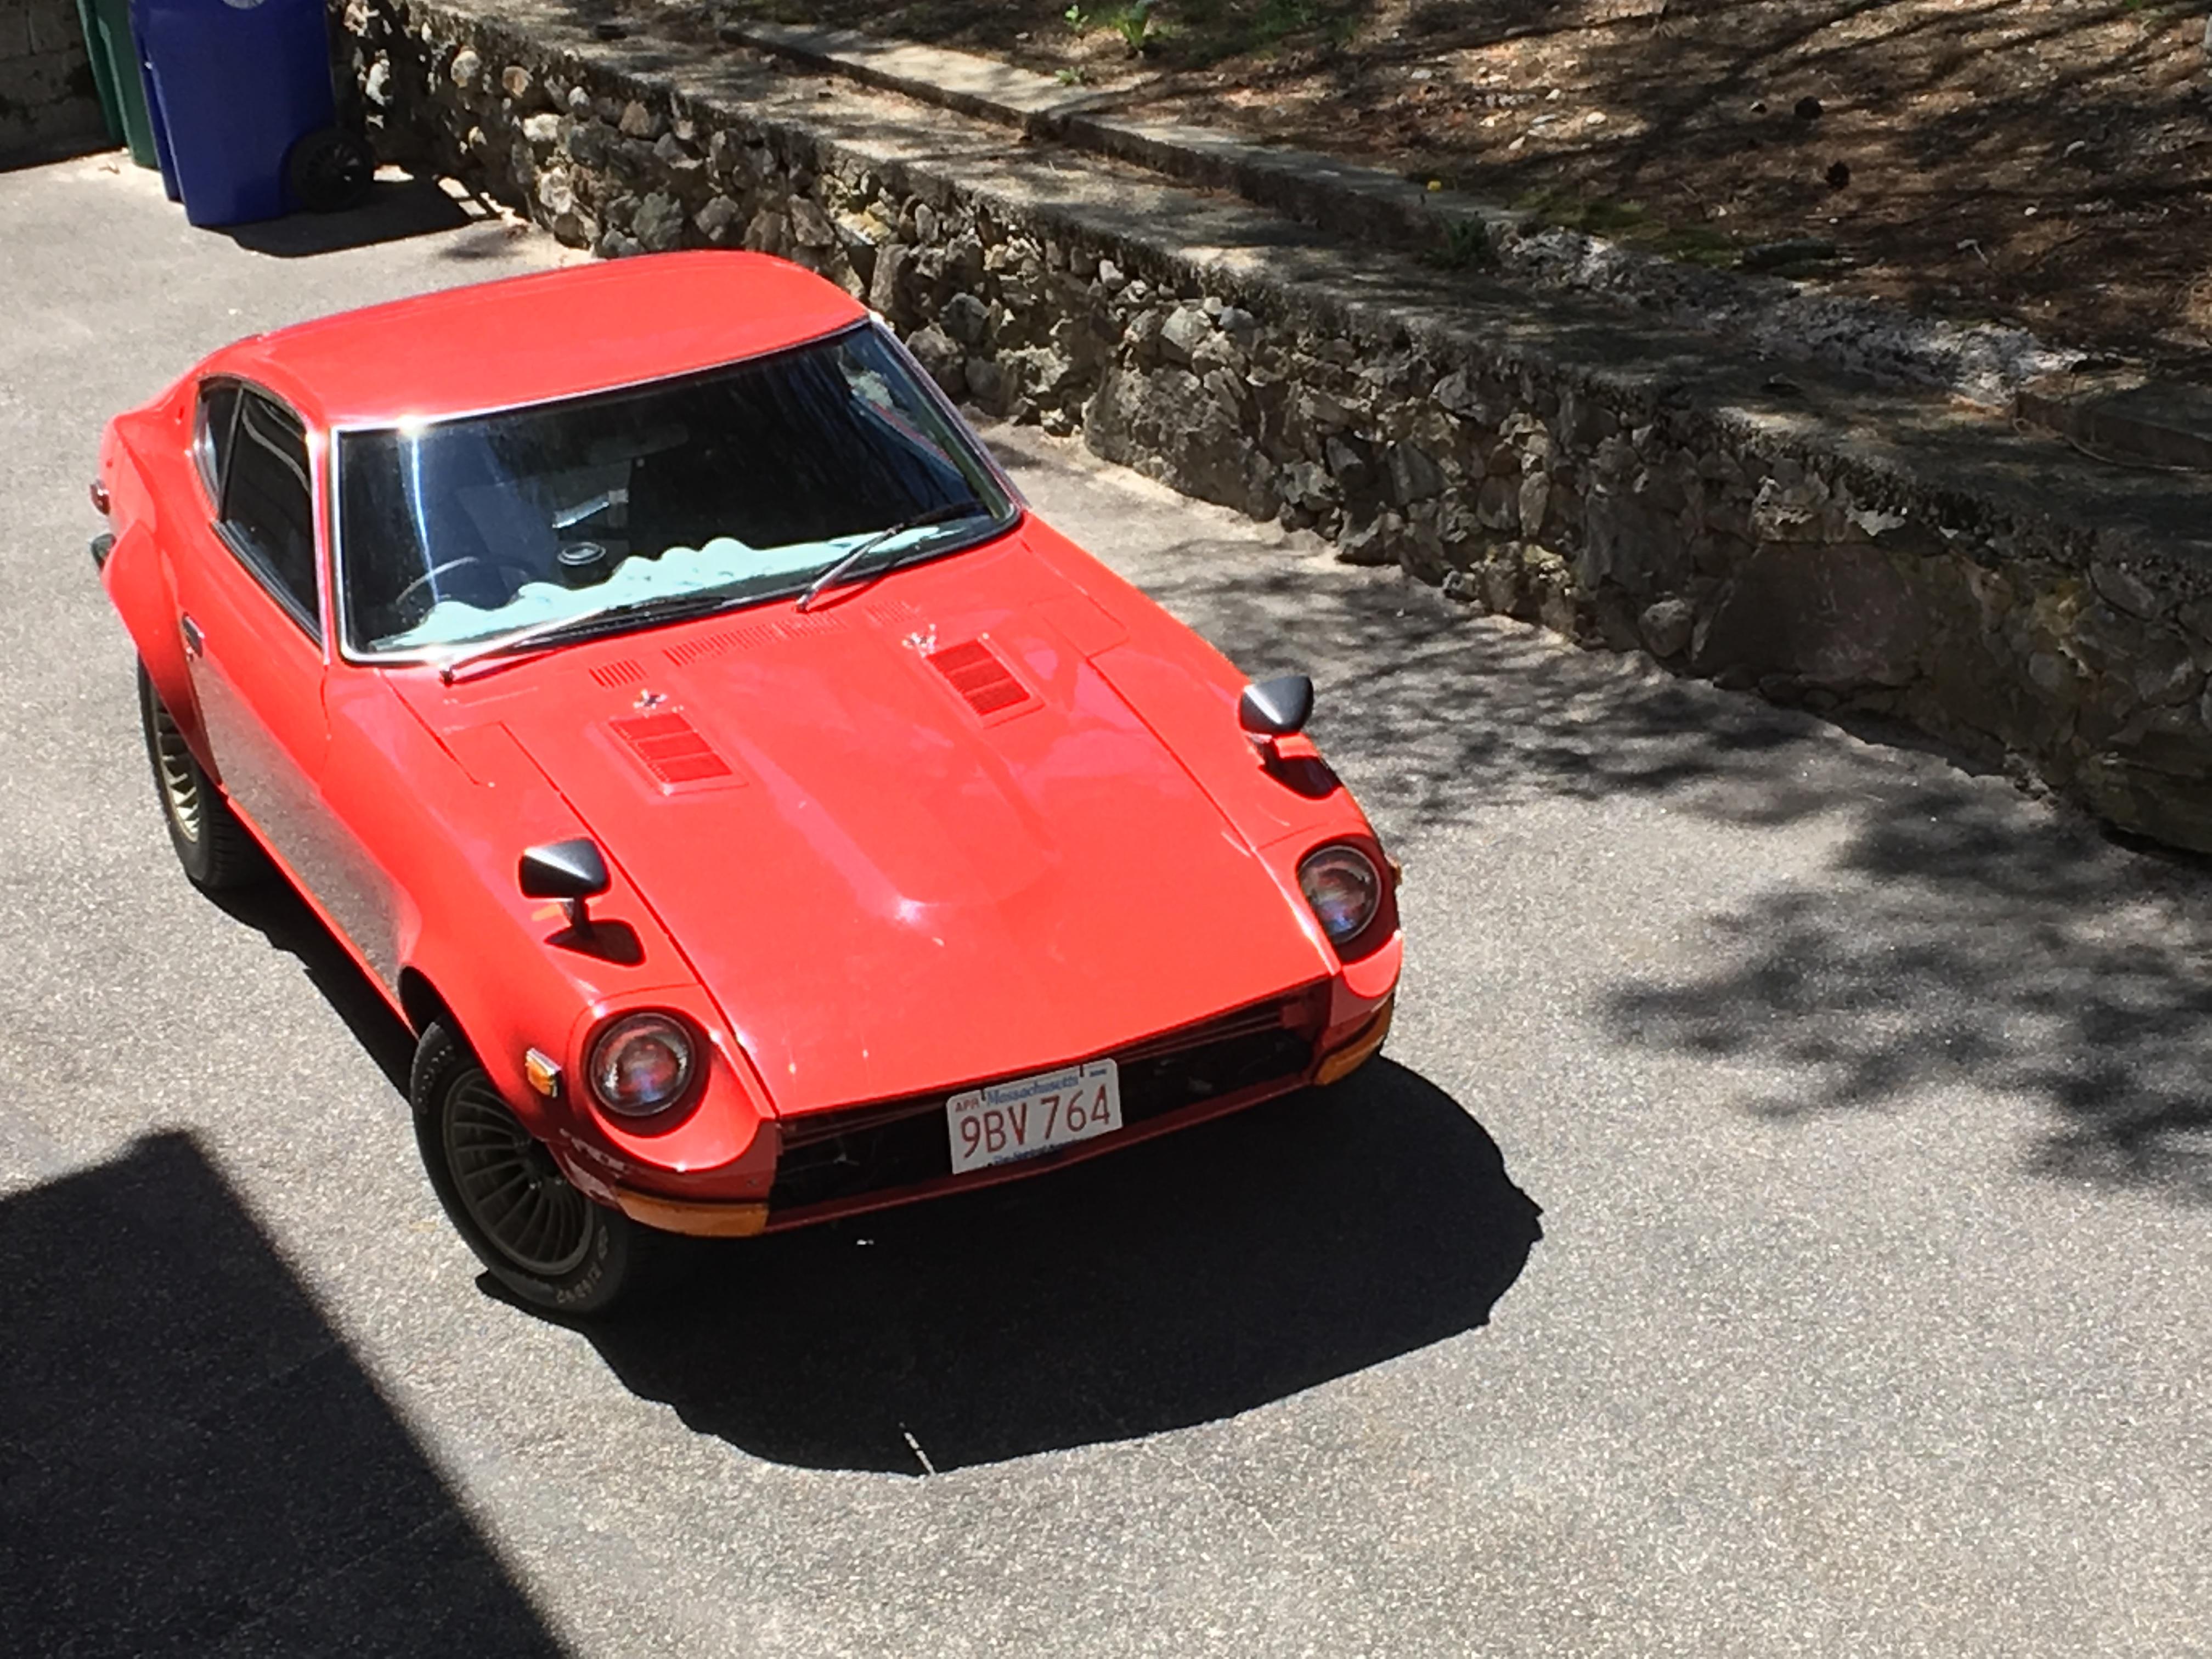
I got a new battery for my Fairlady Z. Given the battery was smaller than stock the OEM bracket would not work. A quick design in fusion 360, a quick print of a prototype. then some tweaking before the final print. Works perfectly.
I stumped, but working through problem solving. A nudge or ideas might help 73 Fairlady Z - recent purchase, just getting it road ready. PO has been restoring for 21 years, not run for at least 4 years. Headlights work; low beam & high beam + rear lights come on Hazard switch works with all 4 lights working If I use the indicators with the hazards on, I can hear the indicator relay also clicking on/off Brake lights work However when I go to use the indicators the headlights come on solid. Clearly something shorting or incorrectly wired.
I got a new battery for my Fairlady Z. Given the battery was smaller than stock the OEM bracket would not work. A quick design in fusion 360, a quick print of a prototype. then some tweaking before the final print. Works perfectly.

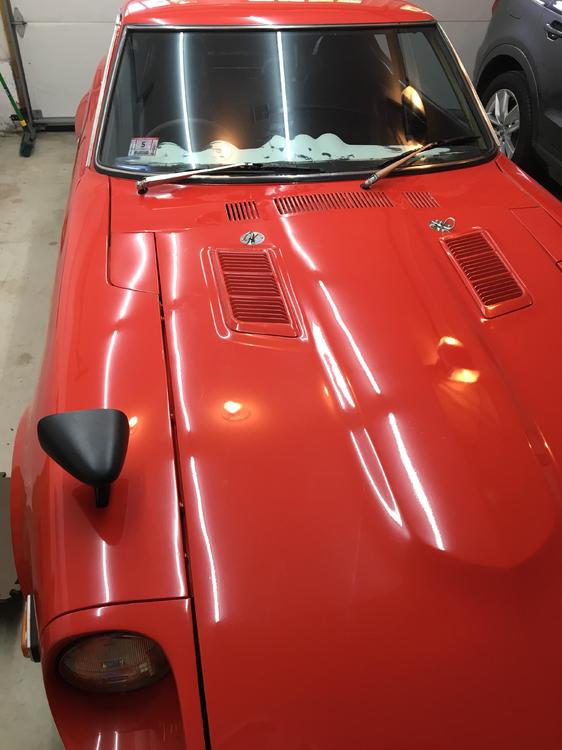
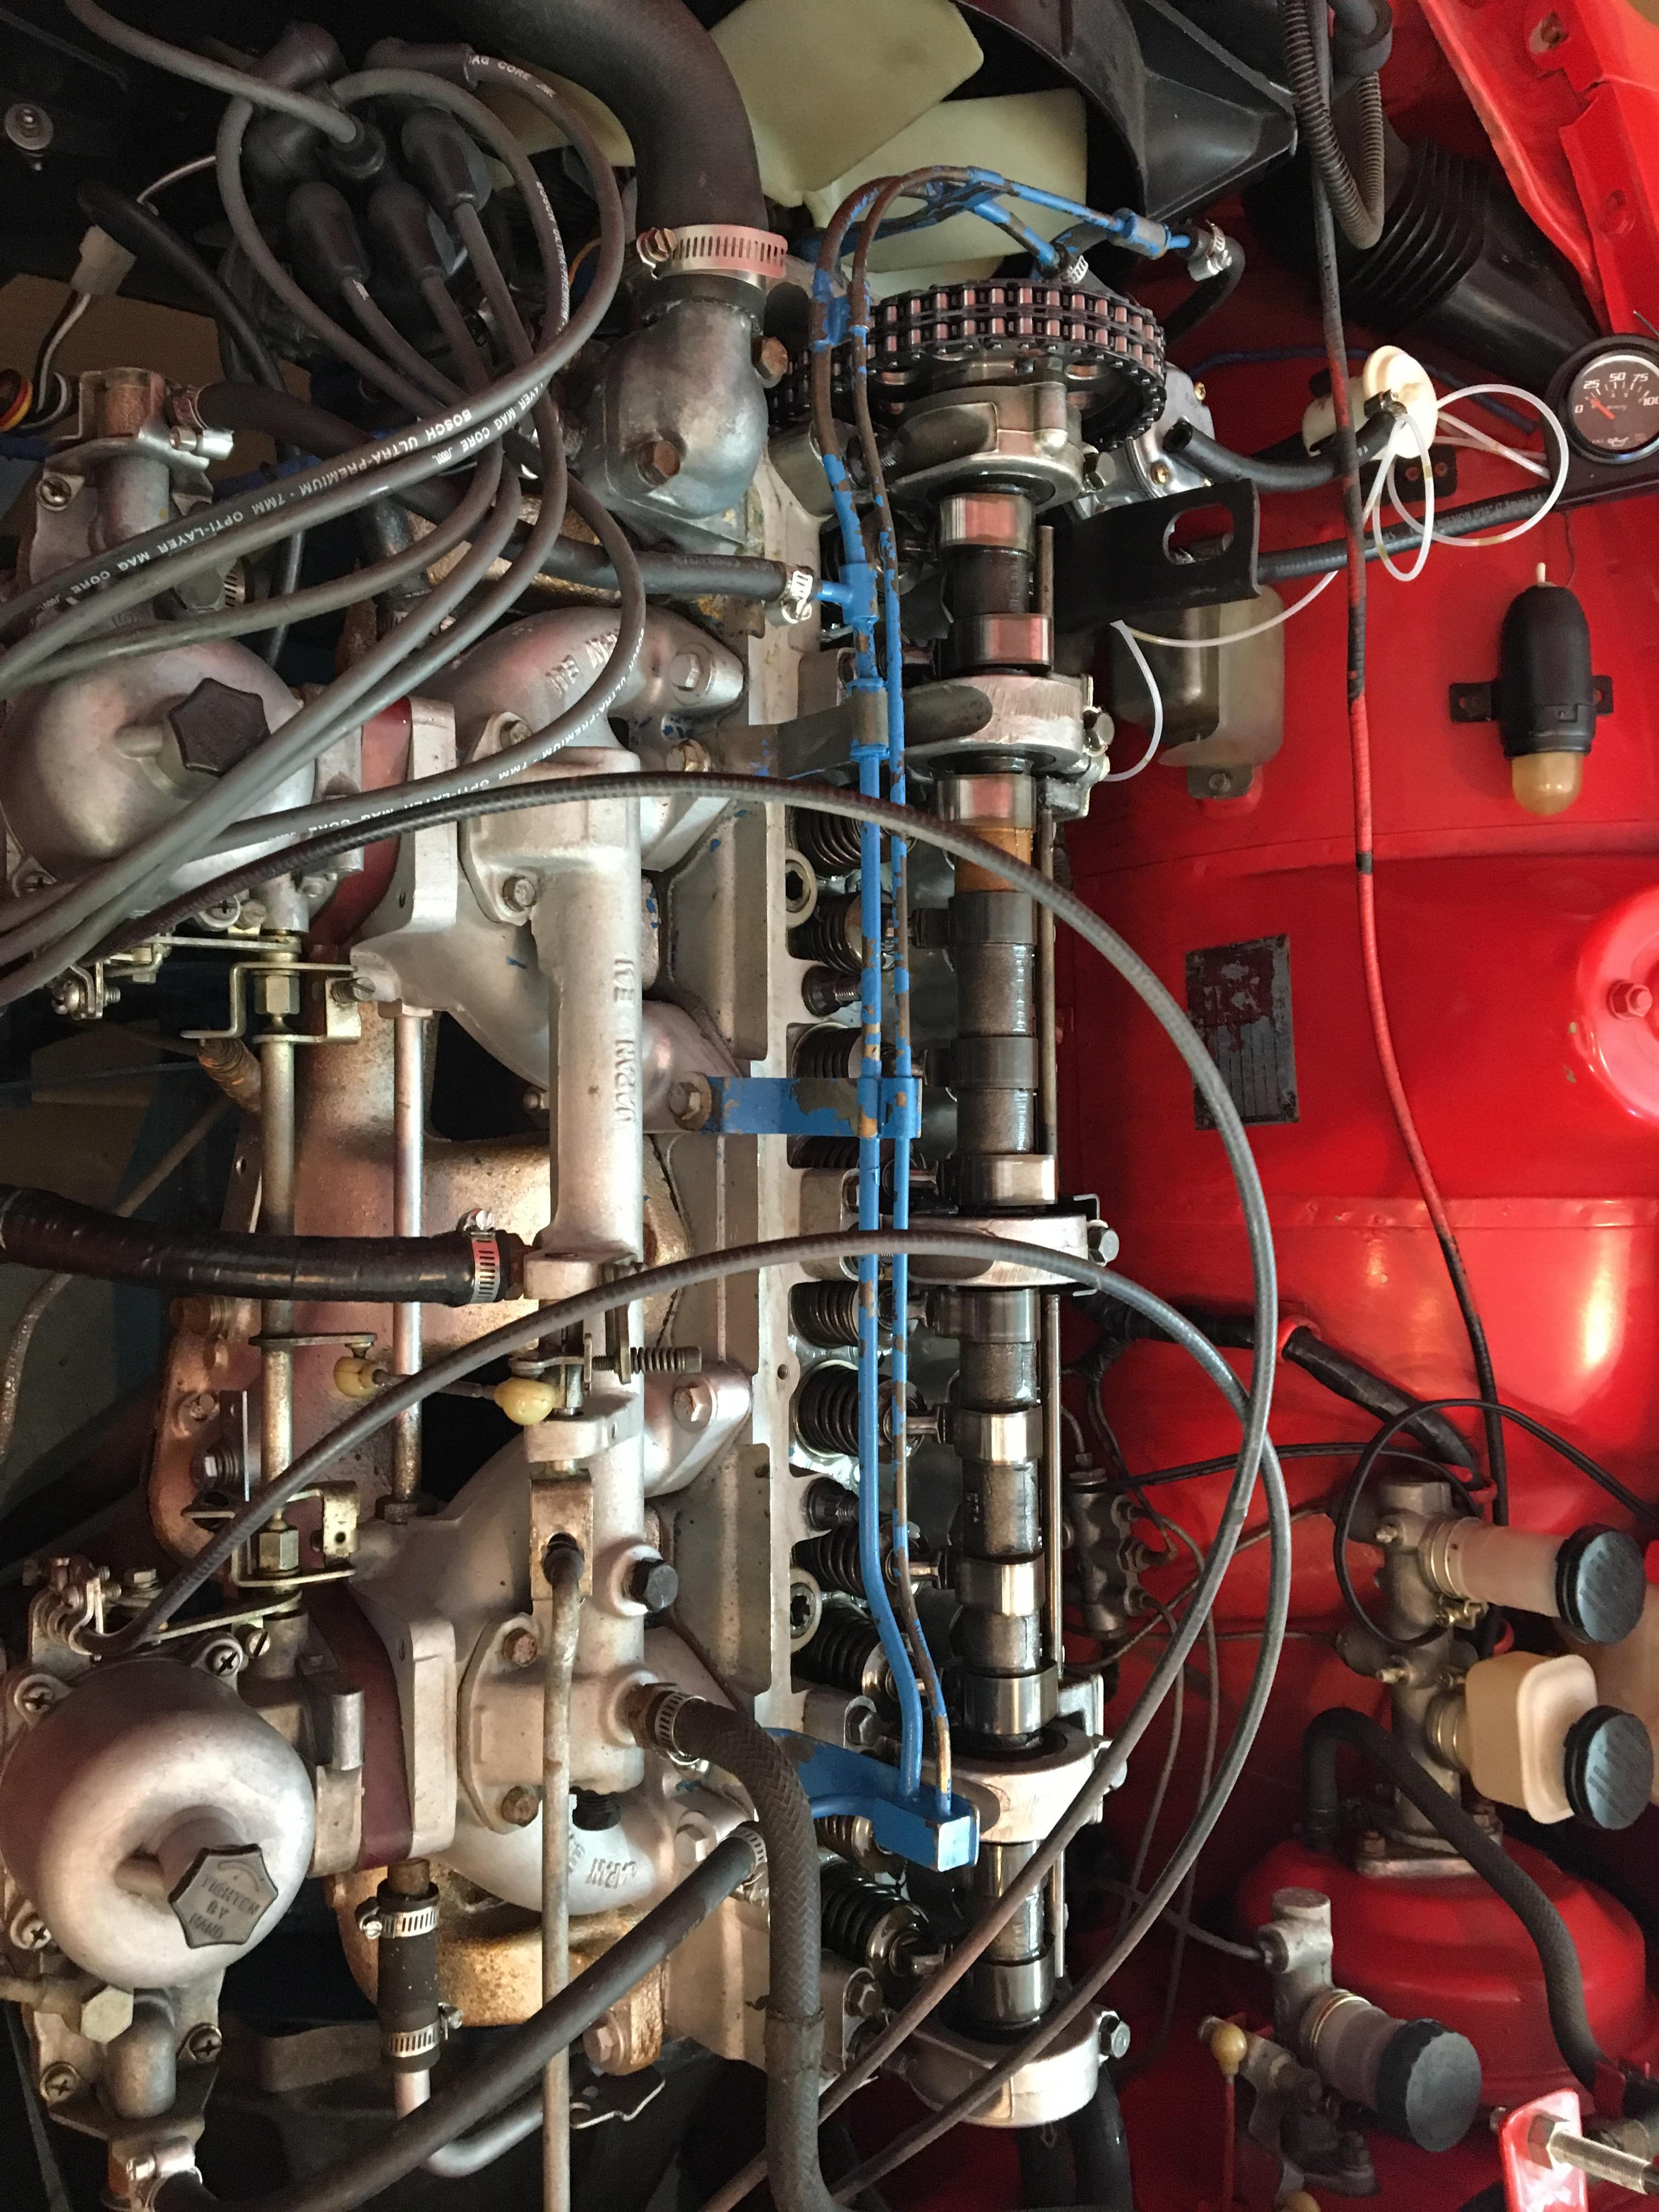
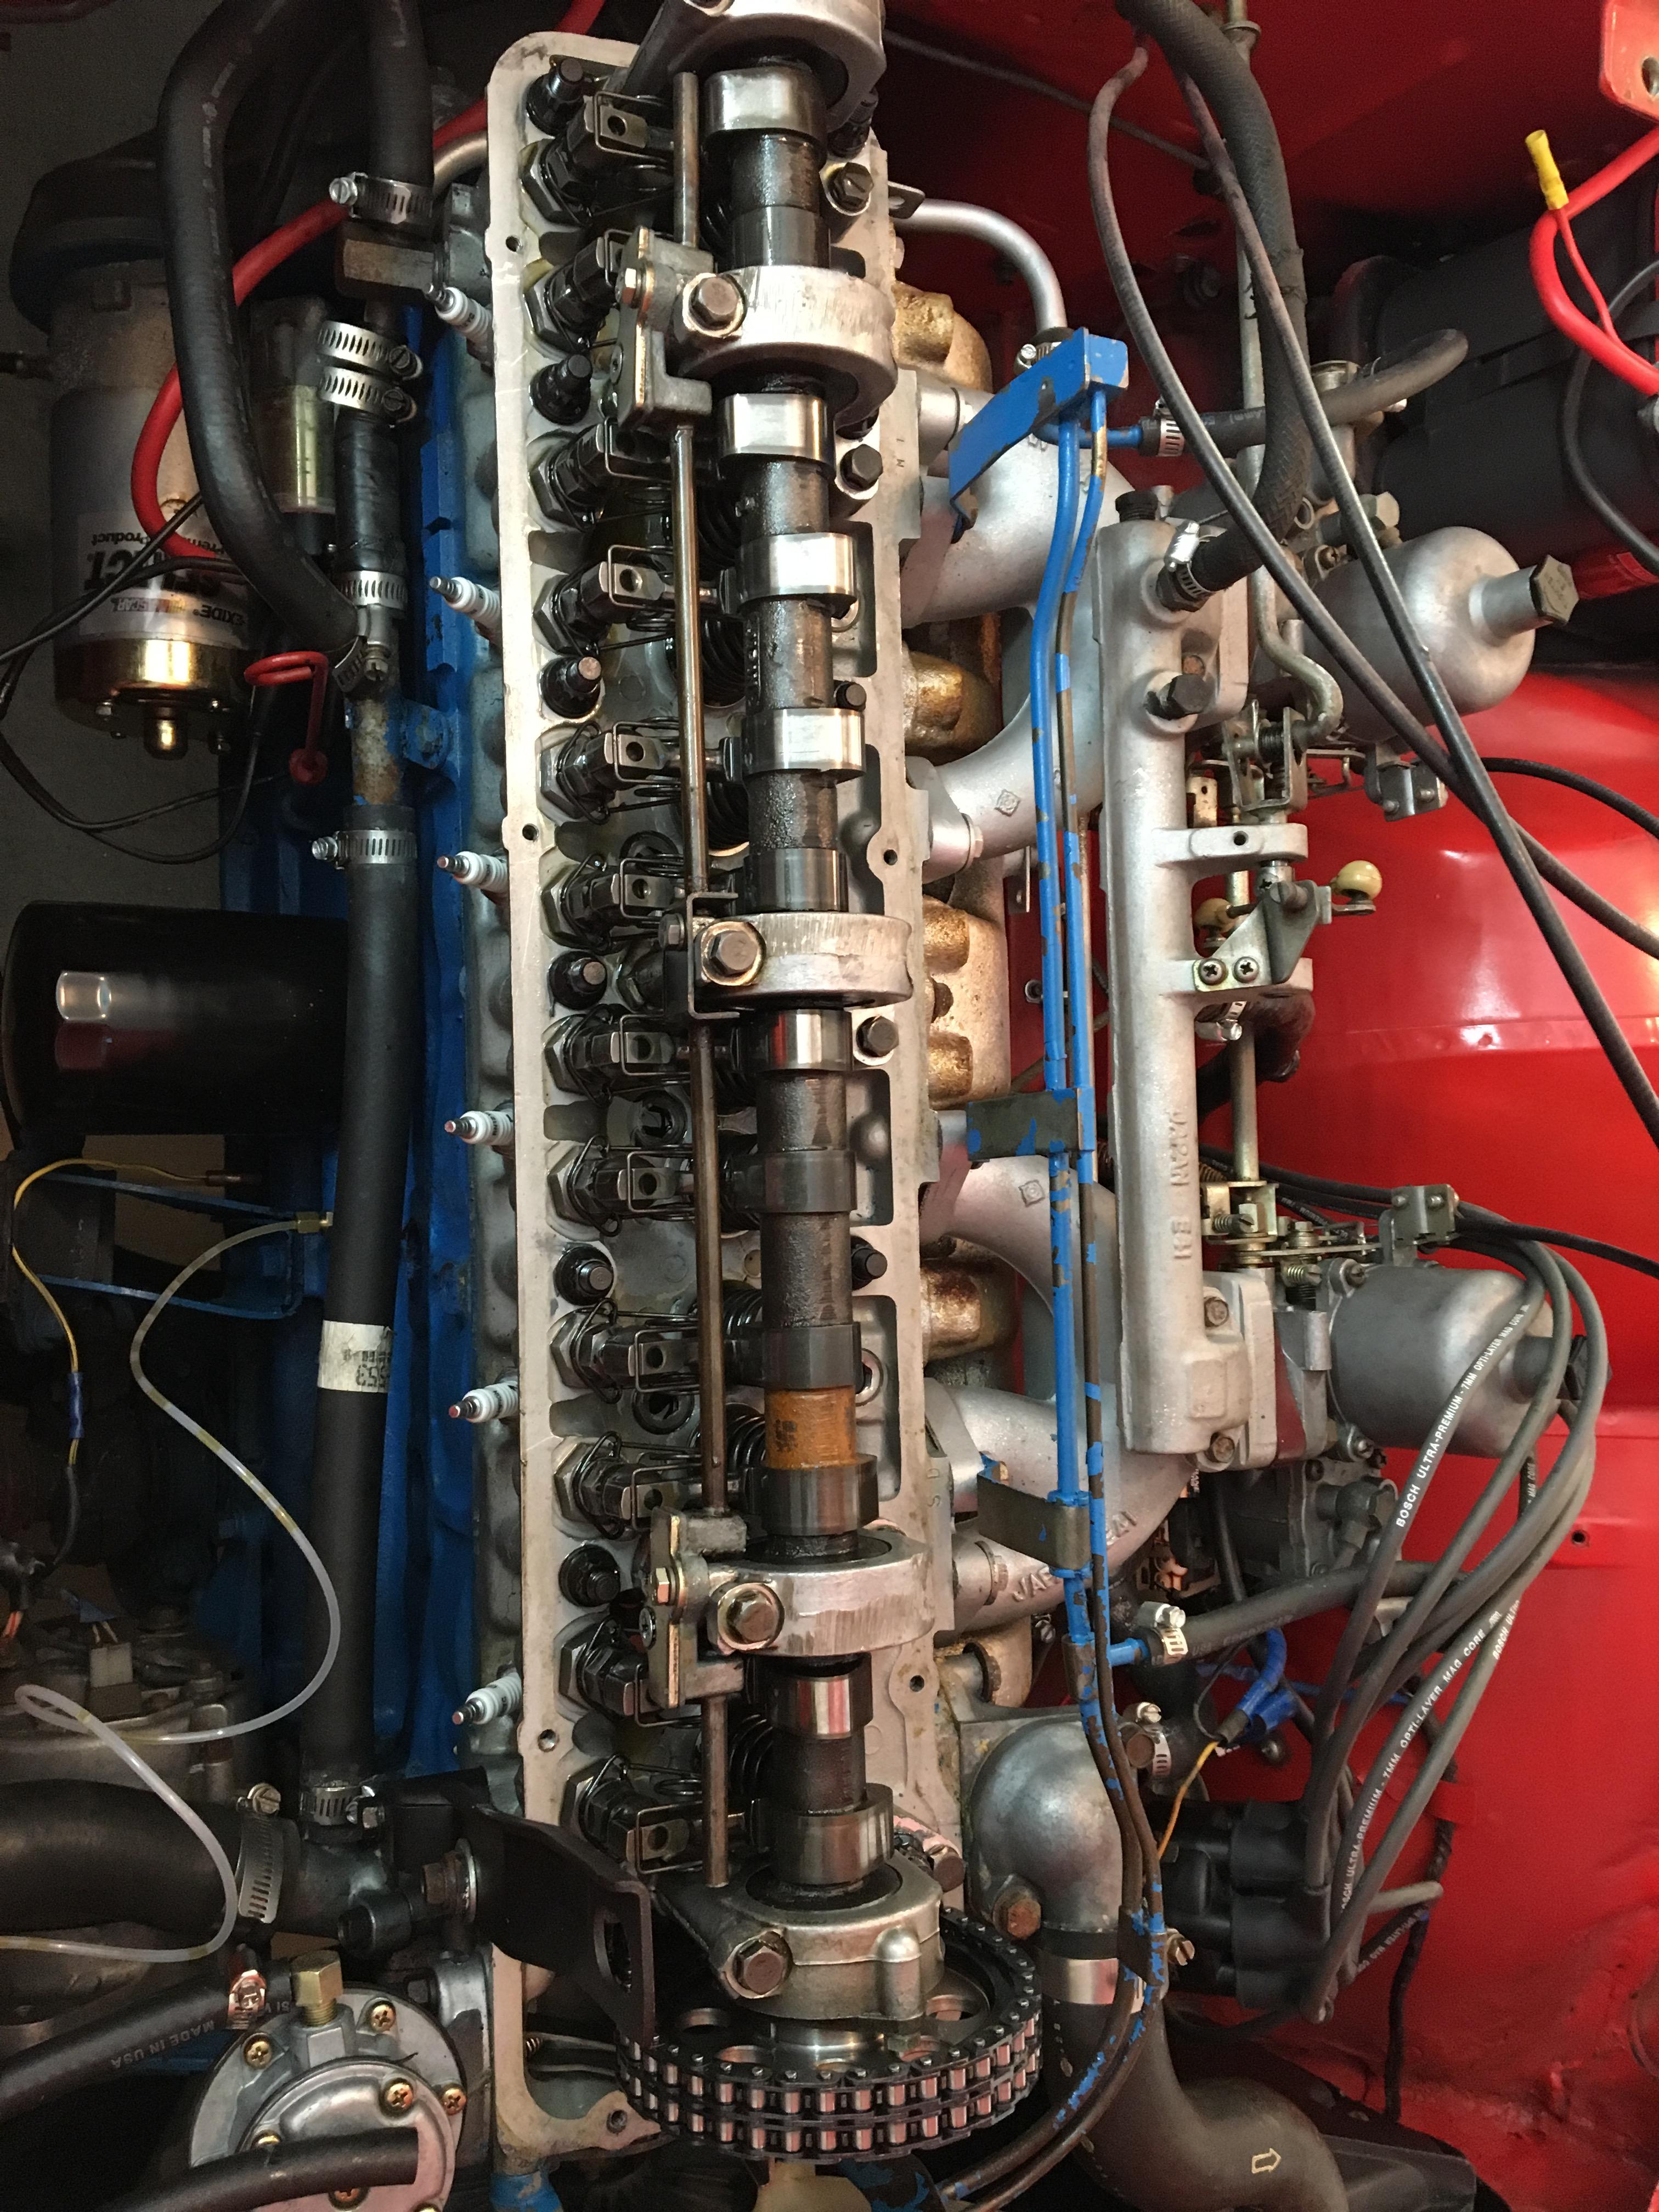
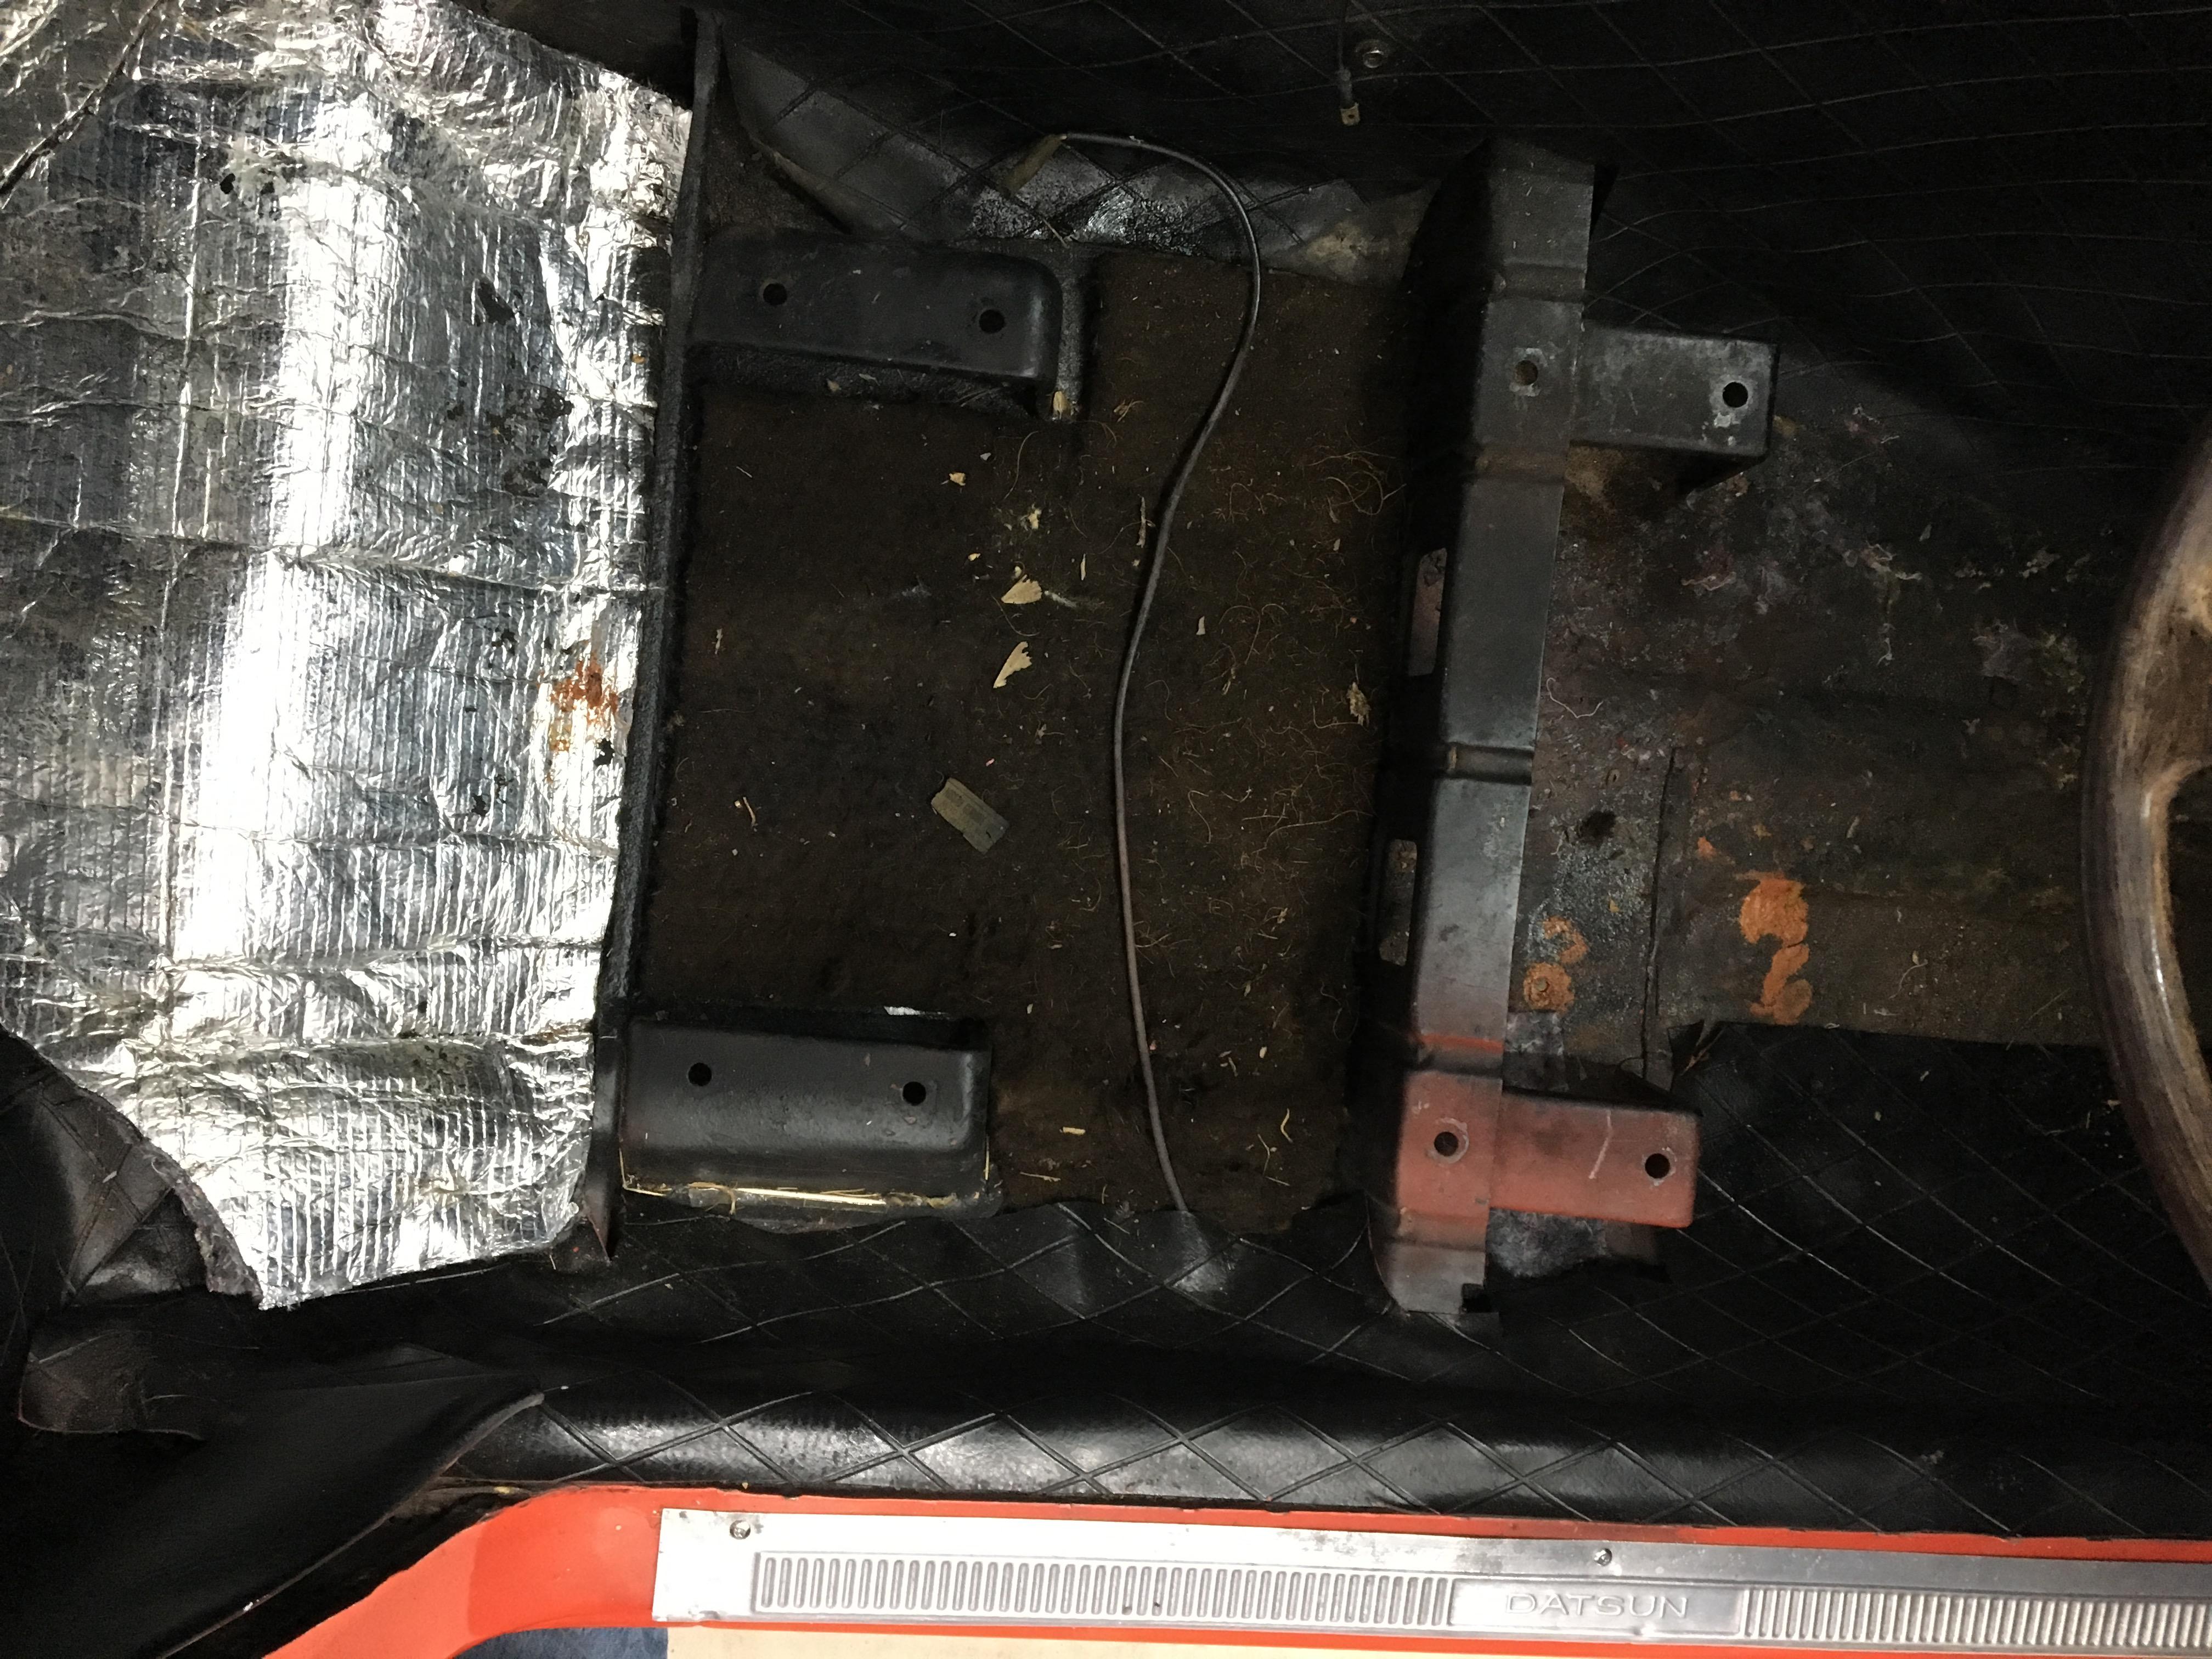
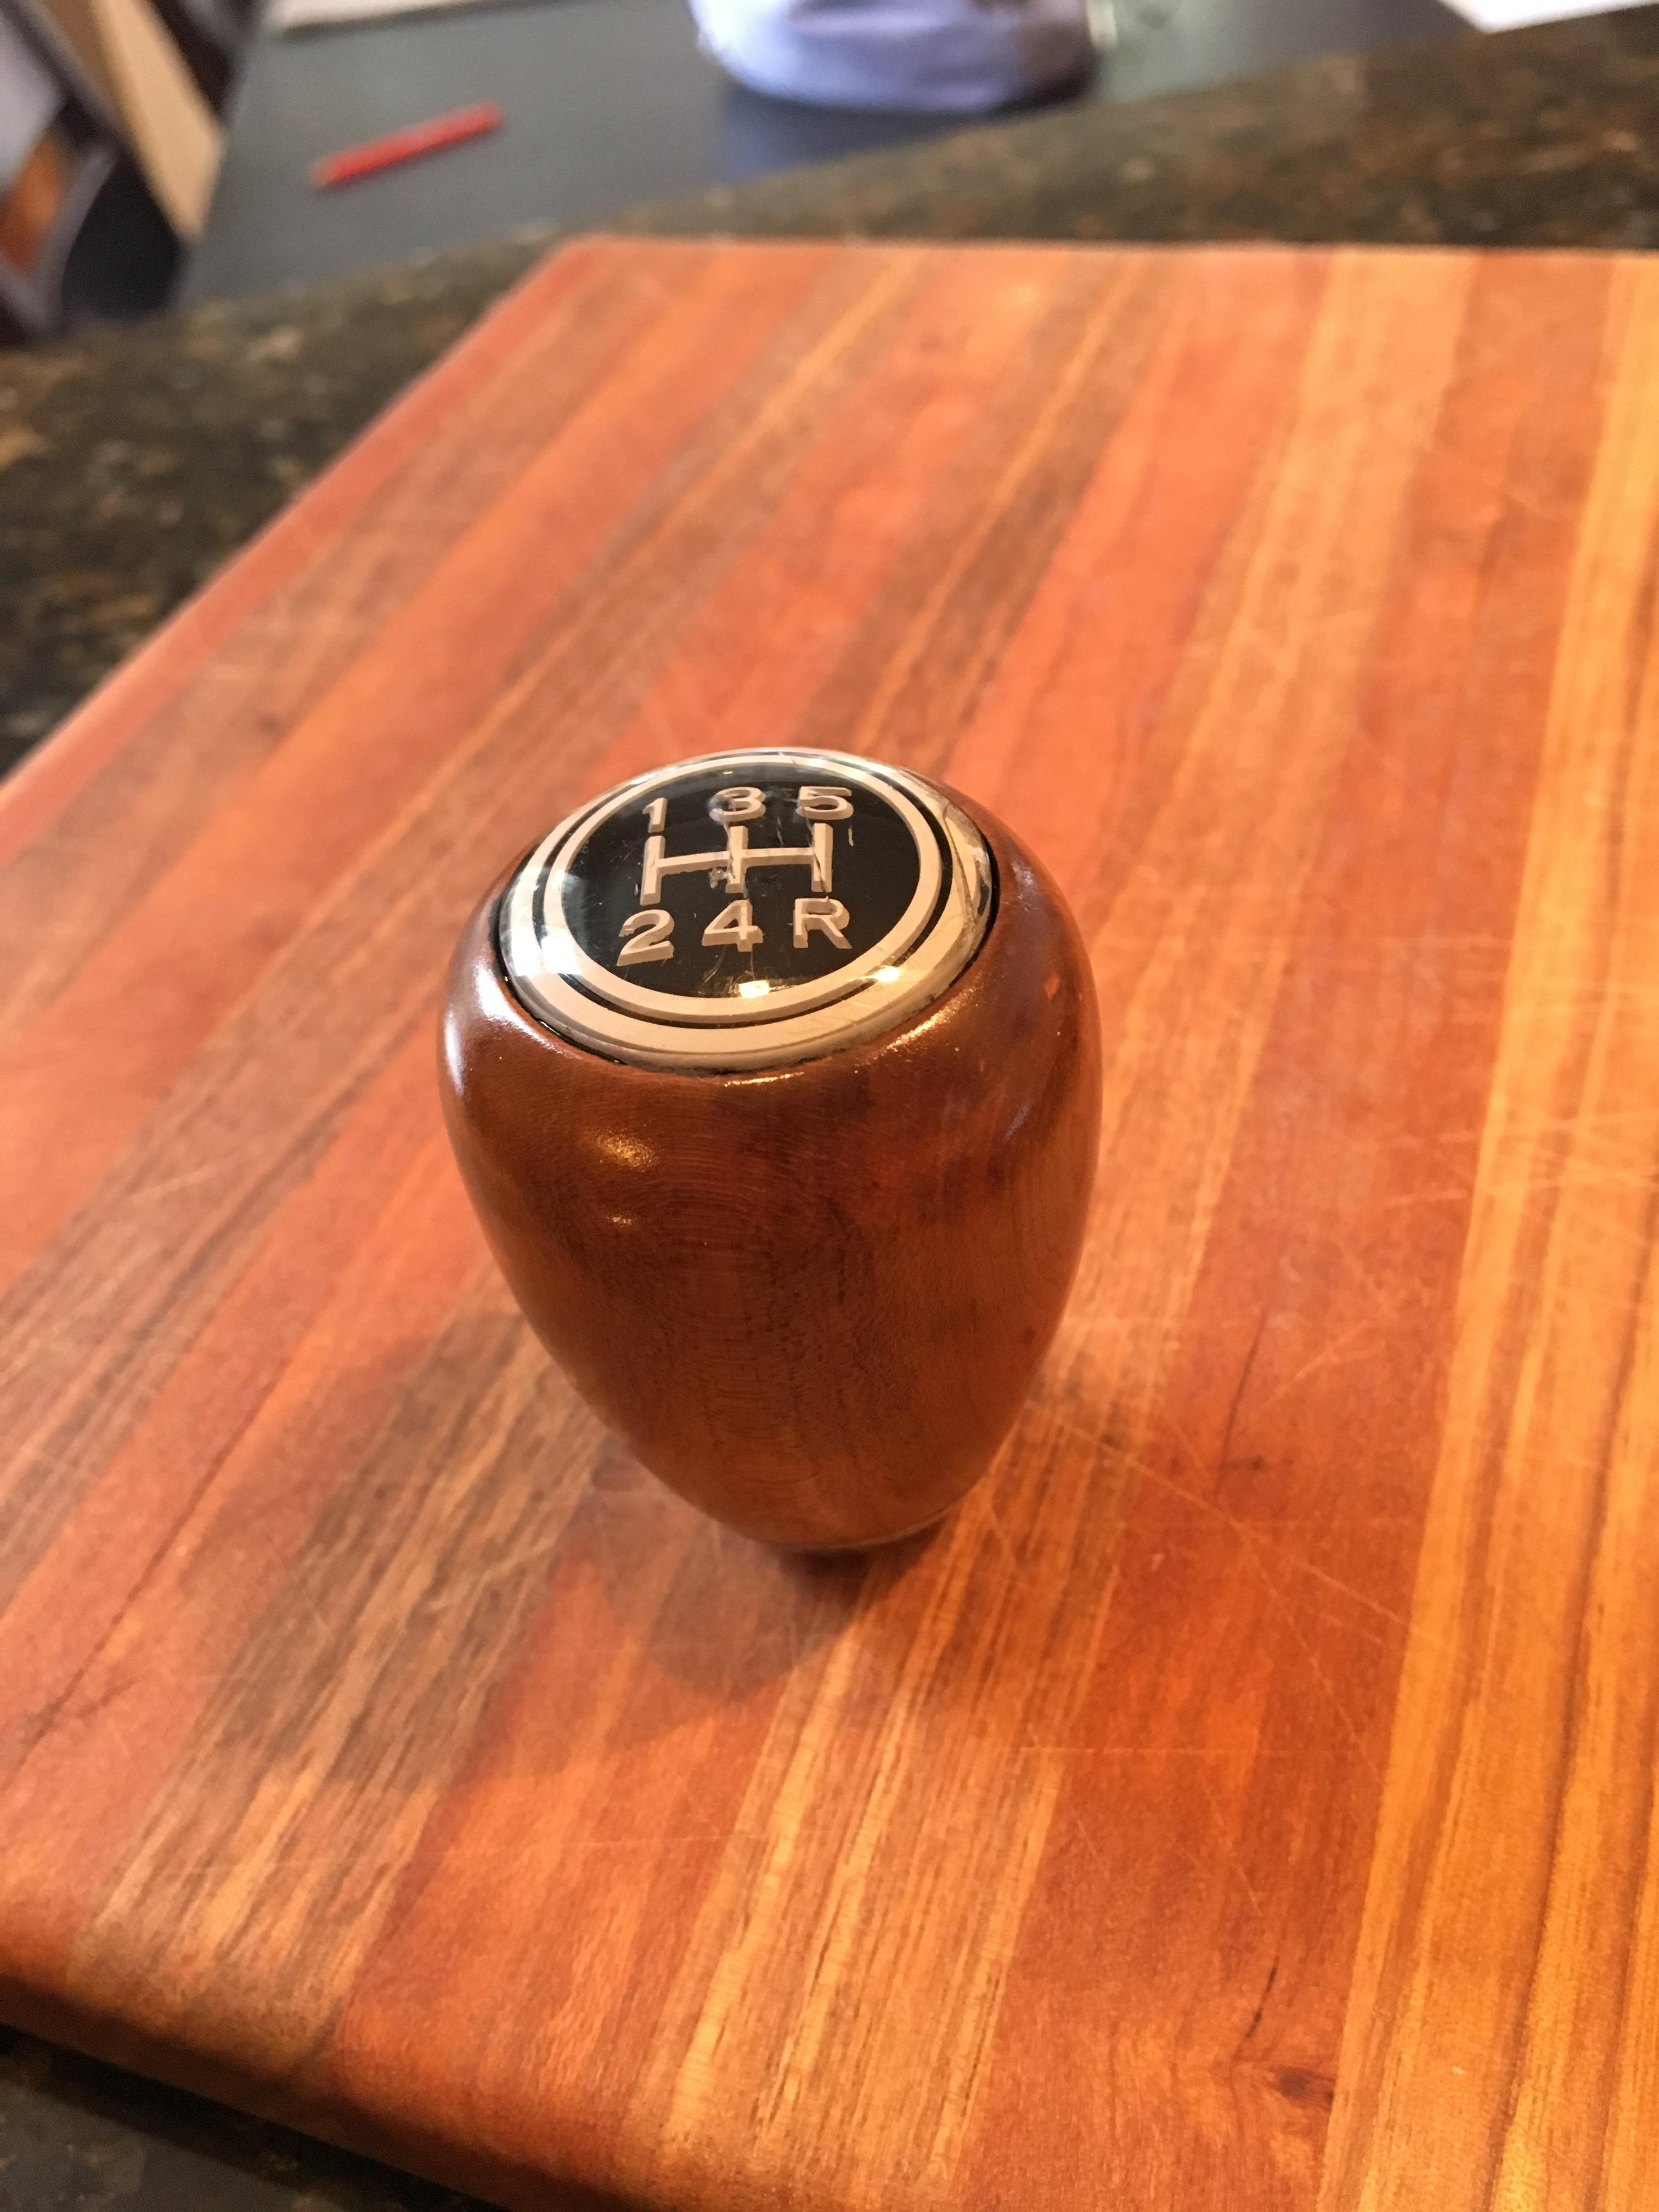
 Month 1 - She runs. Got Looey to start! Had some concerns about oil pressure. Wanted to make sure everything was in order before starting. Cranking the engine was not showing oil pressure on the gauge. Rebuilt the oil pressure gauge, tested and reinstalled it. However still no pressure when cranking. A cheap mechanical gauge helped to confirm pressure. Pulled off the cam cover to check the oil spreader was flowing on all outlets. All good. The car has clearly not run much since the rebuild by the previous owner, very clean and still had anti-seize on the bolts still. Drained carbs. Jerry can with new fuel and ensured the system was pumping. Fired her up. Runs remarkably well. Went to drain the main tank only to discover the P.O. had already done that. Put some fuel in, reconnected system and in now runs from the main tank. Discovered the alternator bearings died, terrible loud noise from them. Figured would do an upgrade to the alternator at same time and remove old voltage regulator. Whilst Looey is a 73, it does not have the have an electric fuel pump so the z cars upgrade and plug worked straight up. This weekend inspected the brakes and bled them. A clevis pin was missing from the handbrake...another parts order required! Replacing the brake fluid and bleeding went ok. However now there is a squeak from the master cylinder / booster? Will have to investigate further. Any ideas? Handbrake (or E-brake) button was seized, so that had to come out, clean and reassemble. Note the button screws out. Seat out as well, inspected the floors. Only a couple of spots of rust. Handbrake all working now. Other fun stuff done: cleaned and re-varnished gear stick knob. Next to get the temperature gauge working. New seat belts on order, once they are installed will be close to a test drive!


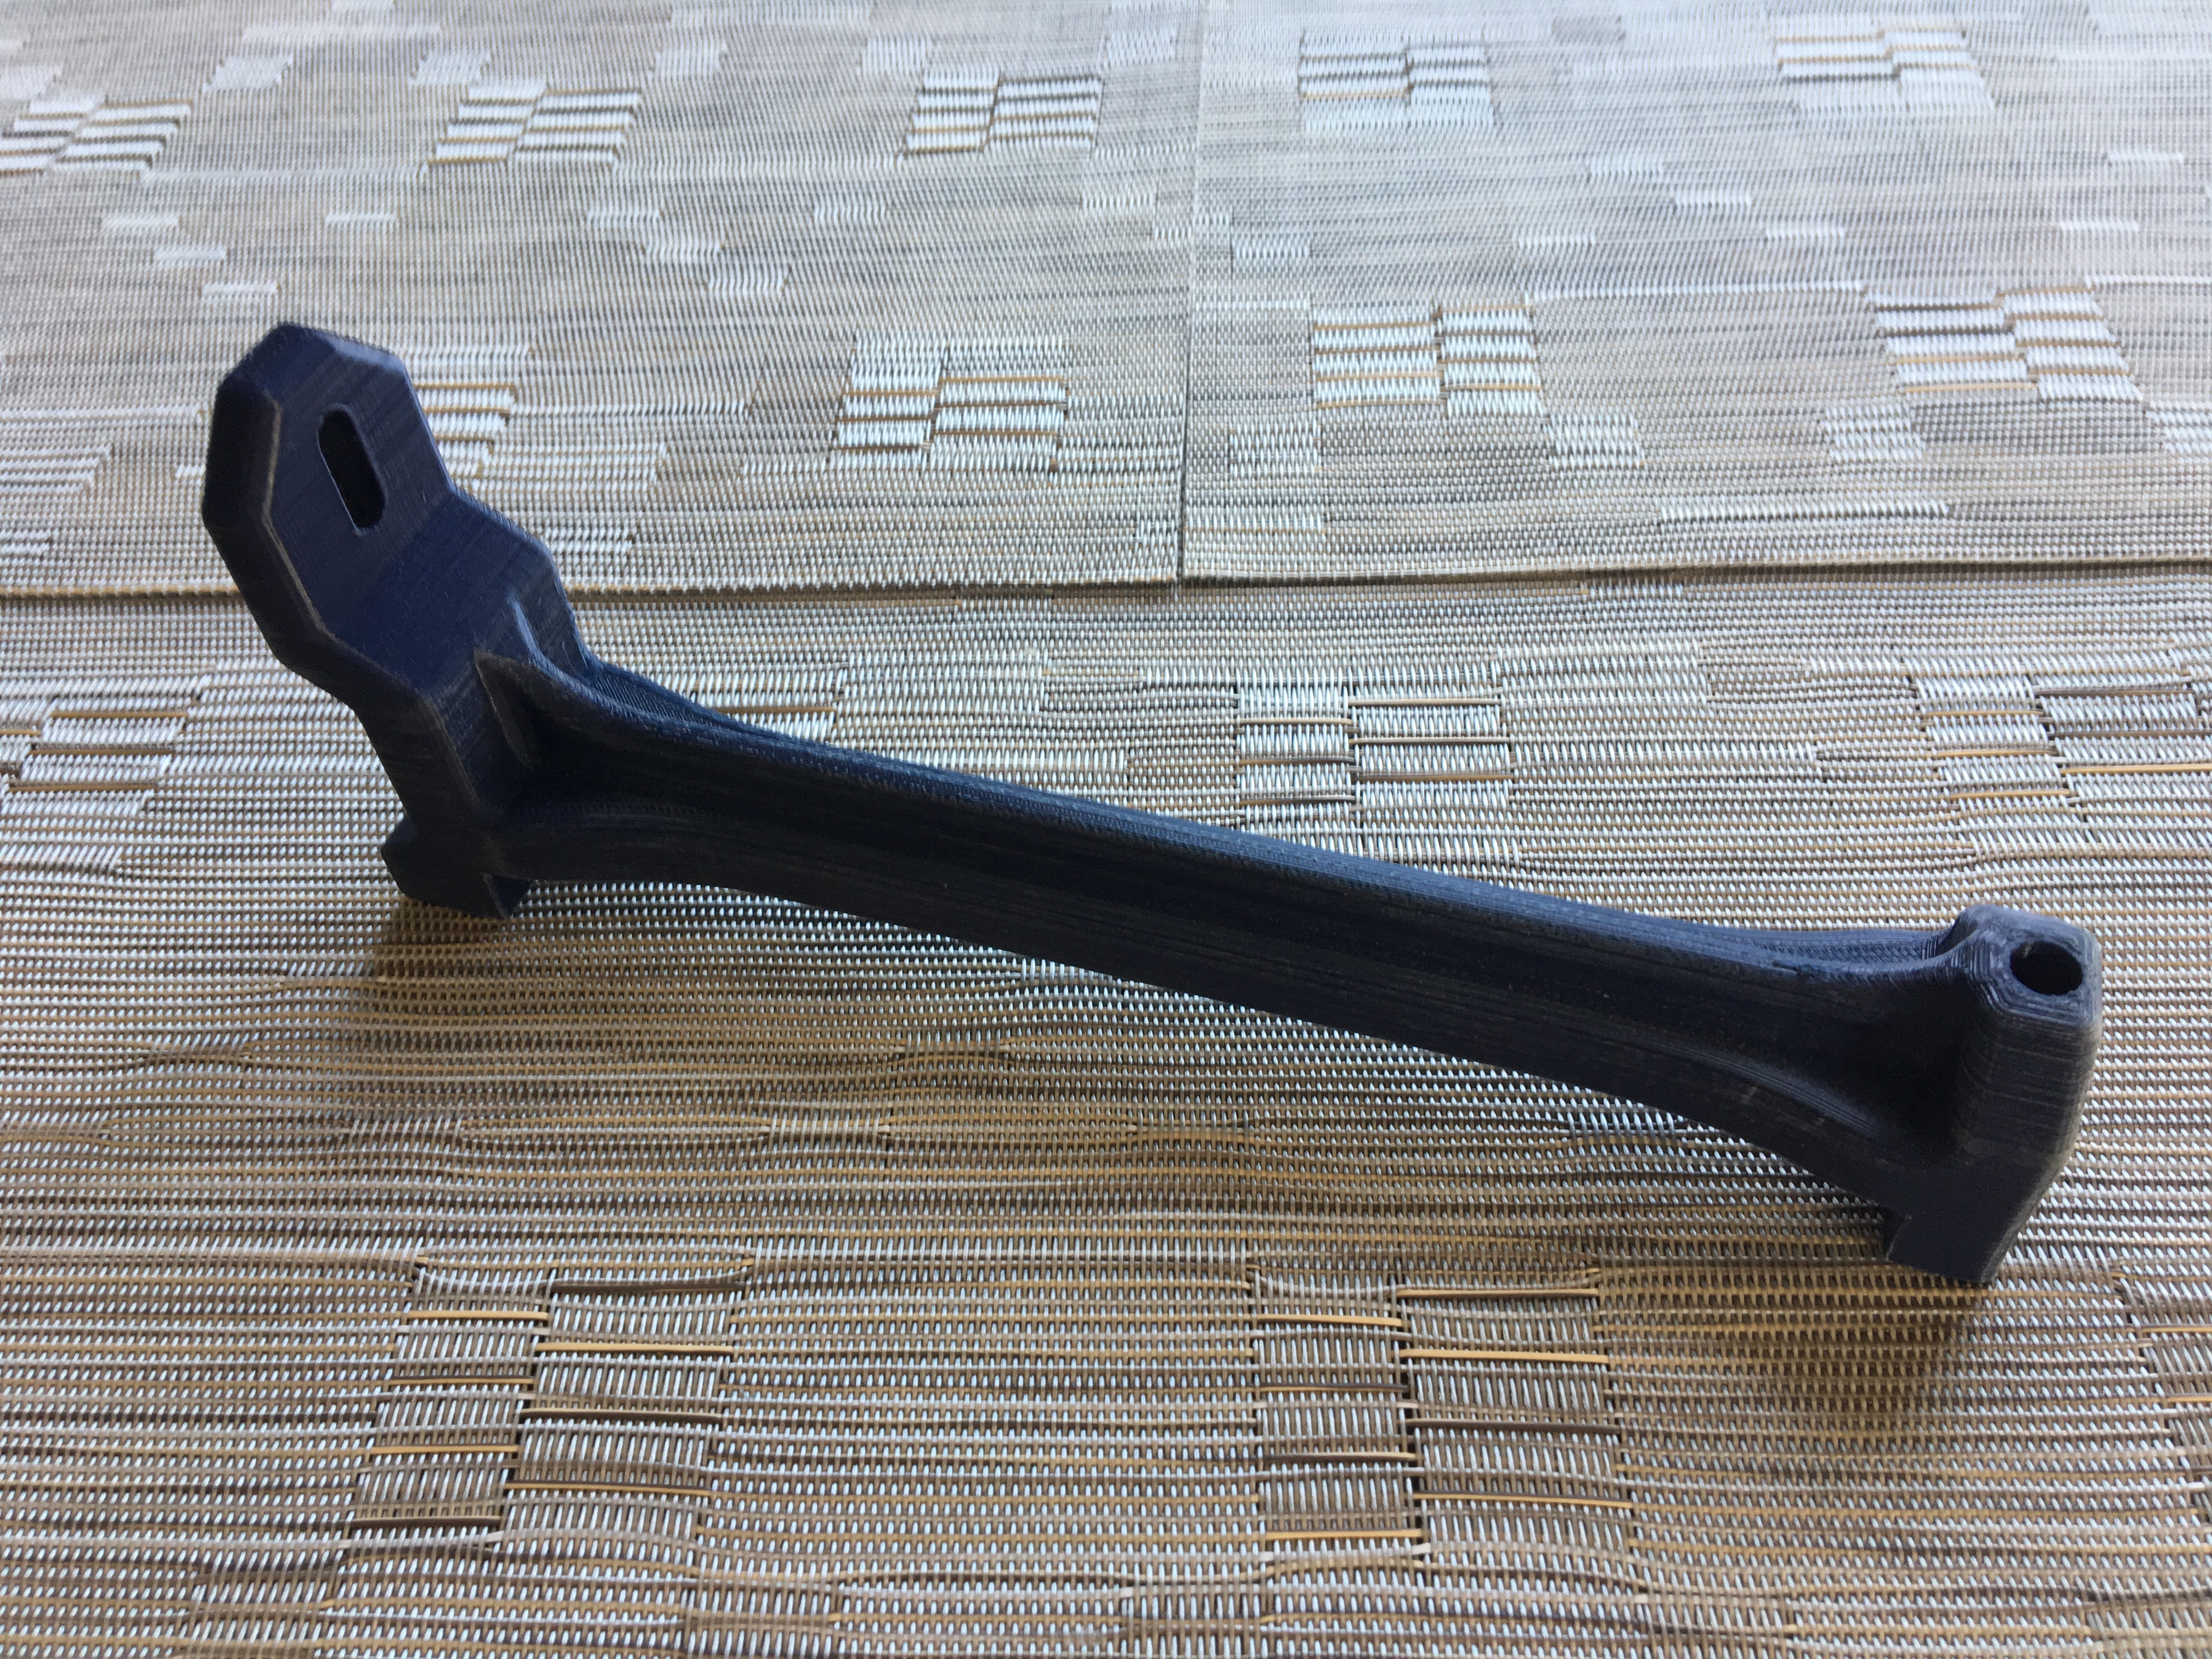
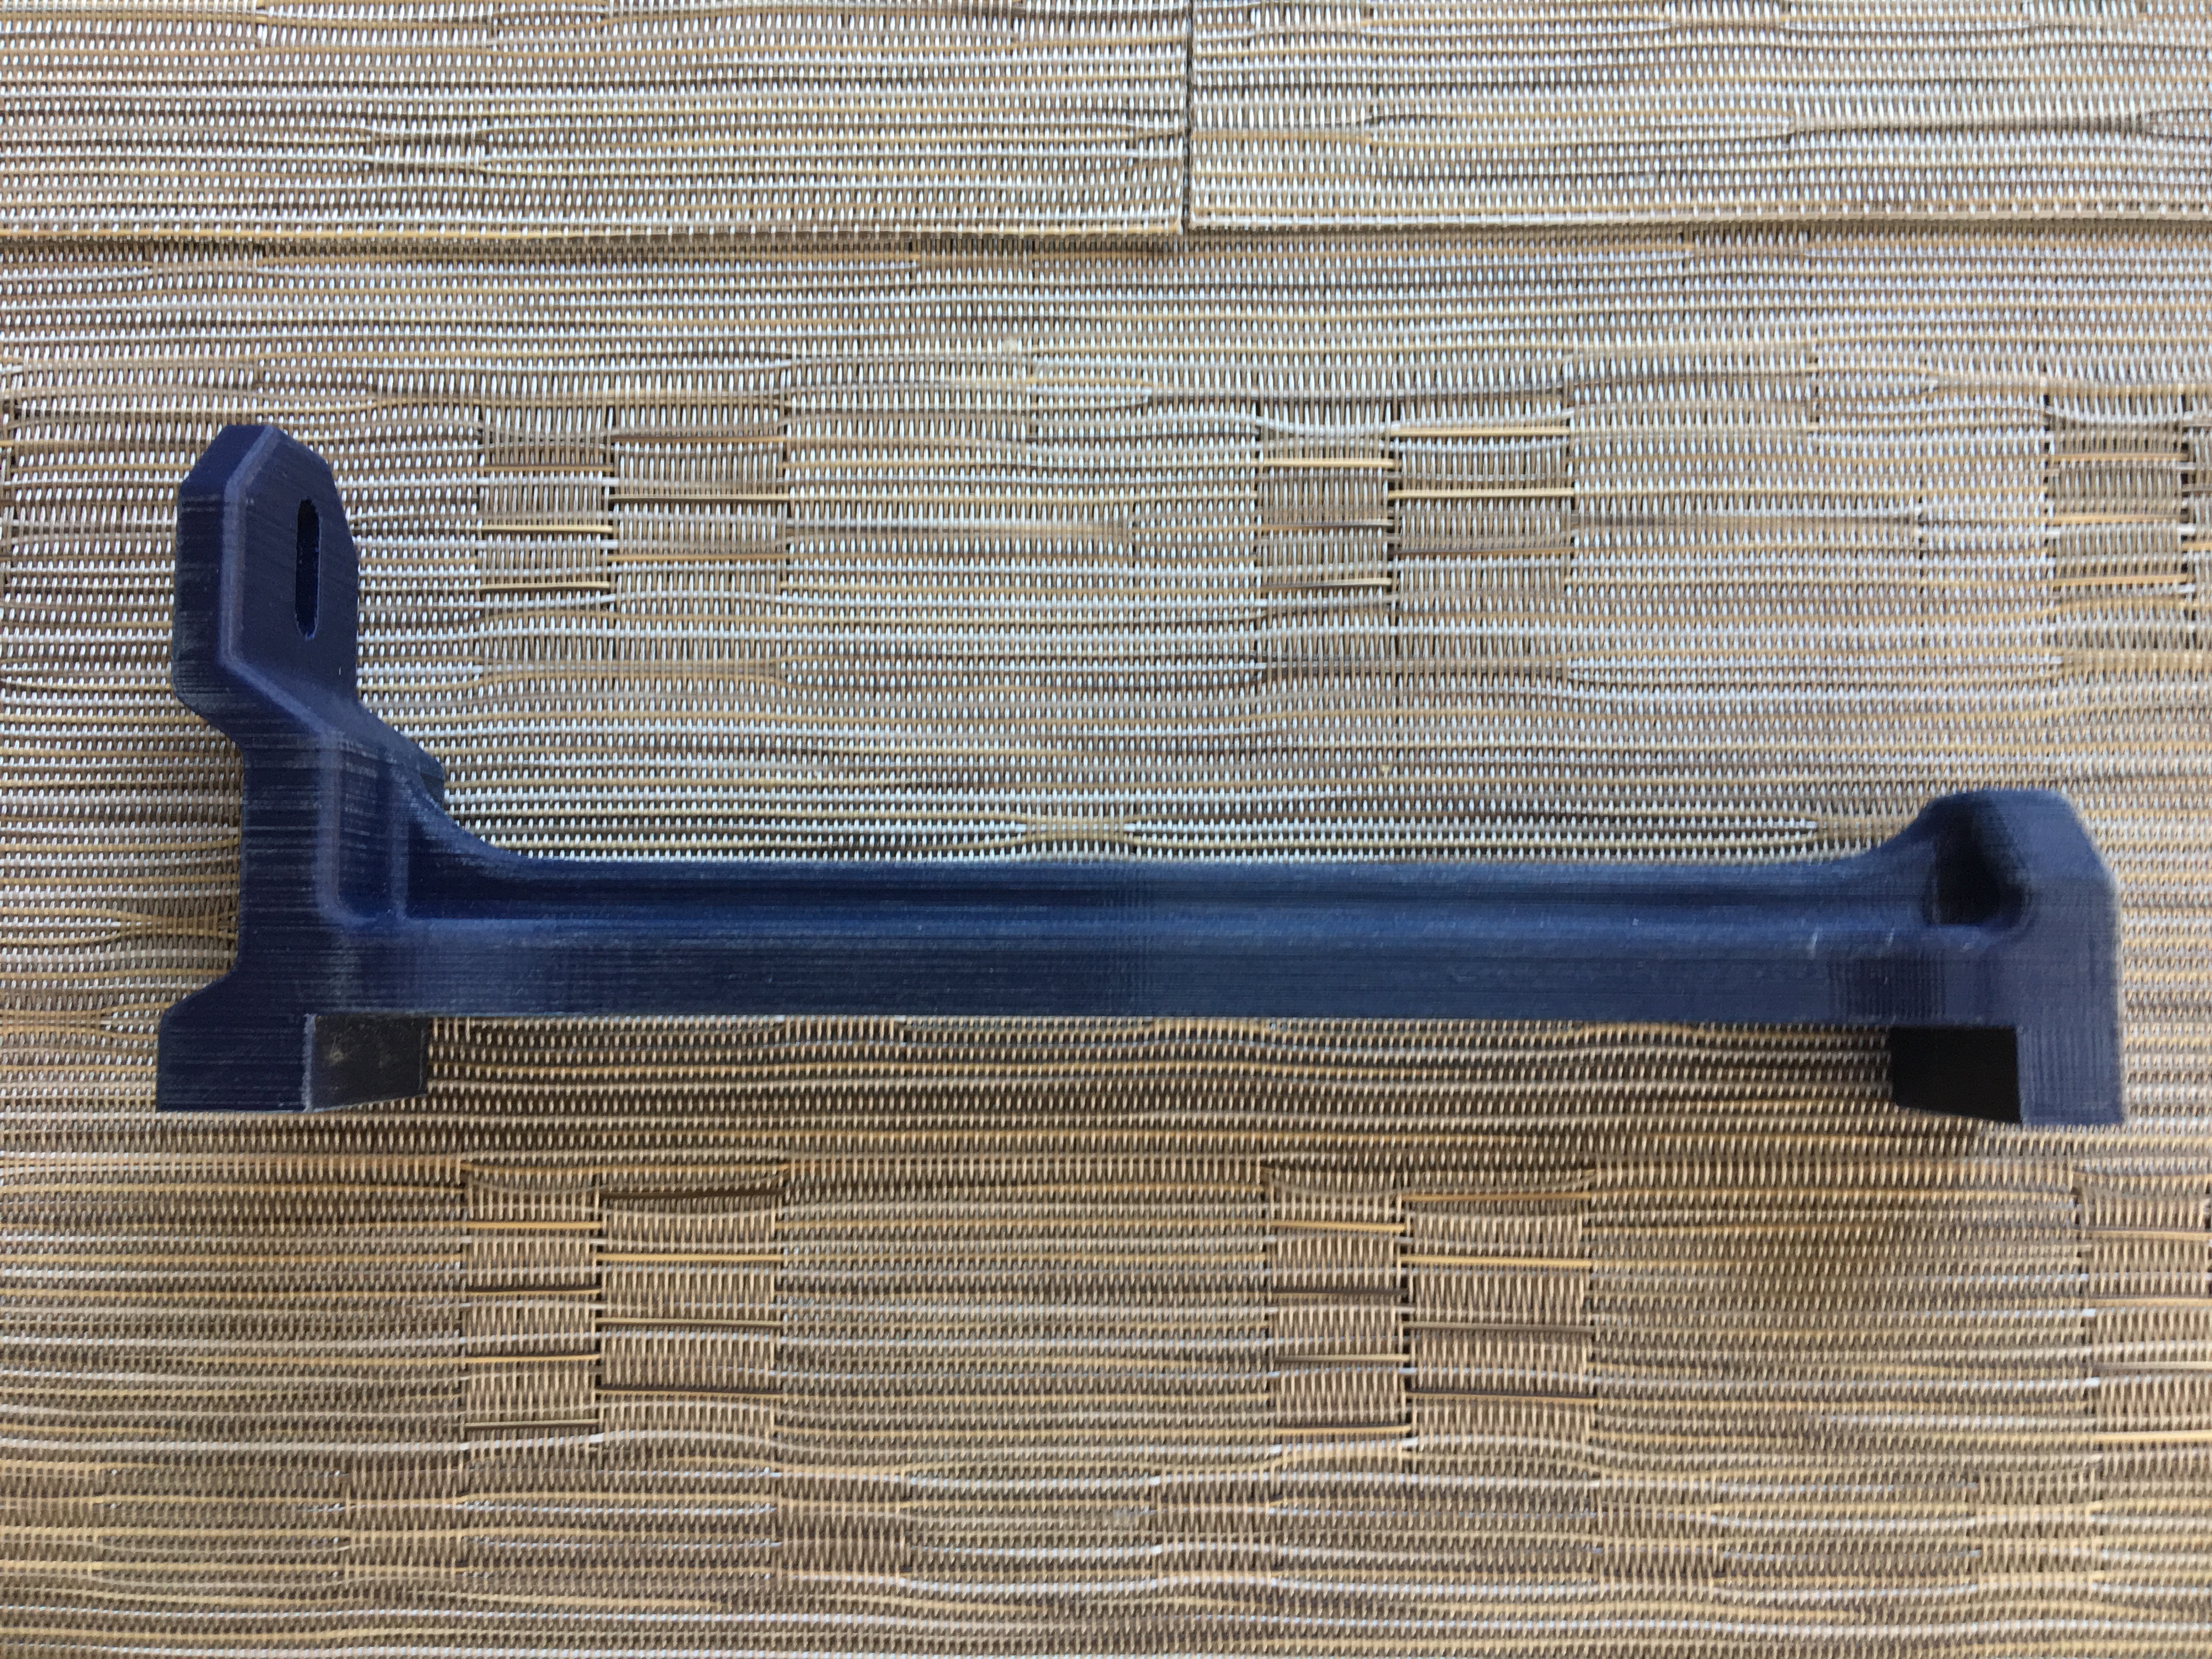
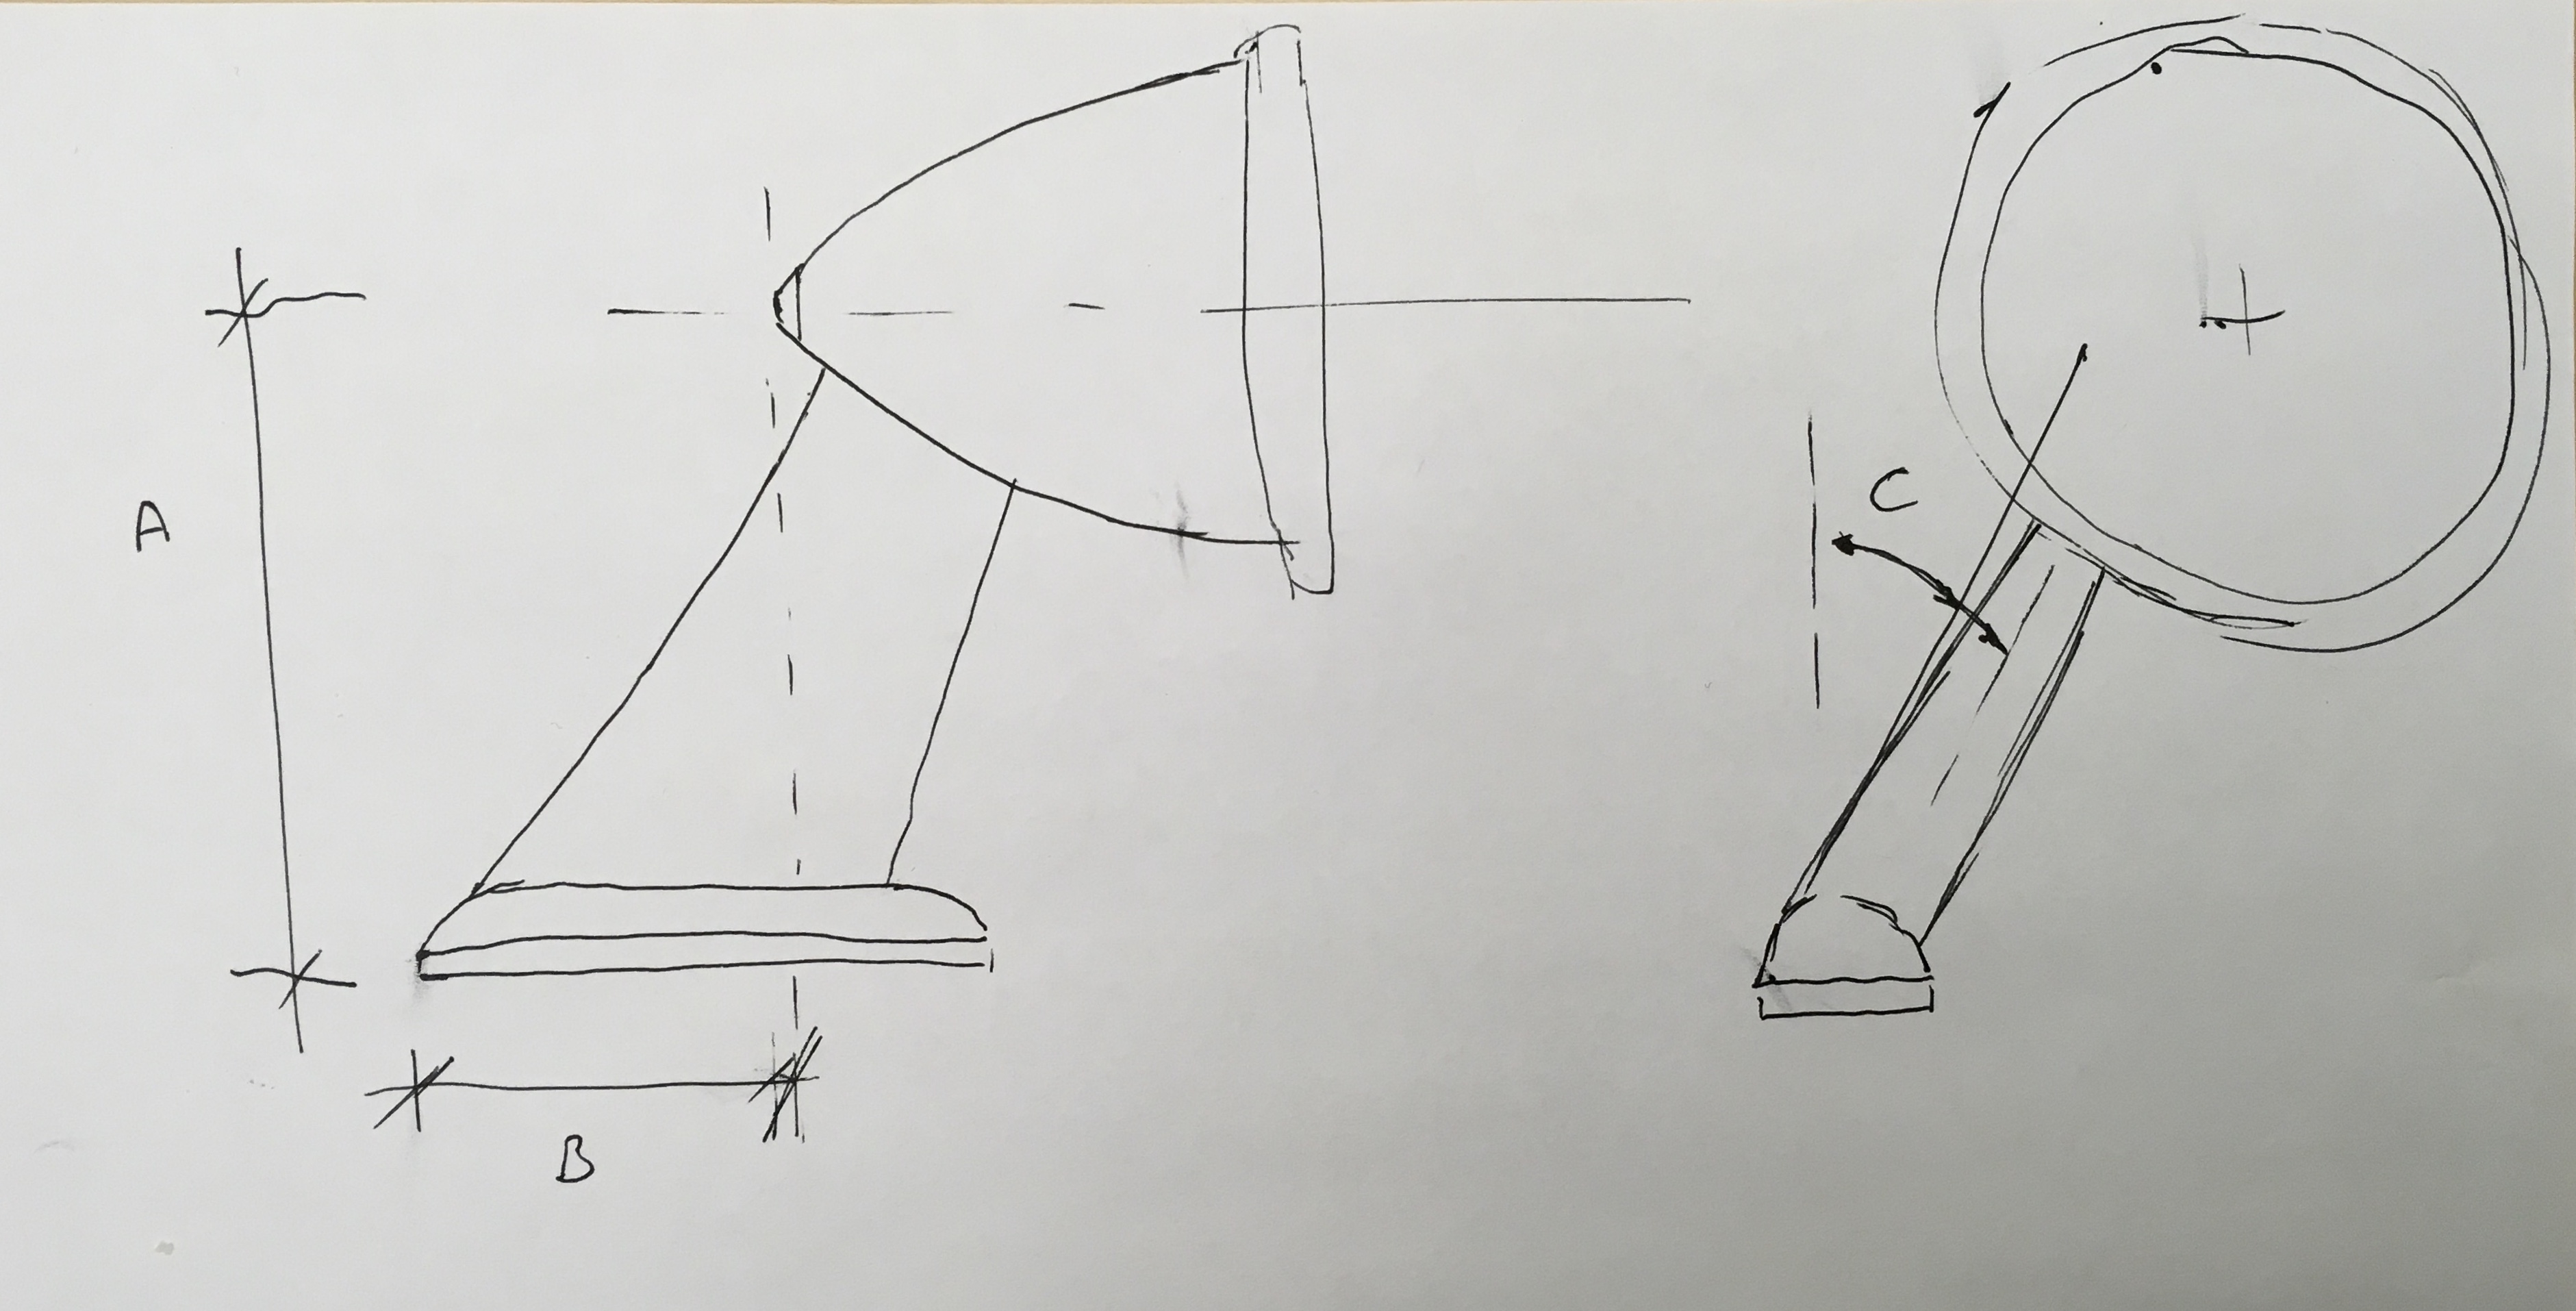
 I’m looking for some dimensions of the long arm original JDM fender mirror. Planning to buy a cheap set (https://zcardepot.com/mirror-bullet-style-black-240z-260z-280z-70-78.html?gclid=CjwKCAjw2dvWBRBvEiwADllhn0PO9n9E9yaRQdEEbrvl-4P9_Ckc5zkTip-ZyPXSaW-JEToJ8ncwhxoCuZkQAvD_BwE) and rebuild with longer arms. I will model the parts in fusion 360 then 3d print the arm sections. Also will look to add a spring mechanism at the base. looking for height A, offset B and side offset angle C.
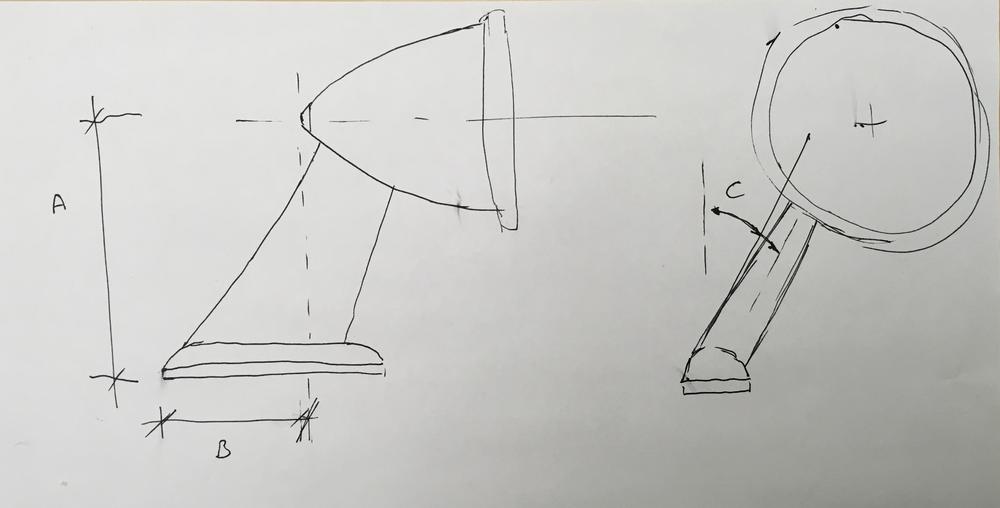 As a team of one working on the car, I am very Agile. ;-) I just do what I want, when I want.
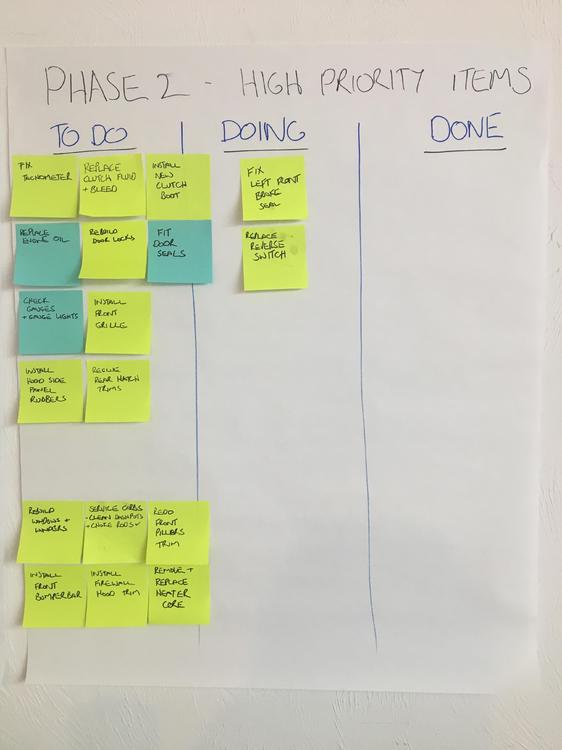
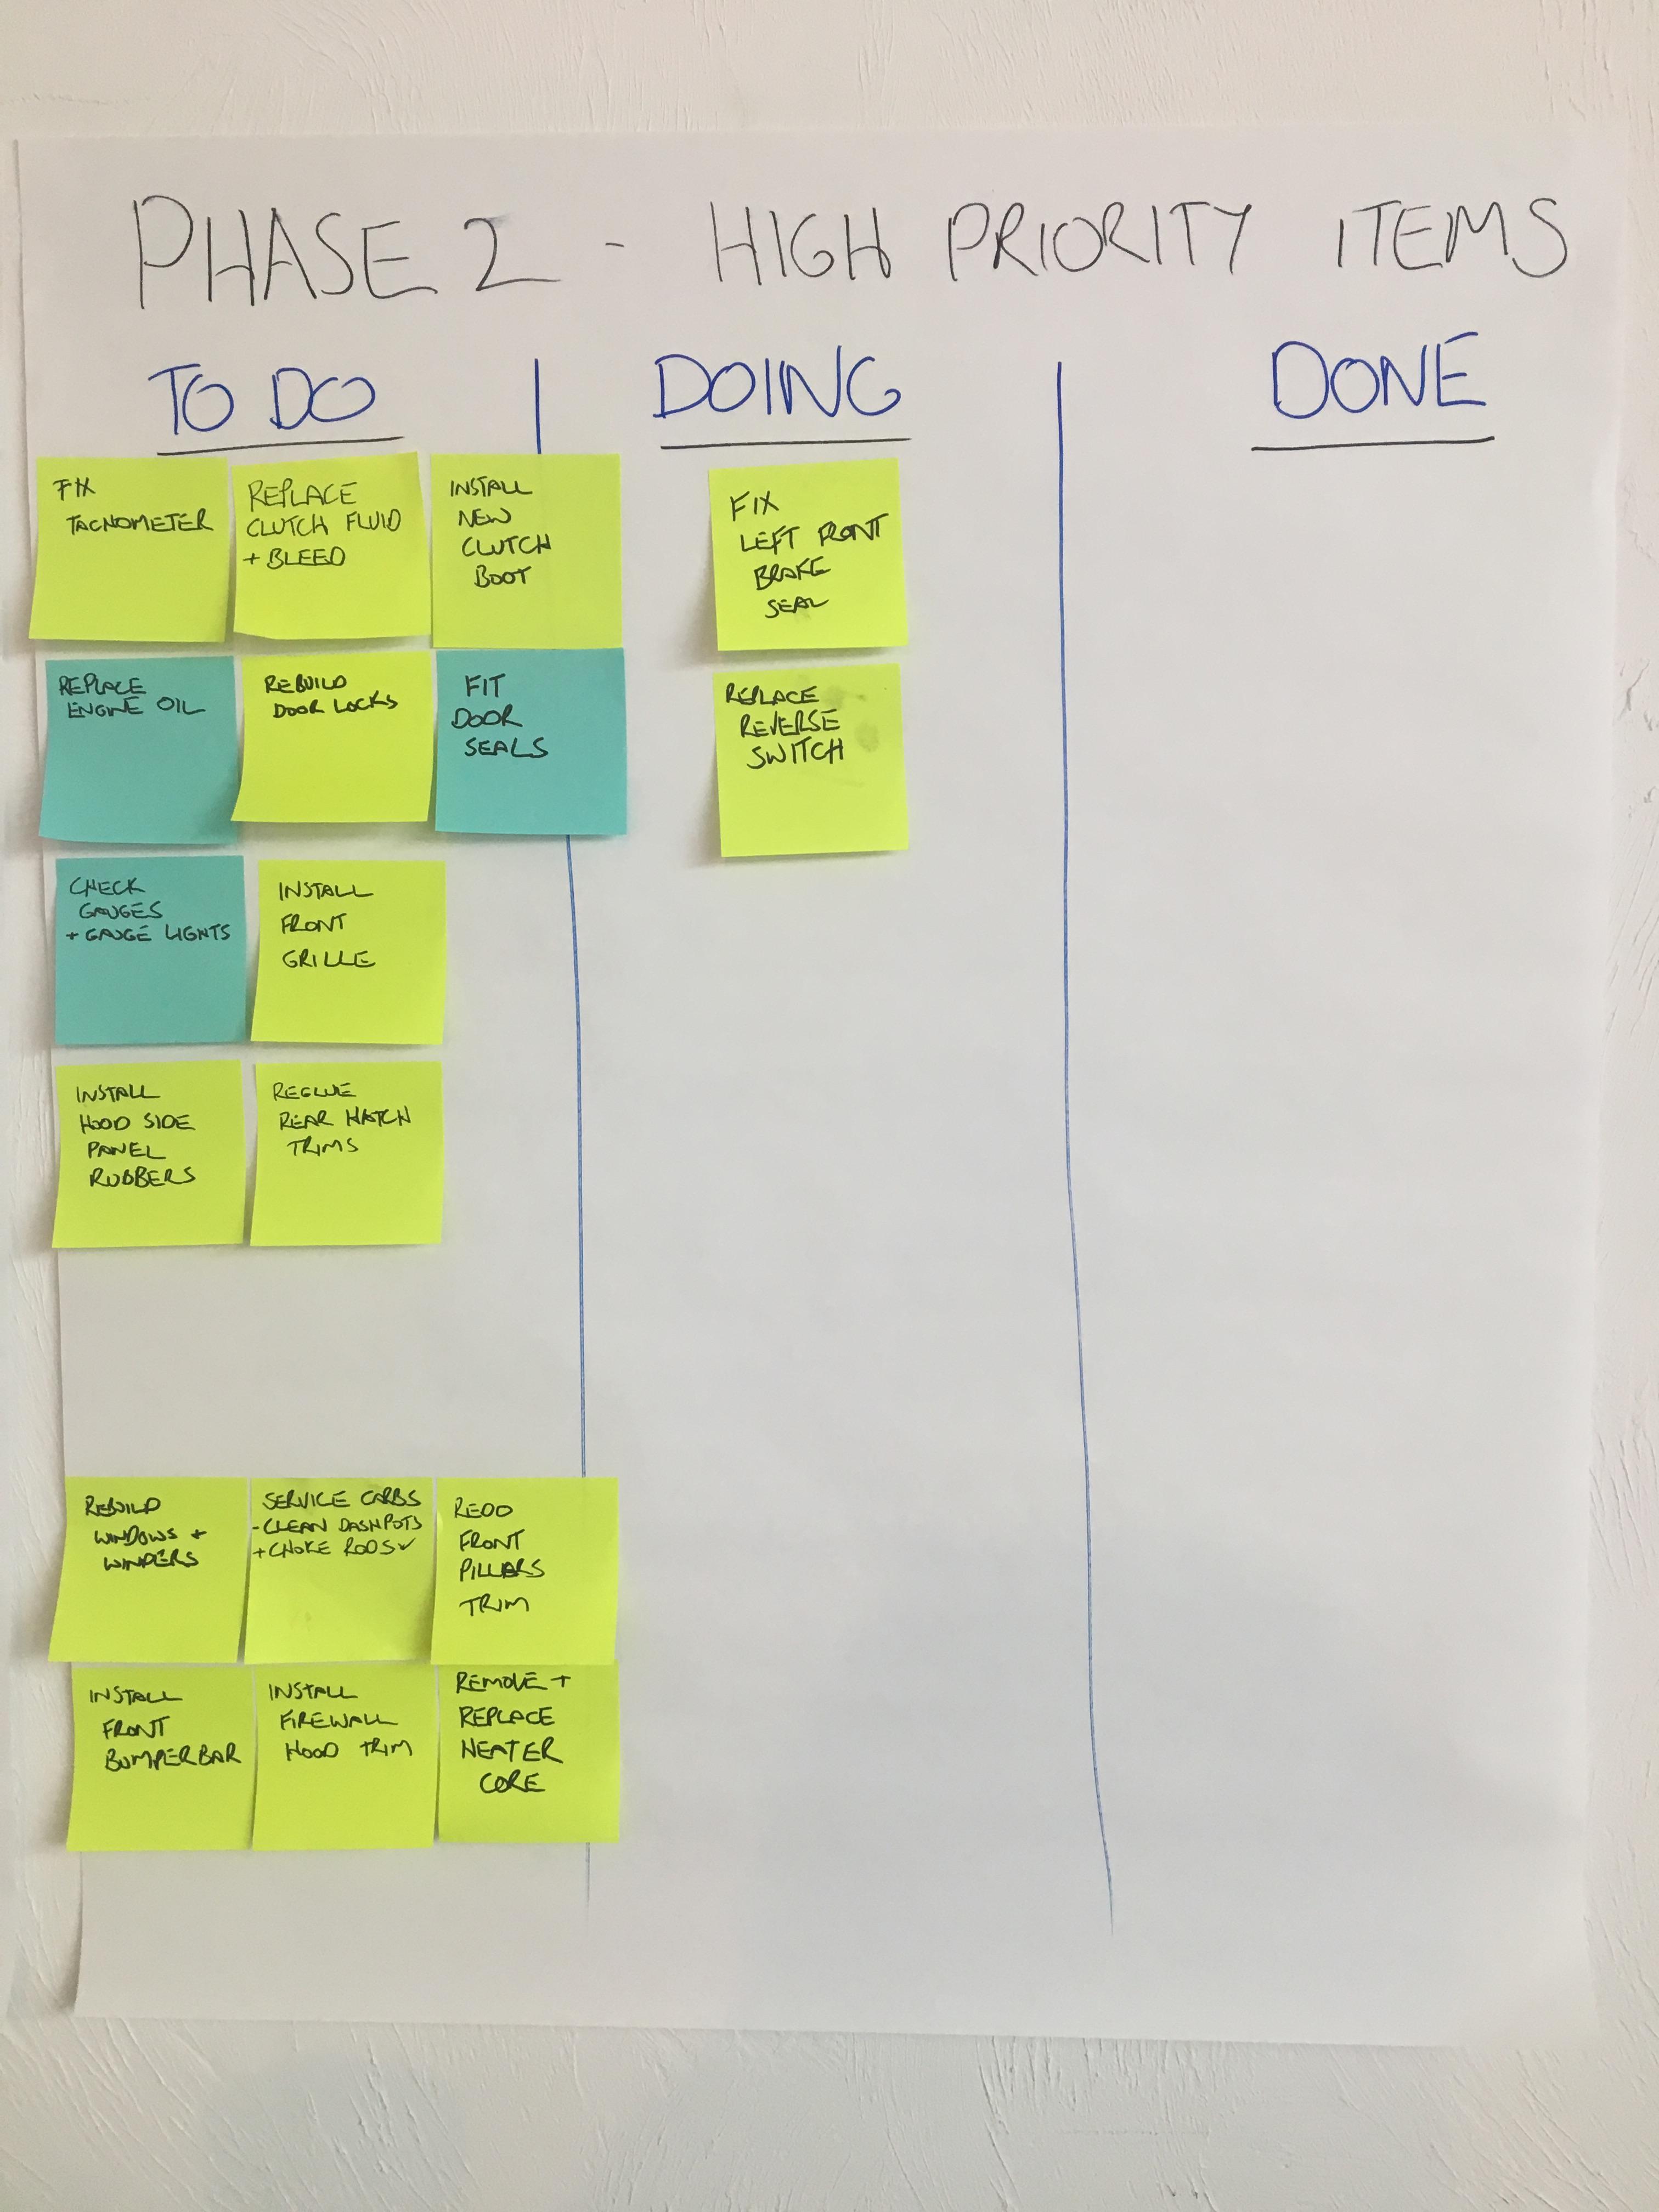
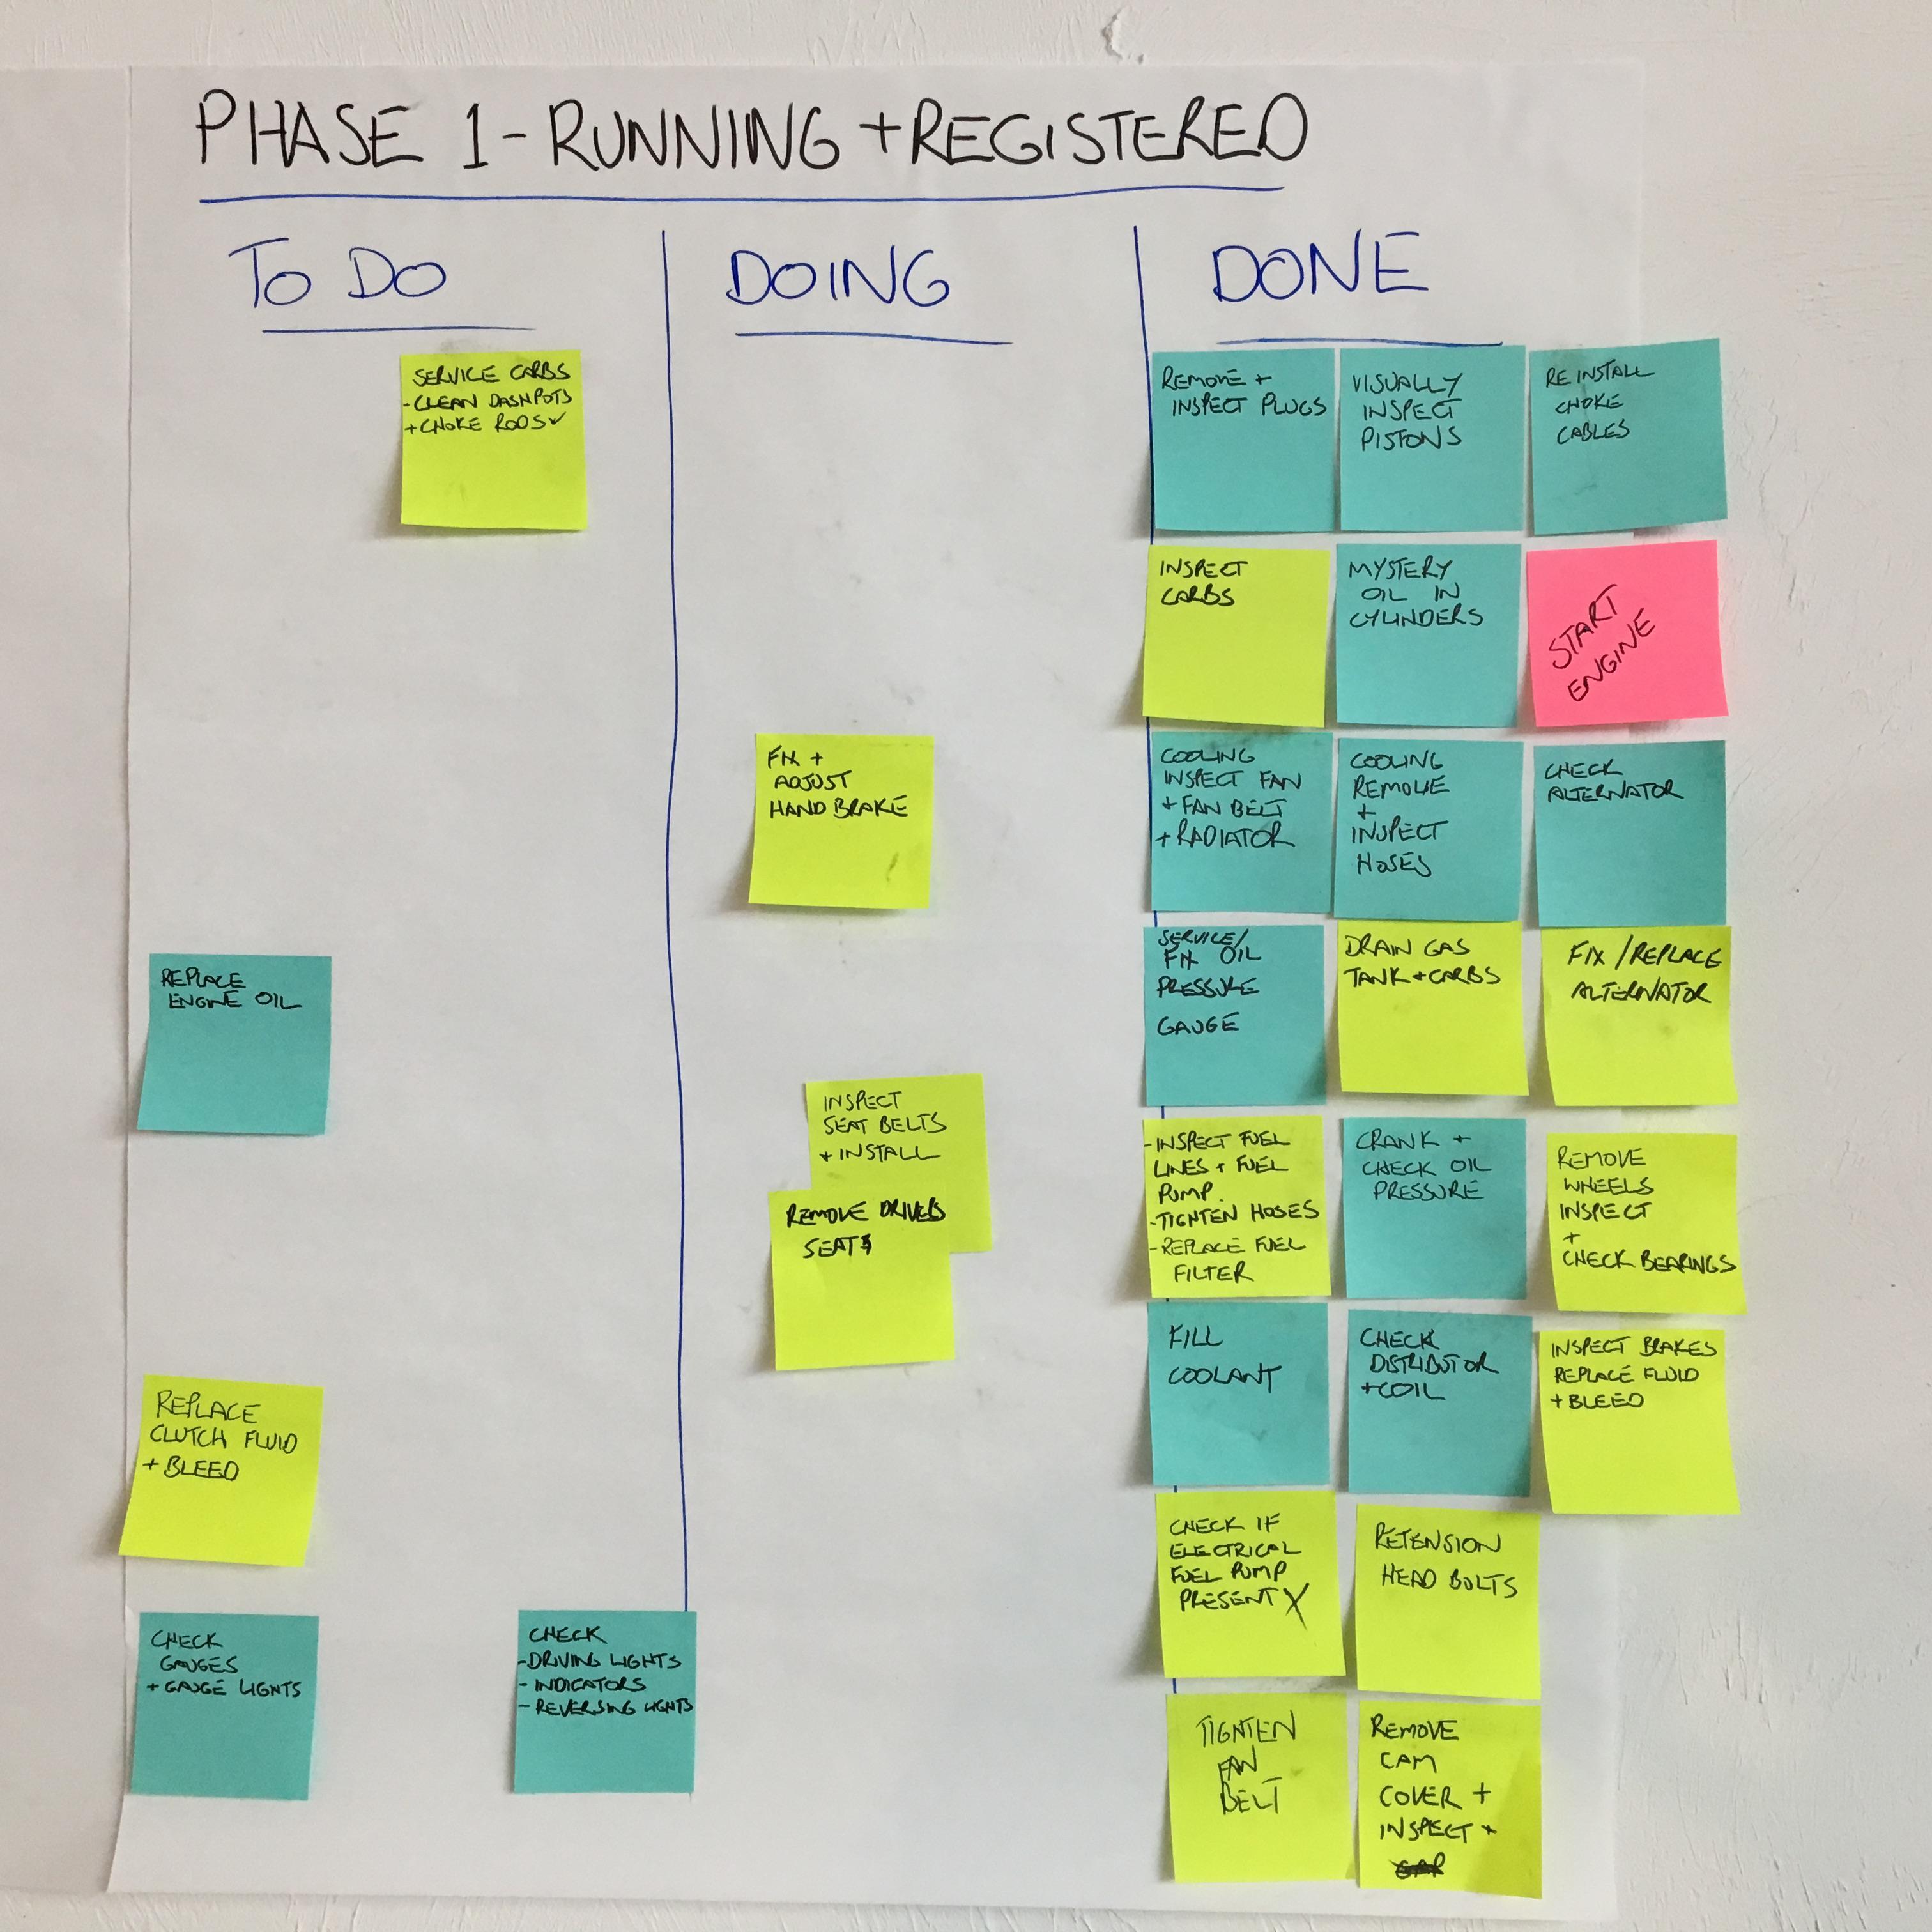
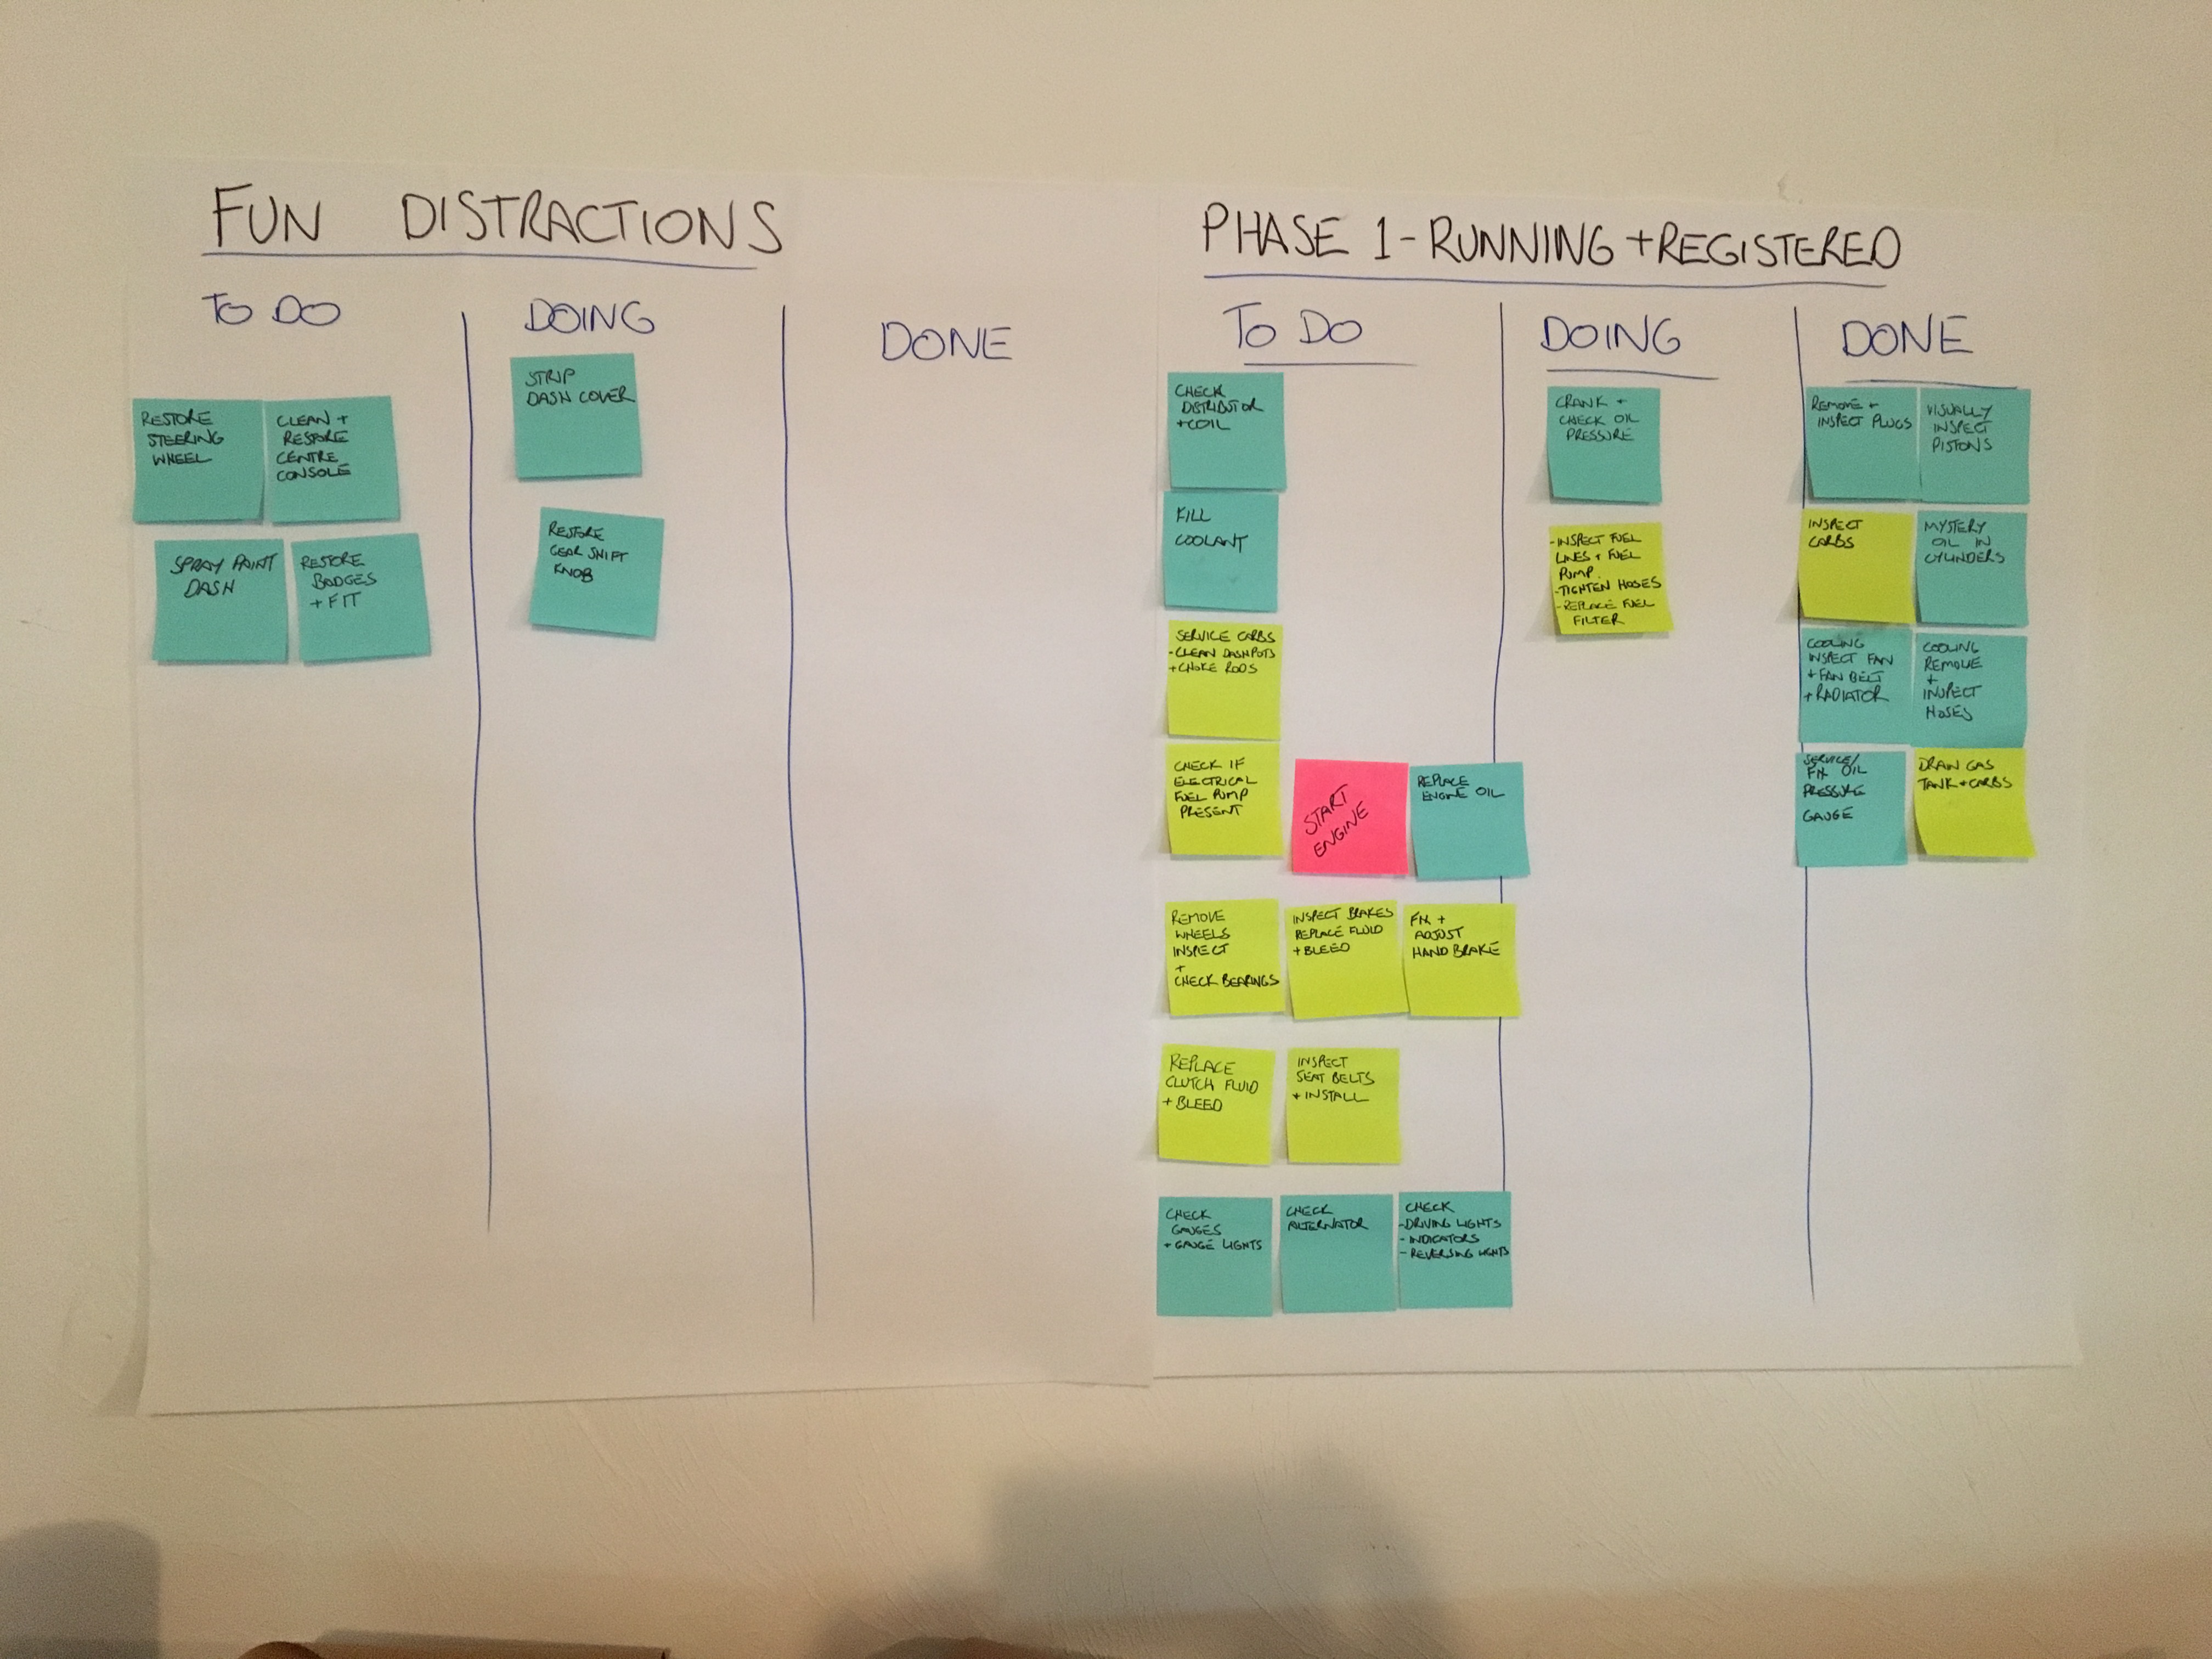
Spent to many years as a project manager & lean. Just had to do a Kamban board.
As a team of one working on the car, I am very Agile. ;-) I just do what I want, when I want.
Spent to many years as a project manager & lean. Just had to do a Kamban board. The rear quarters have been cut. Will need to get rear panel repair steel. Hopefully there is is no need to replace the inner panels. I’m more worried about the front. They also are likely to have been cut. Harder to find steel for that. Hoping to find some front panels or a 3” cut out of the wheel arch.


.JPG.55823dba7e56f28111ee4f01eec38f76.JPG)


Important Information
By using this site, you agree to our Privacy Policy and Guidelines. We have placed cookies on your device to help make this website better. You can adjust your cookie settings, otherwise we'll assume you're okay to continue.