Av8ferg
-
Posts
1,538 -
Joined
-
Last visited
-
Days Won
45
Content Type
Profiles
Knowledge Base
Zcar Wiki
Forums
Gallery
Events
Downloads
Store
Blogs
Collections
Classifieds
Everything posted by Av8ferg
-
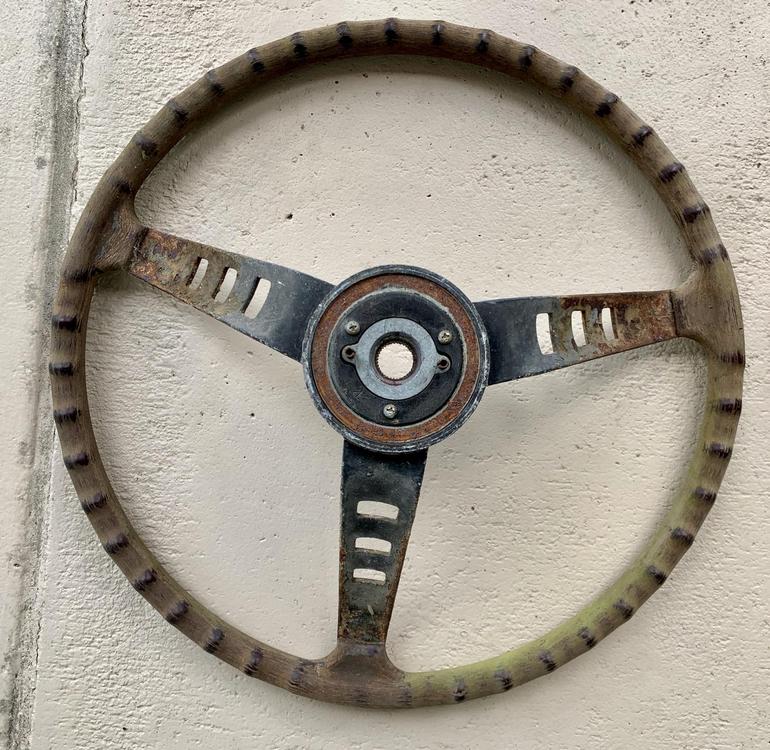
Yeah, you’re probably right. I’m not sure I’m a fan that. I have three steering wheels. This will be my test case. Interesting, the nicest one I have had a leather wrap on it when I bought it from a guy in Montana that owned the car for a decade. The wrapped looked like it was from the 70’s. Under it was pretty dark so I’m doubtful it was ever refinished. They may have changed the colors as the production progressed. Here a pic of that wheel. Sent from my iPhone using Tapatalk
-
Going for Red Sedona [emoji2369] Sent from my iPhone using Tapatalk
-
The sales rep just tested a can of minwax Red Mahogany in a wood stickz It was SUPER dark brownish. Gonna try something else Sent from my iPhone using Tapatalk
-
What color stain did you use for that. I like the reddish tint. Sent from my iPhone using Tapatalk
-
Interesting, I got a light gun stock stain but now reconsidering using it after your comment. Maybe I’ll test a small area first with plain polyurethane. After sanding the resin wheel portion it had a nice light straw look and when I rinsed it off it got surprisingly dark while moist. Maybe the polyurethane will act the same but with a shine. Will post my results later today. Sent from my iPhone using Tapatalk
-
Metal bars came out pretty good. Gonna let the paint cure for 24hrs and then start on the wood. Sent from my iPhone using Tapatalk
-
Here is the knob sanded down. The shift knob map was totally destroyed. Trying to tint both the wheel and knob to match. Won’t be easy because they’re different materials and won’t accept color the same. Speaking of the shift knob map. A 5 speed Nissan one seems impossible to find but the old Toyota one looks almost identical. I just wonder if the diameter is the same. Here’s the shift knob map on a old FJ. It’s only $12 Sent from my iPhone using Tapatalk
-
Interesting, I’m restoring a shift knob I found on the same car. Was going to match them. I’ll post pics Sent from my iPhone using Tapatalk
-
So the wood/resin wheel portion of this steering wheel of mine sanded has that straw look you mentioned but wasn’t the original color a reddish mahogany. I was going to re-tint and then coat with a glossy polyurethane. Sent from my iPhone using Tapatalk
-
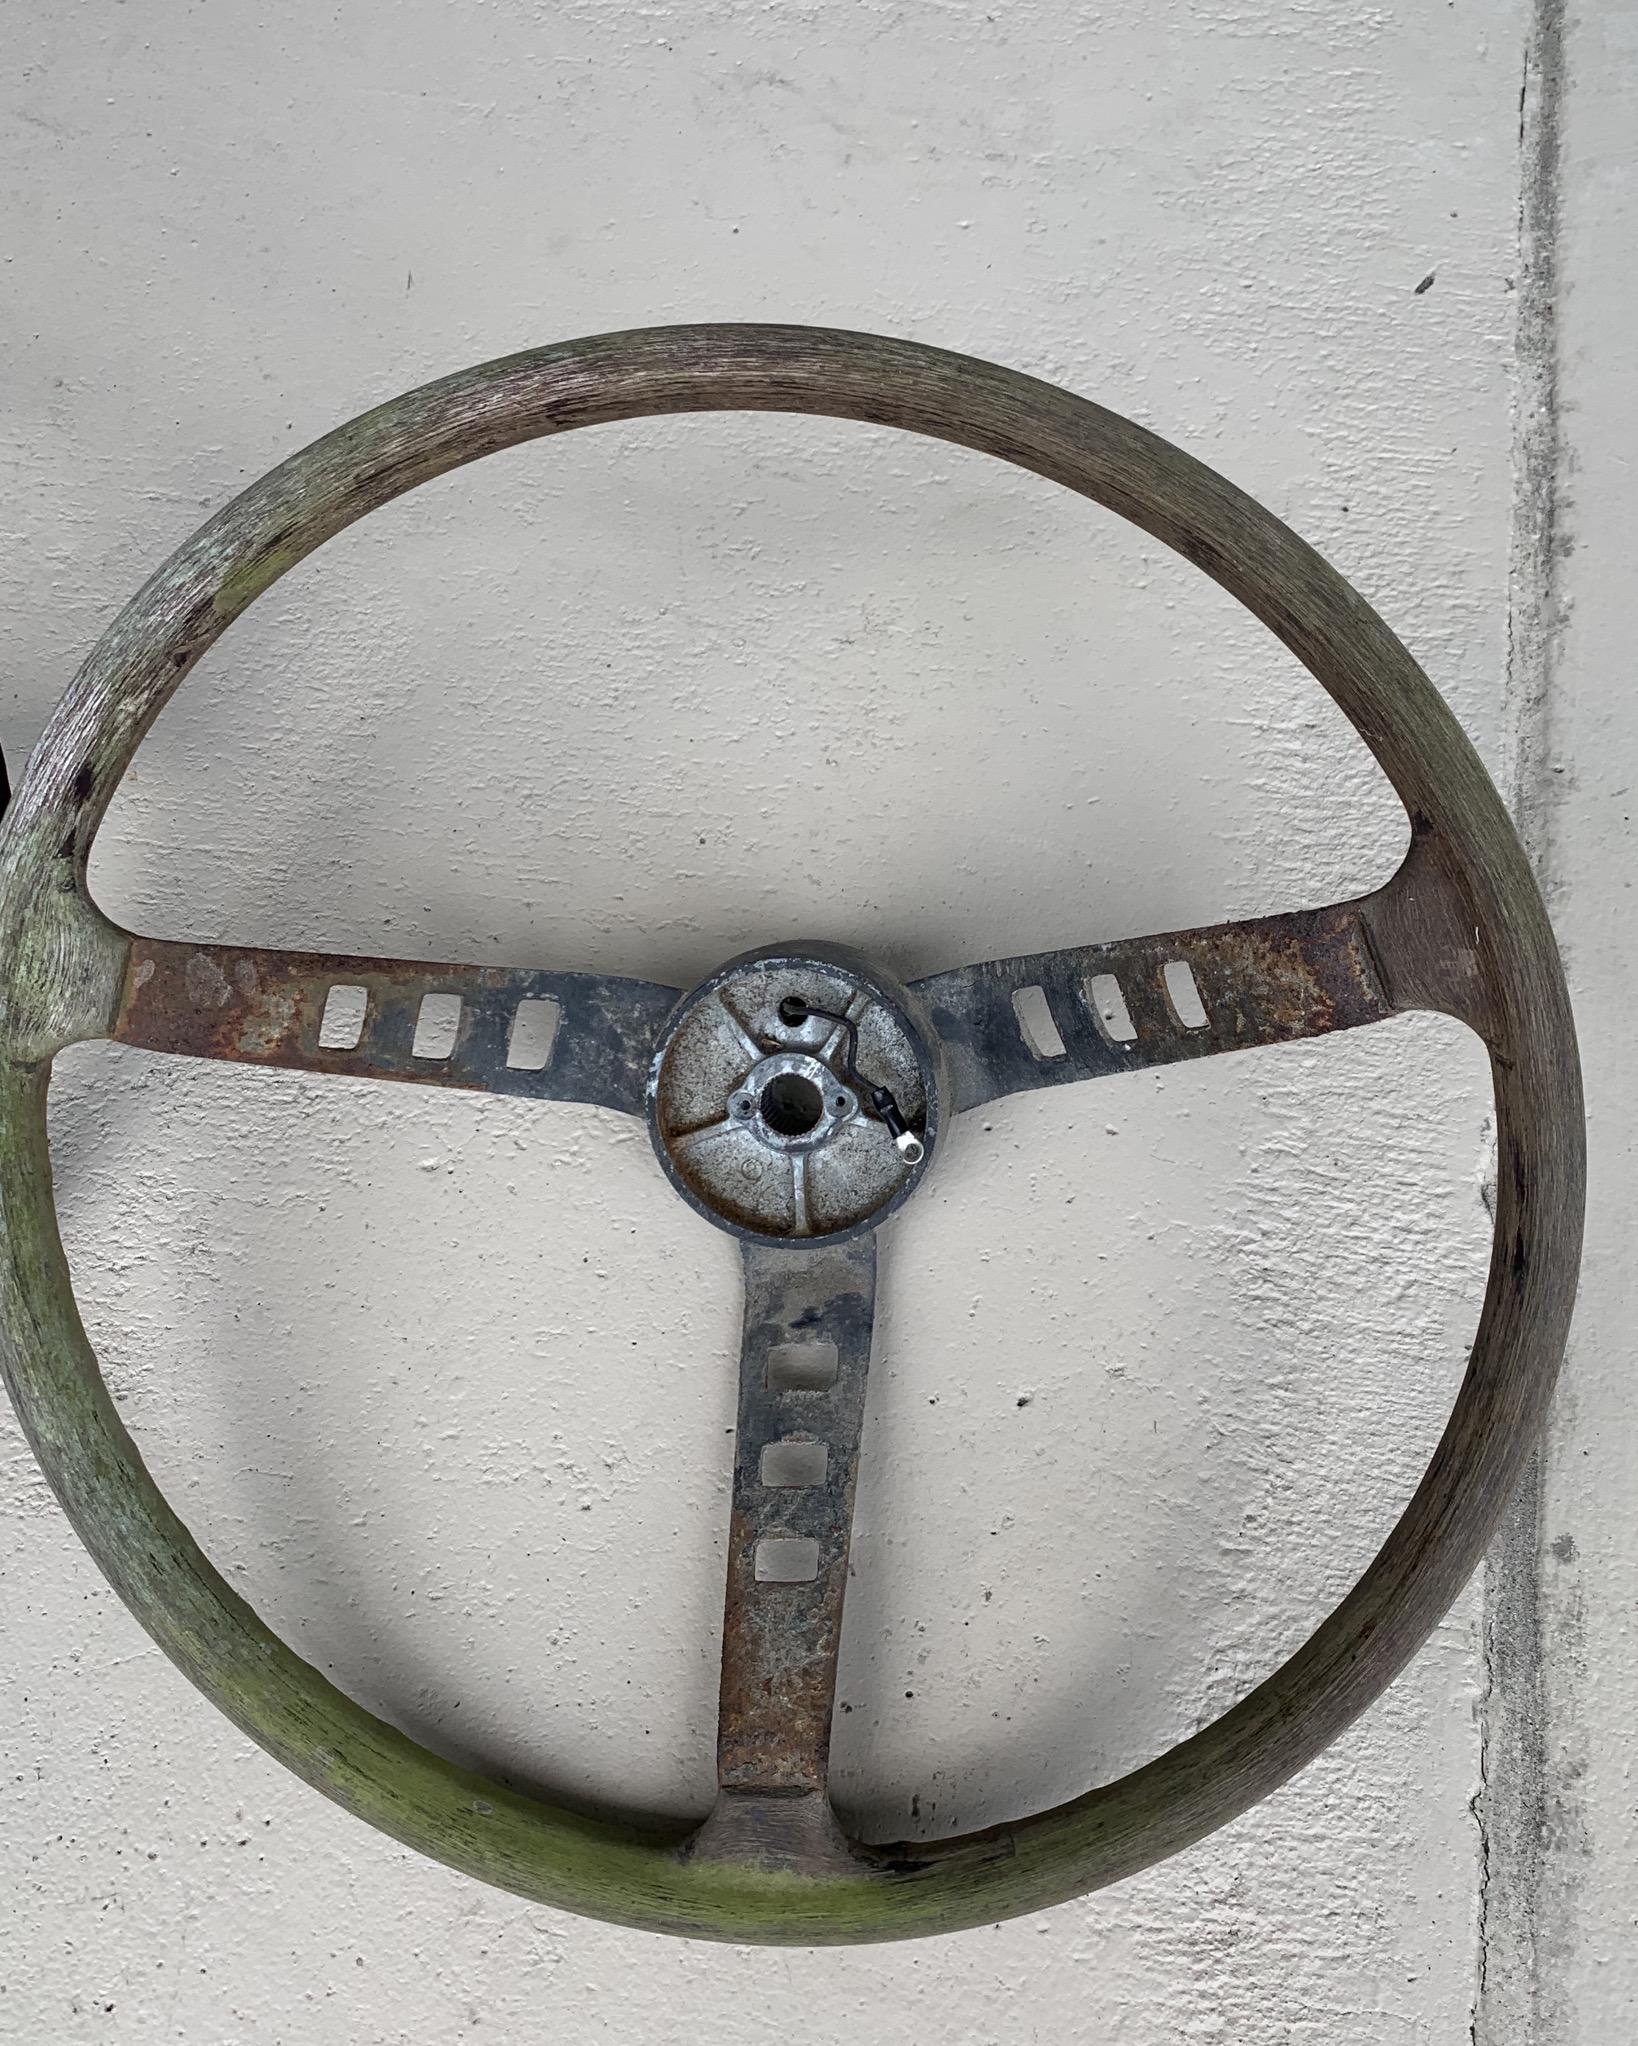
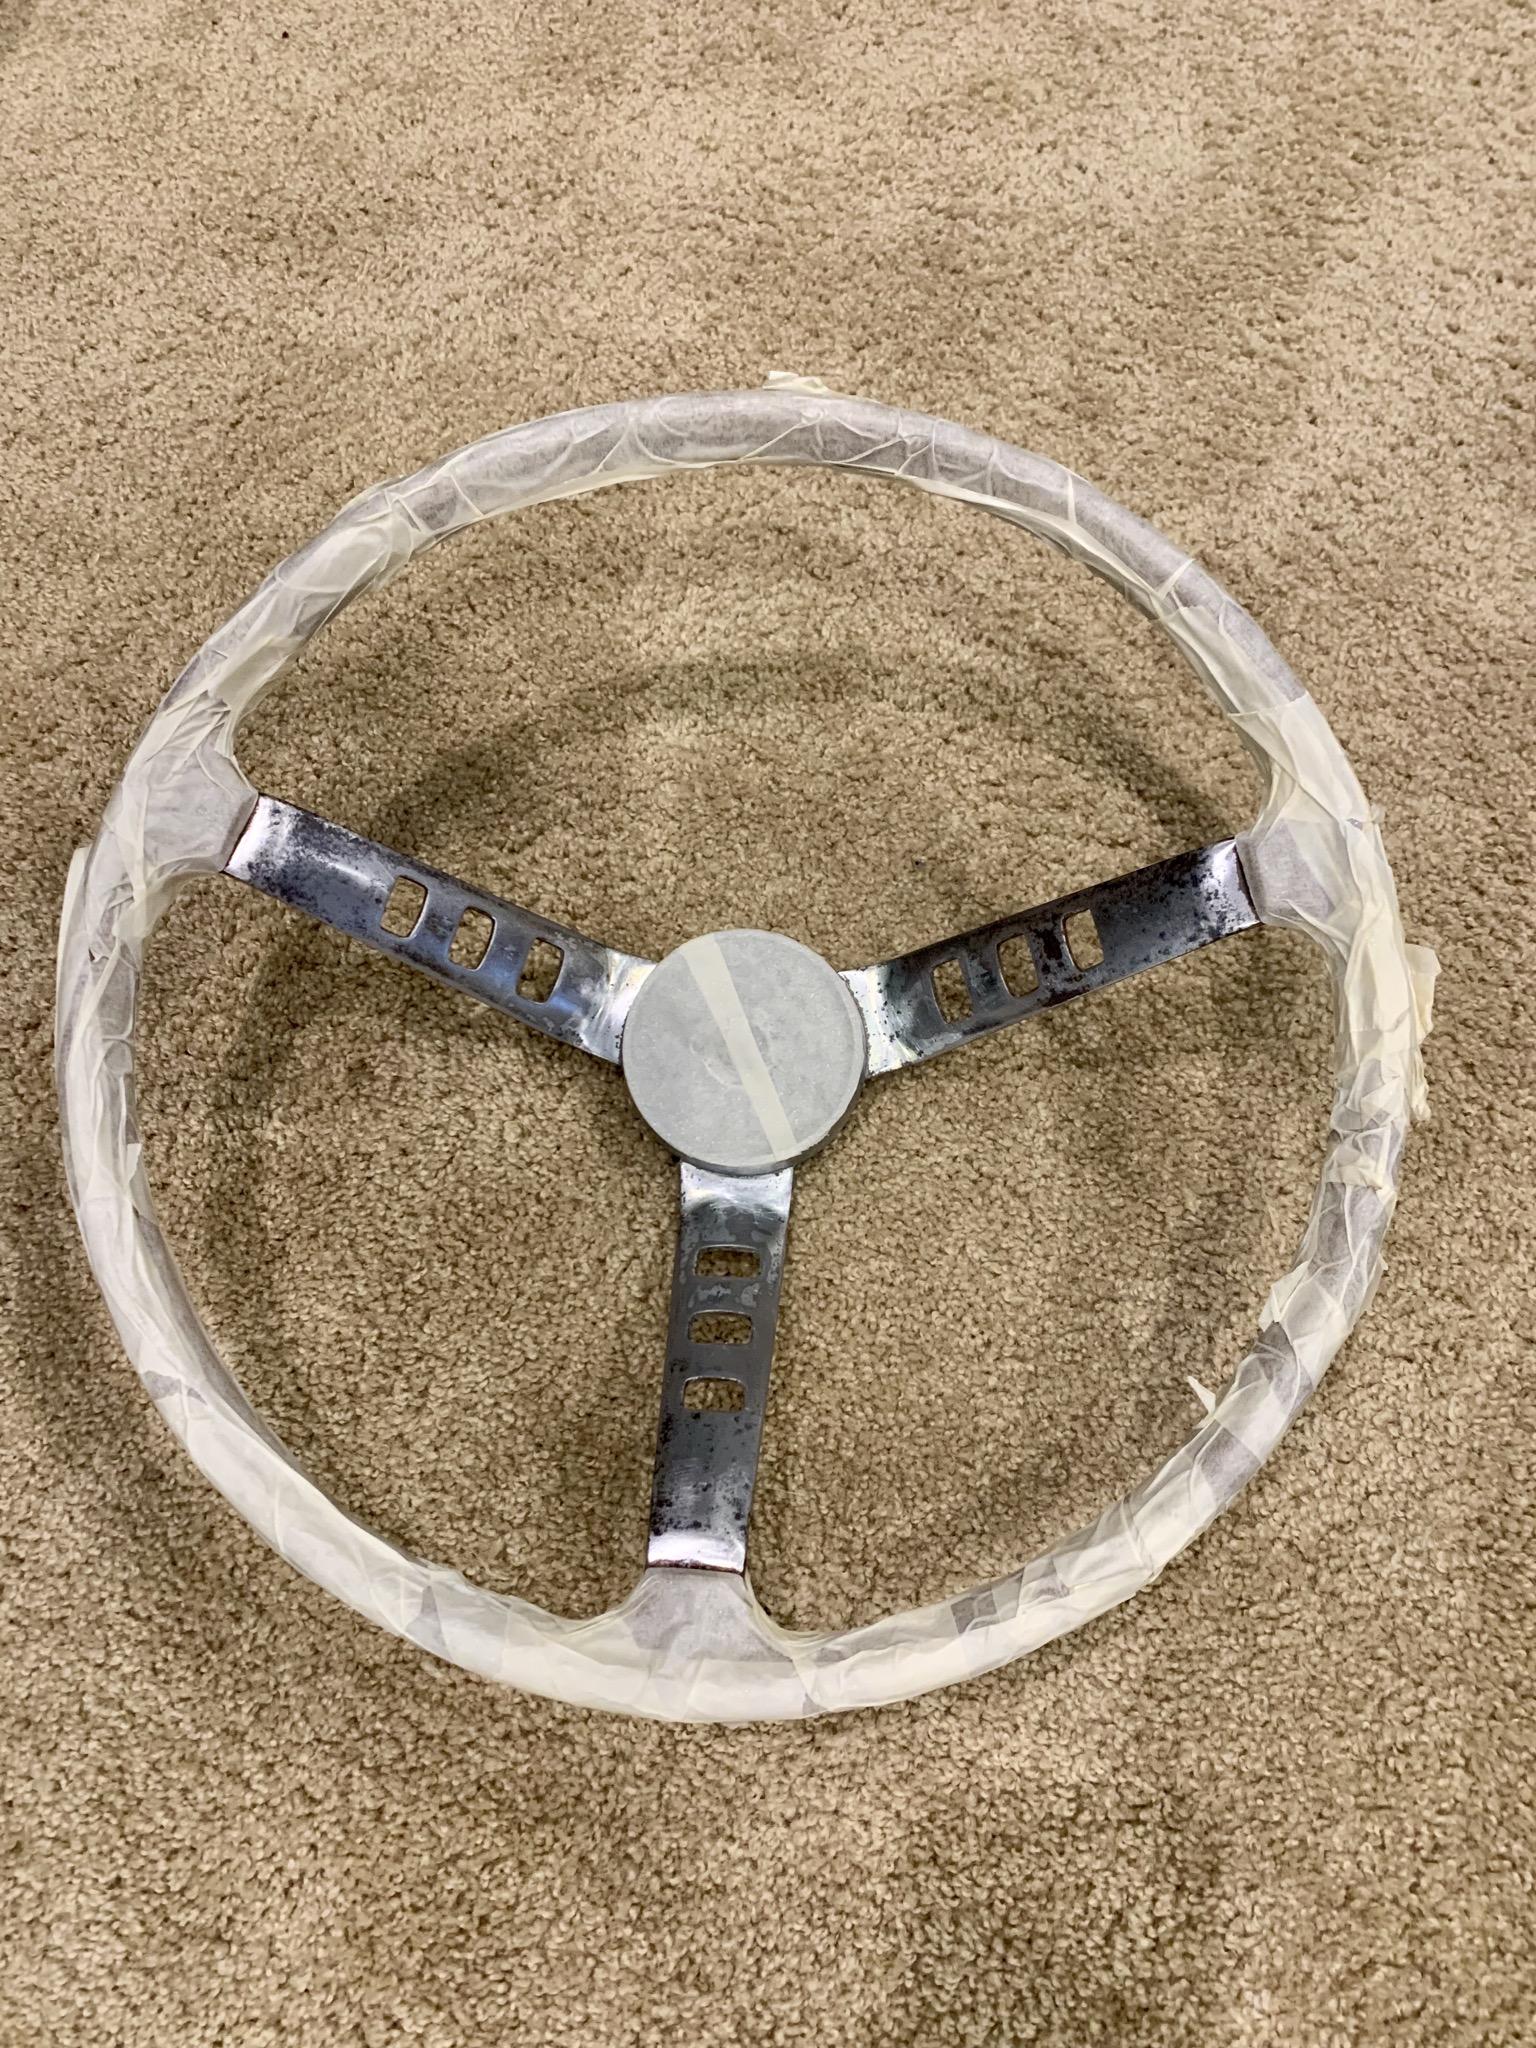
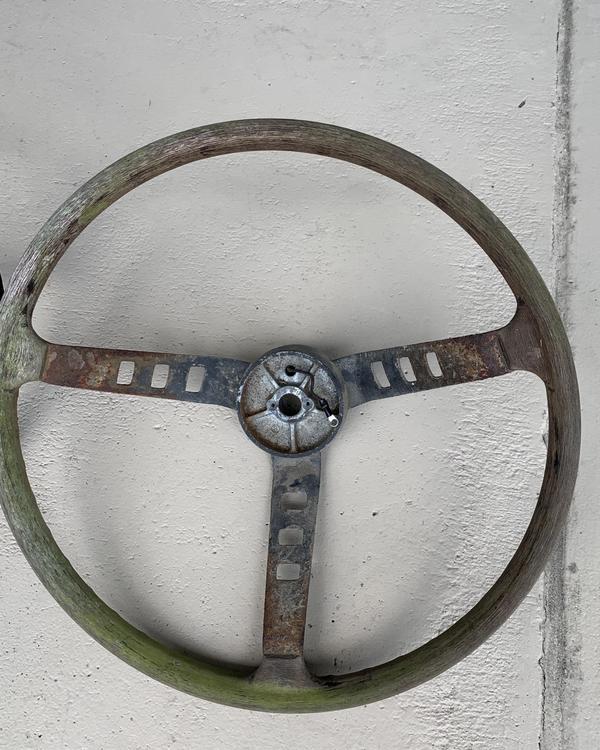
So, I’ve stumbled upon two 240z steering wheels in the past couple weeks during my junkyard explorations. They were really rough but were only $30 so I thought I attempt a home restoration. I thought I’d share my experience in this process. I know there are other posts but I don’t think anyone has posted a wheel that looked as bad as the one I’m restoring. I’ve completed the clean up and strip down. I used a small palm sander for the metal with 240 grit and 320 grit wet sand on the wood. I’ve masked the wood off and will prime, paint and clear coat the metal today. Here is the wheel as it looked after pulling for the rusted Z. It had some green algae on it too. Car was in a pseudo swap in Mississippi with no drivers door so I wasn’t surprised.

-
Welcome to the forum. The folks on here love to help Z owners with problems, so you’ve come to the right place for quality advice. So, I going to ask the questions most would ask before we get the ball rolling. 1. What is the recent history of this car. Did you just buy it? Has it been sitting, was it a weekend driver etc. 2. What recent work has been done on the car? 3. Is your car stock for the most part or modified. So fill in some more details so we can start to narrow down the problem. Sent from my iPhone using Tapatalk
-

Complete Misfire on Three Cylinders
Av8ferg replied to Captain Obvious's topic in Engine & Drivetrain
I’m gonna guess that there is likely some valve damage considering you drove it for awhile to get home but maybe I’m wrong. I think it’s a head removal anyways s time will tell. I fully expect a detailed report post removal. I know you got car issues besides the Z, hope you get some free time to hash them all out. Sent from my iPhone using Tapatalk -
Complete Misfire on Three Cylinders
Av8ferg replied to Captain Obvious's topic in Engine & Drivetrain
Drive 5 hours and bring your bug repellant Sent from my iPhone using Tapatalk -
Complete Misfire on Three Cylinders
Av8ferg replied to Captain Obvious's topic in Engine & Drivetrain
I agree a replacement head might be a good move. I’m pulling that N42 head next time I’m away for work. There are 2 N47’s in that yard. Meet me there and we’ll pull them both. $70 [emoji2369] Sent from my iPhone using Tapatalk -
Complete Misfire on Three Cylinders
Av8ferg replied to Captain Obvious's topic in Engine & Drivetrain
Might as well get a spare Z while your at it. An hour from my house I found a 76 the yard will deliver to my house for $800. Minimal rust and tighter 100%. Tempting but my wife would for sure stab me with a dull spoon if it did it. Sent from my iPhone using Tapatalk -
Complete Misfire on Three Cylinders
Av8ferg replied to Captain Obvious's topic in Engine & Drivetrain
Well, for sure put a new cam in it. That’s the fast way to go and you’d likely keep this engine as a spare I presume anyway. So, what intrigues me is what was the mechanism for the failure. Is it possible something got in the head and jammed the cam for a moment. Why did it break where it did? Either the cam experienced some sort of trauma or it was faulty and had a small stress riser that finally gave way. I took a 4 week course on aircraft accidents and we had a structures class that focused on metal fatigue and a lot can be determined by looking at the fracture. You can tell If it failed slowly or immediately. I’d think the area most prone to cam fracture would be where to sprocket connects. This is where the load is being applied. Sent from my iPhone using Tapatalk -
Complete Misfire on Three Cylinders
Av8ferg replied to Captain Obvious's topic in Engine & Drivetrain
When I was reading about the full engine rebuild I read about doing either MPI or DPI inspections for cracks in the Crank and Cam and Connecting Rods. I thought that maybe it was overkill but now I think your incident shows that it might be worthwhile after all. Sent from my iPhone using Tapatalk -
Complete Misfire on Three Cylinders
Av8ferg replied to Captain Obvious's topic in Engine & Drivetrain
Holy Cow!!! [emoji15] Sorry this happened to you CO. Glad you didn’t have to leave your car in a less than affluent area. At least they wouldn’t have been able to drive it either. Well...the silver lining may be that this is what brakes the inertia and gets you starting that F54/P90 engine rebuilt and in your car? [emoji2369] If you gave me 100 guesses without that video on what caused that I would have never said.... “oh, easy a cracked cam” Sent from my iPhone using Tapatalk -
Here’s one that’s a fair deal ($2,500) and a good candidate for restore. https://austin.craigslist.org/cto/d/austin-280z-datsun/6866650913.html Sent from my iPhone using Tapatalk
-
Picking up a 1977 280z 6 Hours Away. Tips?
Av8ferg replied to BayAreaZ650's topic in Open Discussions
Might be better to use a high temp Permatex Thread Sealant vice Teflon tape because I don’t think those tapes are designed to be exposed to petroleum products. Go to Autozone and get Permatex thread sealant. It comes in a small travel toothpaste size container. My 2 cents. -
Picking up a 1977 280z 6 Hours Away. Tips?
Av8ferg replied to BayAreaZ650's topic in Open Discussions
I agree the fuel filter is a precautionary measure not a fix. It will save you from damaging your fuel pump which is expensive for an OEM one. If you see rust then your tank is failing. It will only get worst and became a hazard to a reliable vehicle. It will have to be cleaned eventually so do it next off season (winter). It’s actually a pain in the arse in my opinion. Don’t put BB’s in you tank either after pulling it to use a an agitation agent to break on the rust. You’ll never get them out. I met a guy first hand who did this and it was a nightmare. He had to cut a door into the tank to get all them out and then weld it back. He eventually dipped his tank in a trash can full of 5:1 diluted water and muriatic acid followed by an immediate rinse in baking soda bath to neutralize the acid and then he poured POR-15 in there. It’s a messy job for sure. I had mine professionally cleaned inside and out by a semi-truck radiator shop and it looks like new. Cost me $350. This a must do job to build a reliable car in my opinion. It’s just one of the things you need to do eventually on an old car. Here are pics of the inside and outside on my tank post cleaning and painting all done by the repair shop. Do it right the first time and save yourself time and hassles. Sent from my iPhone using Tapatalk -
Picking up a 1977 280z 6 Hours Away. Tips?
Av8ferg replied to BayAreaZ650's topic in Open Discussions
Yes, you are correct. Connect it to the line that goes to the pump. Sent from my iPhone using Tapatalk -
Saw this while looking at Craigslist. https://orangecounty.craigslist.org/pts/d/orange-datsun-240z-oem-ash-tray-fuse/6866244463.html Sent from my iPhone using Tapatalk
-
Picking up a 1977 280z 6 Hours Away. Tips?
Av8ferg replied to BayAreaZ650's topic in Open Discussions
Stock is two piston I believe. One on either side. The Toyota’s are 4 piston (2 per side) I’m no expert but that’s what I’ve read when researched doing a brake upgrade on my crappy brakes. Found out my brakes were crappy because there there were no rear brake shoes on my car. Sent from my iPhone using Tapatalk -
Picking up a 1977 280z 6 Hours Away. Tips?
Av8ferg replied to BayAreaZ650's topic in Open Discussions
These are Toyota Pickup calipers. It’s a good upgrade from the original dual piston that came stock. http://www.bleachgarage.com/z-brake-upgrade Sent from my iPhone using Tapatalk