


240z70
Free Member
-
Joined
-
Last visited
Everything posted by 240z70
-
 Yep, that might be the smartest solution Zed.. I will have to attach new brackets to hold the new line, and don't want drill screws pointed into the leatherette tunnel covering... A way to buypass that, might be to run the line thru the firewall, under the center console and popping it down below before the tunnel ends. Unseen, can be attached downward and would provide as you said, a temporary solution until the gear box comes out. Either way, the entire line HAS to be replaced, I don't like joined brake lines. If anyone has a better solution and/or information, let me know. Thanks to all.
 -
Is it possible to remove and replace the brake line going to the rear of a 1970 240Z WITHOUT removing the transmission? I need to replace the line because it has a leak, but I have not lifted up the car yet (to be scheduled) and wanted to find out if anyone had done it or knew if it was possible. I would prefer not to remove the tranny until the time I have to replace the clutch which is still very good now. I thought about it and saw some videos which left me wondering if there is enough room either thru the bottom or by going thru the shifter hole and accessing the 3 or 4 clamps that secure the brake line along the tunnel. It looked like the two inner clamps closest to the shifter might be accessible thru the top and the outer two from the bottom...not sure. If someone has a clue or video, let me know and/or post the link.
-
Need to buy Brake Booster Reaction Disk (Disc) for a 7" Dual Diaphragm Chrome Vacuum Booster. Cant find any place that sells just the disk. Did a lot of searching for a while but no luck. Does anyone know where I can buy one new?
-
Finally changed the exchaust a while back. Cut the 2.5 main pipe, added a 1 in into 2 out used muffler OEM for some car. Dont know what but didnt care. THIS IS TEMPORARY....All I wanted to do was buy time to find the correct set up and be able to drive the car without sounding like i was running straight pipes (which mainly I was) and keep from getting hassled. Yep, bought a sound meter and tested the sound and it sounds good....OEM type maybe a little louder, however at 5000 RPMs the decibels are about 94-96 which is a great improvement from before which was about 116 -120 decibles at the same rpm. The muffler is about 5-6 inches tall, so that killed my available clearance and bumps/steep driveways entrances are a no-no at anything more than 1 mile per hours. Changed the tires with slightly larger ones, 215-60-15 (posted pictures in the tires/wheels forum if you are curious...car and wheels were dirty so disregard that.) and when I changed tires, I raised the suspension up. Between that and the extra tire height, it has about 4 - 5 inches or so clearance on the bottom....Still to low for me... The long term plan is to find low profile wide rectangular 18 to 24 inch muffler that has one 2.5 in and two 2" out. I have seen a company that makes some, the muffler is about 2.75 inches high, about 10-12 inches wide wide and 18-22 inches long, but that one seems loud and its very expensive. Its height was barely more than the 2.5" inch inlet. So I will look to see if anyone either makes one more quiet and less pricey or I may just end up having to make one myself and tig it together...Does not sound like something I would prefer to do, but I do need to have a longterm solution to the ground clearance and the noise. If I have to make it, it will be with bolt on junctions so that if when I bolt on to the supply, I can measure both height and decibels before i spend the time and effort to make the connection to the read pipes. Obviously due to the limited room on the Z, it will be under part of the transmission mid/rear area and also cover most of the driveshaft, but it wont really matter because if I have to drop the tranny or driveshaft, I would have to remove the exaust anyway because of the setup it has and by having bolt on connections, it will simplify the removal/re-installation. I will be looking for a muffler that meets the size/shape requirements but that also has some type of testing on it, whether it is a percentage noise reduction value or a plain tested and will not exceed X-amount of decibels on engines up to 3 liters/6 cylinders at up to XX-amount of RPMs. But I dont know if anyone actually does that.. Some of the ones that said they were quiet, i checked their video and they were pathetically loud, with a drone, and some sounded like the engine was tearing itself apart...I know I am looking for gold and I may have to settle for steel, but have to try... Any suggestions/leads on a source for the muffler that might meet the clearance and noise limitation?
-
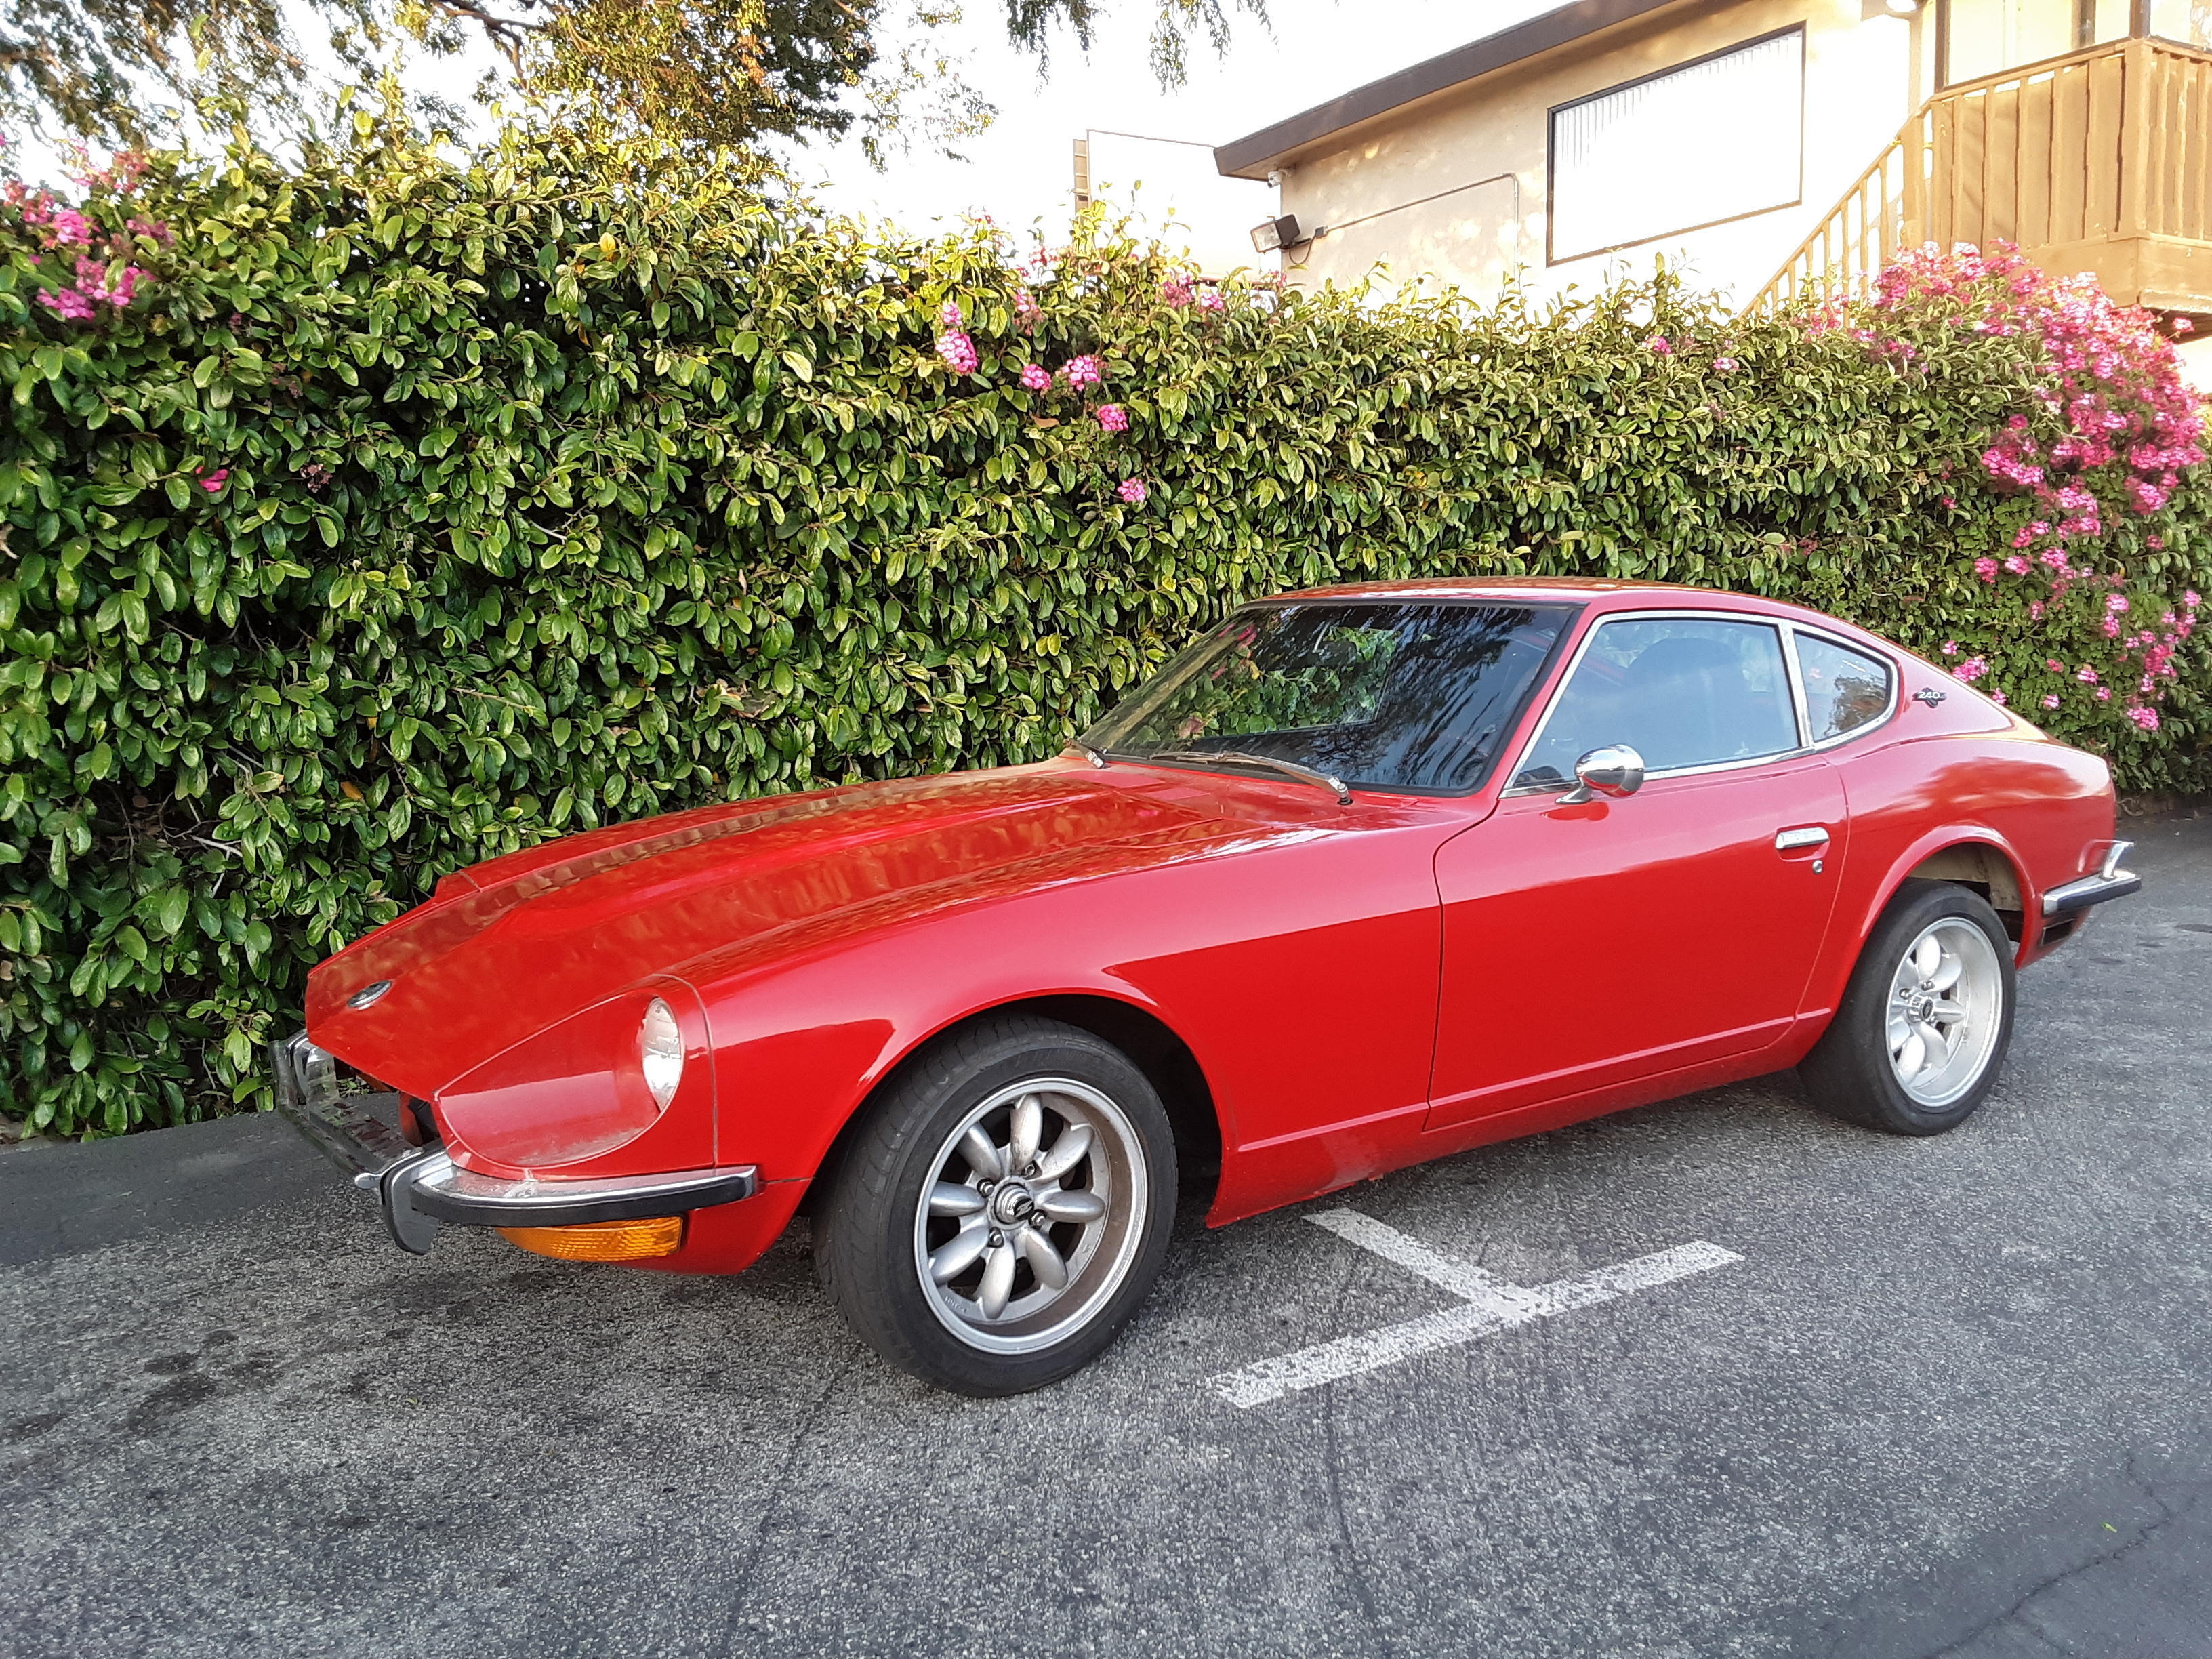
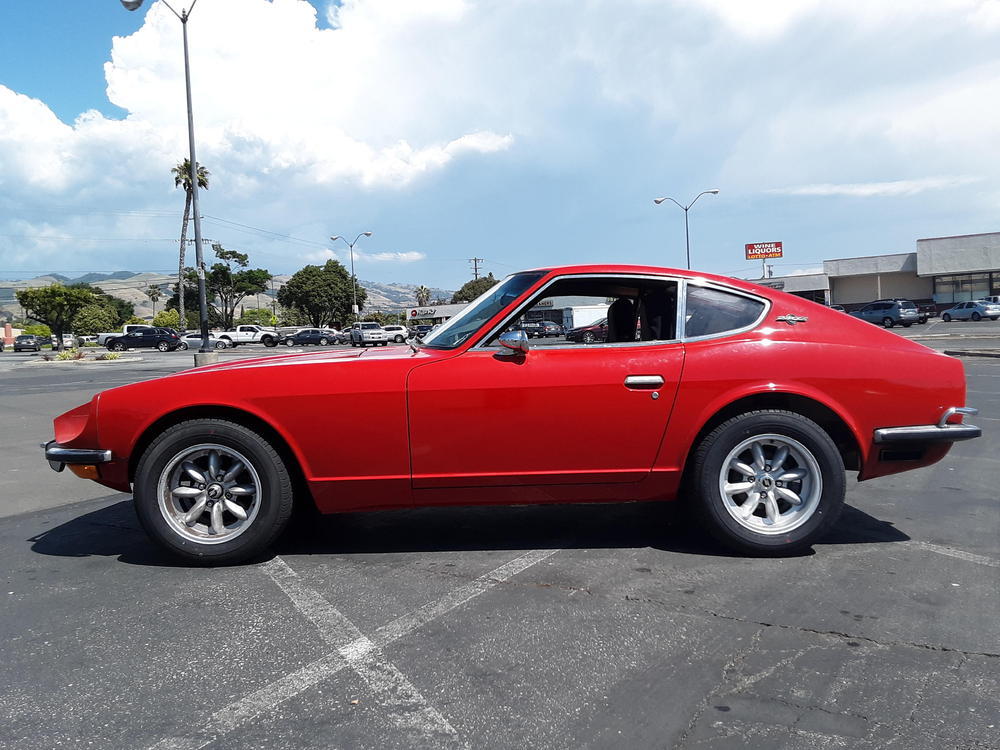
I just changed my panasport wheels from 195's to 215x60xR15. They fill the wheel well pretty decently, adjusted shock height and then did a full alignment. Yeah I know, they need a cleaning...Will do maybe this weekend....
.thumb.jpg.71f615577983ababb0cfef543fb78085.jpg.63b0777f24bc595d6a2b0e8ffb917a2d.jpg)
-
Moved the content to proper venue...
-
Looks like you got a great idea with the calipers...Also I like the info on the spring compression value testing... Good job. As far as the high idle adjustment I always tried to use the highest rpm that the flow meter could accomodate. I dont recall if i was able to reach the 3500 rpm on the one i had....Long time ago. And on my new old Z I still have not adjusted them...The engine revs so smooth and pounces that I have felt the need for it yet. Also have not checked the timing either, gotta do that one of these days... And since you mentioned it, I need to check and see what t ype of distributor I have. All i know is that I have pertronix electronic ignition and its worked out beautifully so far... Lots of works to do on this car..
-
I am very interested in how this turns out. Recently I bought a 1969 240z with a L28, F54 and an MN47 head. Of all the zeees that I have had (240z 1970, 1971, 1971, and a 1972) this is the most powerful and the most stable of them all. It will scream up to 6500rpm or idle at 500-600 rpm without issues. From what the previous owner said, the engine had been rebuilt in Japan (still has the Rebuilt by Nissan Japan sticker on it) a it had come out of a 1982zx turbo, along with the Borg Warner 5 speed transmission. Only other thing I know about it so far is that it has a super light weight flywheel and centerforce clutch... Anyway I am digressing, so back to the subject...I am very curious how yours will turn up since I am planning to change pistons later on ( I am assuming that I have the dished pistons and dont know what cam i have but I am assuming it is the stock???) if I have dished, in order to squeez just a couple of ponies out of. May or may not change the cam, and will definetely not change the SU which were obtained from or reworked by ZTherapy.. Thanks for taking the time to keep us posted.
-
Yep, I wonder what else i am going to find or not find..... Well, regardless, its only obstacles for me to work out slowly as I find them.....AND have a good time at it..Its a project in progress....hahahah. Its going to be like fishing, its not what you catch but rather do you get a few bites that keep you wondering when its going take a serious bite and meanwhile enjoy the beauty of nature....And if i ever find that I dont enjoy it anymore, then its time for it to find a new owner. Thanks guys...Now im gonna backtrack to the front..and find out where it got cut/removed...
-
Carbs...Sometimes maladjusted carbs can create a hellhole of issues..Its worth eliminating that from the equation.. I have had the same problem before in a different Z when I was very new to these cars and it was adjusted by a professional mechanic (whom I think was more familiar with Carters and Holleys than imported dual SU carbs...Anyway this might not help, but what I did was to go to basics and find out as much as I could. Why should I pay somebody to screw them up when I could screw the process better…: So, (with the assumption that the floats and timing are correct.) based on the information we had available at the time...no internet available.....I went for it and here is what ended up being my outcome procedure for various Z’s that I ended up owning. It always worked for me. I have seen people suggest or do the procedure a bit different (missing some of the steps or do it totally different), so perhaps my way is wrong, but my cars screamed with a passion and I didn’t have any issues with shifting 1st, 2nd, or 3rd at 6000+ rpms or idling all day cold or hot at 600 rpms.. They pulled with all the power they could muster. Good old days… Tools: Screwdrivers, tooth brush, carb cleaner, clean towels/rags, paper towels, lubricant (cable?), paperclip, RPM meter, Airflow meter, SAE20 motor oil. Lots of patience is always required. SU carbs are not footballs if you get upset….;-)…. 1-Pull all spark plugs to see if any of them could provide any clues based on their appearance (front vs back ones), I only use NGK plugs if I can help it. Used some Bosh Platinum before and they did ok, but I think NGK may be a bit smoother. 2 checked my timing and set it properly if possible. Always CHECKED for vacuum leaks on all vacuum points/hoses including on the timing advance hose, manifold, brake boost line etc. 3-Checked fuel pump/pressure (I like to have a filter, a pressure regulator and a pressure gauge on the supply side, and a valve and clear filter on the return line to offset spikes/lows and for visual checks) NOTE: SU carbs like a constant 3.5 psi minimum to operate and try not to go over too much if possible. High pressure can overpower the carb floats and then you run the risk of unmetered raw gas into the engine. Check/change fuel filter. 4-Now for the fun part: Took the carbs apart and laid them on a clean towel. NOTE: DO NOT MIX parts from one carb to the other. 5-Cleaned my carbs with cleaner and a clean hard bristle tooth brush...nothing harsher, no sand paper or green cloths etc.... Used paper towels to dry them or you can use compressed air...inspect for abnormalities and a secure and straight needle. Ensure that you clean out the oil/damper tube to remove any particles/gunk etc that may be present. Dry with compressed air or naturally. NOTE; Do not strech nor compress the piston springs by hand. Handle them carefully, you may want to compare their lengths and also follow AK260's suggestion of measuring their compression, however do not damage them in any manner. Just cleand them off with carb cleaner and let them dry by themselves or use compressed air. 6-Backed off ALL adjustment screws: fast idle, balance, and butterfly valve. 7-Turned the fuel mixture on the bottom until it the JET was EXACTLY leveled with the top of the brass jet casing or whatever you call it, where the needle goes into. 8-Using a bent thick paperclip, I would use it as a gap gauge to gap the butterfly valve, then I would turn the screws exactly the same quantity one full turn. NOTE: What I turned in one, I would turn in the other...no deviation... 9-Would put the piston back in very carefully, then I would put 20 Weight Oil in them, then the spring. There is a low and high mark on the dipstick/damper. Fill it to the high mark. I only use this one: 3-in-1 MOTOR OIL SAE 20 available from Grainger. It has a blue label and specifically says SAE 20 MOTOR OIL. Do not use the black label ones that say multi-purpose, nor would I use any other types of oil, transmission fluid, etc. If it is not a SAE20 MOTOR oil, I will never use it. Link: https://www.google.com/search?q=3-in1+oil&source=lnms&tbm=isch&sa=X&ved=0ahUKEwj75-bujcDiAhWPsZ4KHfhdCxIQ_AUIDygC&biw=1908&bih=919#imgrc=H-IYU8JMlAdQ-M: 10- With the pistons, springs and cap in place, I would set the screws on the cap carefully and then lift the pistons with one finger all the way up slowly to make sure they were not rubbing and getting stuck, then i would tighten the screws ever so slightly. Then do the lift on each one again 3 times: every time, it should go up slowly with resistance from the oil and when you remove your finger it should fall with an audible clunk. Both carbs should have the same sounding clunk, if not then they are not dropping equally and most likely are not going up equally either. Sometimes the housing is not set properly and it causes friction on one side which is reflected on the operation of the piston. This and a visual inspection of how the needle sits can help tell you if the needle is bent. Once everything looks normal, tighten the screws appropriately and recheck the up/down action of the pistons.NOTE: Don’t forget to check your choke cable and if it binds when released and inadvertently keeps the gas mixture setting rich instead of letting the assembly fall back into its set point.. 11-Now after the carbs are in move the choke assembly under the carburetor manually (jet gland) down and back up. It should always come back to rest exactly even with the jet casing. Once established that it is not sticking (I always lubricated my assembly) then it is time to adjust it. Use cable lubricant to lubricate the assembly and the choke lines. Should not use grease since it can pick up dust, dry up and become sticky. 12-Move the MIXTURE knurled knob or wheel 3 full turns on each carburetor, then back off exactly one 1/4 turn. The knob/wheel should now be where the jet resting at the equivalent of 2.75 turns from the top brass casing. Member AK260 has suggested using a caliper to measure that. I think its a good idea and how I would incorporate that would be to do the turns manually, then check it with the caliper to obtain a base value before making the rpm adjustments with the car running, and write it down on the car logbook, Then once I had finished fully adjusting the carbs, then I would take the dome off, get a final reading (assuming that I had adjustments to the mixture and get a running depth reading and write t also down. That way, on my next carburetor adjustment event I would already have the final reading that I could use to start off with...Just an idea but I liked AK260's suggestion. 13-Connect a RPM (tach. dwell) meter to engine. Have a “Uni-Syn” carburetor flow meter ready. Heck, I still have both my meters plus a timing light from over 30 years ago… They should be useful on my new old z… 14-Now try to turn the engine on. If it does not start, turn both butterfly screws ¼ turn EQUALLY to increase vacuum in the carbs. Repeat until engine starts and holds. 15-Adjust both BUTTERFLY SCREWS to have an idle of 600 (manual) 750 (automatic transmission), max depending on engine condition. There may be a difference if the engine is tight vs. worn out almost at a rebuild stage. 16-Adjust BALANCE screw SO THAT when one side moves less than a hair, the other side also moves. Once they are even proceed to next step. 17-Adjust the FAST IDLE screw to barely touch the assembly. 18-Rev engine, let it fall down, then check the front carburetor flow. Do this quickly and adjust flow meter adjustment so the indicator is on the half way mark. Check it again quickly, don’t kill the engine. Rev engine between all checks and always let engine fall back to idle before checking again… 19-Now check the rear carburetor to see if it has the same level flow. If so you are half way there. If not, then ADJUST the BUTTERFLY valve to increase or decrease the carb flow until it is equal to the front one. 20-Once they are equal use the FAST IDLE adjustment to bring the engine to 2500/3000 rpm. If your engine will not do that, do at least 2000-2500 rpms. NOTE: At this point, rev your engine several (3) times, note where the rpms come to idle each time, if they are stable and come to rest at say 2500 each time, increase the flow of gas by ADJUSTING the jet knob/wheel ¼ turn only. This must be done EQUALLY to both carbs. If there is not a difference, then go an additional ¼ turn and repeat. There will be a difference in RPMs, either they go up or they go down. If they are going up, continue with the adjustments until they start going down, then UNDO your last increase adjustment. This will identify the correct setting for your particular engine/carb setup. Depending on engine condition your initial increase may actually lower the RPMs. If so do the test in reverse by lowering the gas mixture instead of increasing and undoing your last increment when the RPMs decrease. 21-Re-adjust your flow meter opening to compensate for the new increase in flow. 22-Rev engine several times, let it fall to your new idle. Test FRONT carburetor, adjust flow meter to have indicator on the middle mark if possible, if not use other marks. Rev engine, and RETEST FRONT carb, rev engine, TEST BACK carb. Do this several times to ensure that if there is any difference between the two, it is consistently the same difference. 23-If there is a difference, ADJUST THE BALANCE SCREW ONLY either increasing or decreasing its effect. Continue to test and adjust the balance screw until both carb flow readings are even, then you are almost done. When they are even, proceed to the next step. 24- Release the fast idle all the way out. Rev engine. It should come to rest at the intial set point of 600/650 rpms. If not, adjust the BUTTERFLY SCREWS EQUALLY to bring it to that point. 25- Now adjust your FAST IDLE screw until you have your desired idle rpms. Some people like the 600, others like it higher, but most seem to keep it between 600 and 900 from what I remember. I like to see an engine at 600 and stable. NOTE: These settings are for a manual transmission. Automatic transmissions the idle is usually 750 instead of 600 but you can always do the adjustment for 600 and then just set your FAST IDLE at 700 rpms. If your car is manual and it has been properly adjusted and the engine is in good shape, it should be able to idle all day on 600 rpms. Exceptions; Any engine mods (cams, etc,) and if you have air conditioning, you may want to set it a bit higher, just in case you want to be in the parking lot at idle running the AC unit or stuck in heavy traffic on a hot day.... DISCLAIMER: This personal procedure assumes that before you start it you have checked or are confident that the FLOAT are within specifications and the TIMING is correct, and therefore only addresses checking the SPARK PLUGS, VACUUM LINES, FUEL PRESSURE & FUEL FILTER, then adjusting the Carburetors accordingly. Don't forget to check the AIR FILTER(s). They will change the final Misture composition if they are not flowing air freely. Another thing to consider is not sucking hot air from the top of the engine compartment but to utilize the original aircleaner box and get cold air from the front of engine, preferably from the other side of the front wall. I know that a lot of people like the individual air filters like the WELLAND and others but what you are pulling into the engine is hot air sitting above the headers....You can utilize a prefilter that just keeps the rocks/debris from getting into your air box. One thing to remember is that you always adjust the back carb to the front carb, not the other way around. Anyway it is a matter of preference so I am bringing it up as a thought. Clarifications: Mixture screws are on the bottom of each carburetor, Butterfly valve screws are on the back of the carburetor and control how much the butterflies are open at idle, balance screw is on the center balance assembly and controls how the rear carburetor is affected by accelerating in comparison to the front carburetor, fast idle screw is the top idle adjustment screw, JET is the movable tube (that receives the needle) that moves up and down within a fixed brass casing. Anyway, sorry if my crappola suggestions don’t work for you, but I figured I would pass on my measly useless info in case it had anything you might find useful…There is a lot of information out here that may help you more than this but I figured I would add my .02 cents.
-
Ok, here are some pictures take on the top rear/right and on the bottom rear/right. Disregard the black bundle (2) that you see on top. I added those there myself so they are not part of the equation.
.thumb.jpg.4f80f76b307205549ad8781fad02c8cc.jpg)
.thumb.jpg.8a8007bc37c4a7b5a1e824f930d077df.jpg)
.thumb.jpg.7456cbd8b7e0d7d642f9ce2a9221bd9f.jpg)
.thumb.jpg.45731282cdd1e7cf3970aa8a69d6131f.jpg)
.thumb.jpg.a5b44061d3f9bac4270ae5609a76ec63.jpg)
.thumb.jpg.c22d4068a9b4e8e1260b7a2fd5d66443.jpg)
.thumb.jpg.eb32aa796a2833d2c358f799ed690ce3.jpg)
.thumb.jpg.b547209d3570bf8dab90fb74a267825a.jpg)
.thumb.jpg.8cae581a14bcb711f8db0159090aed25.jpg)
.thumb.jpg.a566d6ef978f864a9ddb487d993c2141.jpg)
.thumb.jpg.f7f6d5c5190d9b1310878516516a23e6.jpg)
.thumb.jpg.2cbfe1838421ef271ef6365f5702b177.jpg)
.thumb.jpg.b716a6e52eaaa3c6a158a0965483cff0.jpg)
.thumb.jpg.ec19176d0c2a389e9f3c1fe3b60b8abe.jpg)
-
Vin is #399 build date 11/69 that is why i was asking for anyone with the early z to perhaps shed some light....I will take pictures of what I have.
-
Rechecked, but no wad of wires anywhere below. Actually the only wire that comes below is a green wire for the fuel pump, and below is also a black ground wire that is connected to fuel pump. No other wires are present. I also rechecked the top and all the wires are loose not in a loom so I can see that there is no yellow wire and that all of them go to the lights except the ones for the dome light. Does anyone else here have a 240z built in 10 or 11/69? I need to have someone with one of the 69 built z check what their wire for the sender looks like and where does it come out of the frame with pictures if possible OR someone who is very knowledgeable with the 69 series I 240z.....
-
Clarifications: It is the Yellow wire for the fuel sender that I am looking for in the back. I cant find it neither below the car nor on top inside the right and rear panels in the hatch area. All wires there are used for the lights except for one green wire which goes below deck and powers the fuel pump. I dont need to drop the tank because I have already dropped it anyway and its not the standard z fuel tank. There are NO wires of any color obstructed by this tank. There are no wires colored yellow at all either below deck or above it.. So the question is where is it?
-
CAR: 240Z build date 11/69: Problem: Cant find the YELLOW wire to connect to sender. It does not exist in the back harness any place. From what everyone says and from various manuals, there are two wires going to the sender: 1 black/ground and one YELLOW. Does anyone have any ideas? I am stumped. Any help/idea would be greatly appreciated.
-
Vents PCV Crankcase Valve Cover.pdfVents PCV Crankcase Valve Cover.pdfVents PCV Crankcase Valve Cover.pdfCurrently I have the crankcase vent tube disconnected, the valve cover vent has a small filter, and the PCV valve has a rubber cap secured with a clamp. After doing some reading on each, I realized that I should make some changes to ensure that gases are not building up under the hood, foreign material not going into the vents (either ccase or vcover) and that i should protect both from backfire pressures if I connect them to the airfilter and/or to the PCV valve. It seems that having the PCV valve connected to the Crankcase vent is beneficial beacause it has slight vacuum to help remove vapors (including condensation), pressure reliefing and minimize overall vapors from building up and entereing the cab area. I am not concerned about re-directing those vapors to the combustion thru the pcv valve but want to make sure that I am not directing any backfire if it happens into the ccase or the vcover compartments. I did a drawing of possible connections and would like someone with more knowledge than myself to take a look at it and see if it makes sense. Components needed are: hoses, Anti backfire valve, check valve, and 2-hose T-Connectors. Any Suggestions/Criticisms?
-
Where can I get a crossmember/mount for a Borg Warner T5 transmission to fit a 240z 1970? The cross member i have currently is a mismatch of plates and bolts.....its Crap. and I want to put one in that fits the offset design without having a frankenstein creation.
-
-
Understood. No insult meant. But it is great to have someone who actually has sought after parts at a great price, and that person does deserve to reap a small benefit from providing those even if its only to pay for the original expenditure. I dont think that anyone could claim that unethical after all someone had purchase the whole caboodle but might only need 3 or 4 parts. Why not help the community and at the same time benefit a bit even if it is a small amount. But if you did not have that intention, I fully understand and was not implying it, only commenting that it would be an excellent way for the whole community to benefit.
-
-
Thanks for the pictures guys. That helps a lot. My first Z had one, the others did not and I didnt remember how it was connected nor what the parts looked like. The reason I would like to get one because it is handy when you want to set the rpms higher whithout having to choke the heck out of it, hold the pedal down or adjust the fast idle screw. It is extremely convenient and one does not really miss it unless you actually had one in the past, then you do. Its not necessary but it is great to have one.
-
Well, if you buy a pack of 25, use what you need, then divide the total cost by 25 + a reasonable percentage profit, and sell them to the community. This way you got yours for free and no one is getting gouged...
-
I tried to see if there was a listing or search function that allowed you to search mufflers by size and decibels. I know engines are differrent and so are the sounds they output, but it would make sense to have a baseline of mufflers that instead of a top number maybe they might be listed by how many decibels they reduce the sound. And then you could have them tested on several engines. Tier 1= under 3 liter, Tier2= 3 to 5 liter, and Tier 3= 5 to 8 liter engine ( say a 2.3 liter, a 350 engine, and 460 engine). You could have reduction in the tier 1 of 50 decibels, a tier 2 reduction of 25 decibels and a tier 3 reduction of maybe 15 decibels, then take an average and that would be the rating on the muffler, in this case a value of 30. or you could just show it like a wheel size, 50/25/15 and this would be the actual values instead of an average. I really thought if nothing else that at least the muffler manufacturers would have some type of decibel rating on their units...THEY DONT or at least i did not find any.. What i did find was "agressive sound", low drone removal, quiet, quieter, louder and whisper, stealth. Its true that it points you towards a direction, but it does not give you specifics. If i point East and tell you that you will find a pot of gold in this house but dont give you an address, all you know is that it is towards the east, but that is it. Quiet or quieter without a value or comparison, does not mean anything. Is it quieter than a Saturn V rocket or quieter than a mouse? There is a lot of territory there to gauge. Anyway, I dont want to take chances and spend the money on the wrong one. I want to know before I buy it if it is going to meet the guidelines and not kill the engine with smothering.
-
-

.jpg.331b2aec01e07e674a6374770c3a99fd.jpg)
.jpg.6e4071a298abd02819988da2719ea4f9.jpg)
.jpg.20c16cb468fffe89e74a168d7821bf15.jpg)
.jpg.665abe05ff888830ff8d1224ba264091.jpg)
.jpg.686ca053874582b43cde0c3ad78e3f47.jpg)
.jpg.d955f2129af28be3682eda8dcadc59f7.jpg)
.jpg.1c8d8b5aa4723c59ce473aa8cbbe4881.jpg)
.jpg.8eba05aaf22eeb7c1bf087ec4ddf1a81.jpg)
.jpg.92d1ce91a7011442454aeb7052621c32.jpg)
.jpg.0a167e9311b8f7ace82f589f143882f8.jpg)
.jpg.4291b33d1a2777d3ec2f5286c98bc27f.jpg)
.jpg.1a52ce9626dd7dc086b151edf5349613.jpg)
.jpg.42be4d1eb8868d5386582d186dd0532a.jpg)
.jpg.99a03b8b7b0ebdc04b3257fdde113781.jpg)