Elliott000
Free Member
-
Joined
-
Last visited
Everything posted by Elliott000
-
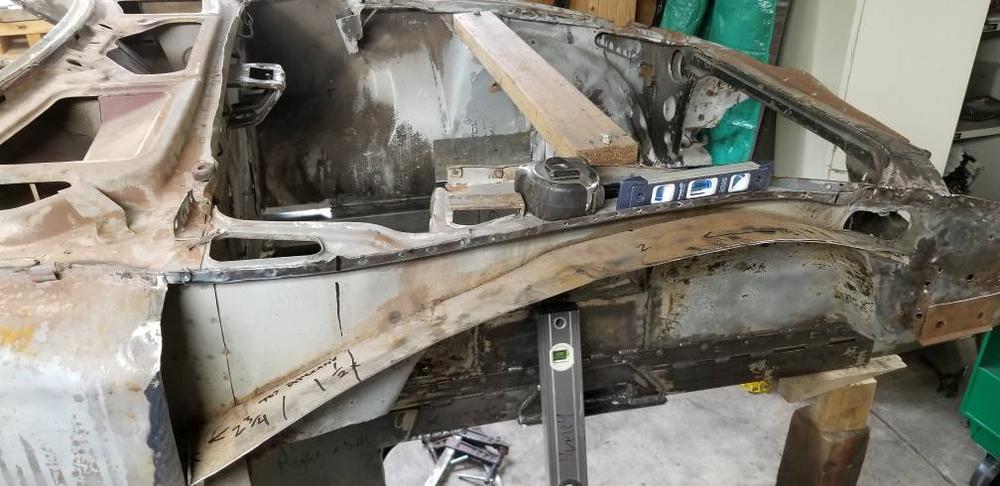
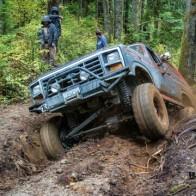 Hey would one of you fine folks be able to measure on your cars the distance between the inside faces of the "nose" when the hoods up? I gotta rebuild my upper core support brace and with the bent up front end I don't want to trust whit I have for numbers. Here's a pic of someone else's car, but I'd like the inside measurement between the two faces at the rad support upper member /radiator if that makes sense . Sent from my SM-N950W using Tapatalk
-
Turns out she's not an oil canner. Just a dent haha, ill have to practice my dent removal skills, it pops up but doesn't move the dent from one spot to another as the oil can dent seems to be. Time to try my hand at tin bashing in the lightest of terms. Sent from my SM-N950W using Tapatalk
-
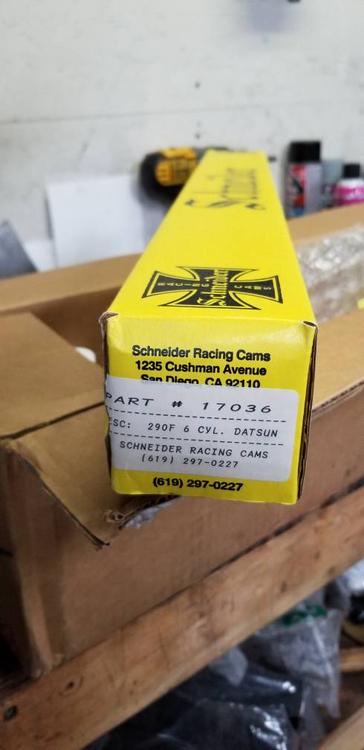
Ok thanks for looking into it. At this stage I'm going to run what is on the motor and just see how everything feels before I start changing things on somewhat of an unkown build. I am selling the cam however so if your interested we can work it out. I have it posted on datsun parts and needs on facebook6 Sent from my SM-N950W using Tapatalk
-
I stripped my doors with a cleaning wheel and the one door is mint with a small rust spit in the corner. Easy fix, however the passenger door has a couple proper dents. I think i should be able to pop one of em, the other is fairly large and when I push it out from the inside she sucks back down. Oil an is that what these ones are called? What's the best method to fix that style or will I be laying 1/4 inch of rage gold on er like the previous owner did Sent from my SM-N950W using Tapatalk
-
Good to know, thanks man Sent from my SM-N950W using Tapatalk
-
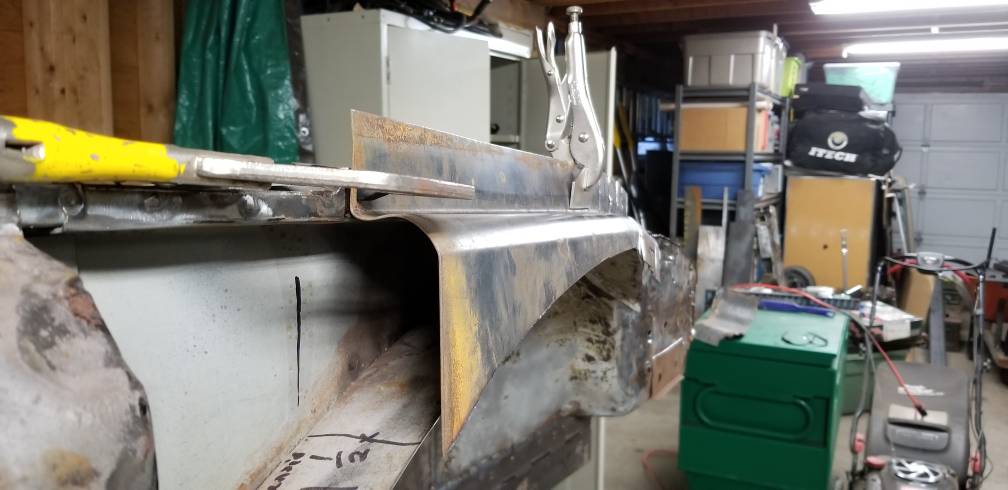
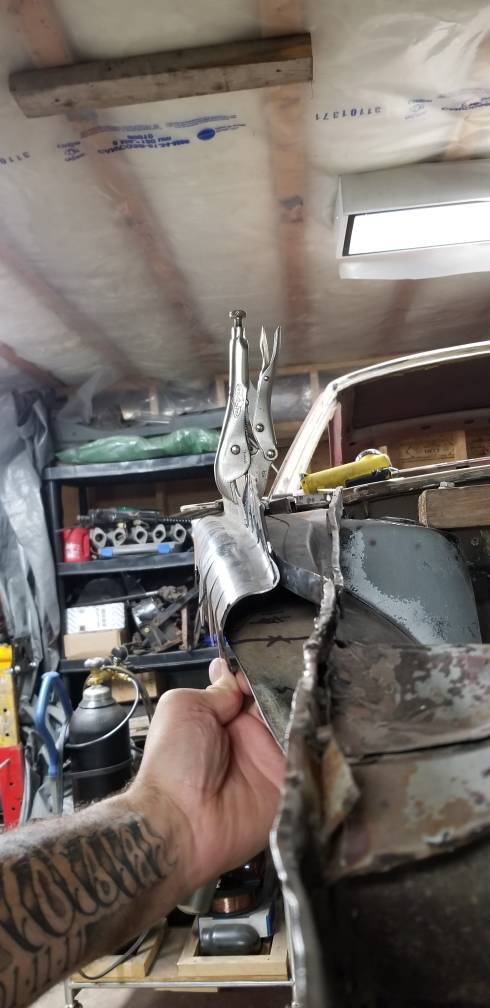
Update, heres what I have conceived..... Hammering on a buck with heavier guage would suck so im bent the contour into some straight stock and ill do reliefs to follow the contour and then dress the seams with some welding. Where it make drastic direction Change on the right ill start with a fresh peice with a custom shoulder in it. Once I sew it up and grinder it will appear almost as stock aside from the square corner at the bottom where it ties into the wheel well. Sent from my SM-N950W using Tapatalk


-
No japan stamp. Sent from my SM-N950W using Tapatalk
-
225 USD shipped I figure. Camshaft, cam lube and breakin oil additive. As packaged from the original shop I think was zstore Sent from my SM-N950W using Tapatalk
-
Thanks eh, after some more thought I'm just going to sell it. I have a complete running motor, ill use what I got and go from there once I've driven it. Even if I do the leg work for this cam I think it comes away from where I want power Sent from my SM-N950W using Tapatalk
-
Hey guys, when I got the car the PO had purchased a handful of parts. One of them being a stage 4 cam for the rebuilt motor. Question I have is for guys who have experience with this cam and a refreshed 2.4,is it a worthy upgrade? Will I loose lots of bottom end, it will be a street car so launch is a priority aswell as rippin! I do have a lightened flywheel with it aswell. Should I sell this thing and buy sheet metal for the car or put it in the already complete motor..... Thanks guys. Sent from my SM-N950W using Tapatalk

-
Hahaha I'll never do that! Sent from my SM-N950W using Tapatalk
-
I appreciate the confidence! I'm new to the sheet metal game, im used to building for 37 or 40 inch tires and a v8 haha. I actually made some headway today. I cut the passenger side rust off the bulkhead and i can actually make this happen with about three pieces. I've bent a straight run for the middle section that maintains a width on top of about 1 5/8 inch. I don't have pics of that peice but I will tommorow. The two ends I'll have to get creative with a couple relief cuts and maybe a triangle or two to make things blend in. Overall I think ill be good to go. I do however need to make the two thin er parts that come along the end by the hood mounts. That will be the biggest challenge now. Sent from my SM-N950W using Tapatalk
-
I agree on using a thicker stock which I have already. I think ill go the route of multiple pieces attached to make a final form. At least it doesn't have to look amazing since she's covered up. I did get excited when I seen that one guy who just cut em off and layed flat stock over it. But I'm not going that way, I agree these are an important part of the front structure. I'll post up pics as I go along of whatever I create. I tried finding nos for sale with those part numbers but no go, ill keep browsing Sent from my SM-N950W using Tapatalk
-
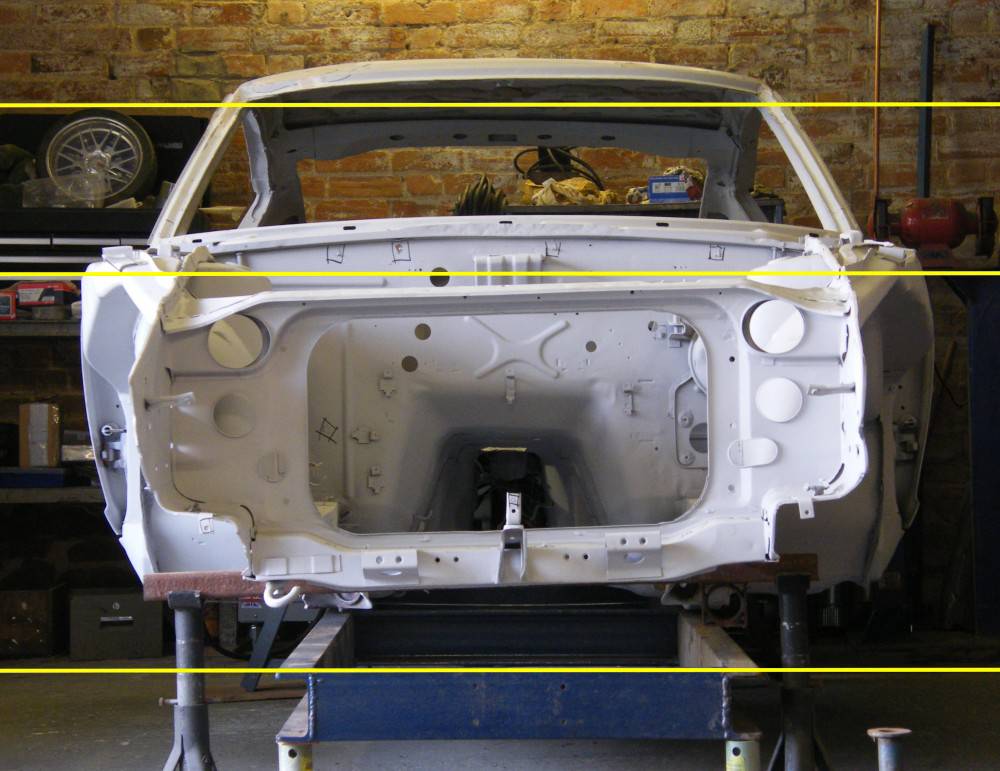
Dude that's awesome and I really appreciate all the research! I've got my tower braced right now at about 907 center to center while I've been working on the rails and inner fenders. I'm currently re attaching the fenders to the frame and have confirmed number in the vertical on both sides are the same. I'm pretty confident that everything will line up. I laid one of my old fenders on there and bolted on the door. Checked gaps etc because of having to lift the one side, i was worried it may cause issues but shes spot on. I measured the hood just now and it "seems" as though there will be sufficient gap for it to close low n behold the gap is same front and rear in relation to hood width.thi g's are looking up! In the topic of this actual thread. Once I finish the tie in, I'll be onto the over wheel air things. Should be fun.... I still haven't decidied on what the plan is haha. Maybe full on tin basher, or I might do card board cut outs and basically replicate it but with square corners essentially boxing it. Sent from my SM-N950W using Tapatalk
-
I'm not trying to discredit anyone's safety observations either. But I'd rather drop 350 hp onto steel tubes than a rusty frame that will fold if if i fart over a speed bump. Sent from my SM-N950W using Tapatalk
-
In Canada, if the car was previously registered with a clean title then im good to go. As far as the safety side of things go, let's be honest there is a danger factor in this setup ill agree to that. Theres also danger inherent in driving my lifted truck over 80 km if I swerve hard with no sway bars she will probably be on it lid. If i hit something head on in the 240 and put the engine into my nuts I don't think the frame rail will be of my biggest concern. On the other hand, Im more concerned about getting driven over in this low arse car. I appreciate that some people, And I don't really know what u guys mean when referring these porsche types.... But some. Guys might not be happy with the way certain things get done and not only on my build. In my case, I got a rusty z, ive always wanted one, and I'm goin to build this one to the best of my ability and budget, and when it's done I'll enjoy and try my best to avoid any trees. If it's an auto mobile vs automobile accident chances are it will happen at some sort of angle or ill drive under a truck and cut my head off anyway. Sent from my SM-N950W using Tapatalk
-
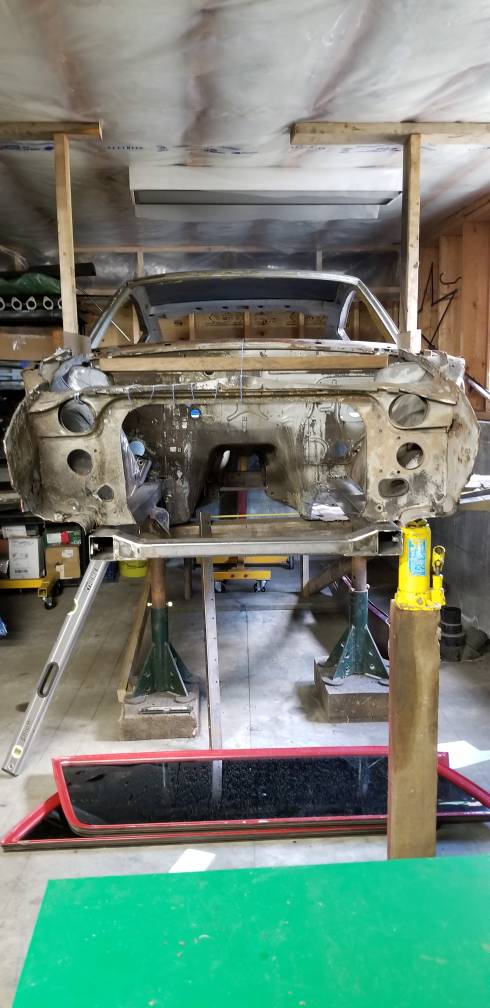
My redneck frame rack. The car is level and I shimmed a tight fit above the lower a pillar area to my ceiling . Like mentioned the nose on these things does t take much to move around. In the picture I have the driver side pushed up higher to sit. I've since dropped it and shimmed it to the frame. Supporting itself out front and loaded its all straight now Sent from my SM-N950W using Tapatalk

-
It's 2 mm square tube, the work that went into er now thier both staying ha. I went around on the web and found a few others who made thier own rails from the same material. I figured I'd be better off than trying to make a straight rail from folded paper. I understand where you are coming from though. I'll have to scratch head on this now. Sent from my SM-N950W using Tapatalk
-
this thread is awesome. following, great work.
-
she was an easy tug, I actually planted the car from the top down essentially. Jacked up the low side and let it hold there for a couple days, Today i released it and it settled in good. Once i weld the inner fenders back to the frame rails she will be true and the improvement in appearance is huge already! After this though I move into the job regarding those upper bulkheads. it wont be a ton of fun but ill get through it! thanks guys
-
That's what i was thinking. I have to either anchor the main body/chassis to the ground or I can fab up and basically anchor it from the ceiling so she can't lift. Then jack the side that's low slow n steady till it recovers in the right spot. Im just worried about creating elsewhere Sent from my SM-N950W using Tapatalk
-
Haha, $^!# mixers! Gotta love em. Sent from my SM-N950W using Tapatalk
-
I've fabricated the driver side rail now and tacked it in place. I'm about 1/16 out of square on the engine bay but I think ill roll with it. Everything seems to line up with my center and outside lines I'm using for reference. I'll fabricate the lower rad support then tackle how I will fix the twist on the upper strut tower pieces of structure. The pass side is pretty straight but the driver side goes low kinda like this guys situation but ot quite as bad and the opposite direction. Sent from my SM-N950W using Tapatalk

-
Stroker, it's a term used when an e Hines stroke has been increased but the bore etc remains about the same, more displacement and generally a low end torque motor. More radical example. My bronco has a 351w block but it's stroked to a 408 cubic inch block so all perifrerals are 351w stock stuff it shes got some better bottom end jam. Sent from my SM-N950W using Tapatalk
-
good info. Darcy is the guy i bought the car from. he was told it was a stroker and thats clearly wrong. Doesnt really bother me, I drove my buddys stock 240 with a somewhat tired 2.4 and it was a fun drive so im sure this will be aswell. The final game plan years down the road is an inline 6 turbo of some fashion. but again, that's probably a couple yrs after the cars driving.