


.jpg.29ae2c4a5aeec52ca7887f8f12267ab6.jpg)

Neb
Free Member
-
Joined
-
Last visited
-
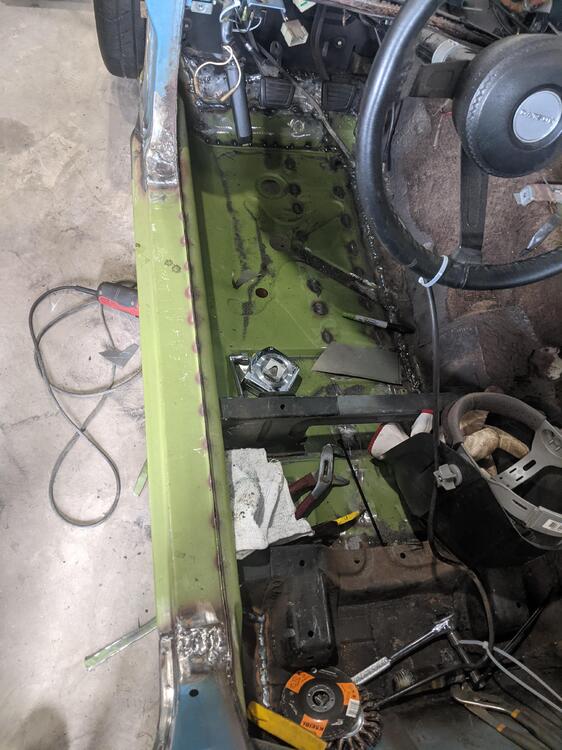
Fitment check on the passenger side floorboard and rockers..
.thumb.jpeg.e624c7b62489fa641d65f1bc6dcf21ae.jpeg)
.thumb.jpeg.856ec5d5cb3f78fd81c53cf64f8d4d58.jpeg)
-
Very much all of the above. Sawzall where we could because its quickest/safest. Drilled spot welds, then followed with hammer and chisel where trying to preserve the old stuff. Angle grinder with a cutting wheel where we had to. Dirty work, but it goes a lot faster after you get your methods down..
-
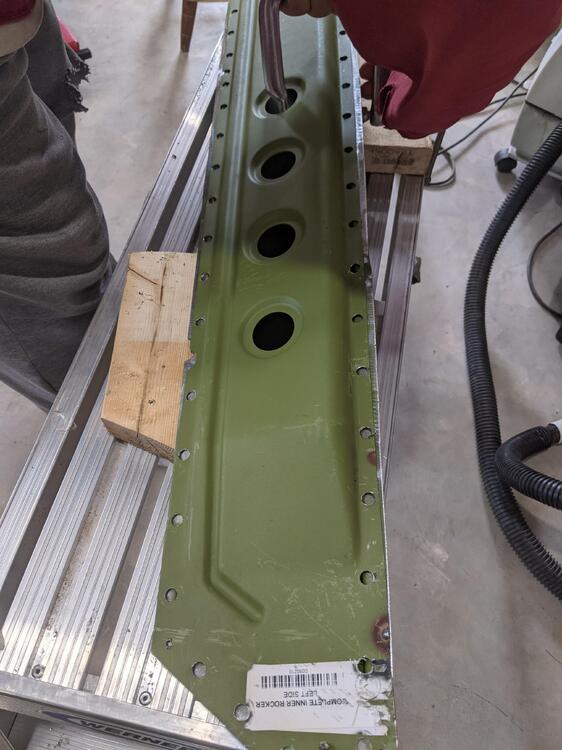
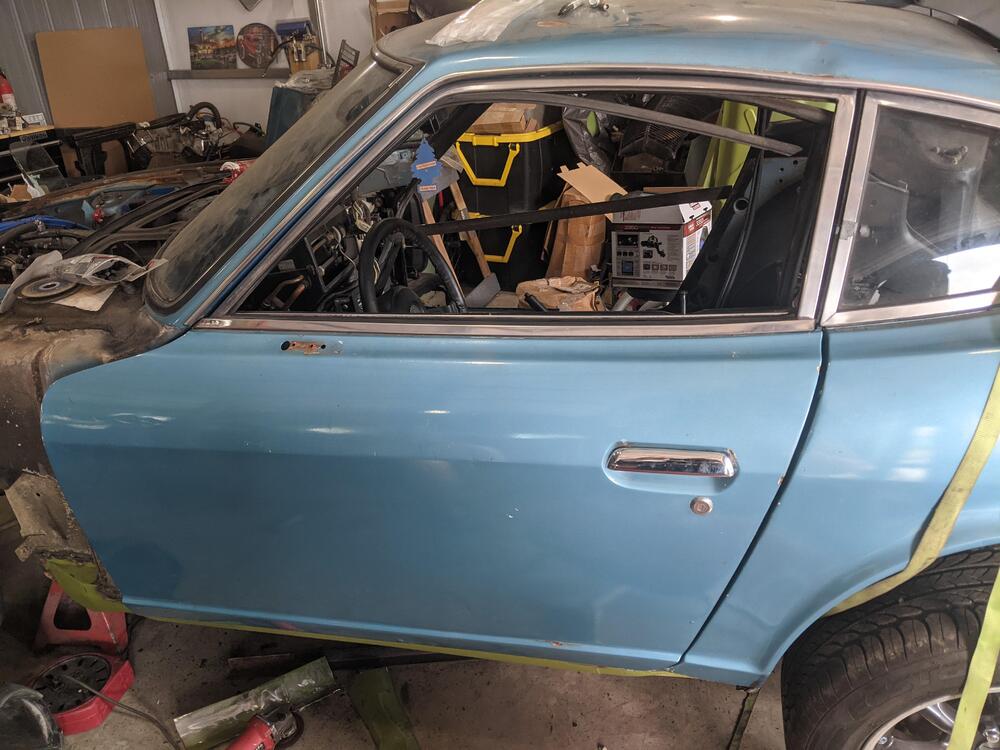
Alrighty here are a couple shots of the bottom of the Driver's side fender and the rockers. When lining them up, the Klassicfab panels include every detail of the originals as far as I could tell, so we were able to use the profile of the bottom of the A-pillar to line up the inner+outer rocker combo pretty easily. Lining up the rockers: Shot of the bottom of the new rockers+front quarter panel. Toe box is still a work in progress; previous repair job basically patched that whole area with a much less concave section, so its getting remade. Shot of the door+quarter panel alignment. Door can probably stand to be adjusted forward a bit more here.. but so far so good!:
.thumb.jpeg.f1351d15c6a396bfb38fb394c92d0645.jpeg)
.thumb.jpeg.b50627d8df2ab58e7a5cc950b076496b.jpeg)
.thumb.jpeg.a6b1505836658847329773b1d82ec540.jpeg)
-
Well so far I've only knocked out the driver's side and haven't tried fitment of that front left fender yet. But that is a good point and I will check into that. For my car, that area of the rocker was completely rotted away so there wasn't anything mechanically holding it on (I used magnets). That and the tab on the fender itself had also rusted off. So I figure it can only be better in my case lol. On the passenger side we will have to be more careful. I'll try and get a picture when I check fitment for the driver's side fender..
-
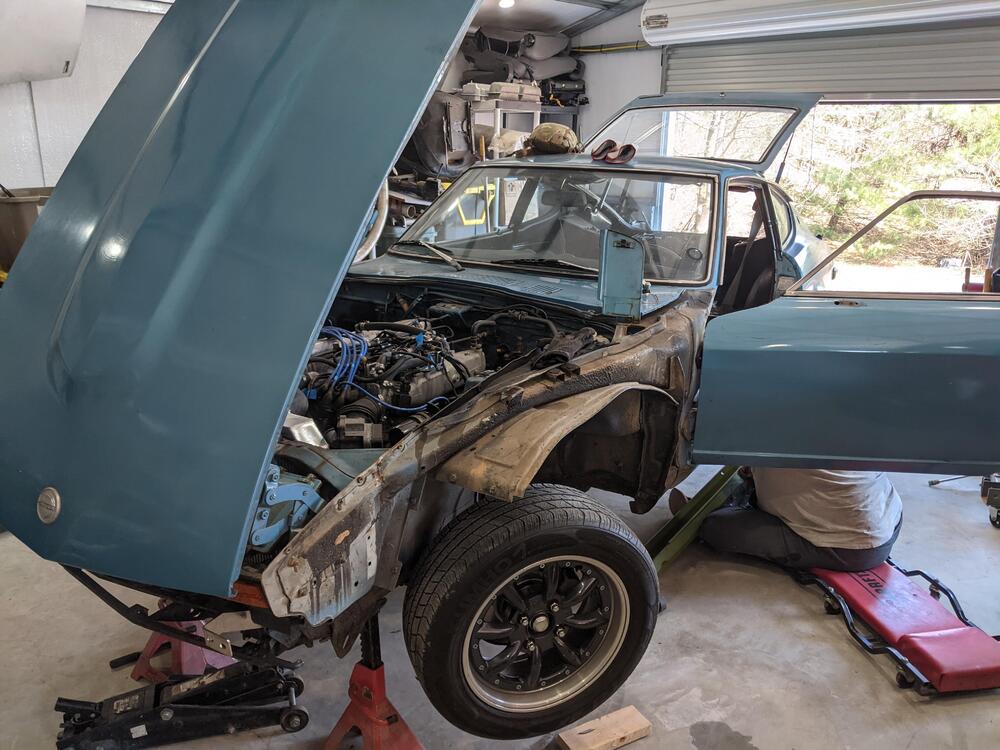
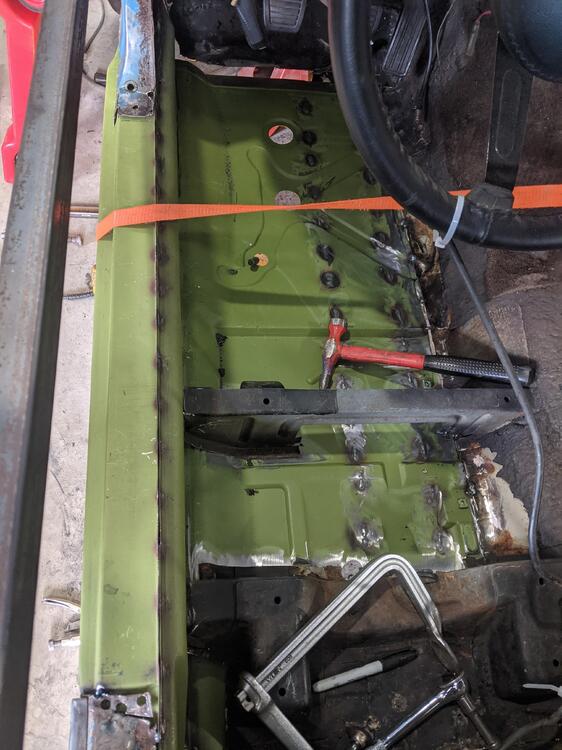
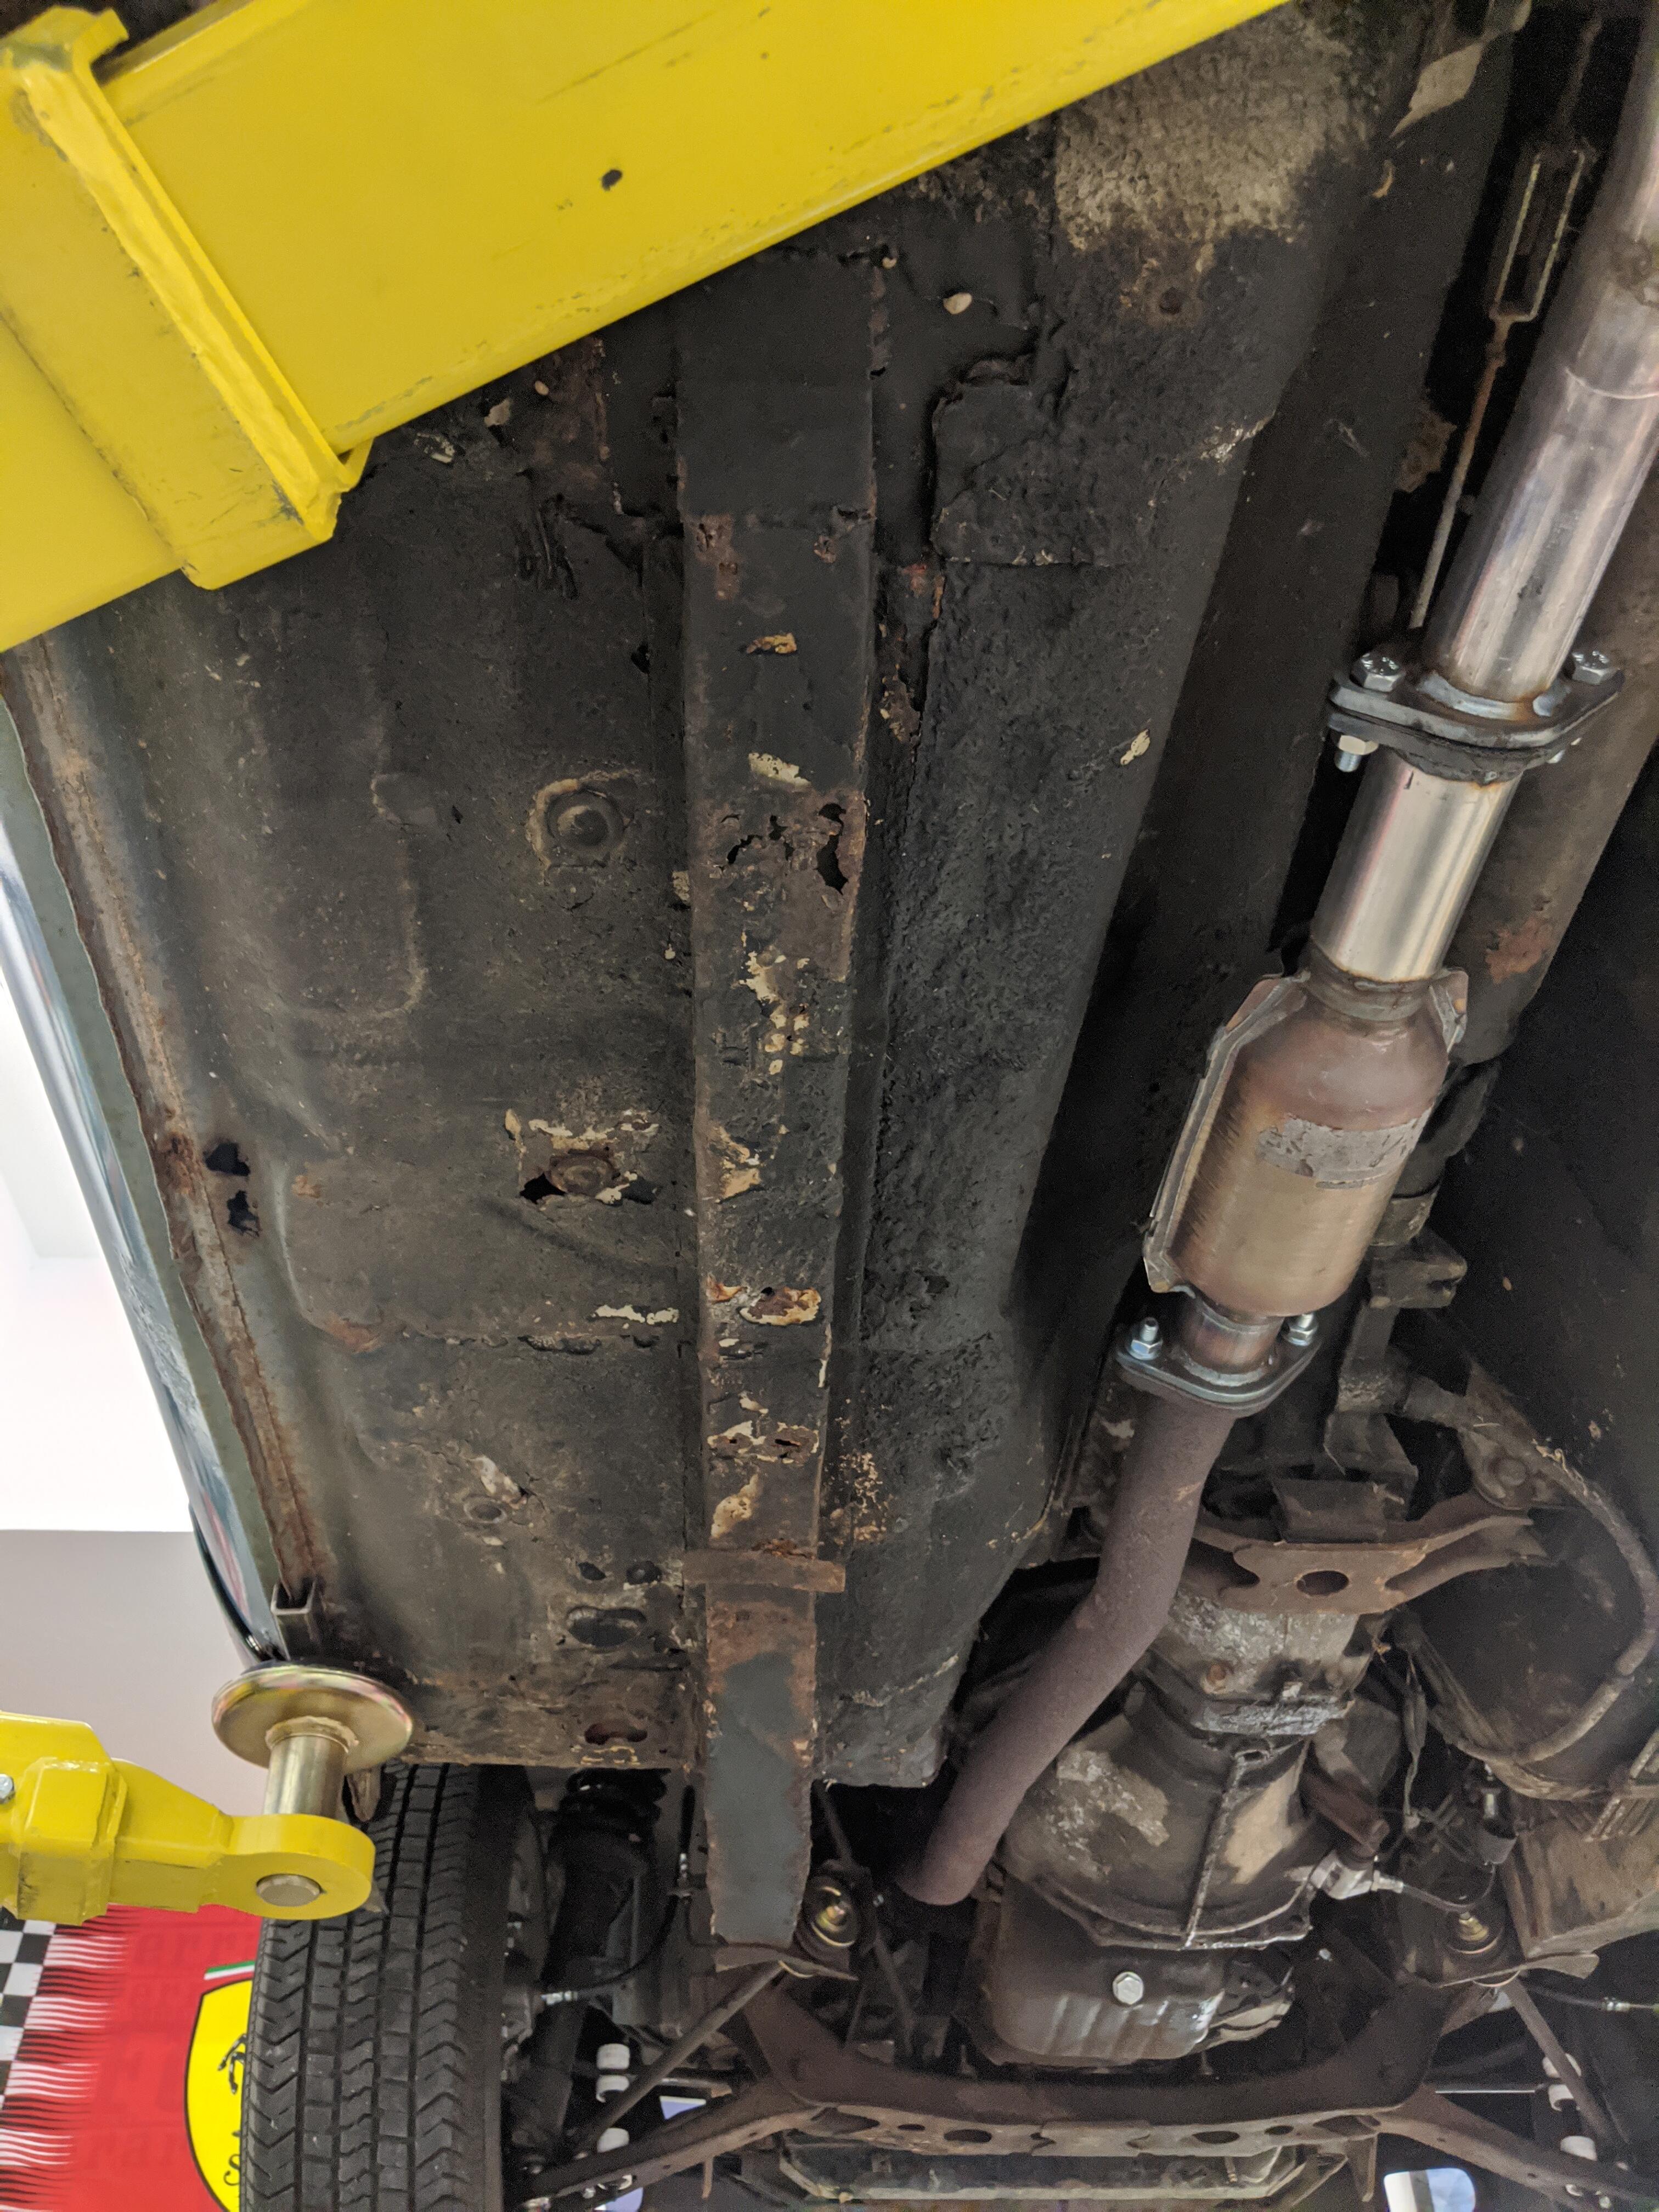
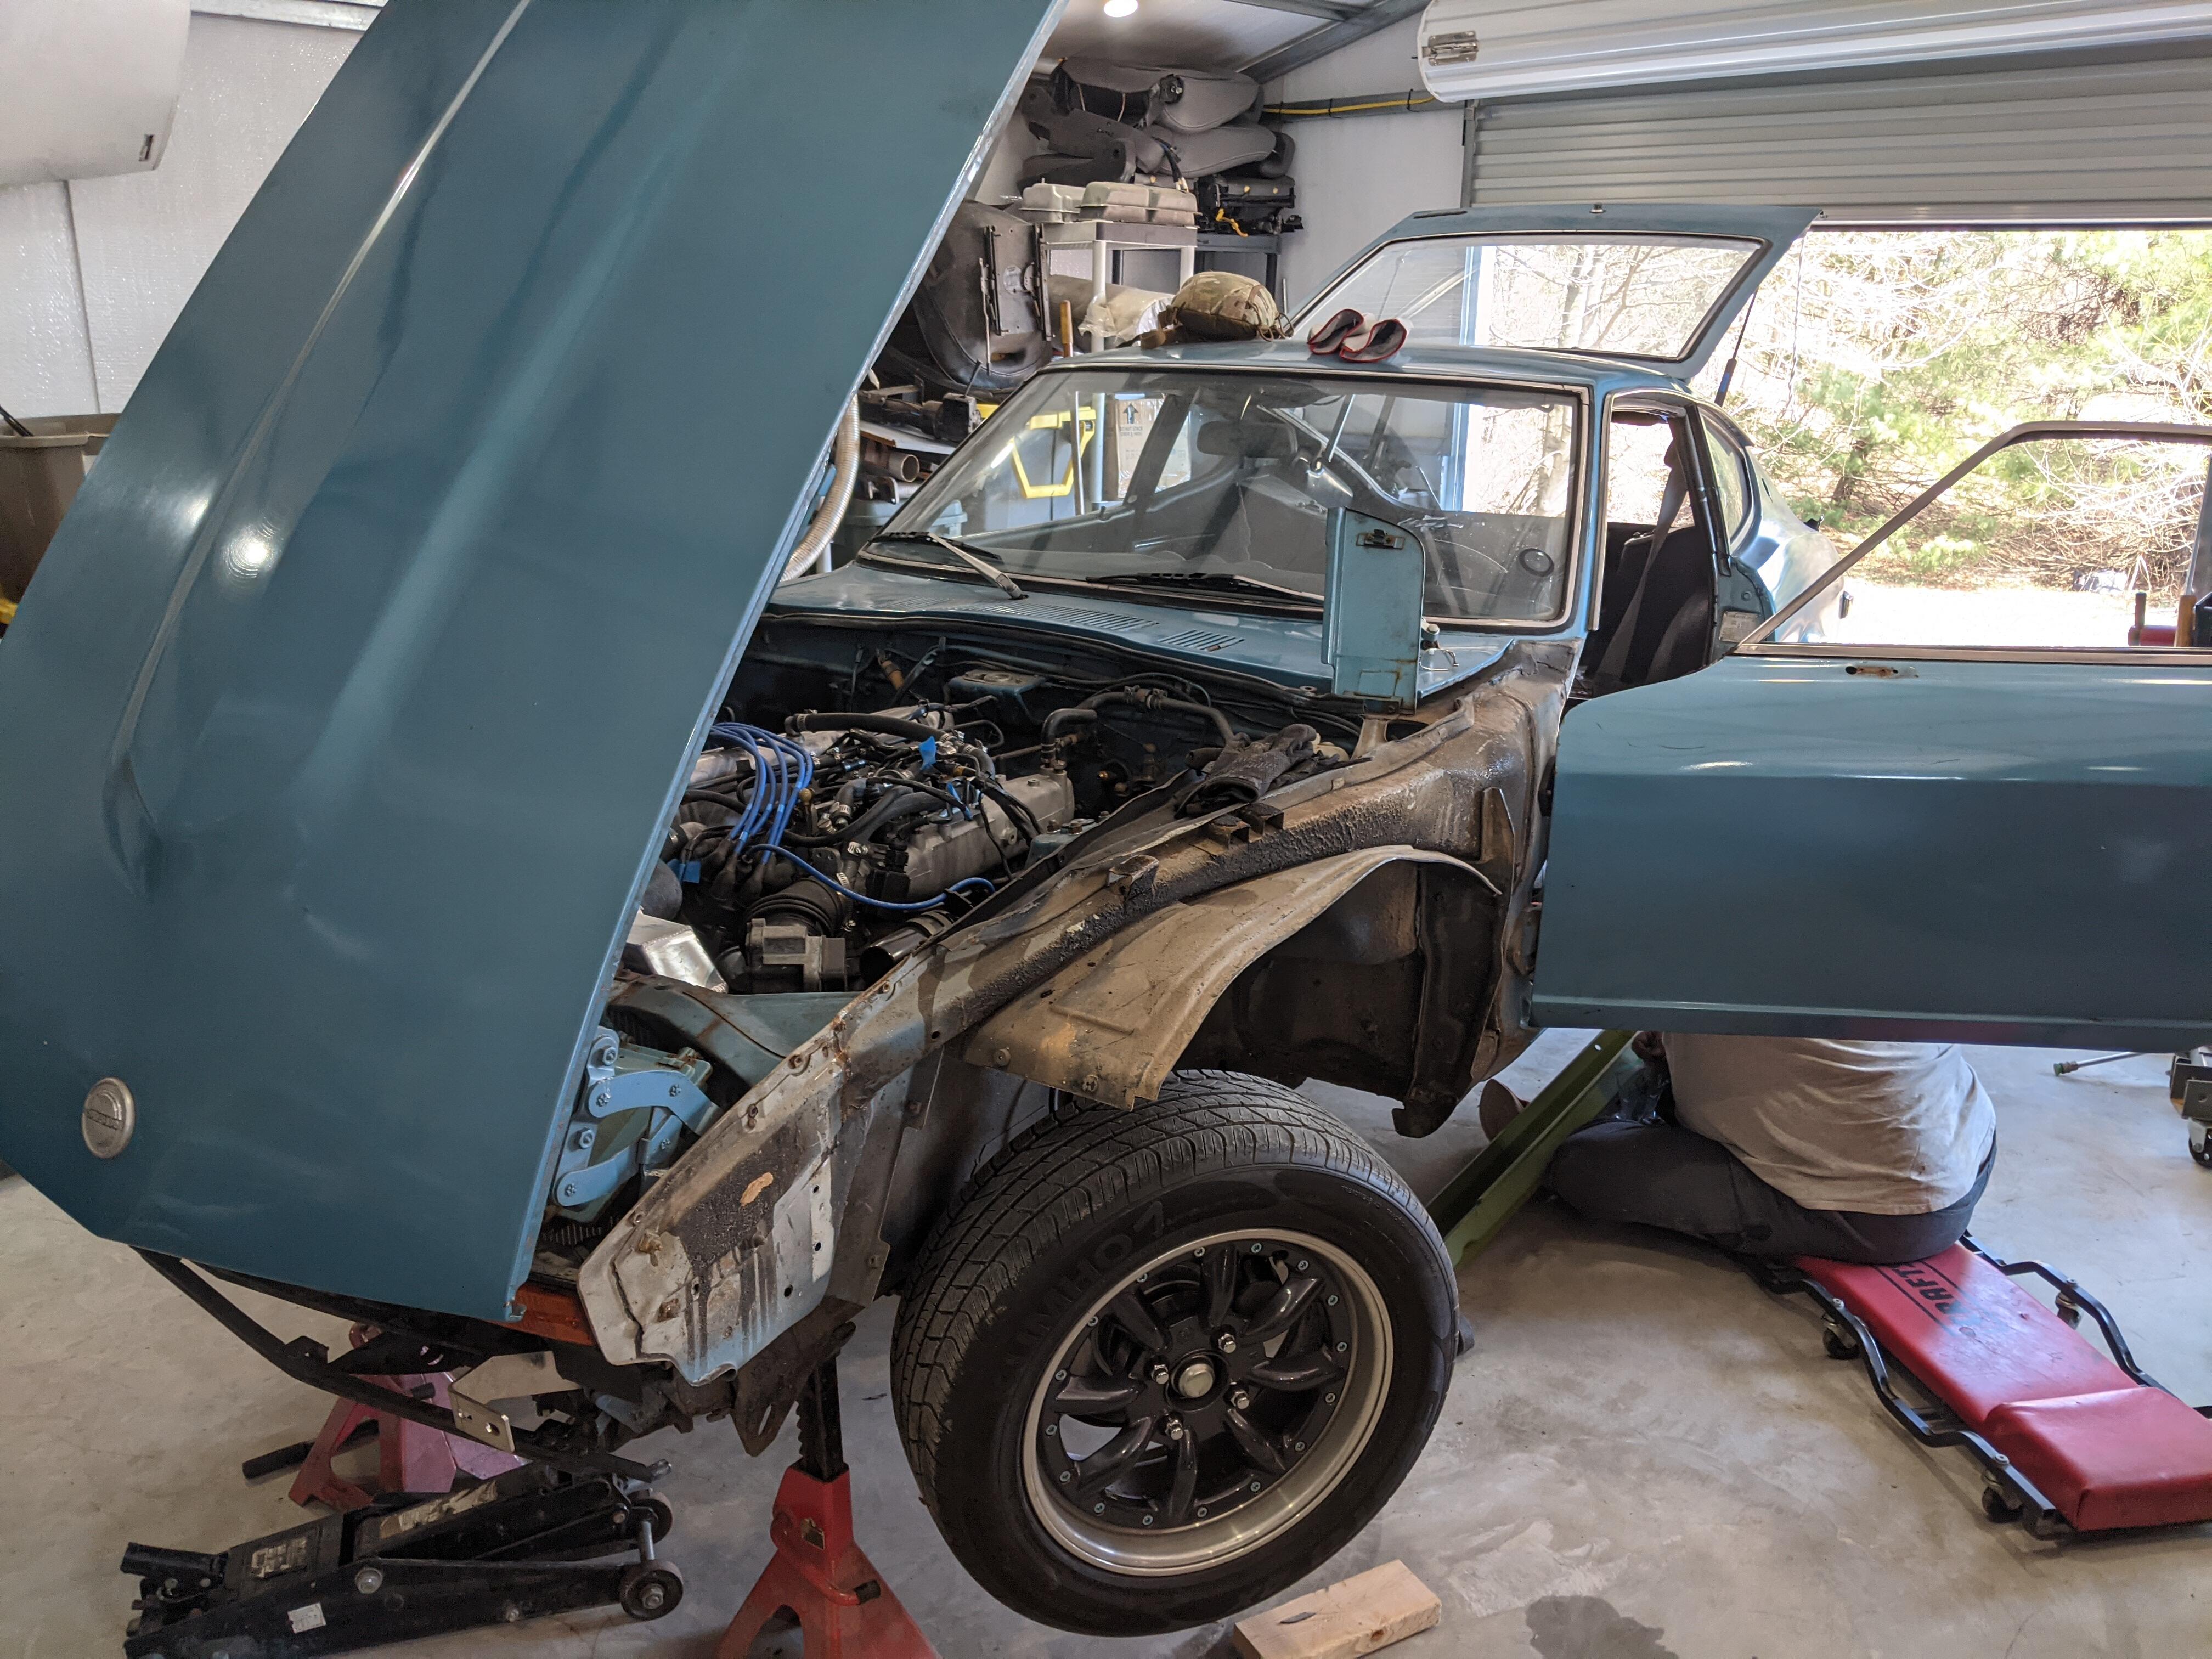
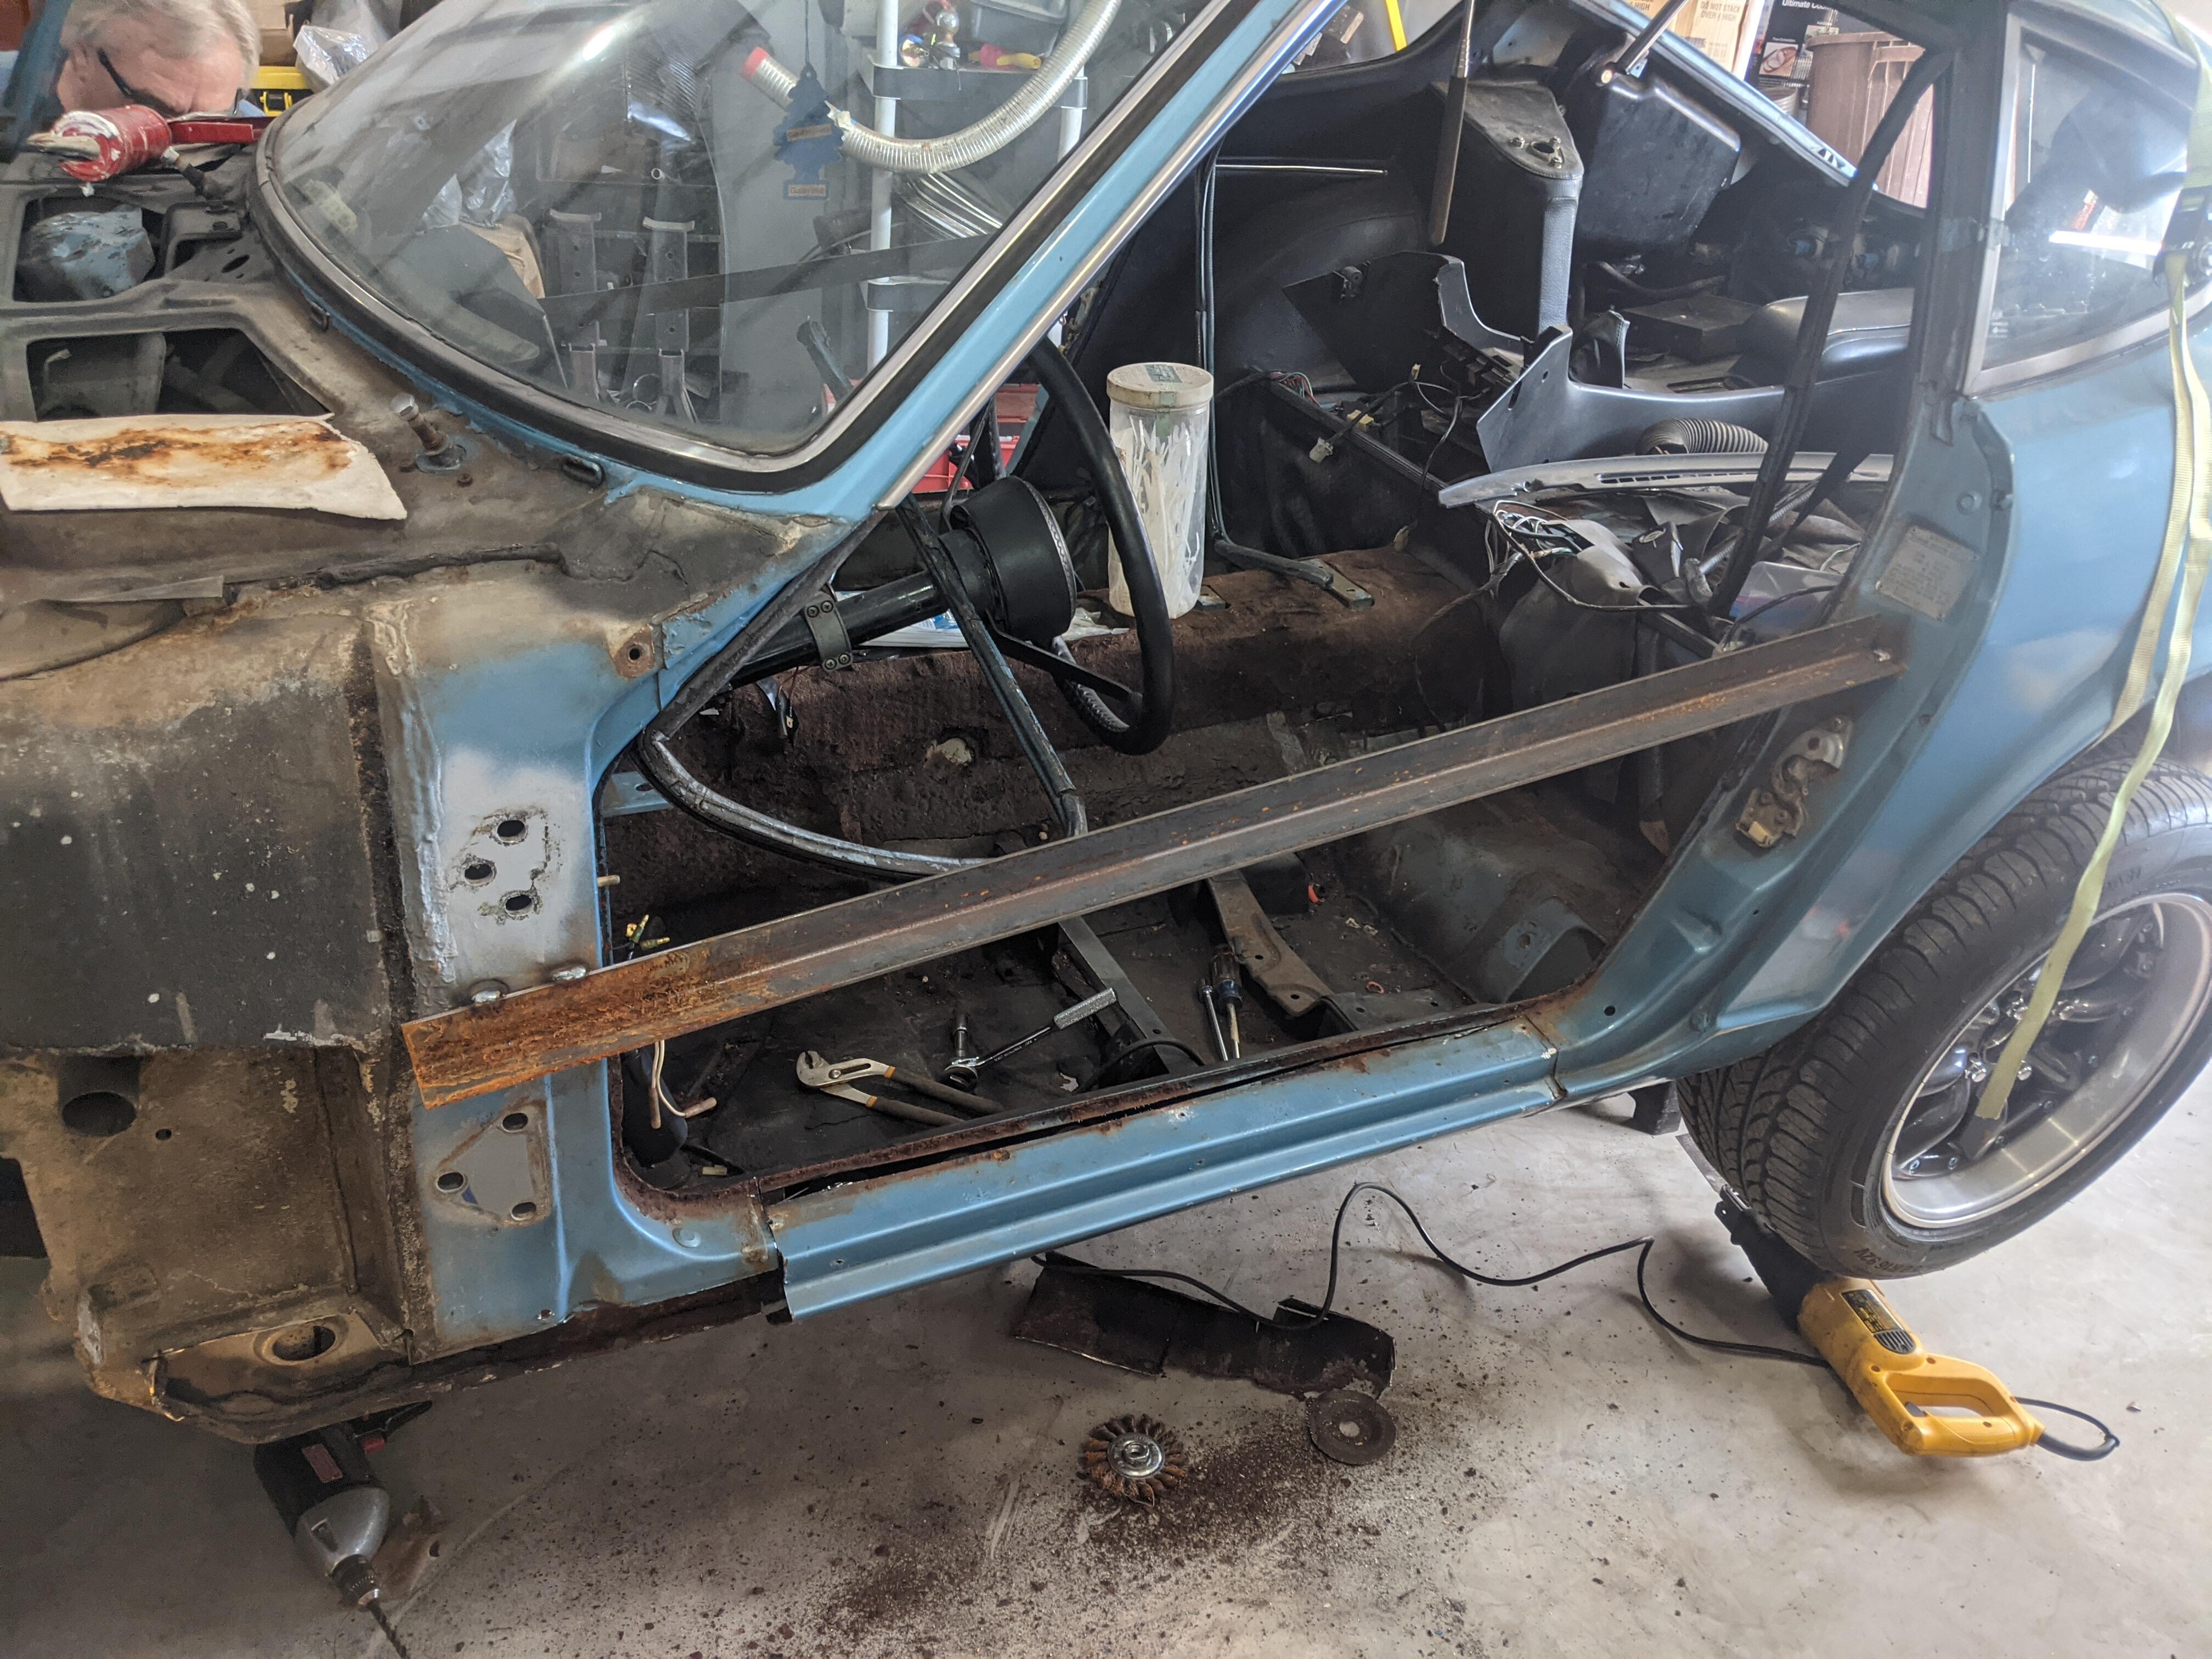
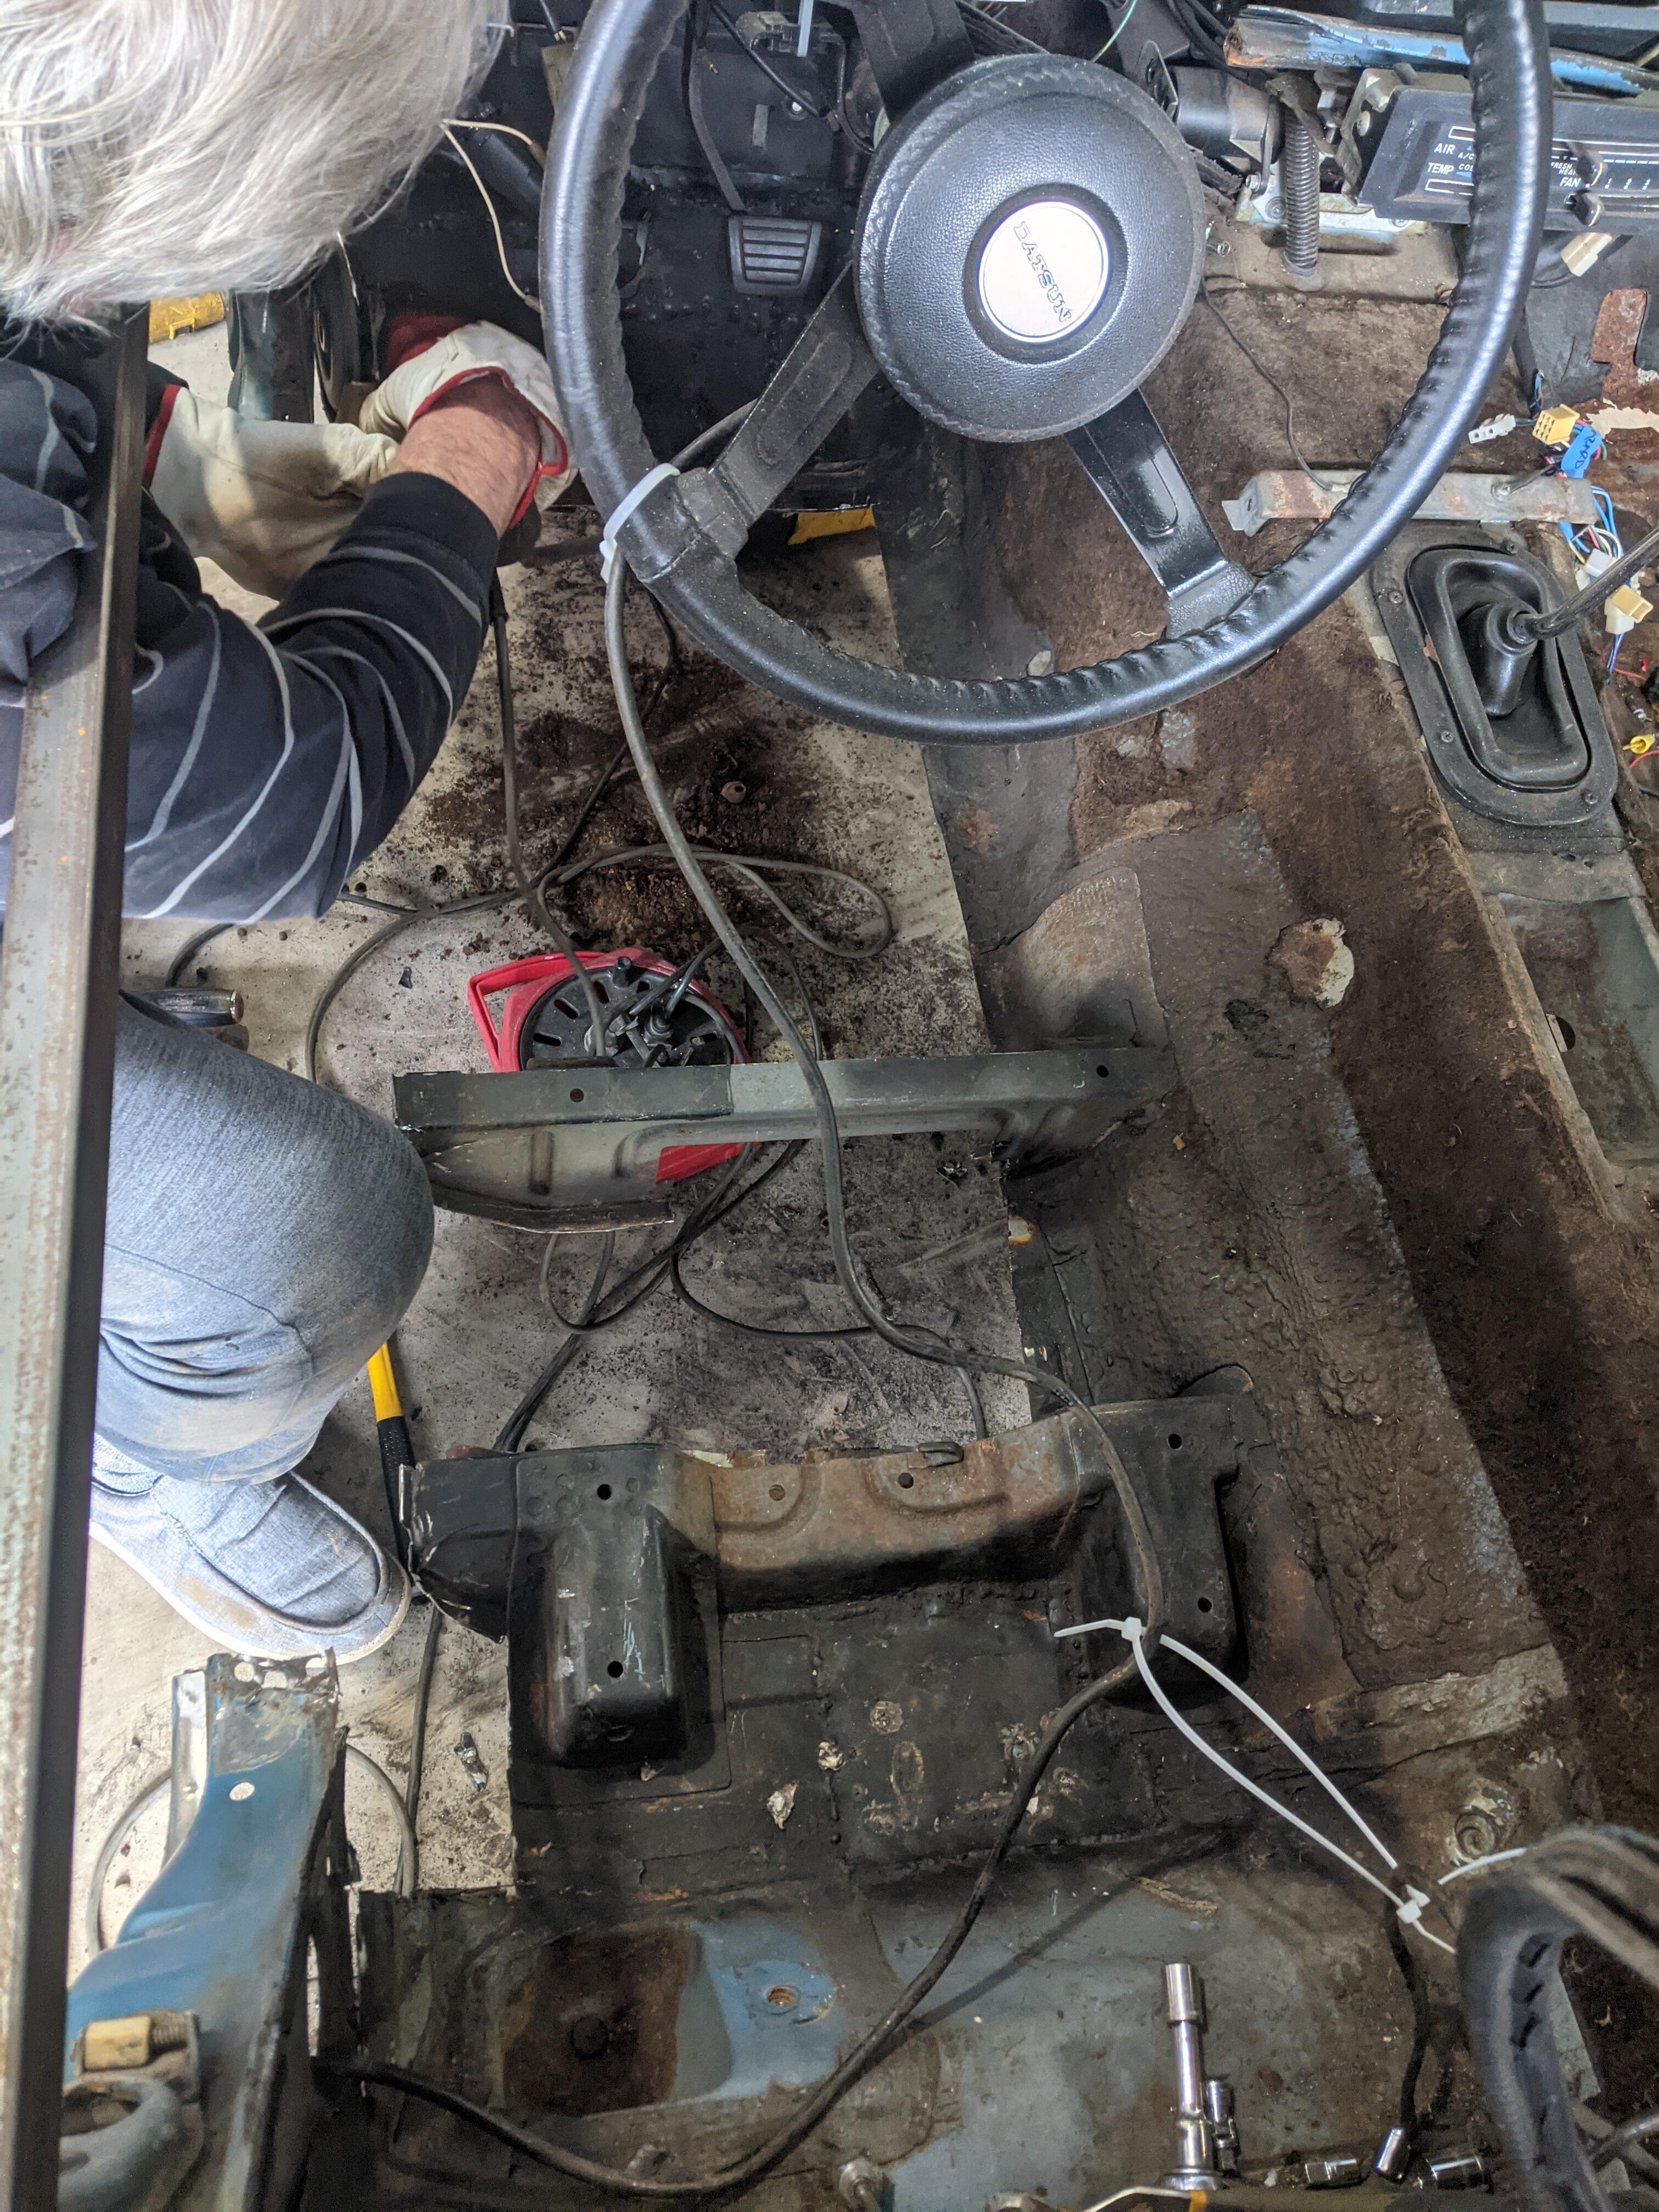
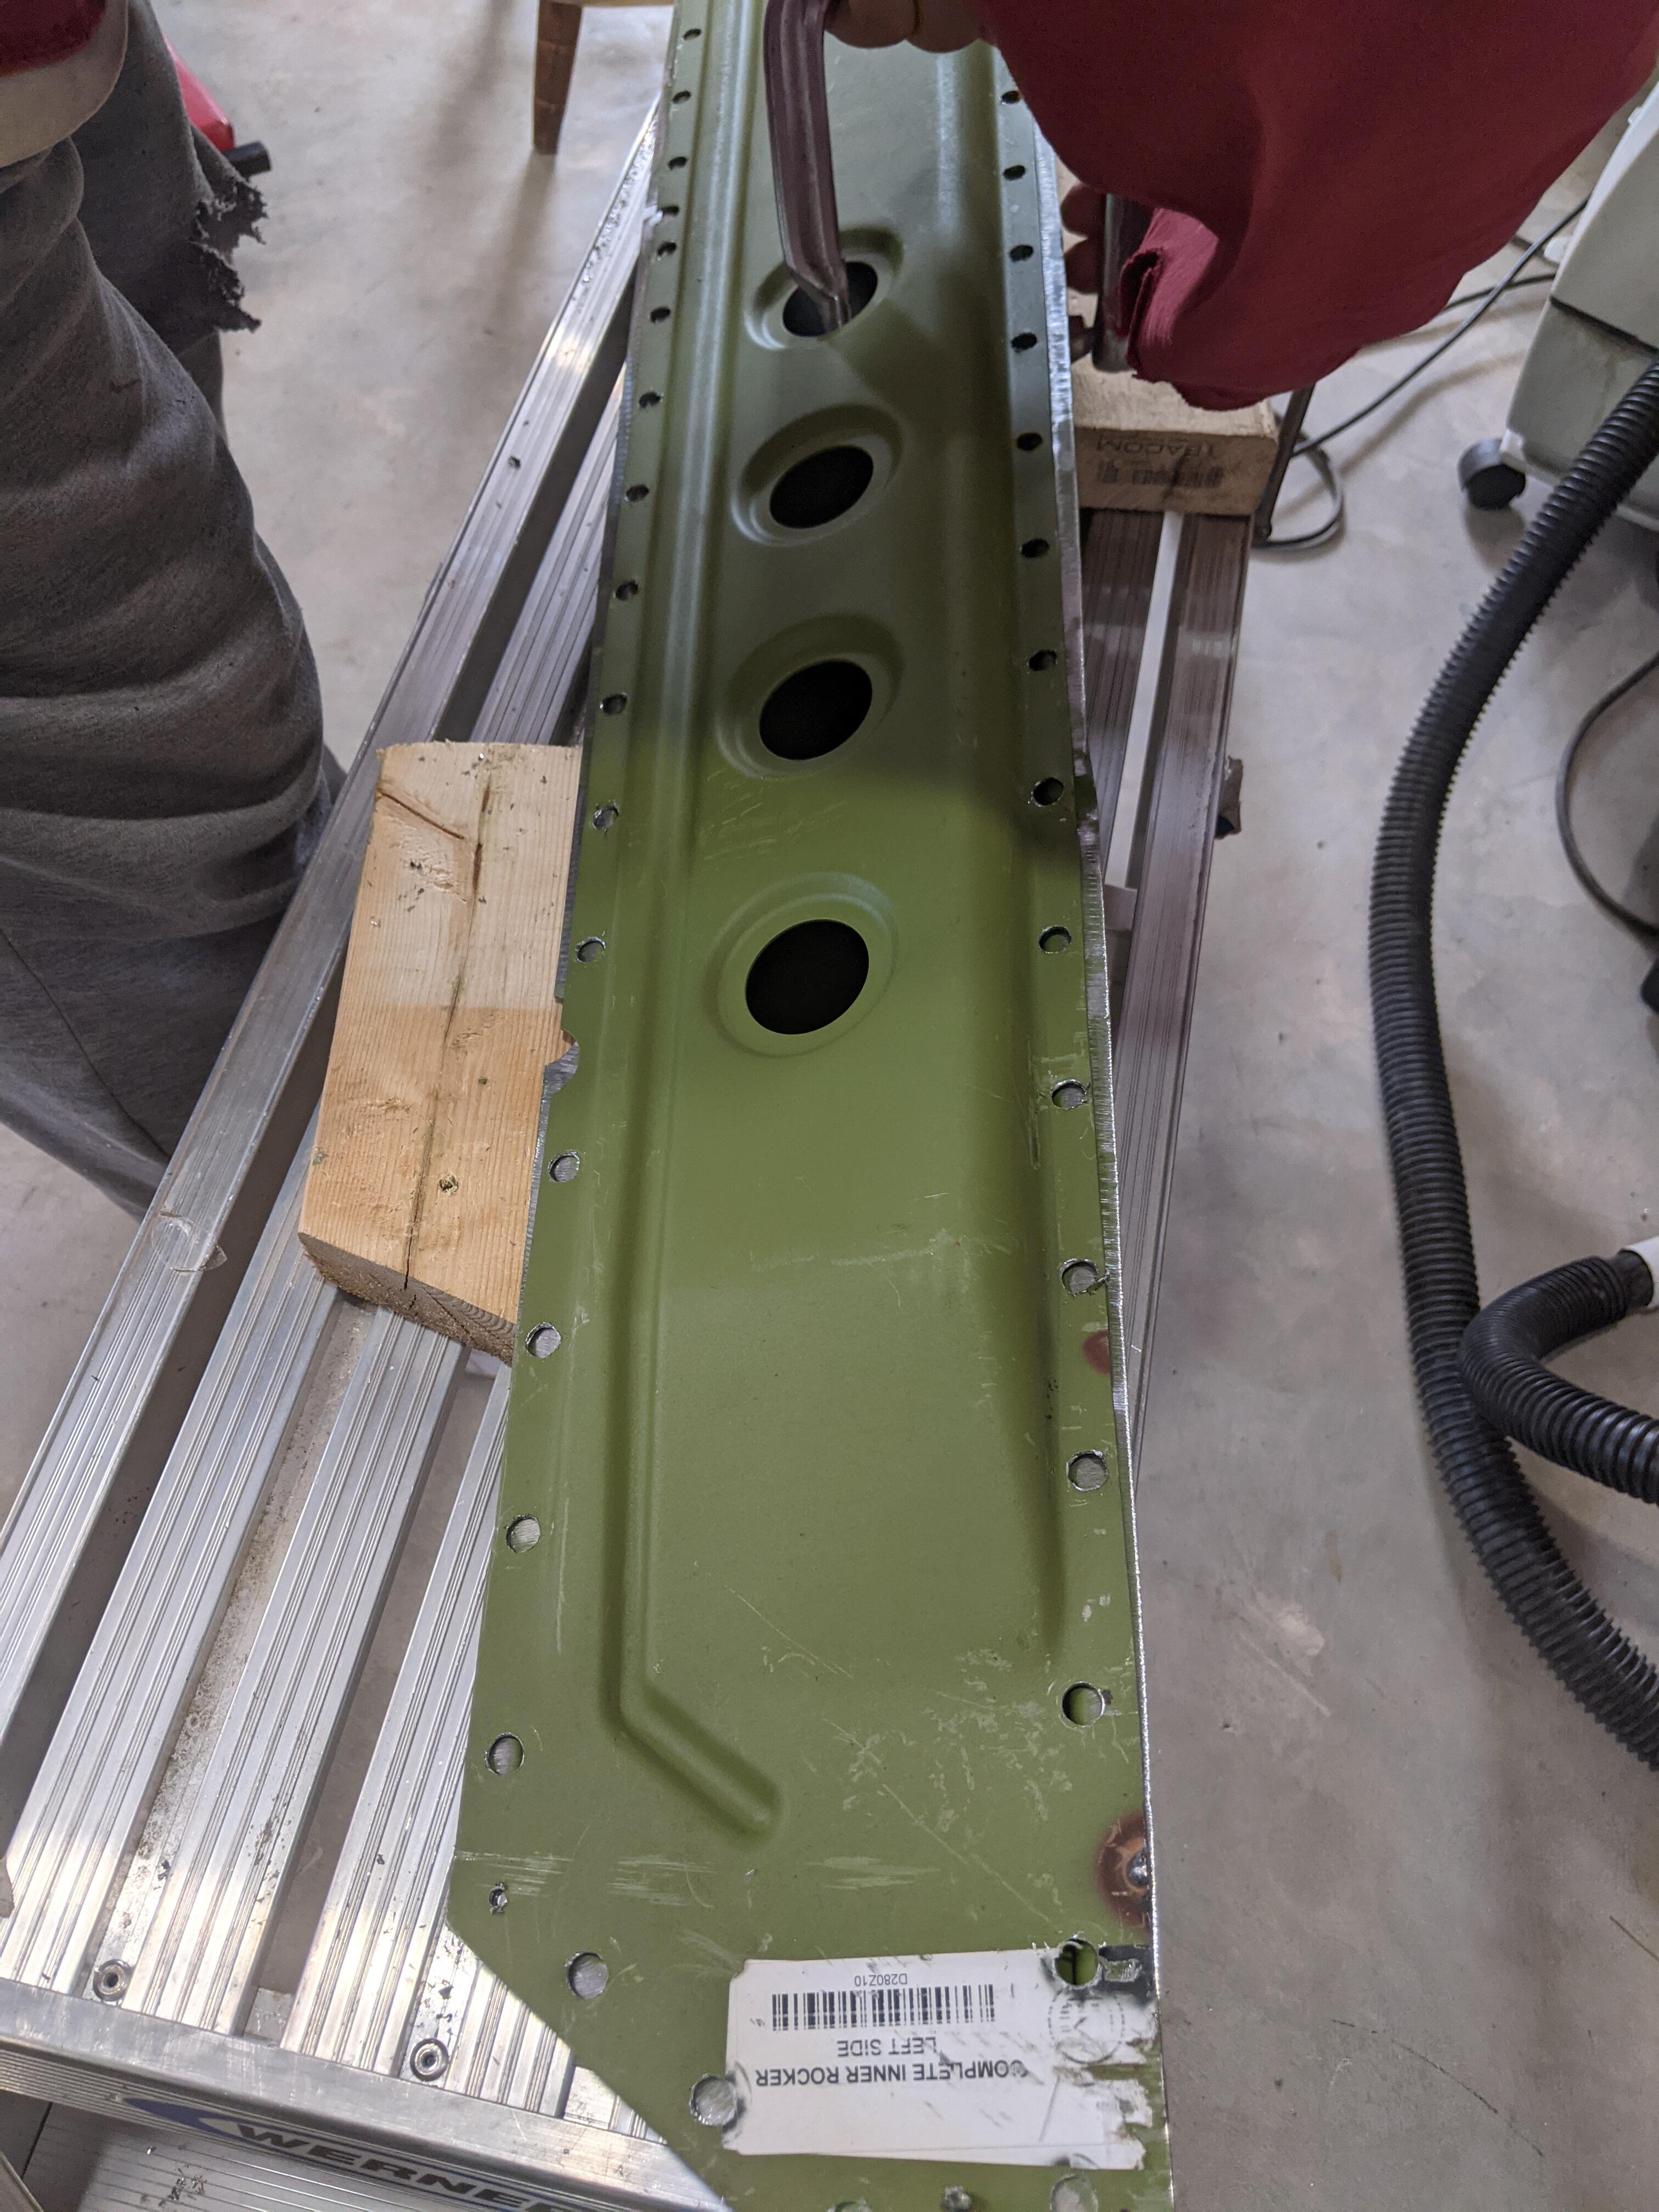
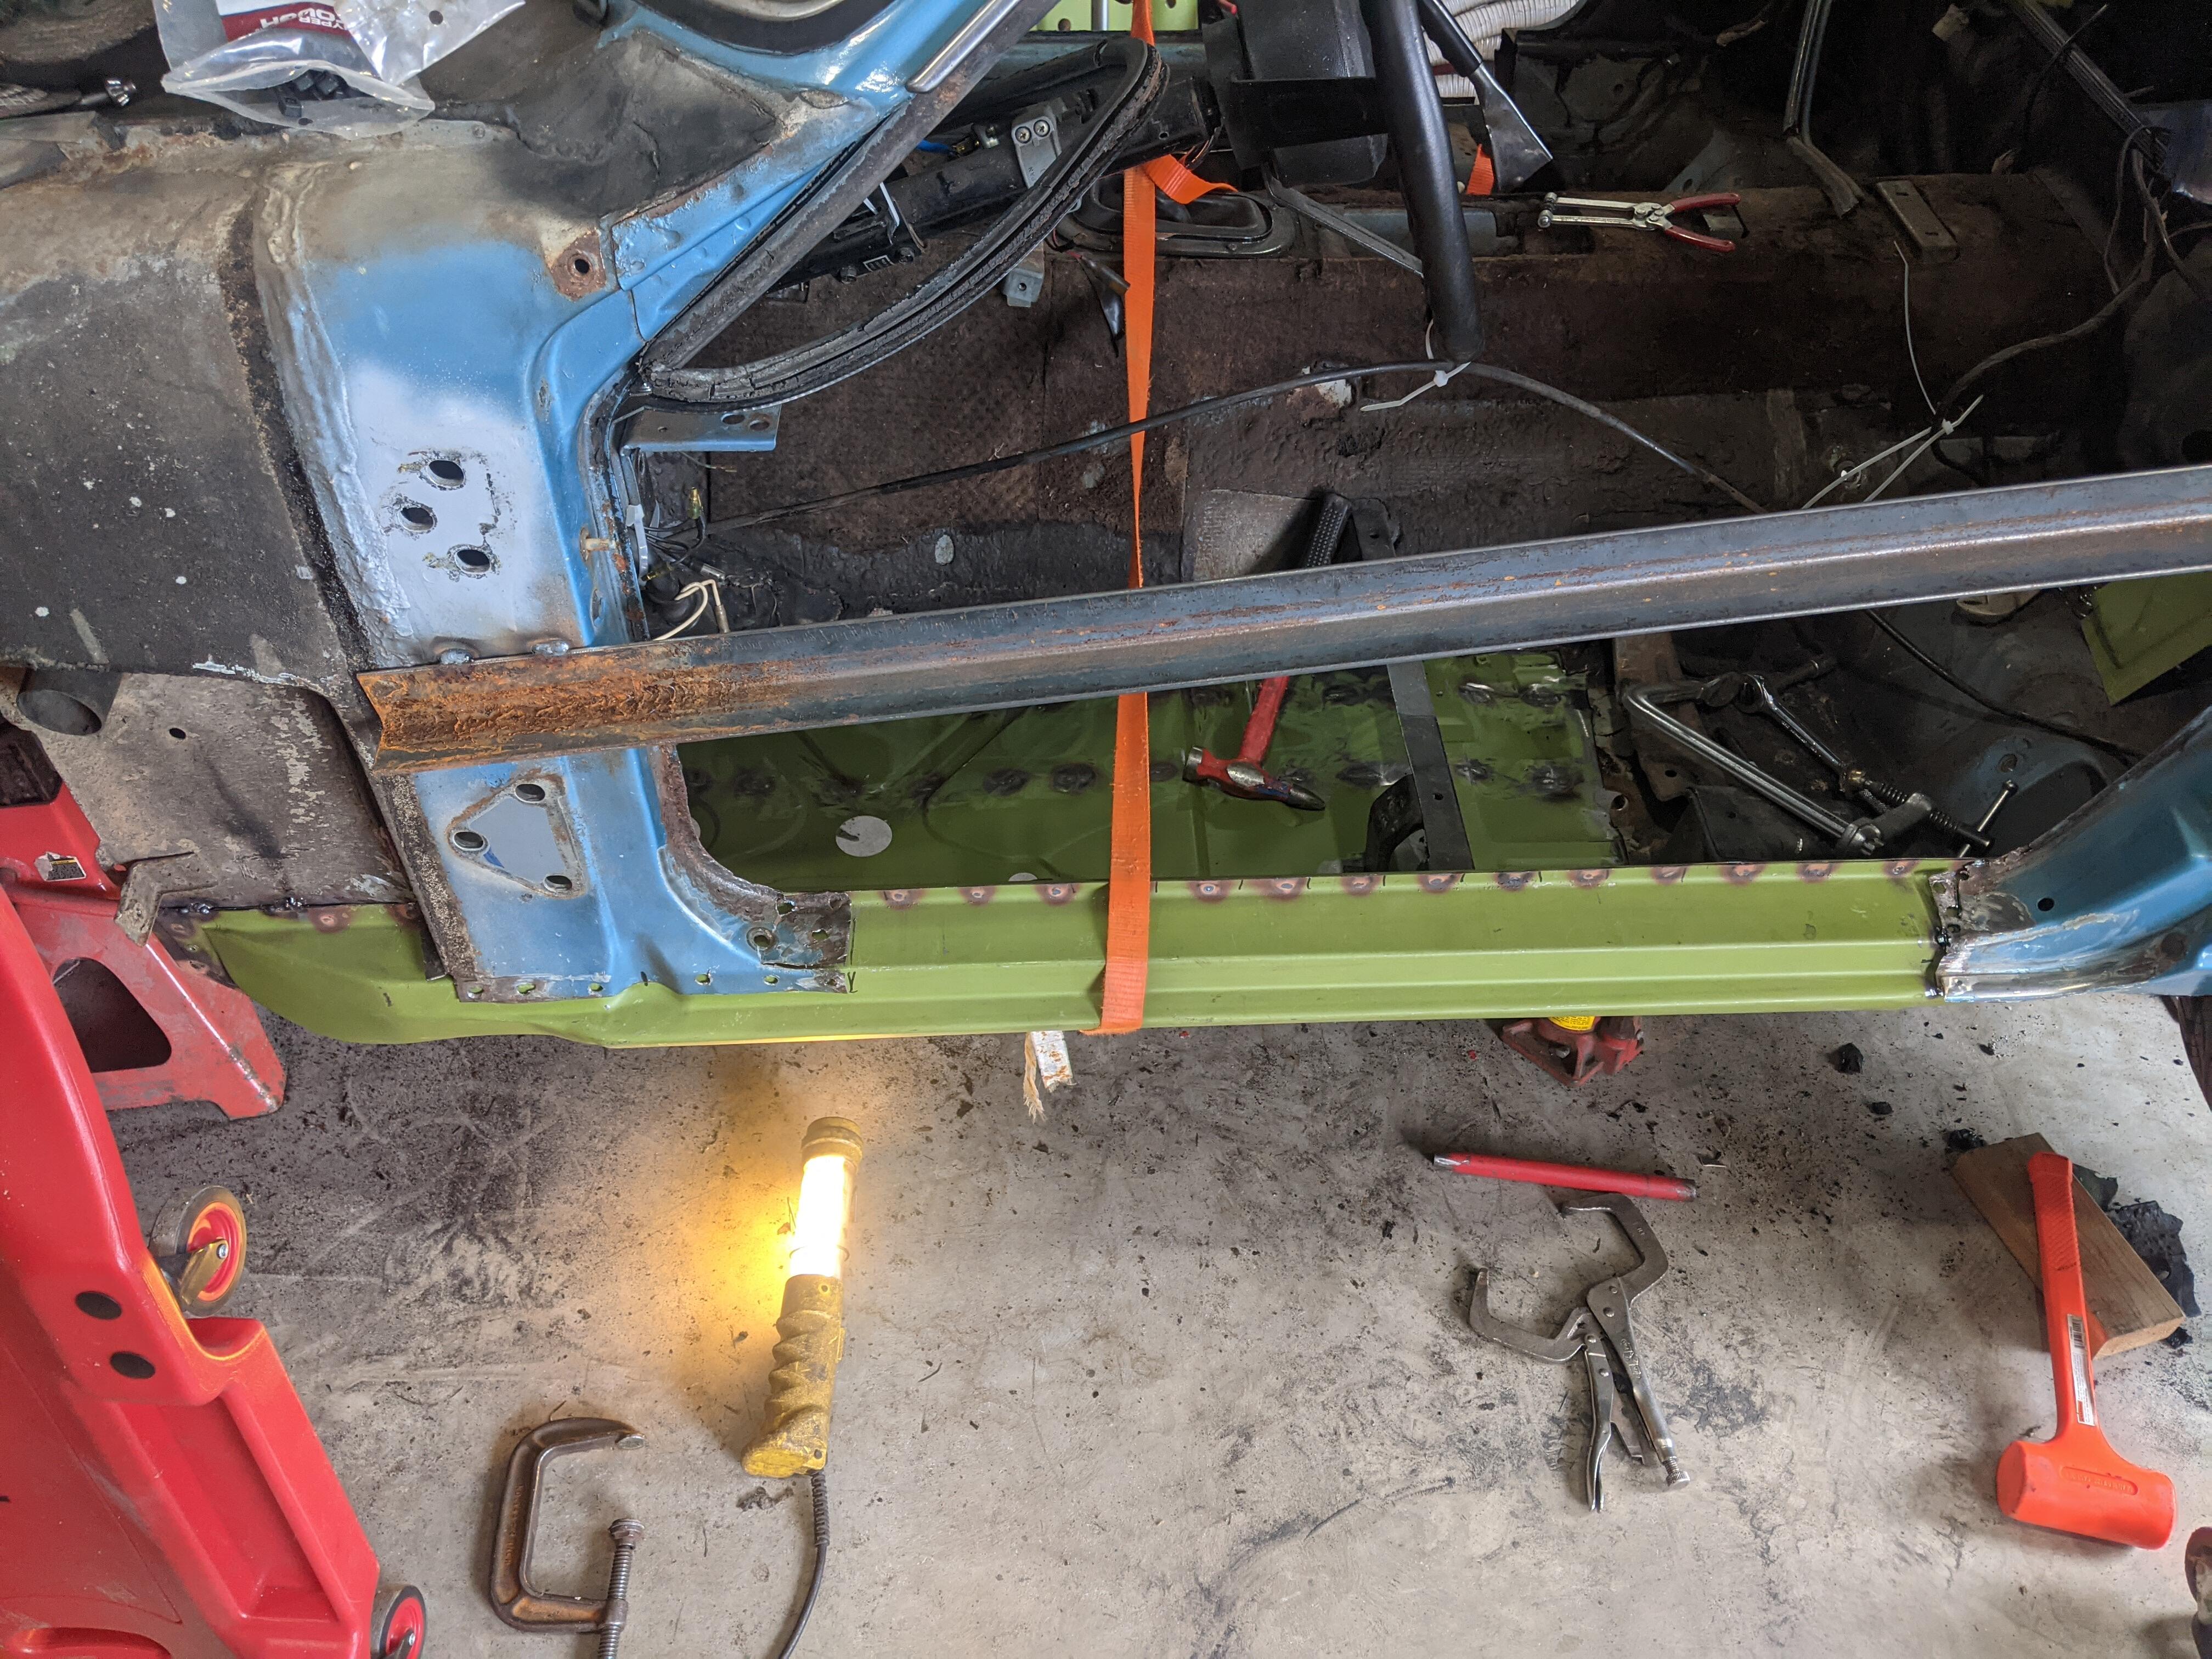
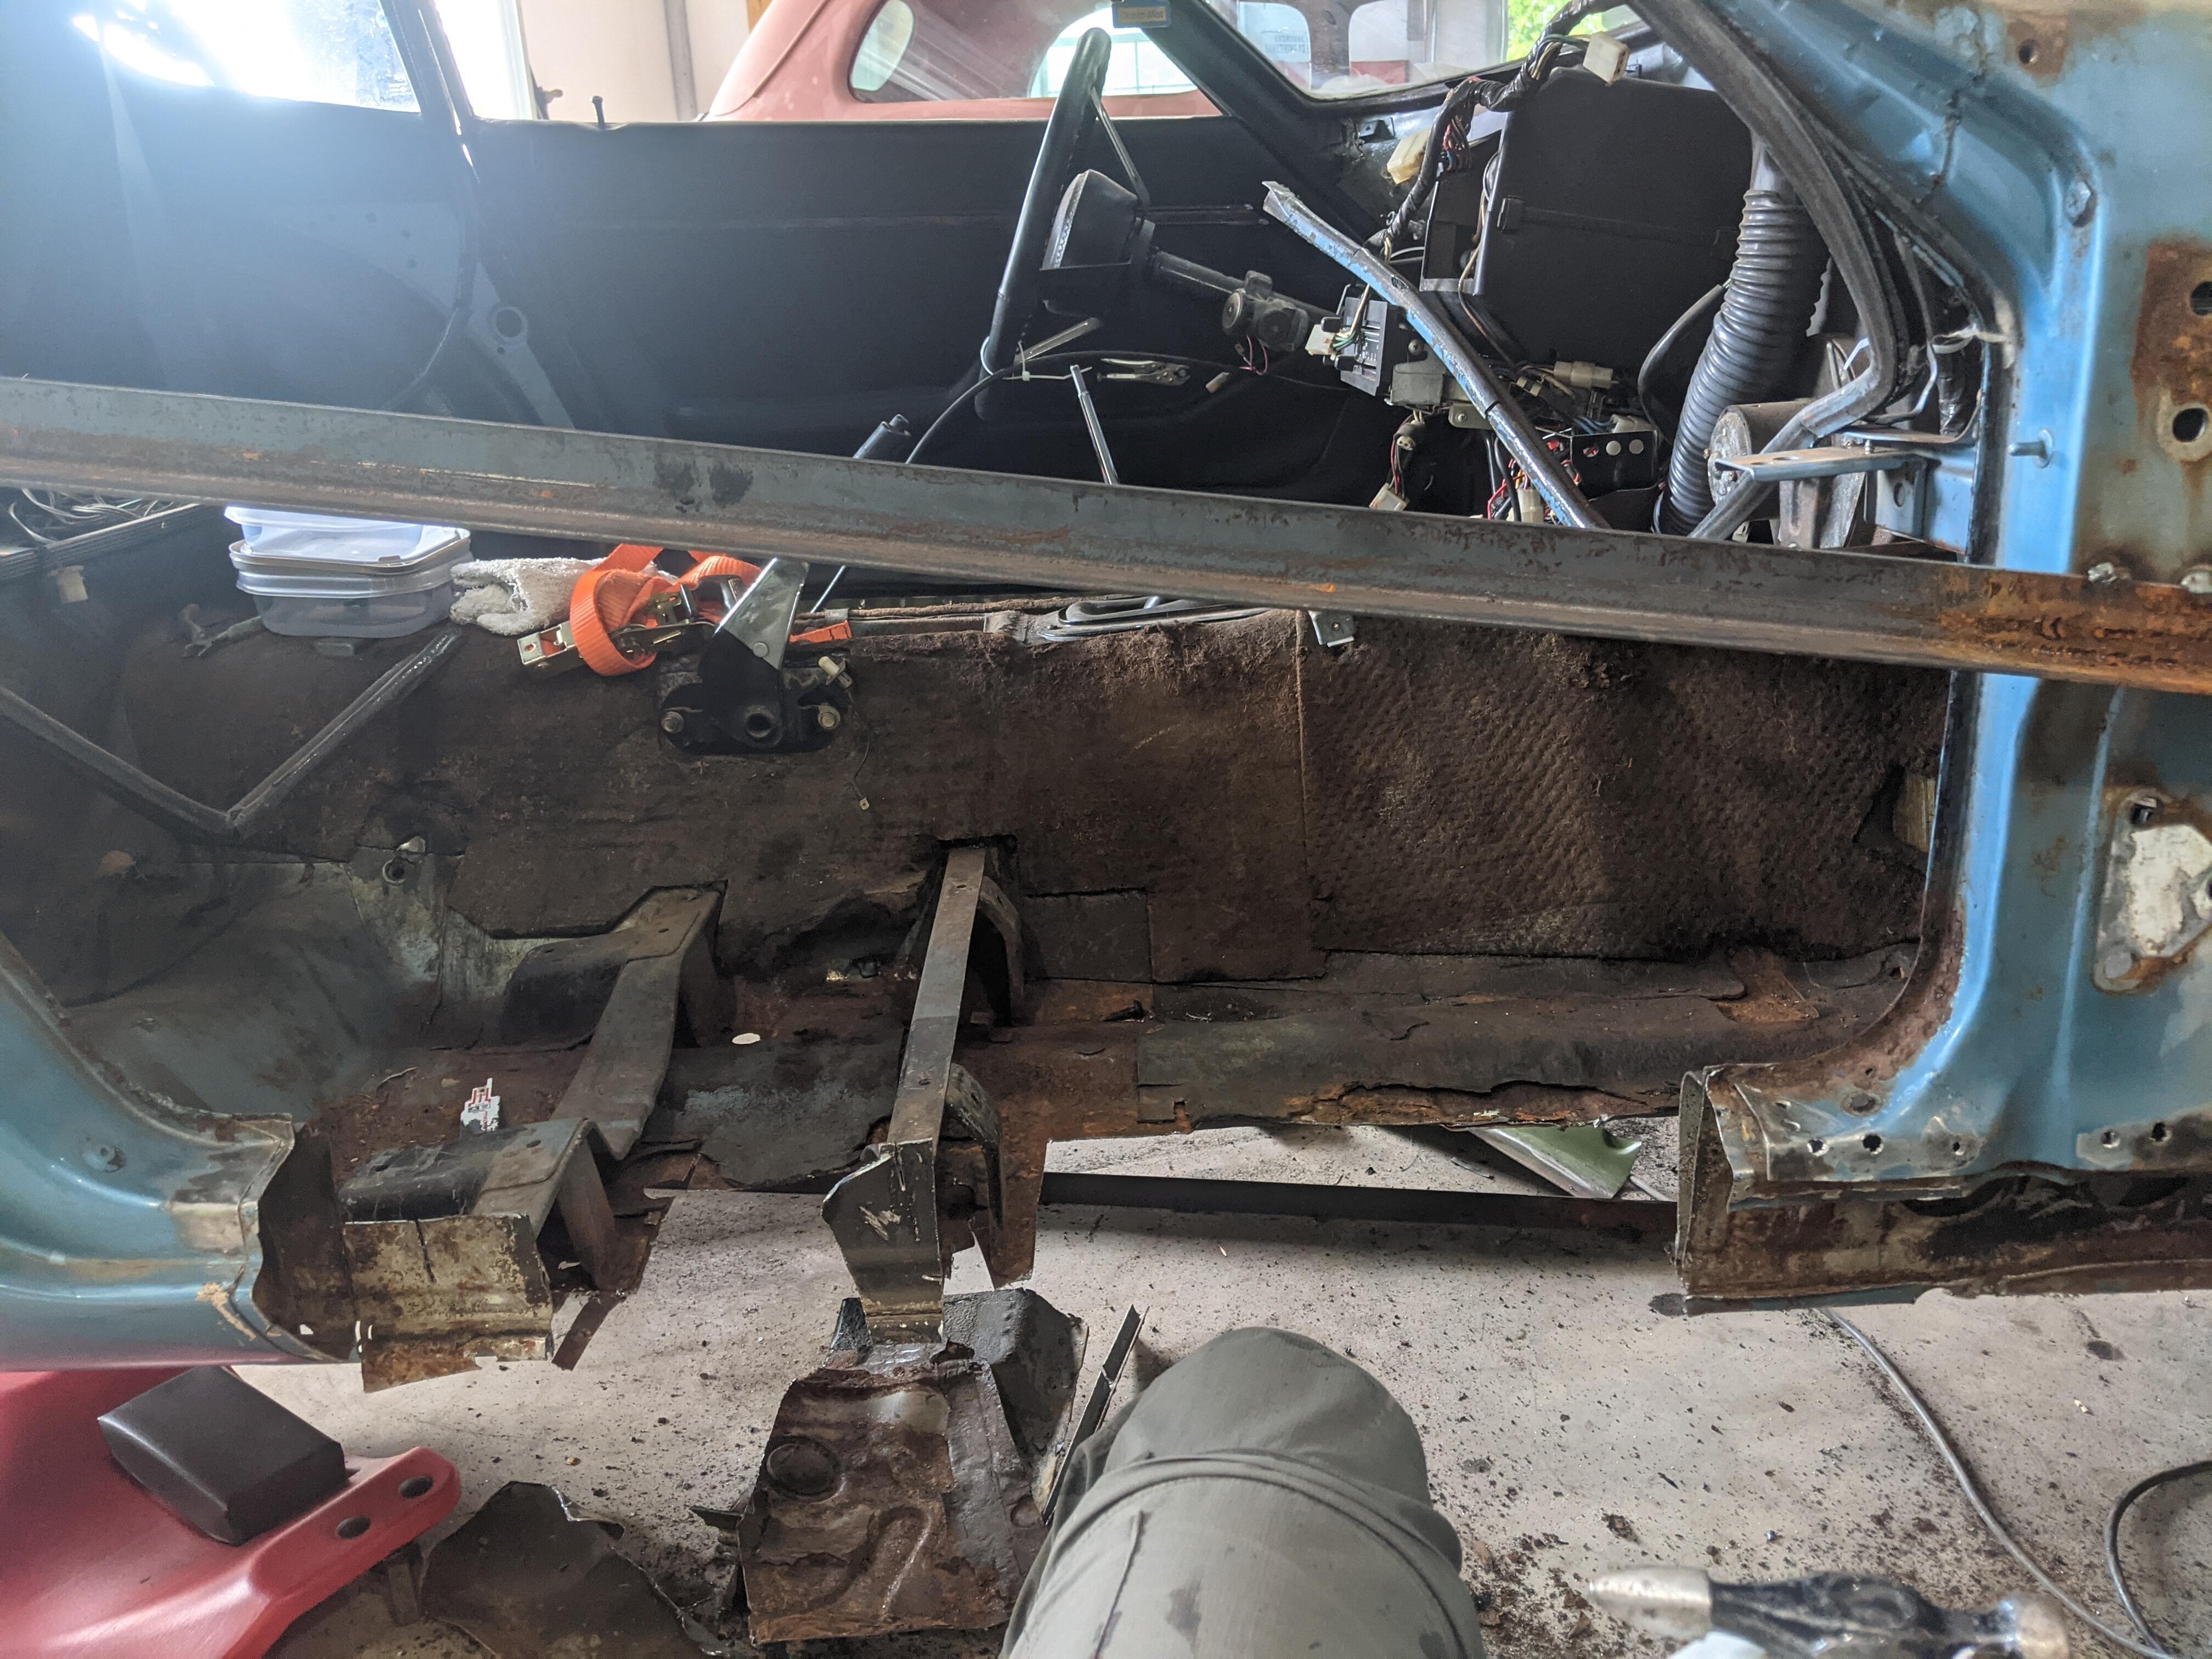
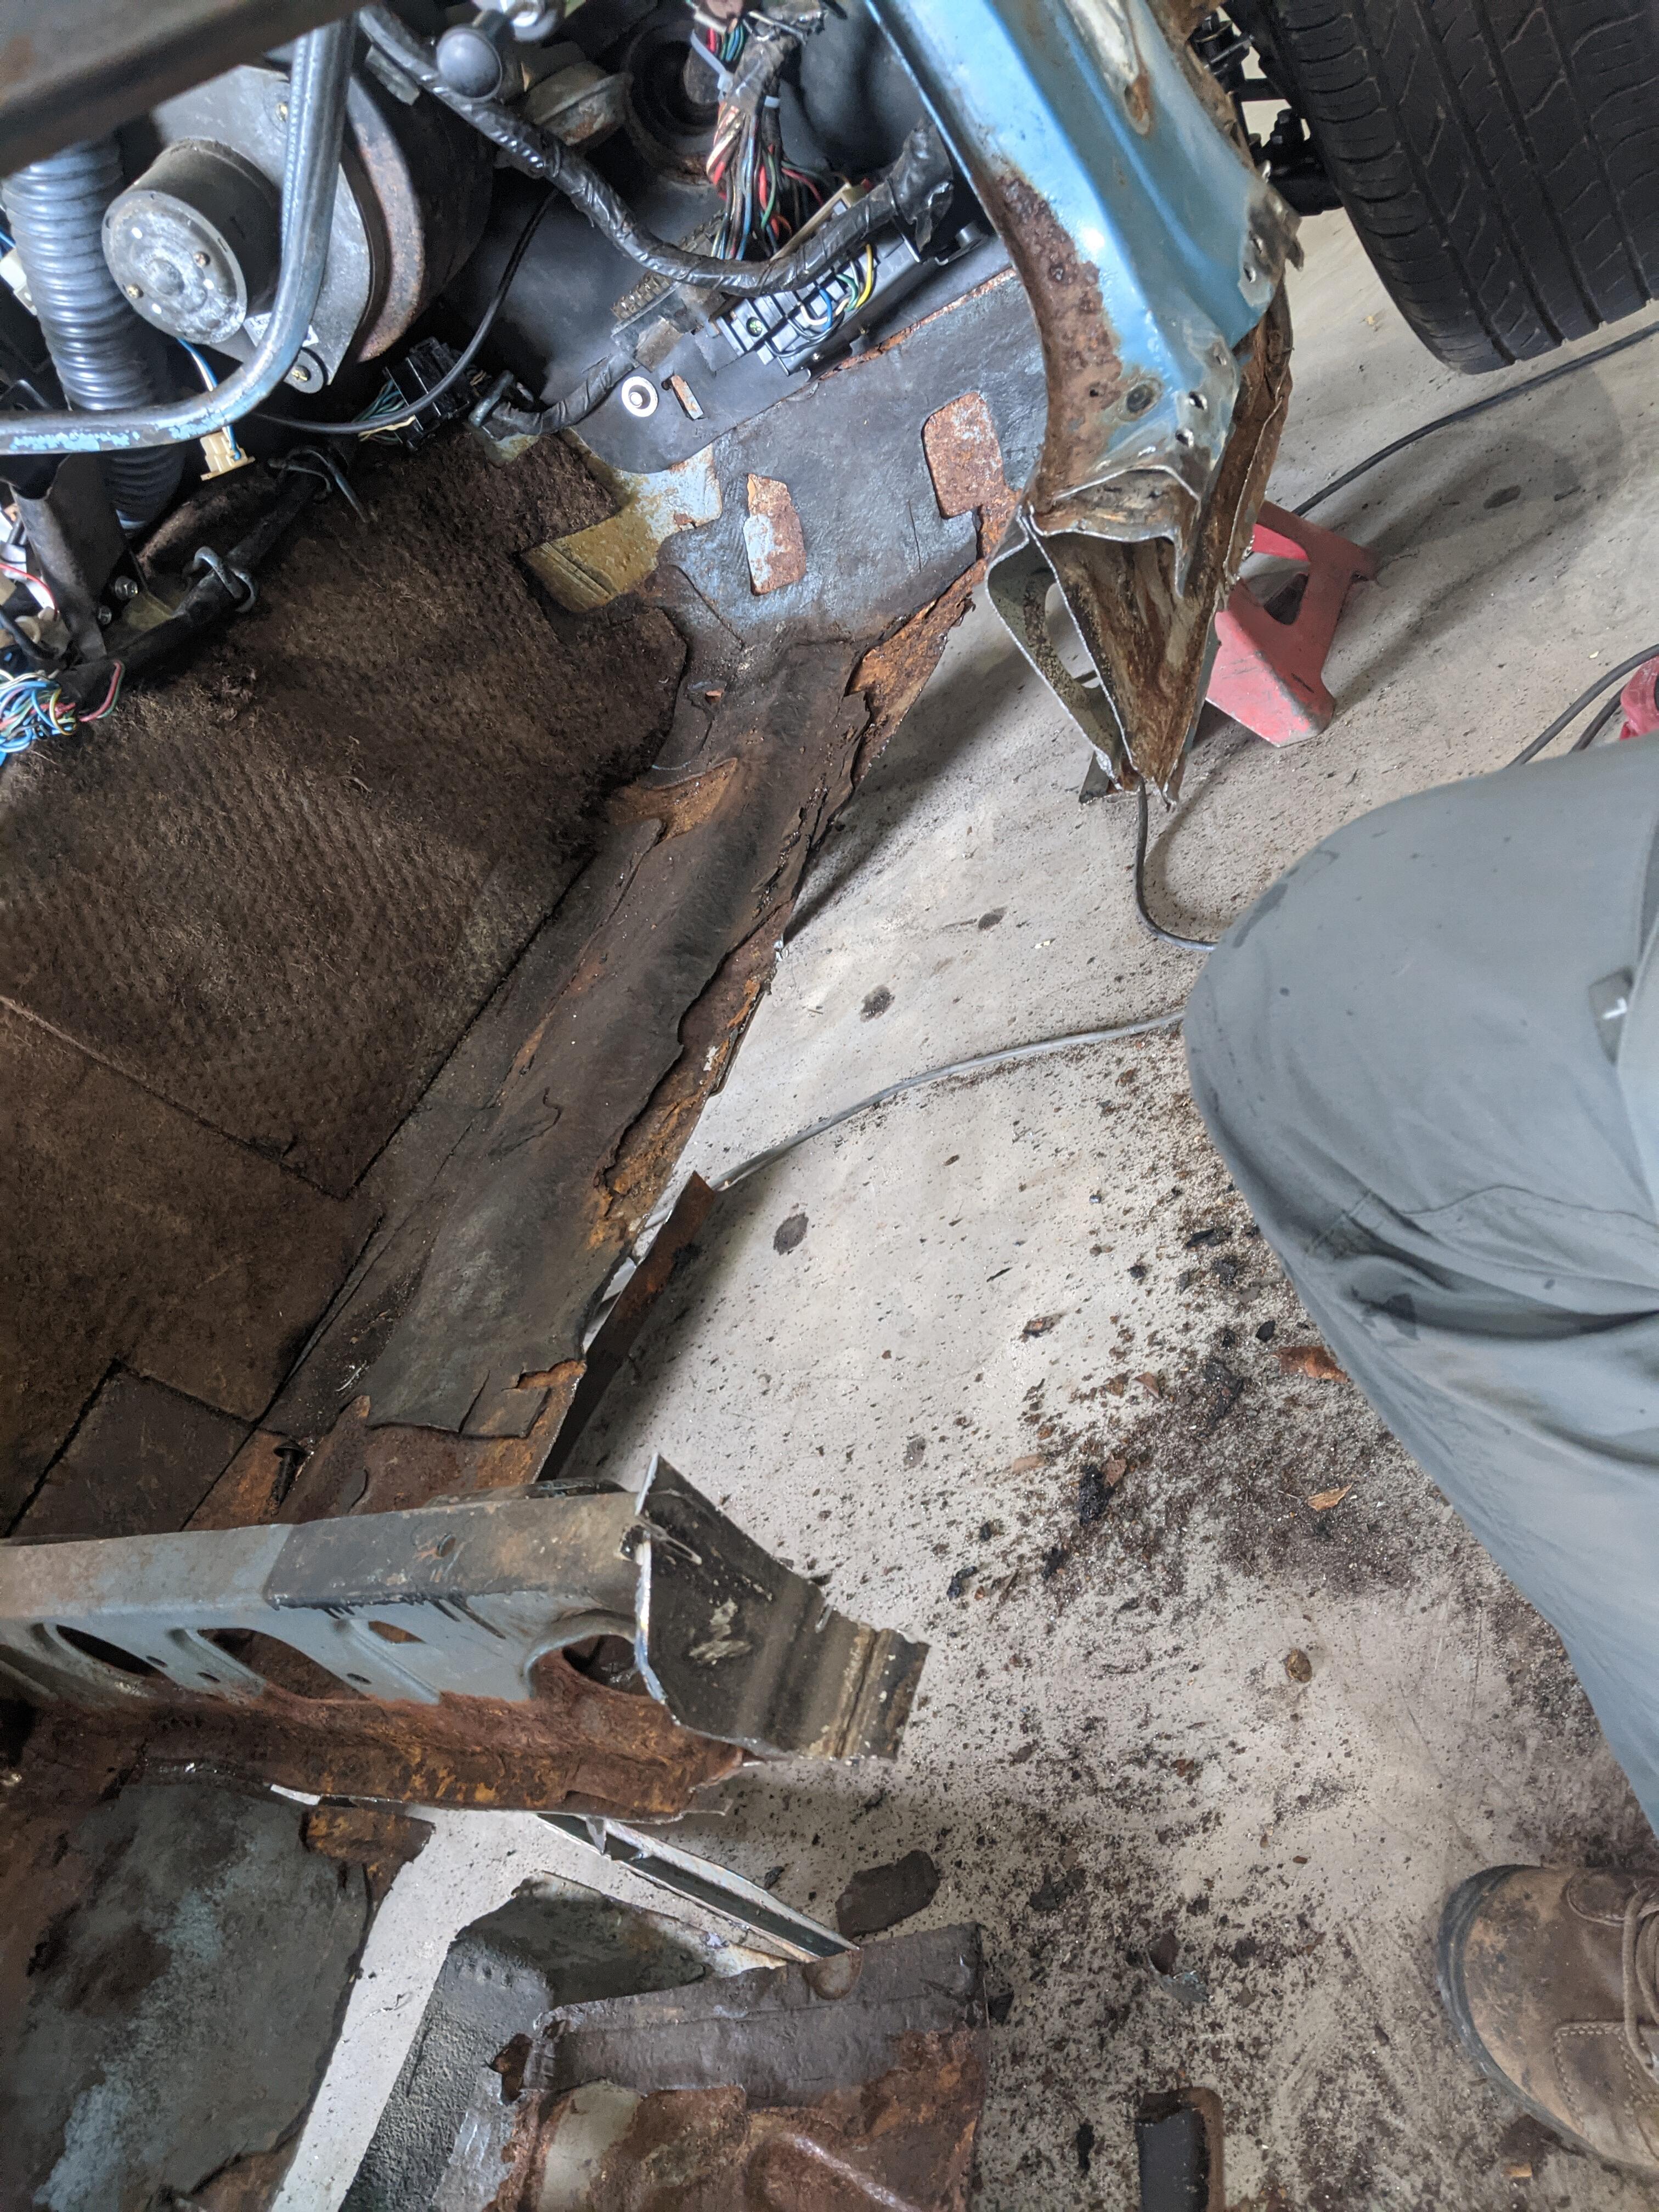
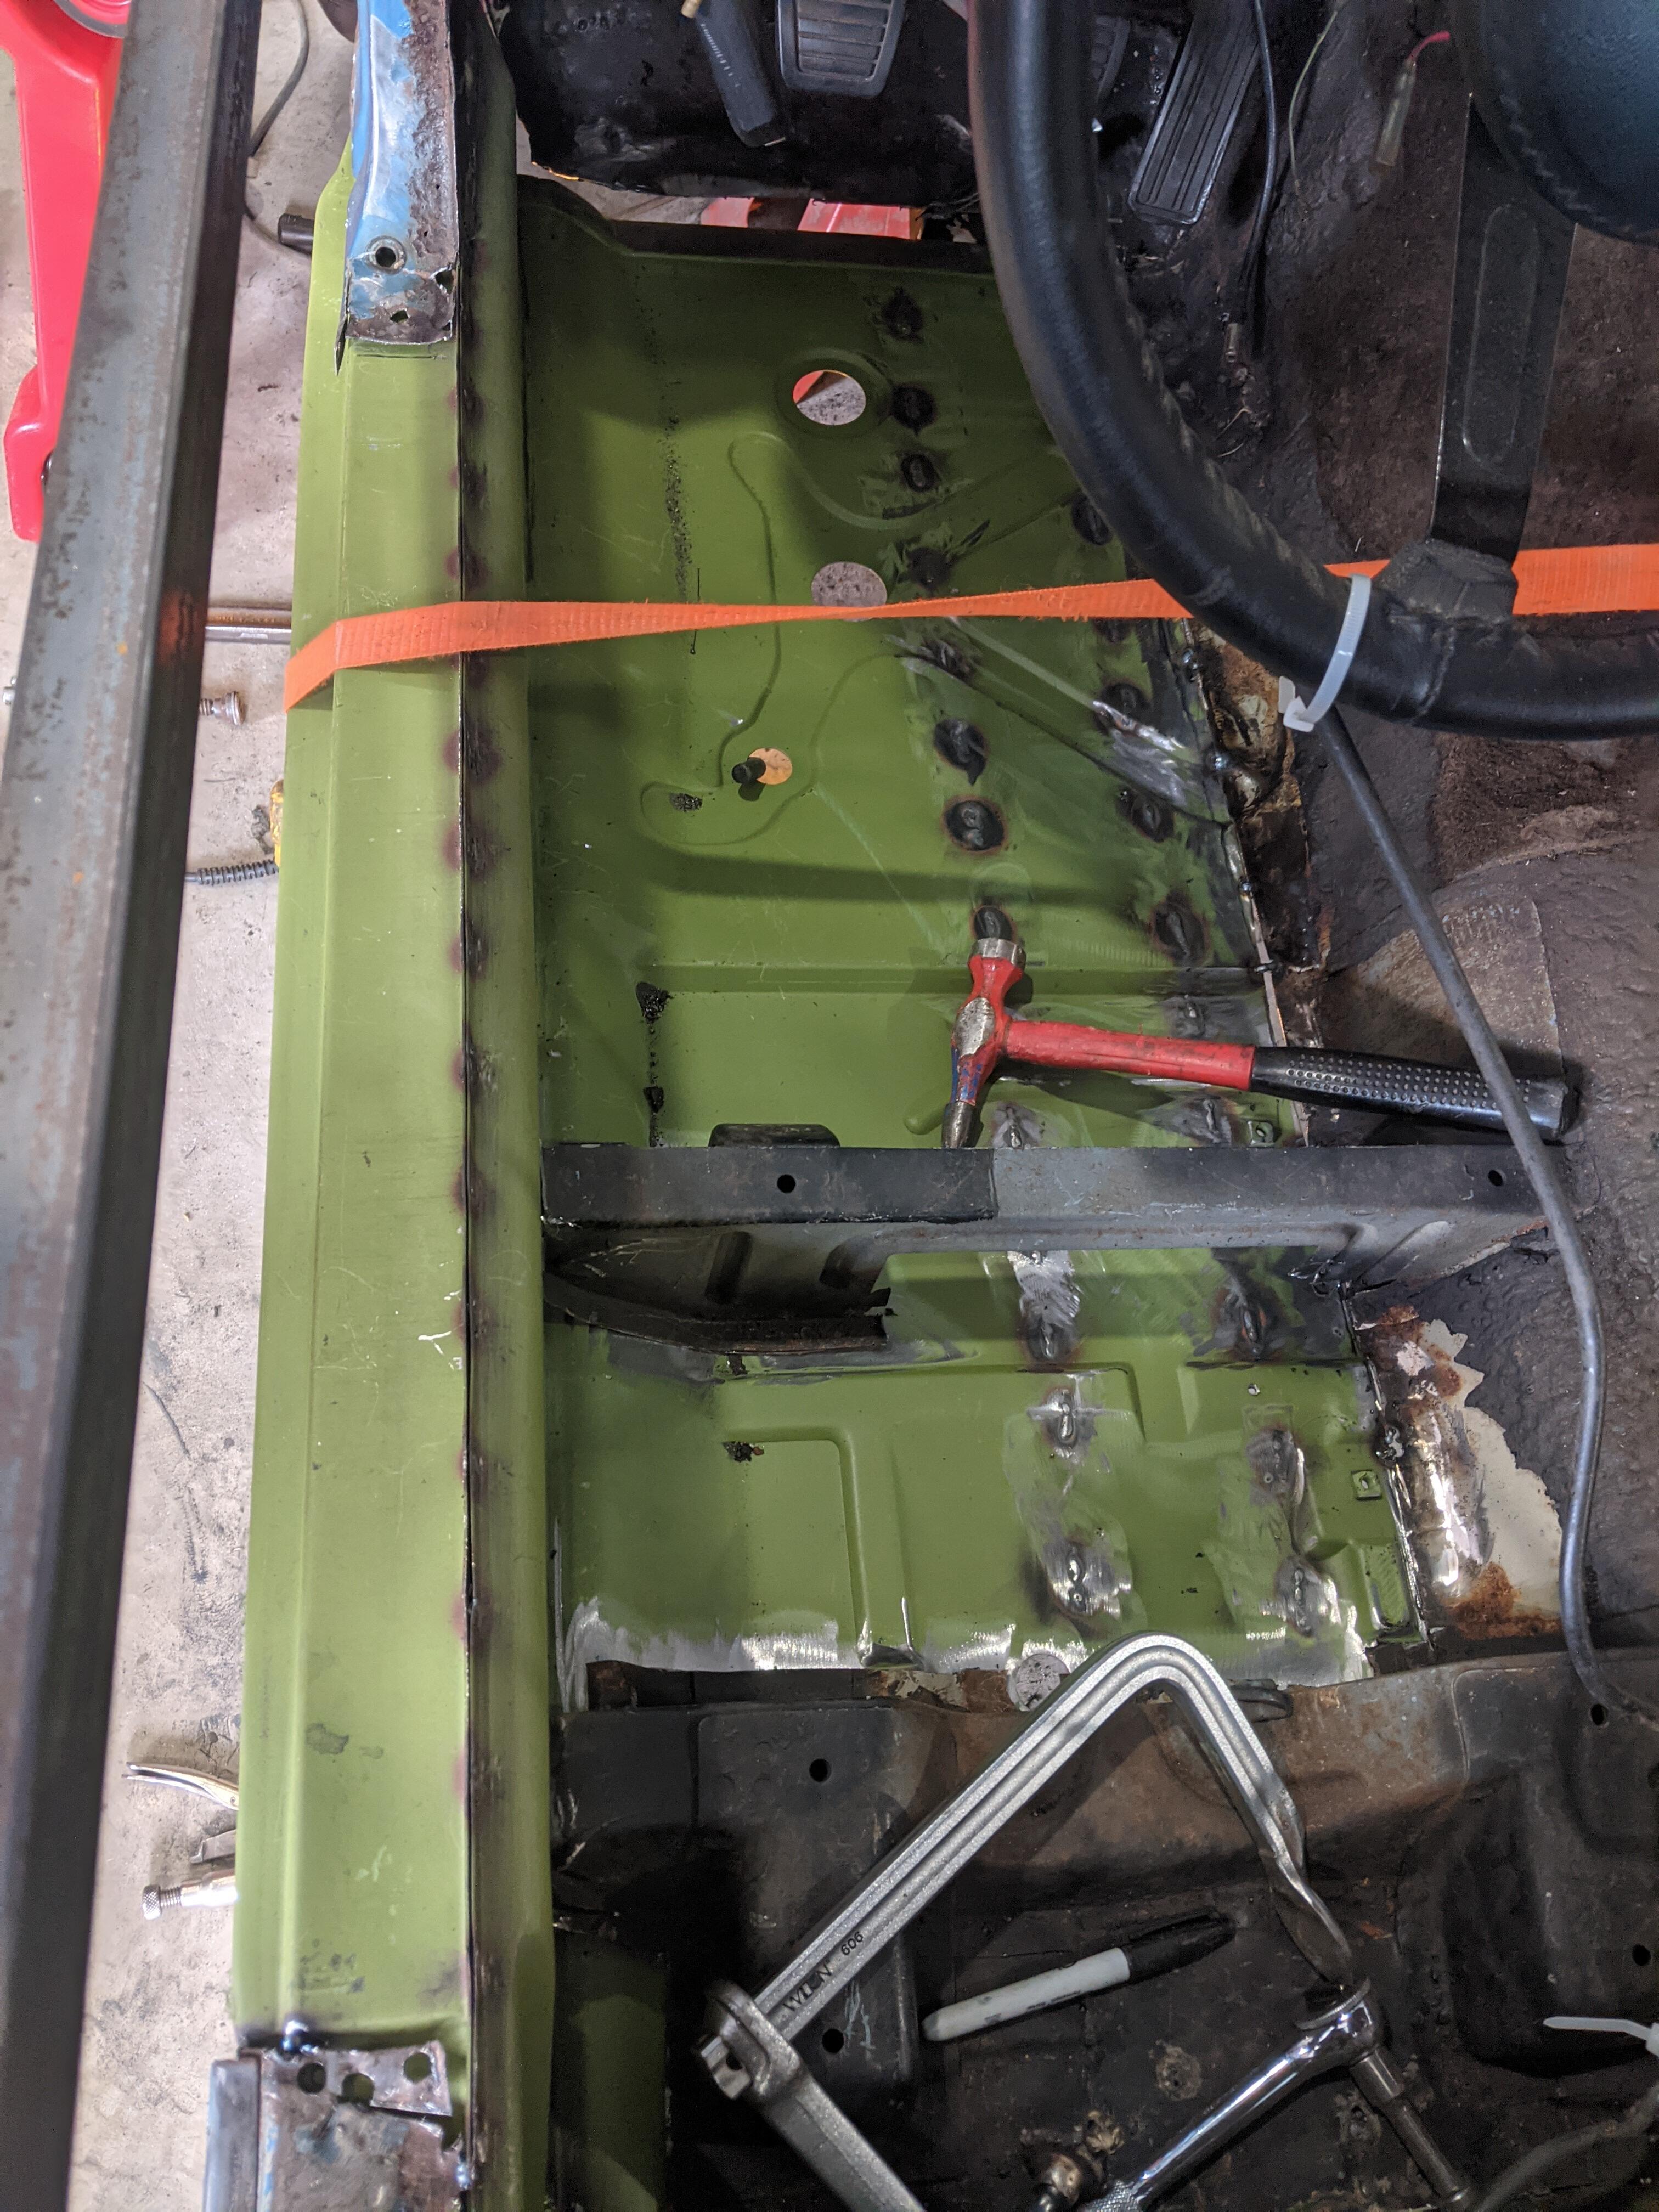
Just wanted to show some of the work I've been doing on my Z to fix some thoroughly rusted floorpans and rockers. It is still very much in-progress but I'll try to update as it goes on. Hopefully it'll be of help to someone as a reference, or at least encourage folks to give it a shot. If you see anything wrong with the approach, please let me know! Some quick background: The car is a '75 that I picked up in KY a few years back. Since then I fixed the fuel system and got it running, squared away the suspension (new bushings, shocks, springs, hubs, etc etc). But that is where my skill set ran out; never welded and never done resto work. Kept trying to find a shop to do the body work, but never had any luck. Then I moved and ended up close to a family member who happens to be a retired welder and enjoys doing resto/custom work on cars. Perfect chance to dive into the Z! So I bought a set of the Klassicfab panels and we dove in. The floors/rails started off like so: Driver's Side: Driver's side outer rocker looking rough: Passenger side: The drivers side was worse, but both were pretty shot. There had been a previous repair to the drivers side floor pan in 2 areas, and the rail had been reinforced as well. But both floorpans were perforated in many areas and the rockers on both sides were pretty shot. The frame rails were also obviously shot. First up, we got the car on blocks and welded in some braces. Then we removed the driver's side inner and outer rockers and floorpan (scary initially to cut into the car, but that wore off quick), leaving the seat braces largely intact. Then we welded together the new rockers (inner to outer), and welded the new frame rail to the bottom of the floorpan and tacked those in: Then we welded those in.. or actually my Uncle did most of it because that is some EXPERT level welding; that steel is THIN And then a quick check for door fitment.. should have done this after the tacks and BEFORE welding.. thankfully lined up fine (not perfectly lined up here because the bolts aren't tightened yet) Next onto the passenger side.. same strategy; started cutting out the rockers and floorpan Nice shot of the 4-layer 'sandwich' that is the rockers+pan+bottom of the A pillar: And thats as far as I've made it thus far.. more to follow in the future. What a dirty and laborious job.. but also highly rewarding so far. I am learning a ton! -Ben


-
In the middle of installing floors and rockers in my 280Z; their panels have been a great fit so far. Wish they made more areas on the car!

-
good point about the signature 😄
-
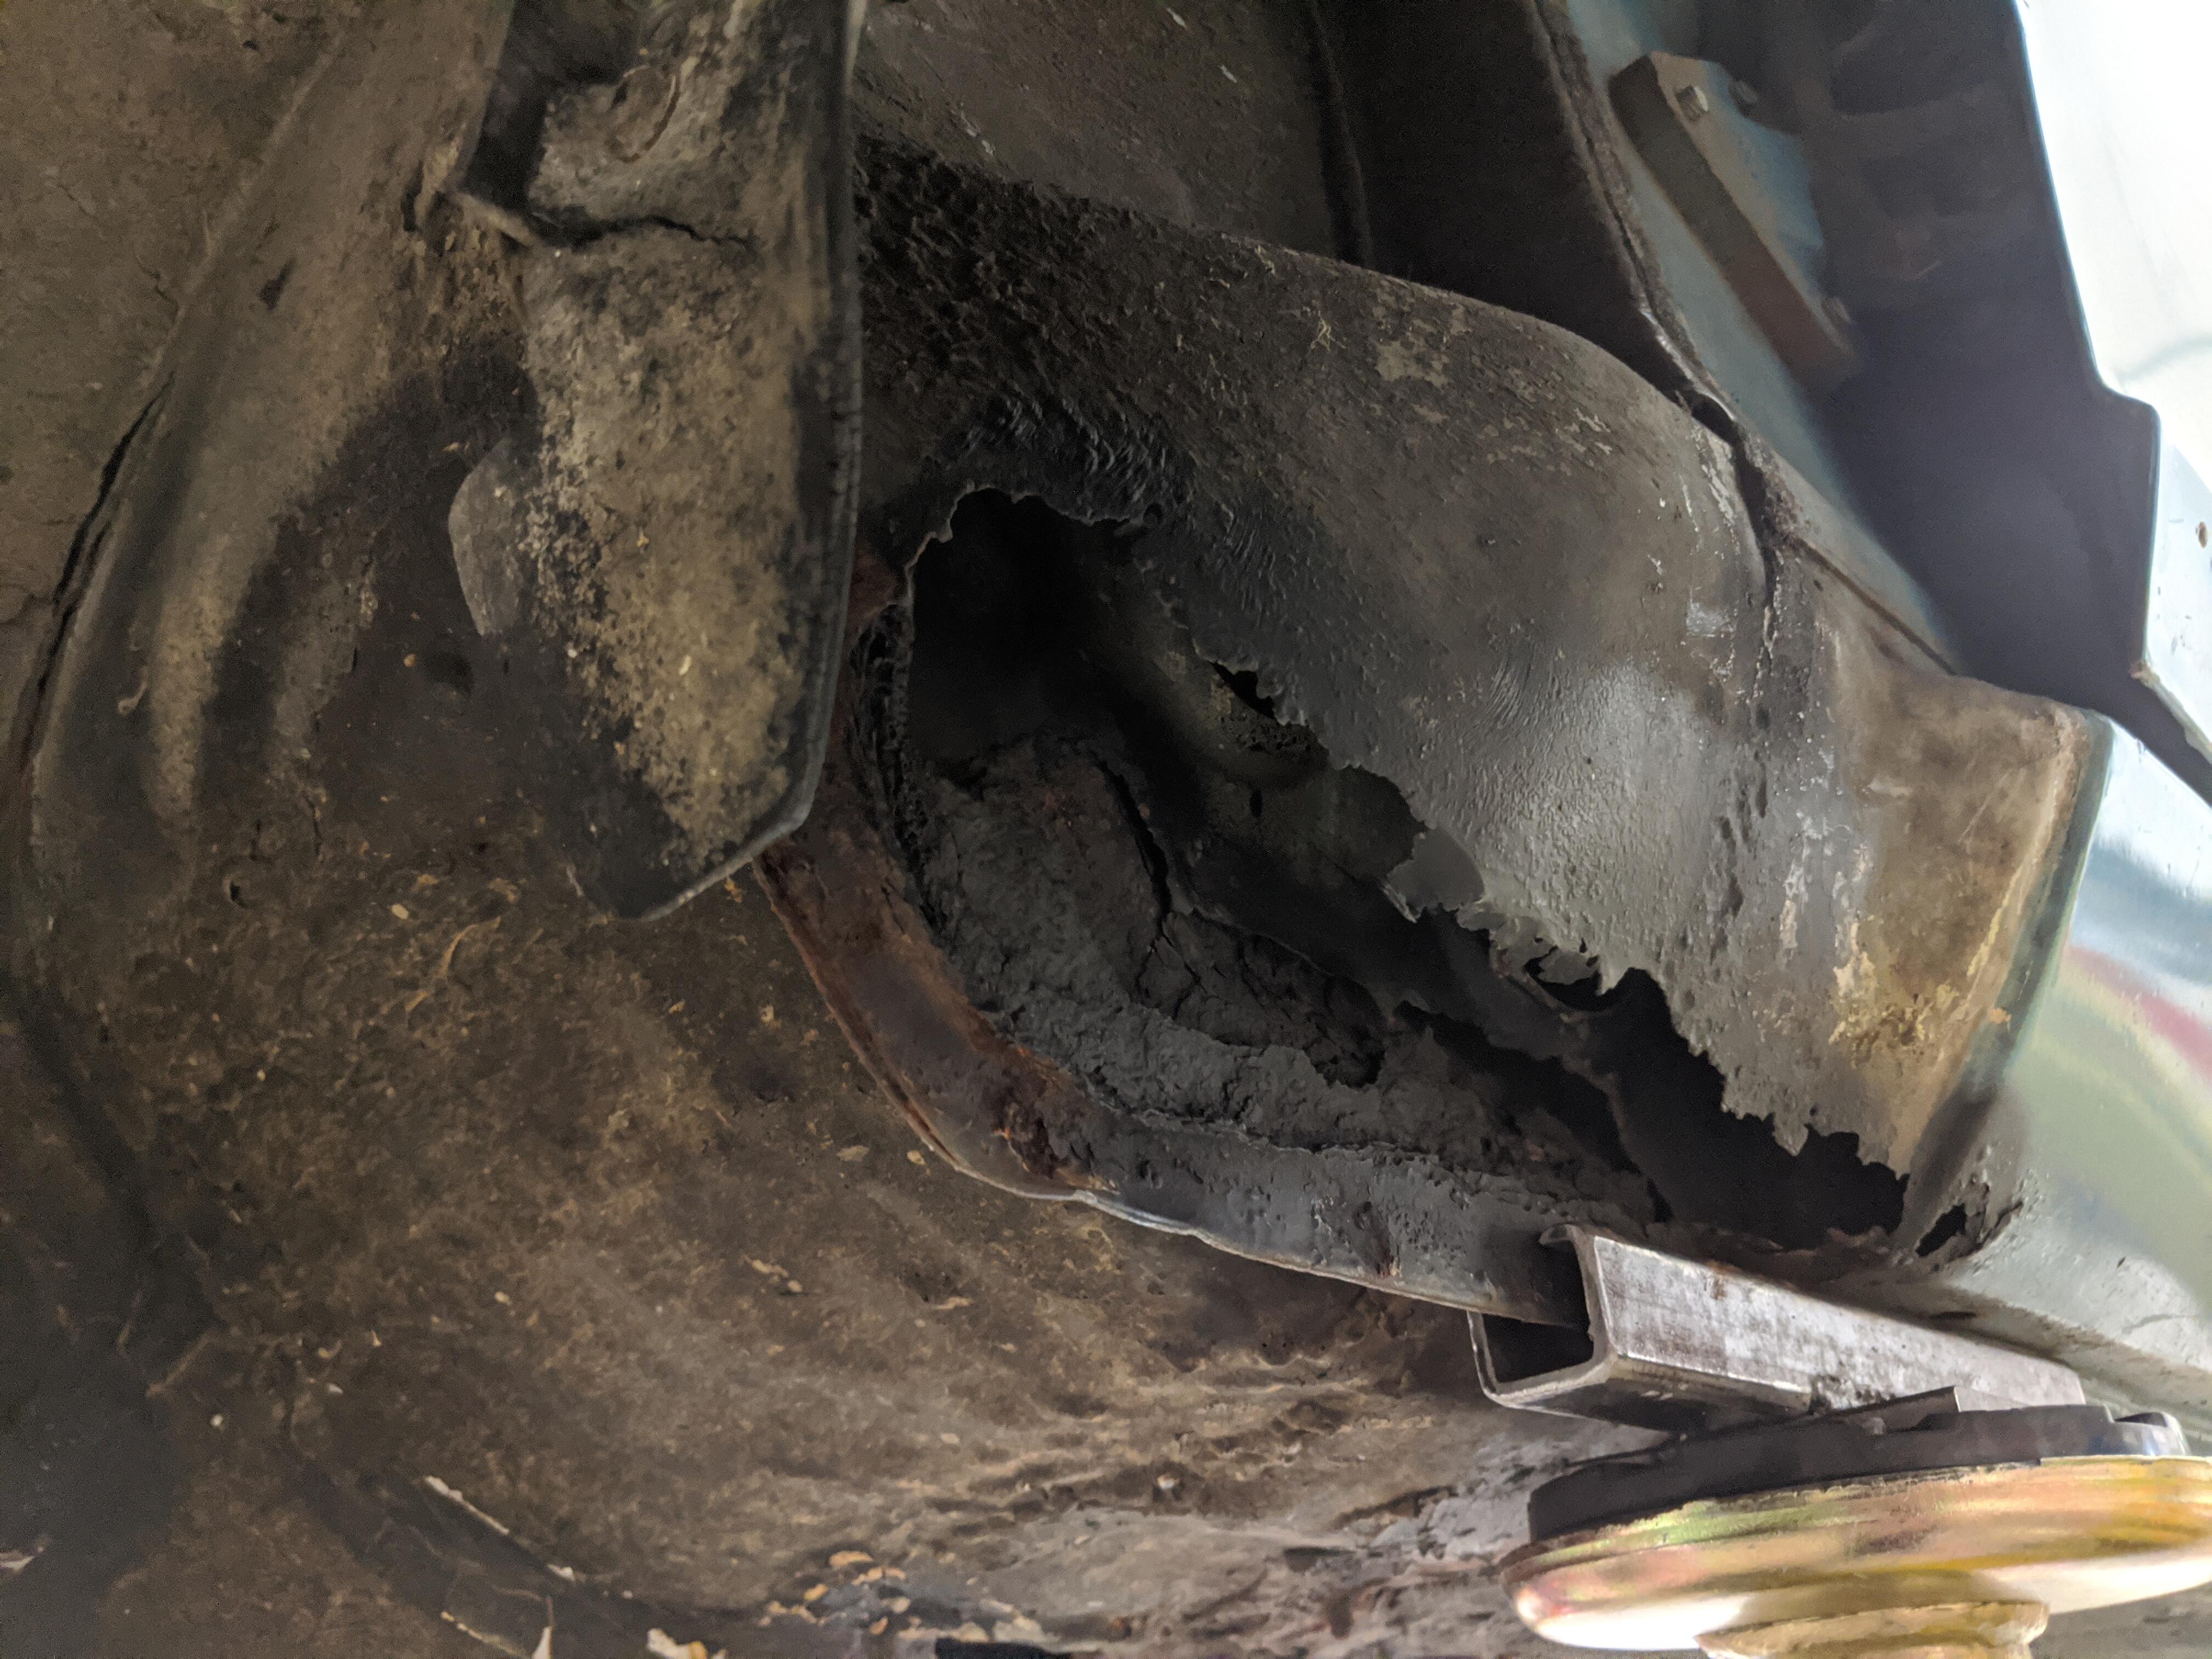
It does appear to of rusted from the inside out. I do not believe klassicfab makes those particular panels for the 280z.. I wonder if they would be the same though? Thanks for the feedback; always good to know its a common problem..
-
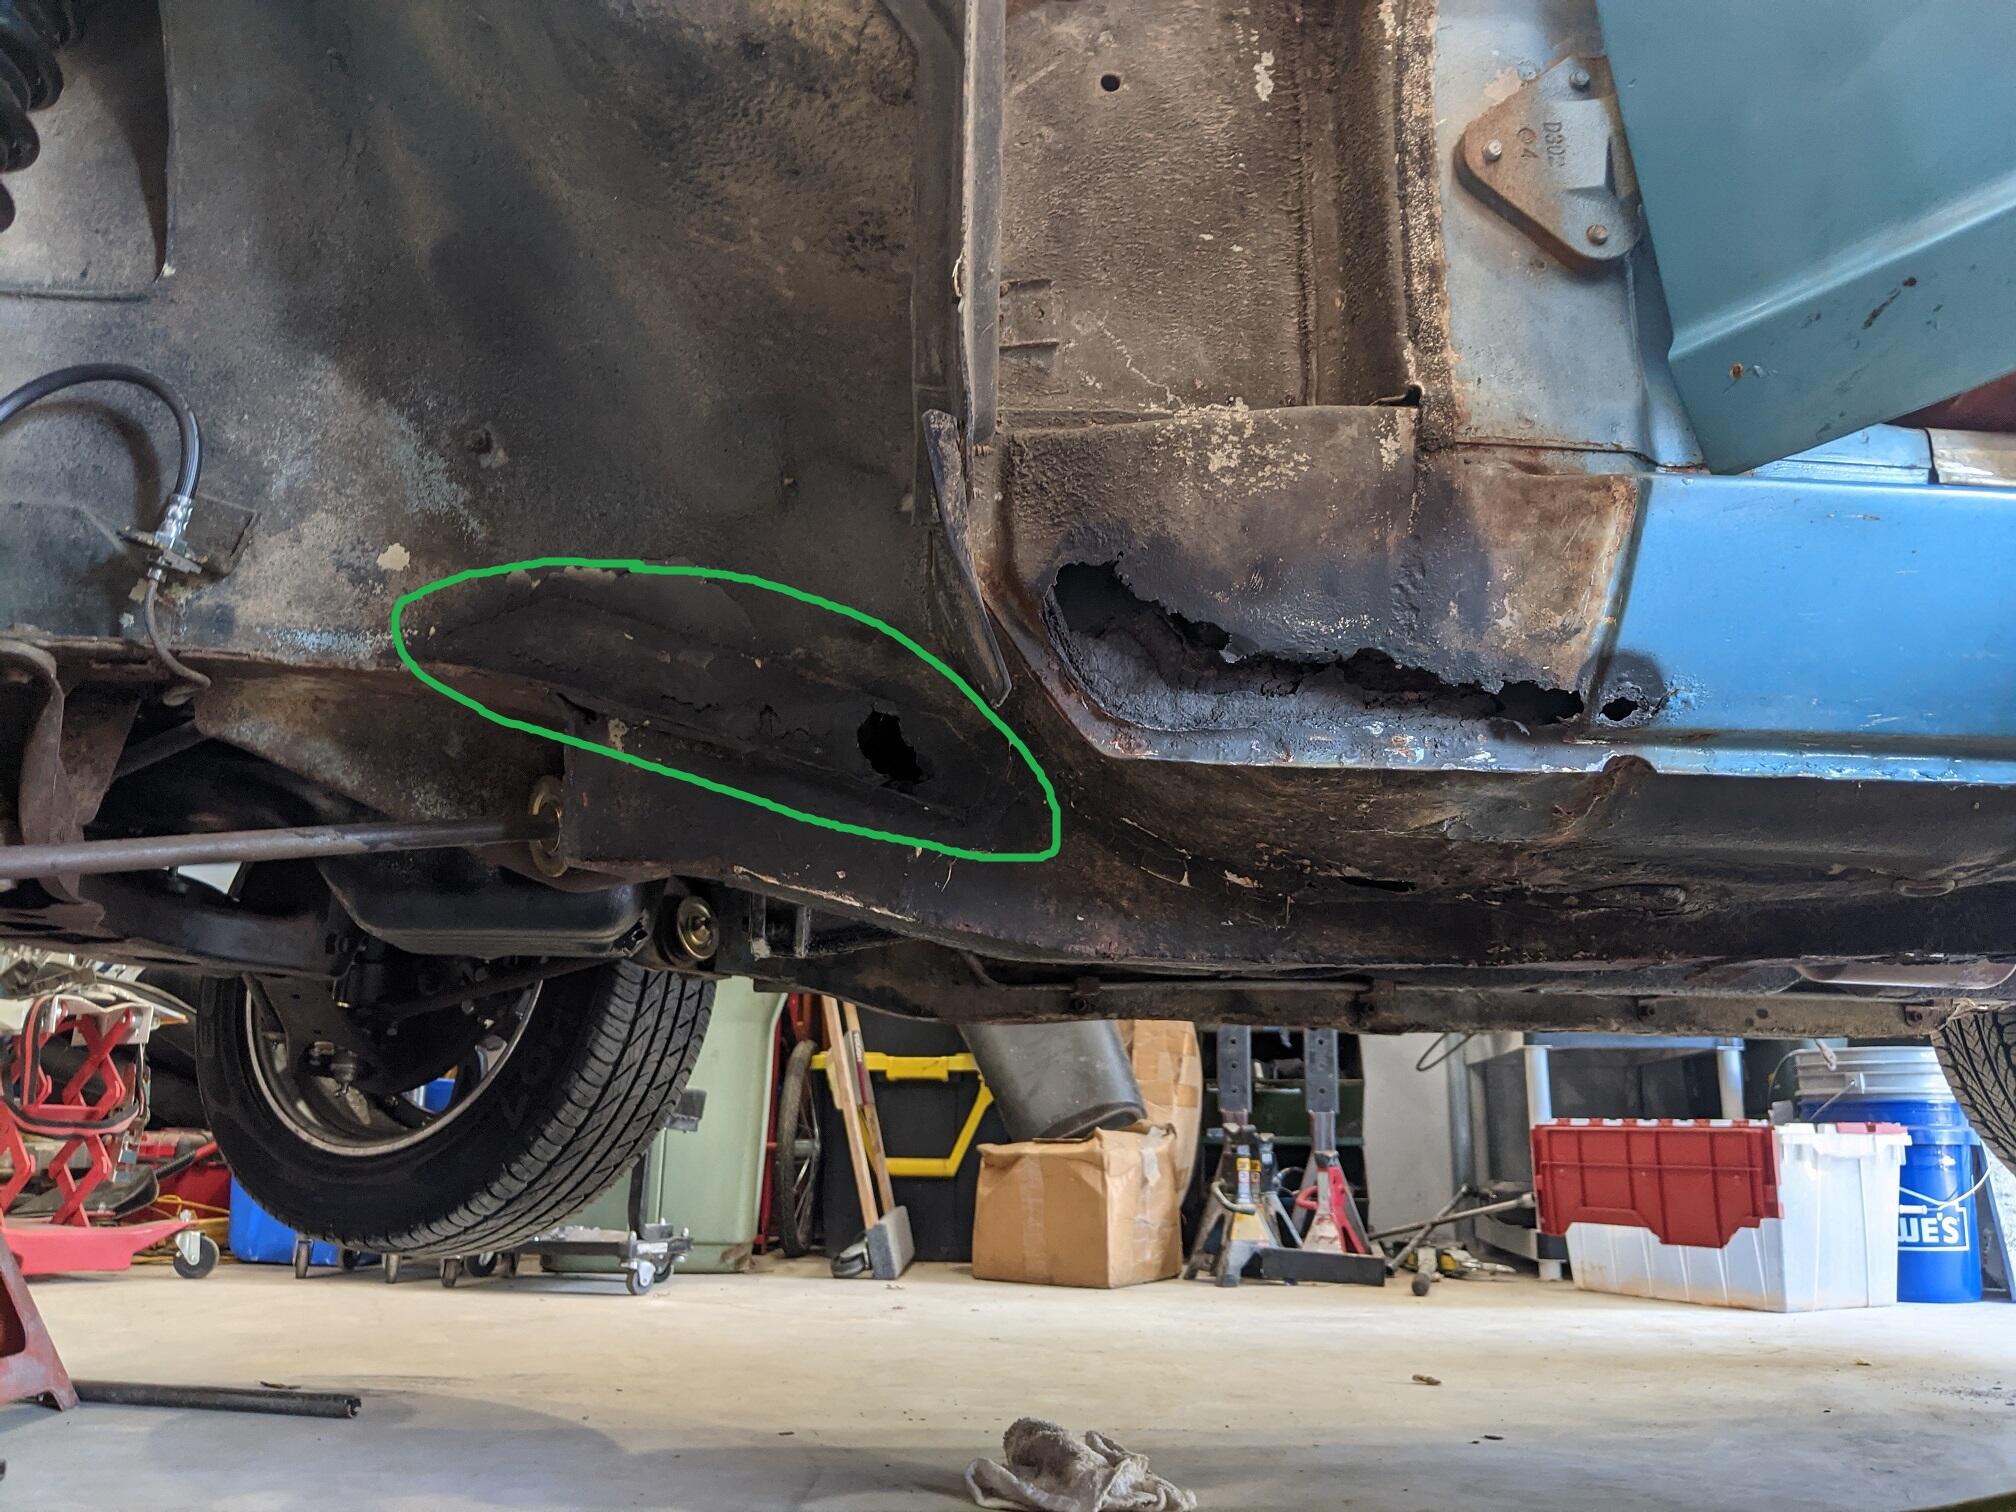
So we've pretty much figured out how to tackle the floor pans, frame rails, and rockers (by replacement with Klassicfab panels), and there are a couple other patches around the body. But what is this particular area referred to as, how structural is it, and what are some good methods for getting in there and repairing? Would a simple flat section matching the profile welded in its place do the trick? Thanks in advance! Ben

-
Thanks for the feedback. I have to agree the roll cage doesn't fit here. Sticking to the repair for now, with an eye toward some bolt ins and maybe a roll bar eventually. Also, I popped over to the bad dog site. When y'all say subframe connectors, which part are you specifically referring to? Is that the ends of the frame rail segments they offer? Thanks again, Ben
-
So I have the good fortune of being able to enlist some knowledgeable welding help from a family member, and will soon be diving into the repair of my driver's side floor pan and both frame rails. We also will be hopefully repairing a couple other smaller problem areas. I'm wondering: what other mods would be a good to undertake while I've got the interior out and the ability to weld? The car is going to be mostly driven for street/weekend/club outings, but I'd like to get it out at Summit Pt or VIR and am considering a roll cage. Or really any other chassis stiffening or safety improvements. I did already splurge a bit on the Apex Engineering braces for the front that go in the fenders. I figure at the very least I'll put in a bolt in 3way brace up front. But welding is a dark art to me, and I want to leverage the time I have well. For those of you who've been down this road, do you have any suggested mods? Thanks in advance, Ben
-
Thread resurrection hah. I ended up getting a tune up at Datsun Spirit and Eiji sorted it out. Running very well now. Appreciate the follow ups
-
My fronts are 205/55R16. So yours would be an inch less in overall diameter. Mine did settle some after a couple drives.
-
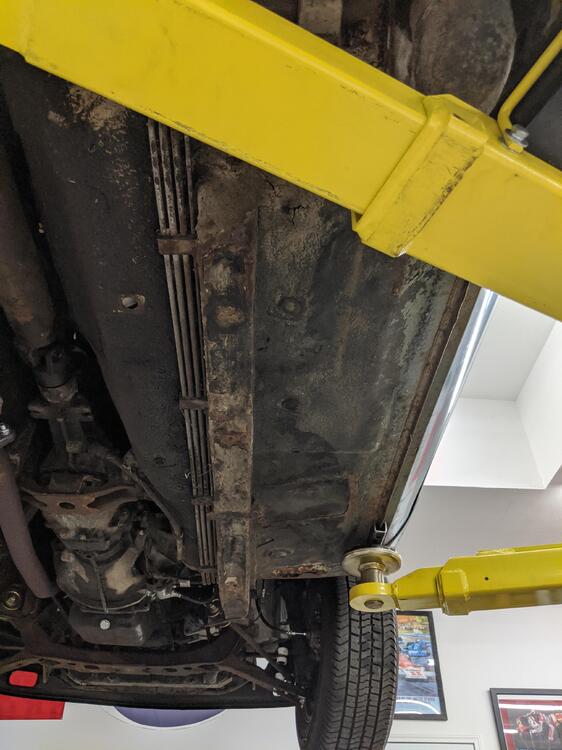
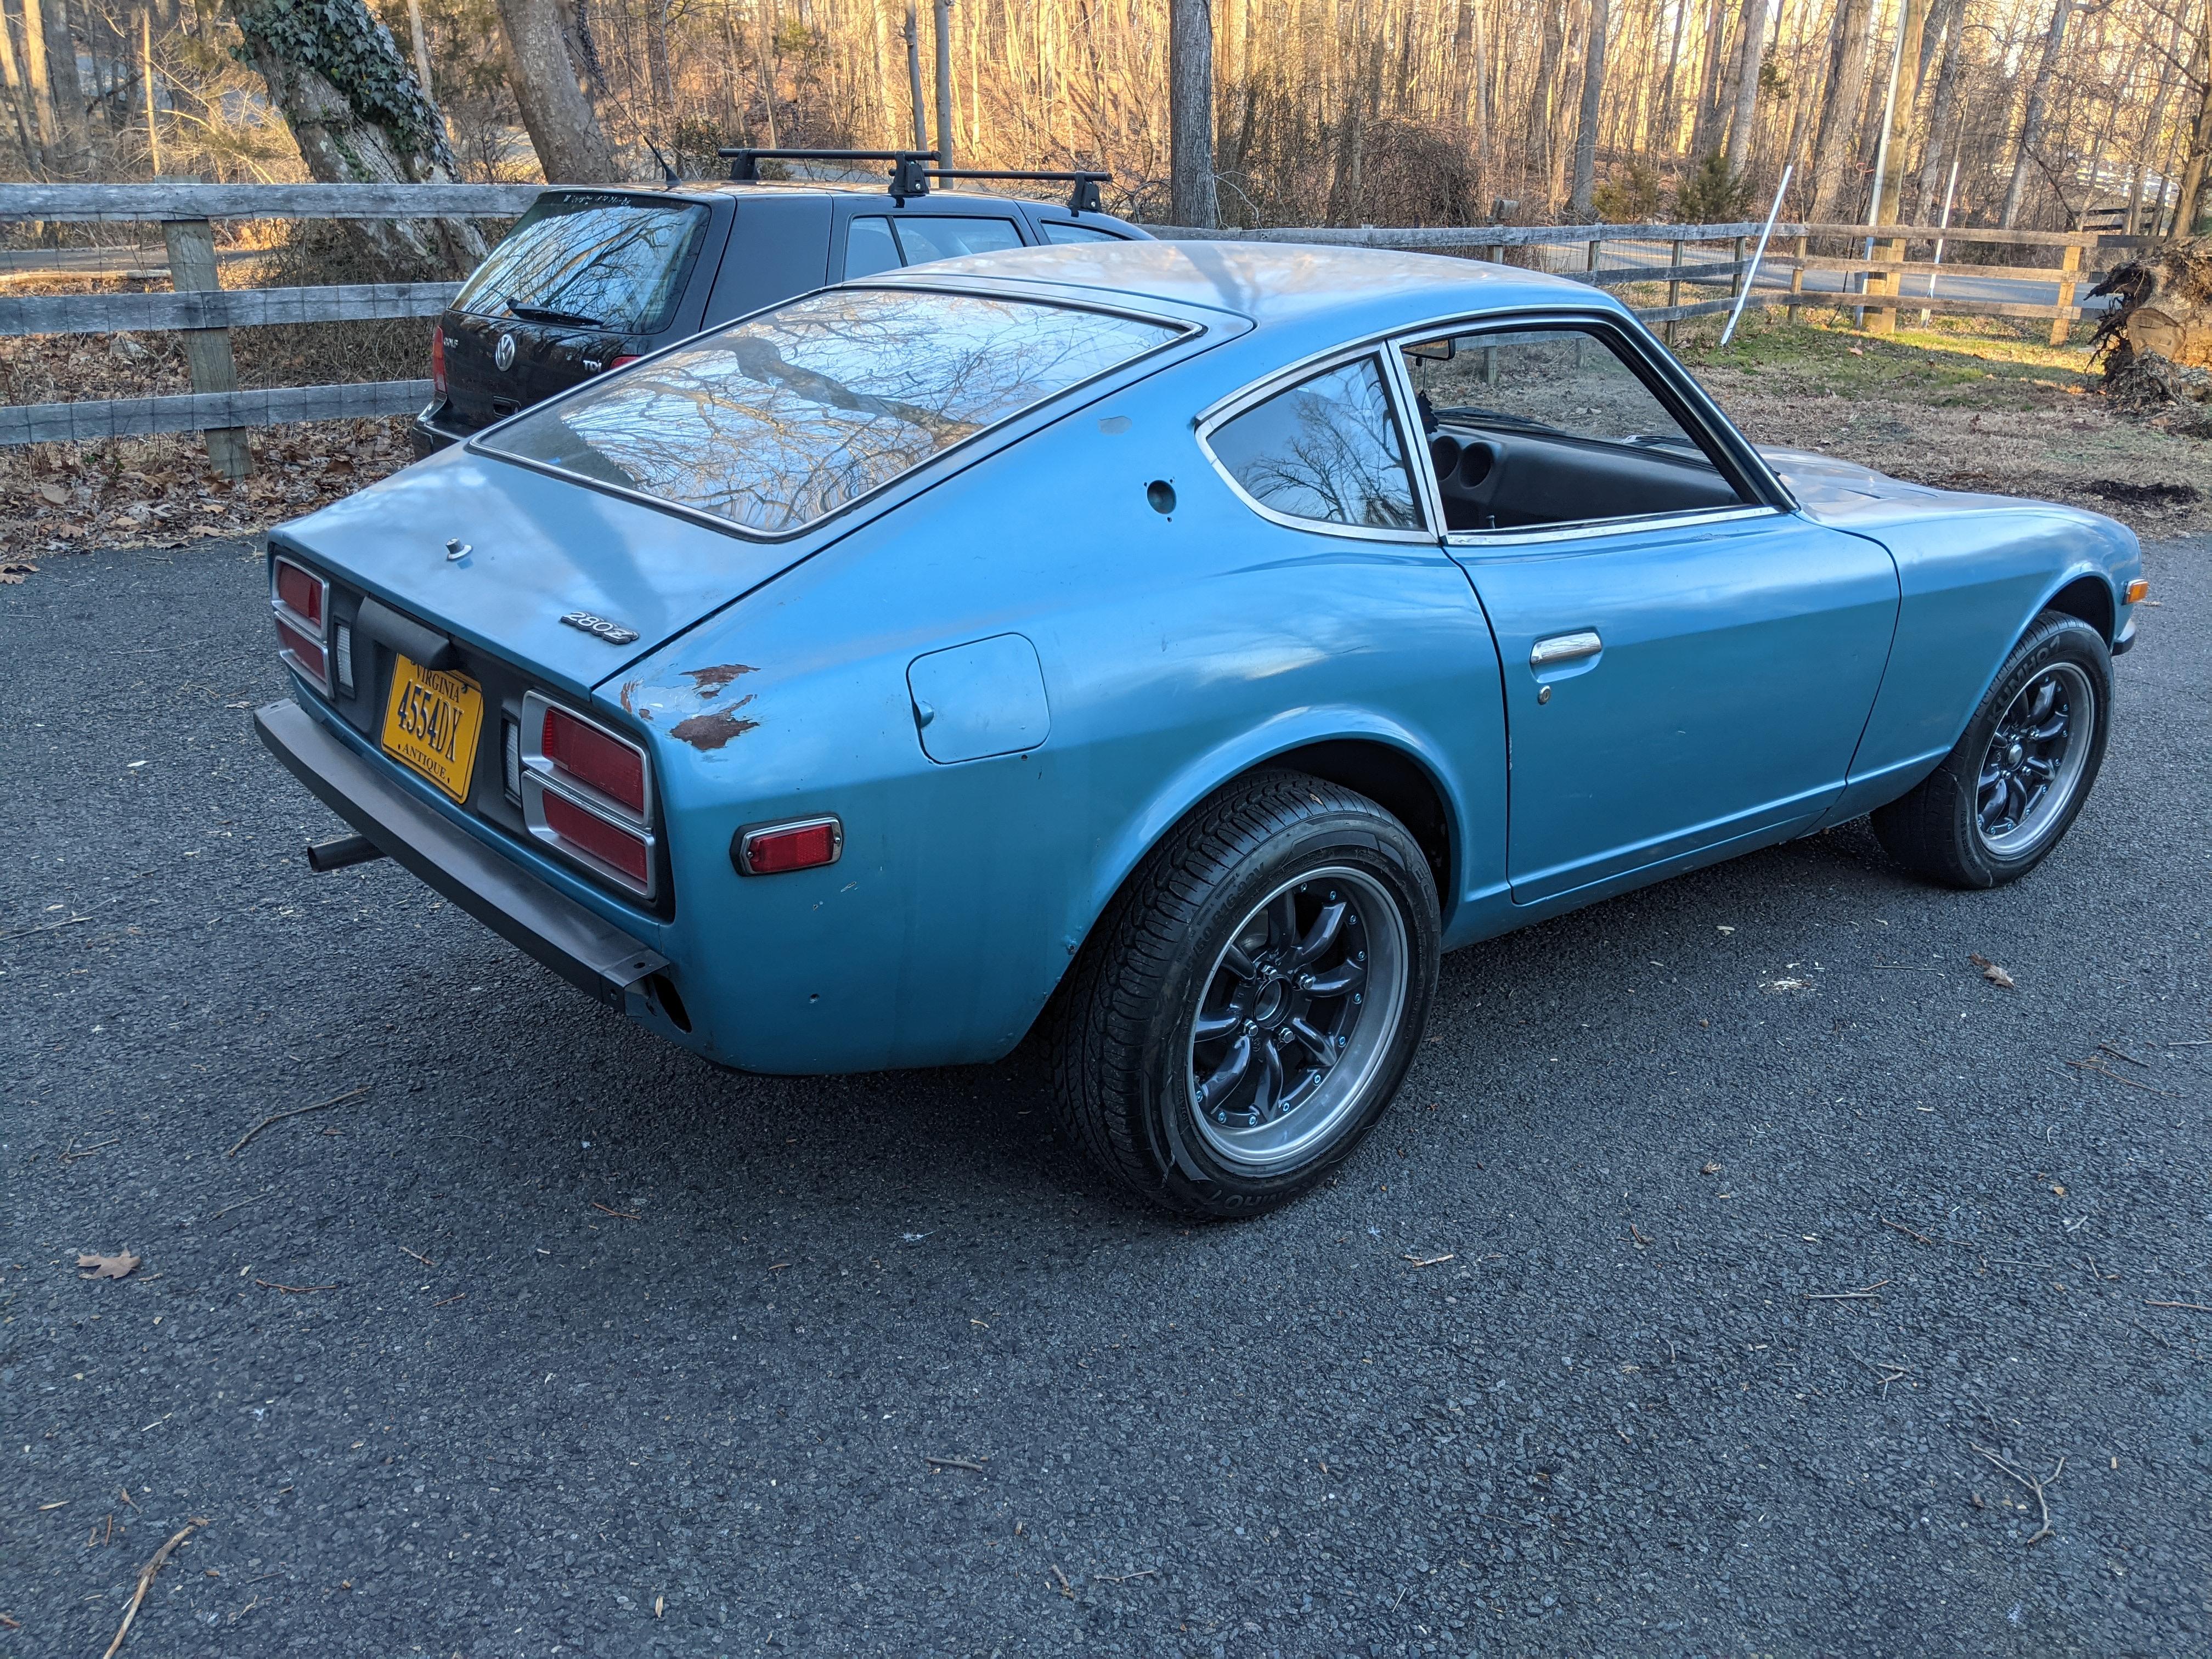
Just wanted to chime in after installing these on my '75 280Z. I definitely researched this thread, and very much appreciate all of the great feedback and information here. Nothing but a good experience for me. I replaced the stock springs paired with KYBs with the full eibach lowering kit (23-4042 on MSA) and koni shocks (2x 23-1033, and 2x 23-1034 on MSA). I also did the MSA sway bars at the same time. Everything bolted up fine. I had the usual issues with the rears when trying to get enough clearance without pulling the spindle bolts. I ended up dropping the rear subframe; pita, but there was no way those spindles were coming out and I wasn't ready to tackle that monster just yet. I did not have any issues fitting the gland nuts, or with seating the shocks into the strut tubes. The fronts were done in about 1/4 the time of the rears, mostly due to having to drop the subframe. Once installed, the drop in ride height was definitely noticeable. I didn't measure, but I'll include a picture or two of the before/after. I set the shocks to 1/2 rotation from full soft for starters, and haven't felt the need to adjust them further yet. I've been out on 2 short twisty drives so far. The car feels firm, but in a sporty confident way. Bumps are felt but not harsh. Far less dive and roll. I'm sure the sways are helping there as well. The shocks and springs seem very well paired. A definitely improvement over the floaty feeling of the stock springs/sways + KYBs. Looking forward to pushing it a little harder this summer!
.thumb.jpg.dca115758718d33e620d84ad14db09fb.jpg)
.thumb.jpeg.a4726c7dc01d11bc2d500c283338a305.jpeg)

.thumb.jpeg.7ffda07855aa876da71933c5c0b1b774.jpeg)
-
I did try unplugging the cold start; no change. But good point clamping the hose. I'll give that a shot tonight. And I'll definitely revisit that TPS; pretty sure I set it where it needed to be when I was reassembling my TB/manifold. But, come to think of it, that may have been before I found that my throttle valve wasn't fully closing due to the little stop screw on the engine side being slightly too far down (found that when the TB Idle screw wasn't killing idle even when all the way screwed in). Definitely rechecking that now.. Thanks! Yeah.. I feel like I owe half of y'all a few beers already from my previous cries for help.. Zed Head for sure ?
.jpeg.164f58c354209ee1b93aa0c38a44616e.jpeg)
.jpeg.1885ac40c13cd47251874b8e5f6caeb6.jpeg)


.jpeg.0fe72a3d2e668ef8aef6e25ff09f32c1.jpeg)
.jpeg.a4eefb71abd60b68a7085a6e021ac934.jpeg)
.jpeg.7d0275ff78ef666d258bb681a01c8f98.jpeg)


.jpg.1d4ddd1180c7b371594c080d06309707.jpg)
.jpeg.2b4147c75f492a69537e08d4fc2ddc54.jpeg)
.jpeg.0c87cfc497331bbd4f7431a1ea87852d.jpeg)