.jpg.29ae2c4a5aeec52ca7887f8f12267ab6.jpg)

Neb
Free Member
-
Joined
-
Last visited
Everything posted by Neb
-
Fitment check on the passenger side floorboard and rockers..
.thumb.jpeg.e624c7b62489fa641d65f1bc6dcf21ae.jpeg)
.thumb.jpeg.856ec5d5cb3f78fd81c53cf64f8d4d58.jpeg)
-
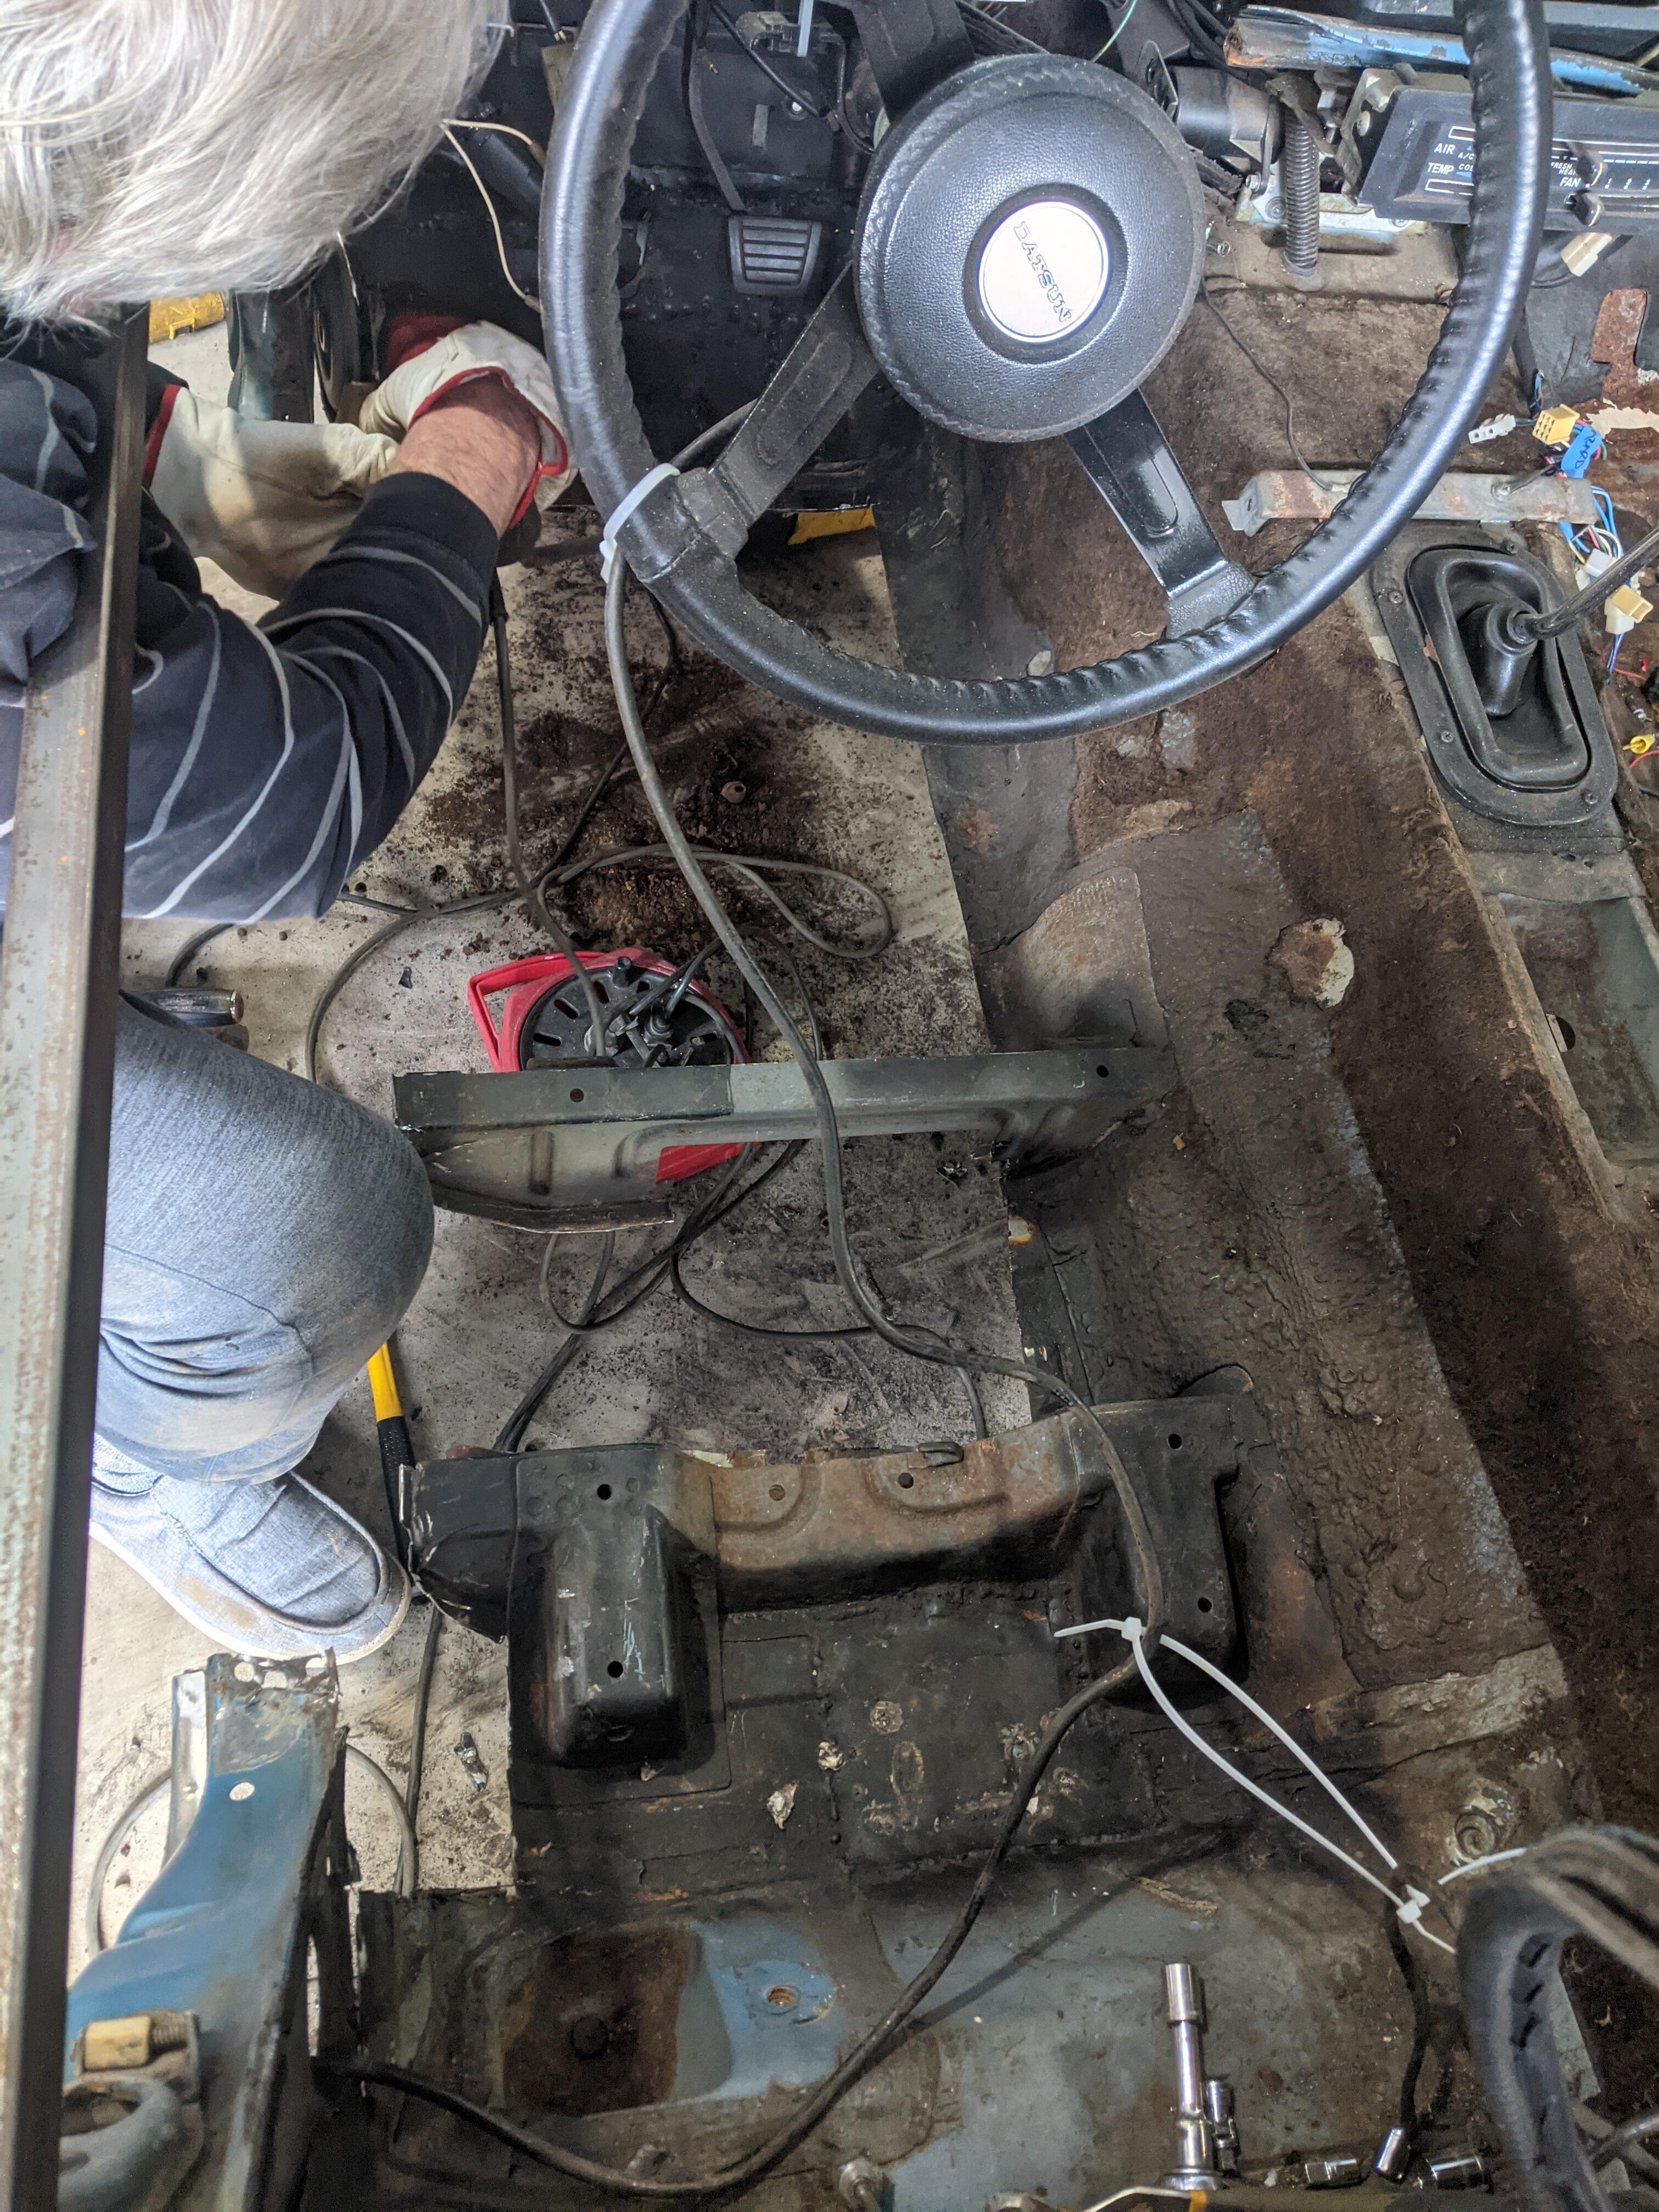
Very much all of the above. Sawzall where we could because its quickest/safest. Drilled spot welds, then followed with hammer and chisel where trying to preserve the old stuff. Angle grinder with a cutting wheel where we had to. Dirty work, but it goes a lot faster after you get your methods down..
-
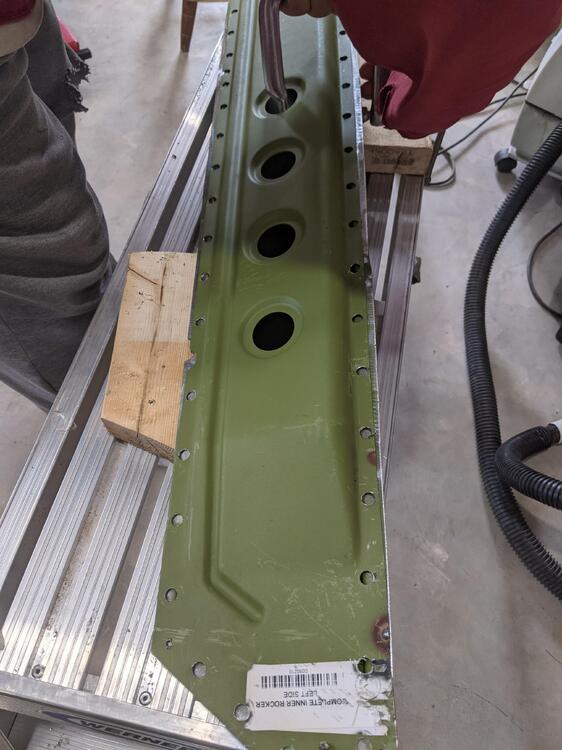
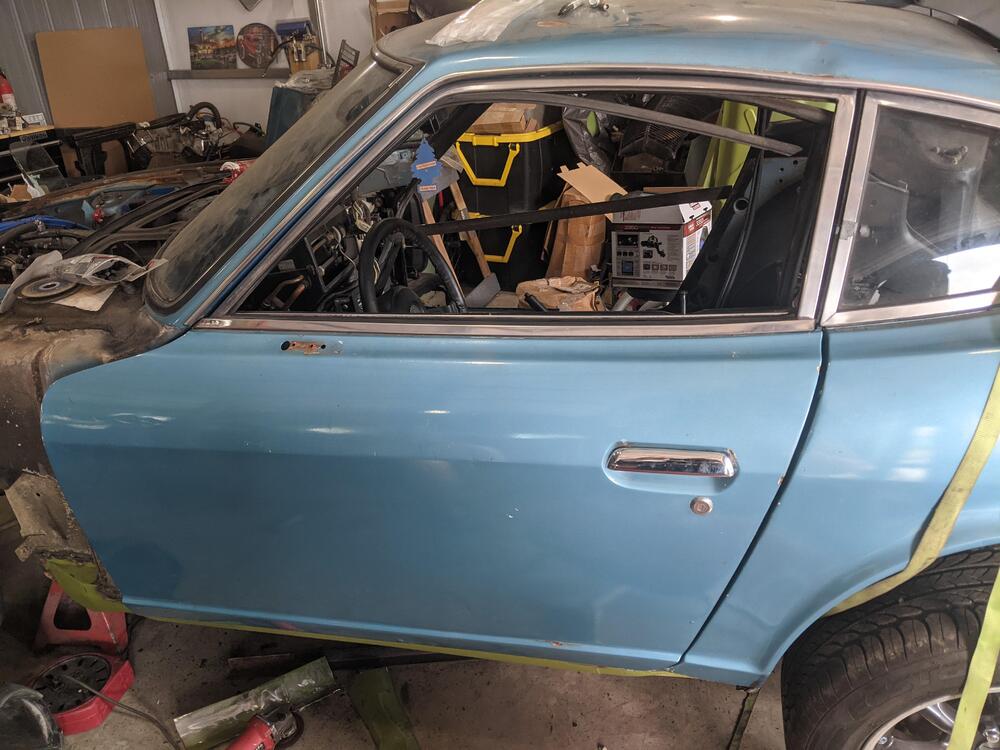
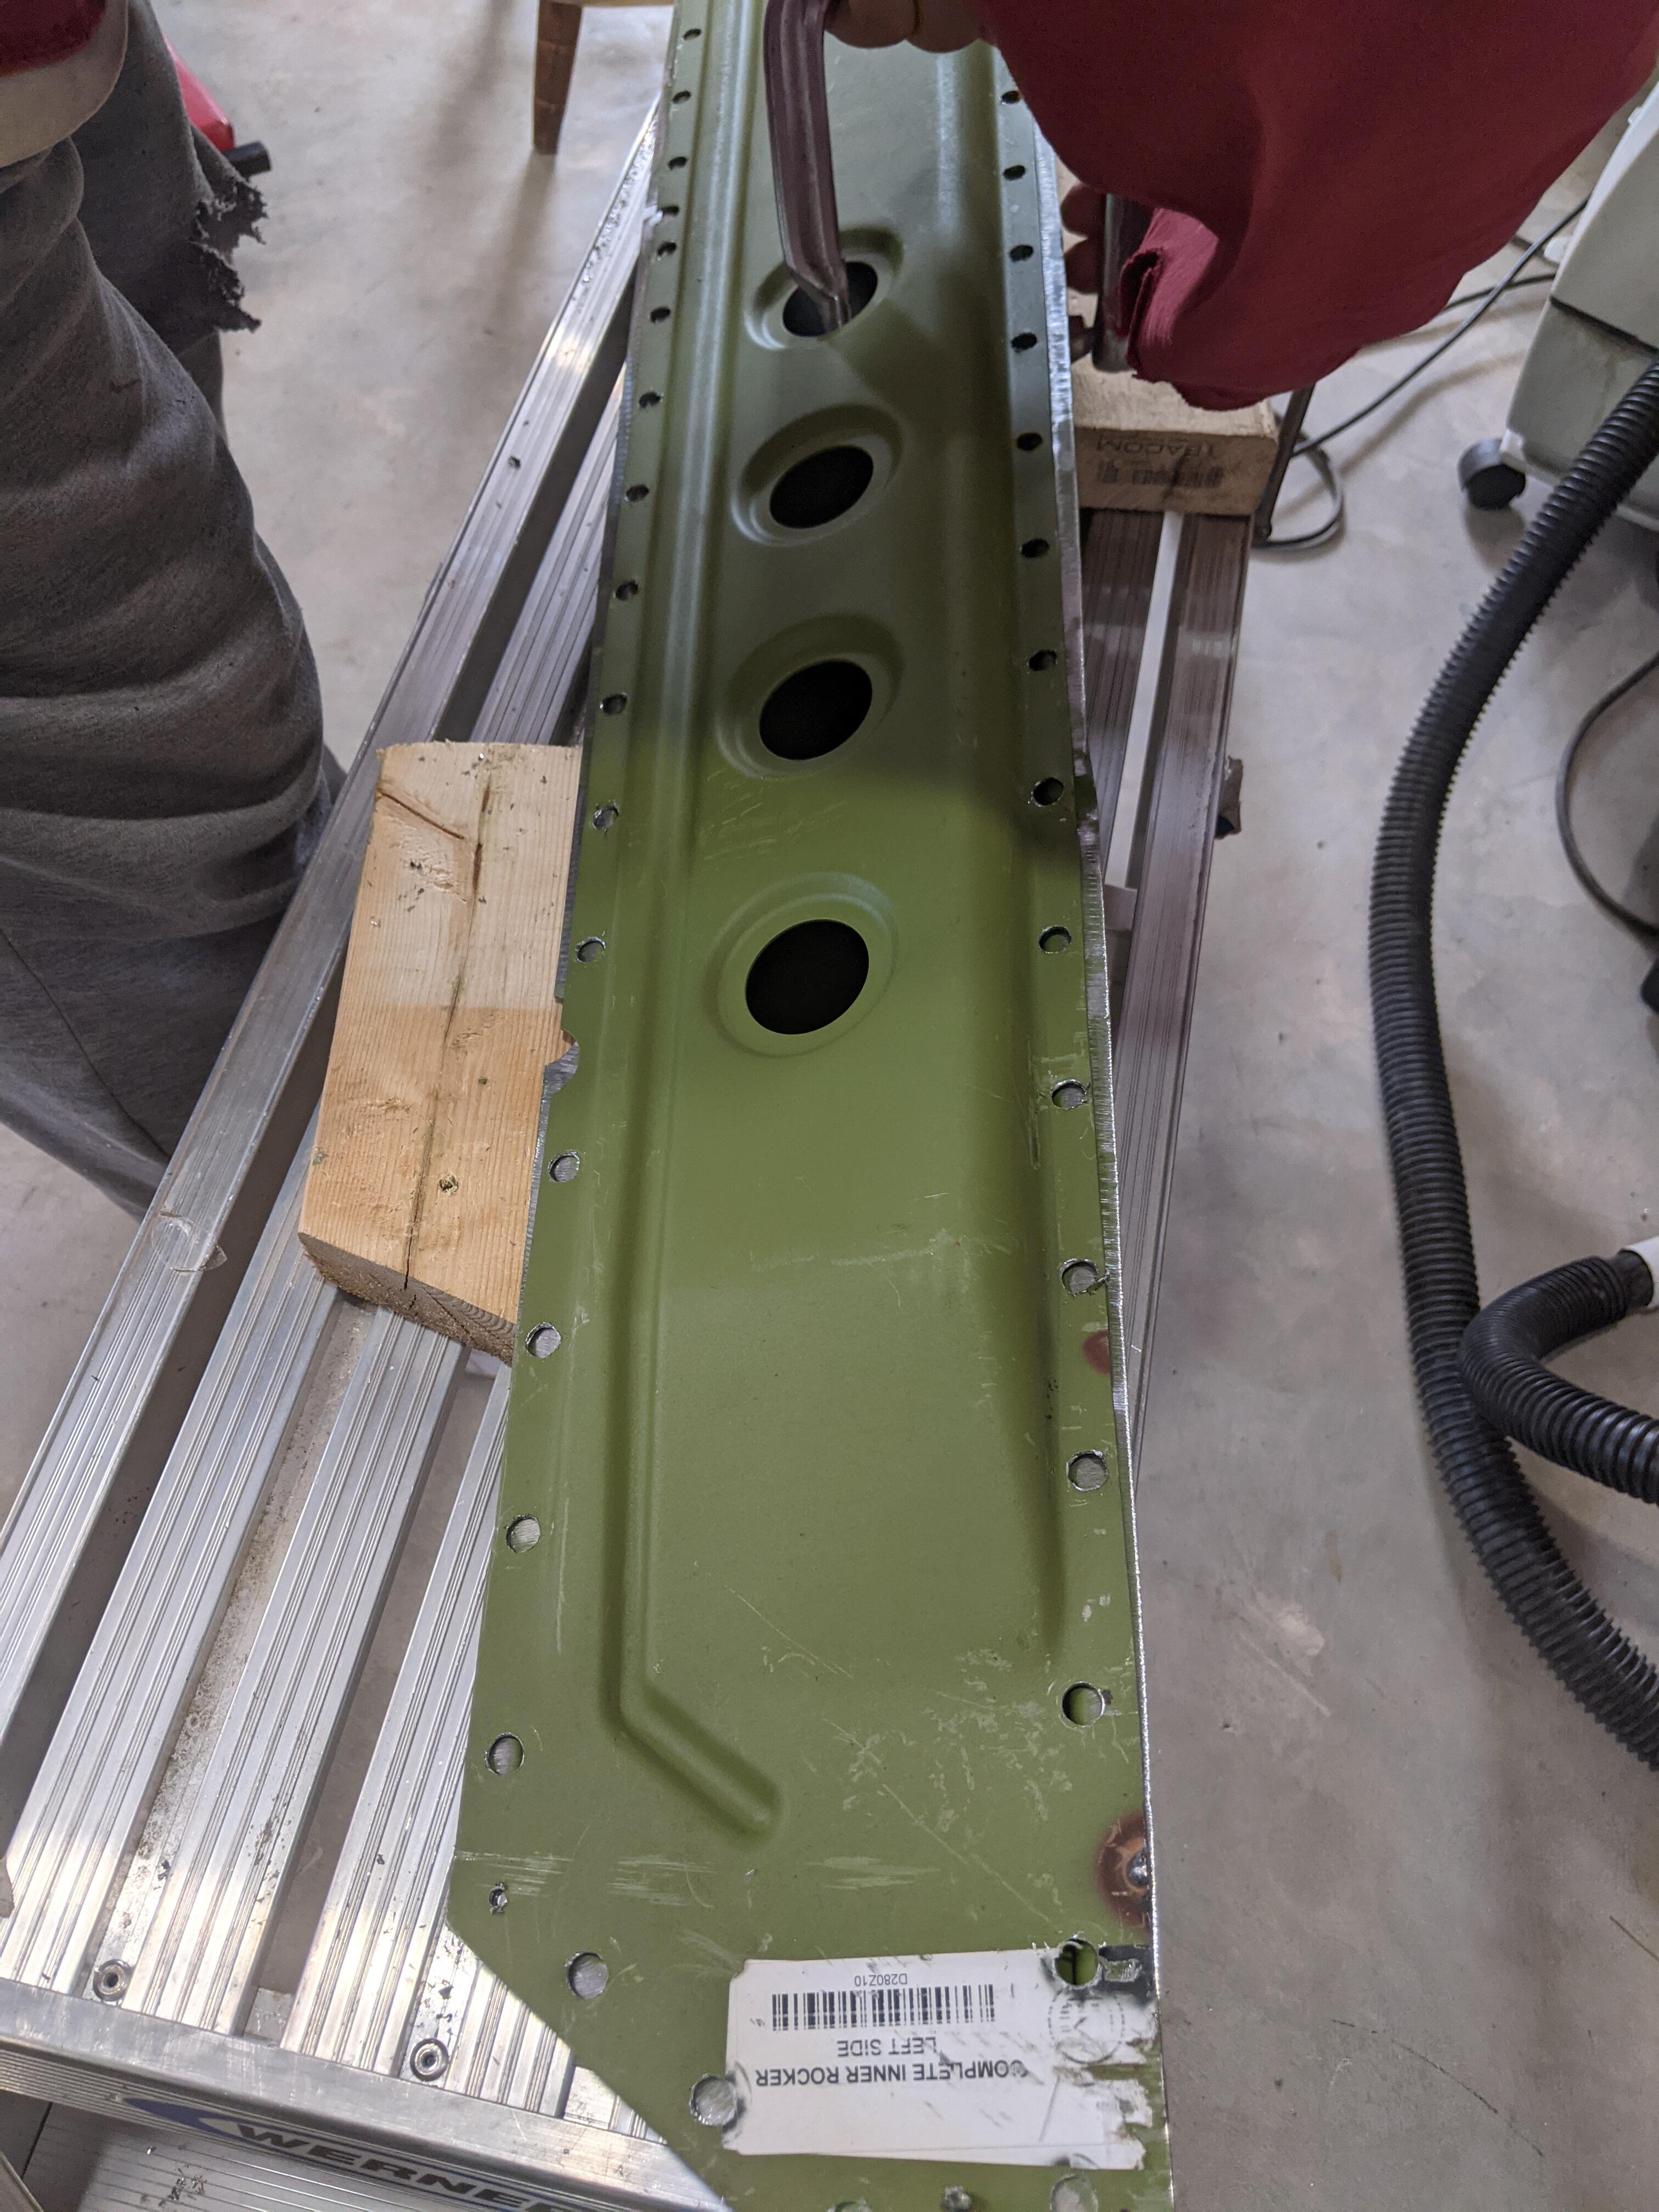
Alrighty here are a couple shots of the bottom of the Driver's side fender and the rockers. When lining them up, the Klassicfab panels include every detail of the originals as far as I could tell, so we were able to use the profile of the bottom of the A-pillar to line up the inner+outer rocker combo pretty easily. Lining up the rockers: Shot of the bottom of the new rockers+front quarter panel. Toe box is still a work in progress; previous repair job basically patched that whole area with a much less concave section, so its getting remade. Shot of the door+quarter panel alignment. Door can probably stand to be adjusted forward a bit more here.. but so far so good!:
.thumb.jpeg.f1351d15c6a396bfb38fb394c92d0645.jpeg)
.thumb.jpeg.b50627d8df2ab58e7a5cc950b076496b.jpeg)
.thumb.jpeg.a6b1505836658847329773b1d82ec540.jpeg)
-
Well so far I've only knocked out the driver's side and haven't tried fitment of that front left fender yet. But that is a good point and I will check into that. For my car, that area of the rocker was completely rotted away so there wasn't anything mechanically holding it on (I used magnets). That and the tab on the fender itself had also rusted off. So I figure it can only be better in my case lol. On the passenger side we will have to be more careful. I'll try and get a picture when I check fitment for the driver's side fender..
-
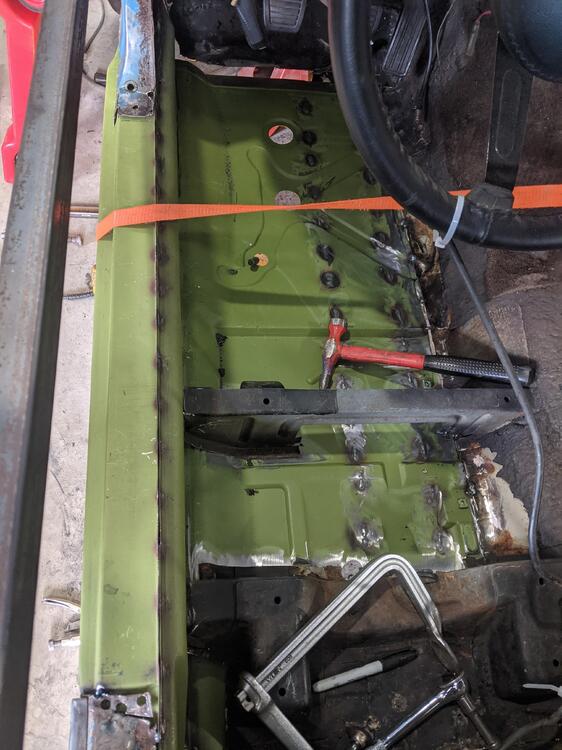
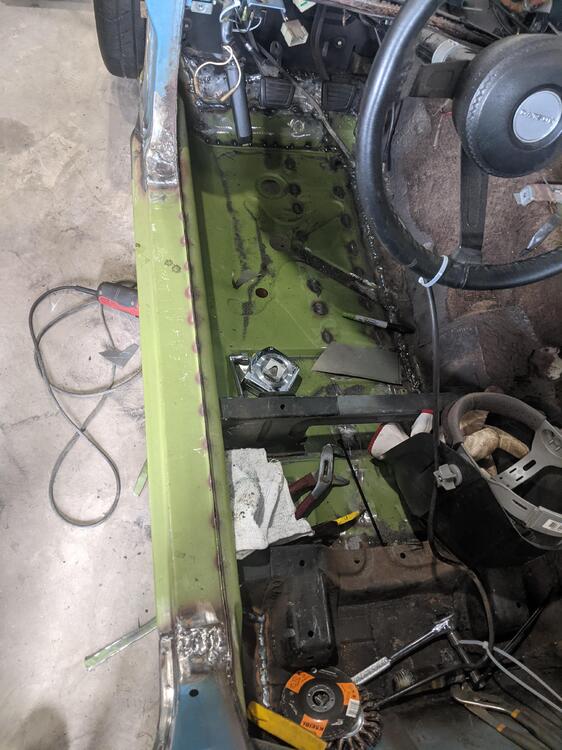
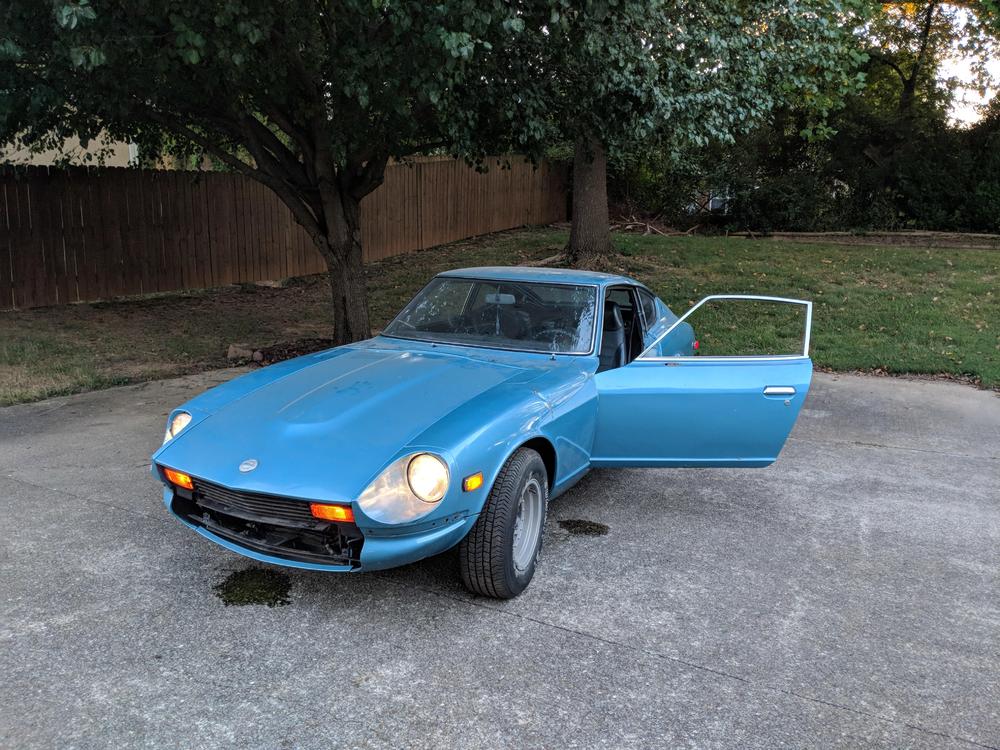
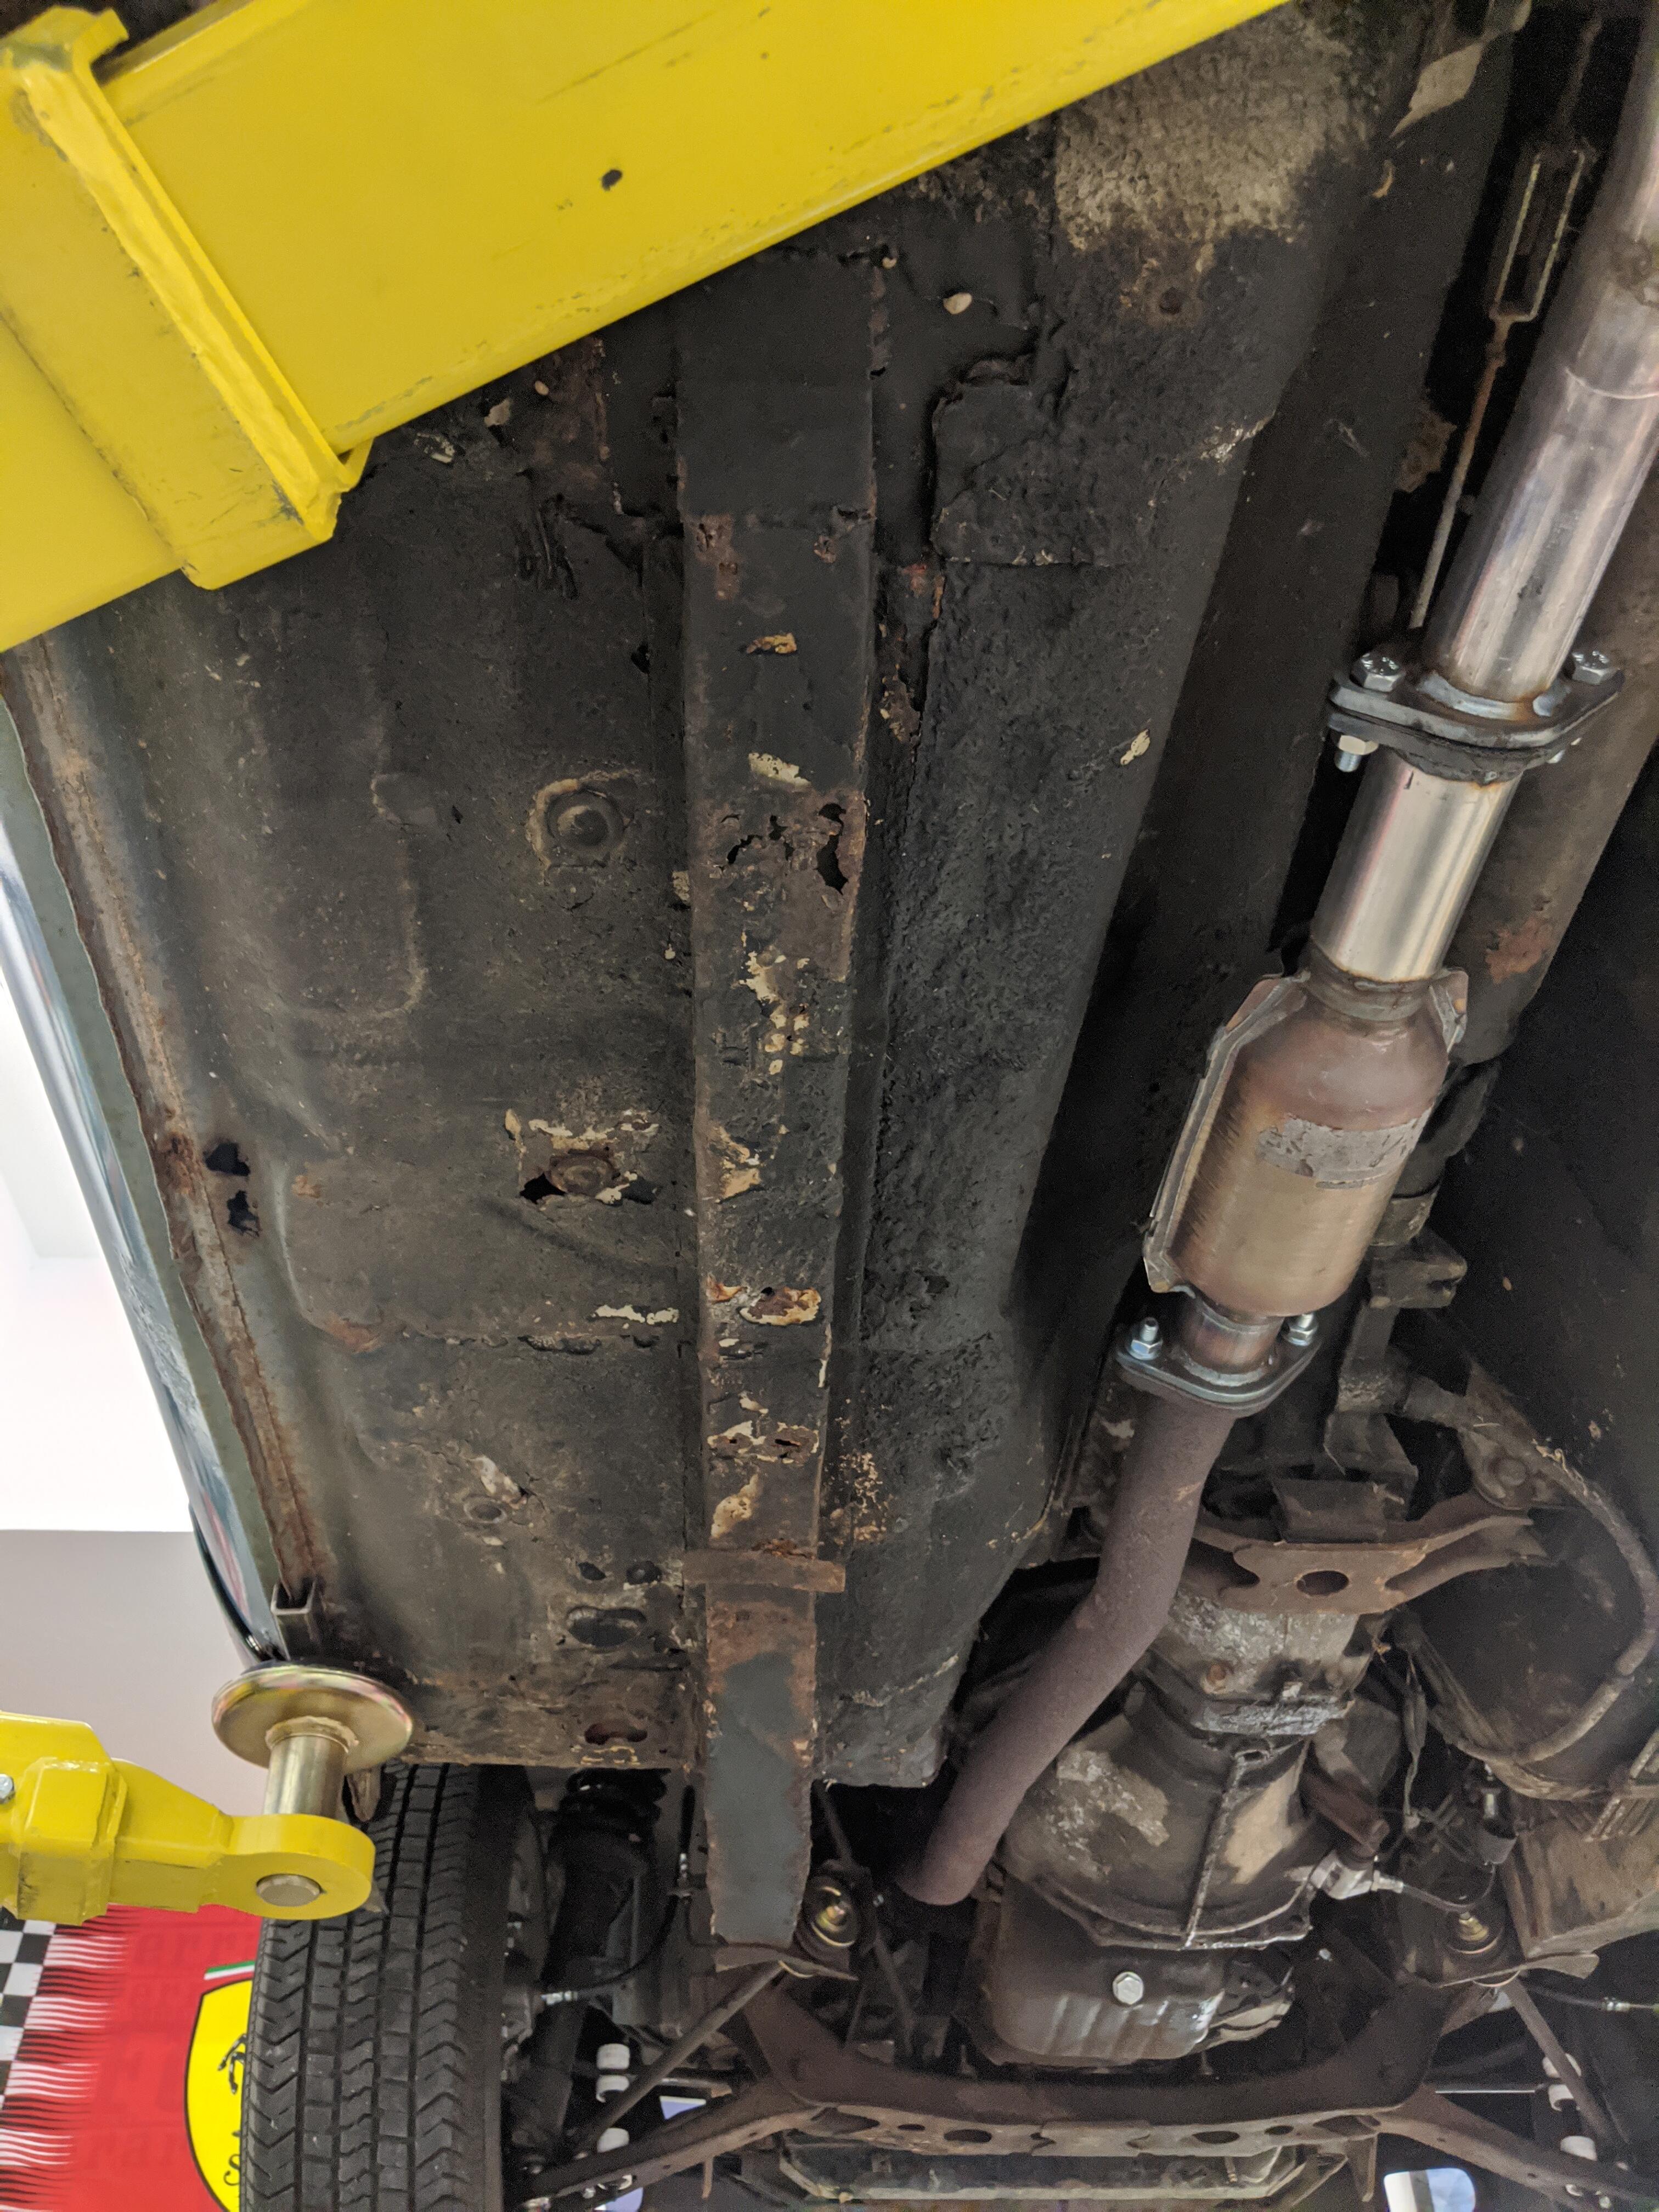
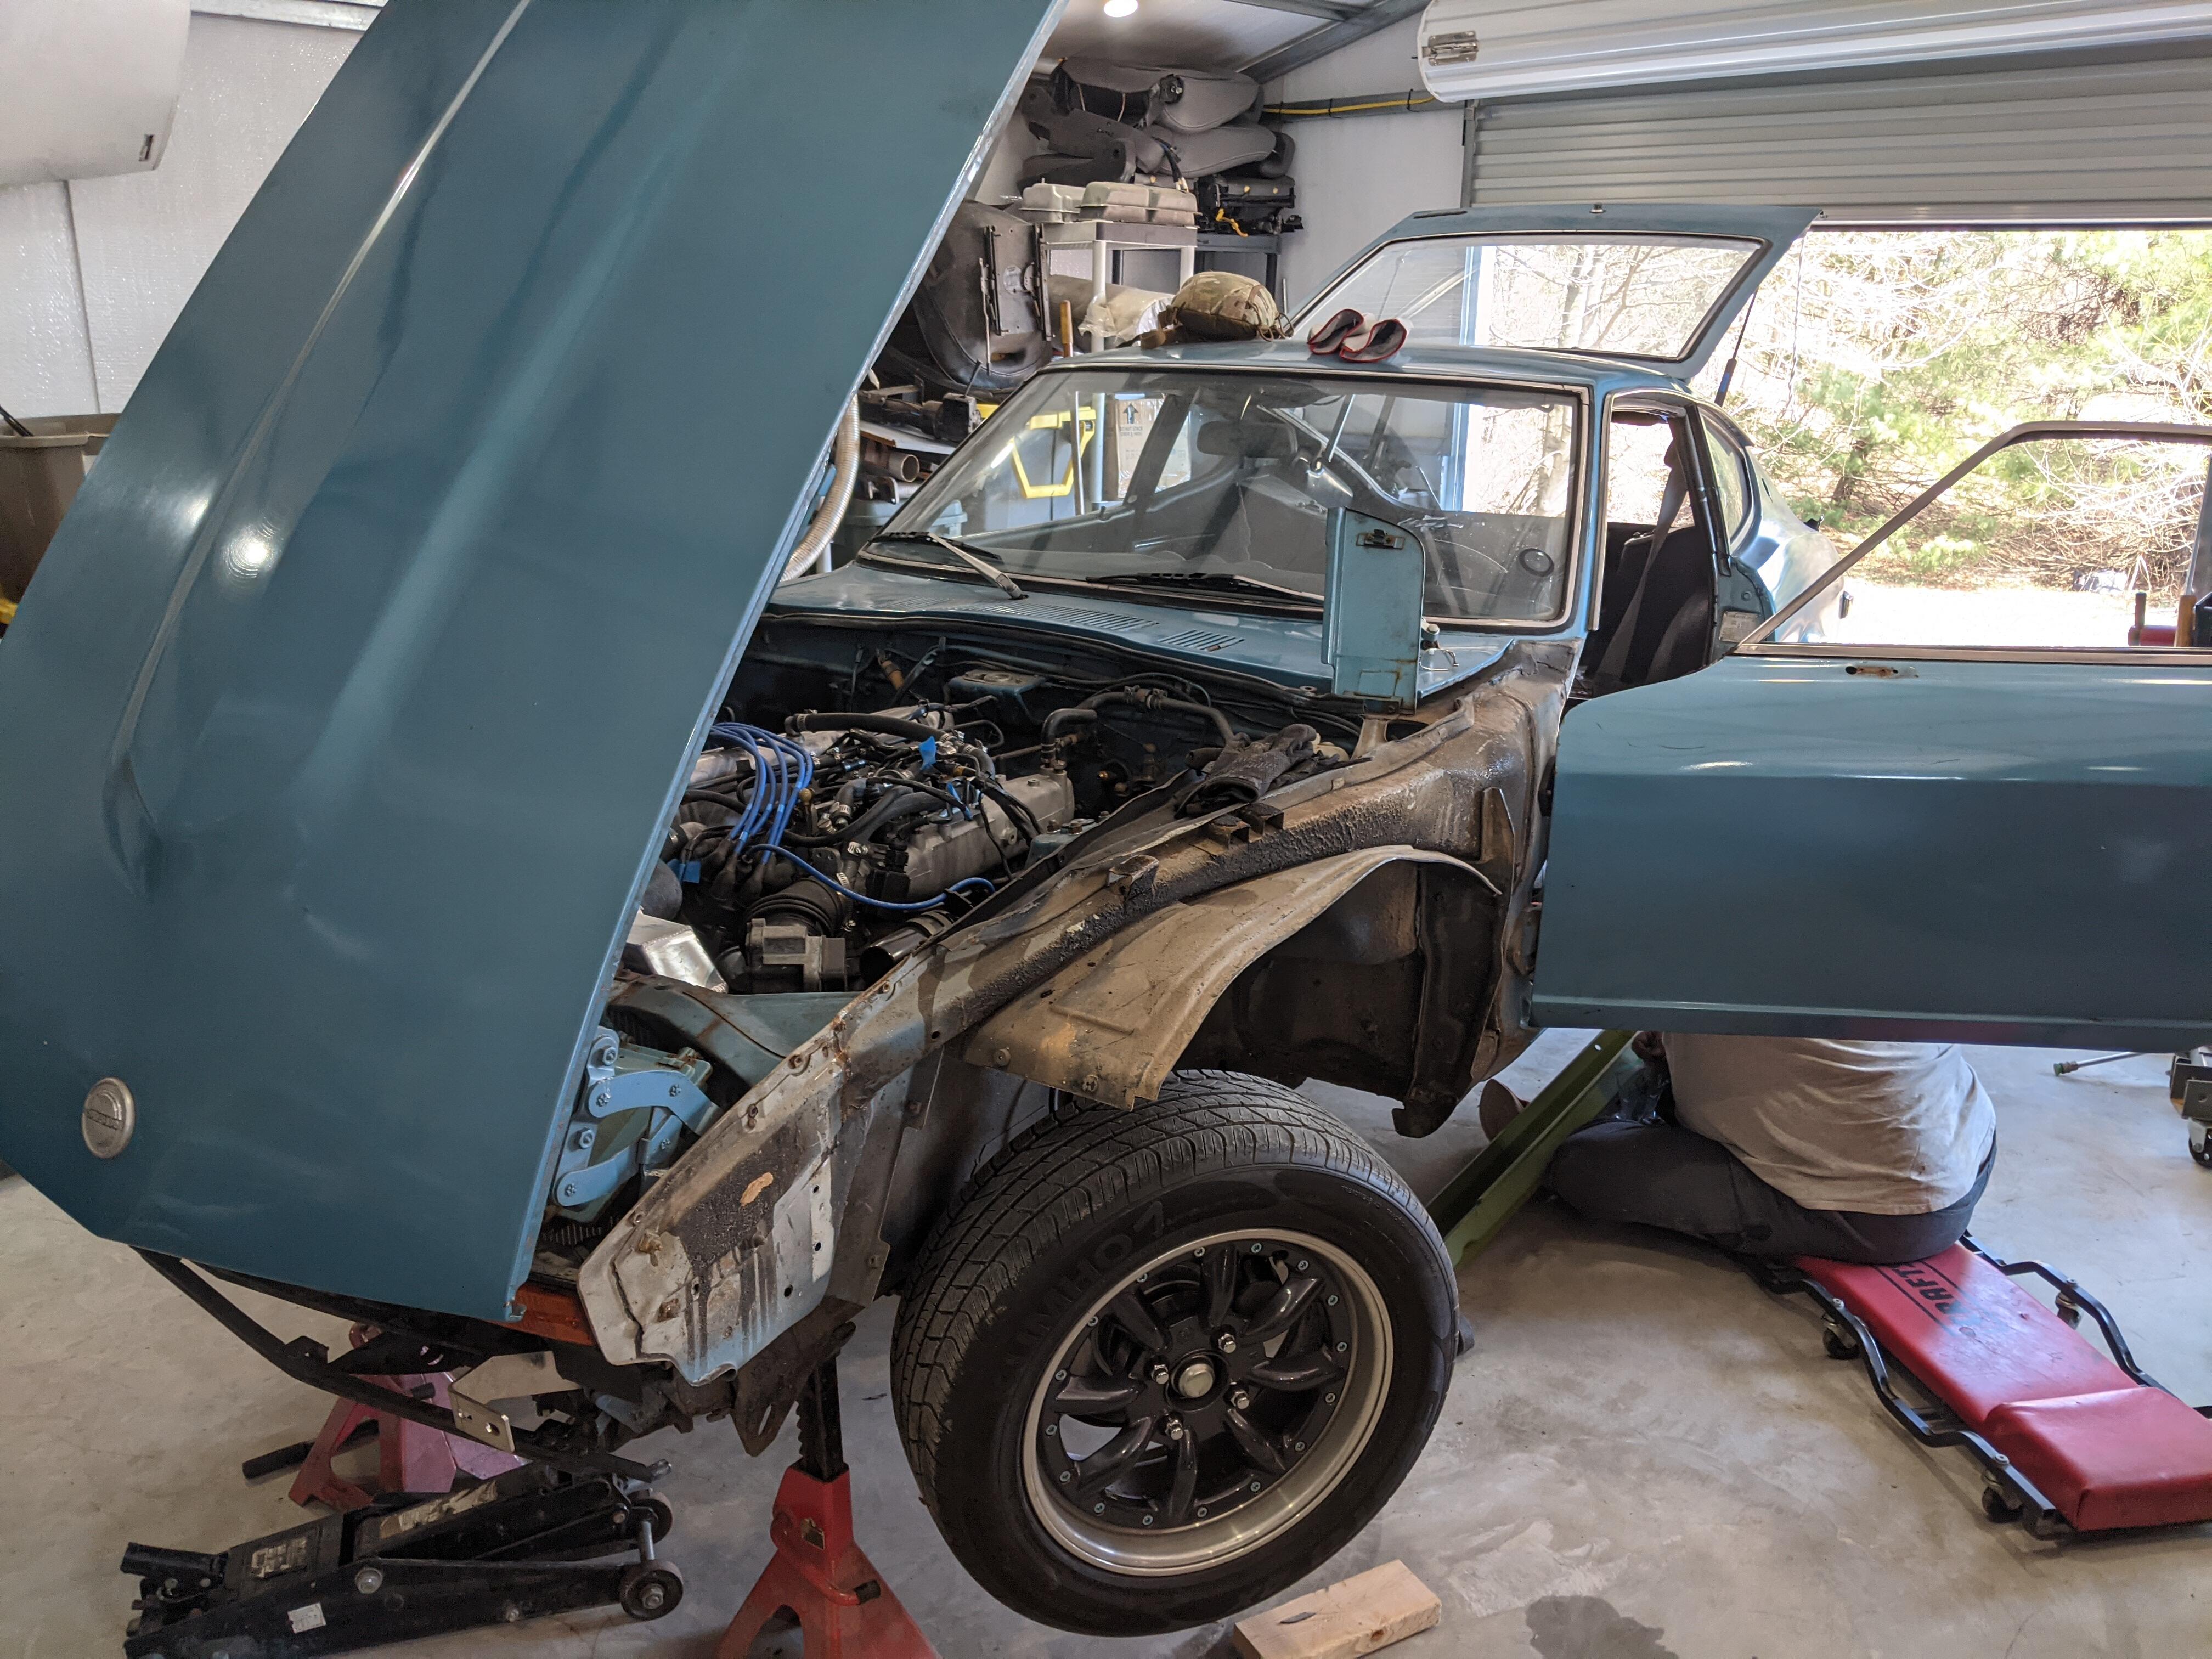
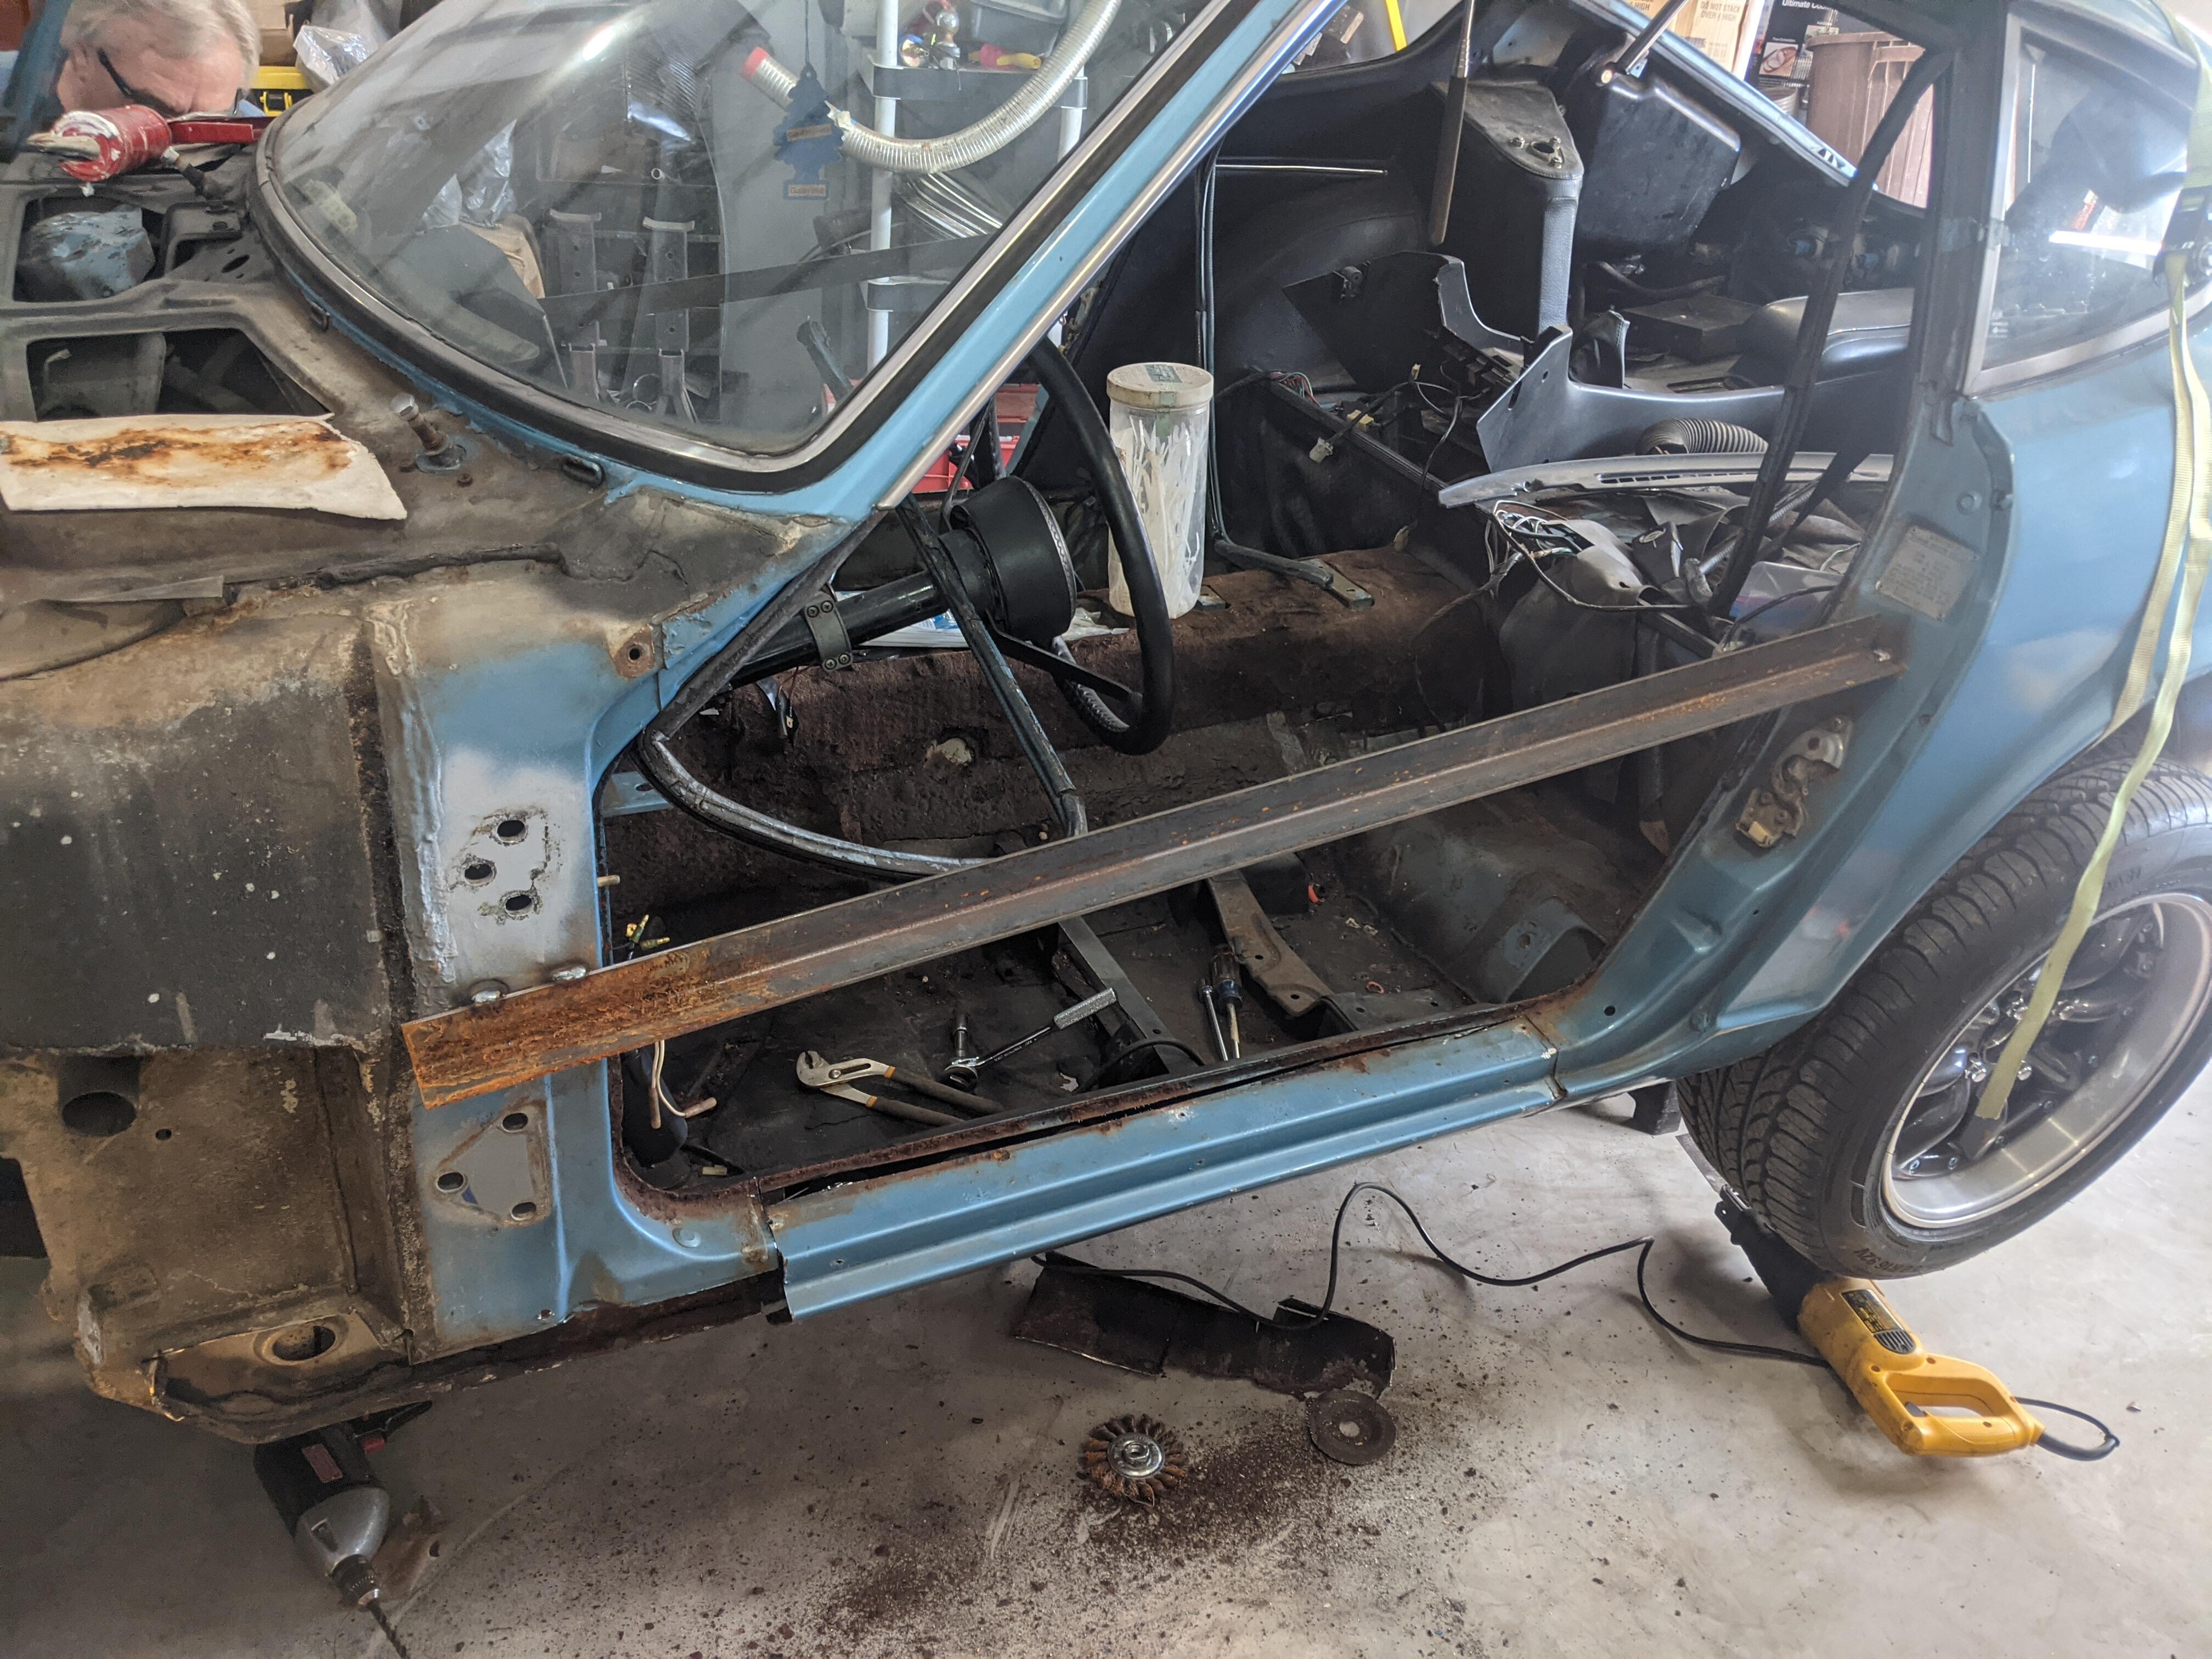
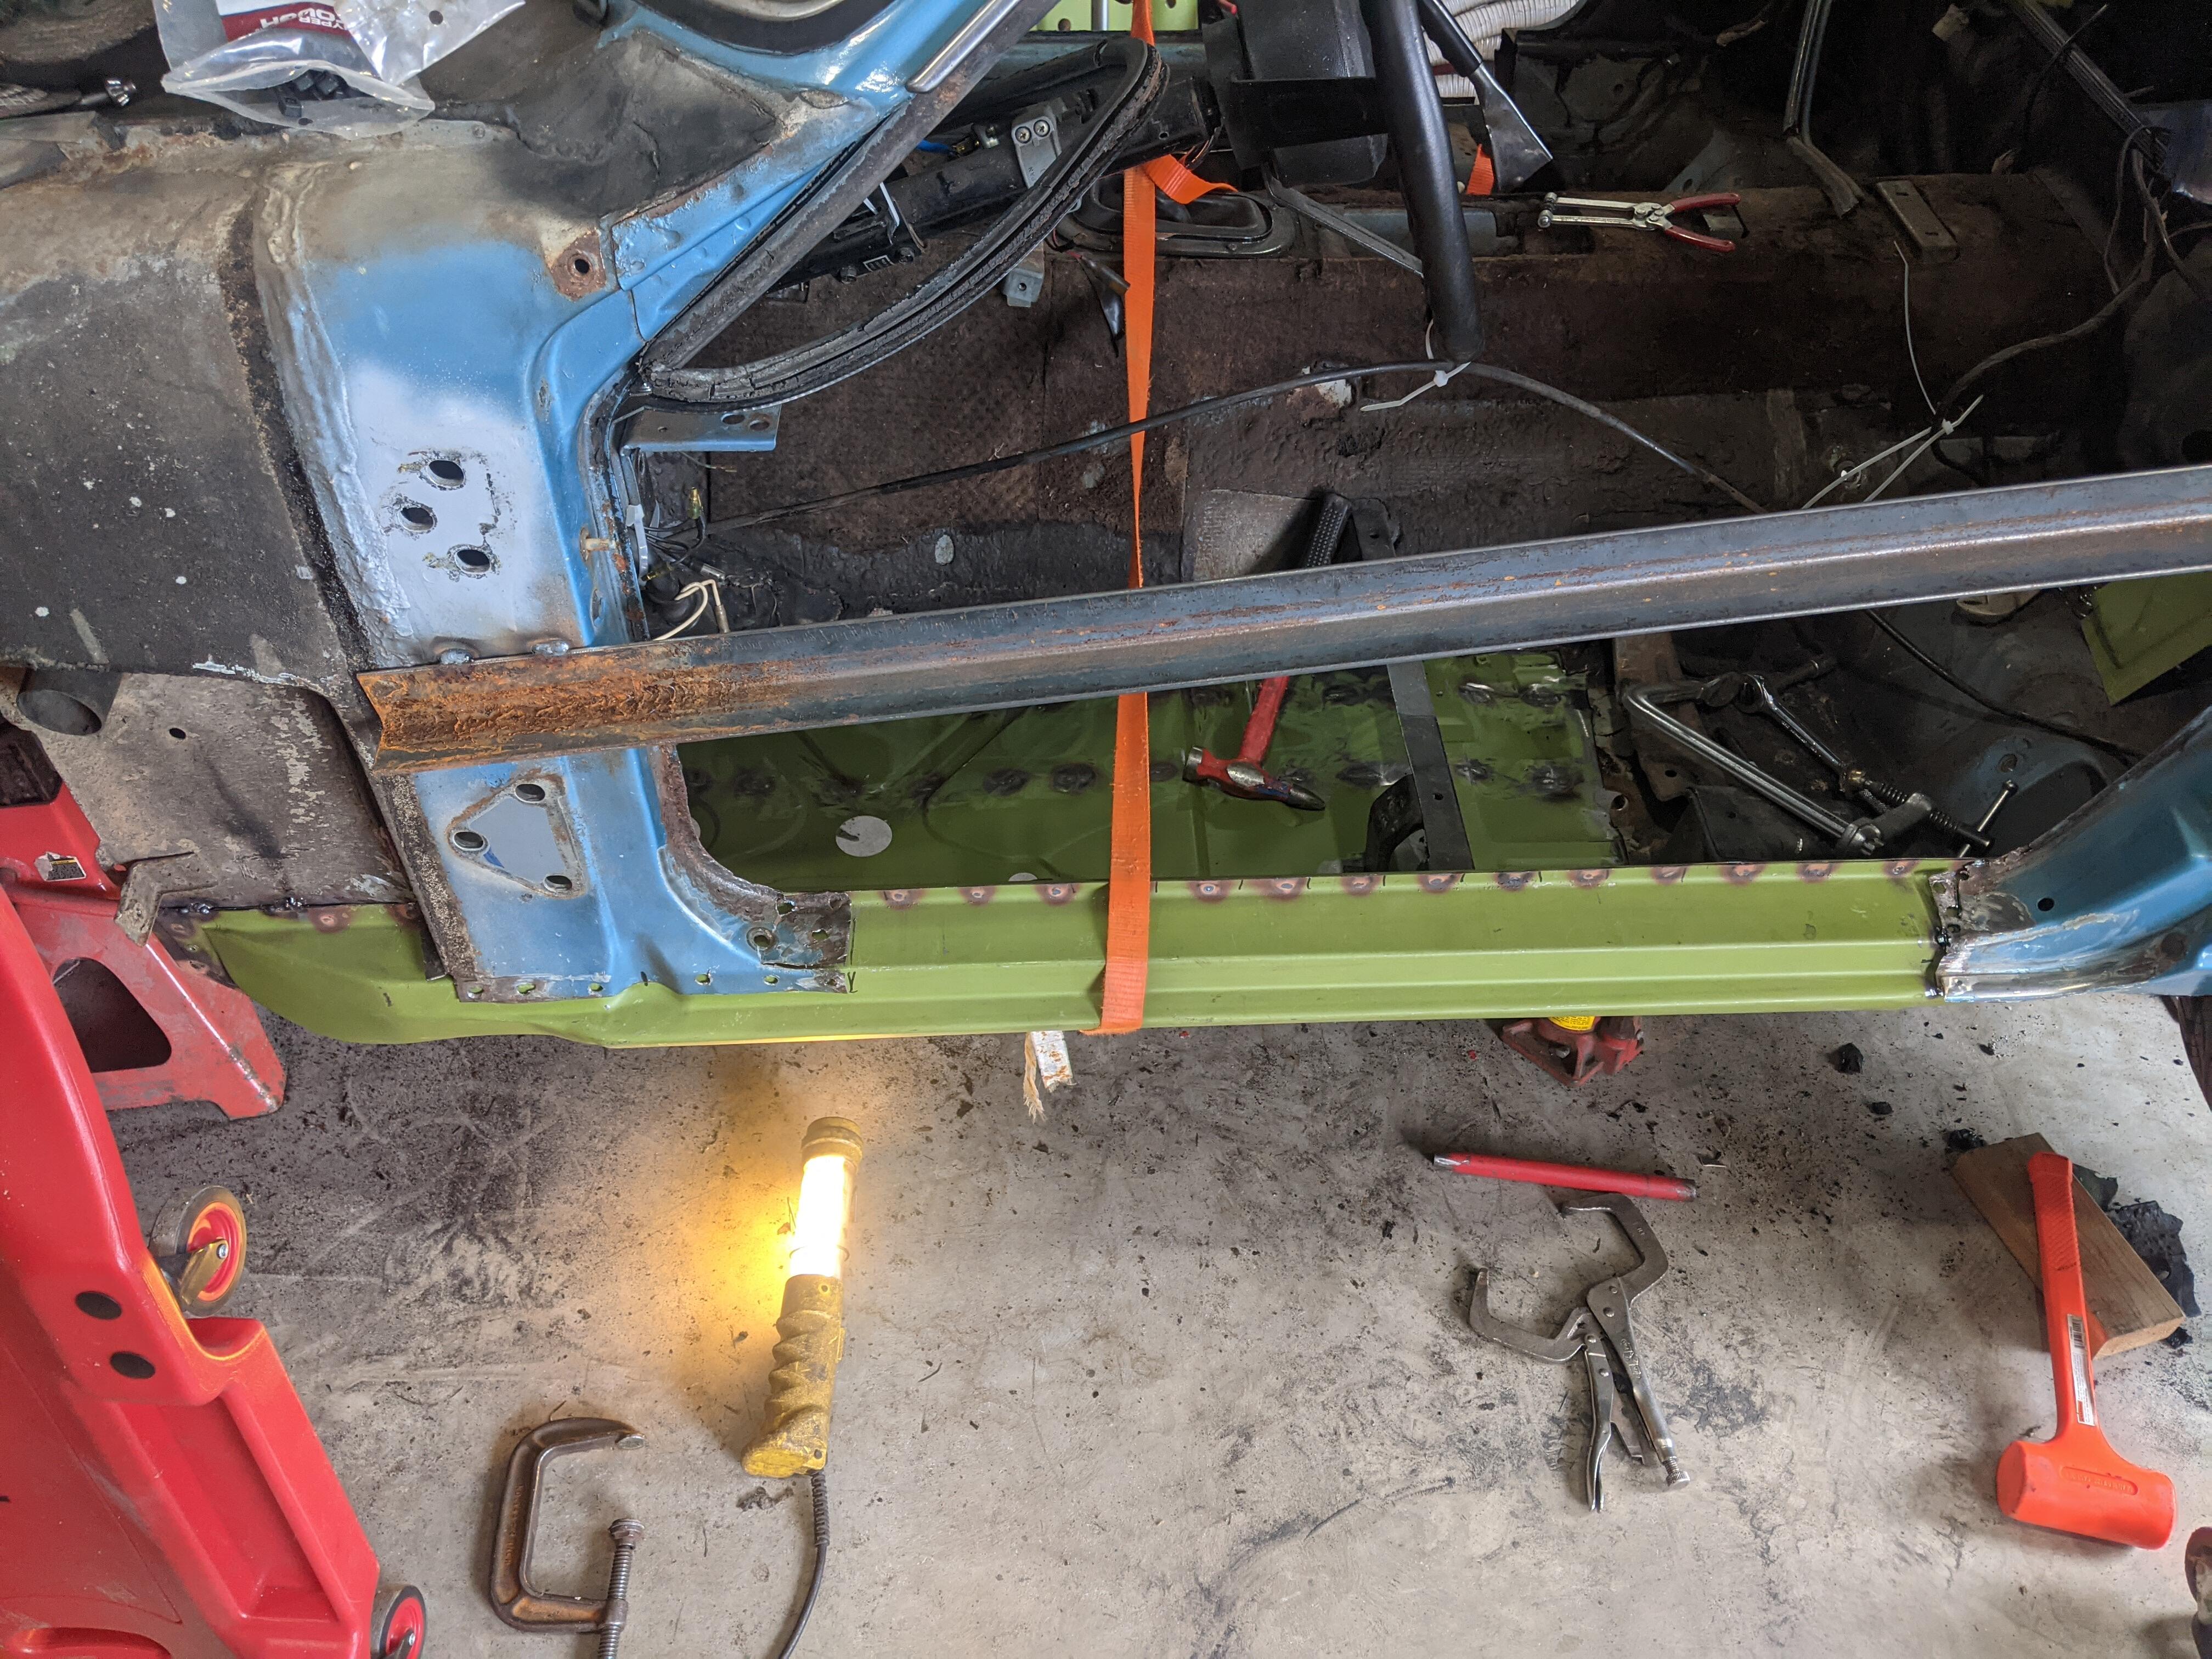
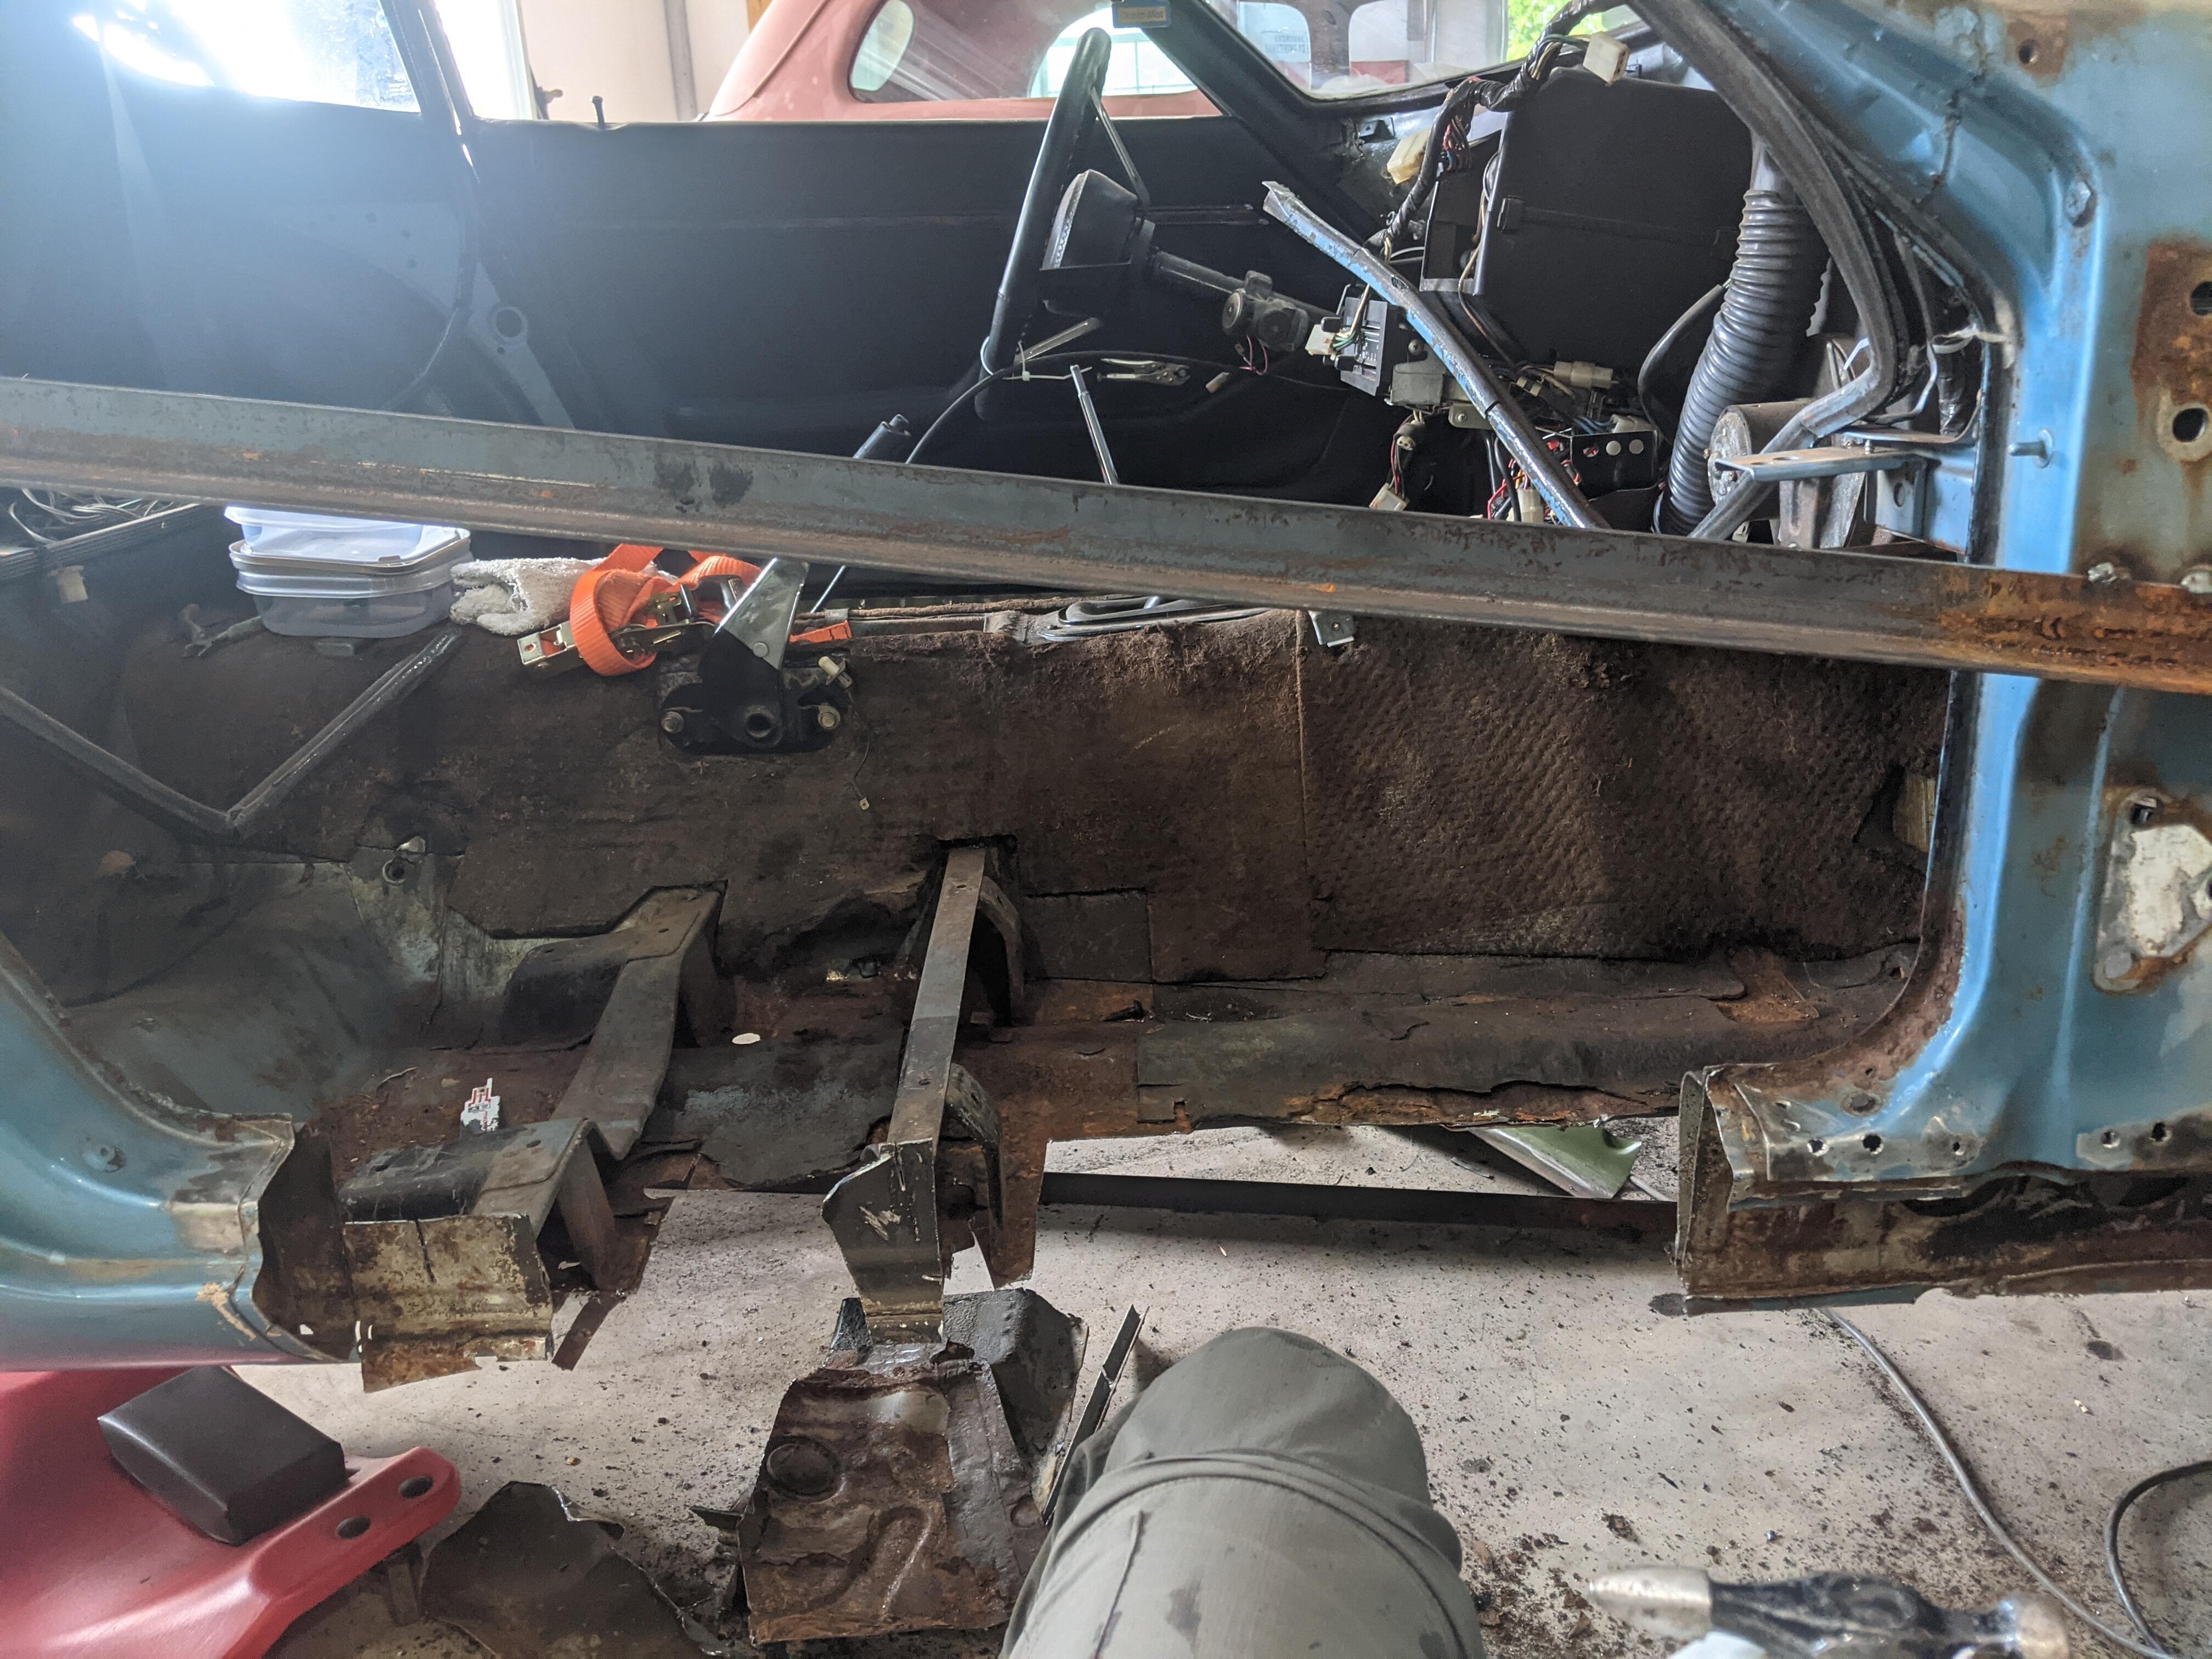
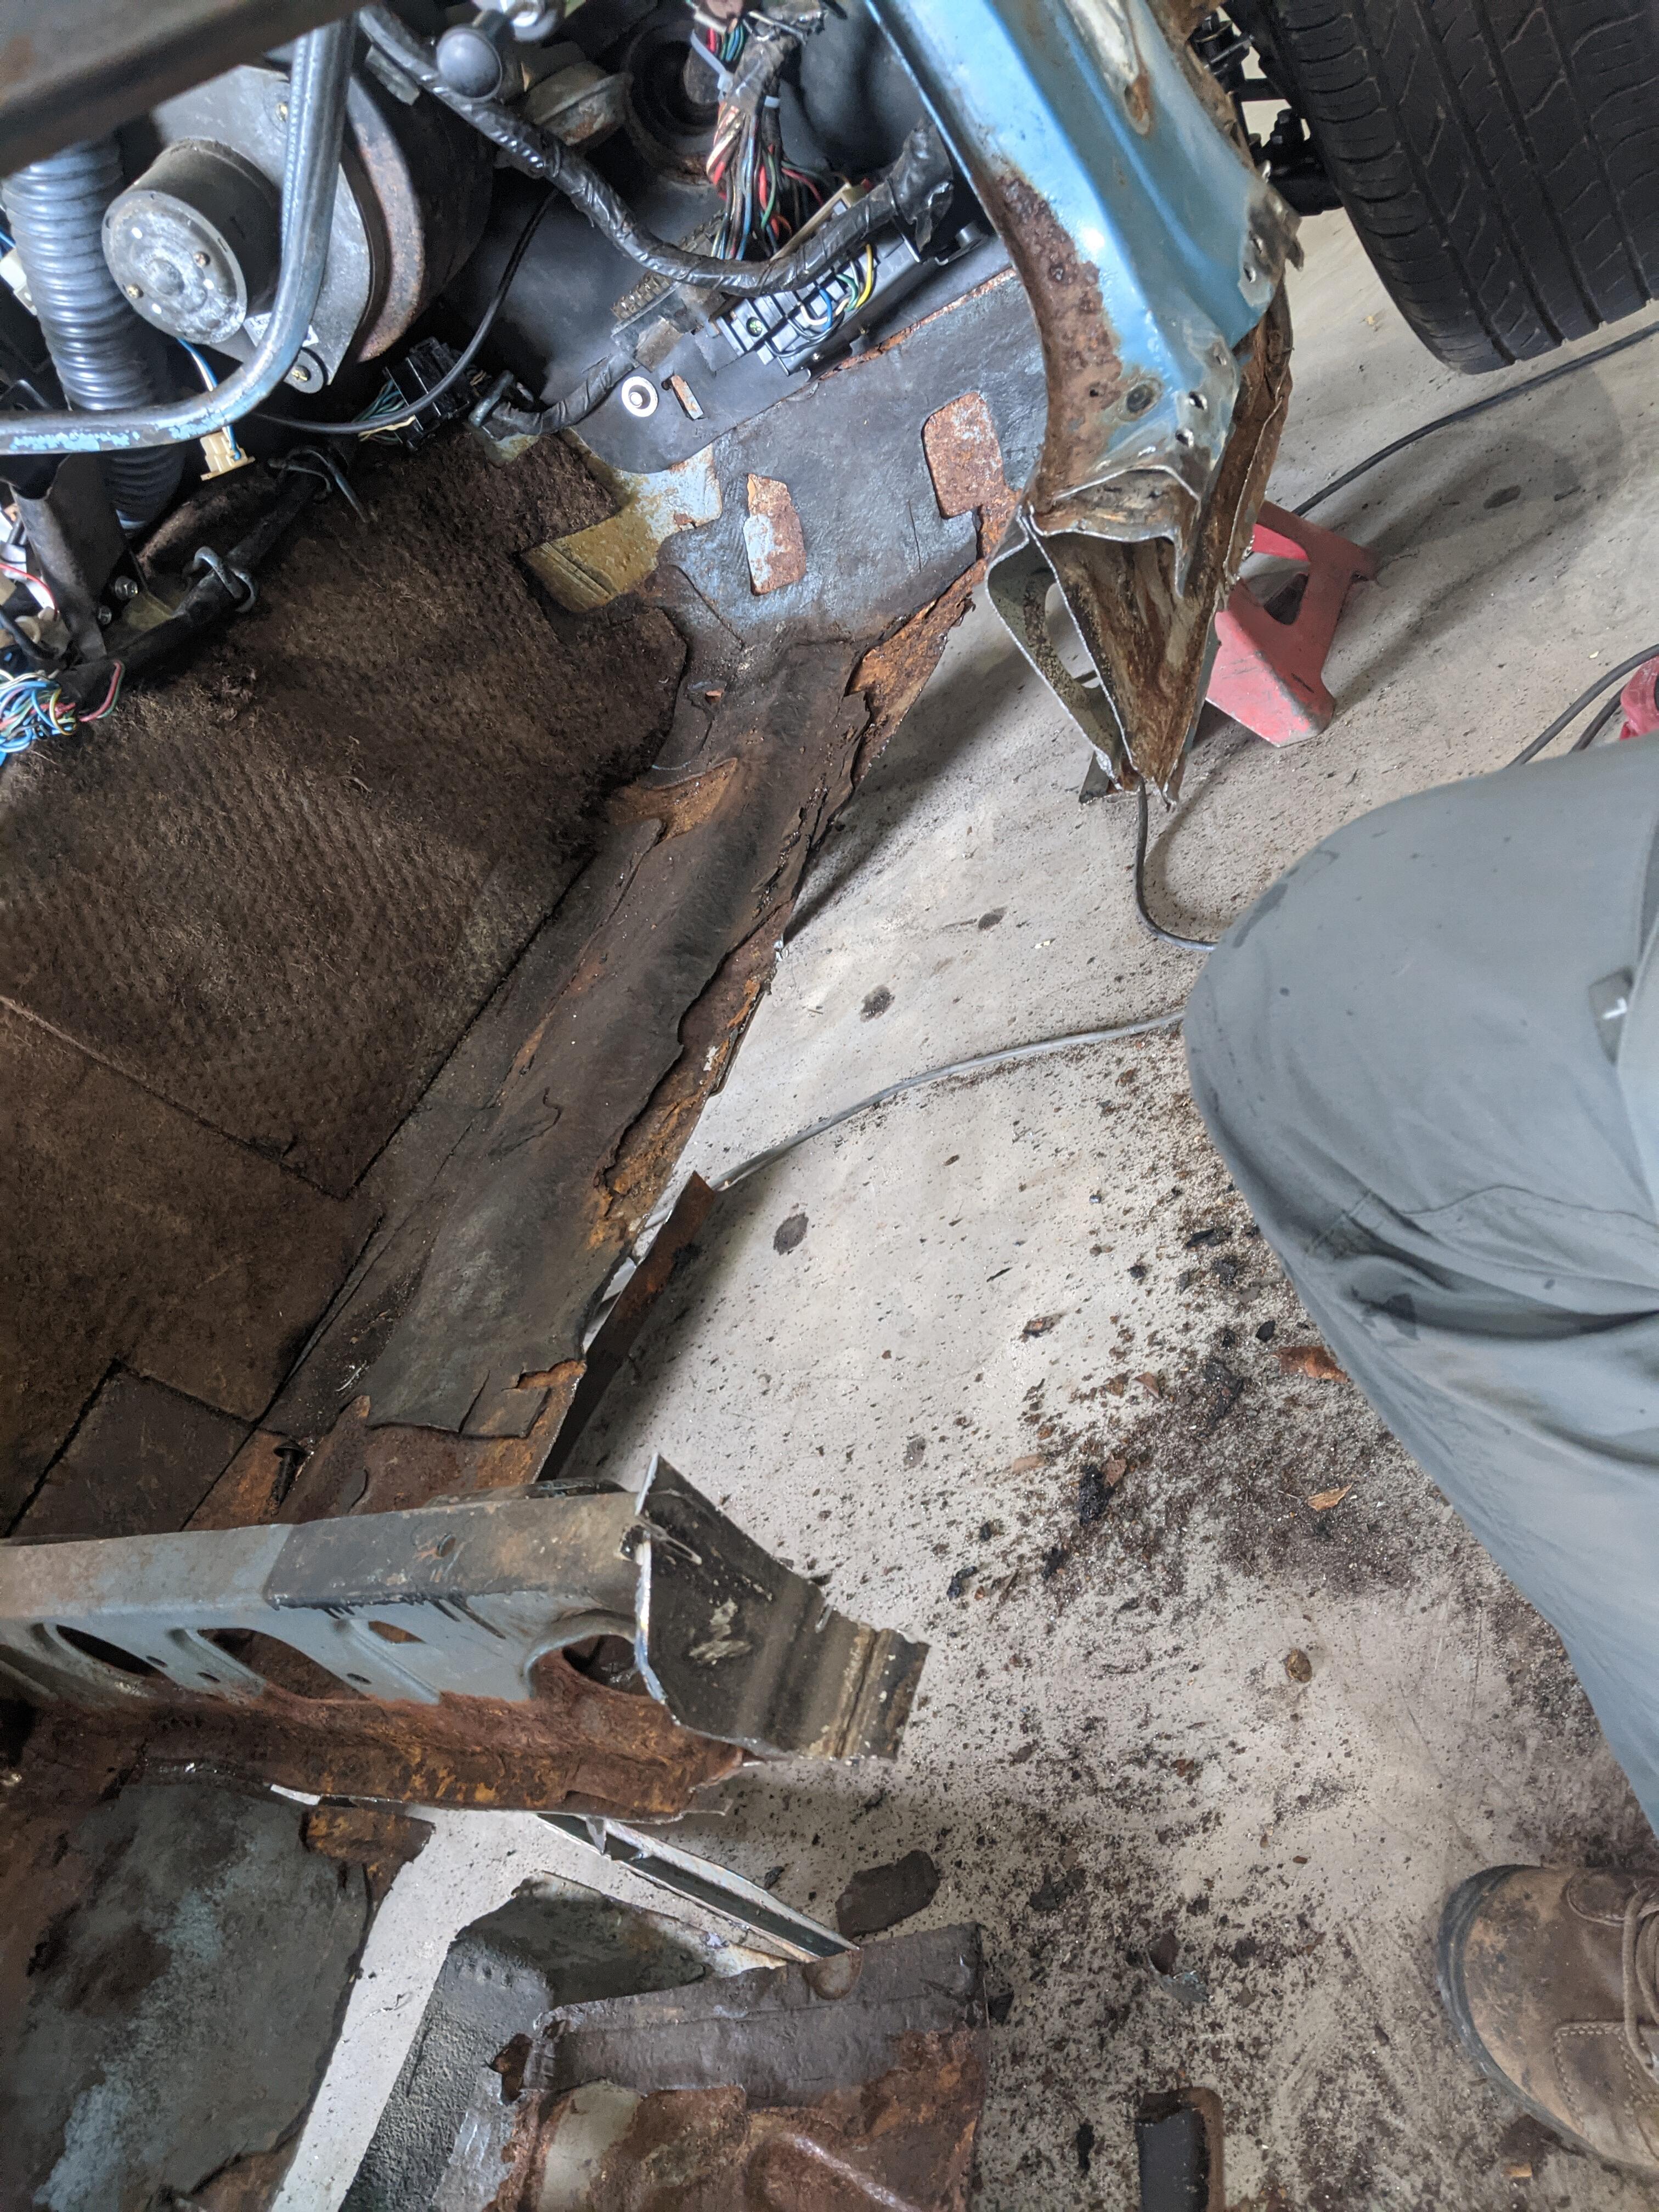
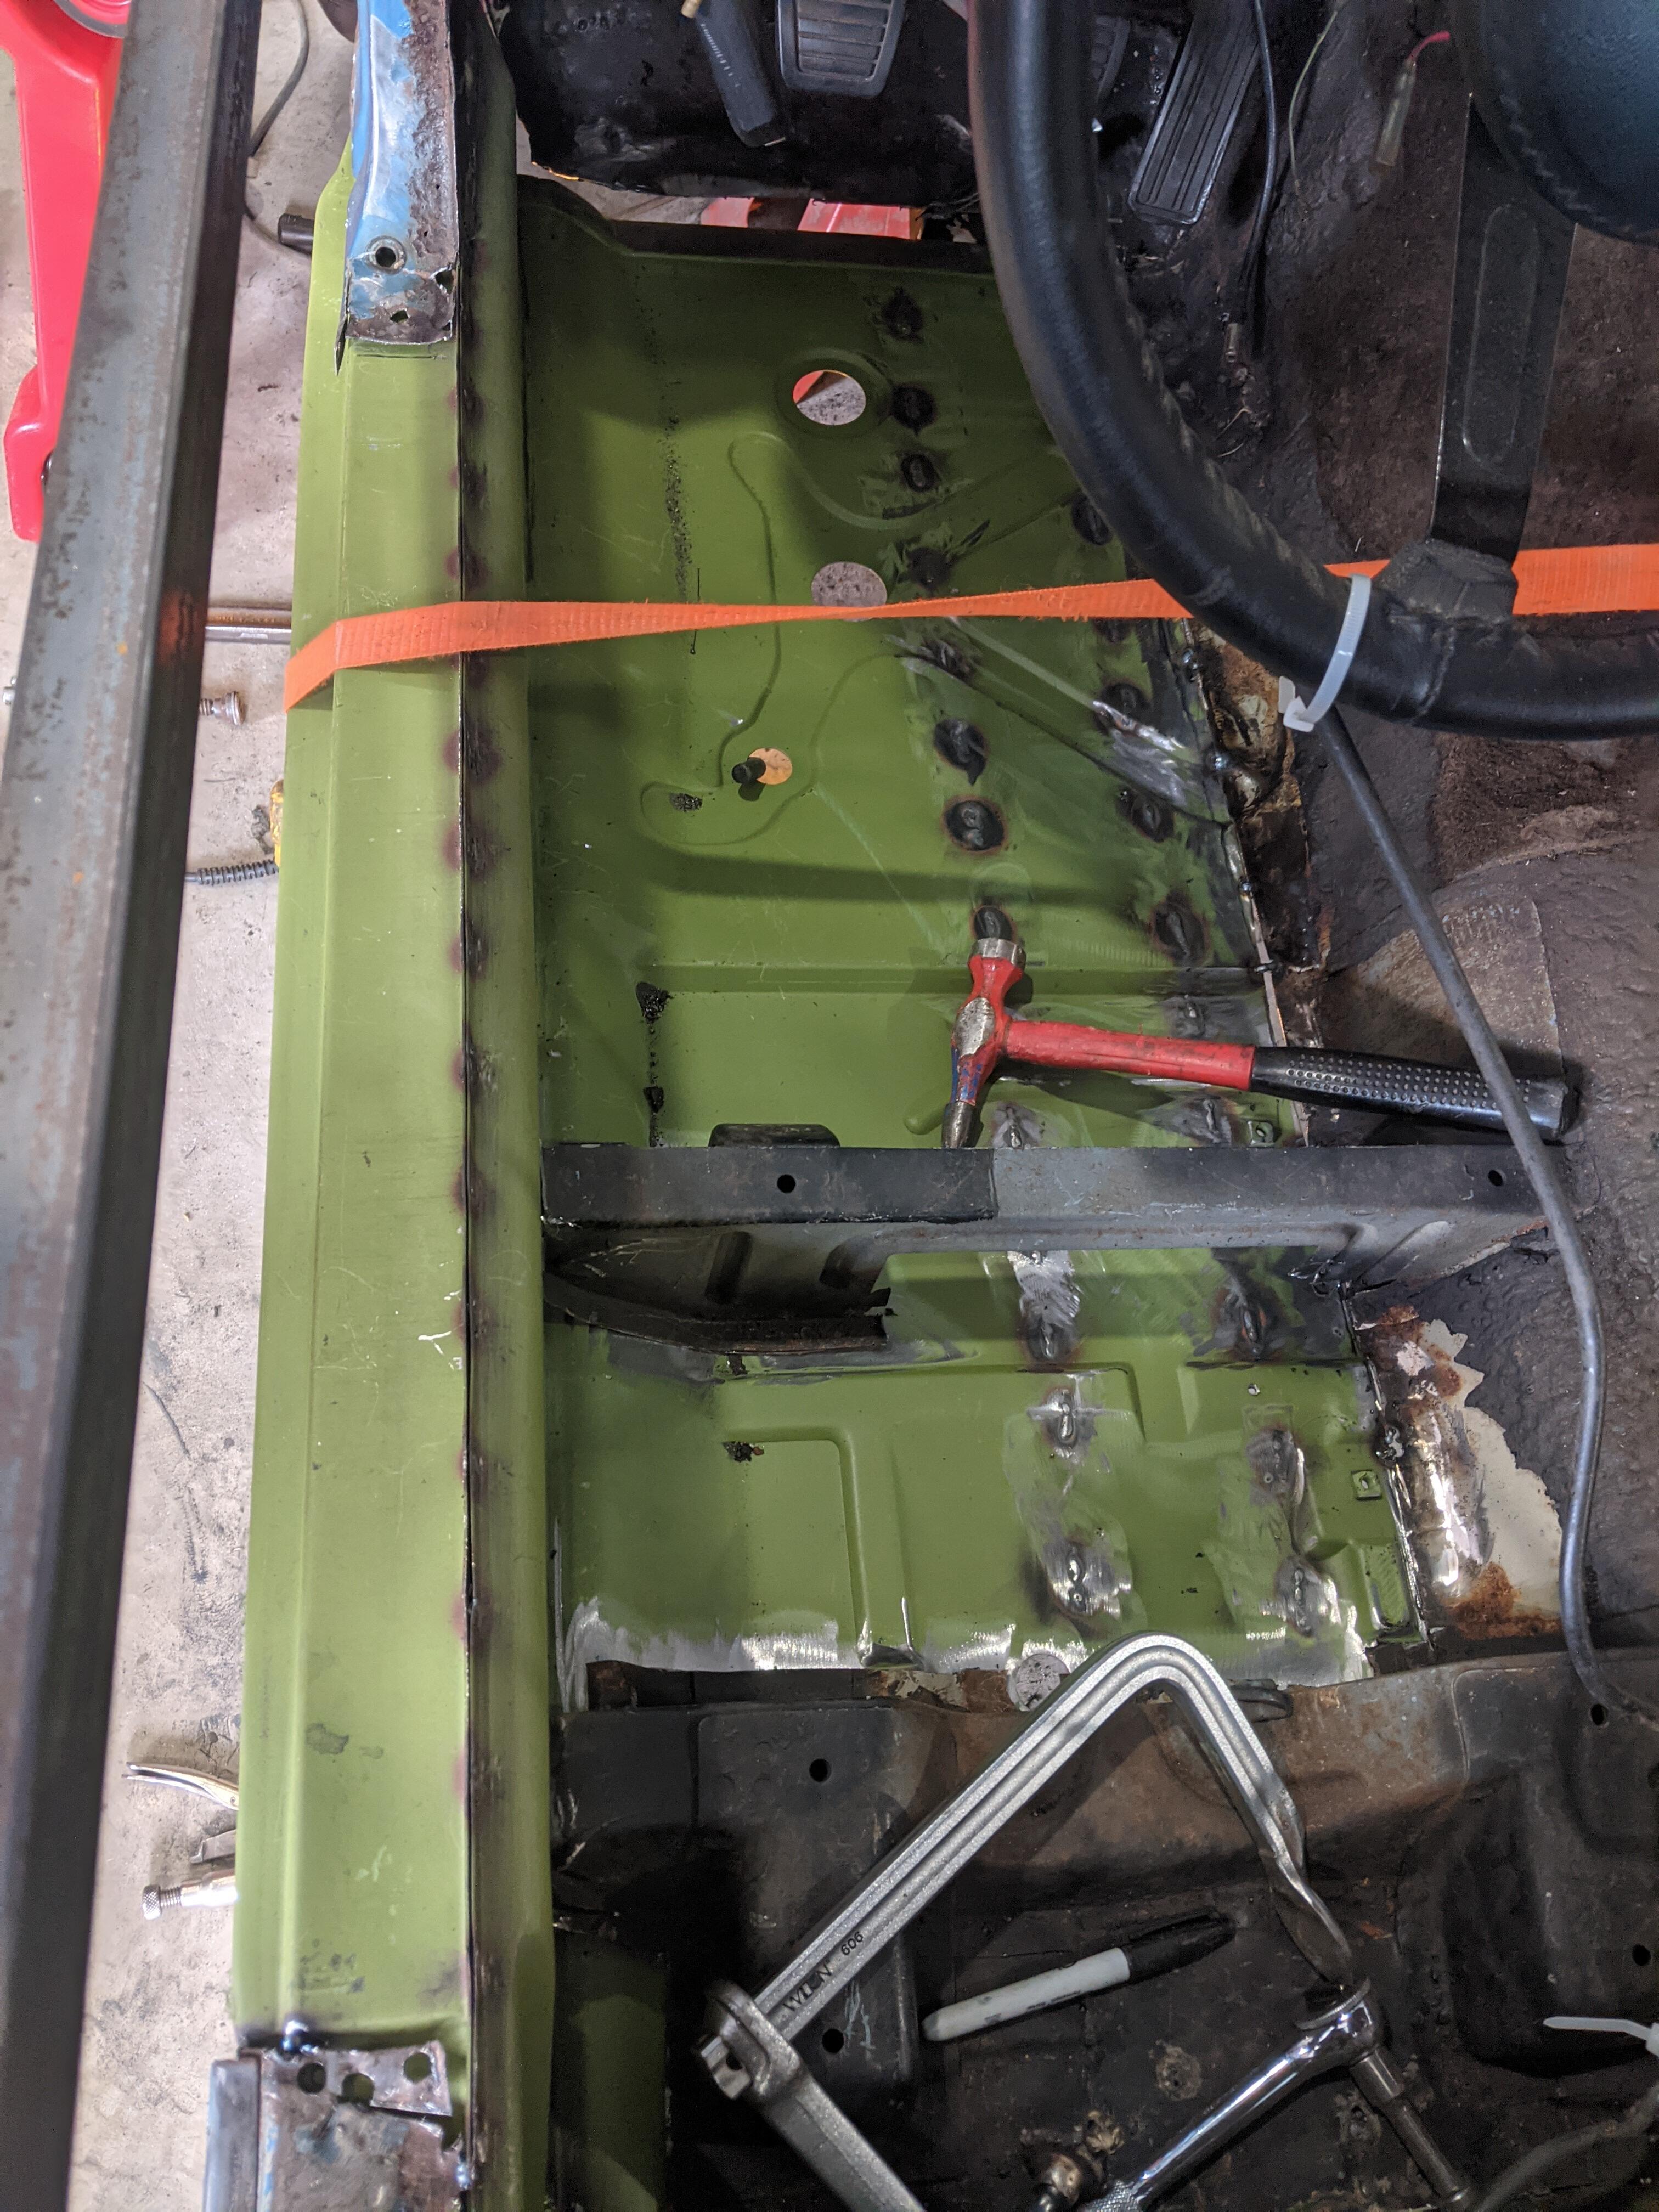
Just wanted to show some of the work I've been doing on my Z to fix some thoroughly rusted floorpans and rockers. It is still very much in-progress but I'll try to update as it goes on. Hopefully it'll be of help to someone as a reference, or at least encourage folks to give it a shot. If you see anything wrong with the approach, please let me know! Some quick background: The car is a '75 that I picked up in KY a few years back. Since then I fixed the fuel system and got it running, squared away the suspension (new bushings, shocks, springs, hubs, etc etc). But that is where my skill set ran out; never welded and never done resto work. Kept trying to find a shop to do the body work, but never had any luck. Then I moved and ended up close to a family member who happens to be a retired welder and enjoys doing resto/custom work on cars. Perfect chance to dive into the Z! So I bought a set of the Klassicfab panels and we dove in. The floors/rails started off like so: Driver's Side: Driver's side outer rocker looking rough: Passenger side: The drivers side was worse, but both were pretty shot. There had been a previous repair to the drivers side floor pan in 2 areas, and the rail had been reinforced as well. But both floorpans were perforated in many areas and the rockers on both sides were pretty shot. The frame rails were also obviously shot. First up, we got the car on blocks and welded in some braces. Then we removed the driver's side inner and outer rockers and floorpan (scary initially to cut into the car, but that wore off quick), leaving the seat braces largely intact. Then we welded together the new rockers (inner to outer), and welded the new frame rail to the bottom of the floorpan and tacked those in: Then we welded those in.. or actually my Uncle did most of it because that is some EXPERT level welding; that steel is THIN And then a quick check for door fitment.. should have done this after the tacks and BEFORE welding.. thankfully lined up fine (not perfectly lined up here because the bolts aren't tightened yet) Next onto the passenger side.. same strategy; started cutting out the rockers and floorpan Nice shot of the 4-layer 'sandwich' that is the rockers+pan+bottom of the A pillar: And thats as far as I've made it thus far.. more to follow in the future. What a dirty and laborious job.. but also highly rewarding so far. I am learning a ton! -Ben


-
In the middle of installing floors and rockers in my 280Z; their panels have been a great fit so far. Wish they made more areas on the car!

-
good point about the signature 😄
-
It does appear to of rusted from the inside out. I do not believe klassicfab makes those particular panels for the 280z.. I wonder if they would be the same though? Thanks for the feedback; always good to know its a common problem..
-
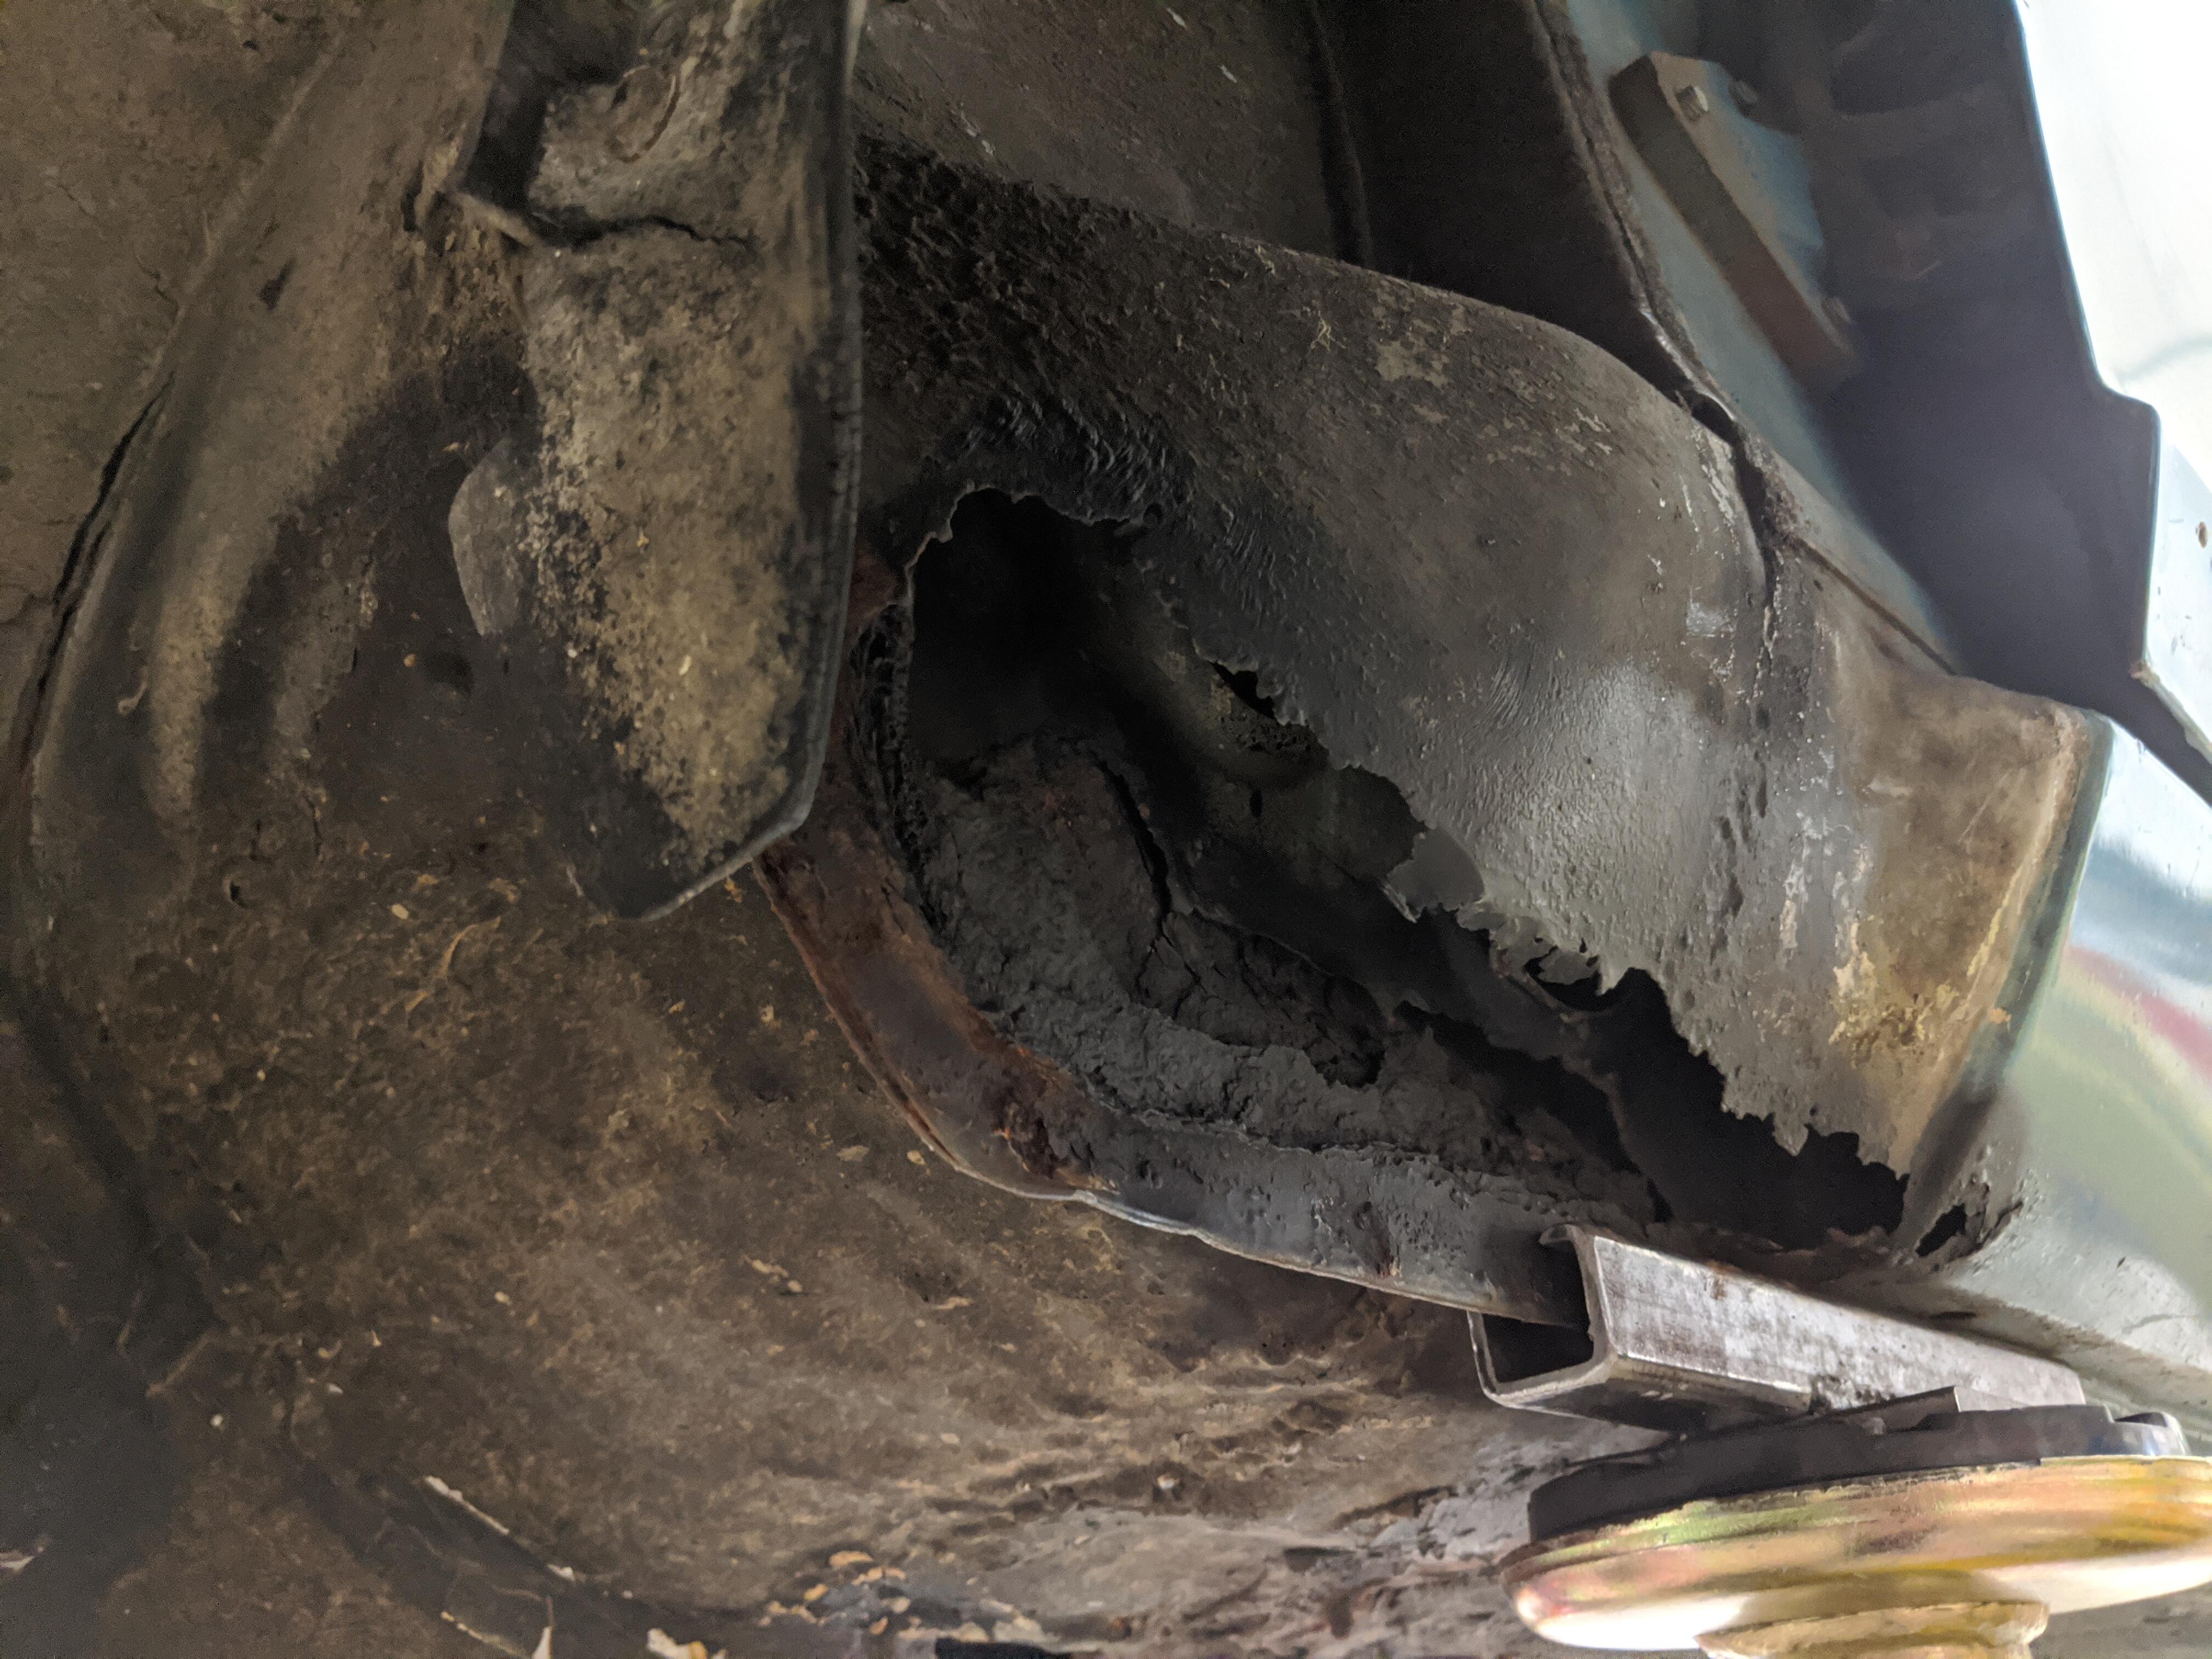
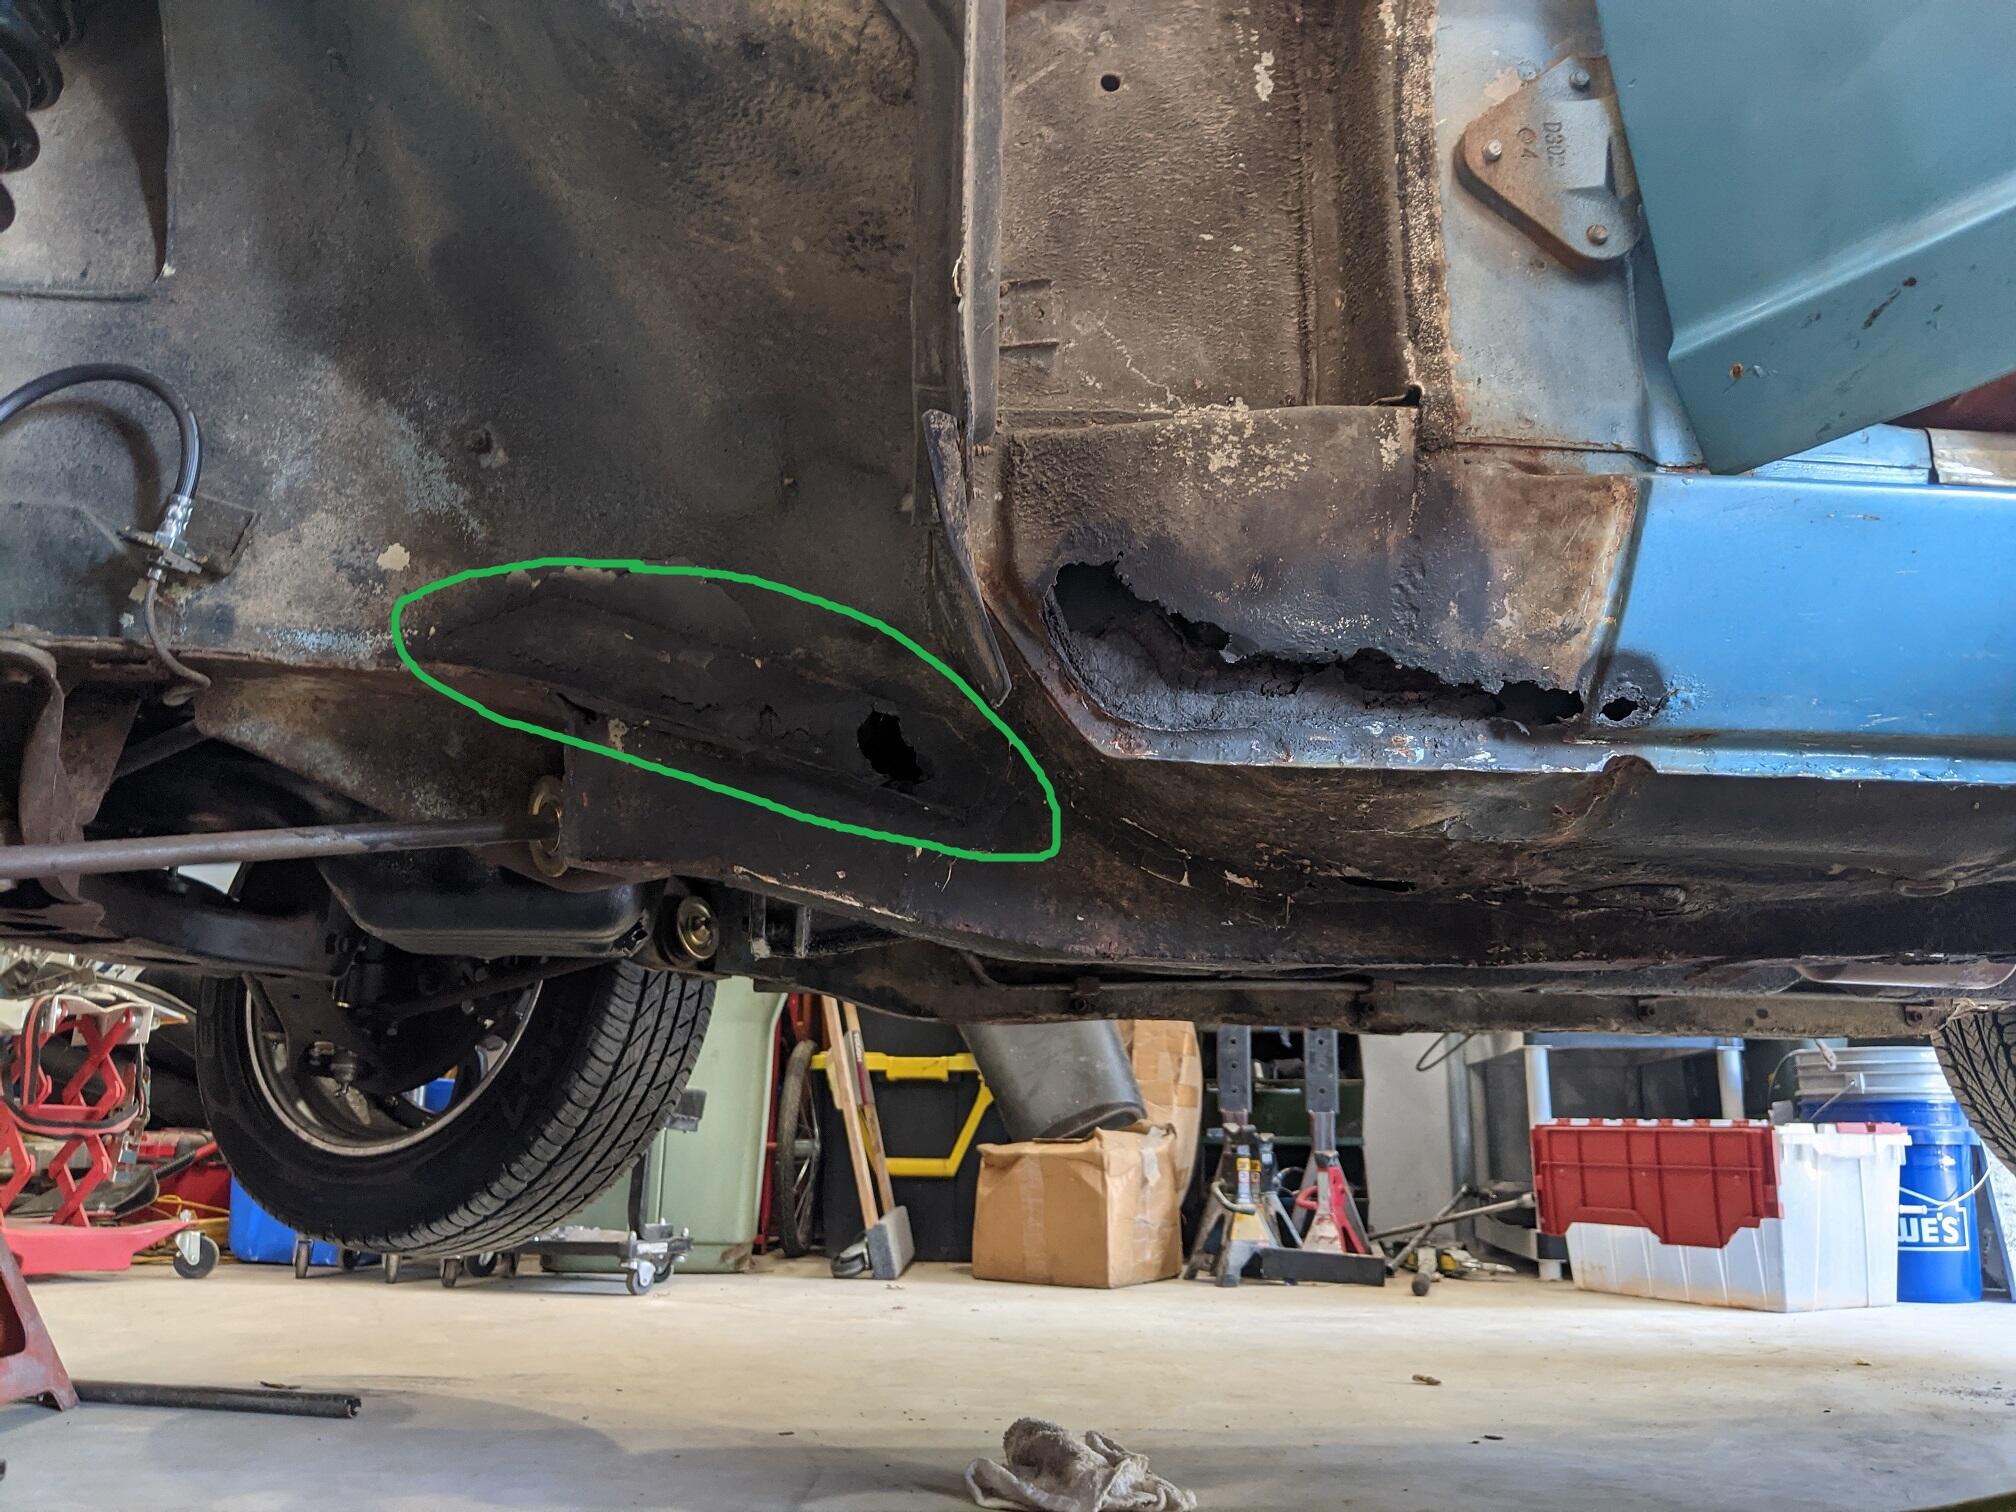
So we've pretty much figured out how to tackle the floor pans, frame rails, and rockers (by replacement with Klassicfab panels), and there are a couple other patches around the body. But what is this particular area referred to as, how structural is it, and what are some good methods for getting in there and repairing? Would a simple flat section matching the profile welded in its place do the trick? Thanks in advance! Ben

-
Thanks for the feedback. I have to agree the roll cage doesn't fit here. Sticking to the repair for now, with an eye toward some bolt ins and maybe a roll bar eventually. Also, I popped over to the bad dog site. When y'all say subframe connectors, which part are you specifically referring to? Is that the ends of the frame rail segments they offer? Thanks again, Ben
-
So I have the good fortune of being able to enlist some knowledgeable welding help from a family member, and will soon be diving into the repair of my driver's side floor pan and both frame rails. We also will be hopefully repairing a couple other smaller problem areas. I'm wondering: what other mods would be a good to undertake while I've got the interior out and the ability to weld? The car is going to be mostly driven for street/weekend/club outings, but I'd like to get it out at Summit Pt or VIR and am considering a roll cage. Or really any other chassis stiffening or safety improvements. I did already splurge a bit on the Apex Engineering braces for the front that go in the fenders. I figure at the very least I'll put in a bolt in 3way brace up front. But welding is a dark art to me, and I want to leverage the time I have well. For those of you who've been down this road, do you have any suggested mods? Thanks in advance, Ben
-
Thread resurrection hah. I ended up getting a tune up at Datsun Spirit and Eiji sorted it out. Running very well now. Appreciate the follow ups
-
My fronts are 205/55R16. So yours would be an inch less in overall diameter. Mine did settle some after a couple drives.
-
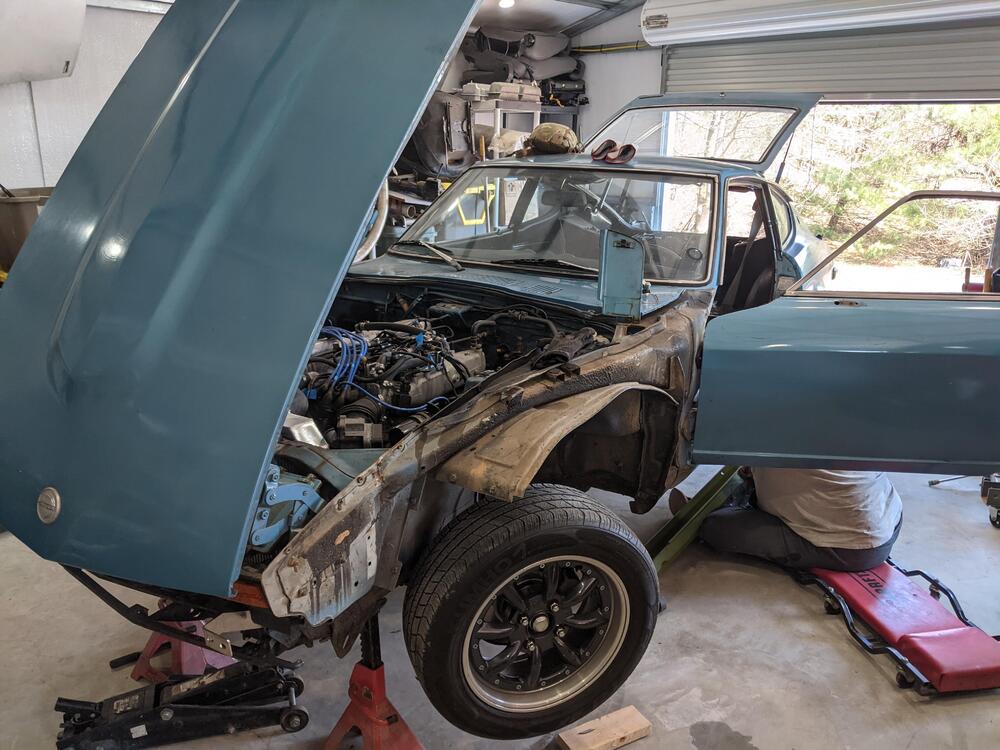
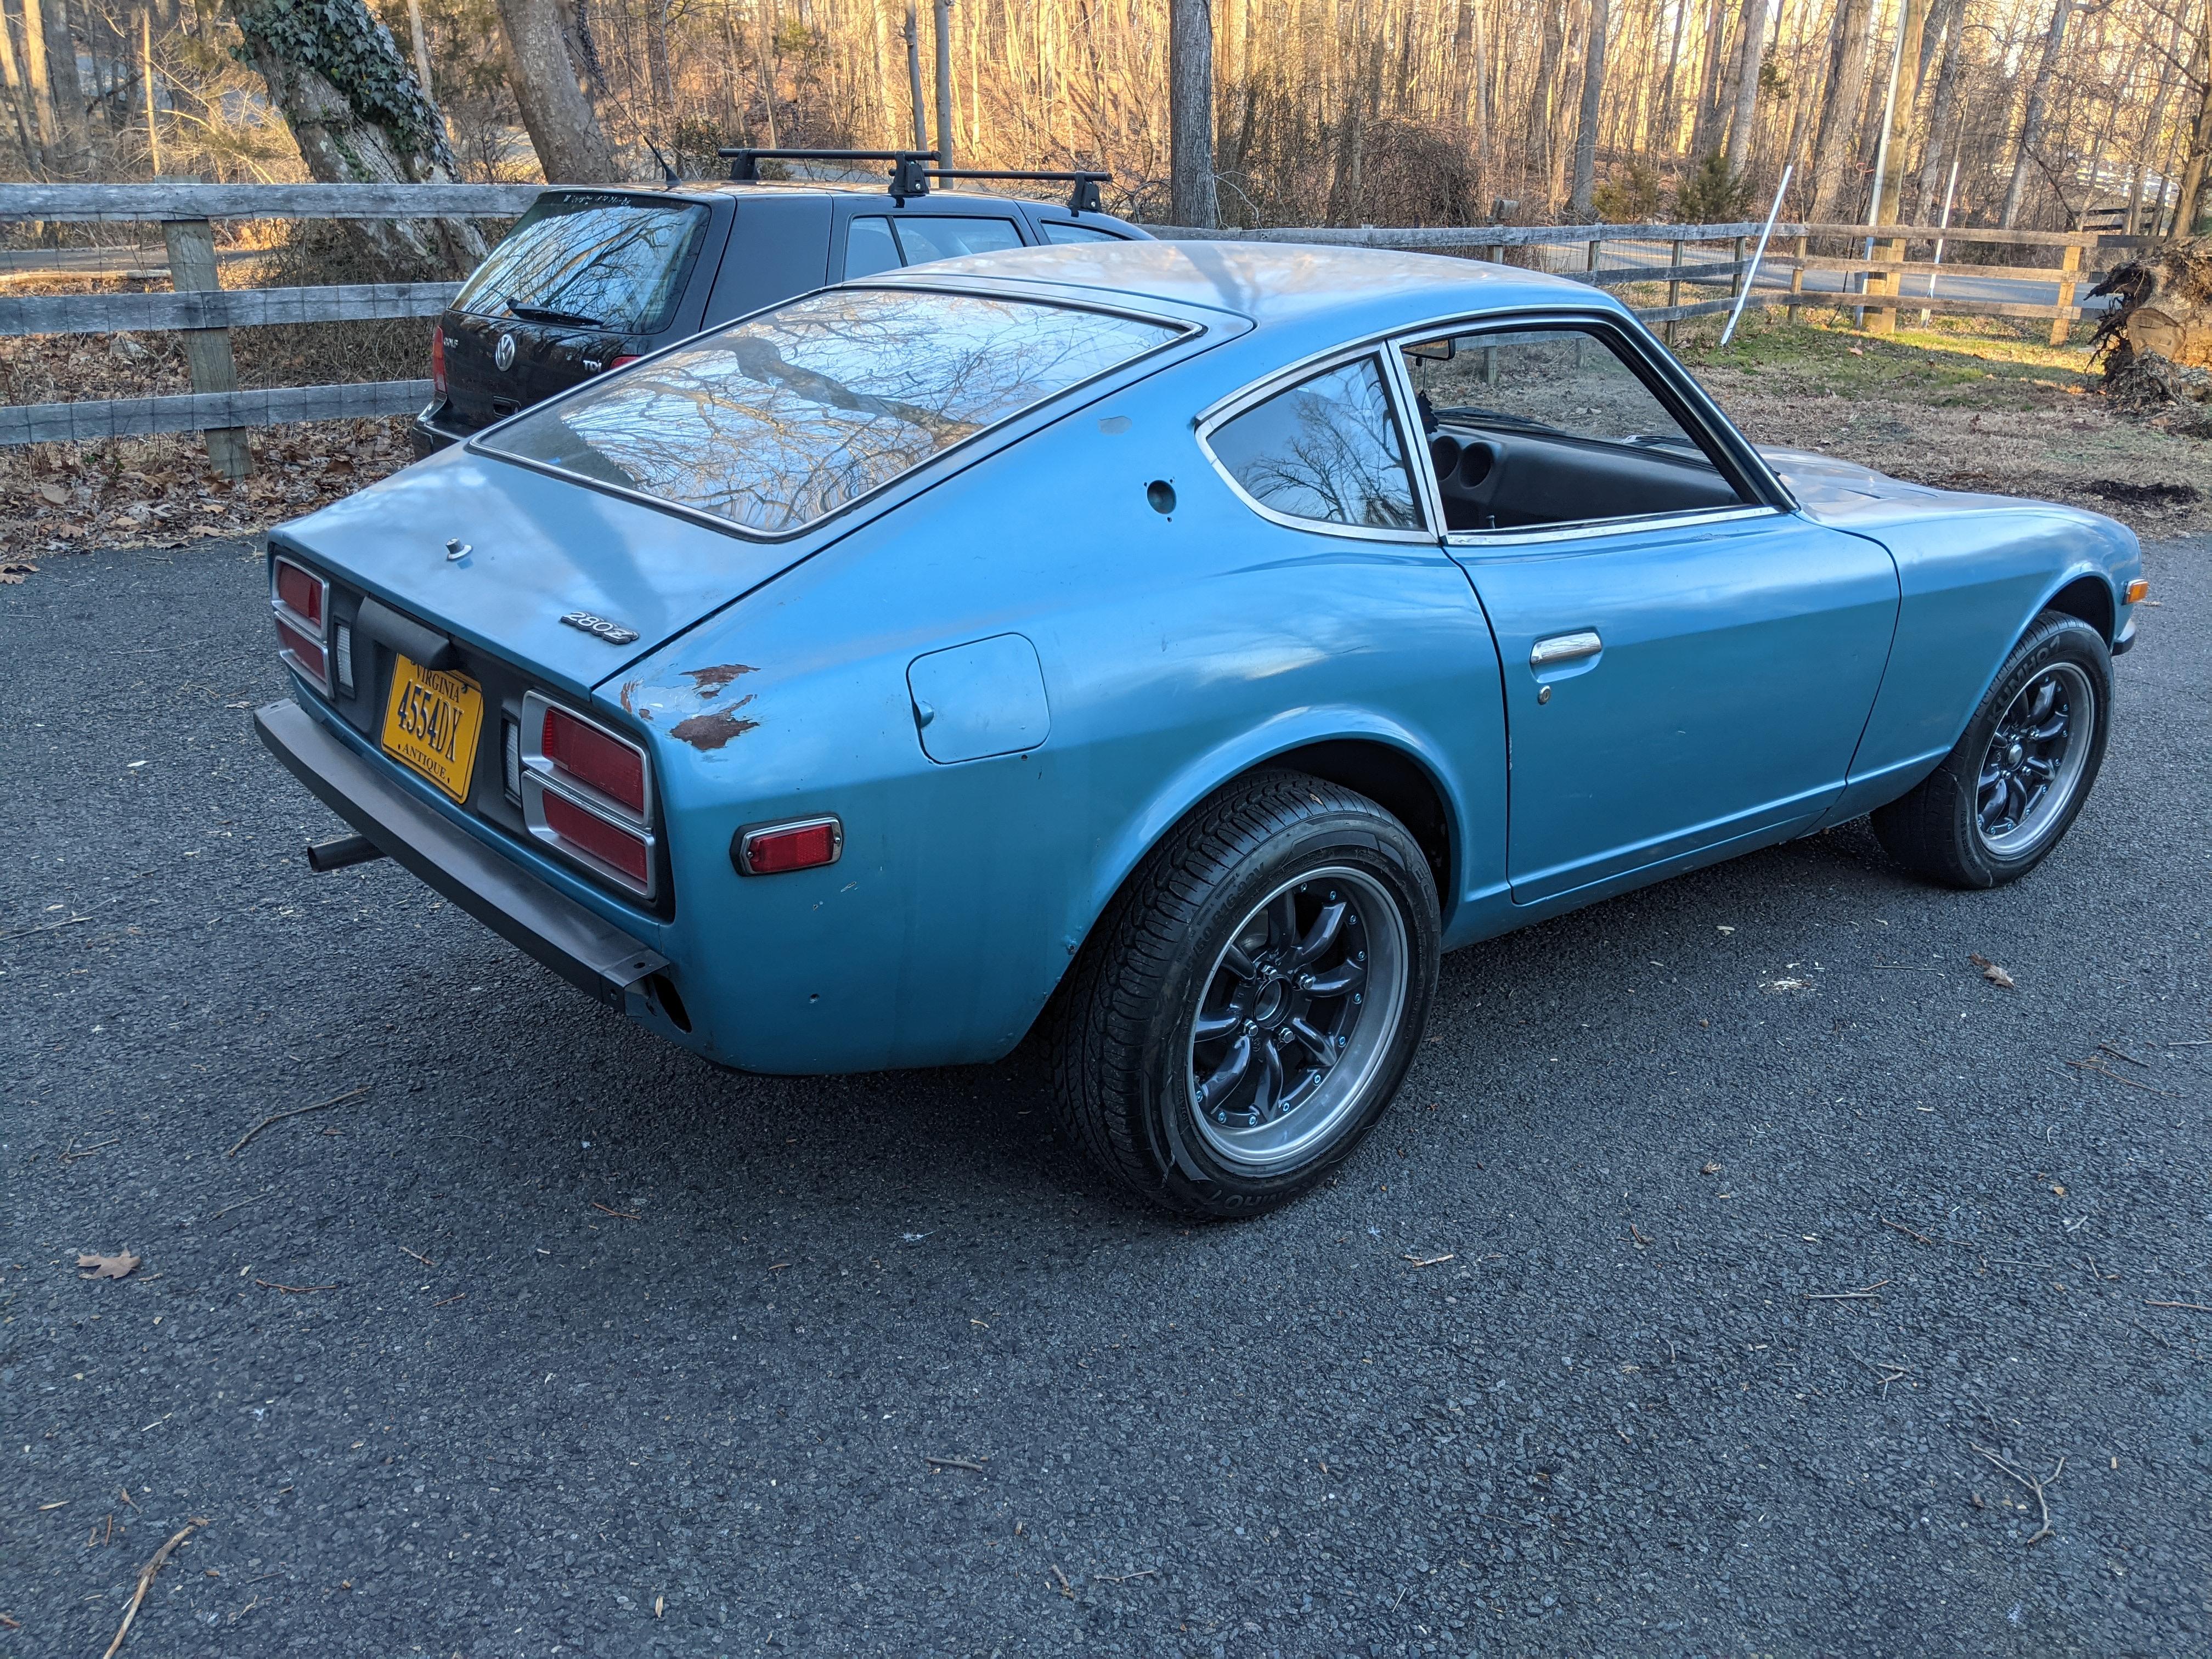
Just wanted to chime in after installing these on my '75 280Z. I definitely researched this thread, and very much appreciate all of the great feedback and information here. Nothing but a good experience for me. I replaced the stock springs paired with KYBs with the full eibach lowering kit (23-4042 on MSA) and koni shocks (2x 23-1033, and 2x 23-1034 on MSA). I also did the MSA sway bars at the same time. Everything bolted up fine. I had the usual issues with the rears when trying to get enough clearance without pulling the spindle bolts. I ended up dropping the rear subframe; pita, but there was no way those spindles were coming out and I wasn't ready to tackle that monster just yet. I did not have any issues fitting the gland nuts, or with seating the shocks into the strut tubes. The fronts were done in about 1/4 the time of the rears, mostly due to having to drop the subframe. Once installed, the drop in ride height was definitely noticeable. I didn't measure, but I'll include a picture or two of the before/after. I set the shocks to 1/2 rotation from full soft for starters, and haven't felt the need to adjust them further yet. I've been out on 2 short twisty drives so far. The car feels firm, but in a sporty confident way. Bumps are felt but not harsh. Far less dive and roll. I'm sure the sways are helping there as well. The shocks and springs seem very well paired. A definitely improvement over the floaty feeling of the stock springs/sways + KYBs. Looking forward to pushing it a little harder this summer!
.thumb.jpg.dca115758718d33e620d84ad14db09fb.jpg)
.thumb.jpeg.a4726c7dc01d11bc2d500c283338a305.jpeg)

.thumb.jpeg.7ffda07855aa876da71933c5c0b1b774.jpeg)
-
I did try unplugging the cold start; no change. But good point clamping the hose. I'll give that a shot tonight. And I'll definitely revisit that TPS; pretty sure I set it where it needed to be when I was reassembling my TB/manifold. But, come to think of it, that may have been before I found that my throttle valve wasn't fully closing due to the little stop screw on the engine side being slightly too far down (found that when the TB Idle screw wasn't killing idle even when all the way screwed in). Definitely rechecking that now.. Thanks! Yeah.. I feel like I owe half of y'all a few beers already from my previous cries for help.. Zed Head for sure ?
-
Injectors are all fresh refurbs from RockAuto; I ordered all 6 at once. 4 came in 'green top', and 2 are kind of a beige color. I figured they were equivalent.. might be a bad assumption though. Picture attached The coolant temp sensor is new, and seemed a little high on the resistance (just checked it again, 1050 ohms @ 110F) but its pretty close to the values in the manual when interpolated. Maybe 5% on the high side. I'll recheck it again when the engine is completely cool. I checked it back when I installed it.. should have written down the values but I came to the same conclusion then. And PO was definitely in the AFM; it had 2 different types of glue holding the black cover on. I'll try pushing the black weight around a bit tomorrow night and see what happens. Nervous about messing with that thing.. I can move this over to my other thread if you think that'd be more appropriate; didn't mean to go starting a new thread unnecessarily. On the plus side I did figure out the timing issue (with tons of much appreciated help from yourself and others!), so I figured I'd start a new one. Regardless, thanks for the response ?

-
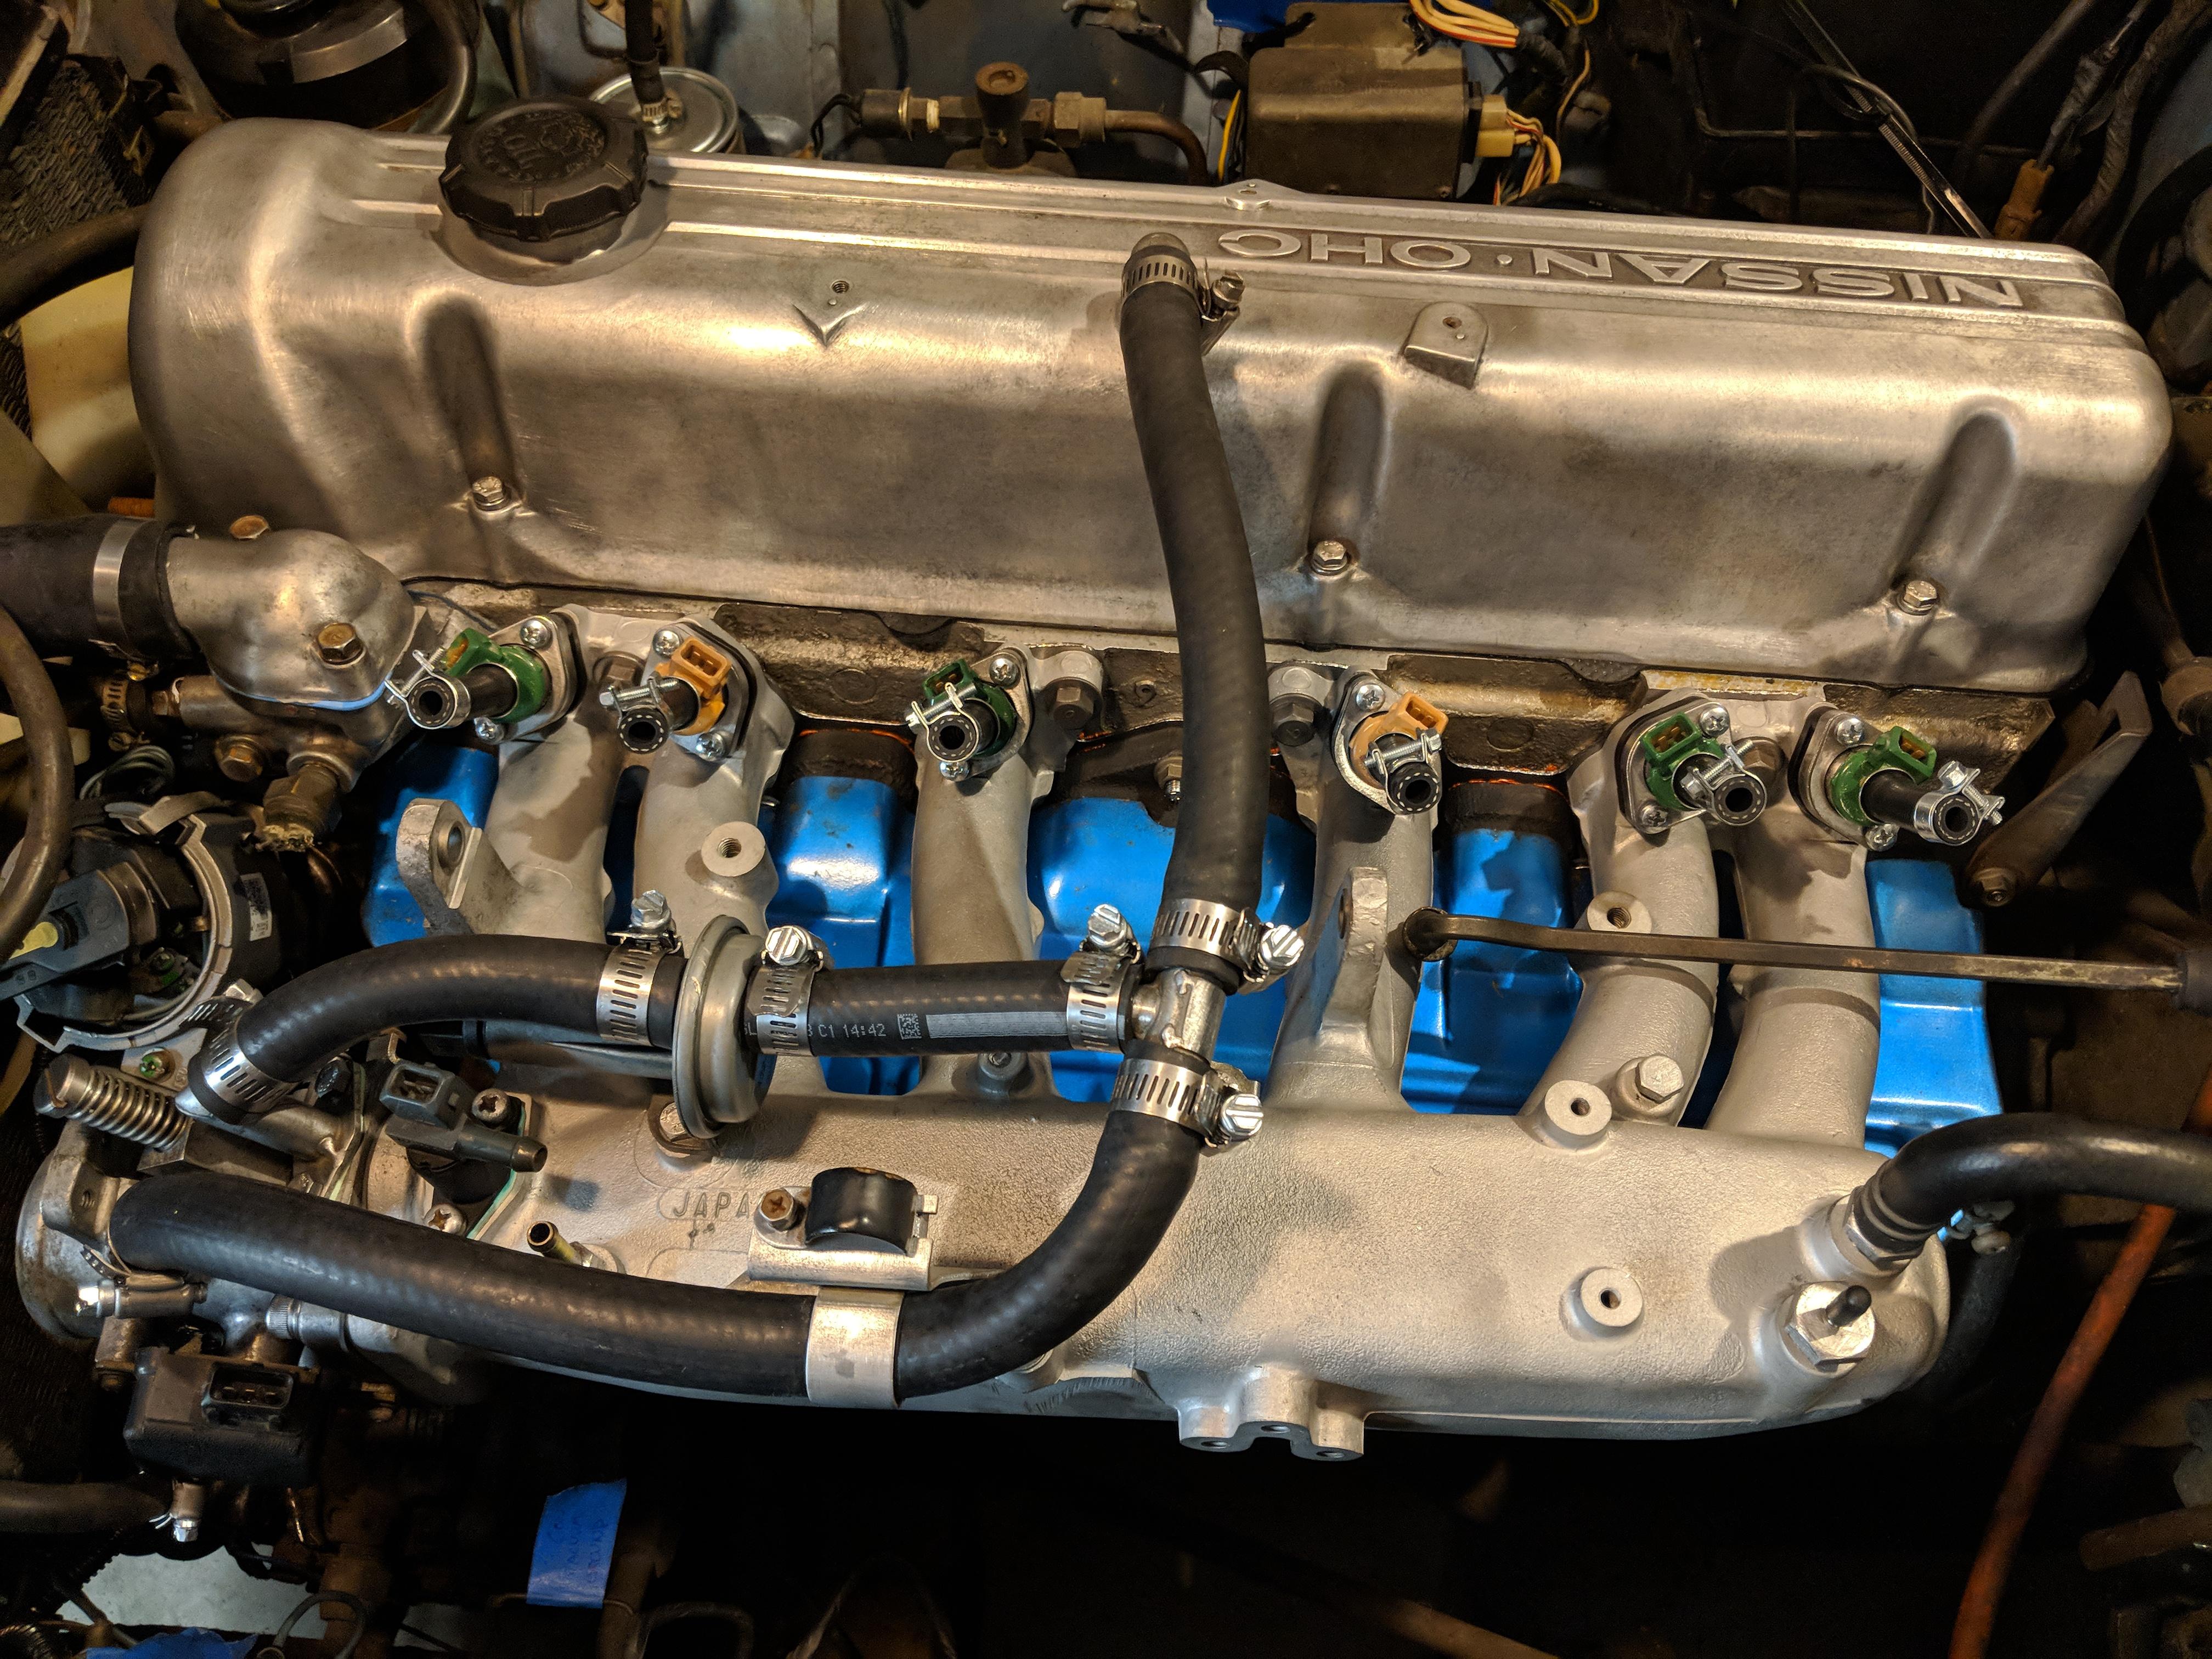
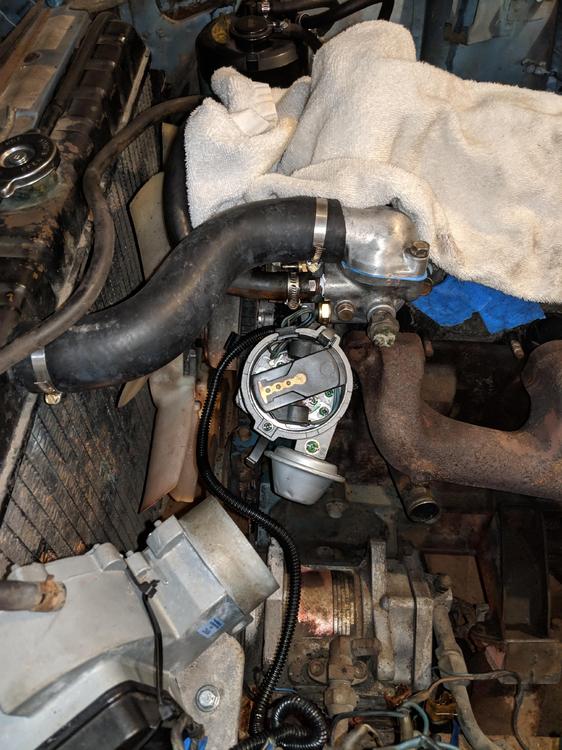
I just finished refreshing my intake manifold/injectors/ignition system and I'm attempting to get this thing running right. Having never before actually experienced a properly running Z, I feel like I'm going in circles trying to get it to where it is somewhat healthy. Here is where it sits as of this evening: It'll start after a few cranks, but usually dies a few times, then picks up a high idle (maybe 1500ish). The idle will come down to about 1200 RPM after it warms up (about 2/3 to 1/2 on the temp gauge). The conditions at that point (its fairly steady here): RPM: 1100-1200 Timing: ~15 BTDC on the crank pulley (this is where it seems to be happiest) Vacuum: Just over 20 inHG (needles vibrates a bit) AFM Idle screw: 3.5 turns from fully in (I don't adjust this; I just ran it in and backed it out to the same spot to see where it was) TB Idle screw: 4 turns from fully in Fuel pressure: pretty steady at 28psi Revs readily, no hesitation and sounds pretty smooth at high RPM Have not driven it in this condition to assess its performance under load; don't want to get stranded The exhaust smells pretty funky, like it is running super rich. It'll also 'chuff.. chuff chuff' here and there. It seems really sensitive to the TB idle adjust; if I turn it in or out even half a turn it'll die. Same with the timing; a few degrees in either direction (especially decreasing) will kill it. I can't seem to get it to idle at any lower RPM without it dying though. From what I understand, I'm shooting for a lower idle (800-900), but I just can't seem to adjust it to there without having it die. And the funky exhaust has me worried the neighbors are going to complain at some point. Some more relevant information on the engine: its a maxima N47 head on a 280ZX block (courtesy of the PO; not sure why or how this came to be). I know this produces higher compression, but I'm hoping its still close enough to stock to where it will work with the stock FI system. Pistons look dished, camshaft I'm assuming is the one that came with the maxima head (Its internally oiled, doesn't look new). The EFI bible checks for the AFM are passing EXCEPT the pins 7-8 resistance check (which says 'continuity, very small resistance' or something similar but is reading as 145ohms). New NGK plugs, coil, wires, freshly refurbed distributor; lots of recently added blood/sweat/tears. My next step is going to be getting the AFM rebuilt. From there.. not sure. Anyway, sorry for the long post. Any help/opinions would be more than welcome ?
-
I thought so too; even finished up bolting on the oil pump. But then I put the distributor cap on there. The rotor was well passed the no. 1 plug position, even with the adjustment screw at full advance in its slot. Yeah, setting the ignition will tell all I suppose. I just hope its better than it started. At least I know the trick to setting that spindle now ?
-
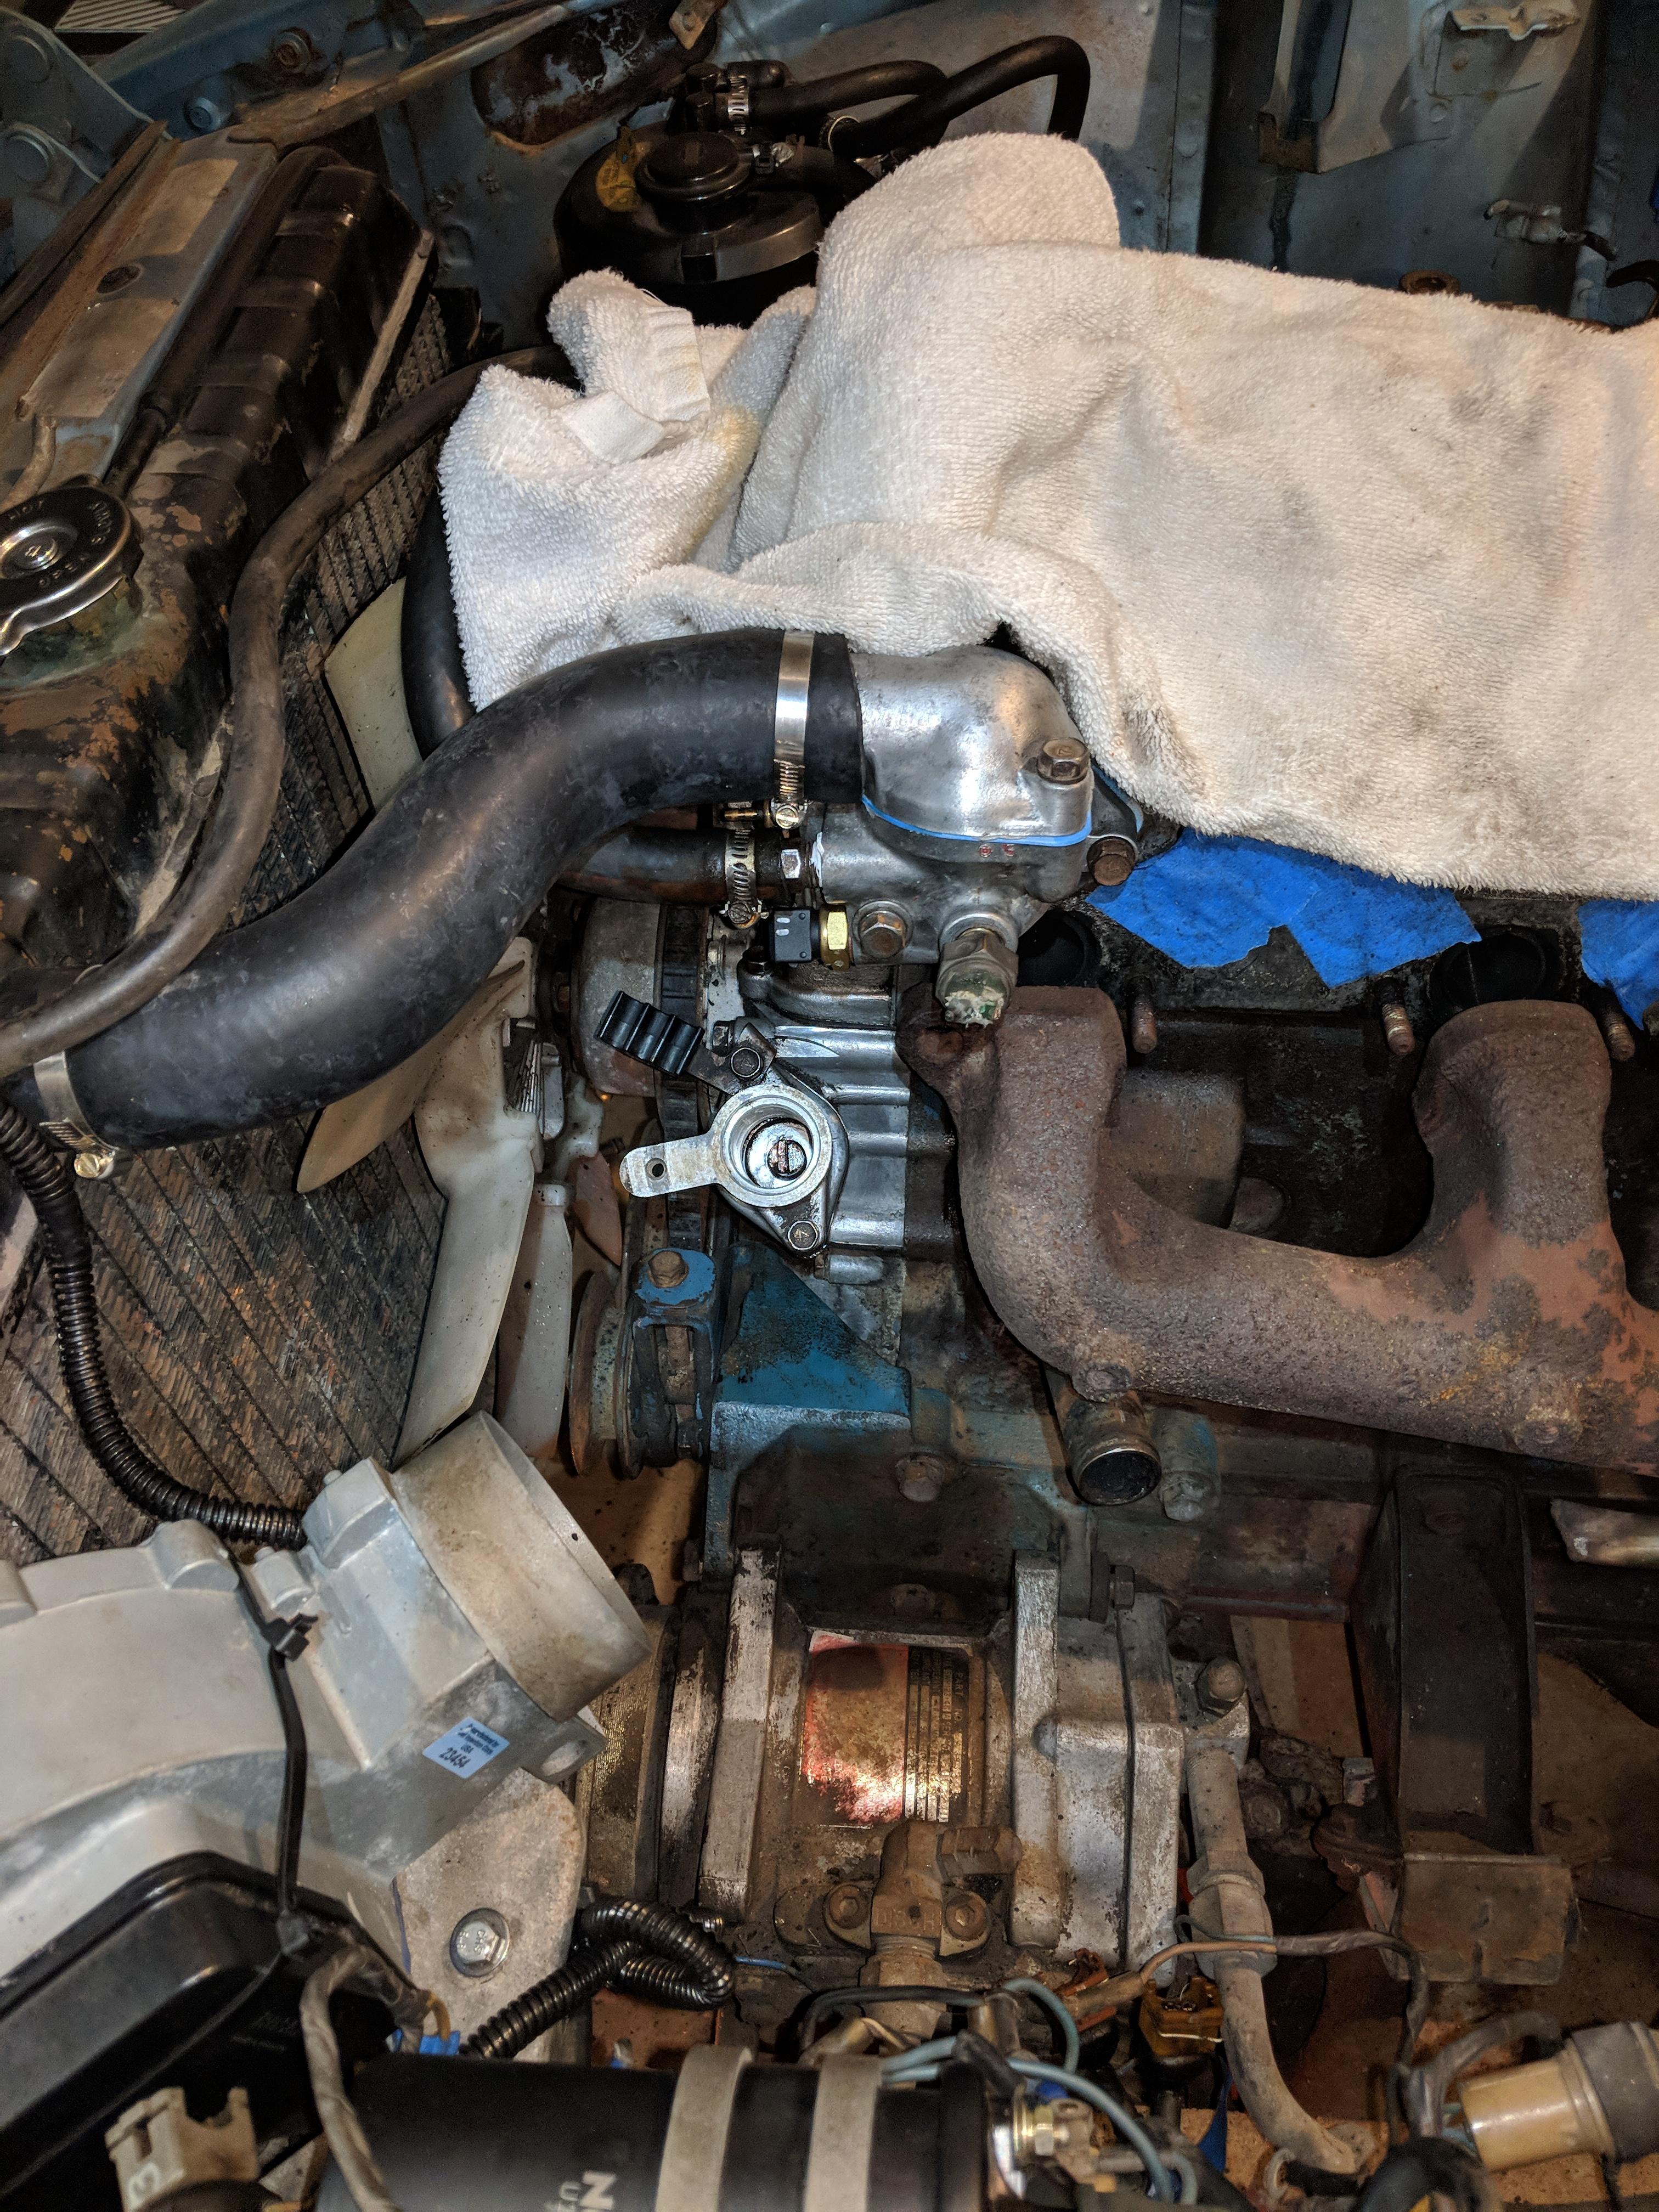
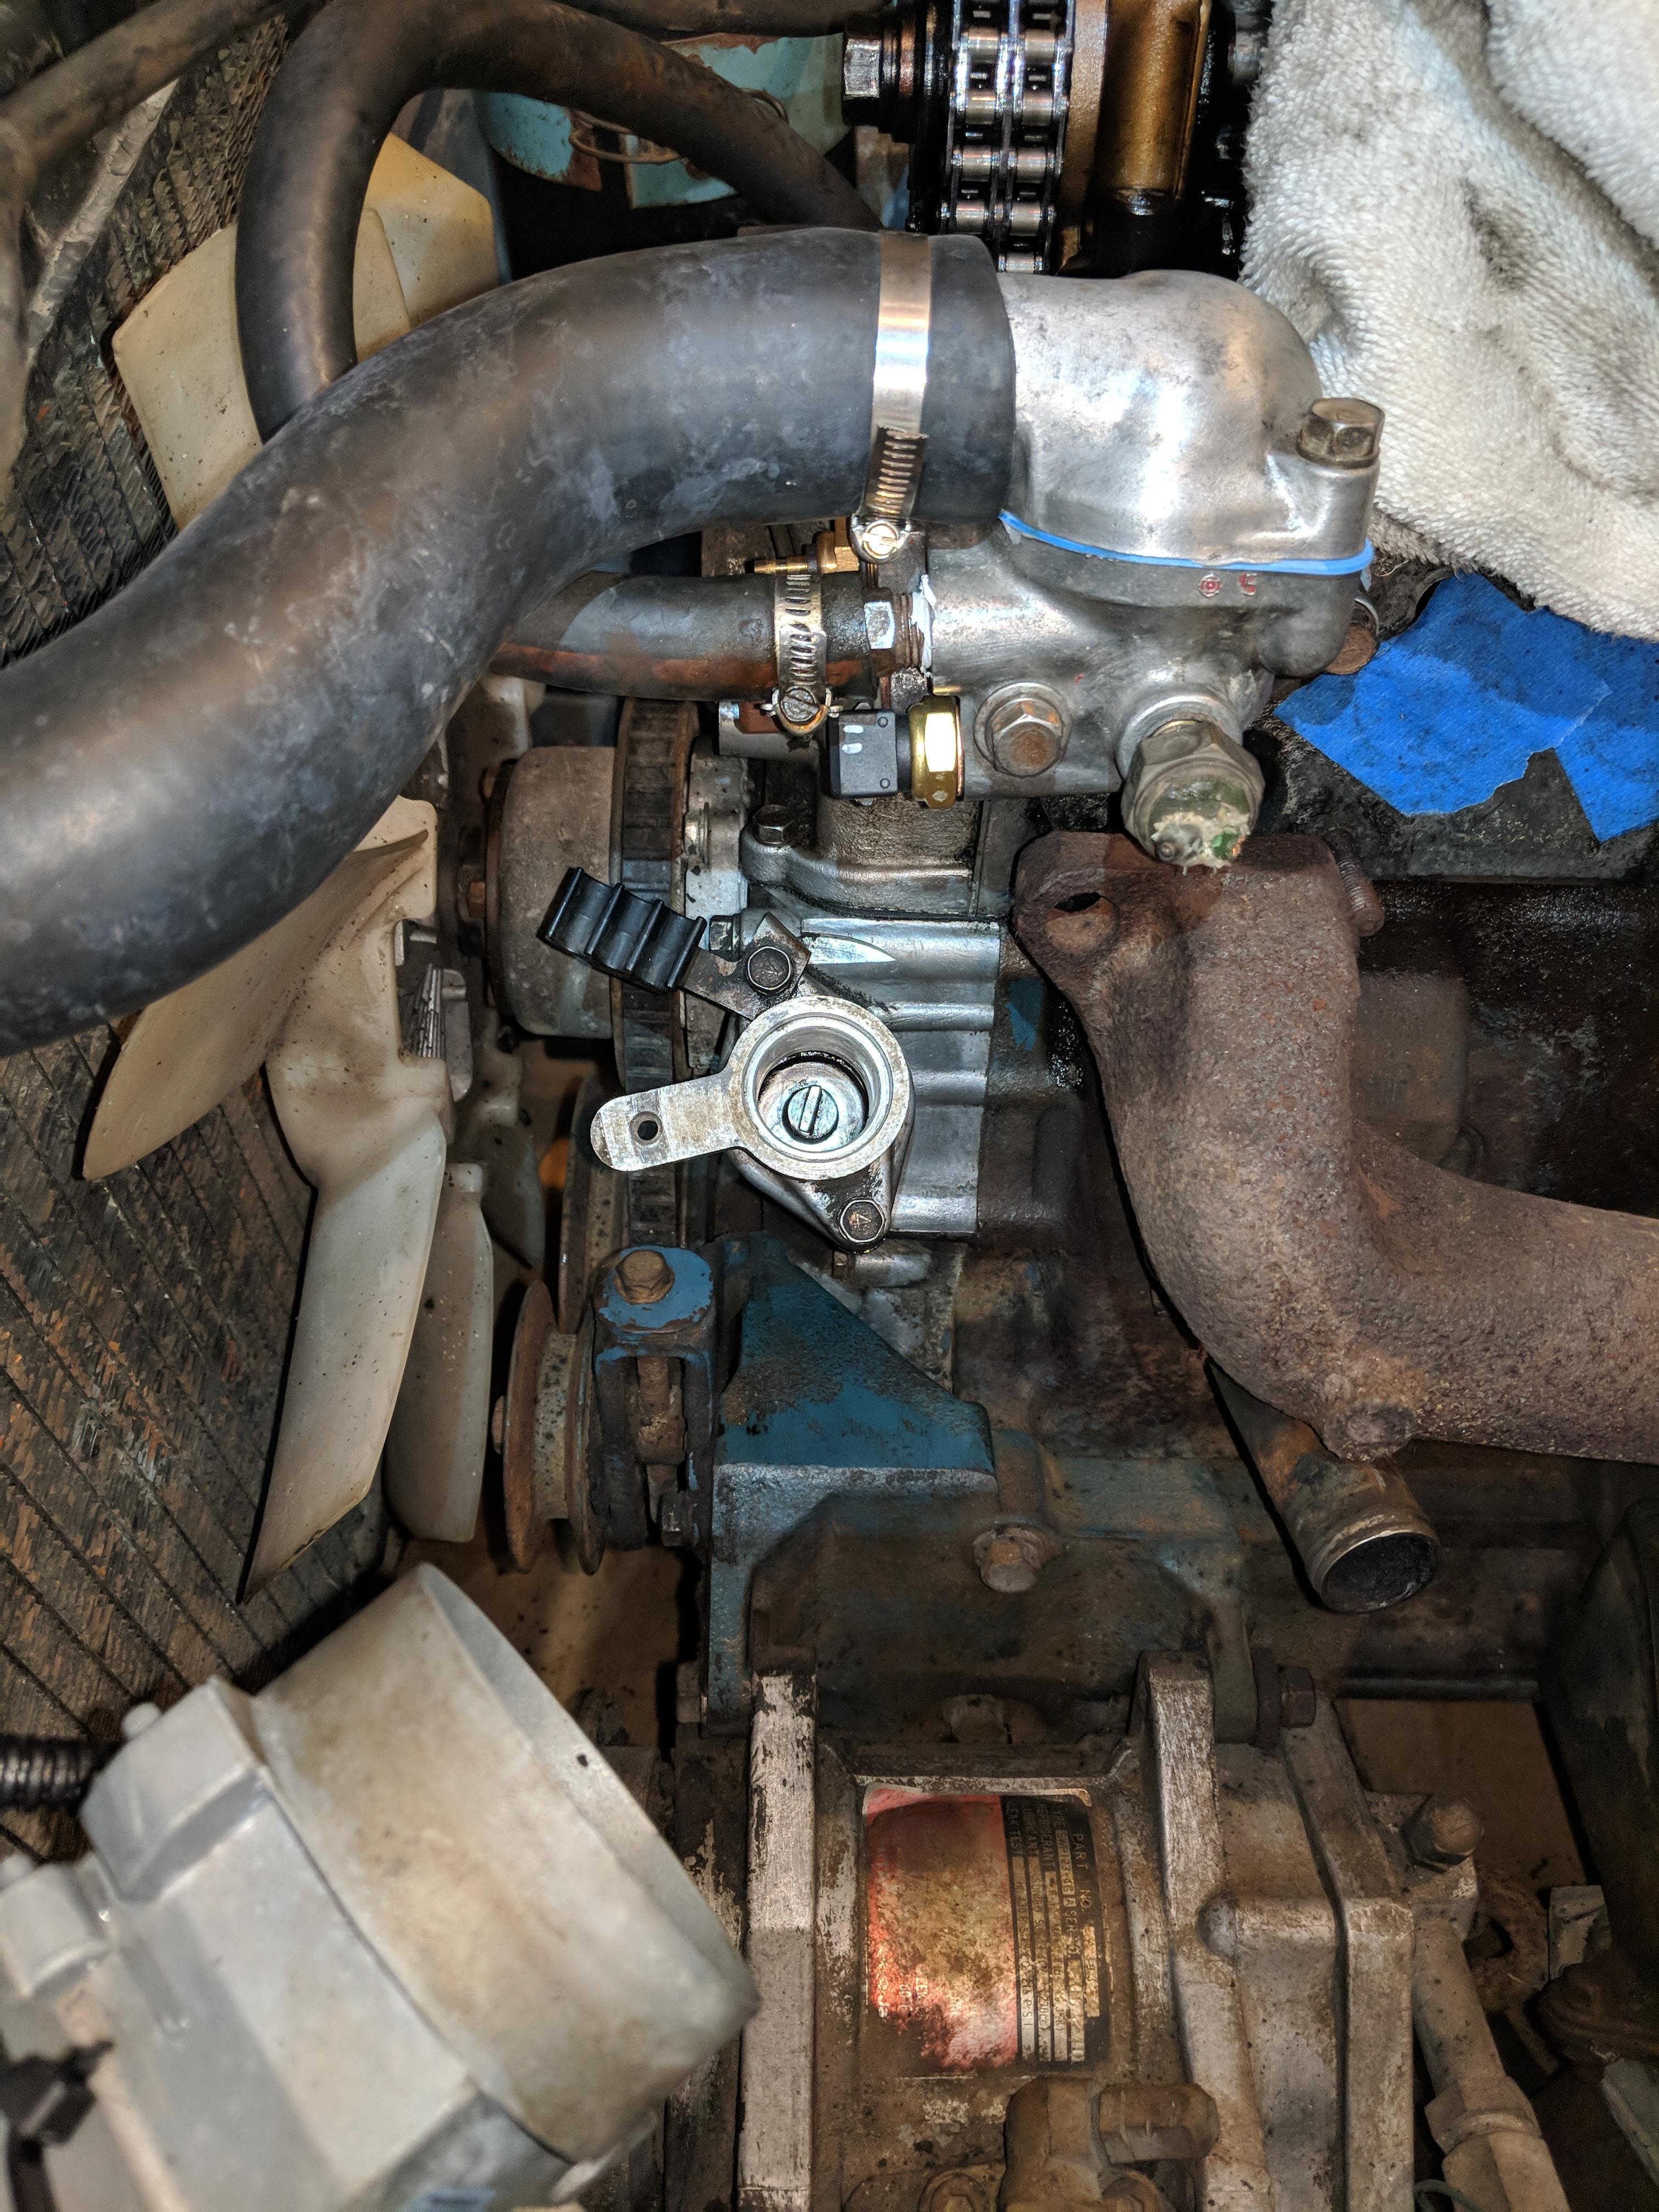
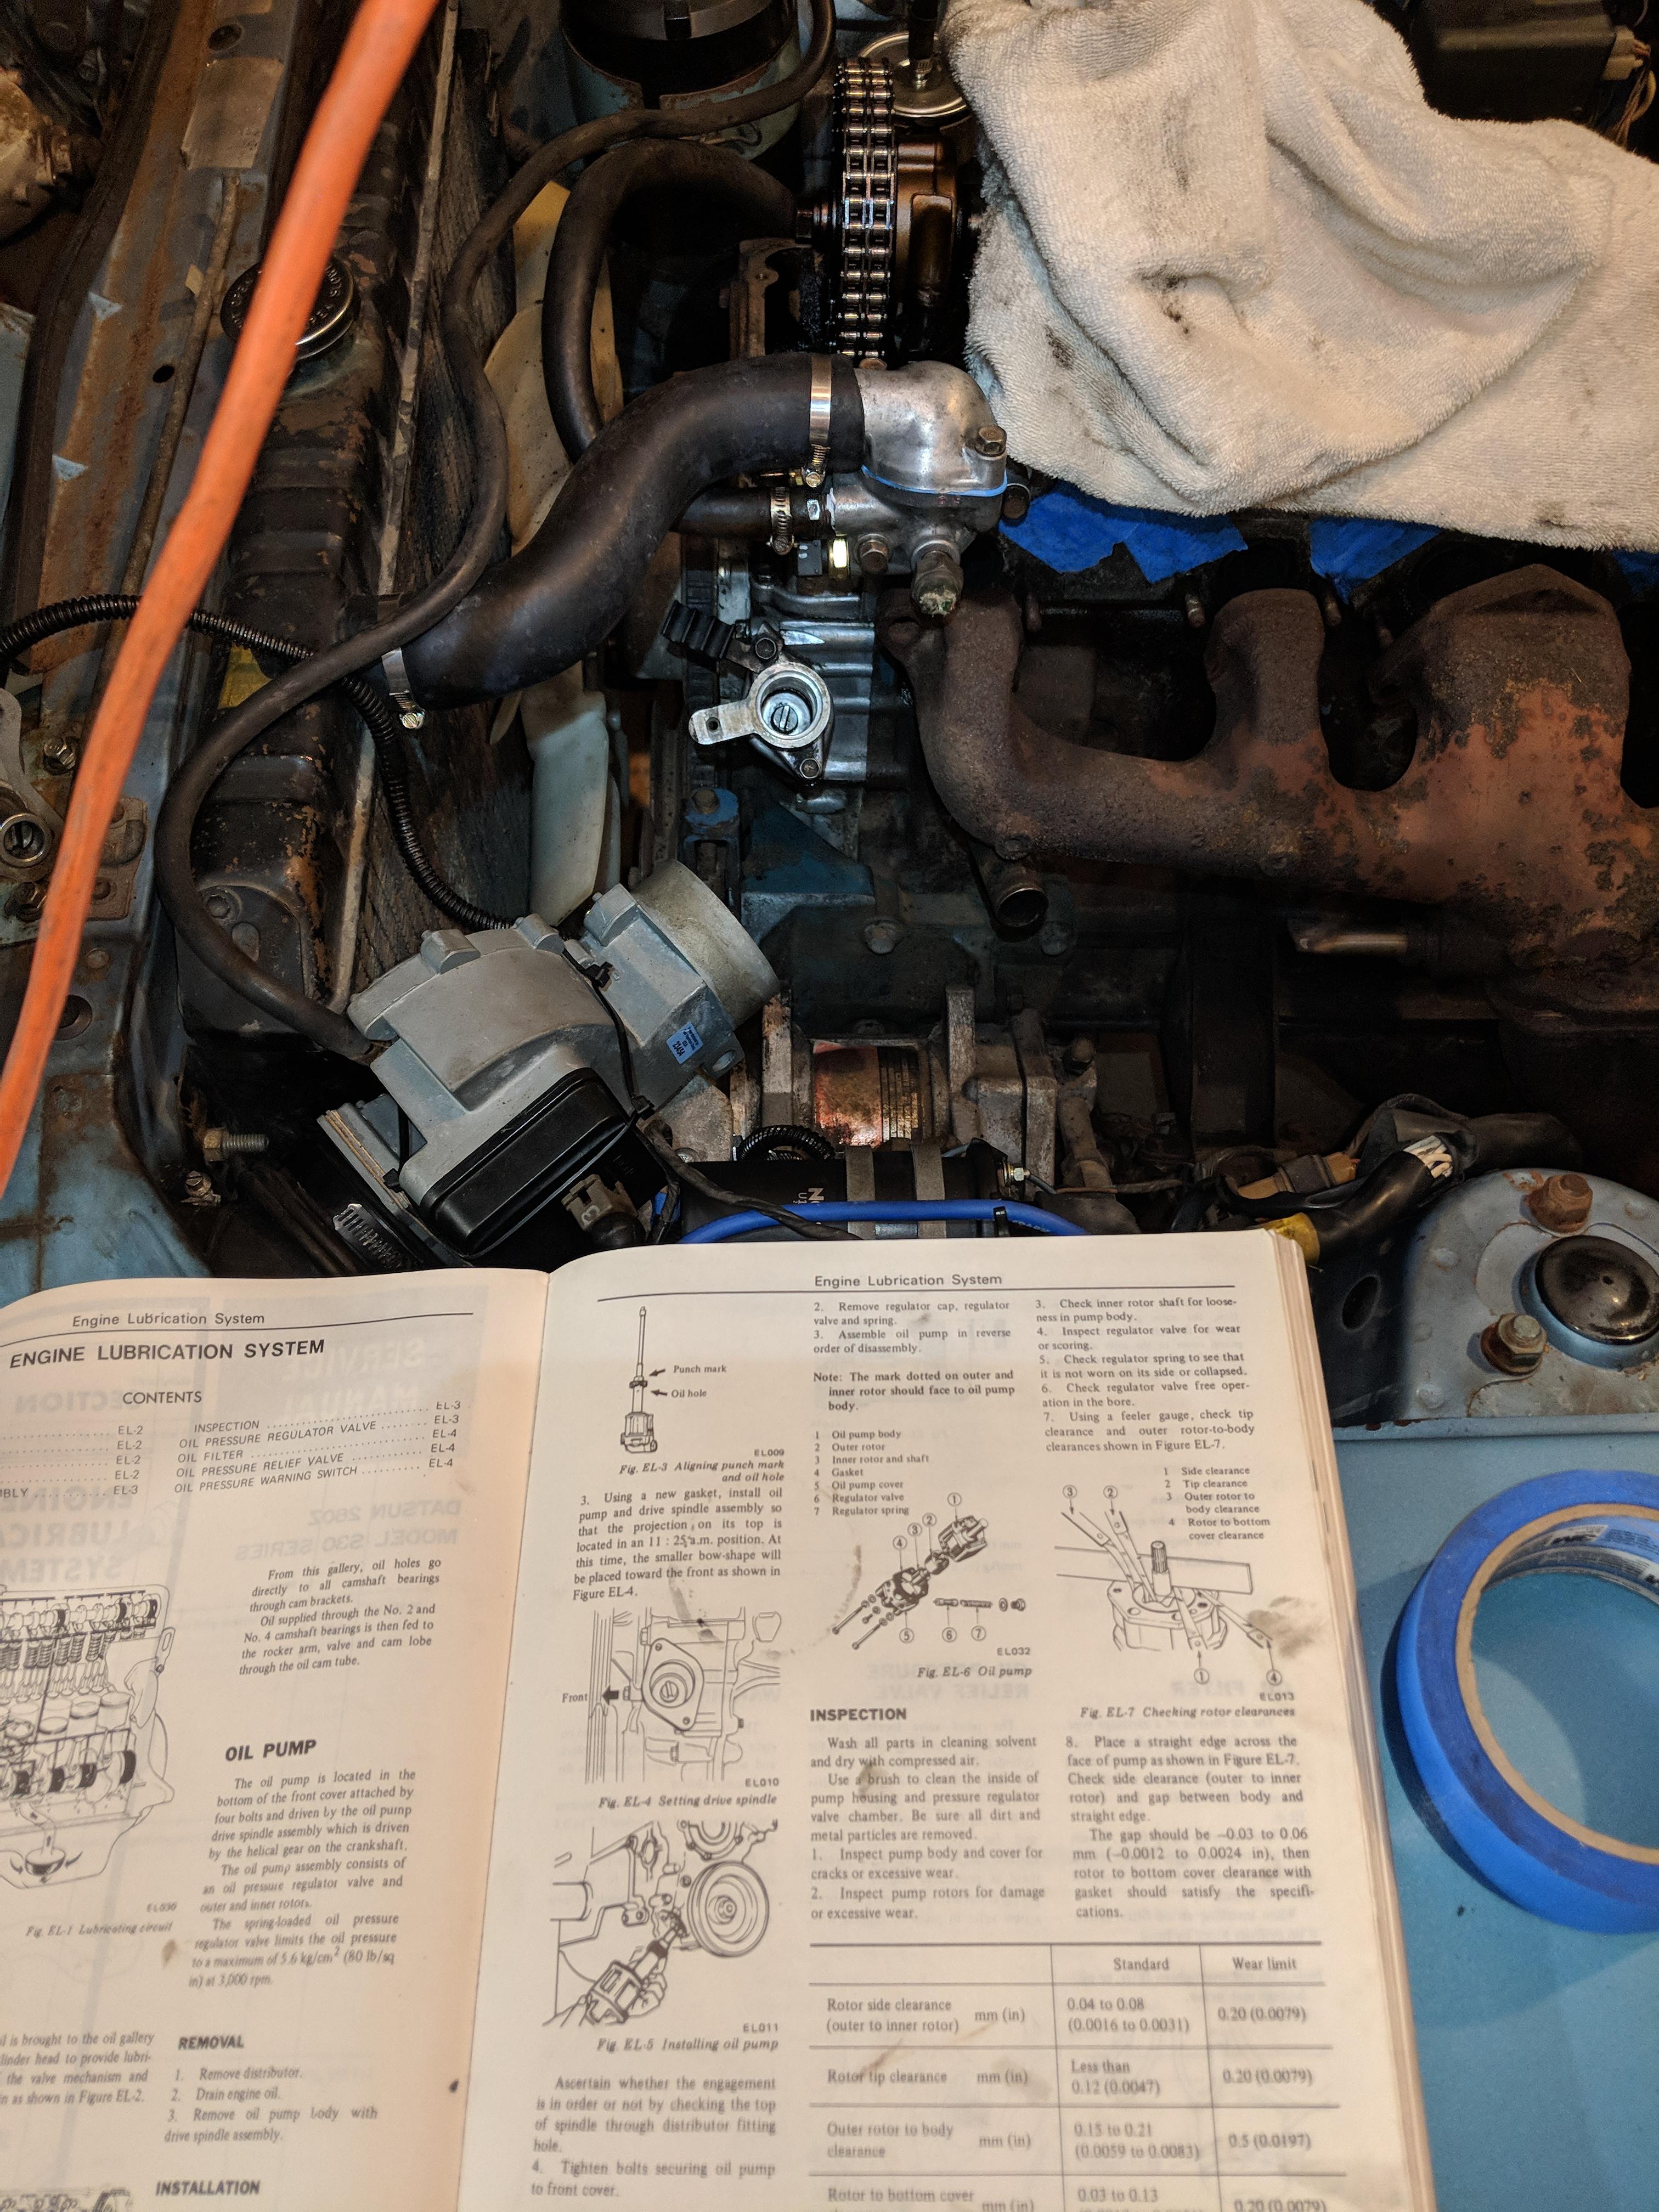
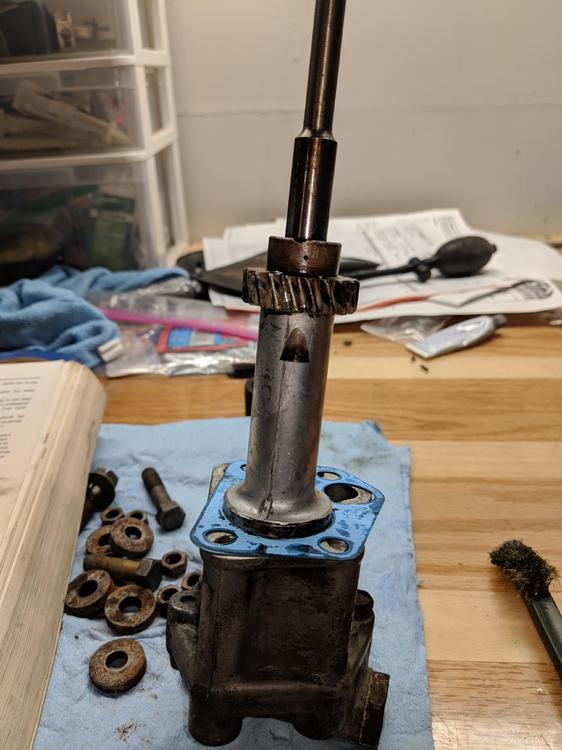
Alright, I got under there again last night and took another stab (or rather a dozen) at aligning this thing. The procedure mentioned in the book siteunseen posted worked; if I rotated the oil pump CW while I inserted it until flush, and then rotated it so the bolt holes lined back up after it was flush, it would produce the CCW rotation up top. I ended up with 3 'options' (I'm assuming these are based on the gear teeth spacing) and went with the one that pointed the distributor rotor at the #1 plug (which was the most CCW one). I think the vice grip method could work, but I didn't have vice grips long enough to hold the top of the spindle. Hopefully this resolves the timing issues. Y'all are awesome; once again appreciate the help! I'll probably post again once I finish rebuilding the intake manifold and get it all back together and see where the timing is at.. this is the final orientation of the rotor: This was the final config: This one looked better, but the distributor still wasn't quite pointing to the no. 1 plug:


-
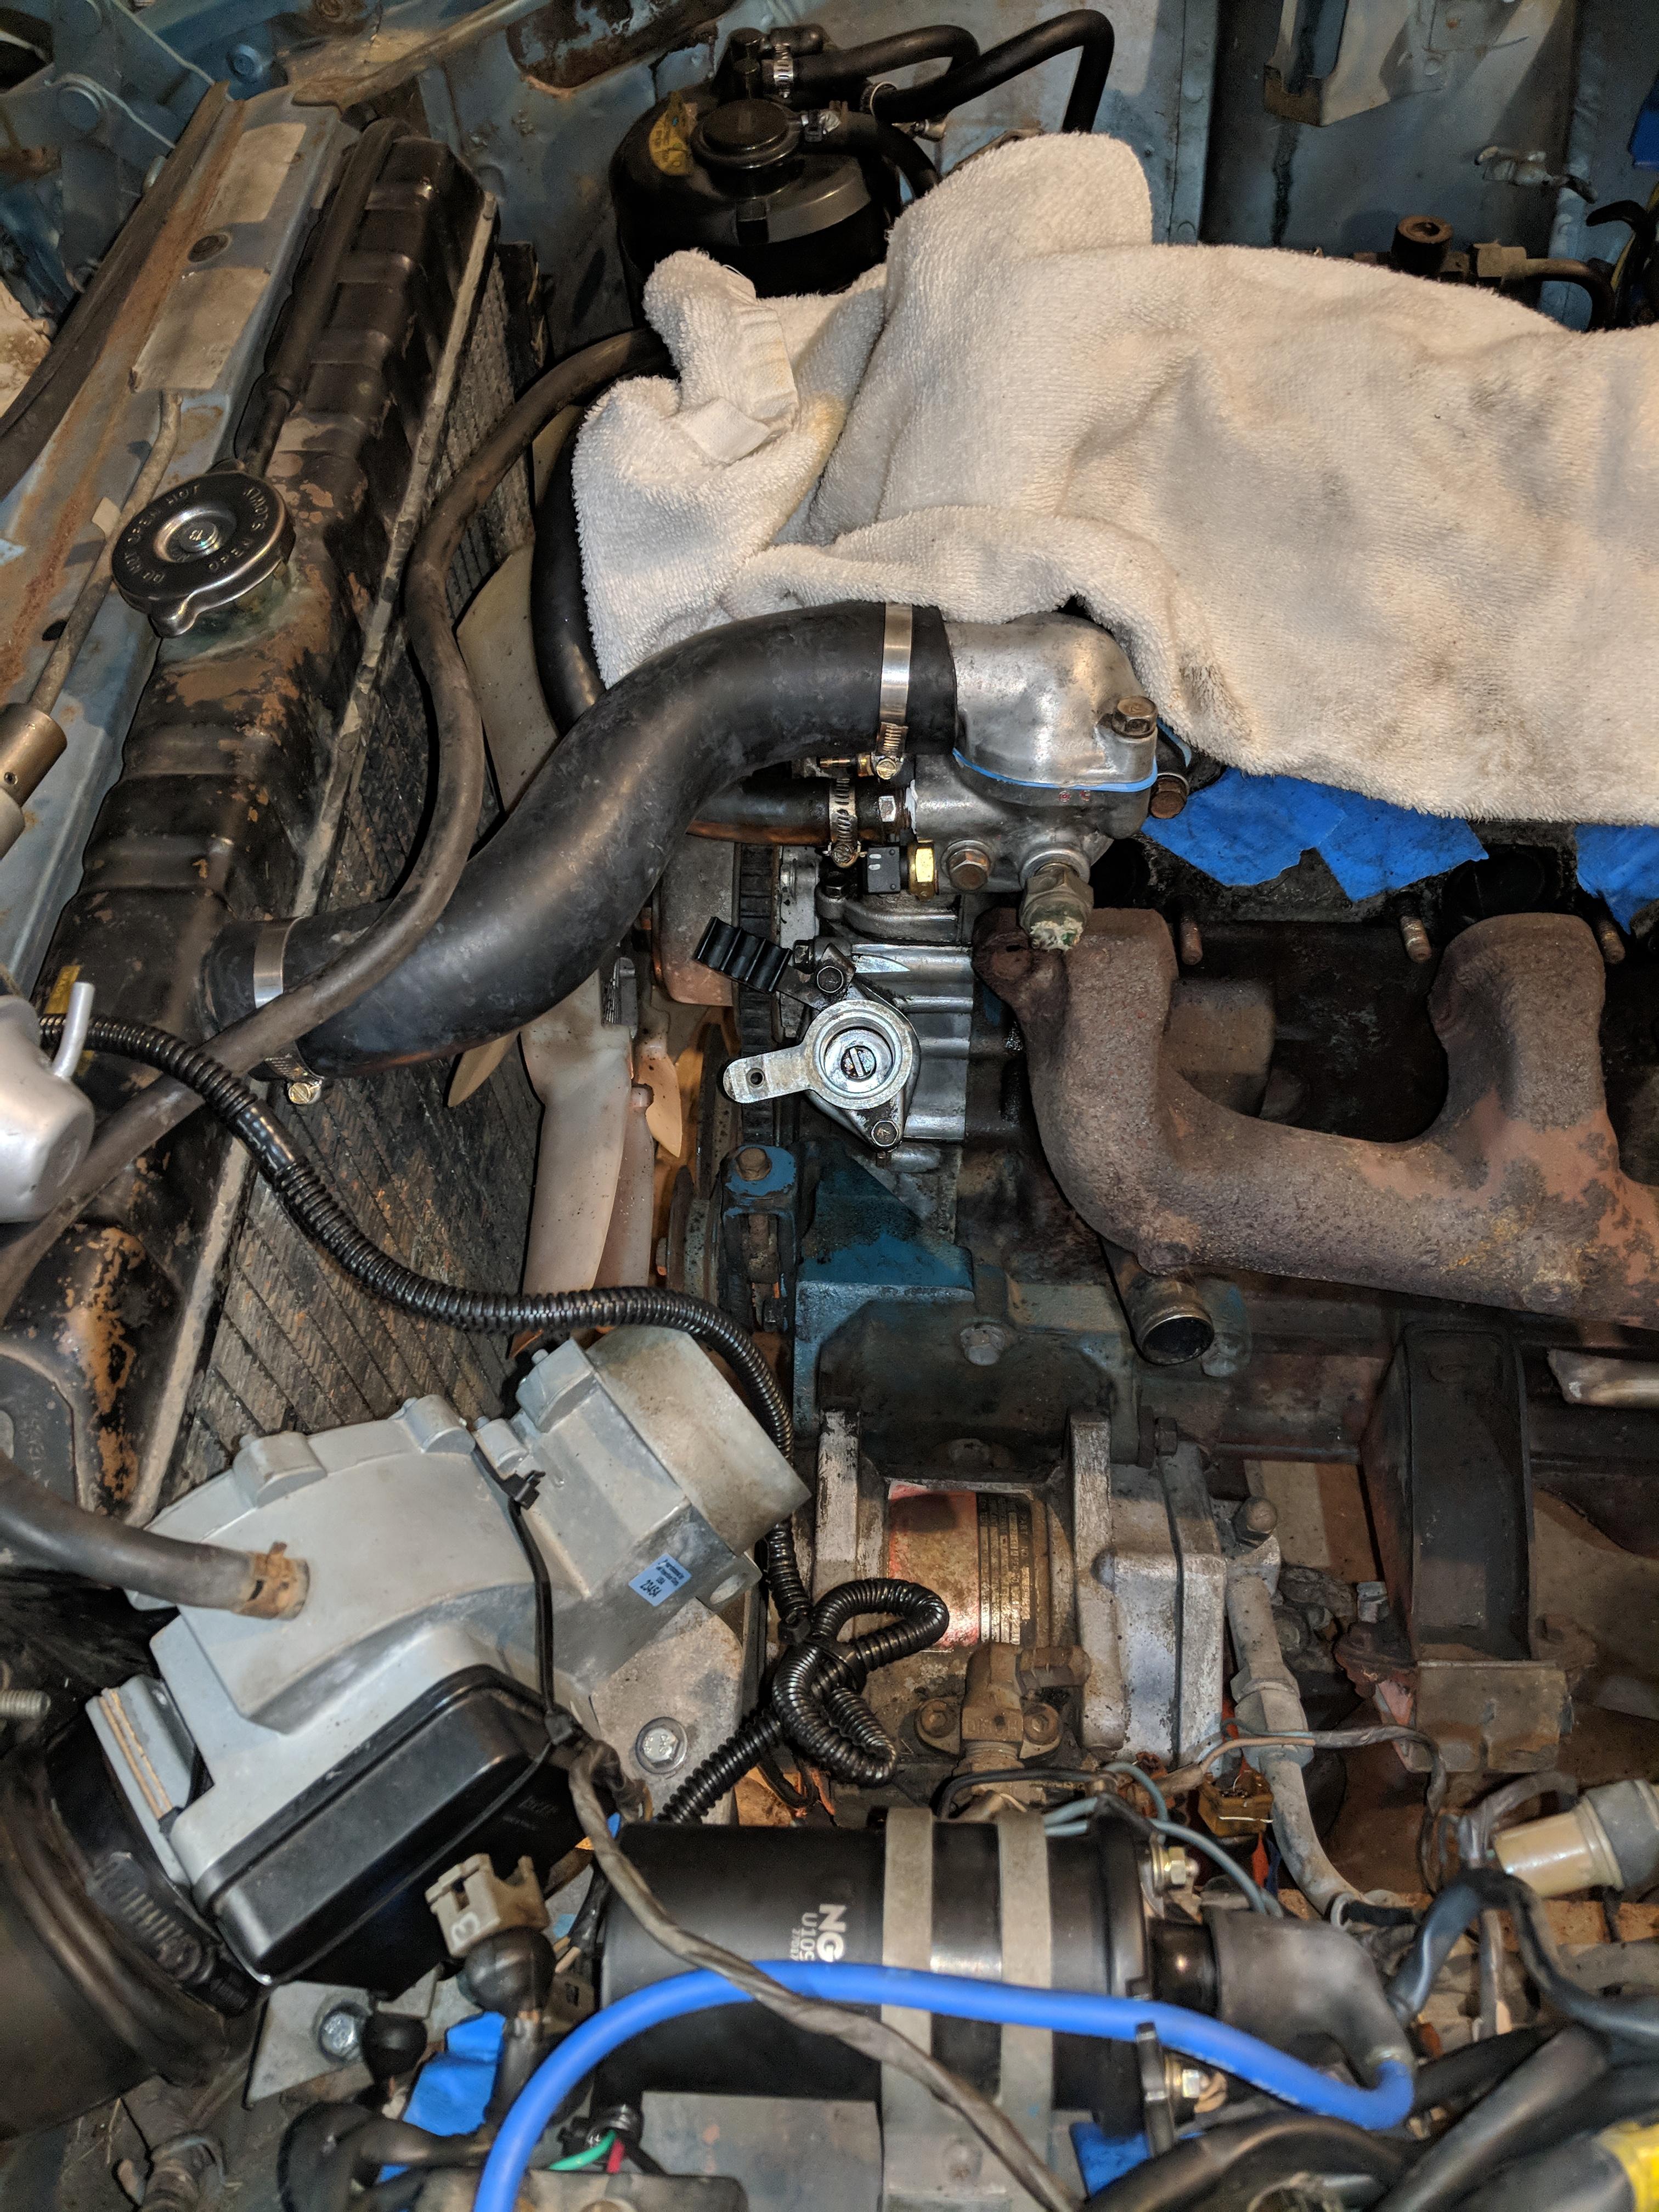
Thread resurrection! Thanks again for all the help.. but I've run into another issue with this whole timing problem and would really appreciate a sanity check here.. ? I finally got around to removing the oil pump, but ran into a problem when I went to re-install it. I've aligned the spindle and the pump as per the FSM (punch mark above the oil hole), and then reinstalled the assembly, but it still looks wrong. I'm at about 1 o'clock, while the FMS is at about 1130.. what am I missing here?? I was very careful not to turn the spindle during install (actually put it in twice; ended up the same orientation each time). Cylinder 1 is TDC. Timing mark is right at 0deg. My brain officially hurts.. I'm about to just skip the 'align the oil hole with the punch mark' and orient it so the top of the spindle matches the FSM so I can clear up this timing issue. Would that cause any issues? What could lead to this condition? Improper rebuild of the oil pump by PO? Any feedback would be appreciated ?


-
sorry to resurrect.. but today I had the exhaust manifold off and the square manifold will indeed cover the round ports no issue!
-
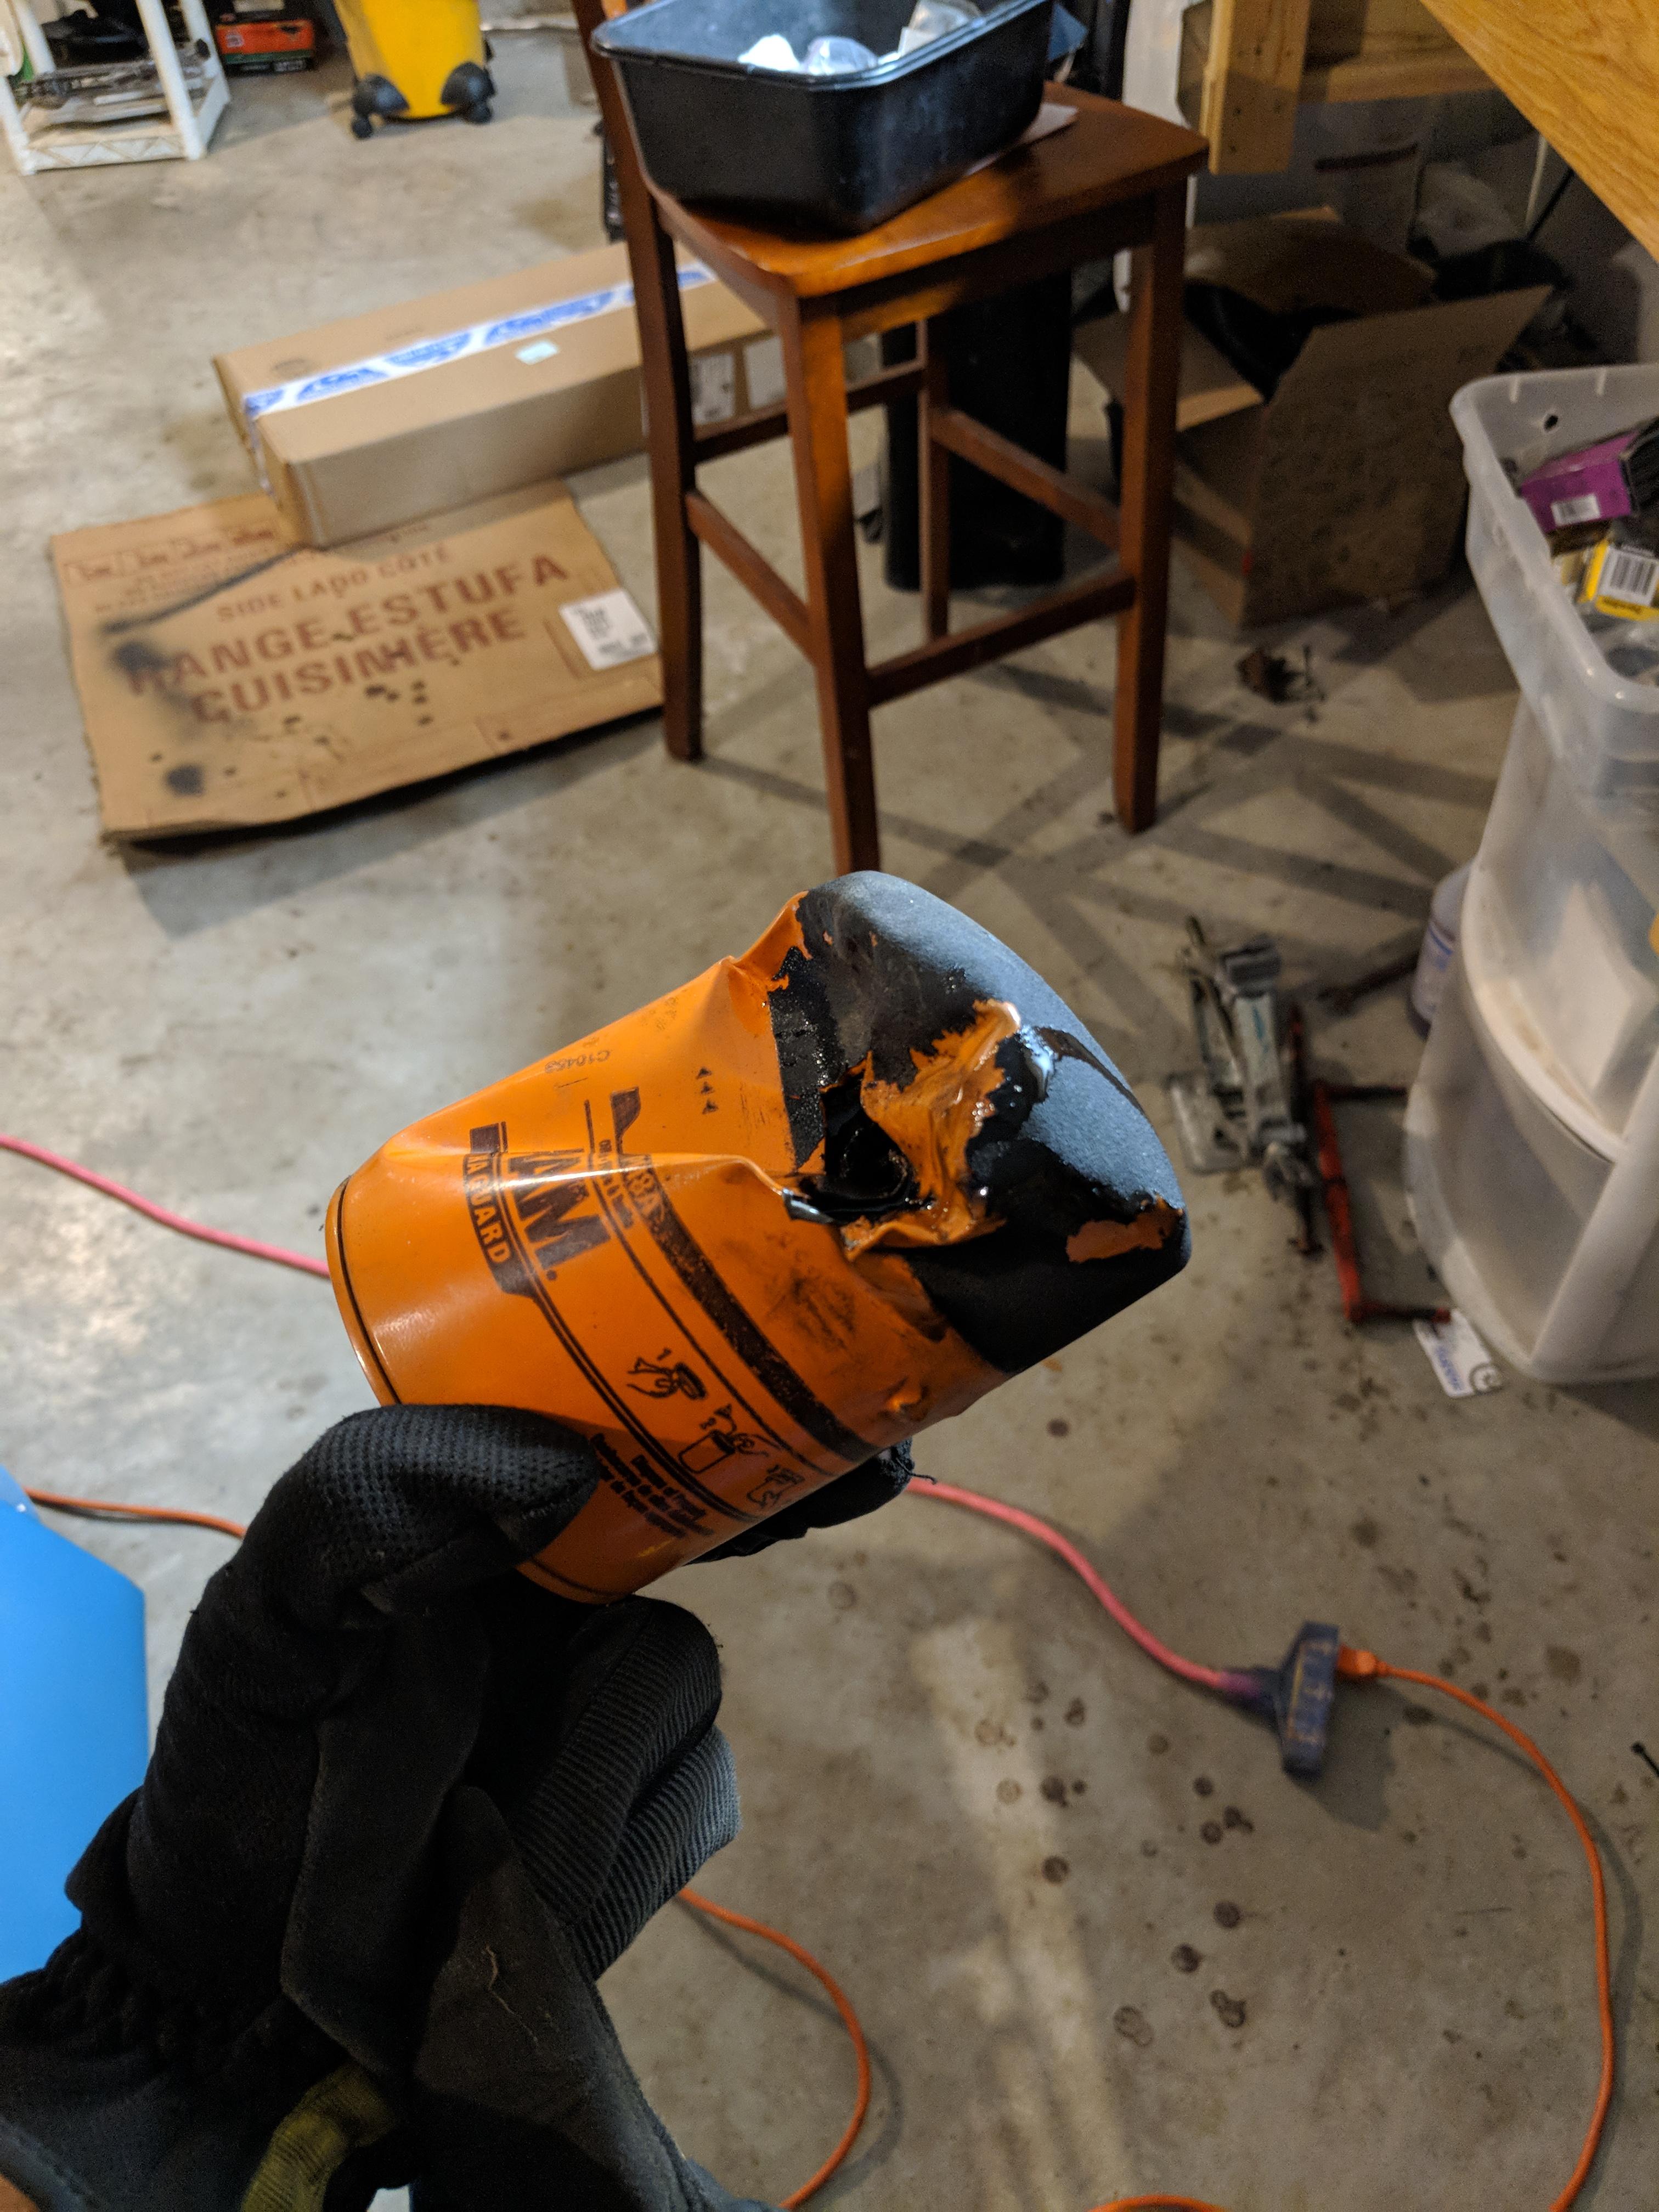
Success! I swapped out the radiator cap and that seems to of resolved the coolant purge issue. Ran it for a good 10-15 minutes last night and didn't have any coolant leaks. Also did a temp fix on that coolant hose to block the bypass for now. Also also took a quick look at the water temp sensor; still nothing on the gauge. Pretty sure its wired up correctly. Sensor is new. More troubleshooting to follow.. Probably would have gotten more done, except I also changed the oil and had some serious difficulty removing the old oil filter. And while I was at it, I got the oil pressure sensor swapped and functioning. Good to see at least that gauge is doing what its supposed to ? Definitely appreciate the replies!
-
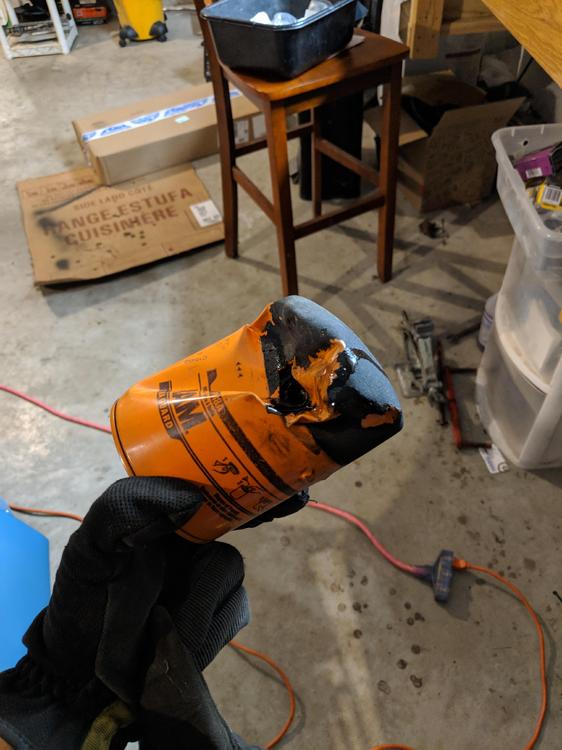
Hmmm alrighty. I'll try the old radiator cap and see if it happens again. And I'll block that line; thanks for the input! I hope the 'short circuit' didn't cause it to overheat.. I 3D printed it ? want one? This is what I'm worried about. I need to troubleshoot the temp guage; it either isnt working or it didn't get hot enough to register. I think tomorrow I'll take it out and put it in some hot water while still electrically connected and see what I get. It's a new sensor so I was hoping it would work ? but I'm yet to actually see it register anything
-
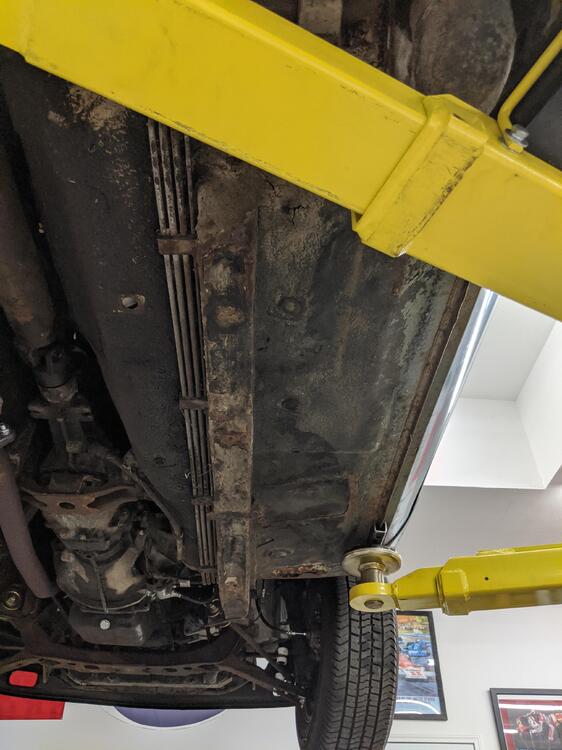
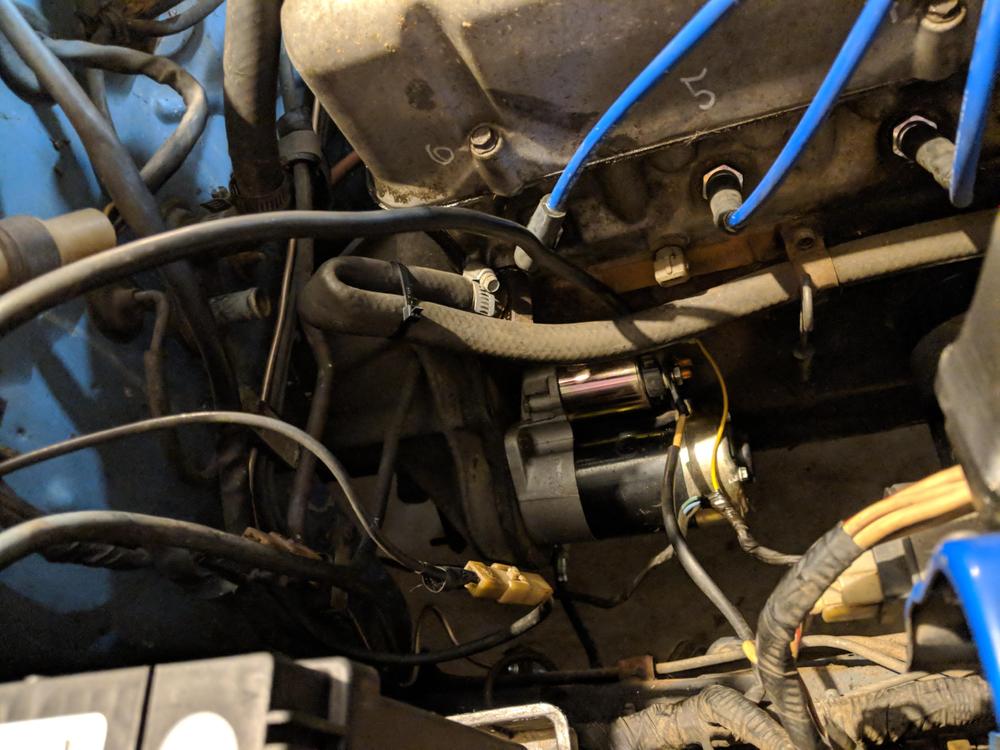
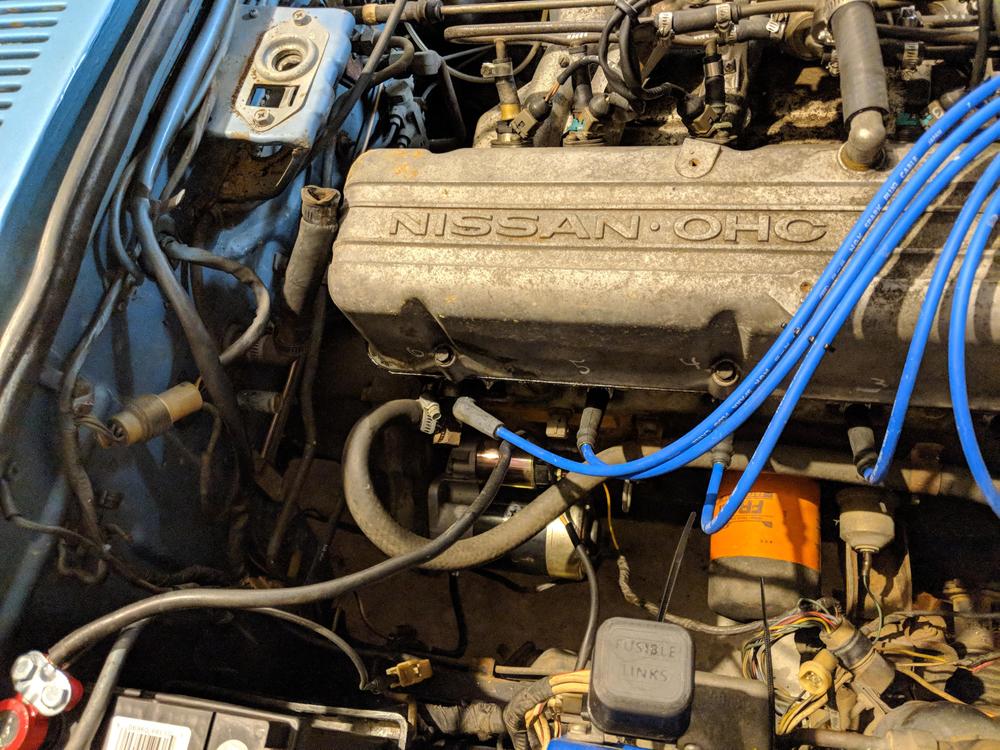
Well I finally got my Z to (almost) ambulatory status. Unfortunately after about 5 minutes of idling and a very brief trip down the driveway and back, coolant started streaming out of the vent tube originating by the radiator cap. And continued for a couple minutes after shutting it off. Kind of a sad end to it's first self-propelled journey, but was curious if anyone had any ideas on why it would be dumping coolant. I don't think I had it running long enough to get anywhere near overheating. Is that where it would purge if I had maybe over-filled it? Or is it possible that it did overheat after a couple minutes if idling.. I have also recently replaced the thermostat. And I also took the two coolant lines running through the firewall (I was assuming one was going into the heater core, and one was coming back) and just hooked one output into the other input so the heater core is omitted (picture included; had a leak somewhere above the passenger side floorboard and saving that for later). I also just replaced the radiator cap. Any obvious answers here? I'm worried I screwed up those lines. Or maybe something is funky with the thermostat.. or maybe I'm being paranoid and I just over-filled it. Thoughts? Thanks!
-
Sadly no; I asked remembering she was looking. And someone else was asking about something that attaches to the end of the airbox, but he didn't have that one either..
.jpeg.164f58c354209ee1b93aa0c38a44616e.jpeg)
.jpeg.1885ac40c13cd47251874b8e5f6caeb6.jpeg)


.jpeg.0fe72a3d2e668ef8aef6e25ff09f32c1.jpeg)
.jpeg.a4eefb71abd60b68a7085a6e021ac934.jpeg)
.jpeg.7d0275ff78ef666d258bb681a01c8f98.jpeg)


.jpg.1d4ddd1180c7b371594c080d06309707.jpg)
.jpeg.2b4147c75f492a69537e08d4fc2ddc54.jpeg)
.jpeg.0c87cfc497331bbd4f7431a1ea87852d.jpeg)