Broman
Member
-
Joined
-
Last visited
Everything posted by Broman
-
Correct...the exterior body color.
-
Once I heard someone say that one reason they favored PPG is that PPG has the formulas for the early Z colors. But the guy at my local PPG store begs to differ. He DID have one early blue in the system, but it was titled "1971-72 Blue" so that is not at all helpful since 71 and 72 have very different blues. Does anyone have the PPG Deltron formula, perhaps stuck to the side of a can of leftover 903 Universal Blue?
-
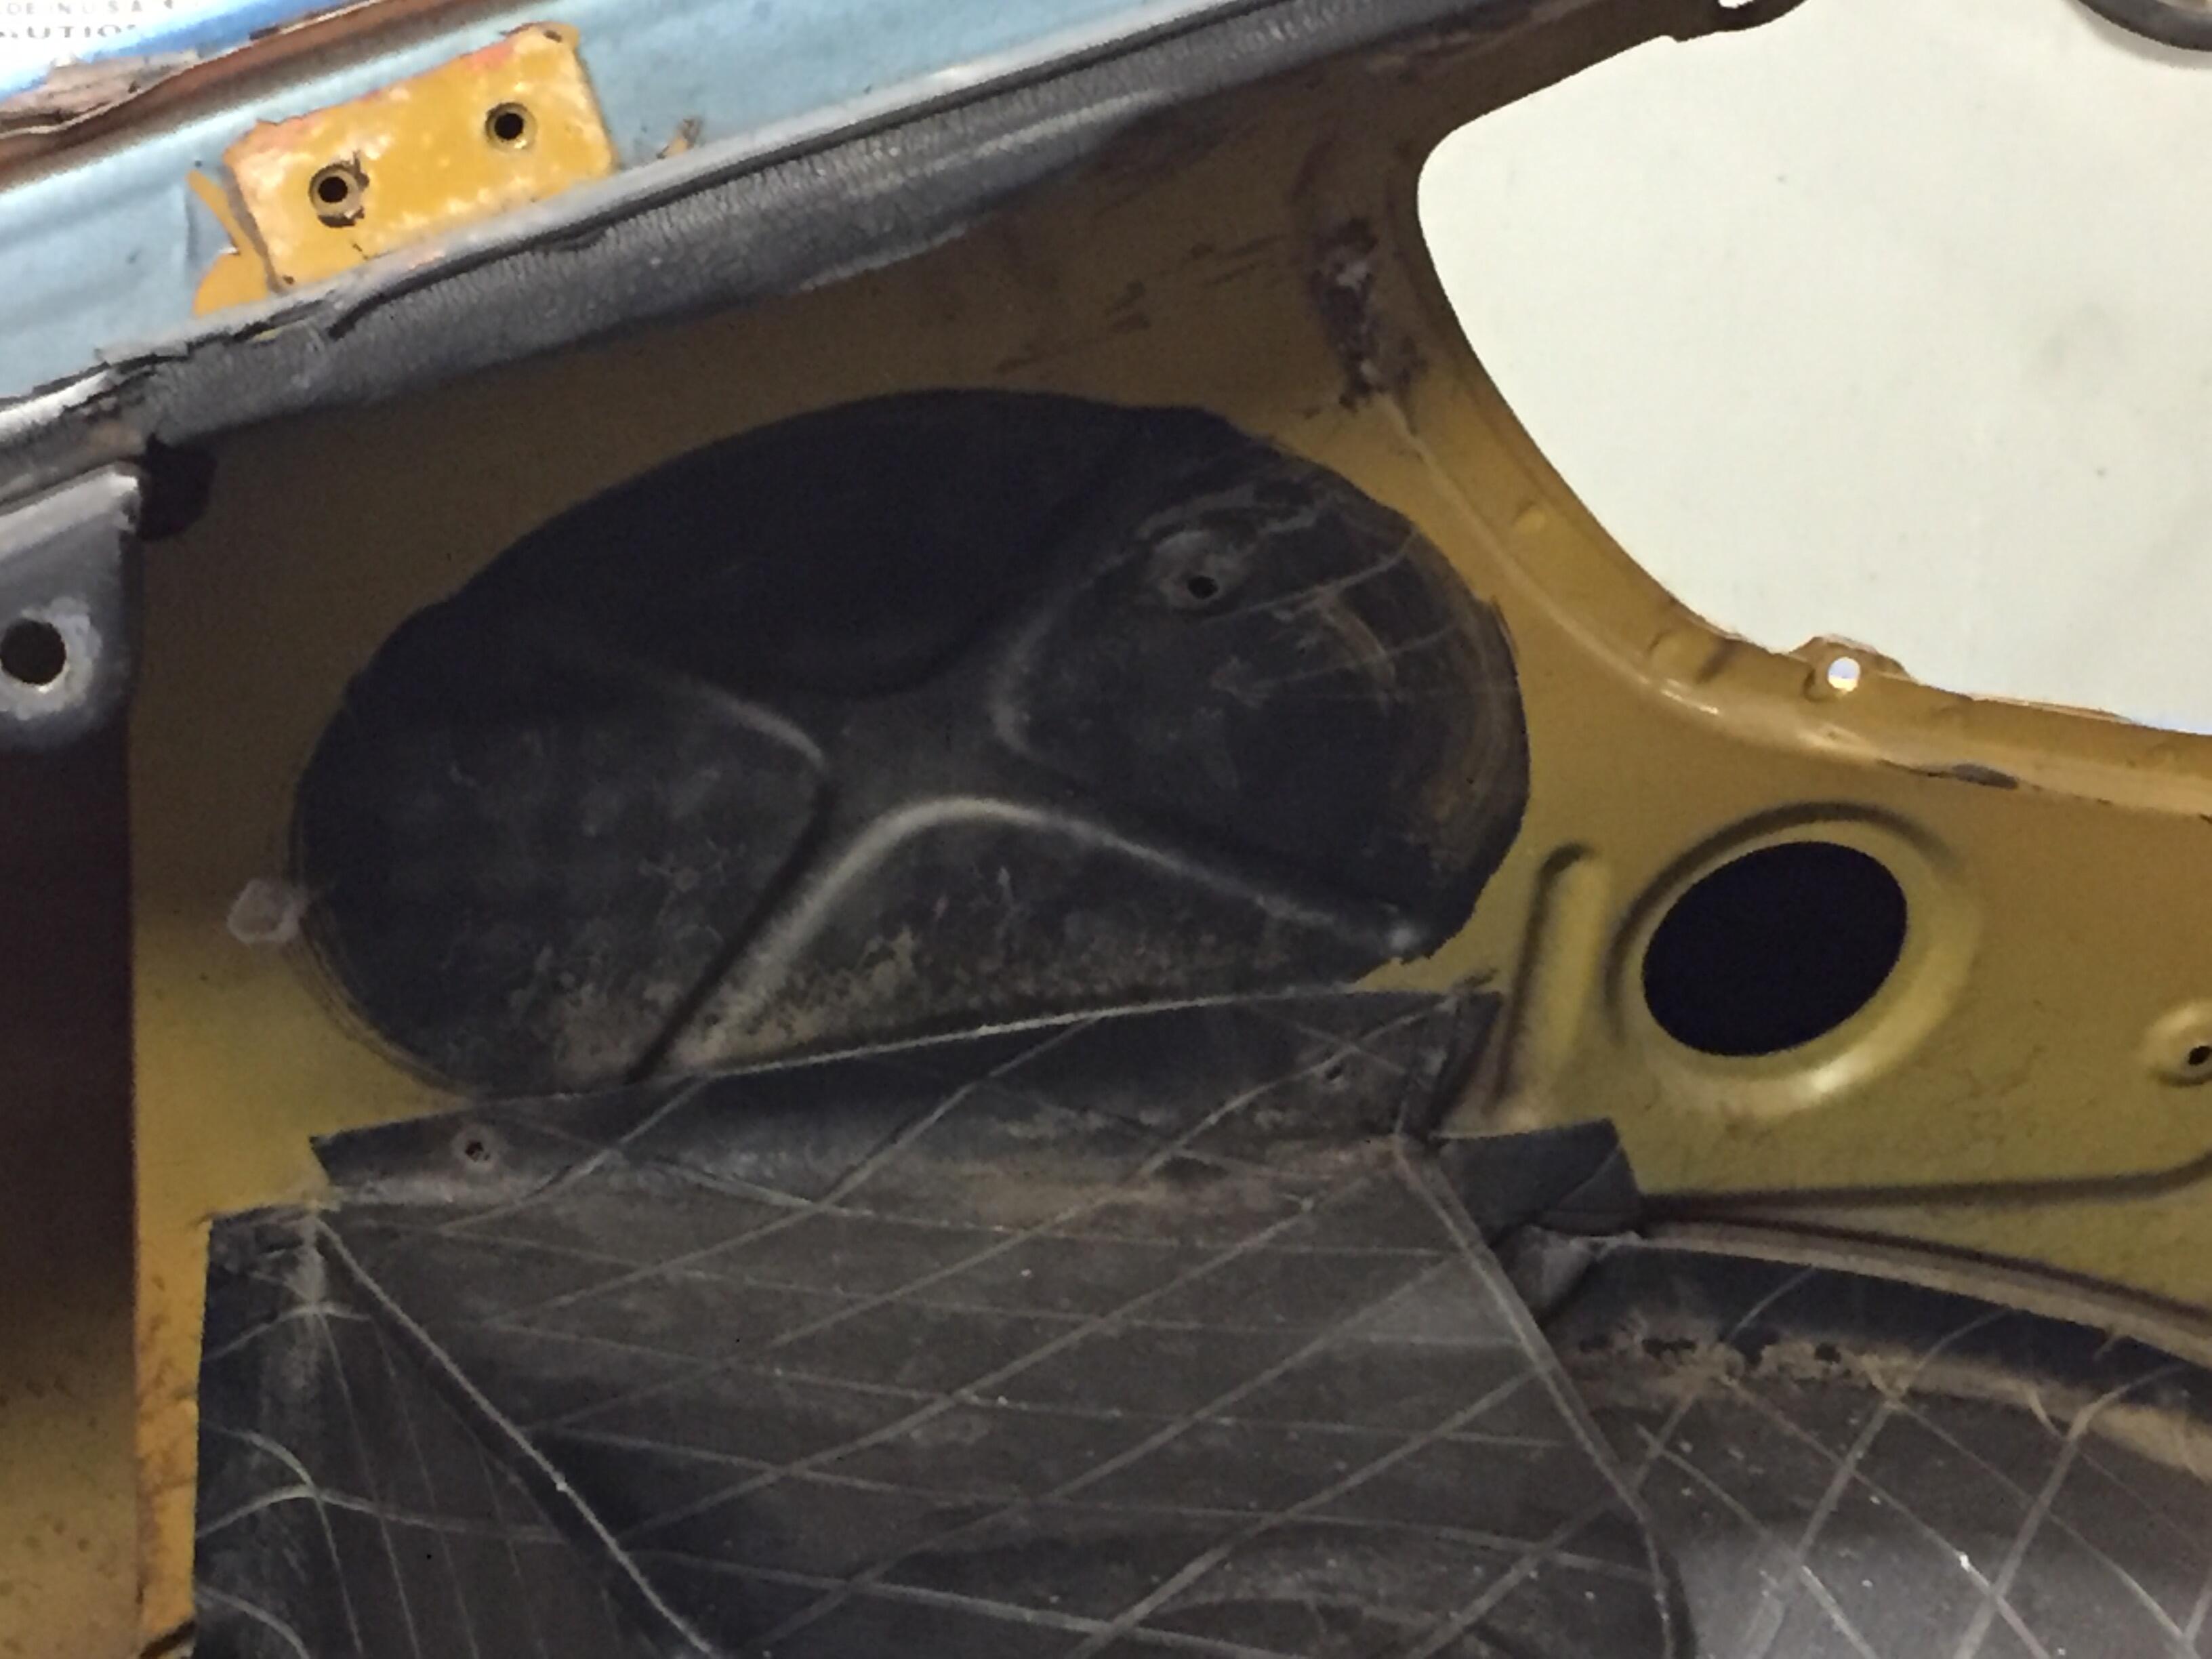
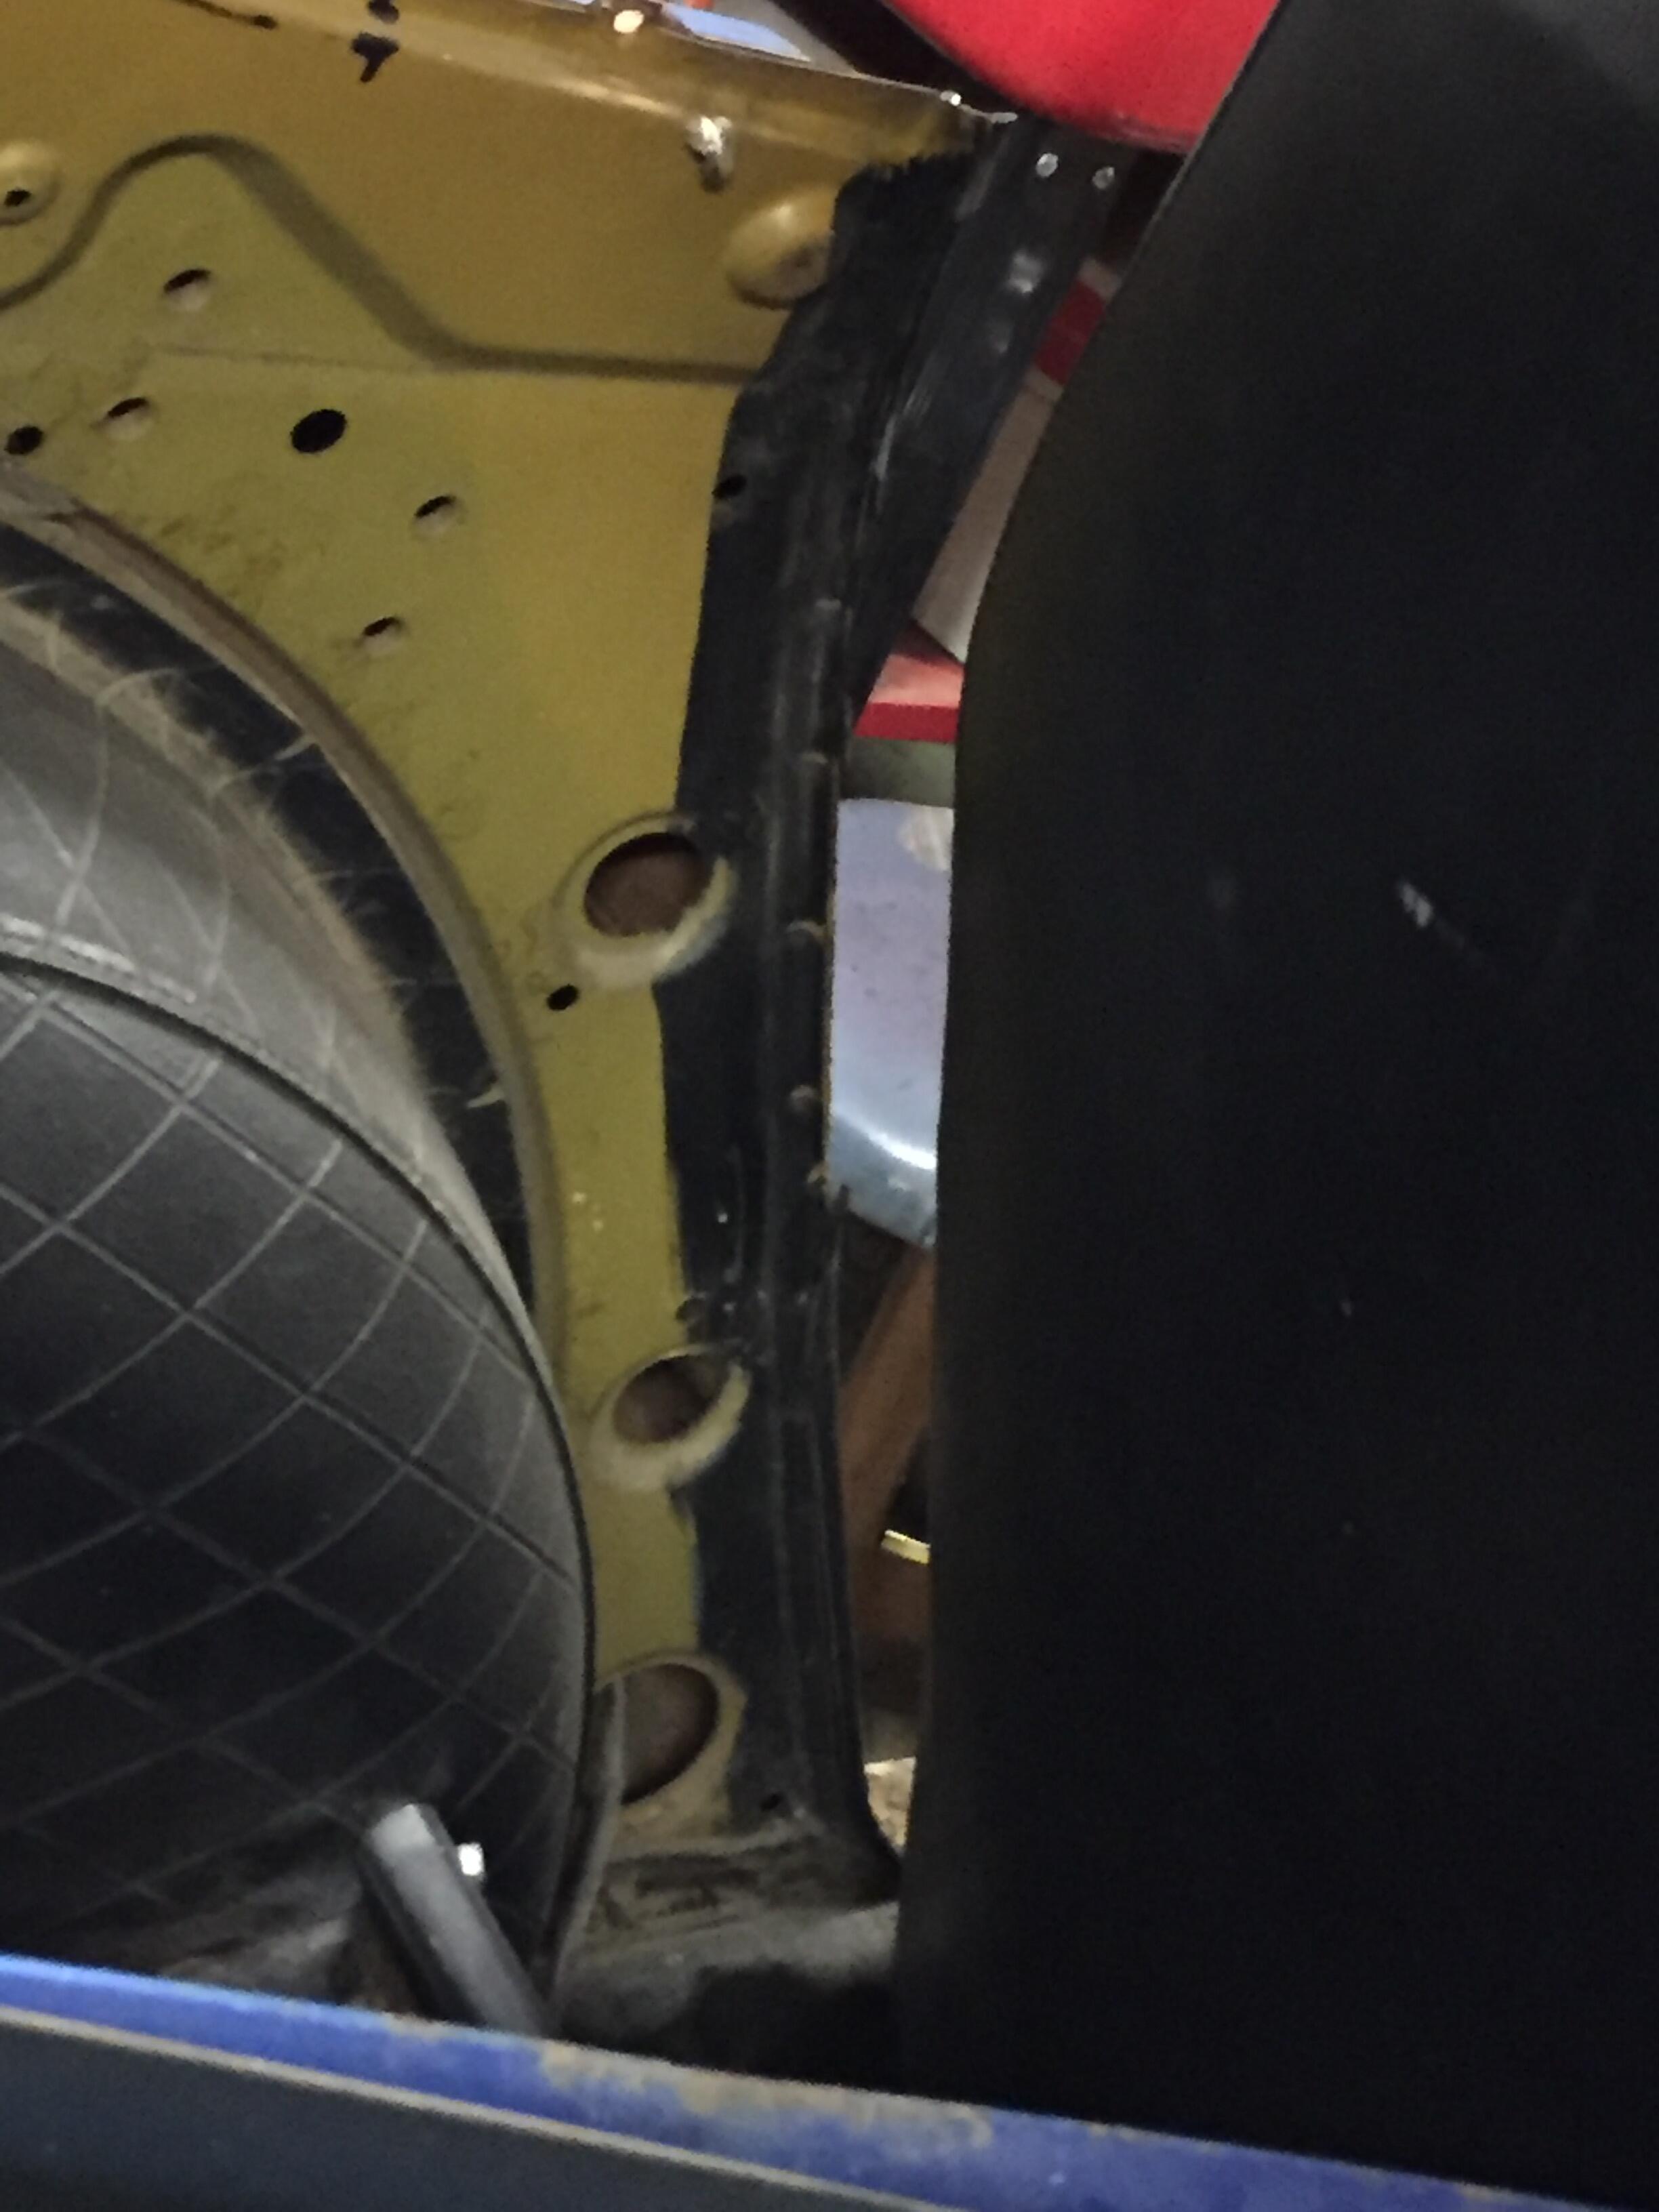
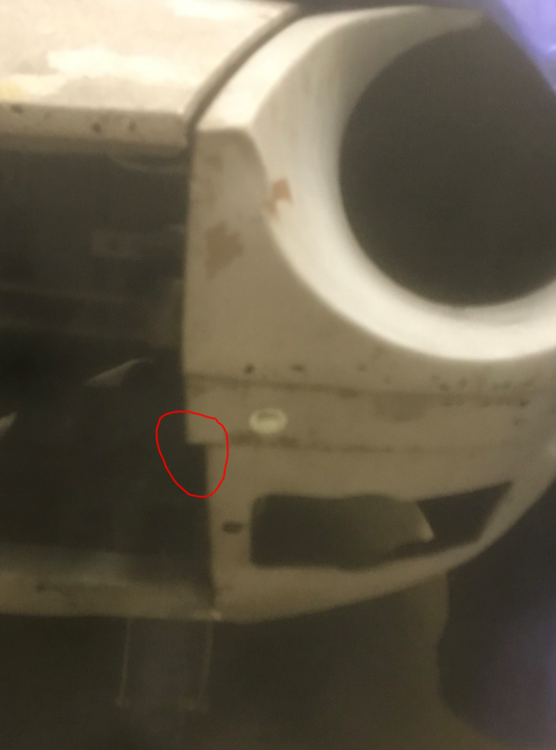
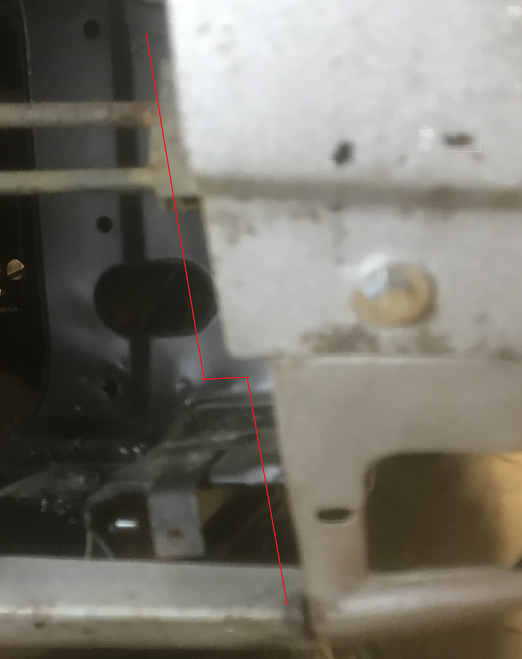
Well, allow me to ask my fellow 240Z owners to help with the detective work! Here is my ask: If you have a 240Z with original METAL headlight bezels, please check them to see if you have this third mystery hole. Even if your bumper is bolted on, I think there is enough gap between the bumper and the body to peek in and confirm/deny this hole's existence. And if you see it, is there a matching hole in the valence behind it. I am trying to determine approx when this hole showed up.
-
Sorry, here is a wider pic of the situation. I need to apologize for the fuzziness...by iPhone camera lens cracked and I haven't had time to replace it.
-
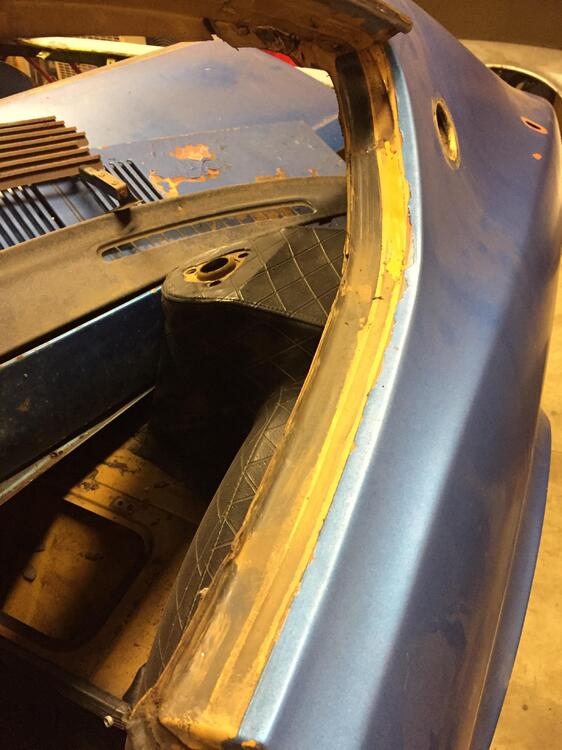
That is correct. This pic tries to show the lower valance (that has the large hole for the turn signal) mounting to the headlight bezel.
-
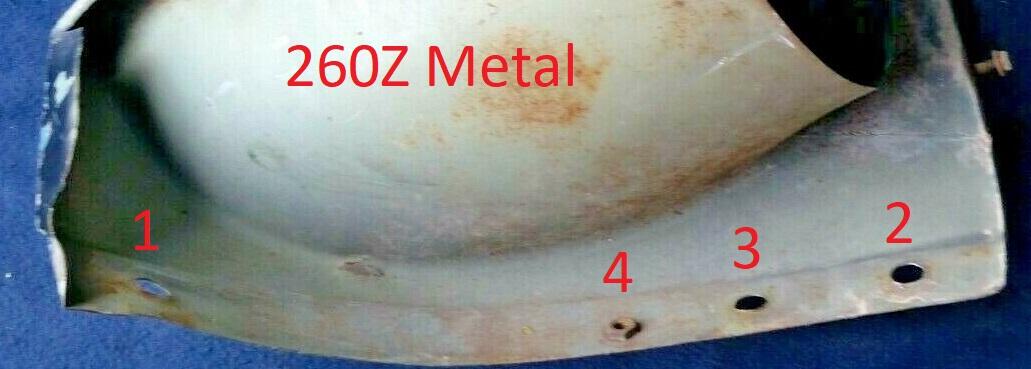
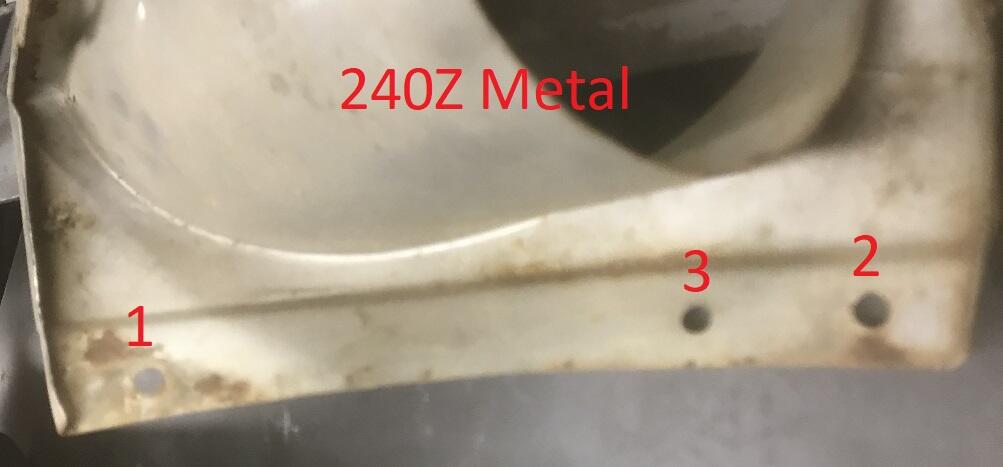
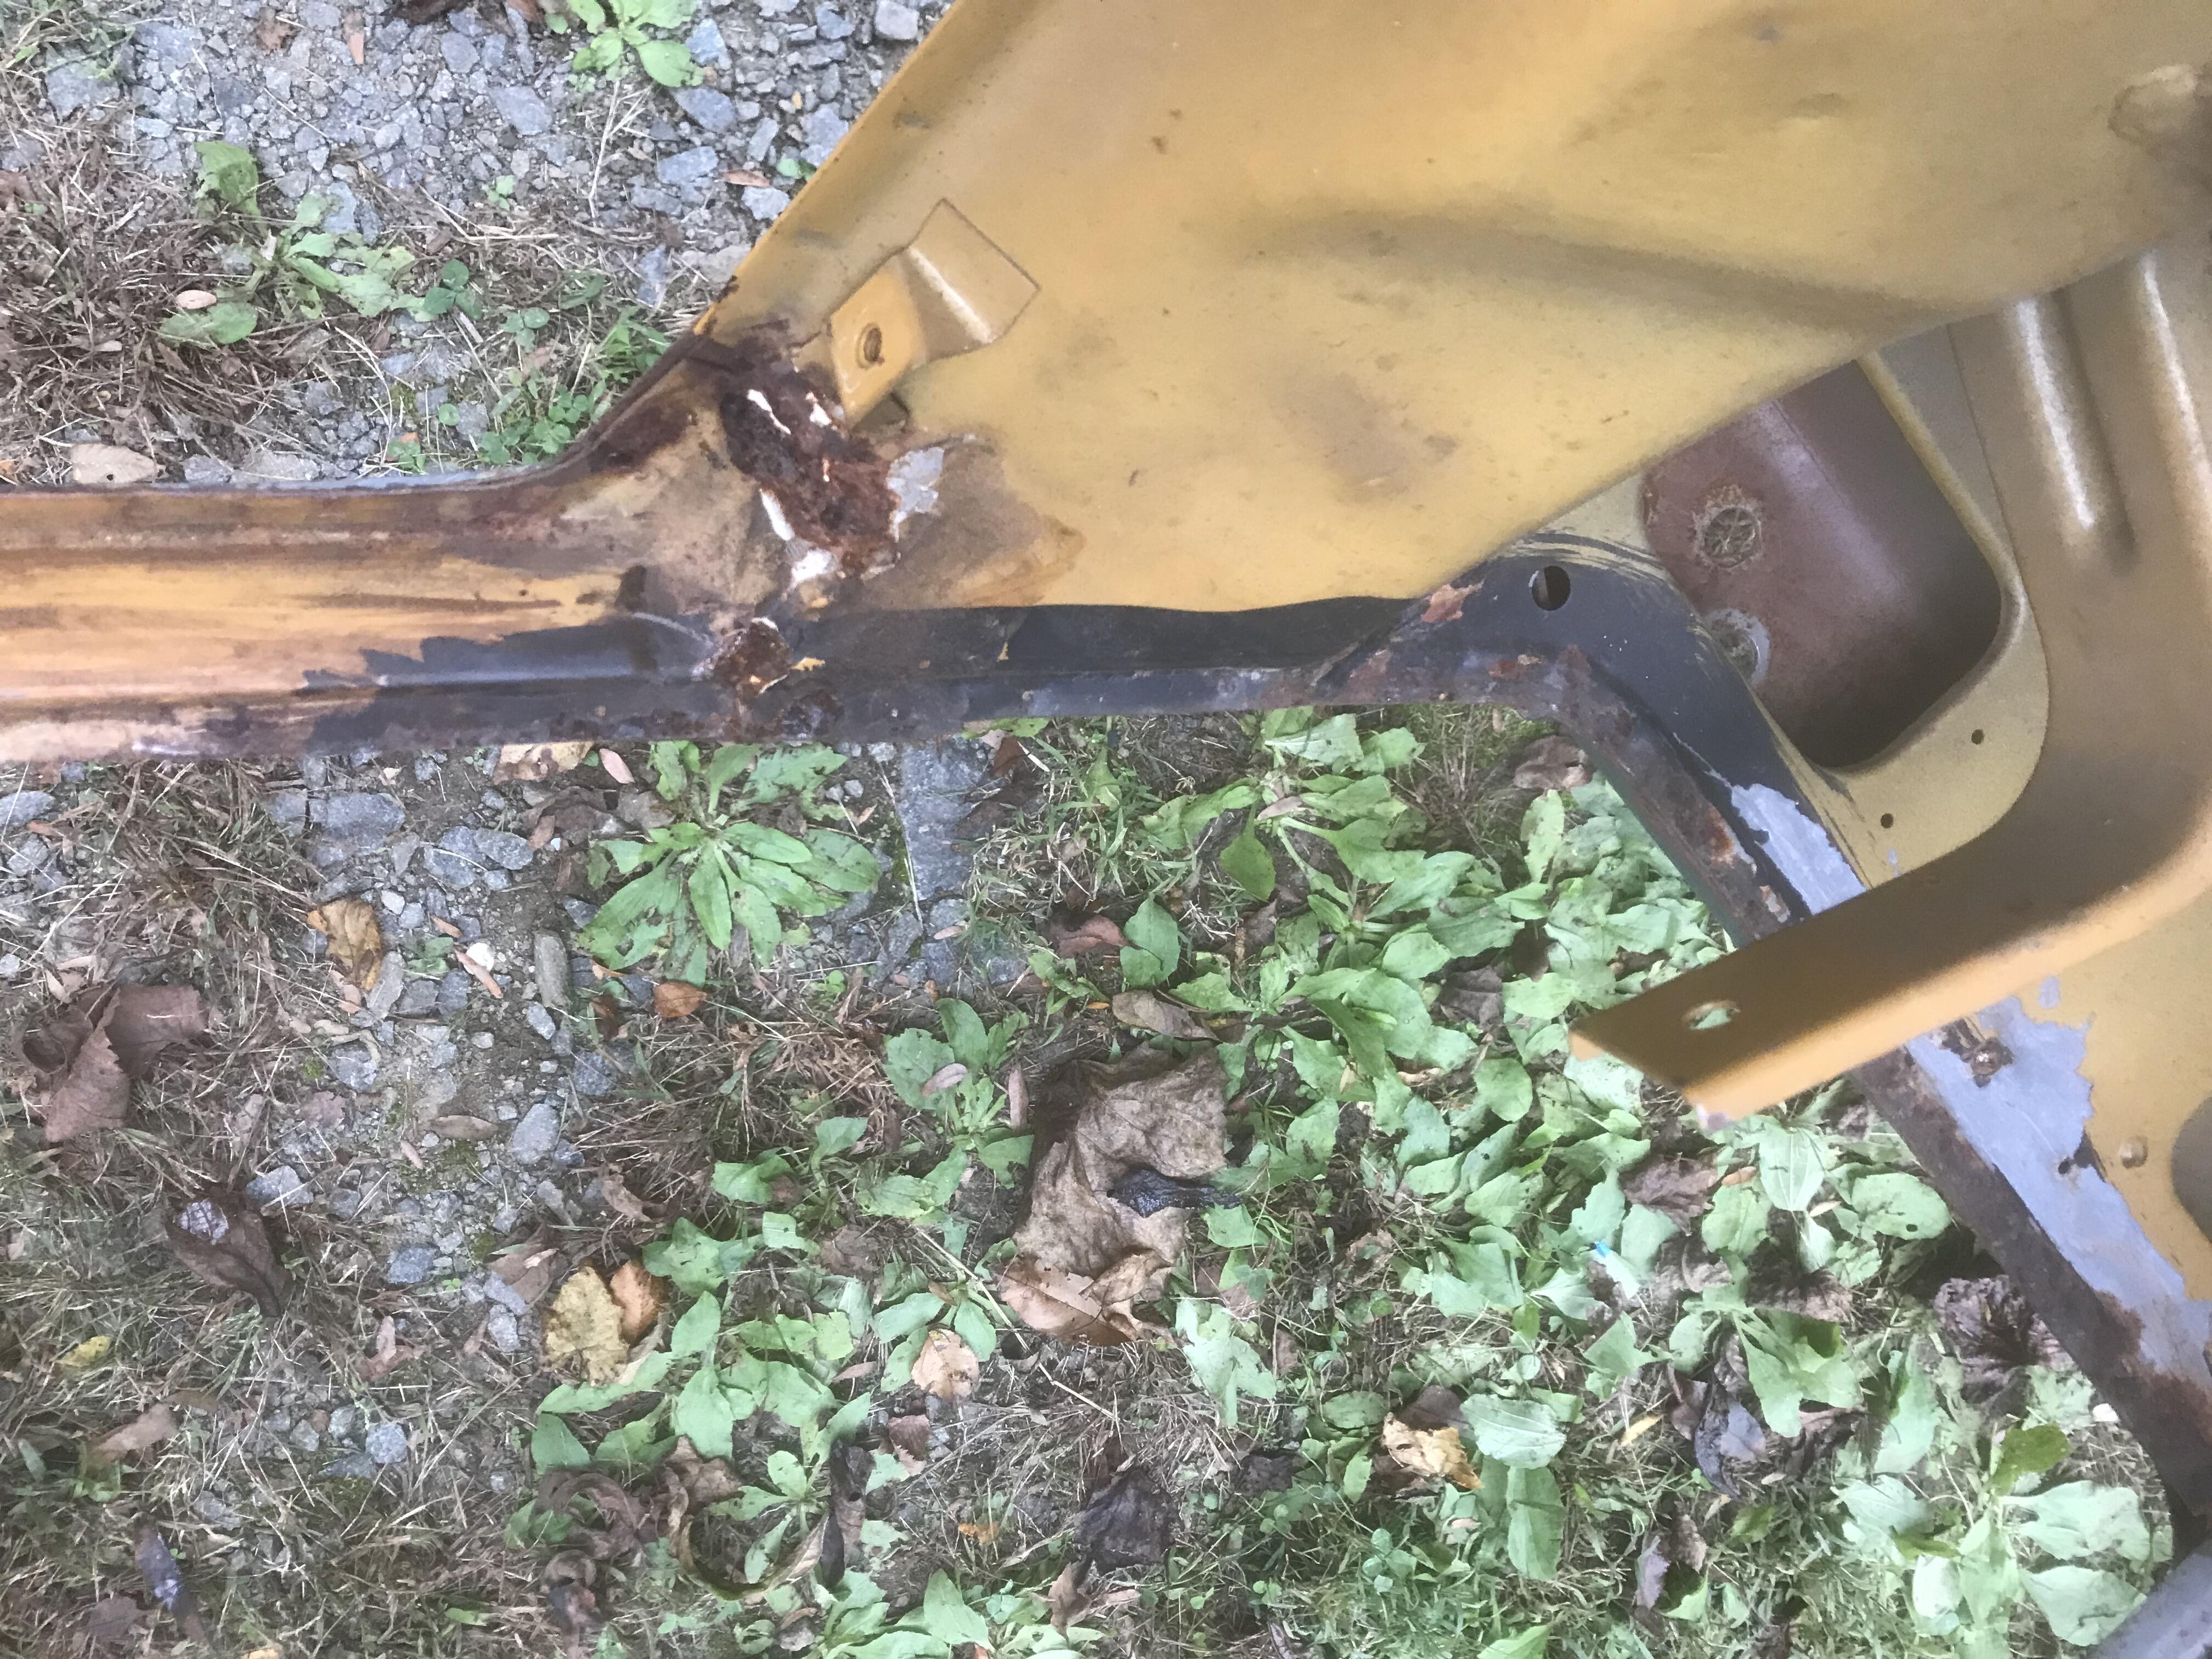
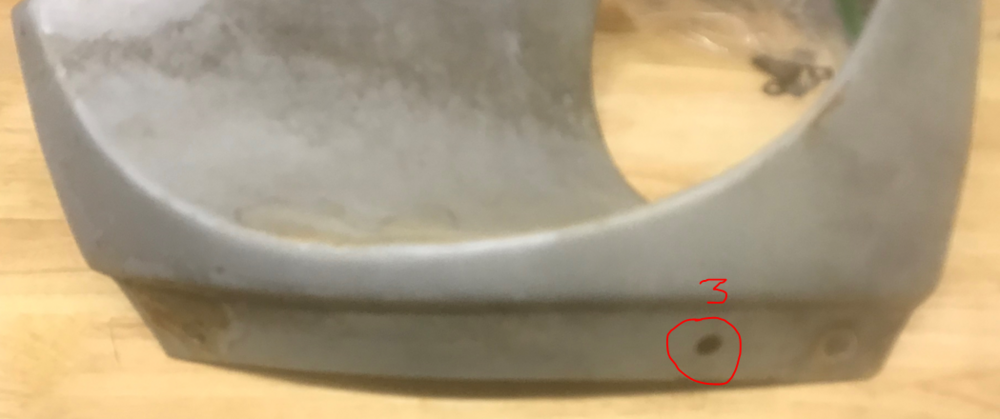
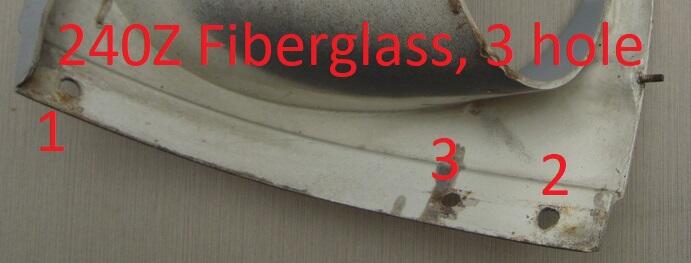
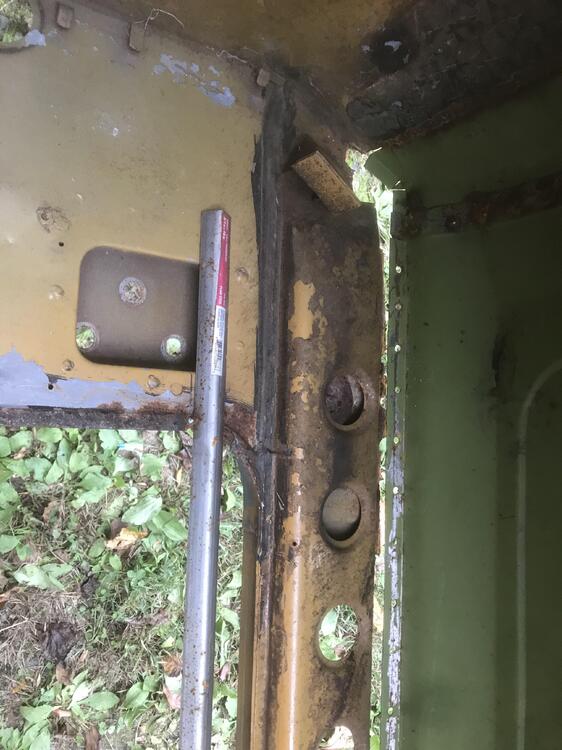
So during a trial refit of the panels of my May 71 240Z project I had an issue getting the lower lip of the LH headlight bezel ("sugar scoop") to lay flat against the upper lip of the lower corner valance. While researching the issue, I quickly went a rabbit hole and discovered no less that FIVE variations of the S30 bezel, and the differences all seem to be related to the number and type of holes on the lower lip that overlays the top of the lower corner valance. Here is the original fiberglass bucket, with two holes (#1 and #2) that align with the two cages nuts on the valance. These holes are the same on all the variants. But here is a bezel where an additional mystery hole (#3) shows up. I have no idea what it is for, but it does have a matching hole in SOME 240Z valances. (Other 240Z valances do not this this hole.) This mystery hole seems to be continued on all further variants. When they switched over to a metal bezel, they appeared to keep the same hole positions. With the new 260Z bumpers that use a rubber filler between the bumper and the body, this filler has a metal tab that is screwed into yet another, albeit smaller, hole (#4) in the bezel. And this hole has a factory-installed hex (not square) nut resistively welded to the back of the bezel to accept the screw holding the rubber filler. BUT...when this nut showed up on the back of the bezel, a corresponding notch in the top of the corner valance was added so the the valance and bezel lips would still lie flat. (This is what caused me a problem. Some previous owner put a 260Z bezel on my car while keeping a 240Z valance and the nut gapped the panels...no bueno.) When the 280Z grew a even larger bumper, this rubber filler strip was no longer used. While I am just speculating, it appears that they did away with the hex-nut-welding step, but left the #4 hole (no savings to delete it from the tooling). This all is just one man's observations, and I welcome other findings y'all have made.


-
Is this normal? The headlight bezel extends a good 3/8" beyond the top edge of the lower corner valance. Everything else fits perfectly on this corner of the car. 5/71 Series 2 240Z.
-
A few differences I see between his Series 1 and my Series 2 - the earlier car's hatch prop bracket was blacked out (maybe mine was, too and I just missed it!) - the earlier car did not have blackout behind the interior plastic vent holes - the earlier car had the inboard portion of the front seat bracket blacked out, whereas mine and may others I've seen just blackout the outboard portion These were done by humans who get sloppy, so variations will exist. But the procedures also evolve as they learned more with each car. These differences are what make automotive archeology so much fun!
-
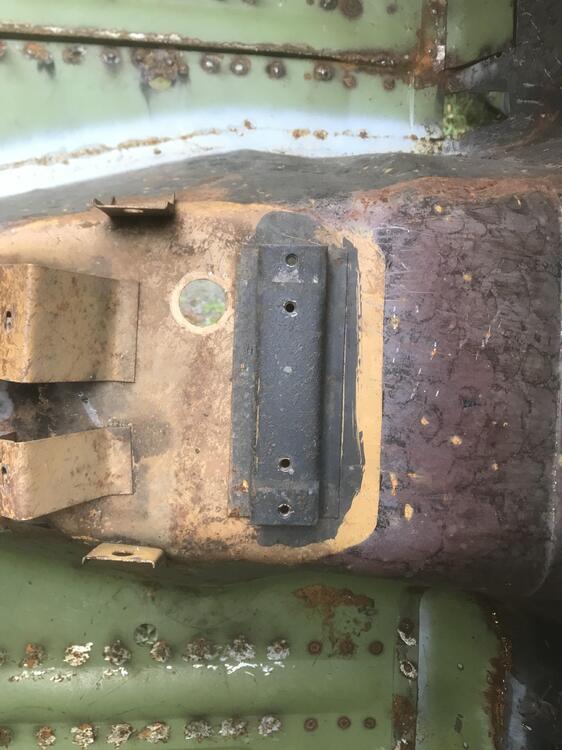
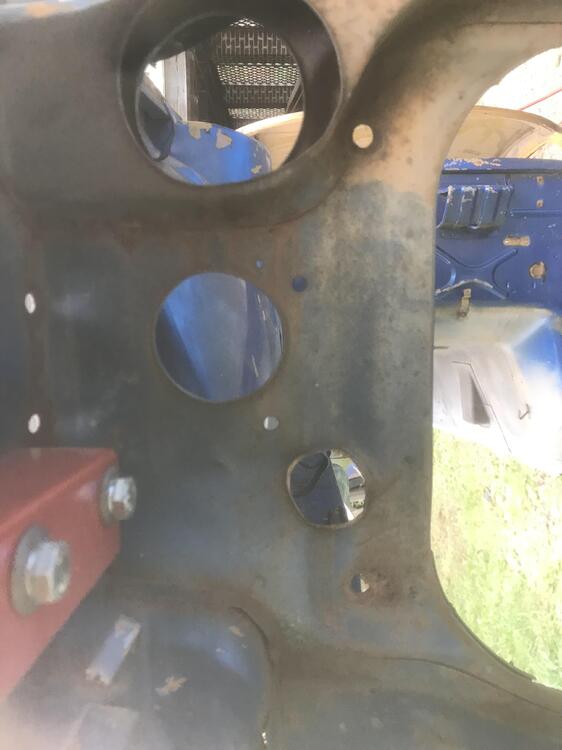
Indeed. Here is my 5/71 Series 2 car (and one from another car). - behind plastic trim vent holes - below rear quarter windows - around the front and rear edge of the door openings - the mounting bracket in the tranny tunnel - the outer roughly 1/3 of the fwd seat brackets - all rear seat brackets - part of rad support directly behind the grille - grille brackets (all five)


-
This is what I have on my Z, and I have seen many other similar patterns. They seem to just blackout the area directly behind the grille.
-
Wow..how did I miss the rear hatch! Duh! I asked about the plated door latch and strikers because on the old Corvettes (my previous addiction) these were the two items installed before paint so that the doors would stay closed when intended. They were masked rather roughly so they had body color paint around the edges. But I will not repeat that on my Z if no one has seen that trick done by Nissan.
-
I had not considered using a liquid (paint on) coating...but it's worth a test.
-
Unfortunately with the ones from https://www.240zrubberparts.com/ you can get two single covers from each advertised item, but they are out of stock.
-
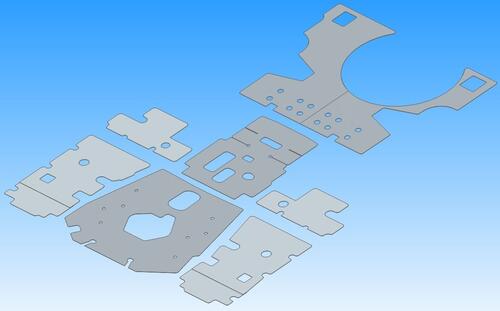
So while I am a fair ways off from applying color to my 71 240Z, I am trying to be sure I understand the painting sequence that Nissan used. When the car was ready to get shot with it's color coat, here is what I believe was installed, and therefore got painted the final color: - Two doors - Hood - Cowl panel and its four receiving "sockets" in the lower windshield frame - Two inspection doors (battery, clutch master) - Hood hinge assy with torsion rods - Two fenders - Two headlight buckets ("sugar scoops") - Front lower valance - Two front lower corners - Gas door - Two interior compartment doors (not applicable to Series I) - Interior sound deadening mats What I am not sure of: - Hood prop rod? - Door latches on door? - Door strikers on jamb? Did I miss anything?
-
I couldn't find any good write-up in other threads, so here goes. Regarding the dozen of thin, bendable harness tabs welded all over the body...a close inspection of mine confirms that they were covered in their rubber casings AFTER the color coat. I read some folks who said the rubber coatings were painted body color, but that clearly was not the case with mine (5/71 240Z). Anyway, since many of mine are broken off or cracked, I am looking for an authentic way to replace the black casings over these tabs. The commonly proposed solution is to use heat shrink, especially the kind that is adhesive-lined. But my issue is that regular heat-shrink comes in a sleeve and leaves an open end, whereas the originals are more of a cap than a sleeve. I have found a few potential options online from electrical firms that make "heat shrink caps" (heat-shrink with one end pre-sealed). I will test those and report back. But has anyone else solved this issue already?
-