Broman
Free Member
-
Joined
-
Last visited
Everything posted by Broman
-
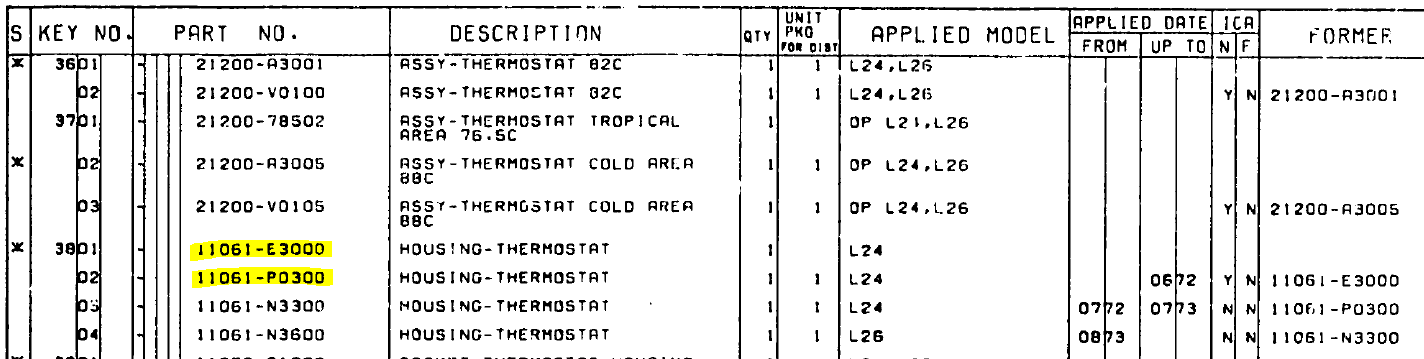
So it's still not really clear just when the factory made the switch over to the wide-flange 11061-P0300. The fiche indicates either were possible up to 6/72. But the wide-flange 11061-P0300 does NOT have the extra hole @CanTechZ mentions. The housing with the extra hole showed up on the '73 models and is part number 11061-N3300. And it changed again for the L26 is is part number 11061-N3600.

-
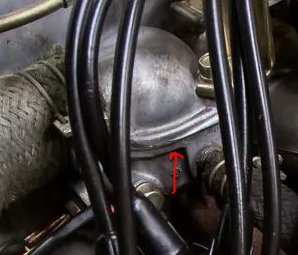
Regarding the LOWER thermostat housing, the conclusion I'm coming to is that indeed, the narrow-flange one is 11061-E3000 and is for 70-72 cars. It seems to have been replaced by the wider/tapered flange 11061-P0300. The micro-fiche seems to support this. Also here is a pic of the early 21K-mile BAT '71 car with the narrow flange housing.
-
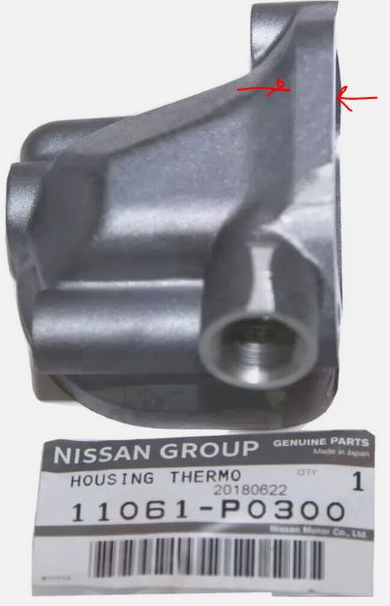
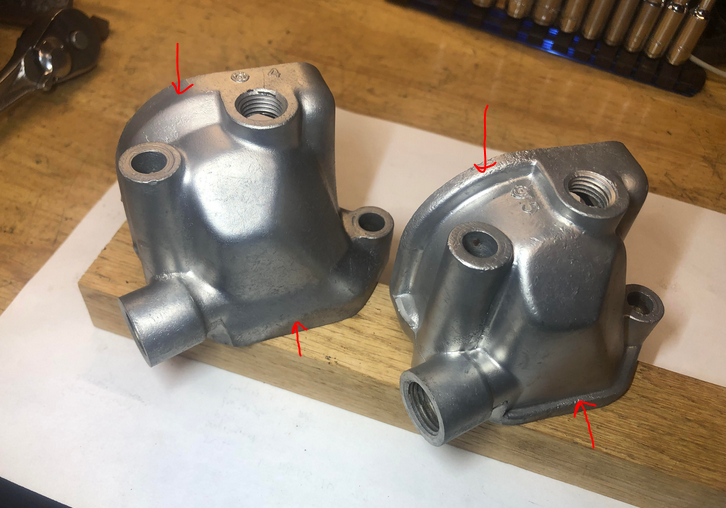
After receiving a box of parts back from the vapor honer, I noticed that the two lower thermostat housings I had are different. One came from a 72, the other I am not sure. I believe the one on the left is part number 11061-P0300, which the microfiche indicates was used on 1973's. So I suspect the one on the right, having lighter-duty top and head flanges, is 11061-E3000 and is for 70-72. Can anyone confirm? What's on your original early 240Z's?

-
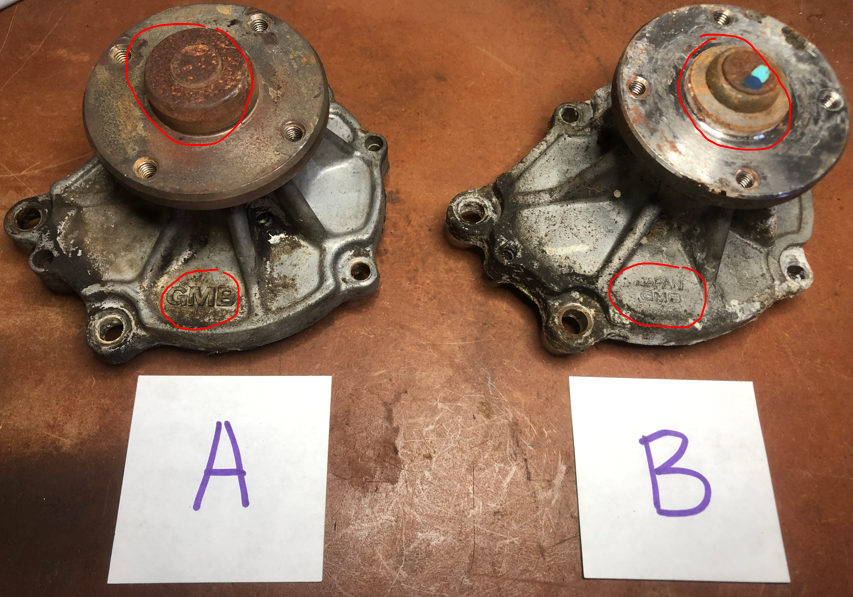
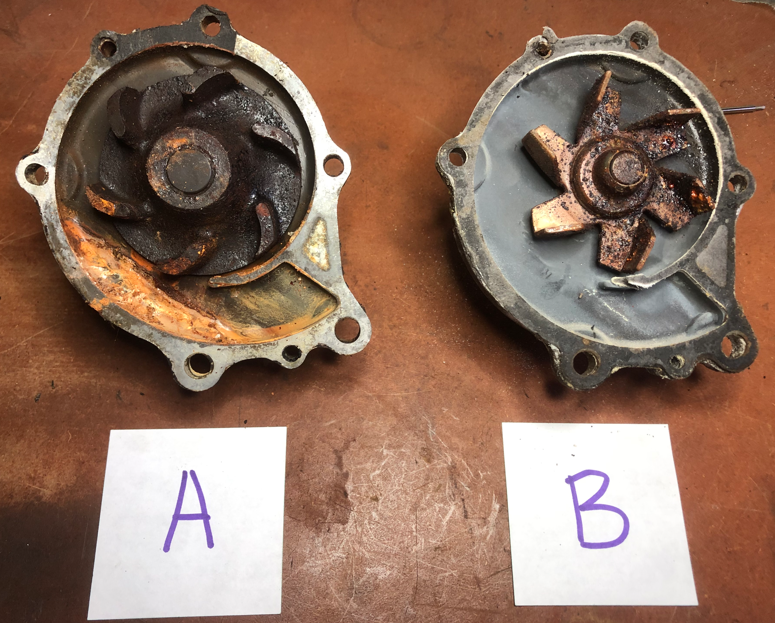
Which is the original/correct water pump for a May 1971 240Z?
-
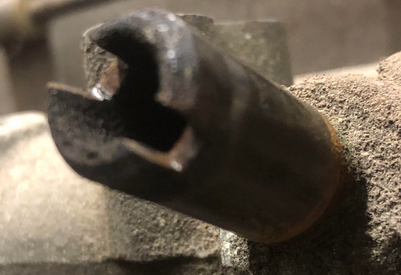
Heating + vice grips did the trick! I'd still like to learn the name of that fitting and get the proper tool for my toolbox.
-
I tried that sheet metal trick. I found a stout piece that fix snugly in the slot. It just bent the sheet metal! Since the coefficient of thermal expansion (Cte) of aluminum is around 23 but steel is only around 12, heating it should cause the alum to open more and loosen it's grip. On to the propane!
-
Exactly what tool is used to extract this threaded fitting? I hope there is some type of socket that engages these slots. Help!
-
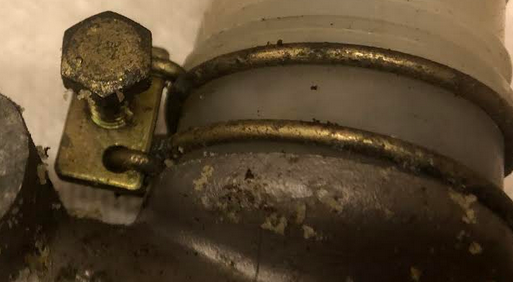
Has anyone worked out the significance of these casting marks on the master cylinder? What are yours? This pic is from my May 71 car, but who knows if it is is the original one. :-(

-
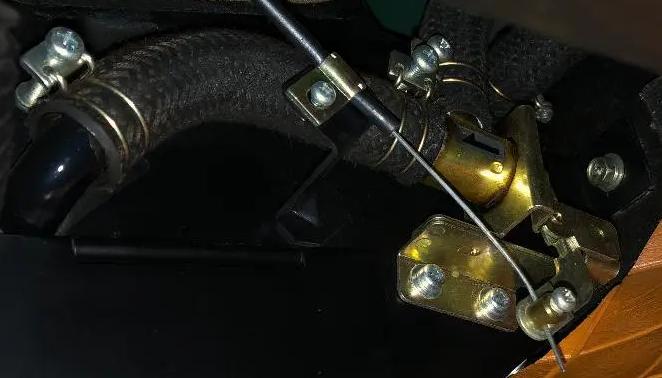
So I took a close look at the $310K BAT Green Series 1 and was a bit surprised. In multiple places is looks like the hoops are yellow and the screw mechanism is clear. Am I imagining this?
-
With 12 months and only 1 digit, what does Nissan use for the last three months: "A" and "B"? Or something else? I have caliper here that has "X" in this position. Maybe the 10th, 11, and 12th months are "X", "Y", and "Z"?
-
Yeah, but that rule of thumb might be better said that "everything in the cabin is clear, otherwise yellow". Because most all the undercarriage is yellow. It seems like Nissan felt that if it is to be seen (without opening the hood), it should be silver-colored. Yellow, with it's additional chromate protection, seems to be mostly reserved for items out-of-sight of passengers. But I'd still like additional opinions...what color(s) have you seen your original hose clamps? I mean both the engine compartment ones as well as the one back by the fuel evap tank.
-
OK, I was so focused on the finish color I totally missed the fact that the screw was a hex-head instead of a pan-head JIS! D'oh! Captain, I really don't know the history of this car...so nothing surprises me. But here's my basic question...now that I have all the small hardware cleaned and ready to send out for plating, should all my hose clamps go in the "clear zinc" box or the "yellow zinc" box?
-
Oh yeah, this is from a May 1971 car
-
I've heard some conflicting info on the subject, so I figured I'd consult the hive mind. Regarding the wire-type hose clamps used all over... 1) Were they all clear zinc/cad, all yellow zinc (zinc with yellow chromate), or are their two variants? 2) If two variants, what is the rule of thumb as to which ones go where? 3) If two variants, did they have different part numbers? I ask because it was my understanding (perhaps incorrect) that they were all clear zinc, then I discovered this when disassembling my clutch master cylinder tonight: Extra credit: Have any other data guru's out there put together a spreadsheet that lists all clamps and their sizes? Thanks!
-
Interesting. Does anyone have a pic and/or any dimensions of this insulation?
-
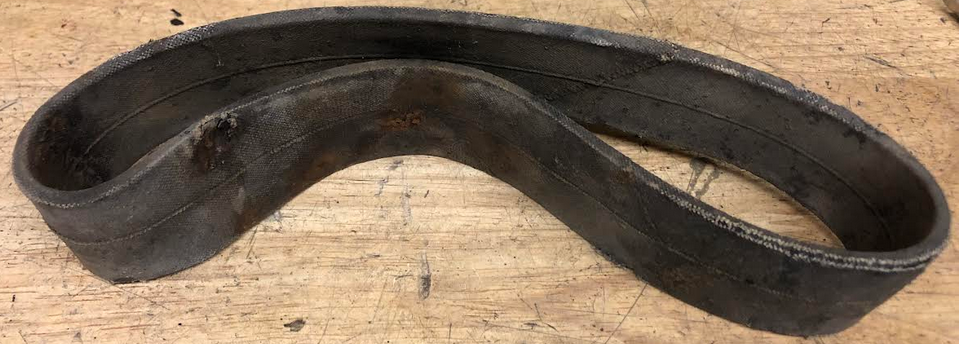
My existing (original) arrester belt (above the front snout of the diff) seems to be in good shape except for being a bit stiff and dirty. Is there any trick to help return some suppleness and flexibility to this?
-
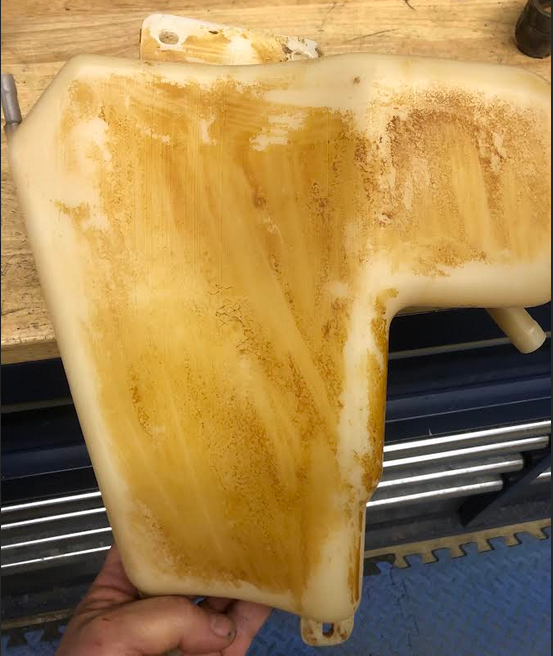
So looking at the back of my otherwise very clean vapor canister it has some "stuff" on it that looks like contact cement. Seems to have brush strokes. But nothing was adhered to it. The front side (facing inboard) is free of this stuff. Anyone know what this is from?
-
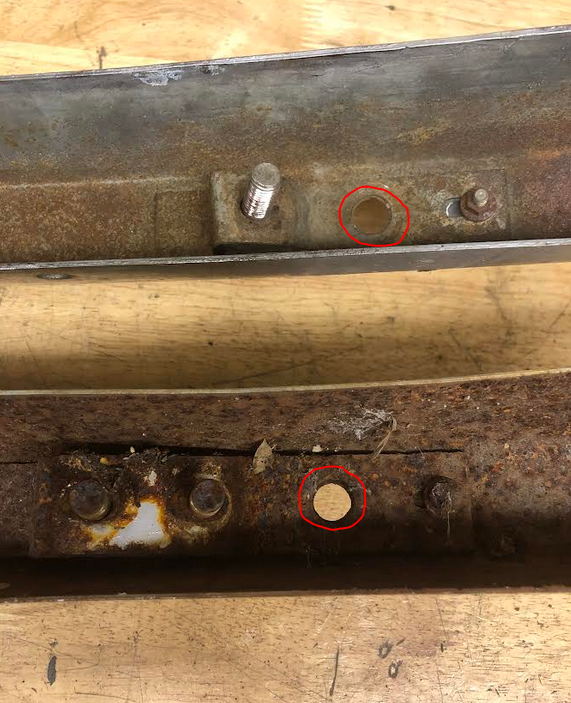
I need help identifying some 240 front bumpers. The lower (rusty) bumper came off my 240Z. I bought the upper (clean) bumper at a swap meet but now see that the attachments to the bumper brackets are totally different. (The circled holes are for the over-rider.) The lower (rusty) bumper has the inner mounting studs 30.5 inches apart. The upper (clean) bumper has them 33.5 inches apart. And the license plate brackets are also drilled differently. The rusty one seemed to be original to my May 1971 240Z and fit perfectly. But what the heck is this upper one from?
-
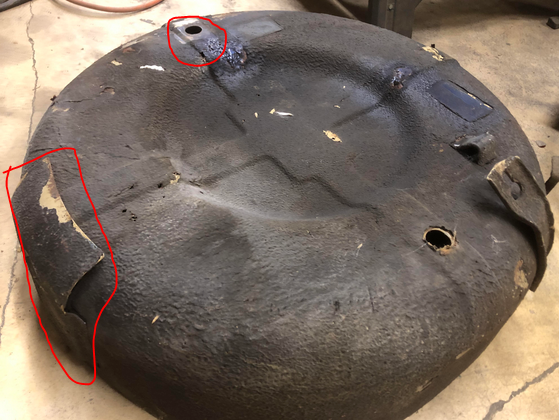
May 1971. I dug around and found the original, old rusted-out one from may car...one drain hole. So sometime between 5/71 and 7/76 they added a second drain hole. Also, my 5/71 tub did NOT have a heat-shield on the side. Here's a pic of a later tub that has the second (rear) drain hole and a heat shield. I wonder when this change was made.
-
-
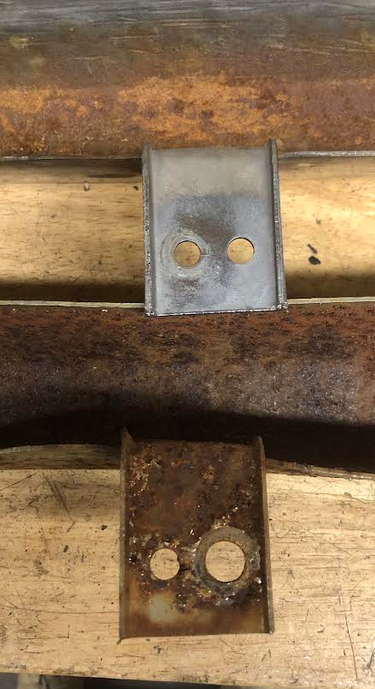
The hinged lids of the 240Z attach using the outer pairs of tapped holes. But why do both doors have this extra pair in the middle? I have seen pics of brackets bolting here for the 1977 and later false floors, but why were they on earlier cars?

-
Regarding the deep (full-size) spare tire tubs, I have seen two differences. 1) Some have one drain hole (fwd) and some have 2 (fwd and aft). 2) Some have what looks like a heat shielded welded to the side next to muffler. The question: what is the date of these changes? Before I weld in my salvaged tire tub I wanna make sure I have the correct one.
-
Aha!! Many hours later... Once properly shaped, the piece is perfect! But as-delivered the shape was quite a bit off. Perhaps it warped in the Colombian sun before shipment! "Patience, grasshopper"
-
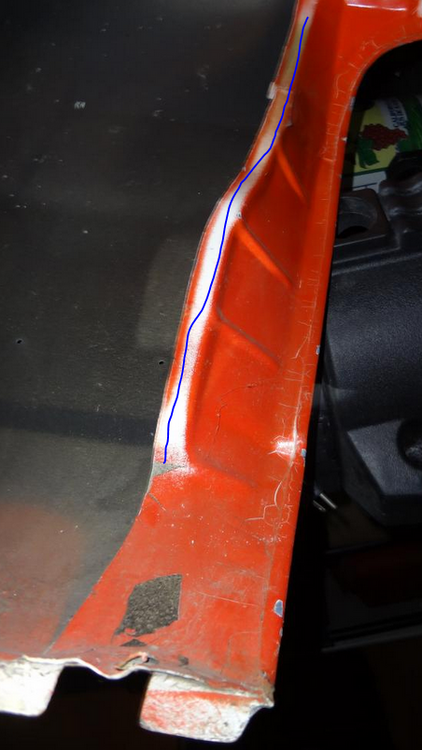
Other than KFVintage, what do y'all think is the best fitting/most accurate dogleg repair panels? KF makes some fantastic panels (some panel more fantastic than others) but I just can't come close to getting them to fit with the KF ones I have. Looking for folks who have install experience with other panels.
-
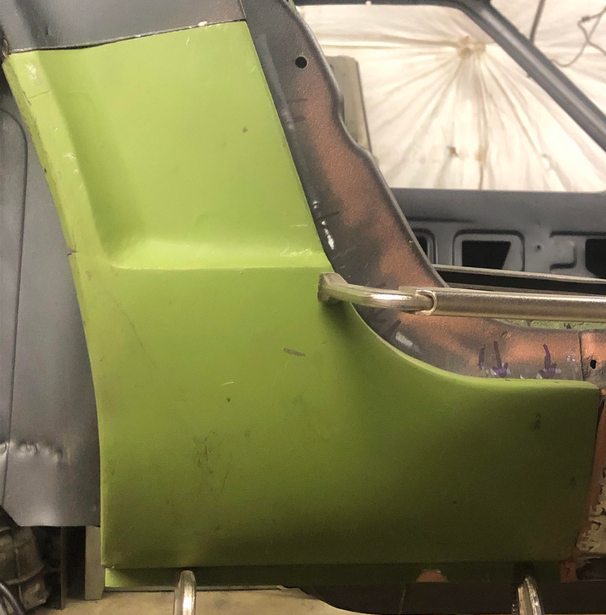
Does anyone have a source for this rubber/foam seal for the fender inner wing. It seems it will likely push out the fender slightly and I want to have it installed before I get more picky with panel fit. It is what is attached here (thanks to Geezer for the stolen pic!) Nissan has discontinued it, but I imagine someone here has found suitable material somewhere. Thanks in advance.