Jem2749
Free Member
-
Joined
-
Last visited
-
 “You think it’s worthWHAT? We gotta see this.”
 -
Jem2749 changed their profile photo
-
All that work to widen the car and the wheel fitment looks terrible.
-
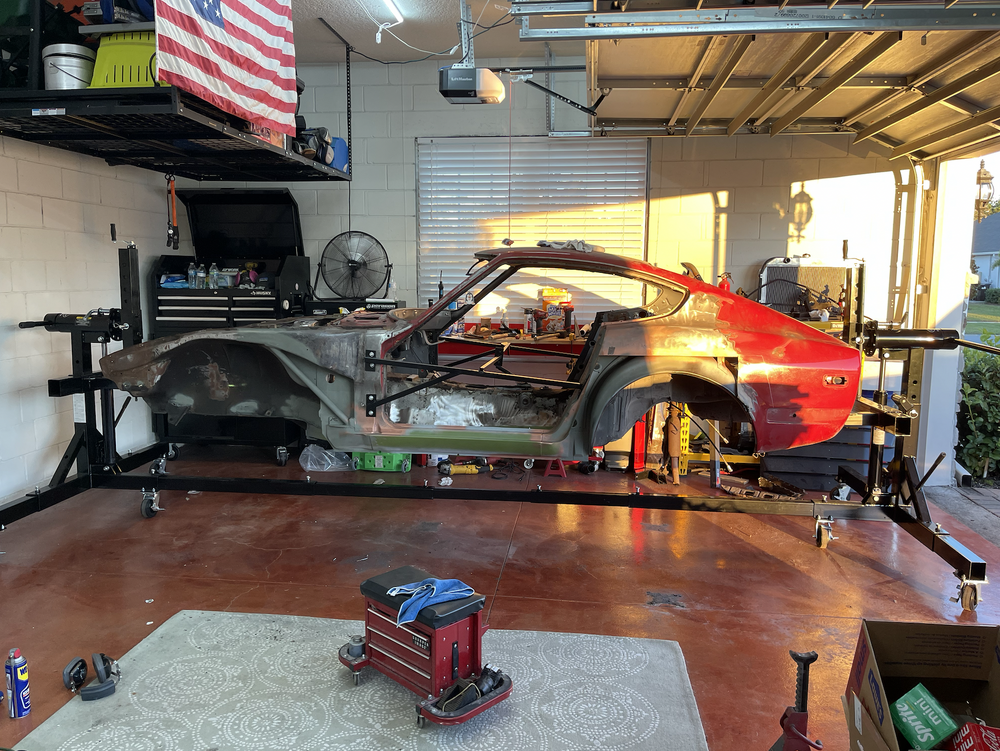
The enemy of good is better. I'm not sure how things snowballed but now I'm here - and loving every minute of it. So far I've burned in: Inner /outer rocker panels on the driver's side Inner dogleg lower on the driver's side Rear driver's wheel tub Driver's floor, frame rail, toe boards, and rear quarter are next. Then onto the passenger! Question for those of you that have put your Z's on a rotisserie: I need to replace the passenger chasis rail (that connects the firewall to the radiator support). Can I do that on the rotisserie? Or would you recommend it on jackstands/a jig if I can make one?
-
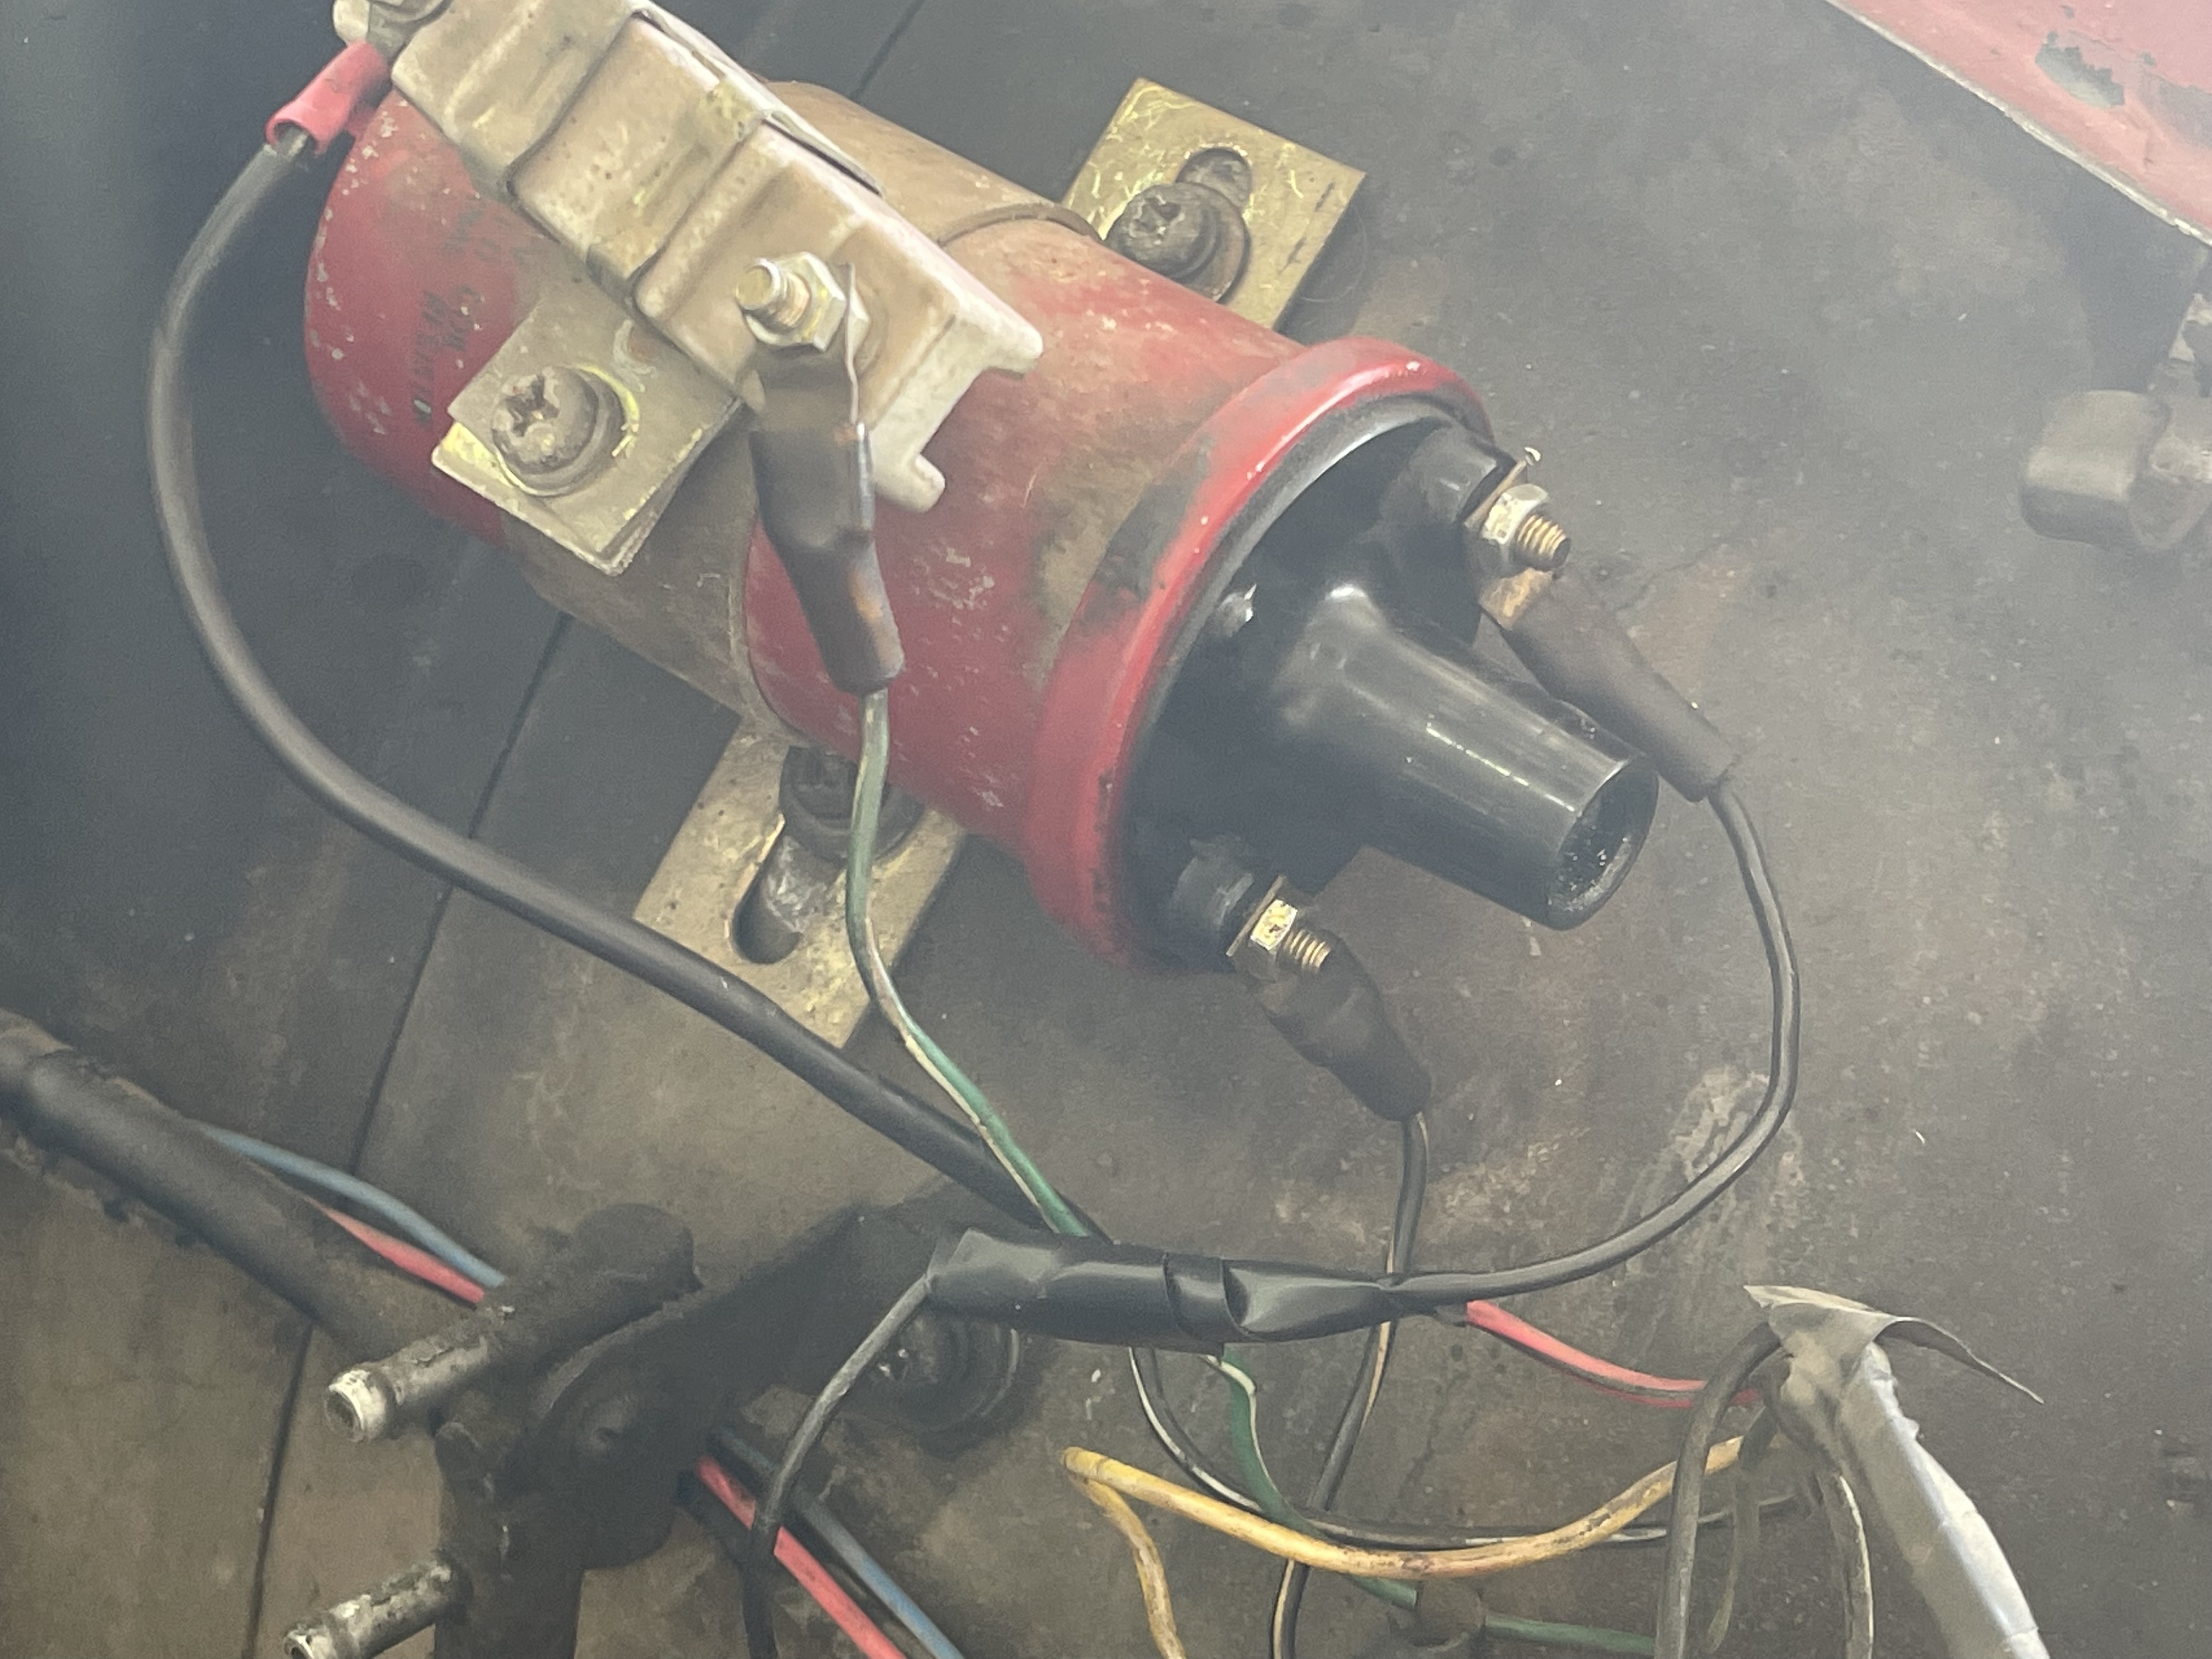
Here's a really terrible pic I took of my coil with a working Tach before I stripped the engine bay. I believe this illustrates/confirms what @Zed Headwrote above.

-
Having trouble adding a video- but here's an update on my 240: HUGE shoutout and THANK YOU to everyone in this thread- especially 240260280 for all the help and advice! Please excuse the mess in the garage, it's usually immaculate hahah
-
Ok hear me out.... My horn pad was doing the same thing and it’s because the cracking plastic no longer holds snug on the wheel. Instead of a zip tie, I used a soldering iron. Just hold the horn pad together so that the cracks in the plastic close, then carefully draw the hot iron back and forth over the plastic melting it back together. The secret is to melt enough material for it to bond with out burning all the way through. After doing that my horn pad fits snug and had a satisfying “click” when pressed back on to the wheel.
-
Thanks for the kind words... and the call yesterday!! As soon as I'm home from the office this evening I'm getting to work with the goal of moving under it's own power.
-
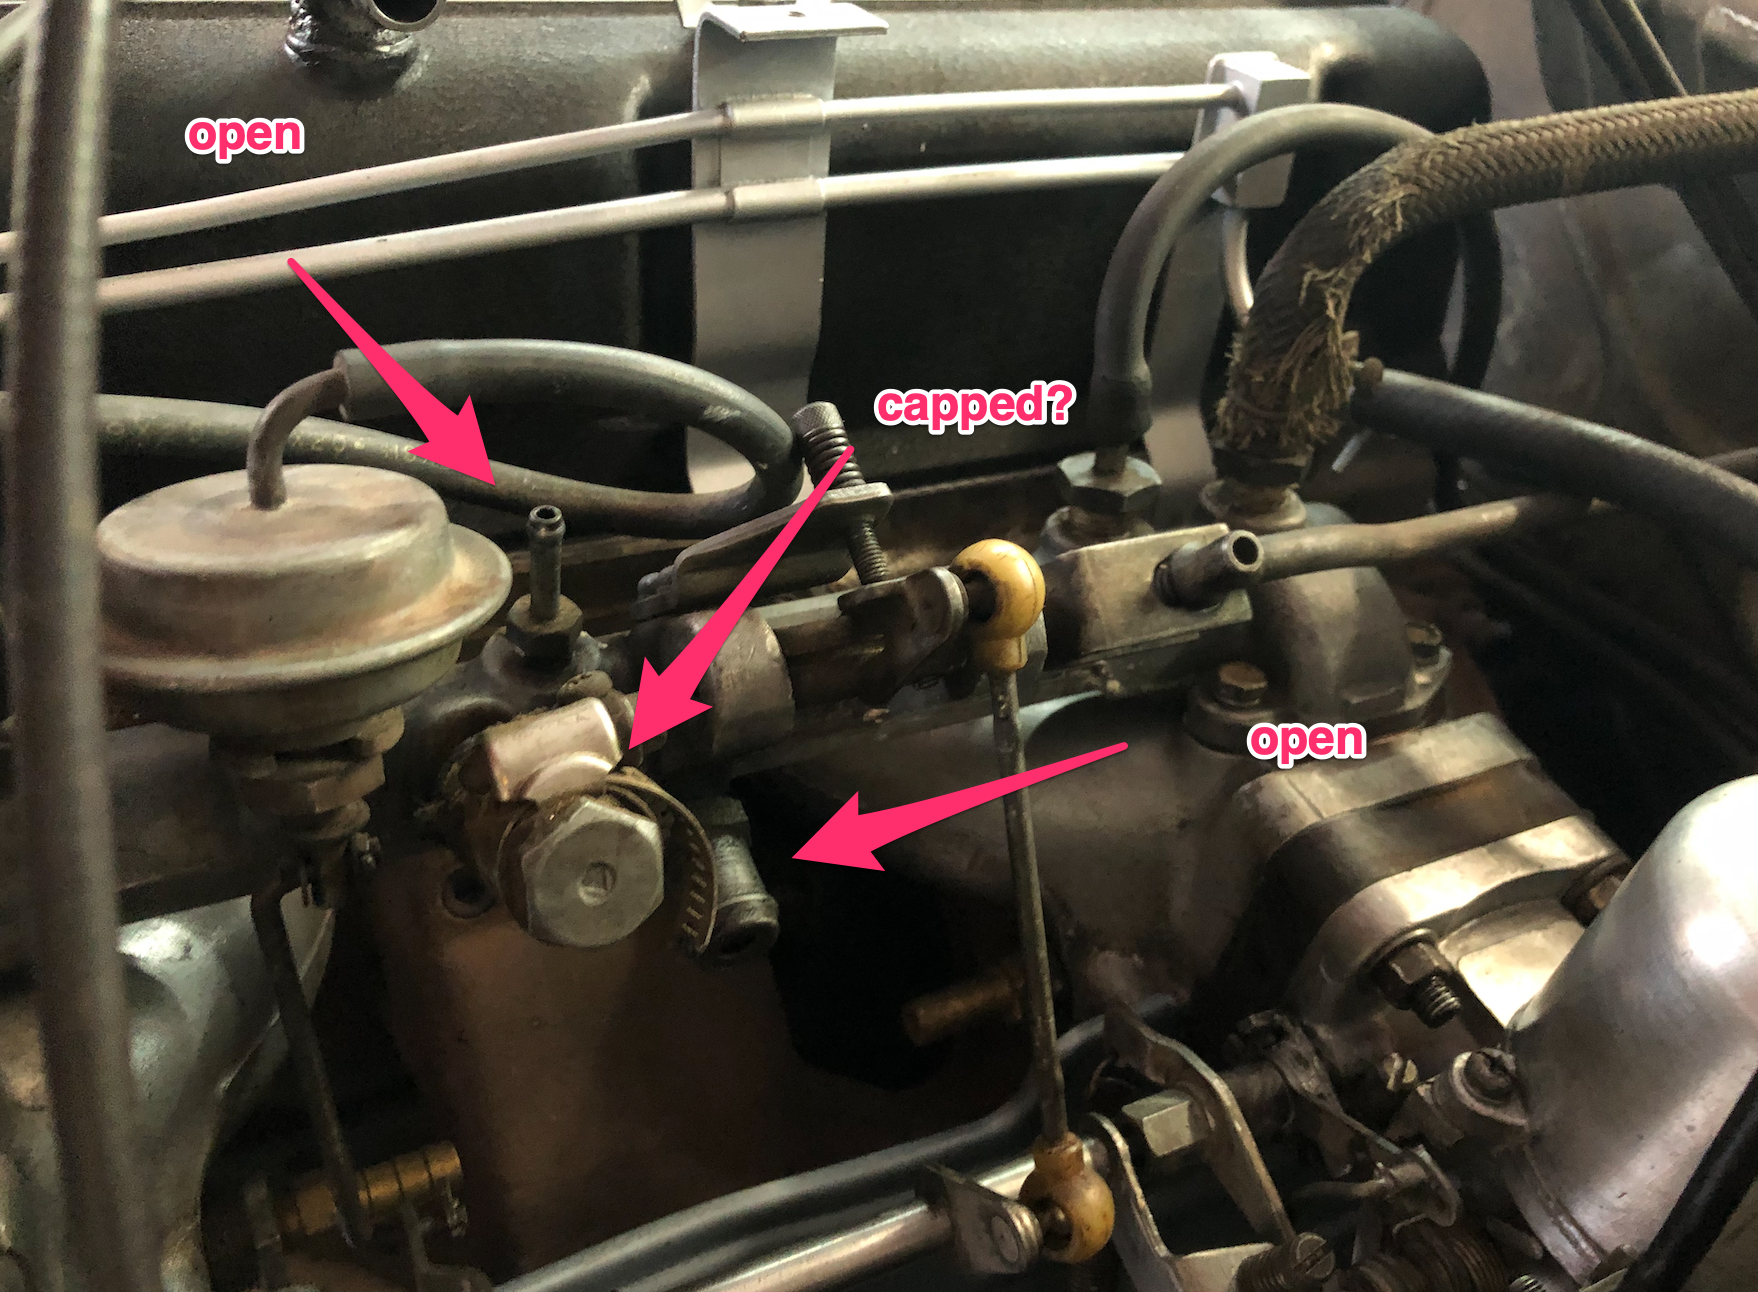
Any idea of what they are / where they go? With them uncapped is that affecting "suction" within the SUs? Admittedly, I can't even blame the PO on this one (my late uncle). I got a little overzealous when the car was delivered and started pulling off rotted/broken hoses without recording where they went. Live and learn. I also appreciate the offer! PM'ing you now!
-
The jets move freely with the choke lever pulled and released. I'm not sure if this is how it's supposed to be done, but I disconnected the set screws that hold the choke cables, drew the lever all the way back, and opened the jets to their full-down position- then reattached the choke cables. My thinking here was that I'd pull up all the slack and ensure that they're in "full-down" when the lever is all the way back. ?♂️
-
Hey everyone, I'm stumped. After about a dozen weekends of trying and endless searching on this forum/ reading Haynes manuals- I need to swallow my pride and ask for help. I have a 1970 240 that hasn't run since the the late 90's. Since then it was sitting in a barn in rural Nebraska until it came to live with me about a year ago. I've been trying in vein to get this thing to fire up to no avail. I've looked at fuel, spark, timing, and compression with no joy. Here are the particulars: Fuel: Fuel Pump- It has a new mechanical fuel pump that pumps gas when cranked. With the gatorade bottle method, I'm getting what I believe to be pretty good flow and can fill half of the bottle rather quickly. I've also added a clear filter so I can visibly see that fuel is coming from the tank. I've also opened the float bowls on both SU's (more on those in a second) and can see that they are about half full. There are no visible leaks throughout the entire fuel system and the return line looks clear as well. SU Carbs- The carbs have been "rebuilt" by me in an attempt to diagnose the no start problem. And by rebuilt, I mean that I disassembled, cleaned, and replaced needles, gaskets, and the little valve that allows in fuel within the float bowl. The distance between the float and the valve is also within "spec" according to the measuring device you get with a rebuild kit as well as some googling. The jets have been centered and the jet height adjustment is smooth as is the piston in its operation (falls freely and smoothly with a "clunk") The gas line from the float bowl to the jet is clear of debris and has been thoroughly cleaned. The choke cable was adjusted to coincide with the full range of motion for the jet. Even with all this, I feel like fuel is not getting into the combustion chamber. There doesn't seem to be any suction and when cranking, I can't see the piston move. Should it? There are also some open and capped ports above the Carbs- I have NO IDEA what these are and can't find any definitive answers online. I've attached a photo of them below. Any one know what they are? Should I be seeing vacuum in the carbs that draws up the piston / pulls in fuel vapor? Spark: Battery- The car has a new battery and with a charger, I'm maintaining over 13V when tested. Coil- Things are a little iffy here. The coil is getting 12.8V when the ignition is set to ON. When measuring resistance, I'm only seeing 1.8 Ohms which I believe to be low according to online resources. Spark Plugs- The plugs are new and have gaps ranging from .3 to .35 when using a gap tool. I understand this to be within spec. When cranking, I've removed each plug individually and visually inspected the spark against a nut on the strut tower. All 6 plugs had blue/purple arcing which seemed to be strong. Distributor- I'm also a little iffy here. The distributor has new points, condenser, rotor, cap, and plug cables. I measure 12V when touching the points and the contacts between the rotor and cap are clean as they are new. The rotor spins counter clockwise in sequence with cranking, but I really have no idea what I'm looking at here. Starter- The starter is new and has tested positively at Autozone after I bought it. With the over 13V coming from the battery, the cranking is strong and consistent. Timing: For some reason, timing this car seems like a dark art. I made the mistake of not adequately supporting the timing chain when attempting to adjust the timing sprocket, so I became intimately familiar with how the chain should be set. At TDC according to the marks on the crank pulley, the "-" is almost in line with the "V". I've adjusted it to be a little behind, but when looking today the marks have aligned themselves again. The oil pump shaft that connects to the distributor is at ~11:30 when showing TDC on the pulley marks. I believe that this could be a contributing factor to the no-start situation, but it could also be a red herring as I've previously adjusted timing to be correct. Compression: I just ran a compression test prior to writing this and followed instructions to the best of my ability. The only caveat is that the motor is cold (you know, because it won't run). I'm sure that's affecting the readings, but am unsure if that's 100% the case here. Cyl PSI 1 145 2 140 3 145 4 135 5 135 6 130 These seem low and the diminishing psi in the 4-5-6 cylinders is concerning. I have not performed a leak down test yet but if anyone recommends it, I'll go ahead and do one next weekend. Misc Notes: All fluids filters, and gaskets (oil pan, water pump, thermostat, valve cover) have been changed. There's new oil (10W-40), coolant (and radiator), and real gas with zinc additive. When using starting fluid, I can get the carbs to pop and backfire with smoke, but the car WILL NOT start. The most I can get is a big looney-tunes style backfire out of the exhaust that leaves a black mark on the wall behind the car. This is my first carbureted car and the fundamentals of the SUs seem incredibly simple- I just can't figure out what the issue is here. Thanks in advance for the help. Any direction, assistance, or advice would be GREATLY appreciated.

-
https://lonelydrivercompany.bigcartel.com/product/ldc-s30z-leather-fuel-flap ^save the $$ and make your own.
-
What's going on with the shifter placement on this one?
-
-
I bought a 1976 280z that was in rough shape and way beyond my skillsets but used it as a parts car for a few items for my 240. The wife is complaining about having two Datsuns in the garage (as if you could have too many) so I want to part out the car as much as possible before it goes to the crusher. It has: Complete L28- has not run and not sure of the condition outside of visuals. If you want specific engine parts, I can probably pull em for you (within reason lol). All glass - windshield, rear hatch, side windows fixed and roller All Interior trim- in surprisingly good condition- even the vinyl for things like trans tunnel and wheel hubs Intact dashboard with gauges/vents/ etc - Dash needs a lot of work and is in rough shape. Will need a full cap or a lot of crack fixing. Seats- will need to be recovered but springs and foam are OK Differential Tail Lights and exterior surround- pretty good shape, but will need a coat of paint from sun fading. All suspension parts- usual surface rust. Spicy Edit: I also have the front clip to a 240. It's *most of the assembly from the strut-tower forward. It does NOT have: Transmission or components Exhaust components Body panels- Florida car that sat outside so nothing is salvageable without practically building from scratch I really want to keep as much from the scrap heap and give back to the community so no reasonable offer will be refused. Hell- if you're interested in a part that's too rough of condition or it *might* work for what you need, I'll just give it to you if you want to cover shipping from Orlando. If you're in the area, you can always swing by and grab what you want! PM me with any requests and I can snap some pics of what you're interested in/ send them back. Thanks!
-
HLS30-12385 So I'm thinking it was sold as a '71 even though the door tag says 10/70?