Maritimer
Free Member
-
Joined
-
Last visited
-
No Idea, if they kept the mounting tab that comes off the rear filler neck cup that would probably work, never been in the back of a 260 so I couldn't say for sure
-
Not too sure if this is a body issue or an interior question but it's a little of both. Anyone got measurements and or pictures of the mounting brackets on the inner quarter panel for the evap canister? Helping a buddy out and can't seem to get the interior panels to line up, worried the evap canister be a bit crooked from some earlier repairs. Not to sure how to go about getting this measurement, maybe the height off the floor or depth from the quarter. Even some pics of a properly mounted canister from a car that's not all the way together would be nice. Got a bazillion pics from my rebuild but none of the great smelly can.?
-
I had that same hood issue several times and I fixed it by rotating the hood where it bolts to the hinges. Basically you open your hood, loosen the bolts holding it on the hinge and try to rotate it away from the car, pushing the nose towards the radiator and pulling the top away from the car. You wind up having one hole at the bottom of its adjustment and one at the top. Be gentle and don’t bend the hood, helps to have many hands. Might not work on all cases but worked well enough For me on two different cars, definitely worth a try. I can’t remember what forum post I got the advice from. Only issue I’ve noticed using this method is you have to close the hood a bit to use the prop rod. edit: oops I mean what sheen said, no idea why it works different than the push-down technique
-
Absolutely unknown machine work history on the motor, just know it had a slight warp from a overheat and a valve job done at some point meaning it probably got planed. Called the guys at Rebello about getting parts etc. and they advised me on the shims. It’s only got a .010 (rock auto mystery meat) shim right now. Valves were all at different heights, most in spec but not all so new seats to level out the bad ones.
-
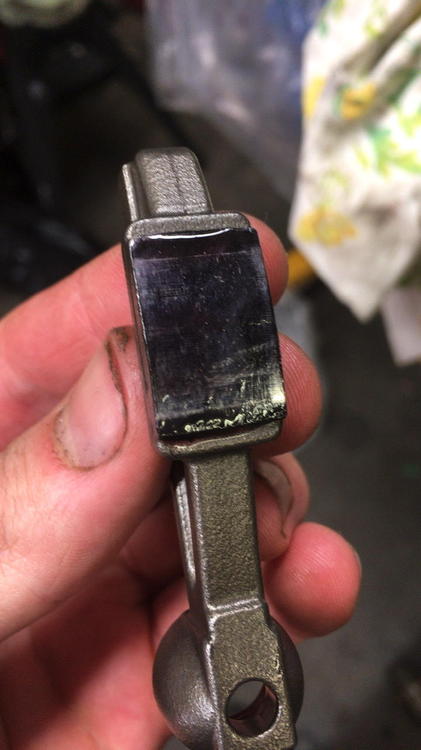
Sure enough, took it to the local engine shop and two valves were sunk. A couple seats, some levelling and a seat of tower shins later and this is my pattern. Sharpie test looks good but the blue dye I was using wipes a bit much, these patterns look better?

-
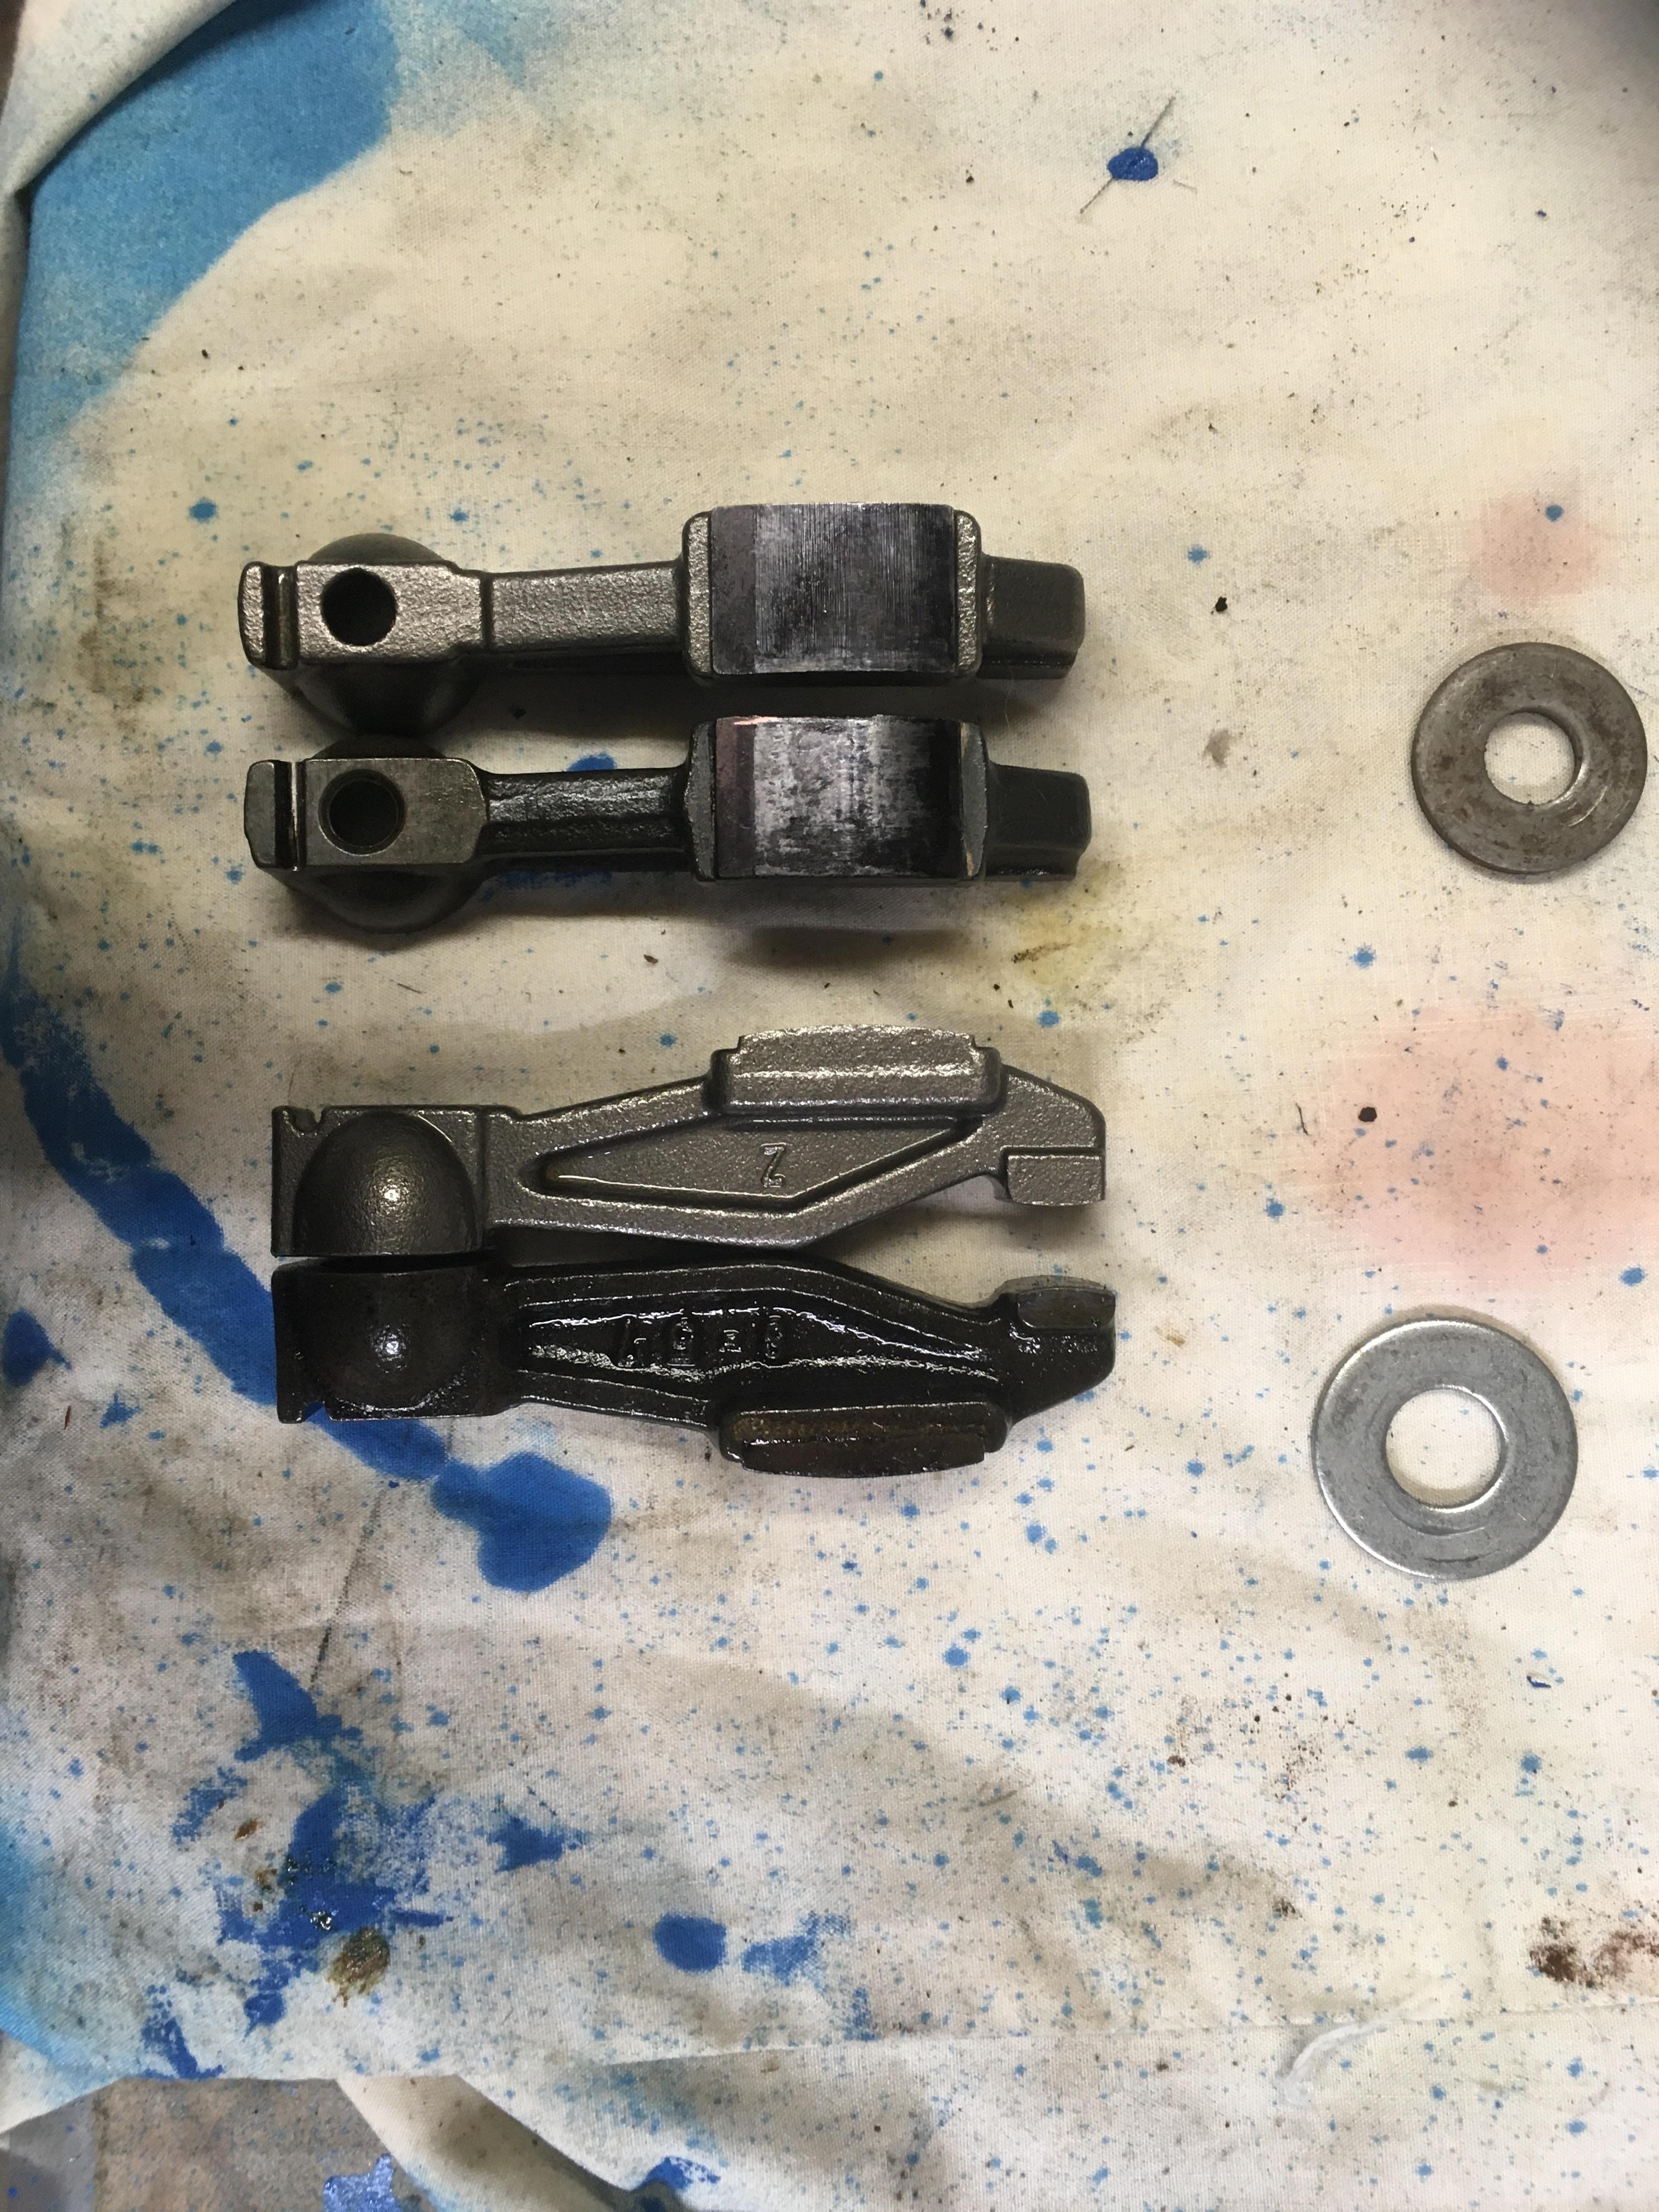
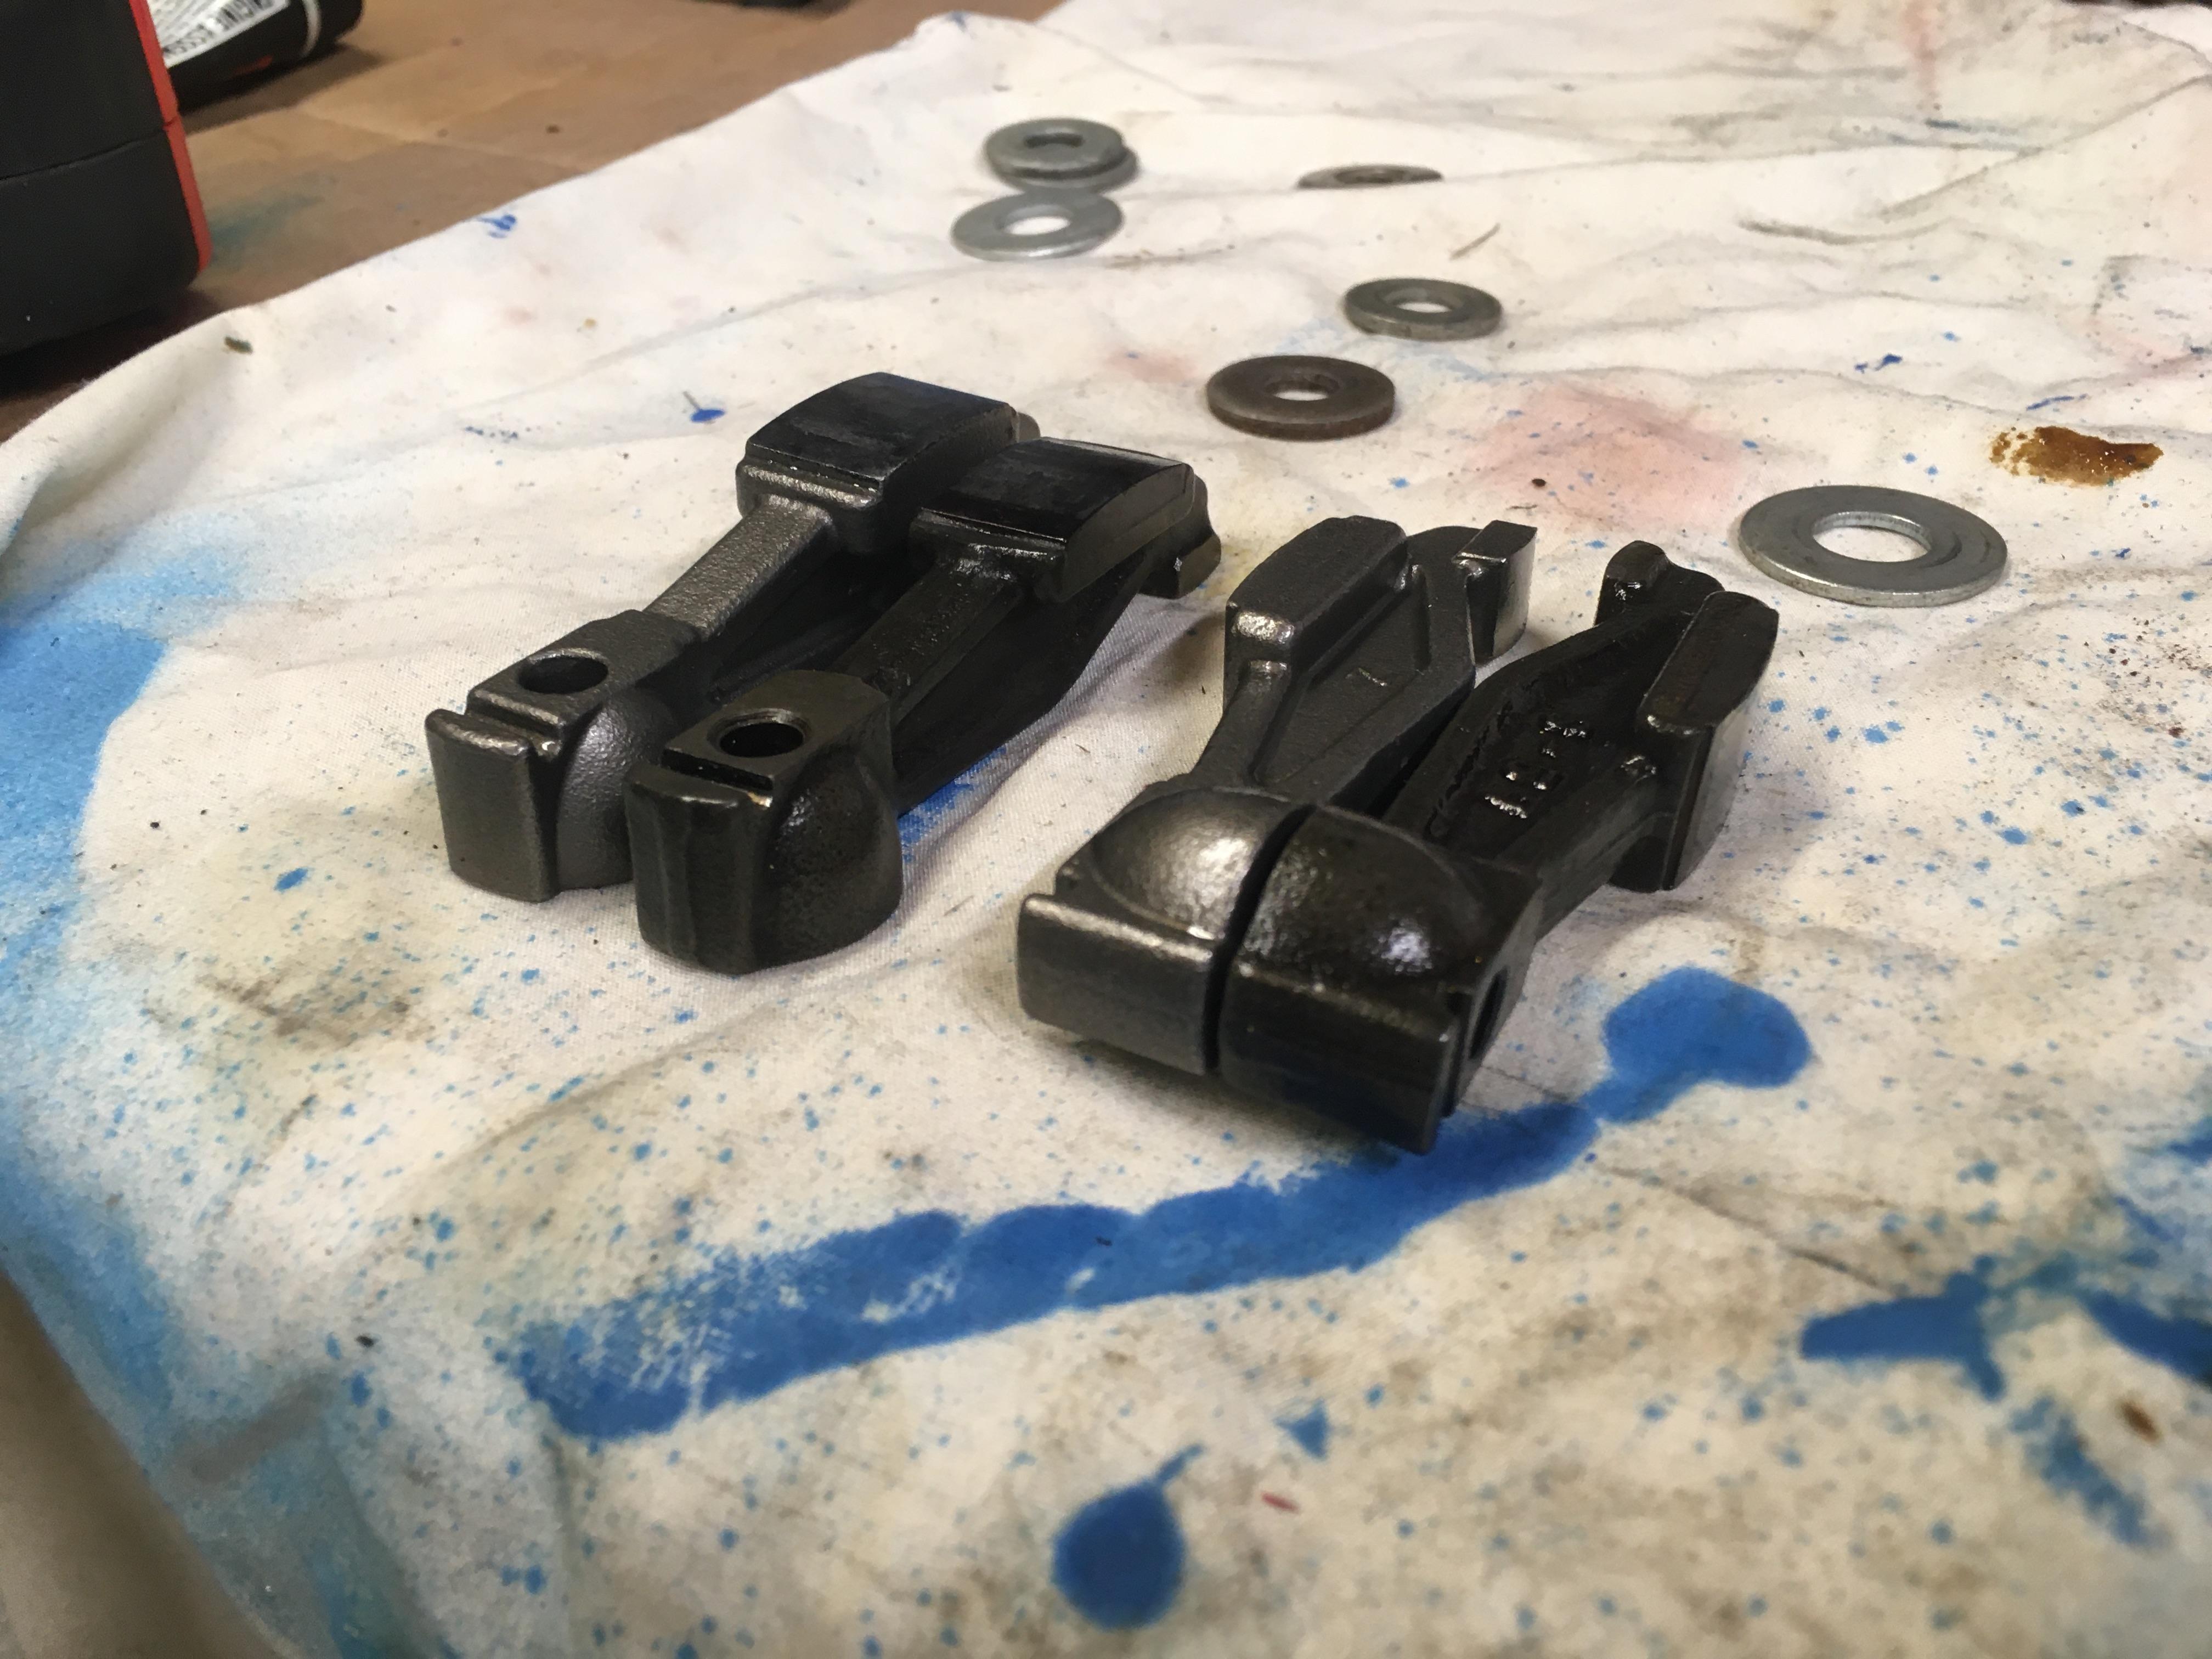
VR1 High Zinc Put my oem rockers back in to check their pattern, still not great but it looks like there’s a slight difference between the one and ITM units. Is this a valve stem fix? Can the OEM pads be safely reduced?


-
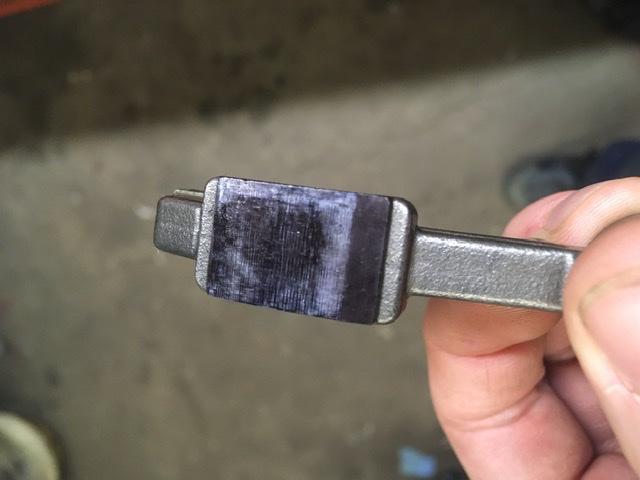
sure enough, measured my rocker guides and they’re all stock .120 size, albeit a bit worn. Rechecked the wipe and it’s way off on a couple cylinders. Most worn (thinnest) pad on the worst one still produced a bad pattern. I’ll check valve heights off the machined valve cover surface but it looks like I’ve got a trip to the machine shop to schedule?
-
Sounds half salvageable then. I see that there’s only .150 and .160 at Motorsport and anything above needs an aftermarket retainer. Is there sizes between this? As far as I’m aware my retainers are all OEM
-
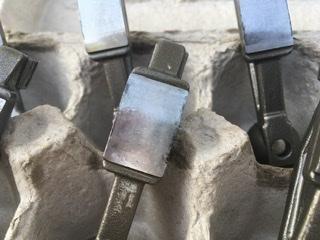
Those are new ITM rockers, no idea on the old lash pads, only have the cam and a set of rockers that ate another cam. Here’s the ones that look worst for wear.
-
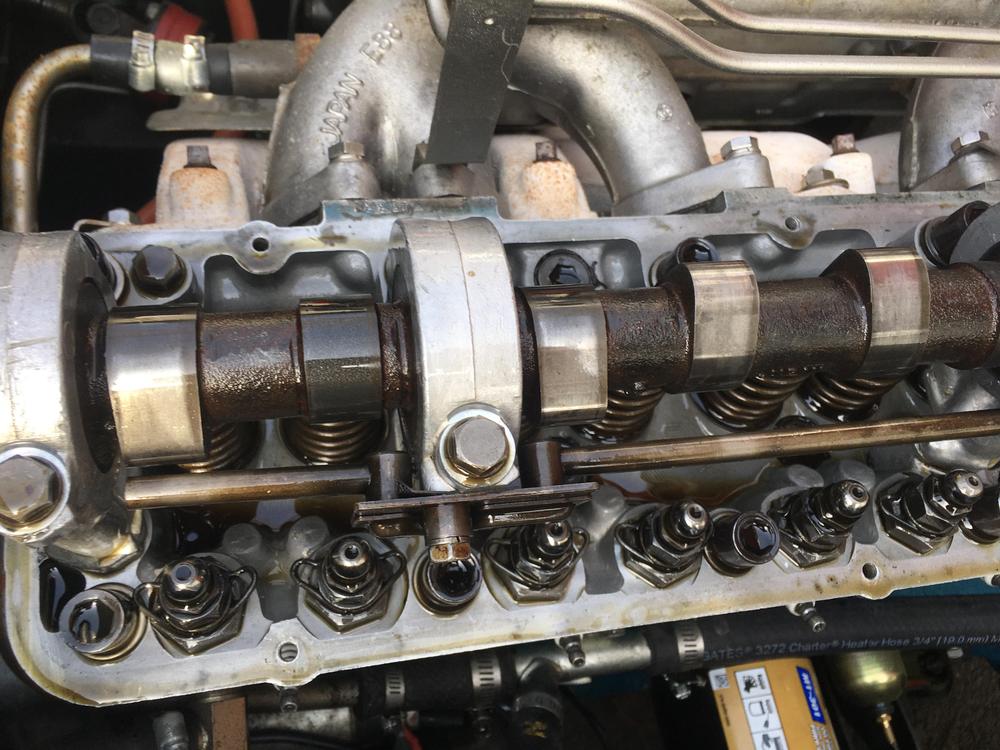
Pulled the valvetrain apart, are these wear patterns bad news?

-
Hi All, Got a fun clicking noise coming from my L24, goes up with engine revs. Just replaced a worn camshaft and rockers trying to solve it, valve lash set cold. Engine is an E31 from an earlier car. The old spark plug lead pull seems to quench it a little. Anyone recognize it?
-
After talking to my metal guy and looking at the condition of my front and rear bumpers I've decided I may just be better off purchasing a set of aftermarket bumpers to replace mine. Does anyone have recommendations/reviews of the available offerings? Right now I'm looking at either MSA or a stainless set from Taiwan.
-
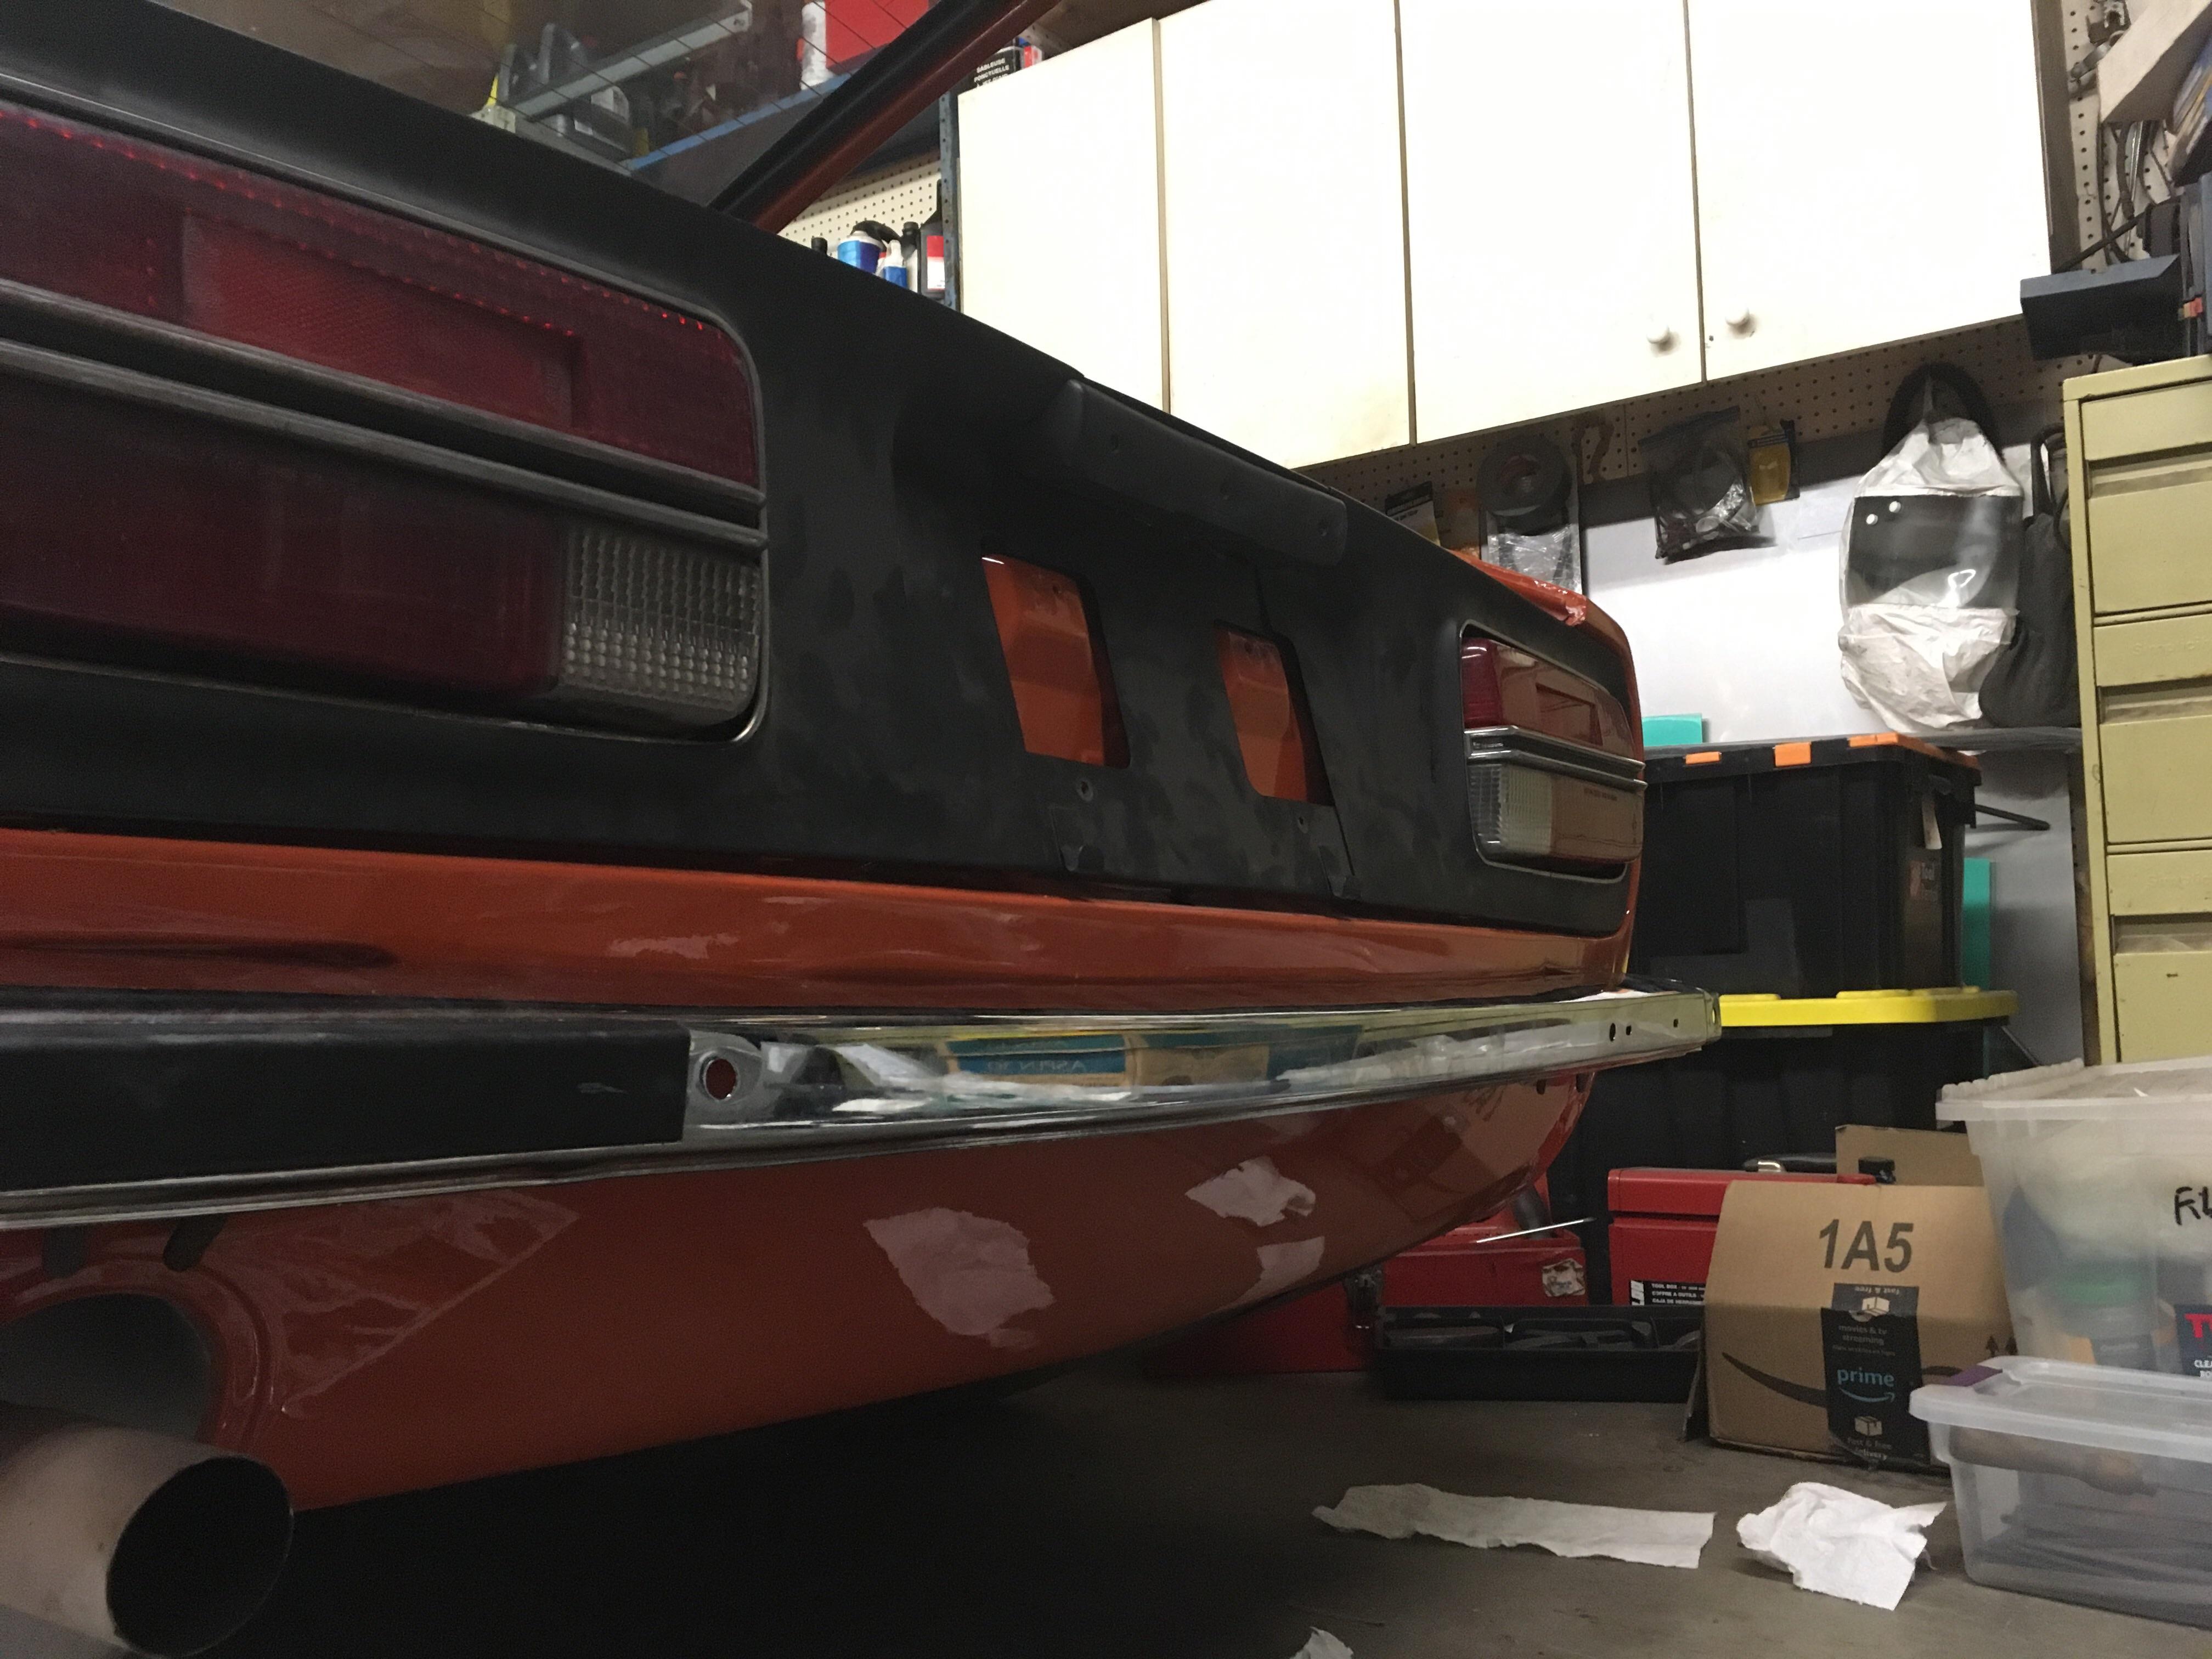
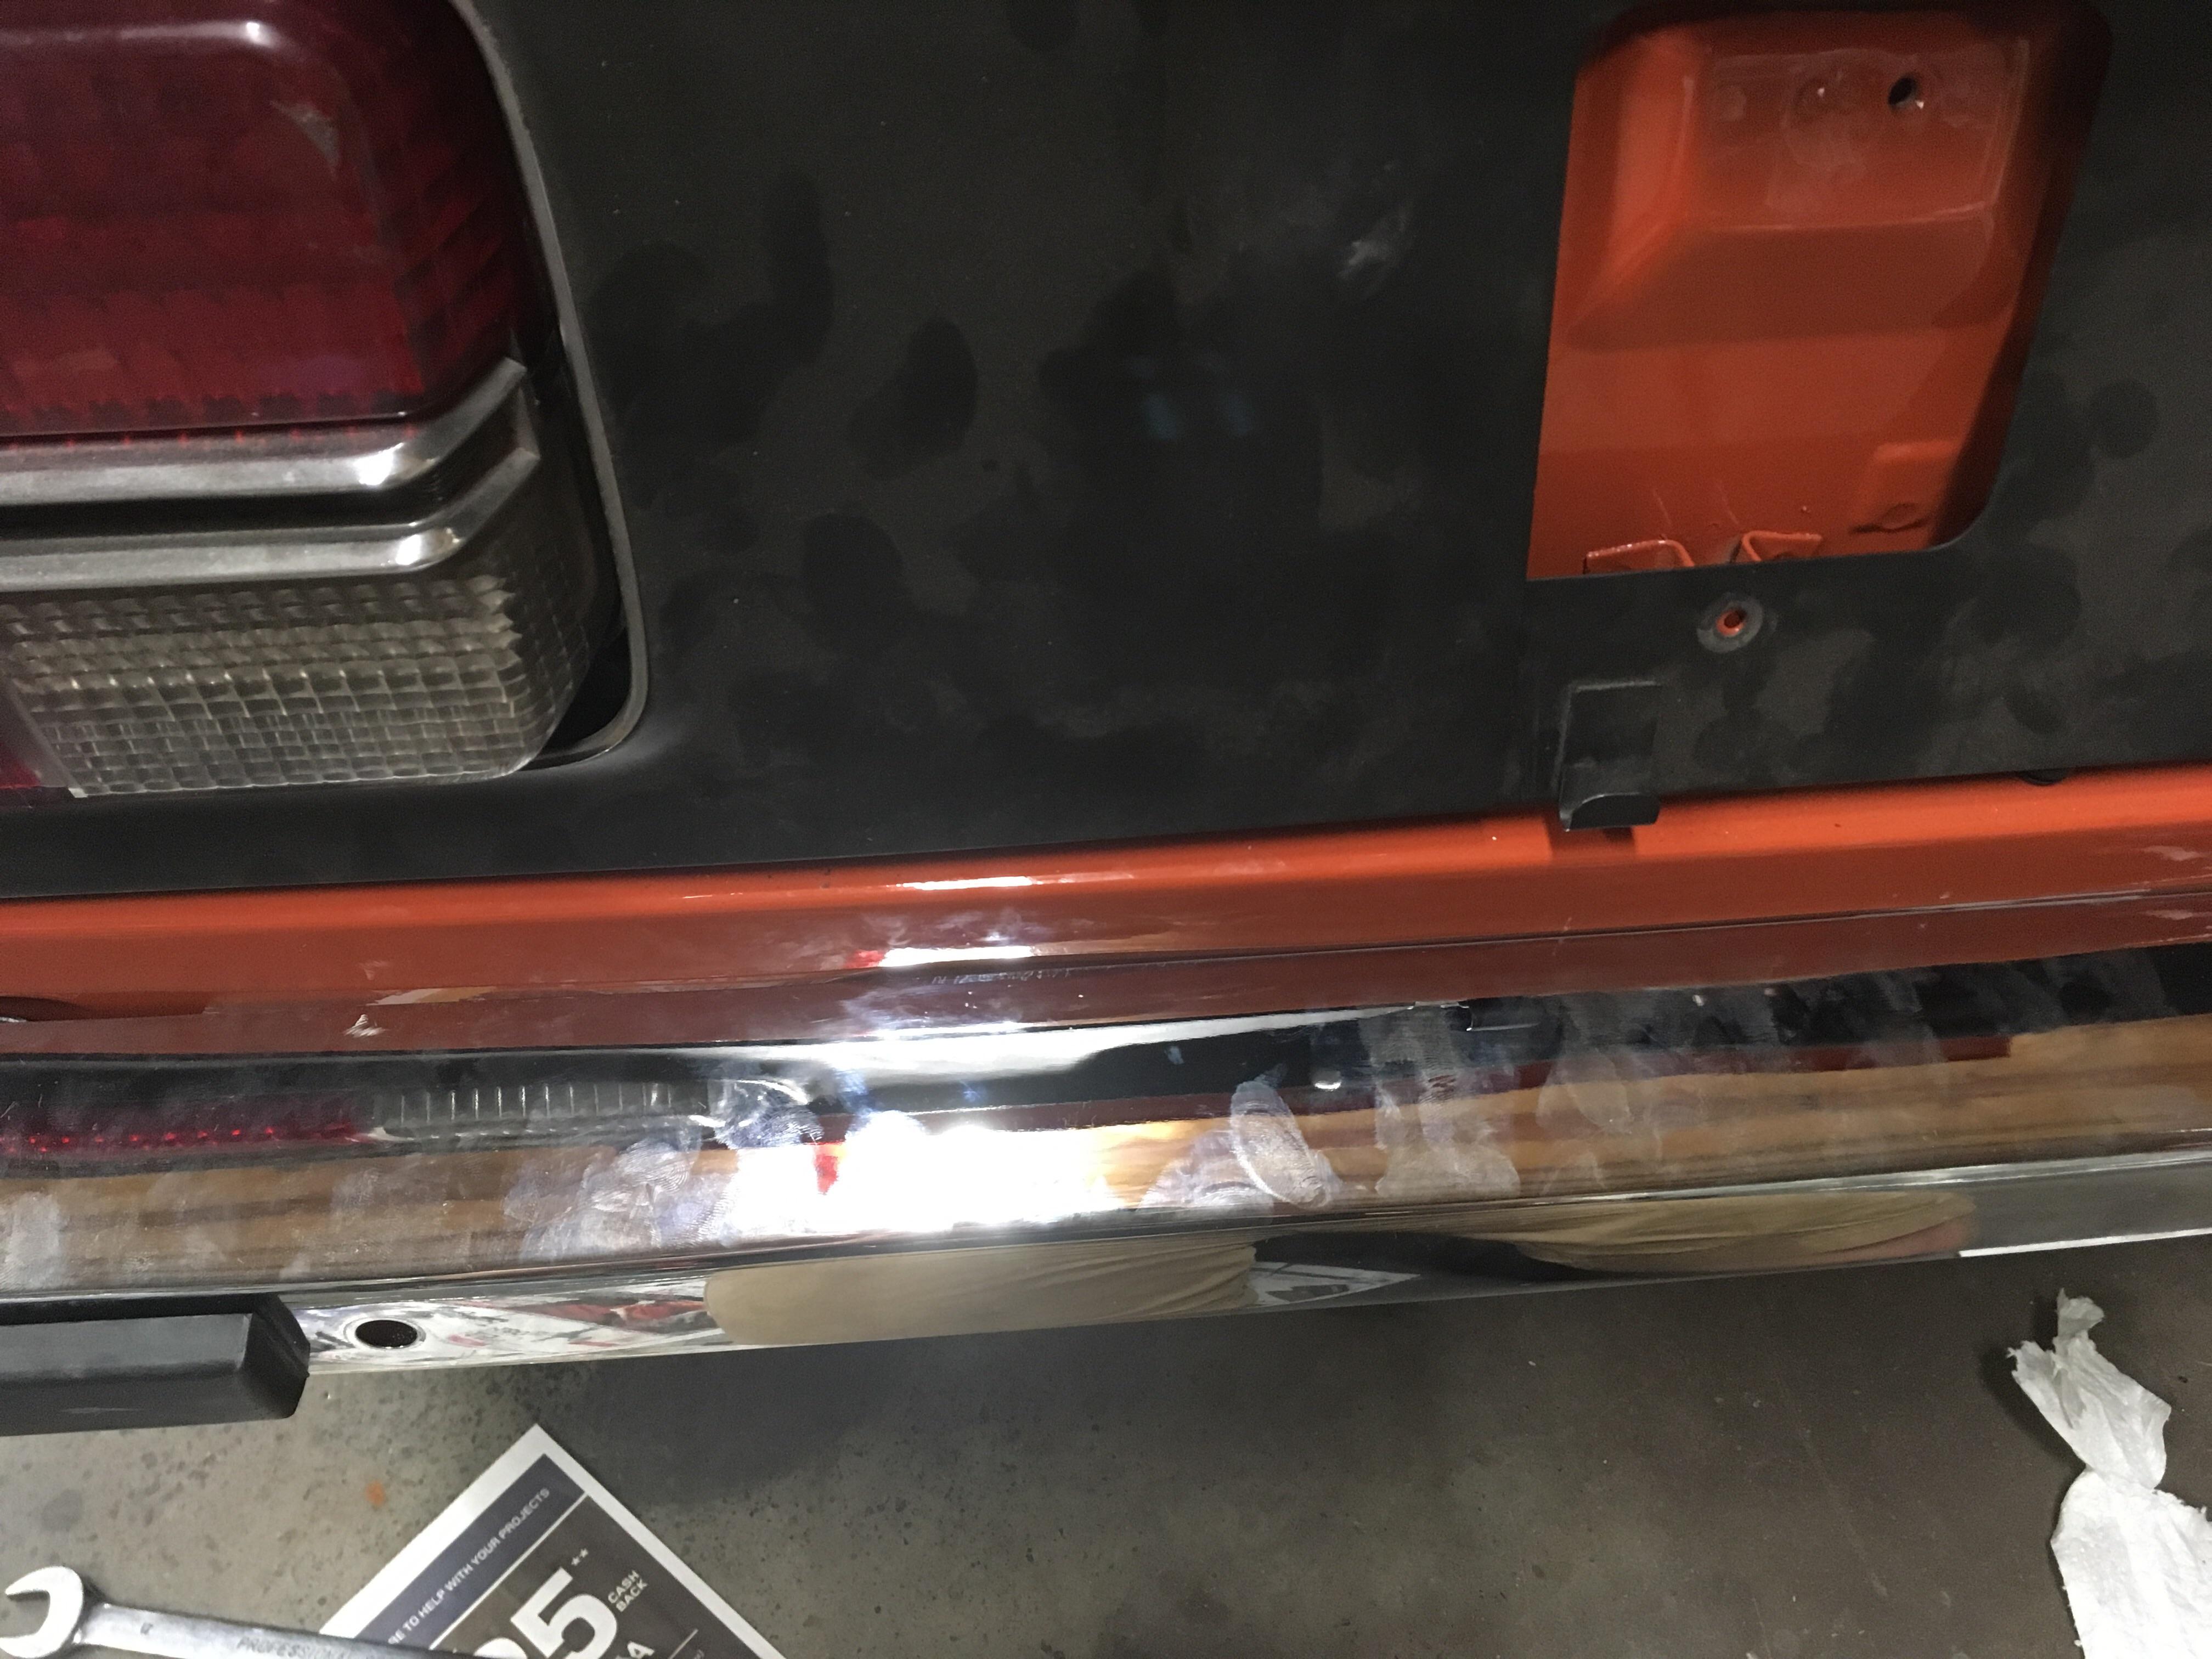
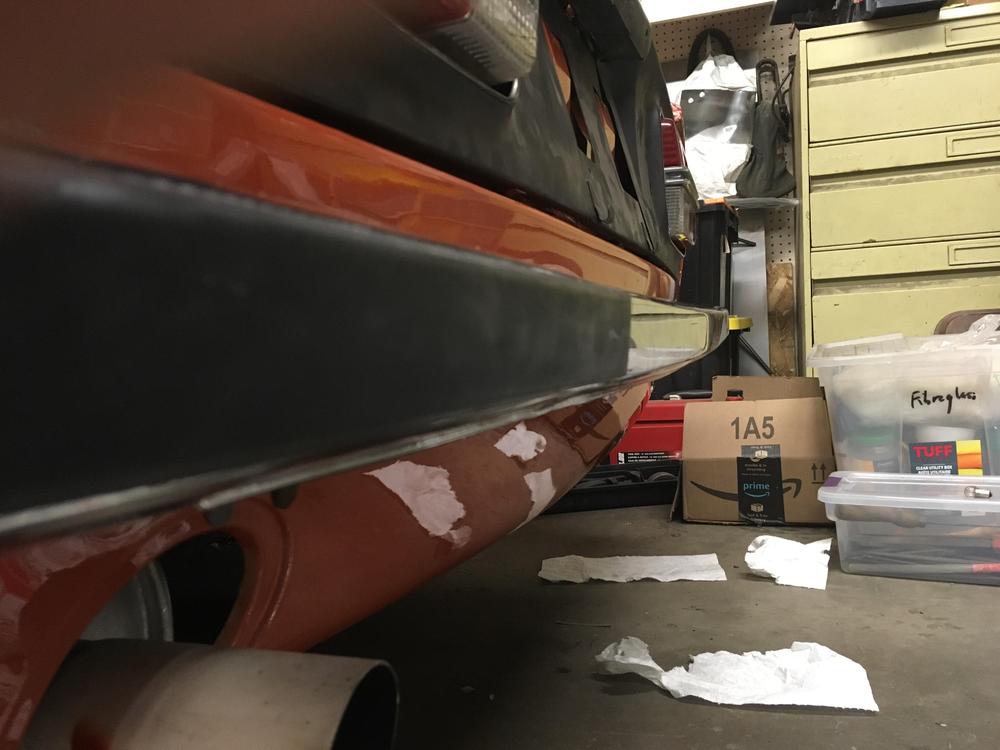
Finally got back to it and got some photos, the bumper snapped at me while tightening it and notched my paint a bit. Anyways, ignoring the fingerprints does this shape look right? My car seems to have a bit of a Chrome smile on the back but I was under the impression that the rear bumper was supposed to be mostly level. I’ve got about 1/4” worth of Chevrolet body spacers in it to get it to this point...


-
I'm up by Burnside. It's a '72 but there's more than a few 69-70 parts on it so the bumper could be either. Looks like it's a rear curvature issue more than anything but the only bumper work I've done was taking it off the car. I've got a few body shims I can play with to space out the centre bolts but it doesn't seem like a normal thing to do as far as I've seen online. Was hoping I'd just bolted the thing on wrong but the bumper may be out of shape. I already tried calling blue but couldn't get him on the line.
-
Trying to get my bumper back on and aligned after a rechroming and the contrary to the FSM the thing is a PITA to install. Seems no matter what way I tighten it down or twist brackets the bumper wont go on without hitting the rear valence in some way or chipping paint with it ?. Is there some magic trick to getting the bumper installed to prevent this? Should there be spacers for the rear brackets to help bring the bumper away from the valence? should the bumper be lined up straight with the bottom of the taillight trim? Should it go into the dip on the rear valence? Any help/pictures of a proper install would be appreciated.