
SpeedRoo
Community Member
-
Joined
-
Last visited
Everything posted by SpeedRoo
-
-
Fantastic work @lapriser well done on taking the initiative to do this. One feature would be to write a script/algorithm to decipher the part numbers, Nissan used a code that determines the bolt type, coating, thickness, length etc. If you automatically did that for each part number it would be a great help to sourcing now obsolete parts. Here's some examples: Part code
-
Appliance did them in 14 x 6 and 14 x 7 sizes. It should be stamped on the inside what they are. I'm in Oregon and have a set of four I don't need. They have tires on them that would have to be removed and they would need shipping to MO.
-
Too much pitting in that to be useable. Just buy new cylinders rather than wasting time chasing leaks.
-
The pitting in the cylinder is what needs to be cleaned up and honed so the seal can work properly. Still looks useable. The cylinder is the later type so readily available new if you want to replace.
-
I hope you are not in a hurry as I don't have a lot of bandwidth to do this at the moment. Again not really commercially viable. Just saw these on JDM parts! https://jdm-car-parts.com/products/spark-plug-wire-set-dated-1977-genuine-nissan-nos-22450-n3626
-
Perfect, just what I need to reproduce the correct markings. The key parts of the spark plug wires are the boots that go on either end. Fortunately I have found a NOS source for them and made up 3 sets for myself.
-
@hiyabrad I'm not sure what the correct screen printing would be for a 11/69 240Z. Unless you have an original I have no way of knowing what is right for your car. Were the 1969 spark plug wires blank with no screen printing? Roo
-
@hiyabrad I didn't go ahead with reproducing the spark plug leads as it was not commercially viable. Also got busy with other projects so just did 3 sets for myself. Roo
-
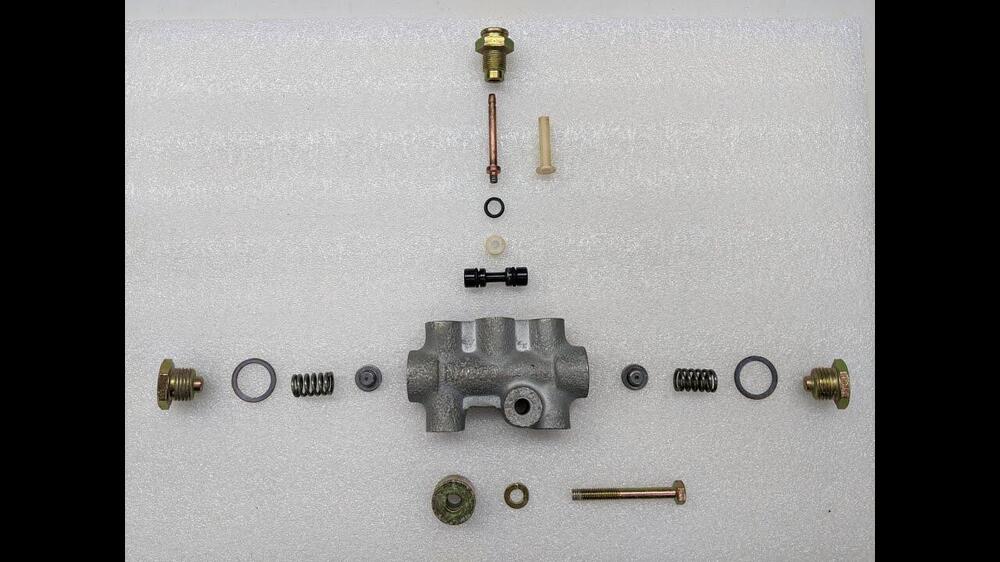
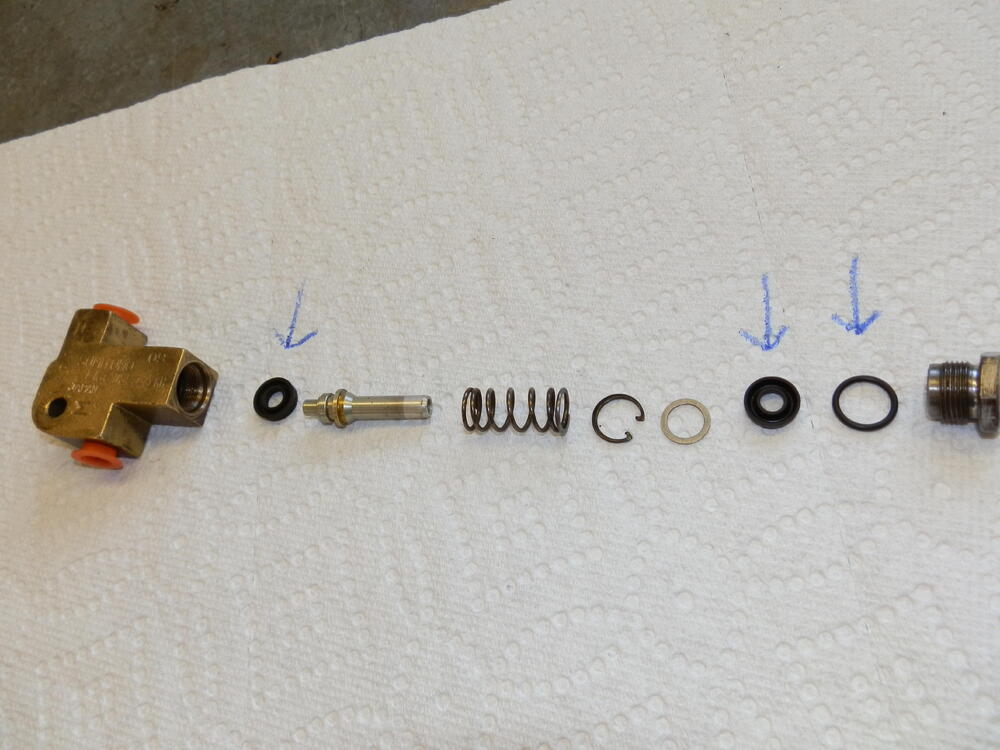
@Warty most times they just need a good flush with brake cleaner. The rear proportioning valve is difficult to disassemble so just blow it out with air pressure then flush it with brake cleaner. Then put brake fluid in and seal with some caps until you reinstall it. The check valve comes apart pretty easily, again clean, flush and refill with brake fluid.
-
@Warty False economy not to replace all the rubber seals and hoses after sitting for 10 years. Pulling the front calipers and replacing seals only takes an hour, do it now while the system is drained of brake fluid. Also rebuild the master with new seals. Never trust what a PO has done, just assume it needs to be redone.
-
@Warty I would clean everything off with a degreaser and pressure washer to see what is still useable. The rear brake cylinders can be rebuilt, the seals usually need replacing. Change out all the rubber brake lines. Remove and strip the brake master cylinder and replace the seals. Rebuild the front brake calipers with new seals. I'd then blow out the brake lines with an air hose then flush them with brake cleaner before starting to reassemble. You may want to check the brake proportioning valve in the rear and flush that out as well, same for the brake failure valve in the engine bay. I have just done all this on one of my cars and the brakes work great.
-
Using Evaporust in the Ultrasonic cleaner heated to 60C is even more effective and quicker. To remove plating an acidic solution or one with Lye in it strips the plating. Purple Power works really well for this. https://www.purplepowerinc.com/ It also strips off old paint followed up by a wire wheel to remove any rust or paint. Lemon juice diluted is great for cleaning aluminum parts.
-
It seems the 1969 build cars didn't get the date code on the calipers, great to see some originals on your car.
-
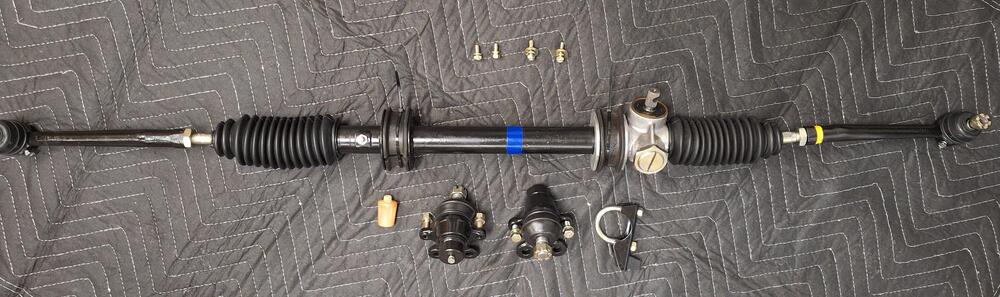
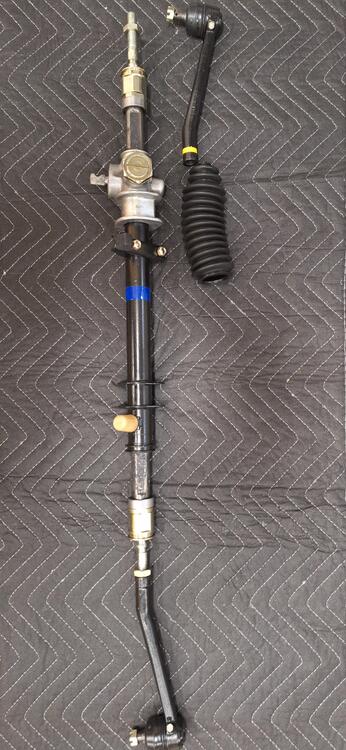
Here's the finished article. Fully rebuilt with new old stock (NOS) Nissan parts including bushings, bearing and rubber boots. All nuts and bolts replated in yellow zinc and the track rods are original parts fully overhauled with correct paint markings. The blue tape on rack in original position. Original ball joints stripped, plated and rebuilt. Two sets for my cars and another set sent to a fellow member from the forum in Arizona. The original rubber boots are held in place with rubber "O" rings just like they used when originally built.
-
Lovely work on 42! Couple of questions, did the brake calipers on the early 1969 build cars have date stamps or were they blank...I know the 1970 builds had a "0" stamped on them. Was it intentional to use uerthane suspension bushings rather than original Nissan ones, is there an advantage to using non original bushings?
-
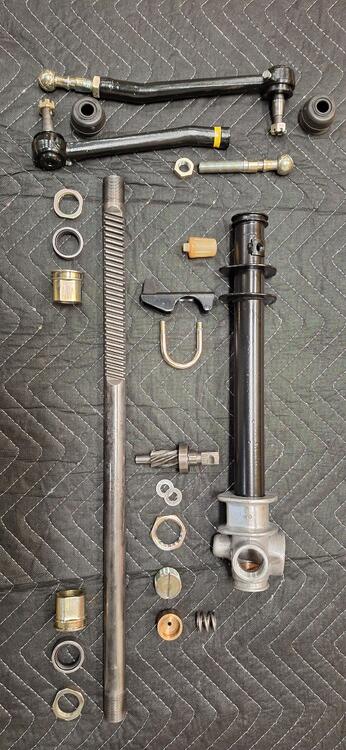
Just finished up rebuilding 3 early steering racks, 2 for my cars and one for a mate. Managed to locate NOS Nissan steering rack bushings, the originals on the rack seem to be the highest wear parts on the assembly. Bushings replaced, rack stripped, sand blasted and repainted in satin black epoxy paint. All the yellow zinc parts replated and boots renewed with NOS parts. Once the boots are fitted and secured with 3 rubber "O" rings for each one they are ready to fit. Blue stripe redone like the original. Track rods restored, stripped, painted and fitted with NOS boots and rubber "O" rings. Yellow paint mark on left track rod like the factory did.
-
Head down to Winks and get a copper crush washer, they should have a metric size to fit the drain plug. I prefer to use copper anywhere fuel is present. Roo
-
@DrFeelGood great to read about bringing your dad's old Z back to life. I'm out in the Gorge in Oregon so not far from you. I have 3 1970 build 240Z and loads of parts as well. Happy to offer advise and guidance when you need it, feel free to reach out by PM.
-
The most difficult thing in trying to restore a 240Z to 100% factory standard is trying to get NOS parts that match those used when the car was built. For a commercial operation constrained by time it's not always possible. There's quite a few parts on this car that have used later bits because that's all that is available. It shouldn't detract from the car and what S30.world have achieved. I'm sure @christoffel will appreciate any feedback on areas that we may think need changing or improving. The road to perfection never ends but as long as we are willing to listen to feedback and make corrections along the way the destination gets closer!
-
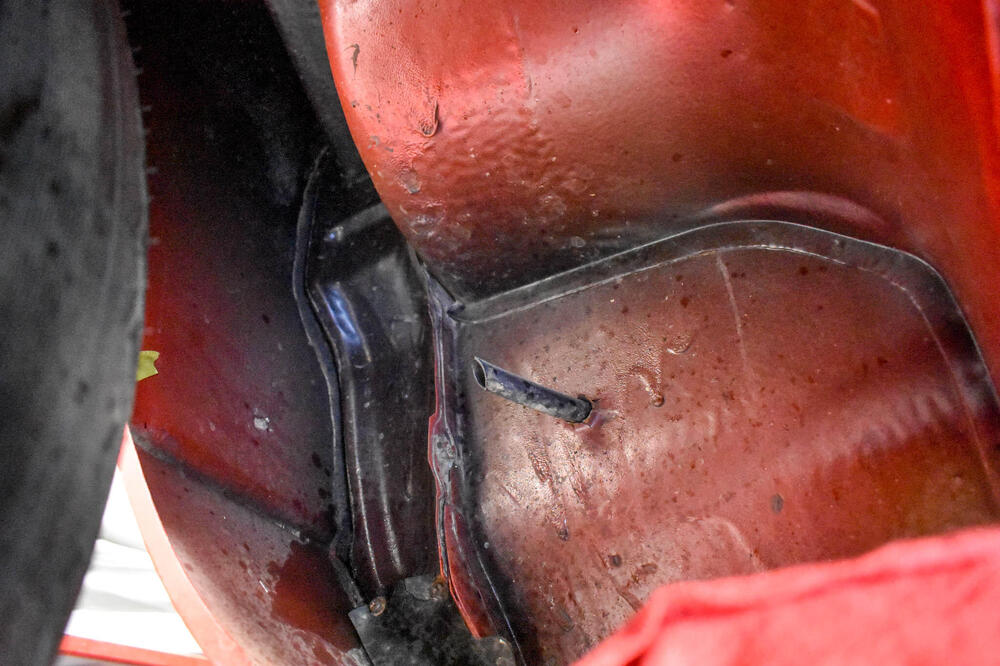
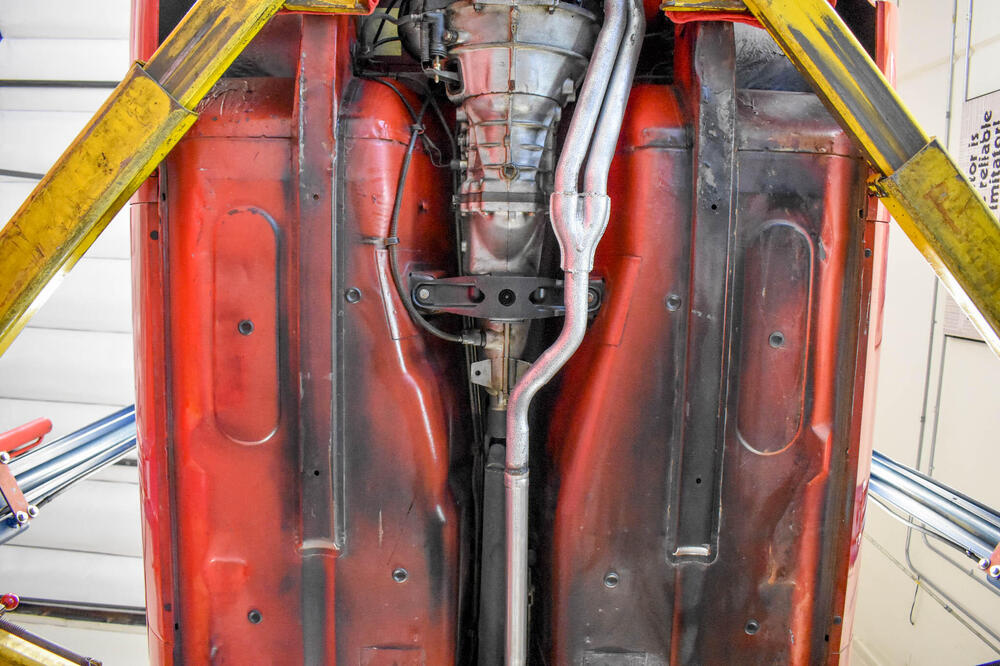
I believe what you are referring to is the "chipseal" that the factory applied to the underside of the chassis. "Undercoating" was applied by the dealers in the USA to add extra rust protection and add to their profit margin! As you say, the original factory applied "chipseal" was blacker in colour and applied very unevenly with lots of runs and build up. If anything S30.world got it a little bit too perfect!
-
Great to see the S30.world 240Z up on BAT. Hundreds of photos to pore over and examine. Best thing is Chris @christoffel is willing to listen and improve things where possible. Lessons learned on this car will help him get closer to a 100% correct restoration in the future. So many little details to get right but at last there's people out there with the passion that want to do it correctly.
-
I'm down in the Gorge on the Oregon side. If you were closer I'd give you a hand to get it going again. The cars are very straight forward and easy to work on, try and find an old school mechanic local to you that understands cars from the 1970s. As they say it's not rocket science. You could probably get by with just draining the tank and flushing it a few times with new fuel. Then disconnect the hose in the engine bay and pressurise the gas tank with an air hose to flush out the line. Fit a new filter and you should be good. The car may not need as much work as you think.
-
I did that with an original Oregon sold 240Z that sat in storage from the early 1980s to 2020. The engine had seized but eventually came good, I drained all the old oil and filled with automatic transmission fluid. Once I got it running I drained that and filled with regular 20W50 oil. I ran the carbs through an ultrasonic cleaner and flushed out the fuel tank and lines. I rebuilt the brakes with new seals in the calipers and drum pistons. The car runs like a rocket now.
-
Actually the part number tells you the length. 08213-82810 The length is 28mm.