rcv
Free Member
-
Joined
-
Last visited
Everything posted by rcv
-
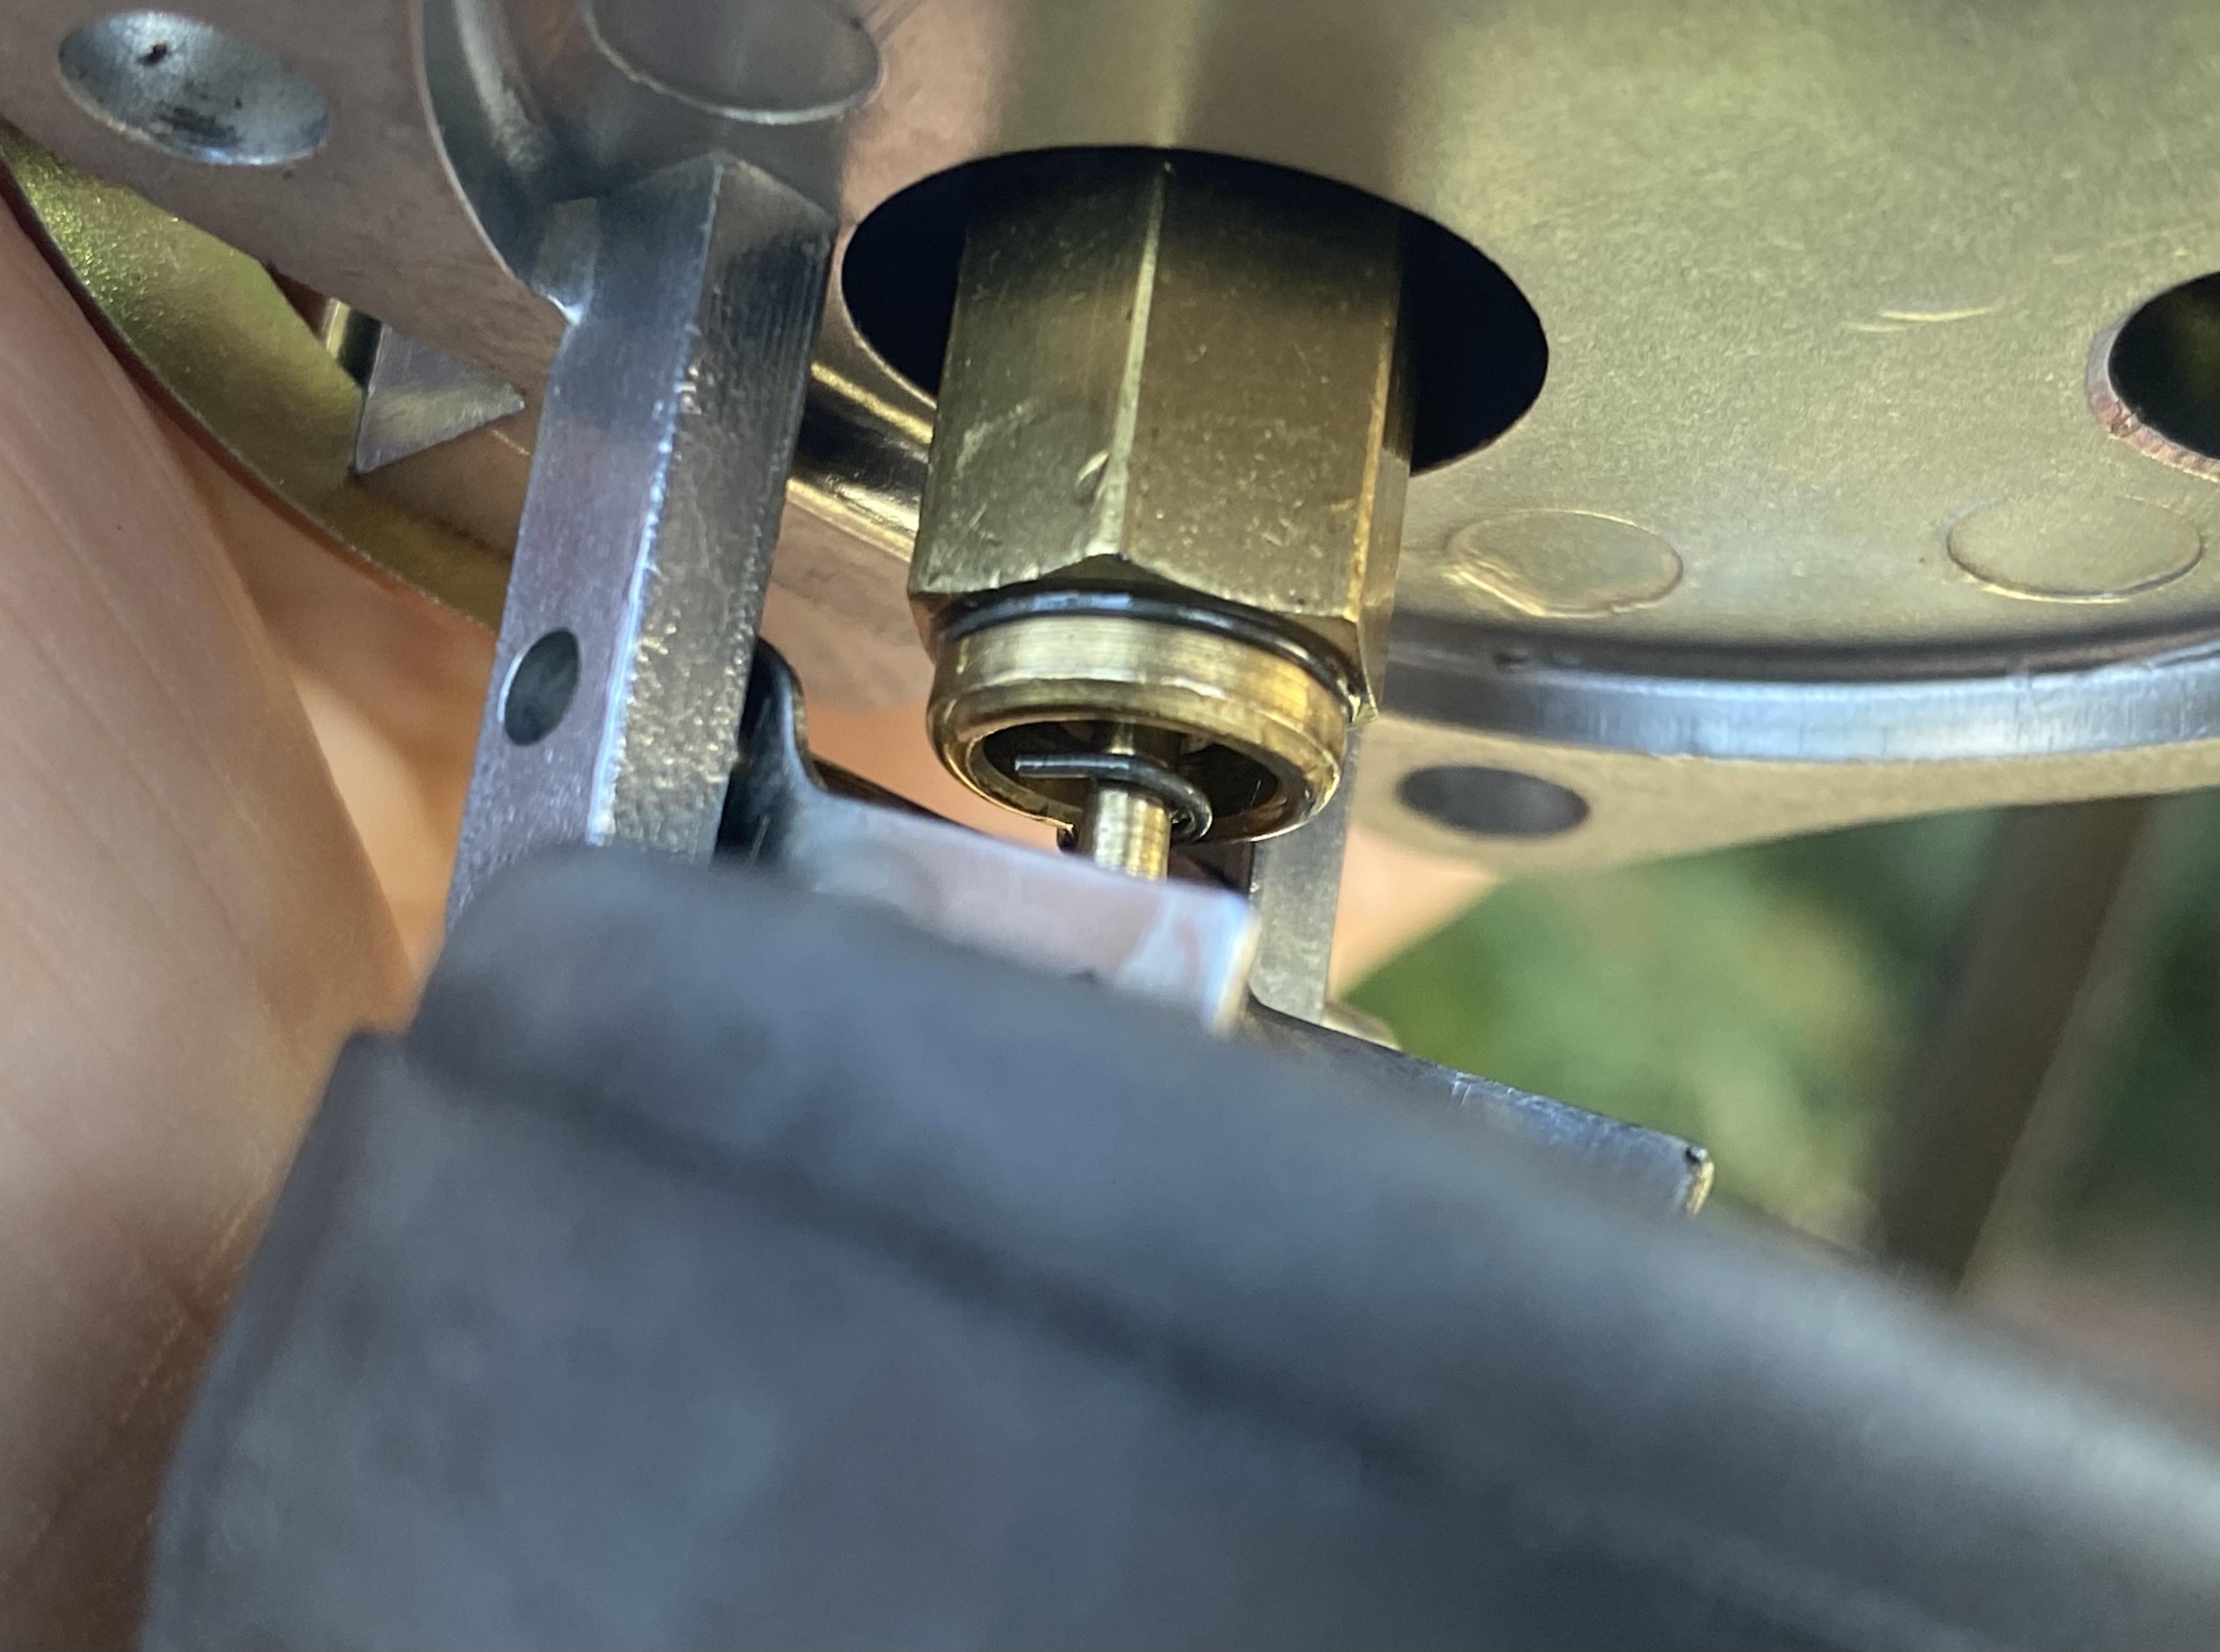
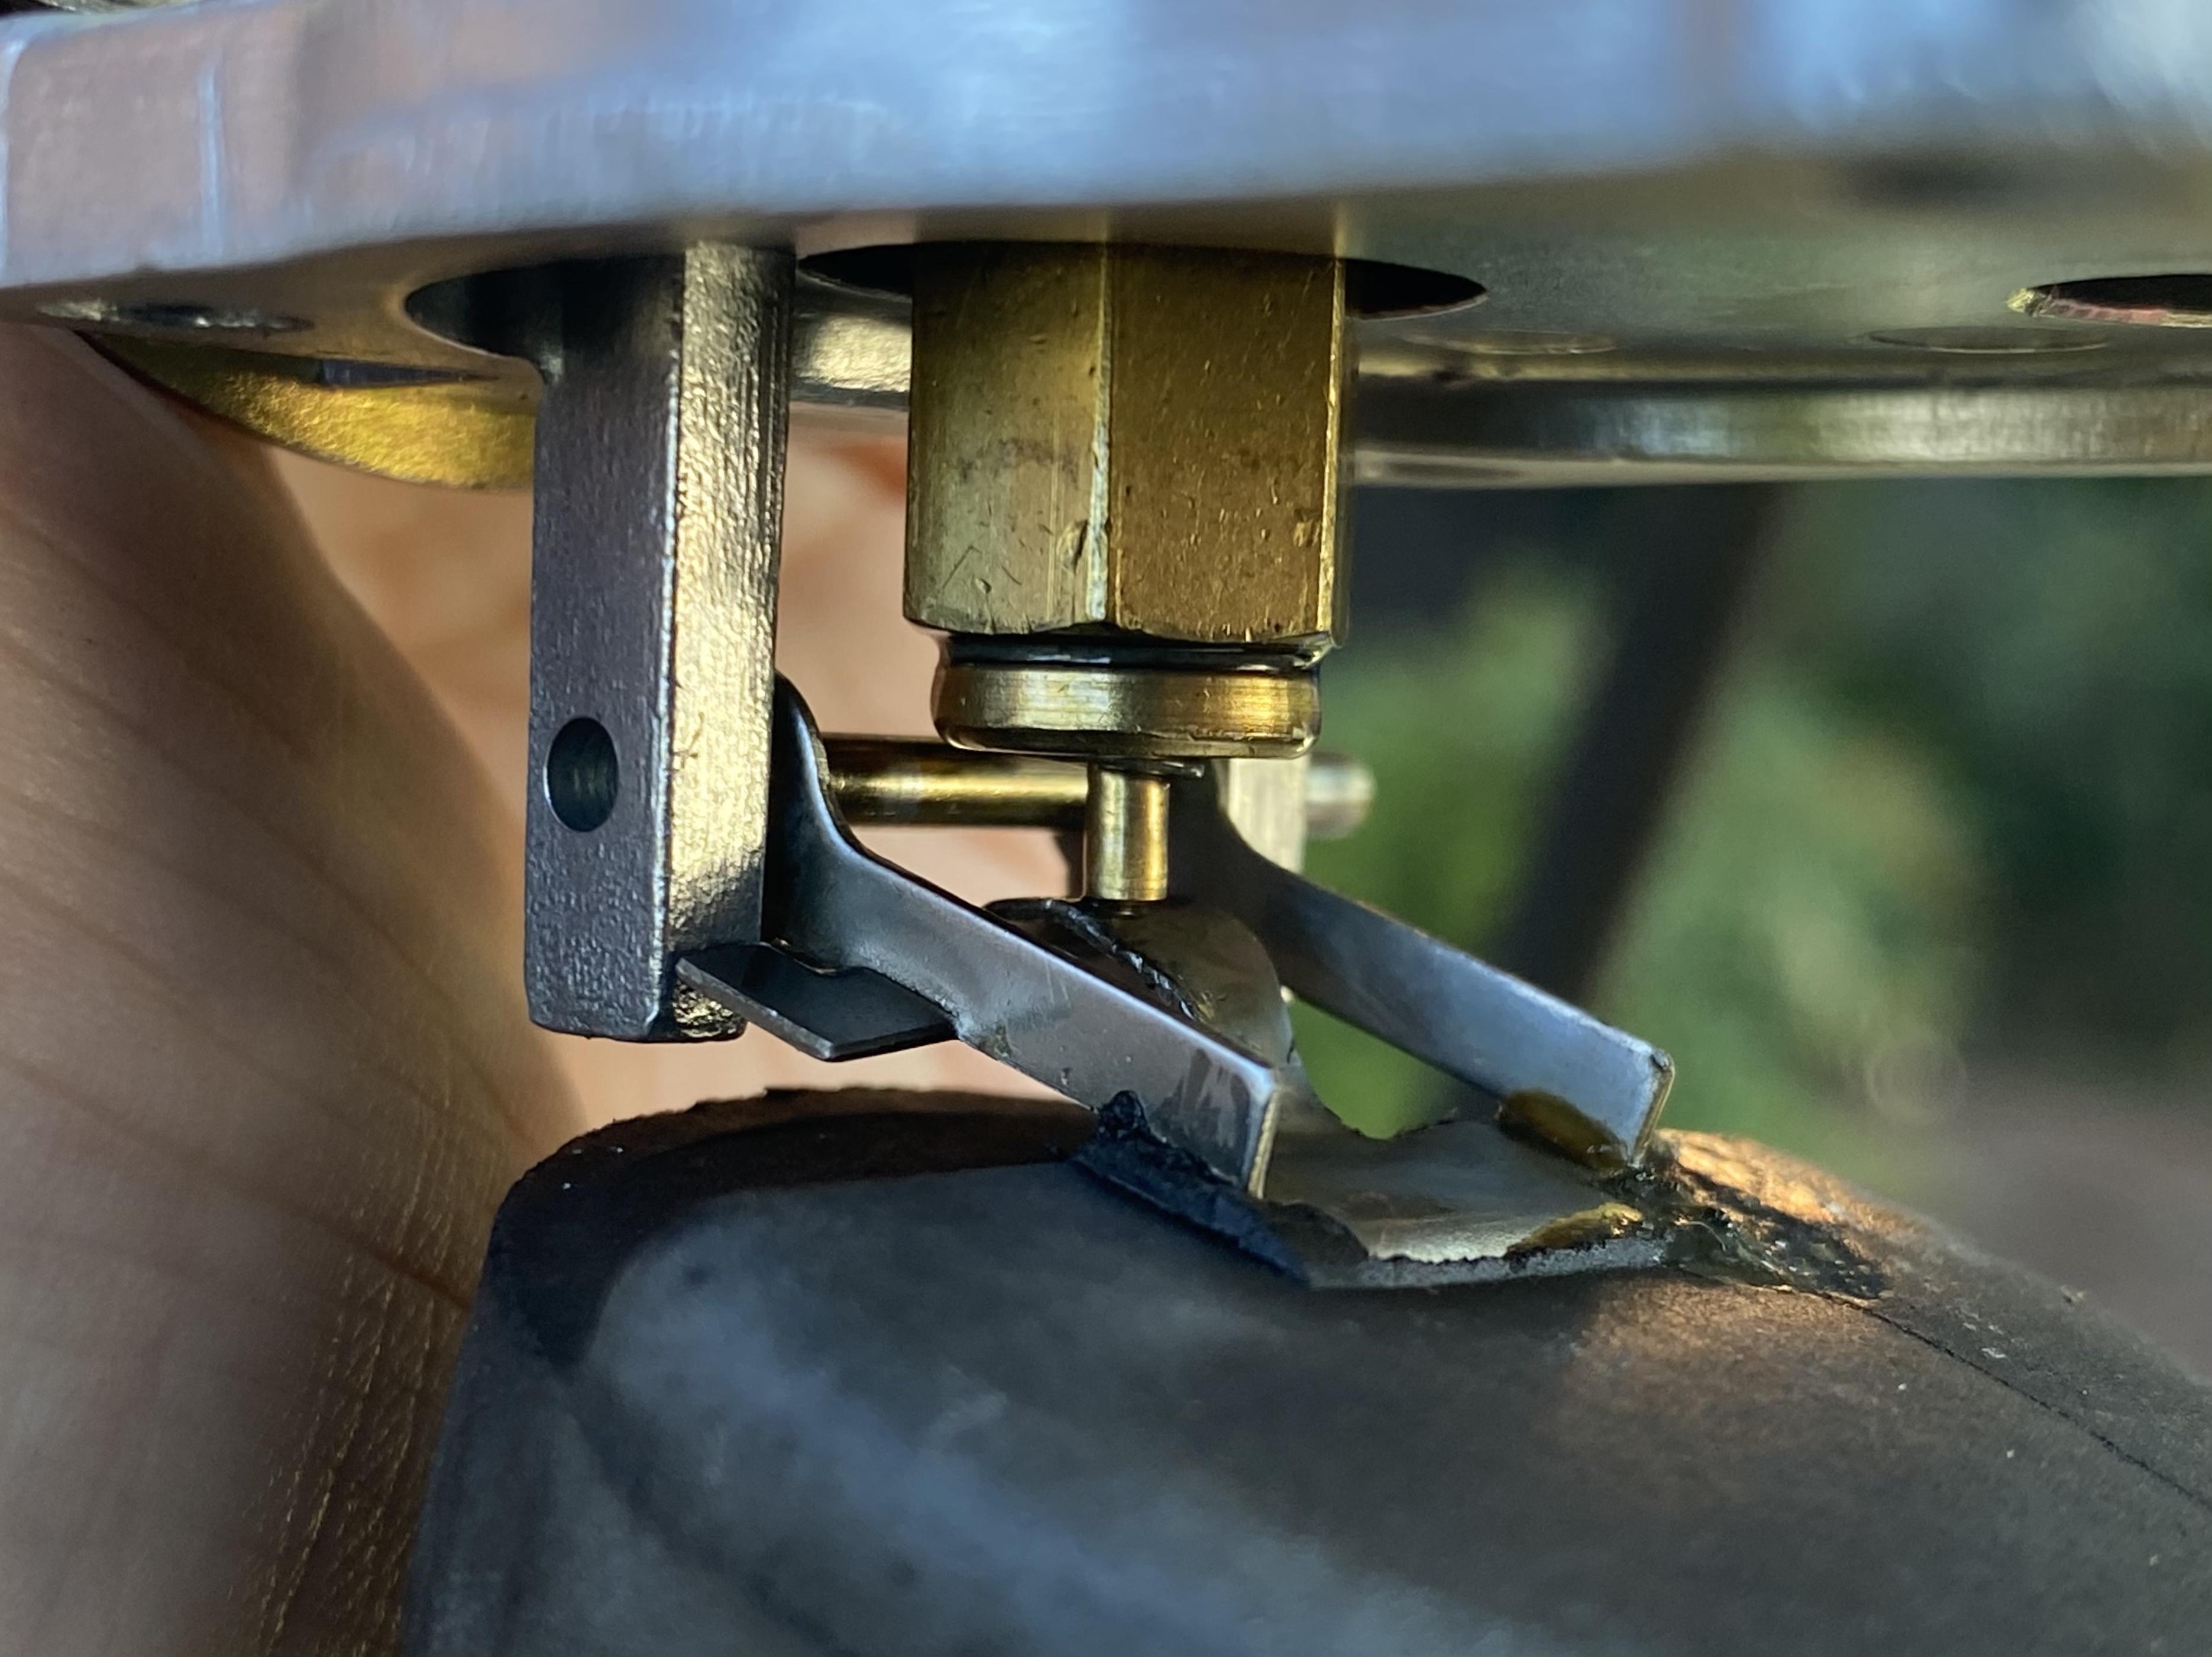
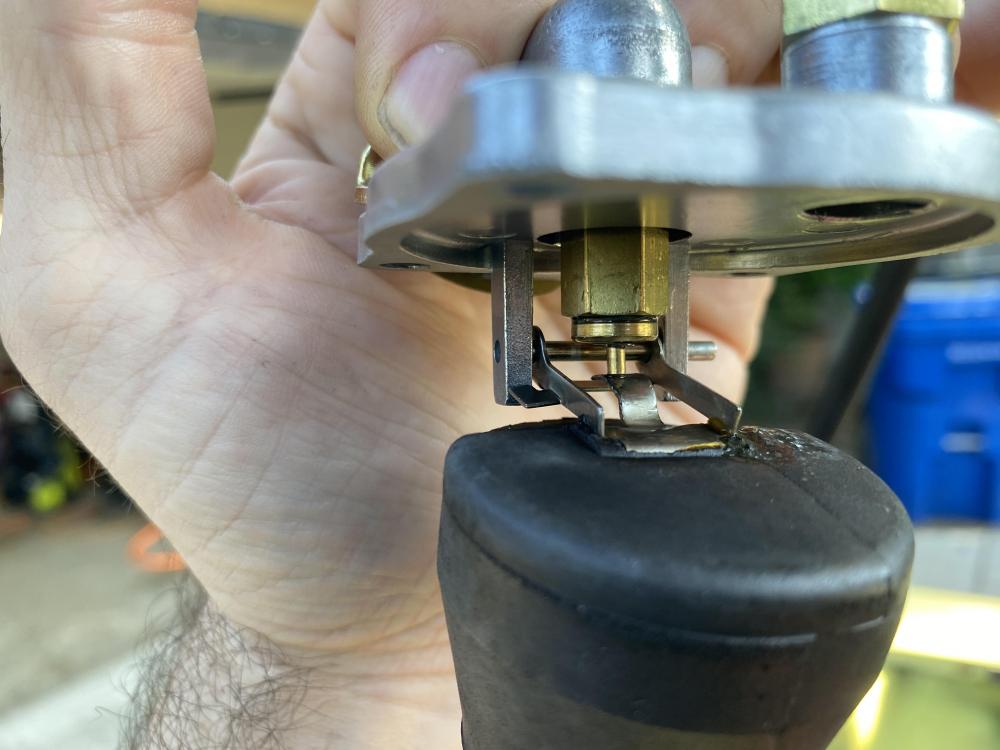
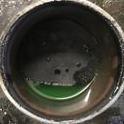 Also here are some pictures of my float in case anything sticks out to anyone. This front float has definitely seen better days.
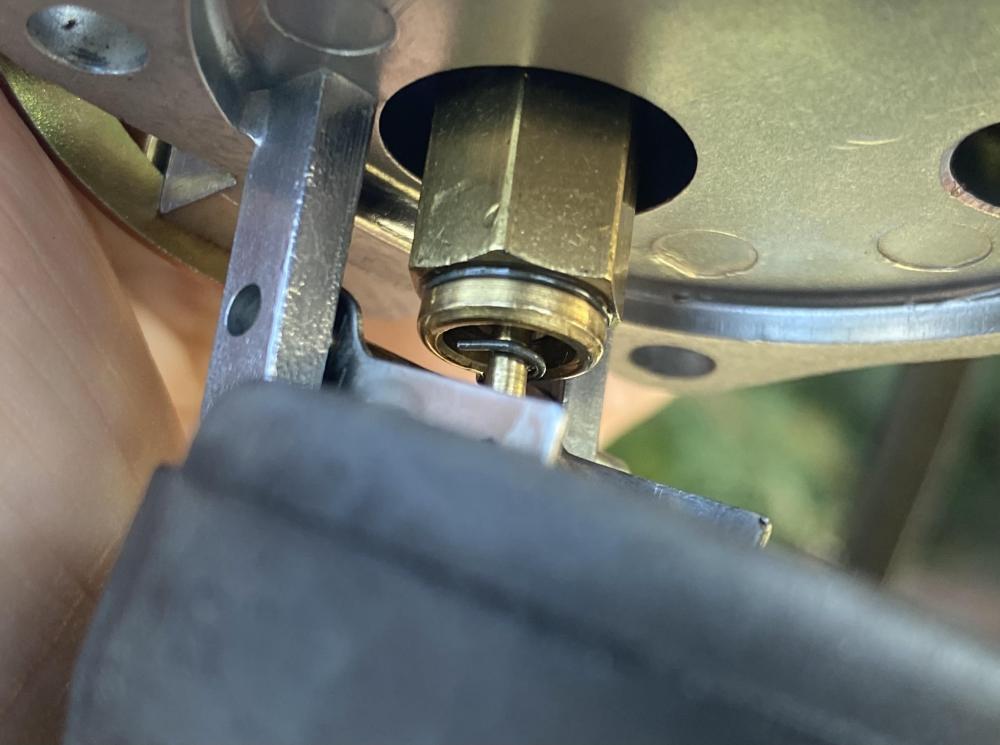

-
I just adjusted both via the FSM method and now the car won’t start at all. I pulled the float lids off and both bowls are bone dry. 😐 I’m going to try the blow method next and see if that gets me anywhere better. @siteunseen I just read through your linked post, and I think I get it. You’re using an electric fuel pump to push fuel through the float while it sits on a glass. Then you just measure the fuel level in the glass when it stops, right? I’m I reading the FSM right when it says the fuel level should be 23mm from the roof of the lid? I don’t have an electric pump, but any reason it wouldn’t work if I pull off my mechanical pump and actuate it manually?
-
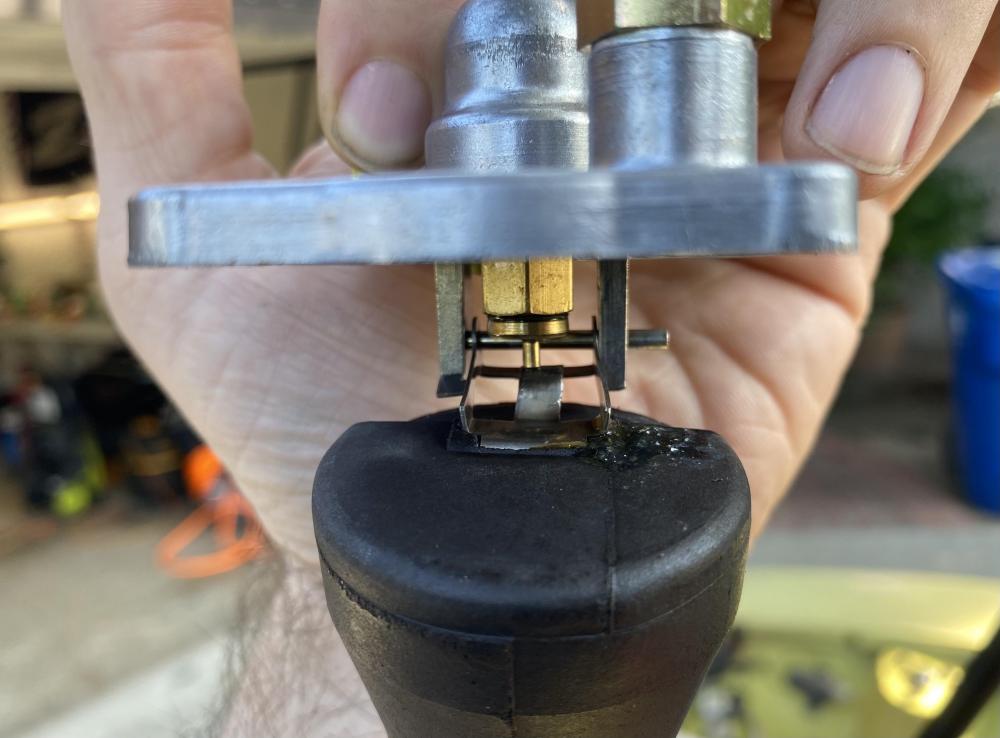
Yup that’s today’s task. The FSM recommends turning the float and lid upside down on the work bench and just eyeballing when the “lever seat contacts the valve stem” and getting that to happen when the top of the float is 0.55” from the bowl lid. The video I linked above instead recommends blowing through the fuel inlet and setting the float so that airflow stops at 0.55”. Unfortunately there’s a lot of variability between these methods, and even the “blow” test differs quite a bit depending on whether I start with the float up or down. For example, measuring the current float height on my rear carb (after adjustment via FSM method) gives me: FSM Method: 0.552” Blow Method (while lowering float): 0.617” Blow Method (while raising float): 0.498”

-
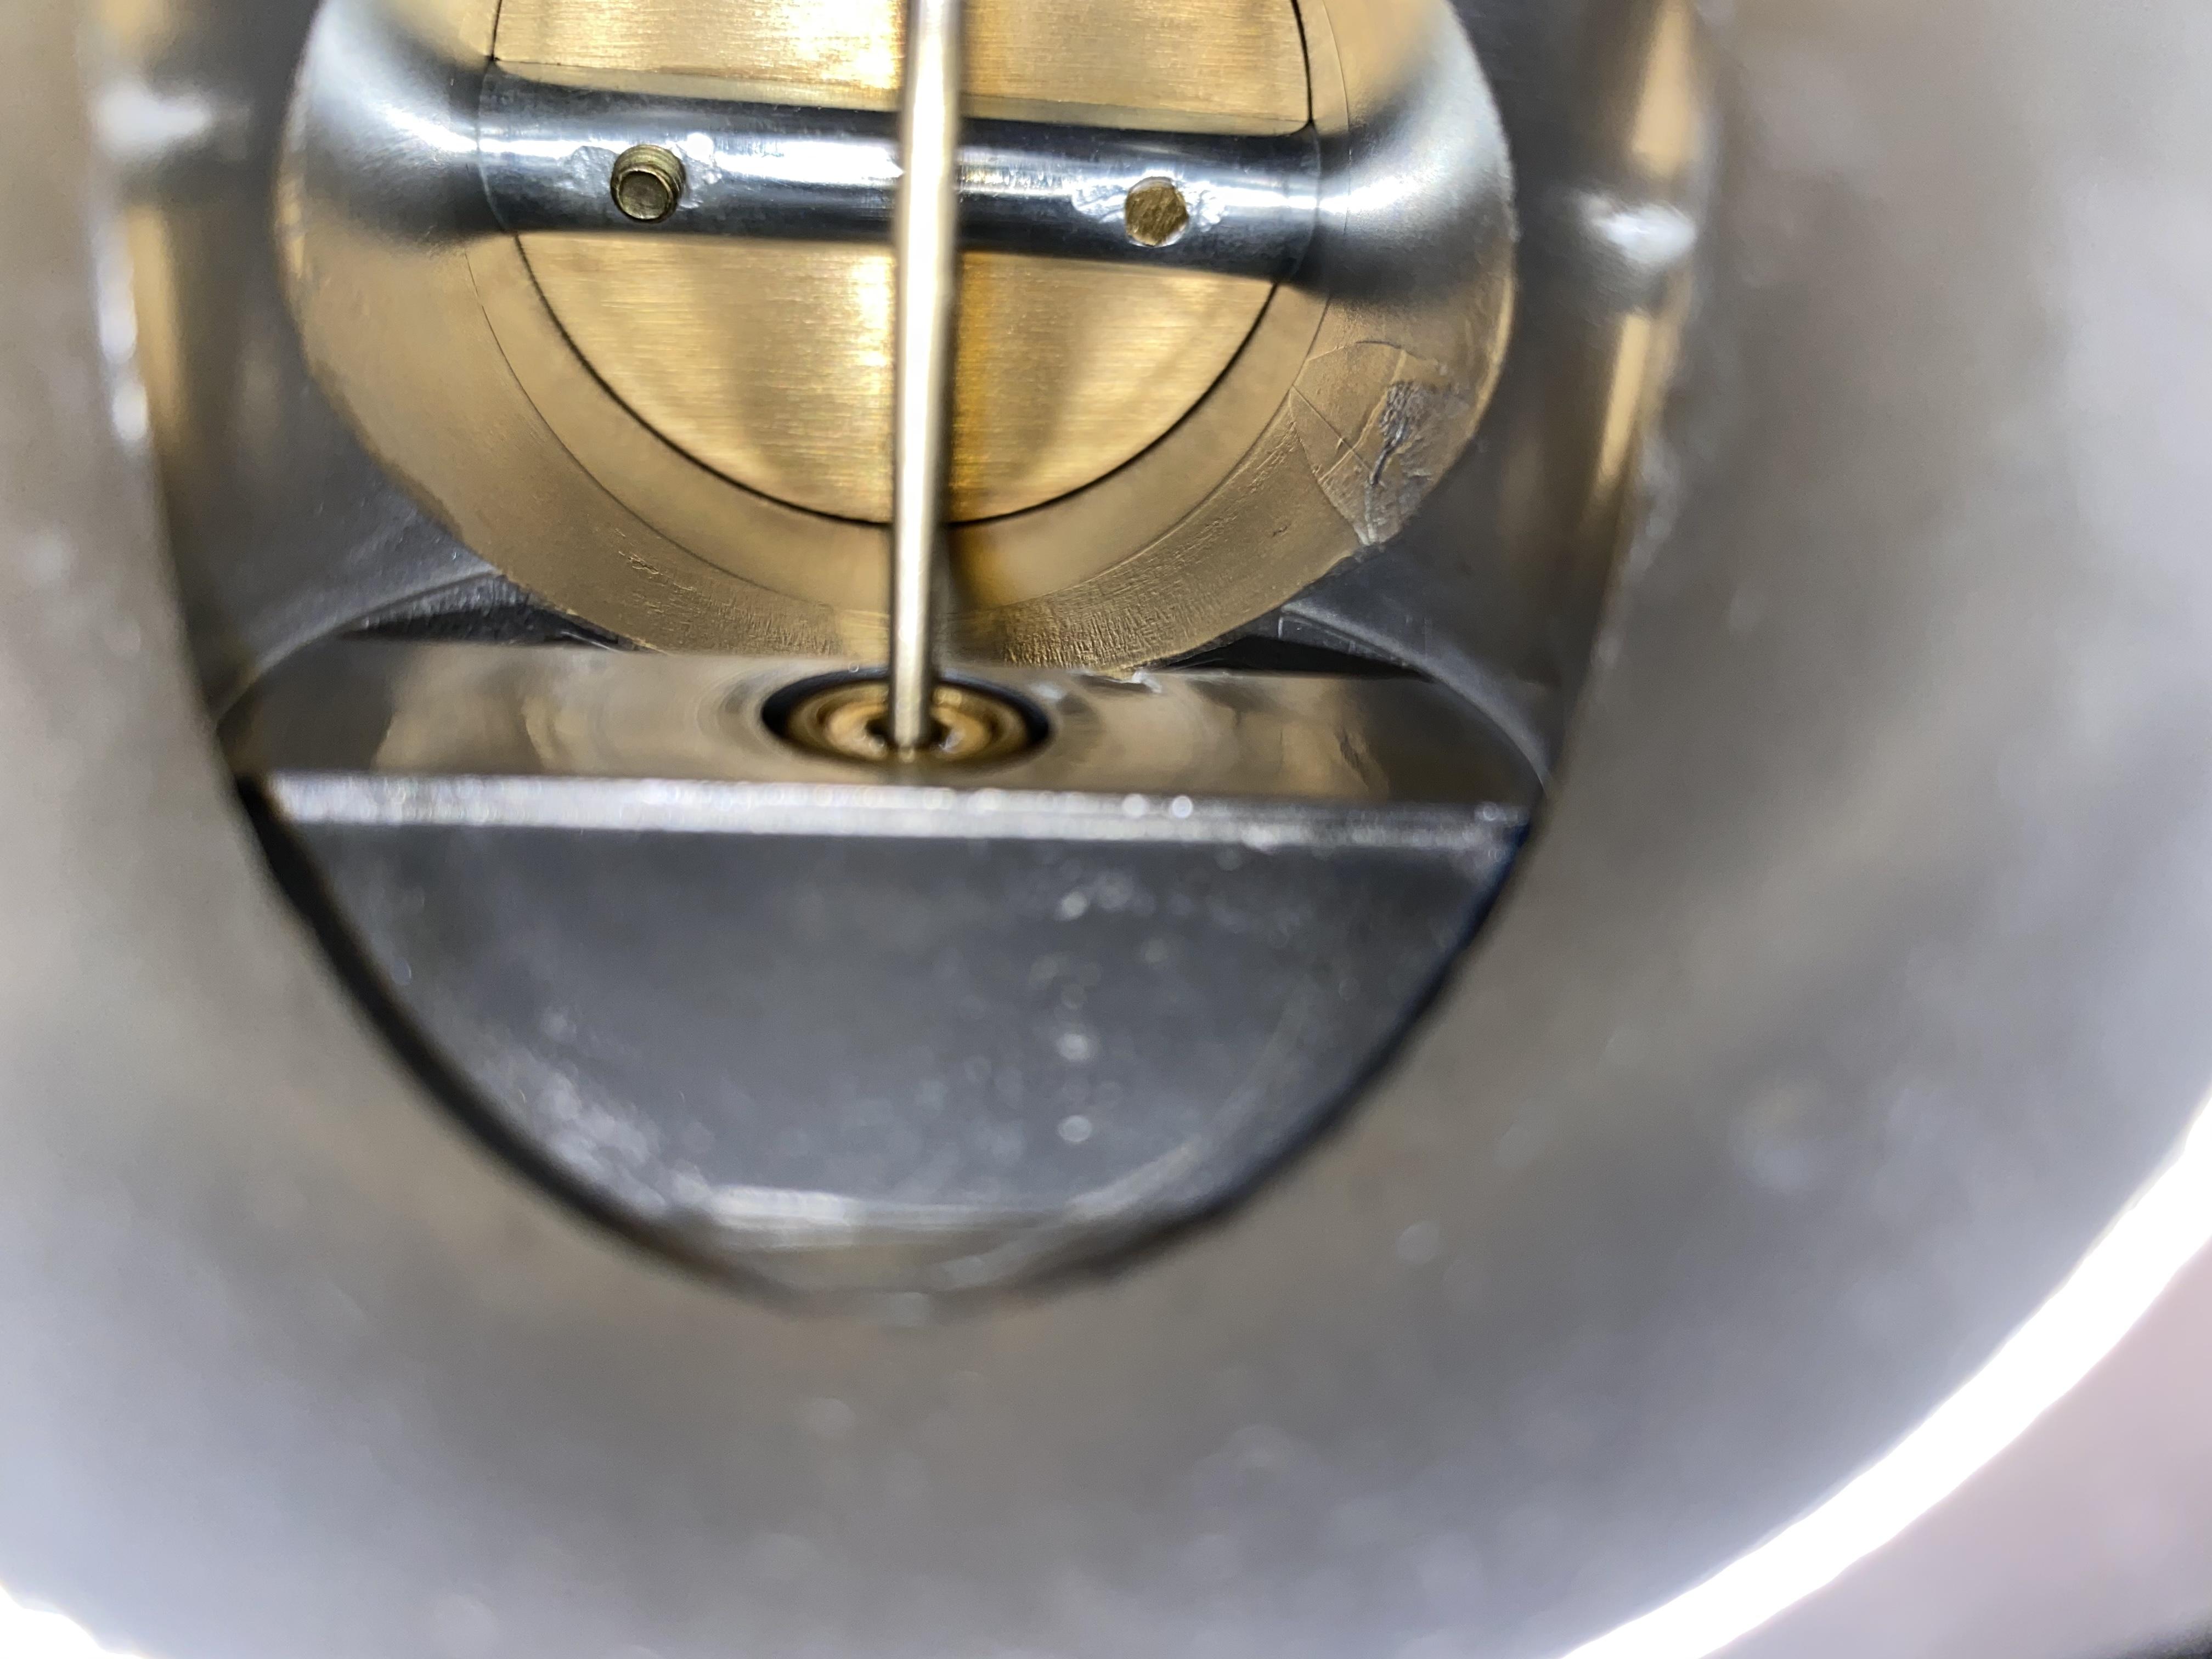
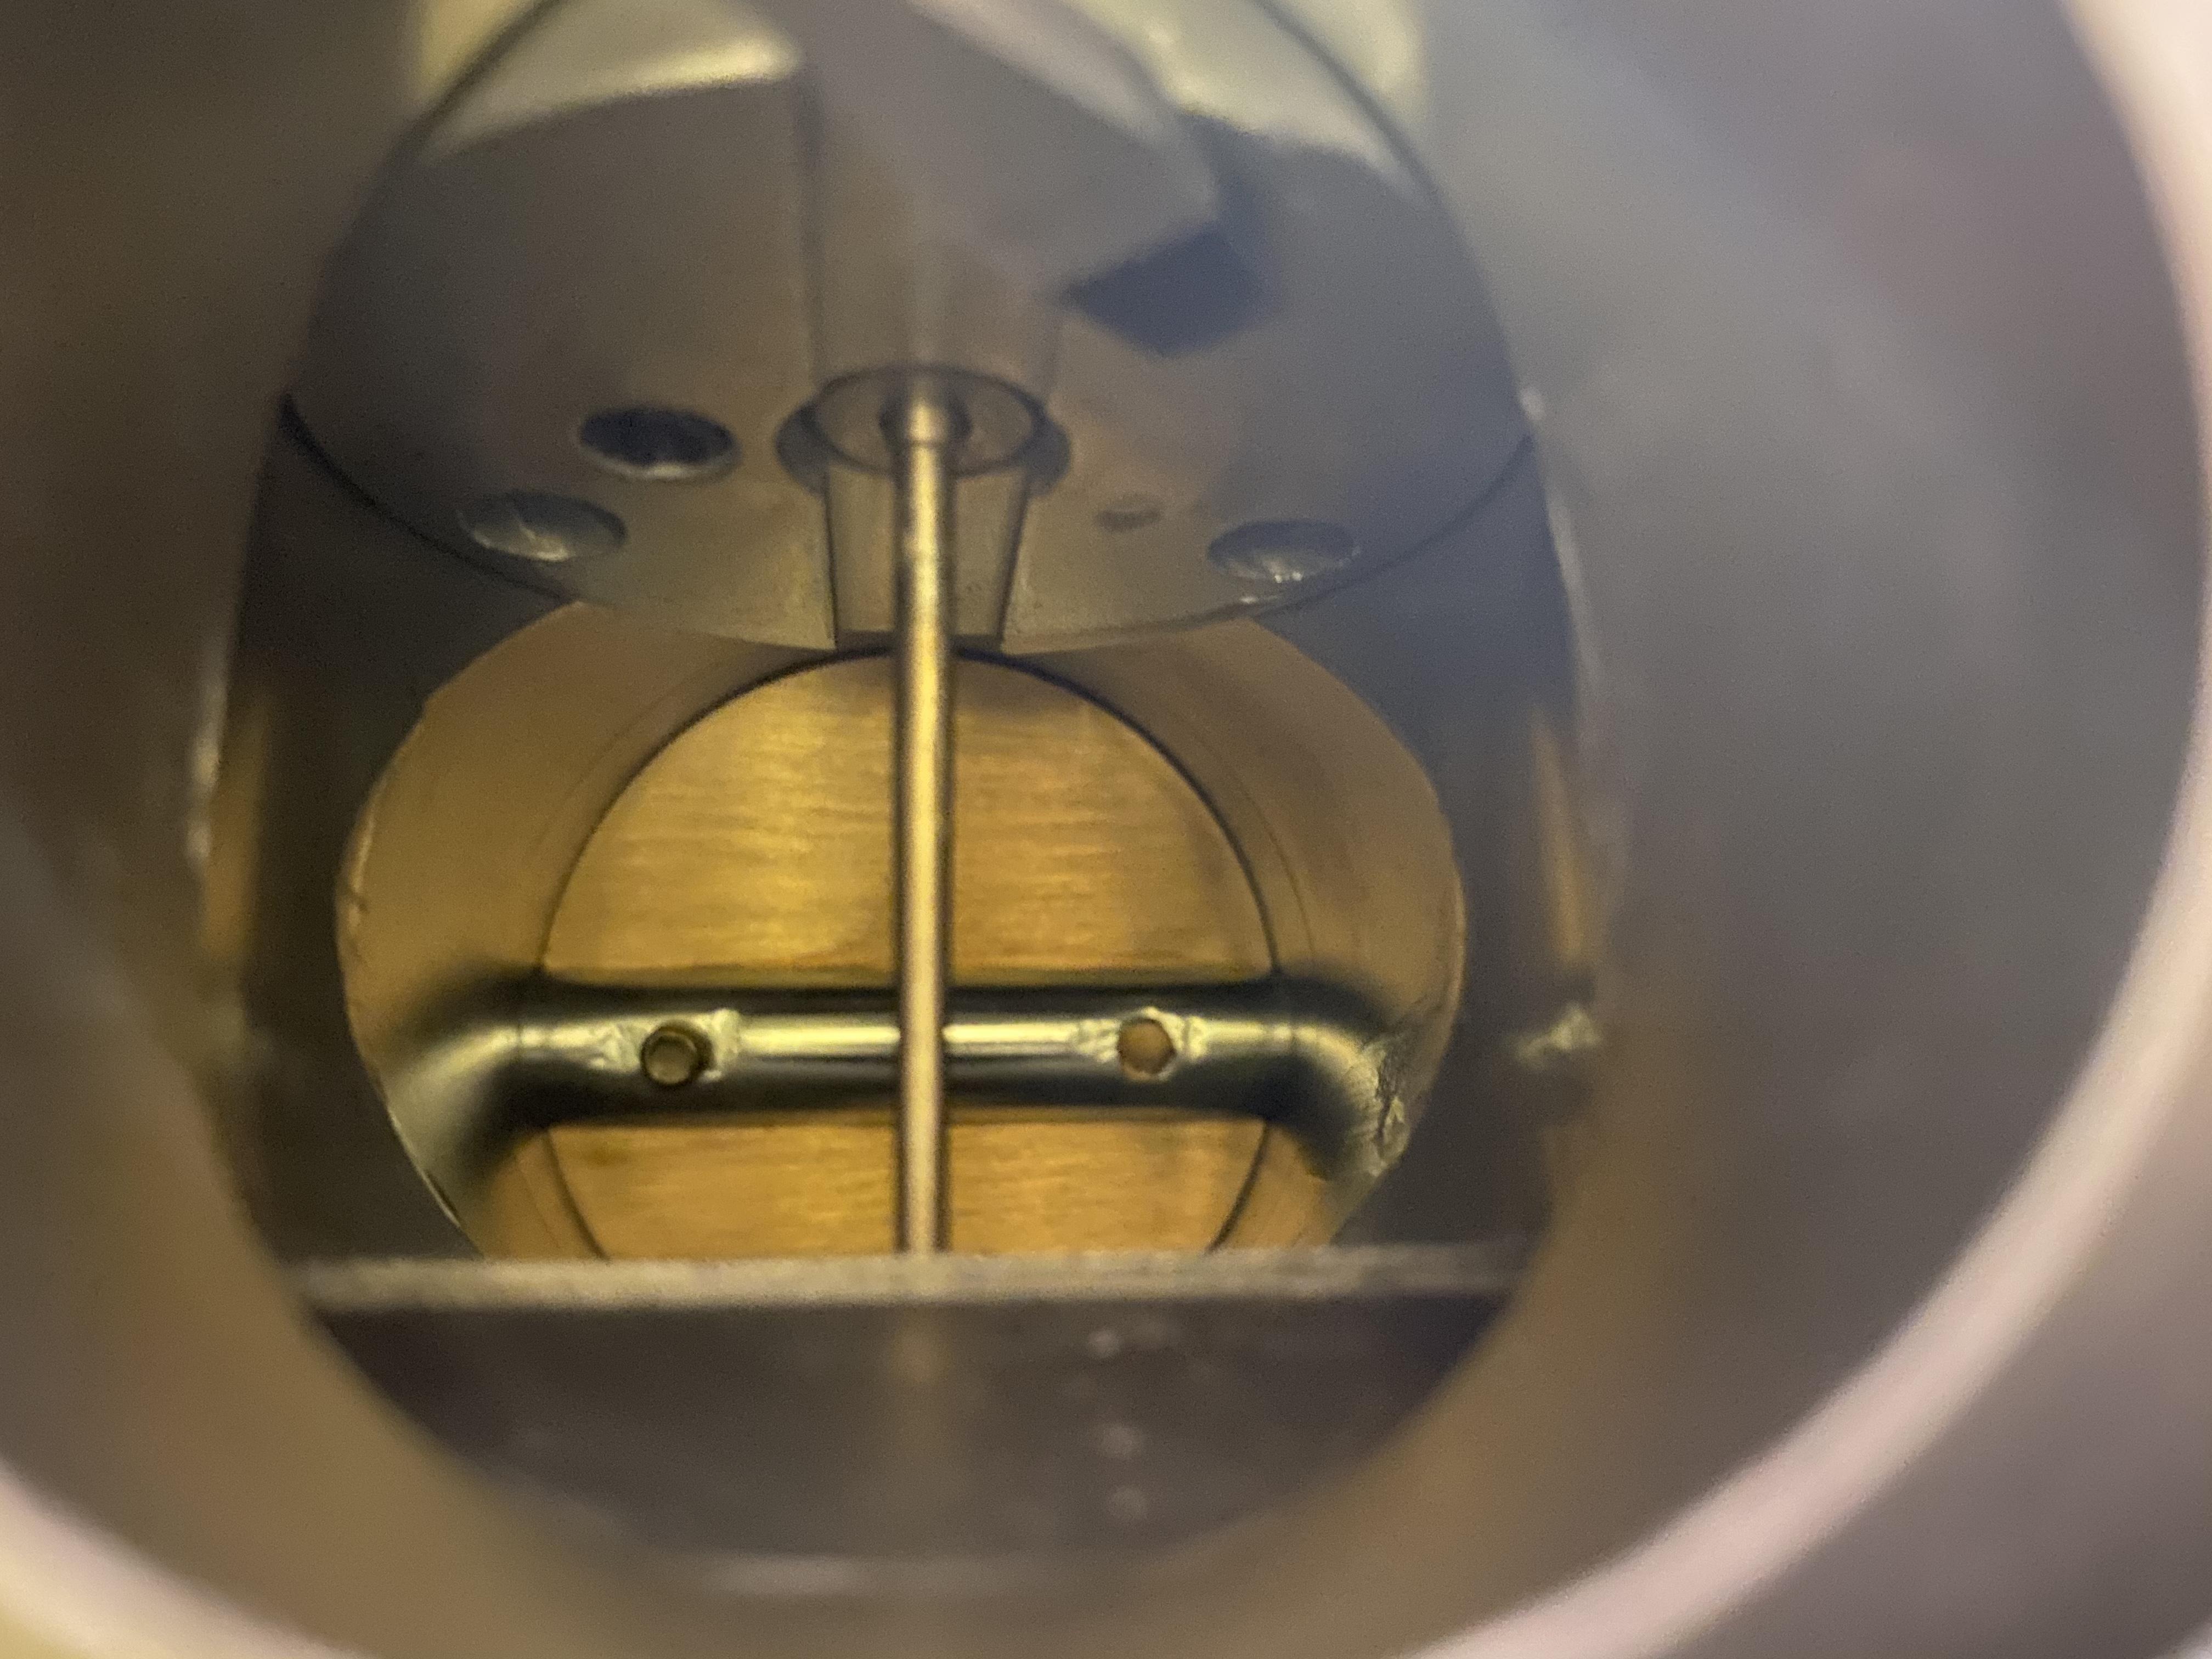
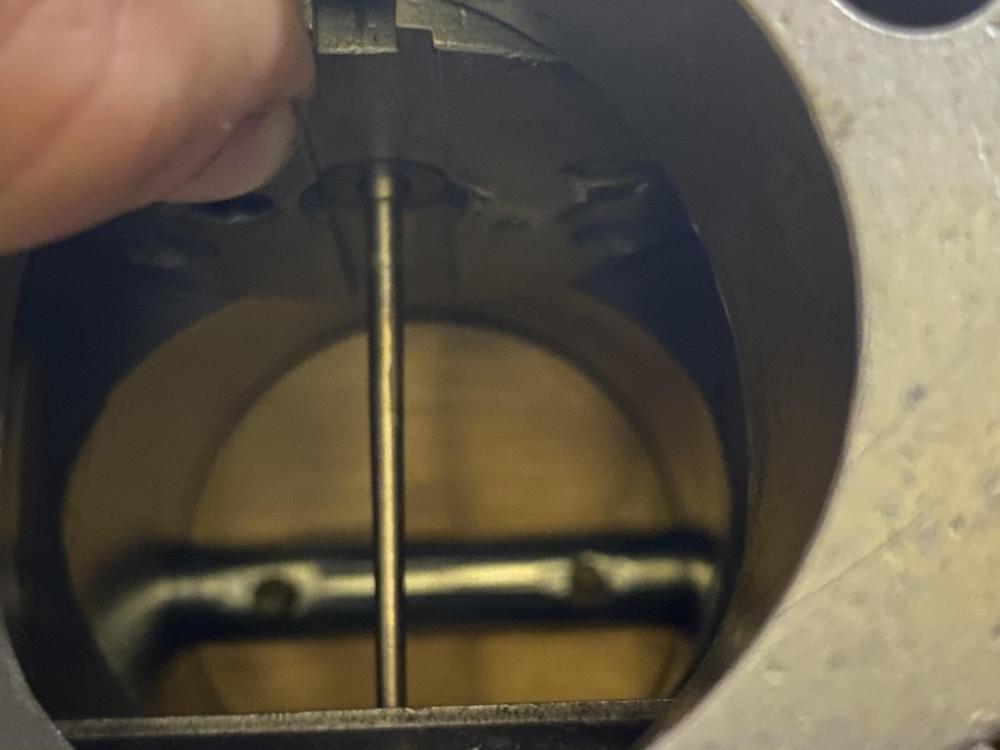
I’ll give Paltech a call early next week if I can’t get things solved by then. I checked his website and there’s no mention of what he uses, and I don’t think he sent me any literature along with the carbs. Here’s some pictures looking down one carb throat if it helps. A little hard to focus, but I can try to borrow a mirror if you think clearer shots would help


-
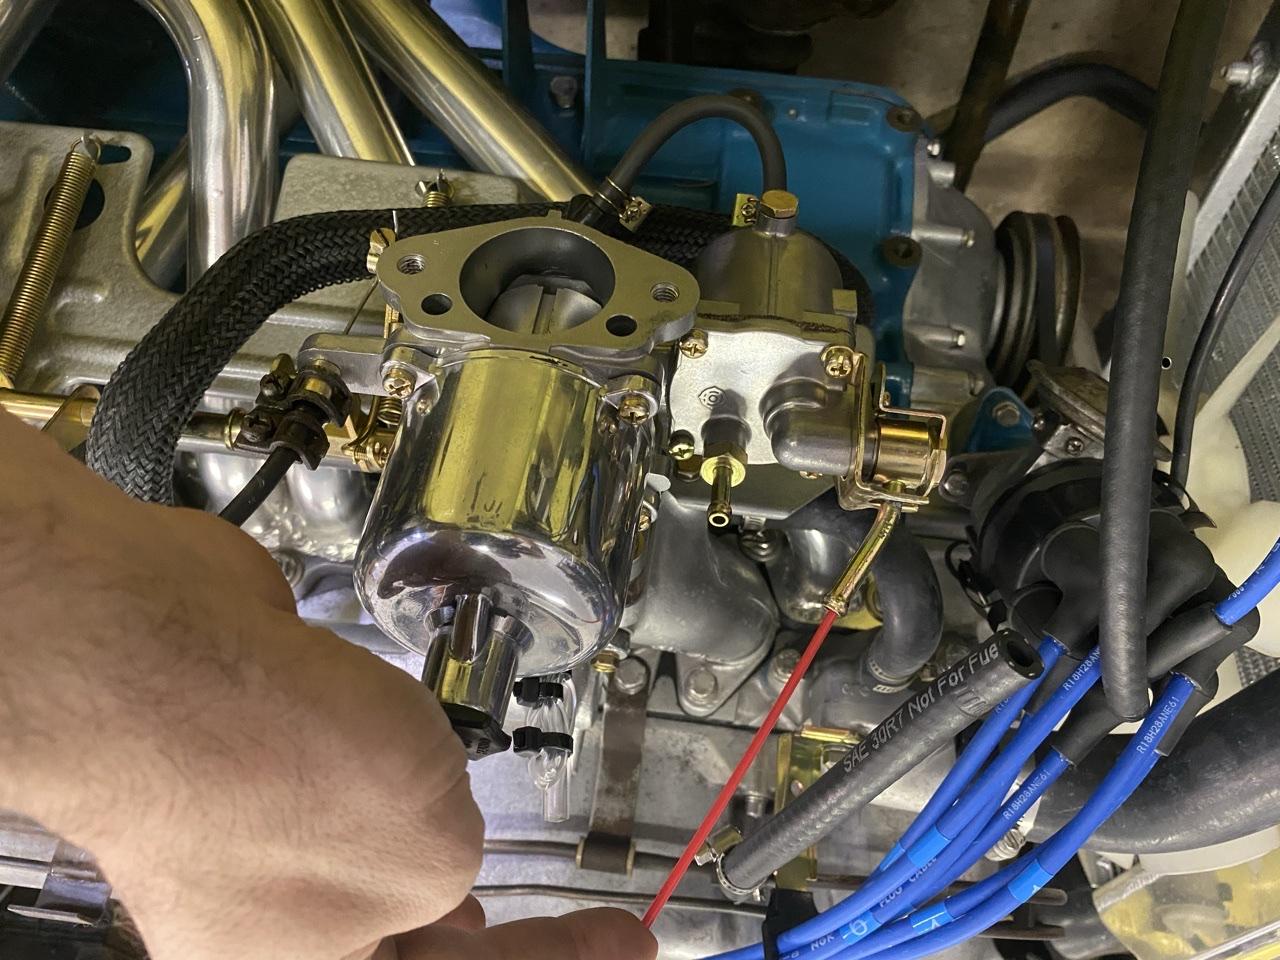
I’ve got both float bowls opened up and at first glance it’s obvious they have very different fuel levels in them: Using my “blow on it until the valve cuts off” method I’m measuring the front level at 0.7” and the rear at 0.4” from the top of the float to the bottom of the bowl lid. This is consistent with the levels in the bowls at least, and I’m hoping this is a big part of my problem. It’s still very weird to me that the front carb wanted to go leaner too, but maybe it was sucking extra fuel through the balance tube? Can anyone confirm that my measurement method seems reasonable? If so I’ll get them adjusted and try to start her up again tomorrow morning
-
@Captain Obvious no idea what the needles are - they’re whatever Jeff put in when he rebuilt them. The part number is written on the fat end of the needle right? Do I need to pull them out of the piston to read them?
-
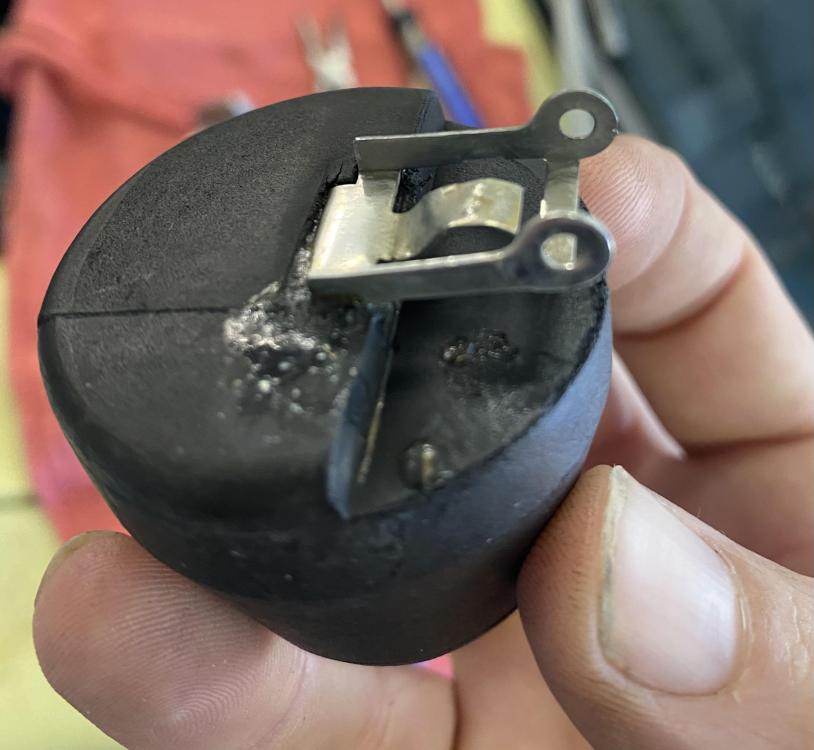
Hah no problem I got the gist. Paltech’s plating work is really really nice. I’m just hoping I can get them to run as good as they look. I pulled the top off the front bowl and now I’d like to adjust the level but I’m a little confused. I think the “Just SU” video instructions only apply to his ball valve, so I’ve been following the instructions in Aaron Neubauer’s video (see below). Following this process, my floats want to cut off air flow from my biological air compressor well before the .55” mark which would mean there should be less fuel in the bowl, not more right? Does this look like the right process to you all?
-
@siteunseen yup from what I’ve watched/read this means I’m too rich. Your theory is that the floats aren’t ever shutting off the fuel supply, and so the pump is just force feeding fuel through the jets? When you say “...through the fuel inlet” how do you mean? The fuel inlet is bent and there should be that grosse (sp?) jet there. Do you mean go in from the bottom? I poked my straw through the bowl vent, and on the rear carb I can feel it bounce a bit but it feels rock solid on the front. I think you may be on to something. I’ll open up the float bowls tomorrow and see what I can see.

-
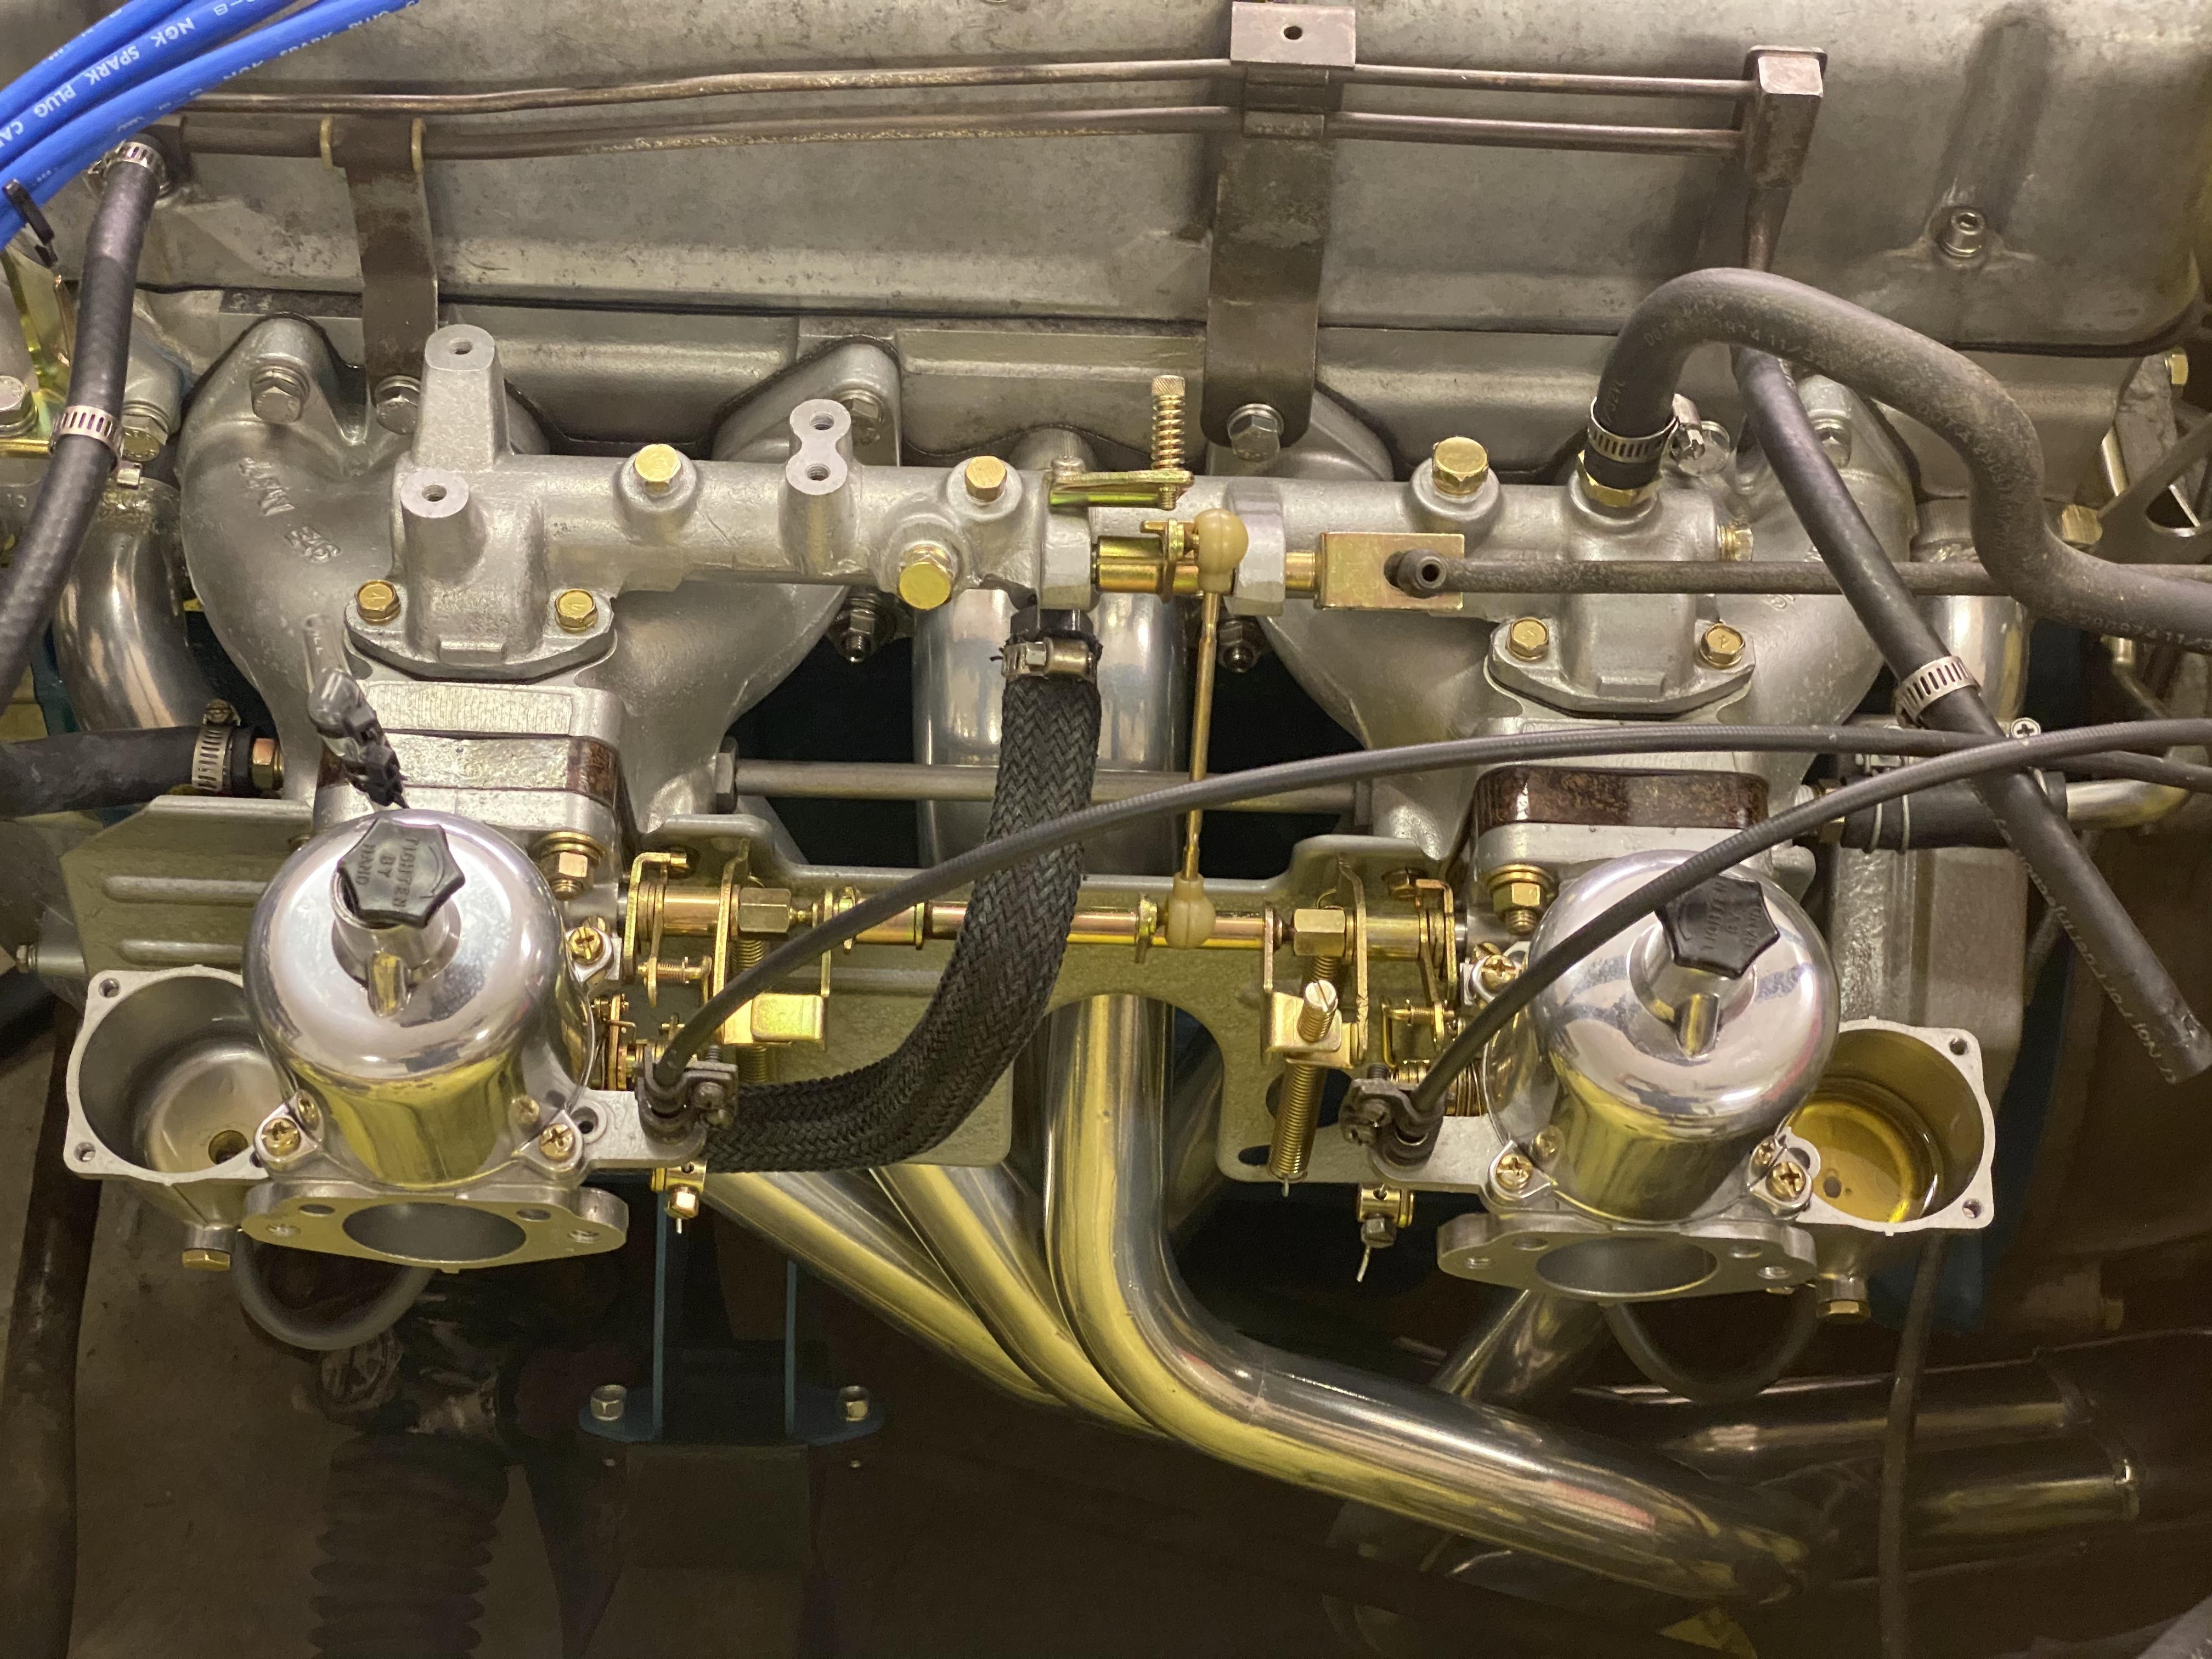
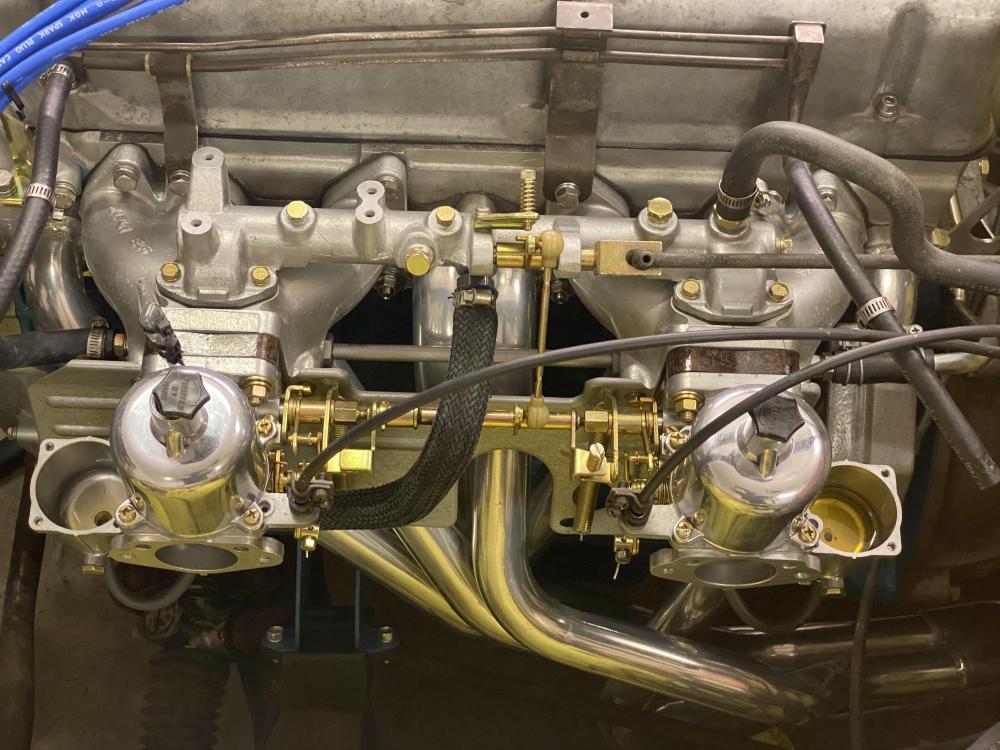
So I’ve been tinkering with the tuning trying to get it to idle well, but haven’t made a lot of good progress. It seems like it’s been running rich - there’s some darkish smoke coming out of the exhaust, and it really doesn’t want to start with the choke on. I readjusted the lash cold this morning hoping that would help, but the adjustments were minimal and it hasn’t seemed to make much of a difference. I also sprayed some starting fluid around the manifold and carbs and didn’t get any change while running, so I don’t think there’s a vacuum leak. I’ve been pressing on those maintenance buttons below my carbs to adjust the mixture, and the RPMs go up every time I do, so I’ve been screwing my mixture knobs in and in and in. At this point they’re screwed all the way in and the car seems happier for it. It’s starts up immediately and idles around 1000-2000 with both my idle screws all the way out. That doesn’t seem right. My carbs were rebuilt by Paltech but I’m wondering if something is wrong there - maybe the needles aren’t seated, or something is wrong with the jet tube. Any thoughts on where I should start looking? Here’s how it starts up now with the mixture knobs as lean as they’ll go: PS before you ask, yup I’m sure the chokes are pushed all the way in 😋
-
Any luck so far @Civilizedape? I'm having similar issues with my build, so I'm interested to hear how yours turned out.
-
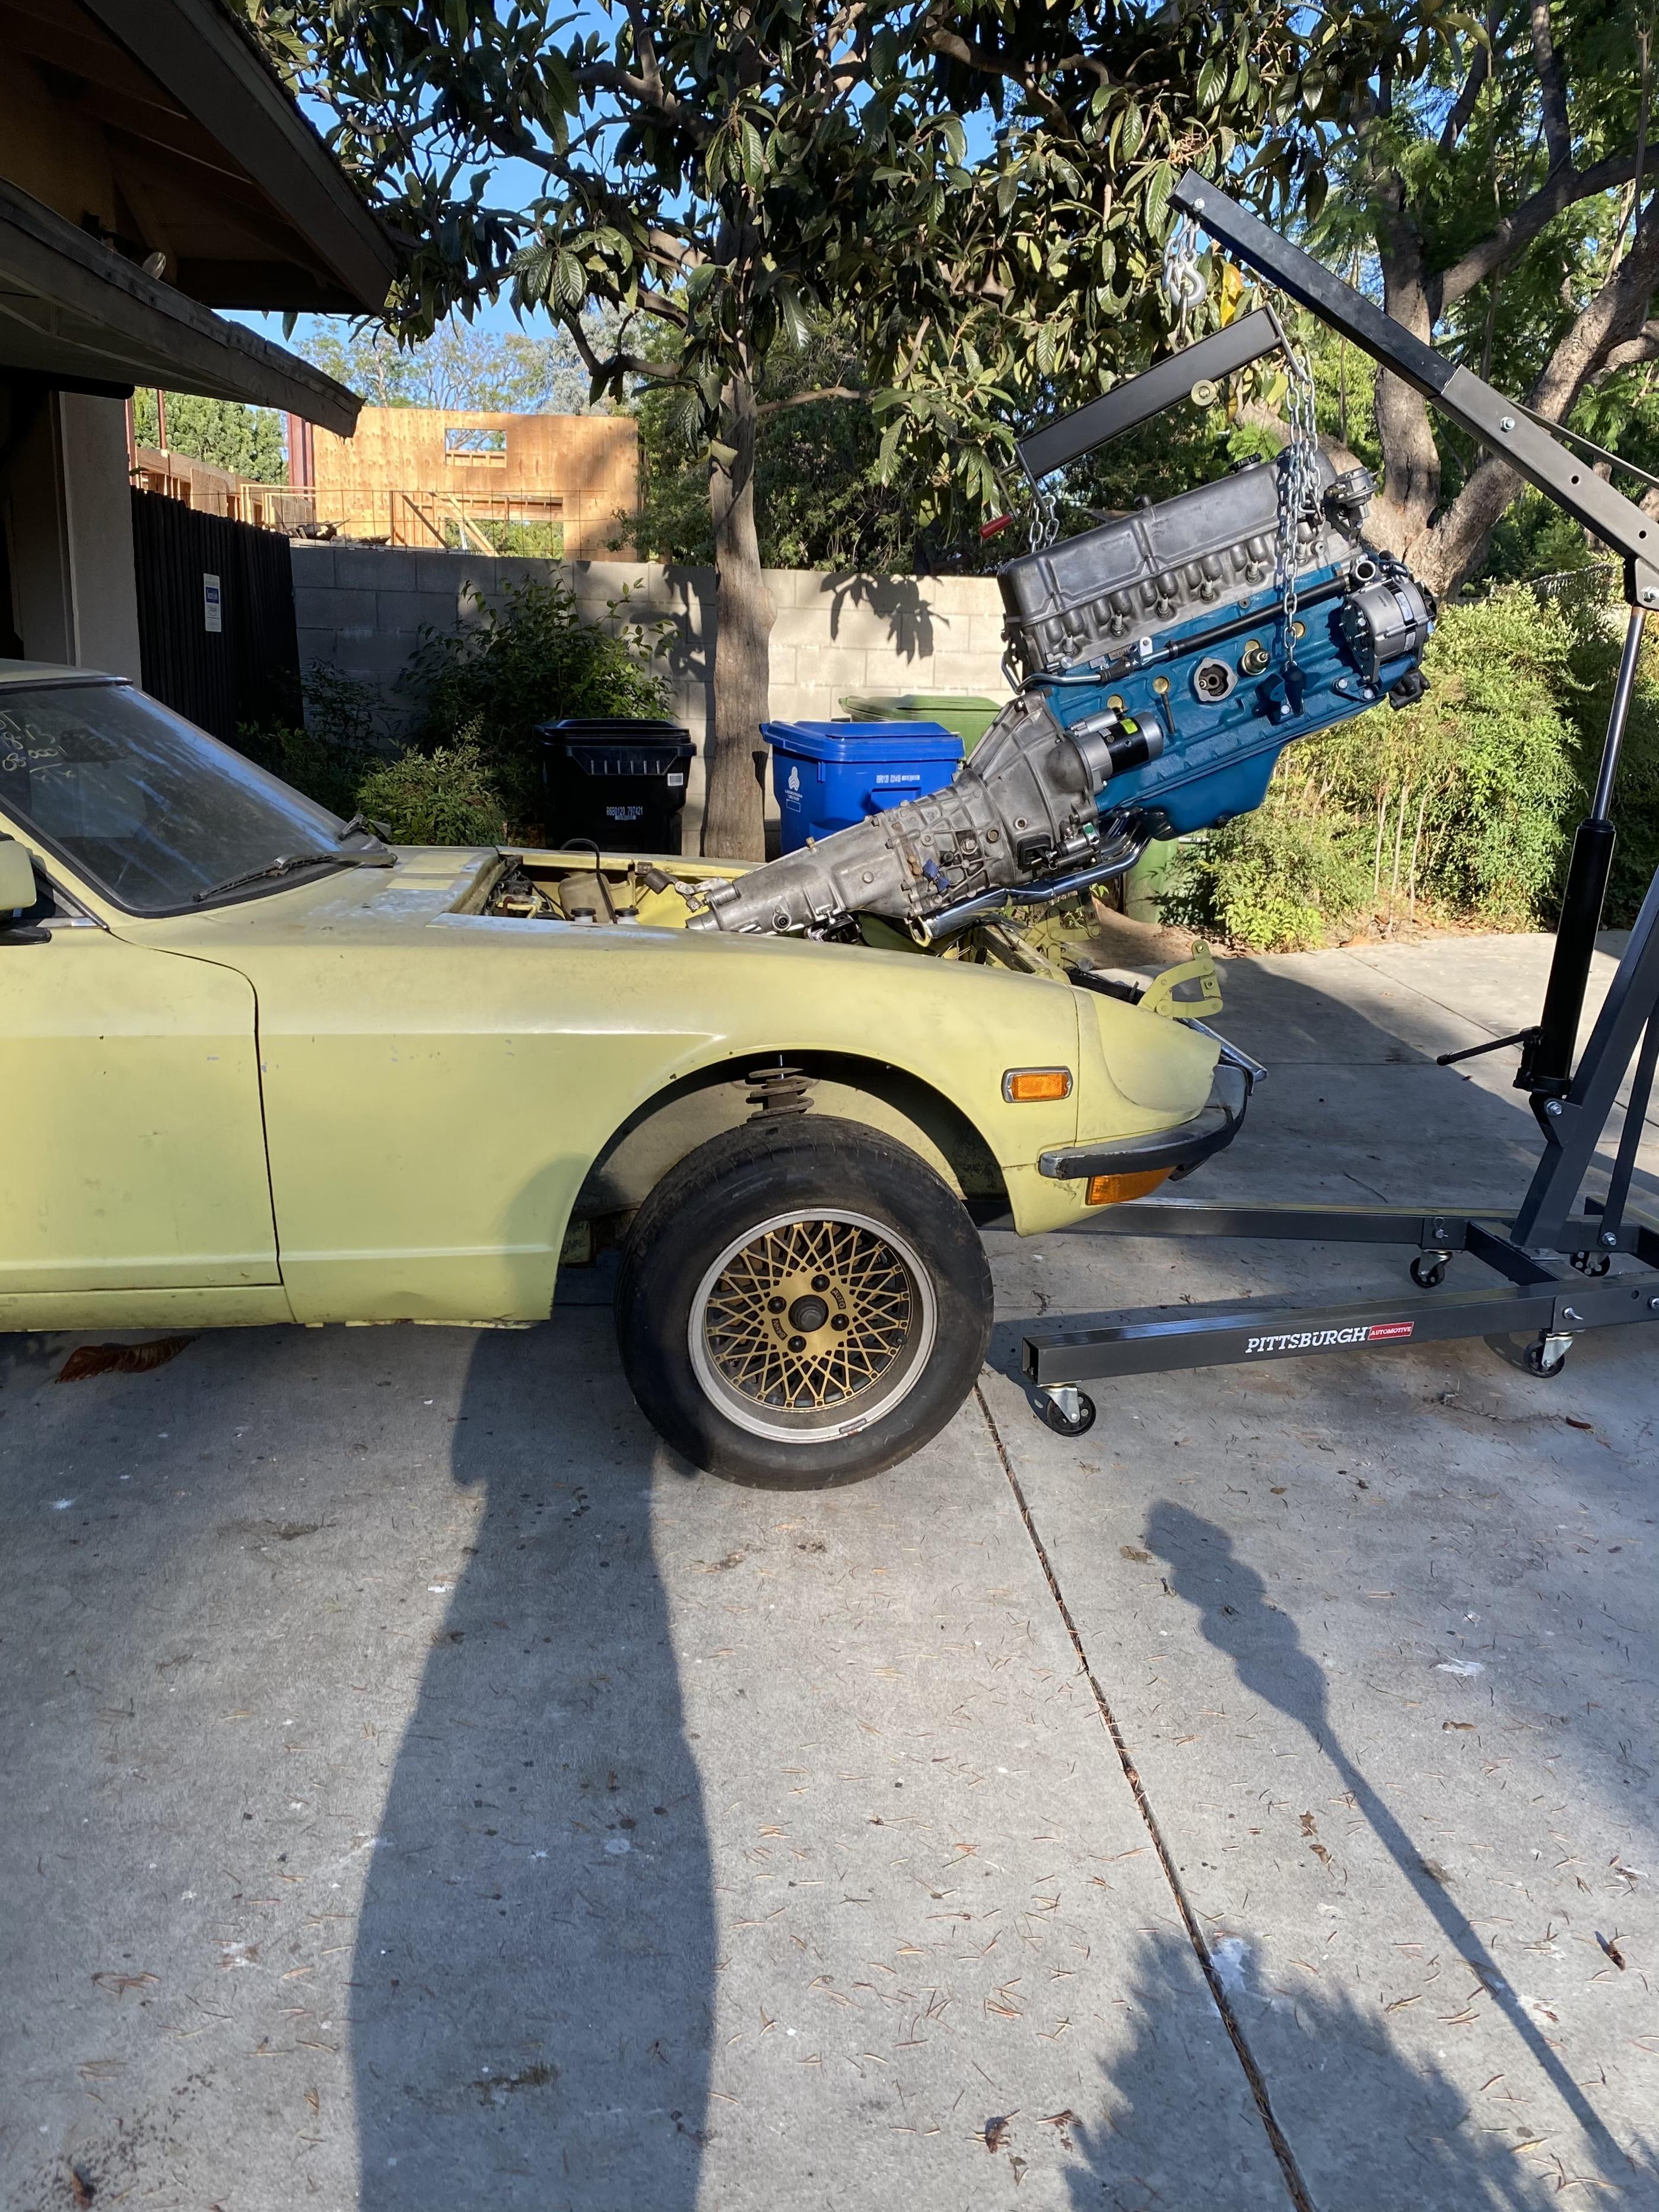
I ended up un-mating and re-mating the transmission about 5 times before the engine went in (see my clutch thread for that fun story). I finally got really good at it. The trick was to get the vertical alignment of the friction disk just perfect. To do that, you have to wiggle it up and down while it’s being held by your alignment tool, and torque down the pressure plate when the disk is in the middle of its range of motion. Once I got that right, the transmission would slide in very smoothly with no issues.
-
I just did them both together. This is my first build and I had a hell of a time getting the transmission mated up even out of the car. I think I would have just quit if I’d tried to do it with the engine already in. Putting them in together was pretty straightforward with my cheap Harbor Freight hoist and load balancer. I roped my fiancé into helping me guide it in, but probably could have done it myself with only marginally more cursing.

-
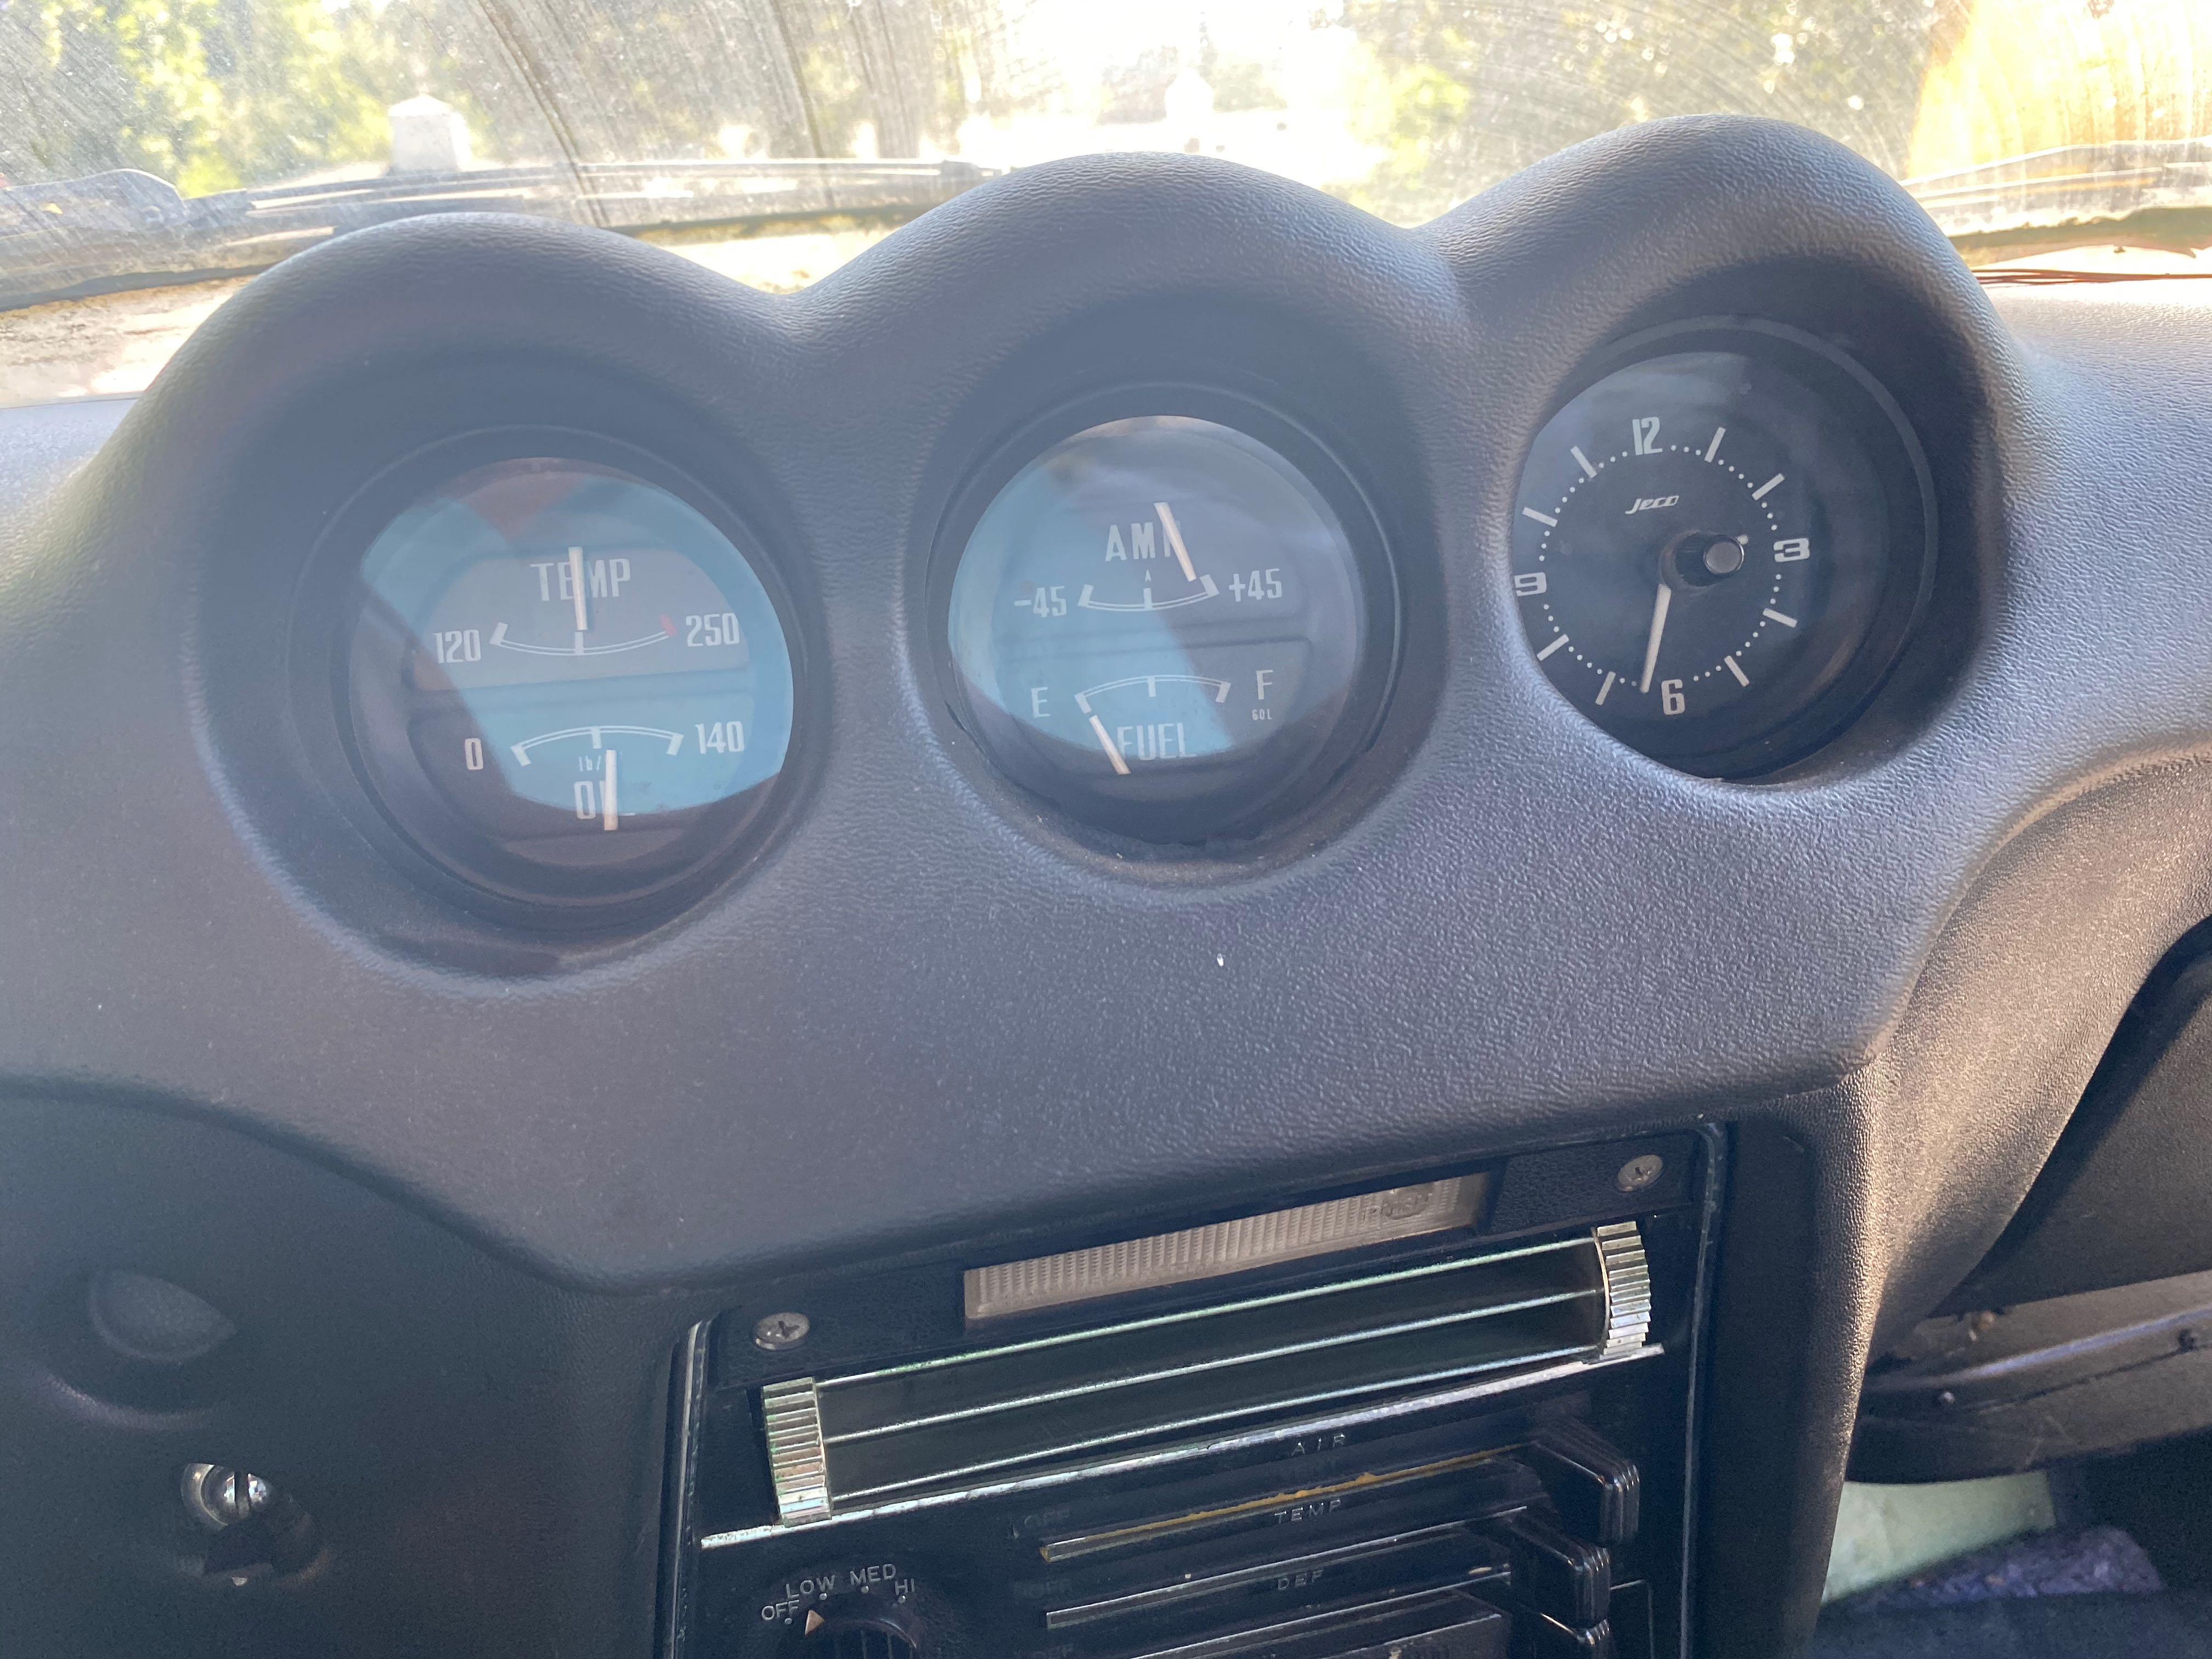
Wow, that's not at all how I thought it worked, but it's pretty damned clever. I was assuming the sender unit's resistance was being used to actuate the gauge needle with electromagnets or some kind of friction clutch or something via a voltage divider. Thanks again for the explanation - it's significantly better than anything I was able to find by just Googling around. Again, it would be a shame if this knowledge stayed buried at the bottom of this not-so-interesting thread.
-
This is great so far @Captain Obvious. I’m out of TV shows to watch, so I’ll be anxiously awaiting your next installment for my new entertainment. I think this probably warrants it’s own thread. It would be a shame for all of this info to get buried under this random topic. If you do start a new one can you just link it here?
-
Sounds great, looking forward to it
-
The camshaft is original - I haven’t had the budget to replace it yet but I had the head rebuilt by a local reputable shop (Valley Head in Northridge) so it does have new pads. I only ran it above 3k briefly, the rest of the time was between 1500-2500, so hopefully it’s ok. I’m also using the high zinc break in oil from Lucas so hopefully that’s helping things ease in.
-
Sure that sounds reasonable. Think it’s worth doing before I run the car any more, or should I let it run for another 20min or so to break it in further before seeing the lash again?
-
Well, I took yall's advice and started it up this afternoon. Oil pressure jumped to the middle of the gauge (70PSI?) almost immediately. I started another thread here if anyone's interested in following along with the fun. FYI before I started the engine I also tried connecting a mechanical pressure gauge in place of the sender. After cranking for a few seconds, I didn't even get a blip on the gauge. I then just pulled out the gauge and put my thumb over the hole and saw a little squirt out where I didn't press hard enough. That was good enough for me, and starting it up was definitely the right decision. @Captain Obvious I'd still love a rundown of how the gauges work if you're up for it.

-
After almost 2 years of slowly rebuilding the engine, I finally got my '70 240Z to start up today! This is the first time I've ever seen the car run, so I'd love some feedback from you all with more experience on how it sounds. The car starts up pretty easily, even with the choke completely disengaged. The RPM seems to drift all over the place though, so I had to keep messing with the fast idle screw to keep it around 2,000 (just above Tom Monroe's recommended 1,500 minimum). It sounds kind of rough to my ears, but again I've never heard the car run properly so I really have no idea. This was originally my (soon-to-be) father in law's car and he thought it sounded a little rough but not terrible. I messed with the timing a little bit and settled on ~15 degrees of advance, but the RPM is wandering around so much that it's hard to know if any adjustments are helping or hurting. I only got around 10 minutes of runtime today because I was running out of a gas can rather than the tank, and I emptied 2 gallons of gas in 10 minutes. I'm pretty sure all of that gas is just going back in the tank through the return line though, as there's no noticeable smoke from the exhaust. Questions: How's it sound? Any concerns from you all? Any concerns about the RPM wandering around, or is this normal for a newly rebuilt engine? I was running water from my garden hose through the open radiator. After my runs today, I just let it drain out and put on the cap and drain plug. Any issues with leaving the remnants of hose water in there? I'm planning on continuing my break-in next weekend, so I'd rather not fill it up with coolant just yet. I also don't want the thing to rust solid over the week. What are your favorite guides for setting timing? Should I try to set timing before or after synchronizing my carbs and getting the mixture set? Thanks everyone - you've all been a huge help so far! Videos: - Very first start! After a few unsuccesful cranks, I handed the keys to my father-in-law-to-be who started it up almost immediately. He claims the car remembers him. - Here's me starting it. I reved it to ~3,500RPM before I got ahold of myself and dropped it back down to 2,000 - Here's a quick walkaround of the car. I'm watching the RPM with my timing light, then bring it in closer to get some engine sound. I then walk around to the exhaust to capture that as well.
-
Definitely, and don’t forget about BRE.
-
Cool, I'm not much of a ME so Fusion 360 is really the only CAD software I know. It would be cool if you could upload the model files to Github or something. I feel like I come across dead links on these forums all the time, and Github feels like a pretty stable place for long-term storage. BTW I have a dimensioned drawing of the inside of a F4W71A bellhousing here: and the various throwout bearing collars here:
-
What are you building it in?
-
Looking good! Any chance you'll release the final model with some flavor of CC license? It would be really nice to have a 3D model to reference when rebuilding.
-
@Captain Obvious I would love a rundown of how those gauges work.
-
I blew it out with compressed air right before I put it on, but I just ordered a cheap torch tip file that I’ll use before I button up the valve cover.