z3beemer
Free Member
-
Joined
-
Last visited
Everything posted by z3beemer
-
The one I have here in the states is a Hitachi . AM/FM mono with on speaker in the left rear hatch panel
-
It's controlled by multiple quick turns on the volume or tuning controls. Fo example if a phone call comes in I can accept it by making one quick turn to the right on the tuning knob. To end the call one quick turn to the left on the tuning knob. Go to the web site they have a good video demonstration of all the features and how to operate them. www.tech-retro.com.
-
I'm working on a complete restoration on a 73 240Z. When I bought the car, I also got a 72 engine and manual trans with it. My intentions were to use the round tops off the 72 and install them on the 73. I'm nearing that part of the project, so I started looking over the carbs on the 72. I do not see any choke plates. There is linkage where the choke cable would connect, but no choke plates or shafts. Are the chokes a separate attachment to the carb housing that I don't have? I know the ones on the 73 are incorporated in the carb bodies. I tried looking at the fish diagram for the 72 but can see anything that helps. any enlightenment would be greatly appreciated. z3beemer
-
Just a follow up on my original post on the Z radio options. I went with the www.tech-retro.com mentioned in my earlier post. I had Ralph the Radio Guy in Bartlett, IL (773 814 5094) do the conversion on mine. So far, I'm very happy with it. The radio looks and work just like the original one. When I got it back, I set it up on the bench and checked out all the features. Everything works as described in thier video. I now have am/fm stereo ,4 channel 45W (ea) speaker connection, usb input, mp3 input, bluetooth, hands free phone with internal or external mic. It now also has a fader and a balance control. My original radio was an am/fm monaural radio with one rear speaker. The car isn't on the road yet, but the radio is installed and tested. All ok
-
Was looking thru the forum for help with reinstalling my stock radio. Looks like others had the same problem. I don't know why it would not go back in the way it came out but I eventually gave up with why and just fixed the problem. Thought I'd share my experience. I refer to the heater panel (the dash mounted center panel above the consul) and the face plate (radio face plate with station numbers, on/off tuning , etc). The infamous metal plate was the problem (for me). BTW I''m working on a 73 240Z. I did have to modify the original rear bracket to accommodate the new heat / ac system but that was not my problem because I still had plenty of room behind the radio. If you look at the other pictures posted in this thread, you'll notice the metal plate has about a 1/2" lip on it. It attaches to the radio itself with the lip facing forward behind the heater panel. That's the only way it can go. The plate is too big to go thru the radio opening in the heater panel from the front. When inserted from behind the radio control shafts will not come forward enough to attach the face plate, even with the metal plate tight against the back of the heater panel. After wrestling with it for a few hours I said &#%! it. I removed the metal plate completely reinserted the radio from the back thru the heater panel opening then attached the radio face plate. I did have to fabricate a few mounting brackets to secure the back of the radio to the trans tunnel for a solid mount but it's in, solidly mounted and working. Still don't know why it would not go in the way it came out but it's in now.
-
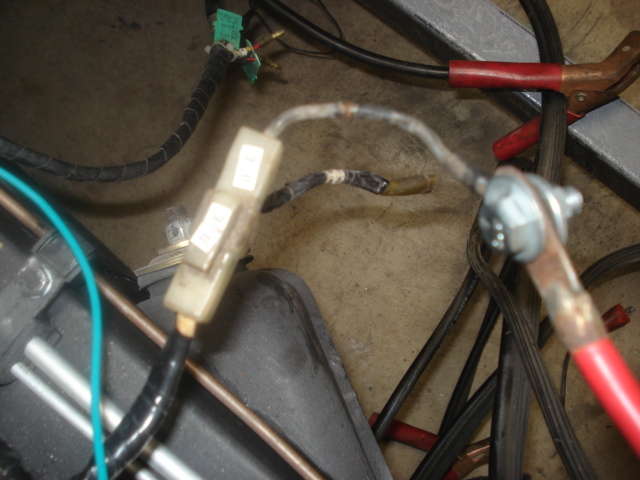
Well, it was a hell of a fight but thanks to all you guys it's fixed. Here are the details, in case someone else has the same problem. I installed the reconditioned headlight switch, crossed my fingers and turned the switch. Success! I had all my lights working except my front turn singles. Rear were OK. Started fooling with the turn signal switch and got the right side working but not the left. Squirted some contact cleaner in the switch followed up with some dielectric grease. Worked the turn signal arm. Now I had left side working but not the right. Started thinking that switch was bad as well. Decided to take it apart and see if there was something I could fix. Figured I had nothing to lose if I had to replace it anyway. Removed it and took it over to the bench to work on. Upon closer examination, I noticed a broken solder joint on the switch. Not the wire, the solder actually broke. I cleaned it up with solvent and resoldered it. All lights and turn signals now work. Hard to believe it broke after 49 years of service. I surmised the intermittent function of the turn signals was caused by the solder joint intermittently making contact. I wanted to do one move test before calling it a total success. Test the headlight high and low beams with the actual headlights, not just voltage reading. I connected the pigtails and took one of my brand-new headlights out of the box and connected it to the right side. Nothing. Moved it over to the left side, nothing. As a long shot I thought maybe they both needed connected (didn't think so but I was grasping at straws). Got the other new headlight and connected it. Now both were connected. One worked one didn't. Switched them around and the problem moved. Took the inoperative light over to the bench and hooked it up to a battery, nothing. Confirming the brand-new headlight was operative. In over 50 years of working on cars, some of those years as a mechanic, I never had a bad headlight out of the box. So that light saga is over. I want to thank you guys for all your help and perseverance in helping me get this resolved. I couldn't have done it without you help. That's why I'm a subscribing member,
-
Well I ordered a reconditioned headlight switch ($$). I'll let you know how it goes once I get it installed. By applying power to the green/blue solder joint all the lights appear to function (except the turn signals). Maybe the replacement headlight switch will correct that. First things first. I'll keep you posted. Thanks!
-
Latest finding on your above recommended checks. Just to clarify: Once I corrected the cross connection in the center stack, I no longer had any instrument lights that worked. Making the checks above , here's what I found. I checked power at the switch solder joints under three conditions: Key on Parking light switch on, Key off parking light switch on, Key off parking light switch off. All resulted in the same results; No power on green/blue solder joint; 12V power to the green/white solder joint. Next I picked up a 12V power source and jumpered it to the green/white solder joint. I now had: instrument lights, tail lights, marker lights and brake warning light on the dash. I'm beginning to think the multifunction switch is bad. On a related note: when I had the wires misconnected and was back feeding thru the instrument lights, the windshield wiper motor worked. Today when I got the lights working the wiper motor did not function (yes the fuse is good) however the wiper switch was very hard to operated I heard something click inside the switch like something broke, the switch operated easily after that but did not operate the wiper motor. Your thoughts??? As usual ...thanks for sharing your expertise.
-
More info: Disregard the earlier comment about no power to the flasher. The attached chart PDF file) is the latest readings. Again thanks: 240z elecr,.pdf
-
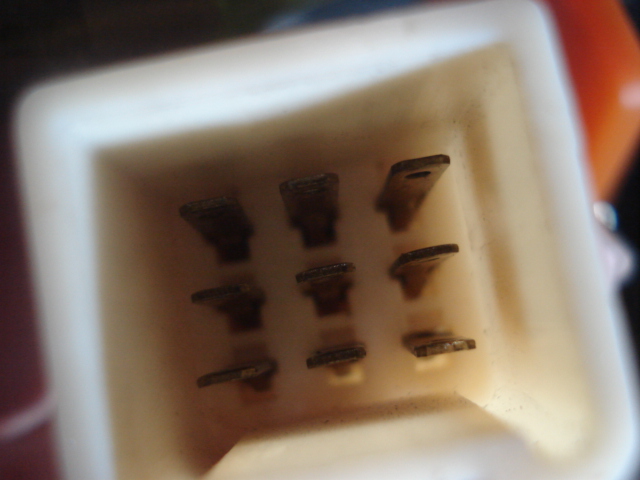
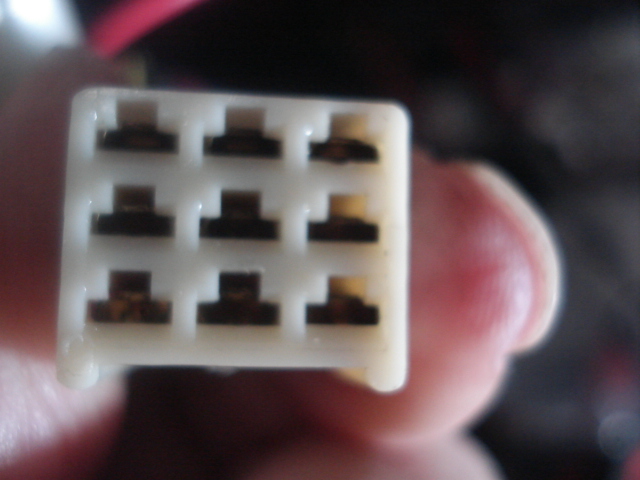
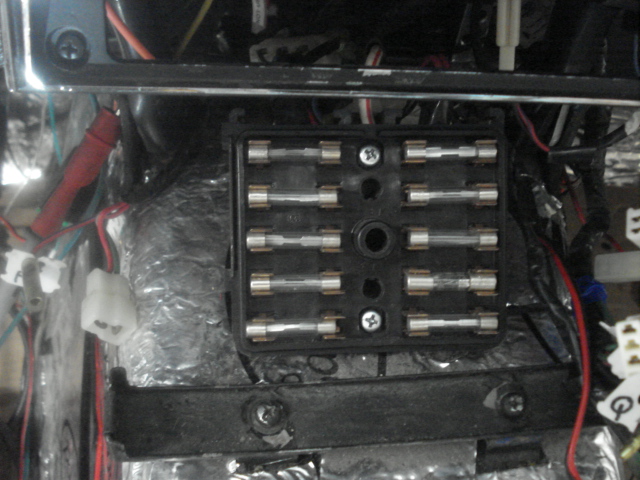
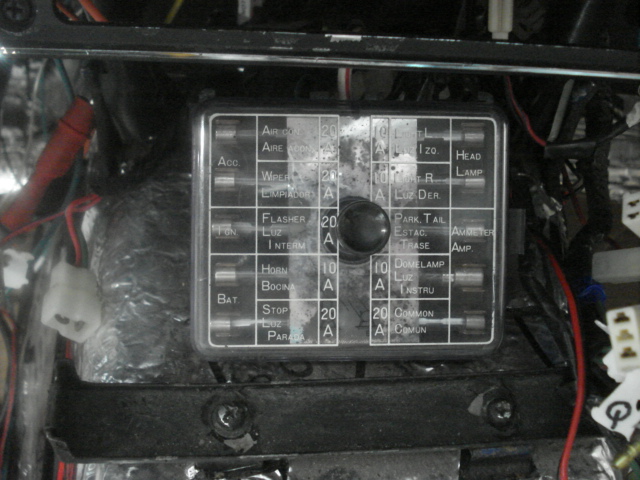
Steve thanks so much for all you help so far. Once I get this resolved I'll have to send you a case of beer or something. Spent several days chasing the demons and here's what I've found: I found the reason the instrument lights wouldn't go out. Looks like I connected the plug to the radio, which was a key on power source, to a matching plug on the instrument wiring. So it was supplying power to all the instrument lights all the time. However now I do not have instrument lights at all. Here are some of the things I have and do not have: Ground between dash and chassis .5 ohms. Between dash and negative batter terminal -99 ohms. Never saw a negative ohm reading before but maybe it's because I have the negative of the battery connected to the chassis via a jumper cable, since there is no engine in the car. I do have dome light and glove box light and switches work as should(door push button switches and glove box switch). Brake lights work normally. Back up lights work if I connect the leads together (no trans installed yet). Headlights are not installed but have power going to the pigtails when switched on. High beam indicator works as normal. No trail lights, marker lights, turn signals or instrument lights. With the hazard switch turned on (pulled out) tail lights flash, turn signals flash and turn signal indicators on dash all flash (but not the marker lights). I seperated the 9 pin connector on the steering column and checked power under 3 conditions; key off, key on light switch off, and key on and light switch on. I can supply those results if you think it would be helpful. I think the most telling thing I found is the there is no power to either side of the 20A fuse labeled Flasher. I'm not sure where the power to it comes from, why its not getting there or if this will solve my problem. One other thing; none of the pigtails between the wiring harness and the center consol are connected at this time. I don't think this is the problem since most of what's under there are indicator lights. Your thoughts???
-
Thanks Steve. I'll check out the items you mentioned on my next go around. I need to walk away from it for a day or so. I'll let you know what I find.
-
You may be right RacerX. In the past I found many times when you're having light problems it ends up being the grounds. Been thru it again today everything seems to be correct, but I could have mis marked something on disassembly, but I was pretty careful and only disconnected one wire/plug at a time and marked both sides of each wire. Does anyone know where I can get a large print color wiring schematic? The one in the FSM is next to impossible to follow. Thanks for all your input guys, I really appreciate it. I'll keep fightiing it.
-
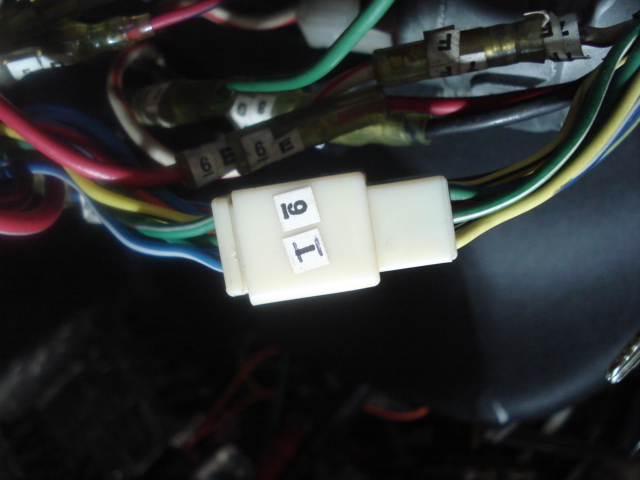
Went another round with the instrument lights and lost again. To respond to a few of the suggestions / questions above: I unplugged the 9 pin connector on the combo switch....No affect. Instrument lights stayed lite. The car is not in finished mode. I'm trying to verify as many circuits as possible now, so I don't have to tear everything apart after it is all back to together. I checked all my connections they all seem ok. I marked each wire on both ends as I took it apart. On the right kick pad where all the plugs and relays are there are two large blue male/female plugs. They are interchangeable (physically but maybe not electrically) I noticed the wires colors on the male side did not match the female side, so I switched them. Now the wires match. I thought " yes, that was the problem"...it wasn't. I looked at FSM BE section and for the meters (gauges) there is a simplified electrical drawing for illumination. It shows the lamps in parallel connected to a 12v source (battery) then thru the rheostat. No other switches are in the circuit. Could it be that there is power to the instrument lights any time the key is on and they are turn off via the rheostat???? As for the original wiring, the car originally had an ARA dealer installed A/C system and an aftermarket alarm. Several tie ins were made but only to bring power to the units. All that has been removed. I don't believe any of that is causing my problem. As usual you input is greatly appreciated. z3beemer
-
Been searching the forum for answers to my problems but have been unable to find one. 73 240Z complete tear down and rebuild. Working on reinstalling the dash and electrical. Trying to check out as much as possible before moving on. I've connected a motorcycle battery to the main electrical cable in the engine bay (that normally connects to the battery cable) for testing purposes. I did a pretty good job of marking all wires and plugs to facilitate reconnecting. Also I installed a new ac/heater system that had its own wire harness. I only had to use one 12V switched wire from the original harness and the blower motor control switch. So now I have two current problems. Most all the instrument lights work but they come on as soon as the ignition is turned on. The switch on the multipurpose switch has no effect on the instrument lights. The rheostat does control the intensity. The second problem is that the 3 instrument lights on the heater control panel do not work at all (bulbs are good). I'm wondering if the multifunction switch is bad. I bought this as a project car that ran but never paid any attention to the instrument lights. All other electrical devices worked. If it's the multifunction switch, I'll replace it, but I know they are pricey, so I don't want to spend the money and have the same problem. I suppose I could splice into one of the other instrument wires and run power to the heater control panel lights, but I will still have the problem with the instrument lights not being controlled by the light switch. This originally was an automatic trans being converted to manual shift (not sure that has anything to do with it but I'm stumped). Thanks in advance for your assistance. Paul (z3beemer)
-
-
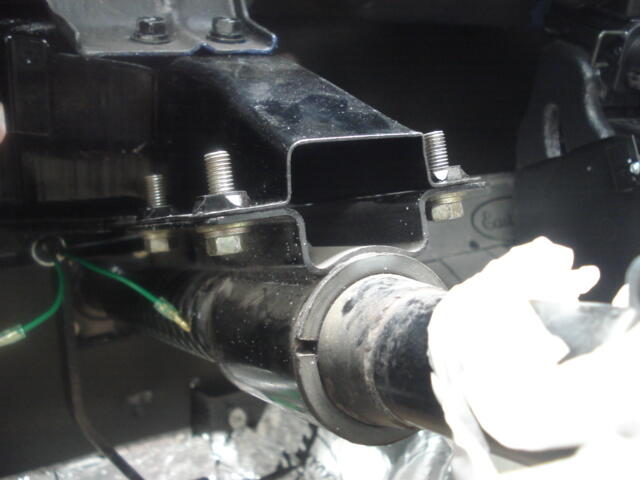
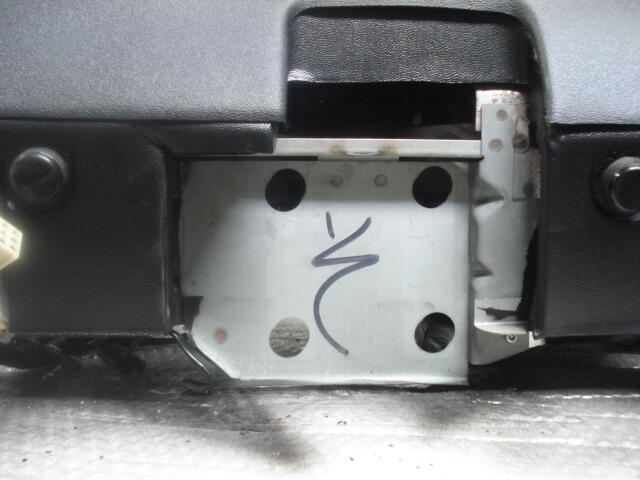
So it's been a while since I removed the dash on my 73 240Z restoration. Since I'm getting old I don't remember things as well. I'm getting ready to re install the dash and could use some help jogging my memory. On the bottom of the dash on the left side there is a bare piece of metal with 4 holes in it. I can't remember if this part of the dash just rests on top of the steering column bracket or if I have to remove the steering column mounting bracket bolts and sandwich the dash plate between the upper and lower halves of the column, then reinstall the bolts. I've included a few pics to illustrate what I'm talking about. Any help greatly appreciated. Paul (zebeemer)
-
-
I have a 73 240Z restoration project underway. I'm currently trying to install a dash overlay. To do so I have to remove the hazard warning switch knob. It's one of the green pull switches. This may sound stupid, but I can't figure out how to get the knob off. I tried pulling, unscrewing, looking for a set screw, looking for a release button on the back. Nothing. It can't come out the back with the knob on. I'm afraid it I pull any harder I'll break it. Any suggestions?
-
I'll most likely be sending mine in for the upgrade in a few weeks. Last time I spoke with them they were quoting 3 weeks turn around. I'll keep you posted on how it goes.
-
I've been looking into radio options for my 73 240Z and found a company that will take your radio and update all the internals but maintain the original face plate, housing, etc. It will even maintain full function of the pushbutton presets. It's not cheap, but provides a lot of options that you can pick and choose. Options include, bluetooth, hands free phone, usb, flashdrive, mp3, etc. You will end up with a 180 watt 4 channel unit. I priced it for mine with all the options and the price was $550. The web site is: www.tech-retro.com. They have a good video on the site that demonstrates the unit and all the features. The actual work is performed through authorized dealers throughout the US. The one closest to me is in Chicago area. I've spoke to him several times and he's been very helpful, plus he's a car guy. Paul (z3beemer)
-
I'm currently in the process of rebuilding the seats in my 73 240z. I'm using new foam from MSA. Upon disassembly of the seat back I noticed a layer of brown straw like material about an inch thick that was between the foam and the seat upholstery. Any idea why this is there, and should I reuse it? It smells kind of musty so I don't want to use it if I don't have to. If I do need it, is there some other material available I can use or should I just leave it out all together. Thanks, Paul (z3beemer)
-
Just wanted everyone to know the great experience I had dealing with Jim (S30Driver). I finally got my fender, one in great shape, and Jim put a lot of work into making it happen. I you ever have the chance to work with him on parts, you can be sure he is reliable and honest. You will never have to worry about his legitimacy. THANKE JIM.
-
I'm in the process of a 73 240Z restoration project, currently working on an auto to manual trans swap. When I bought the car I got an engine & manual trans with it from a 72 240Z. First: Ther is no netural safety switch on the 72 trans, only a back up light switch. Is there anyway to add one? I thought one way may be to use the existing wires that went to the inhibitor switch on the auto and run them to a stop light type switch, and fabricate a bracket the would activate when the clutch pedal is depressed. The only drawback is that the clutch pedal would always have to be depressed, even when the car is in netural, in order to start it. Second: I know the 73 autos had dual point distributors with the second set of points activated via a relay mounted on the lower left fender when the accelerator kickdown switch is depressed. Since I'll be using the single points distributor out of the 72, what's the best way to connect the wires from the relay to the distributor points? I thought I'd just connect the two wires that went to the two sets of points together, then run one wire to the single point set. Will this work or is there a better way? I guess another alternative would be to determine which wire goes to the main set of point on the auto distributor, run just that wire to the single points distributor, then tape up the unused wire for the second set of points. The unused wire will never get power since the kickdown switch will be remove. Comments and suggestions are greatly appreciated. Paul (z3beemer)
-
Dave The location of the filter drier should not be a problem. It's in the exact location as the old dealer installed ARA system. In addition, the filter drier is on the High side of the system. At the pressures R134 systems operate at , there will not be any problem with flow.
-
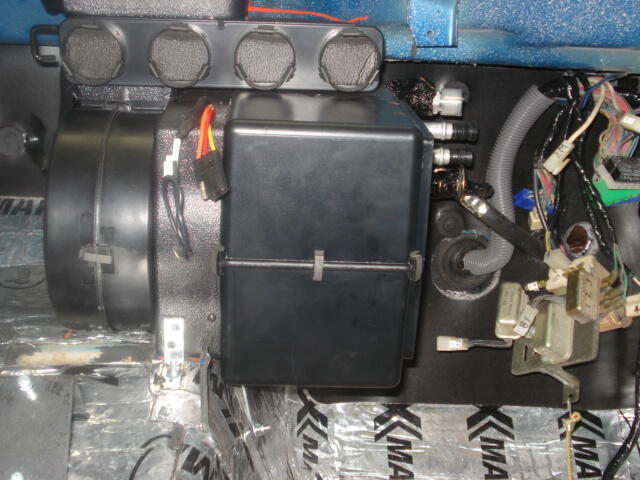
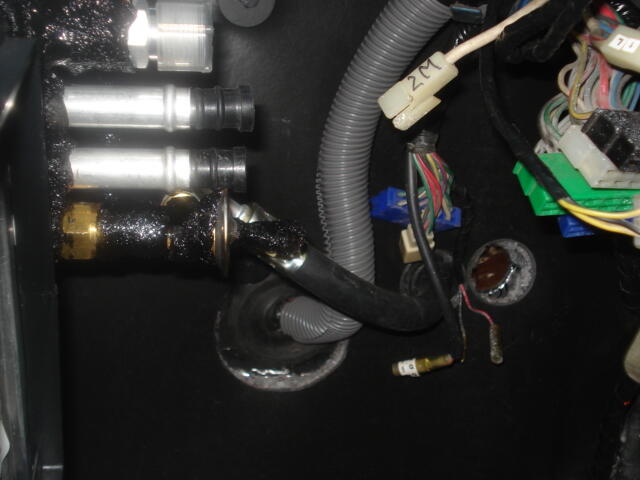
Here are a few pics of this unit and what I've done so far. 1st pic, unit installed. The unit is 11" wide. I have it set 6" in on the trans hump so it extends into the passenger area about 5" leaving plenty of leg room. 2nd pic shows the bottom AC hose(High Press) connected to the evaporator, then routed thru the firewall (under the battery tray) then into the engine bay. 3rd pic shows that same hose routed under the battery tray and connecting to the filter/drier mounted on the right inner fender. With the trail fit of the dash it looks like I may need to cut a small section out of the glove box in the upper left hand corner. I'll post more as I progress.