Jump to content

hls30.com

Member
  • Joined

  • Last visited

Everything posted by hls30.com

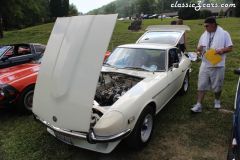
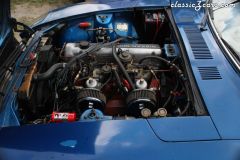
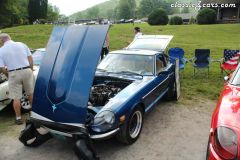
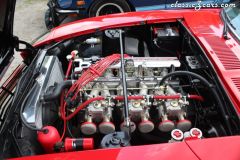
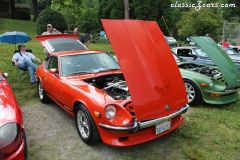
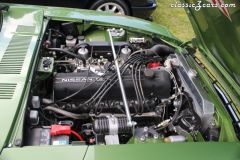
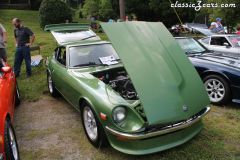
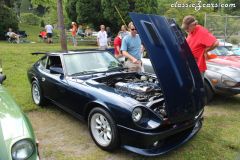
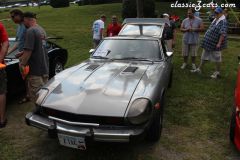
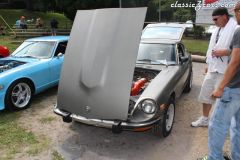
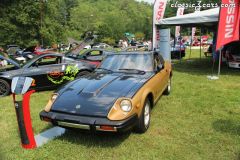
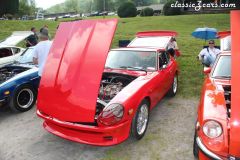
  1. I have a ton of pictures from Zdayz-I'll round the S30s up and post them to a new album in my gallery over the next few days-those of you who haven't been to a Zdayz, better hurry up, I reserved my room for next year while I was there! Bryan and his crew have made it a terrific event, and next year will only be better! It is a great Z experience with an unbeatable driving experience! Will
  2. That site is YET another of the Nissan Fast insertion sites-much like CourtesyParts.com, but it does give you full part numbers! That makes it good tool for checking the prices and actual rarity of ebay parts-too many sellers calling everything that is still available RARE! Competition is good for people looking for parts!
  3. until

    Coastal Z Club will have a Z Cruize on March 30, 2012. we will meet at 6pm at [h=1]Vaden Nissan[/h] 10421 Abercorn Street Savannah, GA 31419at 6:30 we will head to the Sonic on Wilmington Island , and then on to the Fort on Tybee. More information will be found at www.coastalz.org
  4. until

    The next meeting of the Coastal Z Club will be held at B&D Burgers Southside on Abercorn (right in front of Home Depot) at 6:30pm on Tuesday April 17th. We will have a reserved parking area, and special guest(s)! B & D Burgers Southside is located at 11108 Abercorn Street Savannah GA 31416 Tel. (912) 927-8700 http://www.bdburgers.net/ Detail your car and come early for Pictures!
  5. until

    The next meeting of the Coastal Z Club will be held at B&D Burgers Southside on Abercorn (right in front of Home Depot) at 6:30pm on Tuesday April 17th. We will have a reserved parking area, and special guest(s)! B & D Burgers Southside is located at 11108 Abercorn Street Savannah GA 31416 Tel. (912) 927-8700 http://www.bdburgers.net/ Detail your car and come early for Pictures!
  6. until

    Hi everyone! the next meeting of the Coastal Z Club will be on Tuesday March 20th, at 6:30pm at Cheddars in Pooler! 1425 Benton Blvd, Pooler, Georgia 31322 about a mile off I95 Savannah Airport Exit. More info at www.coastalz.com
  7. You can view the page at http://www.classiczcars.com/forums/content.php?129-Rearview-Mirror-Restoratiom
  8. Let the shop know you will bring Larry the Cable Guys sister back from Savannah if you car is not there, and she(it?) will be living with them from then on... Hooters Girls with the car Larry the Cable guys sister with out...you have exactly one month!
  9. hls30.com replied to hls30.com's post in a topic in United States
    I love the idea of club names on the name tags! I'll see if I can get the info off the registration site... Another thing I would like to do is get the club members and their cars together for a group photo On another front. Just added a couple of documents on the Track and Autocross events! on the Motorsports page of Zcon.org Will be adding a link to the overflow hotel, the Inn at Ellis Square 99 and 119 plus tax A short walk and a free ferry ride from Z Island- and closer to The Lady and Son-if you call for reservarions mention ZCON2011 to get the group pricing. One month from today!
  10. Restoring A Rearview mirror?…Yeah, RIGHT! At first glance, you might agree that it looks as if it is a hopeless cause. Not only does it look difficult to disassemble, but what about finding parts? The mirror was available as an assembly, and Nissan has never listed any of its parts individually.. 00:00 Loading ad 00:00 Is it any surprise that most folks opt out for a new one? Since the supply of perfect shape mirrors is slowly being depleted and some of them are close to impossible to find, it becomes a no-brainer to see that someone will decide to either “make-do� or live with a crappy mirror. If you can find them, here are your choices: 1) New IKI brand mirrors are still available and can be had for about $90. Finding a used mirror in good to great shape would be nice, but get real-these things are more than 30 year old! Restore a decent one in about two hours and $30, and have one that looks new! So how do we go about this? The steps are surprisingly easy! And the tools you probably already have! (If not, then you probably shouldn’t be trying to repair anything ….period.) Tools needed: -Both #1 and #2 Phillips screwdrivers; -A plastic eating utensil, tongue depressor or something close -A fully supplied hot water faucet; -a good clean shop rag -a teaspoon of Dawn or liquid soap. -an emery board or a scrap of 400 grit sandpaper -Part of a can of SEM detail black; -A shoe box or something suitable for parts storage. A pair of safety glasses You may need a few other things, but since you may not, I'll get into that later. First, let’s get down to the basics: 1) Clean the mirror. Dampen the rag with water and soap solution, wring out the excess, and wipe the entire mirror assembly to remove all dust dirt, makeup, oil, etc. Note: DO NOT IMMERSE IN WATER or allow water to enter the mirror housing! There are raw steel parts inside that will rust faster than you can imagine! 2) Evaluate the mirror to see if it is a good candidate for restoration. There are two basic criteria to look at: First: The glass, it probably is the worst looking thing in your car - a ring of brown yellow infectious looking yuck growing toward the center from the outside. Well, look past that nastiness in the glass for a bit. Is the glass cracked, scratched or chipped?If so, evaluate the rest of the parts for use with another glass. A chipped, cracked, or scratched glass is not worth repairing. Since the glass is the “key� item,Any damage to the glass(NOT the silvering) renders this assembly as a candidate for donating parts to salvage another assembly - another restoration candidate, or new $90 mirror is the answer for an IKI branded mirror are the answers to damaged glass. But, if the glass just looks infected, it can usually be restored in almost all cases! Second: Condition of the rest of the parts. A) The Mirror Housing. (these examples are all Z mirror and are actually all the same size!) Housing #1(Everwing): The plastic housing is faded, AND it has a dreaded disease common to old plastic…the CRUMBLIES! This is where the surface of the plastic is slowly decomposing into bits and pieces…it crumbles with every touch and attempt to clean it. (Sob!)This housing is probably NOT a good choice for complete restoration. Side Note: While paint can help hide the CRUMBLIES, unless your glass is in terrific shape, things are going to get much worse when you go to take the glass out. If the housing’s appearance is not that critical to you, and if the glass and silvering is acceptable, take into consideration that after the mirror is mounted, the back will never be seen except from several feet away through the windshield. The distance and the windshield can hide quite a bit as long as the viewable side looks good and the back is actually black and not sun faded gray. And if some Lookie-Lou starts peering a bit too close….tell him to get his fat gut off your fender. Housing #2 (IKI): The housing is a little faded but is in otherwise good shape, and has some wear from being moved about. It has no “Crumblies�, but it has faded to a shade of gray, and does have some ring marks. However from the back all it needs is just a coat of paint to look good, even up close! (If you’ll note,all of the wear is on the LEFT side of the mirror(the right side when mounted), so it probably occurred when “She Who Must Be Obeyed� decided to use it so she could paint her face while in traffic! ) Housing #3 (IKI): Hardly faded, a few marks from somewhere in its history-very useable! Housing #4:(Everwing) A perfect housing! The knob. Evaluate the same as with the housing. If it has "The CRUMBLIES" pick another one, if it is faded touch it up-with a sharpie! C) The stem. Because these are made from a zinc alloy, they will corrode under the paint if chipped. D) The mounting spring. It is made of several layers of steel, and I have never seen one damaged or in need of restration-if you manage to find a damaged one, replace it! 3) Field strip the mirror a) Remove the Phillips machine screw holding the knob on. Remove the Phillips machine screw that secures the mirror housing to the Stalk. Inspect these fasteners and their washers, replace/paint as necessary. Store them carefully for reassembly. 4) Remove the Glass! Now comes the most difficult part of the entire procedure-getting the glass out without damaging the housing or the glass. I have used this procedure on no less than 20 mirrors and been successful each time. I have taken apart around 30 mirrors, and this way is the easiest on the glass and the housing-though it does have a high degree of required effort. The glass is interference fit into the housing, that is to say, it is fitted into a channel in the housing. To get it out, the housing must be heated, but the glass must NOT be. The easiest way I have found to do this is to run hot water over the housing with the glass pointing down. If you want your mirror restoration to last more than a month or so, DO NOT immerse the housing (the glass will also get warm), OR allow the water to enter the pivot. The hardware inside the mirror is not always plated, and any water can and normally will start rust faster than you can say red dot-it has on every single one of mine that water has gotten in. I use water because at normal air pressure it will not get above 212 degrees, and most homes don’t put their hot water hotter than 140°; meaning that you might make your hands uncomfortable, but you absolutely can't and won't hurt the plastic. I would stay away from a heat gun because at 800 to 1500 degrees plastic definitely melts, burns, and its chemical binders evaporate if the mirror didn't have the crumblies when you started it probably will when you are through, and is now far more prone to get them from exposure to the sun. It is pretty easy to spoil your efforts with the use of a heat gun. When the housing is hot to the touch, put on some safety glasses, take it in both hands with your fingers not touching the glass (see the picture below) and twist it carefully, (treat it like you’re trying to wring out t water). Remember, this is actually the easy way-though this part of the procedure requires a great deal of effort and intestinal fortitude!!! I have experimented with 30 mirrors-this is the safest and easiest way I have found to get the glass out-I have not broken any glass that I have taken out this way. If you aren't sure , practice with the worst mirror you can find. The glass will not deform, and as you twist the housing it will be forced partially out of the channel and out of the housing. Then, using the plastic knife or wood utensil, work out the glass, ease it out of the housing. A metal utensil can and normally will chip the glass, meaning you must find another one.) Ok the glass is all but out! (This was Housing#1, notice the crumblies are much worse from the force required to twist the housing and remove the mirror) Nissan does not sell new glass. Ebay? Not at the time I wrote this... 5) Take Care of the Glass For this next step you actually need three more tools: a partially stocked checking account, a pen, and a padded box. WHAT! After all that you’re just going to chuck it in and buy a replacement? No! You now send the glass in for re-silvering! This is the secret makes the whole thing cost effective and possible! Most people don't realize a mirror can be resilvered! They can and it isn't that expensive! It costs $20-25 to have this done depending on shipping, and takes about two weeks. I send my mirrors out to: Jerry Green P.O. Box: 797 Porthill, ID 83853-0797 Auto mirror silvering falls under his “minimum charge� rule, so it’s $15.00 as of this writing, the balance will be dependent on how much it costs to ship it back and forth. Email him for shipping charges, or put a prepaid return shipping label in with the mirror. His web site is http://mirrorresilvering.ca/ and he will be happy to take care of your re- silvering needs-even on things than auto mirrors! Now is the time to restore the other parts, If the plastic does not have the crumblies, wipe it down with alcohol or laquer thinner quickly and just before painting. Do not saturate or soak as the prolonged use of any solvent will attack the old plastic, simply wipe let dry and paint. If the paint on the metal parts has nicks or damage, use some 400 grit sand paper to smooth the edges of the damage, again wipe down with alcohol or laquer thinner and paint. The best match I have found for the color is SEM detail black. Don't forget to tape over your star or red dot!!! When you get your glass back, it should be an easy step to once again, heat the housing (usually the mirror will simply pop in when centered in the opening and pushed) and insert the mirror. Restore and replace any parts that need it before you re-assemble and put them back together, what you will have will be something that looks like Photo #9. A beautiful old mirror easily mistaken for a brand spankin' new one

Important Information

By using this site, you agree to our Privacy Policy and Guidelines. We have placed cookies on your device to help make this website better. You can adjust your cookie settings, otherwise we'll assume you're okay to continue.