chaseincats
Community Member
-
Joined
-
Last visited
Everything posted by chaseincats
-
Update: I haven't smoked the car yet - that probably won't be for a month+ since my friend owns the machine and has a very demanding job - but I did want to share that if you have a gasoline smell in your car, change out the original-style clamps on the vapor tank's hoses to modern belt clamps and that will put an end to that issue I discovered.
-
The lugs are the solution, that is all.
-
I always understood it as by the time the hoses are dry-rotted, it's probably time for new/reman injectors
-
I slapped a piece of duct tape over it making sure its flush all the way around, thanks. There's actually 2 of them, that one and a smaller one (about the size of a dime) further down that panel.
-
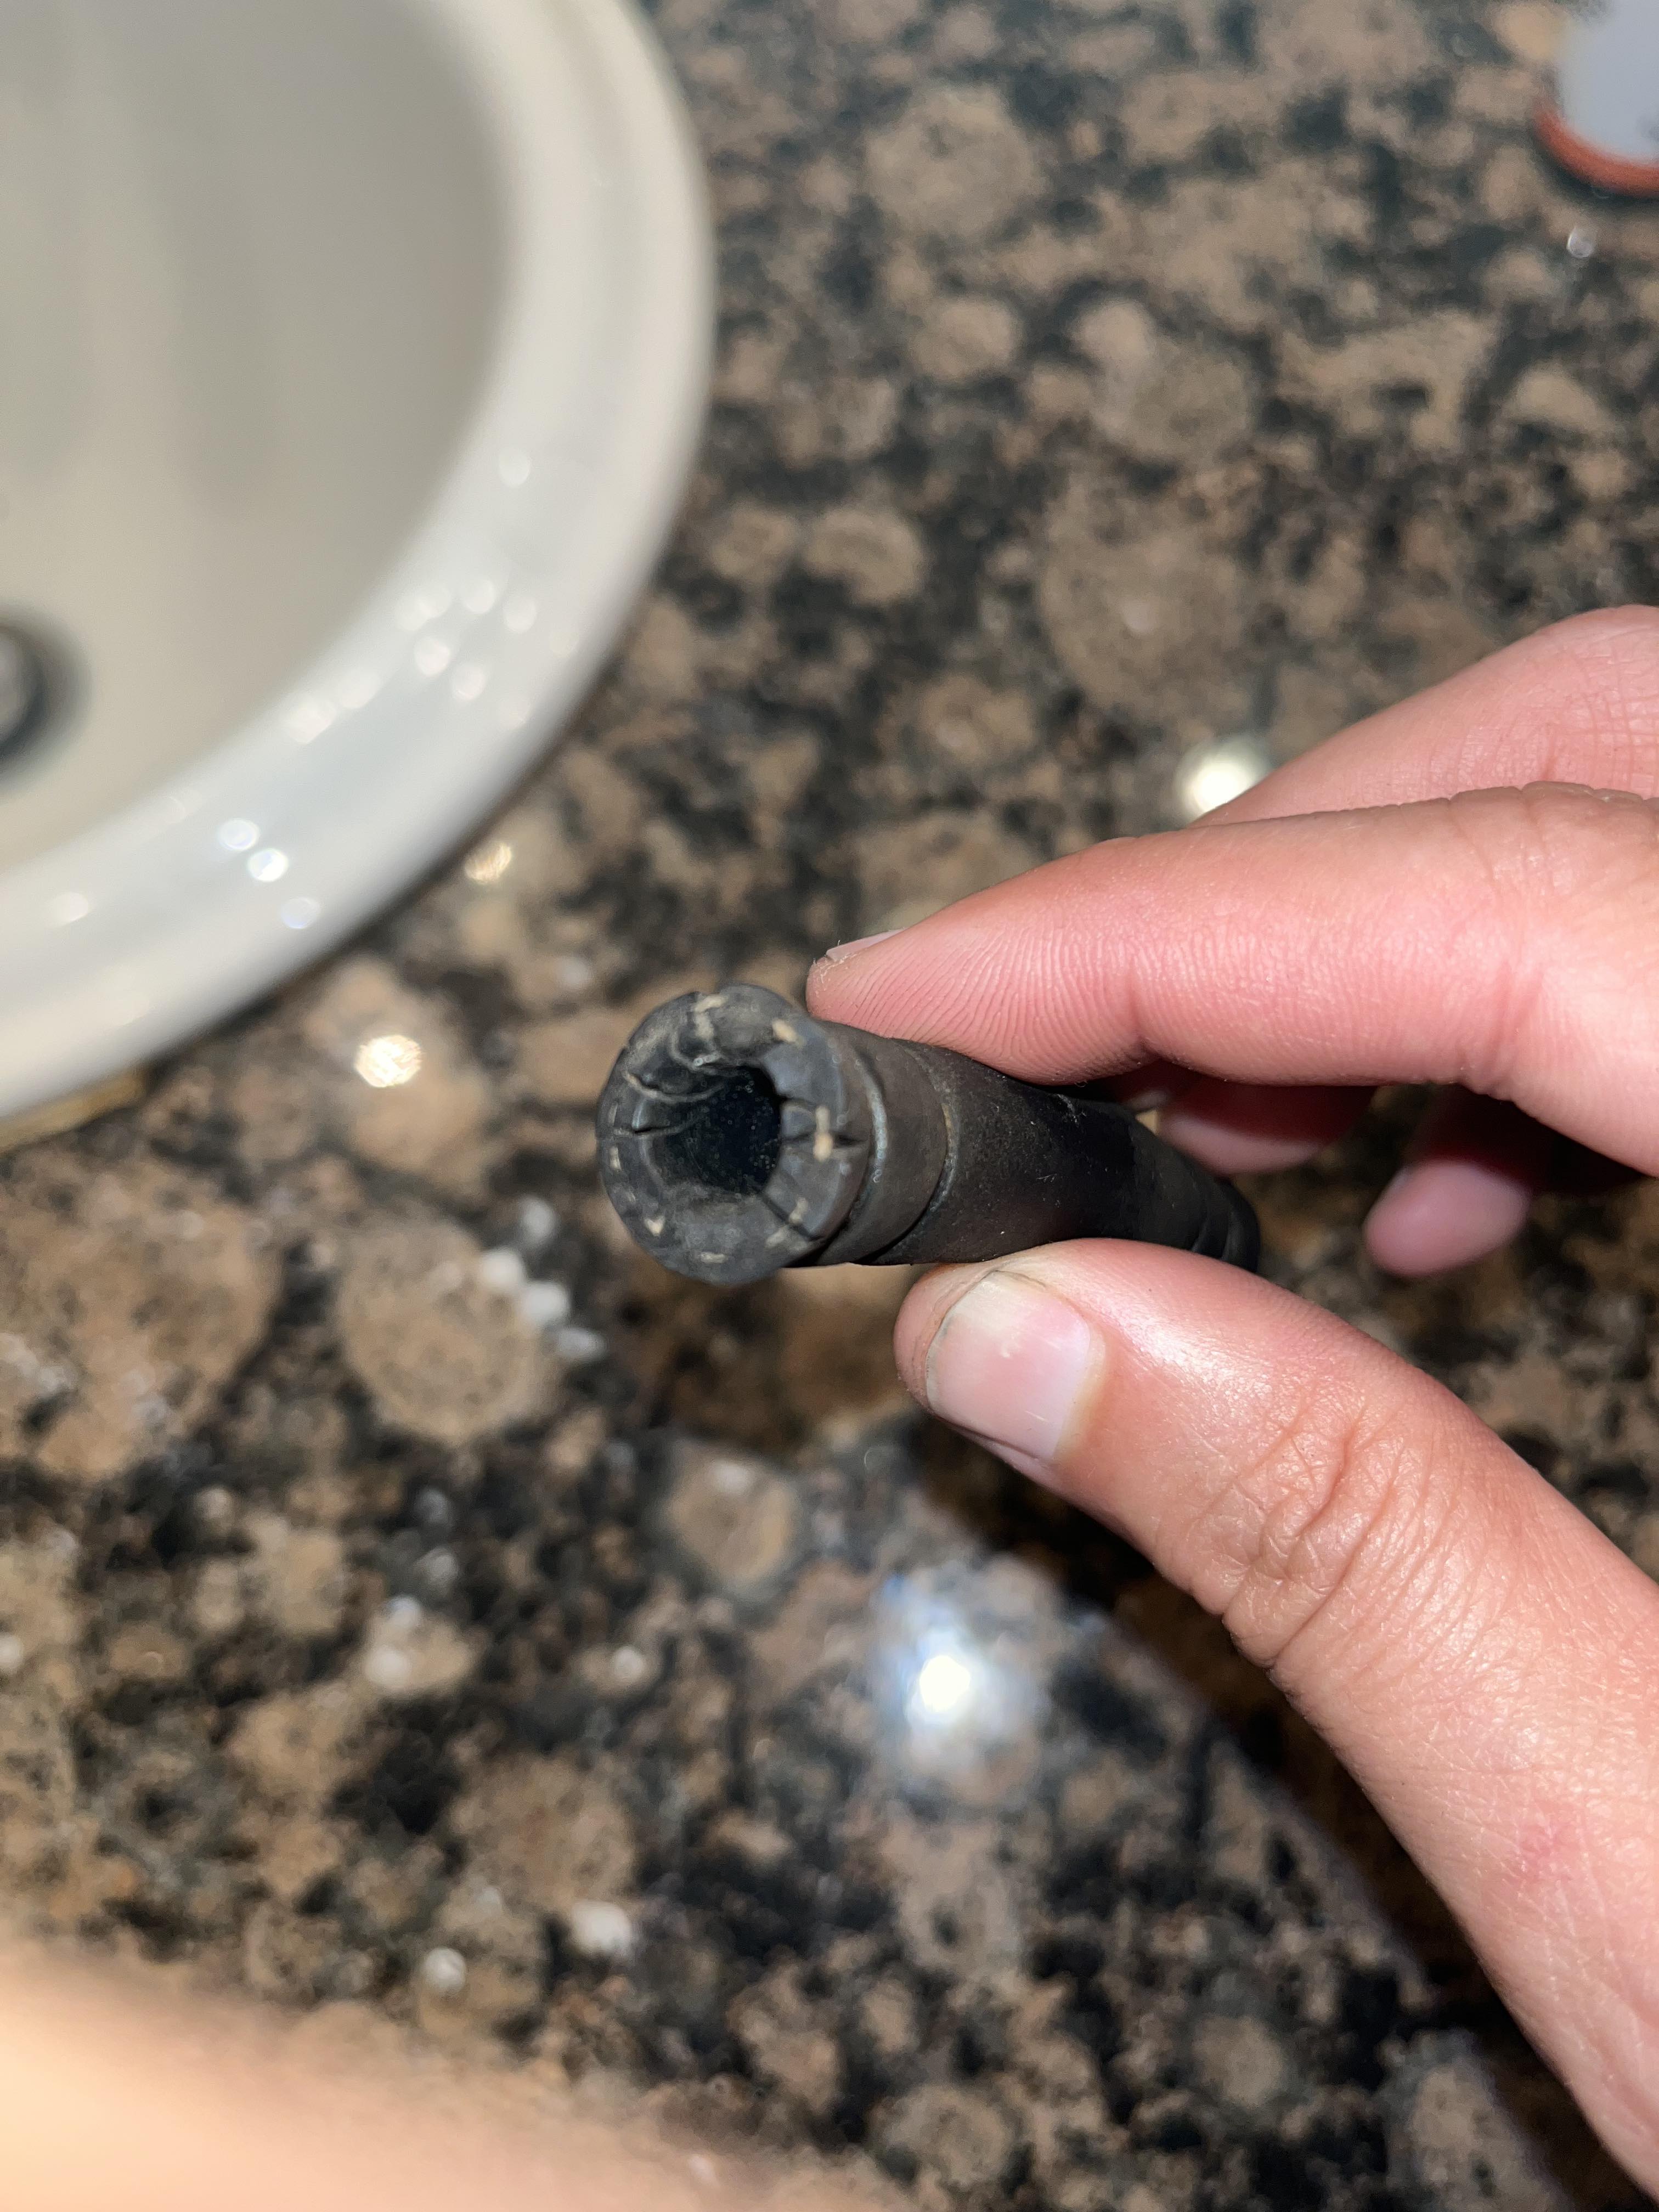
Update: So I just went under the car and looked around, tightened hose clamps, etc. All the hoses under the car looked newish with modern belt-style hose clamps except for one which I yanked off (image below) which will be replaced tomorrow along with belt clamps so I think we're in business here. I also found one screw hole that was missing a screw so I dug one up strictly to plug that leak hole.

-
Definitely. One thing I did was stick a bright light under the car then sat it on the tank shining up towards the underside to see where light shone through then glopped some weatherstrip sealant on it to close under-car leaks
-
Checked all of those except for the fuel sending unit wiring harness grommet - any idea where that is?
-
Sealed that bad boy with some duct tape but thanks for the tip!
-
UPDATE: I blew through the vent hose that goes to the carbon canister and got a thick gas smell in the cabin. I will investigate the vapor tank/hoses tonight. 5/23PM: Found/fixed cabin leak by replacing old style vapor canister hose clamps with belt clamps & confirmed leak under the car using a cigarette and hand pump through the vapor tank also sealed fuel sending unit access door with seal 'n peal. Waiting on a new jack to handle under-car
-
Will do - I'll sniff around tonight. I was thinking that I could probably pull the oil pressure switch connector and pressurize the system while it's sitting which should work. With the taillight gaskets sealed, how would that smell be sneaking into the cabin though?
-
UPDATE: So I drove the car today after letting the sealnpeal cure for 7 days like it says on the package and I'm happy to say it is CONSIDERABLY better. The only time you smell exhaust now is if you really give it some gas. We are going to give it another smoke session to see where the final culprit is but this is definitely something everyone should do. As a side note, this did allow me to now notice there's a gas smell periodically. The interesting thing is though, you will only smell gas near the fuel pump when the car is running - with the car off the smell disappears. I smelled outside the right rear tire after shutting the car off and it is pretty noticeable but no gas smell coming from vapor tank area at least when the car is off. Any ideas what to check? I'm assuming the answer is 'all the fuel pump hoses' but I just don't understand how the car can smell while running but a split hose somehow seals itself when the car is off.
-
That sounds like the seal 'n peel clear silicone sealer we ended up using
-
I'll just use my nose. If I still smell it I'll seal it with tape and if that doesn't work I'll see if my friend can borrow the smoke machine again.
-
Update: The seal 'n peel arrived. I put an outline of it on the housing, let it sit for 10 min, plopped the gasket on top, then put an outline on the car body and popped the lights in. I set them in with the bolts finger tight, waited about 30 minutes, then cranked them in (but that part wasn't on the directions), and now we wait. I will probably use a bunch of duct tape to bridge the body to the housing from the inside of the car as well once everything is dry and in retrospect, this might be all you need to do haha. More to come.
-
Yep, that exact one will be here tomorrow
-
The taillight was the only area in the back that had leaks except for one strange spot - the 2 holes in the gas flap. I didn't know those had access to the body but I guess they do? The two spots are usually plugged with rubber bumpers for the gas flap to close on if memory serves.
-
After a fun night with the gasket scraper, the yellow adhesive is now off the taillight housings and I am right back to where I started before my impatient/hasty decision. Seal 'n peel is arriving on Wednesday, that is all.
-
Isn't that porous? Exhaust should be able to sneak its way through their, no?
-
that's actually a VERY good point and I didn't think about it that way - which is now frustrating me. I was able to pop the taillights off and like @Captain Obvious was saying, it's about volume not glue - some spots were solid but others had an air gap in there, not keeping it air tight. Looks like im going on the hunt for seal 'n peel which is what I should have done to begin with but I was impatient lol
-
I couldn't find it in any store around here and the people I spoke with said it wouldn't bond as well to the painted metal surface since it's meant more as something you place on top of a leak rather than this application which is effectively using it as a glue between the housing, rubber gasket, and metal body.
-
The adhesive is drying on the housing to gasket side since last night. I’ll put the adhesive on the gasket to car side tonight or tomorrow and report back
-
I ended up going with the yellow trim adhesive since that binds to plastic, rubber, and metal since we're gluing the plastic housing to the rubber gasket and the rubber gasket to the vehicle's metal body.
-
Looks like I need a calking gun and point for the peel 'n seal. Would windshield sealer work do you all think?
-
Sounds good, I'll grab some off Amazon
-
Won't that deform when I wash the car and it gets wet?