
kenward1000
Free Member
-
Joined
-
Last visited
-
Used my label maker to create a label saying 'Plus' on both sides. Basically the whole process for me went: Check every last fuse that I could find (both visually and electrically), verify the combo switch is working. Test the stock headlight filaments for continuity (good), discover zero voltage supplied to the headlights. Work backwards to the MSA dual headlight relays, replace them, no improvement. Zed Head posted an image of that same MSA kit where the text said to power it from the positive side of the battery. Discovered it connected to the negative side, by the tech that had replaced the battery. All lights working now. Was there a better troubleshooting sequence to follow?
-
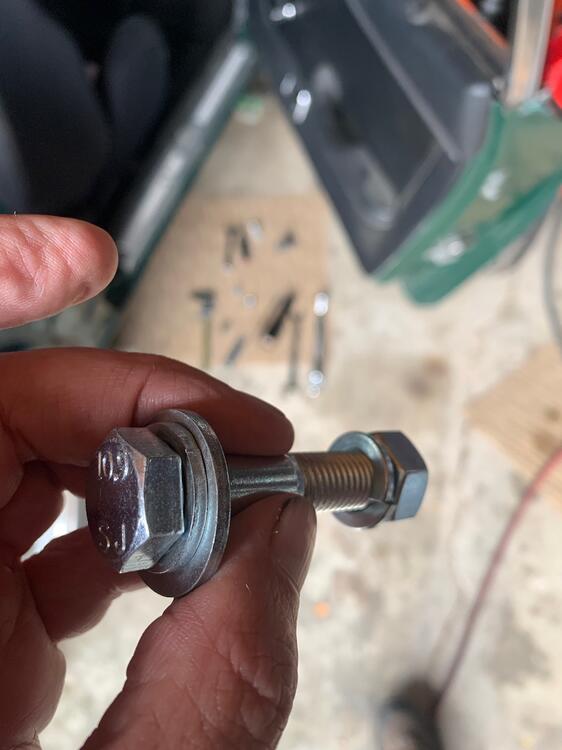
Bingo! Last time my Z was in the shop for a checkup on my Rebello engine, the new wrench decided to replace the battery (which really didn't need replacing). The power cable for the dual headlight relays is black, so the new wrench assumed it went to the negative post on the battery. Moved it back to the positive post and headlights work again. Thanks so much for your help! It might have helped if the MSA kit had a red power cable or at least a "+" tag on it.
-
Yes there is an extra blade fuse in the ground circuit to the dual relay kit. It's good.
-
Not to worry about my electrical and electronic skills. Me and electrons are tight. Haven't needed to employ my Tektronix oscilloscope or Fluke amp clamp yet, just using my Fluke DMM's. Voltages are all good at my aftermarket fuse panel and all the fuses are good. At the connectors for the previously installed dual headlamp relays, there is zero voltage. Zero battery voltage at pin 87 and zero voltage at pin 85 on the relays when the combo switch is switched to headlights. That's why there is no voltage at the headlight connectors themselves. The issue is somewhere between those relays and the rebuilt combo switch. I'm working through it methodically. Appreciate all the suggestions.
-
Replaced both of the headlight relays but still no headlights. Next will test to see if the connectors that the relays plug into, have battery power and then trigger power when the combo switch is set for headlights.
-
After some bench testing, think that at least one of my headlight relays has failed. I'll replace them and see what happens.
-
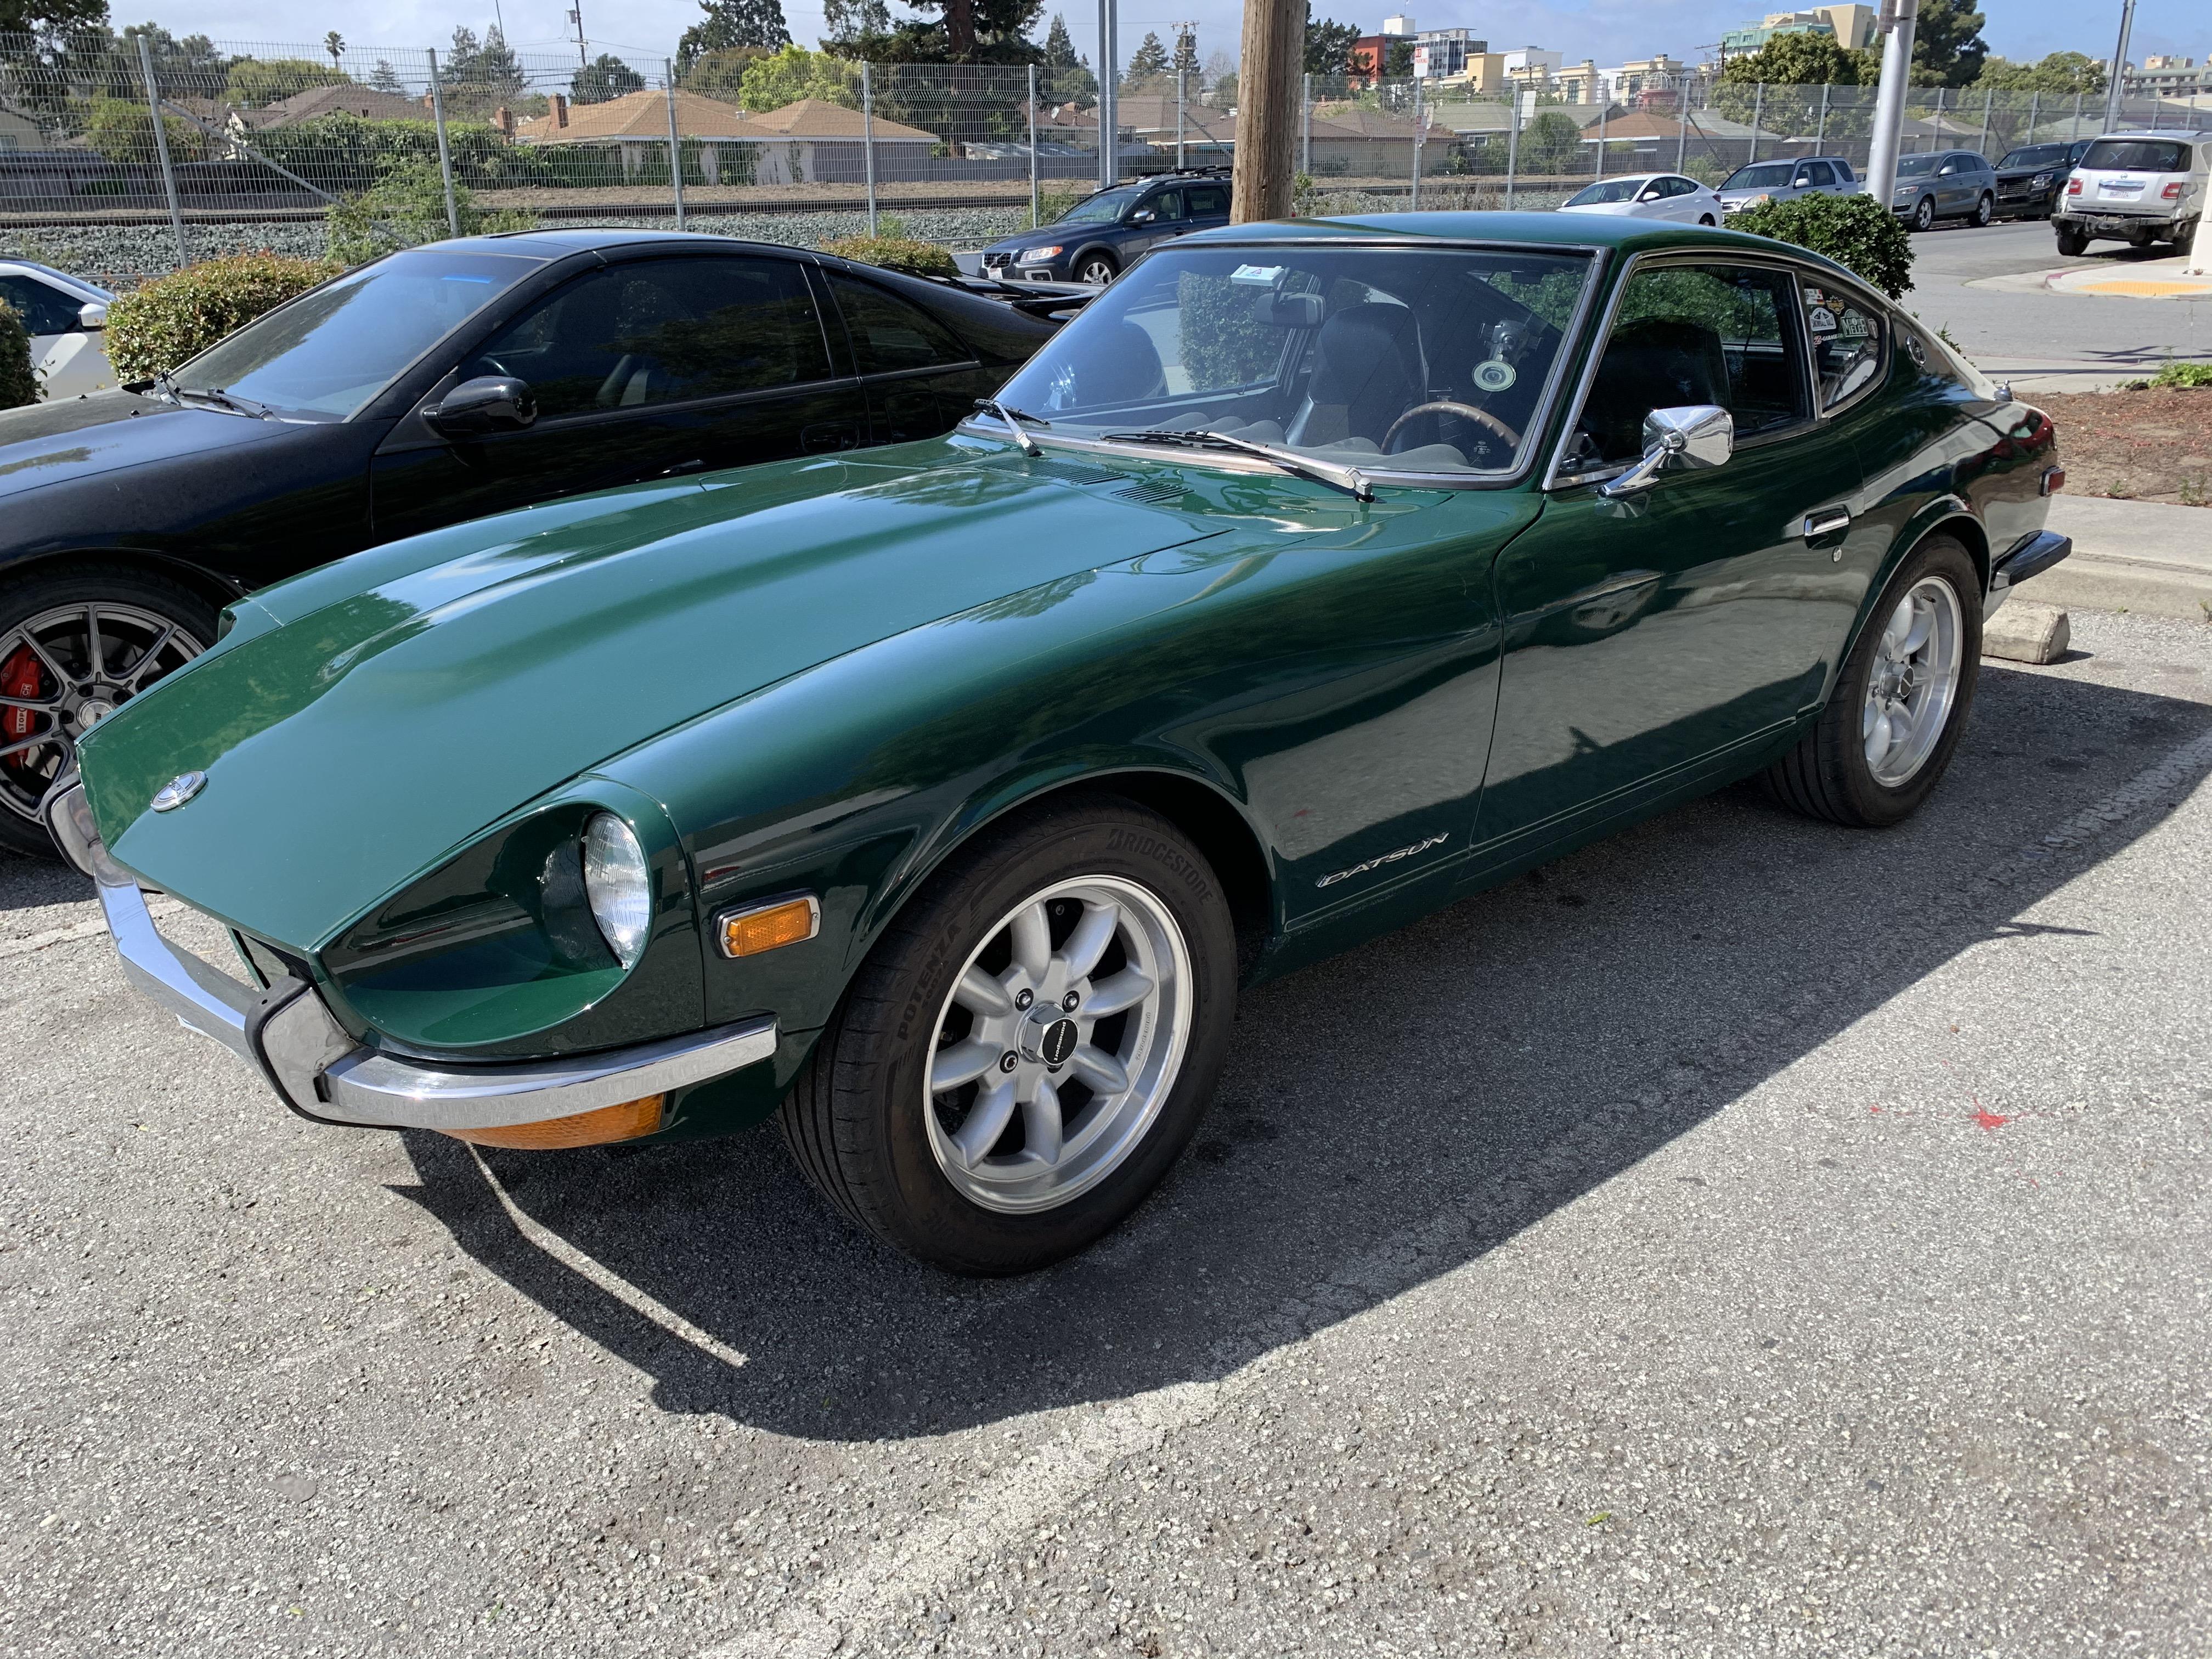
5/71 240Z. Went to drive home late at night from the SnowBall Rally in April, discovered no headlights, neither high nor low beams. Headlights used to work, but now don't. Trying to figure out the issue before the MotherLode 400 Rally. My combo switch had been falling apart, suspected that was the problem. Jay Zinc refurbished my combo switch, tested it, but still no headlights. Pulled every single fuse I can find, including all the fuses in the aftermarket fuse block that Fitted Garage installed, they all have continuity. Found the headlight power connector, confirmed that both filaments in both stock headlights have continuity. No voltage detected at the mating connector, with the car running & headlight switch on. Seems like the problem must be somewhere between the combo switch and the headlamp connector. All other interior and exterior lights work. Suggestions would be appreciated. The precipitating event might be shown in this image, as snow melt caused this creek to overflow.

-
Thanks everyone for all the helpful suggestions. The Corbeau GTS 2 and the retractable Retrobelt has been installed in the passenger side of my 5/71 240Z. Starting in tomorrow with the same on the driver side. California Melee is coming right up!
-
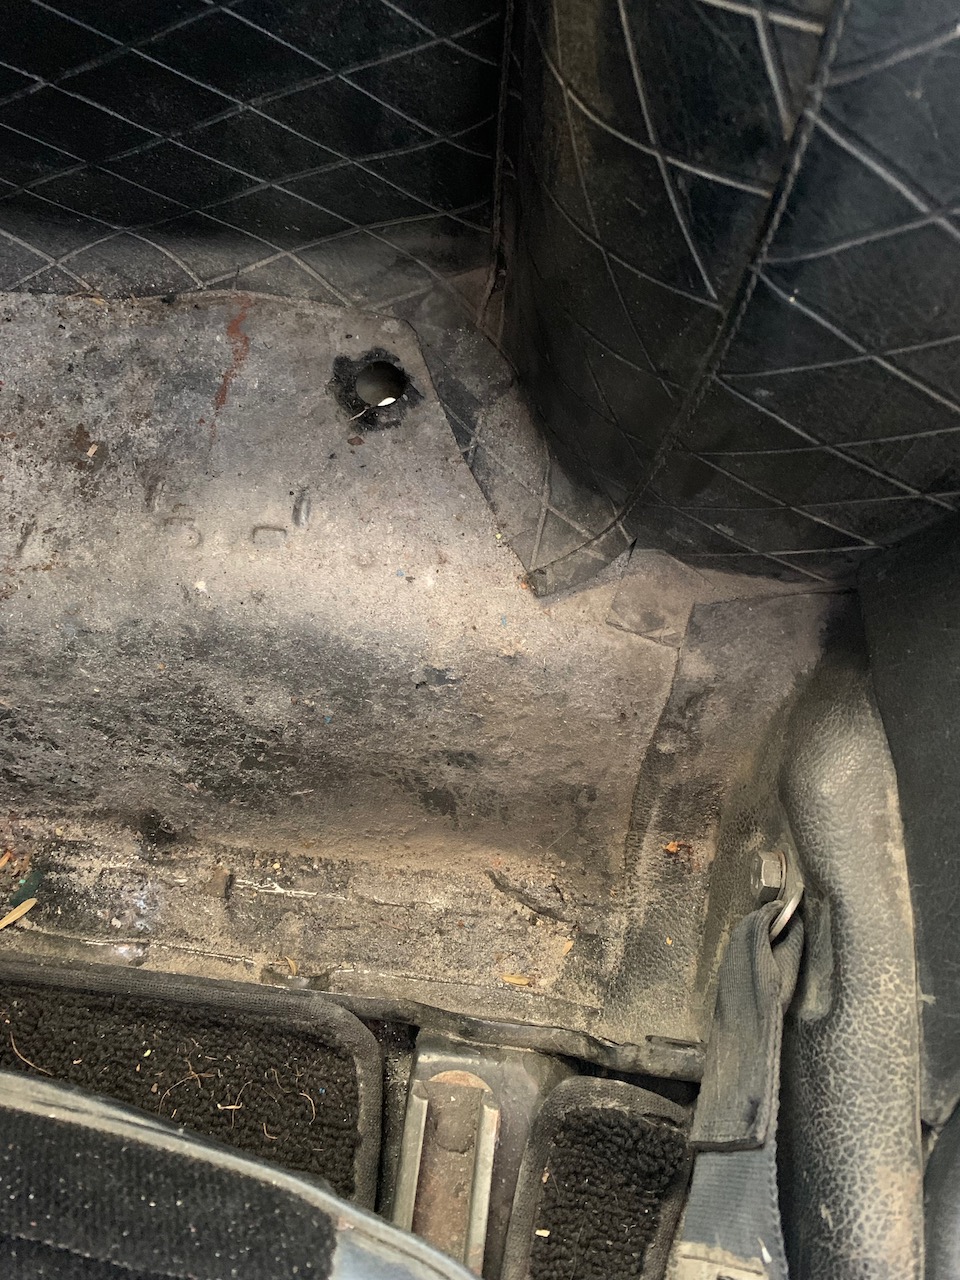
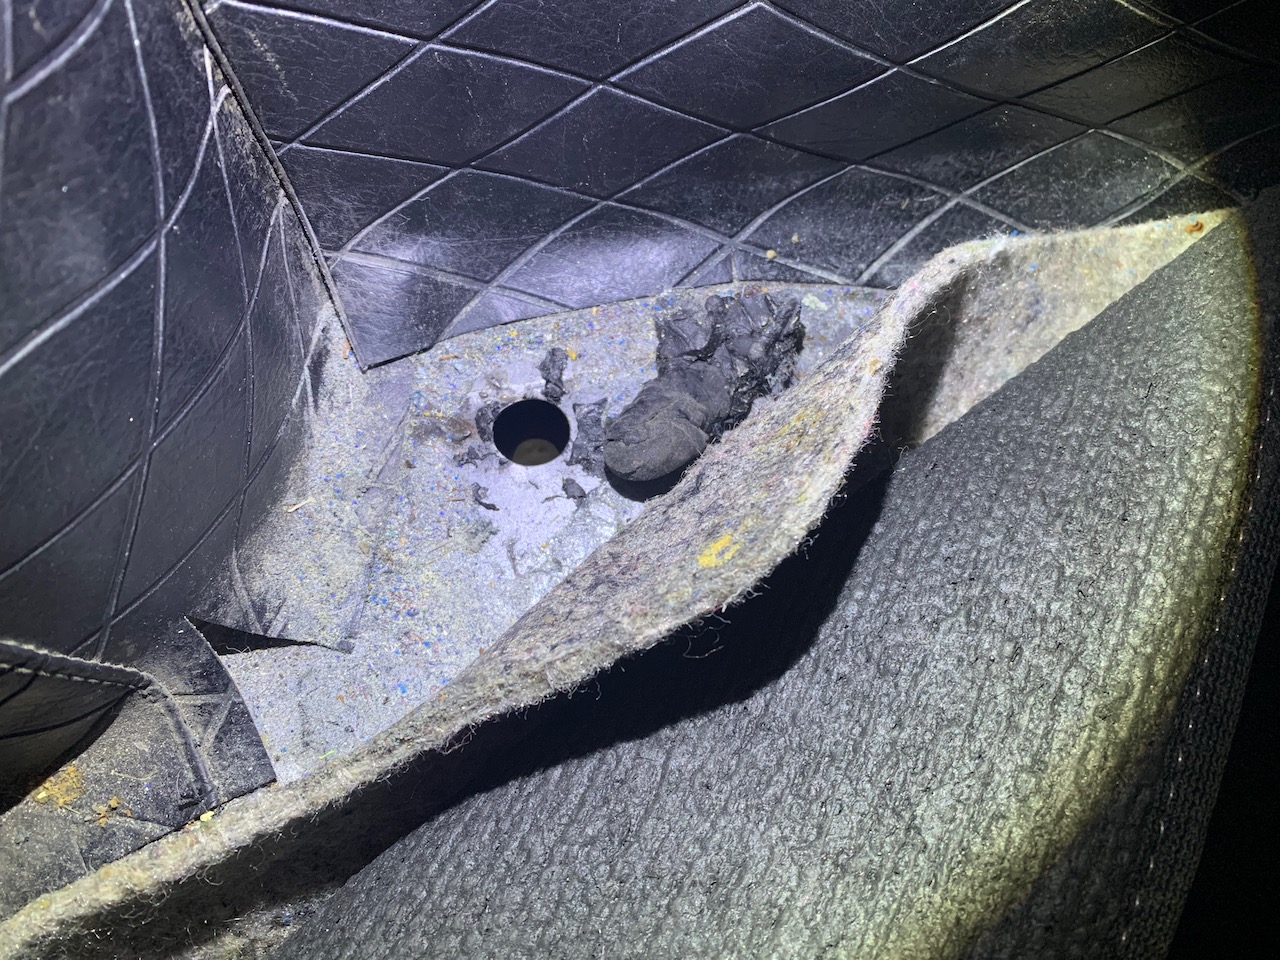
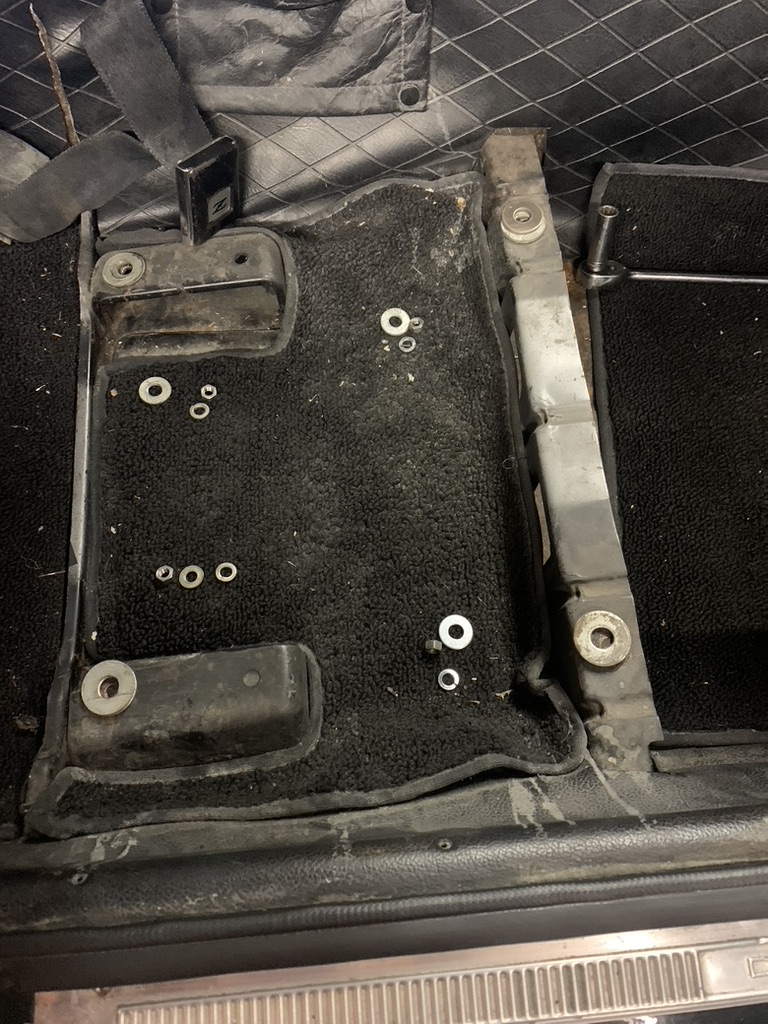
Here is the driver side of my 5/71 240Z. I don't see the mount point shown above by grannyknot. The hole that is shown, goes through a box structure and exits on the underside of the frame. That's the hole I'll use with the HD bracket like on the passenger size. The HD bracket is same thickness and material as the supplied bracket with the Retrobelt. The car was originally silver.

-
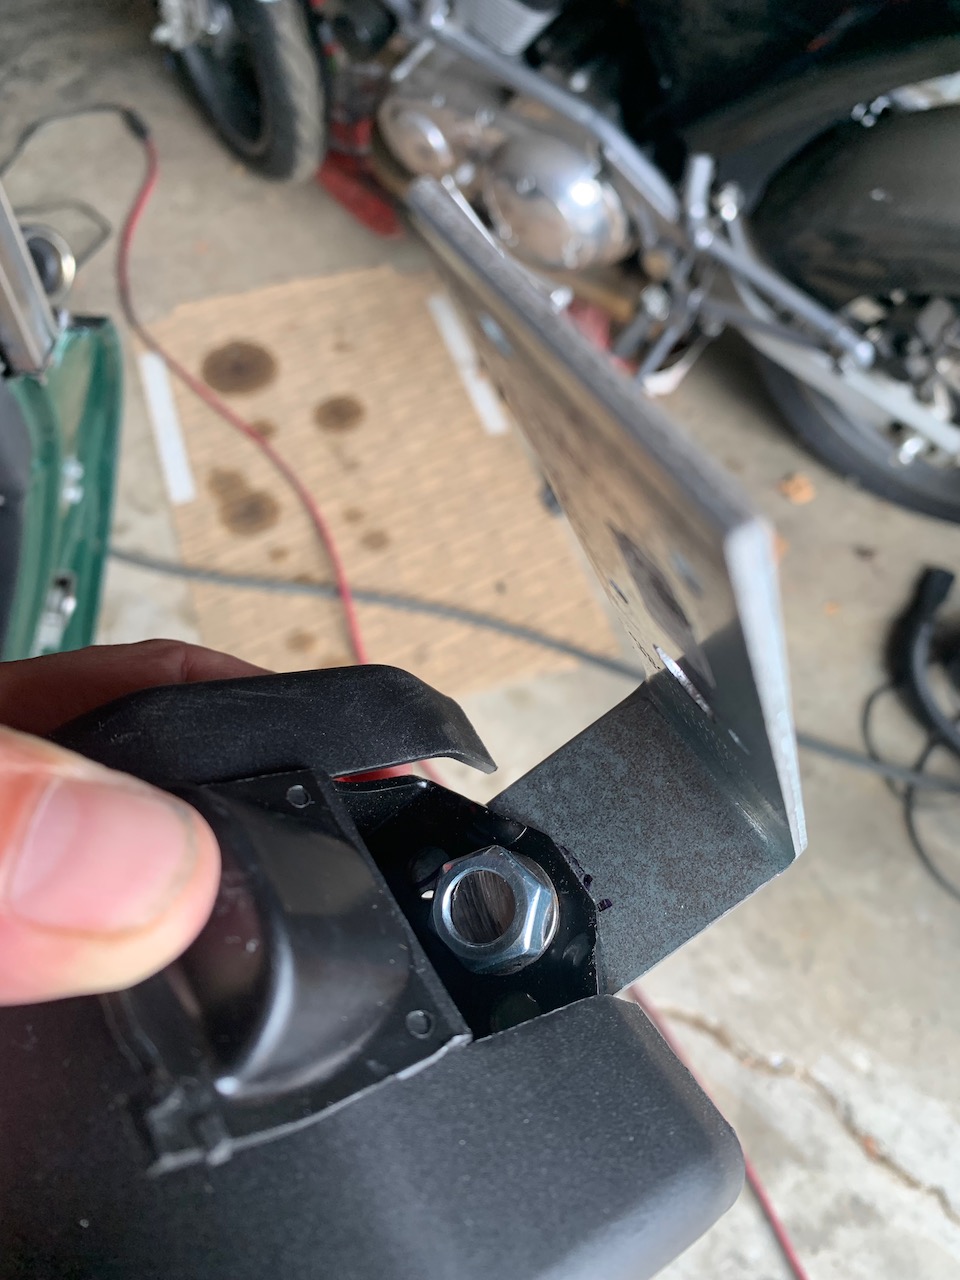
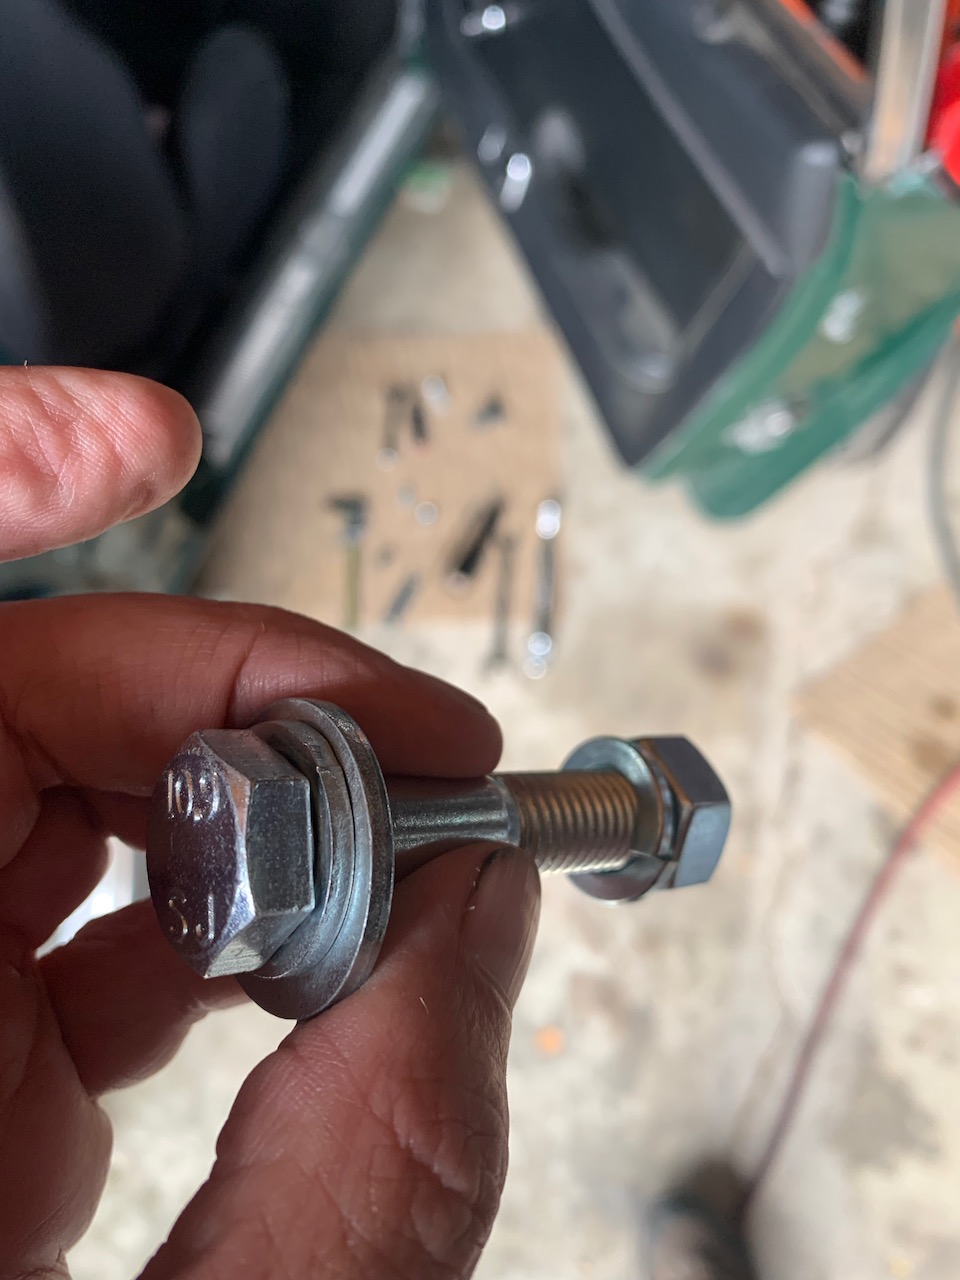
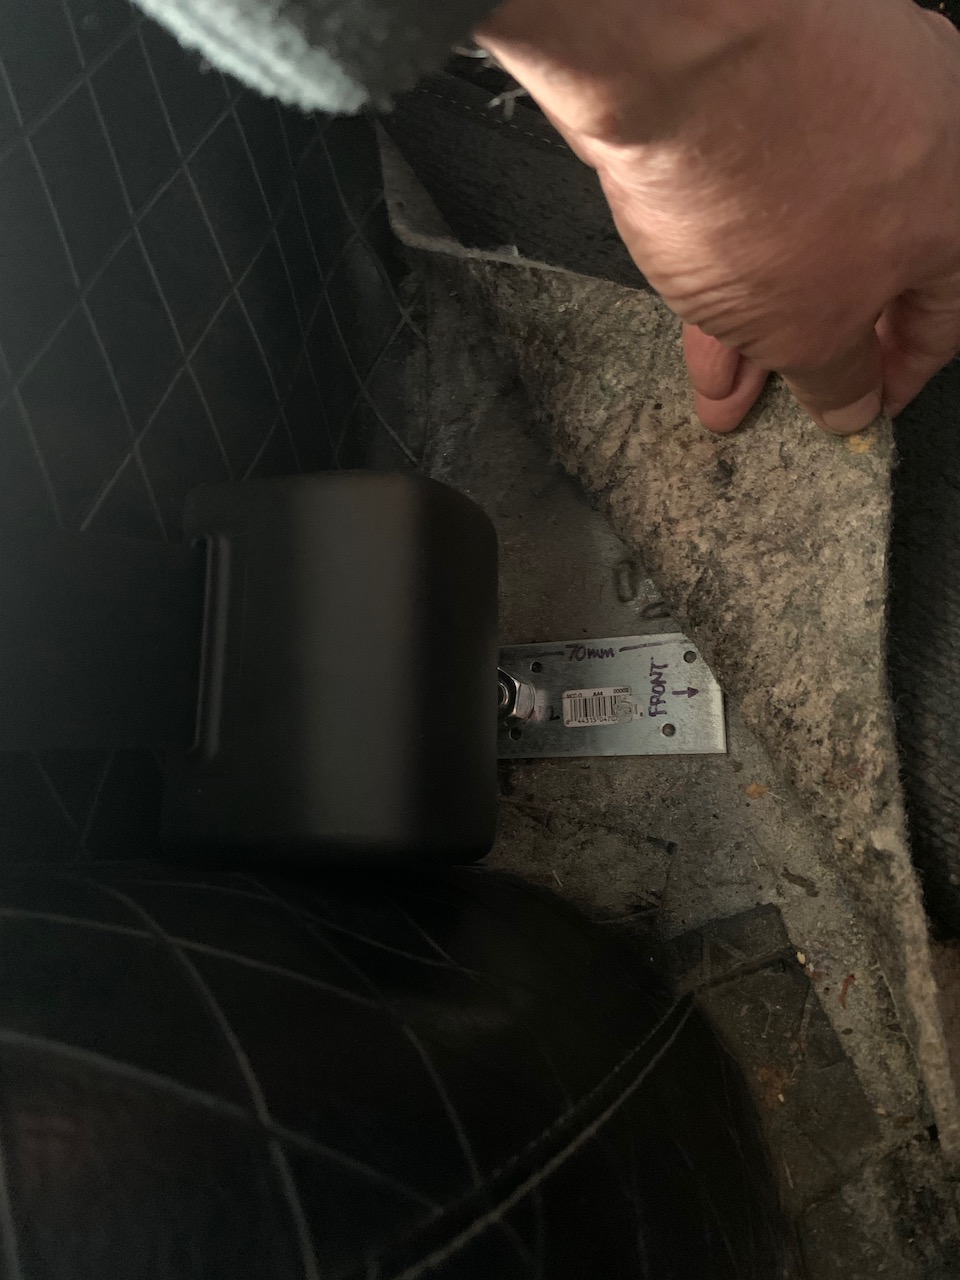
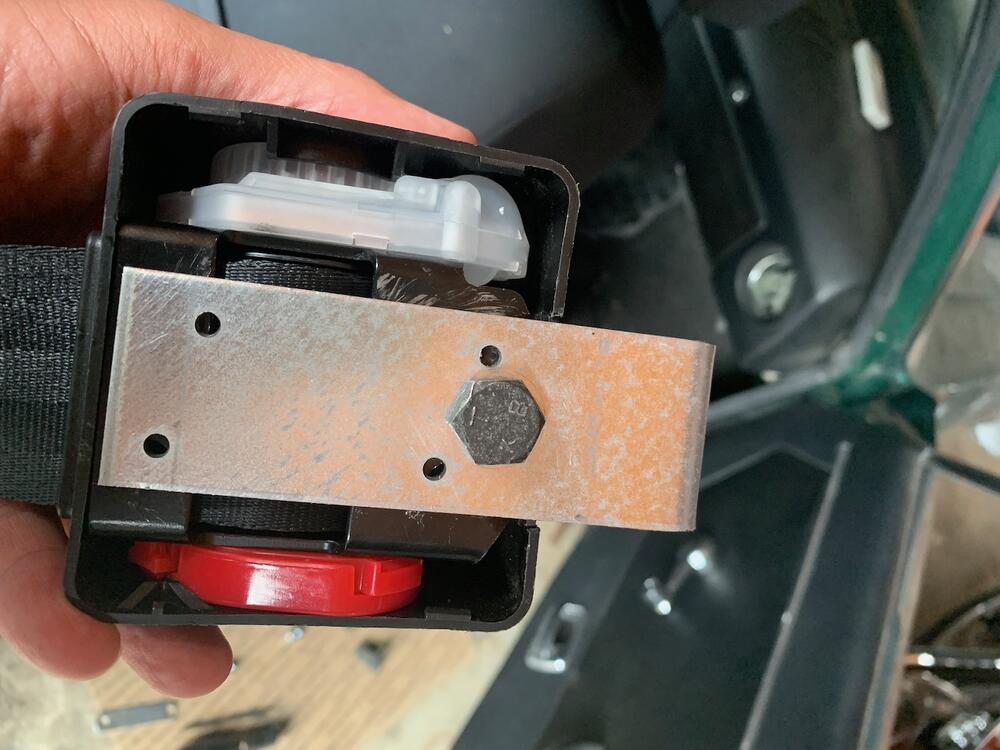
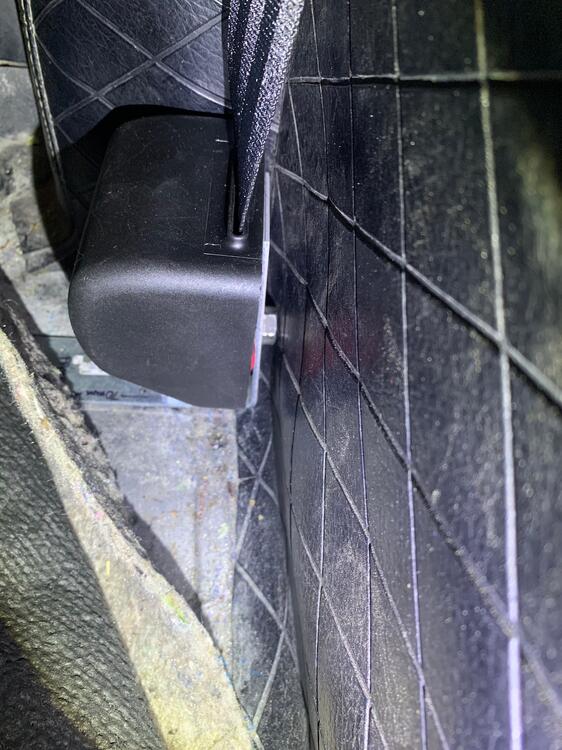
5/71 240Z. Bought a pair of Corbeau GTS 2 seats from MSA, got their recommended retractable seat belt kits as well. https://www.thezstore.com/product/5882/seat-belt-retractable-lap-shoulder-both-sides-70-73-240z Turns out that these are from Retrobelt.com and the instructions are really superficial. Bag of misc fasteners, brackets, etc was provided for the DIYer. MSA said to contact Retrobelt, who declined to provide any further instructions, citing liability concerns. The seat belt rewind mechanism mounting was my concern. Images show it being mounted to the tool box walls or drilling a new hole in the floor. By looking around, found a nasty rubber plug that sealed the interior from the road. Removed it to find a clear path to the underside. Got a L bracket from Home Depot, drilled to suit for M12 holes 70mm from each end, no cutting required. Used a M12-18mm to fasten the rewinder to the bracket, then a M12-60mm to fasten the bracket to the floor. Didn't have to cut anything in the interior, floor mat covers the bracket. Seat slides all the way aft & reclines fully w/o interference from the rewinder. Tested this on the passenger side, now for the driver's side. Critique my installation.


-
I'm no mechanical engineer, but I think the strength comes from the ends being welded to the floor. Here's what my seat mounts look like.

-
Suggest you consider using a cut-off disk to open up the closed sides of those frame mounted boxes. Are the mounting holes the correct dimensions for the Corbeau sliders or will new holes be needed?
-
Happy to report that after much frustration, got the sliders to work, which allowed me to shove the seat all the way forward and tighten the rear fasteners securely. The crux of the problem was that the heads of the fasteners that secure the sliders to the chassis mounts were too tall, interfering with the slider mechanism, but only when the seat was installed. Took several trips to my friends mill to thin them down from ~10mm to ~5mm, which was necessary for the sliders to function smoothly. Thanks for all the suggestions!
-
Yep, made sure the sliders worked all the way fore and aft, before attempting to install the seat plus sliders into my car.
-
The seat is all the way back and doesn't seem to want to slide forward at all. An issue is that due to the cross rail at the front of the seat, I can't reach under the seat to access the rear fasteners, which connect the slider to the frame. With the seat all the way back, there is zero room to reach under the seat from the rear. Have you installed these seats before?