
kenward1000
Free Member
-
Joined
-
Last visited
Everything posted by kenward1000
-
Chassis fuel lines are good. Removed the defective 280z tank today, picking up a good 240z tank tomorrow morning. Should be back to running by noon.
-
Today drained the fuel tank completely. Disconnected supply/return lines from tank to engine compartment, on both ends. Used compressor to blow air through both lines, from engine compartment back to tank. Pressurized air came out without no debris, both hold pressure. Tomorrow will connect an external fuel bottle, located near the tank, to the line supplying fuel from there to the fuel filter. If car starts then I'll know that the lines are good.
-
Friday morning started my 71 240z; ran rough, then worse, then died and wouldn't restart (car is driven daily and recently completed a 600+ mile two day rally). Starts with starter fluid. No fuel coming from mechanical fuel pump output when engine is cranking. Decided that fuel pump had failed. Saturday replaced the fuel pump, fuel filter and a couple of sketchy looking fuel hoses. Still wouldn't start. Added 8 more gallons fuel, did not help. No leaks seen. Today connected fuel bottle to inlet side of fuel filter, car starts right up. Filter and pump are now known to be good. Connected electric fuel pump to line feeding the fuel filter; no gas seen at pump outlet. Tried compressed air from fuel filter inlet back to tank, no bubbles heard, only fumes from filler neck. Seems like the fuel level in the tank must somehow be lower than the pickup? Additional: DPO installed a 280z tank in my car. Tank is dented, can see pinched hoses. Maybe should start with a known good 240z tank and work from there? Thanks for looking at my post!
-
71 240z new to me. Thursday night I filled with gas, adding enough extra after the pump shut off, that I could see gas down in the neck, maybe 4". Intended to drive it the next day but did other things. Friday afternoon got to 85F, I walked by it and saw a little pool of gas on the pavement and gas seeping from under the filler cap. Cursed myself, got a turkey baster and sucked gas out until it was barely visible again, which is about 4" down. Saturday afternoon got to 90F again, and gas was seeping out a second time. Sucked it out again. Today it's done it for the third time in 95F temps! Unfamiliar with how the expansion tank and vent system is supposed to work. Would like to buy a clue, please.
-
Ramble on! Yes, you've answered my questions. Appreciate your help, thanks.
-
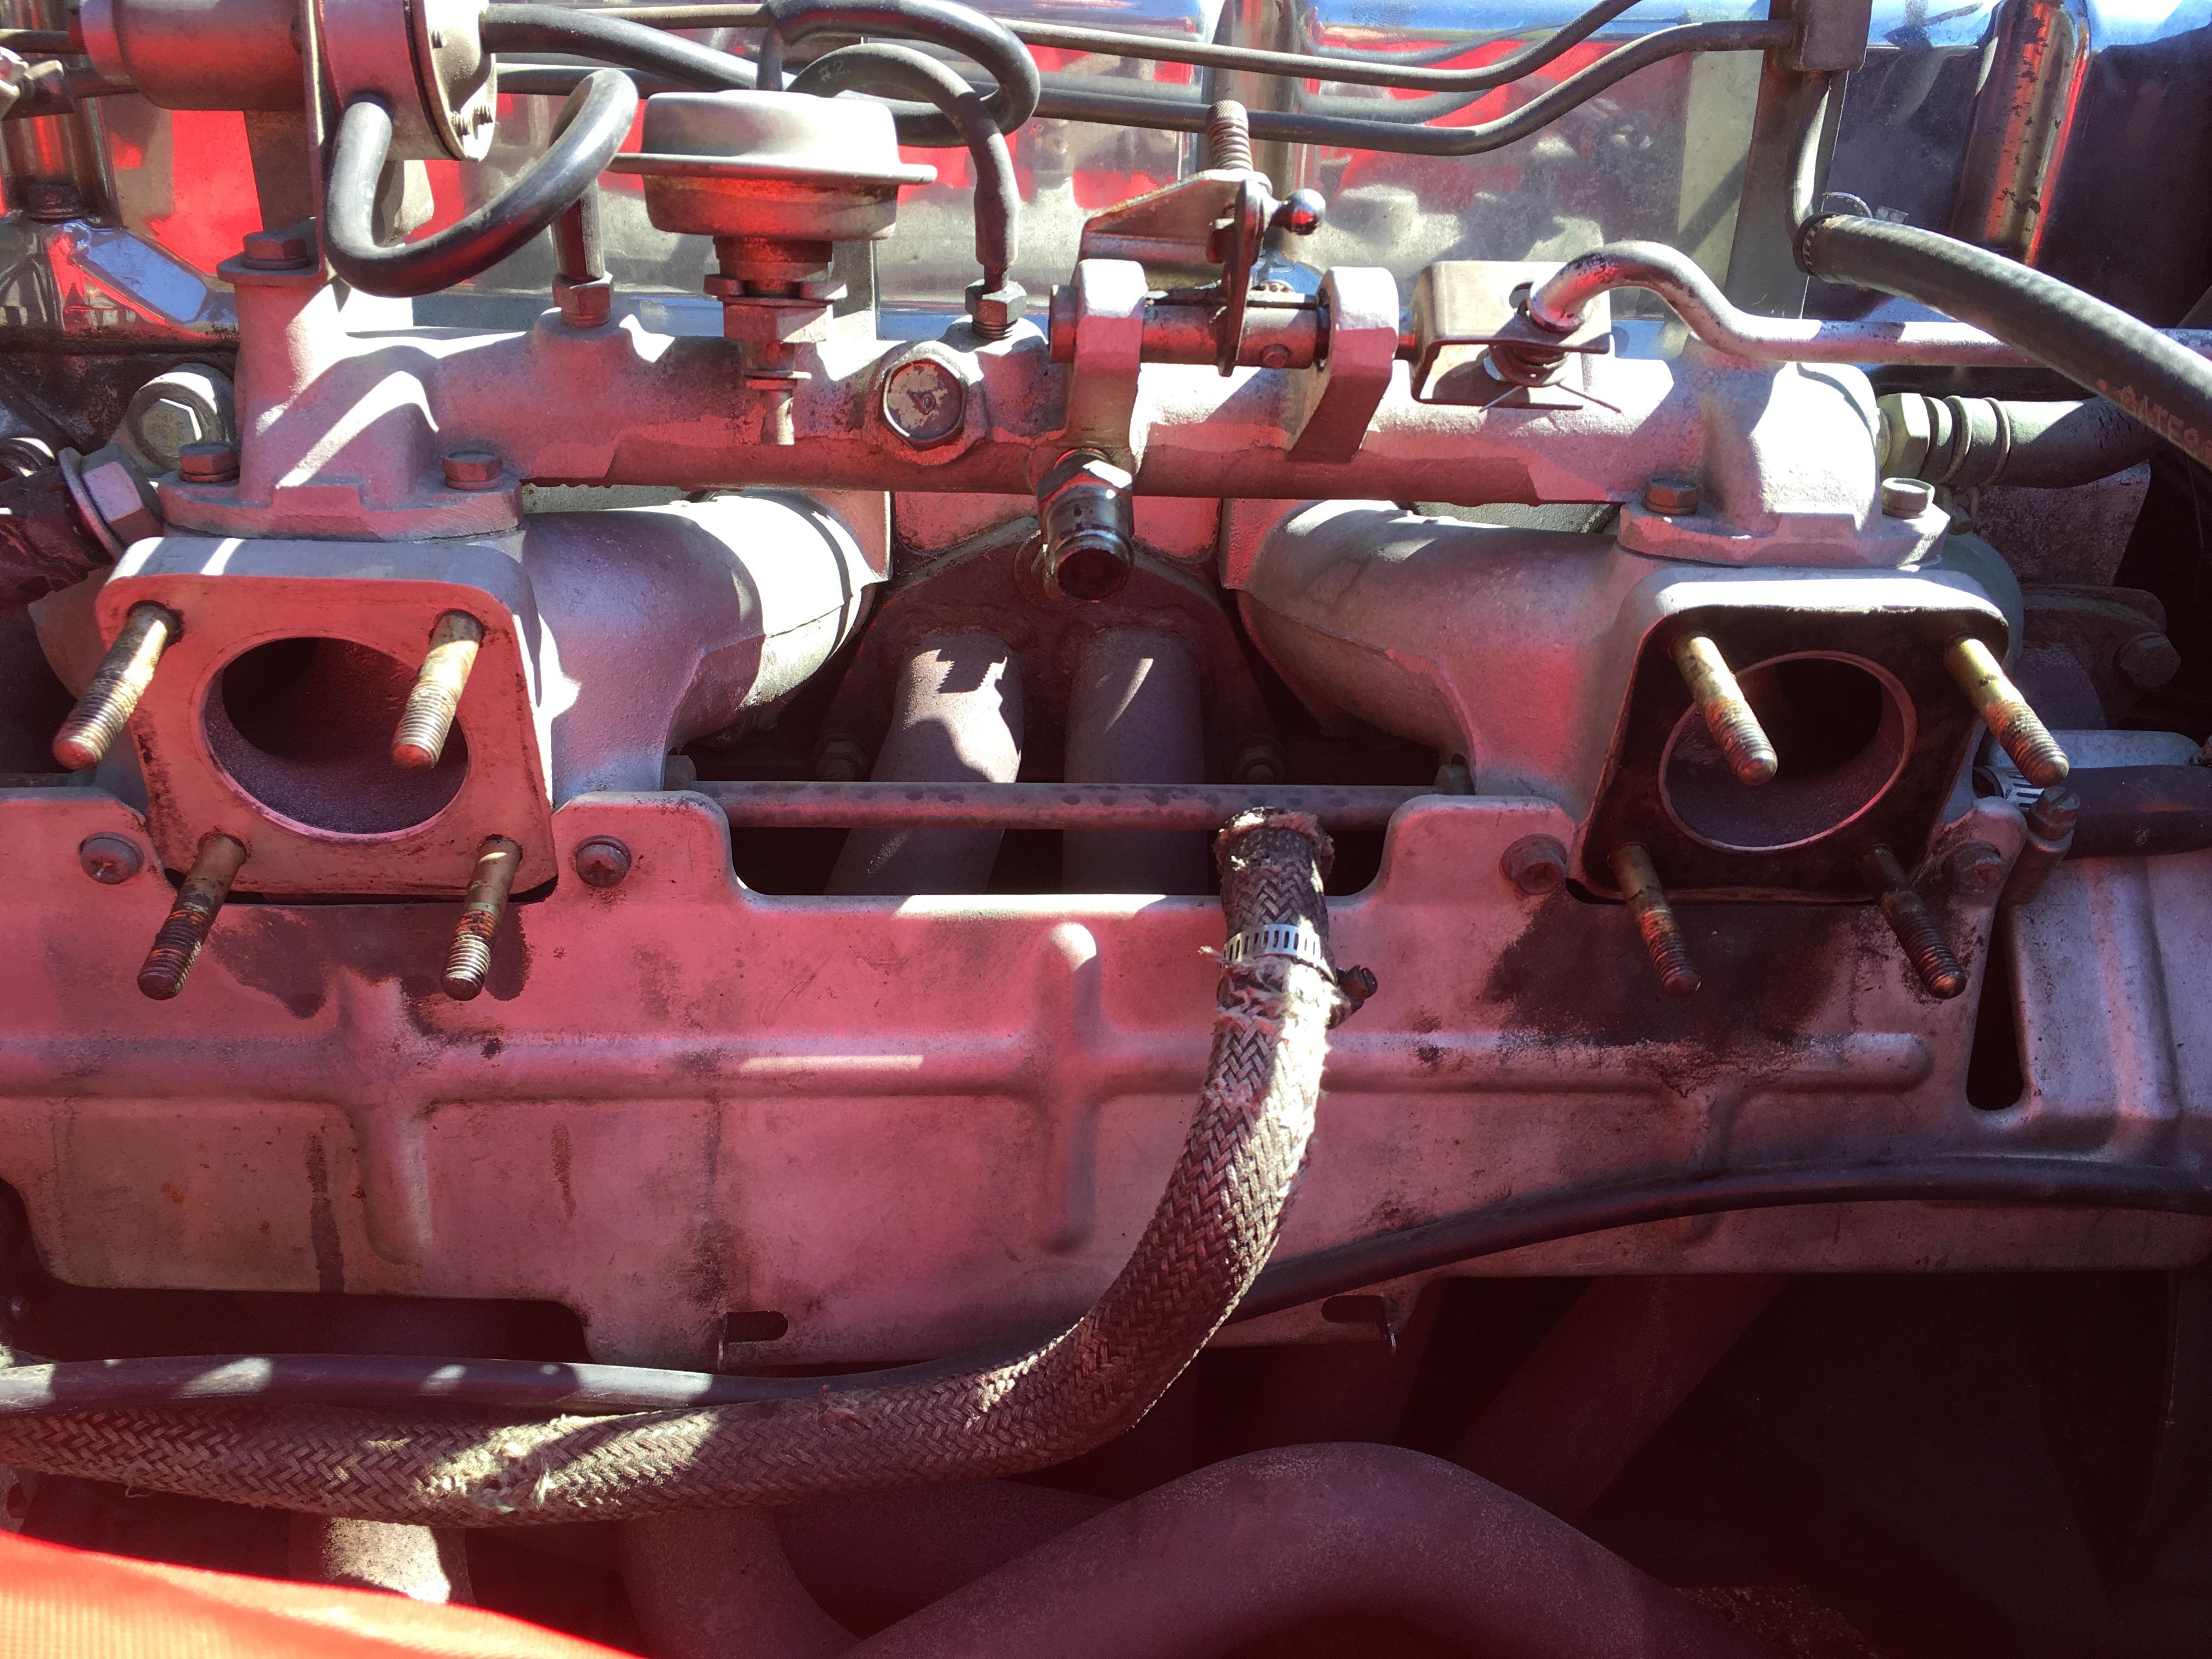
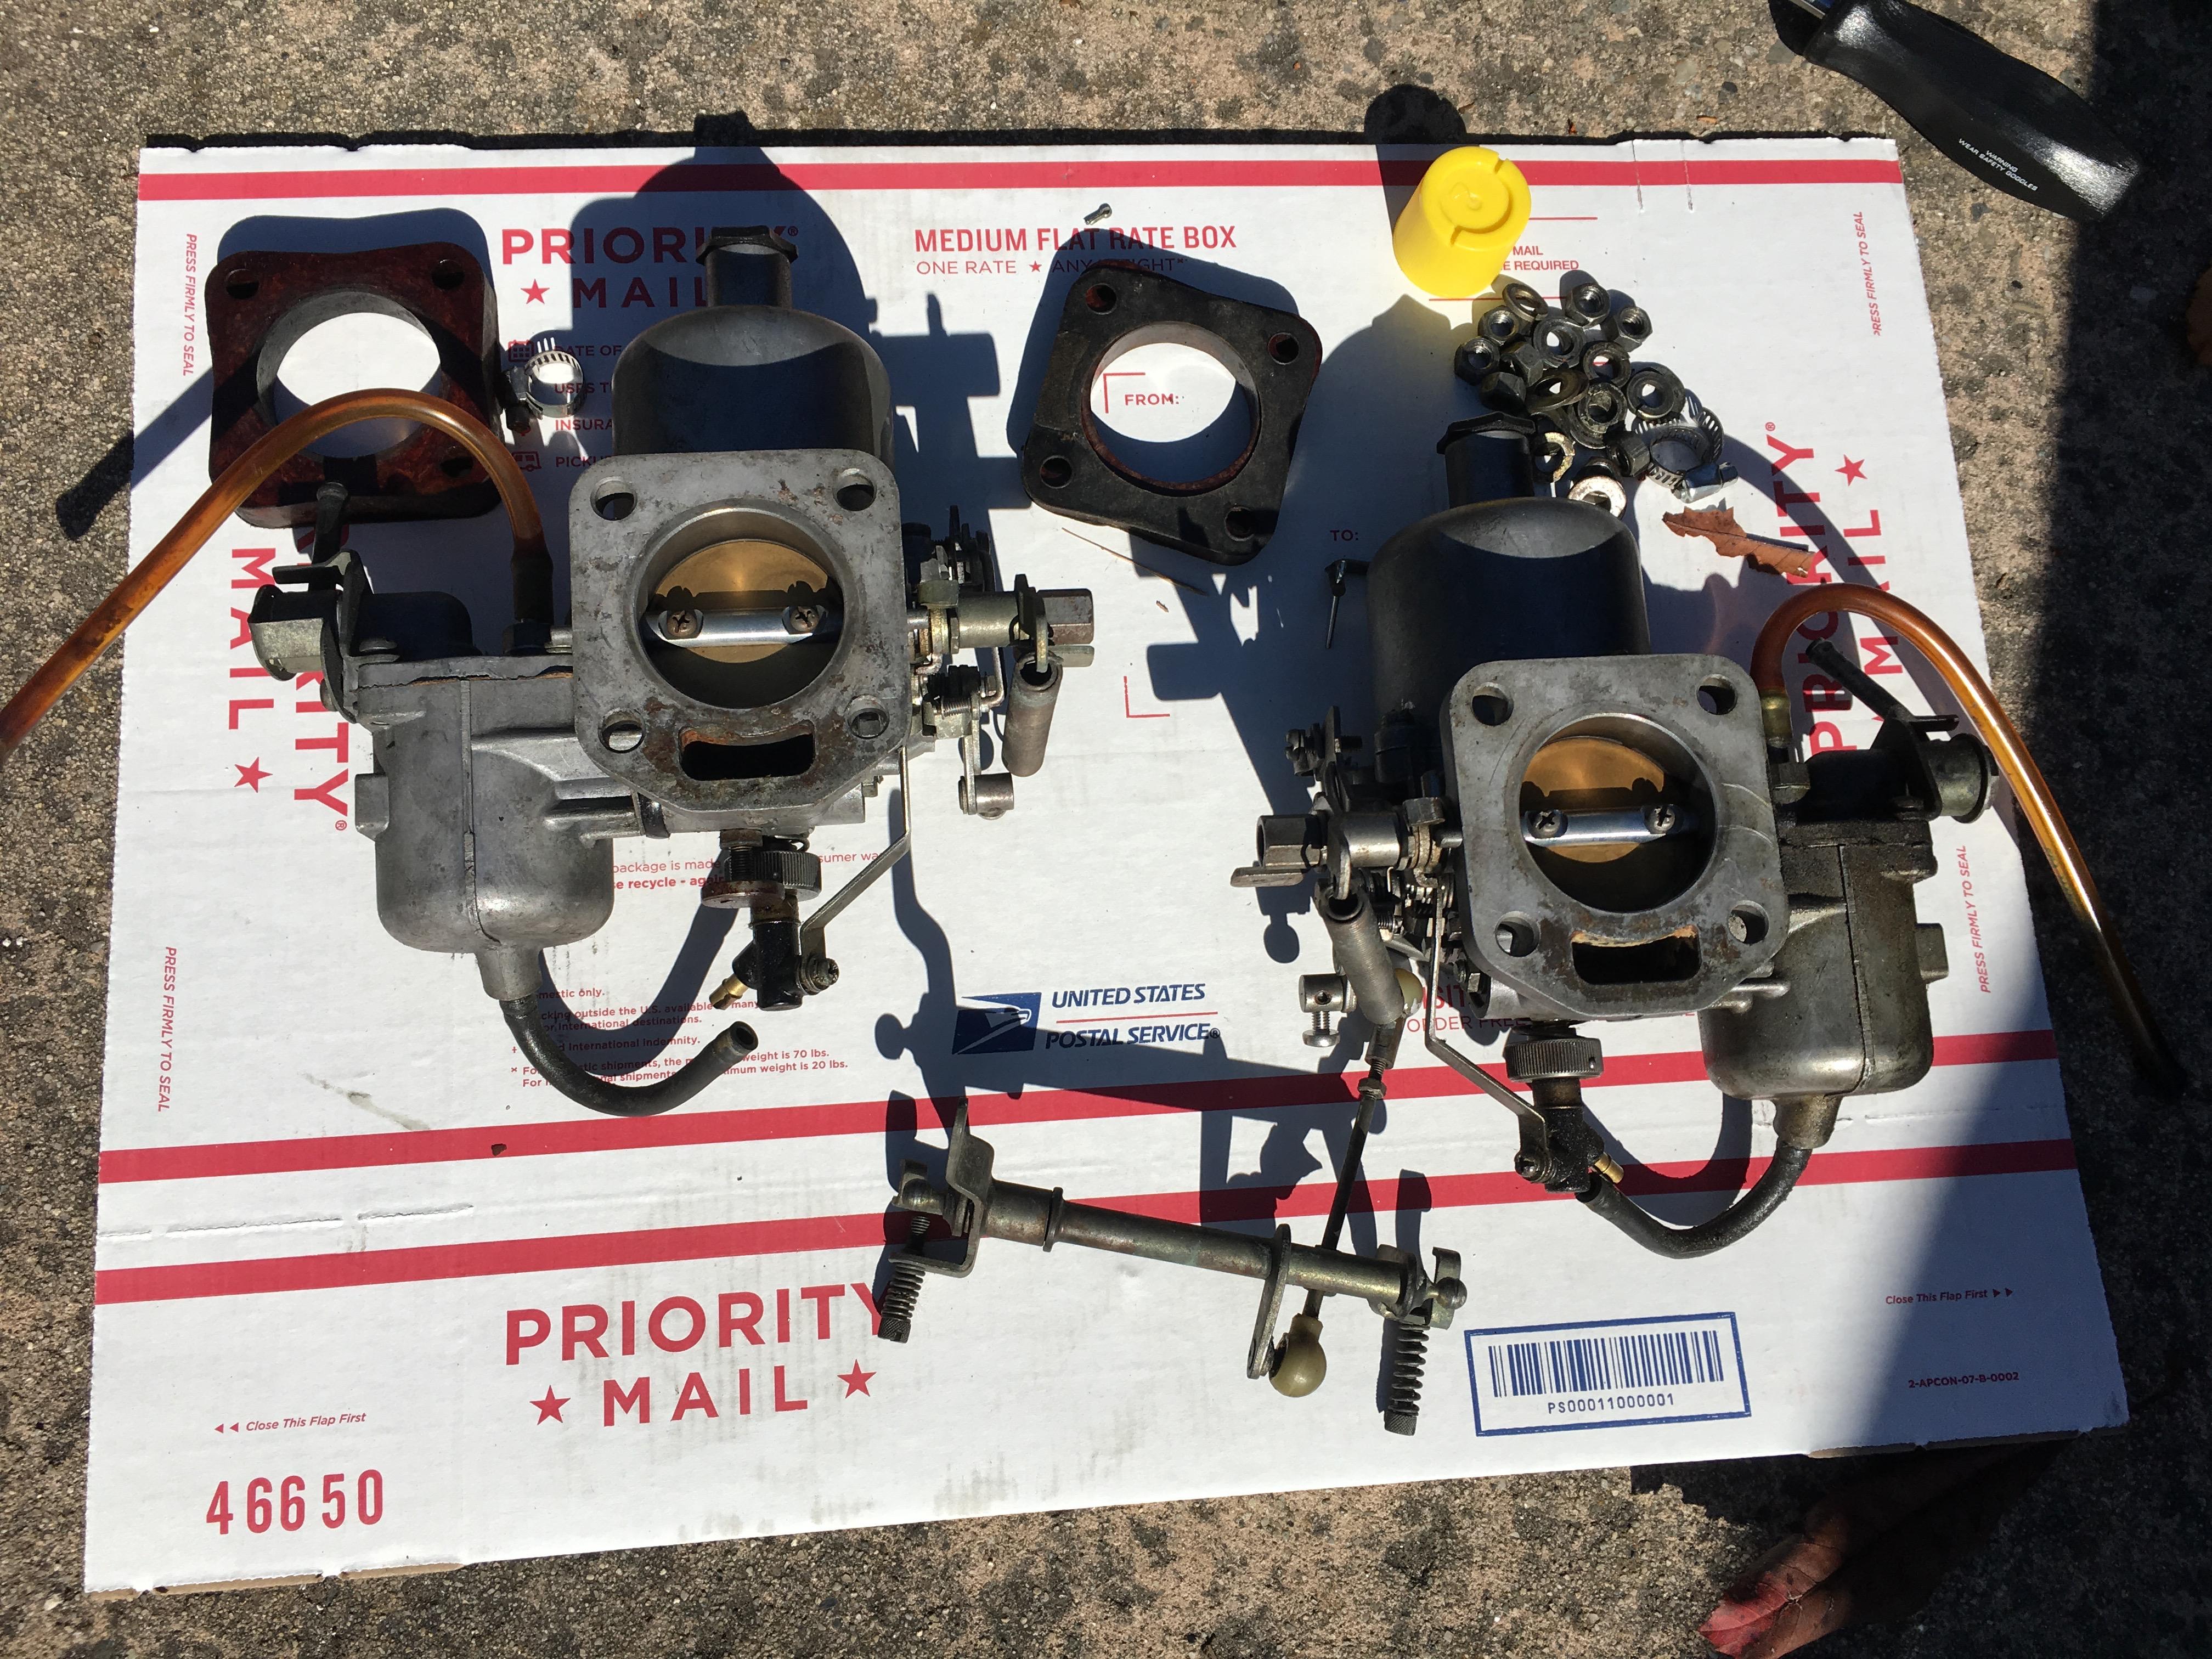
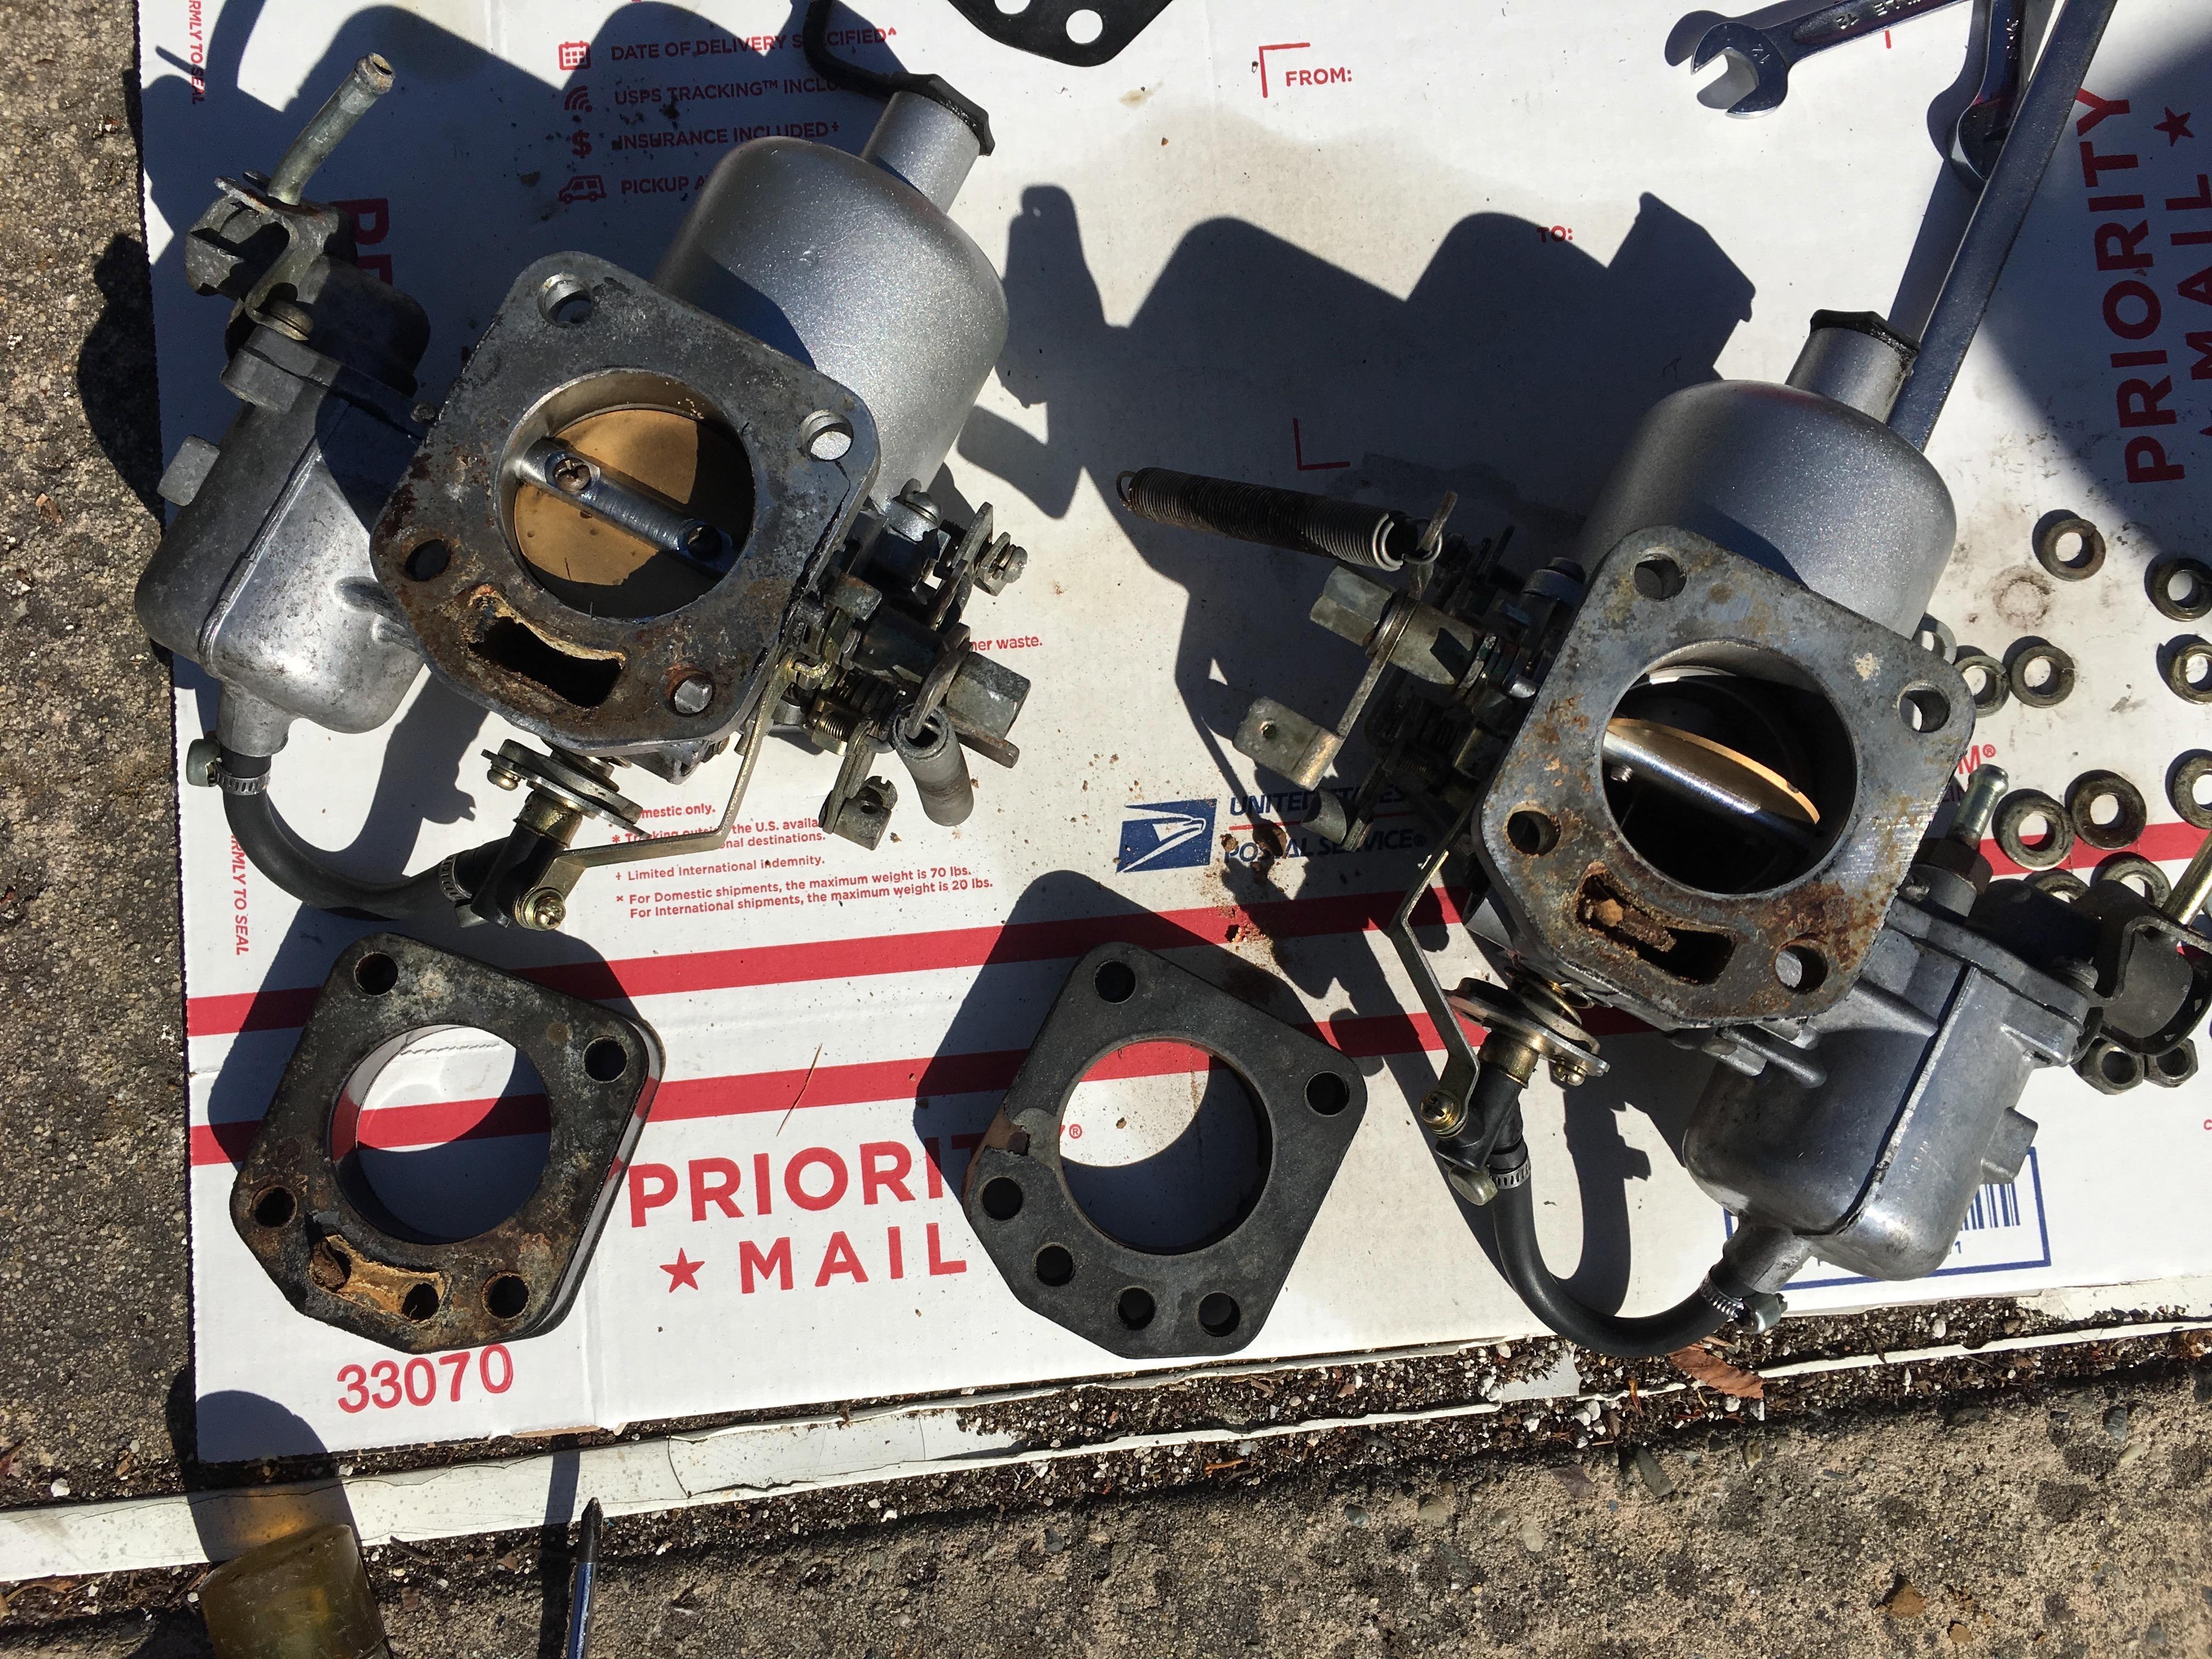
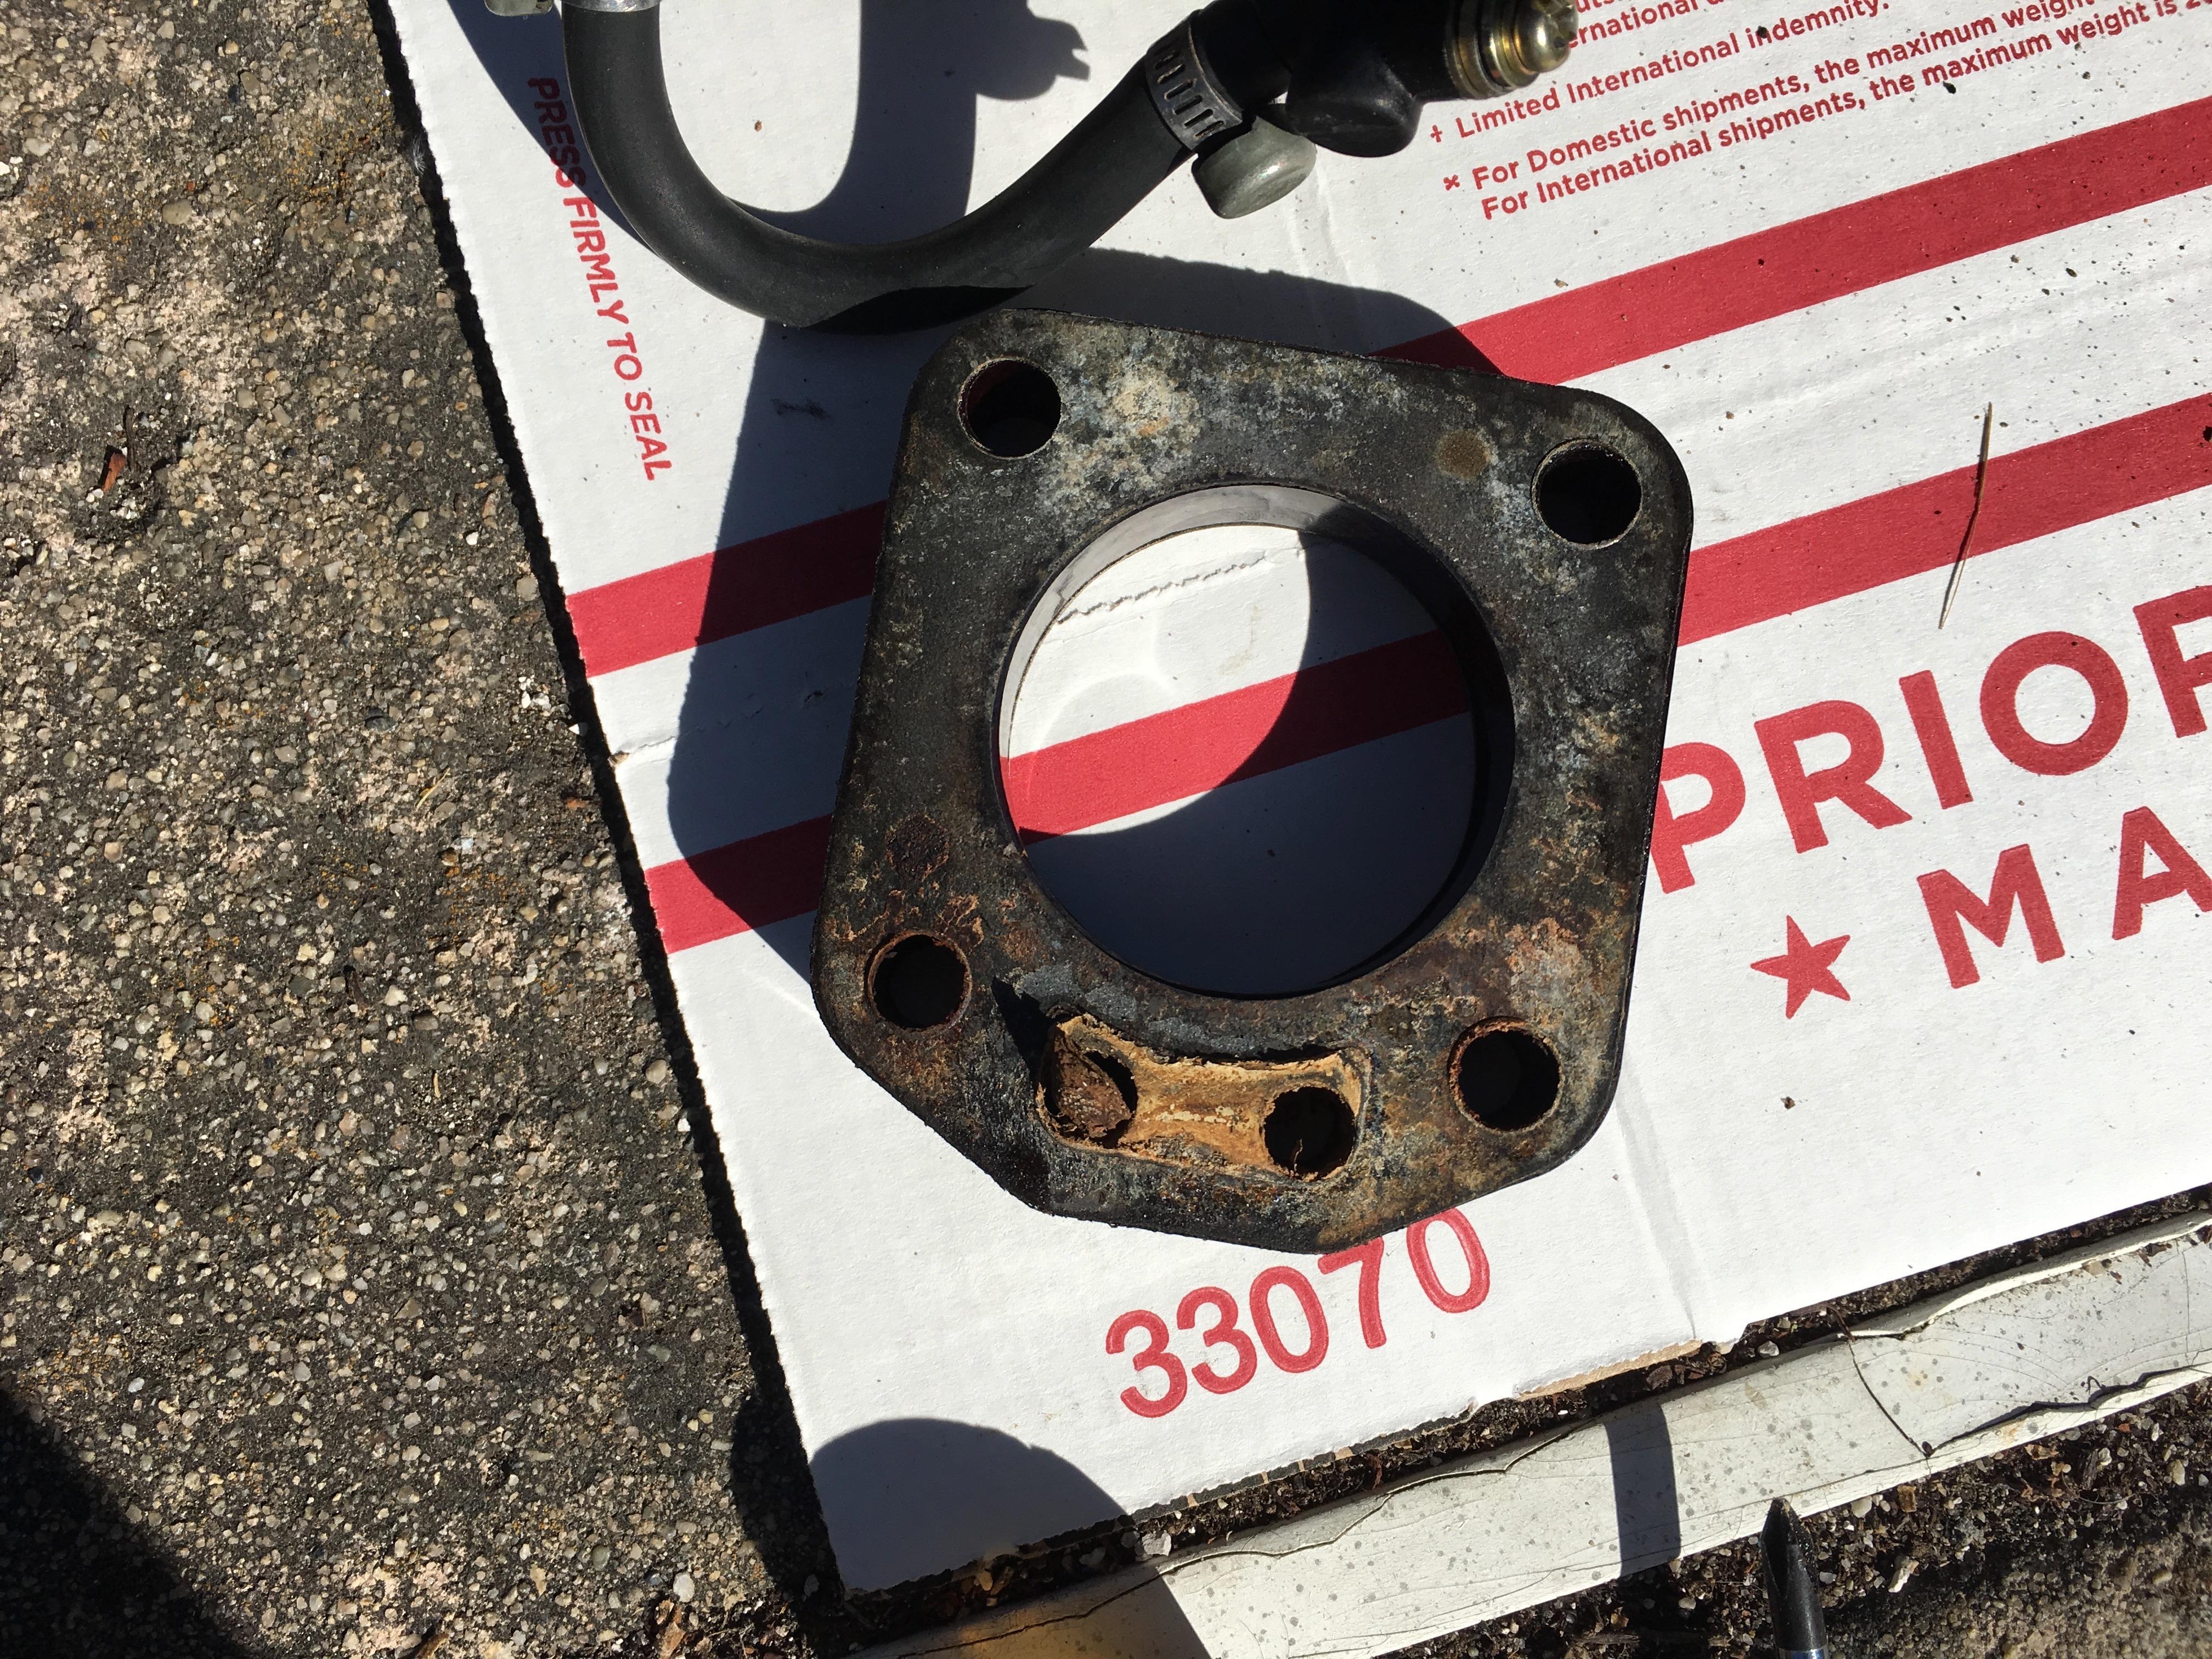
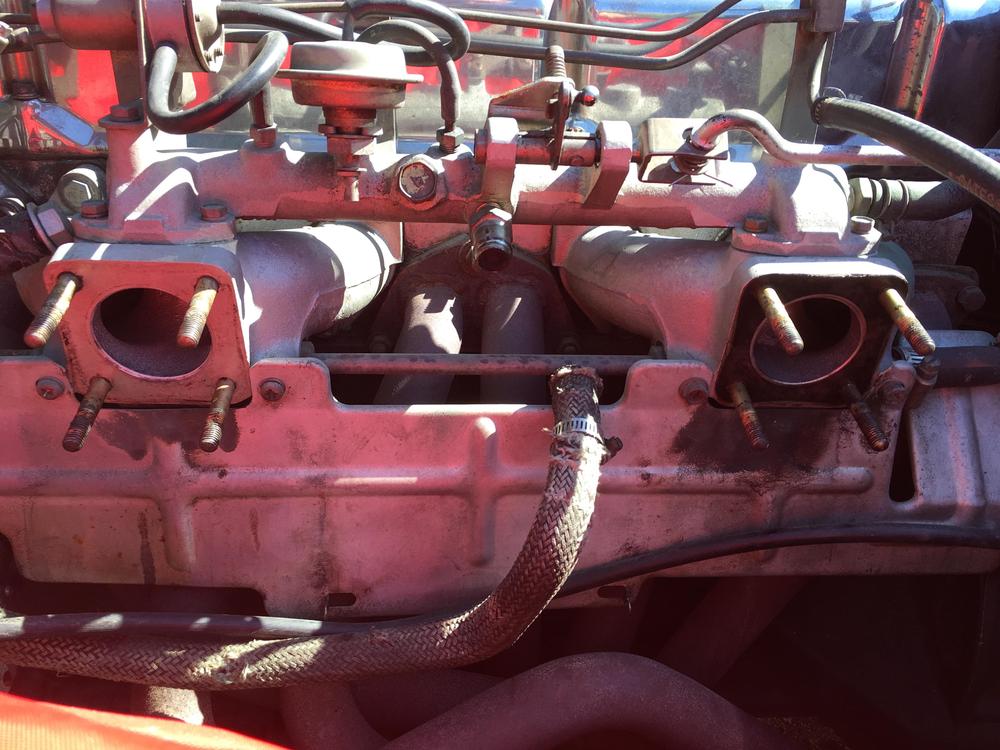
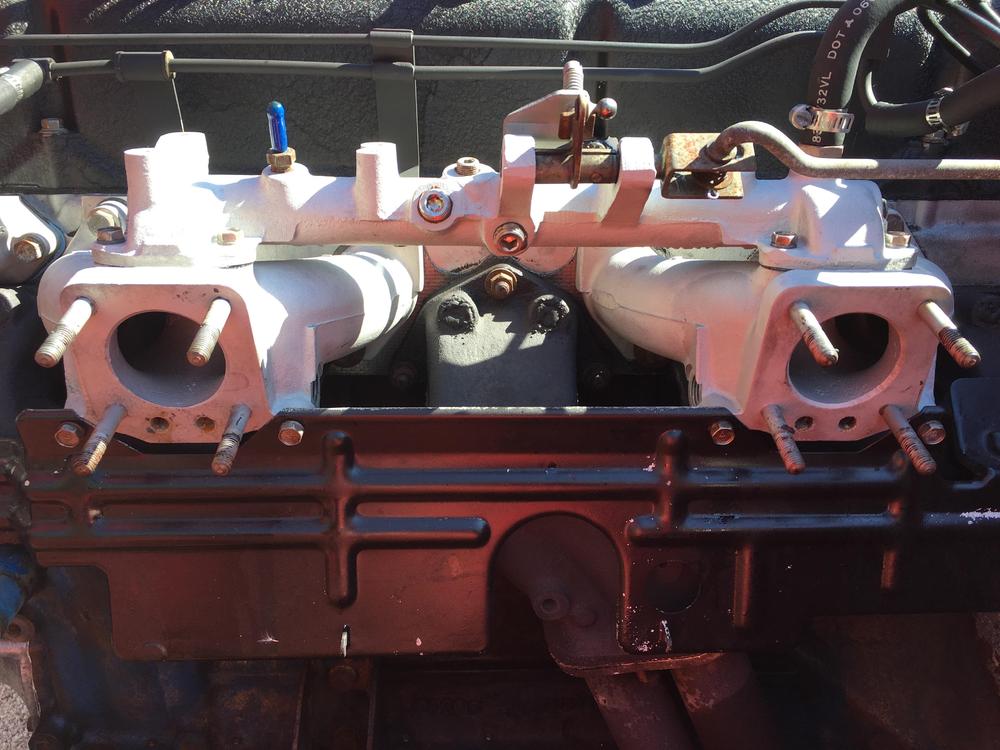
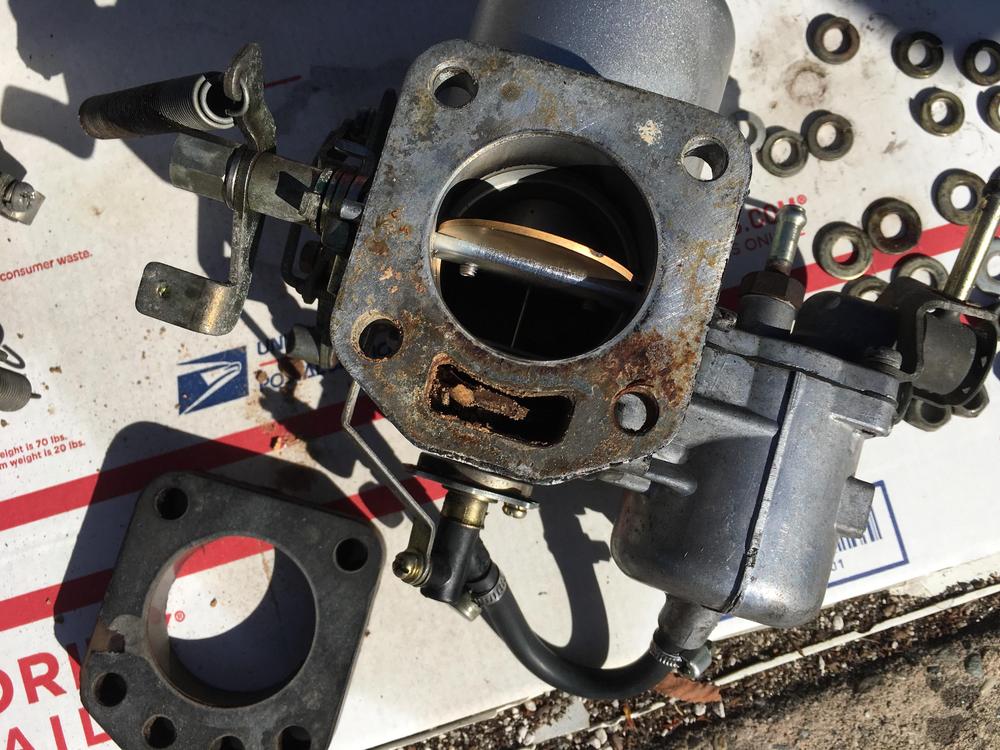
Swapping some "rebuilt" SU's from a 72 240z into a 71 240z (which has a 72 engine), so I can drive the 71 while rebuilding its carbs on the bench. Pulled off both SU carb pairs. The carbs appear to be all the same, only the intake manifolds and insulators are different. The 72 manifold/insulator combos have two extra holes on the lower edge. The 71 manifold/insulator combos don't have those holes, so the elongated opening in the carb base would seem to be open to the atmosphere. Wondering what the deal is, would rather not have to swap the manifolds as well. Bonus: check out the crap in the last images, both in a carb and in an insulator. Any reason I can't proceed with the carb swap? Thanks for reading.


-
Thanks, I'll add those. Was anticipating that people would look at my procedure and comment on anything that was missing/wrong.
-
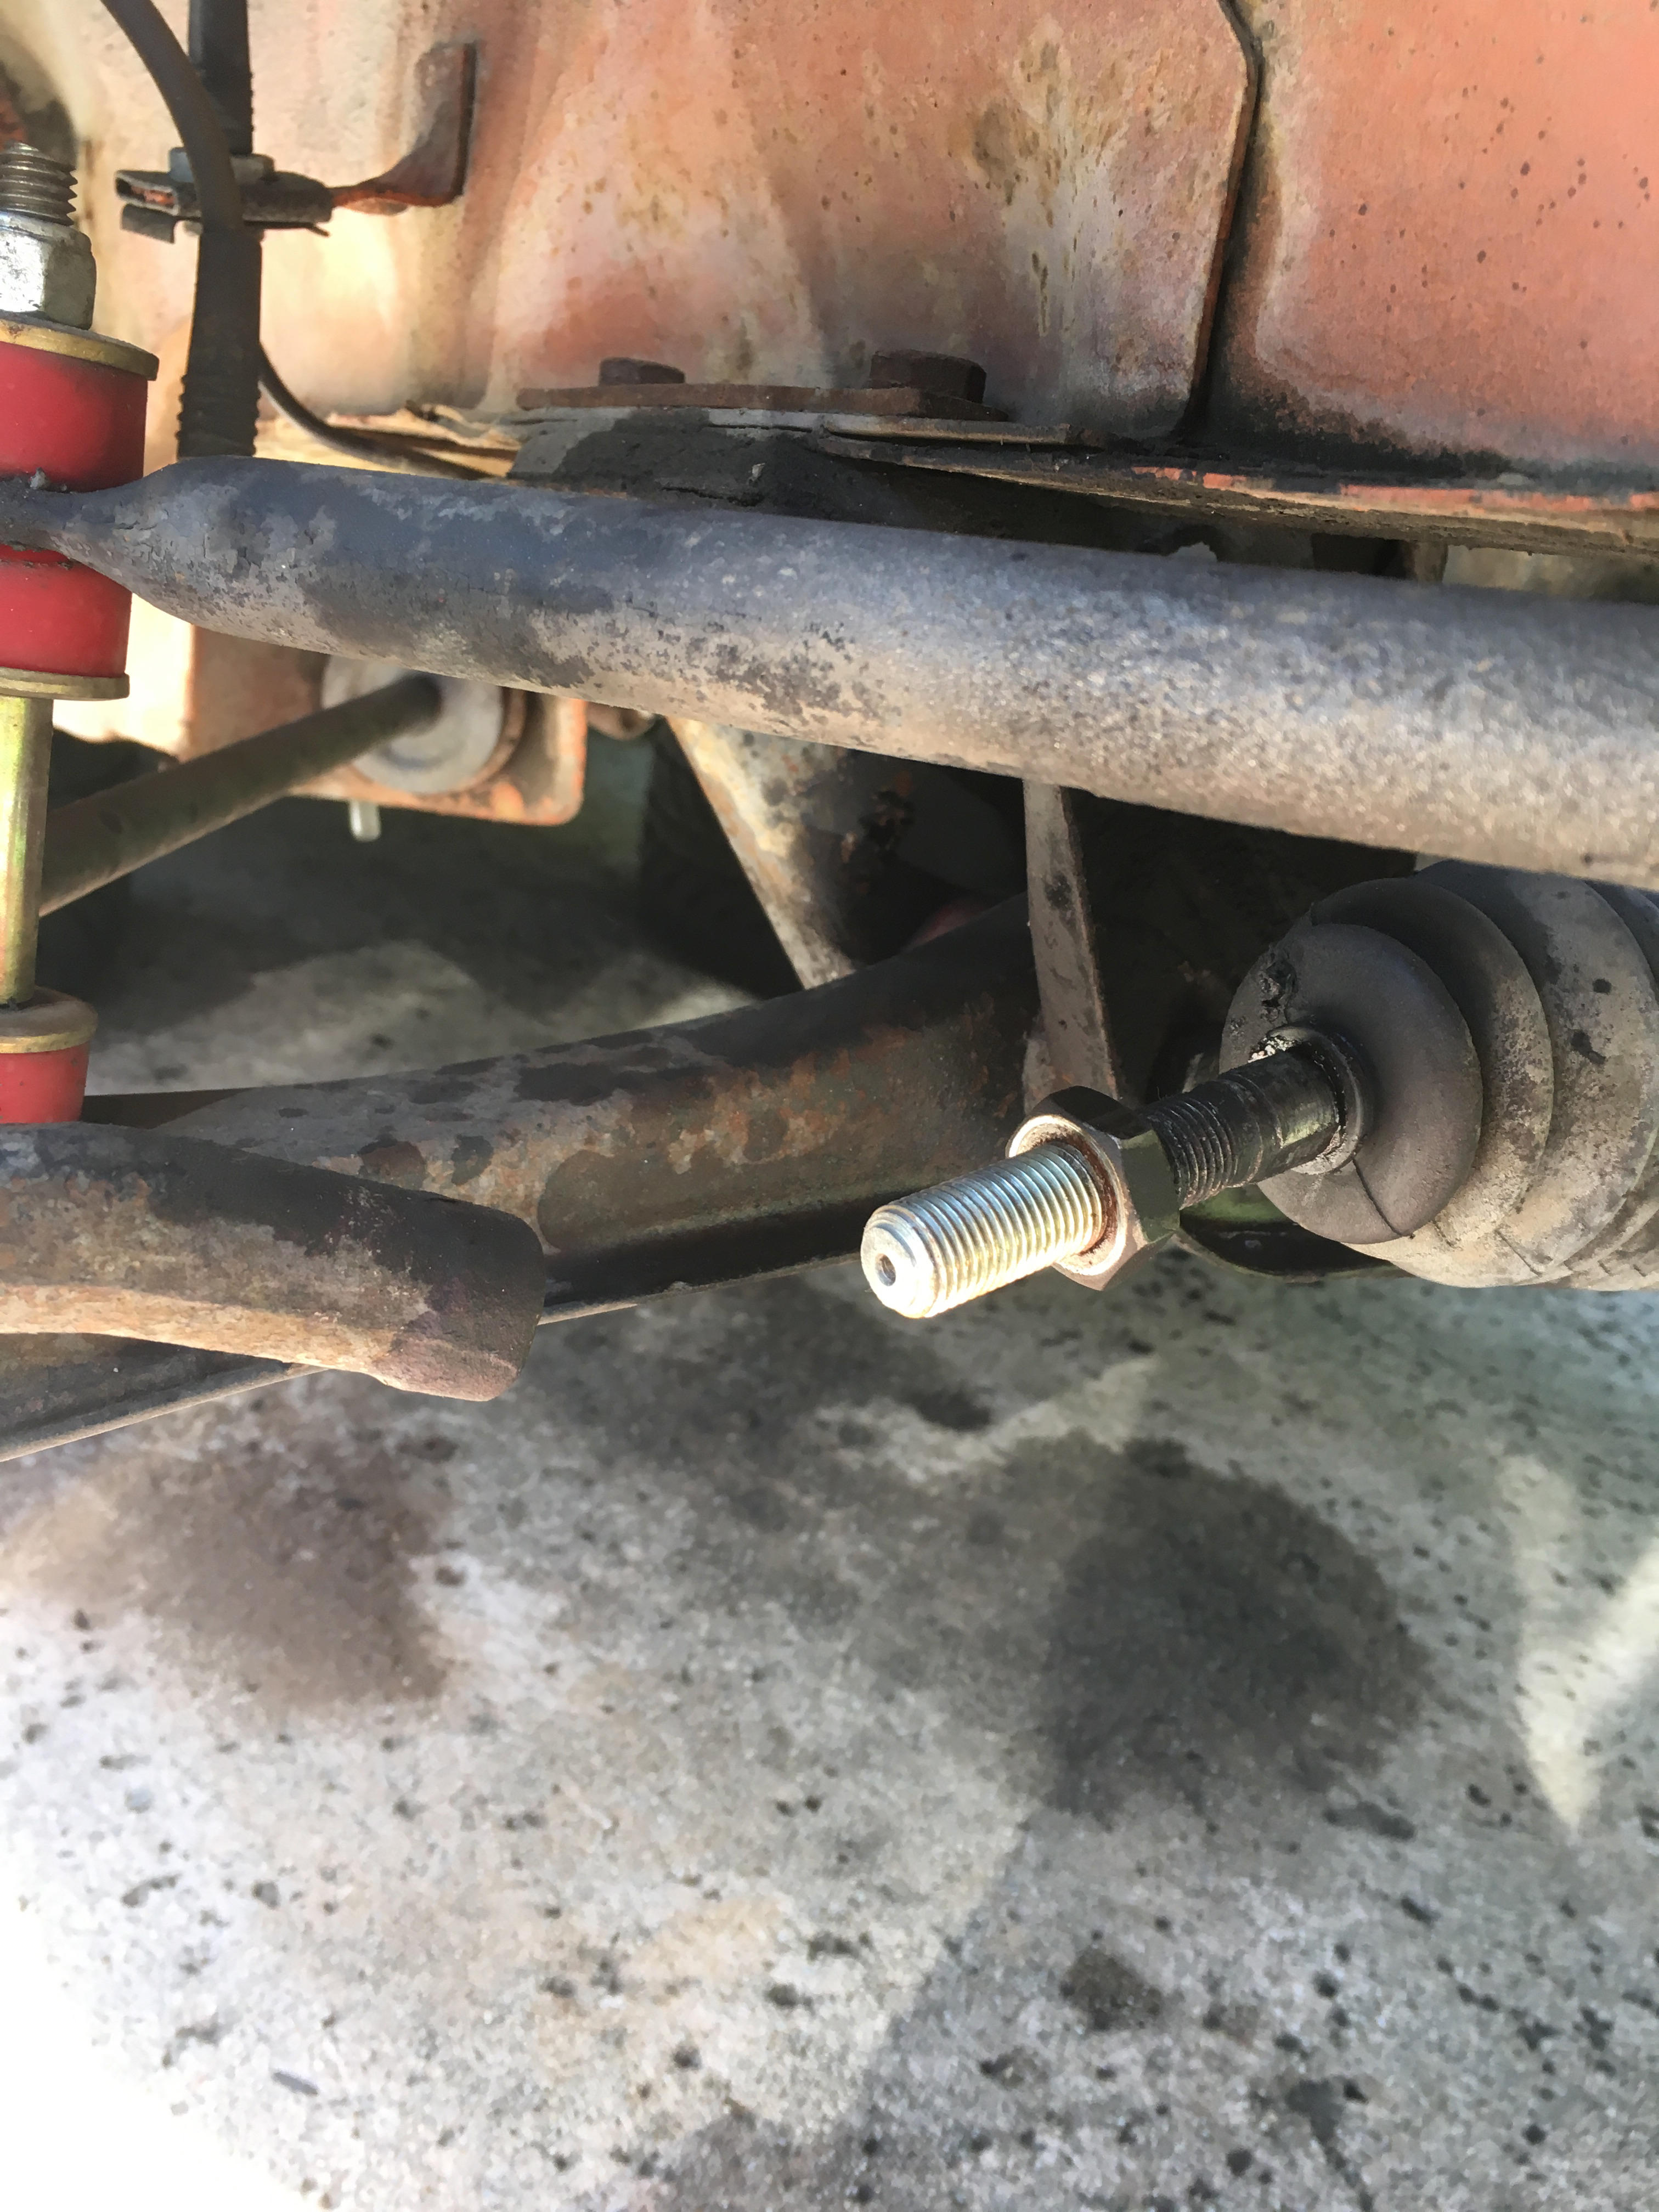
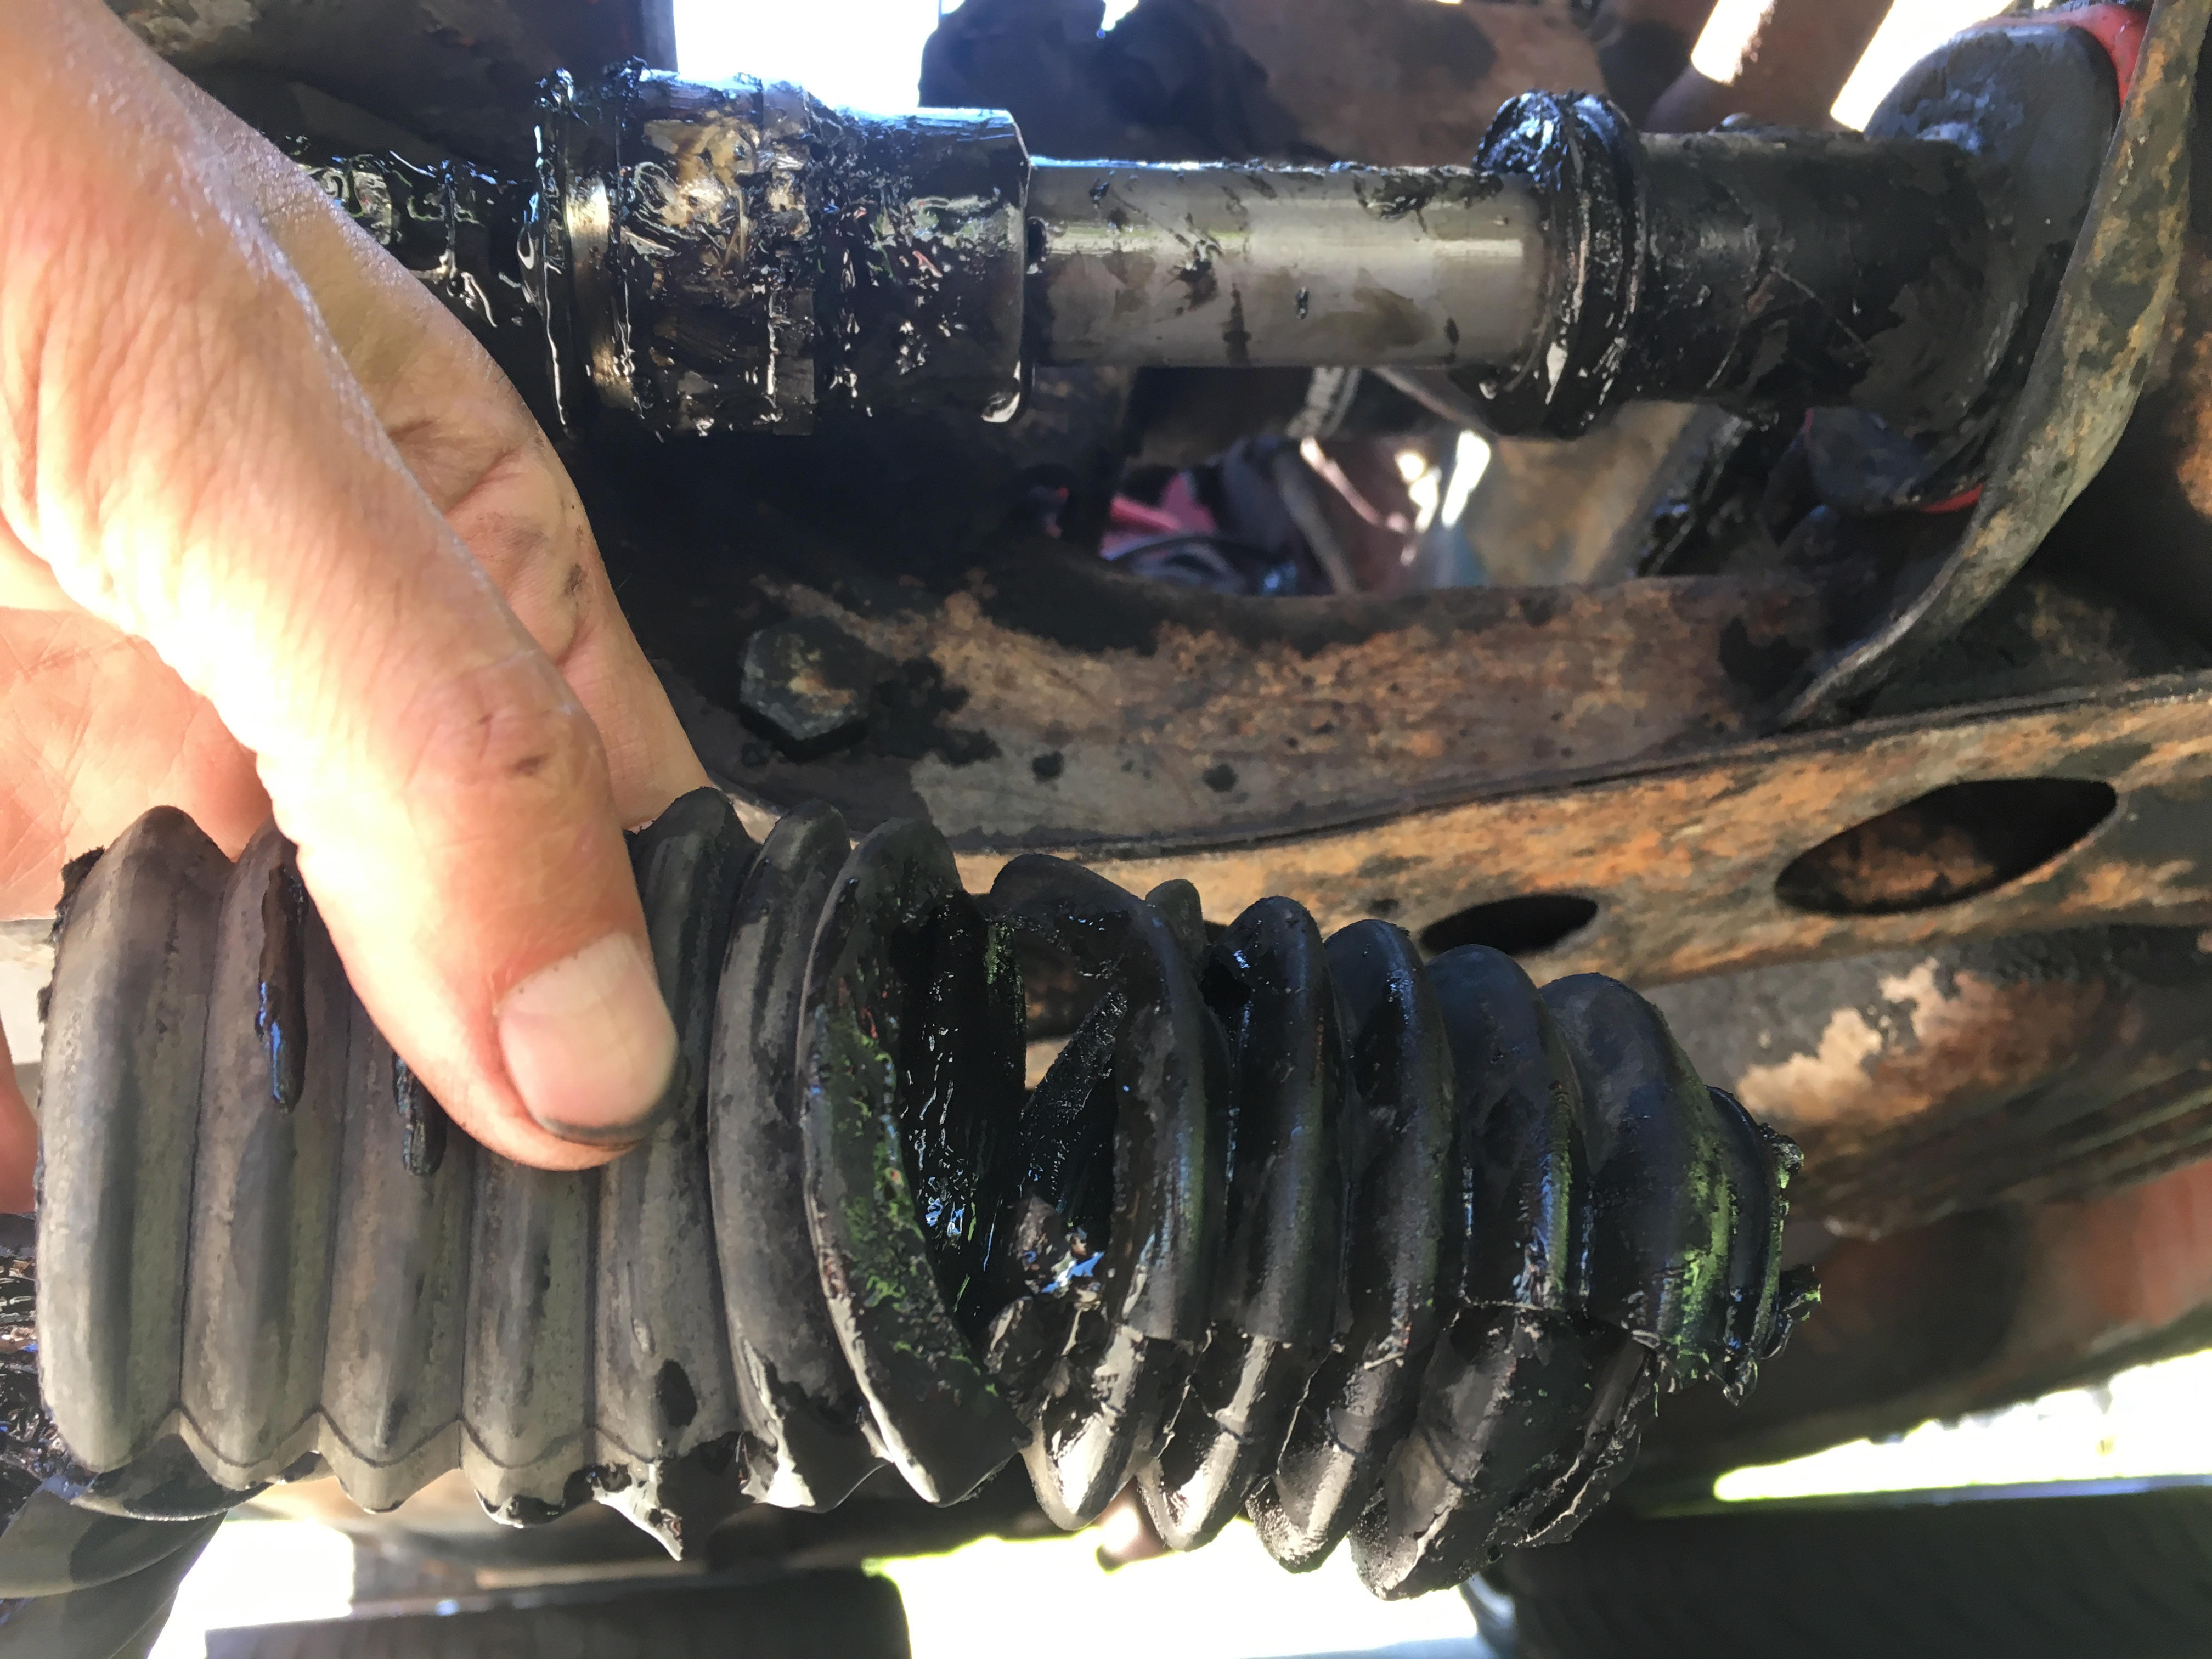
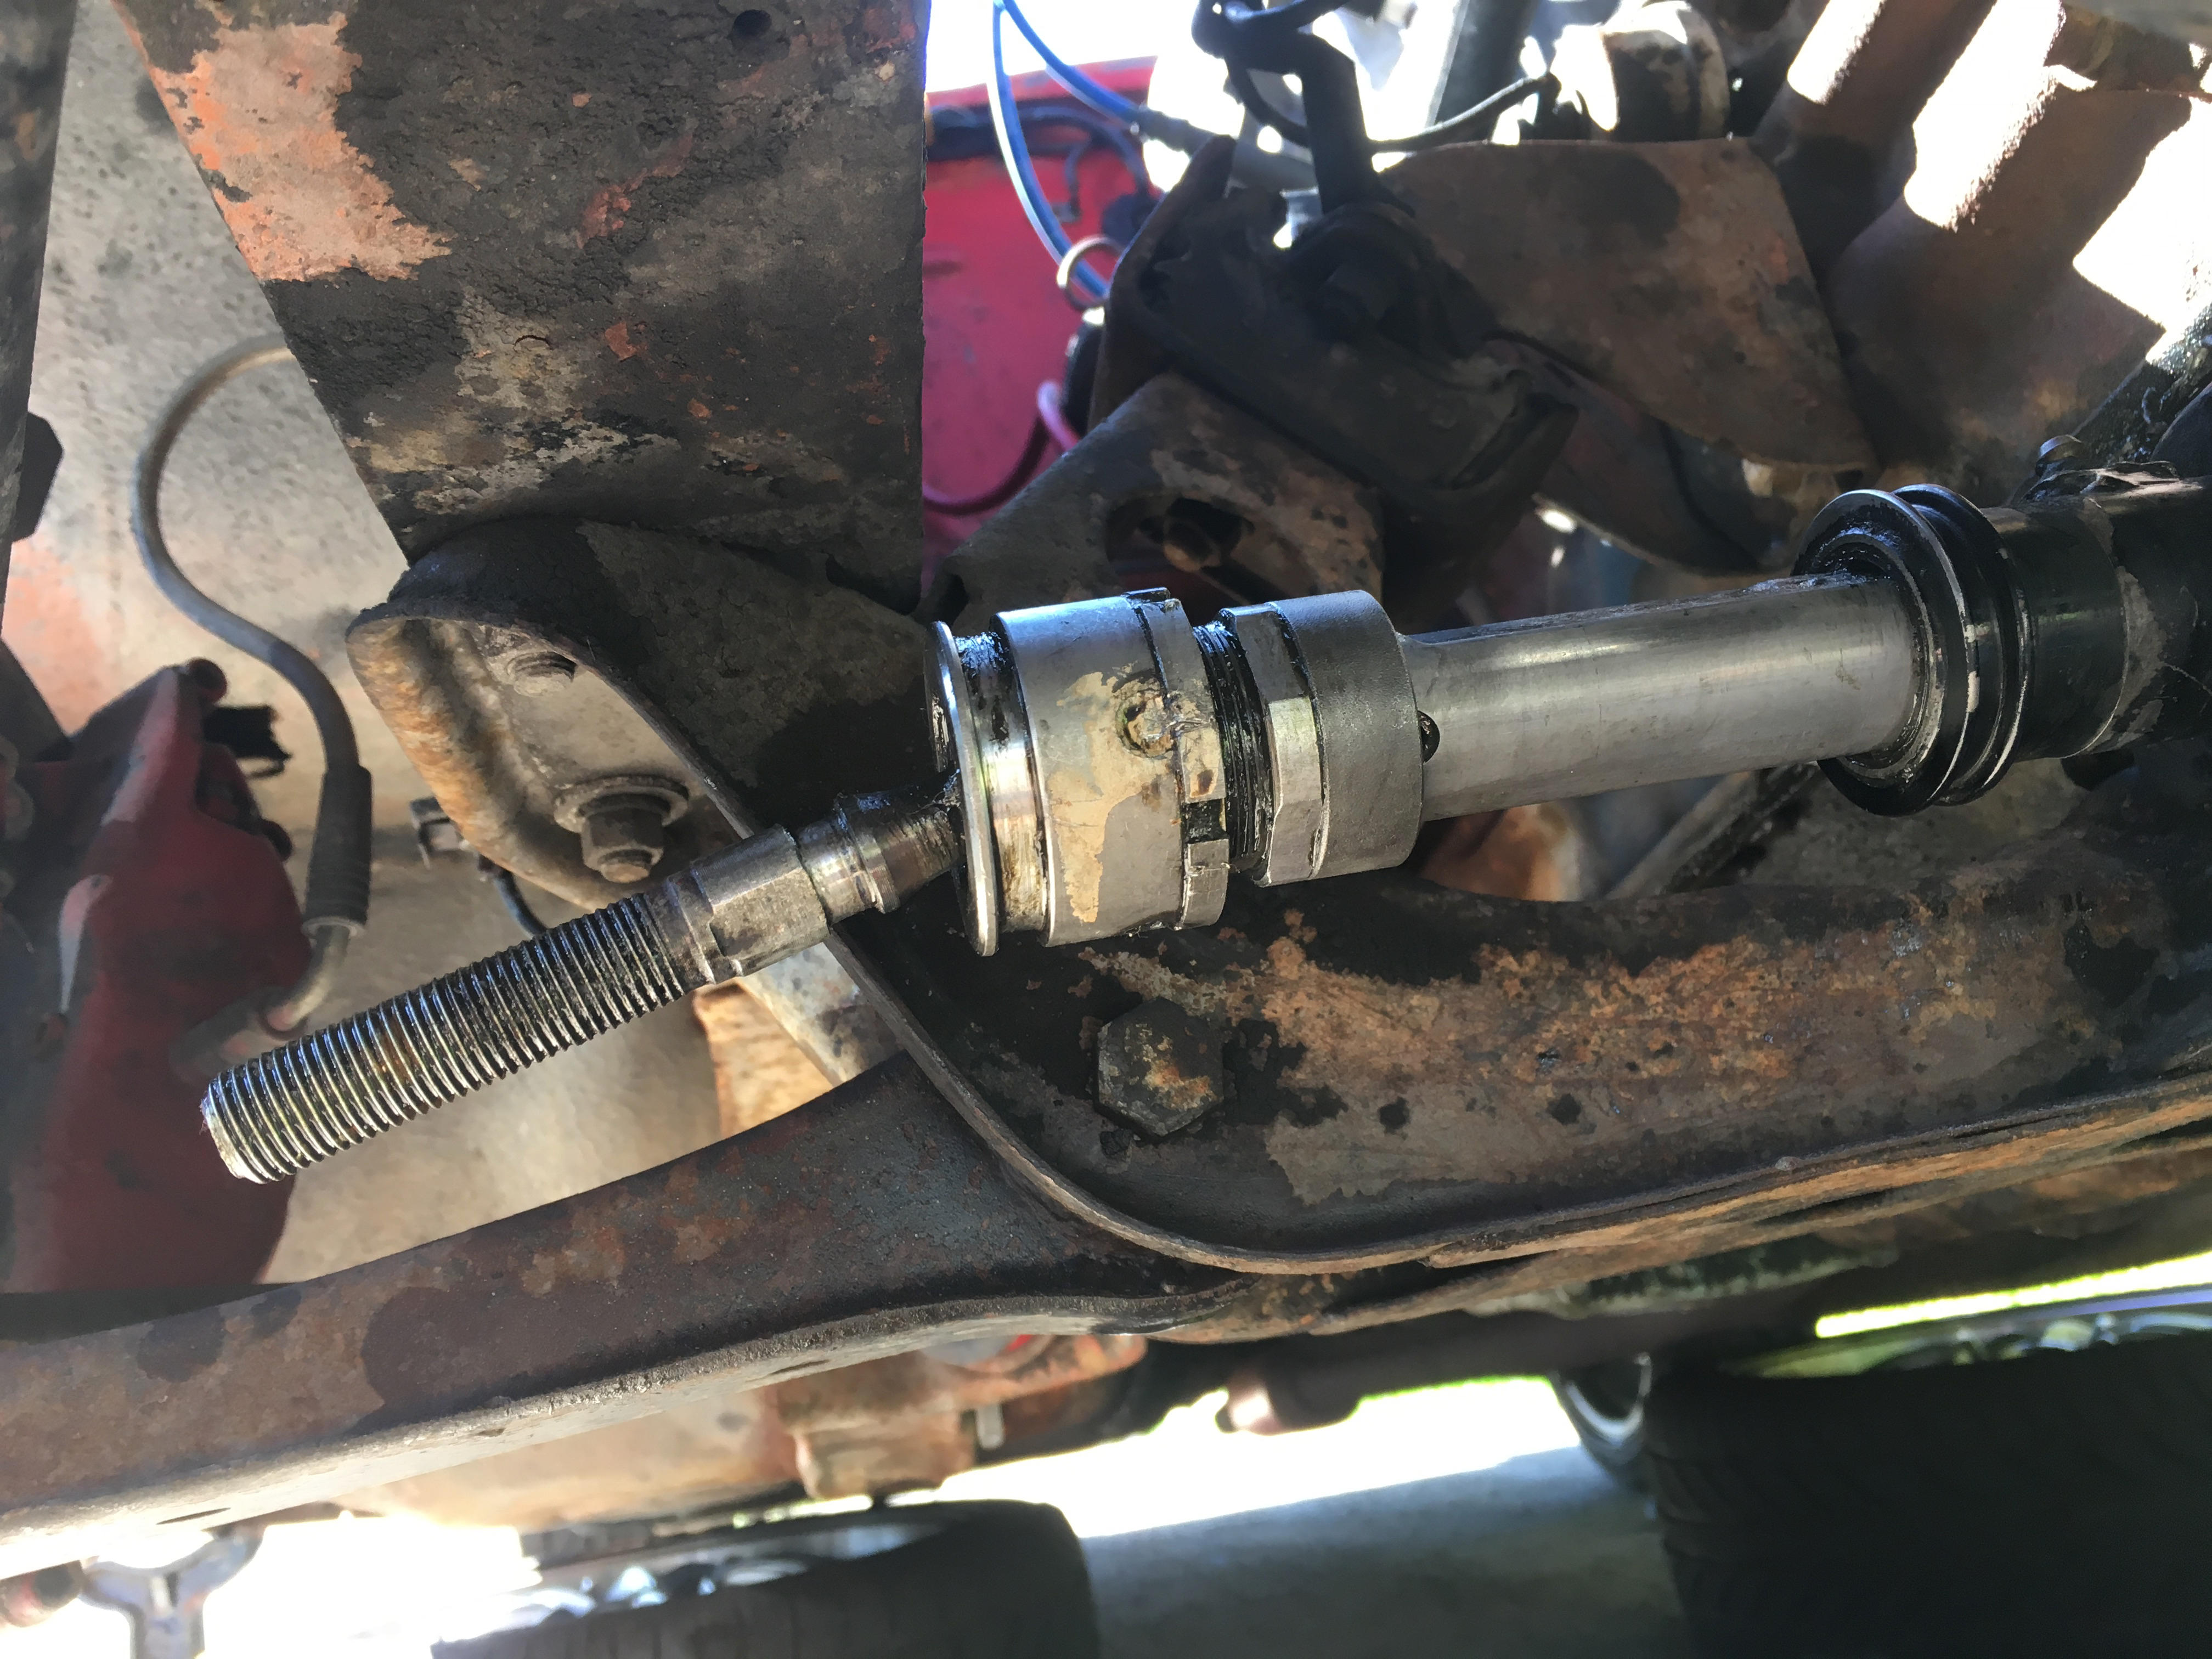
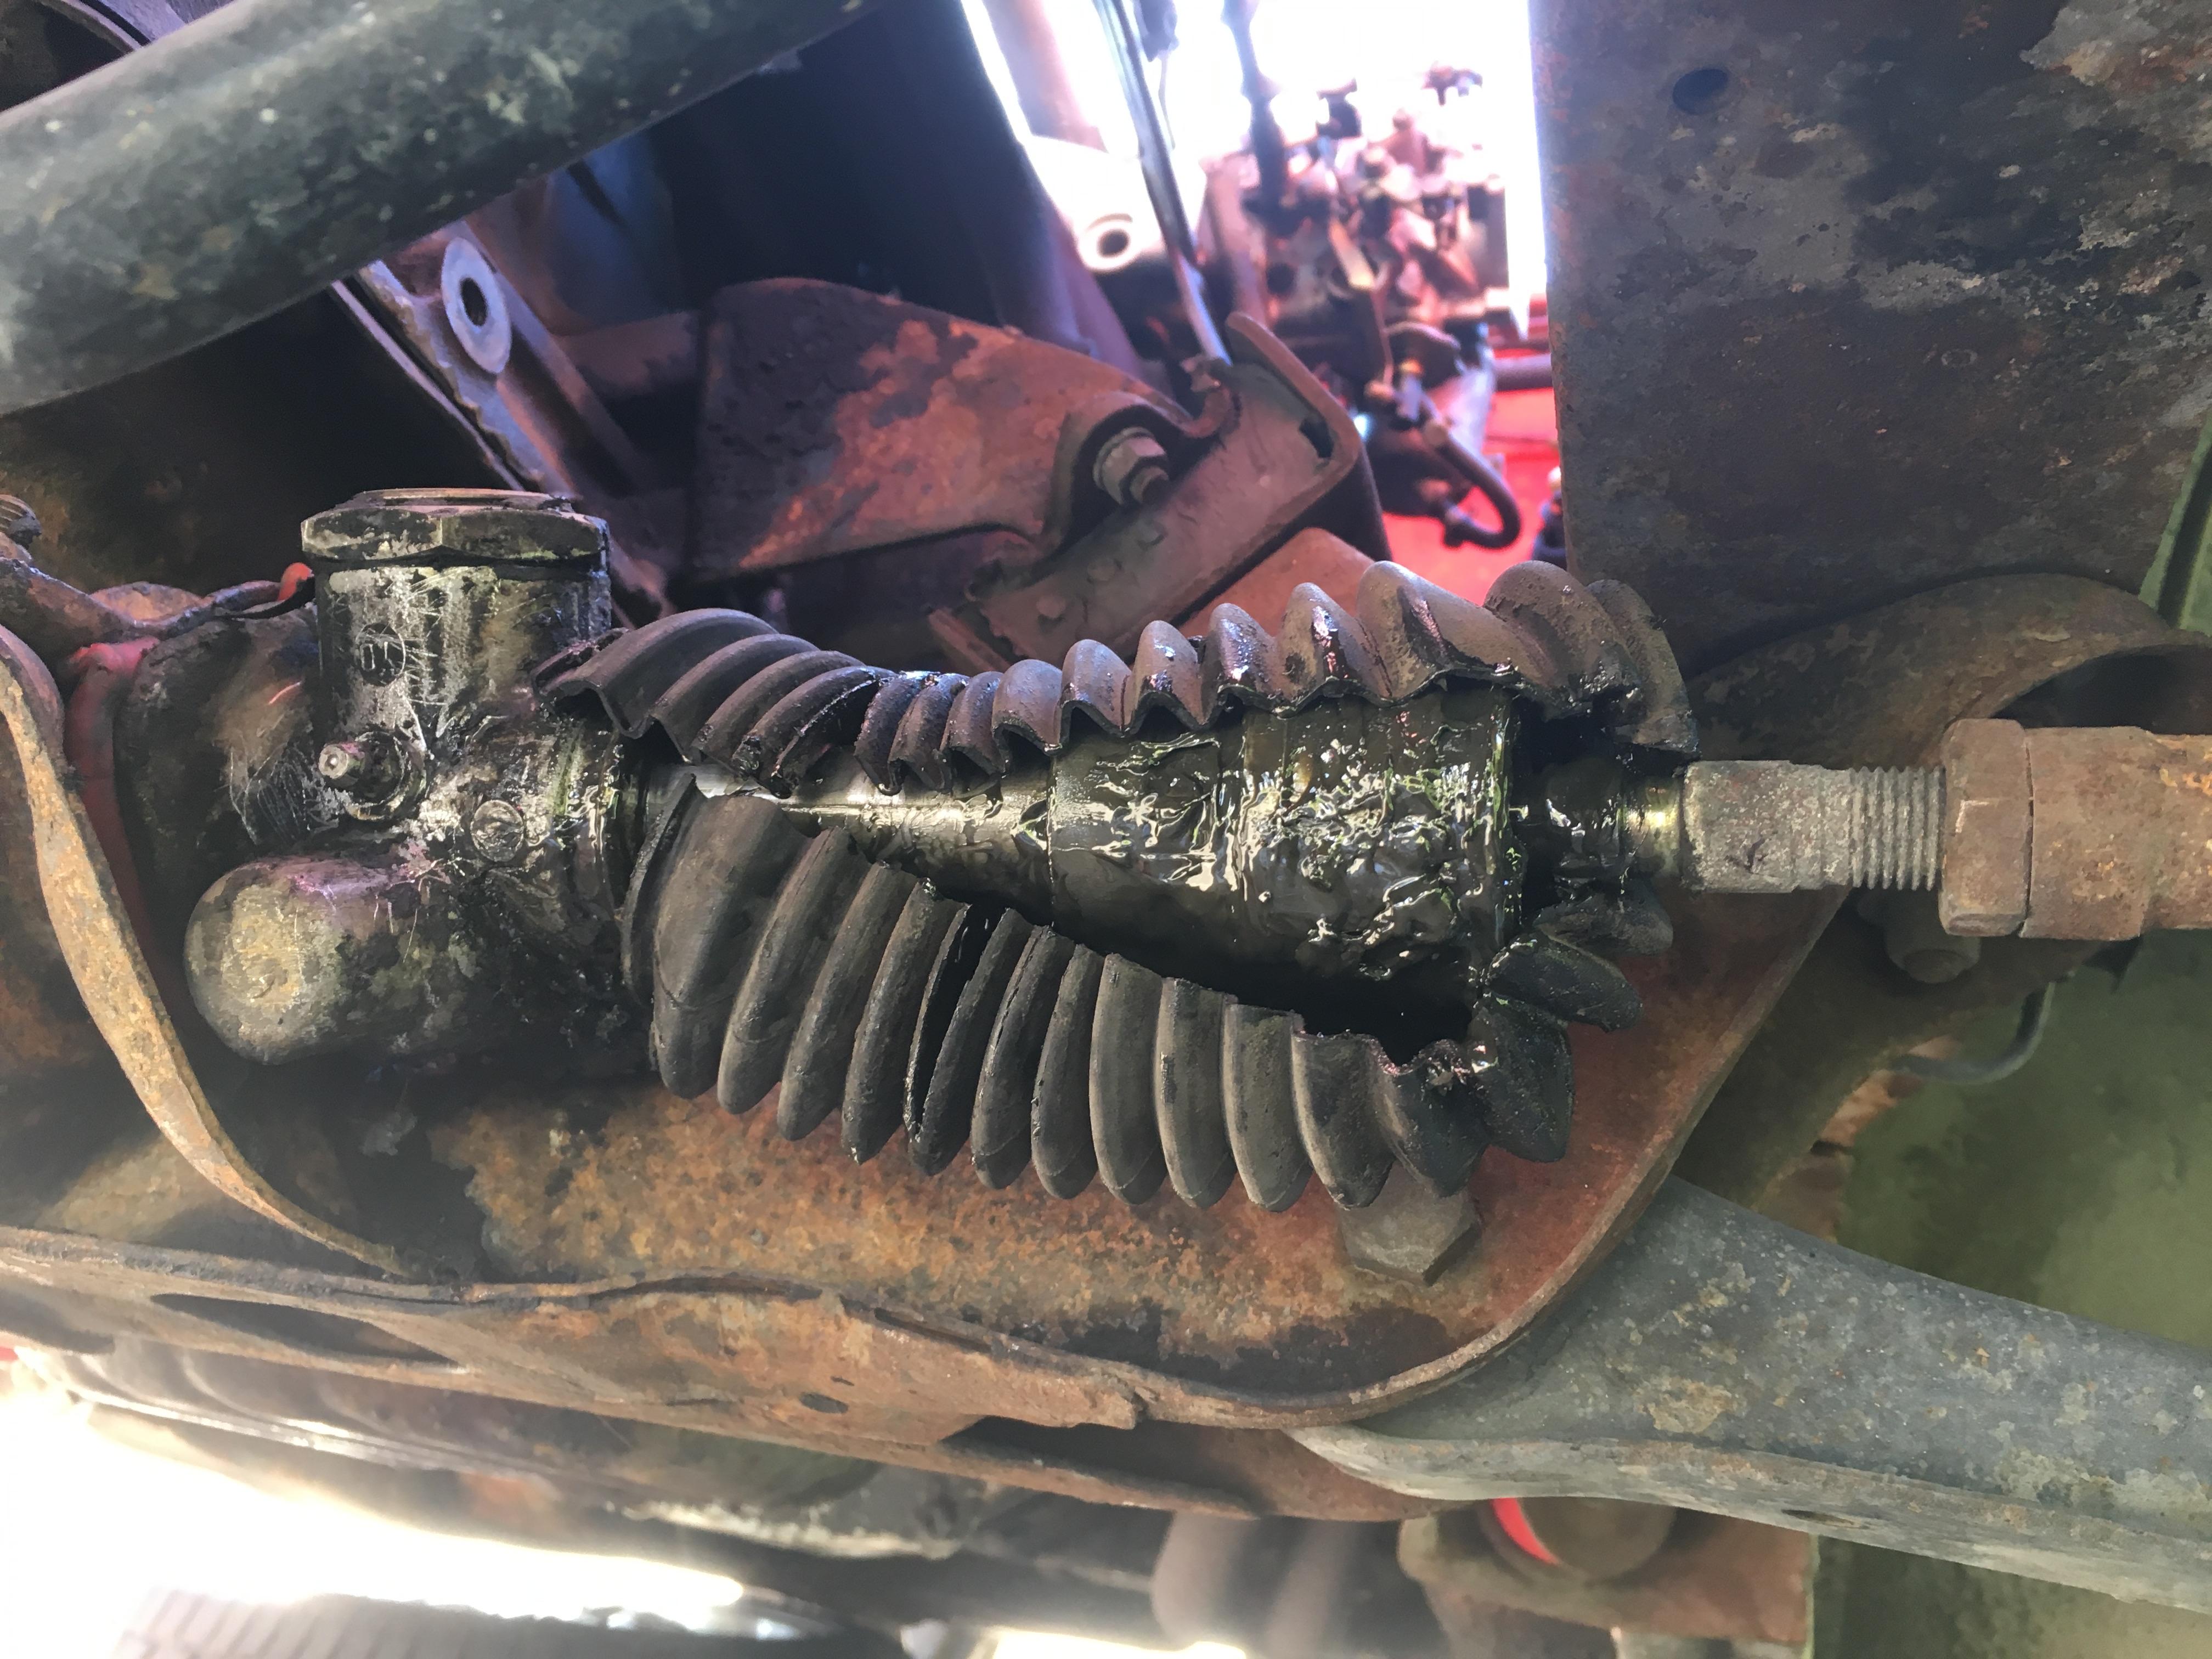
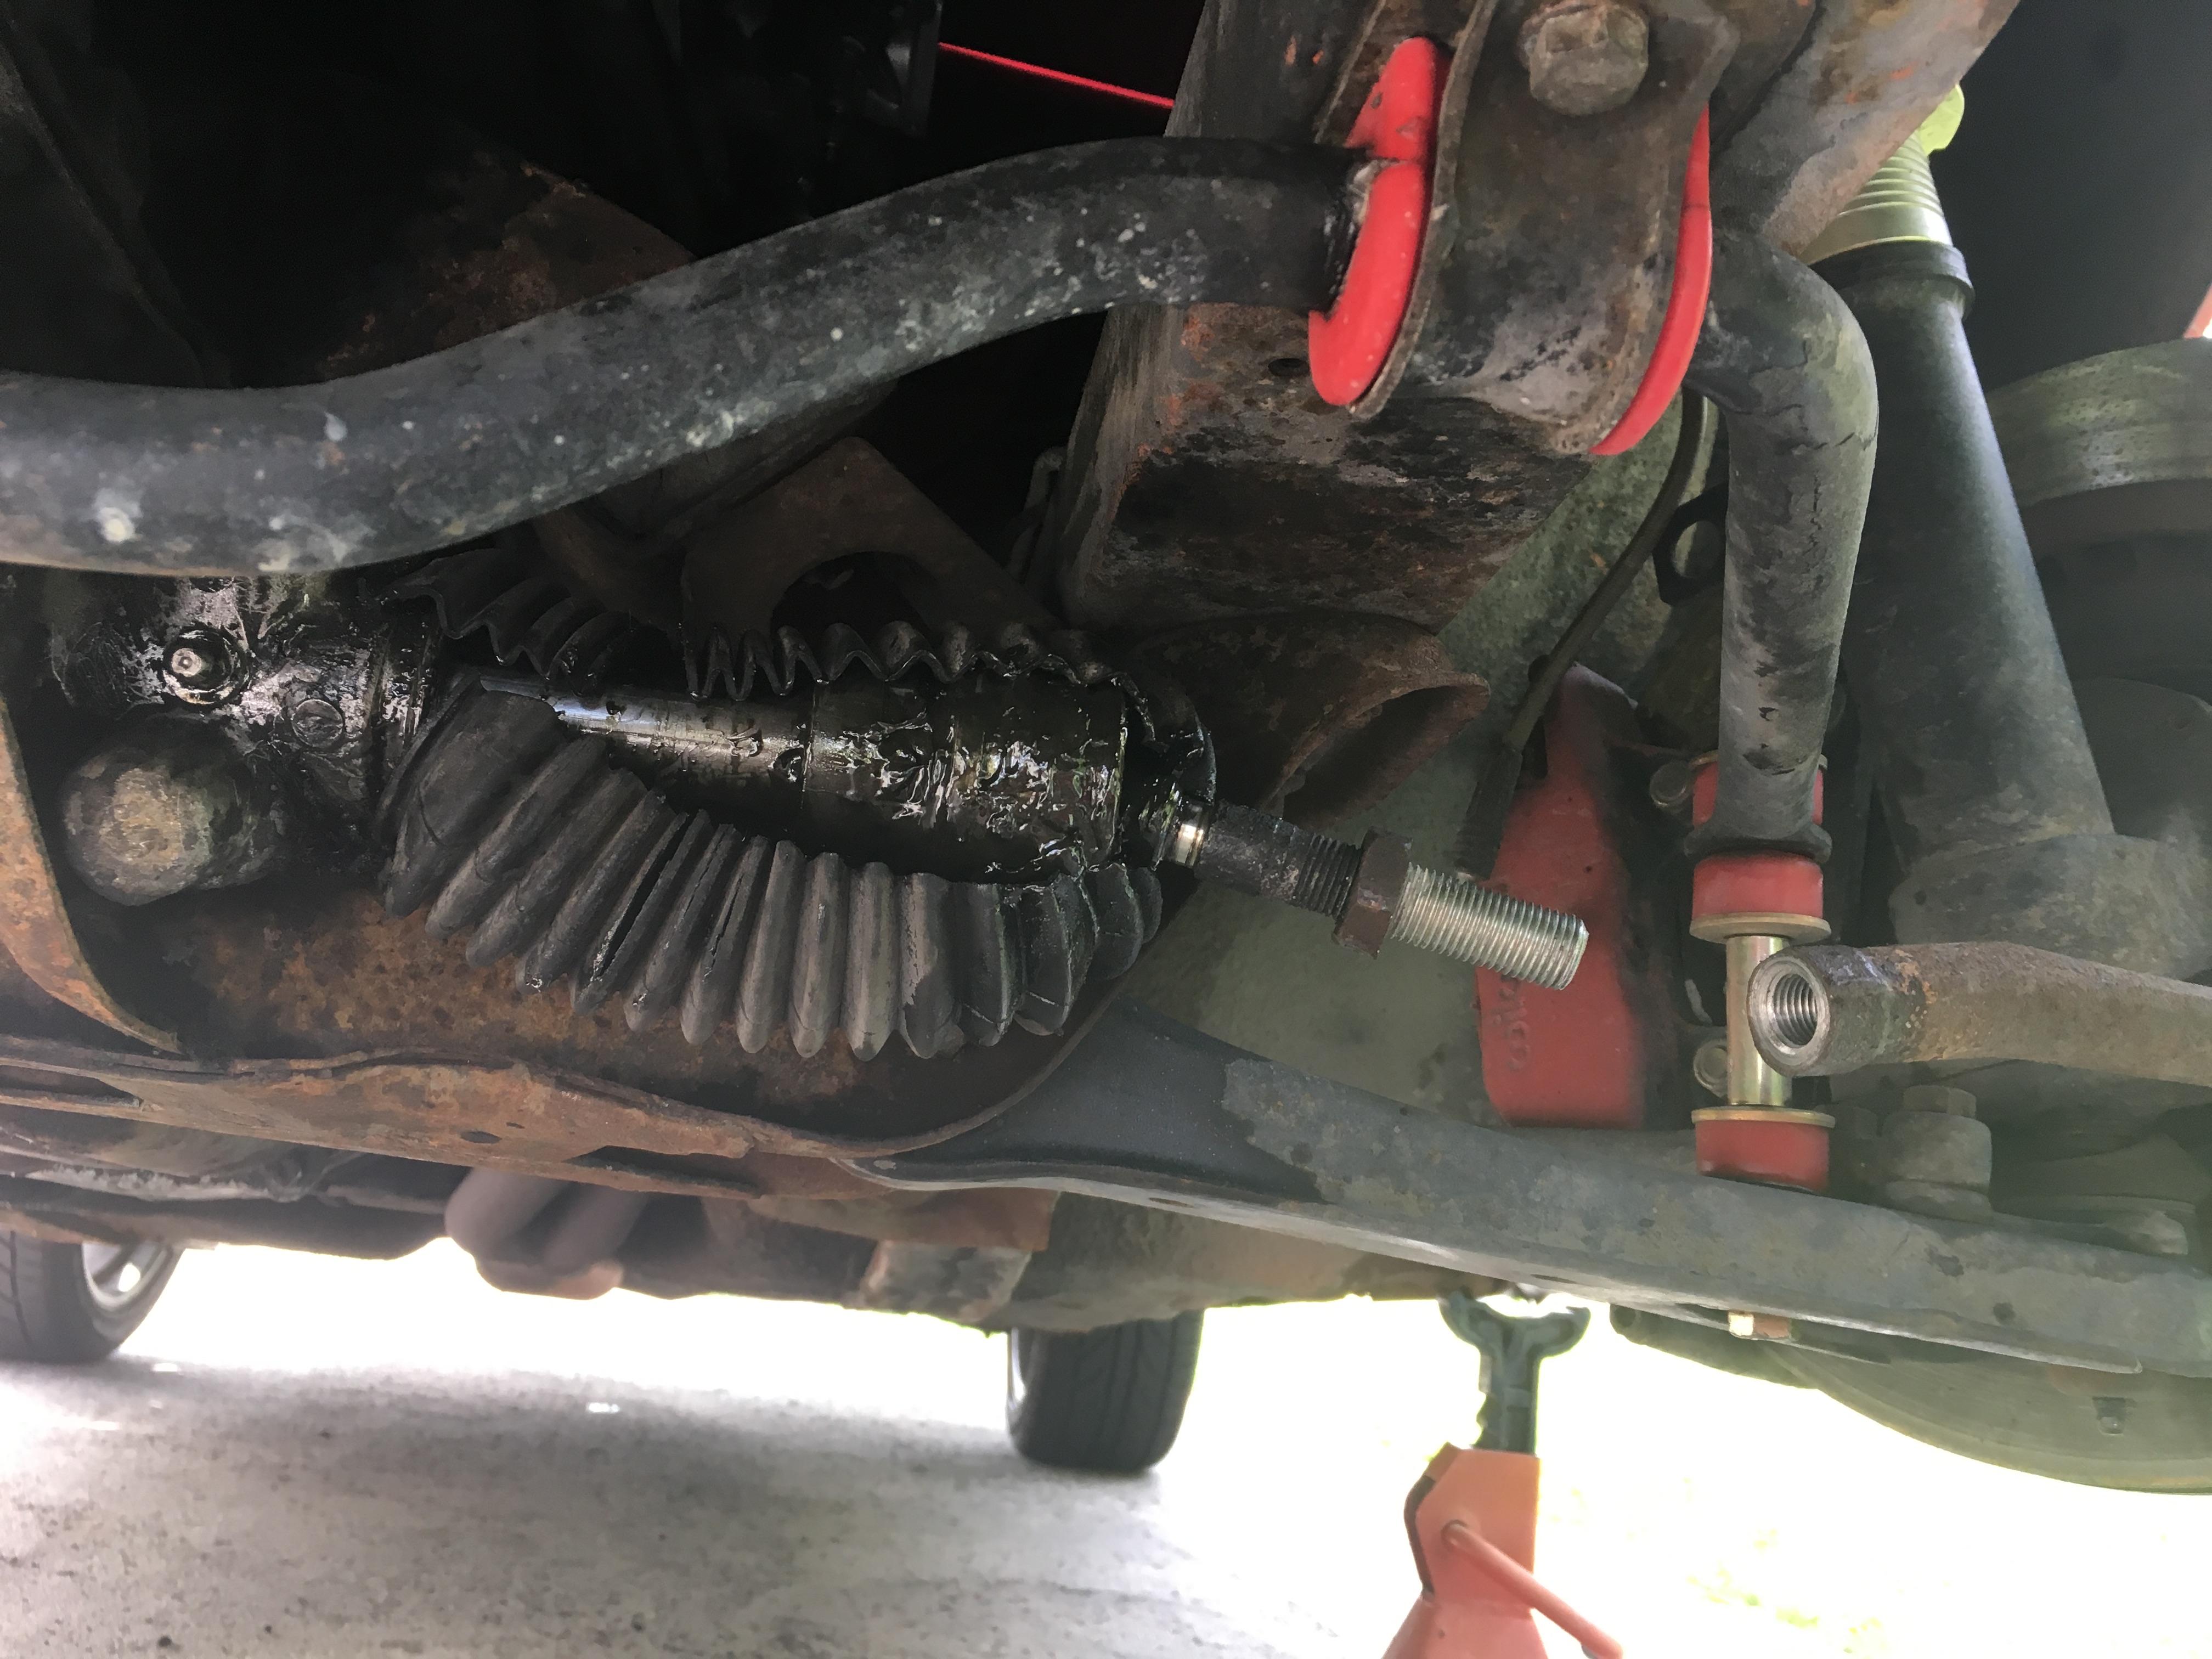
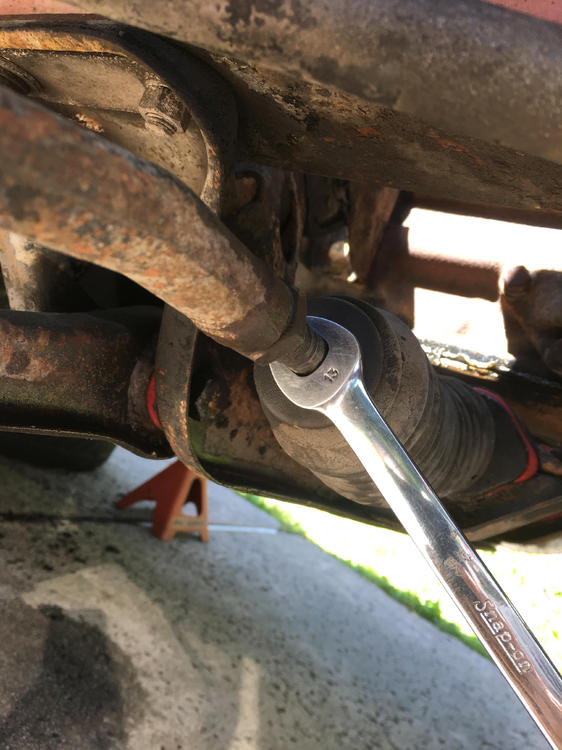
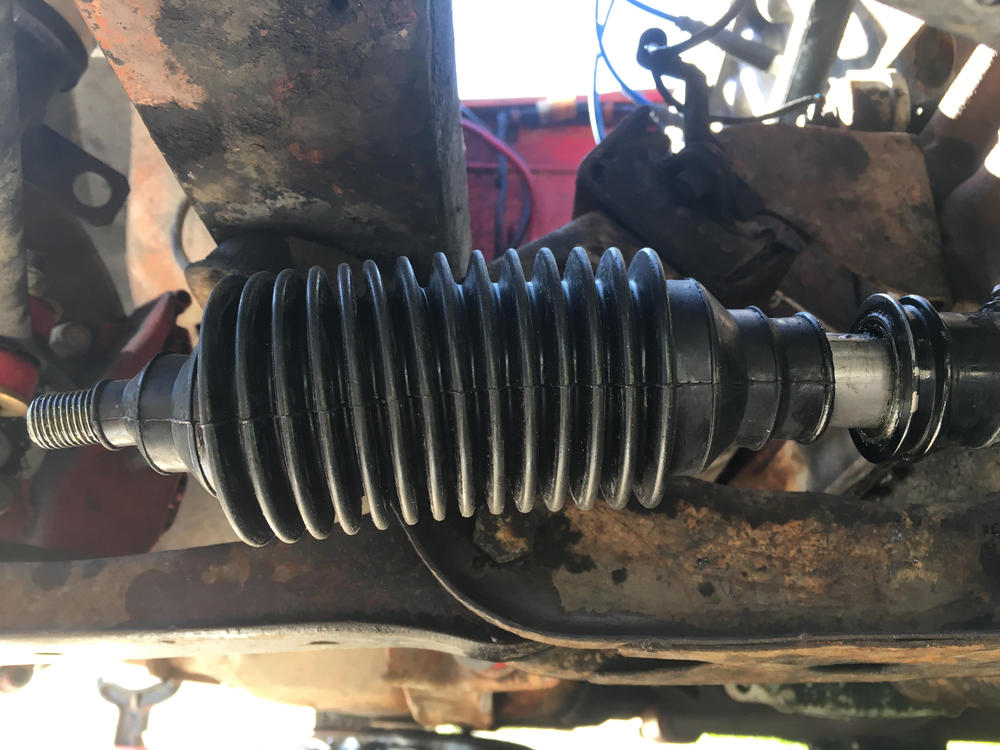
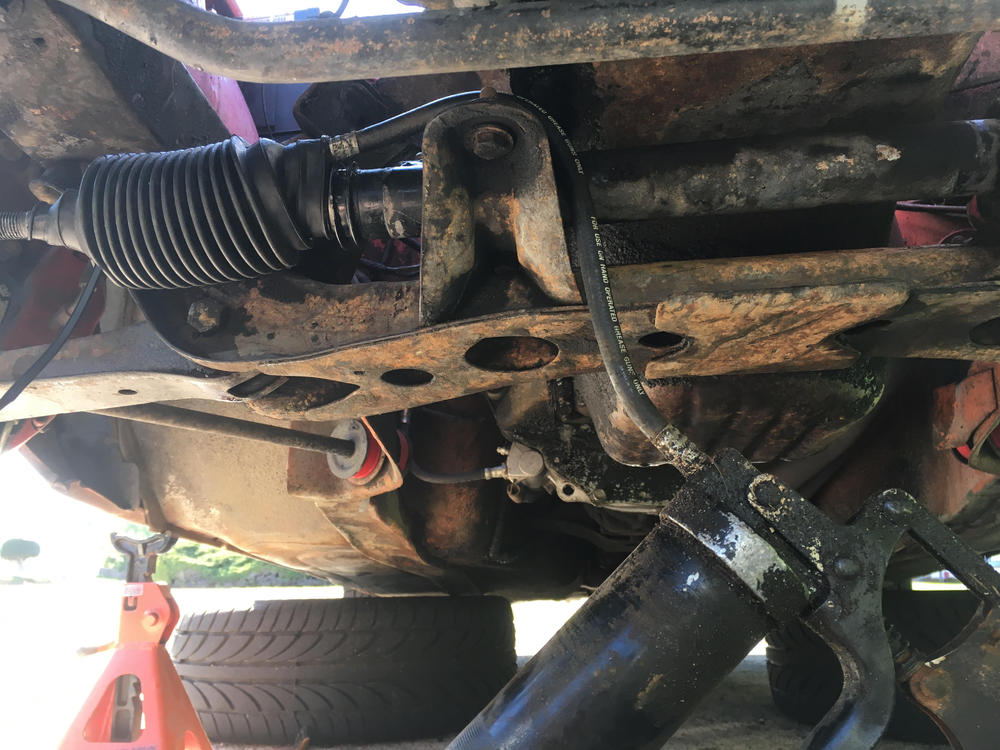
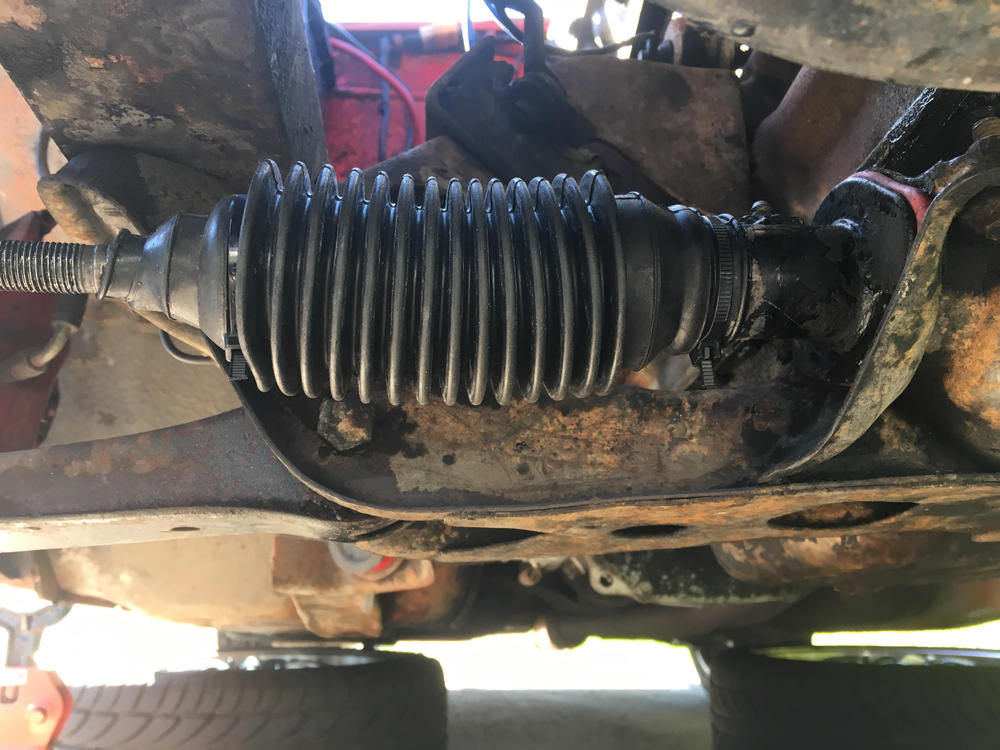
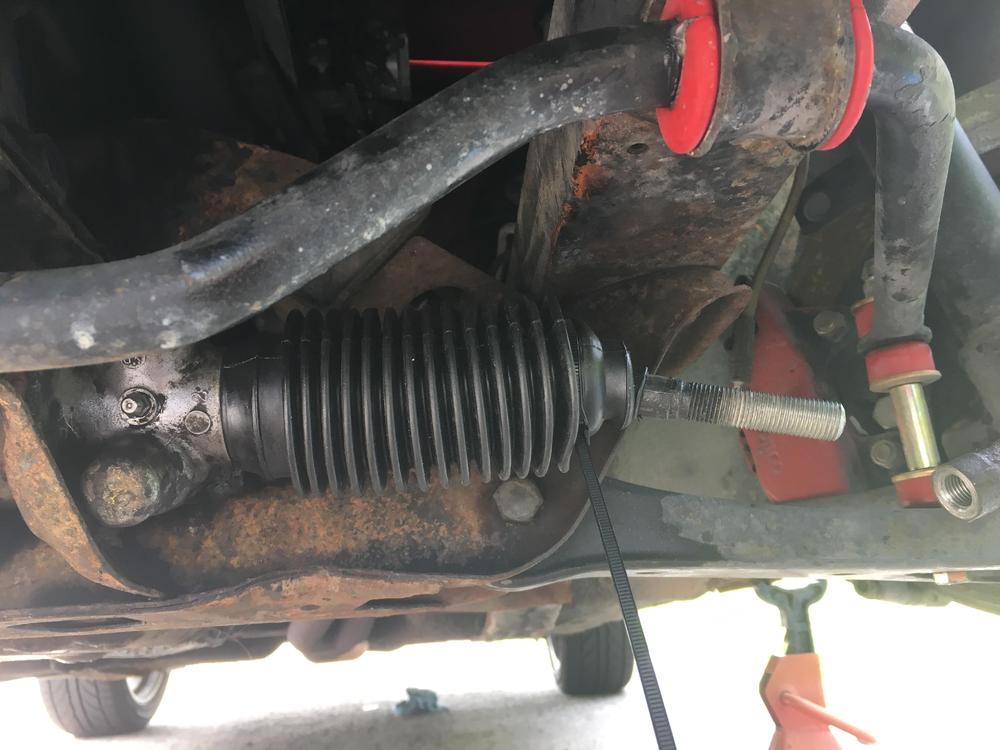
Been on this forum for 4 months, everyone super responsive to my Help Me! posts, about my new-to-me 72 240Z; time to contribute to the forum. Steering rack accordion boots were trash. Bought 23-4459 boots from MSA. First image sequence is for the passenger side. Unscrew the tie rod ends, clean the half shaft, install the new boots (had to trim one section from the small end, about 1/2" to clear tie rod nut), fill with grease, install tie wraps. Start with a full tube of fresh grease, so you don't run out half way and have to drive to 3 auto parts store looking for the same kind. Doh. Second image sequence is for the driver side. Basically the same drill, although had to trim one section from the big end of the boot, so it would fit. Took the opportunity to degrease the steering knuckle. Greased all the zerks afterwards. Didn't find it practical to count how many turns required to remove the tie rod ends, in order to put them back together w/o realignment. Way too imprecise. Just looked for where the tie rod had no grime, turned it in that far. See "passenger tie rod end removed.jpg" Plenty good enough to drive car to Wheel Works for alignment. Hope this helps someone.


-
Thanks SteveJ! That link gave me the clue I needed. After removing all 31 fasteners, the oil pan wouldn't slip down/out to the rear. The only thing I had to do was pull the spark plugs and use a 27mm socket wrench to rotate the crankshaft until the #1 cylinder (front most) rod journal was retracted upwards into the block. Nothing else required. After removal, degreased it thoroughly. Lots of pieces of old gasket material was in the sump! Put down a thin layer of Edelbrock Gasgacinch on the new Fel-Pro gasket plus a layer on the oil pan. Waited 5 min as per the directions, stuck the gasket to the pan. Temporarily put all the fasteners back in to make sure the pan holes stay aligned with the gasket holes, while it dried. Put down another layer on the block and block side of the pan gasket. Reassembly is just the reverse of disassembly, right? Isn't that what shop manuals say? Well the pan wouldn't slide in past the steering rack, stopping an inch short. Whacking on the tail end with a mallet didn't help, it wouldn't go. Realized that there was so much caked on grunge on the steering rack that it was costing me 1/8" of clearance. Once I degreased it, the pan slid right in. Last hurdle was the pan gasket separating from the pan, at the front end. Put two fasteners into the rear corners to hold the pan, then the front of the pan drooped. Using a little L-shaped pick, weaseled the gasket back into place. 29 fasteners later and it was done. Let it sit overnight before firing up. No more drips and leaks!
-
I've got a bad oil pan leak. Put my 72 240z on jack stands, removed all the fasteners, can't get the oil pan out to replace the gasket. Seems to be trapped by the rack & pinon steering mechanism. What's the method for getting the oil pan off? Thanks.
-
Need to leave Friday morning to participate in the Snow Ball rally, so only have two days to get everything back together and running. Wasn't planning on doing anything with the timing chain, but if there's something that needs checking before I button things up, I'd like to know what to check. Same goes for the distributor, oil pump, starter, radiator, valve cover before button up. Thanks!
-
Got the timing cover off today. Driving in the double ended sheet rock knife blades all the way around, followed by the gasket scraper gave me enough gap that I could whack the distributor housing and lower radiator housings with a 4# hammer plus a wood 1"x2" block alternately and slowly walk it off. Whew! The three sheared water pump bolts were all proud of the block by 10mm+ so used some pen oil, hammer shock, MAP cylinder then vice grips slowly back and forth, until they all yielded. Whew!! Although the timing cover came OFF w/o destroying the head gasket or oil pan gasket, not confident about reinstalling the cover w/o screwing up one or both of them. Maybe should remove the rest of the oil pan bolts, lowering it and moving it out of the way slightly. Then install the timing cover with the oil pan last?
-
Took off the starter today and wedged the flywheel so I could spin off the crankshaft pulley nut w/o disturbing TDC on #1. Needed a loaner puller from O'Reillys to extract the pulley. As of right now, I can't seem to get the timing cover to budge. Have removed all the fasteners around the perimeter, the two Ninja bolts on top and the oil pan bolts. I've cycled pen oil and MAP heat around the edges. Next up is to take some box cutter blades and drive them in around the perimeter, hoping to break the timing cover free of the block's front face. Any other suggestions would be appreciated.
-
Ken Ward 1050 Windsor Street San Jose, CA 95129 Thank you for your generosity. I insist on paying for postage and handling.
-
Got the engine set up at TDC on #1 on compression, by watching the valves, watching the piston, confirming with the distributor rotor. Turned the engine over via the 27mm crankshaft pulley nut. Scribed the distributor mount plate, removed the distributor. Removed the oil pump, after unbolting the sway bar from the frame rails. Ready to start removing the timing cover bolts. The crankshaft pulley has to come off. Is there a special tool needed for holding the crankshaft pulley while removing its nut? Thanks for reading.
-
To get #1 on TDC on compression: remove the valve cover, remove spark plugs, rotate engine via crankshaft pulley nut until #1 piston is at top travel limit with intake and exhaust valves closed, following the intake stroke? ZtooZ: "Ps I have a front cover set I don’t need happy to send it to you." Are you offering a timing cover or what? Thanks all!
-
Leaking water pump, possibly the original pump. Searched all the forums, Googled & YouTubed. Used pen oil, heat cycles, shocked the bolts, still 3 of 5 fasteners sheared during gentle removal including both M8 (one at the head and one at the threads) and the long skinny M6 (at the threads). sigh. Looks like to deal with extracting the sheared bolts, need to remove the timing chain cover. Sounds like draining the oil, removing the oil pump. Then can remove the distributor then the timing chain cover. Timing (points ignition) is good right now, want to remove the distributor w/o screwing up the timing. What's the pro method for setting up the engine before removing the distributor? Thanks
-
OK Thanks, I'll figure it out. Will shoot images during the project, willing to do a post project write up if anyone might find it useful.
-
Is there a write-up on the procedure to remove old cracked/split boots, replacing them with new boots? My searches didn't turn up any
-
Thank you, that worked MUCH better.
-
Working on my new-to-me 72 240z today. Successfully replaced the right side steering rack accordian boot today. Started on the left side boot. The jam nut refuses to back off, threatening to round off the nut points. On the right side, the jam nut has a right hand thread. On the left side, is the jam nut rotation direction reversed, as in a left hand thread? Thanks!
-
Been driving the car daily for a month. Forgot about the throttle and choke settings during the test. My throttle was closed and the choke was probably fully engaged. Will try it again, thanks!
-
New owner of a 72 240z coupe. Original engine. This weekend measured compression. Wondering what compression should be for a stock motor. Front to rear: 160# 160# 160# 158# 155# 146# The difference between 160# and 146# is 8.75%
-
Here's what I've found: when the wiper is turned on, if I "help" the wiper arms then it cycles normally. After raising the wiper arms, the motor can turn the main spindles, but really noisy and slow. Shot the main spindles and linkage joints with cleaner followed by lube. Now the wiper function is working again and quieter, but only when the windshield is wet. Maybe still need to pull the linkage and main spindles out again for a serious cleaning. Shouldn't be very difficult. Dismayed by how sluggish the wiper operation is, at either speed. Maybe it's working good as new and maybe it's near total failure. Might be time to look at a wiper motor upgrade with harness. Thanks to everyone who replied!
-
Thanks everyone for the suggestions! It's supposed to stop raining soon, so can go outside and give these tips a try.