


camaro-guy
Free Member
-
Joined
-
Last visited
-
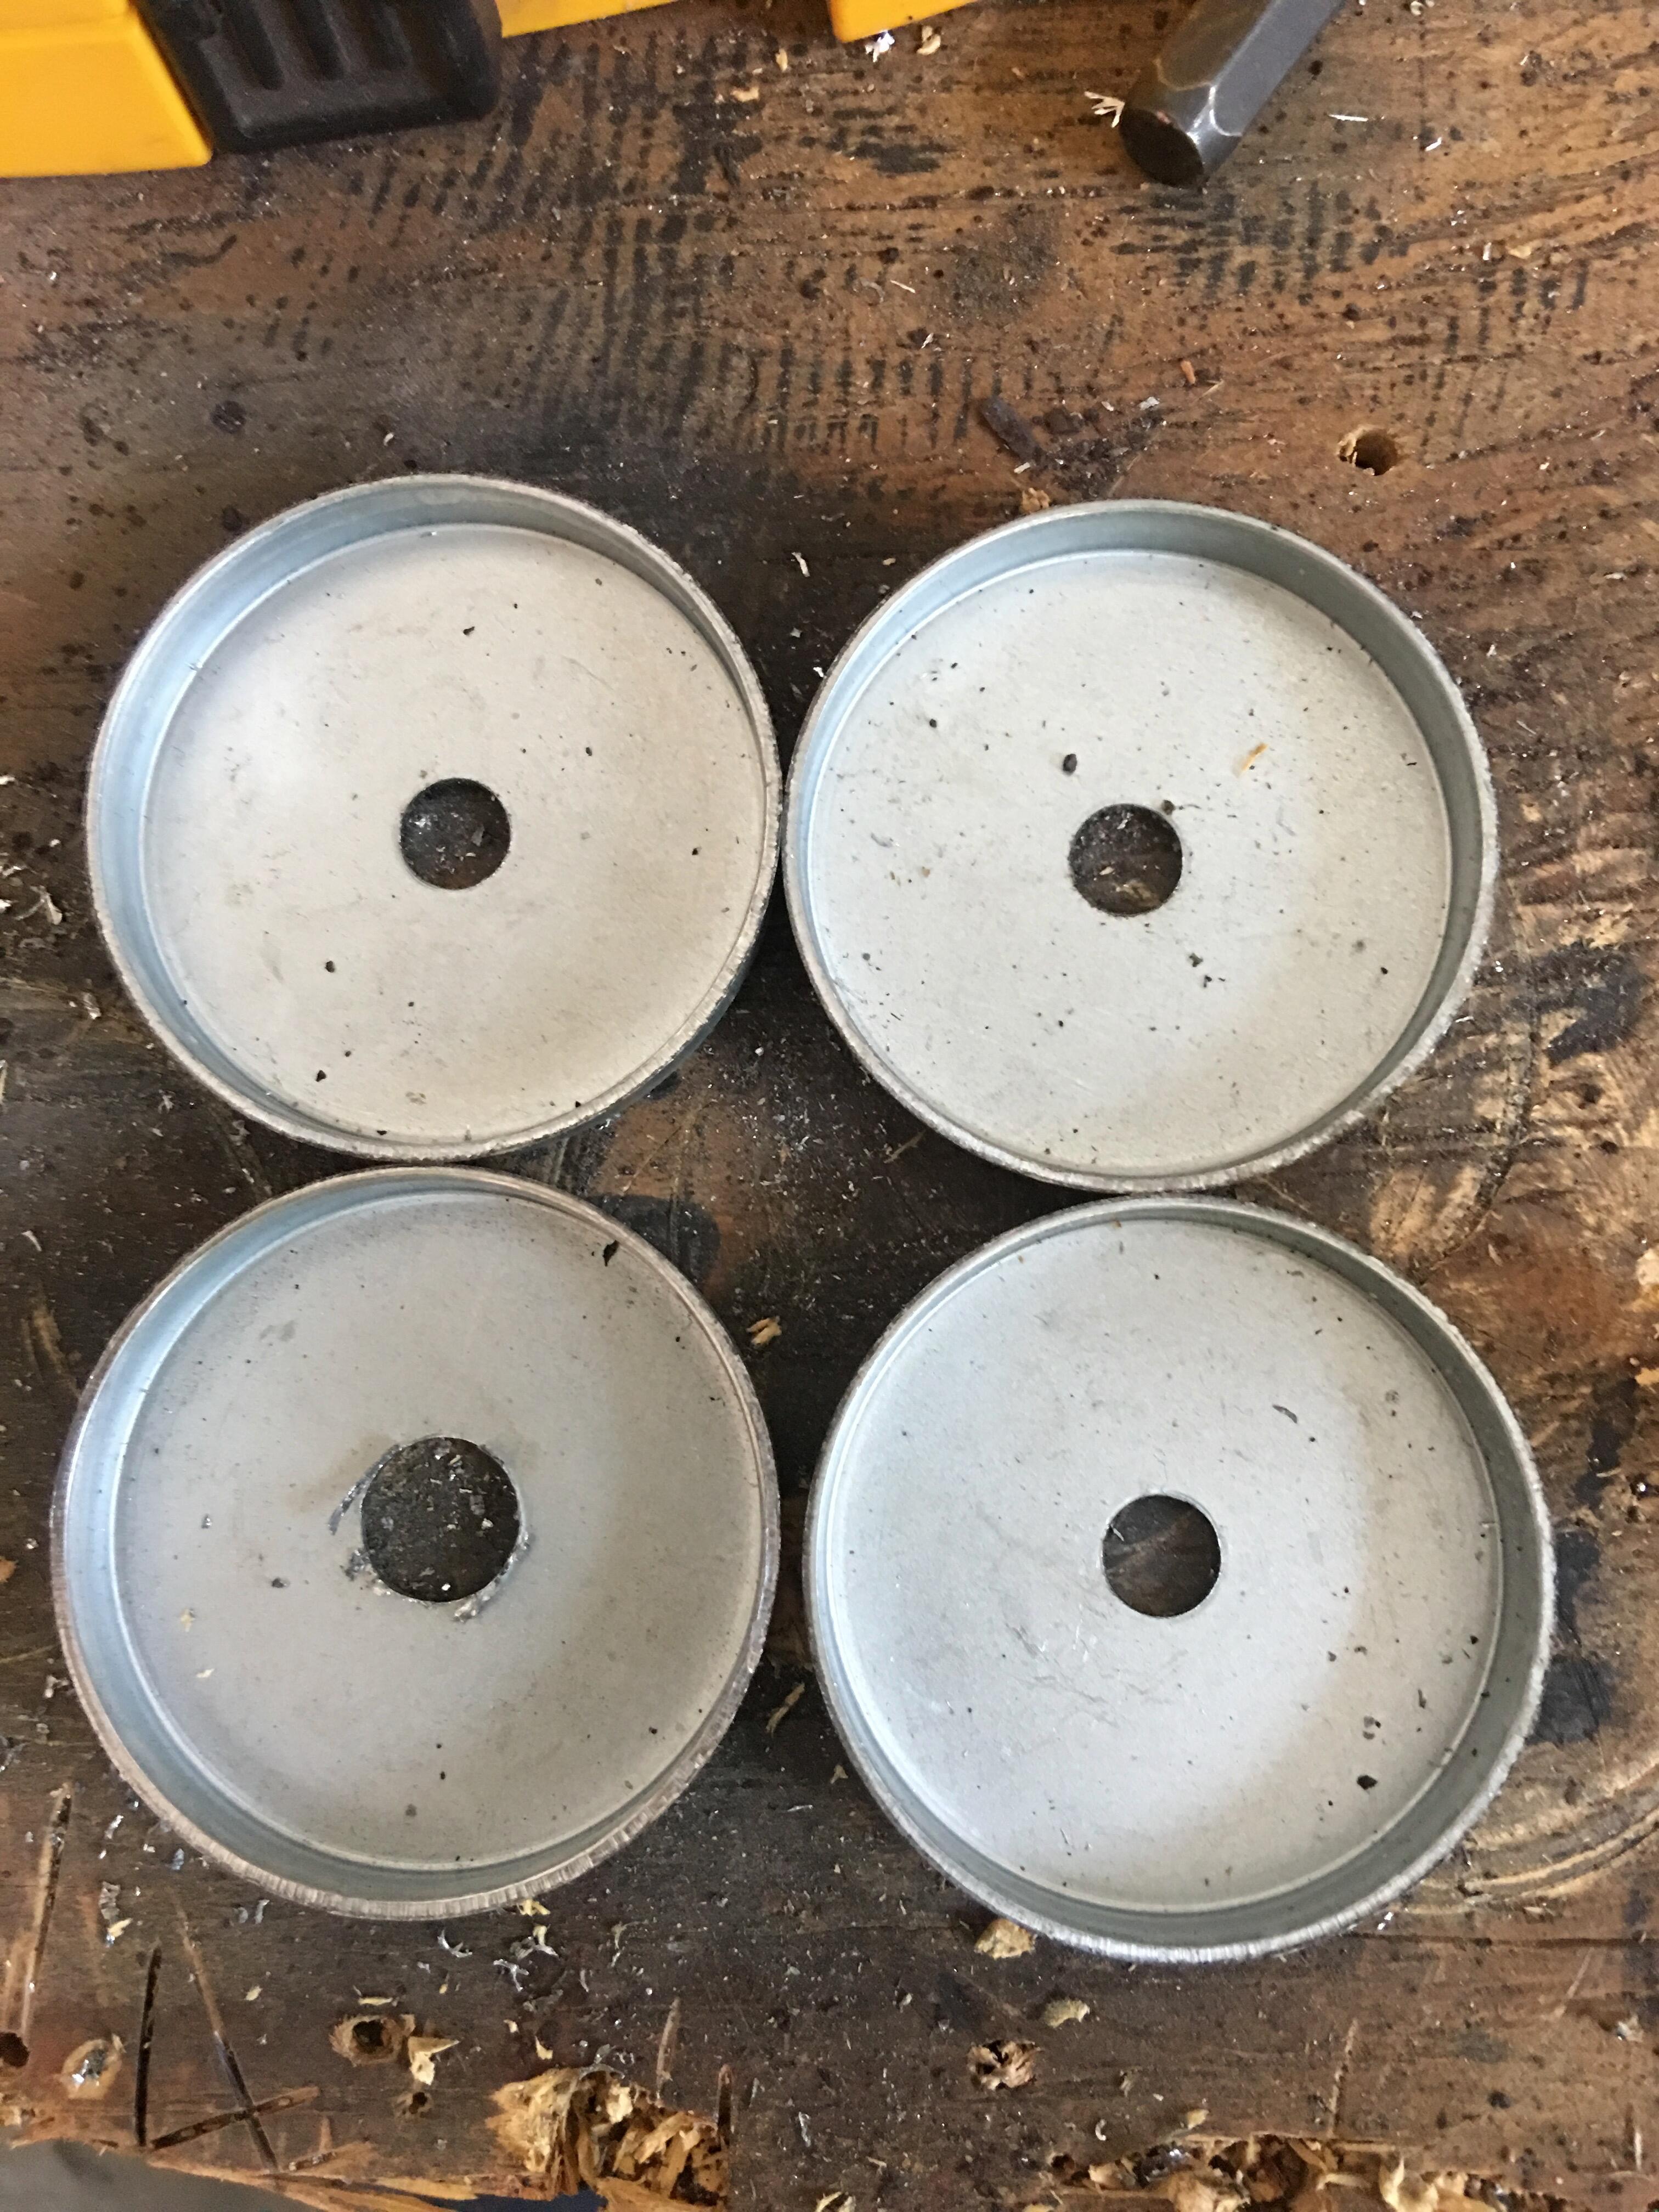
I used 4 inner fender well cup washers from a 1967 Chevelle for my sons 280z 2+2. They are widely available all over the internet. You will need to make the center hole larger. https://www.classicindustries.com/product/f14111.html
-
TJC1969, The knowledge here is amazing! Finding pictures or examples of these cups was very difficult. Once I had gotten all my answers from everyone here, I ended up cutting out a section and welding in a new section with a hole already pre-drilled. I then used the cups I found laying in my garage. The cups had to come off my first generation Camaro (1967-1969) or off my sons 67 Chevelle. They were almost perfect circumferance wise and just required the hole in the center to be drilled out to the proper size. I welded them in place and reassembled. The car has been on the road for a couple of years now. No problems whatsoever. Since the car is a daily driver for my son, I did not want to take a chance of one of those bars snapping, so we went with rubber on both sides. I hope this helps. I will look for more pictures to post. Camaro-guy

-
It was already on the car and fully assembled when I noticed. I placed a block of wood against the firewall and was easily able to move the camshaft forward using the curved portion of a long pry bar. There was not a lot of room, so it was the only thing I could think of. Everything is on, timing lines up nicely, so we are moving on. Kid has homecoming in a few weeks! Remember those days! Camaro-guy
-
You guys are absolutely correct! I have been pretty nervous about this whole head swap and I completely over looked the obvious. We will try to tap it forward this morning with a rubber mallet! Project is back on the move! Thanks again! Camaro-guy
-
site unseen, Yes, I wasn't going to use their name, but yeah camaro-guy
-
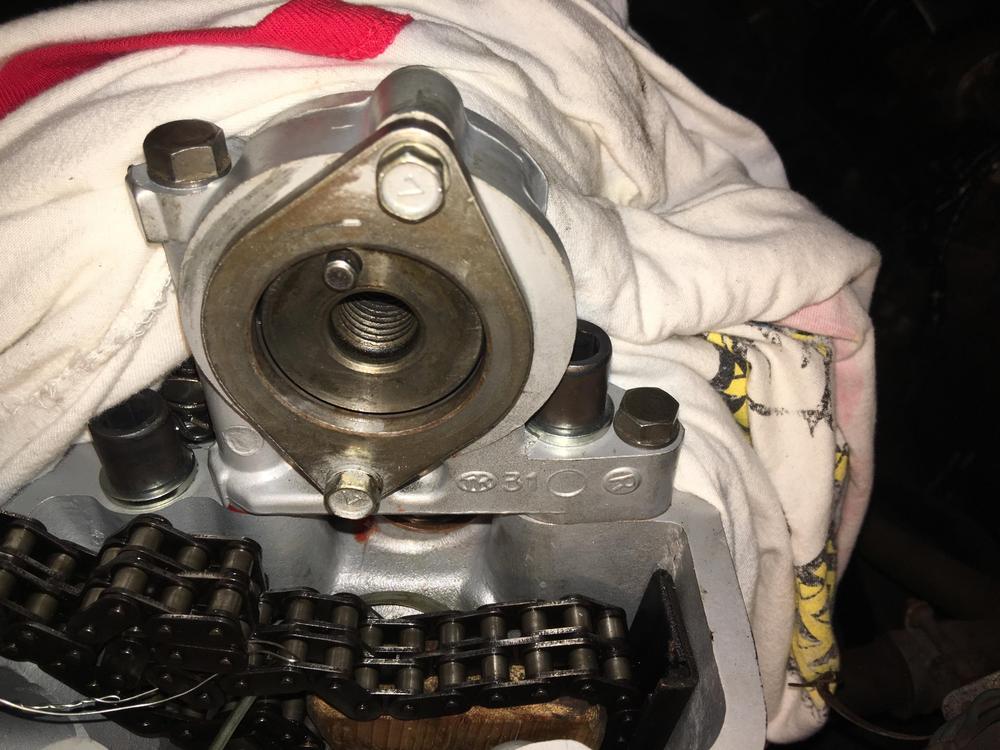
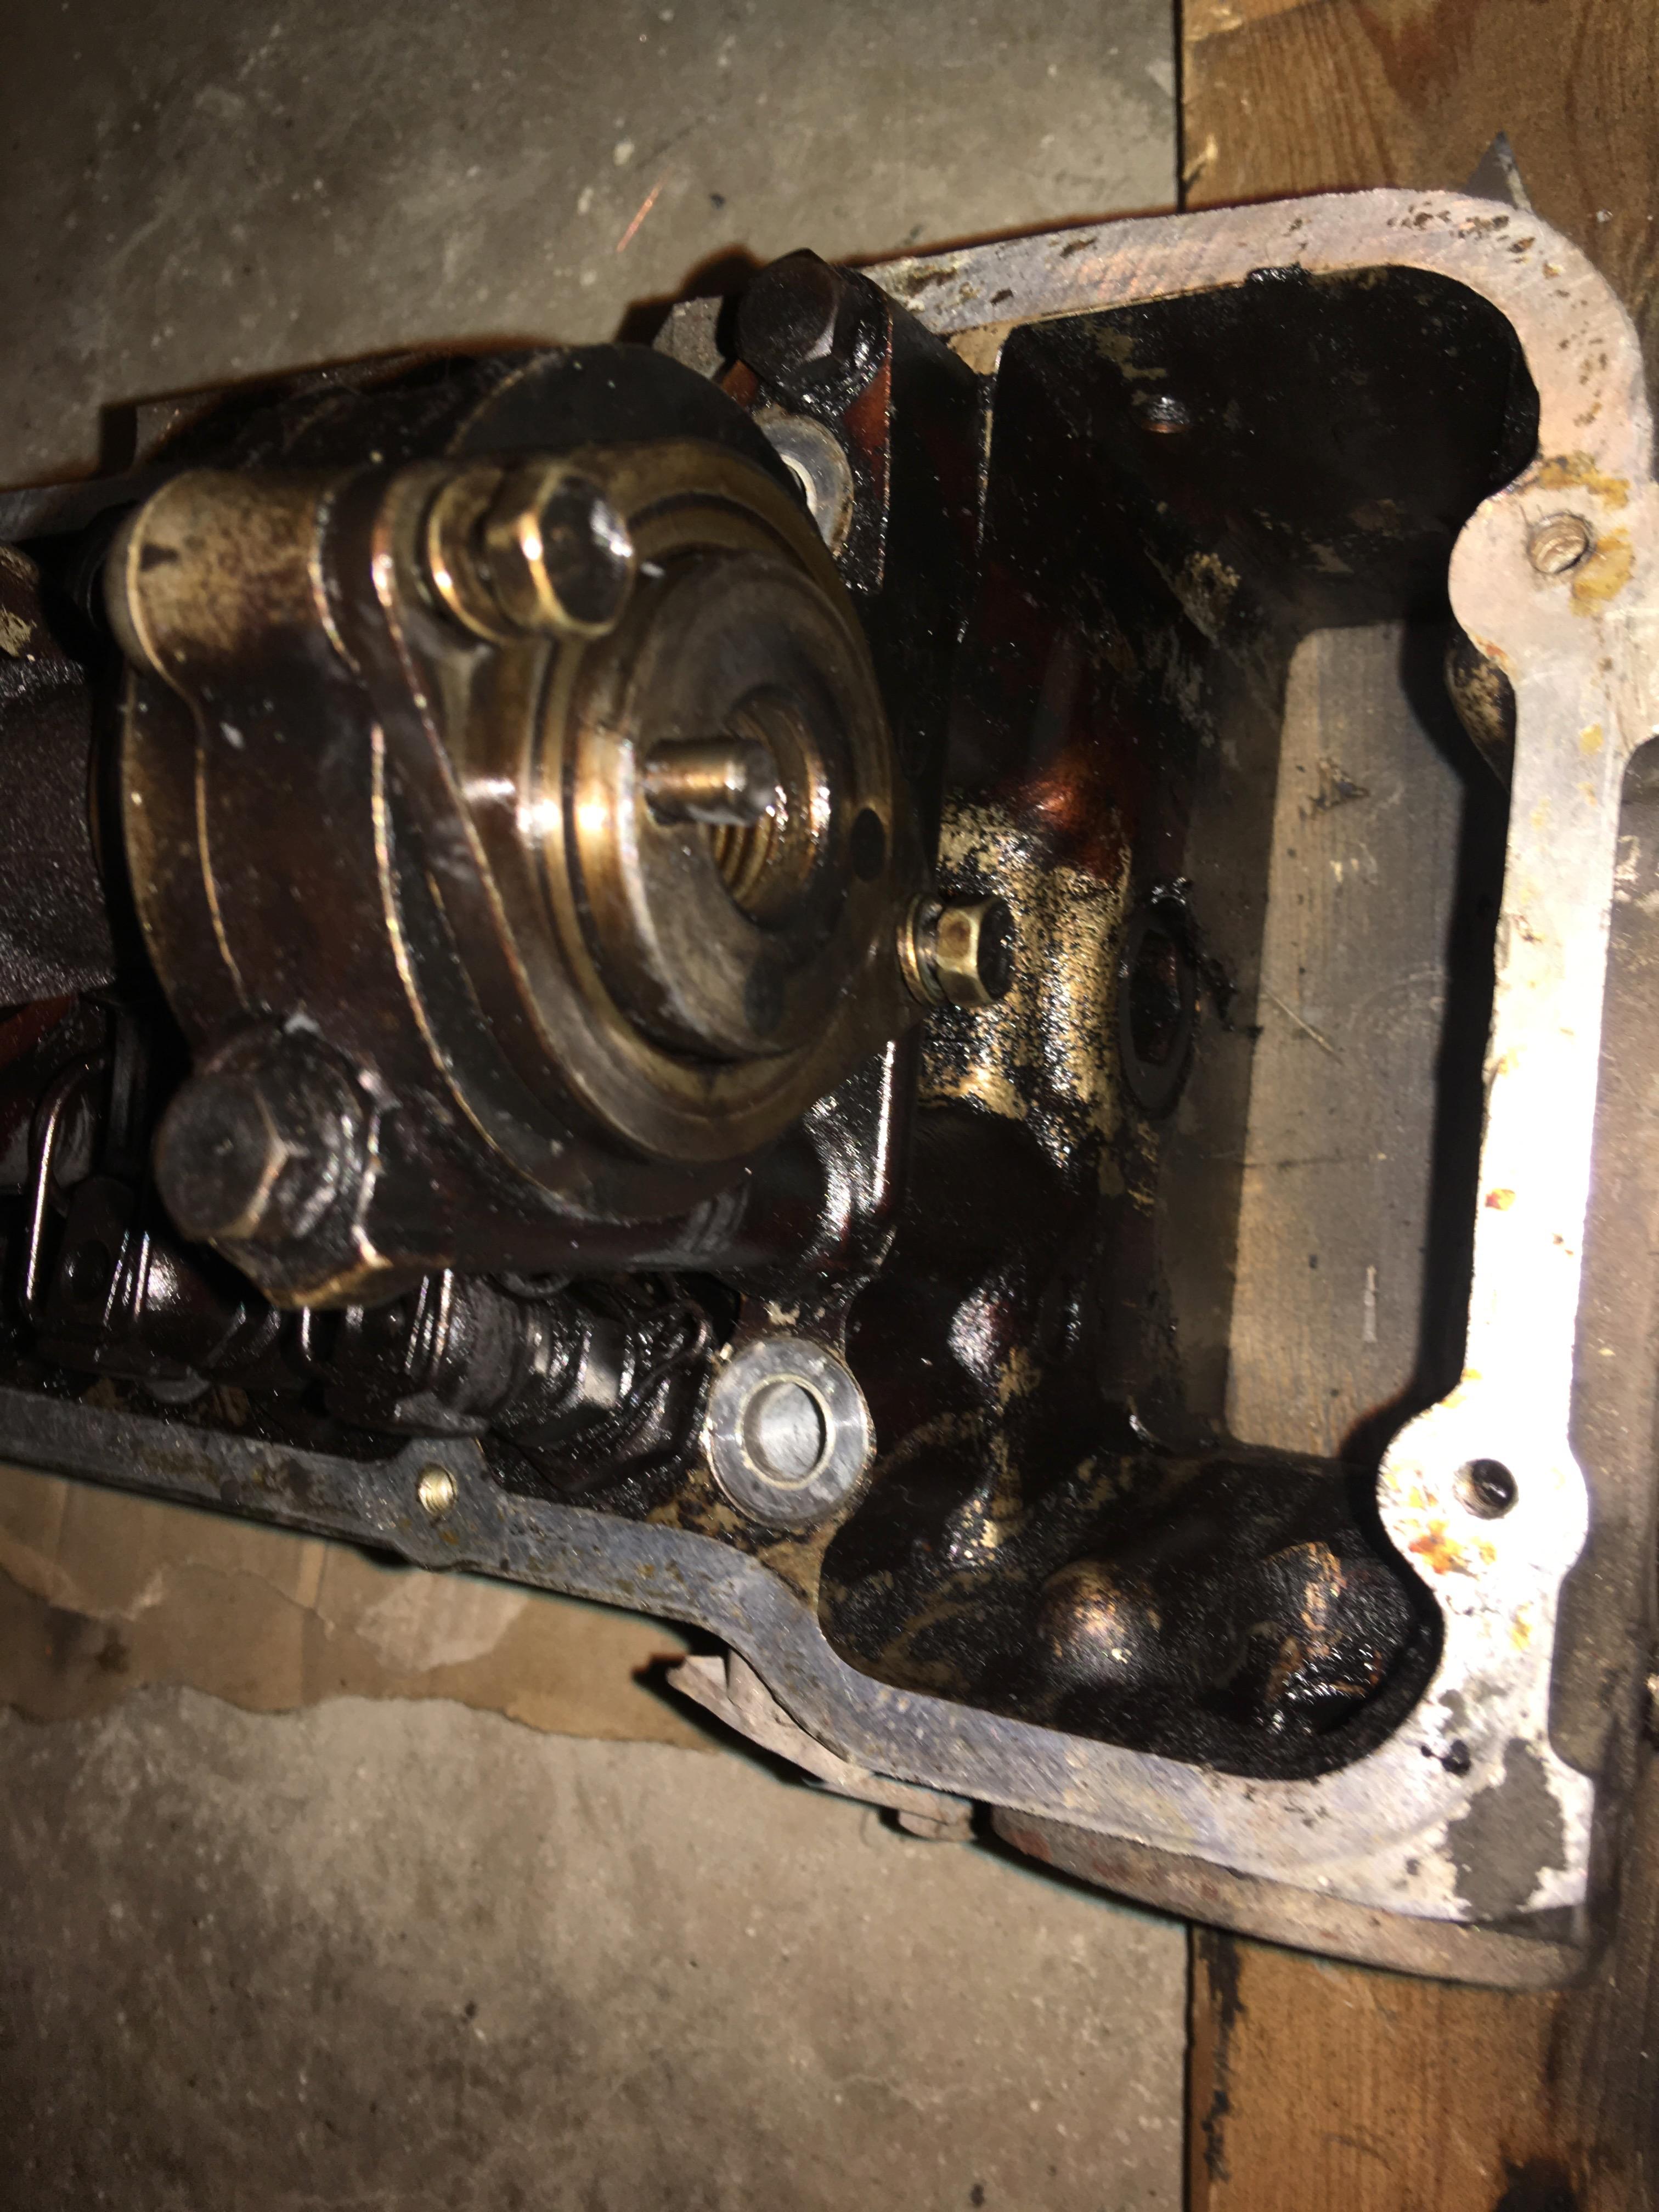
My son and I bought a rebuilt n42 head. We have replaced the head, but when we went to install the cam sprocket, we noticed the end of the cam is different. The first Pic is a pic of the head we took off and the second is of the head we put on the car. The place where the sprocket mounts is different. Got any ideas on how we should tackle this problem? camaro-guy

-
I have a friend who is a professional welder, so I have left him a message to see if he would be willing to help. I like the dies you made, and they should not be that difficult to replicate. Is it possible for you to give me the dimensions of your dies, the inner diameter of the cups, or anything of that nature? Are the cups the diameter of the bushing when compressed or straight out of the box? What is the thickness of the metal the cups are made out of? How deep are the cups? Otherwise I may just have to make some educated guesses and see how it goes. I'm in the middle of the boondocks and there are no Dstsun experts near me that I know of.
-
Ok, so if I understand what you are saying: I should look at disassembling the bracket, replace the center section, and reassemble it on the frame?
-
I do have the original rods, and they appear to be in pretty decent condition...
-
No offense taken...The image looks so different from what I actually have left, that I guess it was hard to believe... camaro-guy
-
So, should there be a "Cup" on each side of the bracket the compression/tension rod passes through?
-
I do not mind welding in a new section. What size is the hole in the center? Is it just large enough for the end of the tension rod to pass through it? Camaro-guy
Any idea how I am going to fix this, or where to go to get something to fix it with? Is that a 76 Datsun 280z in your picture? Camaro-guy
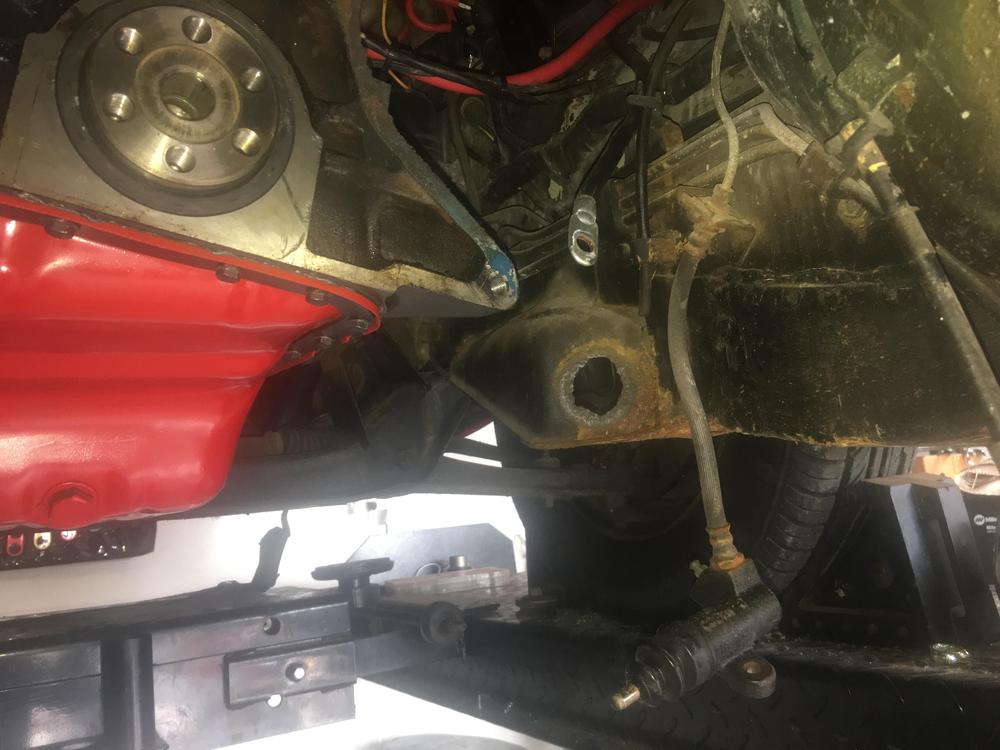
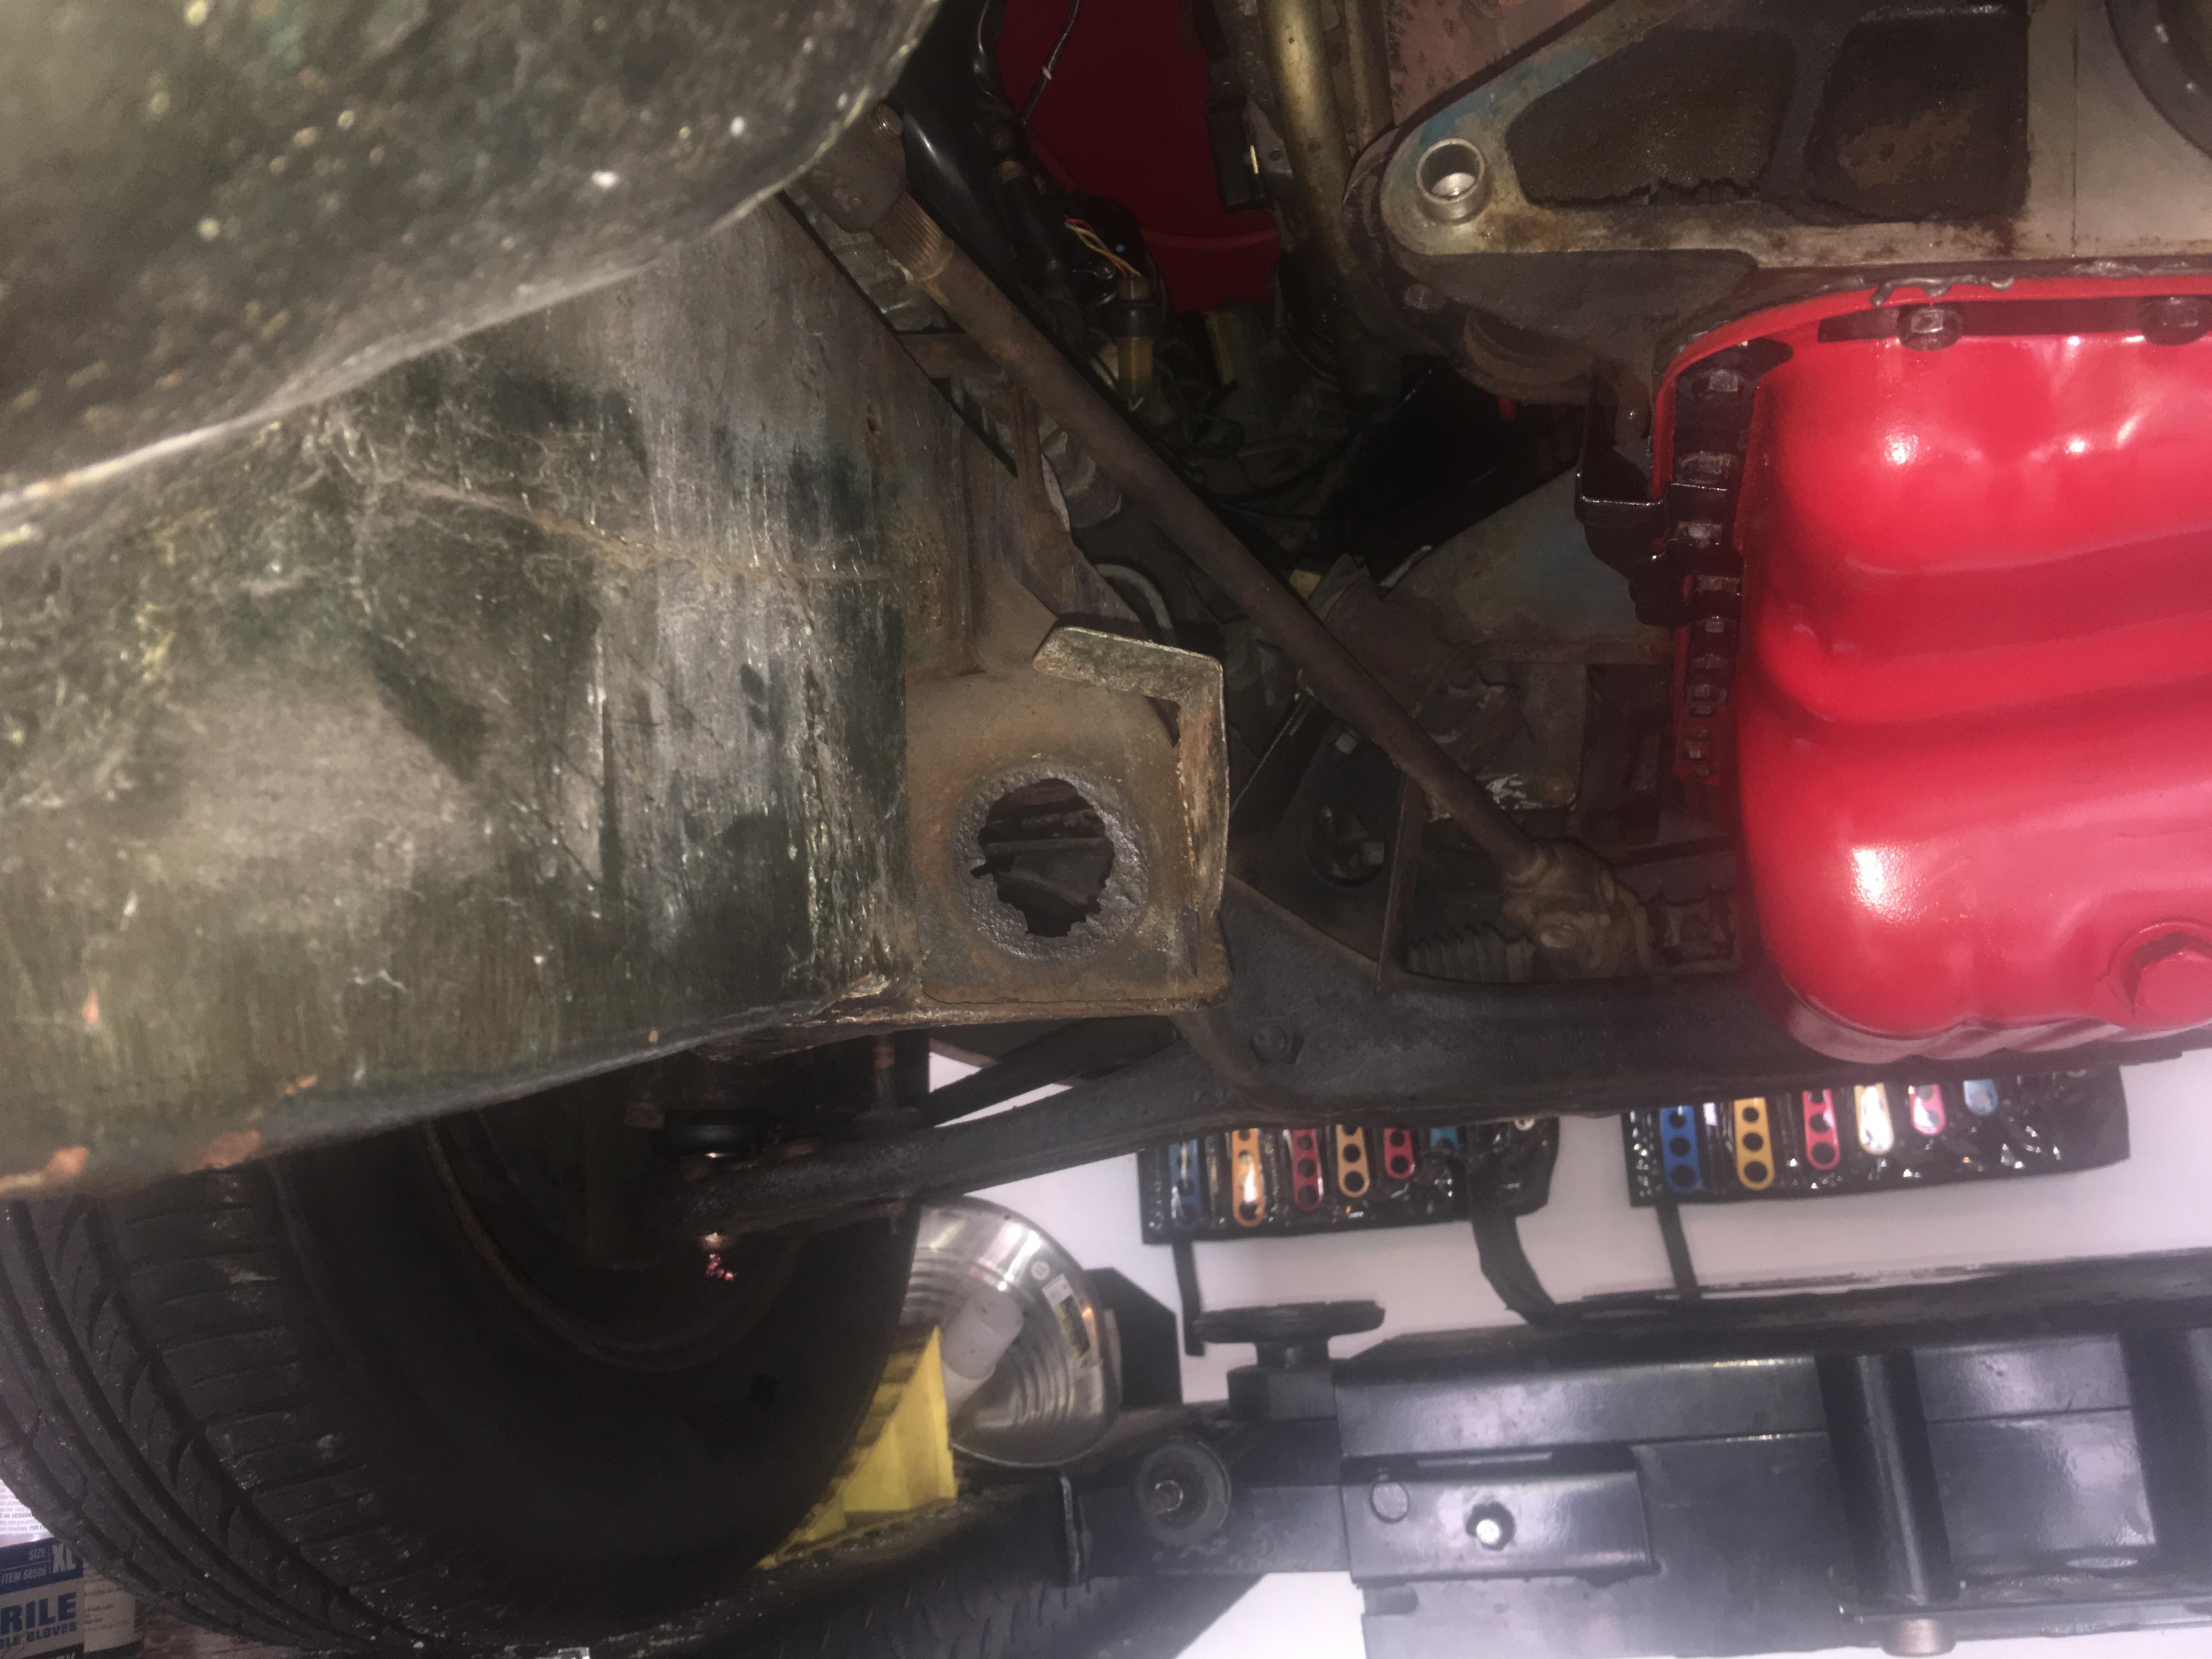
Everyone, My 17 year old picked out a 1976 Datsun 280z 2+2 as his first car. It's a father son project and we are going through the car to replace the worn parts and make it his daily driver. The clutch needs to be changed, and while we are in there and have a lot of stuff out of the car, we are replacing/cleaning up/fixing anything else we see. Immediately, we noticed all the bushings are really worn and nee replaced. When we pulled the tension arms, we found the mounts to be quite worn out. We cannot be the first people to run into this, but after many seacrches we have not located any advice on how to fix these mounts or what the original hole size should be. Mt instinct is to break out the welder and fix it that way, but we are looking for some advice. I have include some pictures so you can see what we are dealing with. camaro-guy


Important Information
By using this site, you agree to our Privacy Policy and Guidelines. We have placed cookies on your device to help make this website better. You can adjust your cookie settings, otherwise we'll assume you're okay to continue.