
ZNate
Free Member
-
Joined
-
Last visited
Everything posted by ZNate
-
Hi Richie, Good fuel tank and engine bay hose supply source reference from texasz. Engine Bay Fuel Lines: From w3wilkes in 2017: I just did all my fuel lines this year with Gates E85 rated hose. 1/4" fuel rail to carbs - maybe 2 1/2 feet 5/16" supply side to fuel rail & tank to steel line - about 6 feet 3/16" return line from rail to steel line & steel line to tank - about 5 feet. These all seemed to fit perfectly. Note: The 3/16” and 5/16” tank to steel line hoses listed by w3wilkes are already included in your metric-sized JBugs “shopping list”. Since the minimum purchase is 10 feet, you will have plenty for the engine bay. You can purchase 1/4” or 6mm cloth wrapped fuel line on eBay: https://www.ebay.com/itm/192199329085?hash=item2cbff9053d:g:i4UAAOSwcgNZKeUY&amdata=enc%3AAQAHAAAAsBAXKMKvoUlGz0Yf%2BSGYq1PML9tMxpmL%2B8LpNFHrvaRIJmgfLtH5SgTKv%2BFmVmNATItn8YxtYgMfAxrOGrVSUlqtYBCyYTVCW9UmXZHRBt8Vg%2BTyiUjStYub8iSxa6pAg8g4lRI2aIwBbRiXZ0W2ZWJAPO%2FFxkWNQWVDnNrIuAoRWlCgoBnlR54tz3VjQ0T24Ow4EIddBFX3meil4evwEsCkhGHEsf%2FbZf%2BcMW%2FXnF7N%7Ctkp%3ABk9SR8TW4cjQYQ Air Bubbles: My mistake, never thought about air bubbles from the tank/supply side. If you are seeing air bubbles coming out the bottom of the filter while the engine is running, you are taking the right steps starting from the fuel source (tank) by replacing the tank hoses and working forward to the engine. When the tank removed is removed, see if you can get a vacuum pressure reading from the fuel hard line in the rear of the car to the hard line output in the engine bay. It would be a good way to test the spliced connection and see if there is a small hole in the hard line you cannot see. Harbor Freight sells a simple, Brake Bleeder and Vacuum Pump Kit for $25. You can find similar kits on eBay. It never worked for me as a brake bleeder, but the vacuum pump is useful. Alternatively, maybe you can borrow one from a friend. Wear eye protection. Blow out the hard line so the vacuum does not intake fuel or dirt. Plug the rear section (phillips screwdriver in old rubber input hose) and put a gauged vacuum pump on the rubber hose going into the fuel filter input. Pump up the vacuum and see if it holds. Not sure how much pressure you should apply, maybe 10 or 20 psi and let it sit for a while. Would assume you would see a pressure change fairly quickly. If it leaks, you have identified the leak is between the two ends. It could be a leak at the splice or in some other location in the line. I read that the steel lines pit over time and leak. I believe the replacements are stainless steel. Check your build date to purchase the correct line. If the hard line tests okay, you could place a heat wrap around the short rubber hose section and leave it be. Use metal or regular zip ties to hold in place. I have heat wrap on my speedometer cable so it does not melt from the headers. I missed a question from your initial post: Your question: Adapters anywhere other than the one on the replacement fuel filler neck in light blue? Answer: No additional adapters that I can remember. The referenced “light blue” adapter in my Z used to connect a vent hose to the fuel filler was made of thin, crushable plastic (junk). I replaced it with a hardware store hose connector. I just carried the fuel filler neck into the store and tested connectors until something fit well. You can also purchase a connector from ZCarDepot for $12. If I remember correctly, the connection is only press fit. No need for a hose clamp. Hope your project goes well. Nate
-
Hi Wally, It looks like Maserati Compound has two ducts in stock matching the visual description. $48 each https://maseraticompound.com/search?q=240z+main+air+duct Did not see any on eBay right now. You could try calling Junkyard Jenny too. Great service and good prices. zcarcrazy702@gmail.com Good Luck Nate
-
Hi Richie, Patcon's photo shows the correct shield. Nice that new replacement shield is available. The ZCarDepot catalog mentions use of stainless steel screws too. The shield I purchased off of eBay shows its age and matches the "52 year old" inside of my Z's wheel well. No painting required. Your Fuel Line/Filter Issue: The other question was back to my actual problem of starting after a few days of sitting. Another newbie I'm sure. I pretty much can predict the problem because I can see there is no fuel in the filter and the fuel level has probably dropped back down into the hard line. If i see fuel in the filter it seems to be fine. Is it normal for the fuel to drop like that after a few days of idle? Is that drop some indication of pressure loss somewhere even though I don't see any significant leaks? Response: I'm assuming your fuel filter is mounted on the wheel well next to the trouble light. Fuel is sucked from the tank and out through the top of the filter to the fuel pump, then to the two carbs. I would assume the loss of fuel in the filter (and unprimed fuel pump making the engine harder to start) is from an air leak between the carbs and the fuel filter output. 1. Are the fuel line hoses clamped tight? Sometimes hoses clamped too tight compromise the hose, leading to fuel or air leaks. 2. How old are your fuel hoses? My Z had six year old hoses that were junk. Dry and brittle, plus clamped too tight. 3. Check the carbs for air/fuel leakage. Check the short hose under each carb too. They can get brittle from exhaust manifold/header heat. Check for drips after running the engine, but only service the hoses with a cold engine. Replacement hoses are available from ZTherapy. The hoses are unique, but inexpensive. Do not use any other type of fuel hose. Try to salvage the wire hose clamps for reuse, but ZTherapy does provide a different type of clamp. 4. What about the fuel pump? They seem to last a long time, but maybe there is an air leak. With a good quality screwdriver, try tightening the 11 screws on the pump. Just be careful to not damage the screw heads. 5. After completing your fuel tank hose work and checking 1-4 above, if there is still a leak that drains your fuel filter (and probably your fuel pump), consider rebuilding or replacing the fuel pump. ZCarDepot does have a couple types of replacement pumps. If you want to keep the Z original, you can also rebuild your existing Nikki pump, using internal parts from a similar Nikki pump. Good luck with your project! Nate
-
Richie, A couple extra thoughts. 1. Take photos as you go and label the hoses as you remove them. Much easier to match as you reassemble. 2. The hoses on the tank are difficult to remove; 50+ years of service. Since they would not slide off easily, I cut them as I lowered the tank. With the tank out I was able twist or slice them from the tank connection. Later you can reassemble the cut pieces to determine the true length. Make them a little longer so as you raise the tank back in place you can cut off any excess. 3. Cut enough of the "funky" bend hose for matching with the new hose and spring at the hardware store. Nate
-
Hi Richie, That is the correct type of door spring. The door spring keeps the hose from kinking or bending too much. It does not turn a straight hose into a bent hose. To find the correct spring, I took the old bent hose portion and the new hose to the local hardware store. I searched through the door springs to test spring diameter and length until I could match the old bend. Easier than I thought. Sorry I do not have the spring size. My Z and all receipts are in WI and I'm in FL for the winter. My 70 240Z has a similar history. A partial restoration (or preservation work) by the second owner in 2012-13 (134K). I became the fifth owner in 2019 (137K) and found similar issues not addressed. I spent the past four summers sorting it out and it runs just like a new car. Starts quickly, reliable, comfortable and quick. I installed a 280ZX close ratio 5-speed and a JDM 3.90 rear end. What a performance boost. Good luck, Nate
-
Hi Richie, I completed this same project on my 1970 240Z (same color) in September 2020. You only want to drop the tank once, so do as much service to it as you can. It was a pain to reinstall, but otherwise a straight forward project. In addition to the hoses, I replaced or installed the following: 1. Fuel Neck (OEM) 2. Fuel Tank Lid Flap (ruined by PO using wrong fuel cap) 3. Fuel Tank Panel Shield (mine was missing) 4. Fuel Sender Connector Boots (old boots may be brittle) 5. Fuel Tank Rubber Strap Isolators You may want to get a new O-ring & locking tab for the fuel sender, in case you need them. If your fuel gauge is not working correctly, replace the fuel sender now. Consider replacing the associated Gas Tank Vent Hose Boots and Grommets. The are available from Banzai Motor Works (GF-17, 18, 19 and 20). Not sure how many of each you will need. Luckily, mine were still serviceable. Based on information at: https://woodworkerb.com/home/datsun-240z-rebuild/240z-fuel-tank/ I ordered five hoses from JBugs in CA. They are cloth braided and appear to be the same as the OEM hoses you are replacing. When you order, make sure all five are in stock. Otherwise, they will charge you for all five and send any out-of-stock hose later (when your project is already completed). In my case, I was sent four of five and I luckily sourced the missing hose (9 x 3MM) from a local, national auto parts store. I did not replace the simple, thin non-clamped vent hoses attached to vapor tank, so be careful removing them. I have no details on type or length. For the “funky” bend hose connection to work, I inserted spring coil (like on older screen doors) into the hose to make the connection work. JBugs Order: Note: Hoses are sold by minimum length requirements. In other words, longer than you need. 1. N203741 VW German Cloth Braided Breather Hose, 12X3.3mm, Length: 10 2. N203701 VW German Cloth Braided Breather Hose, 17X2mm, Length: 10 3. N203551 VW German Cloth Braided Fuel Hose, 5X2.5mm, Length: 3 4. N203571 VW German Cloth Braided Braided Fuel Hose, 7X2.5mm, Length: 3 5. N203761 VW German Cloth Braided Fuel Hose, 9X3mm, Length: 10 Total cost: $116, with free shipping in 2020 Tank Removal Process: 1. Disconnect battery 2. Loosen right rear wheel 3. Jack up car 4. Remove right rear tire remove rear interior panels (I think you have already completed this step) 5. Spray rusty strap nuts & bolts in advance 6. Drain the tank well; any remaining fuel can be drained by removing the fuel sender 7. Remove the wires for the sender 8. Carefully remove fuel hoses next to sender 9. Remove filler neck clamp at tank 10. Carefully remove hoses from expansion tank 11. Support the tank; use a floor jack or transmission jack & small piece of plywood 12. Take off the straps and lower the tank 13. Lower 4”-6” and disconnect remaining hoses 14. Pivot tank forward a bit due to the rear skirt 15. Detach all of the vent hoses, the filler hose & fuel lines 16. Remove the tank If you have no evidence that the tank was previously removed and cleaned or your fuel filter gets dirty quickly, have the tank cleaned. You will probably want to repaint the the exterior. Tank installation is is reverse order, but note: 1. You may have to raise the tank to connect some hoses. Some do not have much room for slack. 2. The tank drops out easier that it goes back in place. I have to fight with mine to clear the rear skirt. You may want to put good quality painters tape along the skirt to avoid skirt damage. Good luck with your project! Nate
-
Hi, In 2020 I replaced my original 240Z seats with Subaru BRZ seats. Here is the link: Selling my Z this spring/summer, so will put the "near perfect" seats back in the car. I'm assuming the new owner would want original over replacement. Good Luck, Nate
-
I've done okay with Wheels/Tires: VTO Classic 8 Wheels, 205/60R15 BFG ADV TA SPRT. Size Diameter Width Rim Range Measured Rim Tread Depth 205/60R15 24.6" 8.2" 5.5-7.5" 6" 9.5/32" 91H SL BSW 600 A A Always good to check the tire specs. I have seen diameters and width differ by brand, with the same published size. Had a Factory Five Mark III (Cobra Replica) and fractions of inches were important to avoid tire rub. New to my 240Z, but assume springs and ride height are major factors. Good Luck, Nate

-
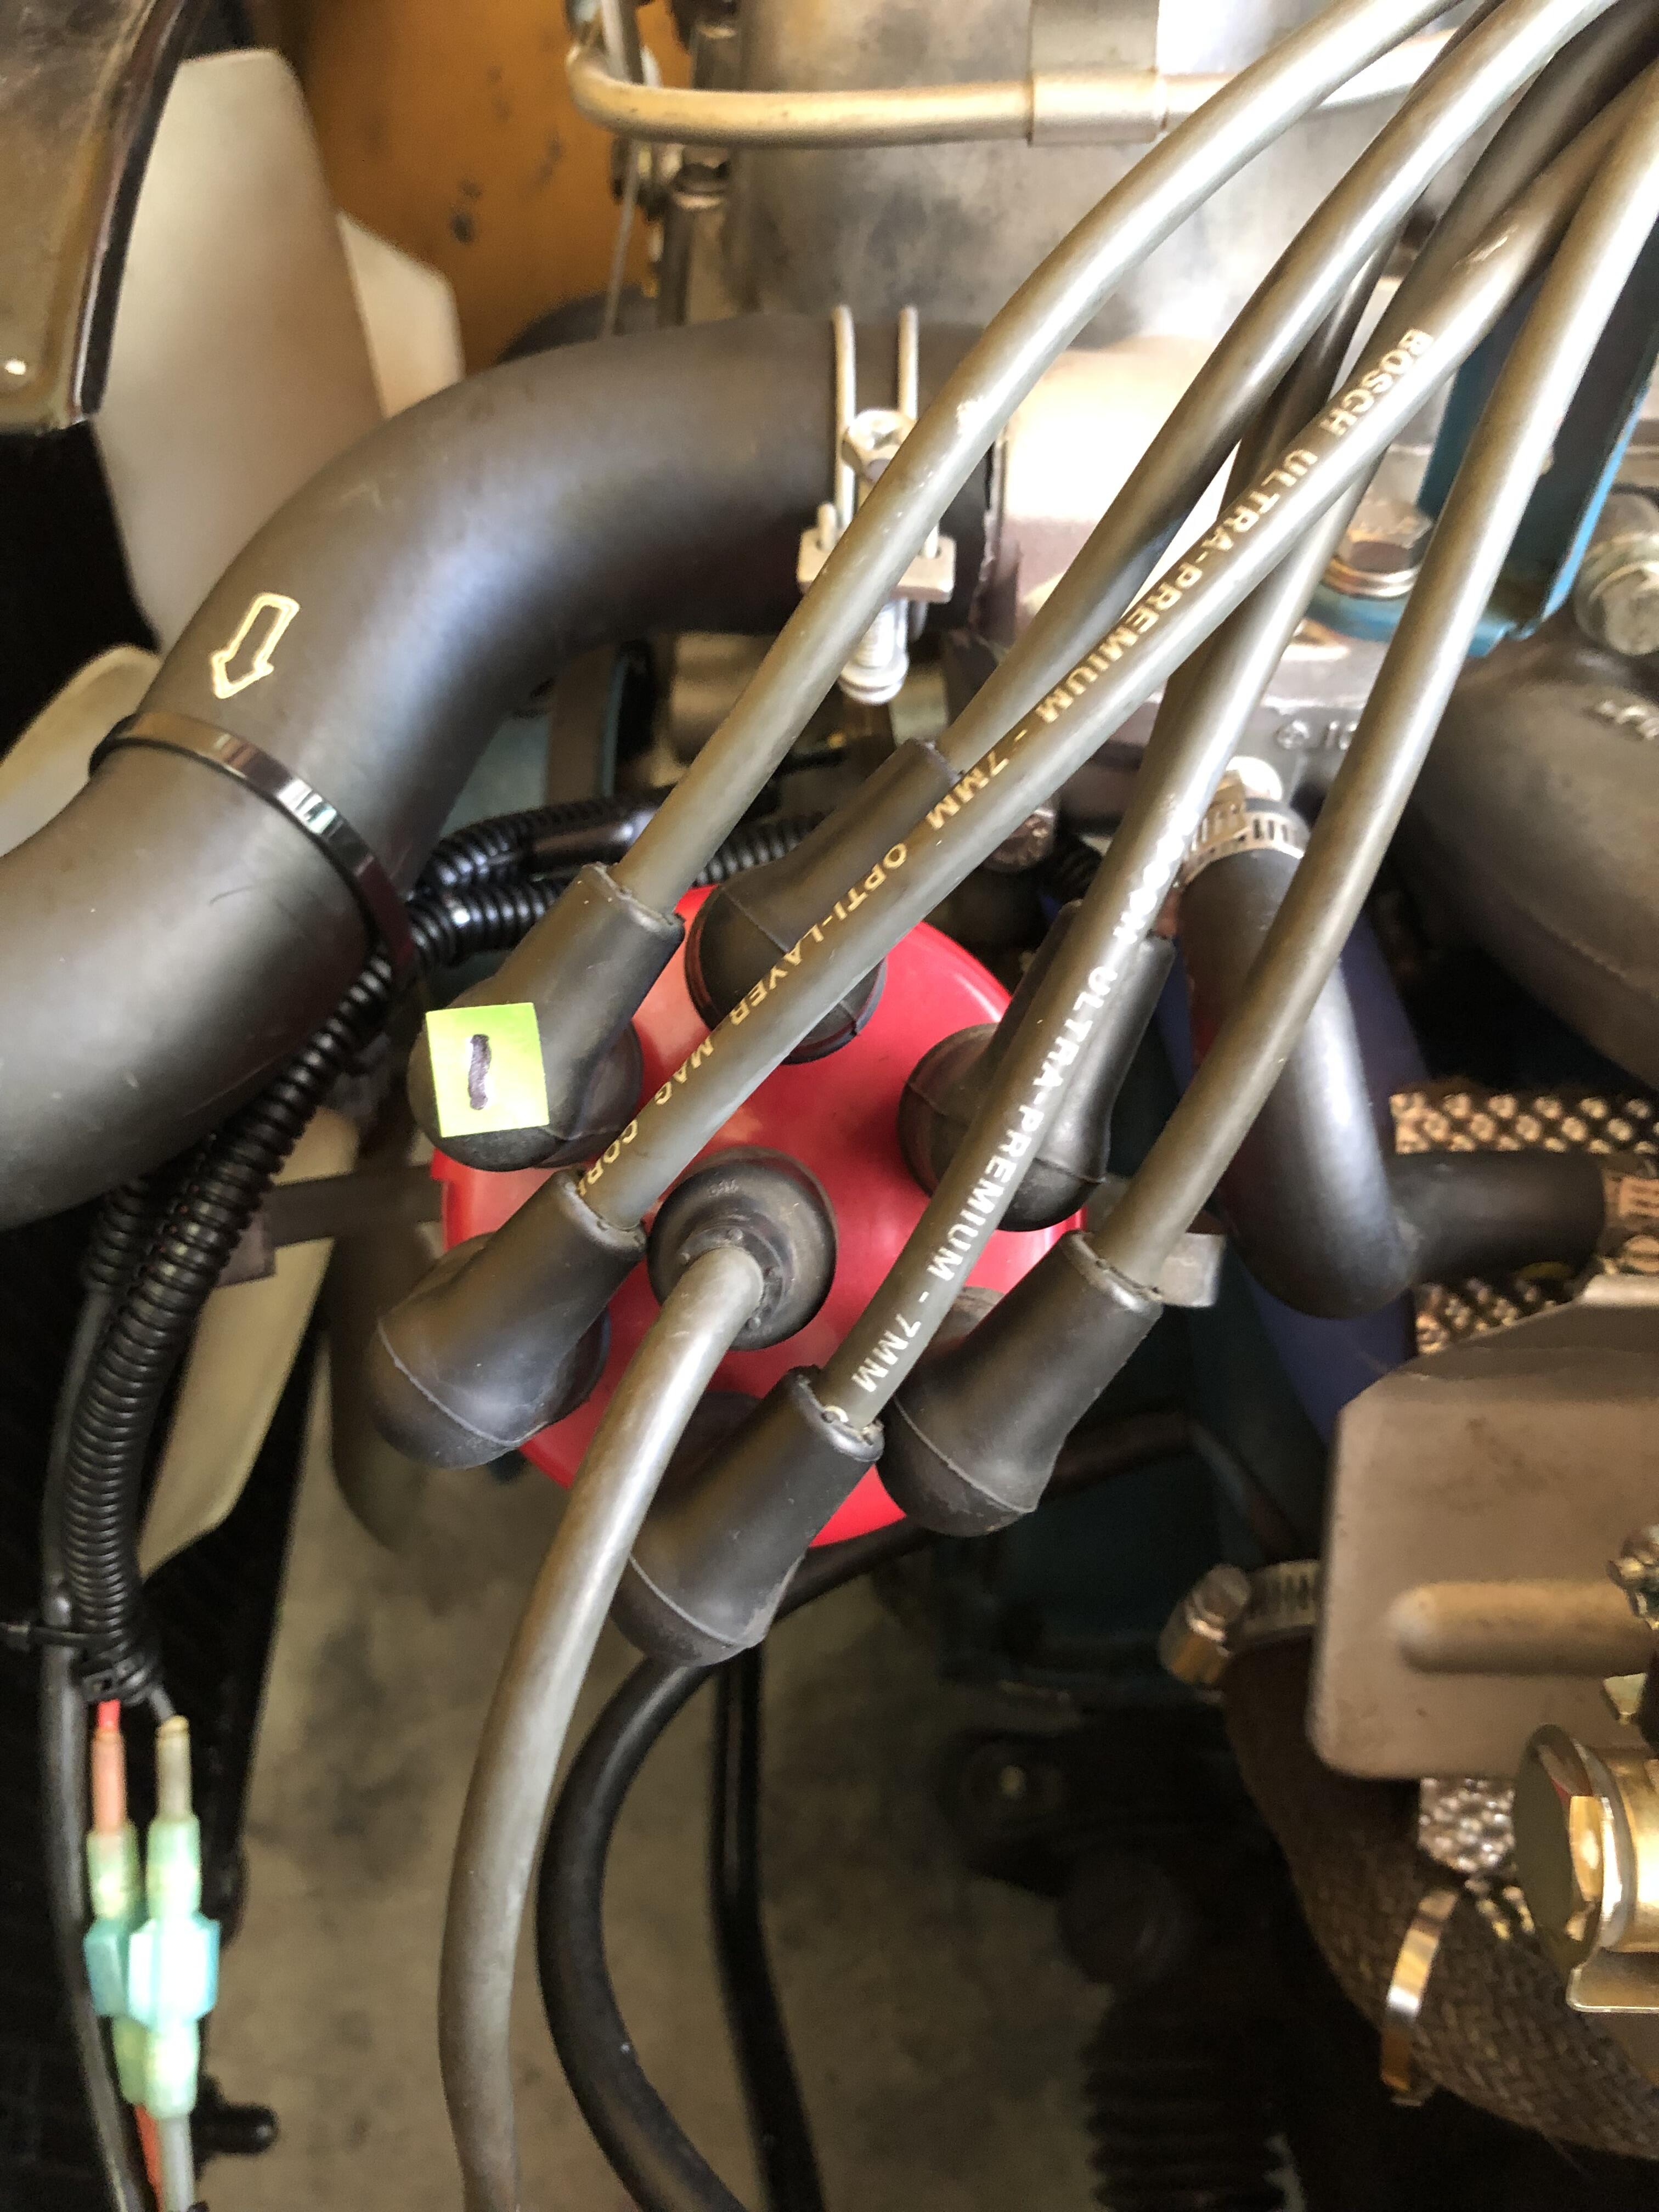
I’m back in business. Installed my rebuilt Cardone distributor and the engine fired right up. Very easy to set timing and adjust my new ZTherapy carbs. Had to install my old Bosch coil wire because the new NGK wire would not fit tight on the Flamethrower coil. It looks like the wire does not push deep enough into the coil, plus the boot has a rib inside which limits the wire insertion. Will work with it and see if I can make it work. So happy to have my car back on the road. Appreciate everyone’s advice along the way. Nate
-
Siteunseen, Thank you for the suggestions. I checked my firing order again and it is correct. The distributor advance is frozen; no movement at all. It looks to be at full advance, so the timing is too far off to start. I am having the distributor remanufactured/rebuilt by Cardone (31-607), via a national auto parts store since no dizzys are available off the shelf. No money up front, but $170 once completed. The store handles all the shipping. Expect to have the dizzy returned in about 10-14 days. One year warranty. (Normally the work takes 3-5 days, but I’m told it could be 7-10 days.) There are used, working dizzys available for $295-$350, but no guarantee how long they will work once installed. Add the cost of a future rebuild and it gets expensive. Regarding the new NGK wires I purchased; they are 8MM vs the old Bosch wires at 7MM. Total weight for the NGK wires is double that of the Bosch. The only issue I found was installing the NGK coil wire. The snout on Flamethrower coils appears to be larger than stock coils, so the boot took lots of effort to slide in place. I will report again in a couple weeks. Thank you, Nate
-
The saga continues, the engine will not start. Installed new NGK plug wires, OEM cap and NGK plugs, but I’m still noticing “kickback”. More kickback at at Advance/Retard mid-point and less at full Retard. I read about sticky/frozen distributor advance mechanisms causing engine starting issues. So if it is frozen too far advanced, the engine will not start. I tried moving the distributor base plate, where the Pertronix unit is attached, but it does not move. According to a 2010 post, frozen advance mechanisms is common. The solution was to replace the distributor. https://www.classiczcars.com/forums/topic/38037-240z-ignition-timing-carb-sync-need-help/ Before I order a new rebuilt distributor, is there anything I can do to the recently purchased, used distributor now installed on the car or is it just a core? Thank you! Nate
-
Steve/Siteunseen, Thank you for the suggestions. Parts on order for Monday, August 8 delivery. My wires were Bosch 7MM that looked new when I purchased the car in 2019 (3500 miles ago). Have upgraded/fixed everything else, so I should have replaced the wires earlier. By surprise, the Bosch wire ends separated from the boot as I removed them from the Mallory cap and transferred them to the OEM cap, which did not go well.
-
No start again... Engine ran great for 15 minutes yesterday with distributor at full retard, but today I'm experiencing the same blowback while trying to start it. The only thing I did was switch a few plug wires because they were touching the cam/valve cover. Had difficulty inserting the wire ends into the new distributor cap, so a couple got mangled a bit. There appears to be a little lip between the plastic and metal inside the female insert on the cap, which catches the male wire end. I thought I fixed the wire ends pretty well, so not sure what to fix/replace now. Very frustrated
-
Got it! Distributor was too far advanced. Had the distributor set to the mid-point marker, but turned it full retard to start the engine. Runs pretty smooth at 1100 rpm, but now I need to set the timing and fine tune the new ZTherapy carbs. Thank you for all your help! Nate
-
Still no luck… Since my last post on July 17, I have completed the following: 1. Installed clean, used 240Z distributor. 2. Installed Pertronix Ignitor II, plus new cap and rotor. 3. Reset oil pump shaft to 11:25 position at TDC, previously it was a notch off. 4. Installed vacuum line to #1 carb. At TDC, the rotor now points just below the 9 o’clock position. While cranking the starter, there is ignition firing that “blows back” and slows or bogs down the starter. Do I have the distributor installed 180 degrees off? I used a small rubber plug to locate the compression stroke for TDC. When it popped off, I used that location for aligning TDC.
-
Since my Mallory specific Pertronix failed, I am going to install an original 240Z dizzy. Should have it in a few days. Probably going to purchase a newer version of Pertronix and the OEM type cap and rotor. Do not think the Mallory parts will work on the OEM unit. Will provide and update when I get my parts. Thank you!
-
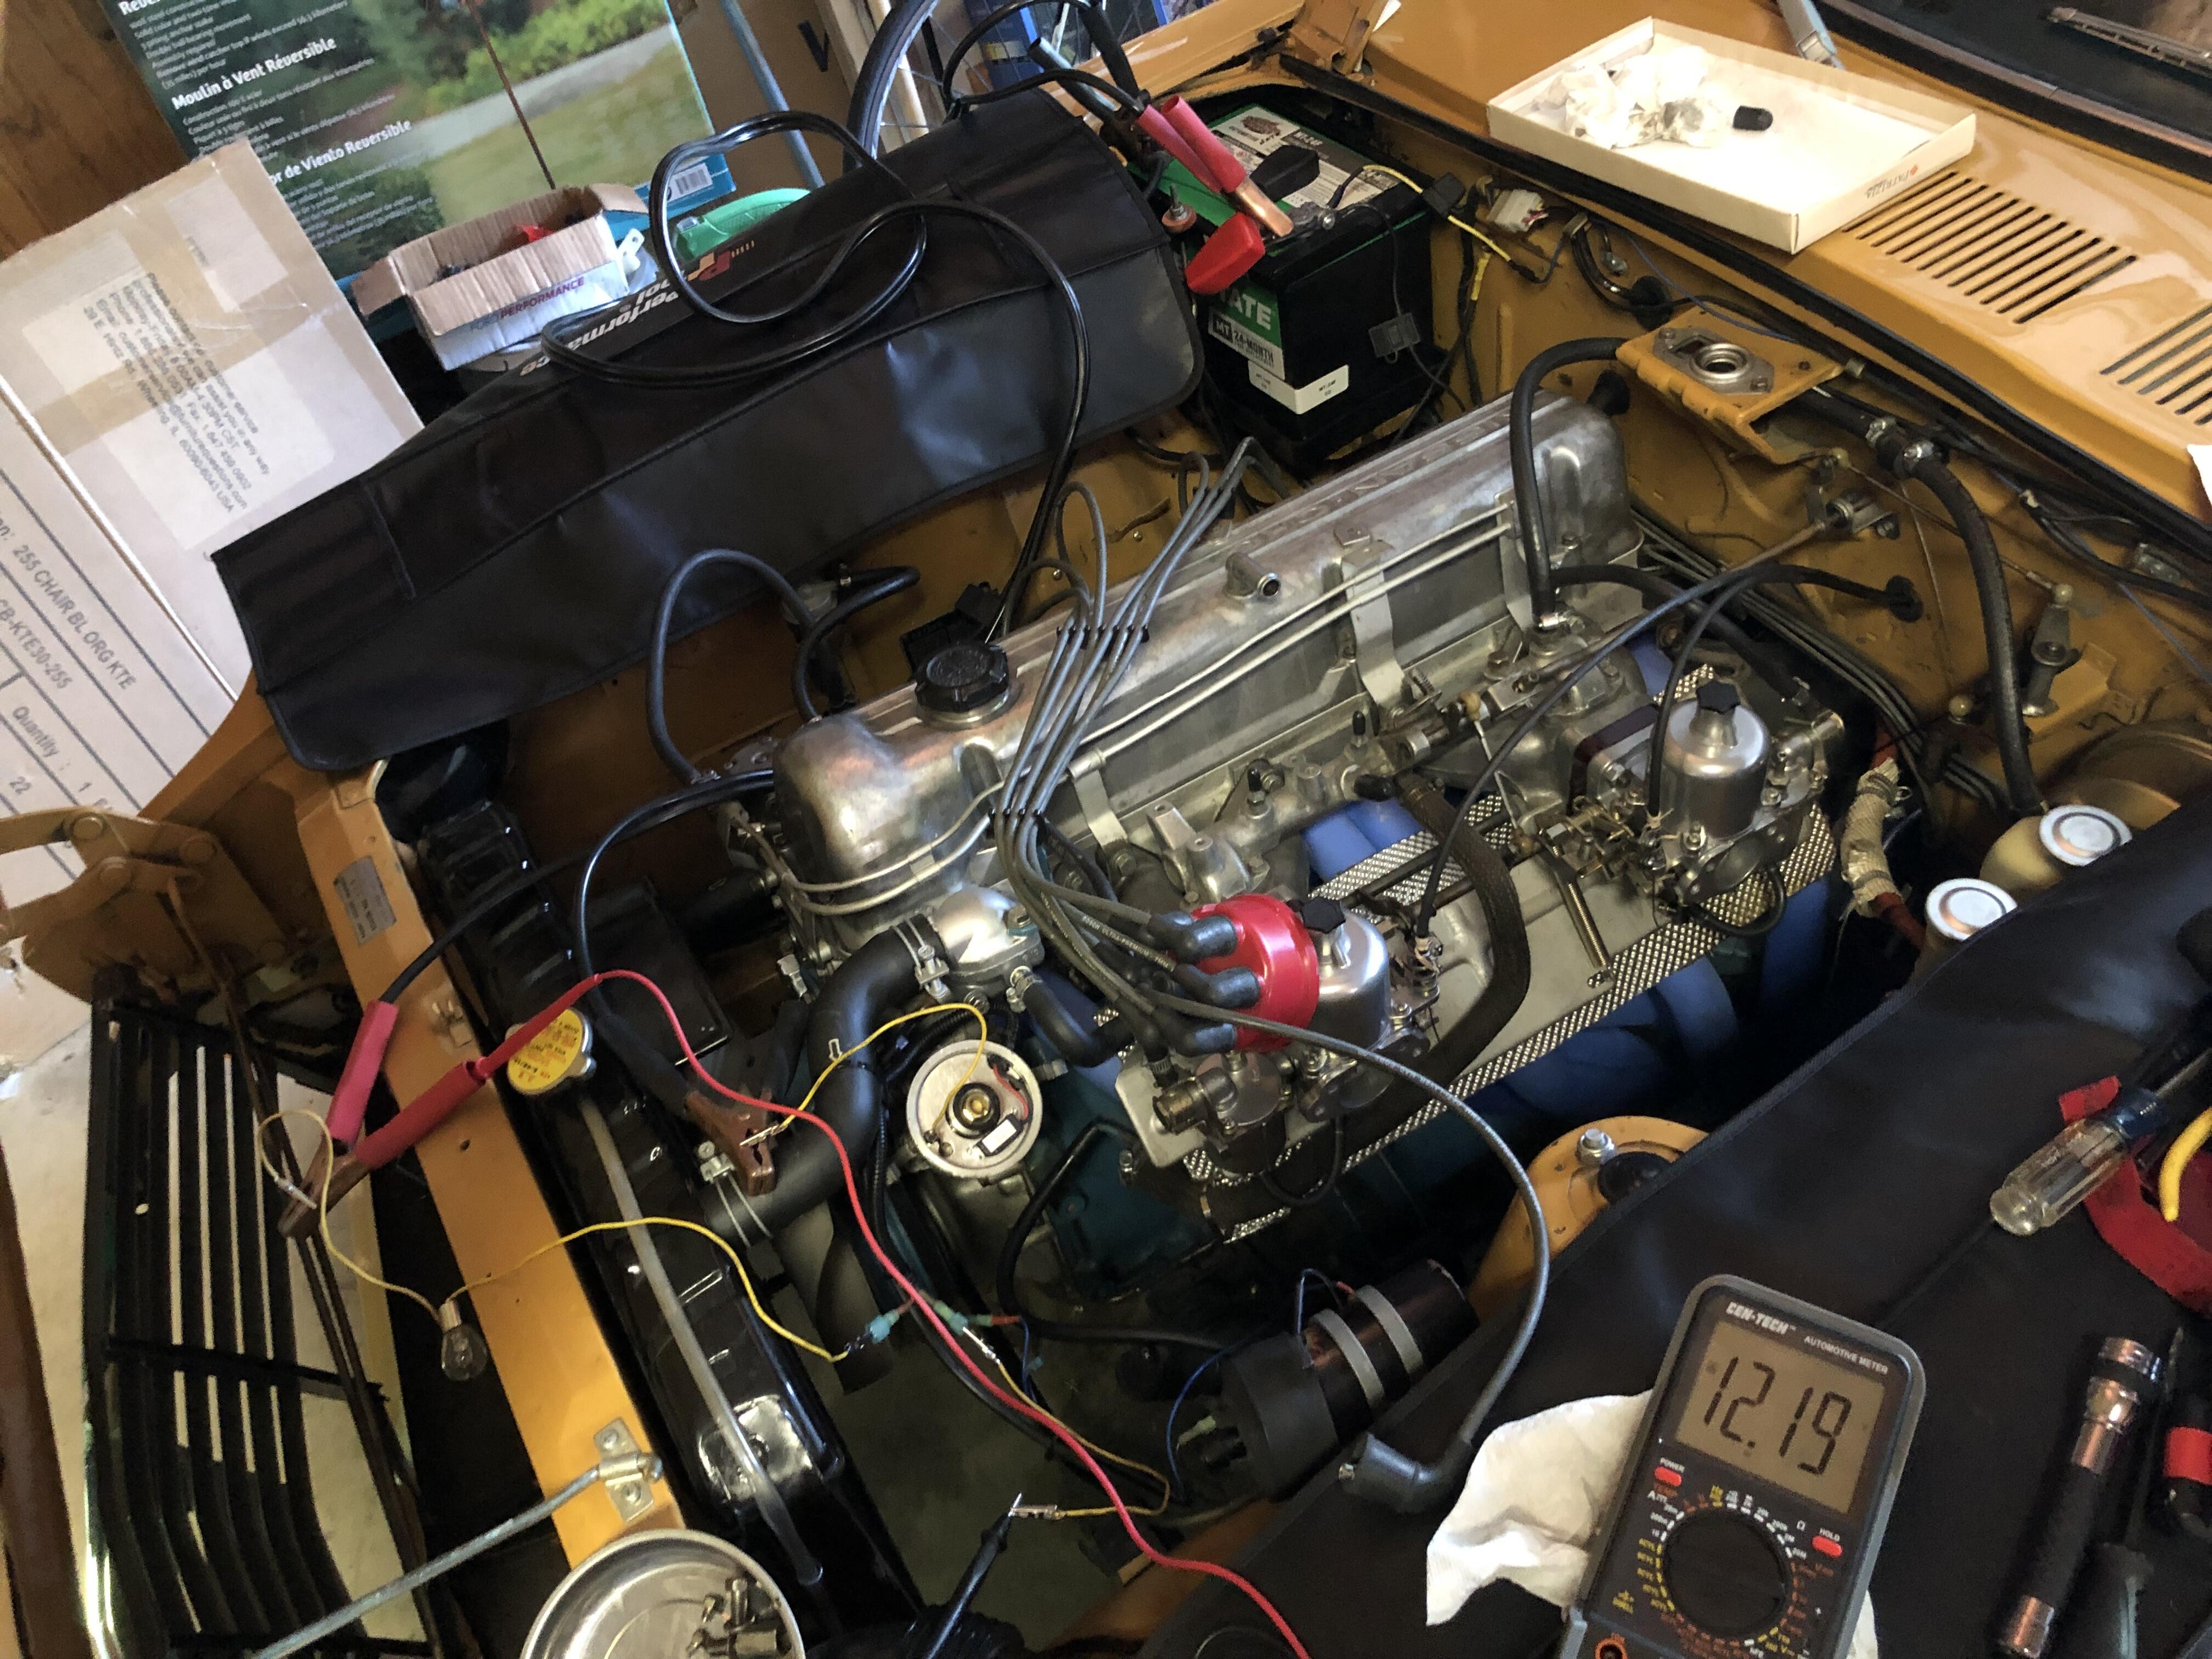
Zed Head: Thank you for the testing information. Performed the test and power is constant. Also did the test with the cap on, with same results. So it looks like the module has quit. The photo shows my rigged up test and meter reading. I can think of two instances where it may have been damaged. 1. I did a test drive to adjust timing with the new carbs. I pulled to the road side and turned on my flashers, which caused my amp meter to go wild. It then blew the 20 amp fuse. 2. After the flashers quit, I drove home and used the right turn signal, which caused the engine to die. Got it restarted, but had no gauges or brake lights on the drive home. Another 20 amp fuse blew. Never had fuse problems before. After replacing the fuses, the flashers and turn signals work fine. FYI, I have cleaned up all my switches in the past couple years (2K miles), so they should be fine. So where does this leave me? 1. Purchase another Pertronix version 1 or, 2. Purchase stock 240Z distributor and install Pertronix or, 3. Purchase a stock 280ZX distributor, which includes electronic ignition. Part stores have rebuilt units for about $160. I guess I can do more research, but these are some questions I would need to answer too: Will my current rotor and cap fit these different distributors? My current Pertronix set-up bypasses the ballast resistor and uses a 3 Ohm coil. Will I need to install a stock coil and hook up the ballast resistor?

-
Read about the downsides of Pertronix version 1, so I have been careful about leaving the key ON. Let me dig up some alligator clips and I'll test the module. Not sure if I can get the test completed tonight or tomorrow morning.
-
I tried getting spark from both ends of the coil wire on the chance I was doing it wrong, but still no spark. The entire ignition was new (Pertronix, rotor, cap, 3.0 Ohm Flamethrower coil) 1500 miles ago, except for the albatross distributor.
-
Zed Head: I pulled the coil wire from the coil for testing. I'll try again with a different ground.
-
I guess I need to determine 10 degrees BTDC for aligning the oil pump shaft? Is there a way to measure or identify this spot this or is it trial and error? If the distributor post is at 12:00, then the rotor needs to be at 12:35?
-
The full twist left or right does not line up with #1, so no spark. Even if I move #1 to a different post on the distributor, there will not be an alignment/spark. I think I need to move the oil pump shaft so I can set up an alignment of the rotor and a distributor post. Should the rotor/shaft align exactly to a post or slightly before/after? Originally the rotor aligned slightly before the #1 plug wire/post, but the timing was around 20 degrees advanced, with no adjustment left to retard the timing.
-
Zed Head & SteveJ: Thanks again for the suggestions. Will try the distributor twist with the key on and get back with you.
-
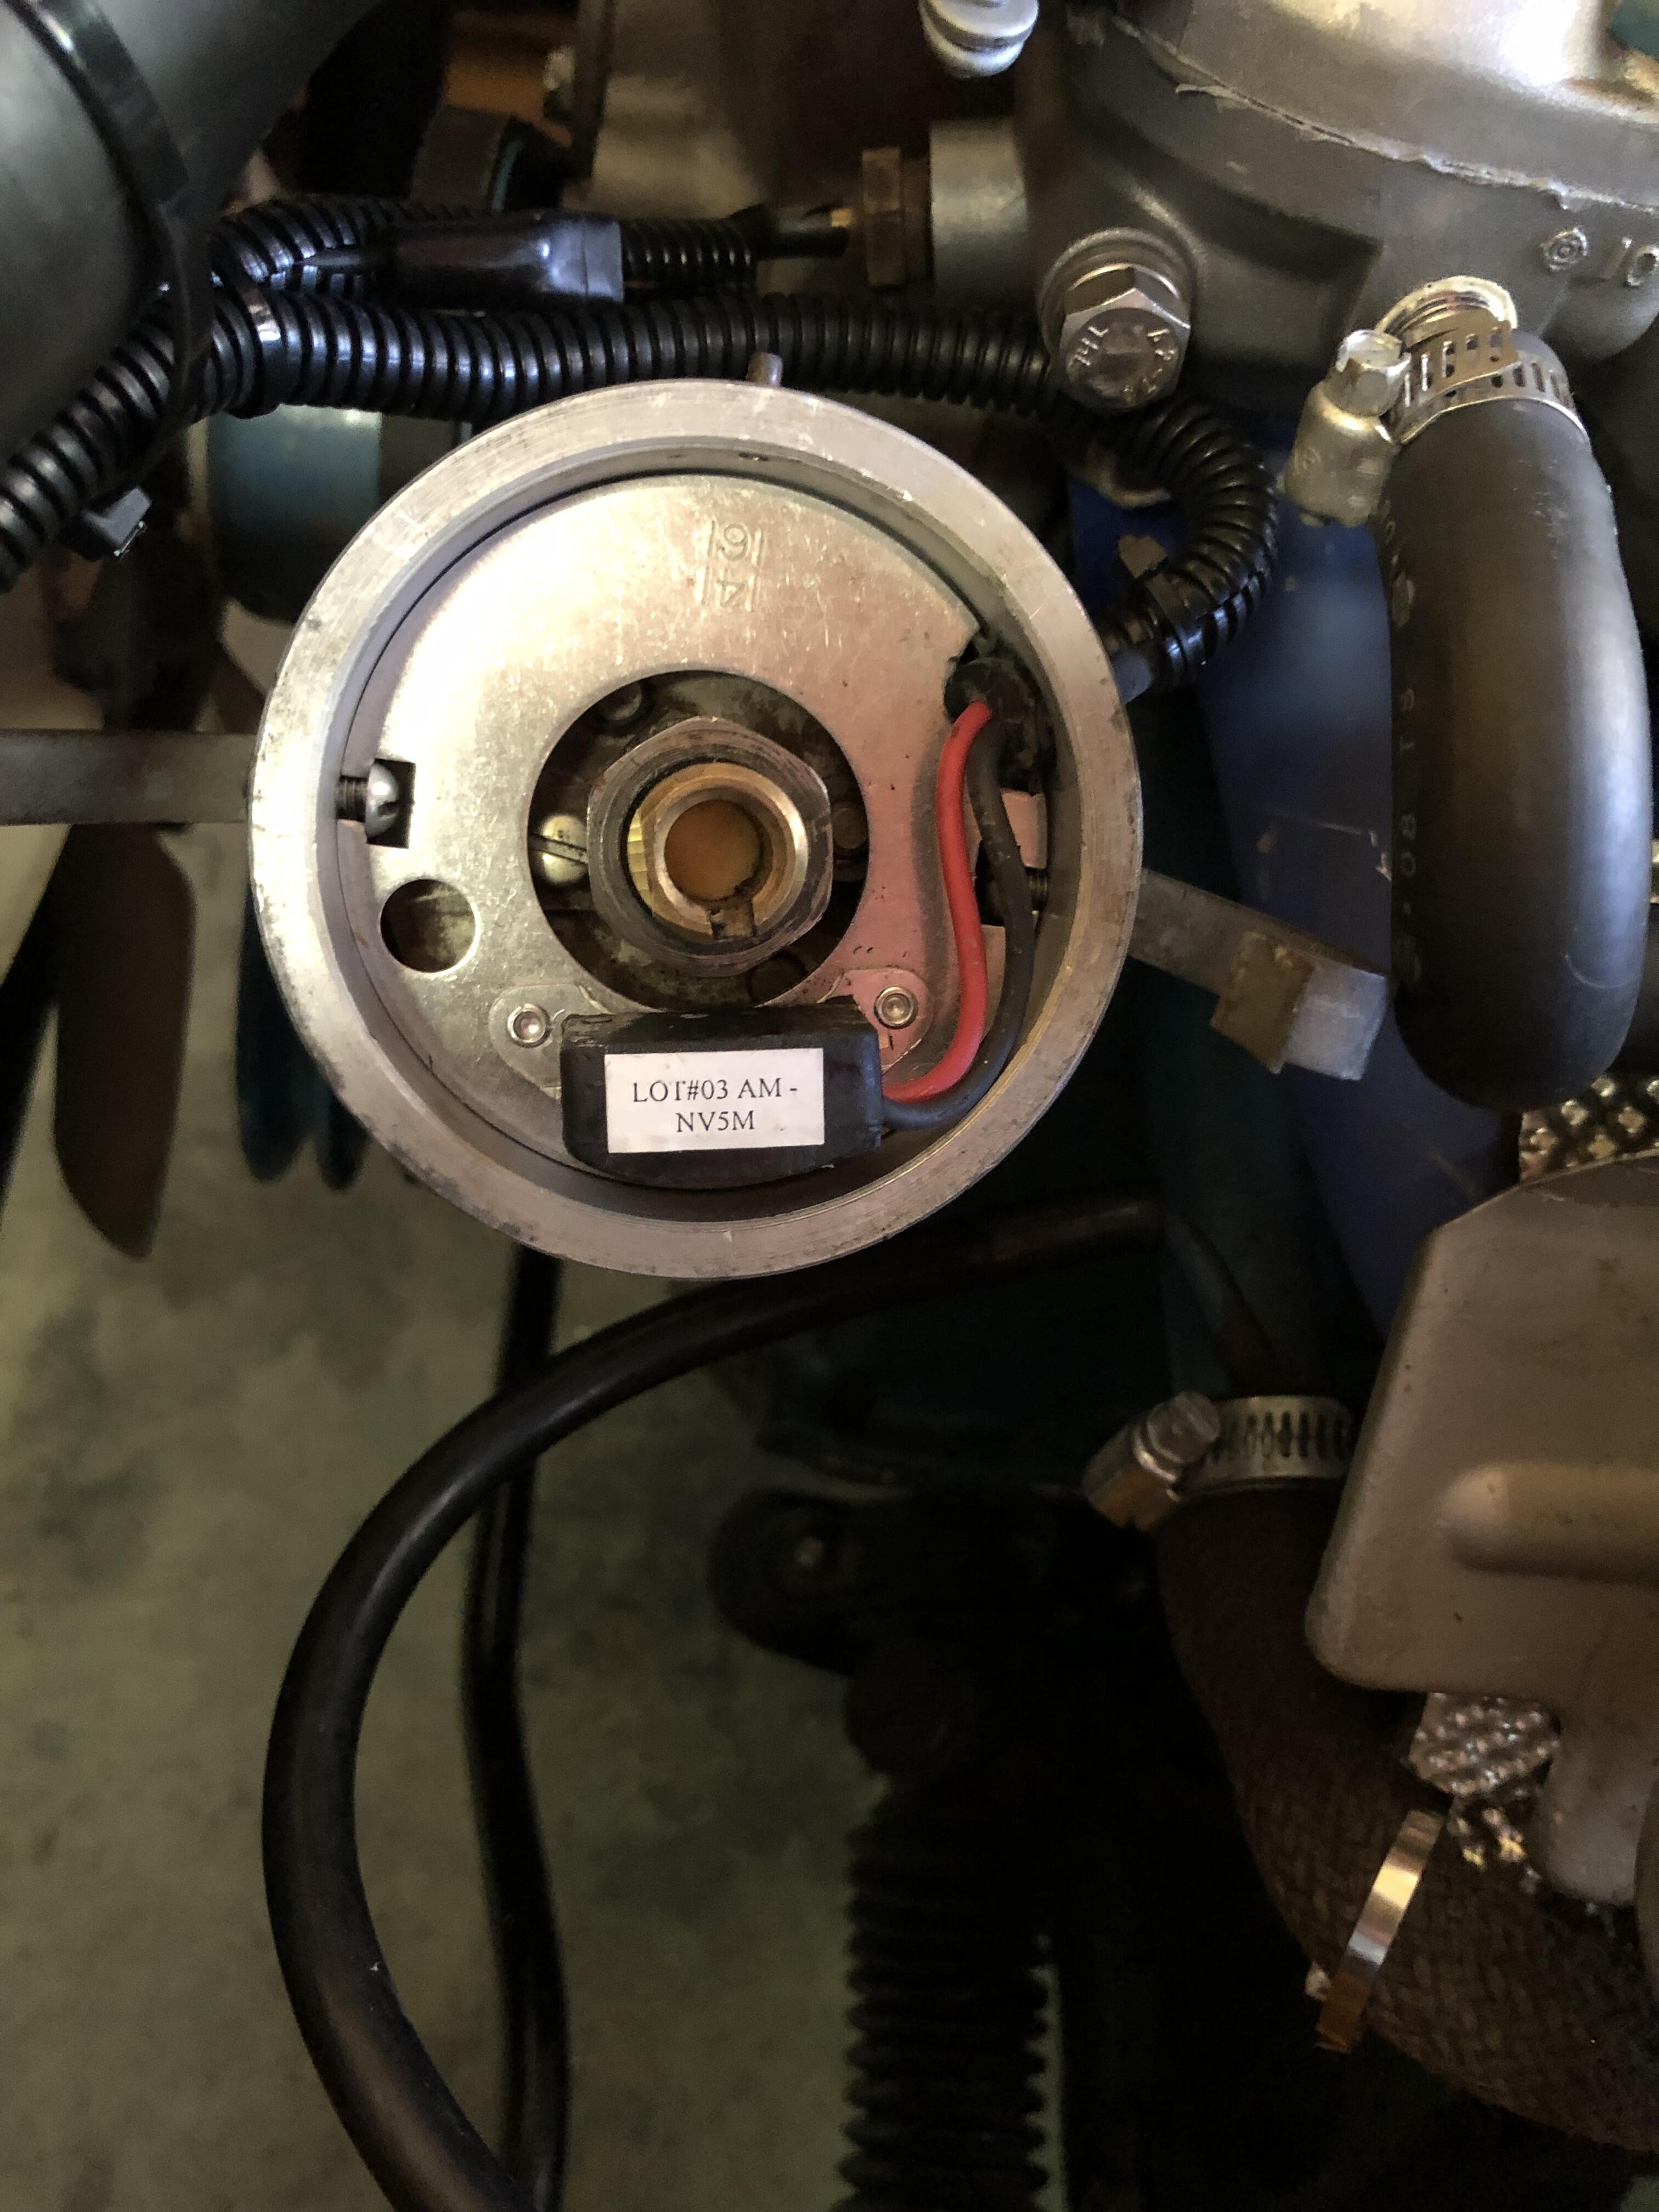
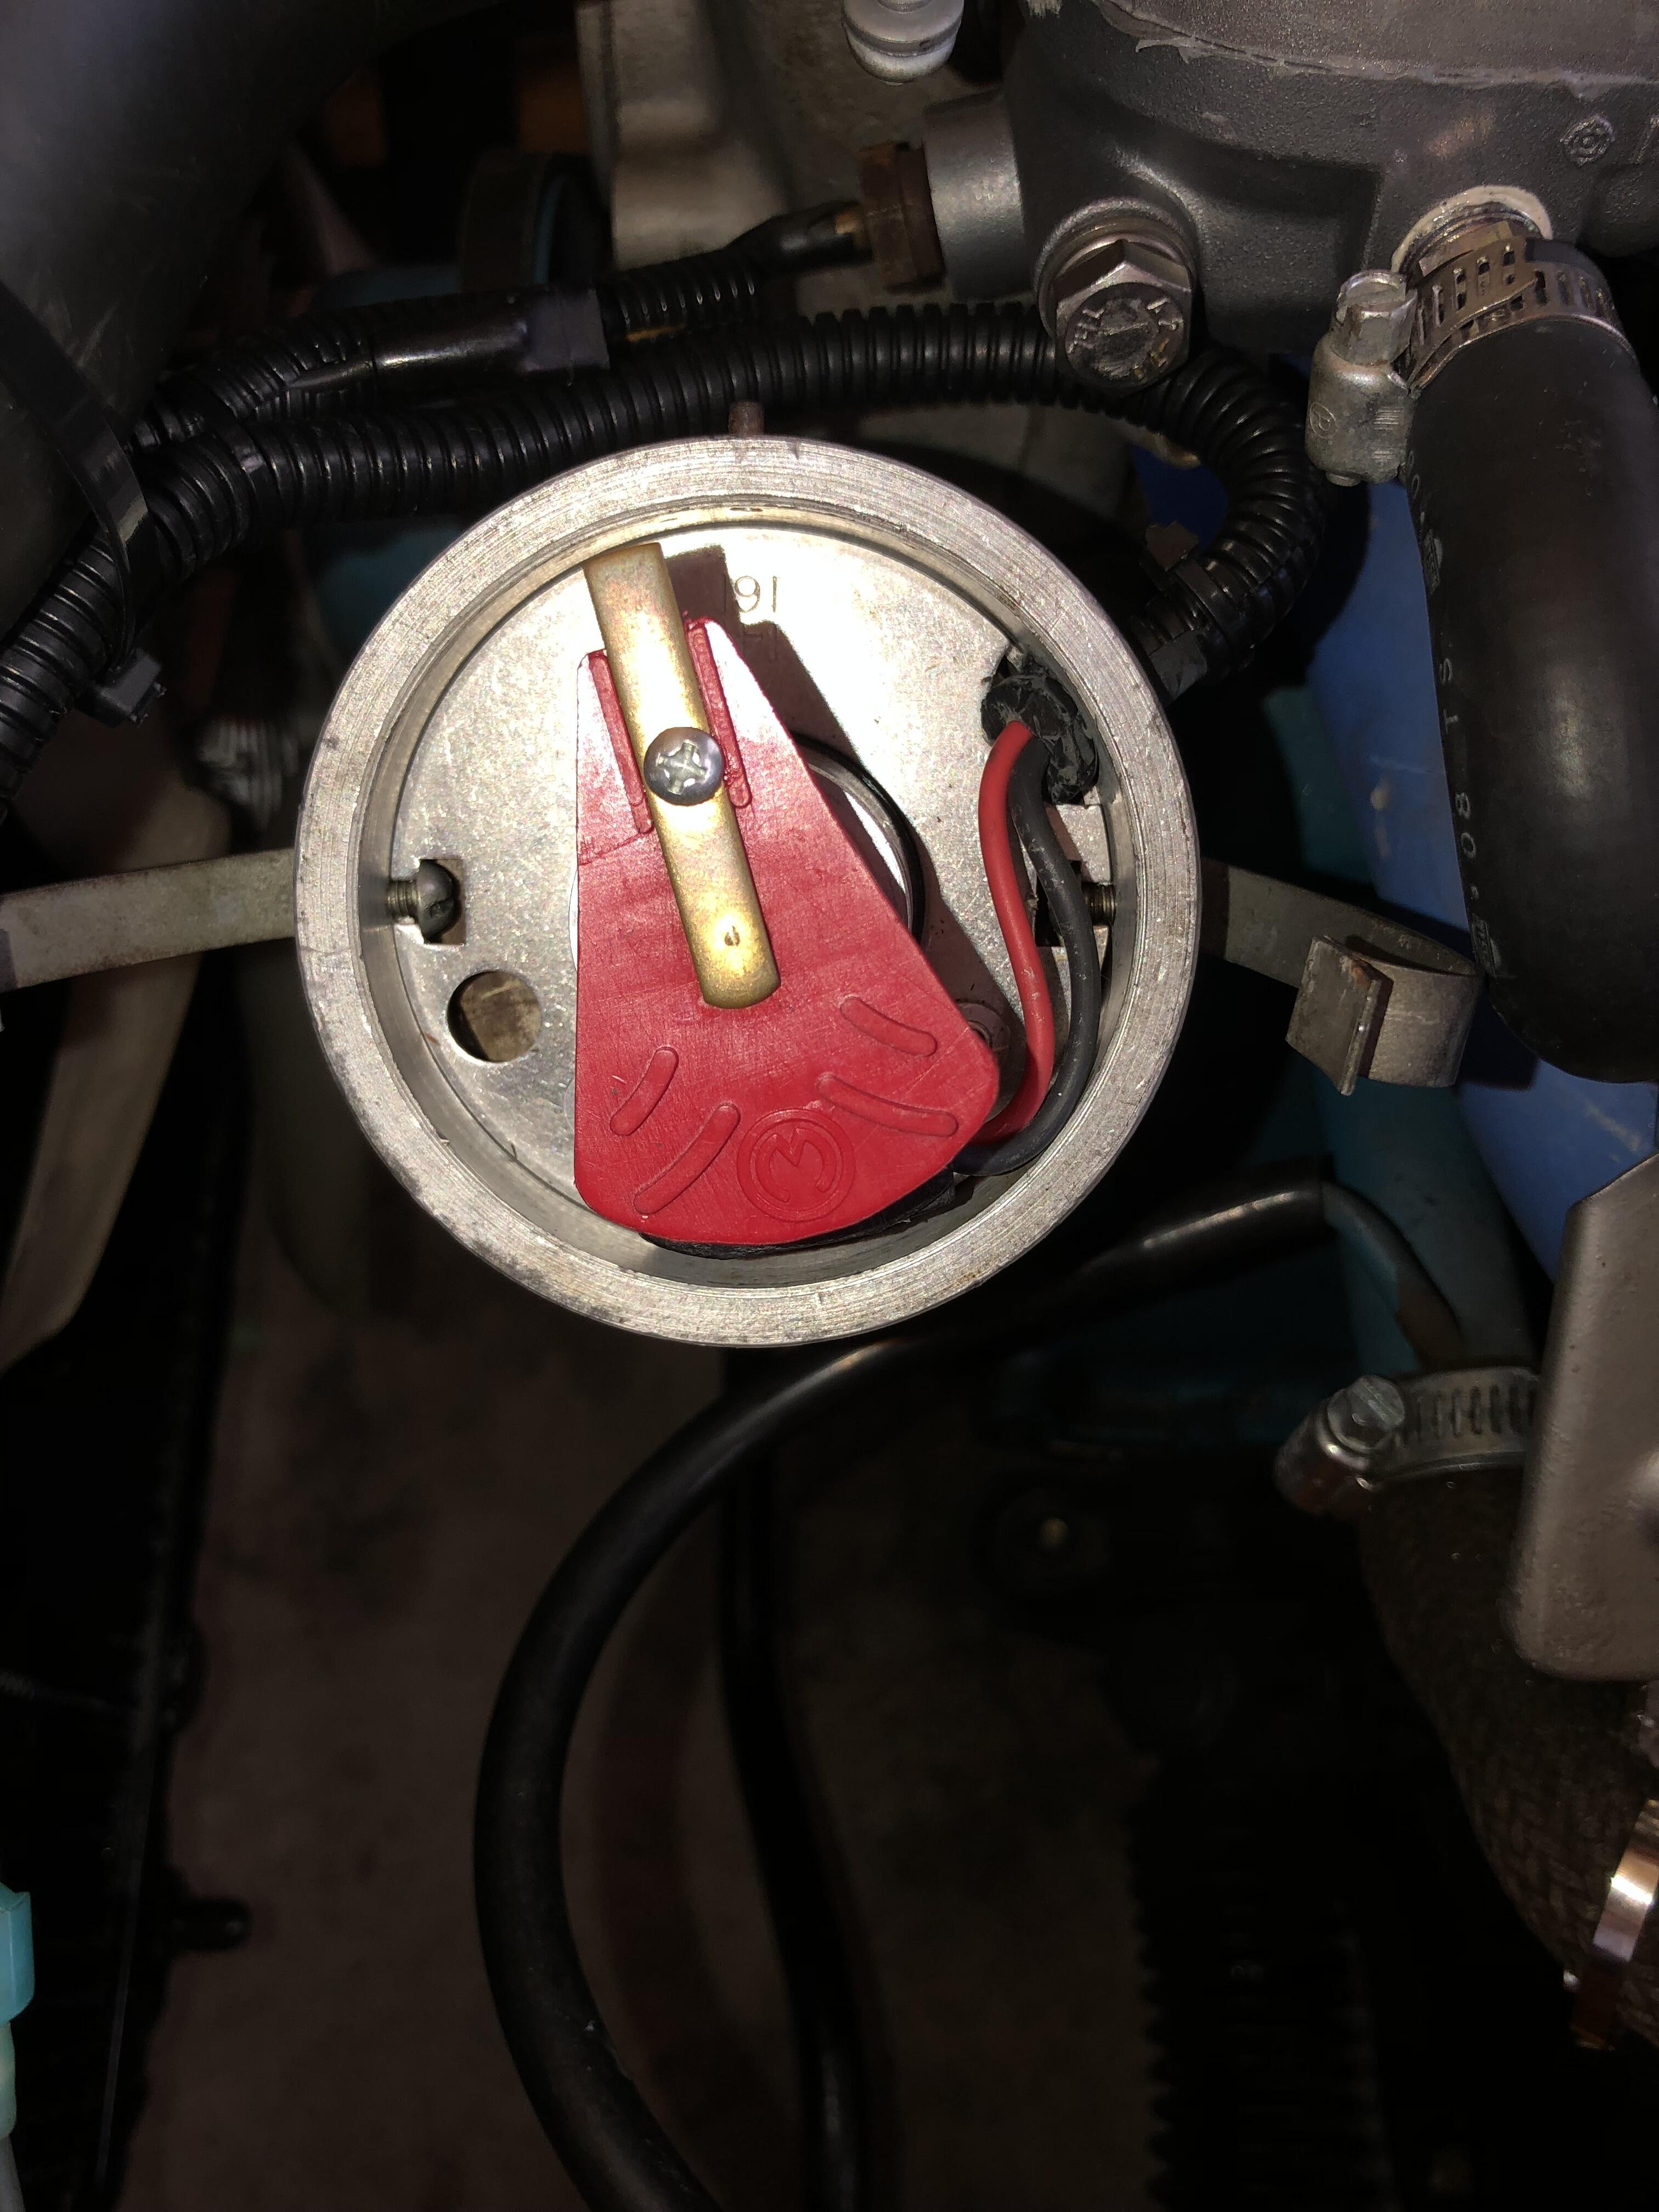
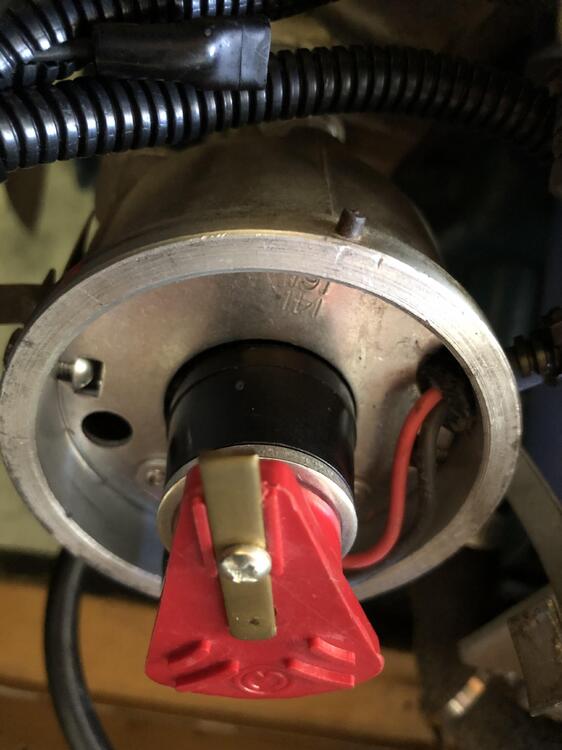
Revised: Originally, the #1 plug wire was at 12:00 and the rotor/oil pump shaft at TDC pointed to somewhere around 12:35 to 1:35. Engine ran bad then too. Zed Head: Took some photos as you suggested. I found the mark on the magnet ring. When installed the mark lines up with the oil pump shaft and rotor. So the #1 plug wire is only thing that does not line up. It appears that my Pertronix version 1 does not have any gap adjustment. Have about 1500 miles on the system over past 2-3 summers.


-
SteveJ: Thank you for your research. There should be two adjustment bolts for timing. Have you played with both? (No, just the 10mm Phillips head to advance or retard timing.) If you have, and what you said still holds, here is what you might do. 1. Put the mark at the first line past the middle and toward retard. Consider that your static zero position. (Okay, will adjust the rotor a little to “zero” it.) 2. Adjust the oil pump from there to put the rotor at TDC. (Not sure what you you are saying. The rotor at 11:25 in the photo matches the oil pump shaft at TDC. I think the Mallory dual point distributor, with no vacuum, is an odd duck. Originally, the #1 plug wire was at 12:00 and the rotor/oil pump shaft at TDC pointed to 1:35. Engine ran bad then too. Zed Head: Thank you for your clarification. Of the things to line up (trigger, rotor, compression stroke on #1 and #1 plug wire) I can only line up the rotor (11:25) and compression stroke on #1. The distributor positions for #1 plug wire is about 10:00 or 12:00. Have no knowledge on how triggering happens. So should I reposition the #1 plug wire to 12:00 and adjust the oil pump shaft so it aligns just right of 12:00? Otherwise, I have no idea where to go other than to throw money at it (different distributor, electronic ignition, etc). The photos show where everything is positioned right now.