
ZNate
Free Member
-
Joined
-
Last visited
Everything posted by ZNate
-
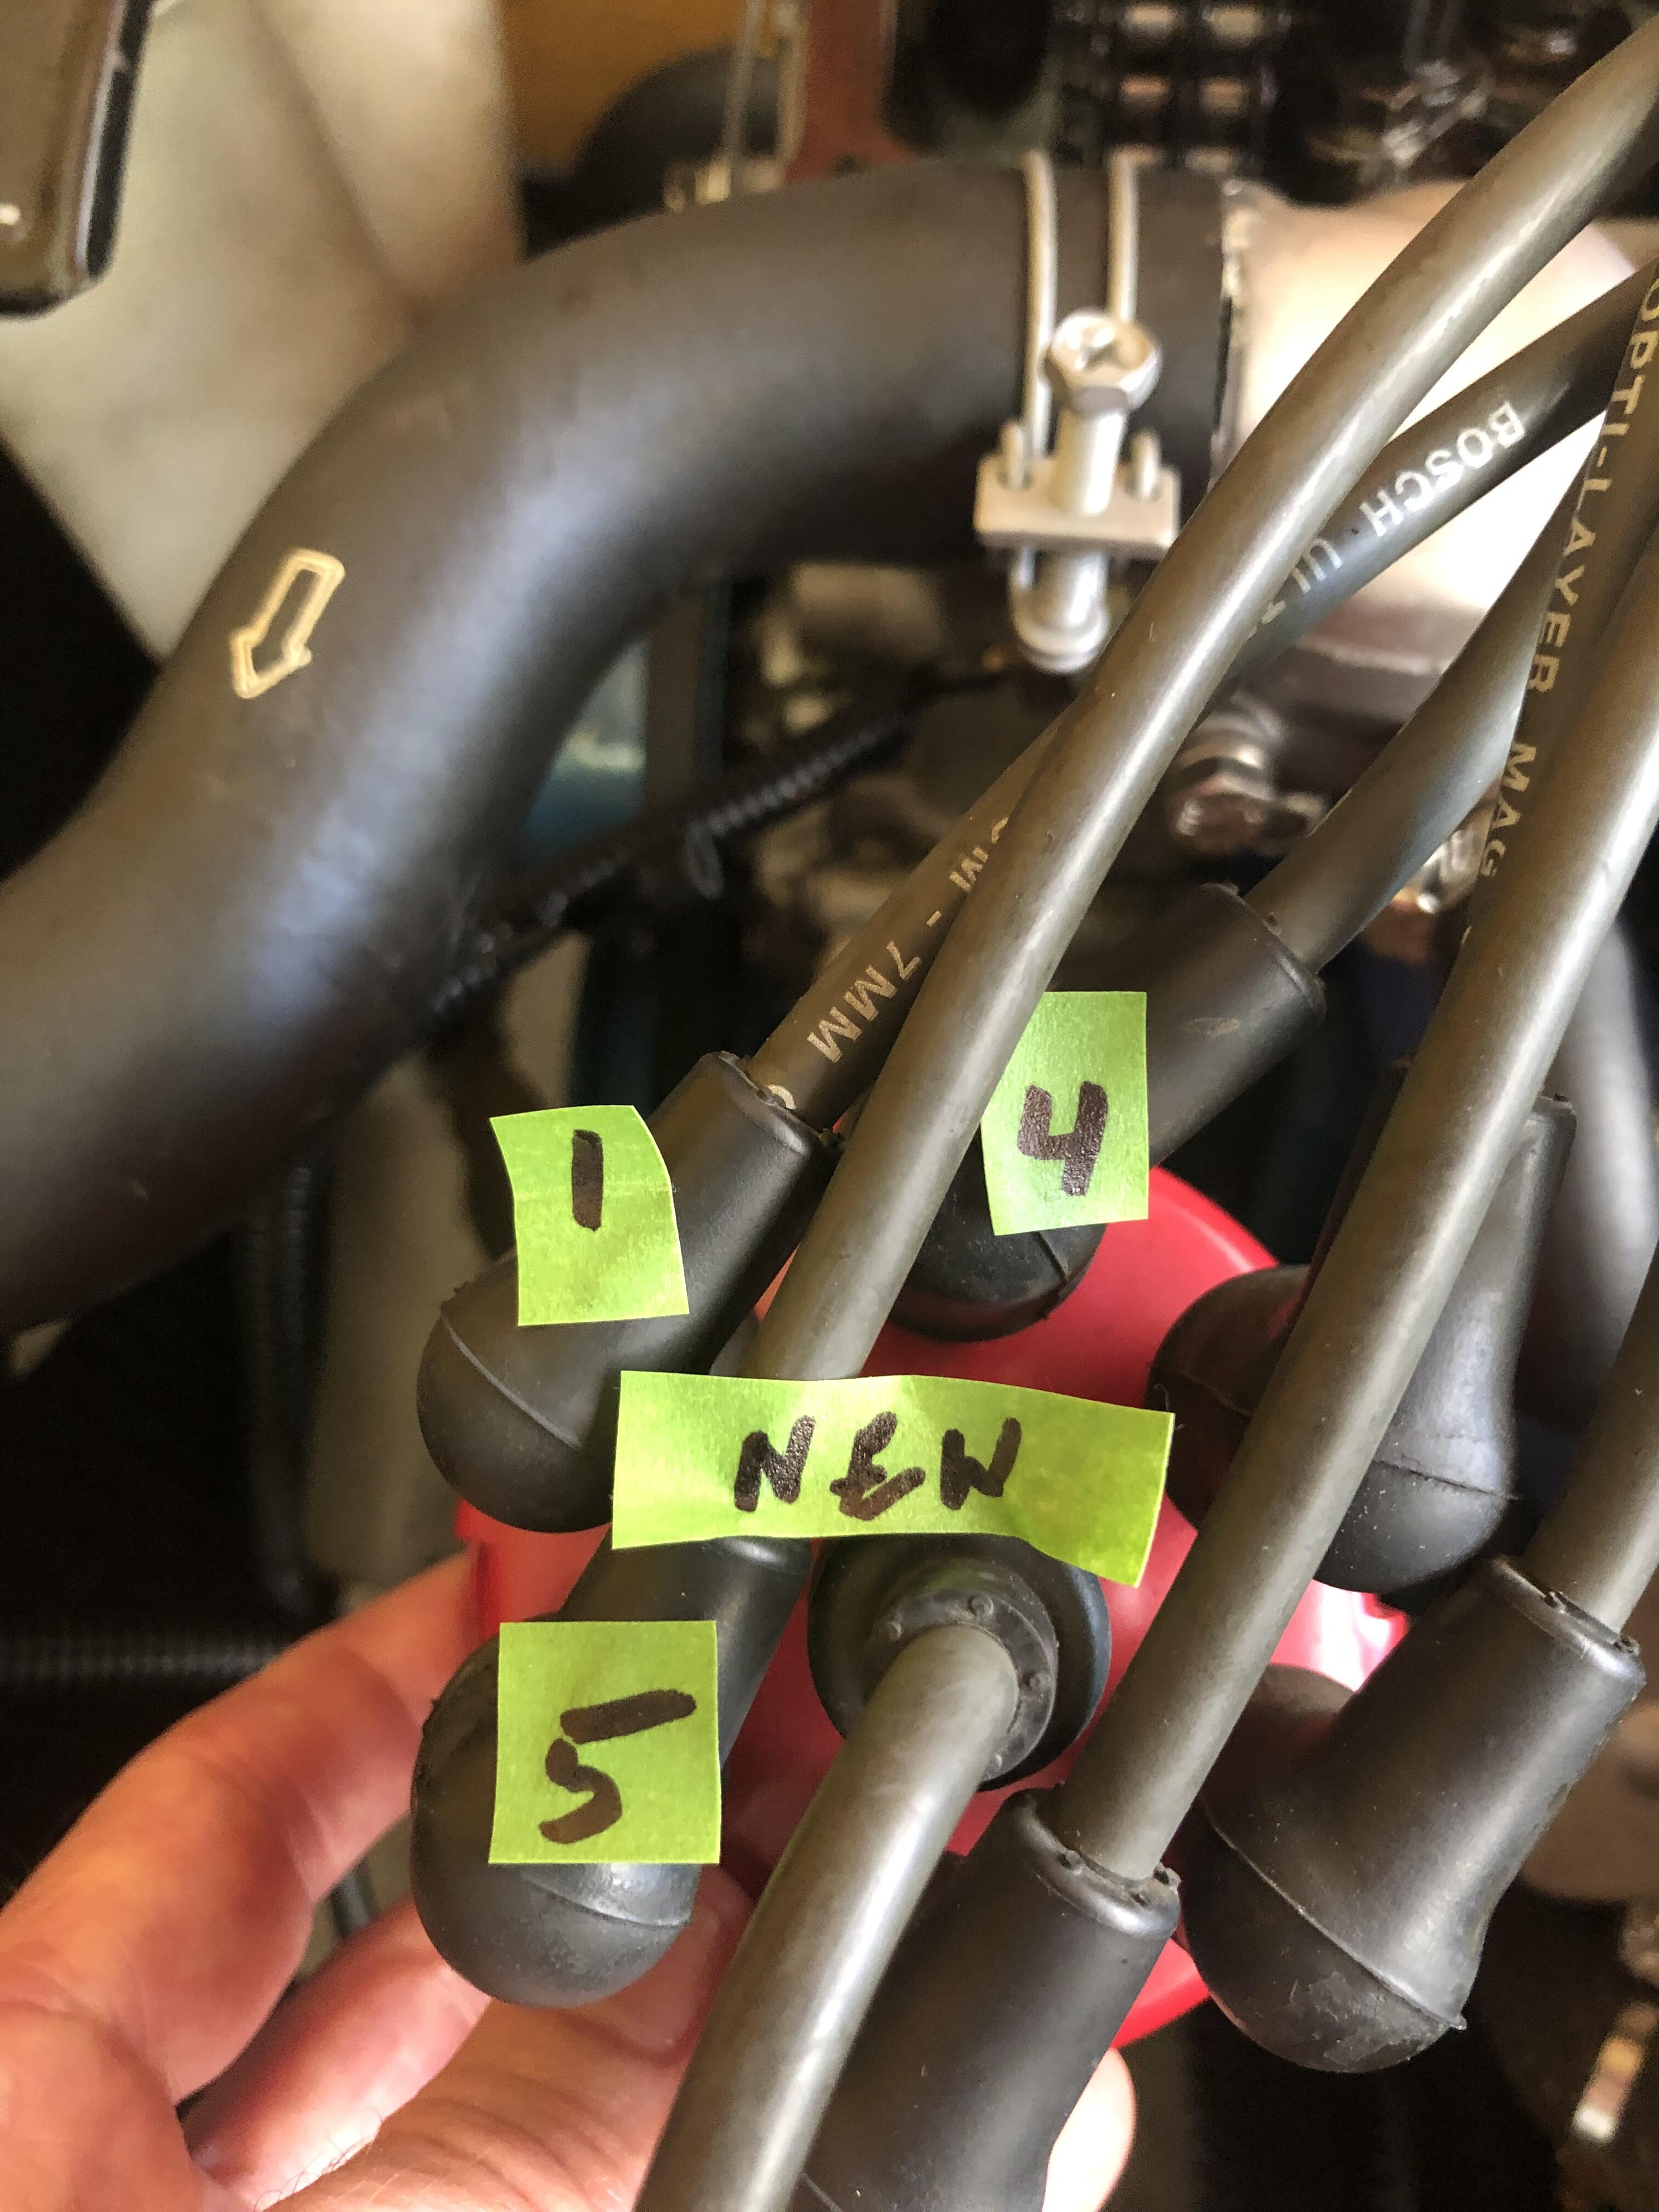
SteveJ: My adjuster is the same and I lined up the center marks when I installed the distributor. My adjuster works a little strange though, it will advance a mark or two, but the retard adjusts past the "R". The rotor points to 11:25 and my #1 plug wire is at 2:00, so they are not close. I could move the #1 plug wire back to 12:00 on the distributor, but that's where I was missing my timing marks and the engine ran horrible.
-
Have the distributor turned counterclockwise to the stops, but backfiring through the carbs continues. Do I need to reset everything back to TDC and move the oil pump shaft 1-2 notches to the left (counterclockwise)?
-
SteveJ: Thank you for the suggestion. I'll try to retard the timing more. Was not sure which way to go advance or retard.
-
Still no luck; unable to start the car. Since last Wednesday, July 13, I moved the plug wires on the distributor one to the left (counterclockwise). The rotor at TDC (11:25) is now before the #1 plug wire at 10:00 on the distributor. The new Nissan valve cover gasket is installed. While cranking I’m getting slight backfiring through the carbs and unusual odors, but it will not start. I think the rotor is not close enough to the #1 plug wire on the distributor now. I’m beyond frustrated.
-
SteveJ: Thank you for the Nissan valve cover gasket details. Once I saw your note last night I ordered a Nissan gasket from a well known Z Car parts house and it shipped this morning. Delivery is scheduled for Saturday.
-
Zed Head: Thank you for the advice. My valve cover gasket no longer usable, so no start attempts until Friday at the earliest. No gaskets available nearby.
-
Zed Head: Based on your suggestion, this is what the #1 plug wire move will look like. Will make the change and let you know the results.

-
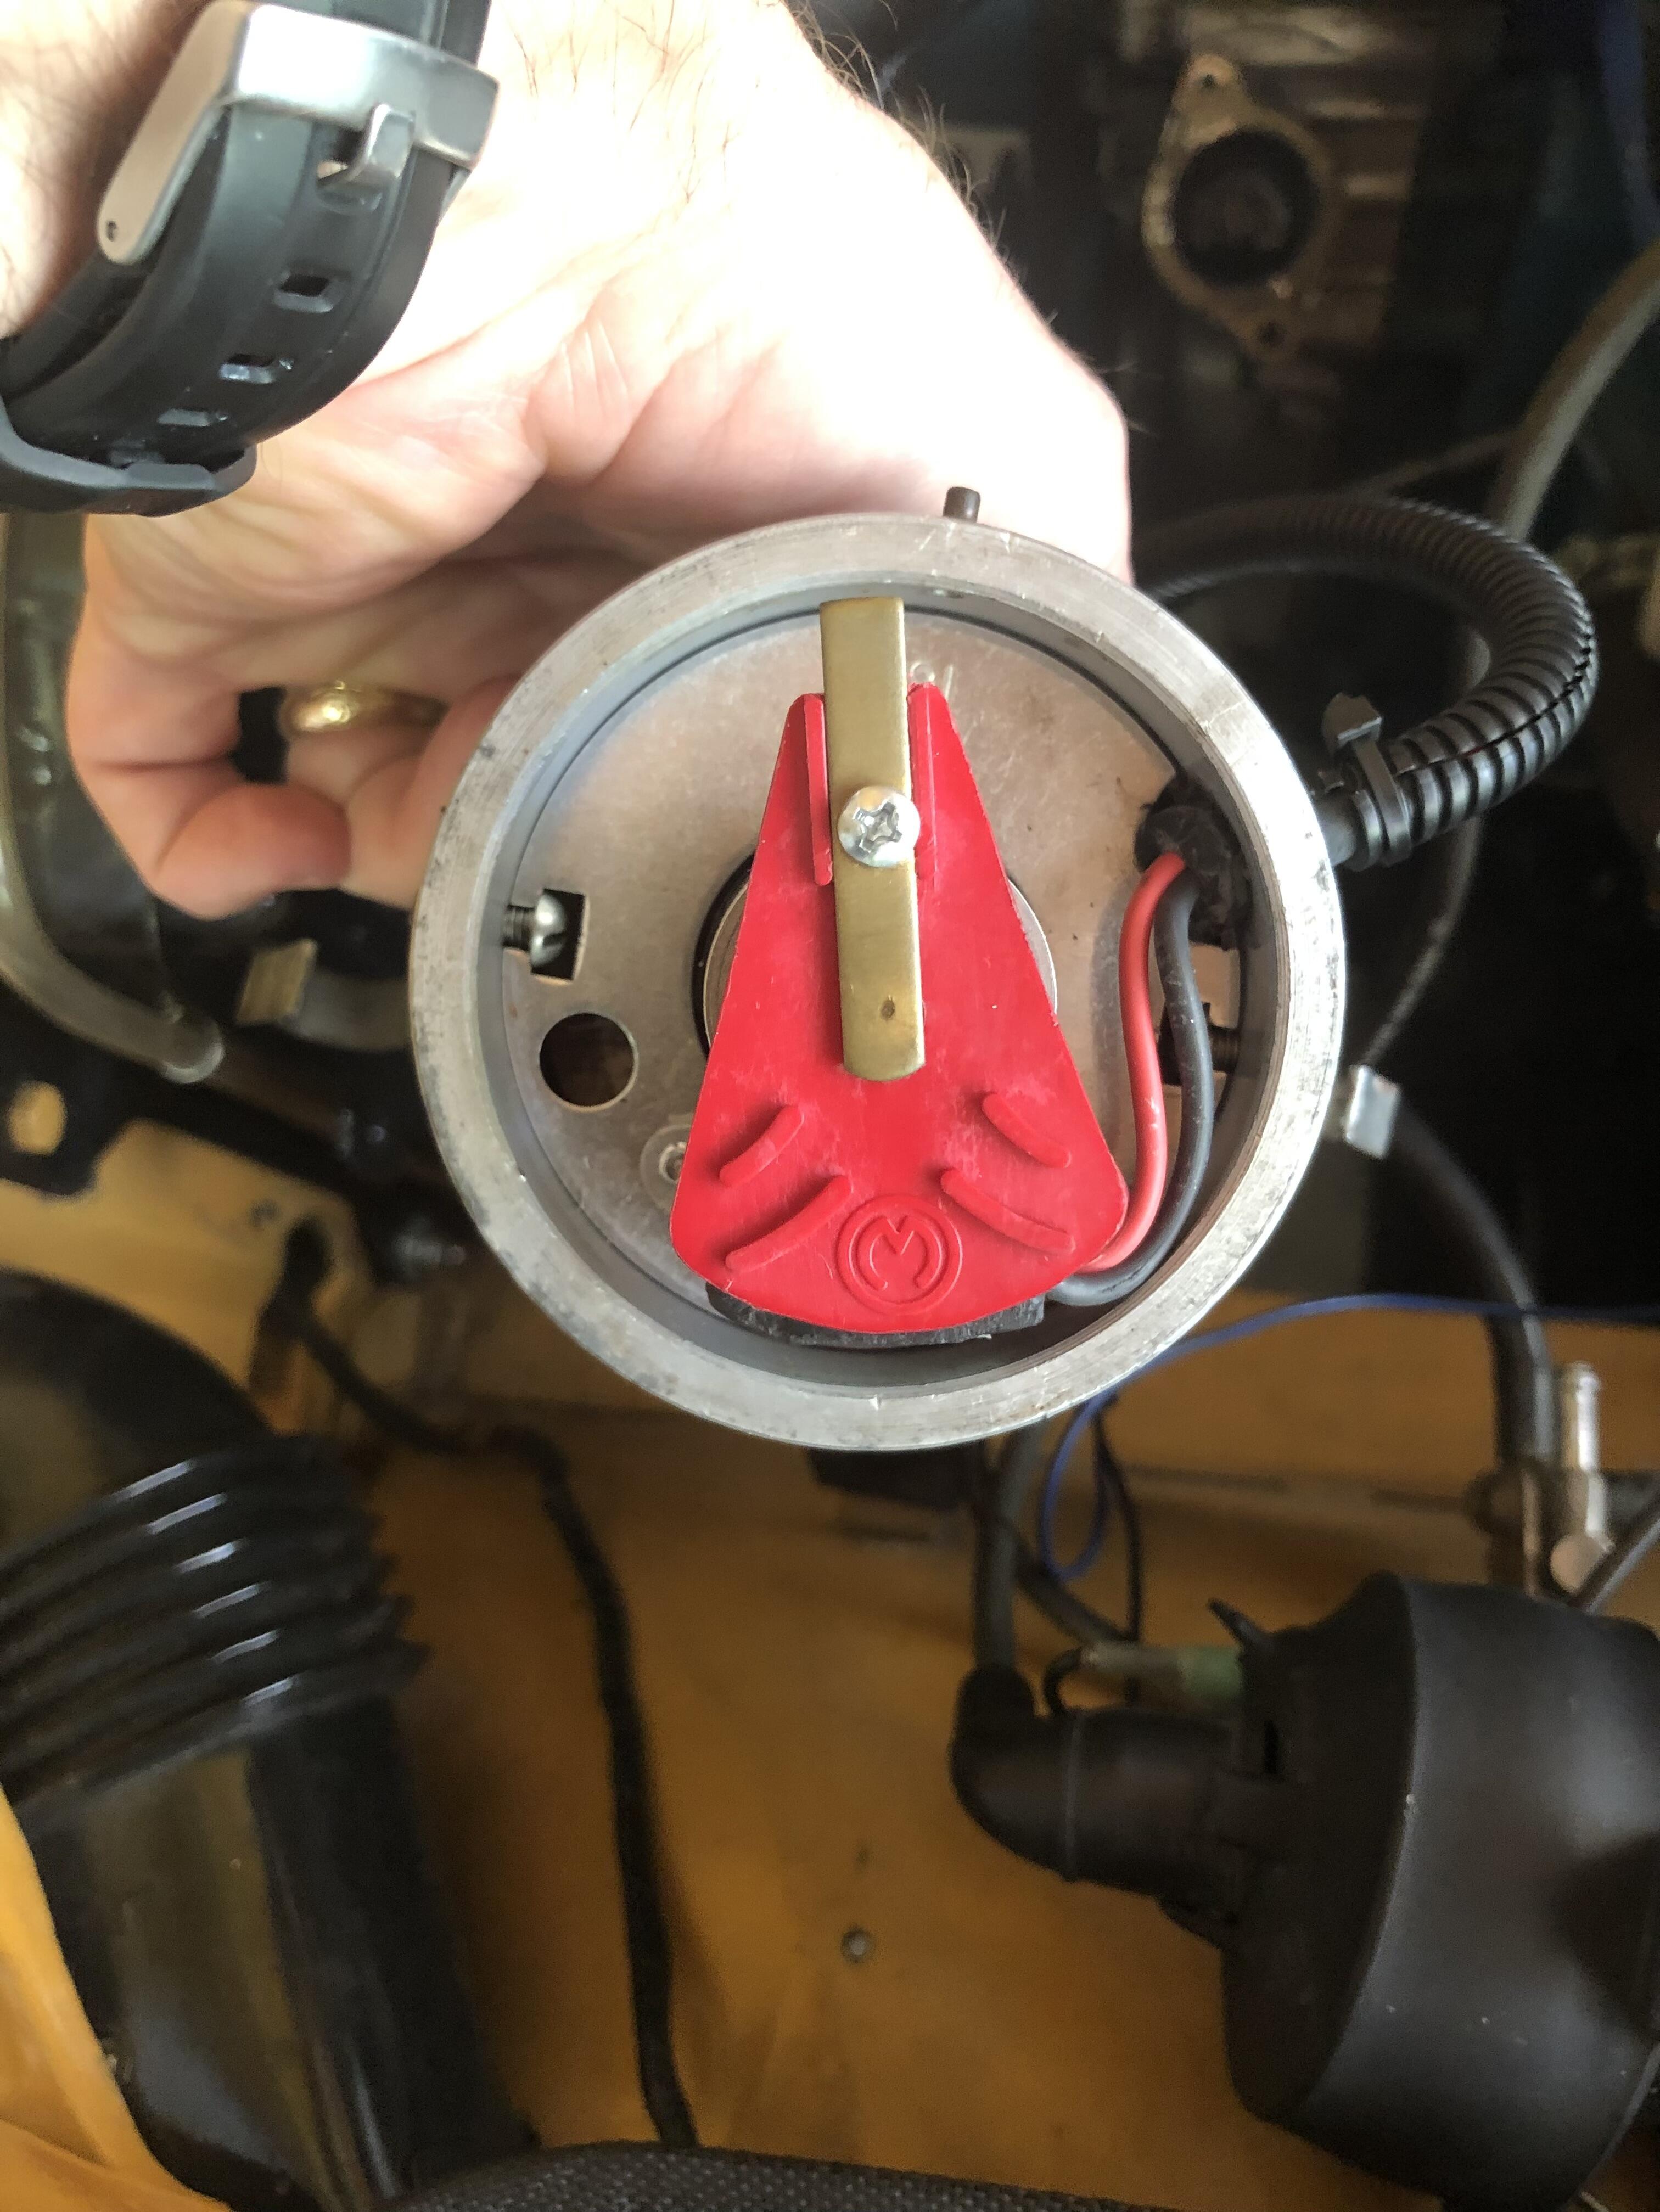
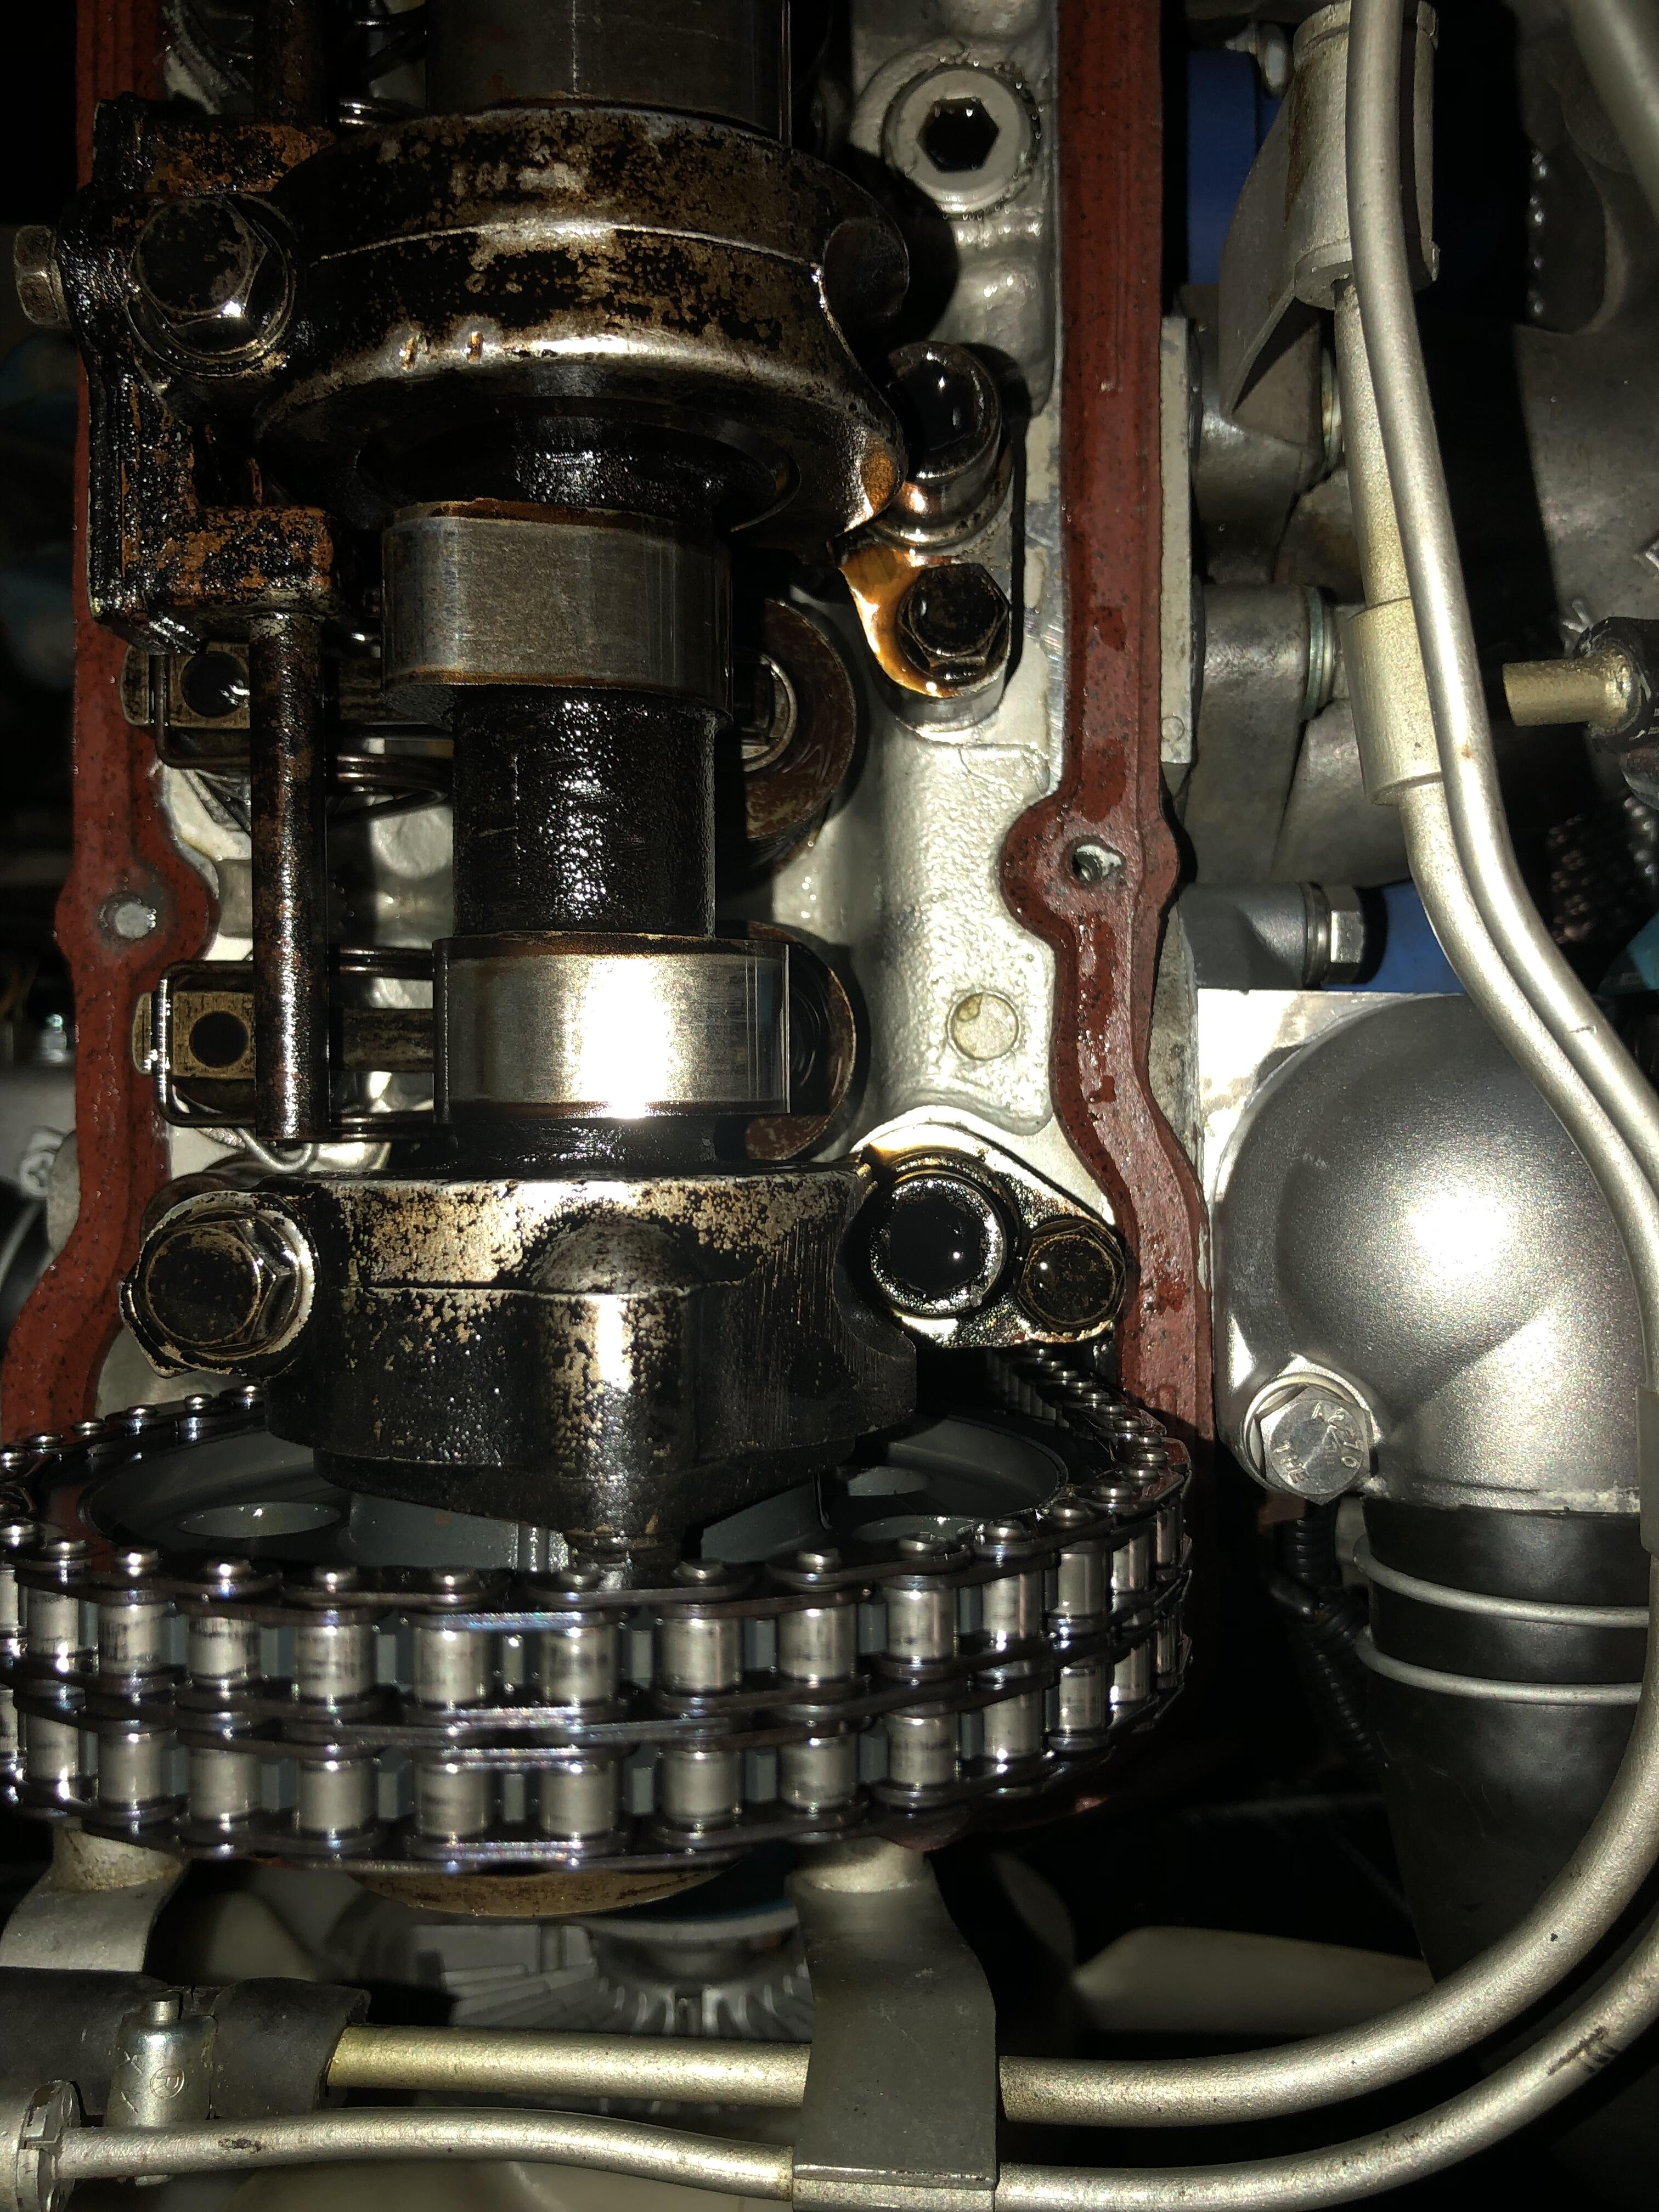
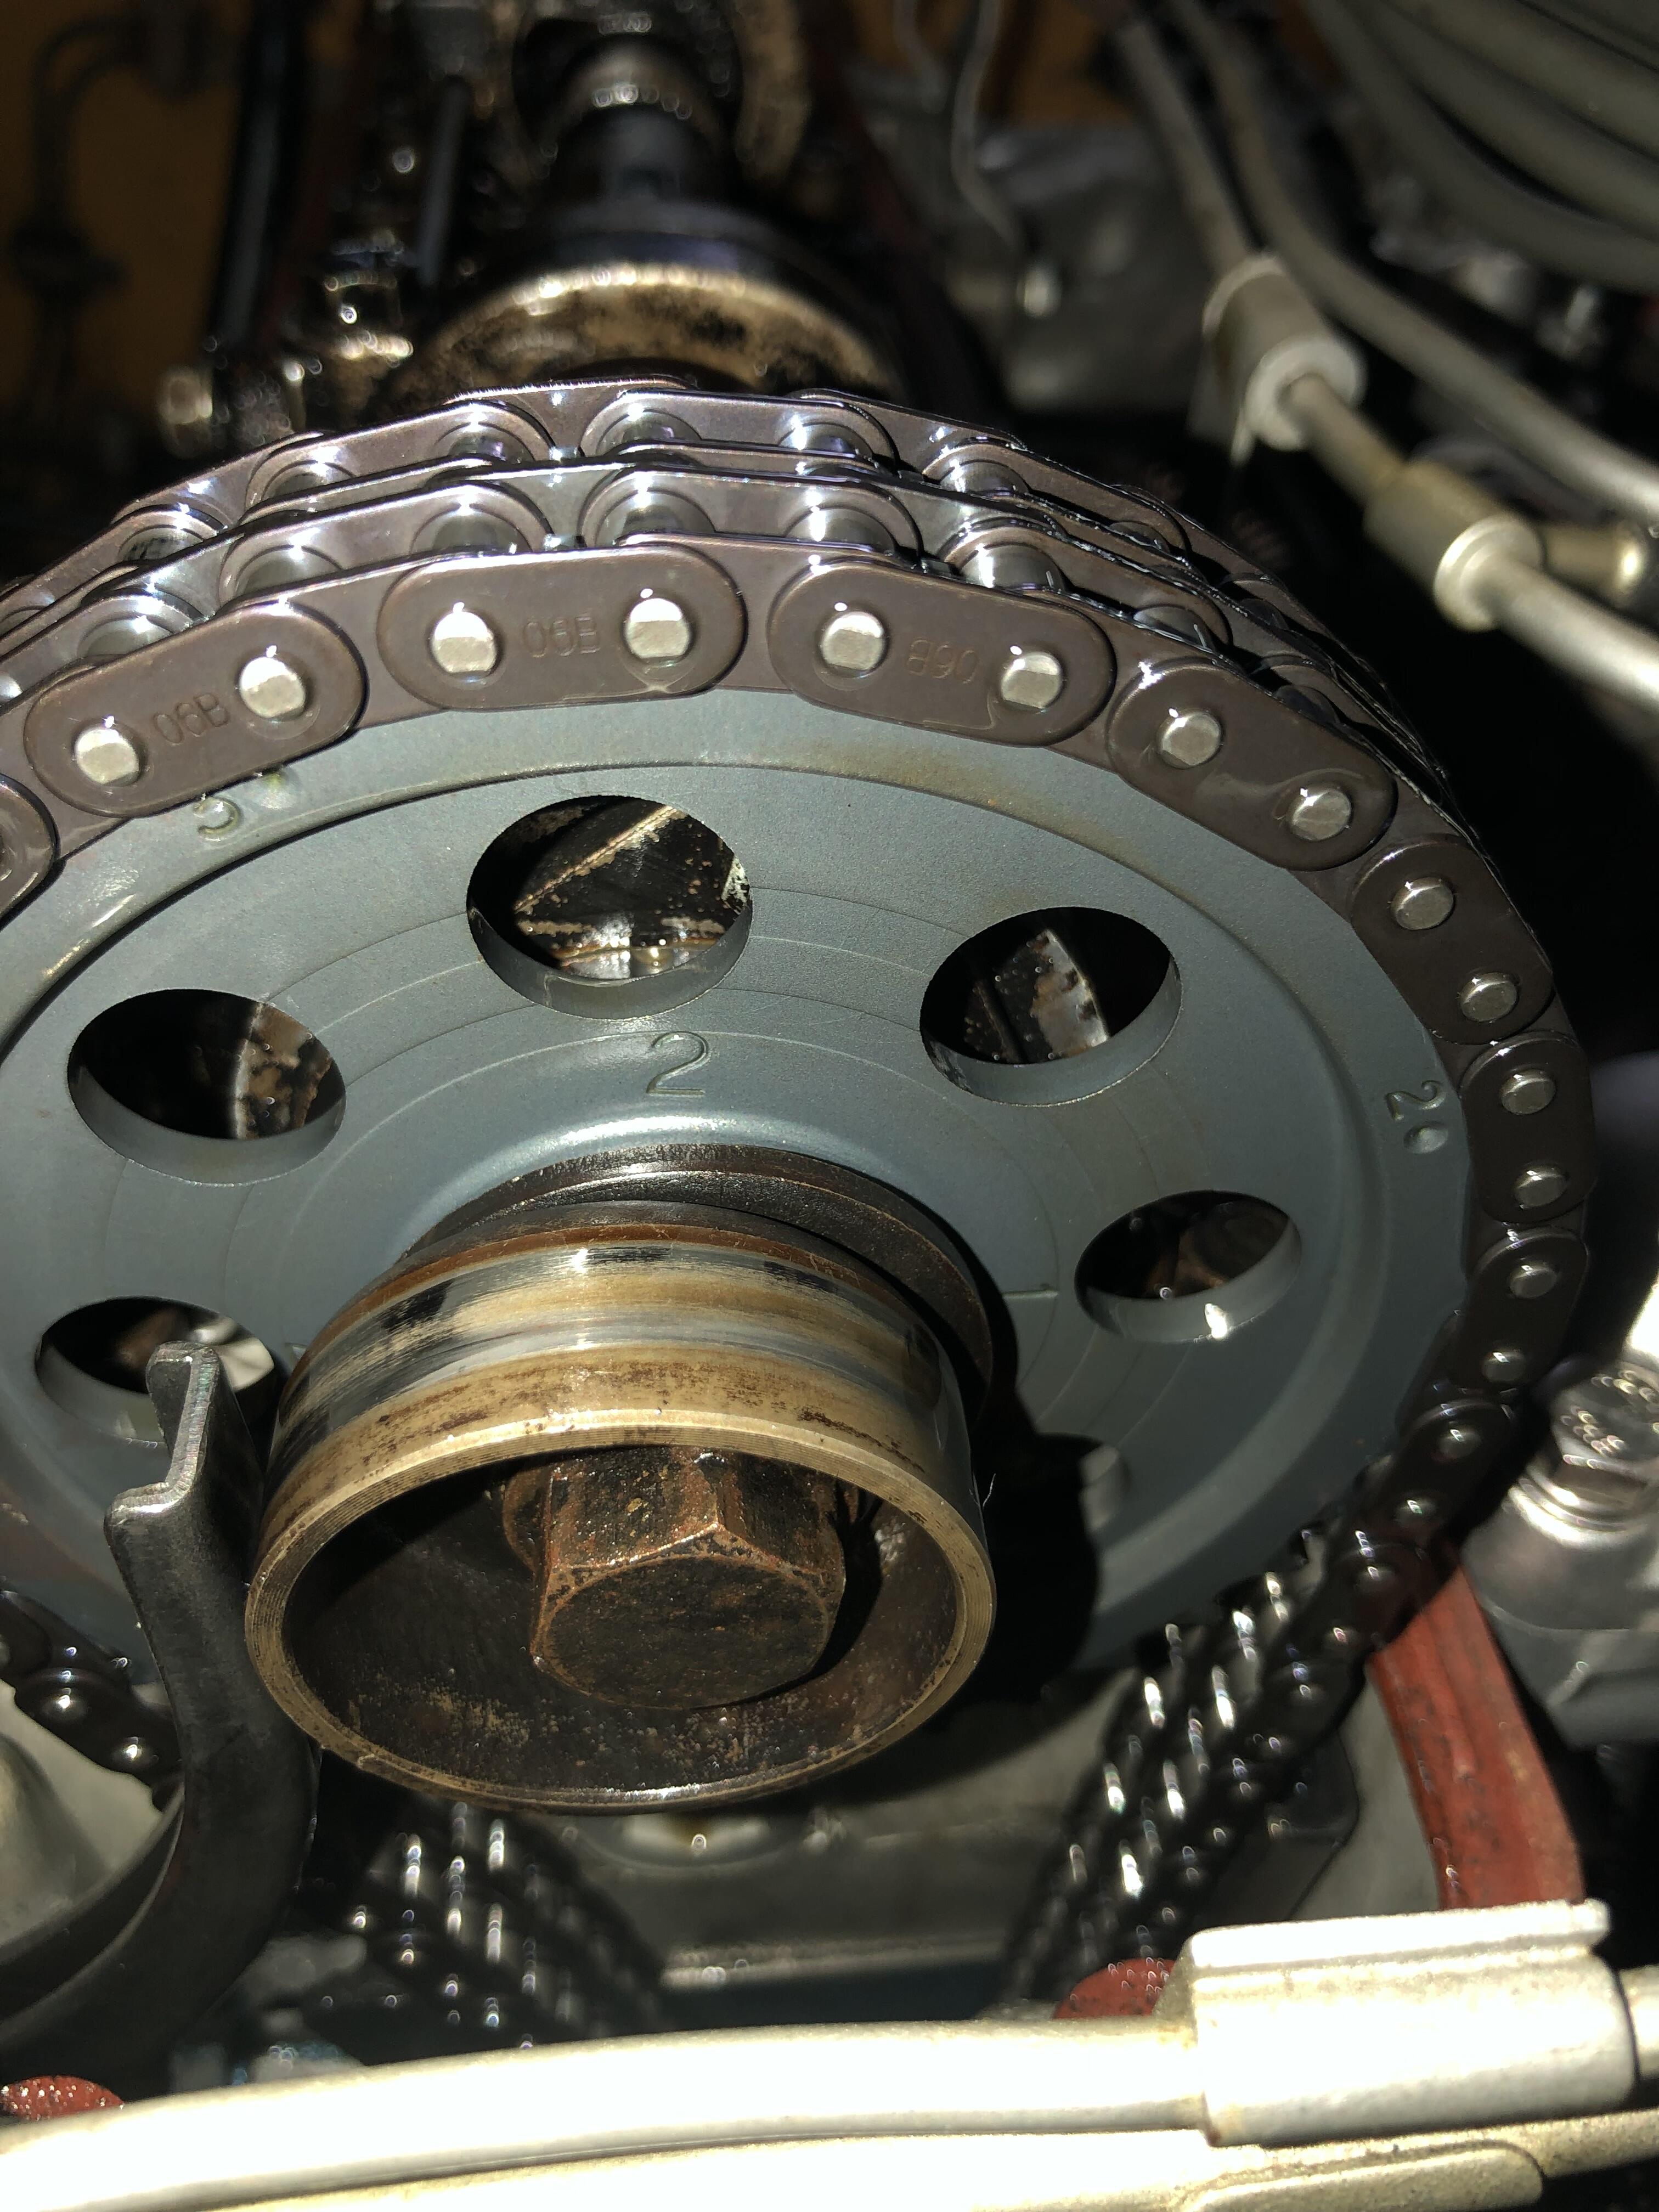
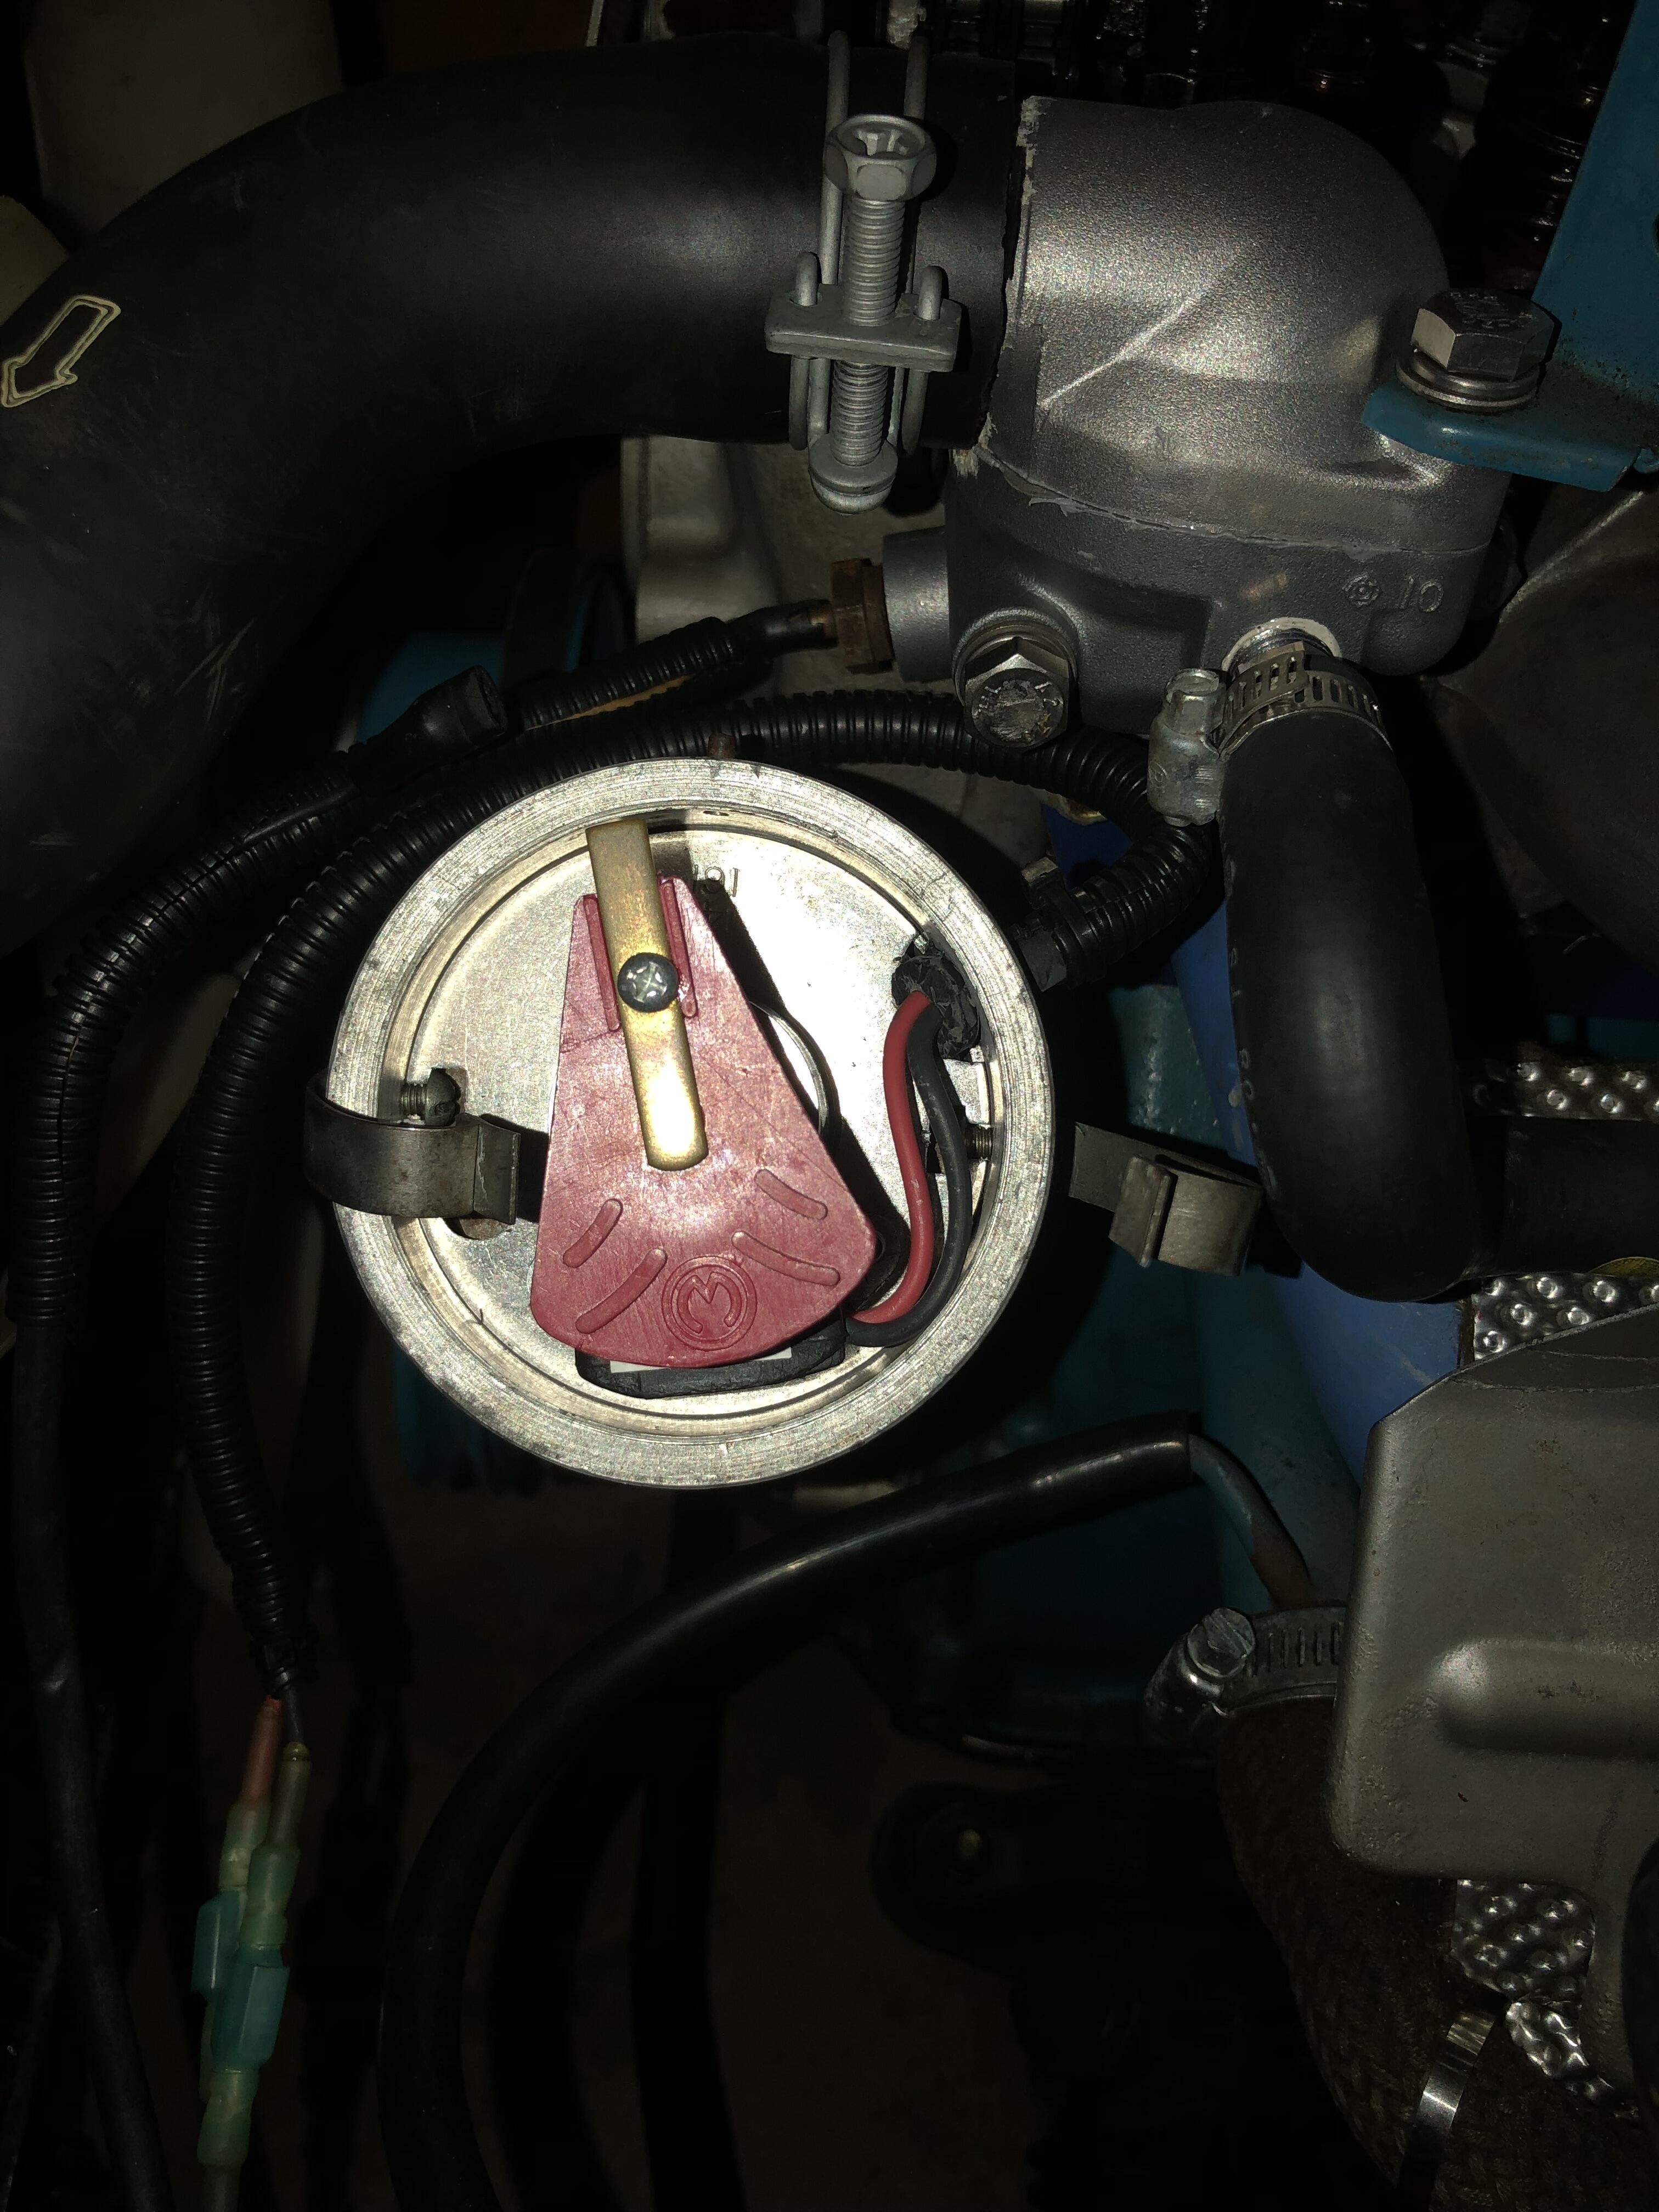
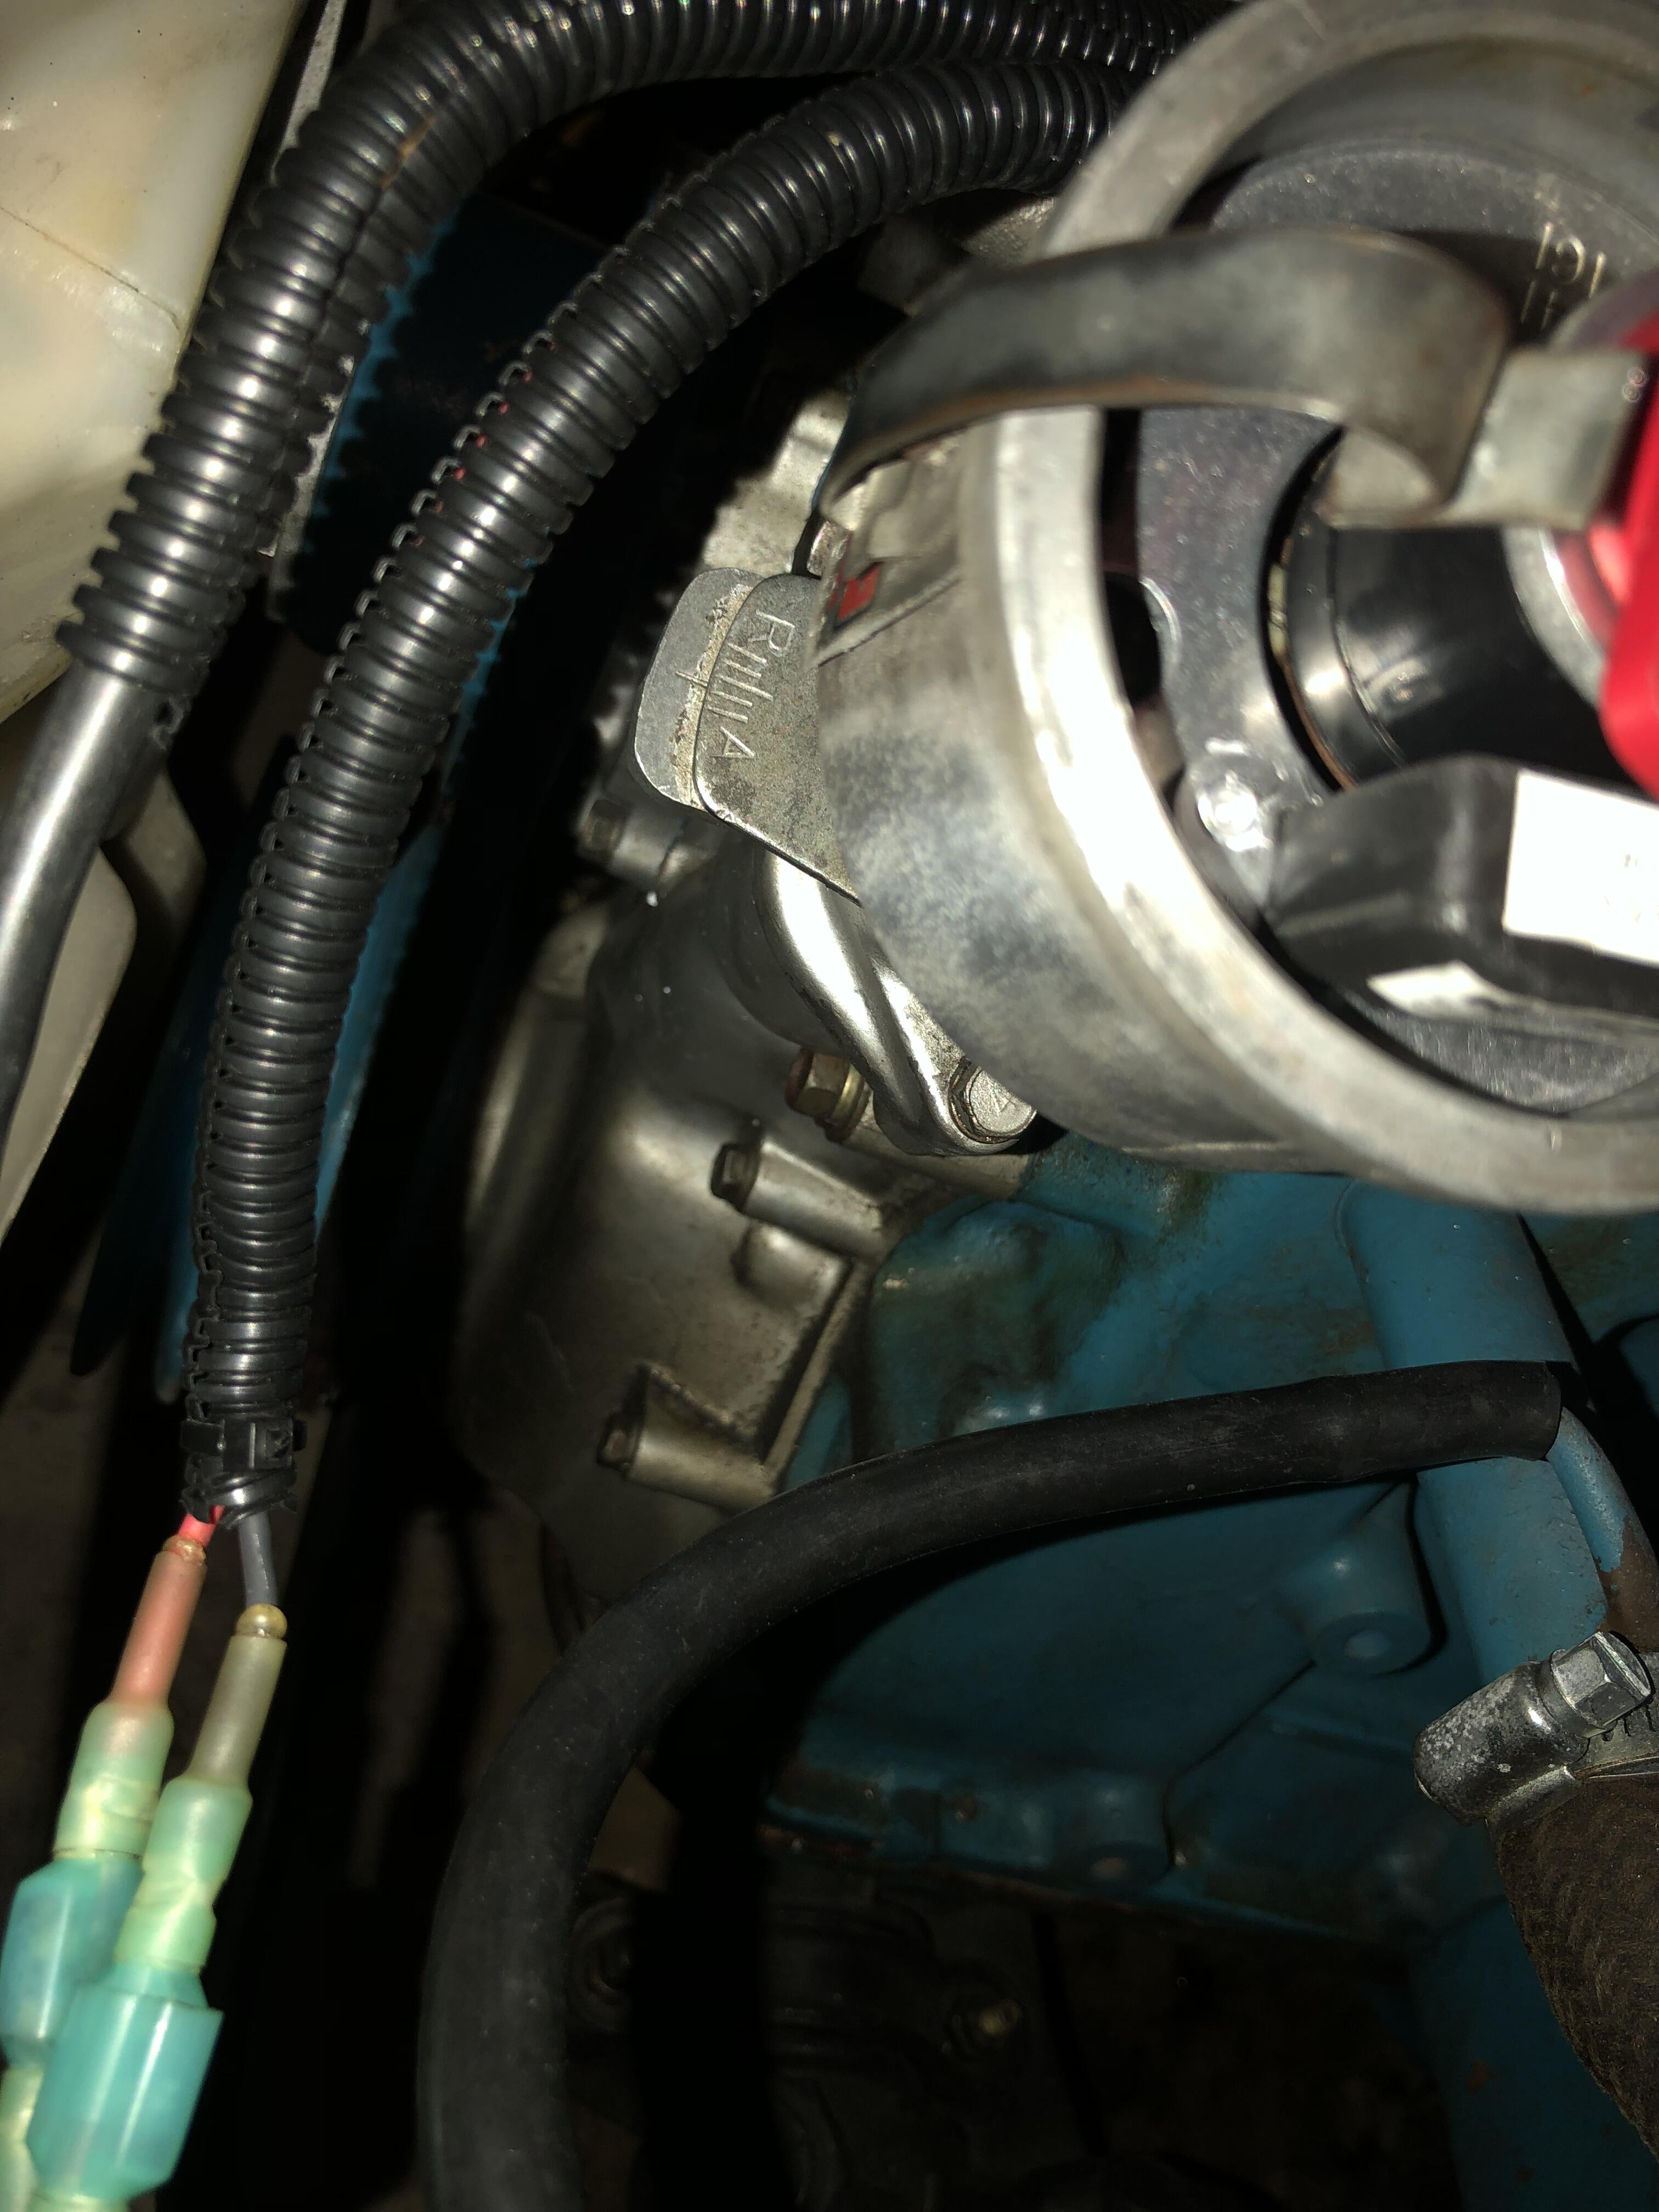
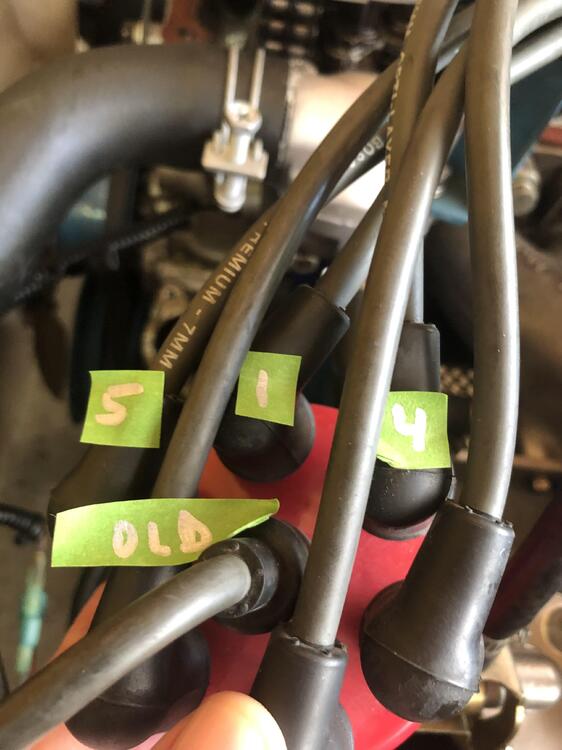
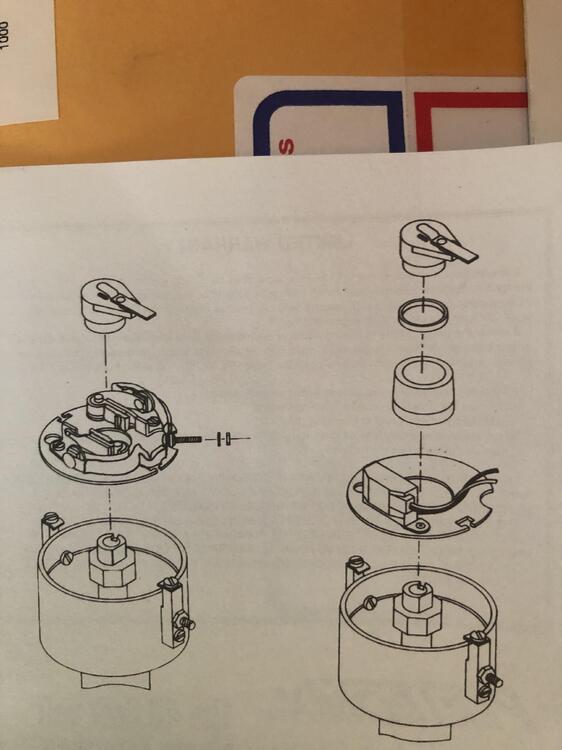
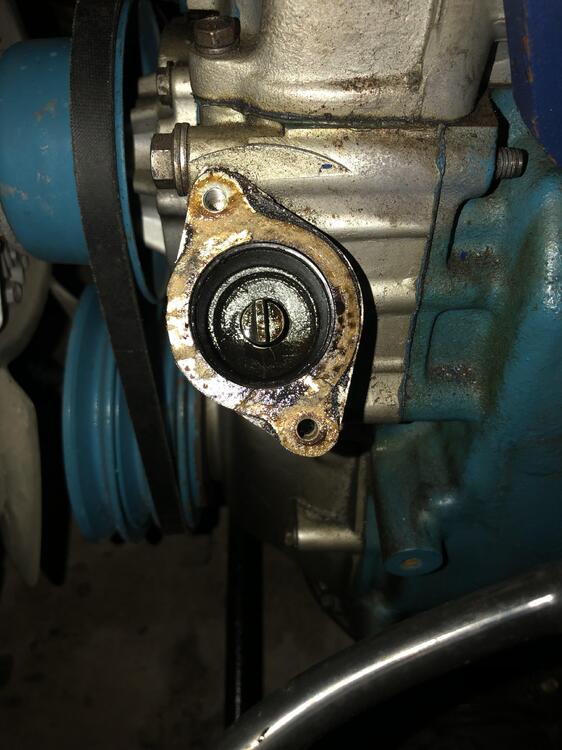
Thank you for the suggestions. Attached are four additional (better) photos. SteveJ: It appears the Pertronix unit only fits into the Mallory dual point distributor one way. The rotor position and the oil shaft appear to align. Used a Testors Enamel paint pen to highlight the timing marks better. Reptoid Overlords: Cleaned up the cam pull notch and the alignment appears to be good. My engine internals need some cleaning.


-
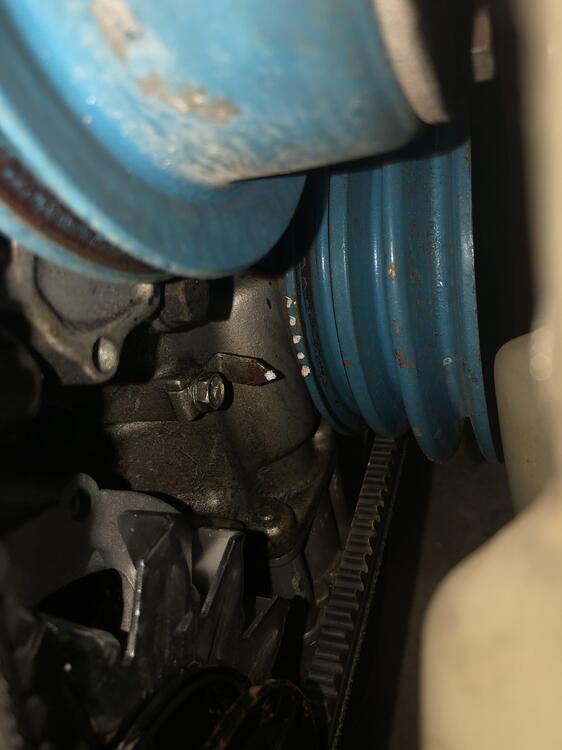
Sorry for the delay, technology problems. Finally got the cork to pop at #1 TDC, so I took the requested photos. The timing mark is difficult to see, but the silver pointer tip is pointing to the dark spot, which is zero. The 5, 10, etc. marks are above the 0 marker. Surprisingly, all the marks line up, but I think I’m not quite at 11:25 with the oil pump shaft. Since my #1 plug wire is currently placed at about 12:30 and the rotor spins counter clockwise, the spark plug is igniting in advance of full compression. So I think that's the problem. Maybe I can move the #1 wire one to the left, which is currently #5 at about 11:00 to get my timing correct.


-
Appreciate the replies. Spent the last hour trying to find TDC for the #1 piston to take photos and help with the diagnosis. Having no luck getting the "cork to pop" at TDC. Will post my results once I get a quick break.
-
My Z runs horrible and I’m unable to locate my timing marks when the #1 piston is at TDC. Have a 1970 240Z 5speed, with 139K (engine rebuild at 134K). Performance modifications: Fujitsubo Legalis R Exhaust and Trust GReddy JDM Exhaust Headers. PO installed a Mallory dual point distributor, which I changed to Pertronix version 1. During the ignition change I found the timing before at 1-2 degrees ATDC with points and 20 degrees BTDC after Pertronix install. I’m sure that change had something to do with the electronic pickup. I was unable to retard the timing much due to adjustment limitations on the distributor, so I adjusted the timing by drivability and the ping test. It ran decent enough. Fast forward to last week, original carbs were impossible to adjust, so I installed replacements from ZTherapy. Prior to carb installation I checked and re-gapped the plugs, adjusted the valves and checked the timing. With the new carbs, the car ran great with full choke, but horrible once warm. The lowest idle with the car still running was 1300 rpm. I knew the timing was off, so I checked the oil pump shaft and found it at 1:35 (rotor at 12:00/#1 plug wire), instead of 11:25. I set the engine at TDC; timing marks/pointer, cam lobs and piston at “what I thought was” compression stroke, based on the manuals. Reinstalled oil pump shaft to 11:25 and bolted down distributor so I would have room for adjustment. The Mallory rotor now installs after the 12:00 position, so past the #1 plug wire. (I’m at 620 feet above sea level, so I found out last night I was running the carbs too lean at 2..5 turns out. So my mixture should be 3-5 turns out based on elevation.) Car still runs horrible, even with the mixture screws out to 3.5 turns. In addition, when using my timing light I cannot find the timing marks and I have no more adjustment left on my distributor. Today, I pulled the #1 plug and inserted an old rubber plug to find the compression stroke. The plug popped out like a champagne cork, but I do not see my timing marks. I’m stumped. Will appreciate advice on getting my car running right with these new carbs. Thank you!
-
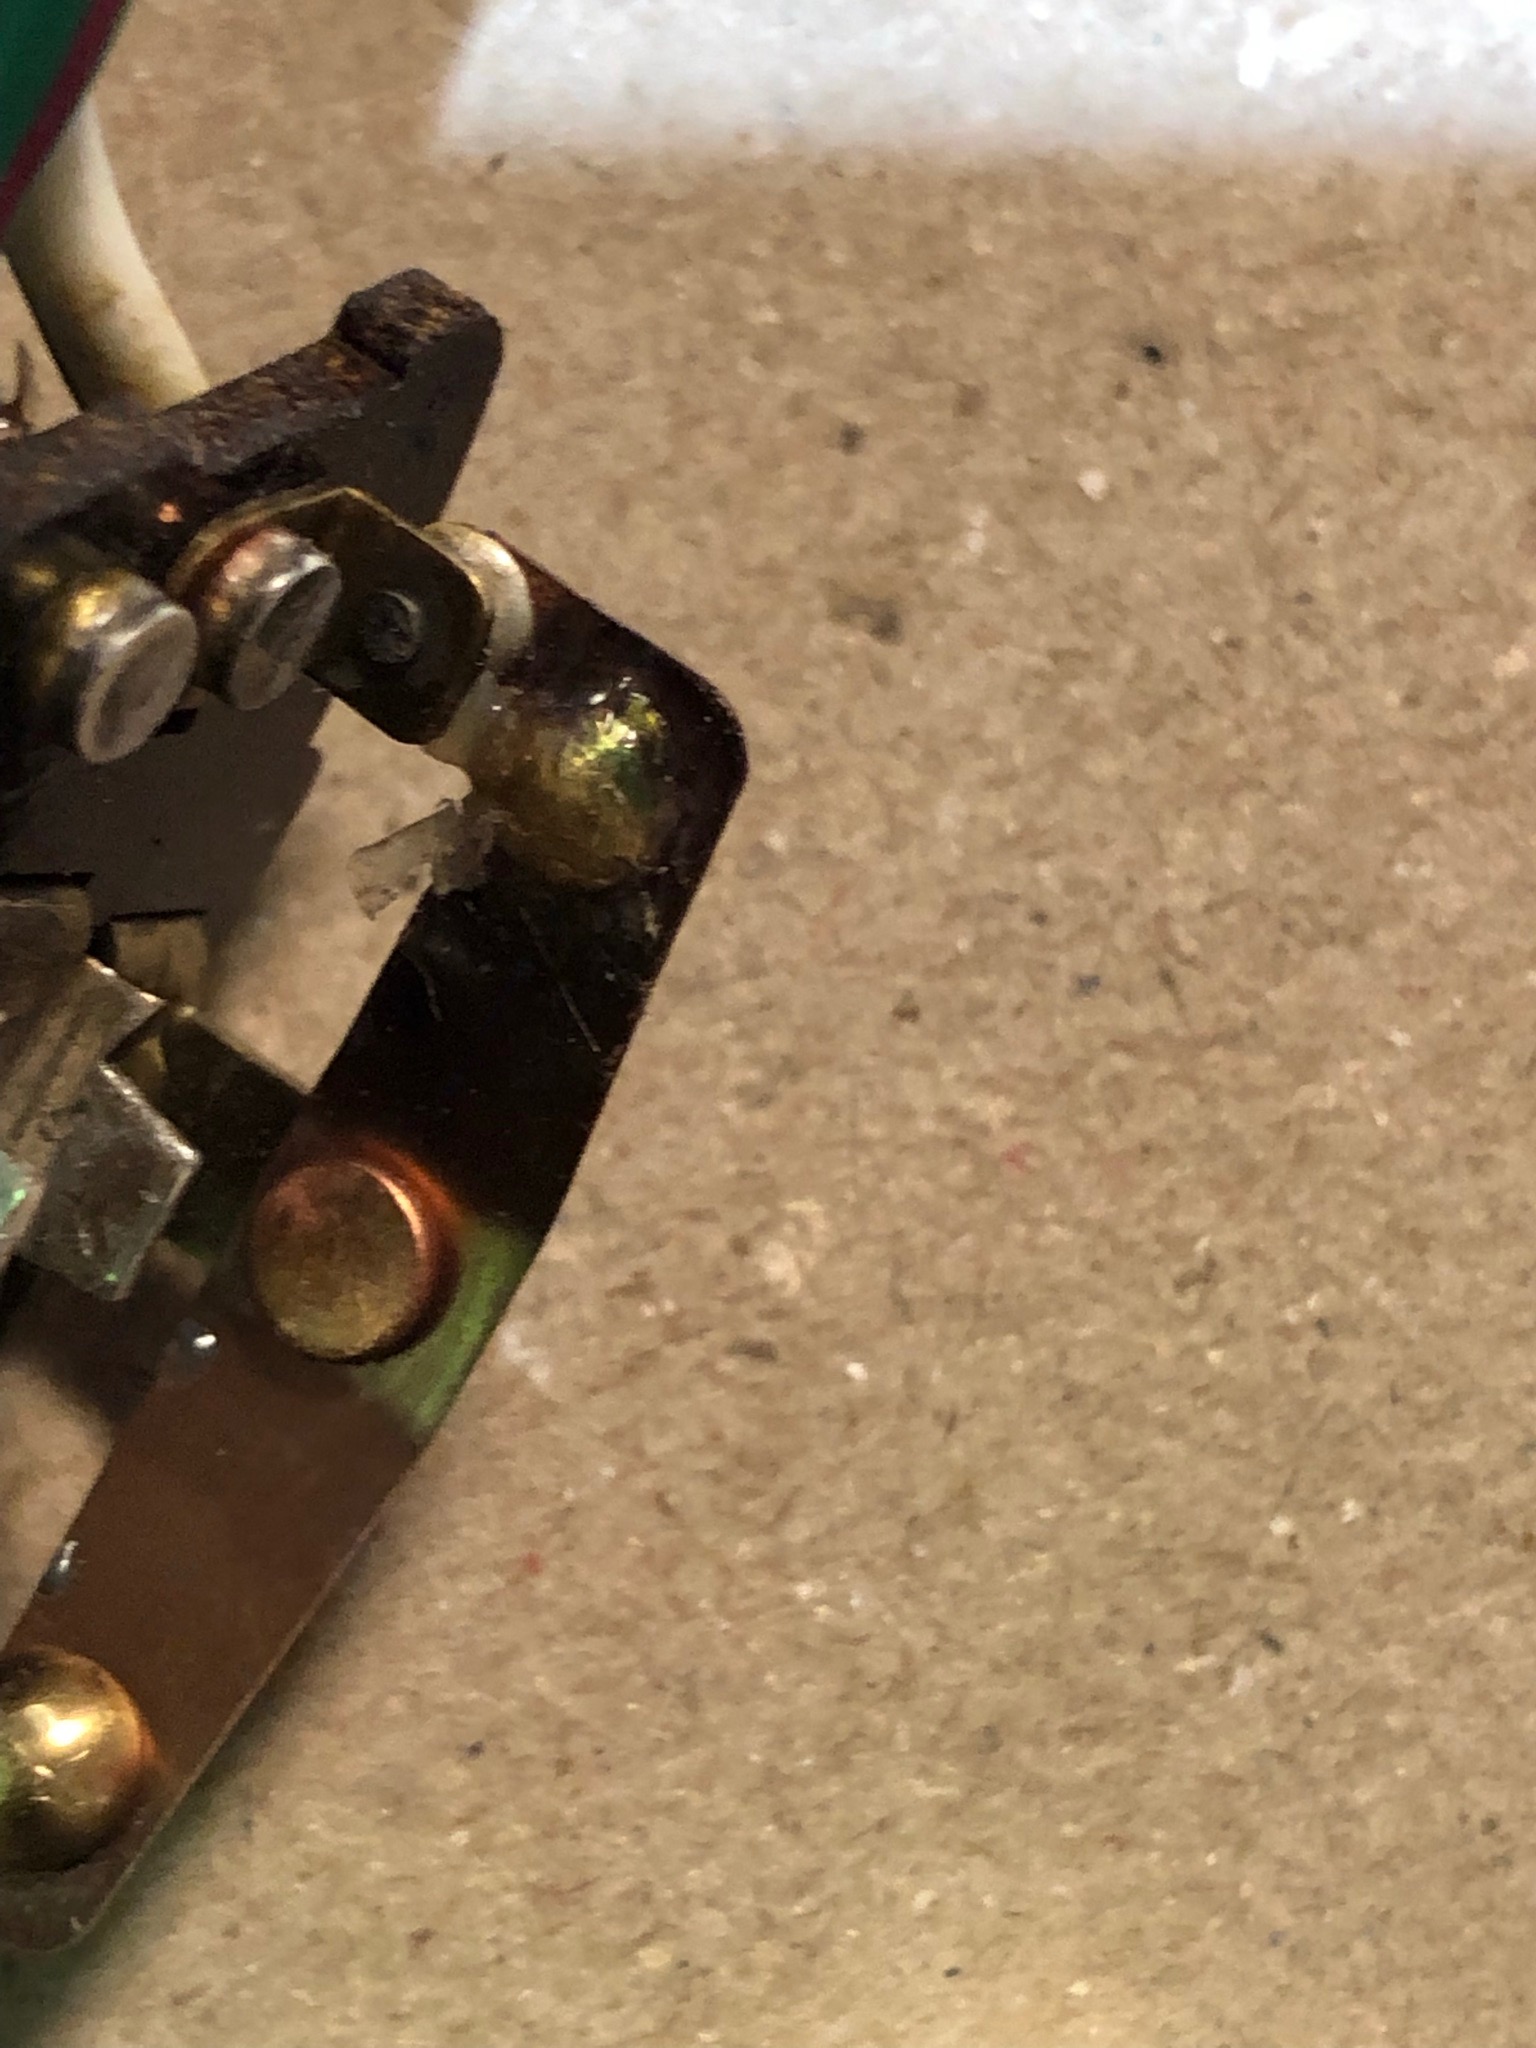
All fixed! The issue causing my brake light fuse to blow was a faulty turn signal switch. As stated above, I got the turn signal switch to partially work yesterday, so today I disassembled it again for repairs, but it failed testing with an ohm meter. I think too much plastic melted into the contacts and I was unable clean it good enough. See attached photos. Luckily I had a spare switch from a later model 240Z (longer wiring harness) that was a perfect match. I was easily able to coil/roll-up the longer harness under the steering wheel. Glad to be back on the road to enjoy a Wisconsin summer. Nate (ZNate)


-
Thank you Zed Head for the suggestion. That will be my next step if the turn signal repairs do not fully resolve the problem. Upon disassembly of the turn signal switch I discovered the bearing out of place, which melted part of the bearing housing containing the spring. I cleaned the switch, reassemble it and installed it again. Brake lights and turn signals worked on one side, but not the other. The switch also did not operate correctly. Tomorrow I will take my time fixing it and utilizing parts from a spare switch. Will provide an update tomorrow.
-
Saw a loose wire, so I repeated my test. No more flashing sparks, but my left side blinkers stopped working. Going to take the turn signal switch apart to investigate and repair.
-
Thank you Zed Head and SteveJ for the advice and easy to read schematic. it's much better than the magnified hard copy I have. I was doing a test with the brake light bulbs removed, brake pedal down, headlights on and then used the turn signal. I saw and heard a quick flash inside the turn signal housing. In addition, the wire and temporary fuse from the battery to brake switch got warm. Not sure if that identified a short in the turn signal switch or the extra amps from a short somewhere else. What do you think? I'm leaning towards removing and checking out the switch. Thank you! Nate
-
After fixing the short causing the fuse link to blow in my 9/70 240Z, I now have brake light issues. I have searched the forums, but have not found this exact issue discussed or anything that I can apply. If someone could help me narrow down the search I would appreciate the assistance. I’m assuming it is a switch issue, but do not want to take them apart again unless it is required. The brake lights work (three bulbs each side) when the brake is depressed. However, if the turn signal or the hazard lights are used, the brake light fuse blows. Turn signal lights, hazards, headlights and driving lights operate correctly before/after the brake light fuse blows. Items of note: 1. Taillights were removed/refurbished over the winter and reinstalled this spring. 2. Recent issue with defrost switch/Acc Relay circuit short identified and successfully repaired. 3. Fuse box, hazard switch, turn signal and combo switch cleaned two years/2000 miles ago. No issues until now. 4. Brake switch is new. 5. Brake circuit is powered directly from the battery to the brake switch with a 15 amp ATC fuse (which currently blows). No fuse issues in two years until now. I cannot remember who I purchased this bypass kit from at this time. Thank you! Nate
-
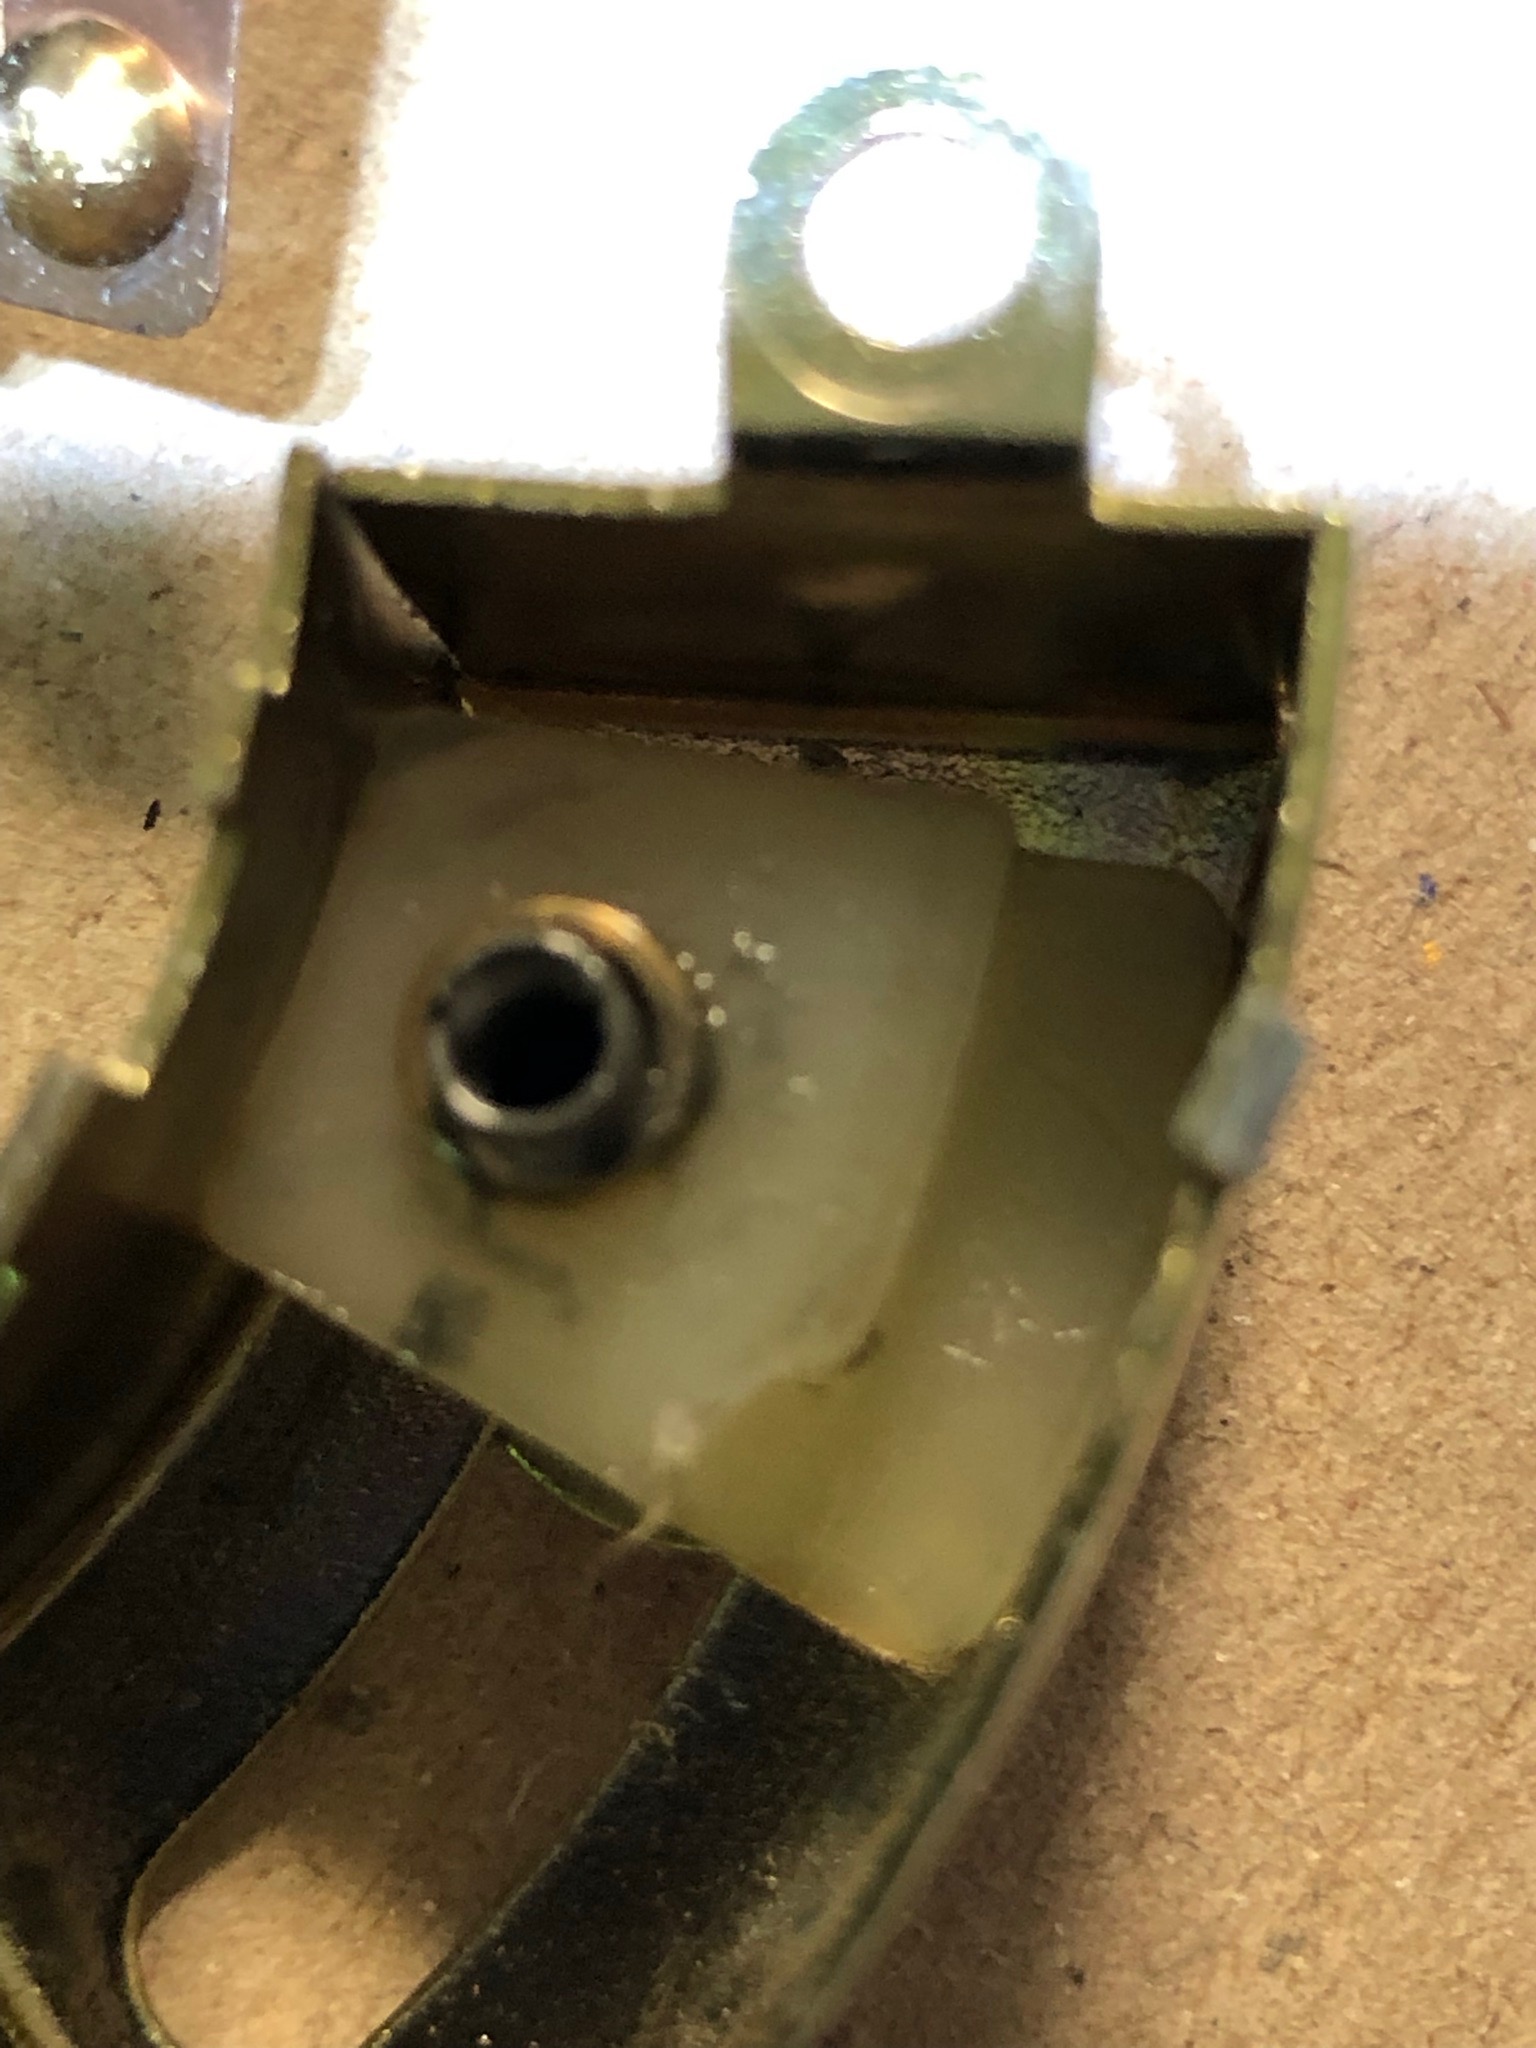
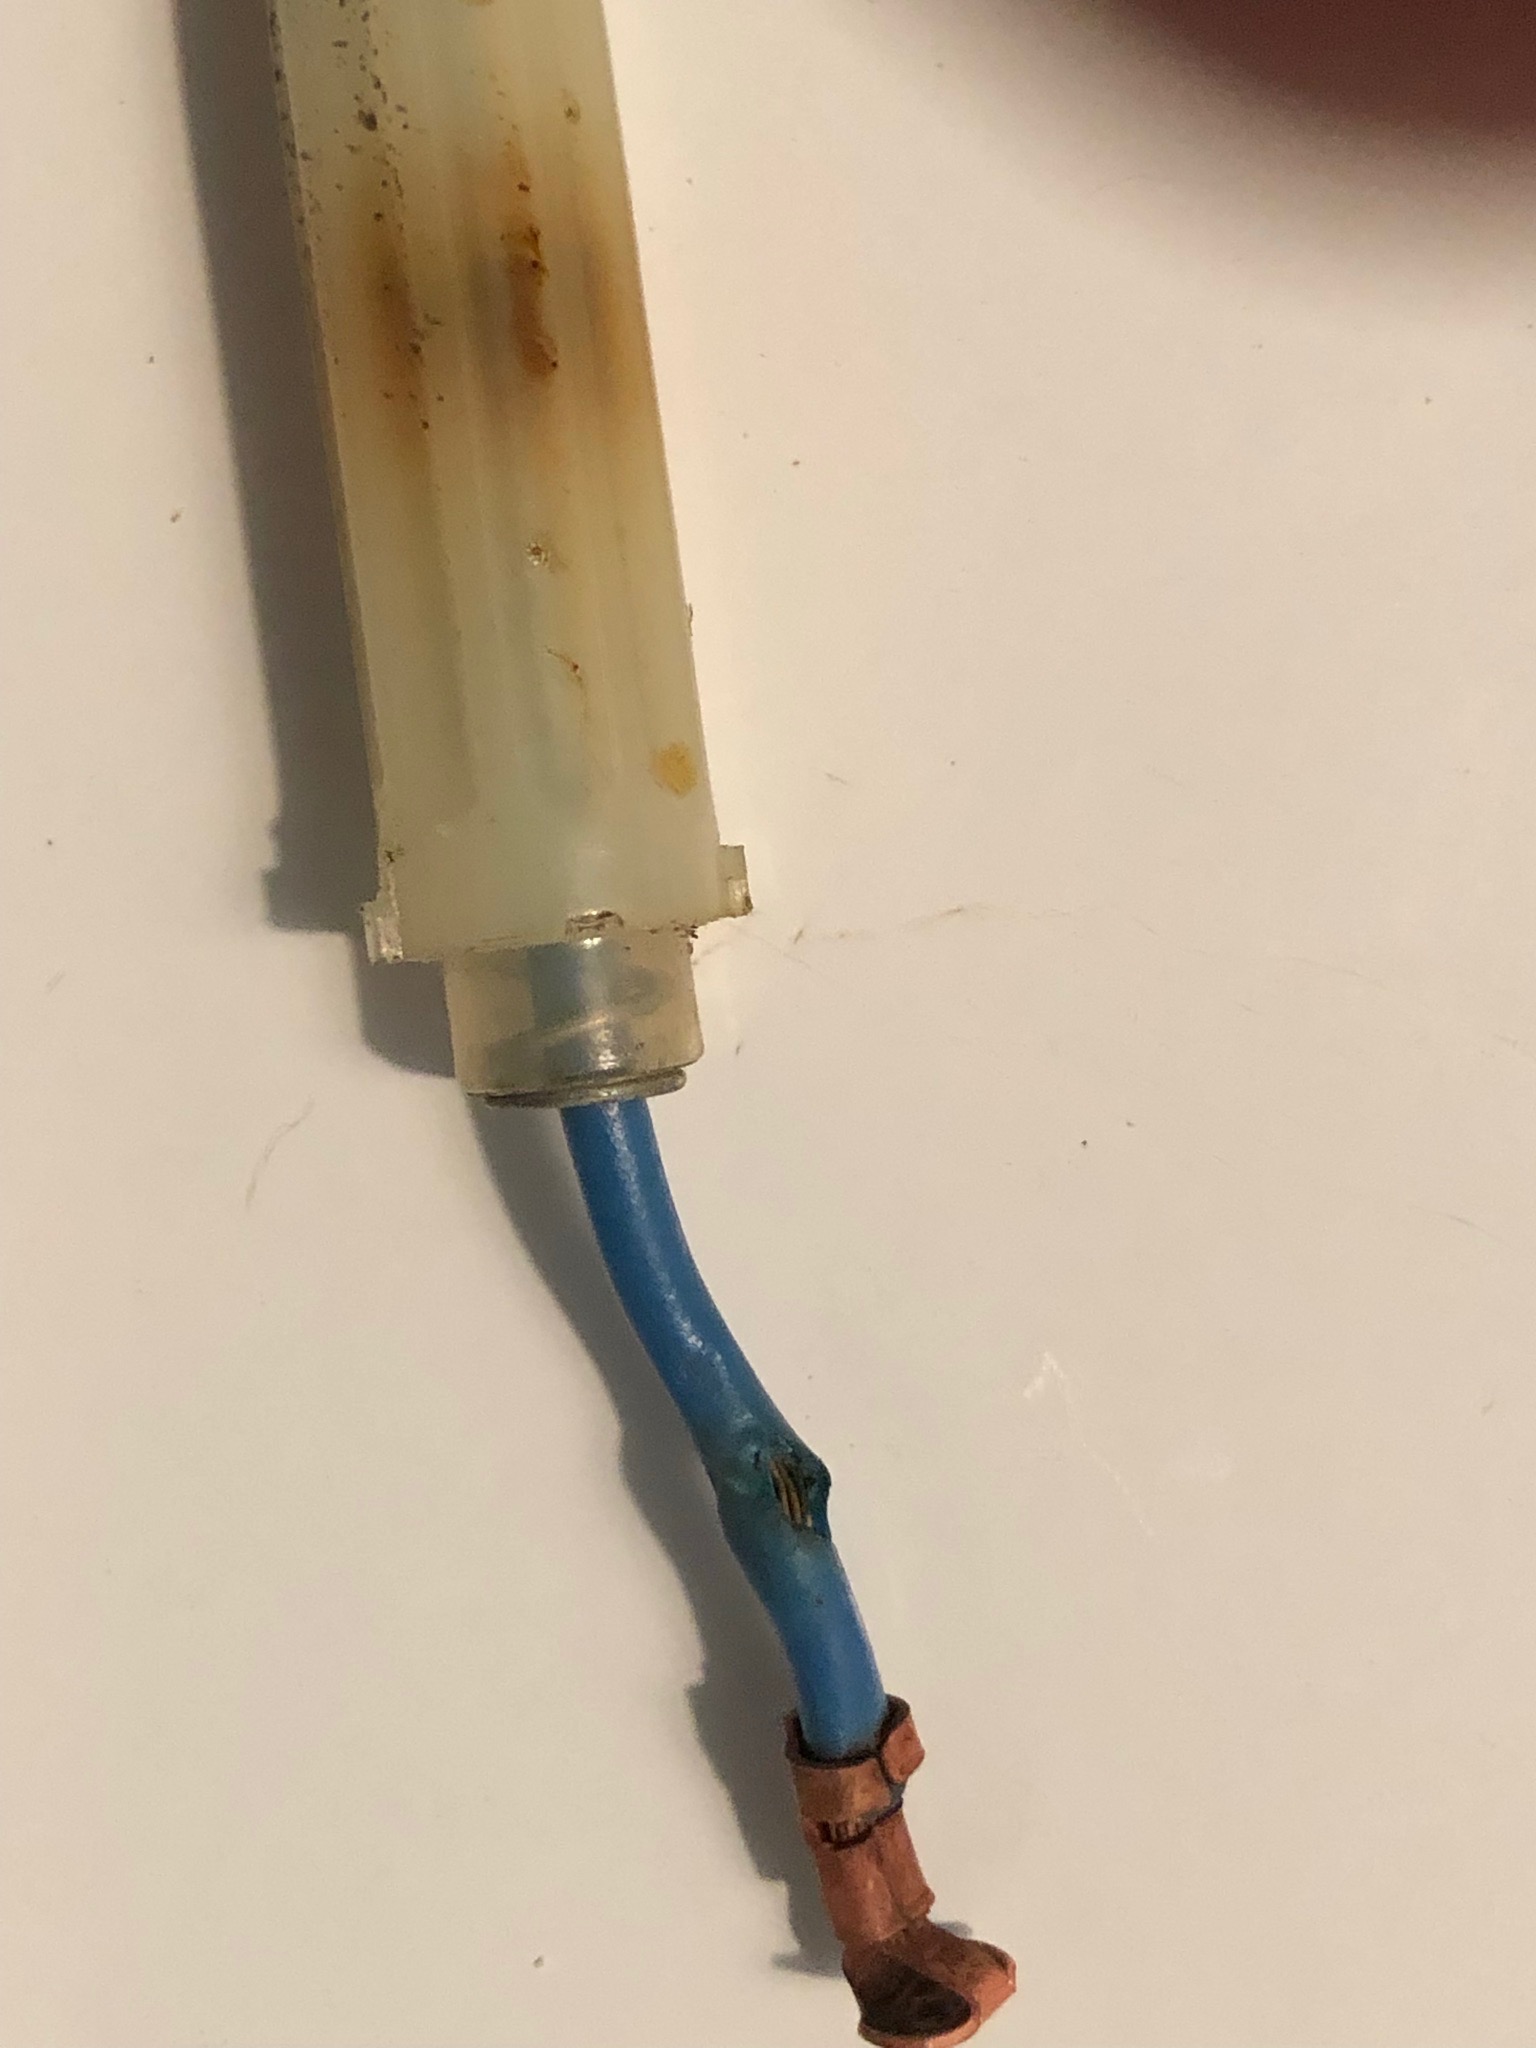
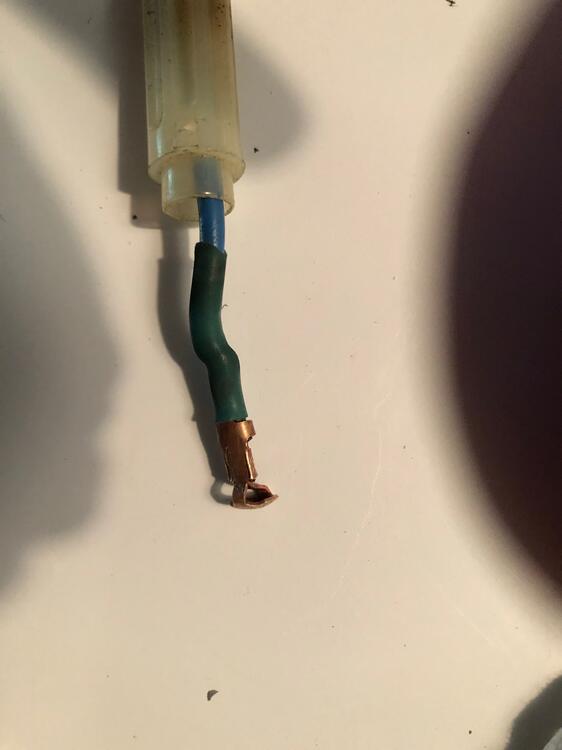
We found the short causing the fuse link to blow and my Z is running again. While waiting for an auto electrics expert to help me, I discovered melted connectors on the defrost switch. The switch was left on by mistake causing the short issue. The switch was non-OEM, with a built-in light and a PO cut the console plate to install the switch. The switch light was burned out, so it was easy to miss that it was on. My expert arrived at this point and he set-up a 12v light bulb to help identify the short. He also added a 25 amp push button fuse to protect the circuit during testing. The bulb lit when connected to the circuit, so he knew there was a short. (I do not know how he connected the test light, since I was in the driver’s seat). He suggested that we remove the Accessory Relay, since it is part of the defrost switch circuit with a potential problem. With the Acc Relay removed, the light went out, so the short was identified somewhere in the Acc Relay circuit. I traced the three defrost switch wires: 1-Ground to cigarette lighter body screw, 2-to a female connector and 3-to a female connector with an inline fuse. The inline fuse contained a 25 amp fuse with a small burn hole. The inside of the holder was brown, plus part of the wire was melted and exposed. I cleaned the holder and copper connection inside, plus I put shrink wrap on the burned/melted wire and inserted the proper 20 amp glass fuse. See attached photos for before/after repairs. Before connecting everything back up I tested the accessory relay circuit. With the relay still detached, I used jumper wires to connect three of four pins. Between the blue-red wire, I attached a 12v bulb. I turned the key slowly from lock to start. The relay clicked correctly at ACC and the bulb did not light as I started the car. Success! No light = short fixed. If the bulb burned bright, we would have still had a short. With positive test. I removed the temporary push button fuse and installed the correct fuse link. The Z starts and runs fine again. Appreciate everyone’s assistance with getting my Z operational again. (My Z now blows the brake light fuse when the turn signals or hazard lights are used. Will do a separate write-up to discuss.) Nate

-
Minor Update: Retested the battery, solenoid and starter today; successfully got the starter to spin the engine. Removed and labeled all fuses in block; then installed one at a time and tested circuit by using a jumper between the fuse link spade and the 8mm solenoid bolt. Repeated adding one fuse at time and testing circuit until all fuses/circuits past the test - no or very little spark when jumper touches solenoid. Off for a few days, will update when I return.
-
Appreciate the reply Zed Head. Have no idea why or how the link blew, it just happened one day. Car drove fine before that. Of all the car work I've done, I have never had to search for an electrical short. Guess I'll need to search google for some how-to.
-
Thank you for the reply. All the fuses are good. Just removed the in-op ARA evaporator to inspect the wiring. No analysis yet.
-
Have a 9/70 240Z with a blown fuse link and no power at red-white at ignition. This happened last fall before car storage, so I have researched over the winter and have worked on the problem for many days. Test 1: Everything still connected, except fuse link. Ran jumper from fuse link connection to solenoid while key turned to start. Had spark when jumper wire touched solenoid. Solenoid appeared to engage a little. Same test/result we had last October. Test 2: Everything still connected, except fuse link. Ran jumper from solenoid to positive battery terminal, but had no response. Test 3: Same as #2, but disconnected positive battery connection from battery. Ran jumper from solenoid to positive battery terminal, but had no response. Battery and starter(s) pass test at auto parts store. 1. New battery cables. 2. Cleaned all starter and battery connections. 3. Cleaned the two grounds (above the battery on the firewall and along the frame where the “white” (yellow on diagram) fuse link connection comes out of the harness). I started testing the original ignition and found no red-white power coming into the key. This suggests, battery, power connections, grounds or something along the red-white from the key to the battery. Would appreciate your help. Thank you! Nate
-
Hi Sean, I found Whitehead quite responsive using their email address: whiteheadperformance@gmail.com In addition to exhaust parts, I purchased JDM R180 with 3.90 gears and a transmission mount. Very pleased with their products. Nate
-
Not exactly the same parts, but I installed a Fujitsubo Legalis R Exhaust and Trust GReddy JDM Exhaust Headers on my 70 240z with R180 diff. Purchased everything from Whitehead Performance in Canada. They are a speed shop and know 240Z's well. Good Luck with your upgrades. Nate
-
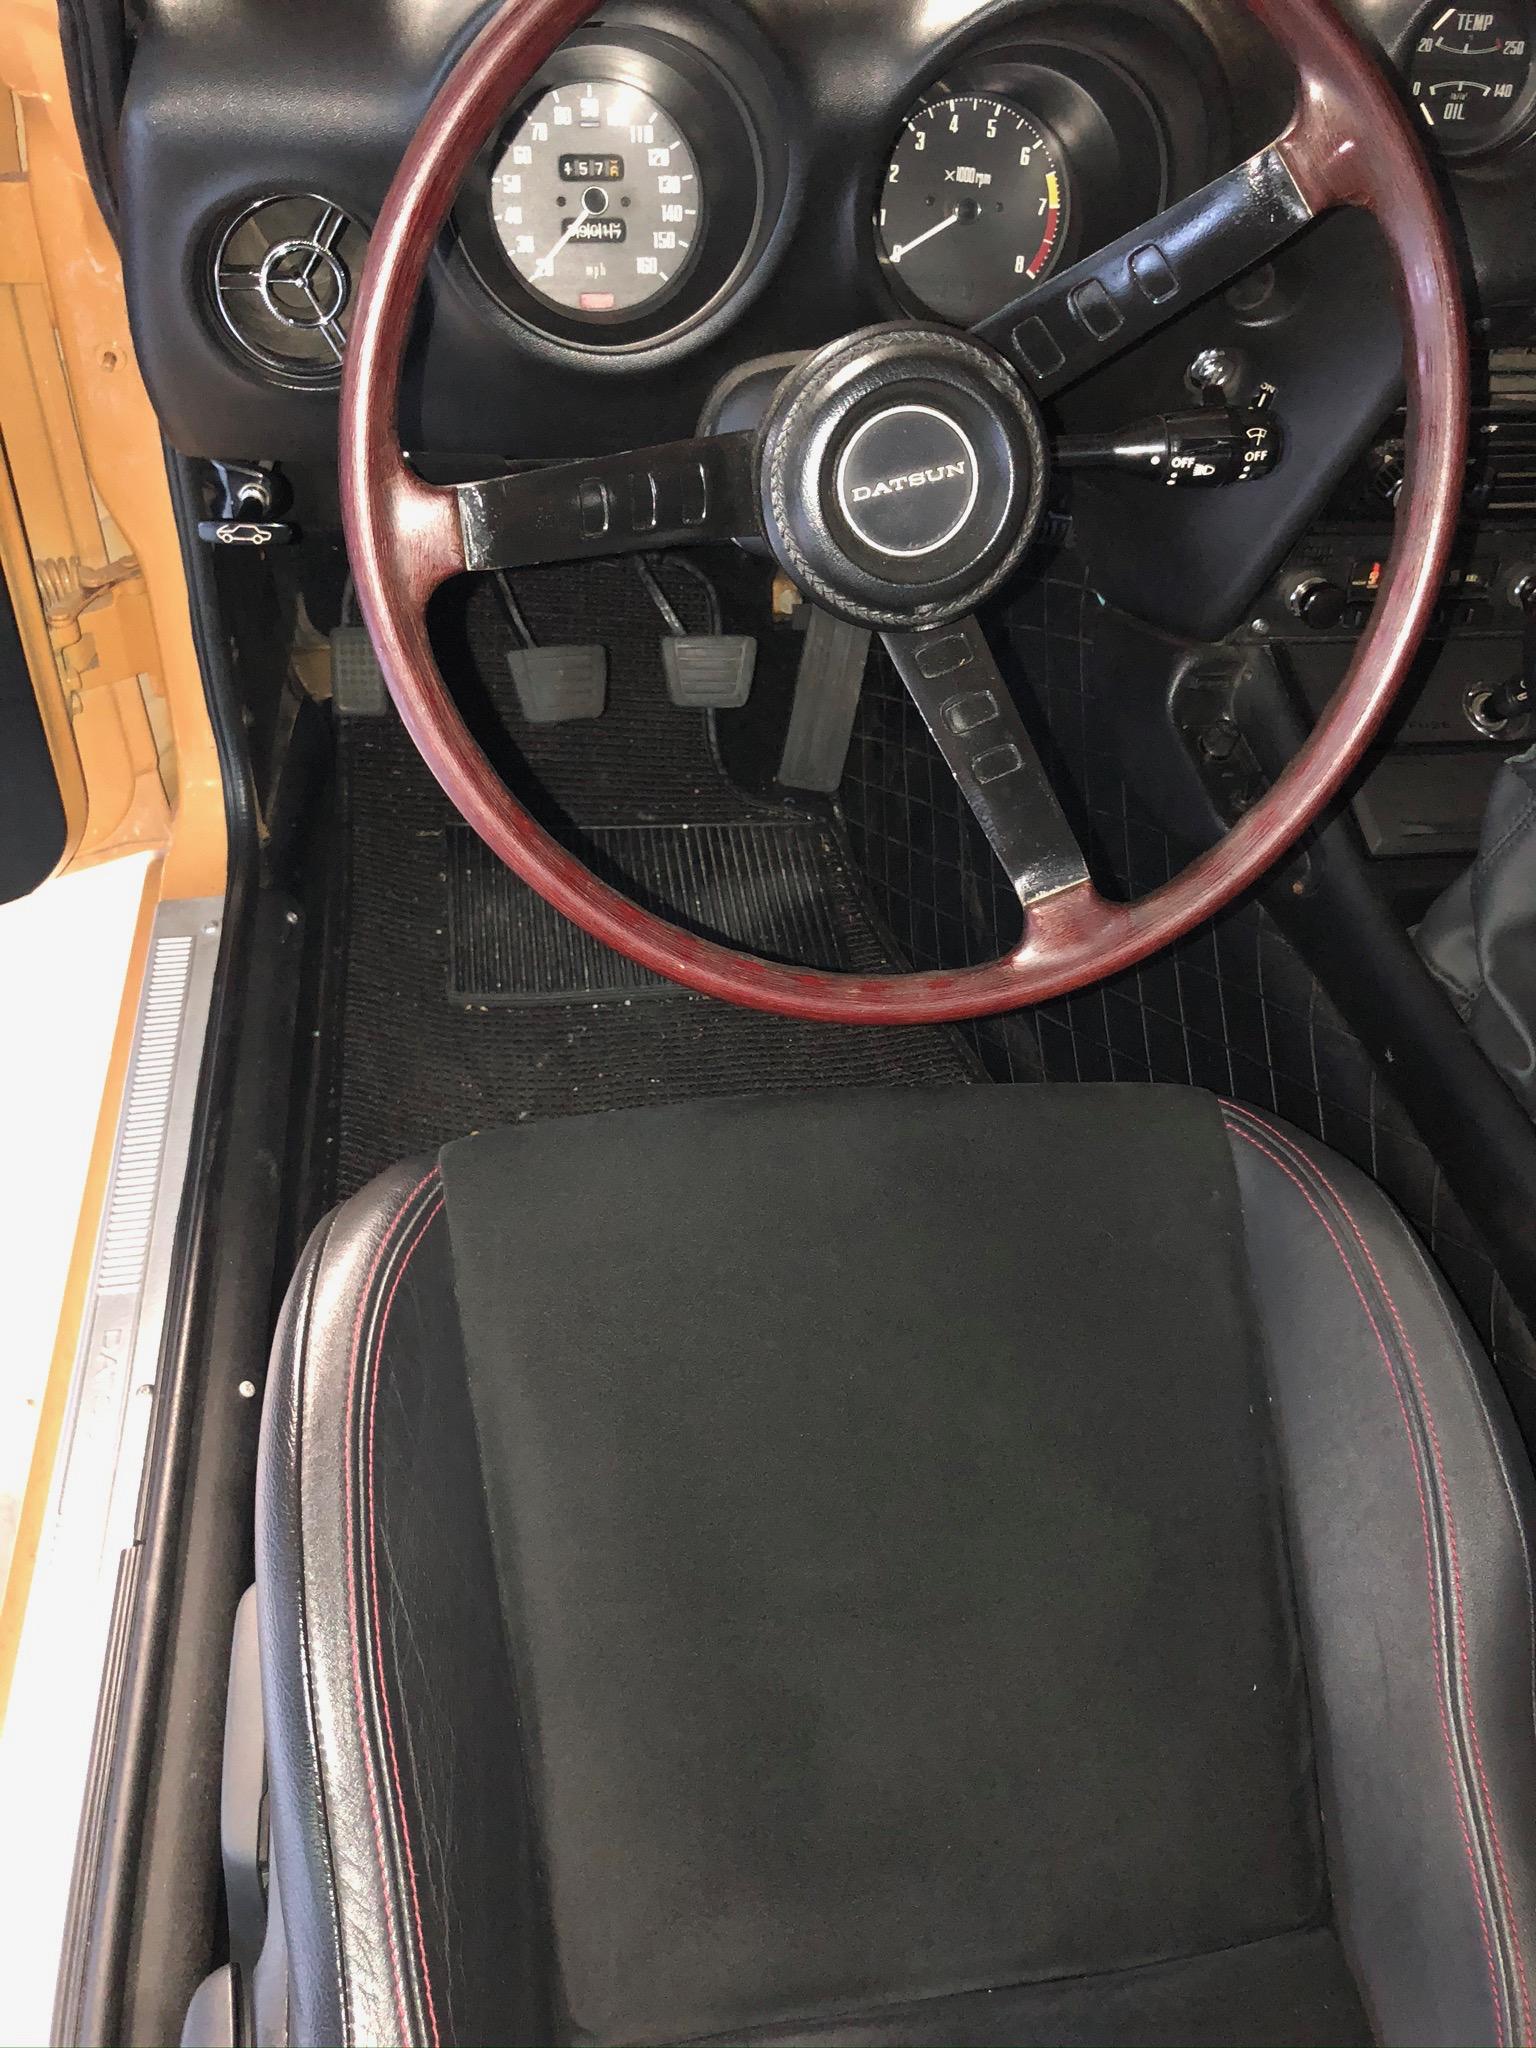
Thank you for the positive and information about your seat swaps too. To keep the Z original looking I tried to resist swapping seats, but so glad I did. BRZ seats are so comfortable. I’m planning on refinishing the steering wheel in the offseason. I think fresh black paint and a glossy reddish tint on the wheel will match the red stitching on the seats nicely.
-
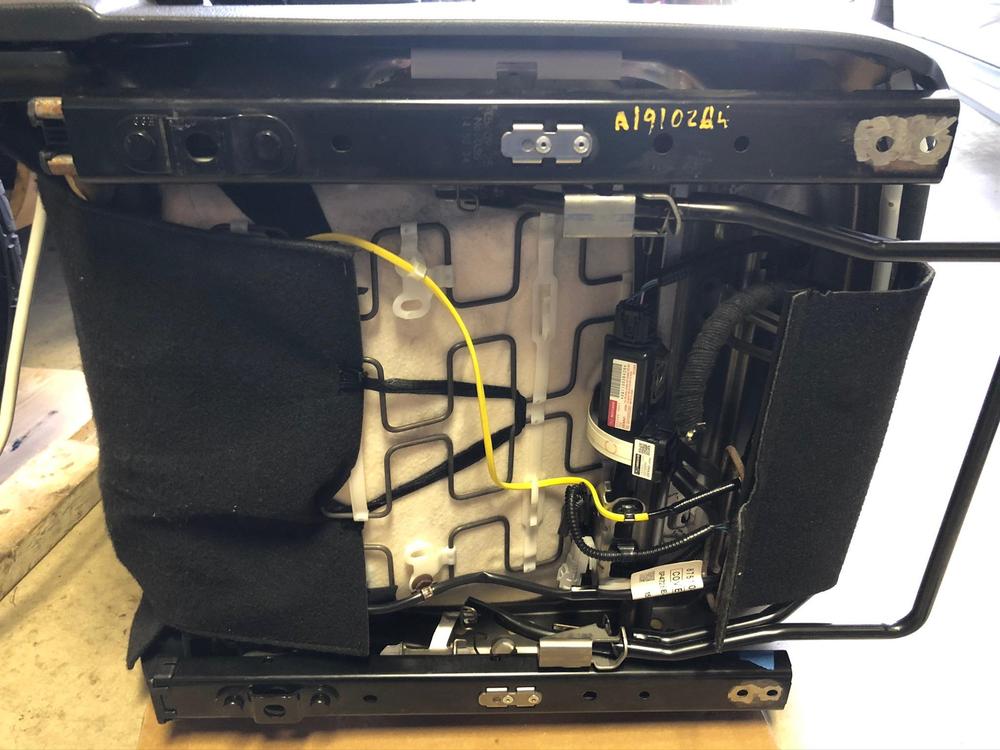
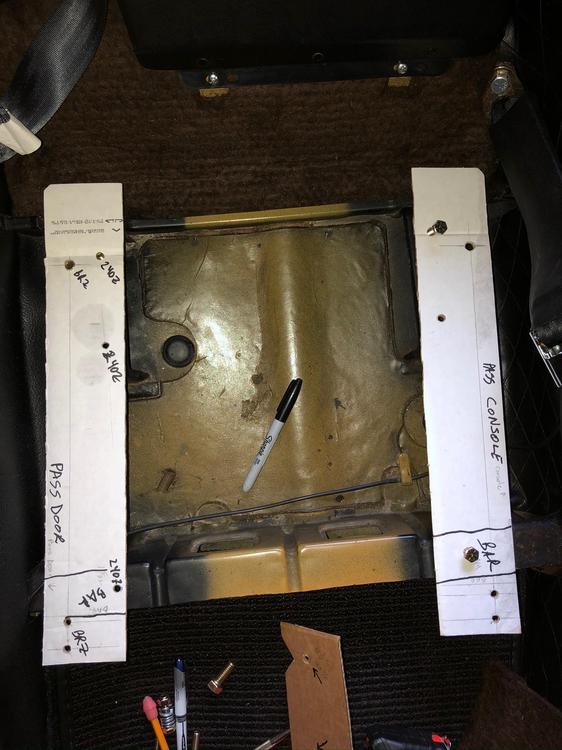
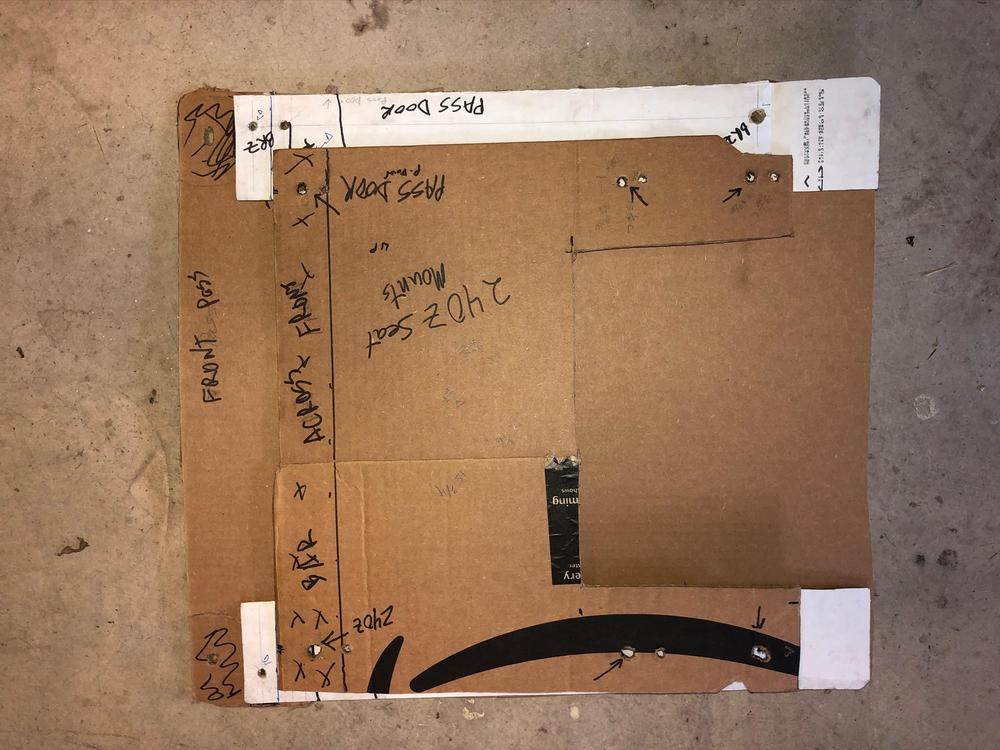
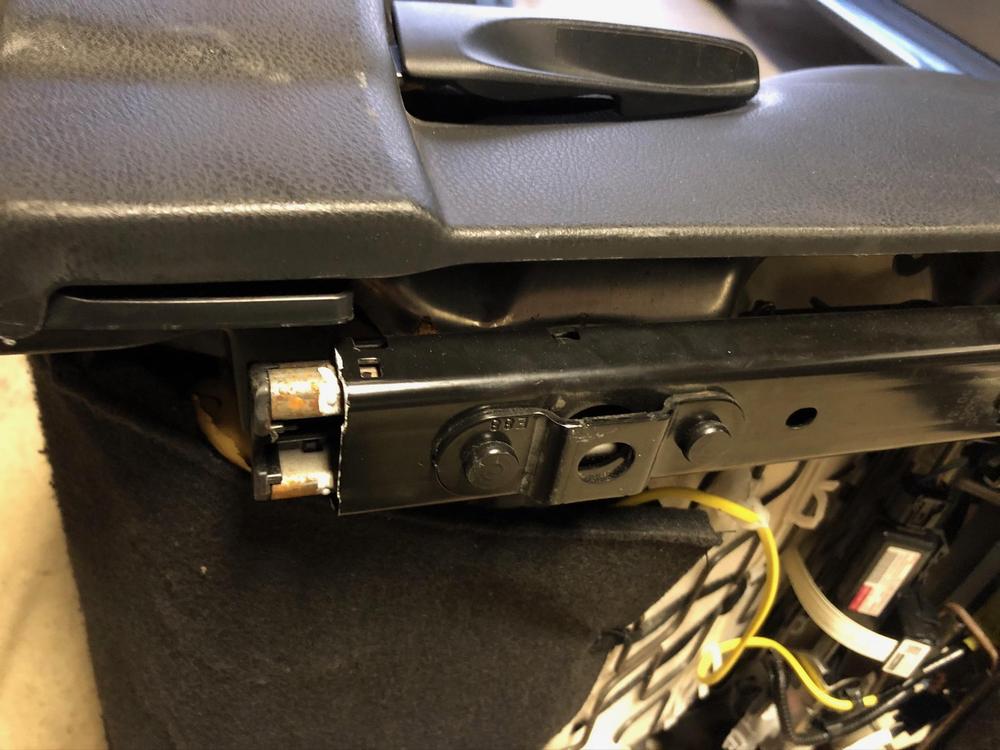
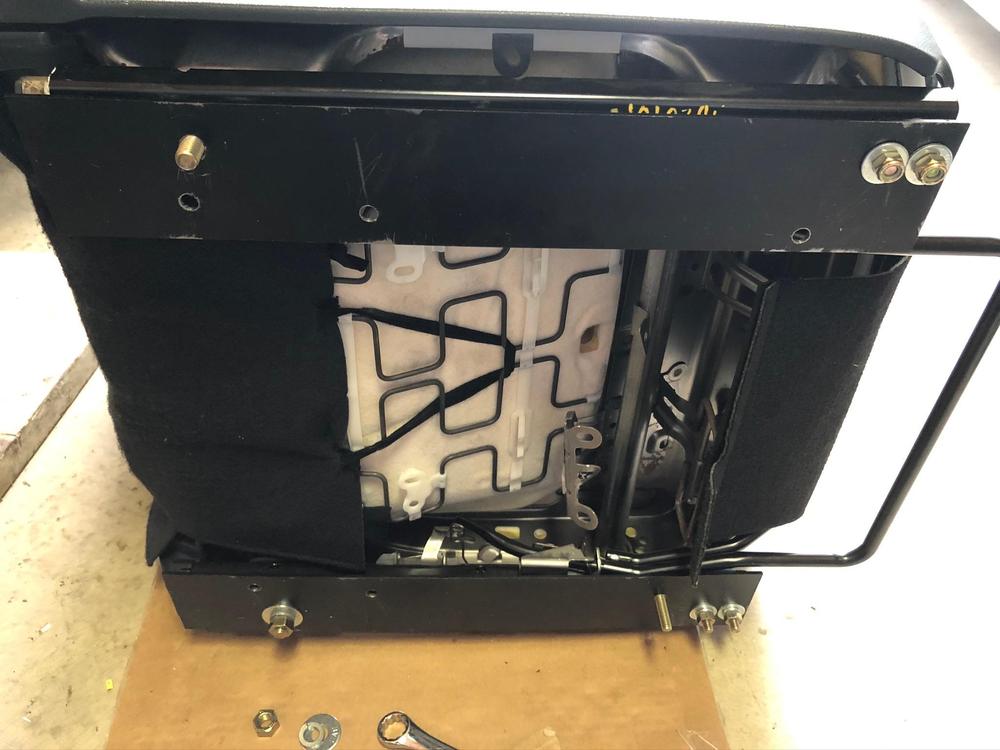
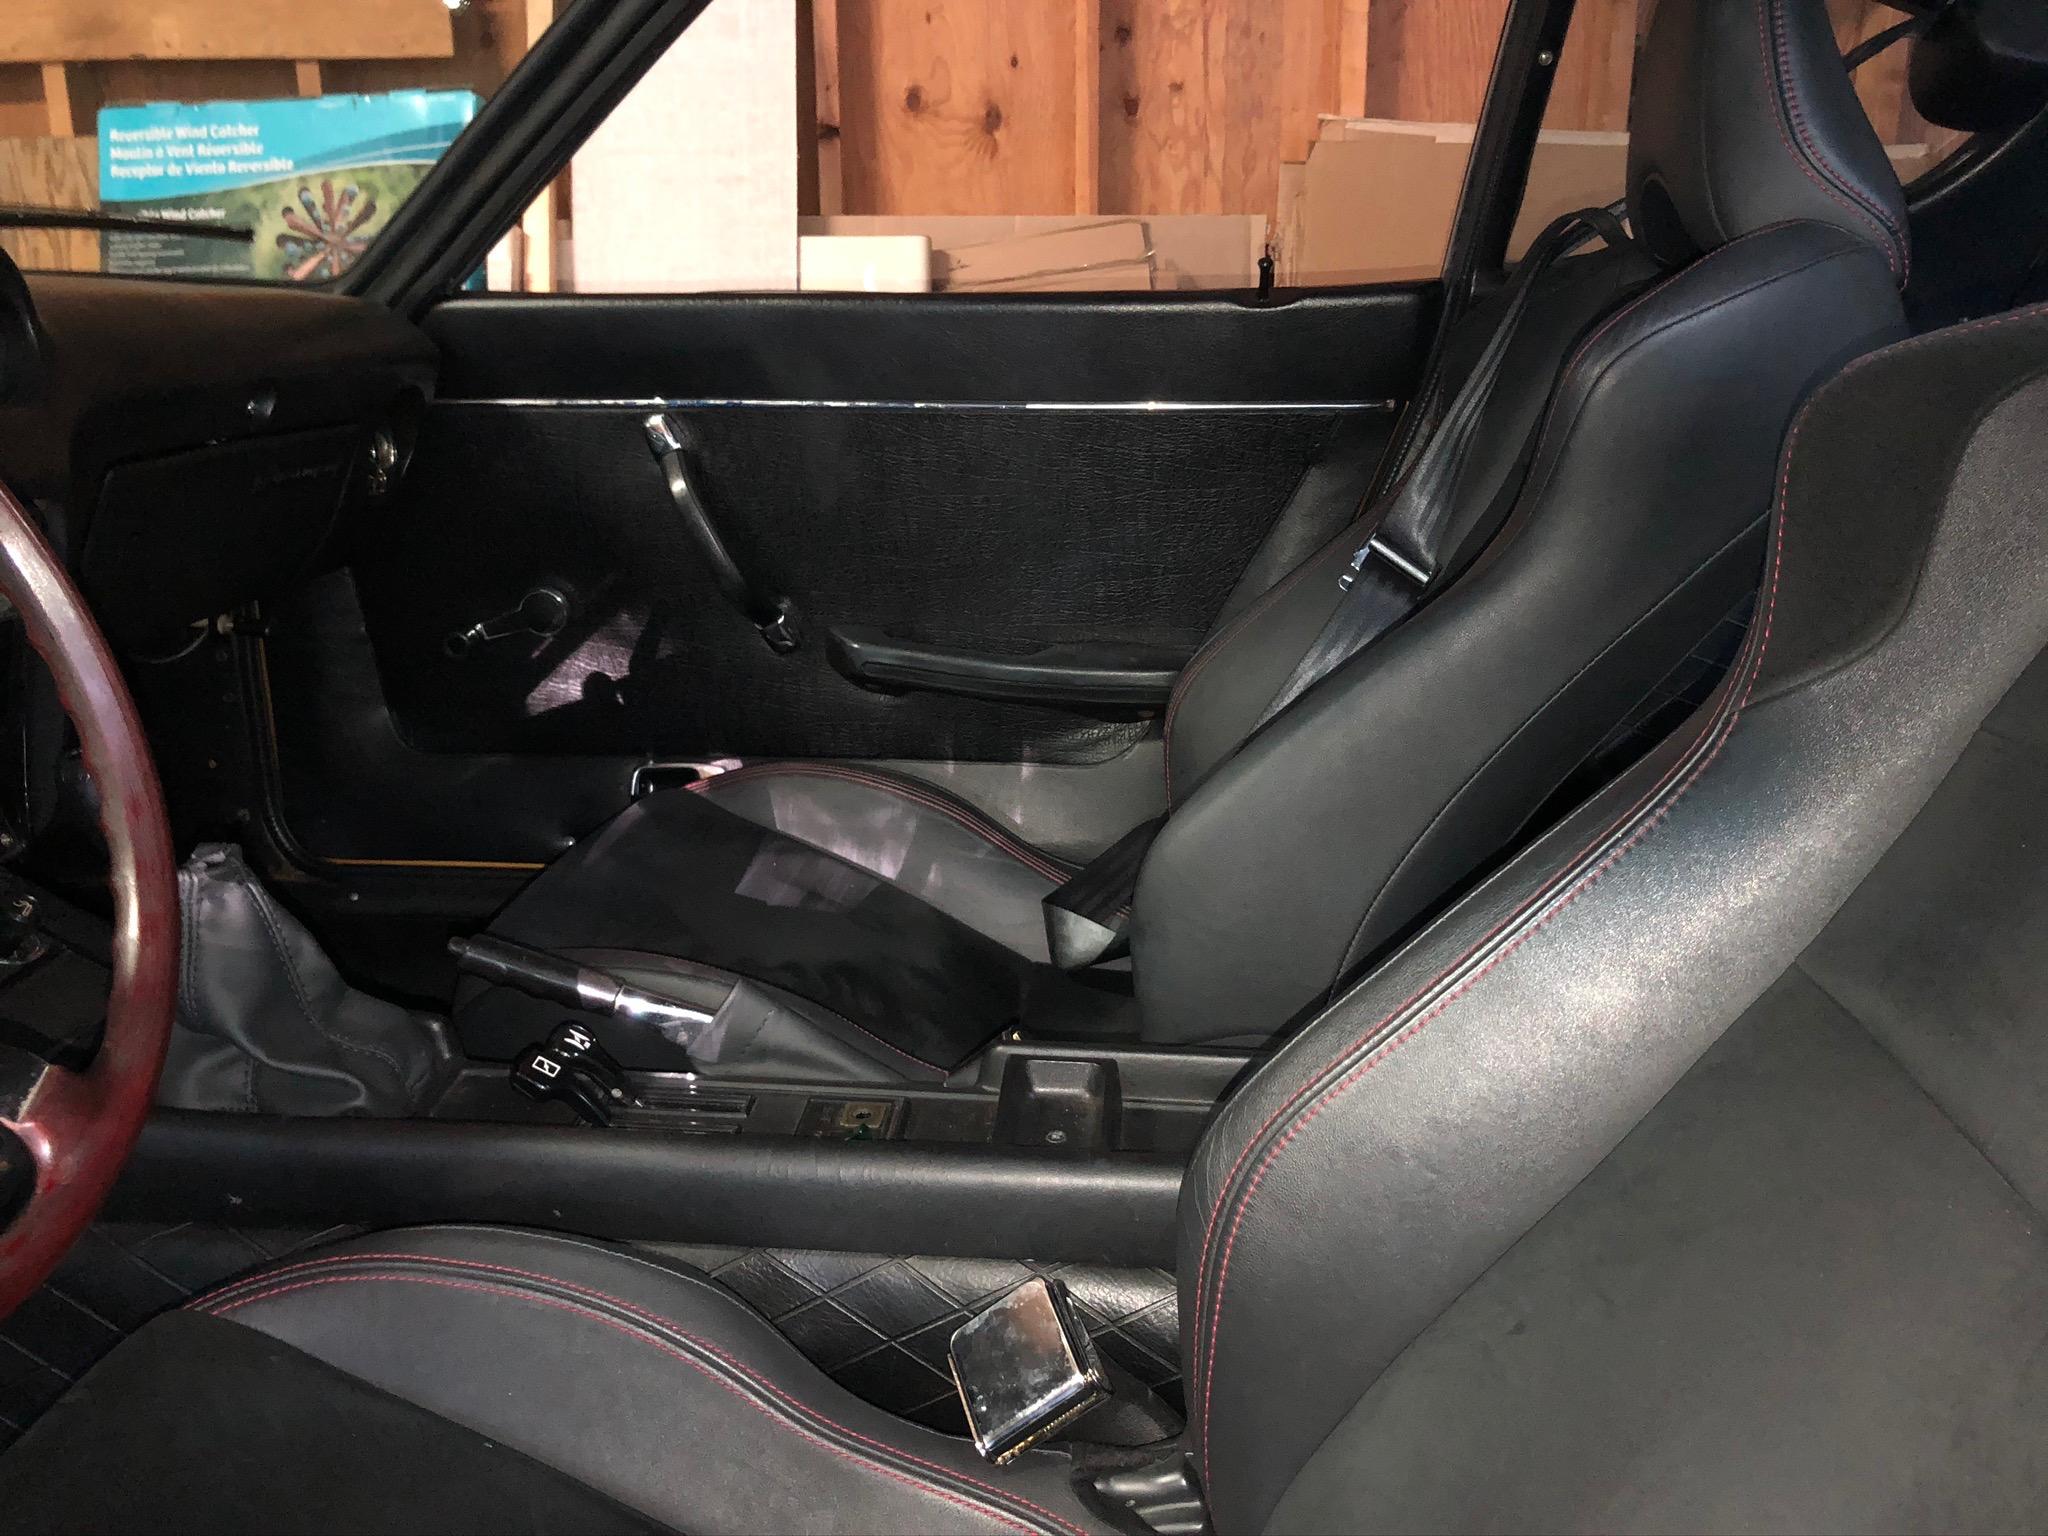
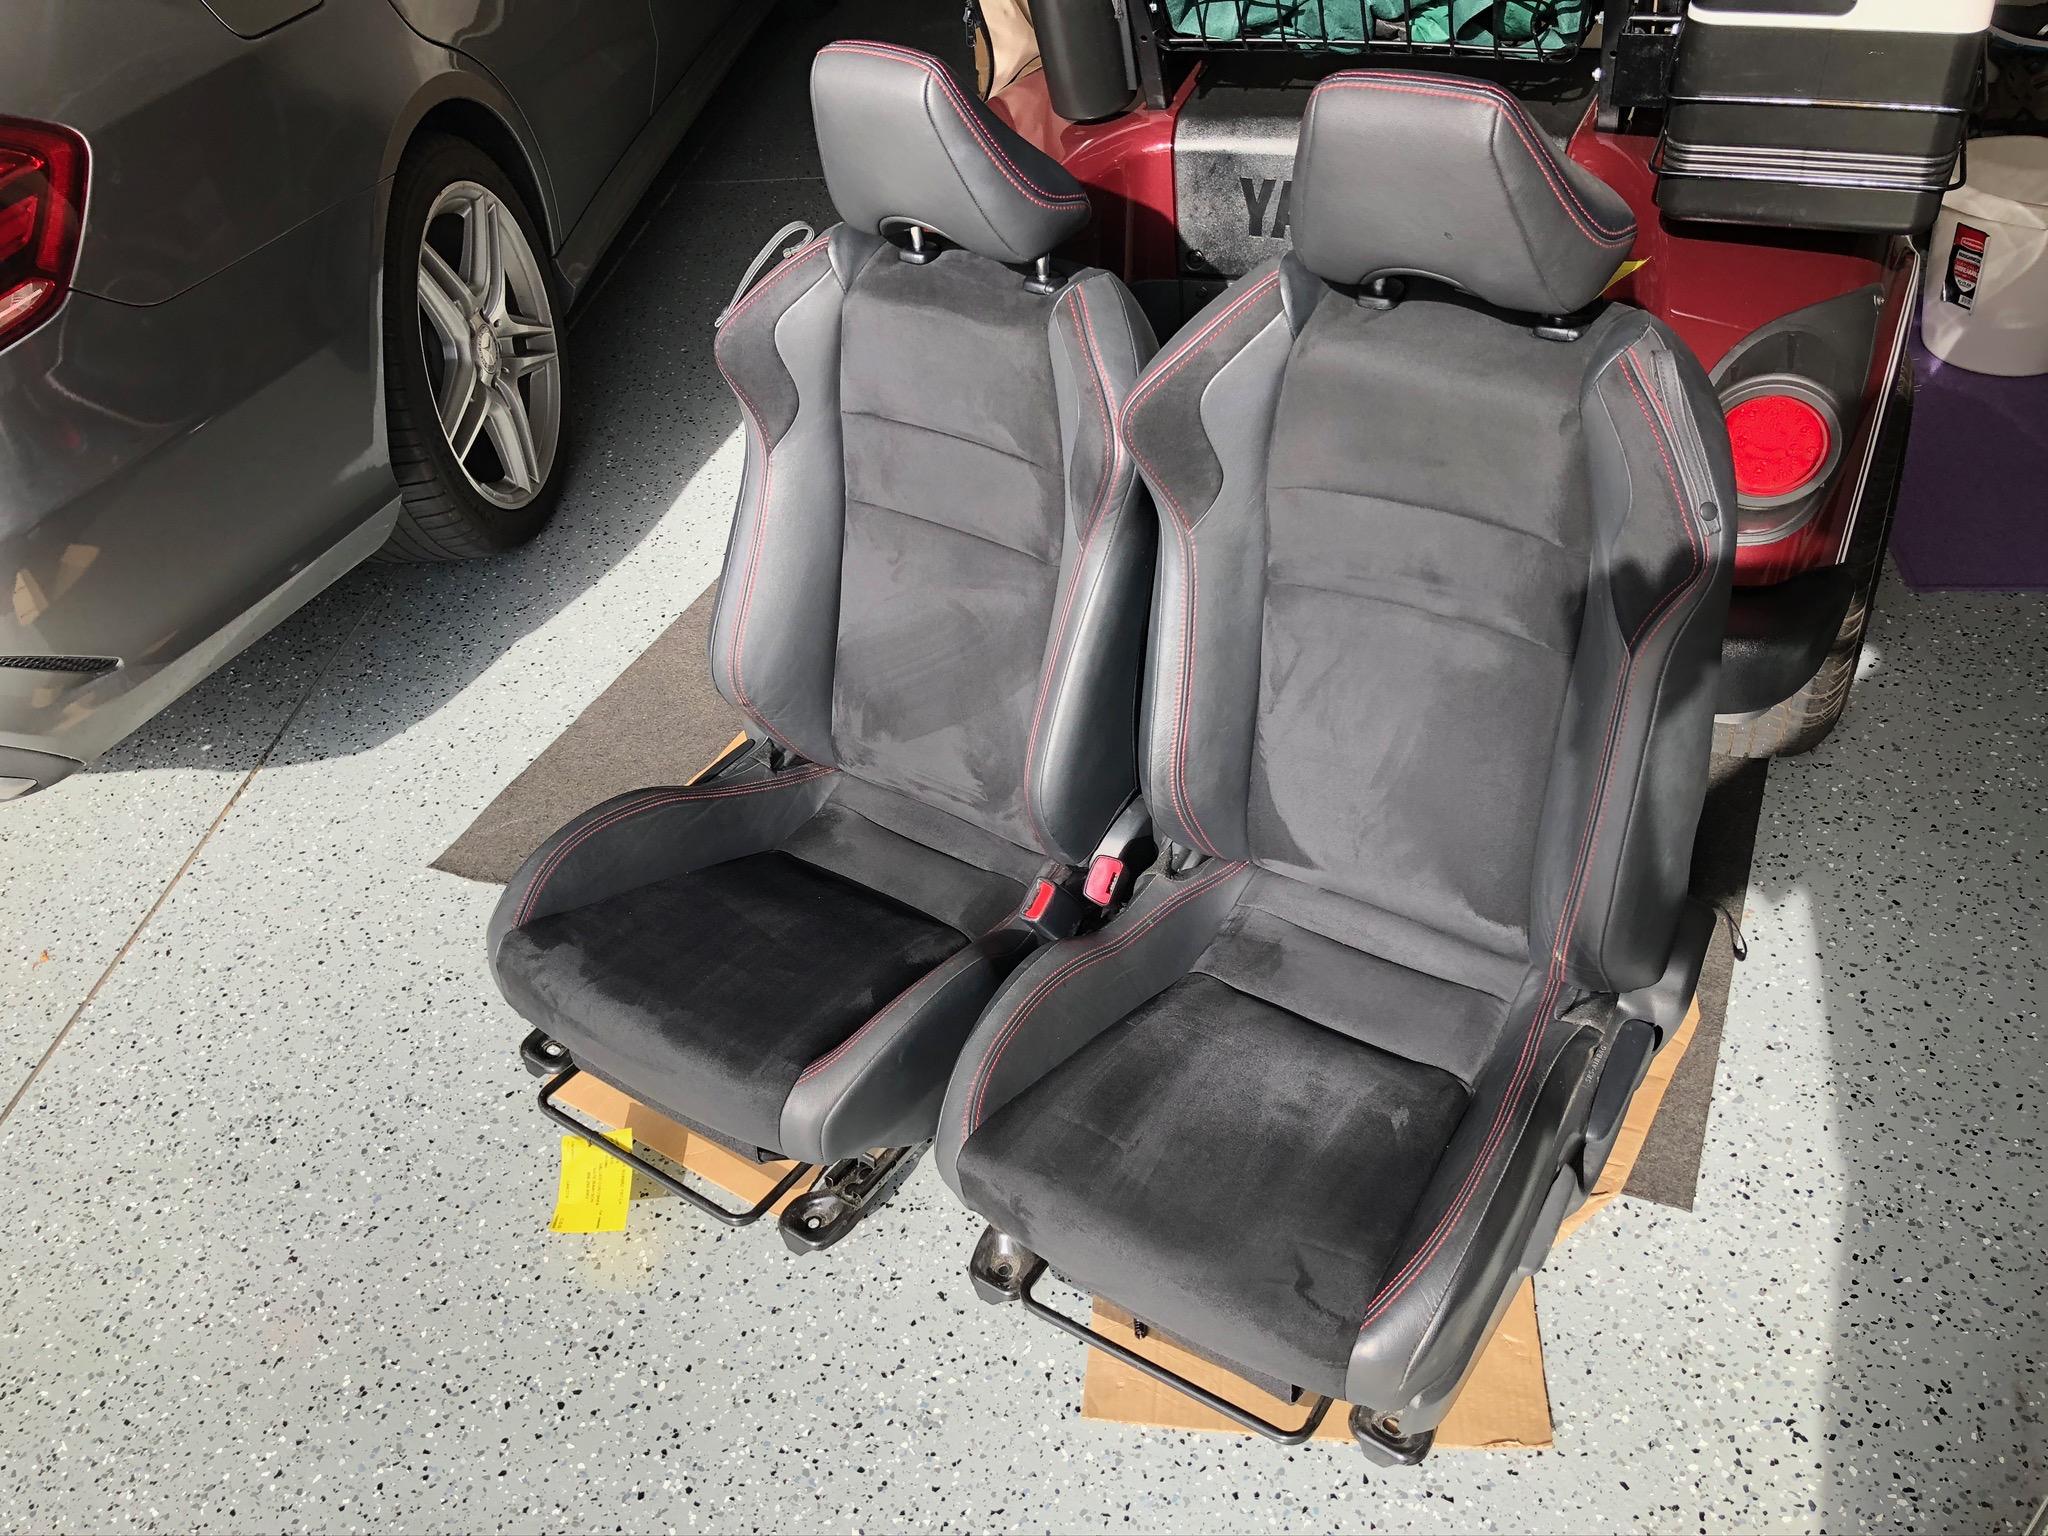
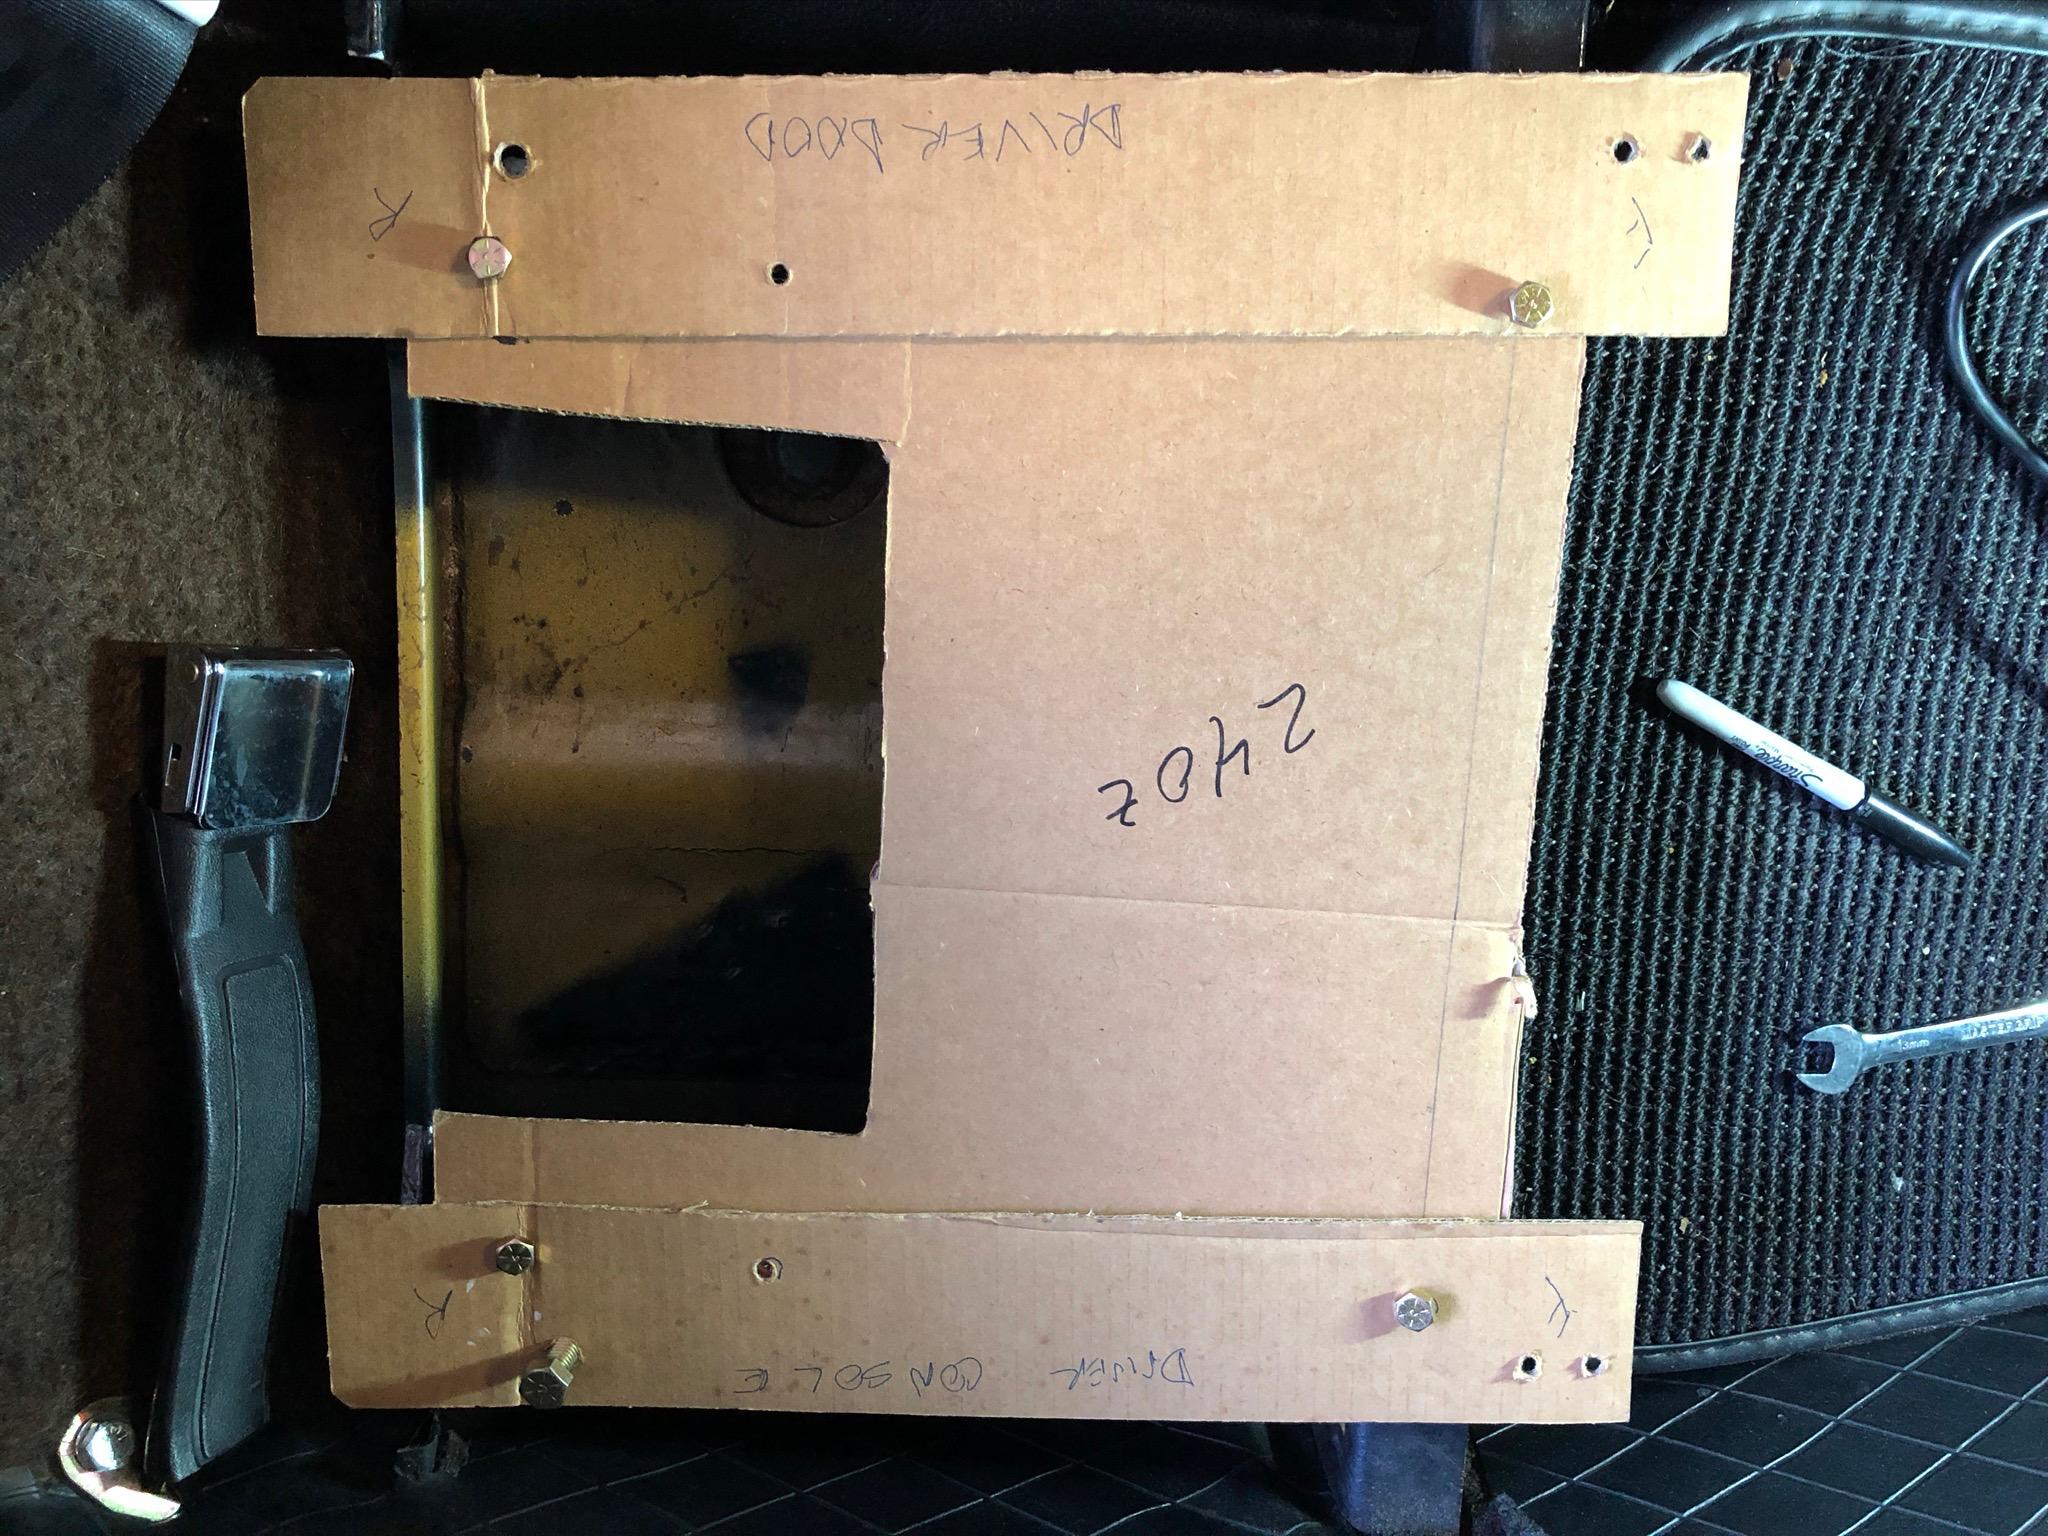
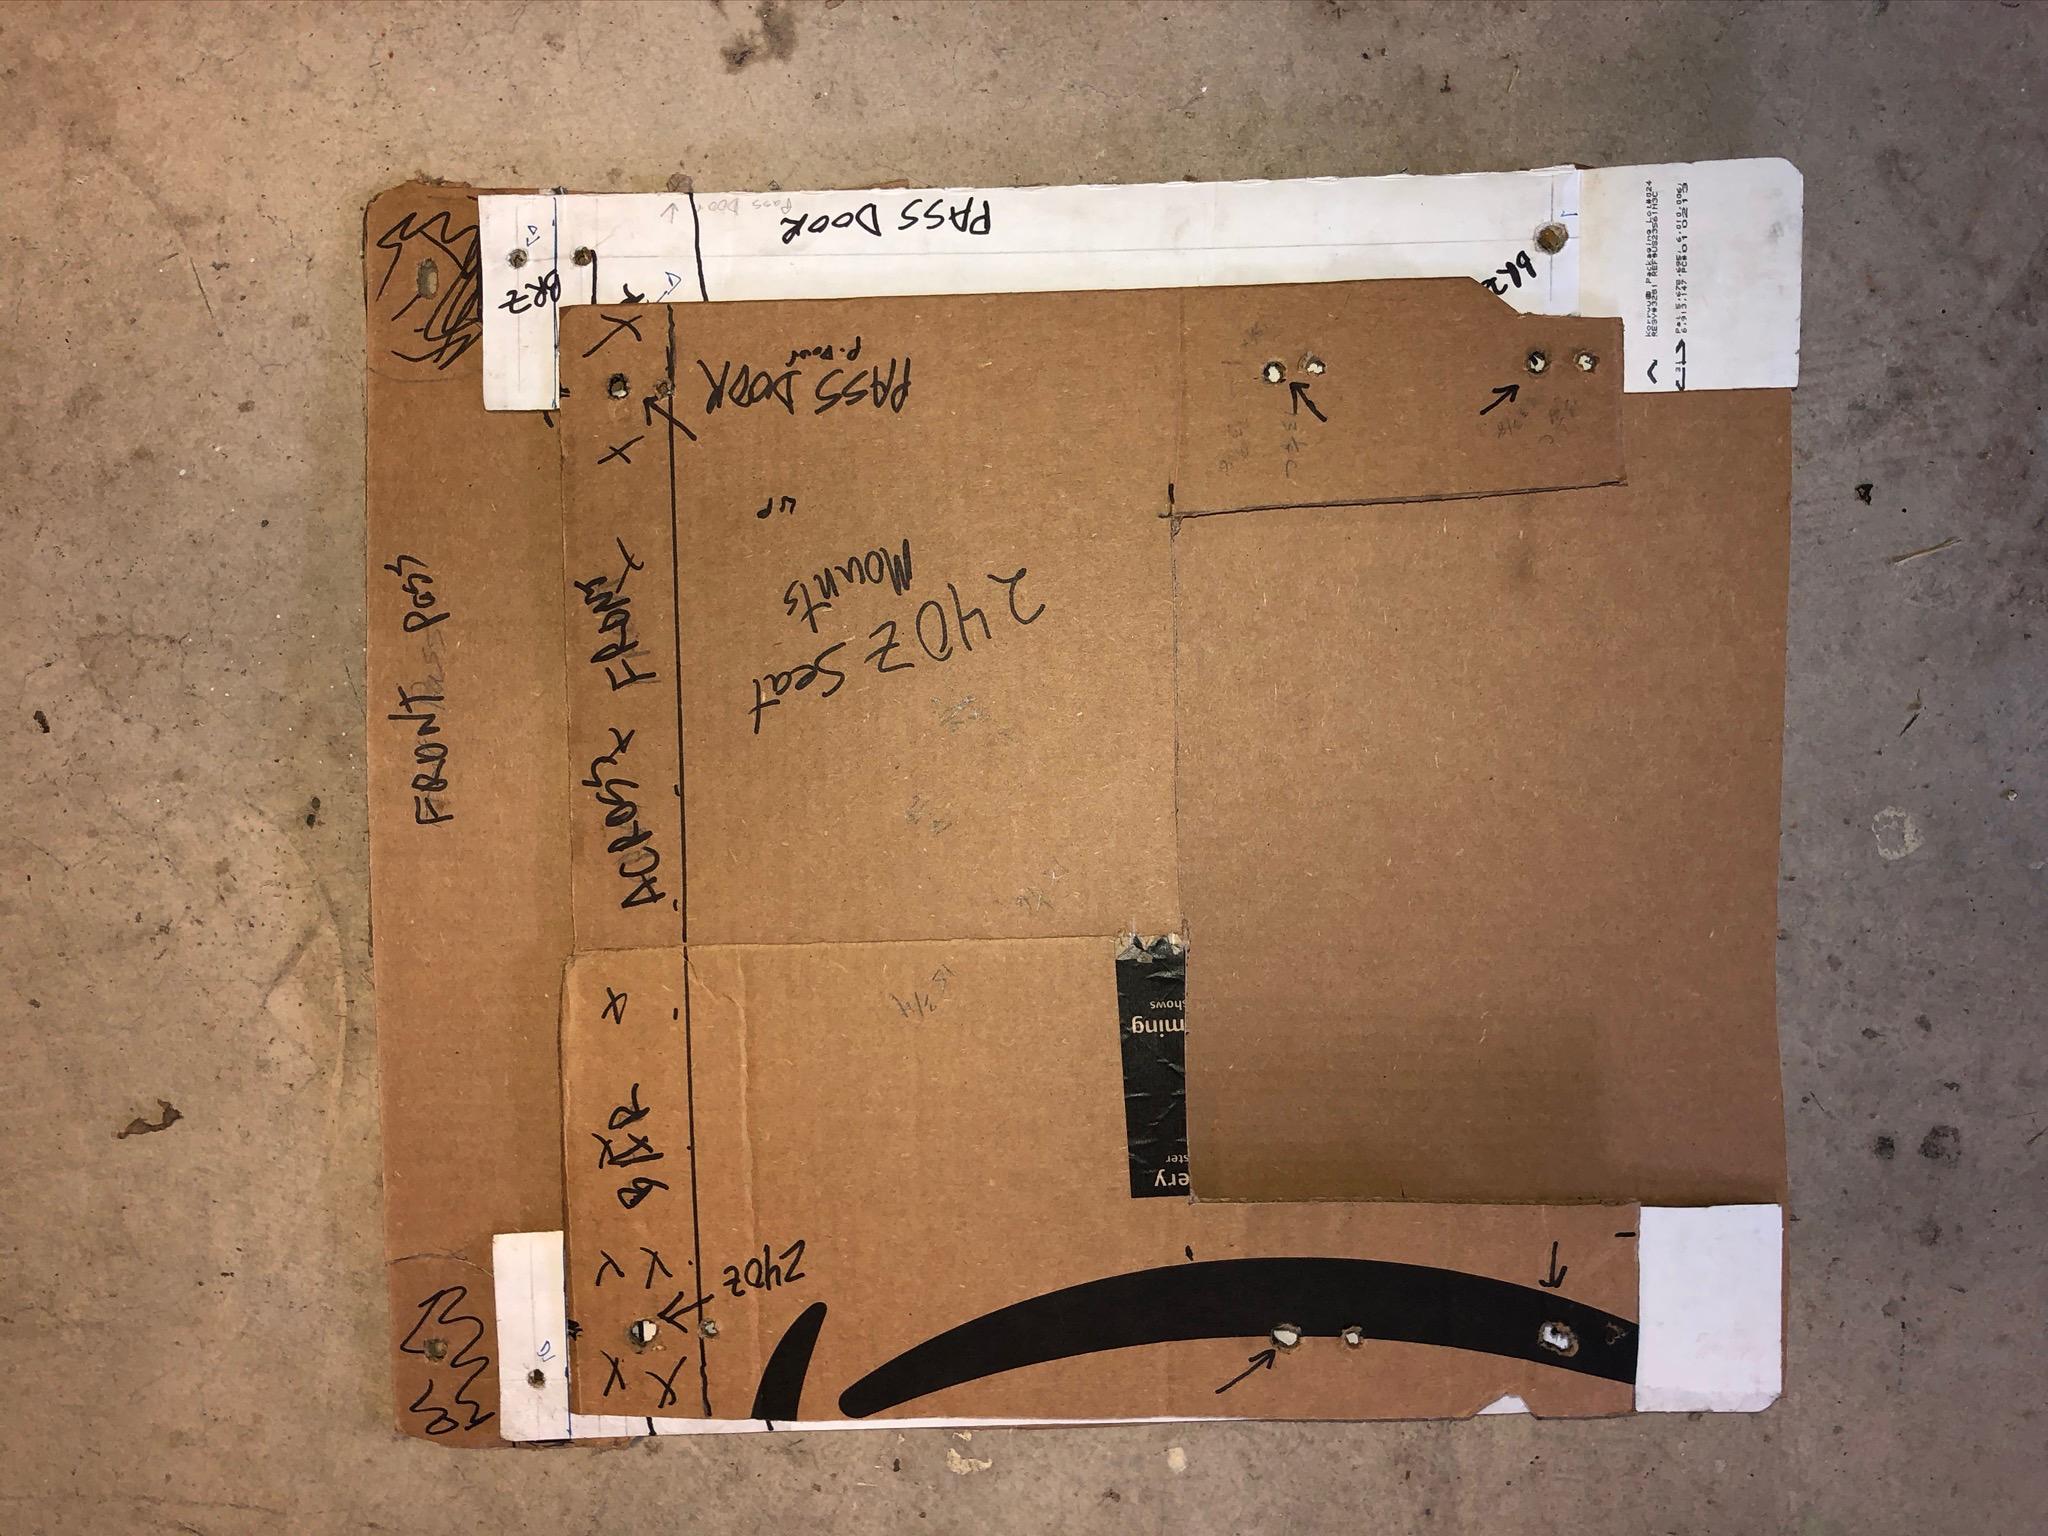
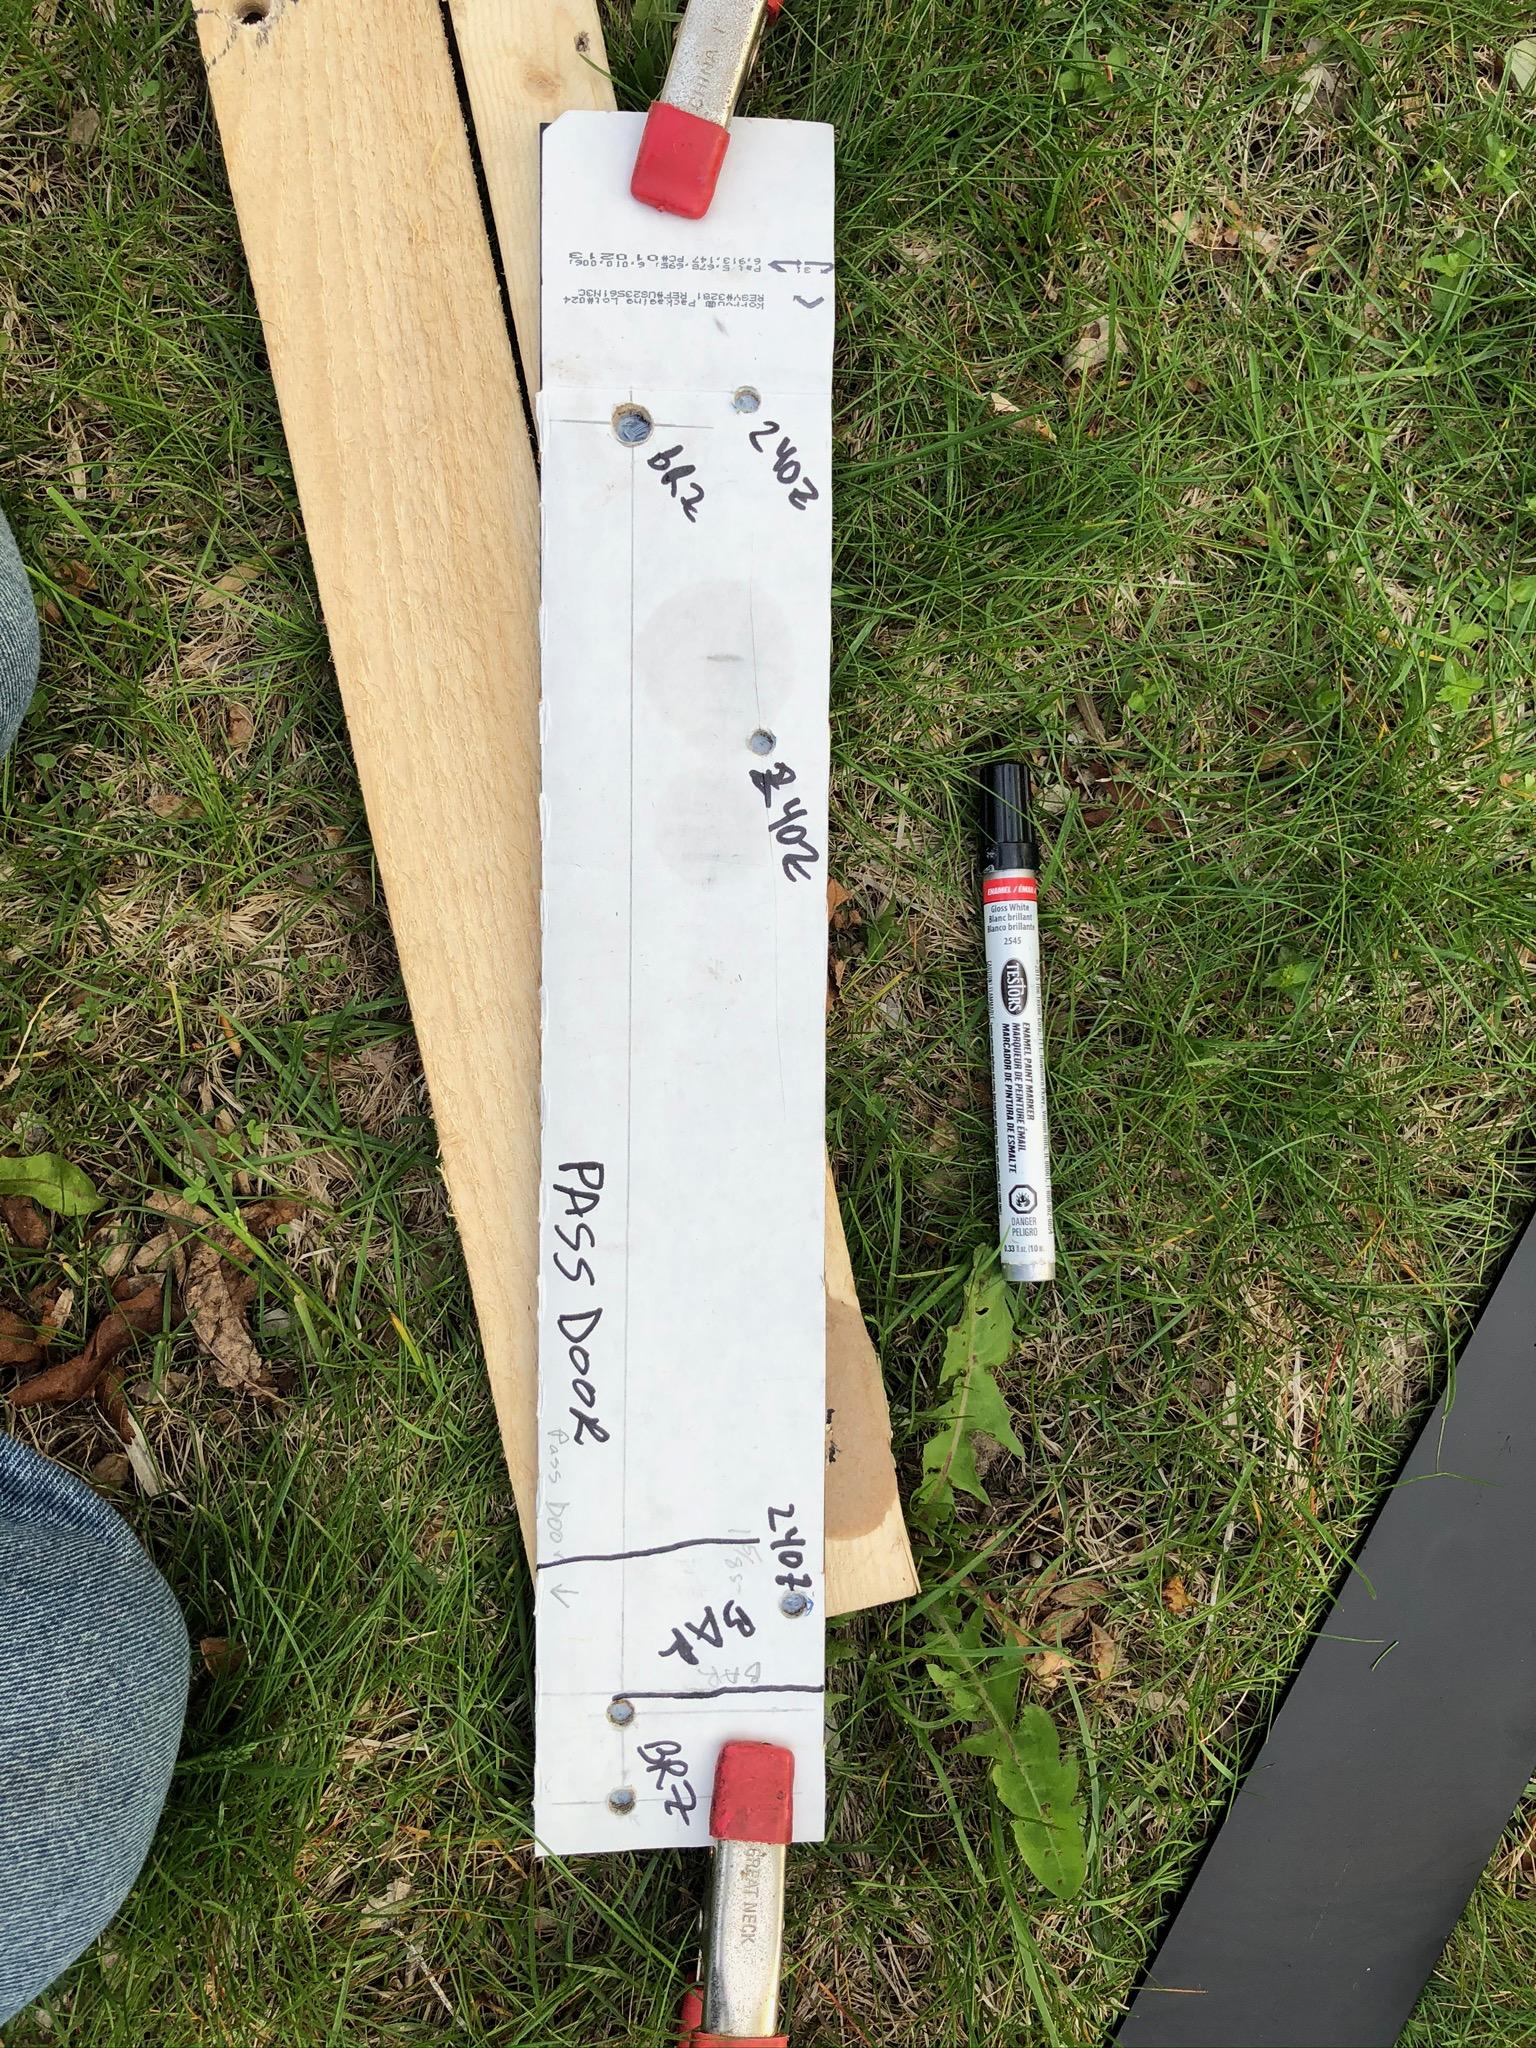
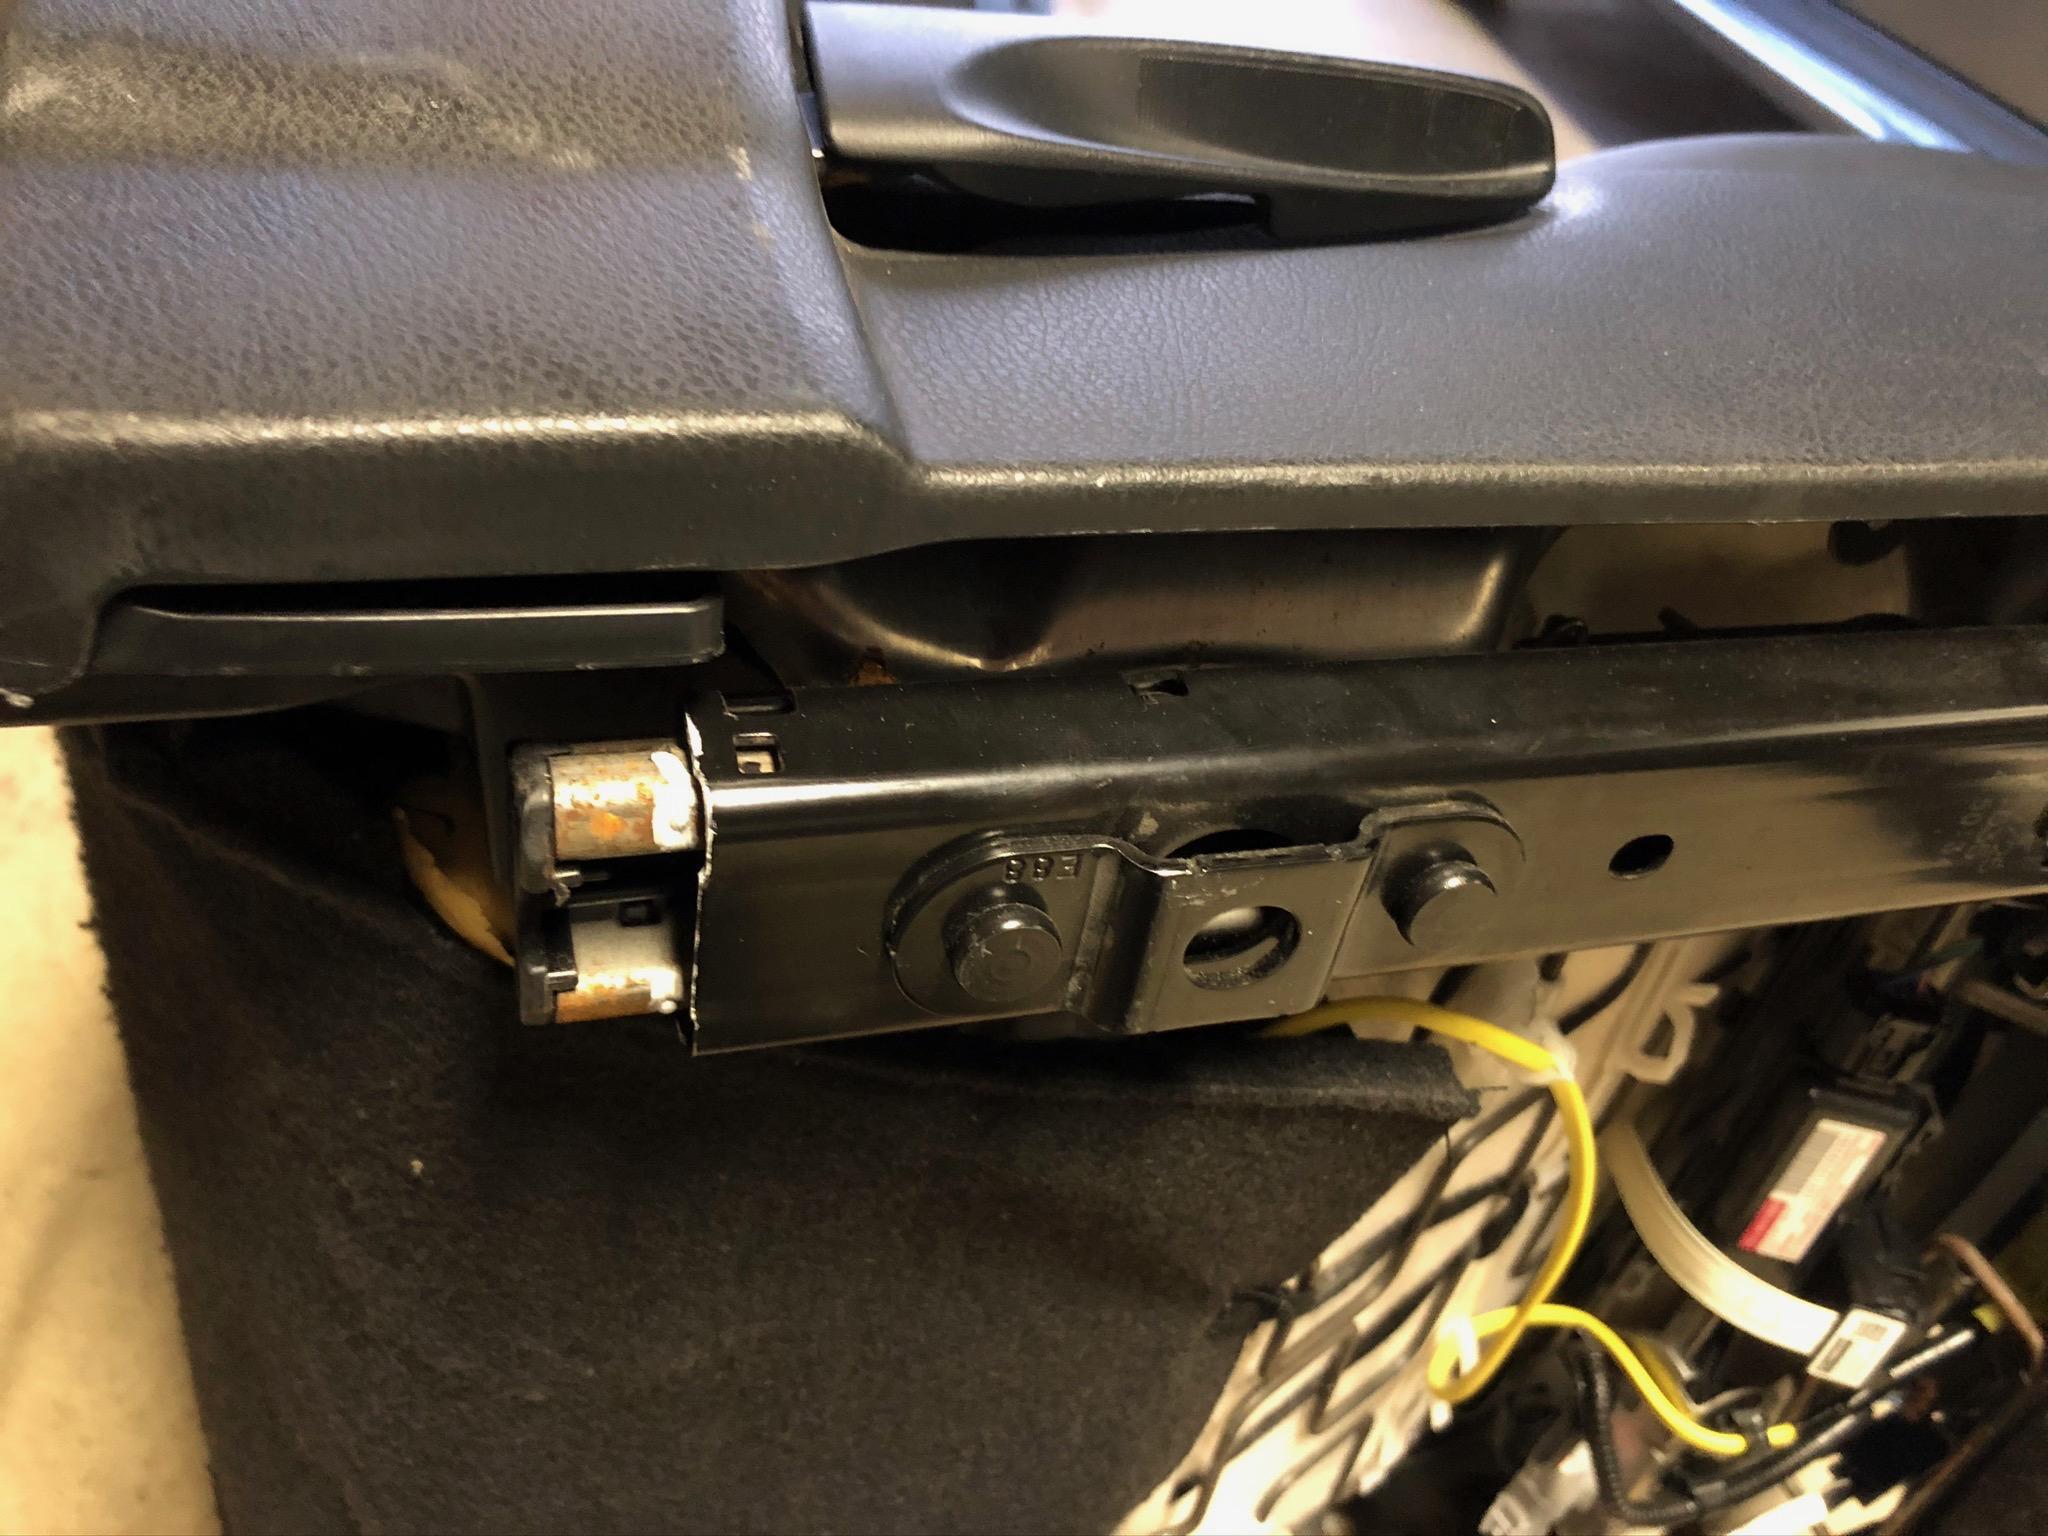
Ever since purchasing my 1970 240Z last April I found the refurbished seats lacking support. I searched for the recommended seats for swapping, but was unable to find any in both nice shape and reasonably priced. Purchasing locally appeared to be the only option due to shipping costs. In my research I found Miata owners using Subaru BRZ/Toyota 86/Scion FR-S seats and since Miata seats are popular swaps for 240Z’s, I decided to focus on the Subaru/Toyota seats. BRZ seat measurements: Seat: 19.5” wide x 19.5” long Hinge Width: 22” Seat Back Height: 33” During the research process I found a great post by Sean240Z from Feb 2013 that provided great how-to information. Before getting into the how-to details, here is my evaluation: Pro: Recaro-like; very comfortable; great side bolstering; seats recline; sturdy; drivers seat height adjustment; strap to keep shoulder harness in position; seat back release lever provides easier access to jack, tool boxes and rear deck. Con: Seats barely fit in Z car; loss of headroom; entry/exit; heavier than original seats; airbag. I’m 6’2”, 185 with 34” inseam and I fit comfortably. I must now lower my head more to get into the car. I think the max driver height is about 6’3” with the seat reclined. Installed Measurements: Driver Seat: Steering Wheel to Seat: 6” (vertical) Firewall to Seat Back: 48” Gas Pedal to Seat Back: 41” Steering Wheel to Seat Back: 18” Seat Bottom to Ceiling: 35.5” Reclined Seat Bottom to Ceiling: 37” Passenger Seat: Firewall to Seat Back: 45” Bottom of Glove Compartment to Seat Back: 31” The BRZ seats I found are black Alcantara with red stitching and leather trim from a low mileage wreck. They were priced at $200 each at an auto recycler, but they discounted them to $100 each. After a good cleaning, they are great looking seats. For installation I made four steel adaptor plates (1/8”x3”x18”). Steel purchased on eBay. Instructions: Remove original Z seat from passenger side; make U-shaped cardboard pattern of Z car mounting area and cut two 3”x18” pieces of cardboard to represent the steel adaptor plates. Mark orientation of cardboard to Z, such as passenger door side or console side. Cut off the two front “cat paw-like” portions of the BRZ seat mount. They extend too far forward and are not needed. Insert new seat into car to test fit; locate rear seat mount area to be trimmed on the Z car. Trim mount area until BRZ seat does not wobble and the adaptor plates lay flat. Paint the area trimmed so it does not rust. Determine slider position in relation to Z’s front mounting bracket and Z seat mounting holes; depending on the slider, there should be a slight exposure of the slider track rearward on the passenger door side only. Once installed, there is plenty of adjustment to slide the seat forward. Create cardboard pattern of entire BRZ seat, including slider mounting holes. Test fit in Z car and draw a line representing the front mounting bracket. Remove BRZ pattern; cut slider mounting holes and test by mounting the cardboard to the bottom of the seat using nuts and bolts. Place the Z cardboard pattern in original position; mark mounting holes and draw a line representing the front mounting bracket. Cut mounting holes and test by mounting on bottom of Z seat. Layout cardboard seat patterns, line up front mounting bracket line and determine best position for mounting holes on adaptor plates. Cut holes in adaptor plates and test fit in car; install Z mount bolt pattern, then adaptor plate patterns and finally BRZ seat pattern. Always better to test fit with cardboard than after drilling holes in the steel. Drill holes a little larger than needed, file off rough areas and test fit. If fit is good, clean up and paint adaptor plates to deter rust. Insert bolts through the front bolt holes to attach the adaptor plates to BRZ sliders. Note that sliders must move forward to access the mounting holes. Push sliders forward to mount rear slider bolts. Note the bolt closest to the door must be tightened when the seat is in the car. Place seat with plates attached into Z car. When the plates are attached to the Z car mounting brackets the bolt heads may interfere with sliding the seat. If so, then loosen BRZ mounting bolts and insert washers between slider and adaptor plate to raise the slider and clear the bolts going into the Z’s seat mounting holes. Another option is to use carriage bolts with flat heads. The BRZ seat hinge area fits very tight, so ensure that the seat belt buckle is visible. If not, it is almost impossible to access it later. After completing the passenger side, repeat on the driver’s side. Cardboard patterns can be flipped over and reused, but make sure the holes are marked to avoid confusion. Good luck with your install!