tleverett
Free Member
-
Joined
-
Last visited
-
@Zed Head Got it, I'll look at it when I pull the tranny out, compare everything to make sure it matches.
-
@siteunseen no worries about the interior work, the seats carpet and console are already out. I've just gotta pull the rubber boots. I haven't heard about that one. So it's an upgrade over the OEM nylon stuff? any specific kit you know of or just "bronze door hinge bushings" should be enough to find it? Oh ya I forgot about that.
-
Hi guys, I have watched tons of videos and read the FSM and anything I could find on removing tranny, swapping clutch and maintenance I need to do while in there. I'm gonna put out everything I can think of and PLEASE let me know if I am missing anything. 1: put car on stands, high enough the transmission can be pulled out from. and disconnect battery 2: Pull out shifter linkage with pin on side 3:Remove Exhaust 4: Drain Tranny fluid 5: Remove Driveshaft(mark how driveshaft is attached, remove 4 blts to diff, then slide out of tranny) 6: remove starter 7: Remove reverse switch, slave cylinder, and I believe speedo cable? 8: jack up to hold flat, unbolt from mount and housing, and pull out tranny 9: Go to tranny pull out clutch fork and throwout bearing. clean shaft and housing with brake cleaner. Switchout new bearing onto collar. Grease clutch fork, pivot bolt, inside of throwout bearing collar, and input shaft. Put on bearing and collar and clean excess amount off spindle. 10. Put in clutch alignment tool and unbolt pressure plate. pull off clutch and plate. Unbolt flywheel using bolt in flywheel, transmission housing and wrench. 11. Clean whole area and then use dental pic to pull crank rear main seal. Oil up new seal and hammer back in making sure not to damage (taking time). Remove pilot bearing from crank with pullers and use rubber or plastic mallet to hammer new in. 12. Attach new flywheel using medium strength thread lock, and tighten in star pattern. Use brake cleaner to clean surface of new flywheel. 13. Put on clutch (big spring side facing away from motor) and attach with clutch tool. Grab pressure plate, clean surface with brake cleaner and attach over clutch. Tighten on star pattern.Turn clutch tool to match trans input shaft as best as possible. 14. Get 2" longer trans mounting bolts, cut the head and make slit in top. attach 2 to trans as guide pins. put tranny back in. Pump new oil in side fill plug. Attach tranny mount. slave, starter, reverse switch, speedo cable. 15 Put in drive shaft following earlier markings 16. REMOVE POS REAR BUMPER MOUNTS WHILE EXHAUST IS OFF (i'm not salty, you're salty) 17. Put exhaust back on. 18. Reattach shifter I have a new clutch kit (exedy) thats coming with clutch, pressure plate, throwout bearing. I'm getting a new pilot bearing, rear main seal, flywheel. I've already replaced the slave cylinder and master cylinder. Is there ANYTHING else I need to do while I'm in there or should also replace?
-
@Patcon That's honestly great advice that I didn't think of. I was in such a rush to try to get it done I forgot to get it to a point I could actually enjoy it first. Thanks!
-
Hi guys! I've got a 1978 280z and after 12 years of sitting the car officially runs again! At this point I'm unsure on the next step between trying to get the car to move under it's own power, or pulling the entire car apart and starting the metal/body work? I'm not sure if it's a smart choice to blow money on stuff I'm just going to redo after I put some systems back in. As it sits the current throttle linkage is like seized in the intake portion that is the piece before the throttle body. Mind you, I have not flushed or replaced the differential, tranny, or radiator fluids. Does anyone have some sort of recommended order of operations for the restoration?
-
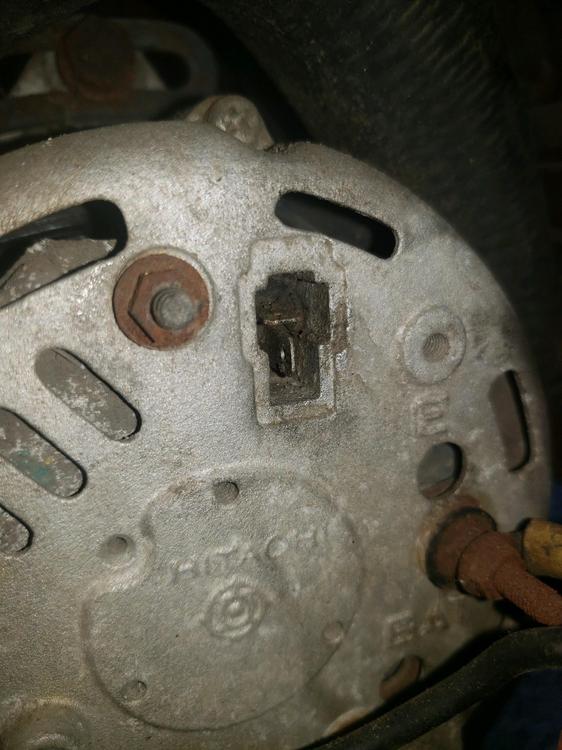
@SteveJ @wal280z after 12 years the car OFFICIALLY runs. It was the ignition relay causing the problems. I bought the "starter" relay mentioned above and after the fuel pumped in it started. WHOOOOOO!! Thanks for the help!
-
@SteveJI was looking for "ignition" relay, but found this as "Starter" relay https://zcardepot.com/products/starter-relay-upgrade-replacement-280z If I'm not wrong this is an ignition relay correct?
-
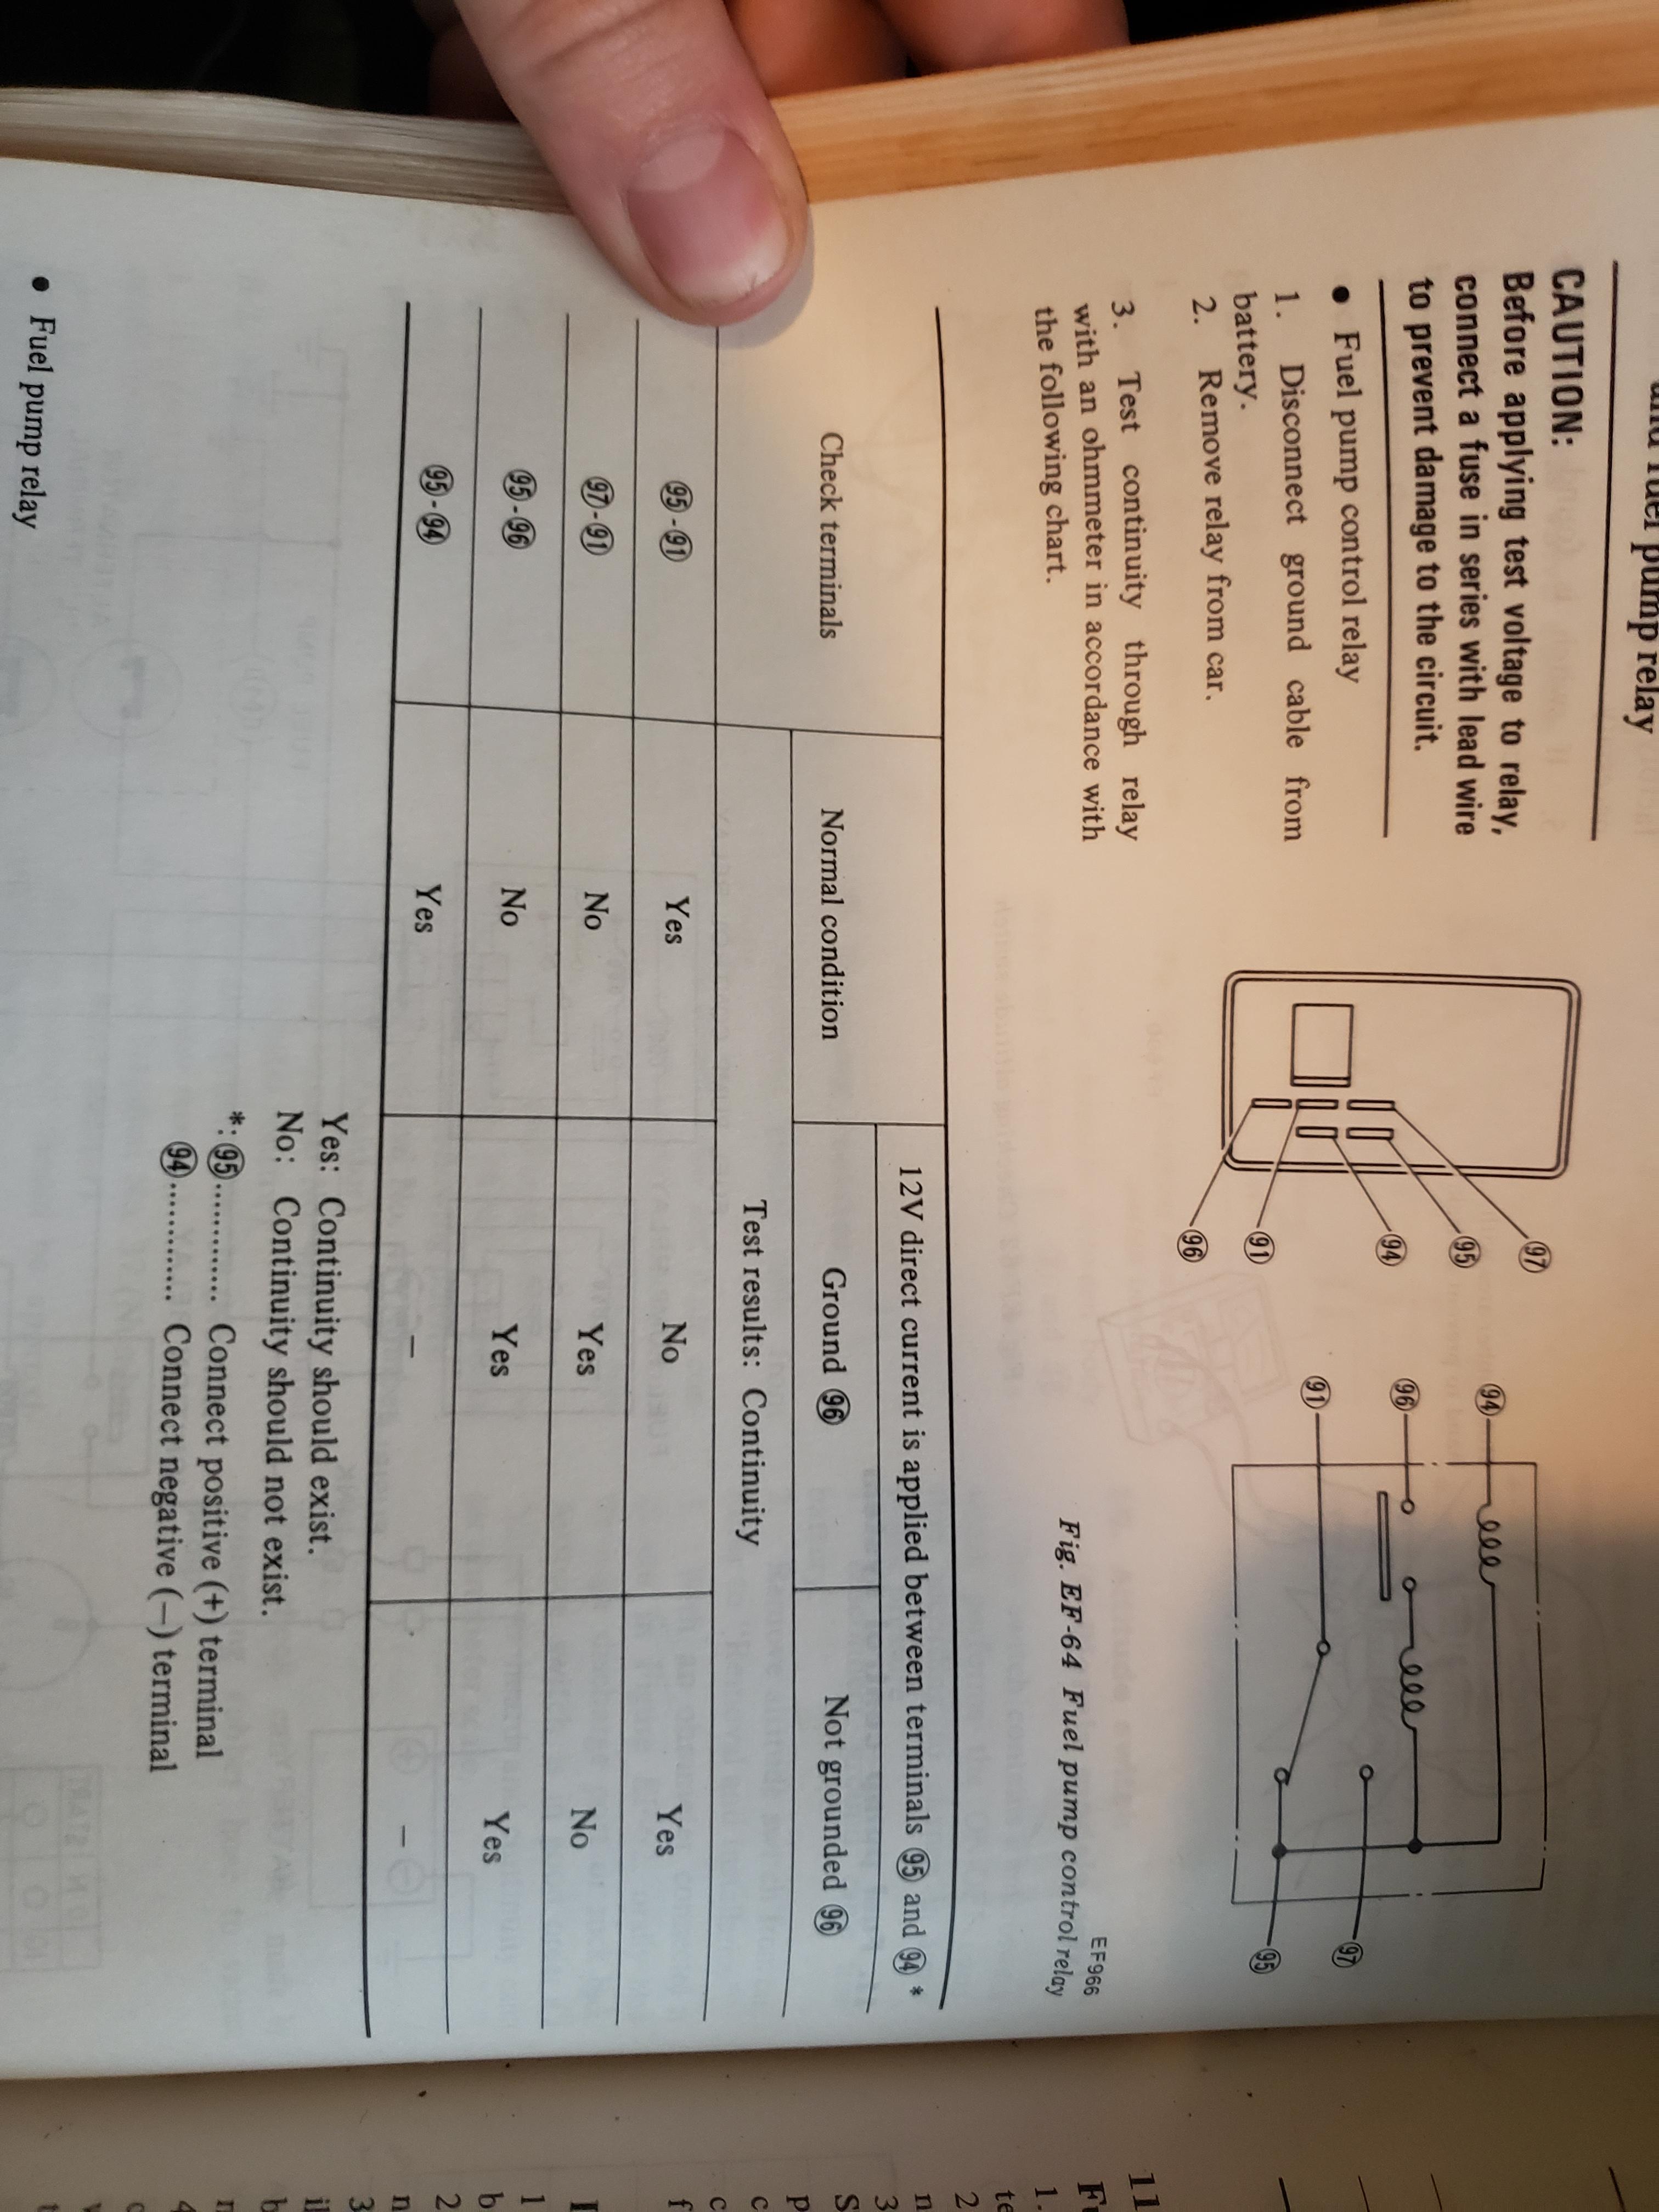
@SteveJFuel pump control relay Normal: 95-91 yes 94-95 no (you said this shouldnt) With current to 94&95: I can hear the relay actuate 95-91 yes 95-96 no but i believe the number shows resistance? With current and ground: 97-96 no 95-96 no The with current and ground i'm not sure if i did correctly, i tried touching to screw in lightswitch plate. I'm not sure if thats good enough
-
@SteveJThanks A bunch, I'm going to grab some leads on the way home from work and give the fuel pump control relay a shot! Let me know if I can help at all with the ignition relay.
-
@SteveJ that's interesting and helpful that you know this stuff. I was so confused because while there was no continuity on the fuel pump switch, it energized and had continuity on the other posts perfectly. I guess it doesn't make too much sense to check non energized continuity because there should be nothing that makes it bad, more so connections and switches are the part that mess up not energizing properly. Sorry if my wordage is bad. Would you still be able to help out making an ignition switch? I still need to check the energized fuel pump control relay because i stopped checking when it didn't have continuity in normal state. Also need to get gator clips because testing with just pins is extremely difficult and tedious lol. But considering i know that switch is bad might as well start somewhere.
-
@Patcon ahhh makes sense
-
@StephenJ I'm sorry I'm unfamiliar with what NLA means. And honestly if you could do that it would be a big help. I looked at the first one, its pins are set up differently on the picture. Is that just a random display image you think, or would i have to find a matching harness and rewire it? It seems z car source has it for $100, ouch. And for the control relay just z car source them and ask right?
-
-
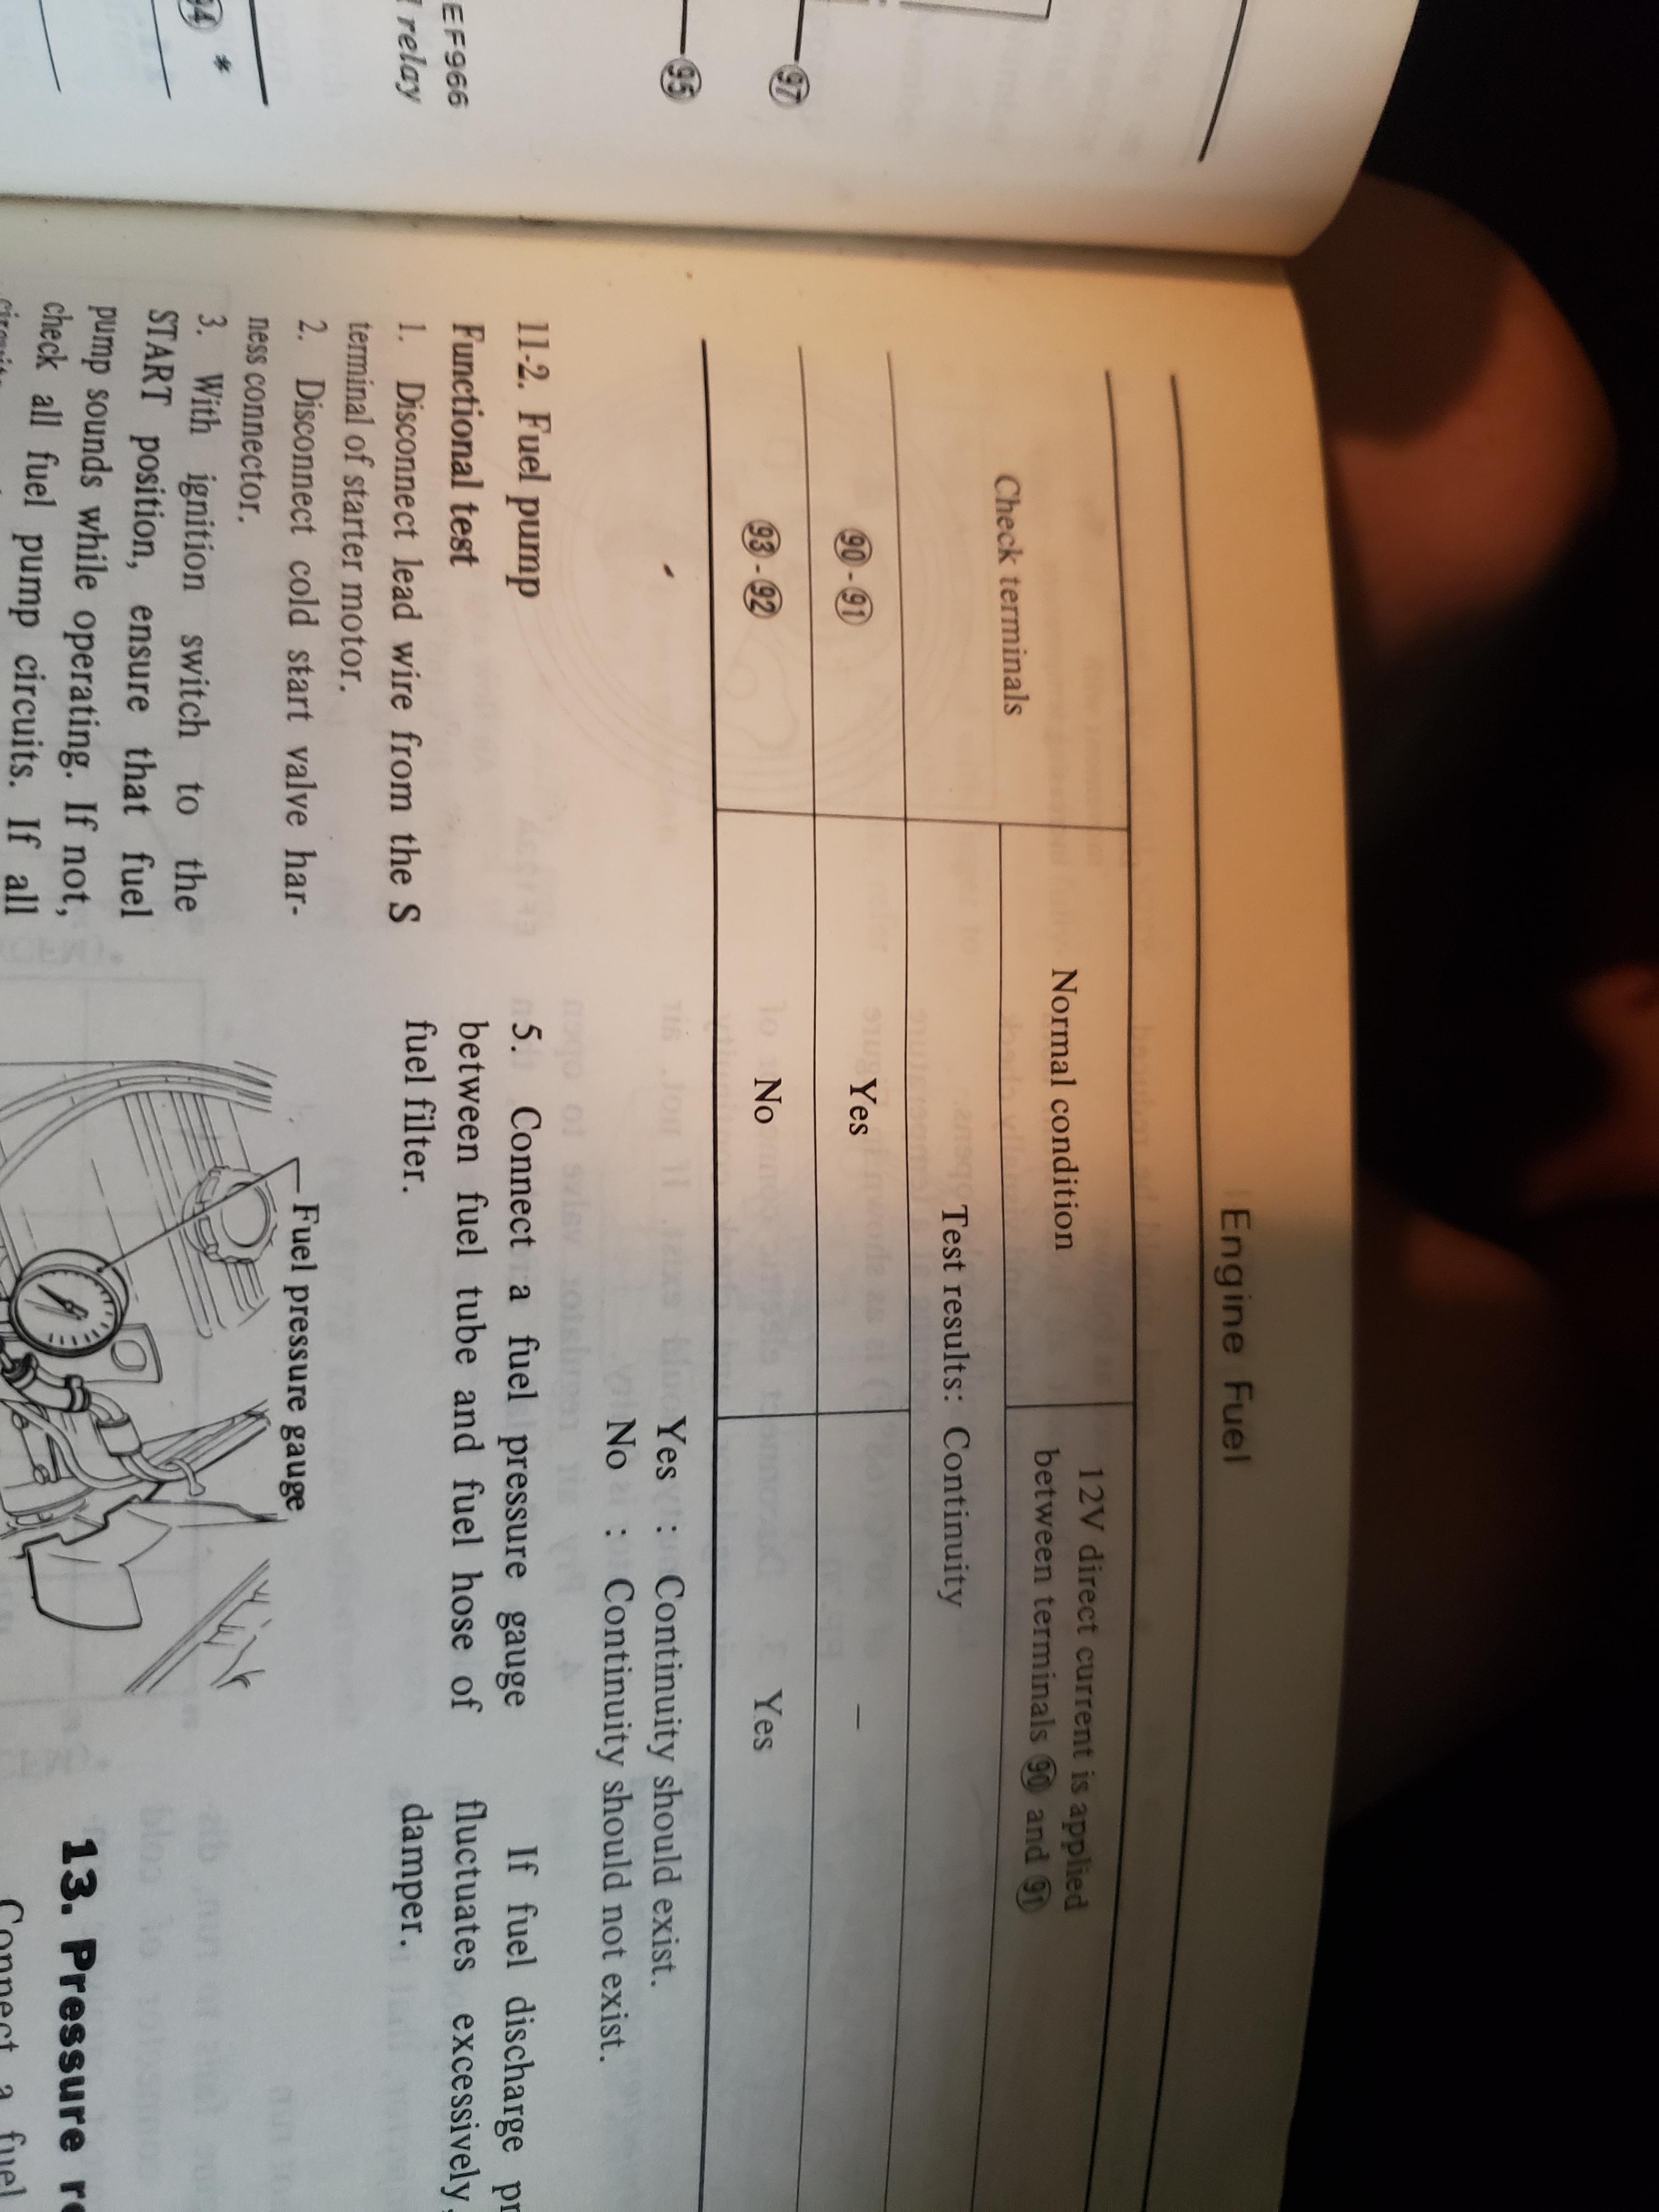
Fuel pump relay. 90-91 did not have continuity in normal condition. 93-92 had continuity when +/- was added to 90-91 Fuel pump control relay under normal 95-91 yes. 95-94 no. So it appears all 3 relays are bad. Fml any idea where is best to get them?
-
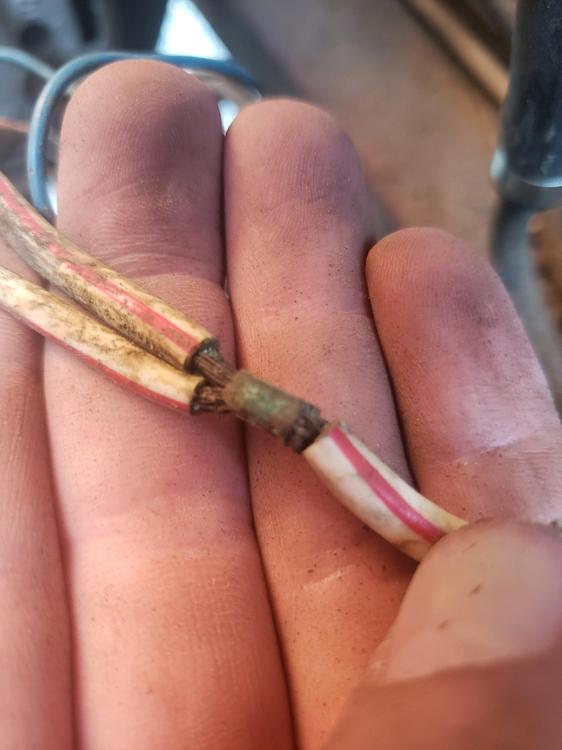
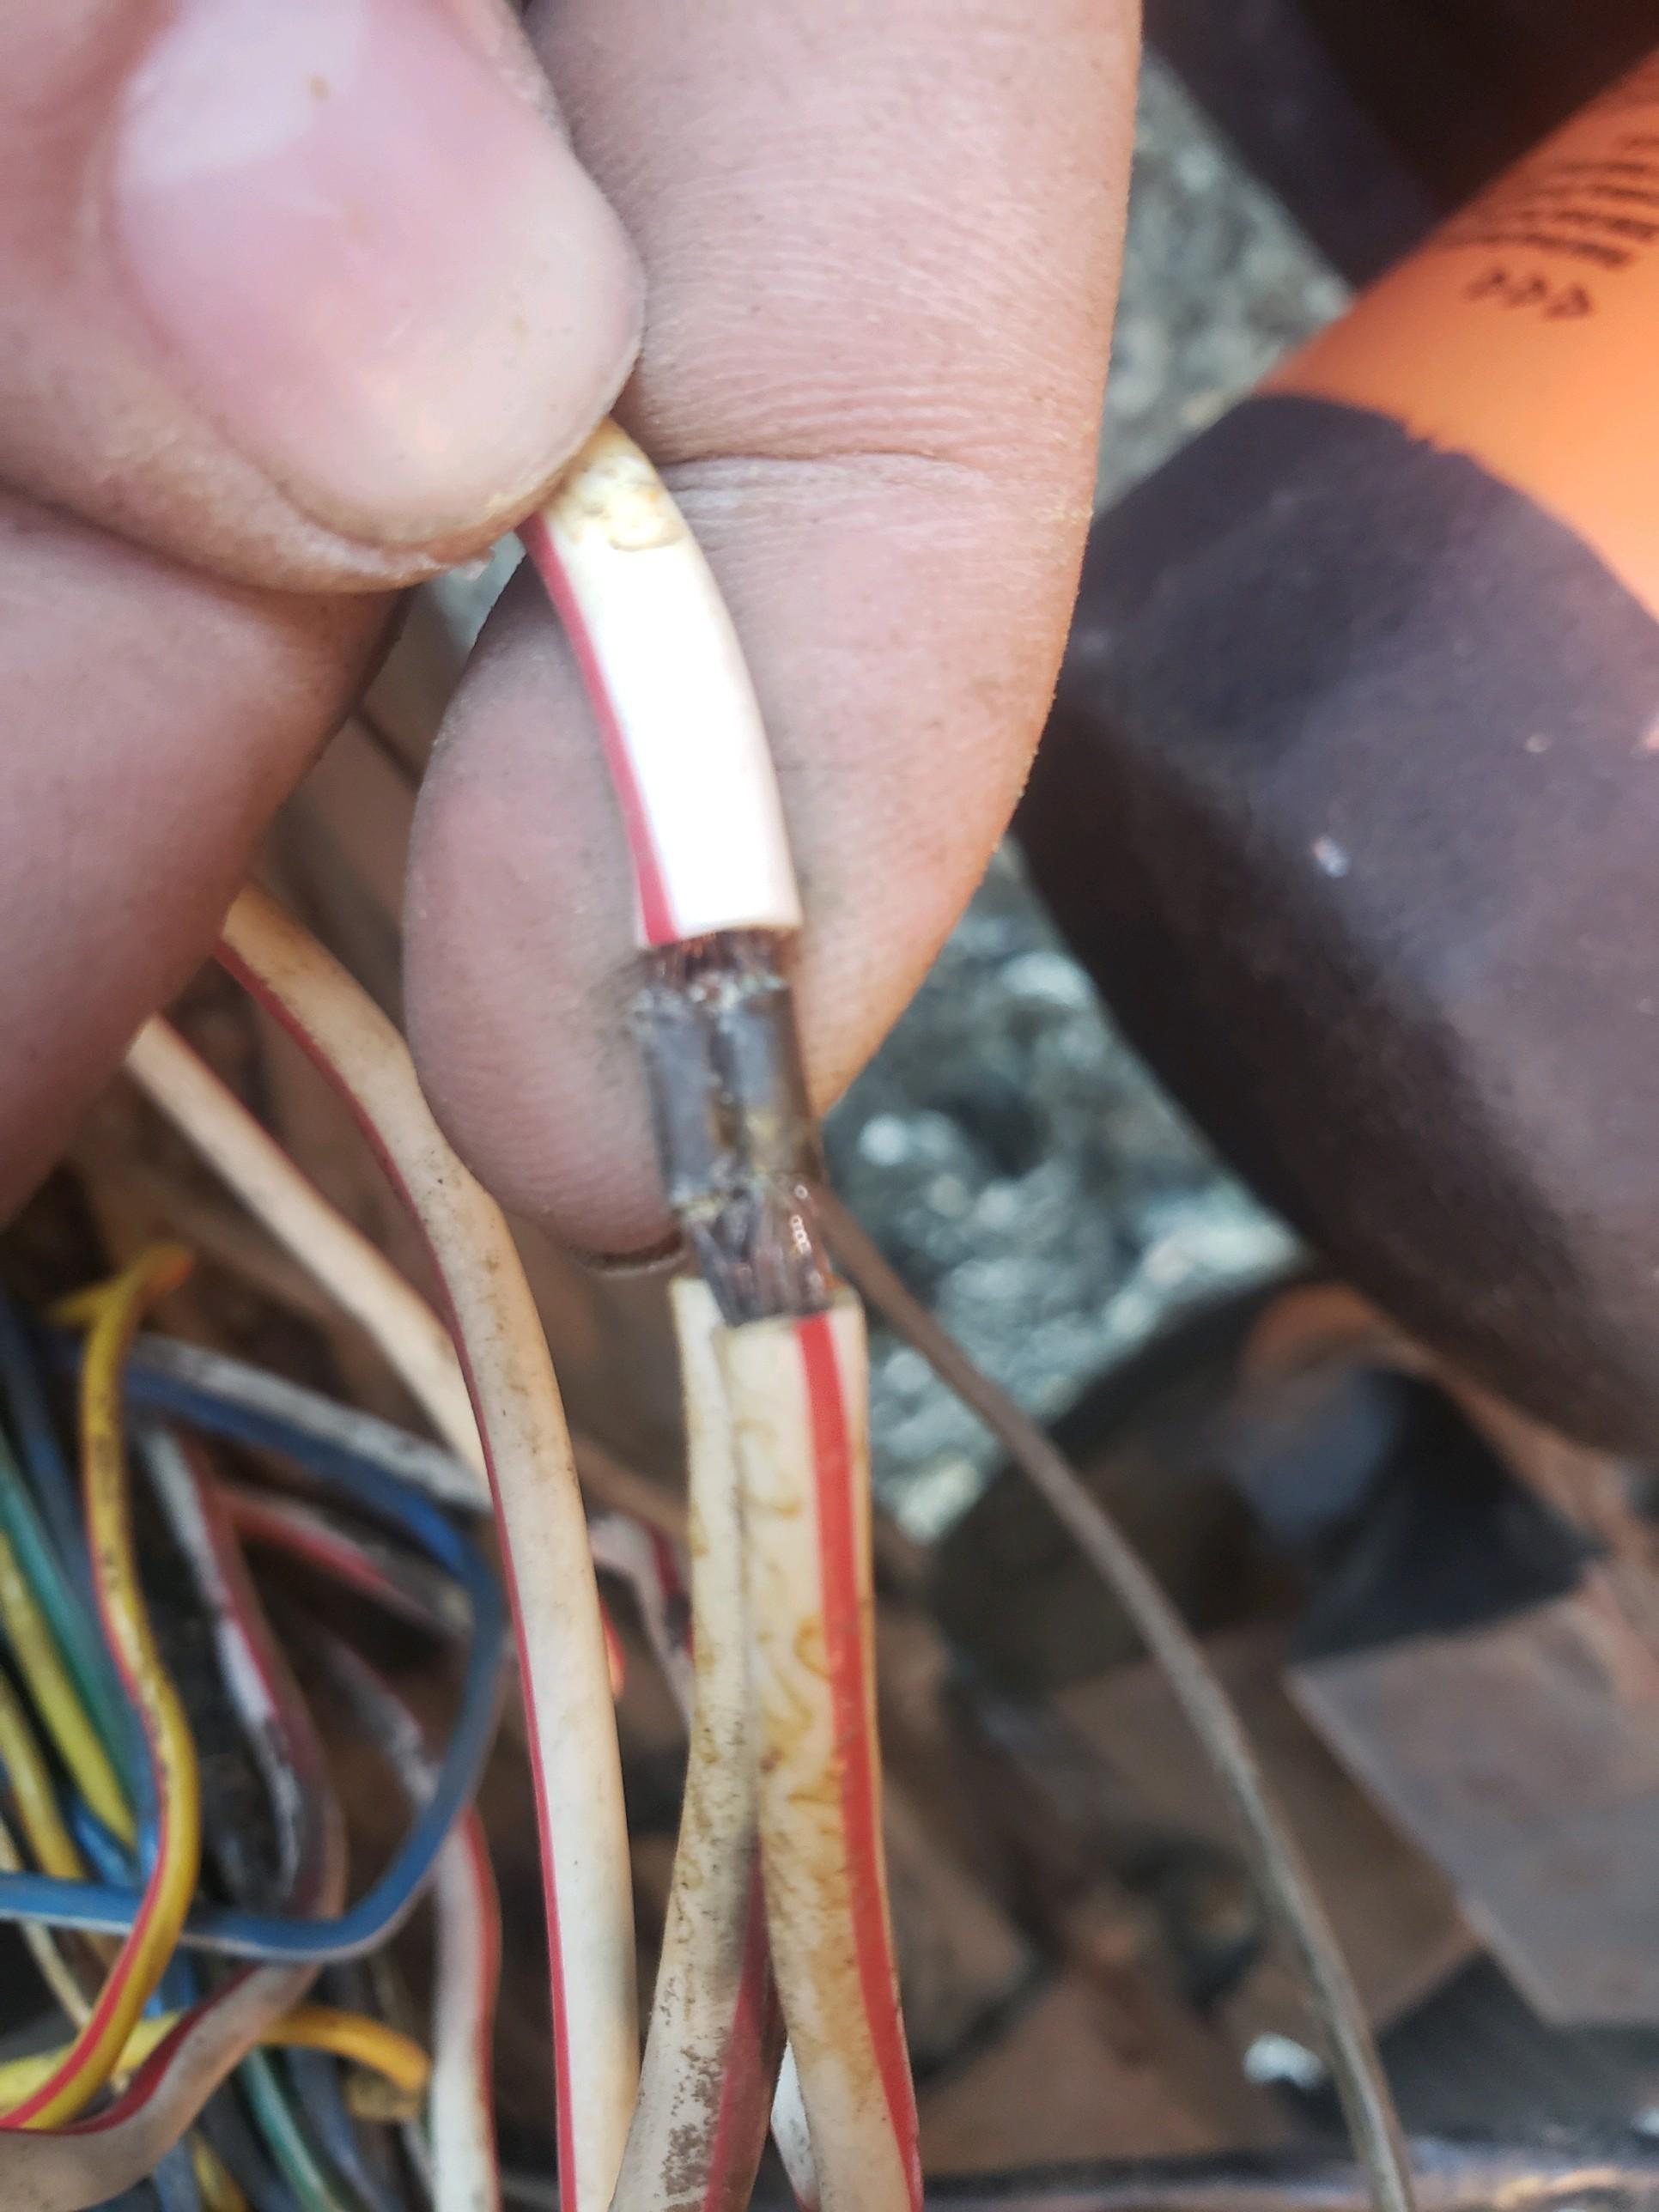
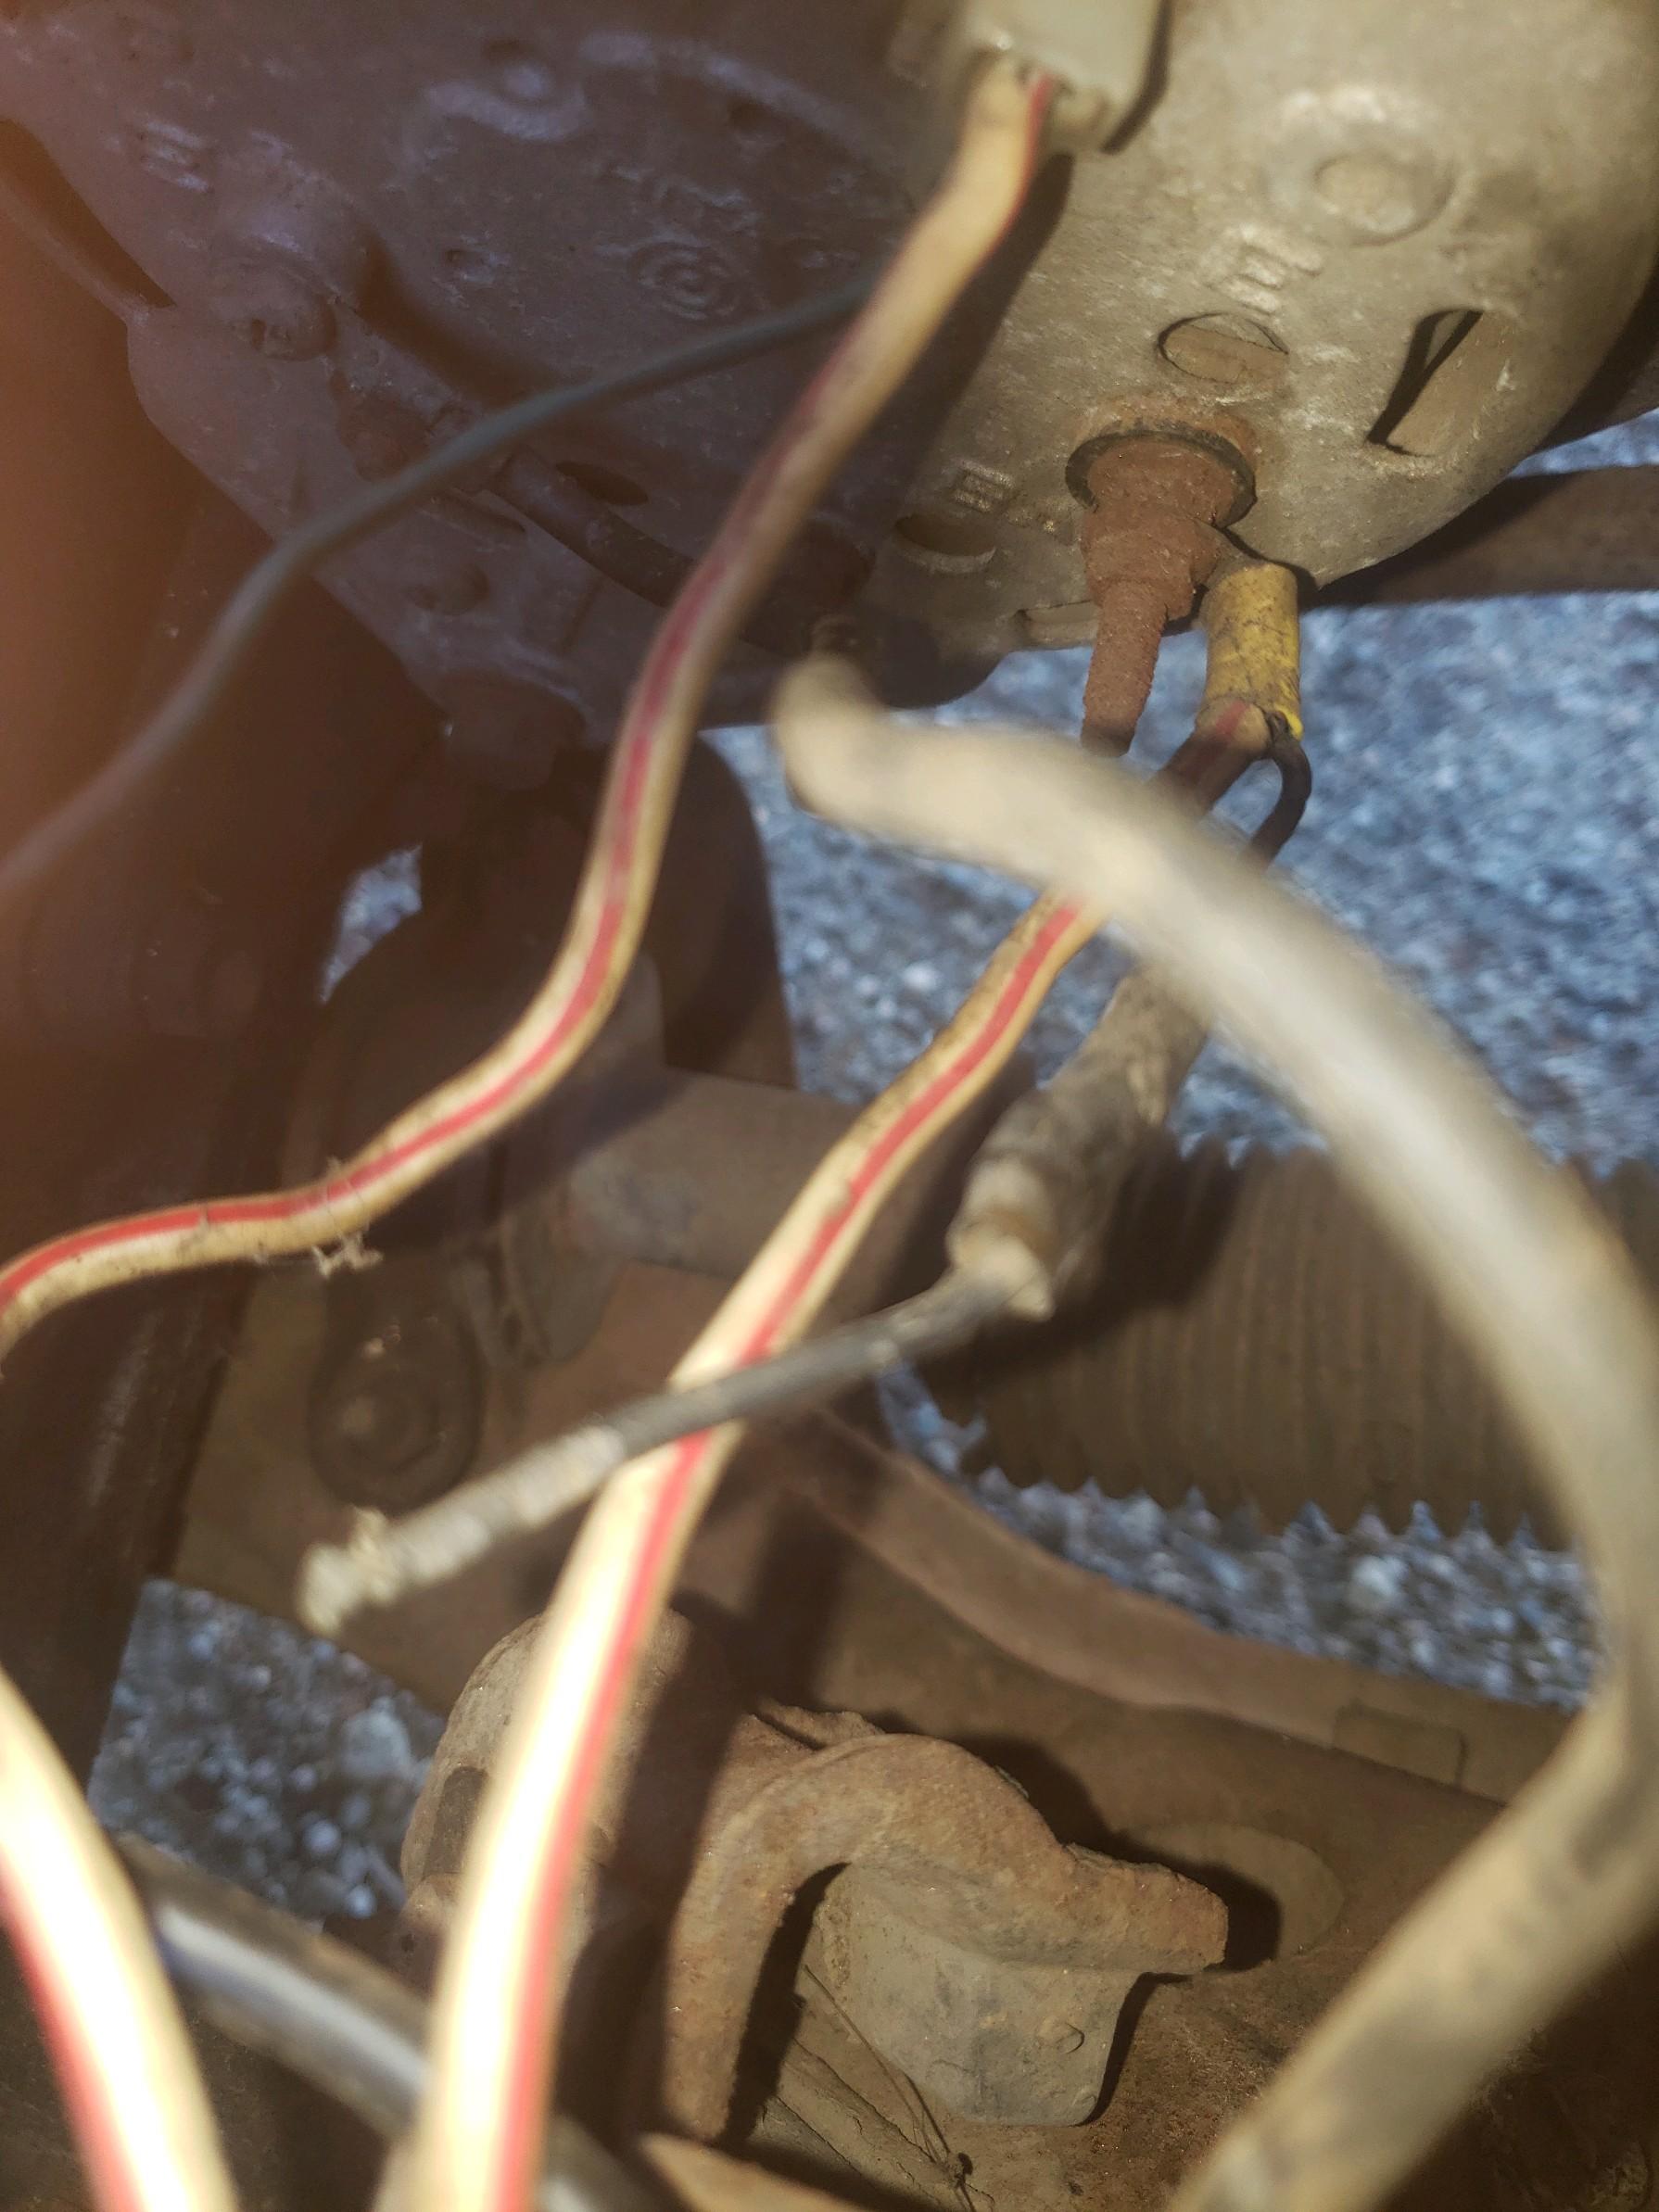
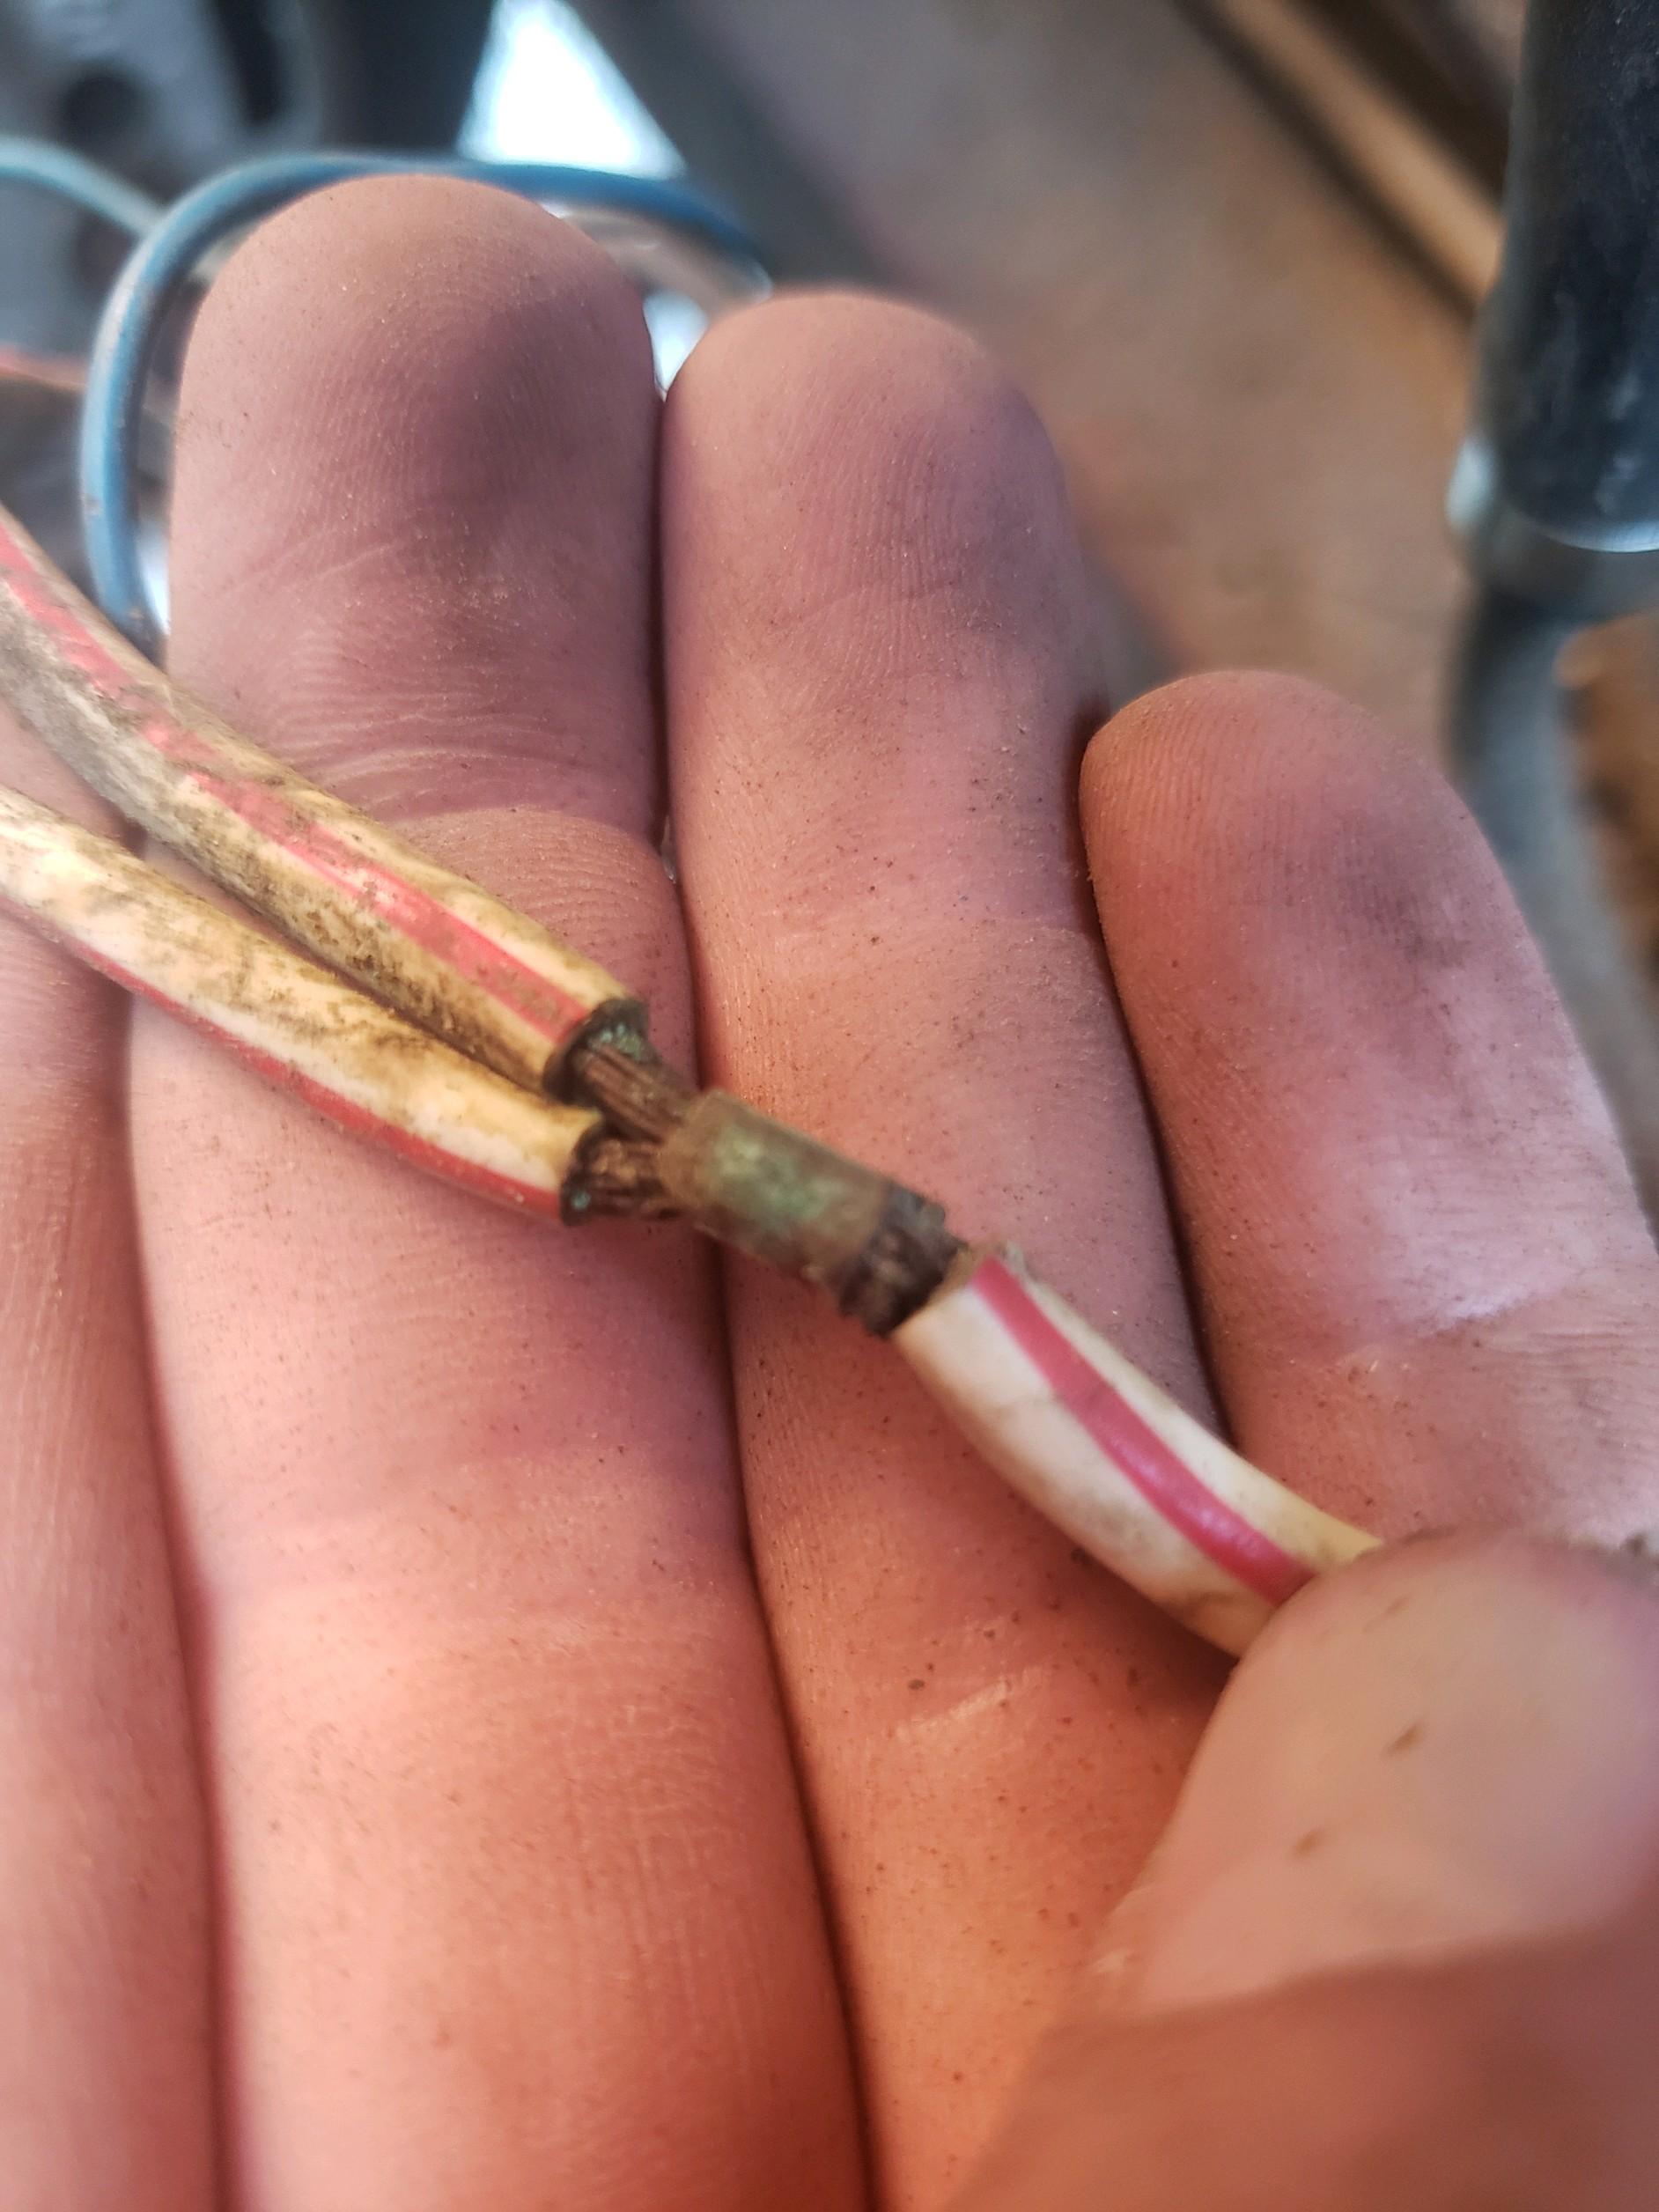
@SteveJ @wal280z okay i peeled off enough harness tape to find the 2 splices and honestly not too bad. I checked the voltage at the harness c9 and all four fusable link wires have voltage (small victory, maxi fuses worked correctly). Okay then i was taking off the ignition relay and all of a sudden THE ACC SOUNDS STARTED GOING OFF, but then turned off. I was pretty excited. i kept unplugging/plugging the relay and every once in a while the ACC sound would come on. I tried to start the car but the oltage was dieing on the battery. I didnt hear anyhtring from the fuel pump the whole time however. I also checked the voltage to the t post on the alternator and it had it. The other w/r wire going to the alternator also had voltage. I am going to test all the relays in a little, however it seems for now I do need an ignition relay if not now soon since it is working intermittently. Any ideas where to go for that? I will work on the oil pressure check tomorrow.