
Trnelson
Free Member
-
Joined
-
Last visited
Everything posted by Trnelson
-
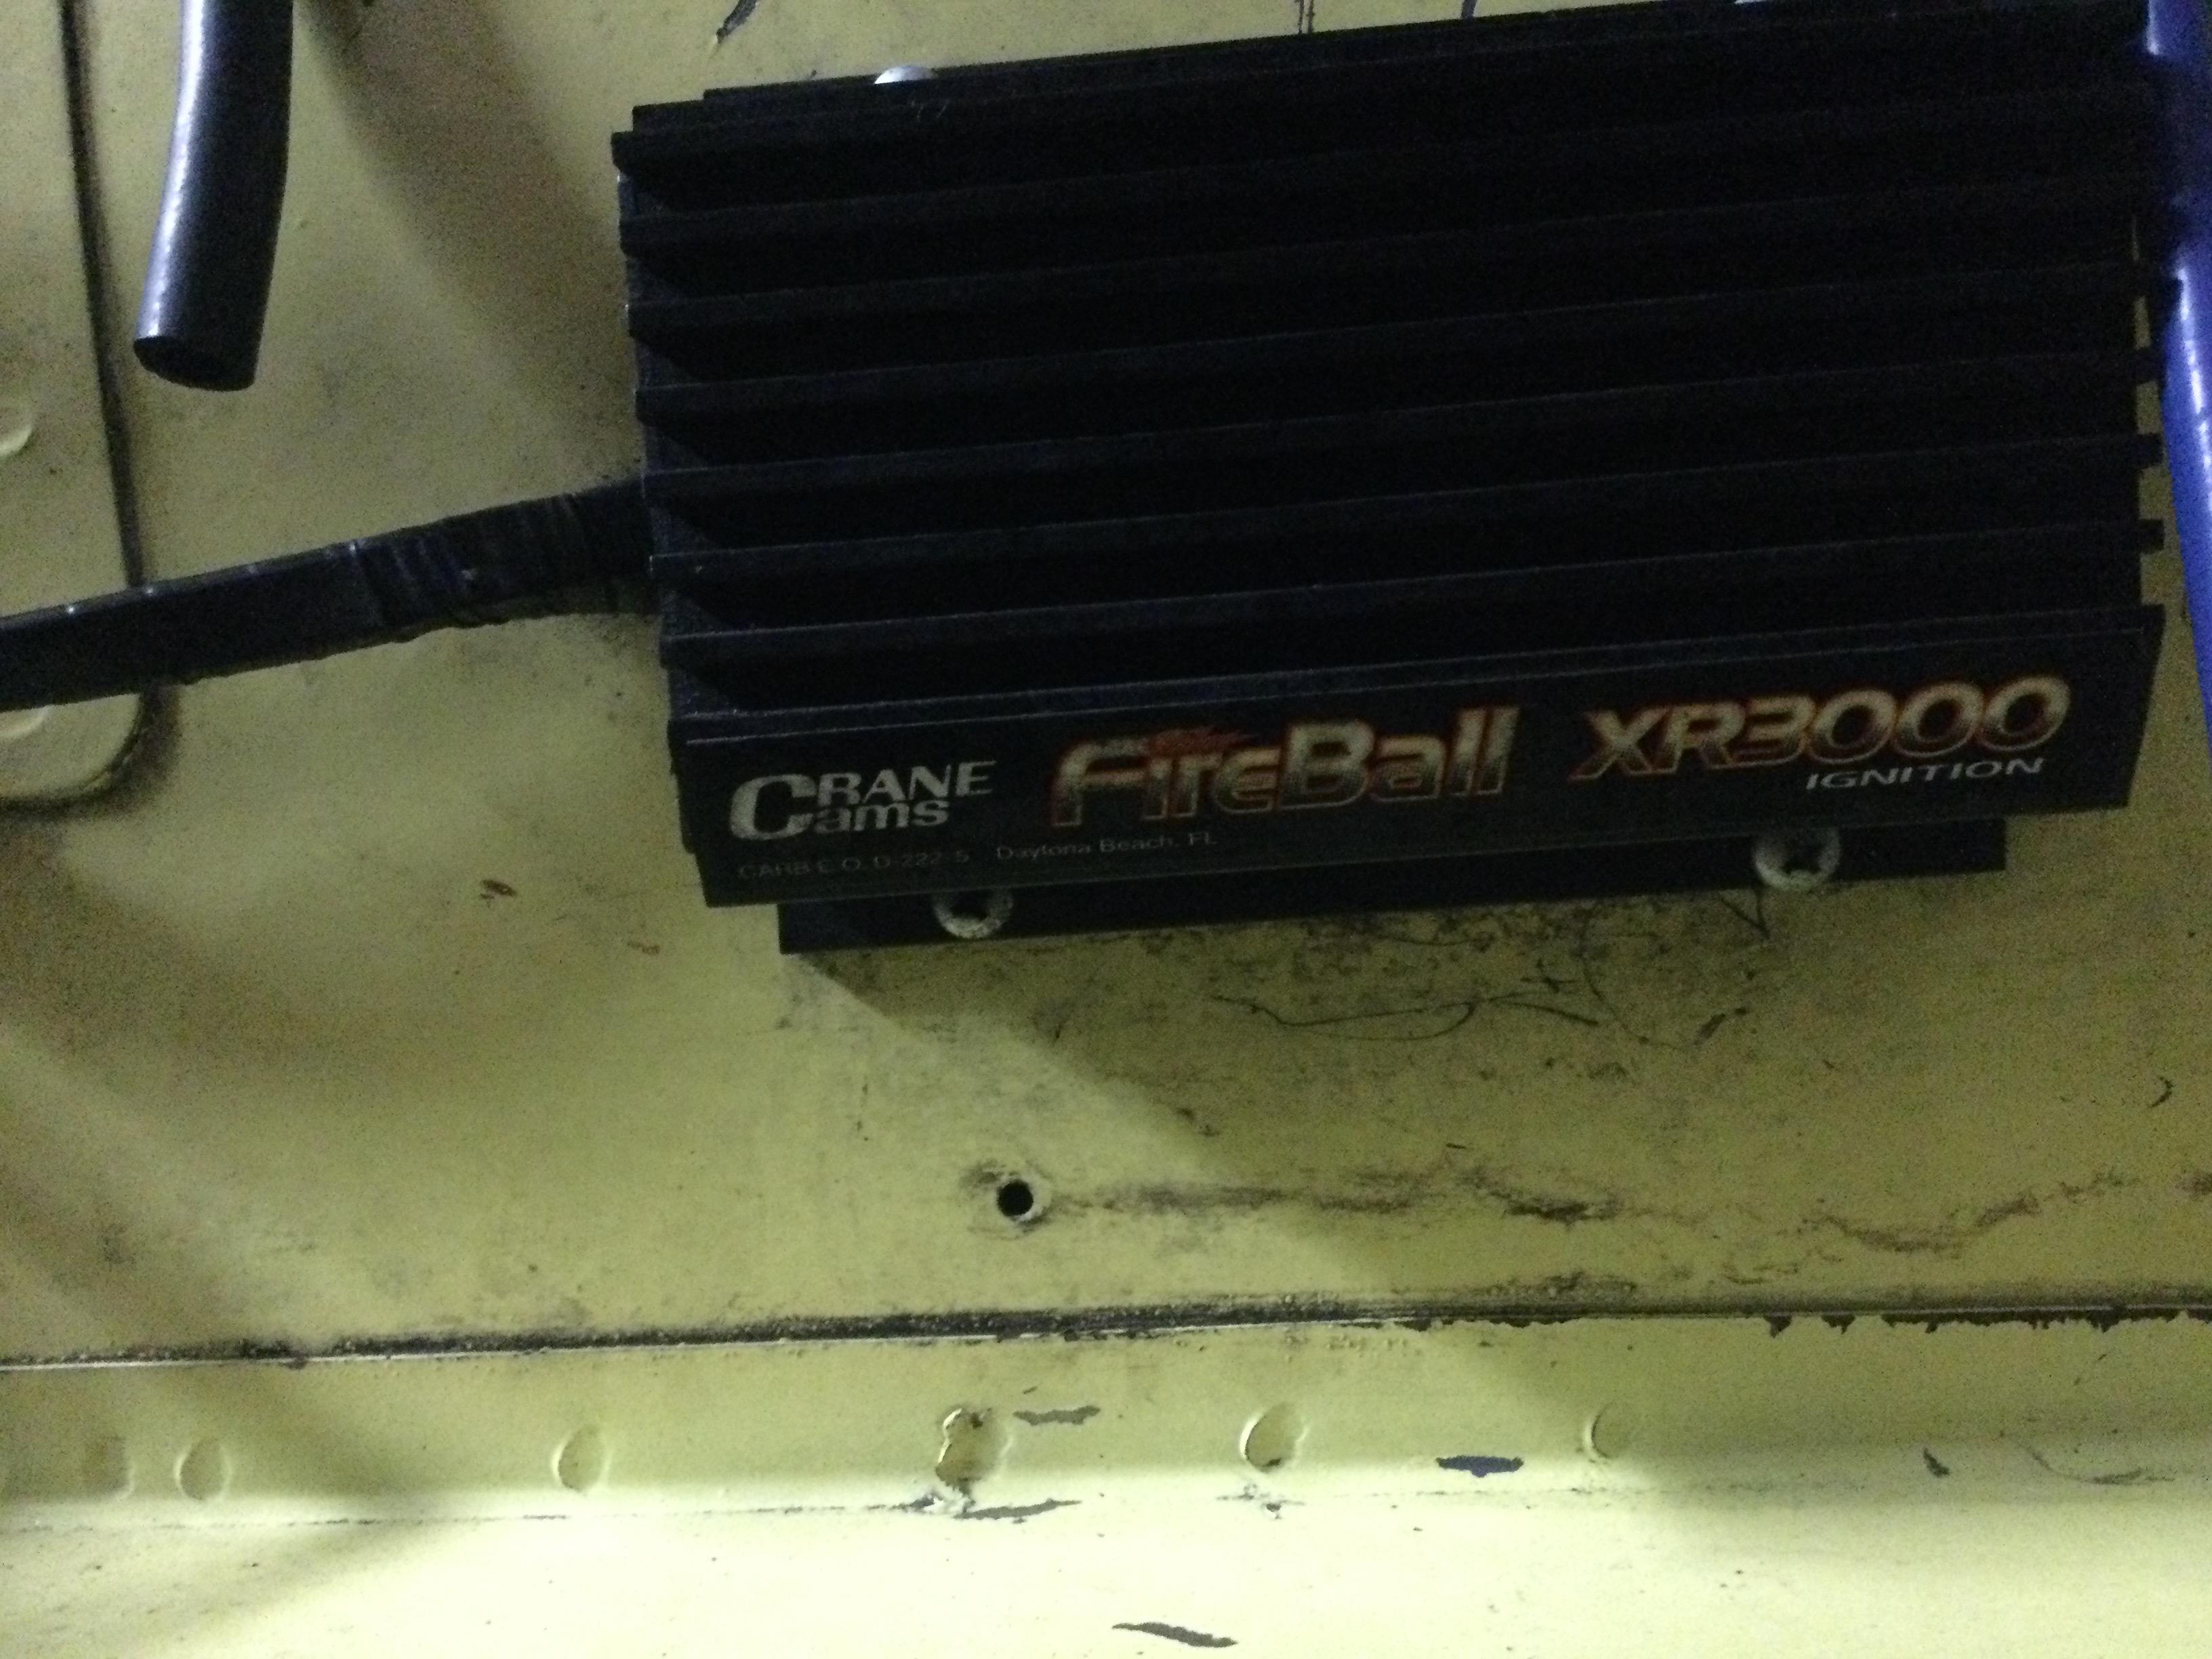
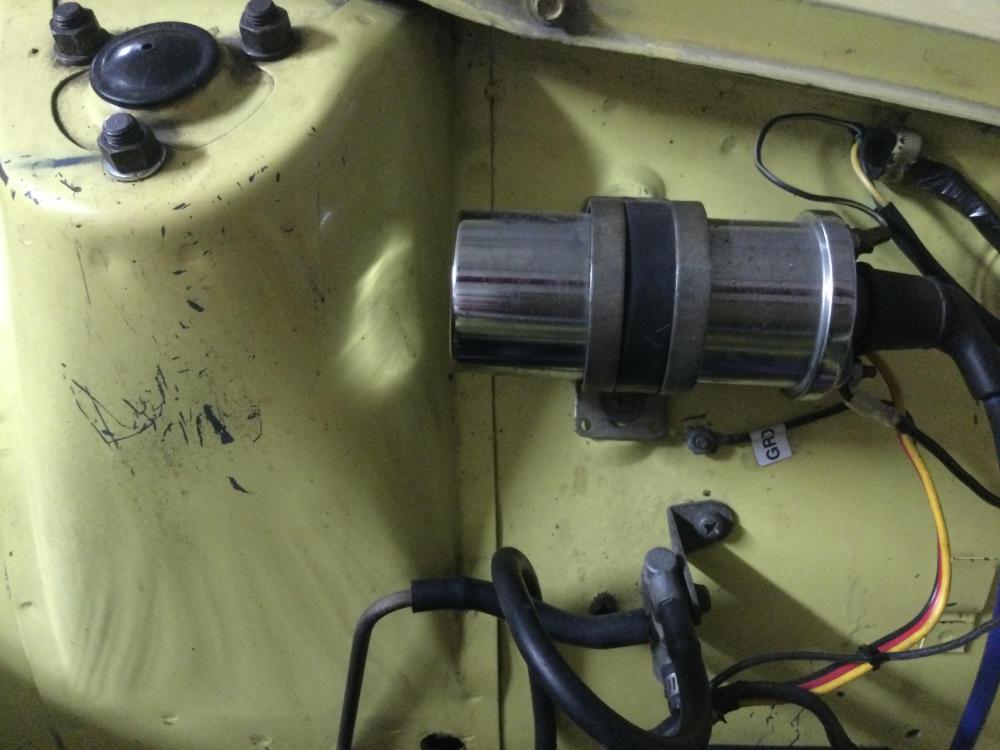
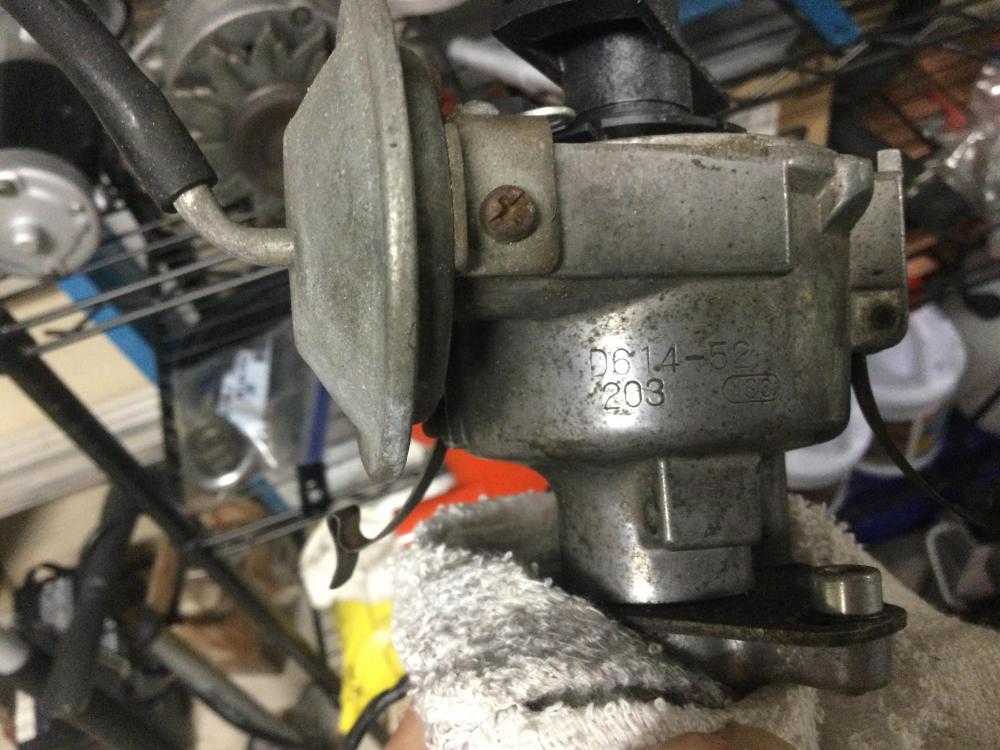
I didn’t readily see any identifying numbers on the coil.
-
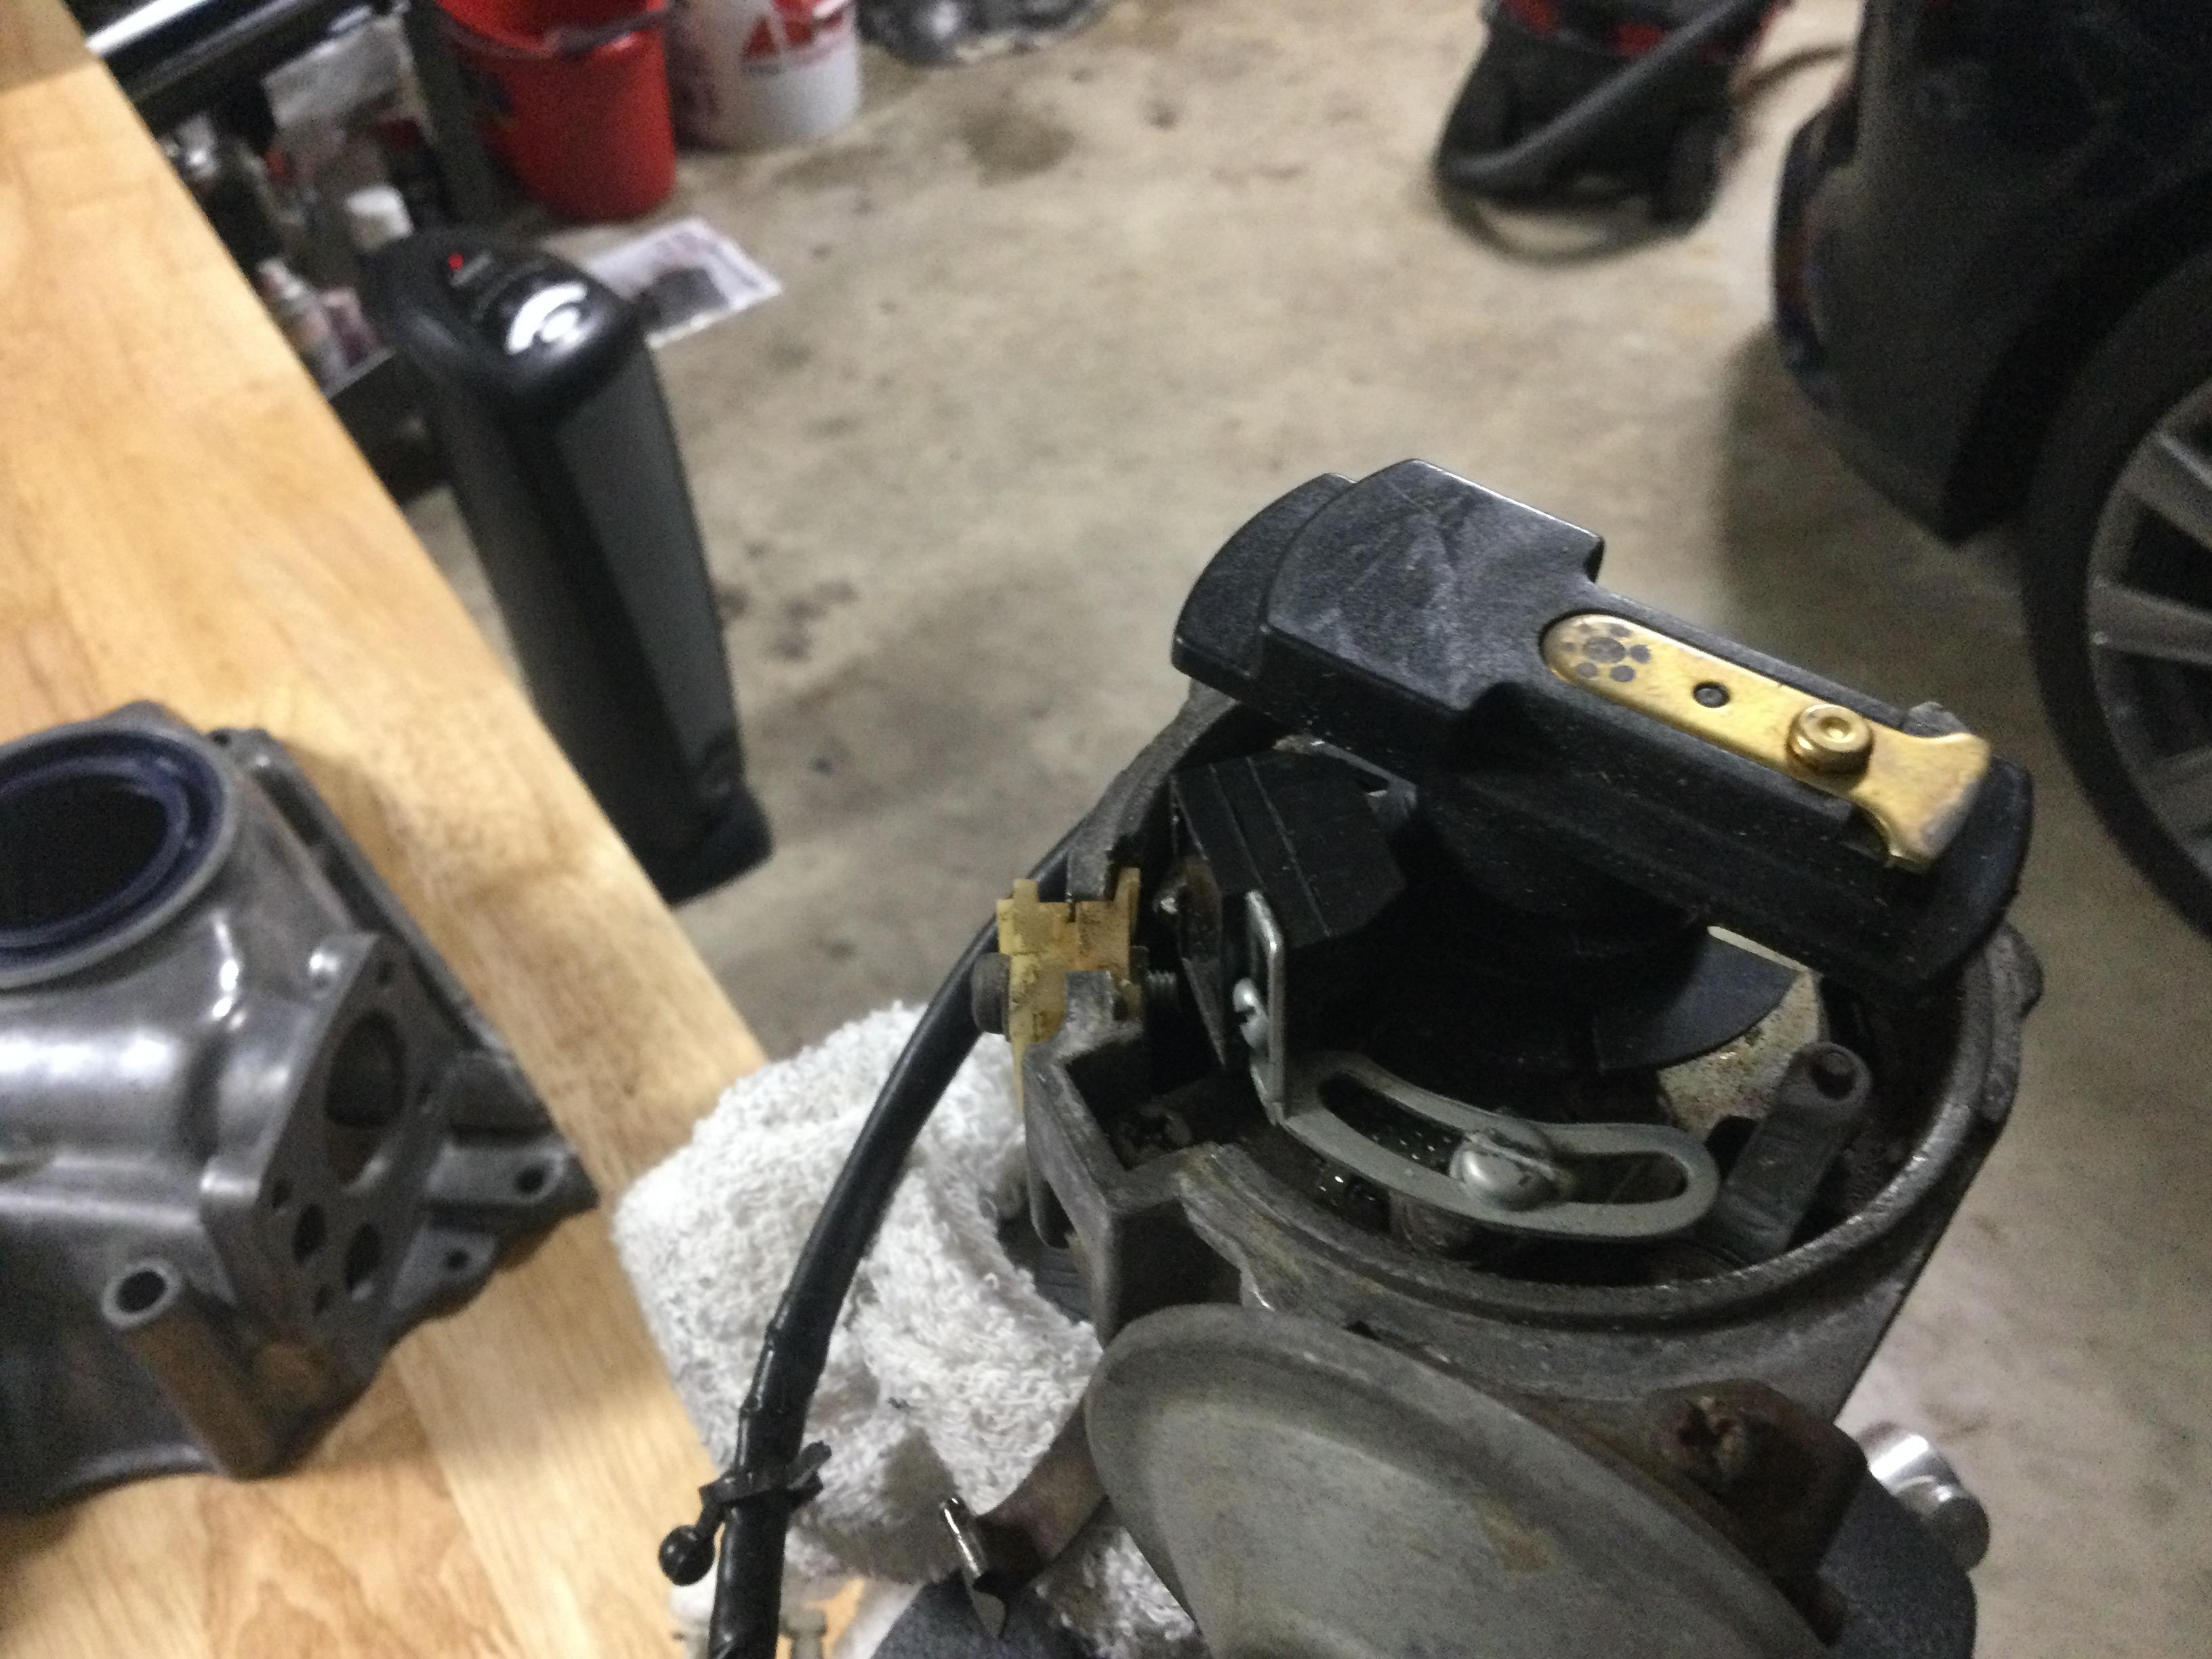
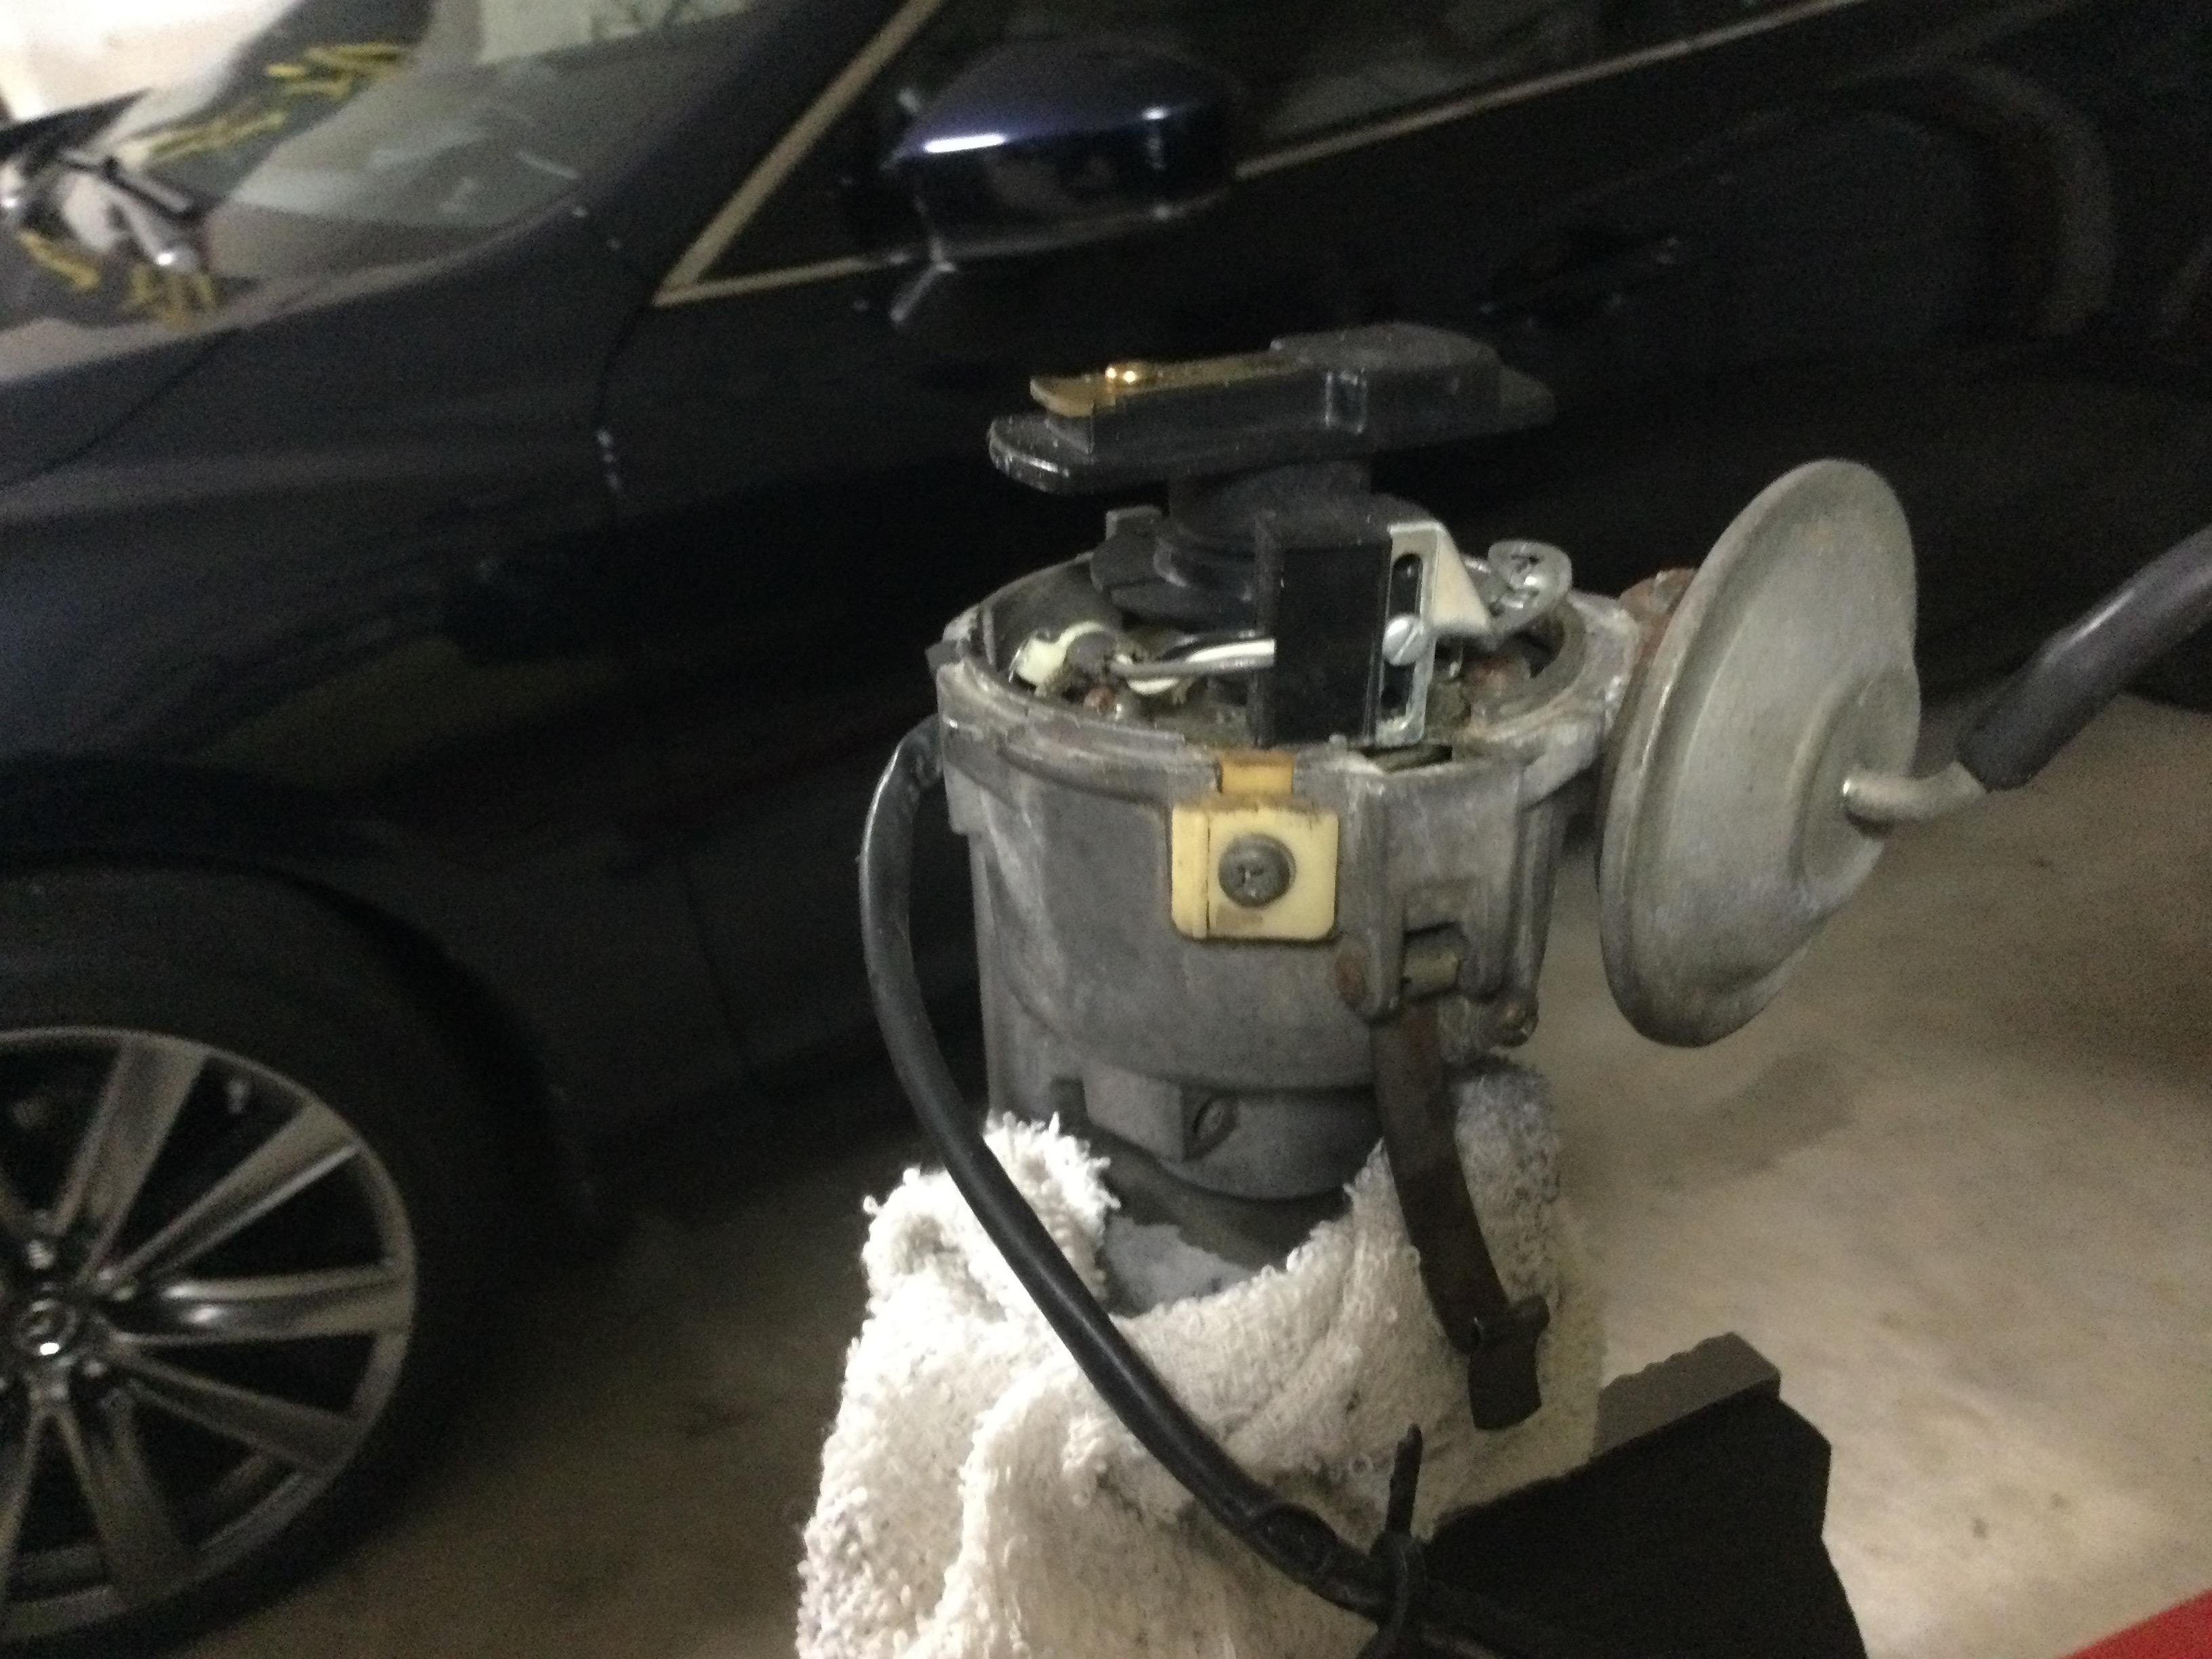
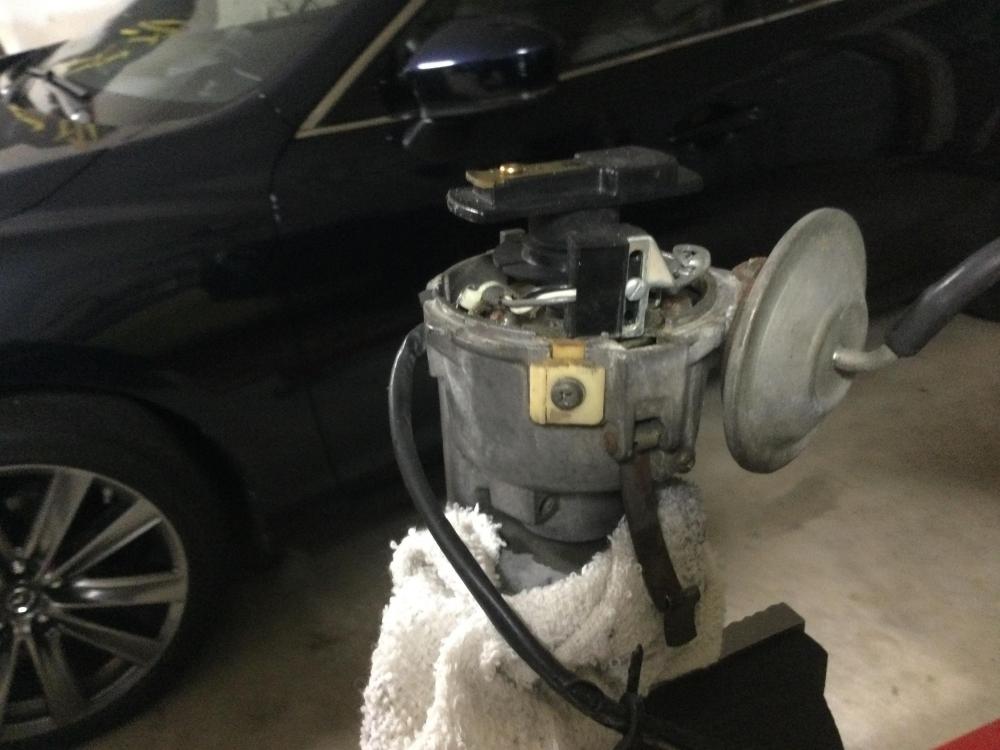
I’ve inherited this electronic ignition system, it was working fine before I tore the engine down and assume it will be ok when I fire it back up. I’d like to find the appropriate cap and rotor for the short term AND know exactly what I have. To this uneducated shade tree mechanic ignition systems are the ultimate form of black voodoo magic. If anyone recognizes these parts please chime in. I’d like to upgrade to the 123 but I think some ZTherapy carbs may predicate the dizzy... short term Please let me know if pics of other parts would be helpful. thanks Tom


-
The timing set is "Engine Pro" brand. I think it will be fine and I'll chalk it up as a learning experience of what to ask about next time before ordering. I HATE the thought of a master link in the timing chain! While the cam gear didn't have the notches it did have the indents labeled 1,2,3 so I do feel confident that it is properly timed. Just got the Z last summer, I've always liked to tinker with stuff but never really got much past basic maintenance items and bolt on accessories. I finally am in a place in life where I have the means and garage to really tear into an engine. When I was younger the problem was that whatever I was working on I typically had to be able to drive it to work the next day! I'm not a mechanic by trade but I have spent the last 26 years around golf course maintenance equipment, maintaining reel mowers to cut perfectly at .100" is a pretty delicate undertaking. During my first job after college I worked with a great mechanic on taking 8 old Toro mowers and combining them to get 5 of them to operate and function properly. He taught me a lot about laying things out, cleaning up all the parts and how to assemble things. In a nutshell I know just enough to be dangerous but thanks to some great books, this forum and no real deadline for completion I have been able to deal with the challenges that pop up on a project like this. Thanks again for your assistance, I'd like to buy you a beer someday.
-
It is satisfying to get to the root of an issue, one of the reasons I love this new to me hobby. The only thing more satisfying than having the cam turn freely is having to use a wrench due to all the pressure from the springs and rockers! Had a rain day today and was able to get the top end done, mounted to the block and the timing chain installed. Question, the new timing kit I received, from an unnamed vendor, seems to be of low quality. The chain has a master link, no bright links which makes sense since it is seemingly made to be cut to fit and cam sprocket doesn’t have the “v” notches to set the timing. I had my old chain and was able to lay them out side by side and they are the same length. I counted links between bright links on the old chain and replicated that on the new one. I installed it and it does match up so I feel like it will be fine, I’m just disappointed in that they feel like generic parts. I’m not sure if this is normal due to the age of these cars or if I just don’t know where to shop. Take a look at this pic and see what you think. The top “homemade” bright link is the master link, notice the lack of notches in the sprocket, yes I did check both sides to be sure...

-
Correct, I was putting the lube on the journals and bearings but when I slid the cam back in I had the same issue with it not wanting to slide all the way in with the tower bolts at full torque. So I loosened everything back up, lubed the journals/bearings, slid it in and when I was torquing everything down the second time is when the Heli-coil broke loose. I finally found a Heli-coil set after 3 stops and decided to check all threads, glad I did because there were two more that appeared sketchy. I’ve replaced them and now have the towers and cam installed. I can easily turn it with my fingers so I’m calling it a success! I’m now beginning to think that the worn out Heli-coil may have been the or at least another issue with the cam fitment. Oh well, either way it’s in and I can finish the top end today. Thanks for the help Captain
-
Update, I studied the towers more closely and sure enough there was a large burr on the rear most tower. I carefully filed it down flush and checked all the others. You were correct, obviously someone had prayed it off with a screwdriver! I oiled the cam and towers with the bolts torqued to 7 lbs. It still stopped at the fifth tower. I removed the fifth tower and tried to push it into position but it wouldn’t go any farther. It seems the issue was with the front cam journal entering the tower. I loosened all the bolts back up, reinstalled the fifth tower and when it stopped I lightly tapped the top of the first tower and viola, it slipped right in and turned with ease. I incrementally torqued all the bolts down and it spun just as freely as with no torque! I did the happy dance and started laying out the valves for installation. Here’s where it becomes my typical Datsun story... I realized in all my happy dancing that I had forgotten to put assembly lube on the towers, once again I had to repeat the procedure of loosening torquing etc. on the LAST bolt to torque to 25 lbs with about 1/8 of a turn to go it gets real easy and just spins with little to no resistance. WTHis going on. As it turns out those threads had been Heli-coiled. How they didn’t come apart when I chased the threads is beyond me. Oh well, looks like I’ll be making the 1.5 hour round trip to the closest parts house, damnit! Better to find it now than at break-in I suppose.

-
Thanks for the advice. No screwdrivers were used by me during disassembly but I suppose the PO may have. I’ll check and those items before I make another attempt. I failed to mention that it do I’d spin freely when the cam was in the first 4 towers, it was when I got to the fifth one that things got janky. I’ll start there to see if I’ve overlooked something obvious.
-
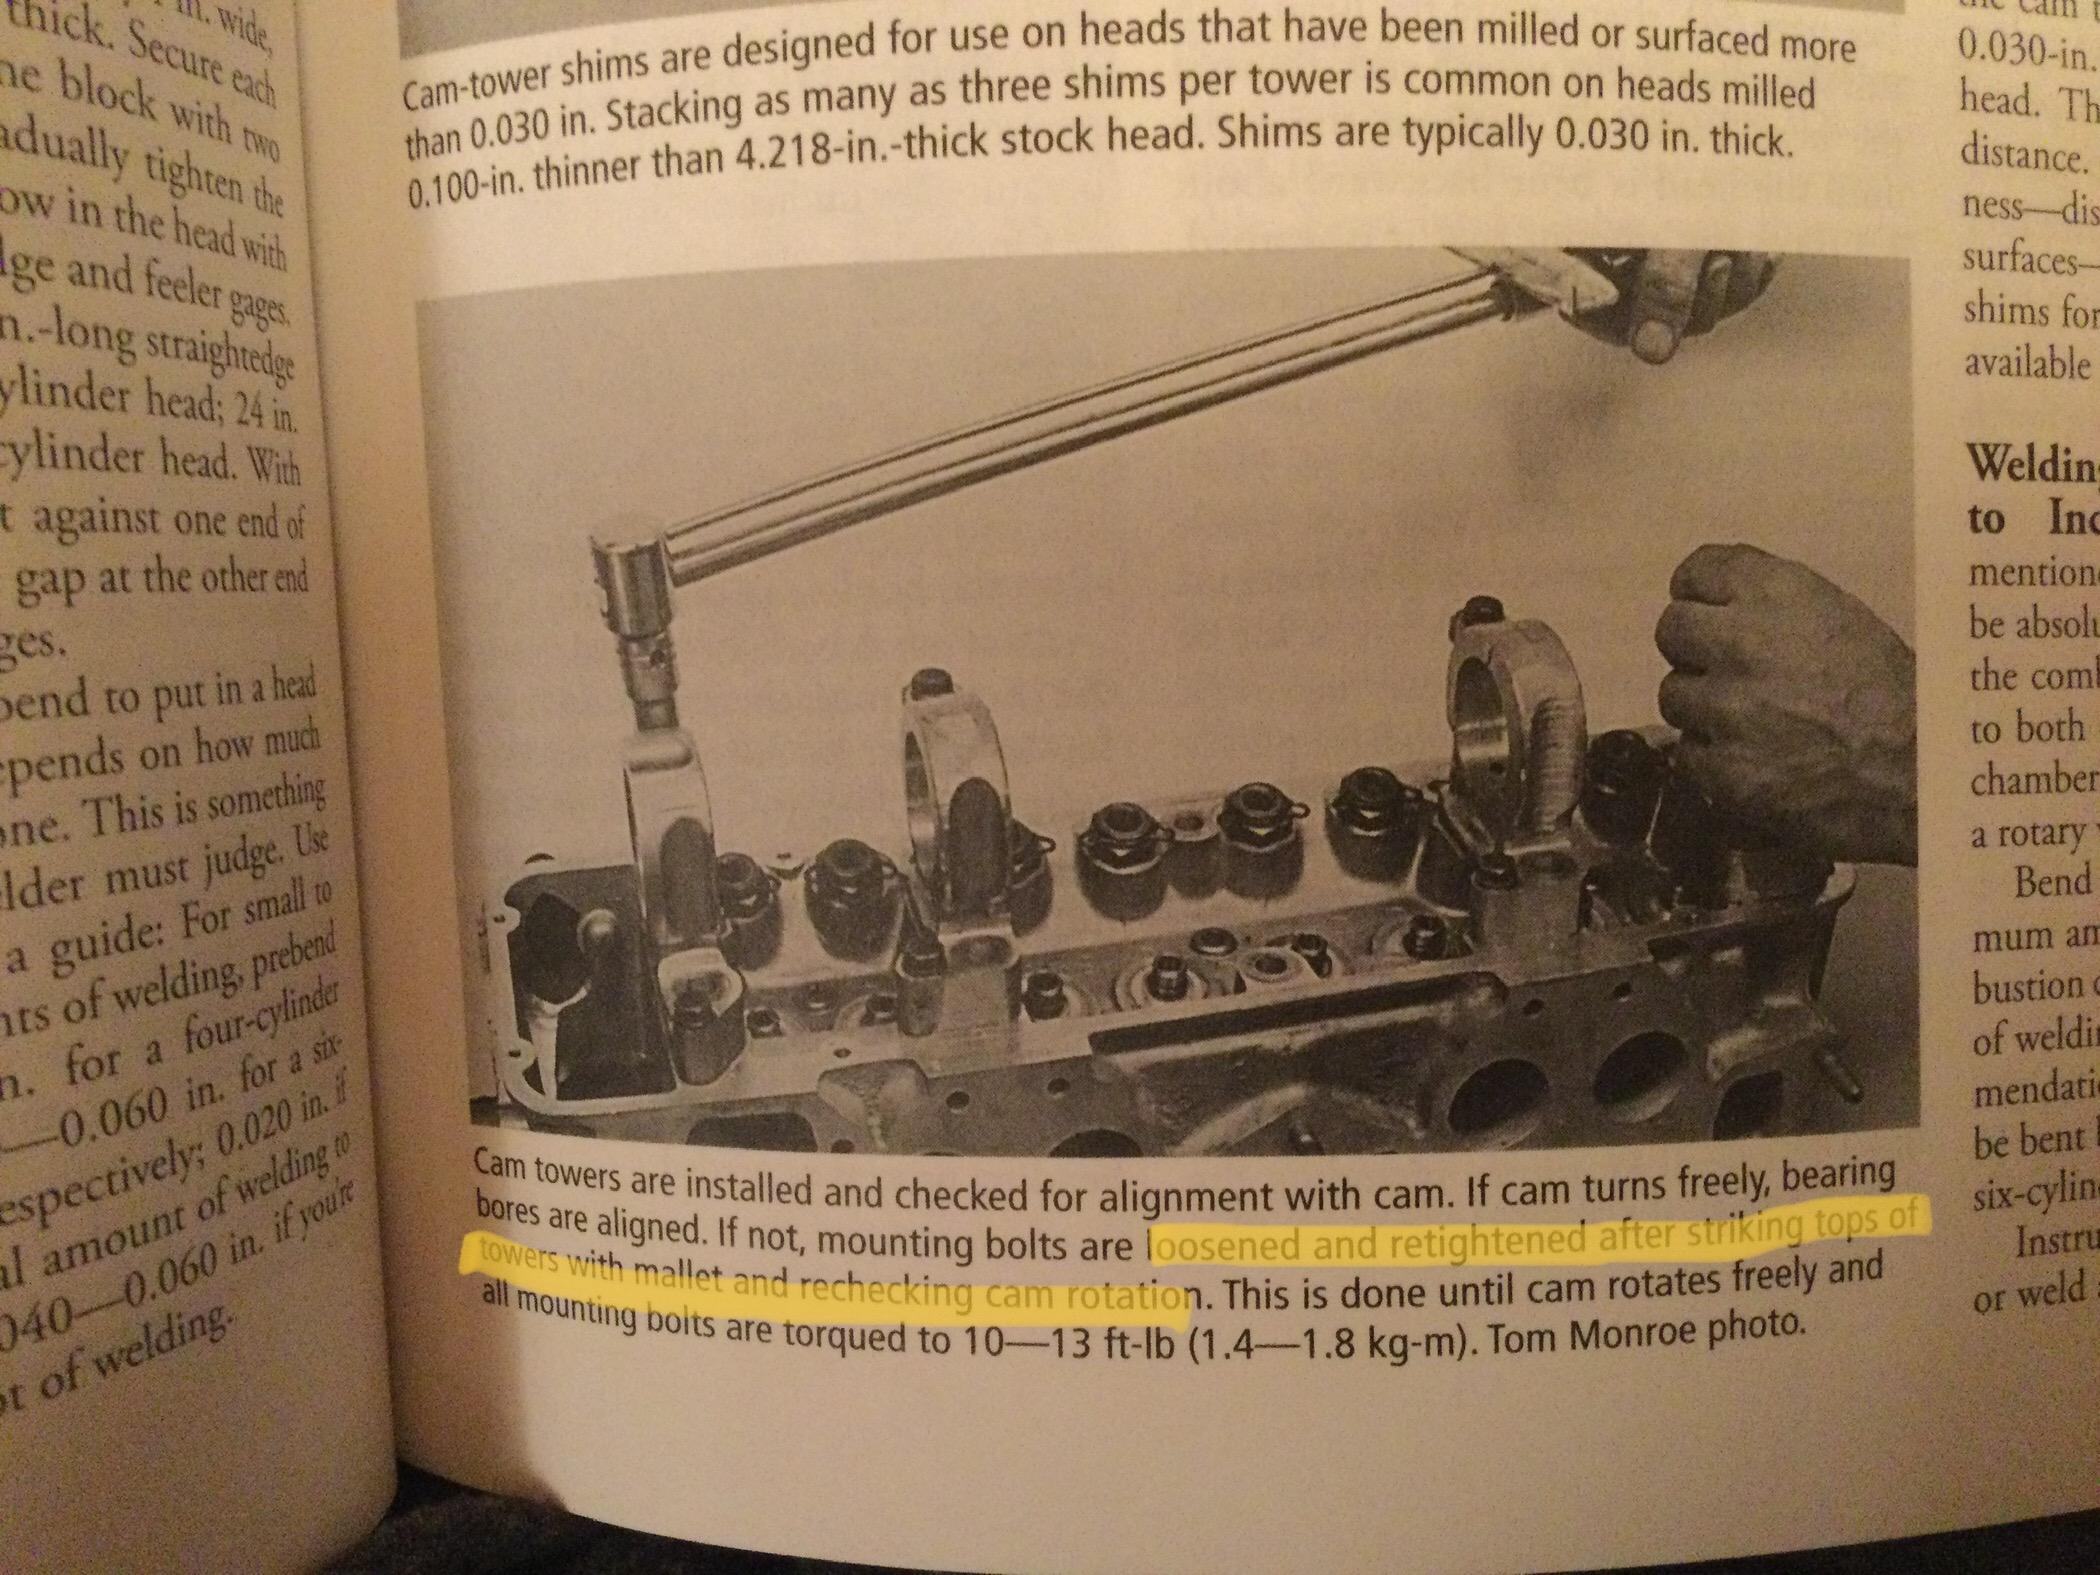
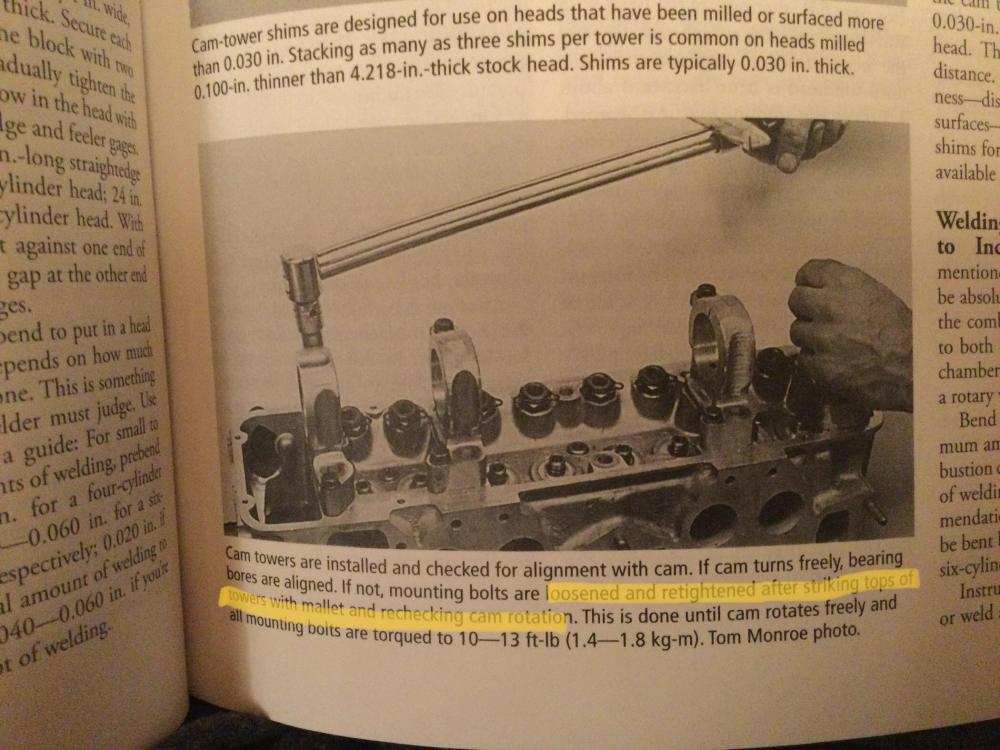
The towers are marked and only finger tightened for the mock up. The wipe marks all looked good but I didn’t check how freely the cam rotated. As far as flatness goes all I have is a 28” straight bar, I can’t remember the tolerances off hand but I did check it with a feeler gauge when I took it apart (Per Monroe manual) and I didn’t have any gaps outside of spec. I’m sure that leaves plenty of room for error but that’s what I had. I will say the engine ran pretty well prior to tear down so I honestly wasn’t looking too hard for parts being bent or out of alignment. Reading that caption makes me think it’s not uncommon, you just have to finesse everything back together. Maybe that’s why the FSM says to not remove them...🤔
-
Getting ready to assemble my cylinder head this weekend. On a mock up run the cam didn’t turn what I would call freely, I could turn it with one hand but it did require some effort. This quote from “How to modify your Datsun” has me wondering how precisely “striking the tops of towers” is done? I understand the towers are align bored but it sounds like there is some percussive finesse potentially needed to get them back in line. Any tips on the assembly? thanks Tom
-
On the stripping/cleaning aspect, what is the most efficient way to clean them up in preparation for plating/painting? I did my fuel rail with scotchbright pads and it took FOREVER! I’d like to do something with mine while the engine is out but that level of tedium hurts my head.
-
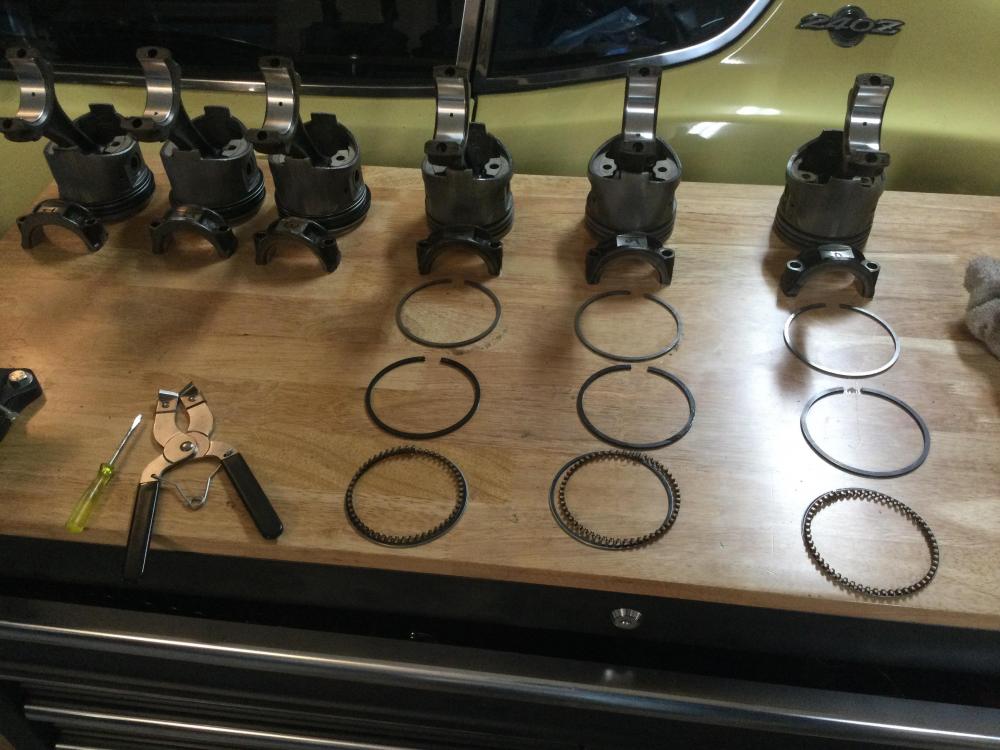
I love it when I make a good mistake!! Of course now I will have to take the other second rings back off the pistons and match them up... my OCD hurts sometimes. I was impressed by the quality of the TPR rings, I'm no expert but the material just felt like higher quality than the Wiseco. I'm not sure if you are planning something similar but if you are the process isn't too bad, a bit tedious and time consuming but once you do a few it goes pretty quick. I have about 4 hours invested in the process, 1 of which was spent on the first ring. Just be patient and "sneak" up on the gap your shooting for, I literally would take a measurement and need just one turn of the grinding wheel to get it where I wanted it.
-
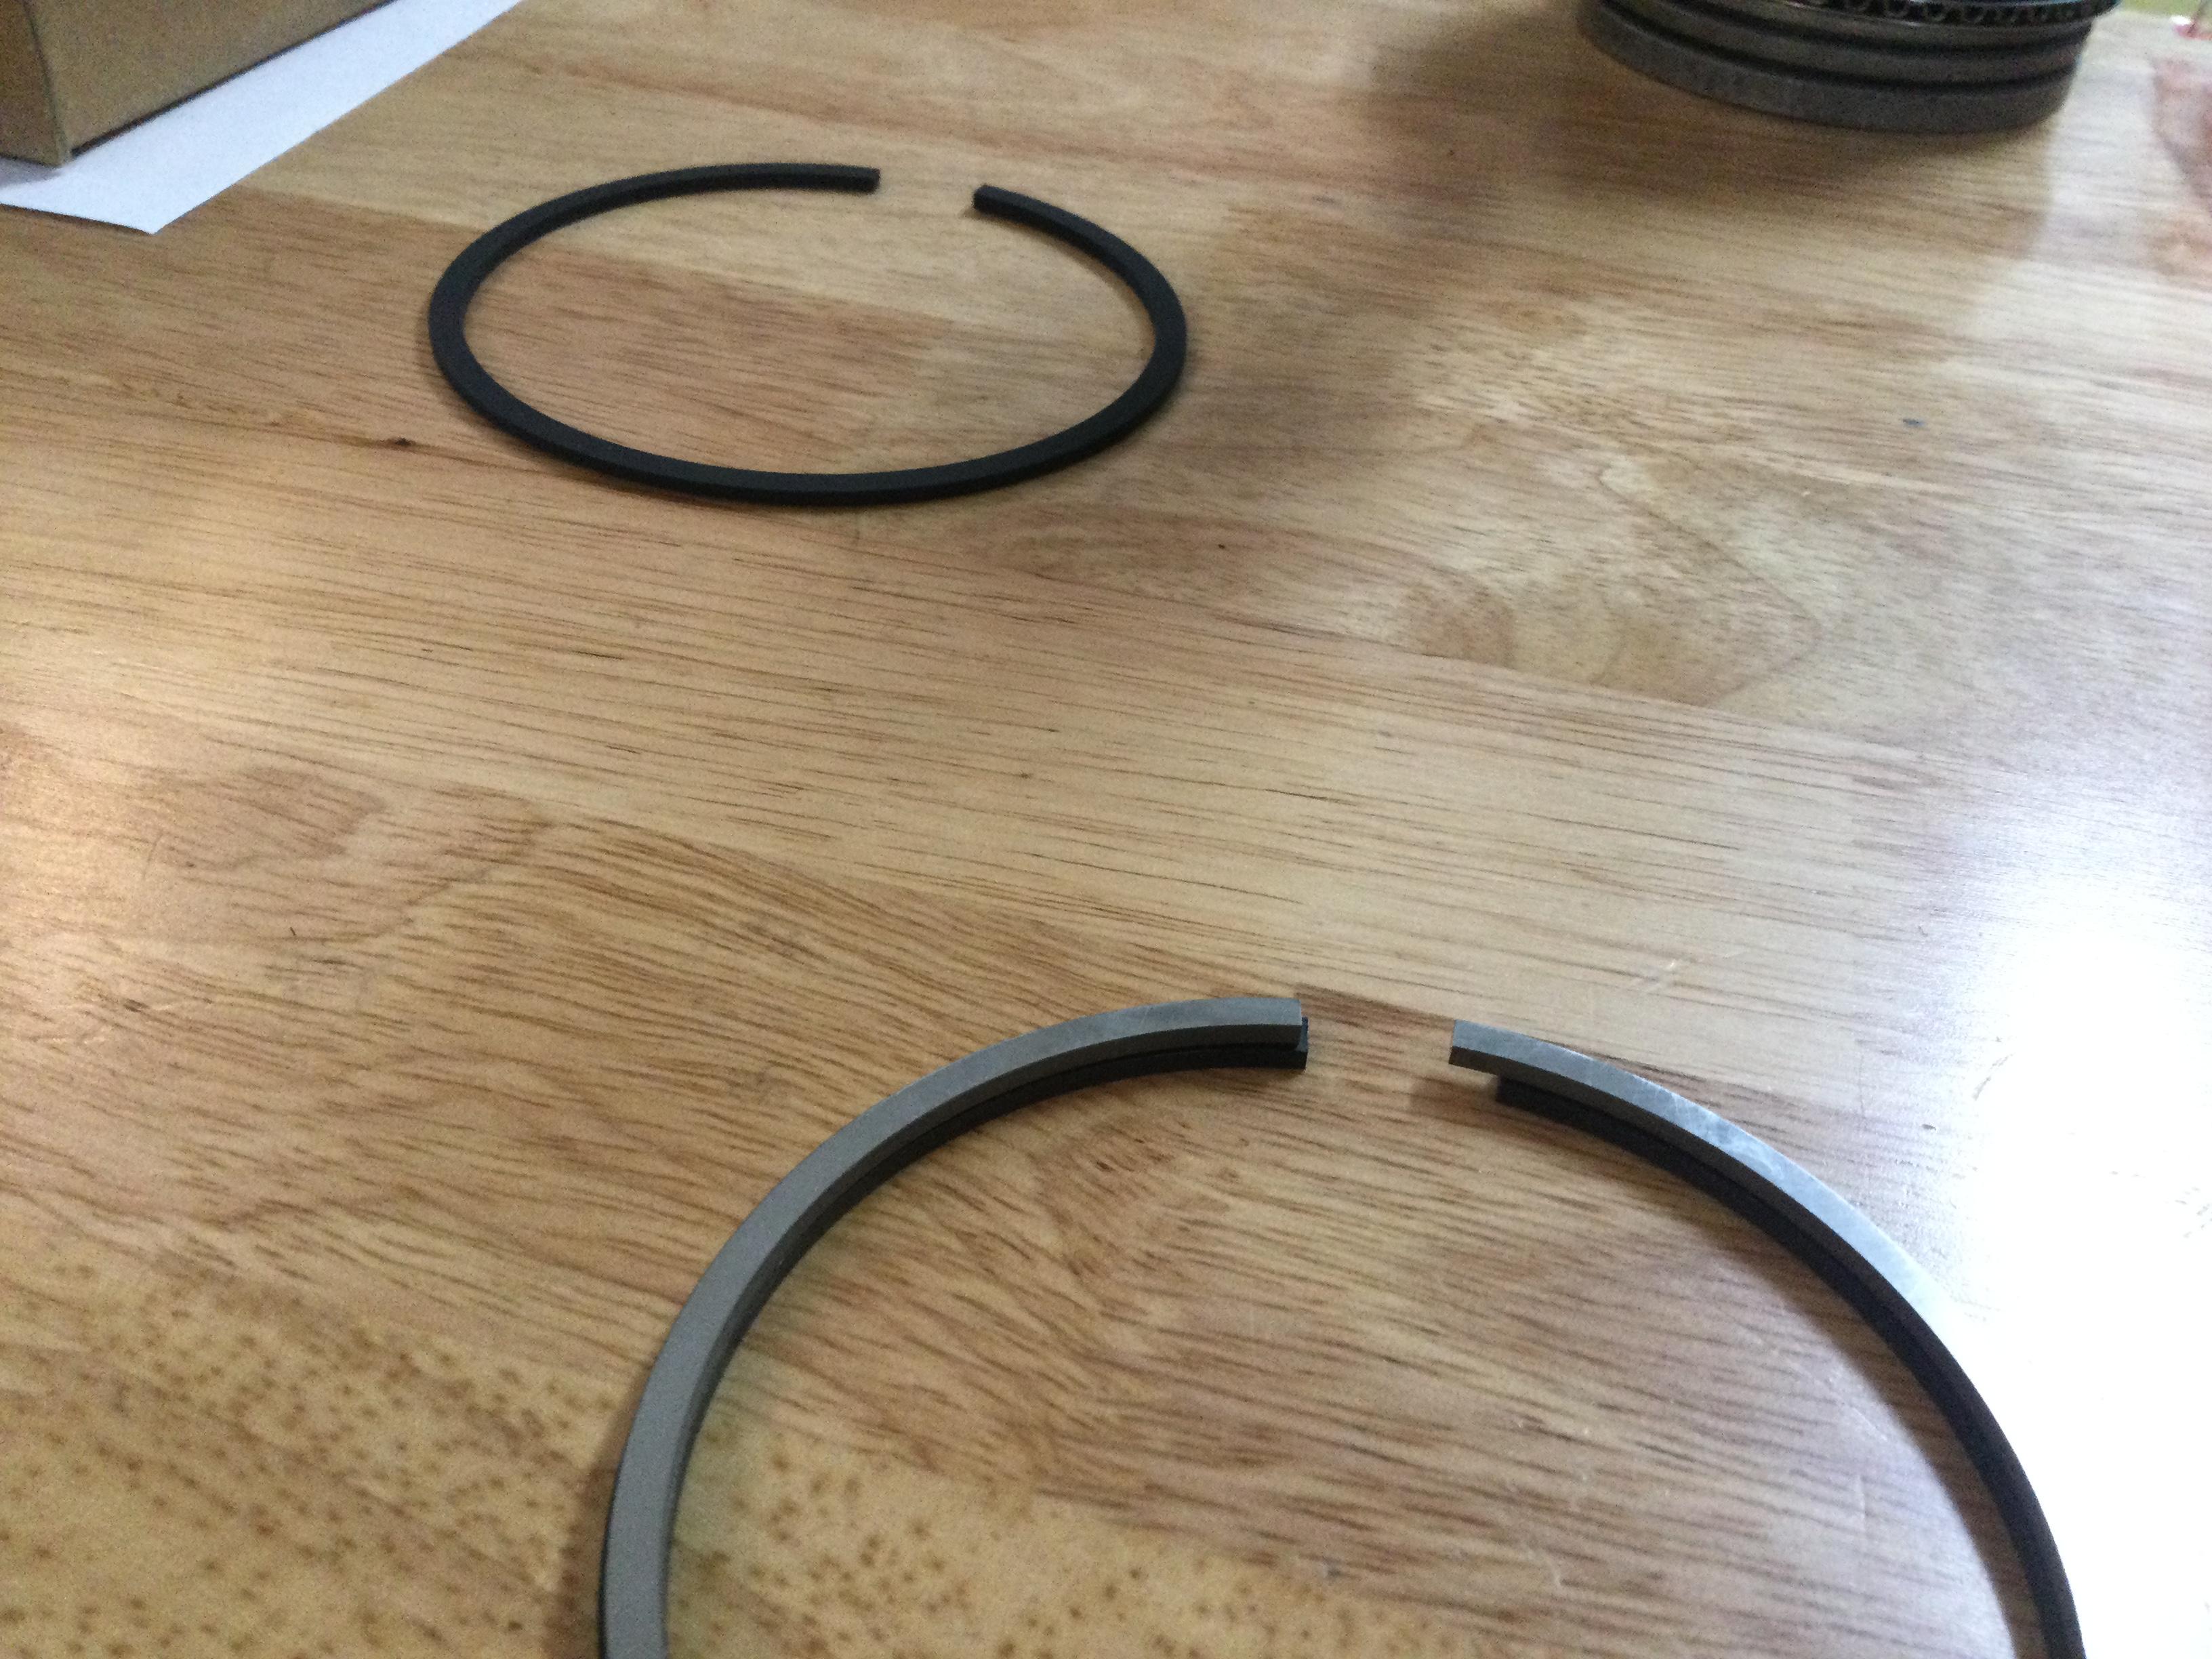
Interestingly the standard sized set was Wiseco and the oversized came from TPR, a Japanese company. I was concerned when I ordered but it looks like it will be fine. Not sure why I didn't think to do it yesterday but I'm going to compare the oil rings from each set to see if there is any noticeable size difference. I'm sure the larger, if it in fact is, would fit, however my concern would be if I just smash it in there if it would hold enough oil being over compressed. Probably overthinking things as usual.
-
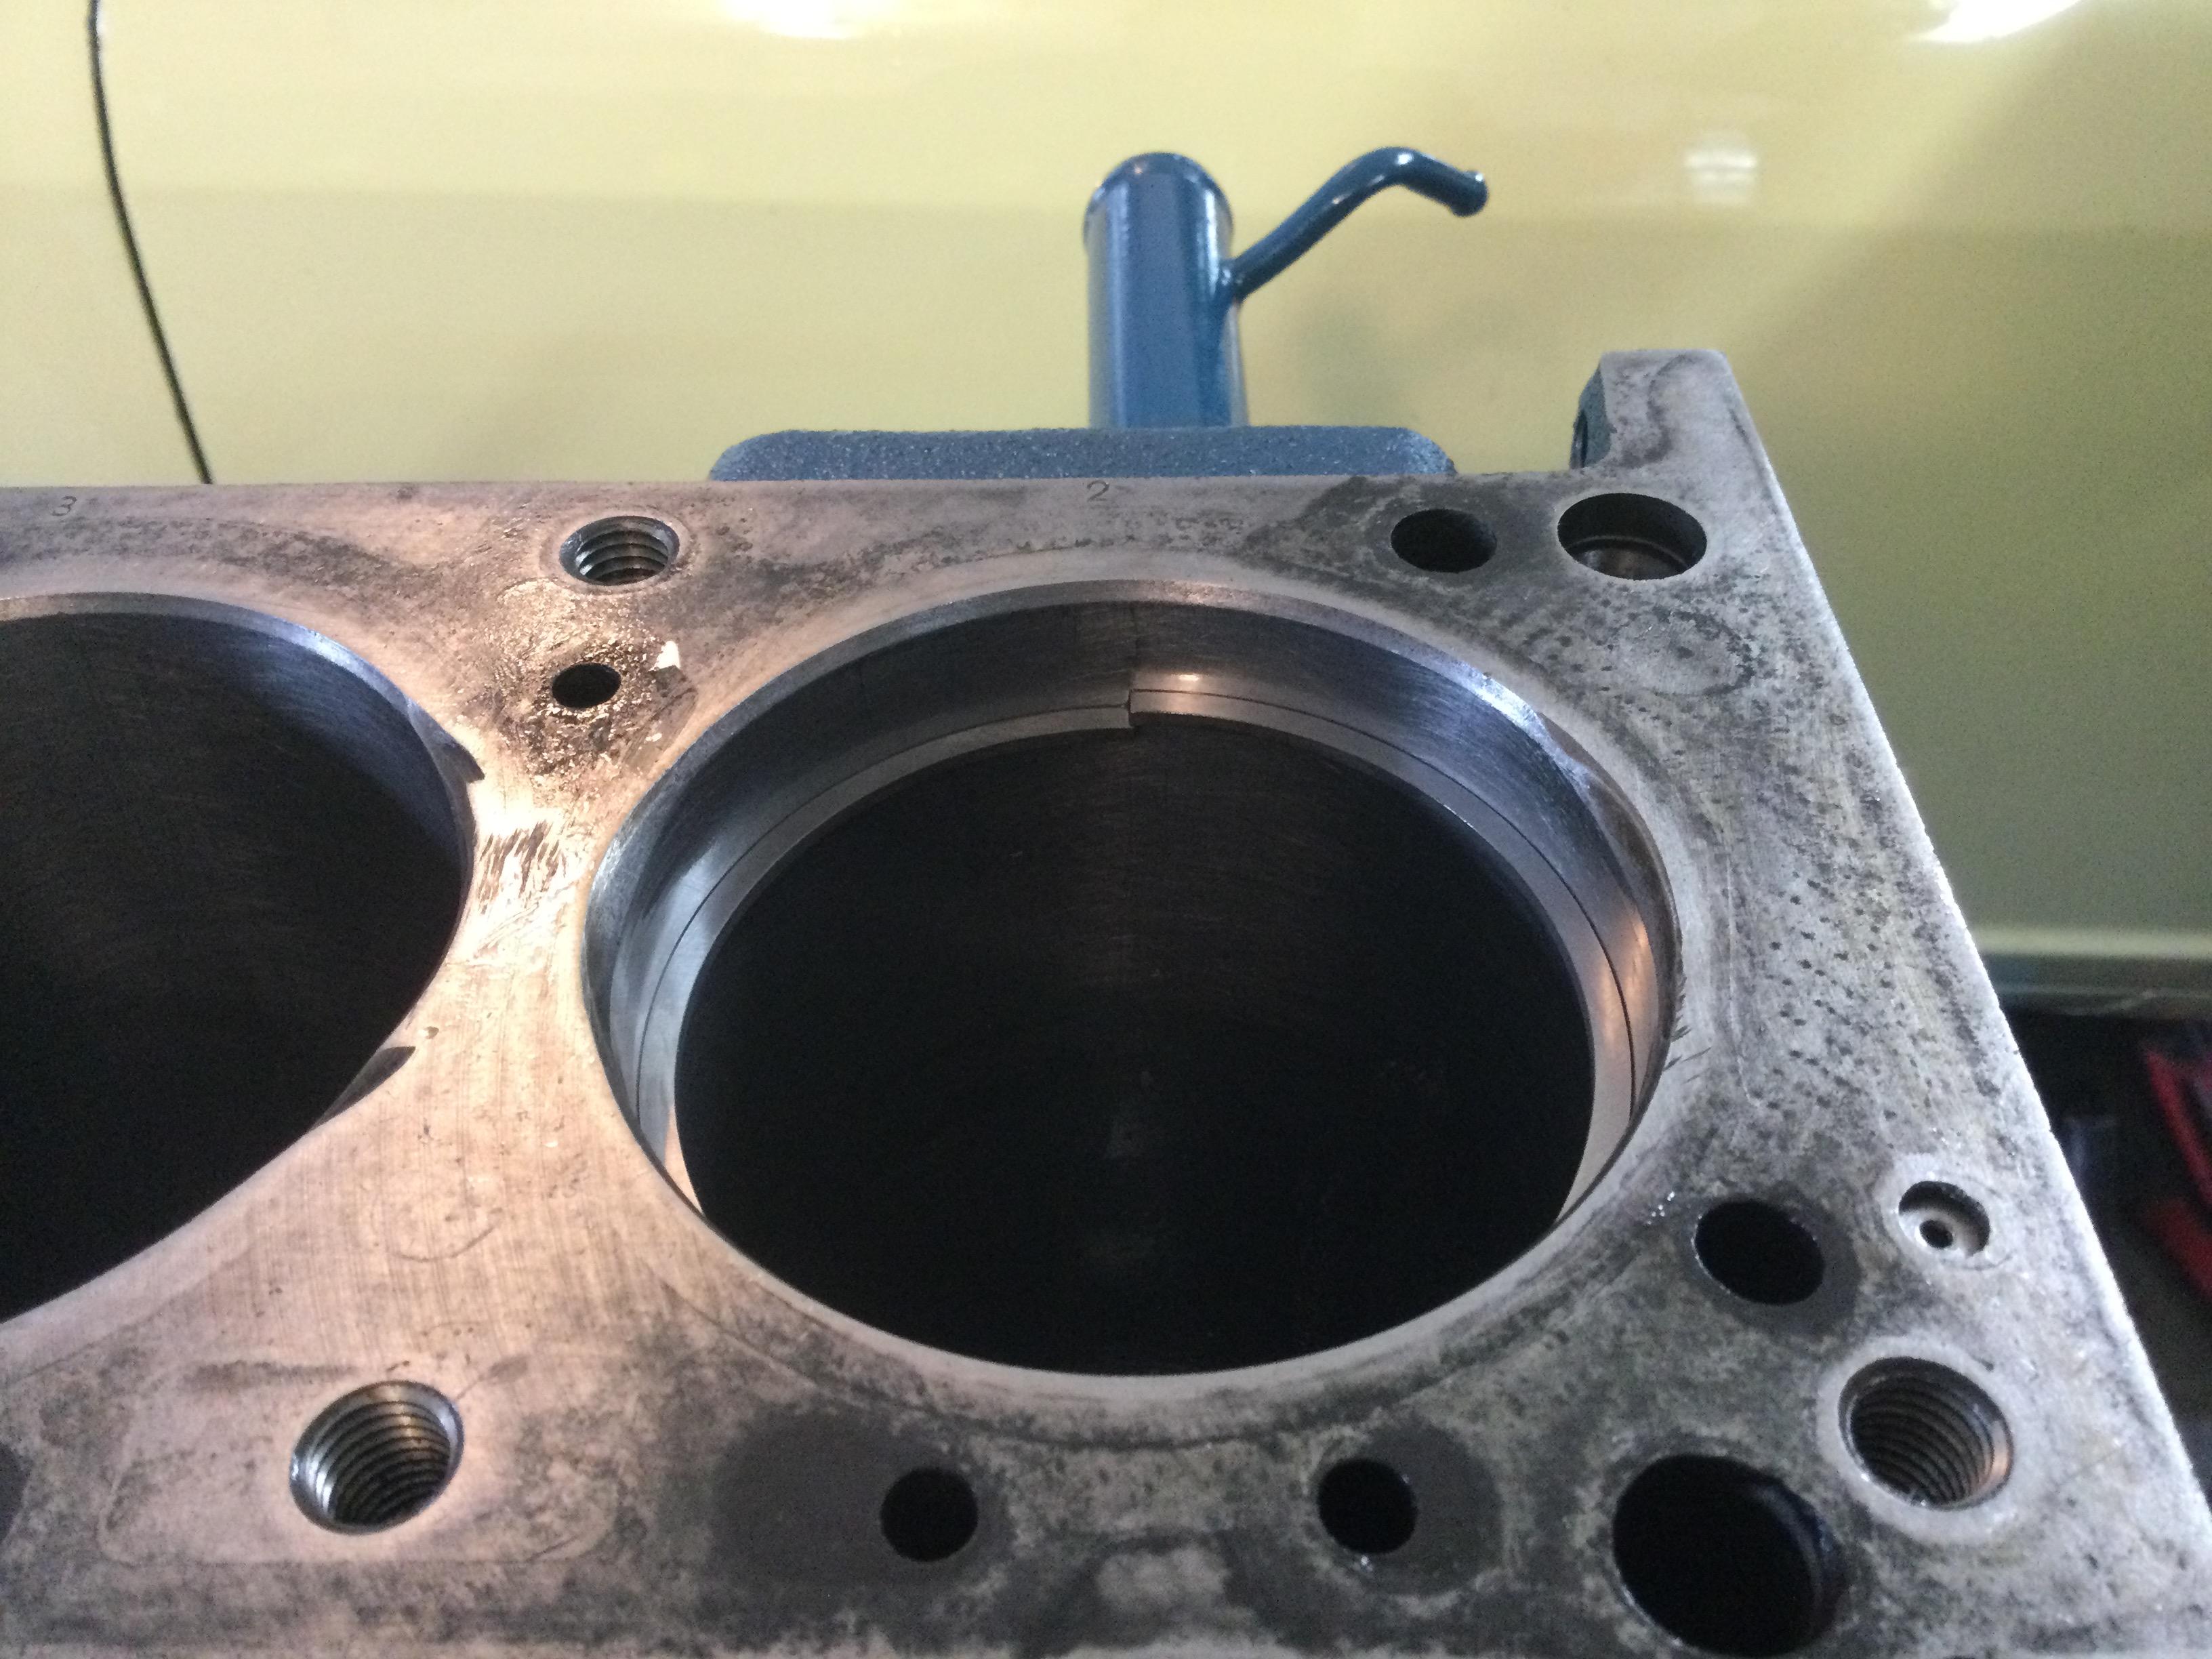
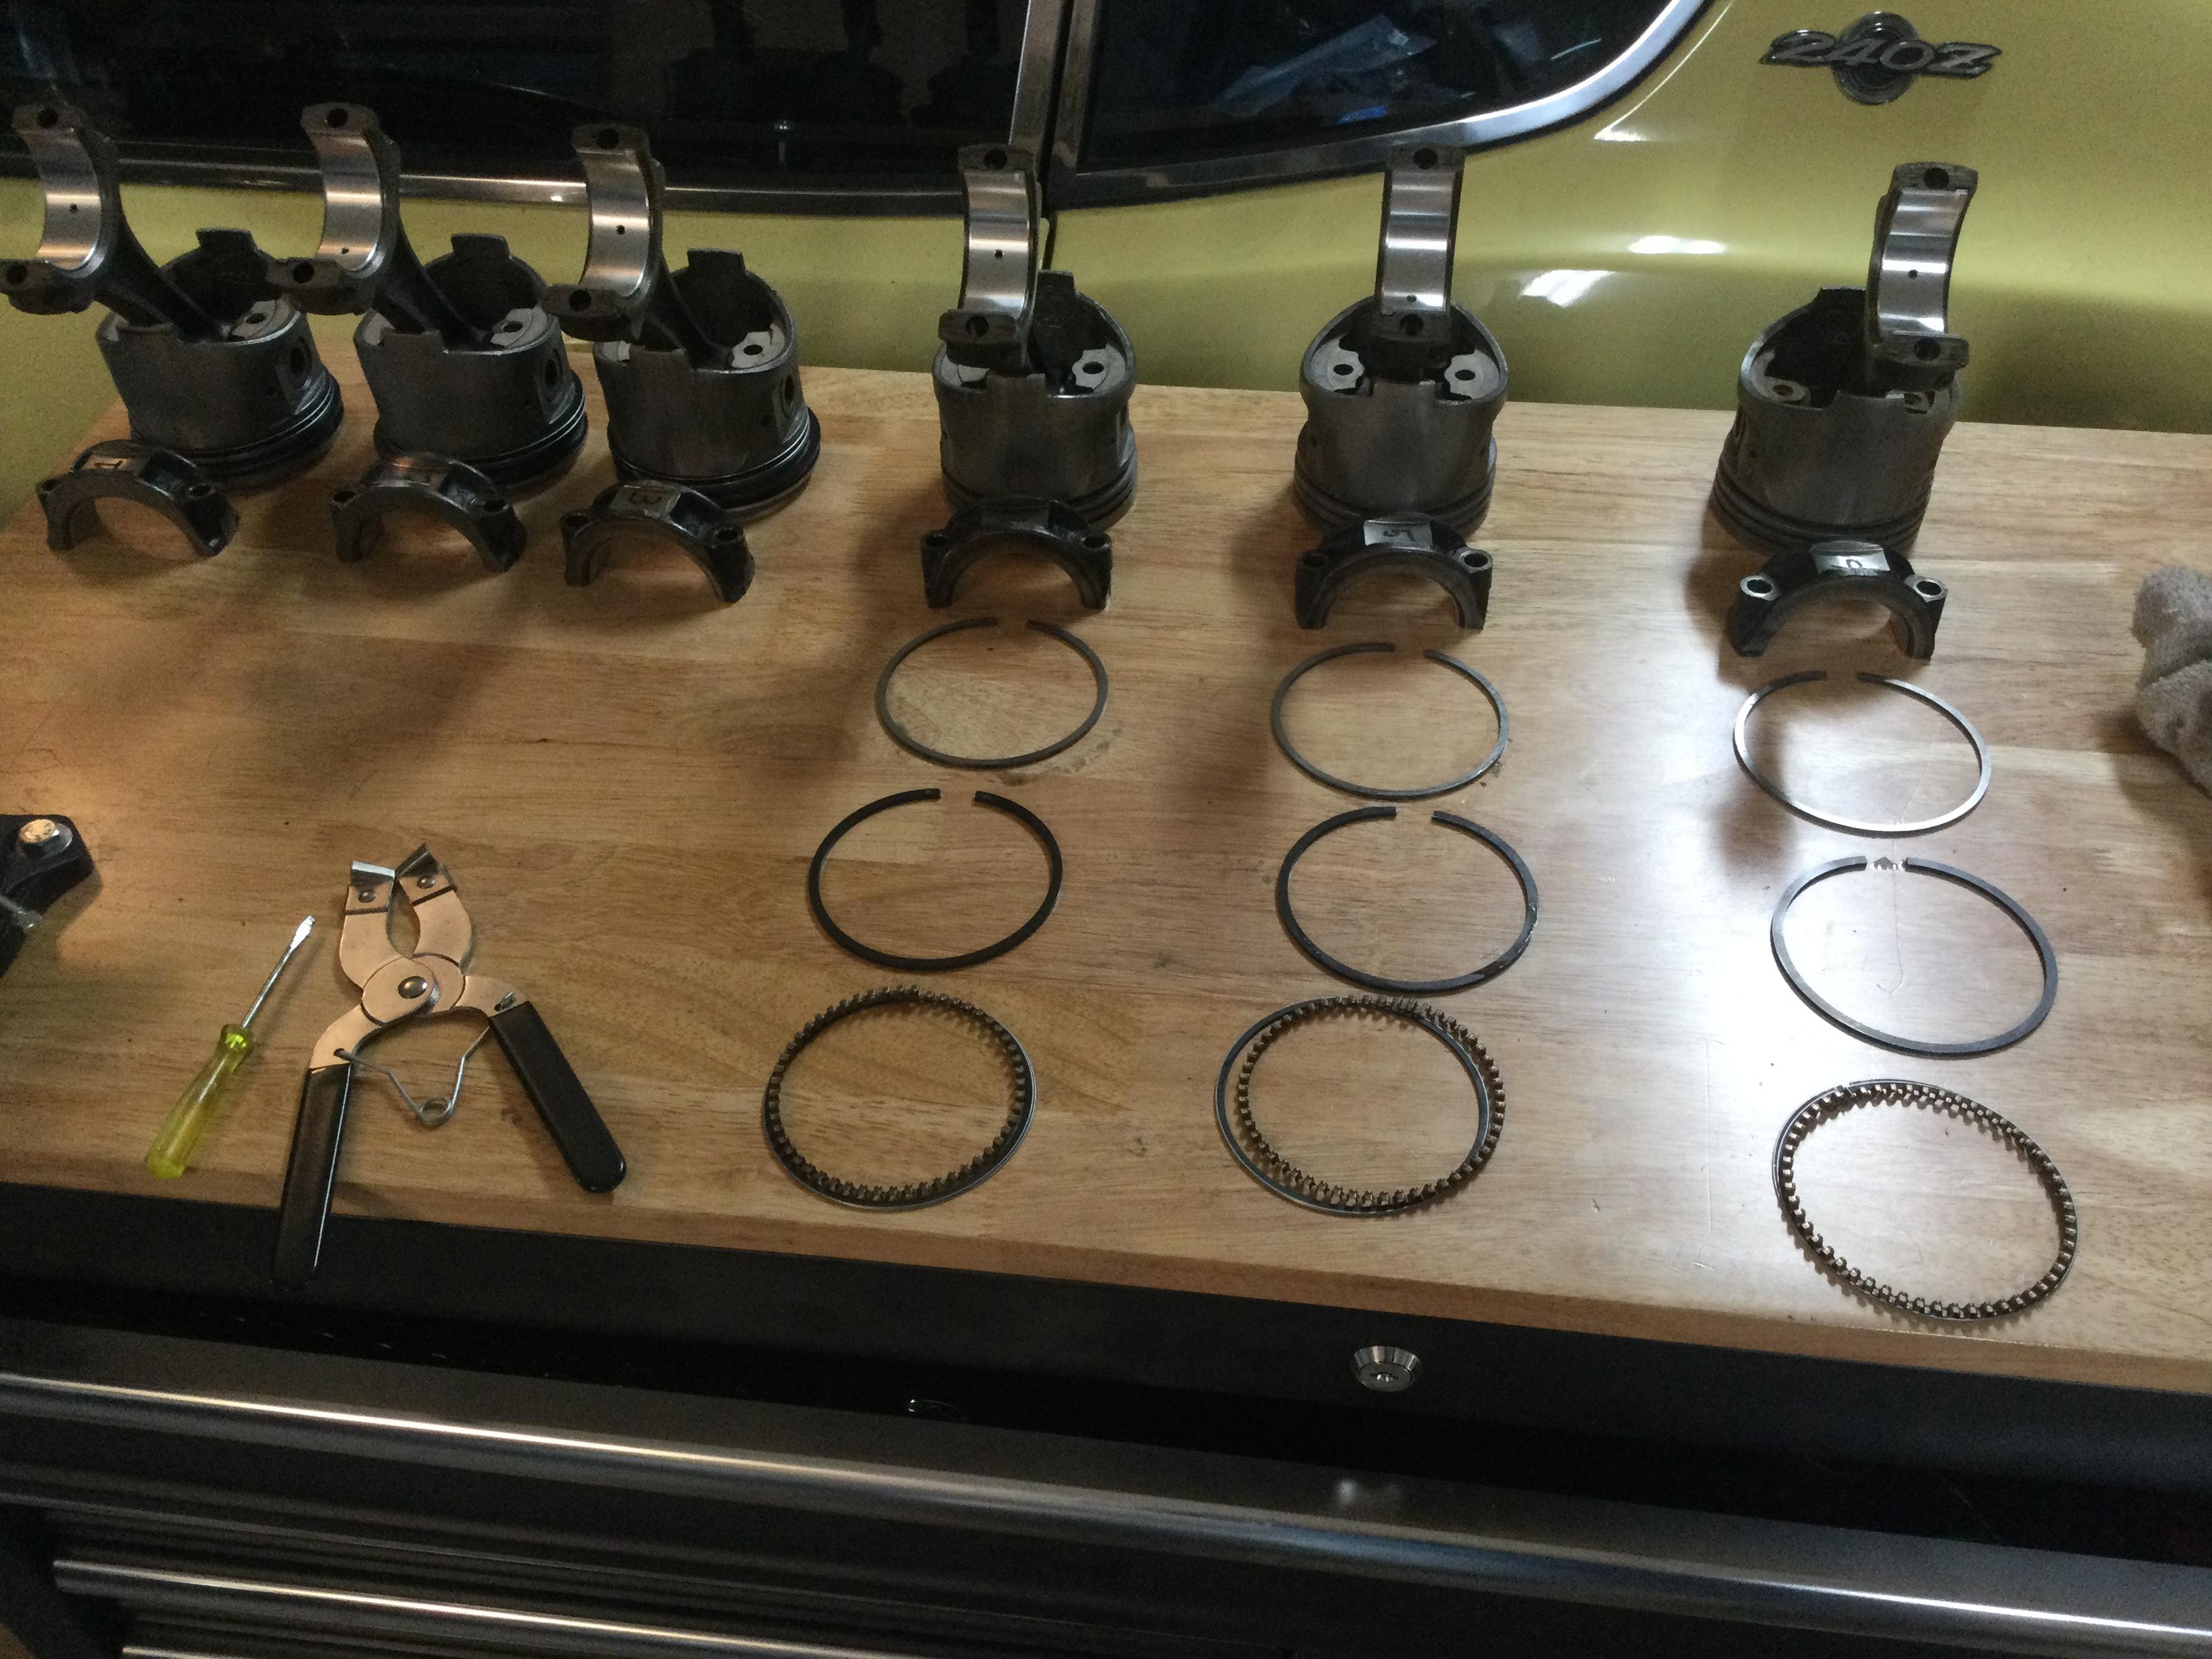
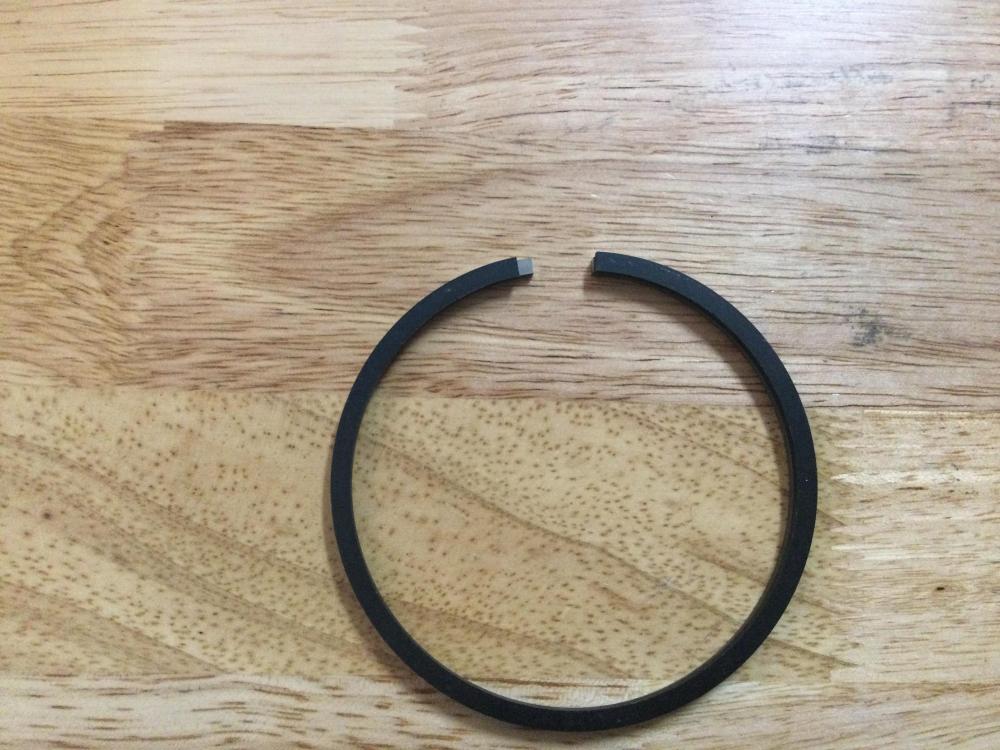
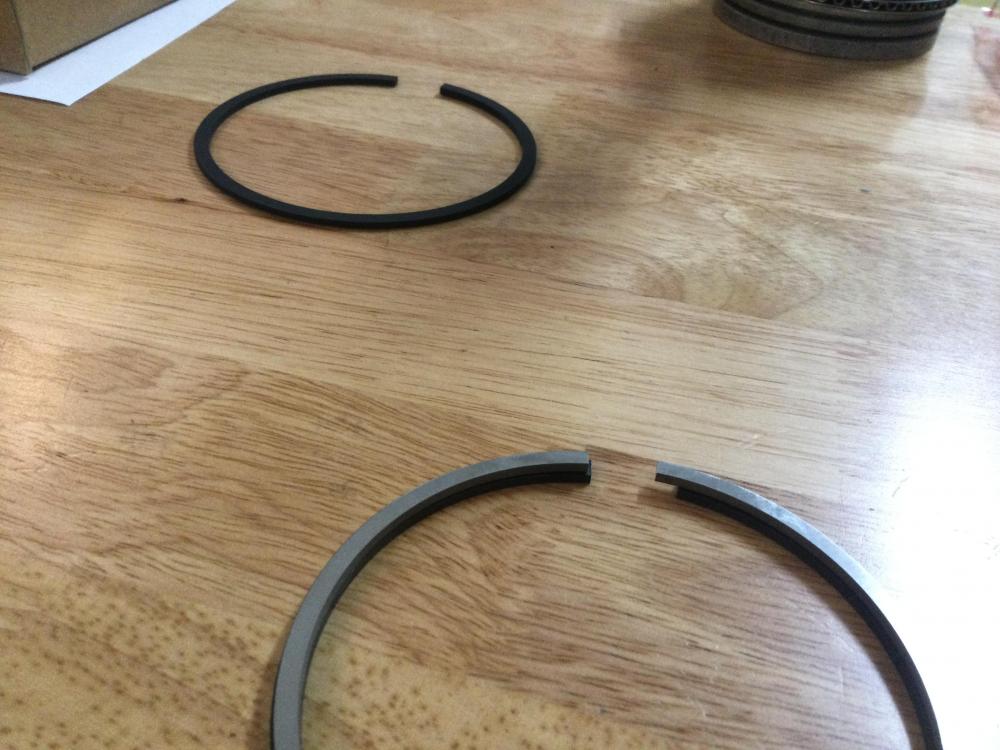
First picture is the standard size on top of the oversized, second pic is vise versa, third is the overlap in the bore prior to grinding and the fourth is halfway through installing the rings. Planning to install them in the block tomorrow, the only concern I have at this point is how the middle oil ring will fit. Thinking it will compress easily but it does seem quite a bit tighter that the one from the standard set. thanks for the input and advice.
-
Received the oversized rings today, as it turns out they are just a little bit longer. I spent several hours filing each one to each piston and I feel really good about it. I’m now well within tolerance and the overall shape seems fine. The only hiccup I had was not realizing that the lower compression ring is seemingly made of a softer material and I overground one 🤦♂️... still a much closer fit than the standard size so I’m sure it will be fine.

-
Unfortunately Fed-Ex let me down today, hopefully they will pull through tomorrow. I have been doing a lot of research and it does indeed look like a tedious process, lots of installing and pulling the rings back out to get it just right. Gotta be careful not to scratch up the bores during the process. I did receive the ring grinder and took a few practice strokes on an old ring, seems pretty smooth and material comes off pretty easily. I’m sure the learning curve will be steep but hopefully it flattens out after the first few rings.
-
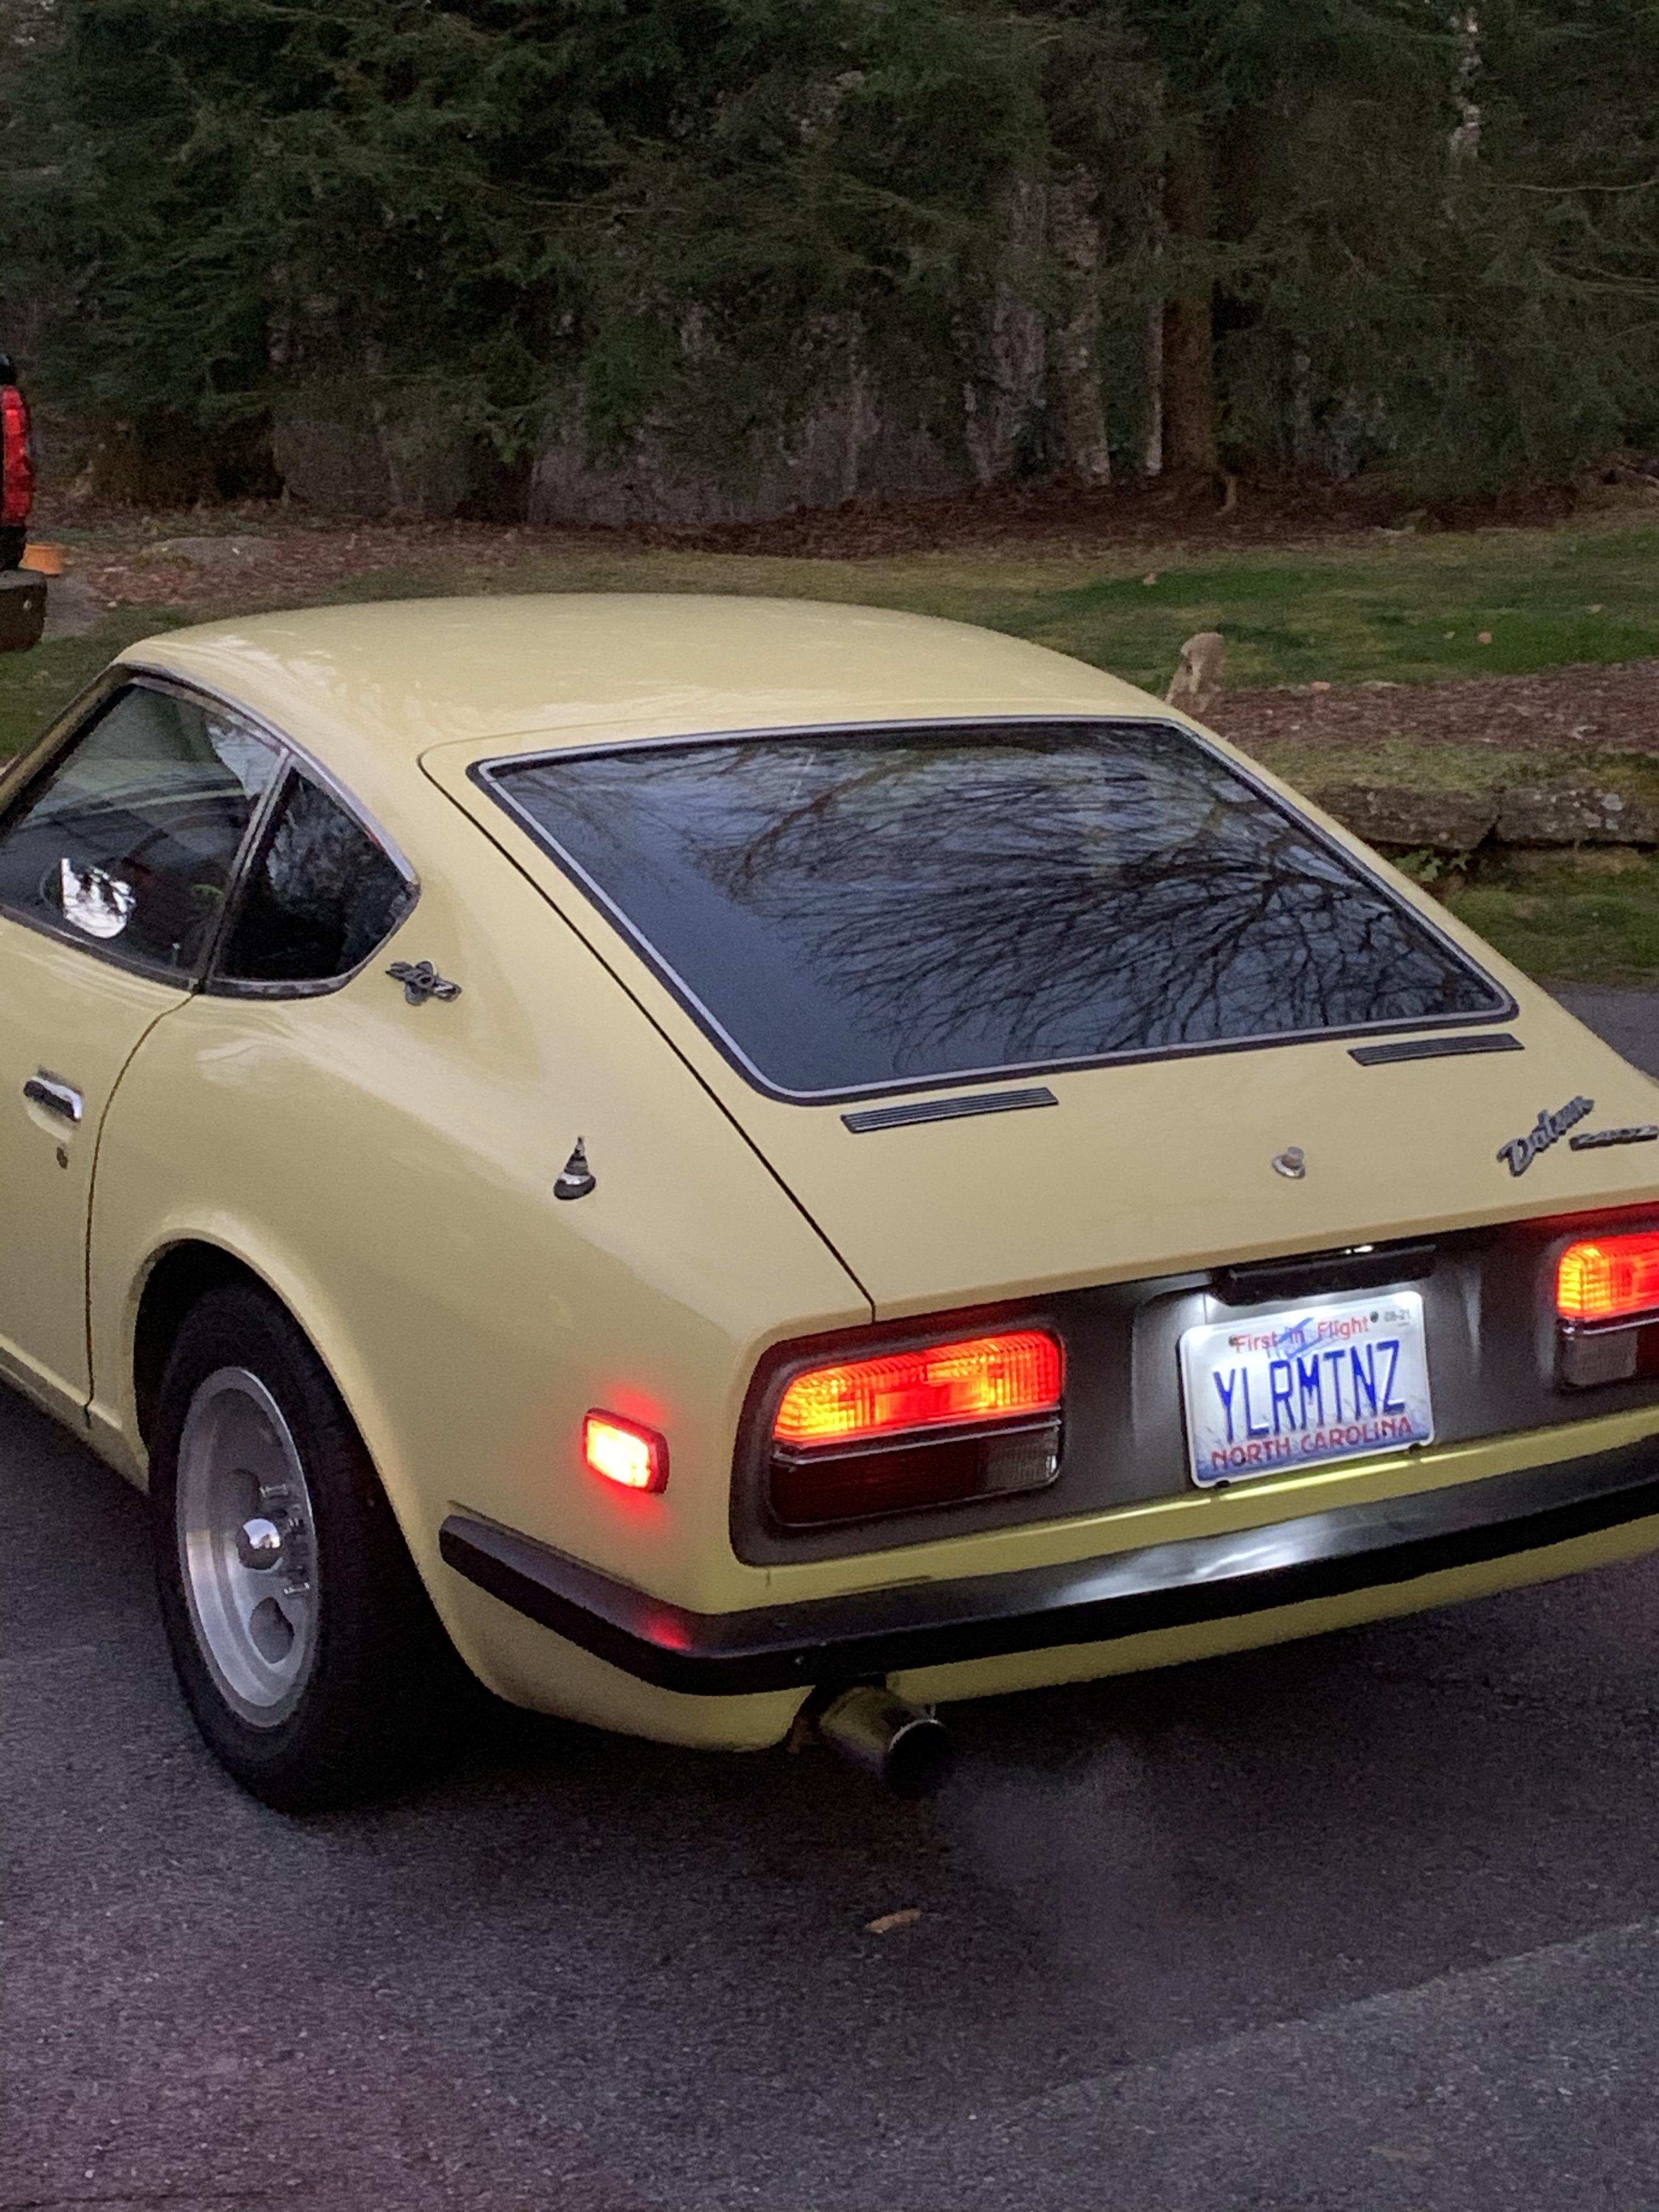
That’s what I used too. Great combo and I’ve gotten used to the brightness now. Certainly helps others see us!! I haven’t switched back yet I agree with @heyitsrama on the tag lights being the older more yellow look, I plan to do that when I get it back out this spring.
-
Yes sir, I’ve been cleaning them up during the lapping/ de-carboning process and they still feel ok, very little wiggle and they all feel consistent. Learned a new trick on checking valve seats, the “bounce test”. When the valves and seats are in good condition the valve will bounce a little when dropped into the seat. A poor sealing seat will land with more of a thud. Sounded hokey but I have confirmed it with a diesel fuel leak check. I’m sure it’s not 100% accurate but it does seem to be a good indicator of valve and seat condition. Now back to lapping...
-
I’m working more on the head today, the guides pass the “wiggle” test so I think I’m ok there. Having to re-lap a few valves due to them failing the diesel fuel leak down test. I hope to finish that today and put the head back together after a through cleaning. I honestly believe that the carbon build up was so bad on the valves that it was, at least in part, contributing to the oil consumption. Thanks for the input. Tom
-
It actually ran pretty well when I pulled it, a little smokey but surprisingly little considering it’s level of oil consumption (+ - 1 quart per 300 miles. When I got it the fumes would make your eyes bleed, that all but disappeared once I got the carbs leaned out to the correct mixture. I’m not sure if that was the cause of tremendous carbon build up in the head or not but it looked like the valves and runners had been sprayed with bed liner! To reiterate, this whole process was and is a learning experience for me. I learn by touching, feeling and doing WAY better than by reading books alone. I know that there will be some wasteful spending but I’m fine with that knowing that I can now at least speak somewhat knowledgeably to engine builders, machinists etc on what I want on my next go-round. At present my goal is basically a through cleaning, new bearings, gaskets, seals. I’ve removed some casting flash from the head, polished the exhaust runners and bowls, lapped the valves, CC’d the combustion chambers ( just for kicks as I haven’t touched them with a grinder) cleaned, polished, painted virtually every piece I’ve removed. I have a lightweight flywheel, new clutch assembly, oil pump, water pump and some other parts I’m forgetting right now to be installed as I put everything back together. I’m sure I have made some mistakes and will probably make more, like stuffing a .010 ring in a sloppy standard bore!, but that’s how I learn best. I was the kid who had to touch the fire to be sure that it was in fact hot. I do appreciate all the helpful information and advice that y’all provide on a daily basis in these forums. Without this knowledge base I would be completely lost in this whole Zcar project. I plan to take some pics of the ring experiment as it develops and I’m sure I will be asking for more help ✌🏻
-
Thank you for the mathematical clarification! Math has never been my strong suit. I have decided for the sake of experimentation to get a set of oversize rings and a filing tool and see what happens. My premonition is that it will take no less than a month of Sundays to file that much off of each ring, I will lose faith, confidence and ambition and wind up going with the stock rings. Supposed to have the supplies by Sunday, stay tuned...
-
Ah, sorry I got all caught up talking about restaurants in Central AL and thought you were replying to me. More measurements coming soon and as far as your question regarding oval shaped bores, they don't seem to be oval as the gap is consistent regardless of orientation within the bore.
-
Damn that brings back memories. We would travel from KY to AL every Christmas, when I saw that I knew we were close to Grannie's house! Glad its still glowing strong
-
I will re-check the piston size this evening but if memory serves me they are 83mm I must be missing something but it seems to me that if you file both ends of a ring equally you could make it smaller when compressed. I'm looking at a manual ring filing tool on Amazon and it seems easy enough to use, just take little bites and keep checking
-
I remember The Goal Post, used to have the neon football flashing through the uprights! Mata's Pizza not too far down Quintard from where the Goal Post used to be. Try it sometime, I'll be willing to bet you will love it.
-
Yea right! FYI if you don't already know Anniston is home to the best pizza place in the southeast.