Dadsun
-
Posts
193 -
Joined
-
Last visited
-
Days Won
1
Content Type
Profiles
Knowledge Base
Zcar Wiki
Forums
Gallery
Events
Downloads
Store
Blogs
Collections
Classifieds
Everything posted by Dadsun
-
Starting Carb Conversion: Flat Tops to Paltechs
Dadsun replied to Dadsun's topic in Open Discussions
Y'all are making my head spin.... -
Starting Carb Conversion: Flat Tops to Paltechs
Dadsun replied to Dadsun's topic in Open Discussions
I'll put that on my longer range to do list, along with finding a 5-speed transmission. 🙂 -
Starting Carb Conversion: Flat Tops to Paltechs
Dadsun replied to Dadsun's topic in Open Discussions
I just went ahead and ordered it from MSA. Those big thick washers are going to be important, I think. Sounds good. Yes, I've been putting the anti-seize stuff on liberally after dealing with two broken off bolts, both involved with the thermostat housing. -
Starting Carb Conversion: Flat Tops to Paltechs
Dadsun replied to Dadsun's topic in Open Discussions
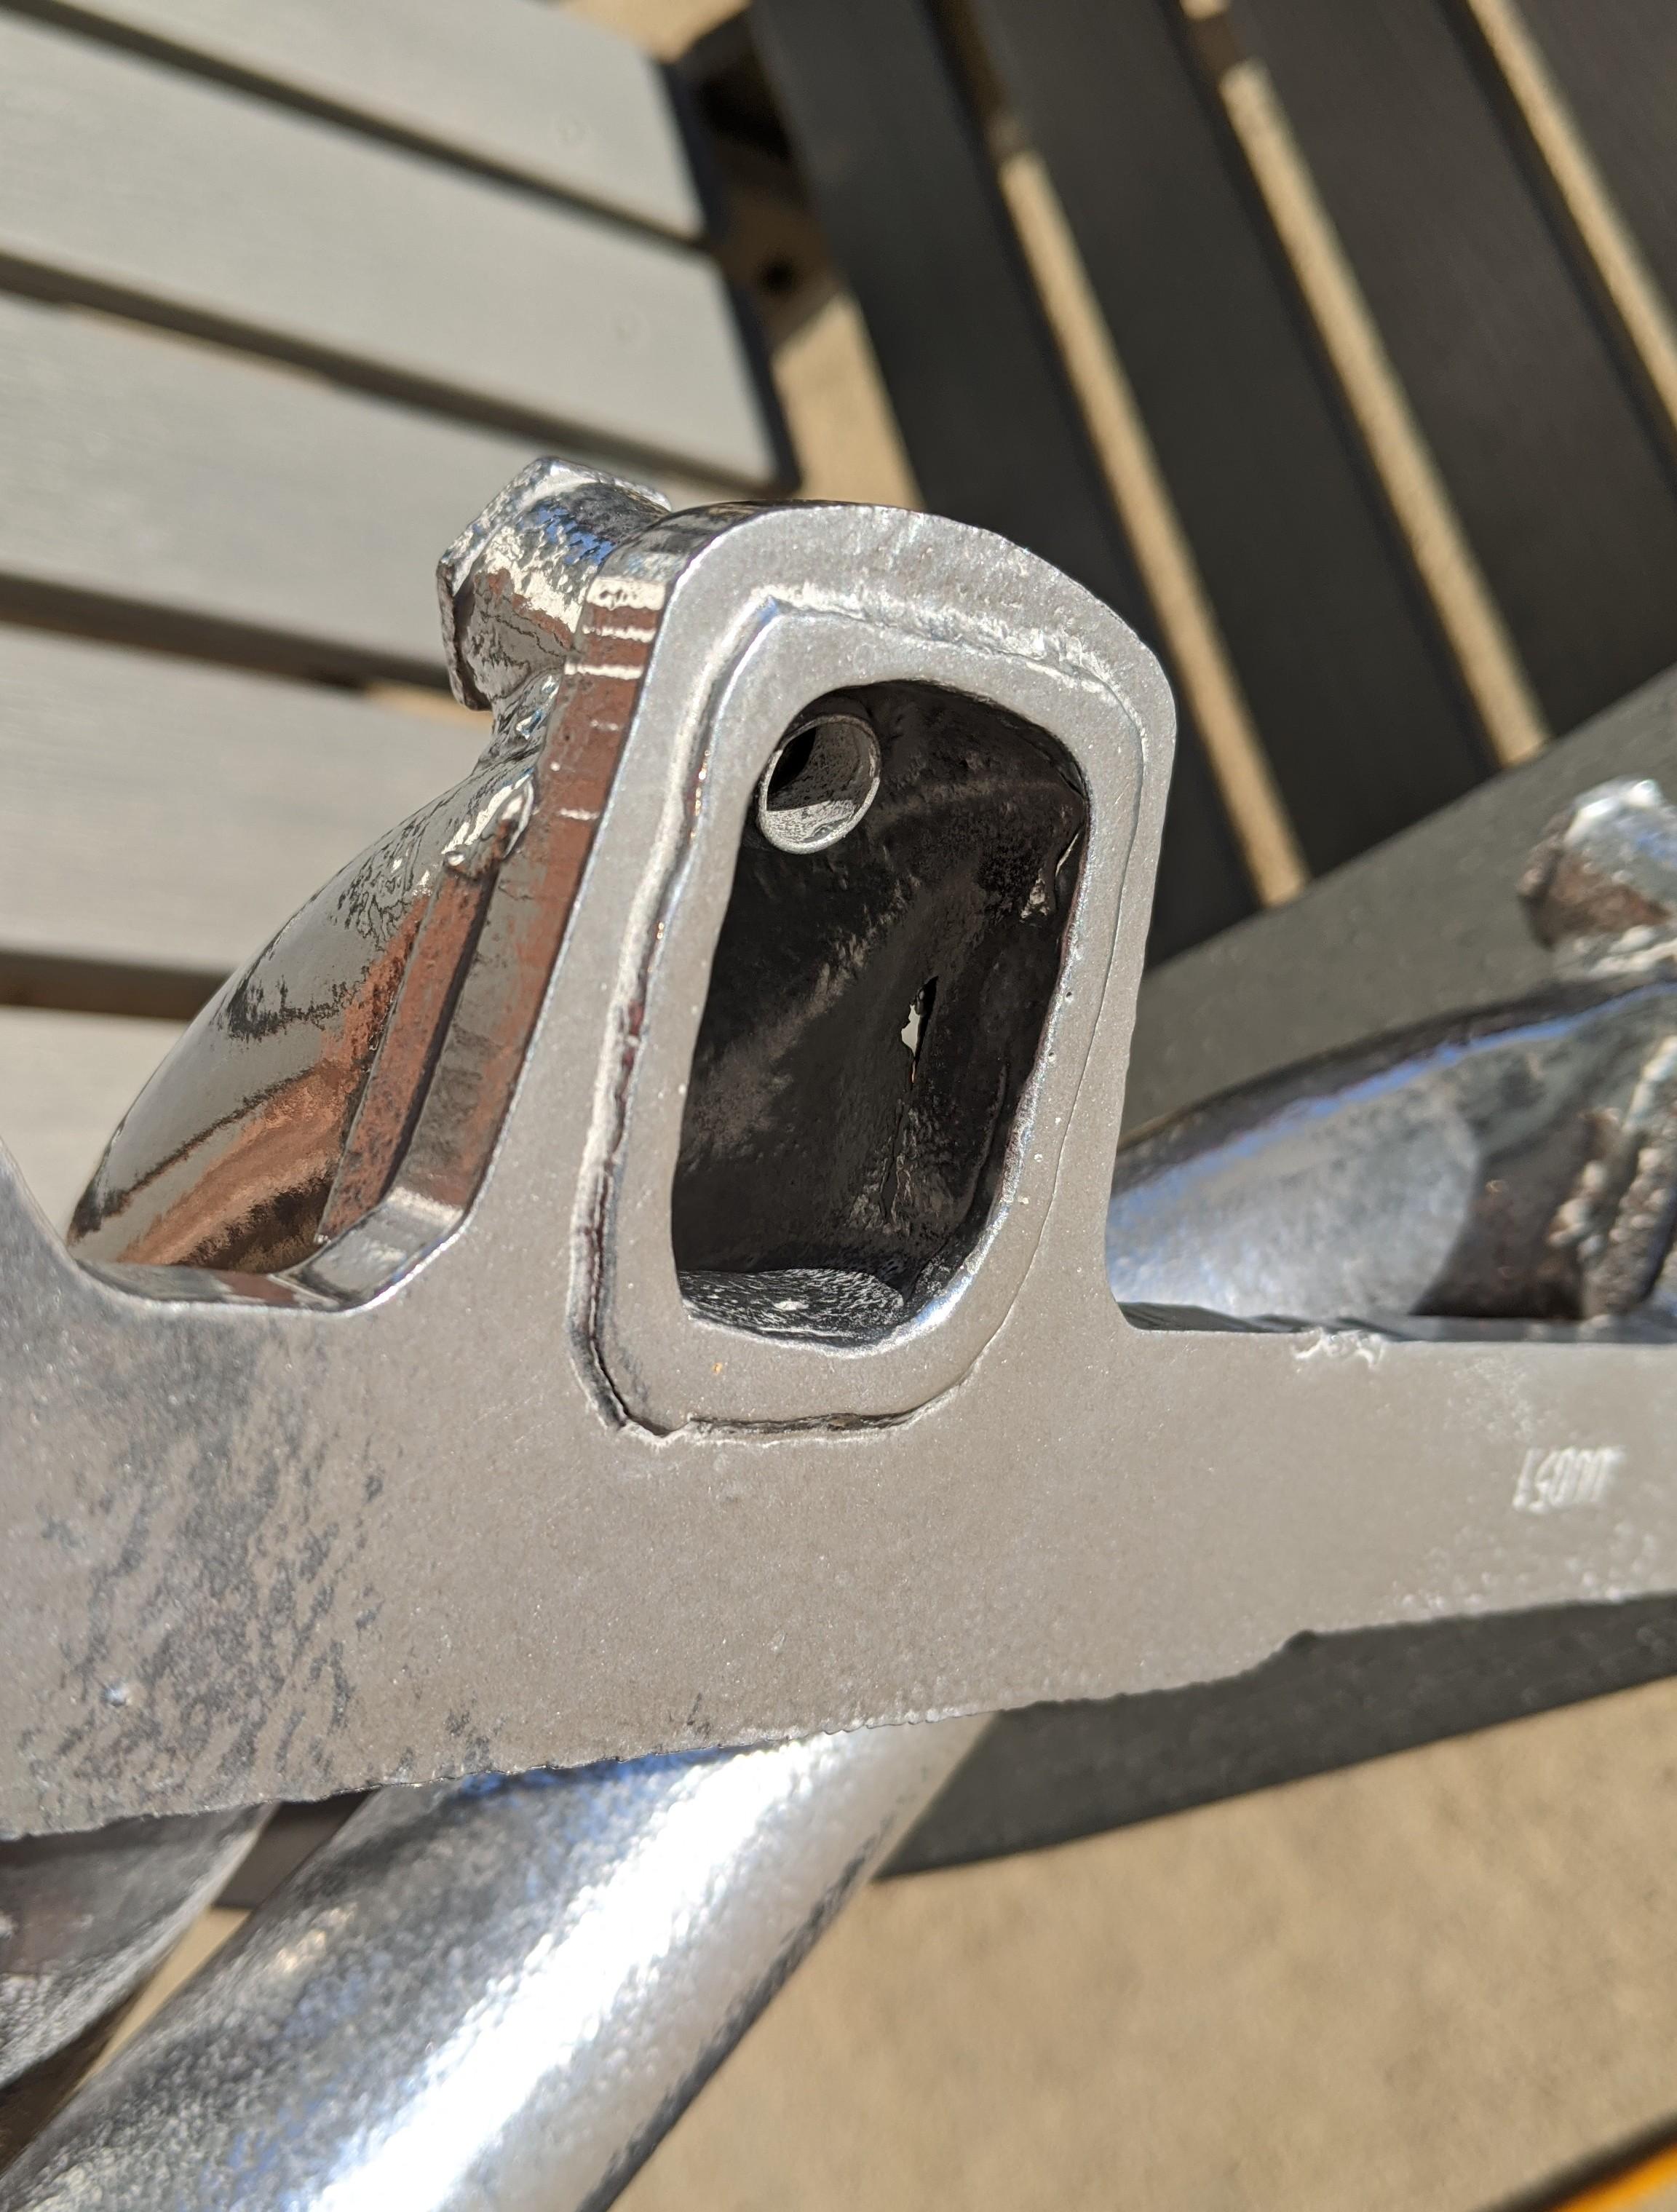
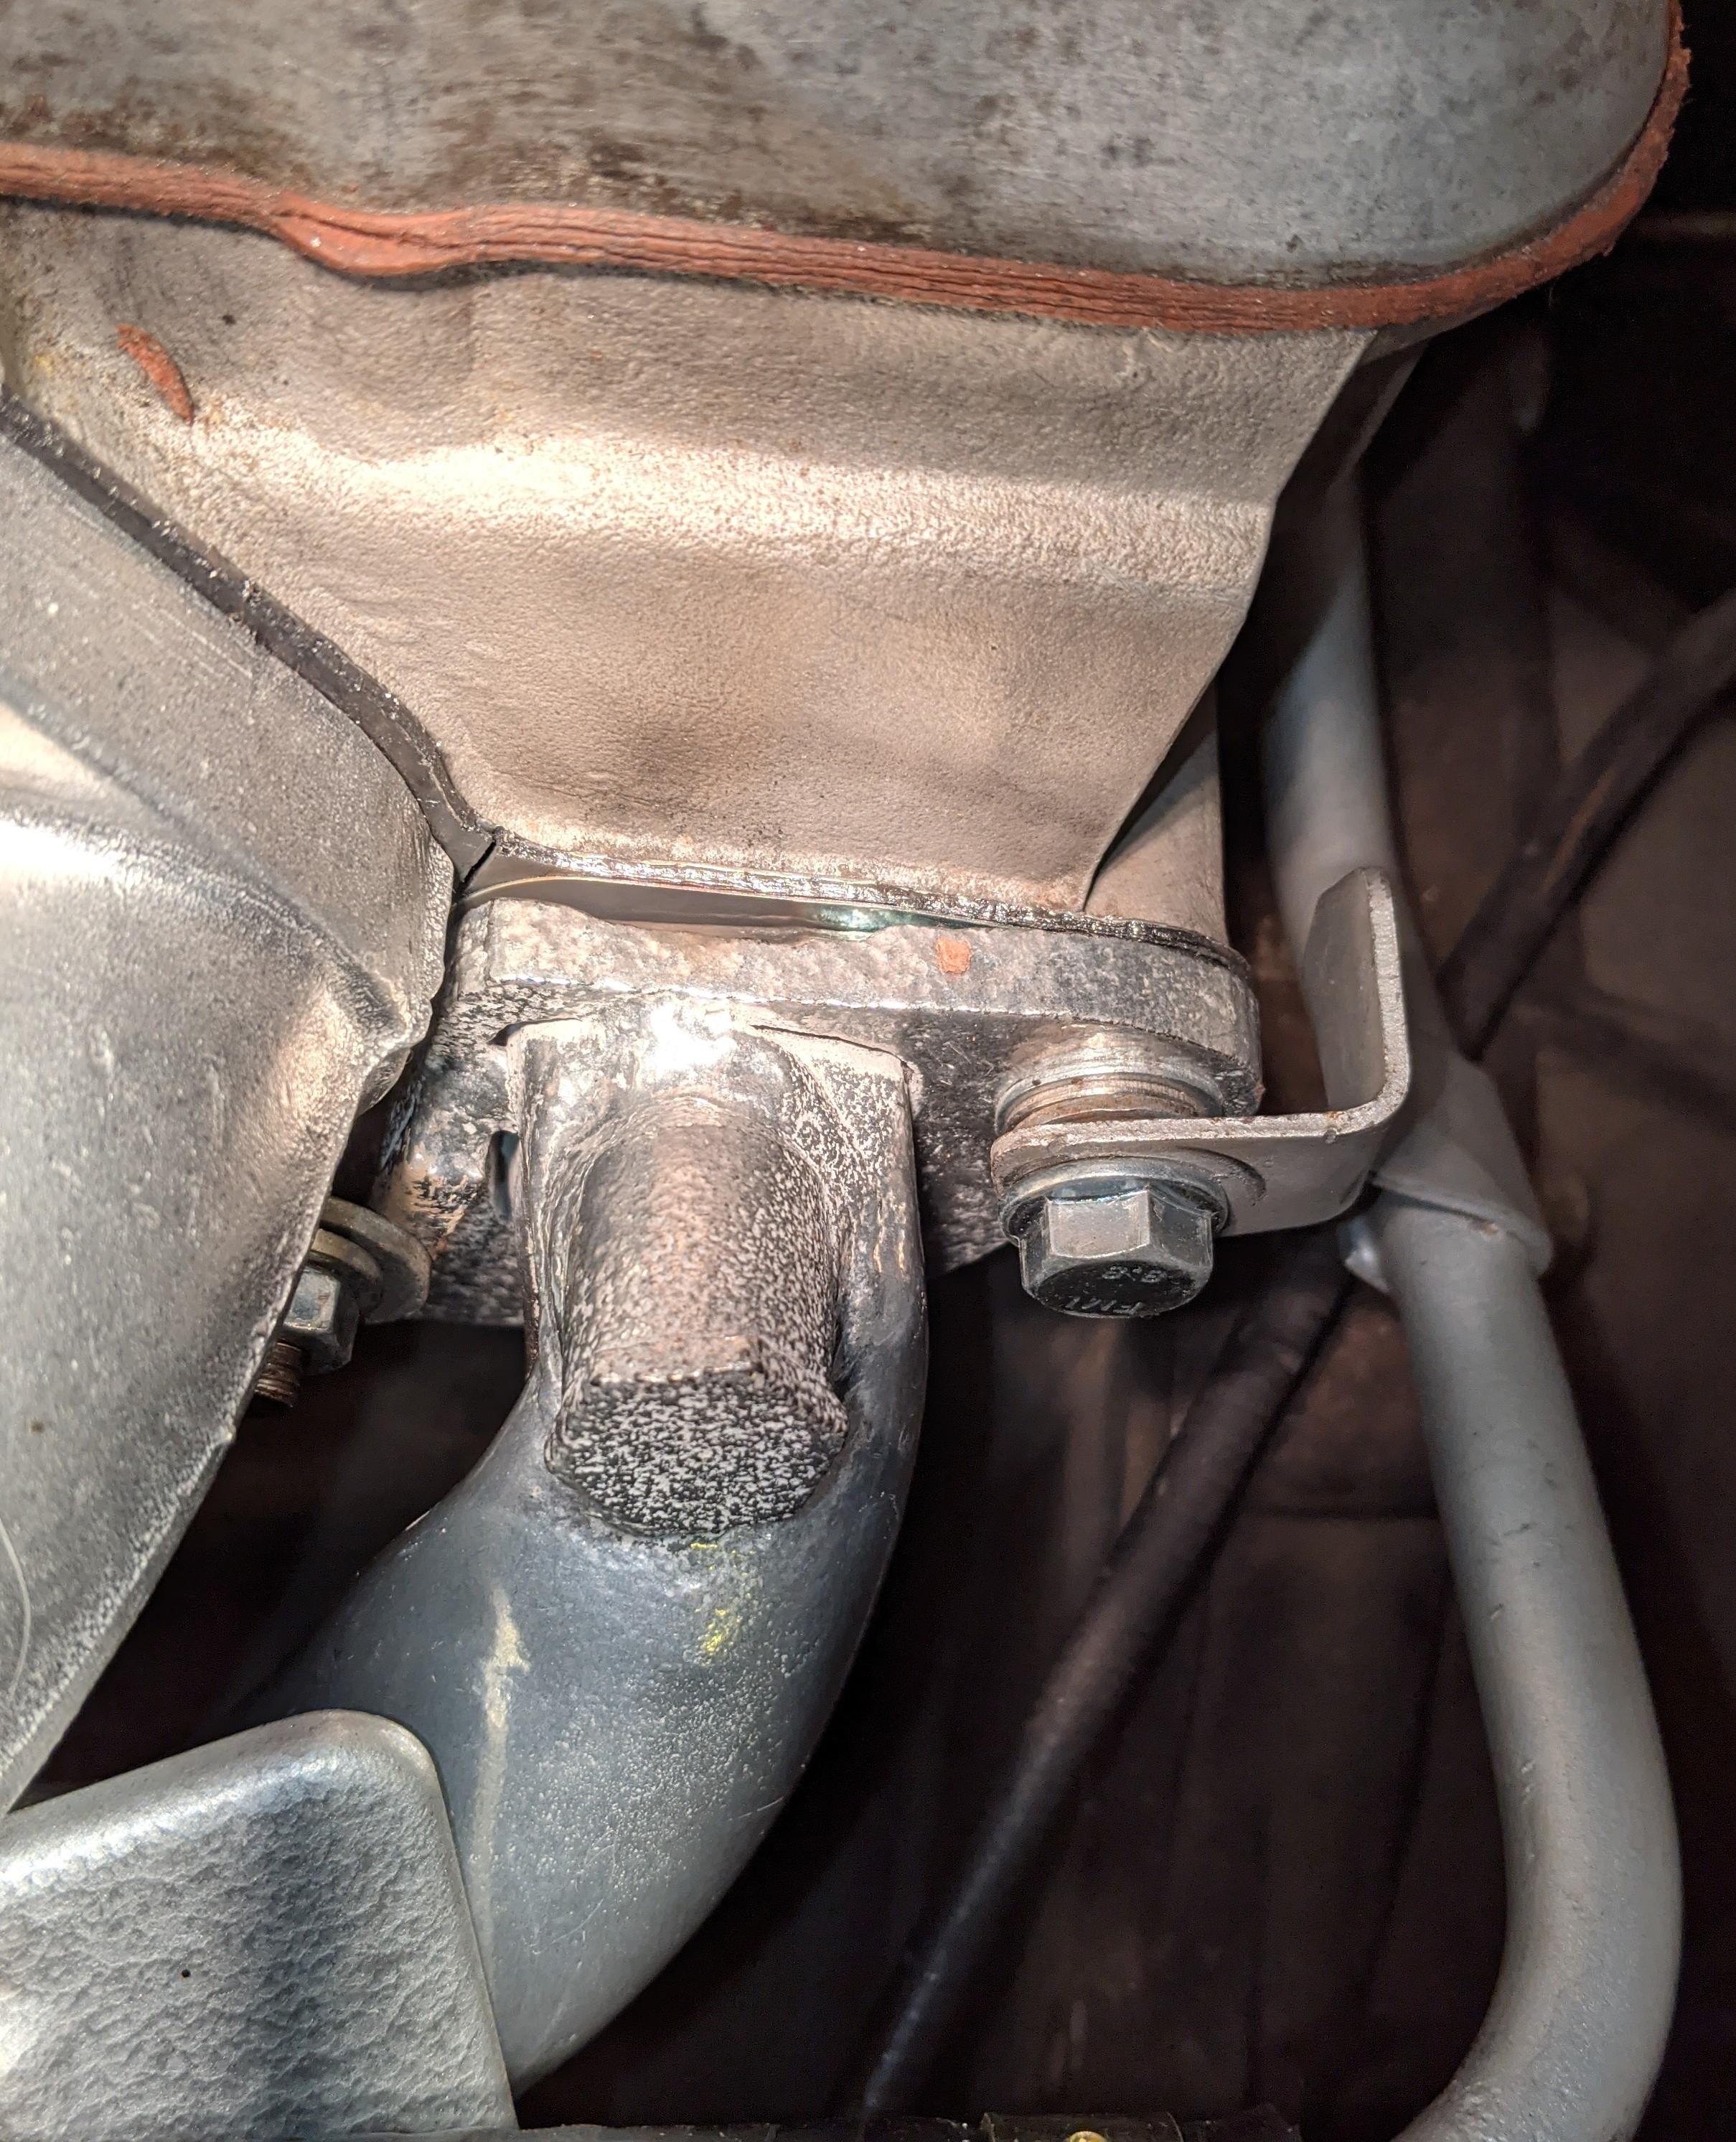
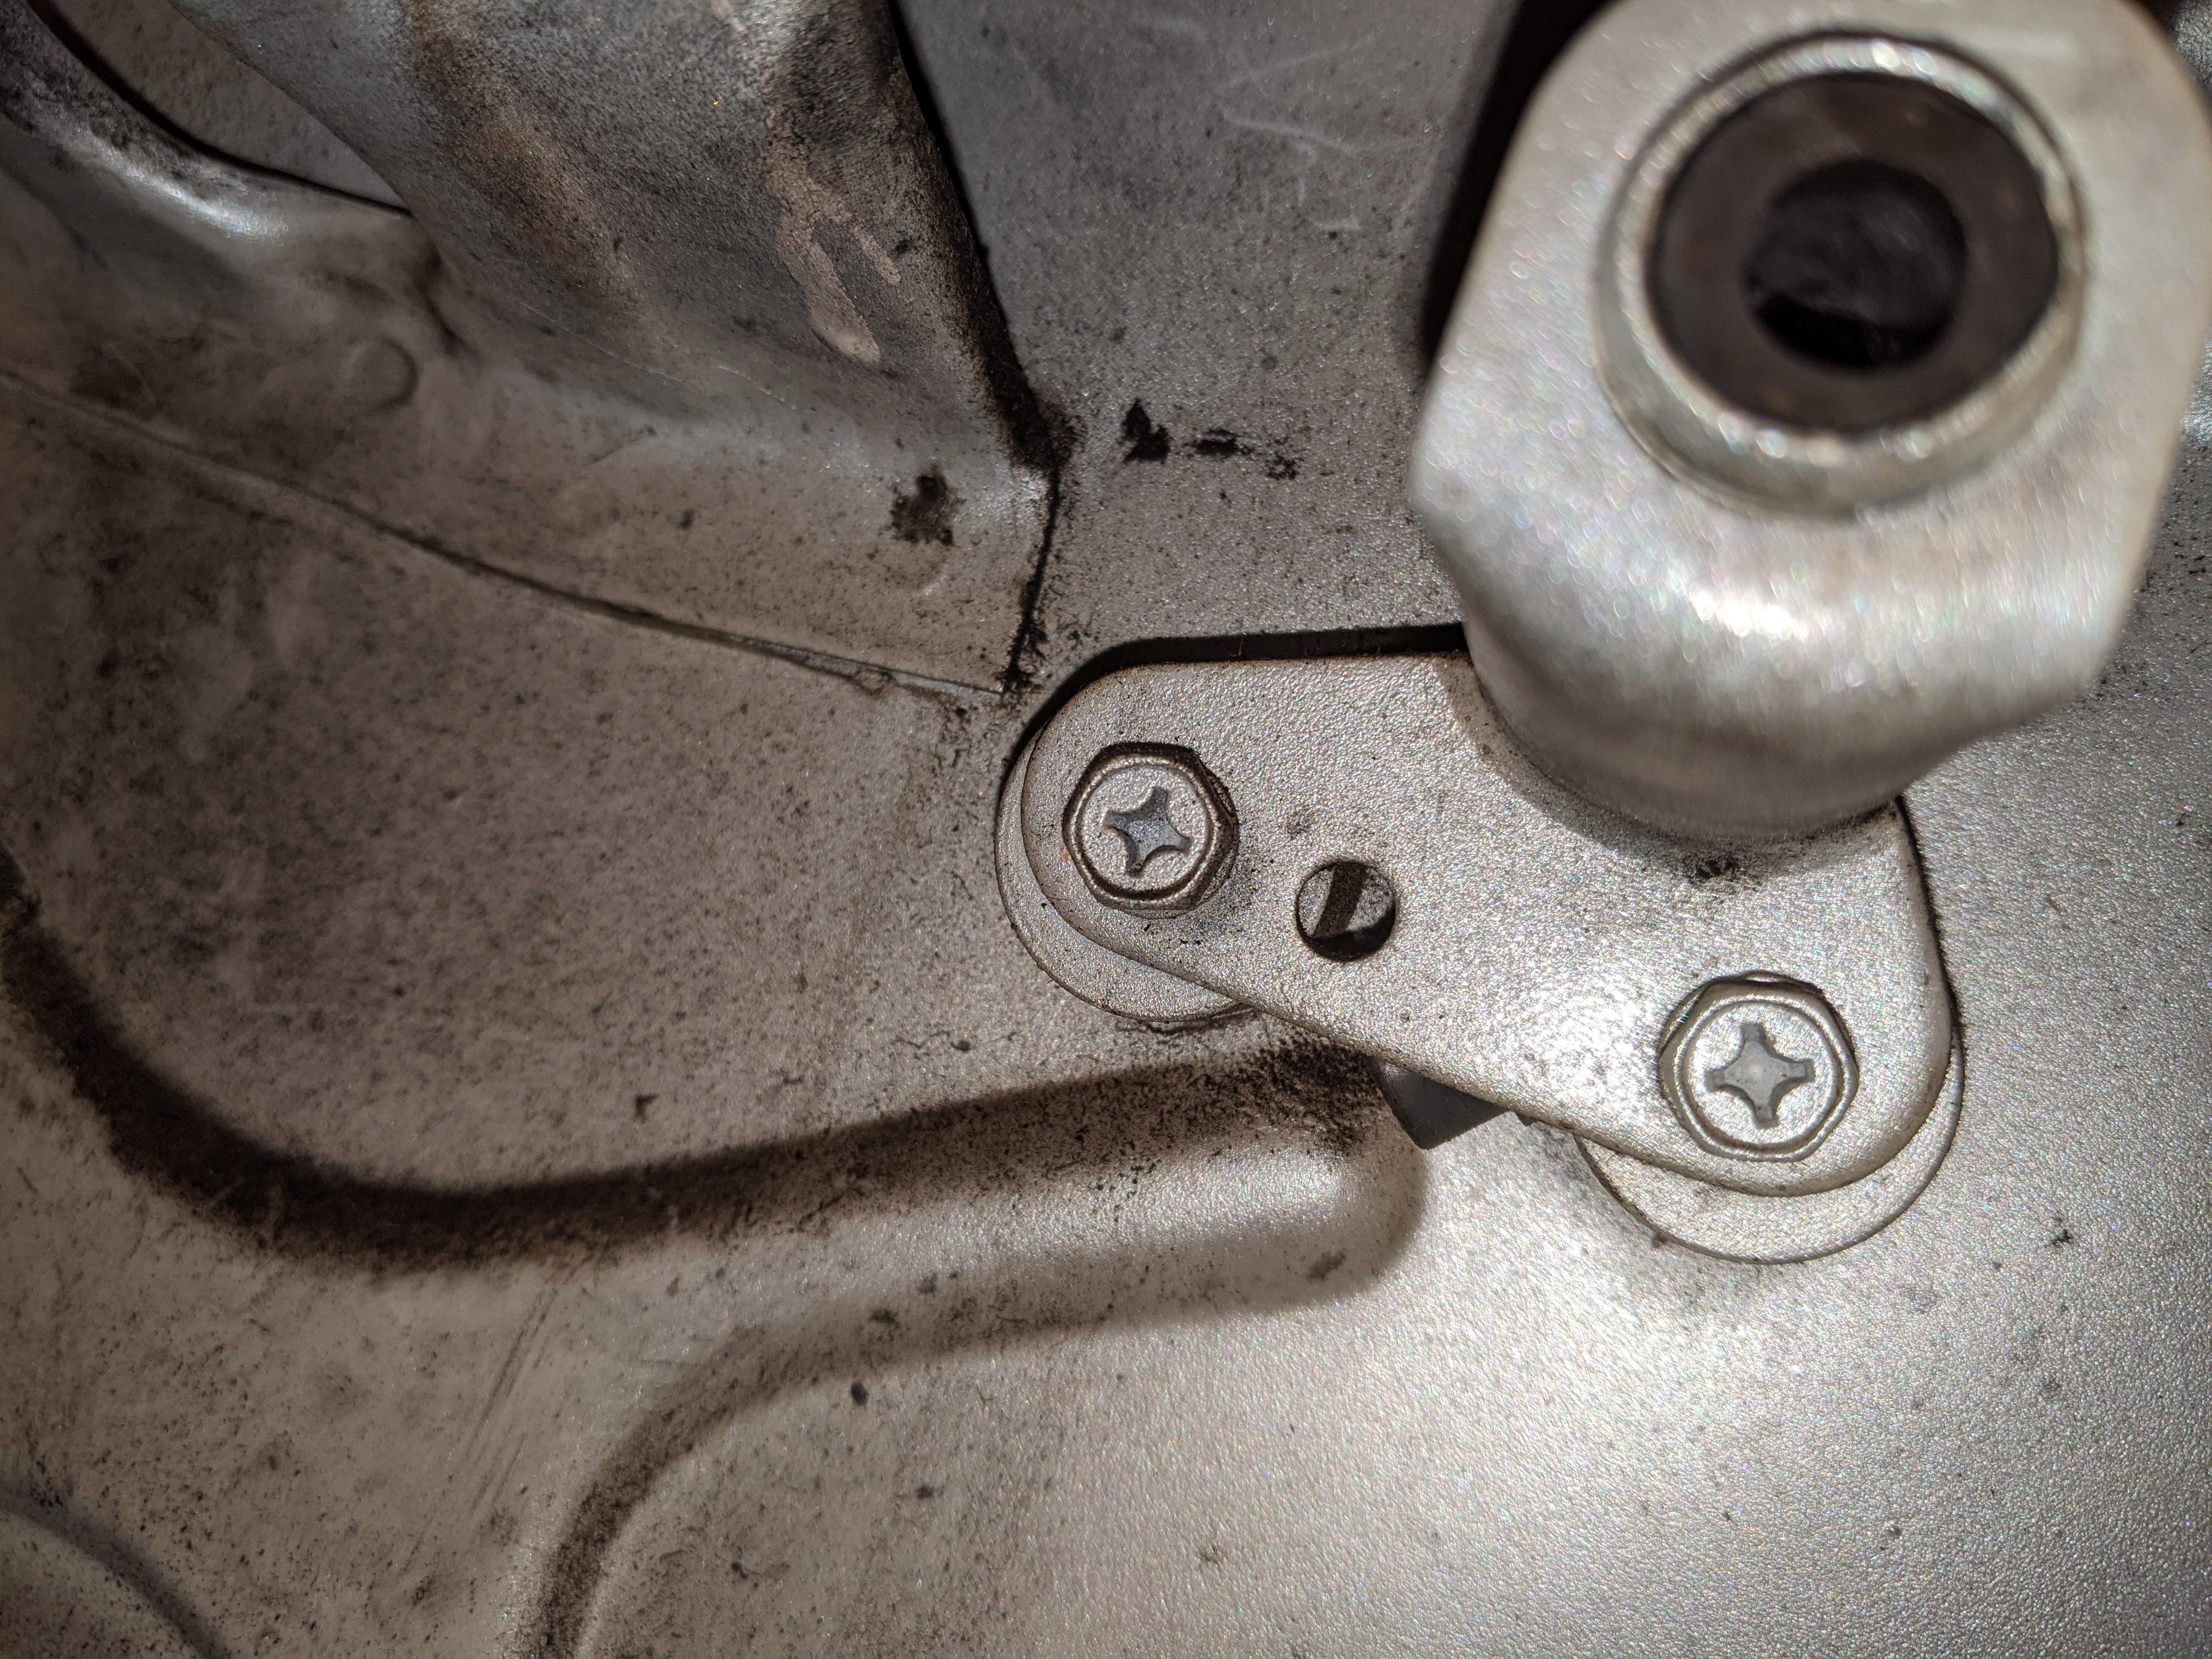
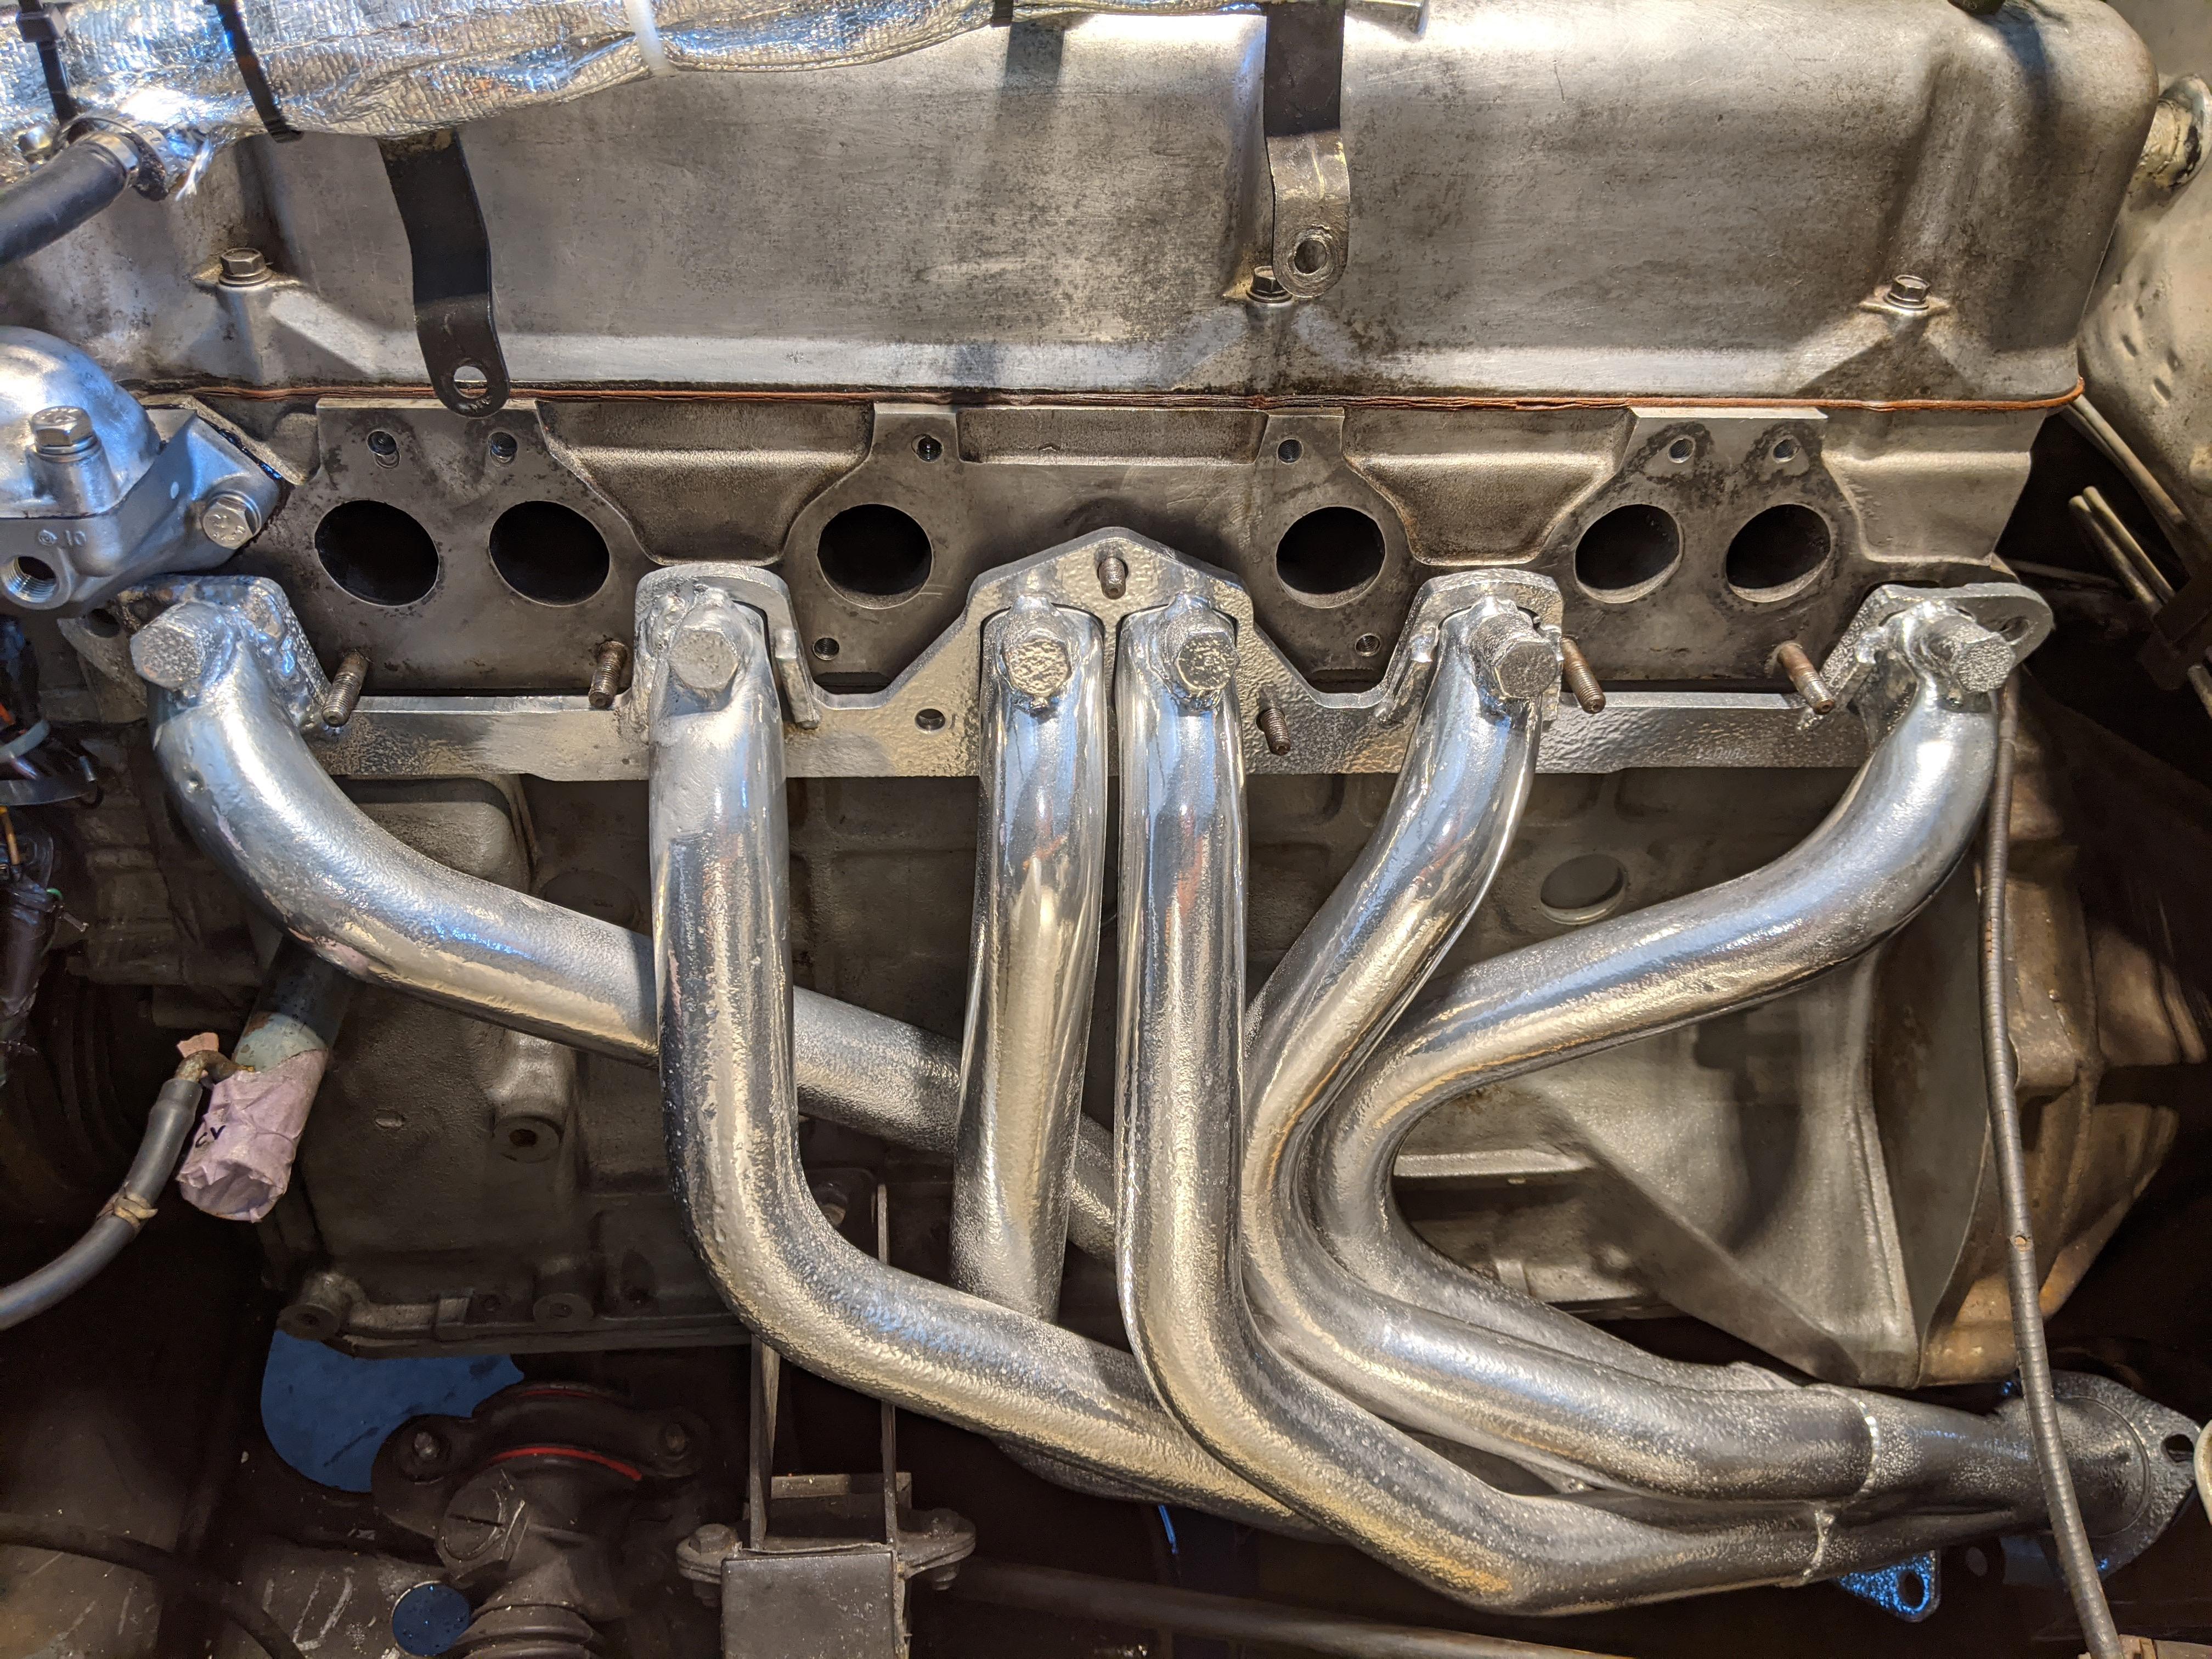
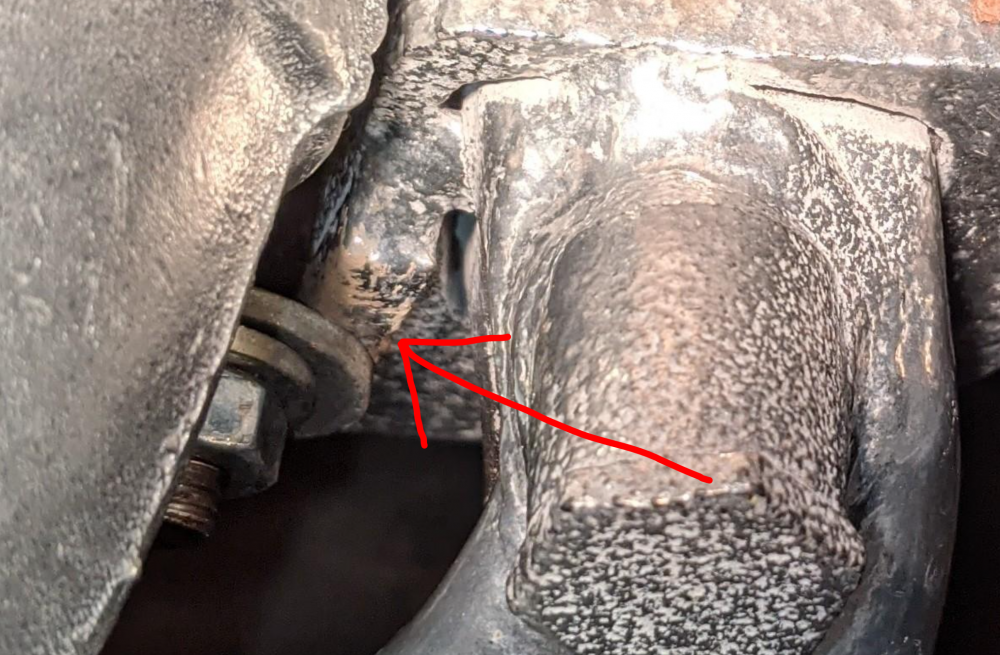
I'm going to disagree, even from my novice position here, that a new header is required. This header is original and has worked with no leaks, I'm assuming, for years. The only things that changed since I bought it were: 1. I removed it and got it ceramic coated at Jet-Hot. If anything, this smoothed the mounting surfaces that meet up with the head. 2. Someone noted the pitted holes in one of the header pipes. I took that pic to send to a welder friend. Had him braze weld the holes. 3. He went a little overboard around those holes and messed up the pre-made mount point for the washers that clamp down on exhaust manifold at the same time it clamps down on the intake maniful. Note: Those thick flange side plates are made to be the same thickness as the intake manifold flange -- meaning that where you saw one of the nut/washers clamping down it was a mismatch because of the weld work. (I.e., the OEM flanges of the exhaust manifold weren't designed to be same thickness of the intake manifold flanges.) Instead of taking off the header at that point and grinding it down to the appropriate, I used a smaller washer and tried to make due. Obviously, that needs fixing. Here is the spot I'm talking about: And here is what a normal one looks like: 4. I did not try to tighten the bolts/studs a ton because I did not want to break off a stud -- which I'd just done when removing the thermostat housing. This is also why I'd opted not to replace the whole set of studs/washers/bolts with a kit from MSA. I did not want to deal with another drill-out into the head. But, alas, I may have to take that chance. For now I'm going to take off the intake manifold, take off exhaust manifold and grind down that spot to receive the washer, triple check that I've got the new manifold gasket facing the right way, and try to tighten down. In the meantime, I'll look into the h/w kit.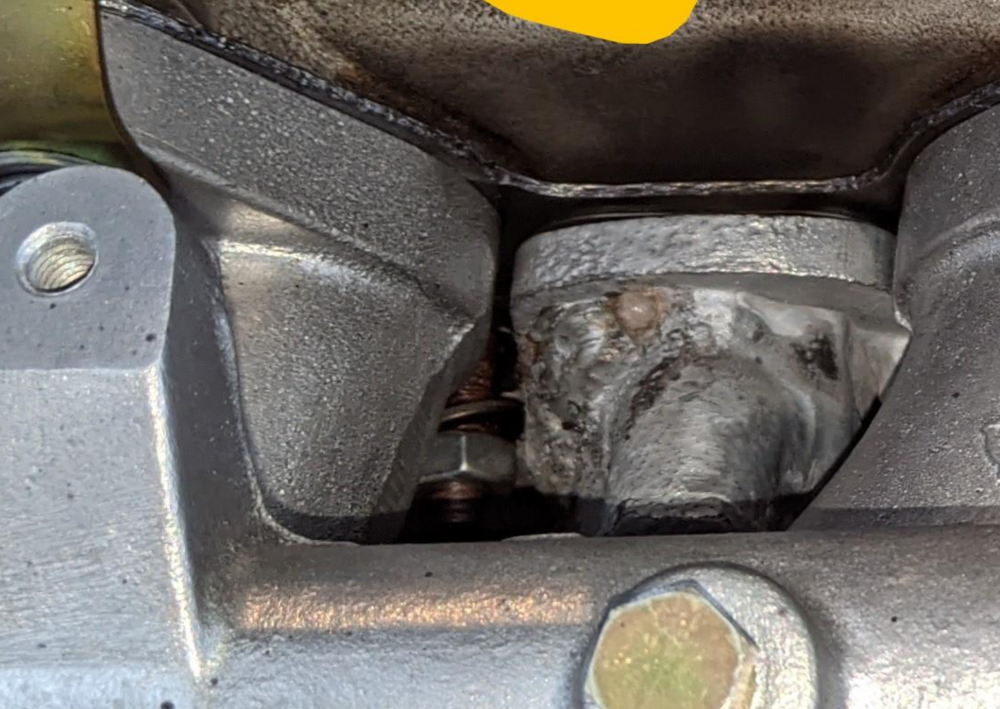
-
Starting Carb Conversion: Flat Tops to Paltechs
Dadsun replied to Dadsun's topic in Open Discussions
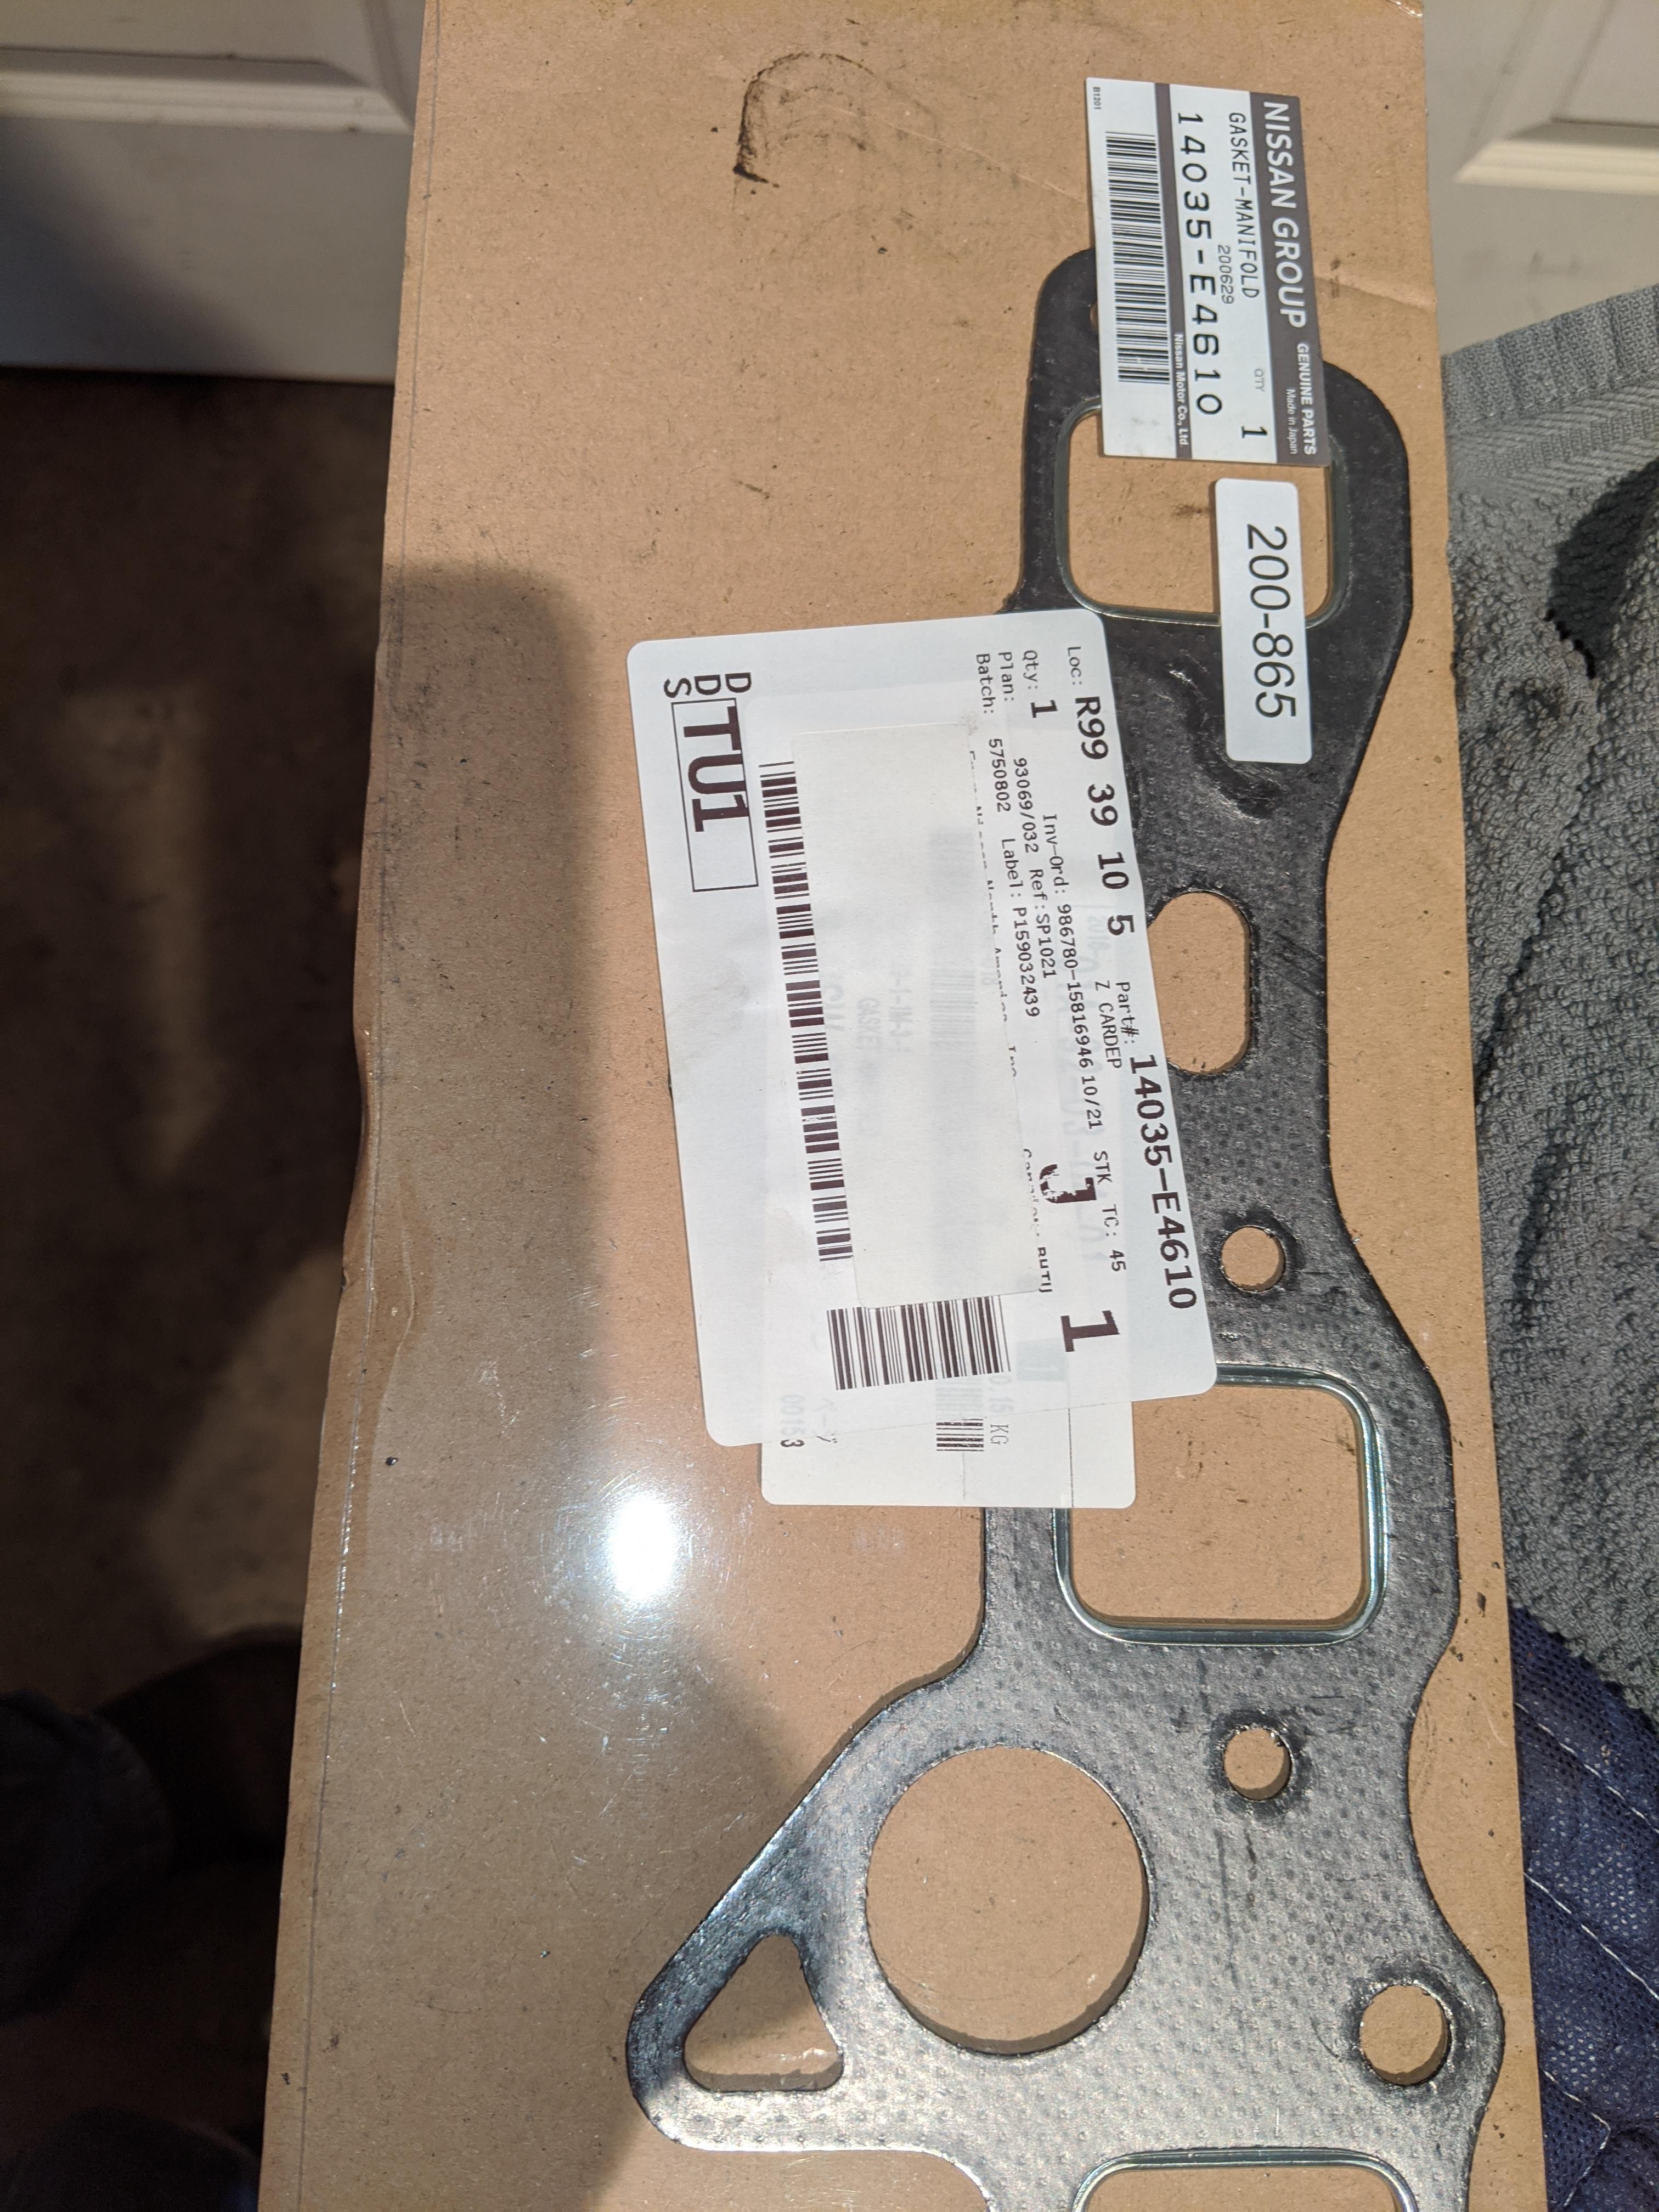
That may look like a split but it's there on the gasket out of the box. See Zcardepot part here. Yes, square exhaust holes on both.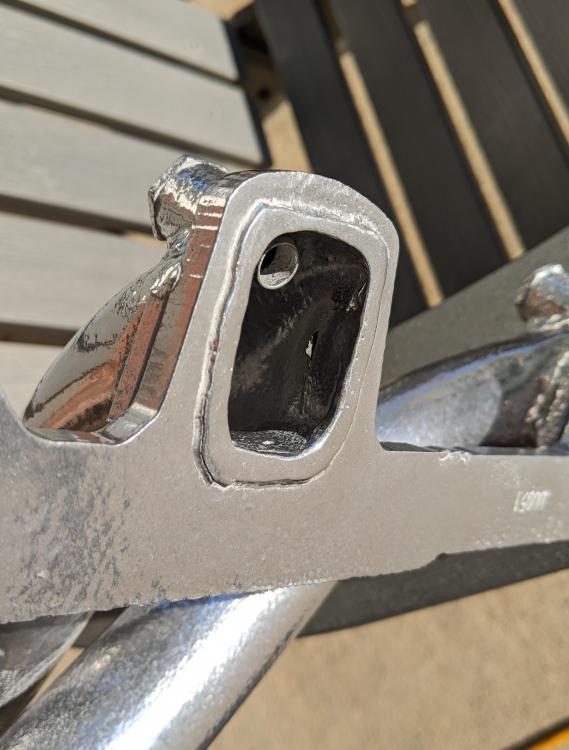
-
Starting Carb Conversion: Flat Tops to Paltechs
Dadsun replied to Dadsun's topic in Open Discussions
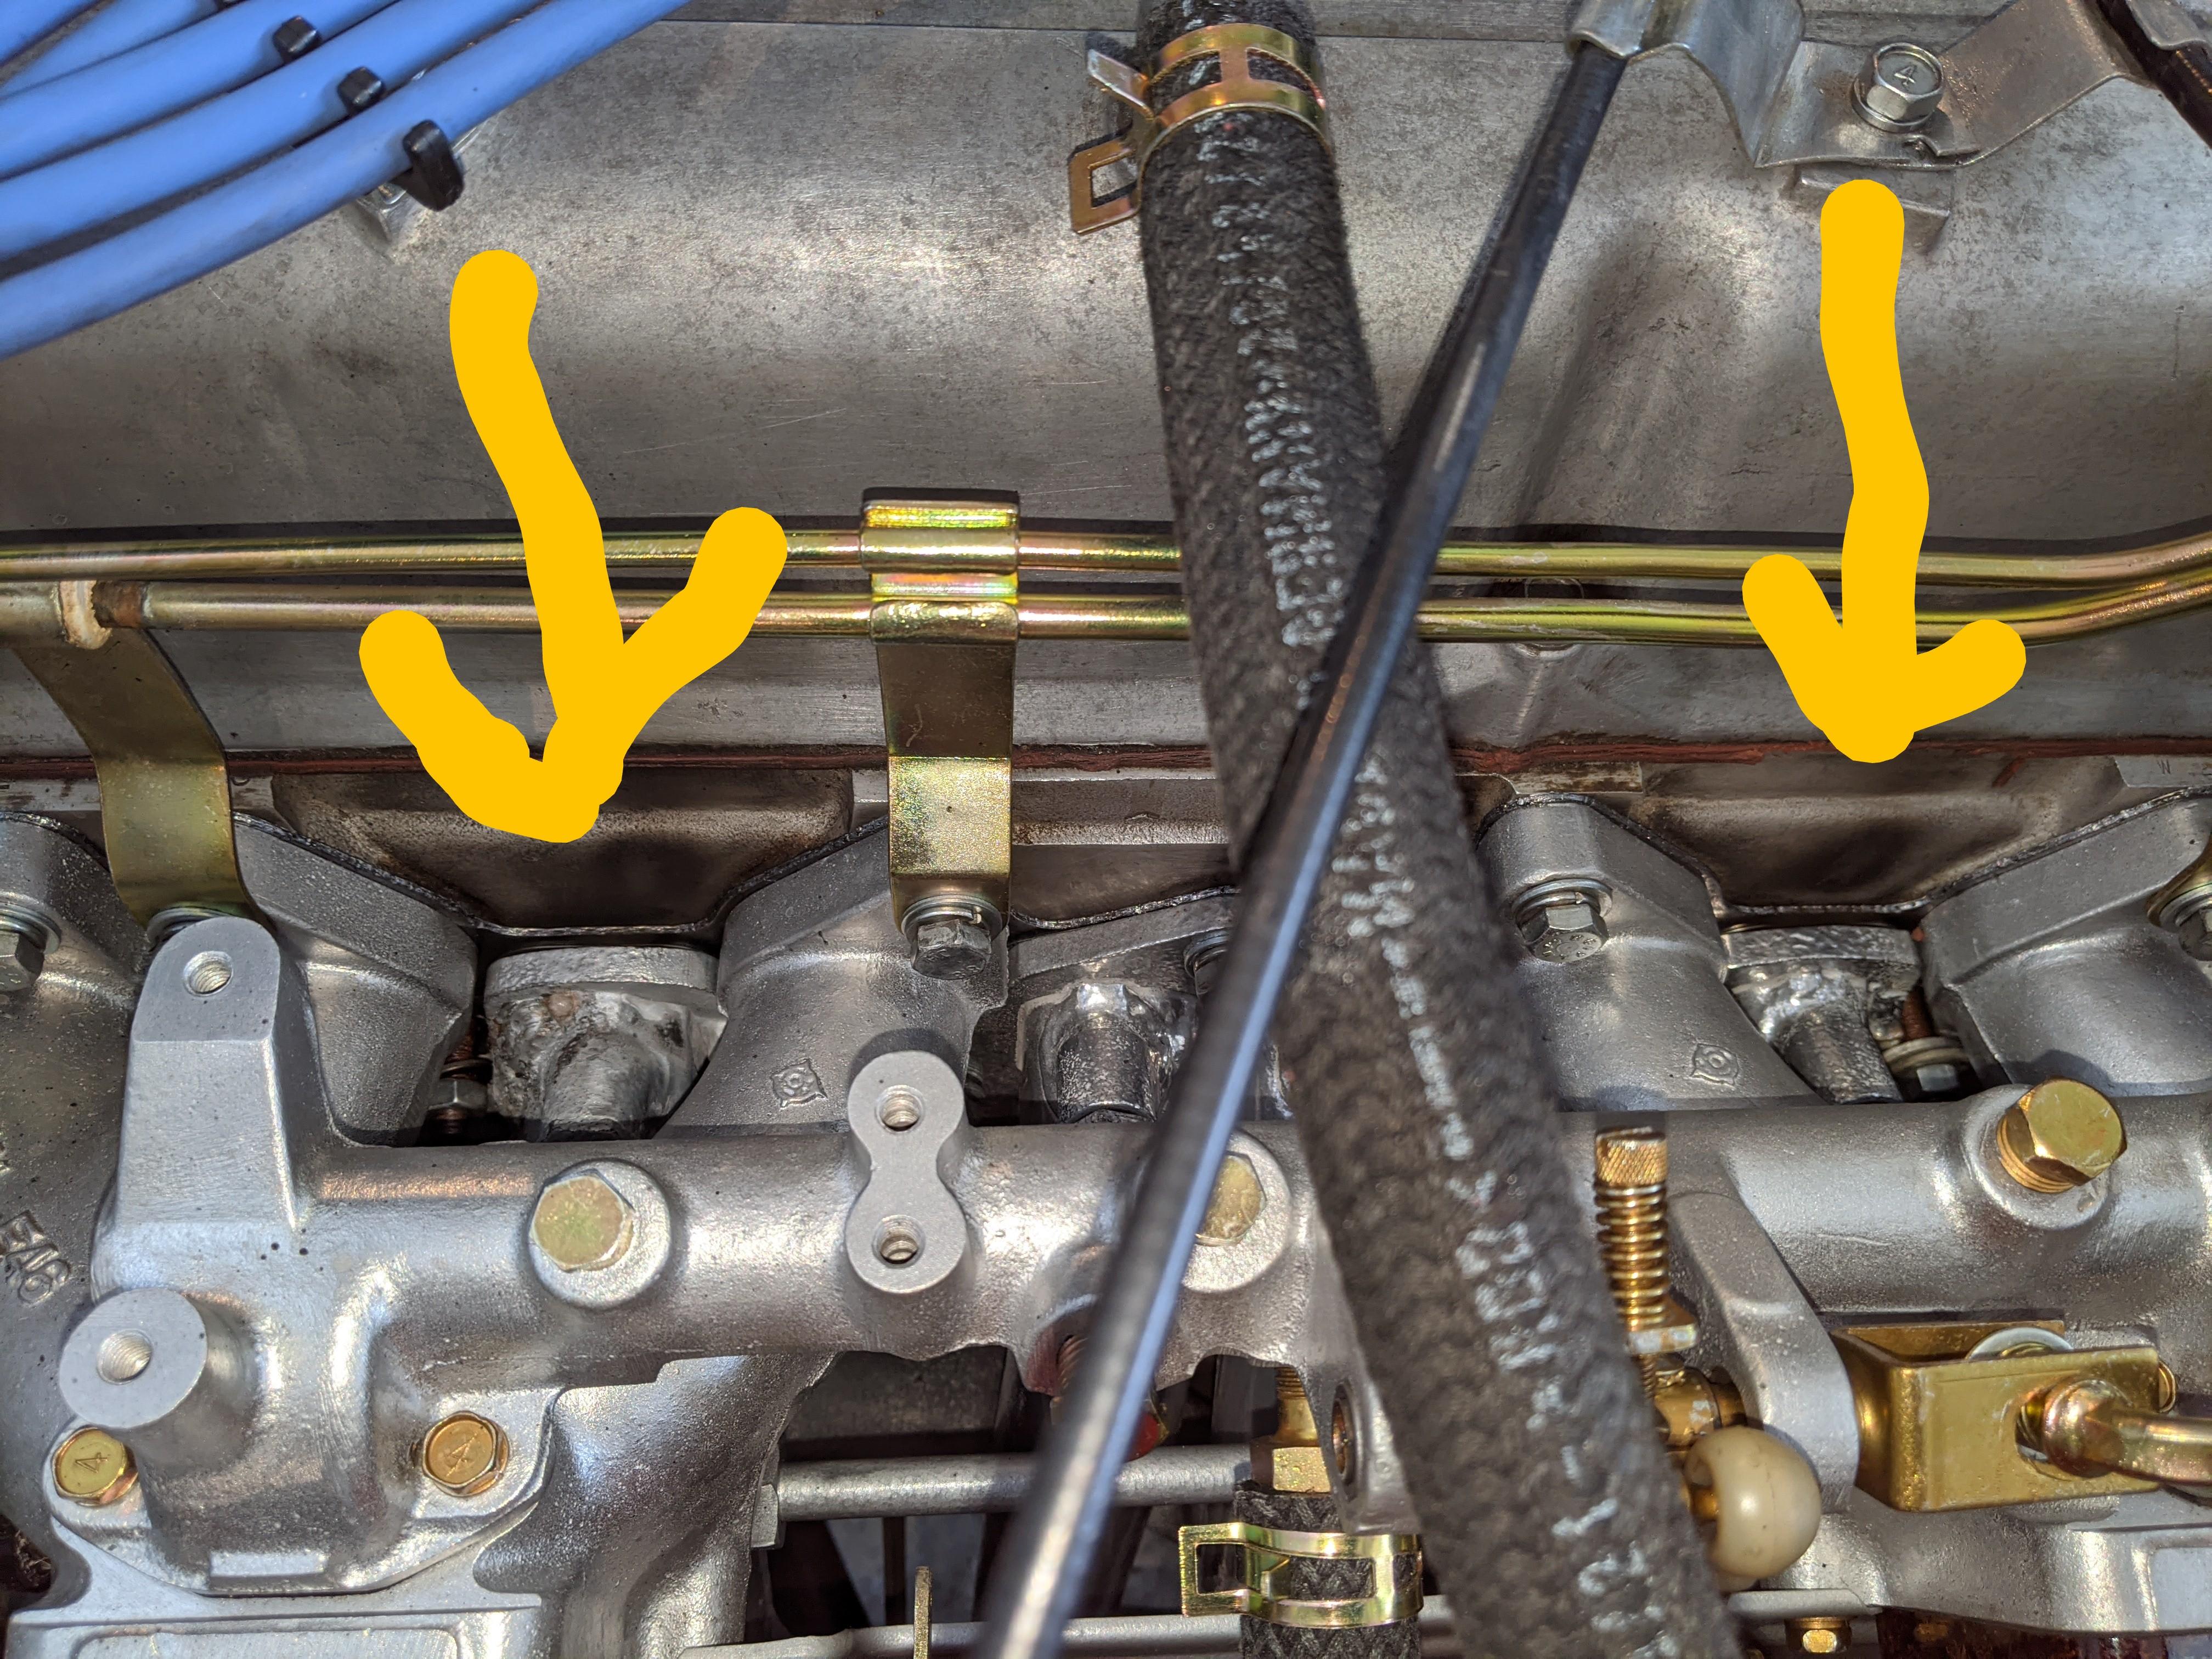
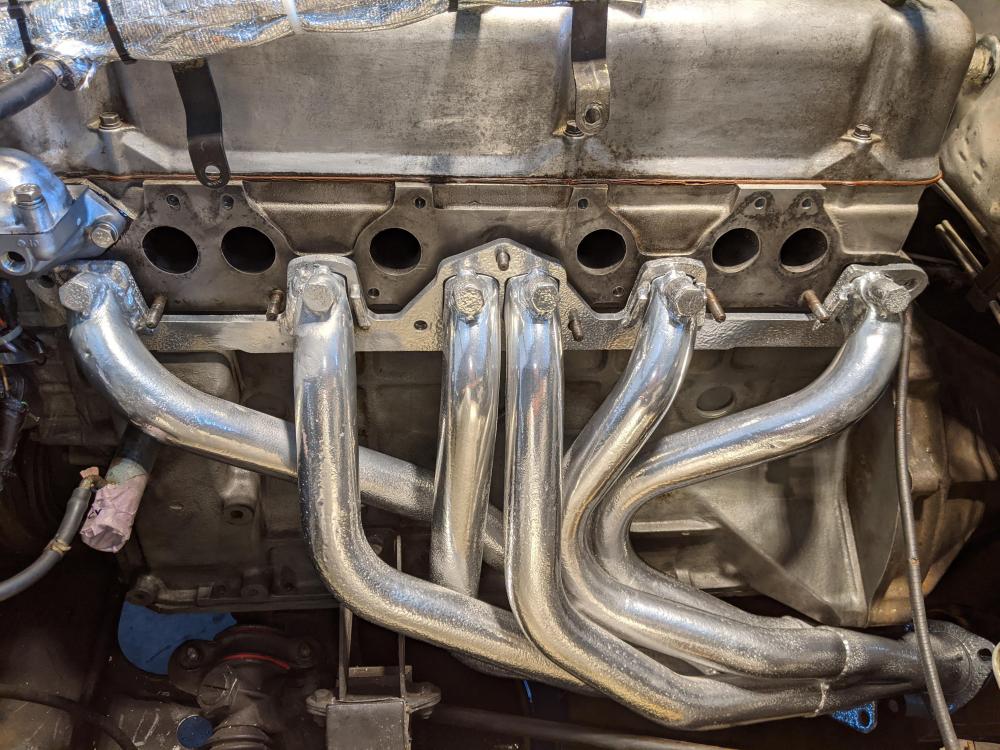
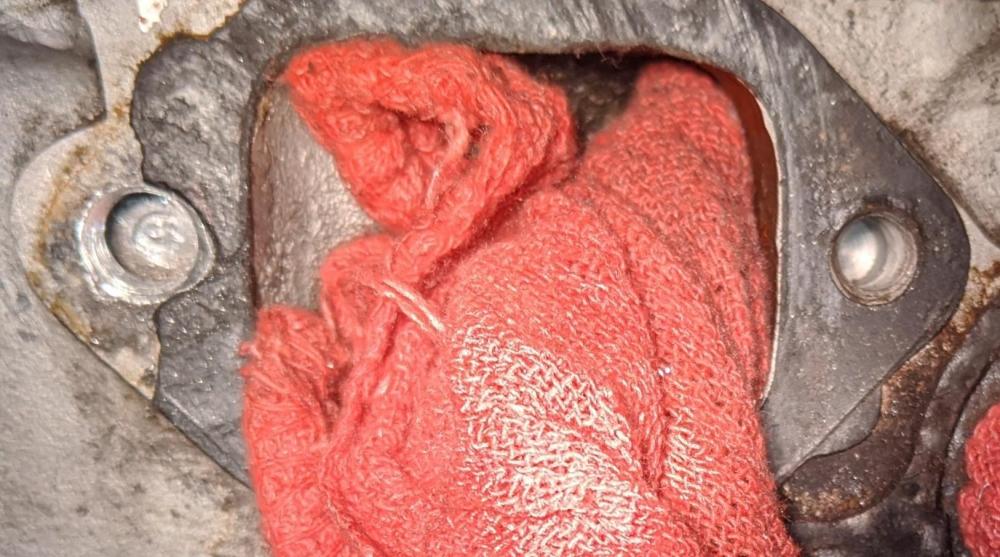
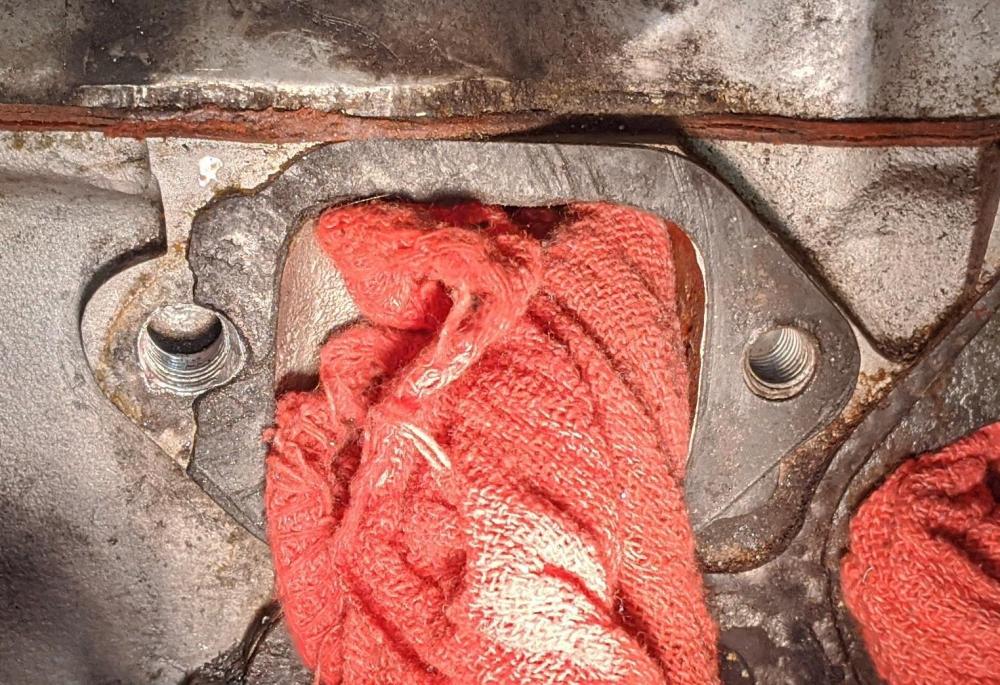
I've got an issue with the exhaust manifold gasket. It's leaking noticeably up between the intake manifold sections. I may have put the gasket on backwards. You can see in the 2nd pic that I mounted it with the side with larger metal plates facing out. The third pic is the gasket still in the wrapper, showing the side with the smaller trim metal around the exhaust openings... Should that side be facing out? Sigh.


-
Starting Carb Conversion: Flat Tops to Paltechs
Dadsun replied to Dadsun's topic in Open Discussions
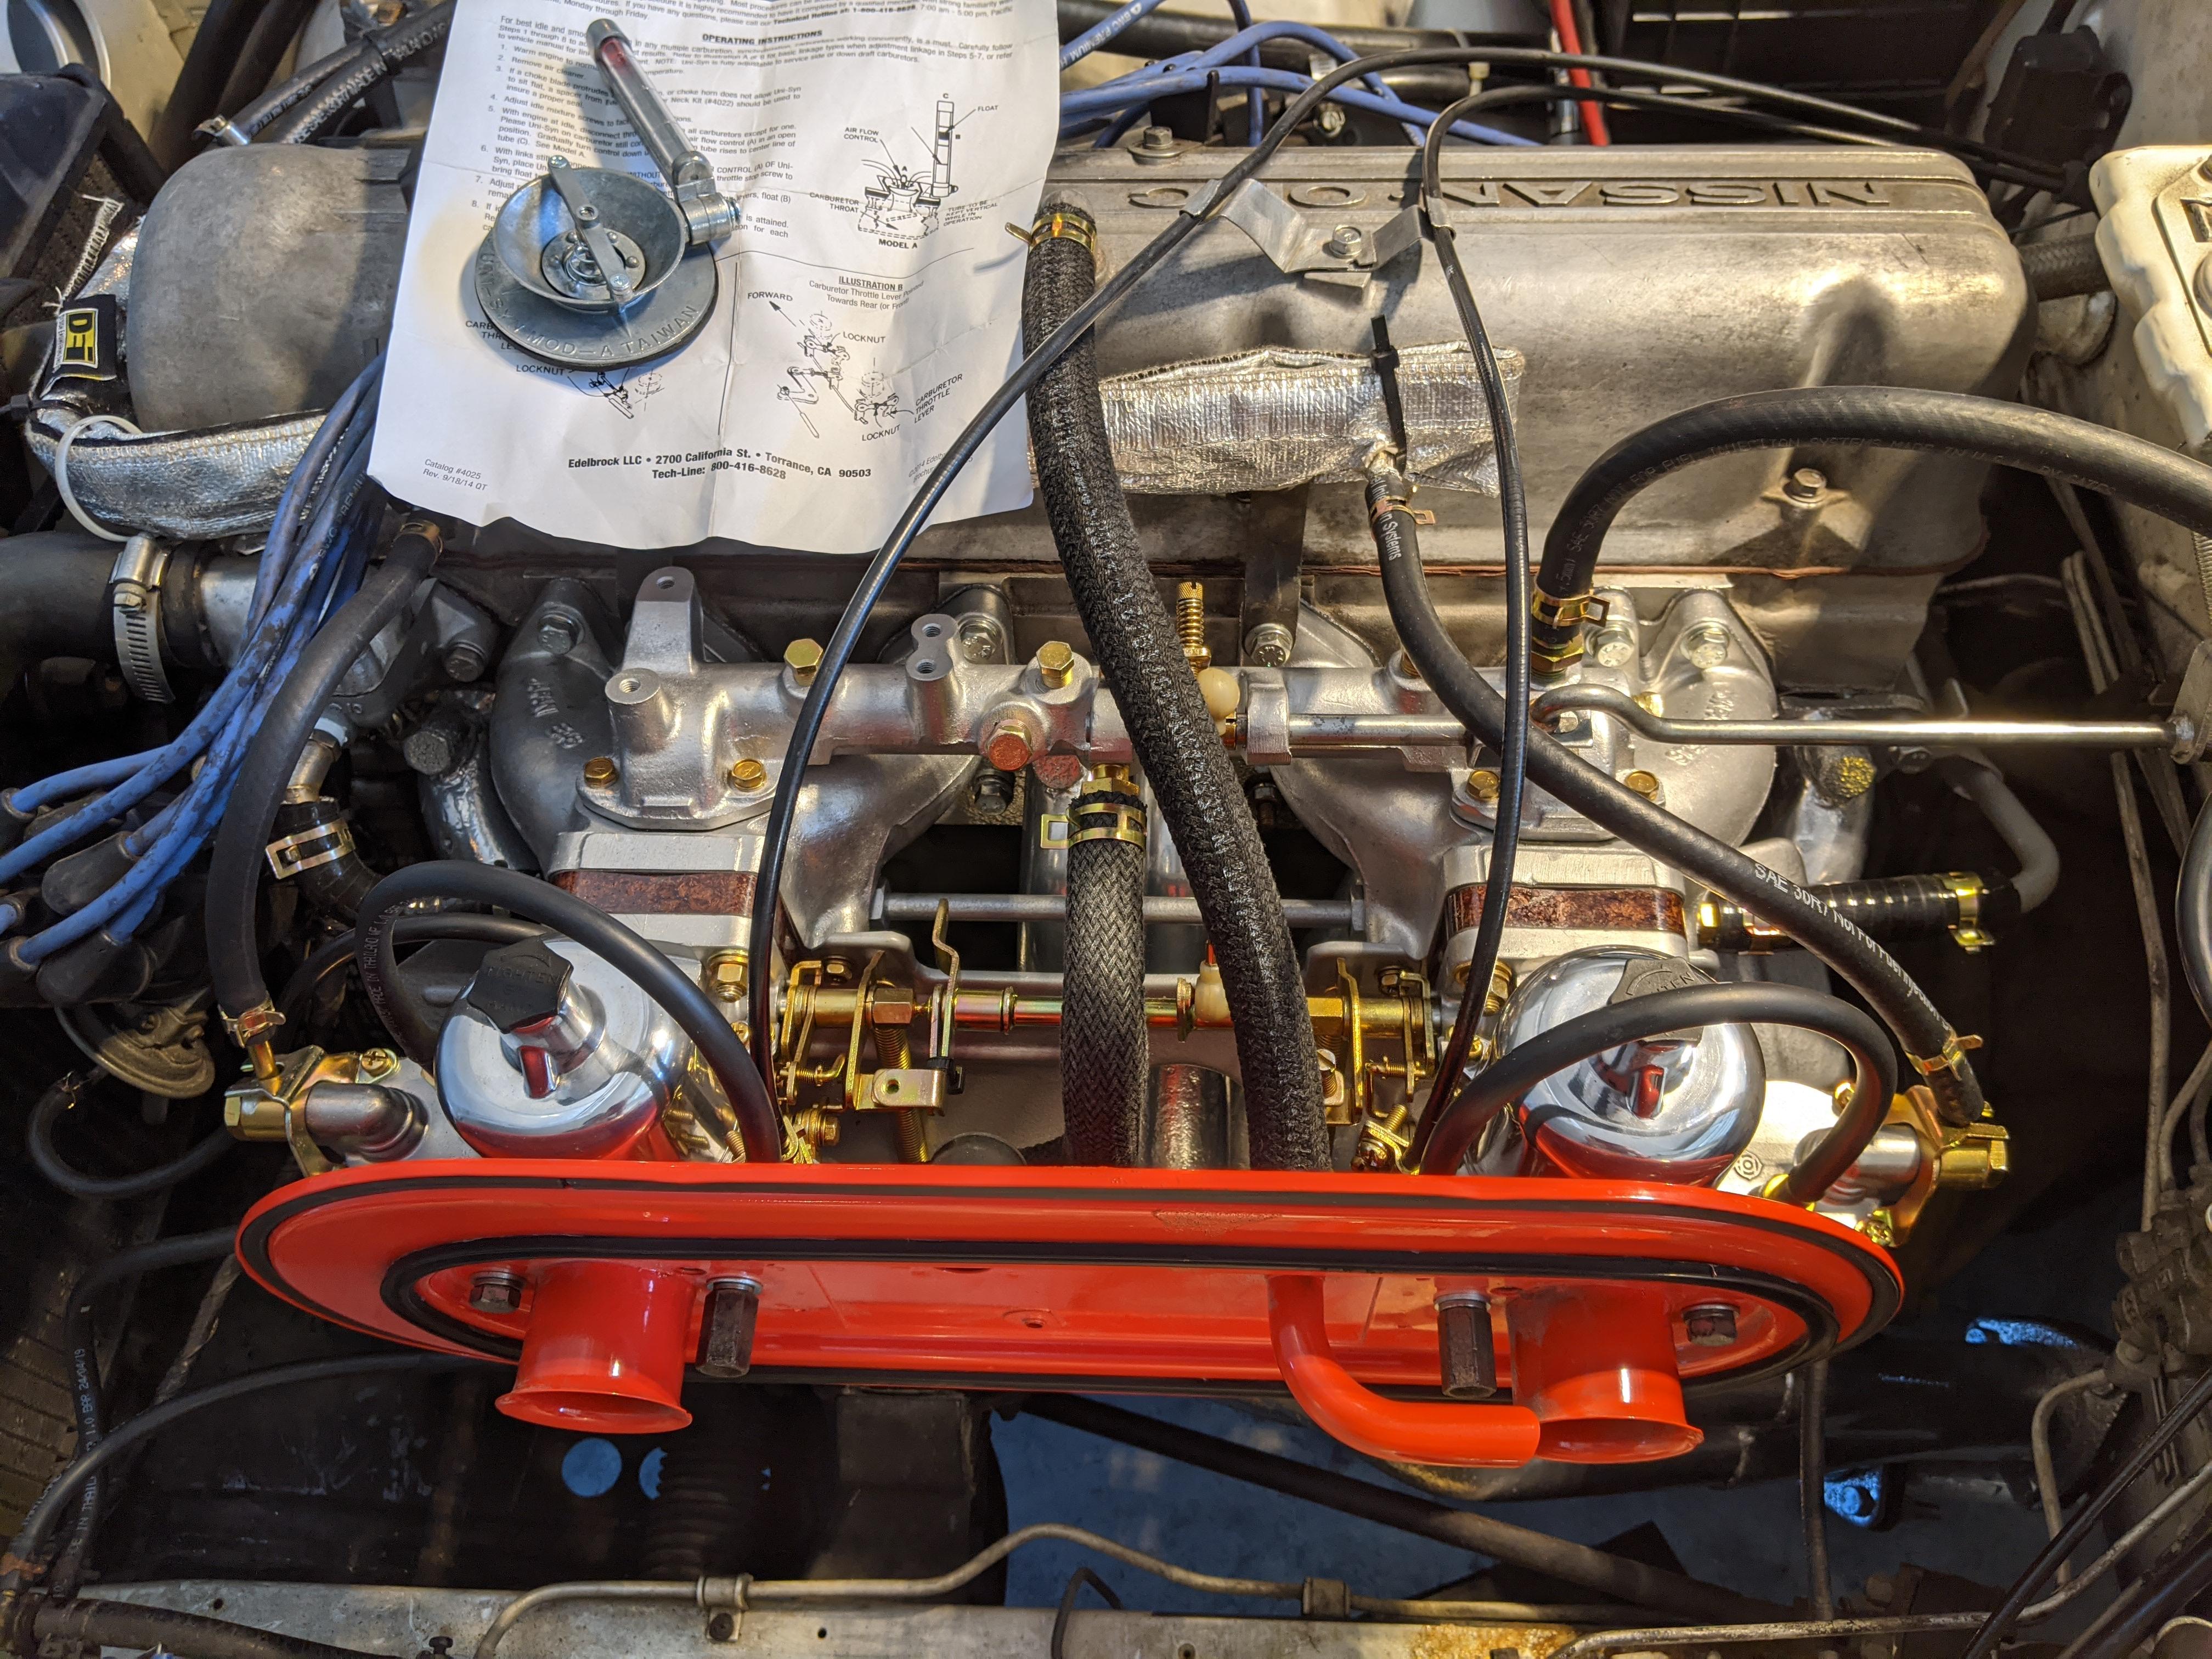
I went back and looked at the quick and dirty SU tuning thread and will try his suggestions on the mixture. While I'm under the hood, I am looking to replace the points with Pertronix electronic ignition (pictured). I've looked through the archives here and see some upgrade to the 3.0ohm coil and bypass the resistor. Thoughts? I'm assuming I don't have to do that right now; that the ignition swap will work along with everything else and also not disrupt my original tachometer.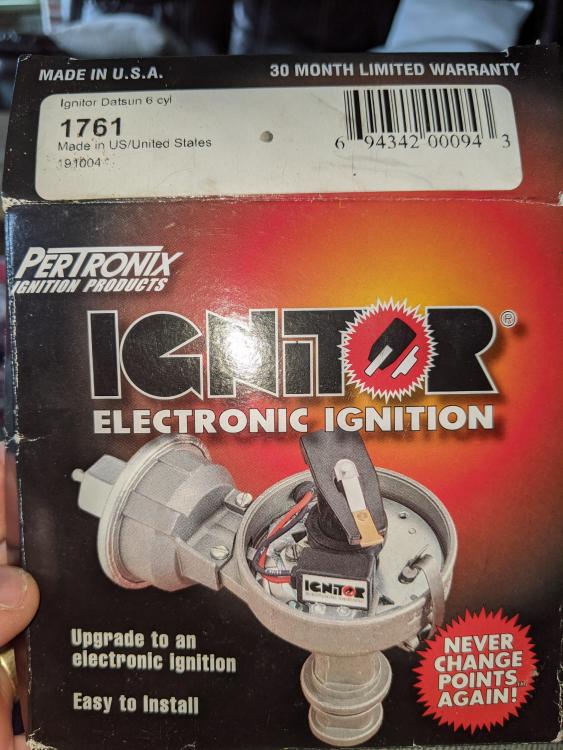
-
Starting Carb Conversion: Flat Tops to Paltechs
Dadsun replied to Dadsun's topic in Open Discussions
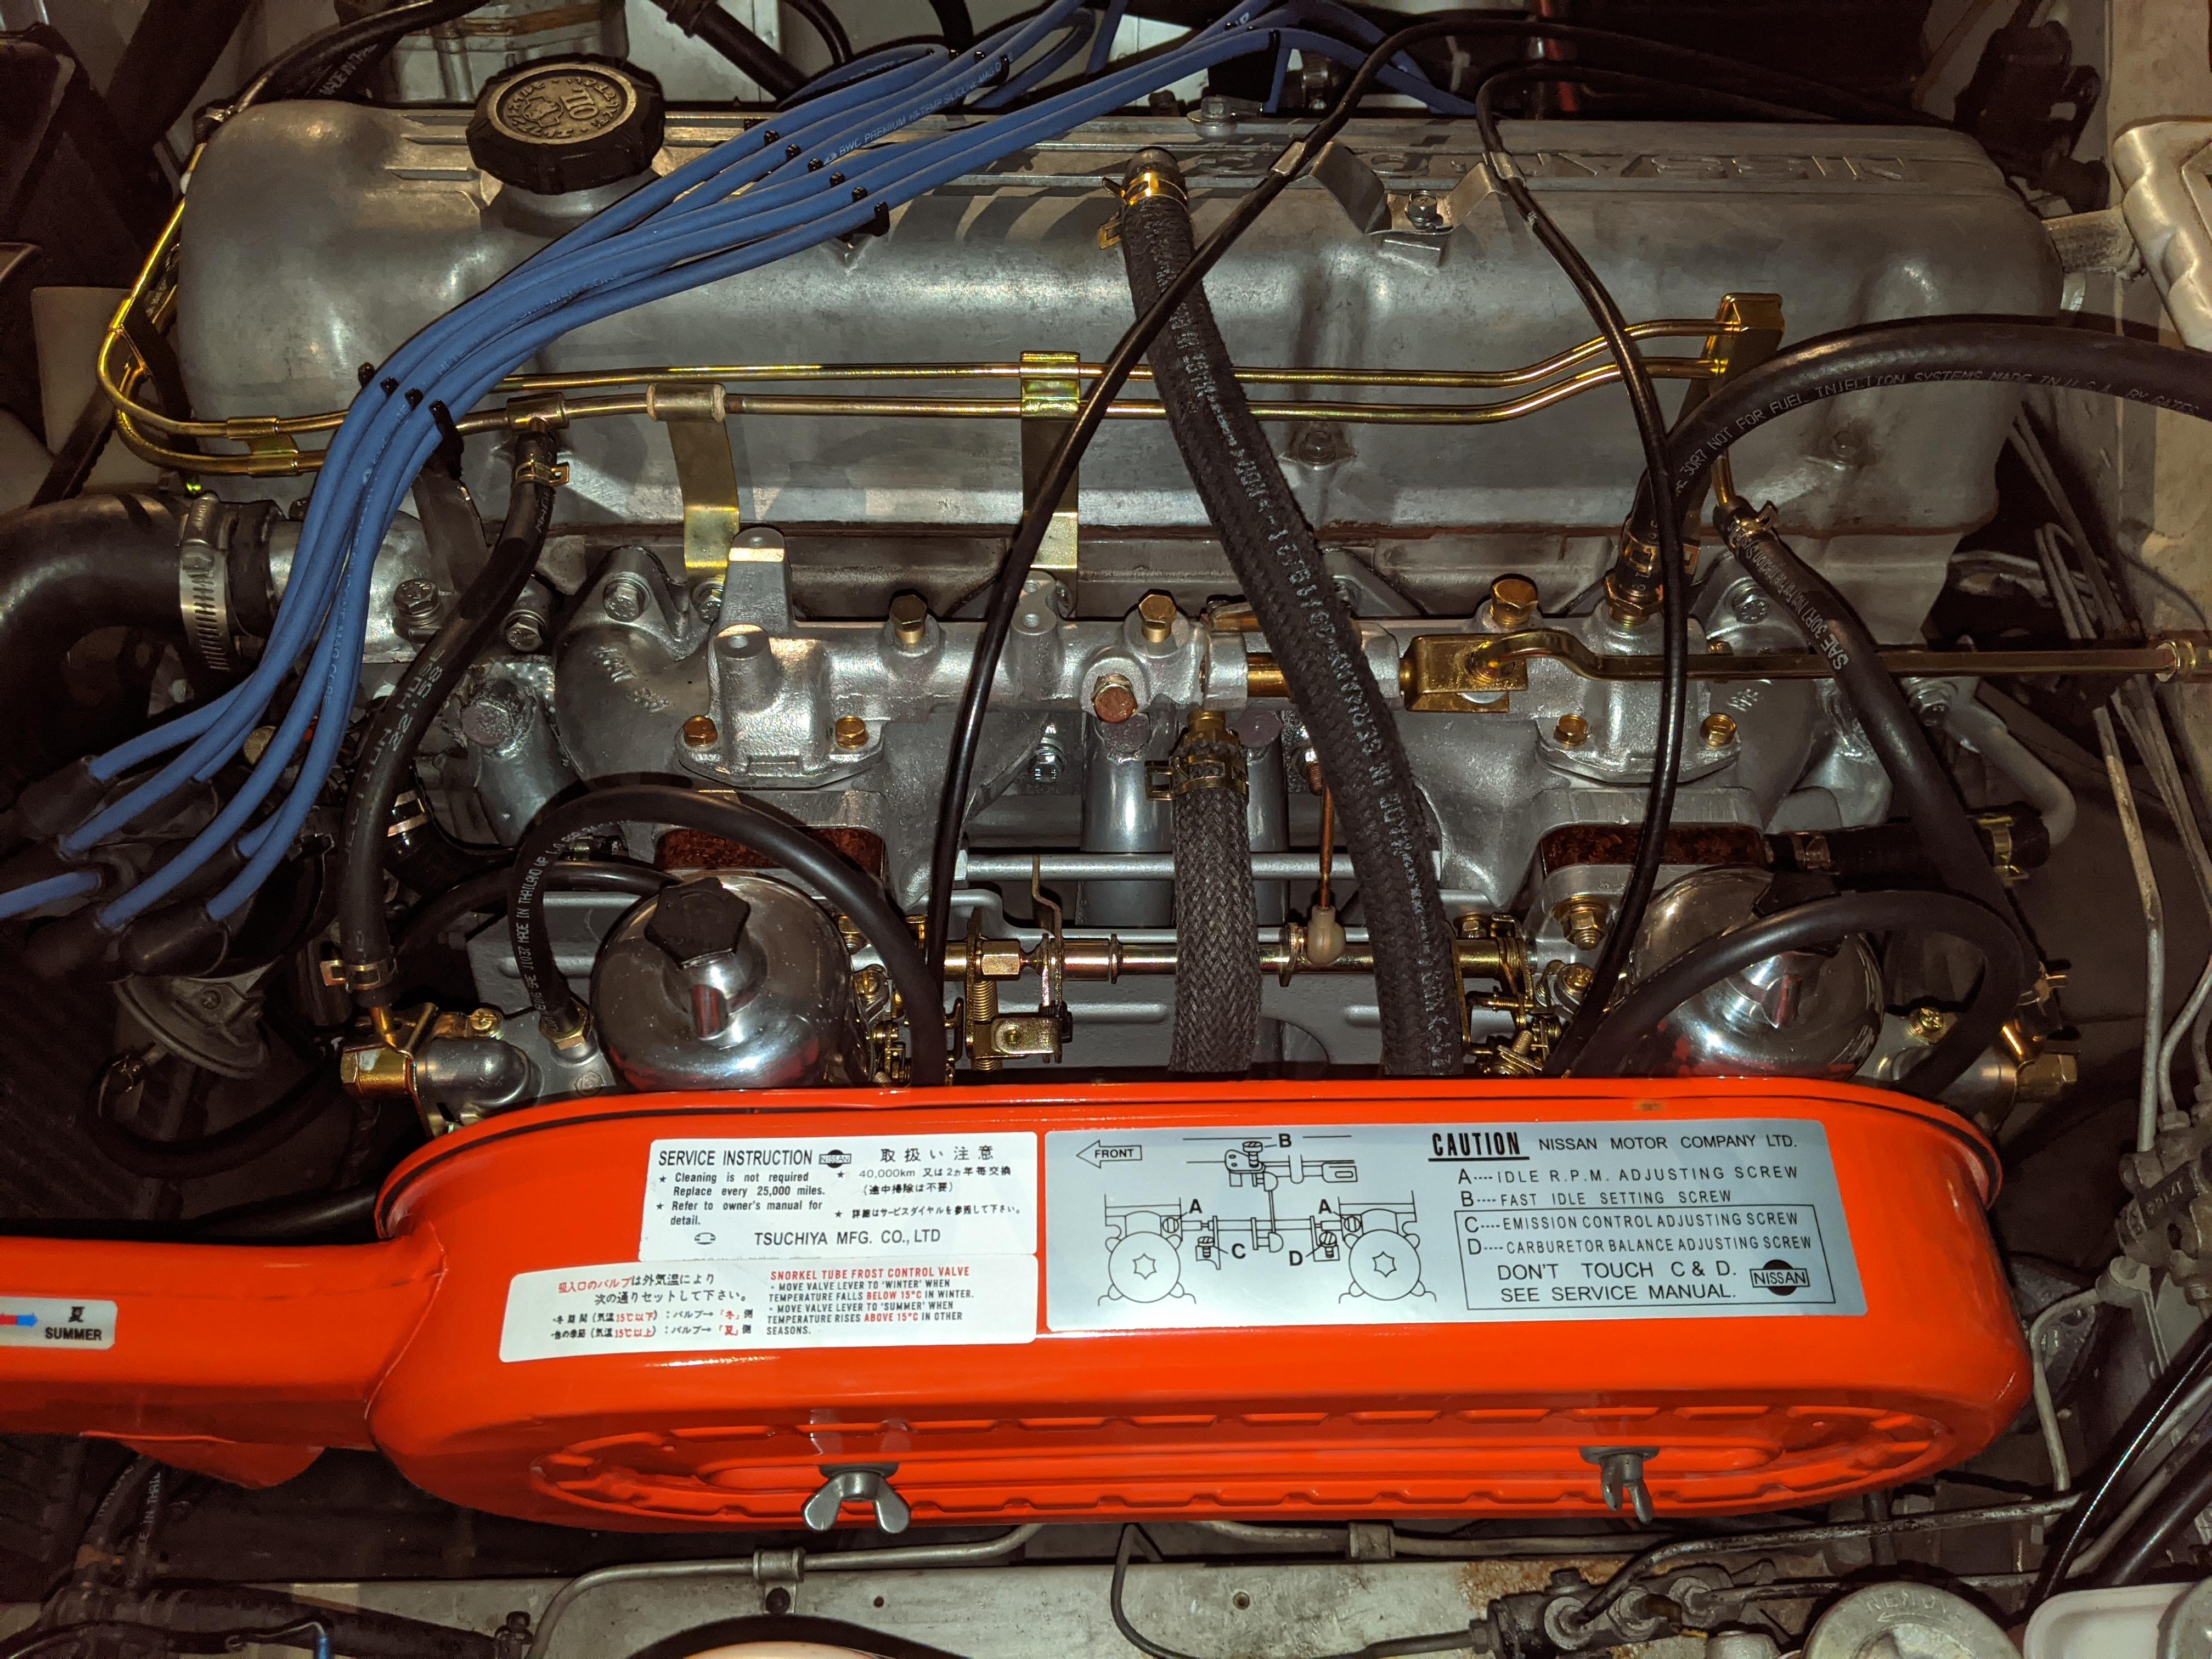
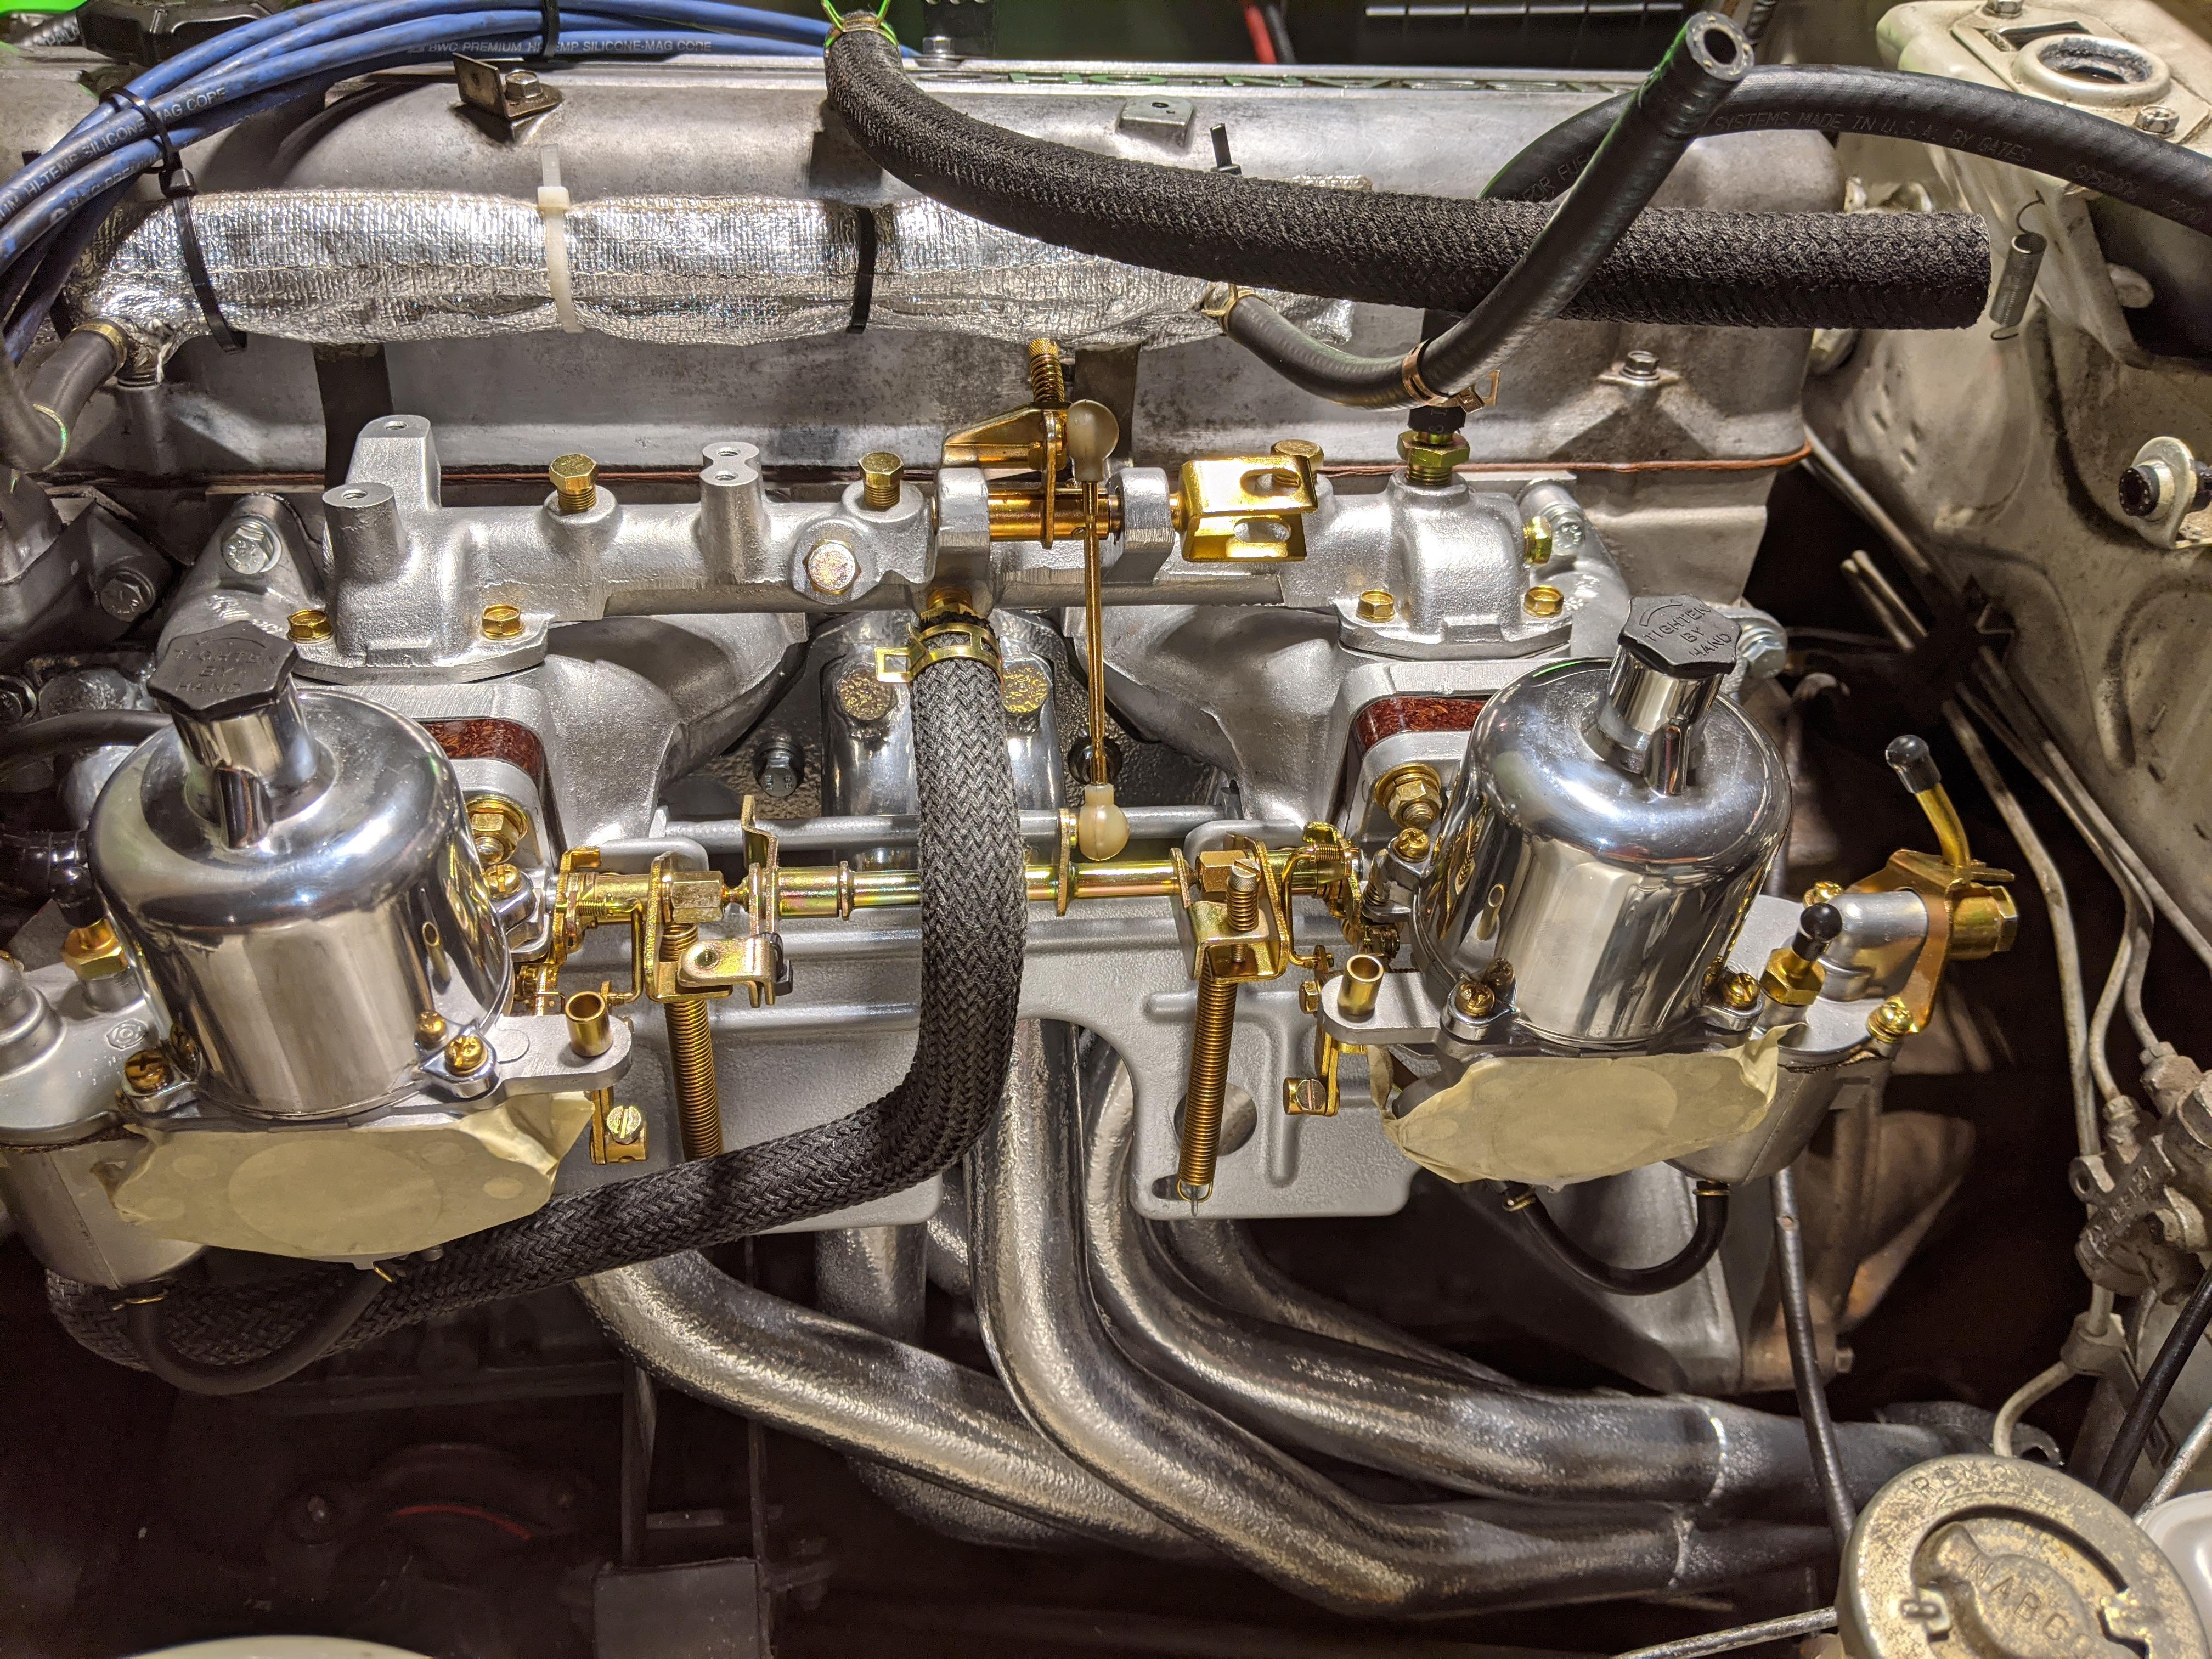
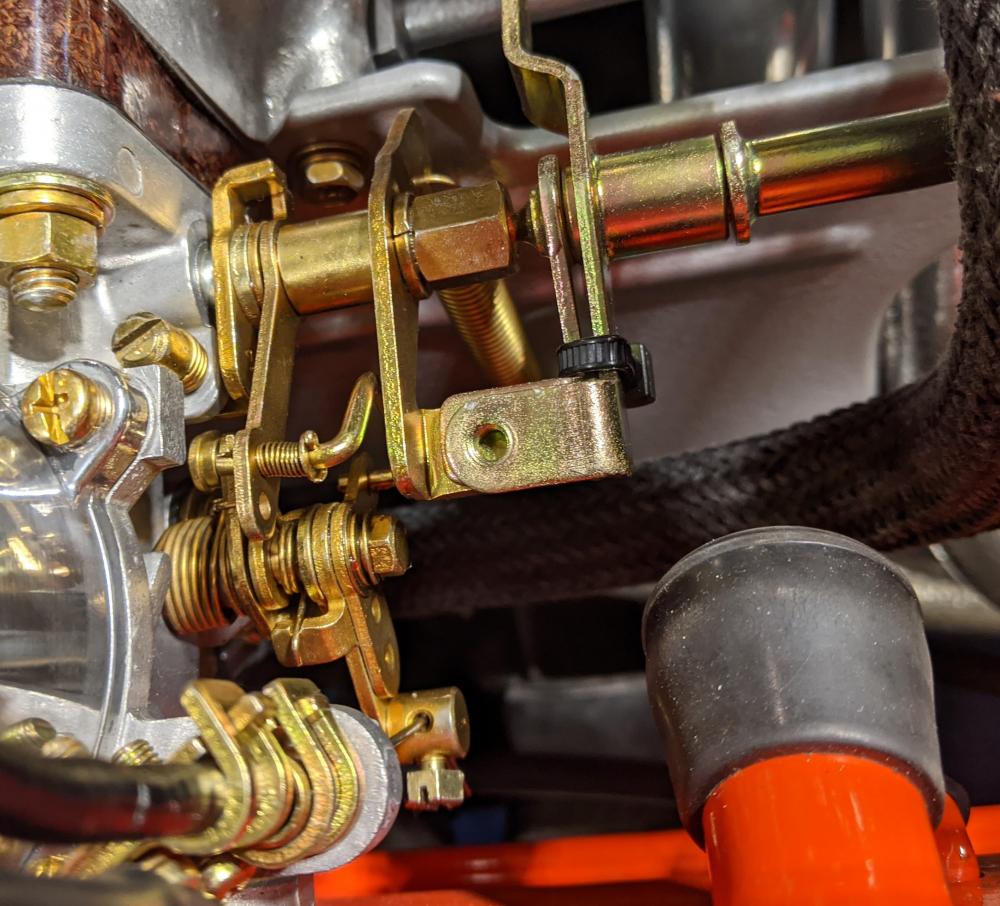
Interesting stuff. Now I understand the role of it and why the zip tie. I'll live with it for now. Been trying to get the balancing and tuning going. I've never tuned a carb so I'm drinking from the firehouse. I think I got it better today. Here's the pic of the new under the hood. Shiny! I used a Colortune on the middle spark plugs (2 and 5) to see if I could tune the mixture with it. Anyone used it before? It worked fine for a while then it seemed to just show me yellow (too rich) all the time no matter what I did. Eventually I just screwed the mixture nuts all the way up and backed them down about 3/4 full turn.
-
Starting Carb Conversion: Flat Tops to Paltechs
Dadsun replied to Dadsun's topic in Open Discussions
Ok, this is good stuff. So, #10 for air flow balancing. In going back and forth between that other article and the service manual I have, the same terms are not always used for each adjusting screw/nut. Btw, I do have a screw to put in the vacant hole ... From my flat top linkage "junk pile".
-
Starting Carb Conversion: Flat Tops to Paltechs
Dadsun replied to Dadsun's topic in Open Discussions
So, if I understand that correctly, the missing screw is needed for the air intake balancing work? Argh. -
Starting Carb Conversion: Flat Tops to Paltechs
Dadsun replied to Dadsun's topic in Open Discussions
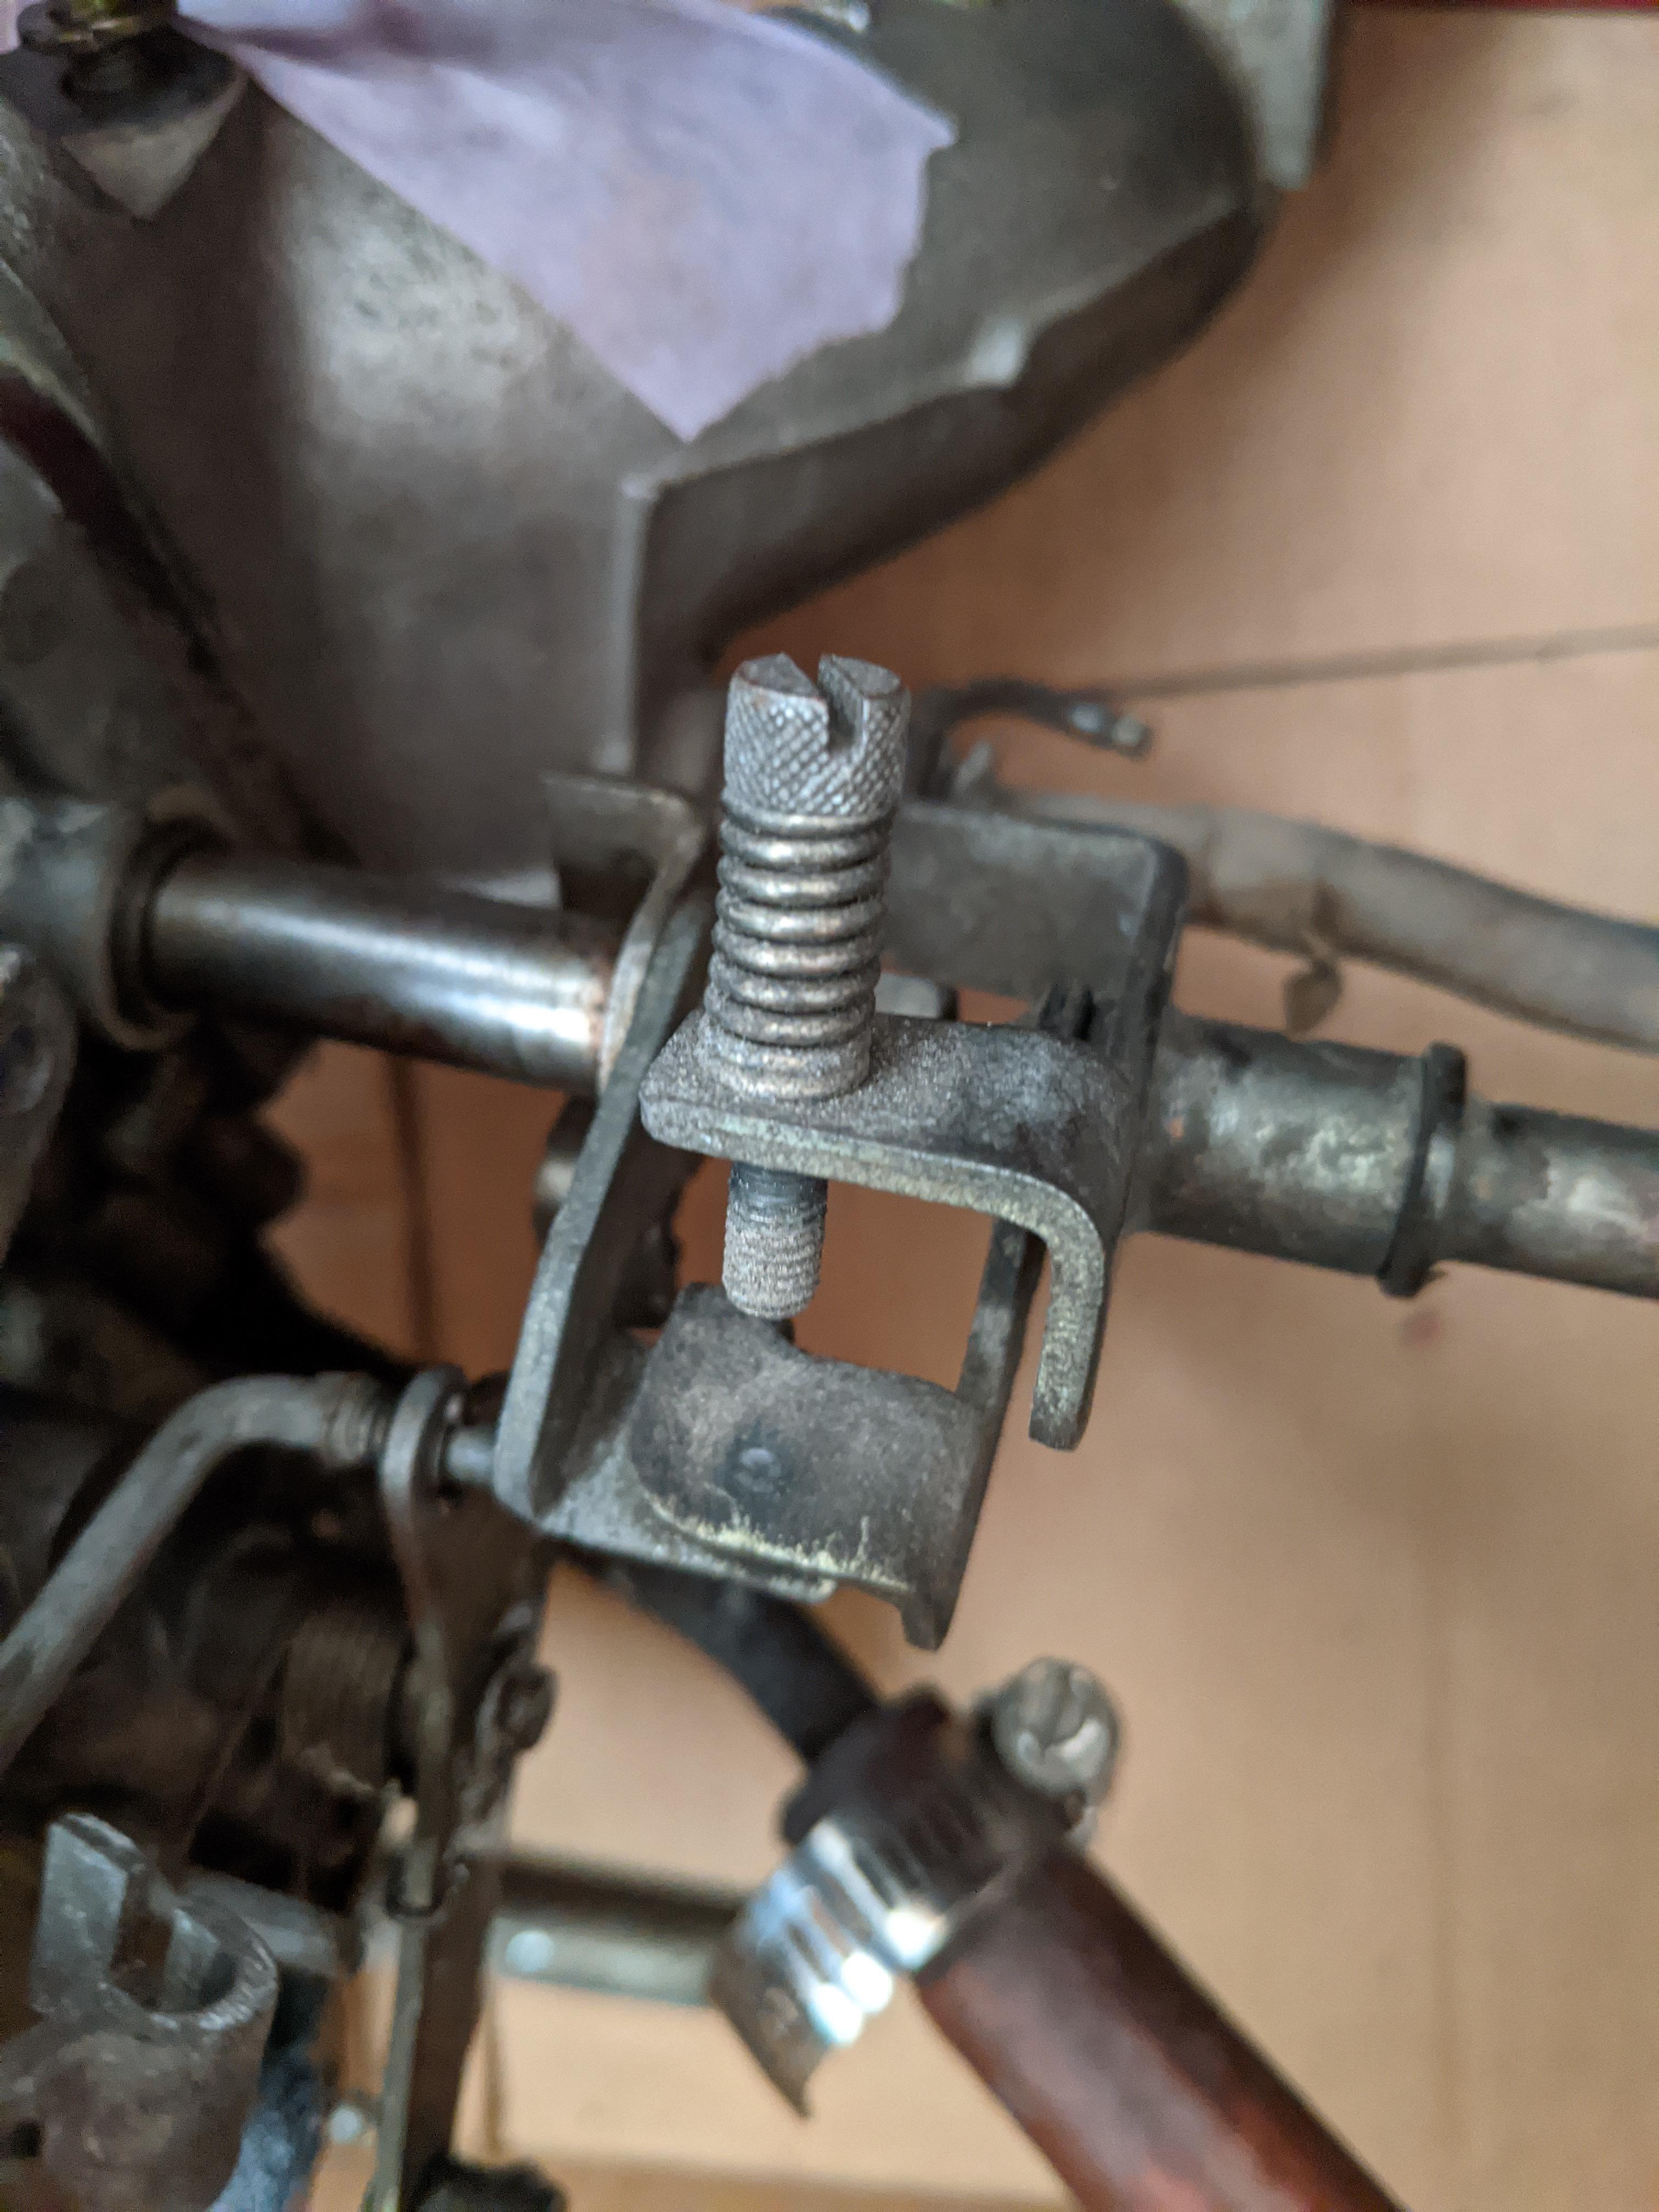
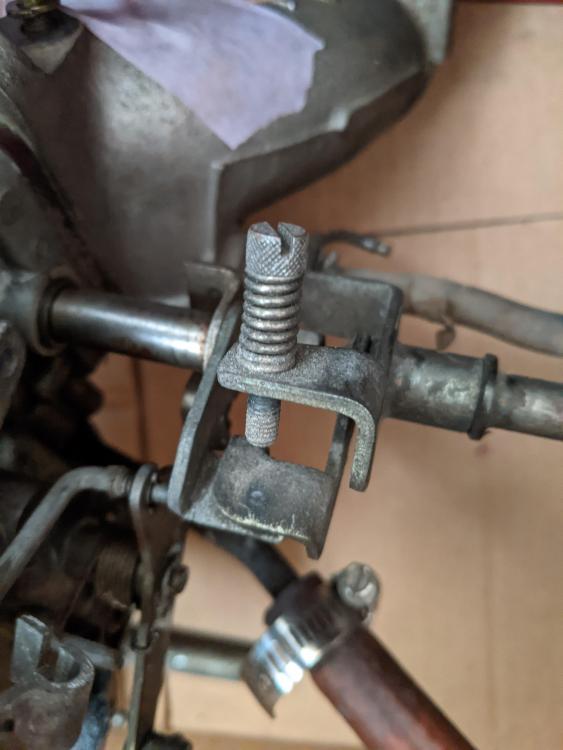
Ok, I'm looking at the Quick and Dirty SU Tuning thread. For balancing it says: "2. Warm up car and remove all linkage connections so that the carb's throttle plates are resting on their set screws. 3. Adjust each set screw so that the suction felt when you put your knuckles against the throat of each carb and feel the air flowing between your fingers is the same on both carbs." ... Is the set screw the same as the throttle adjusting screw on each carb? Also, my setup came with no screw in this place (next to zip tie in pic) that looks to be opposite the balance screw. The guy who refurbished them said no screw necessary there.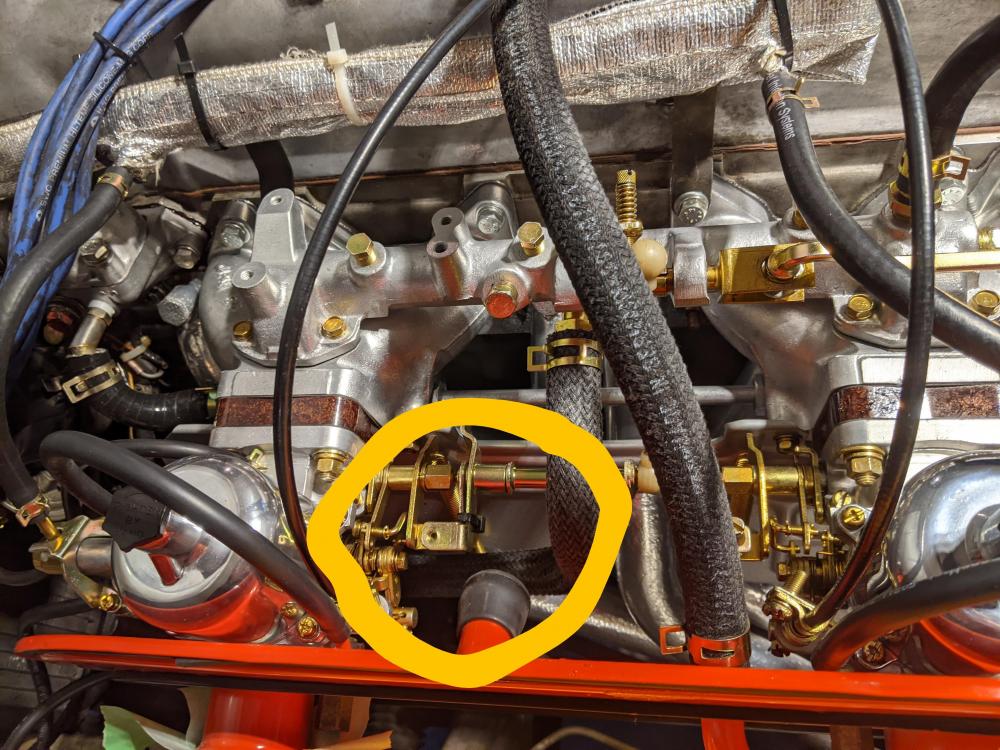
-
Starting Carb Conversion: Flat Tops to Paltechs
Dadsun replied to Dadsun's topic in Open Discussions
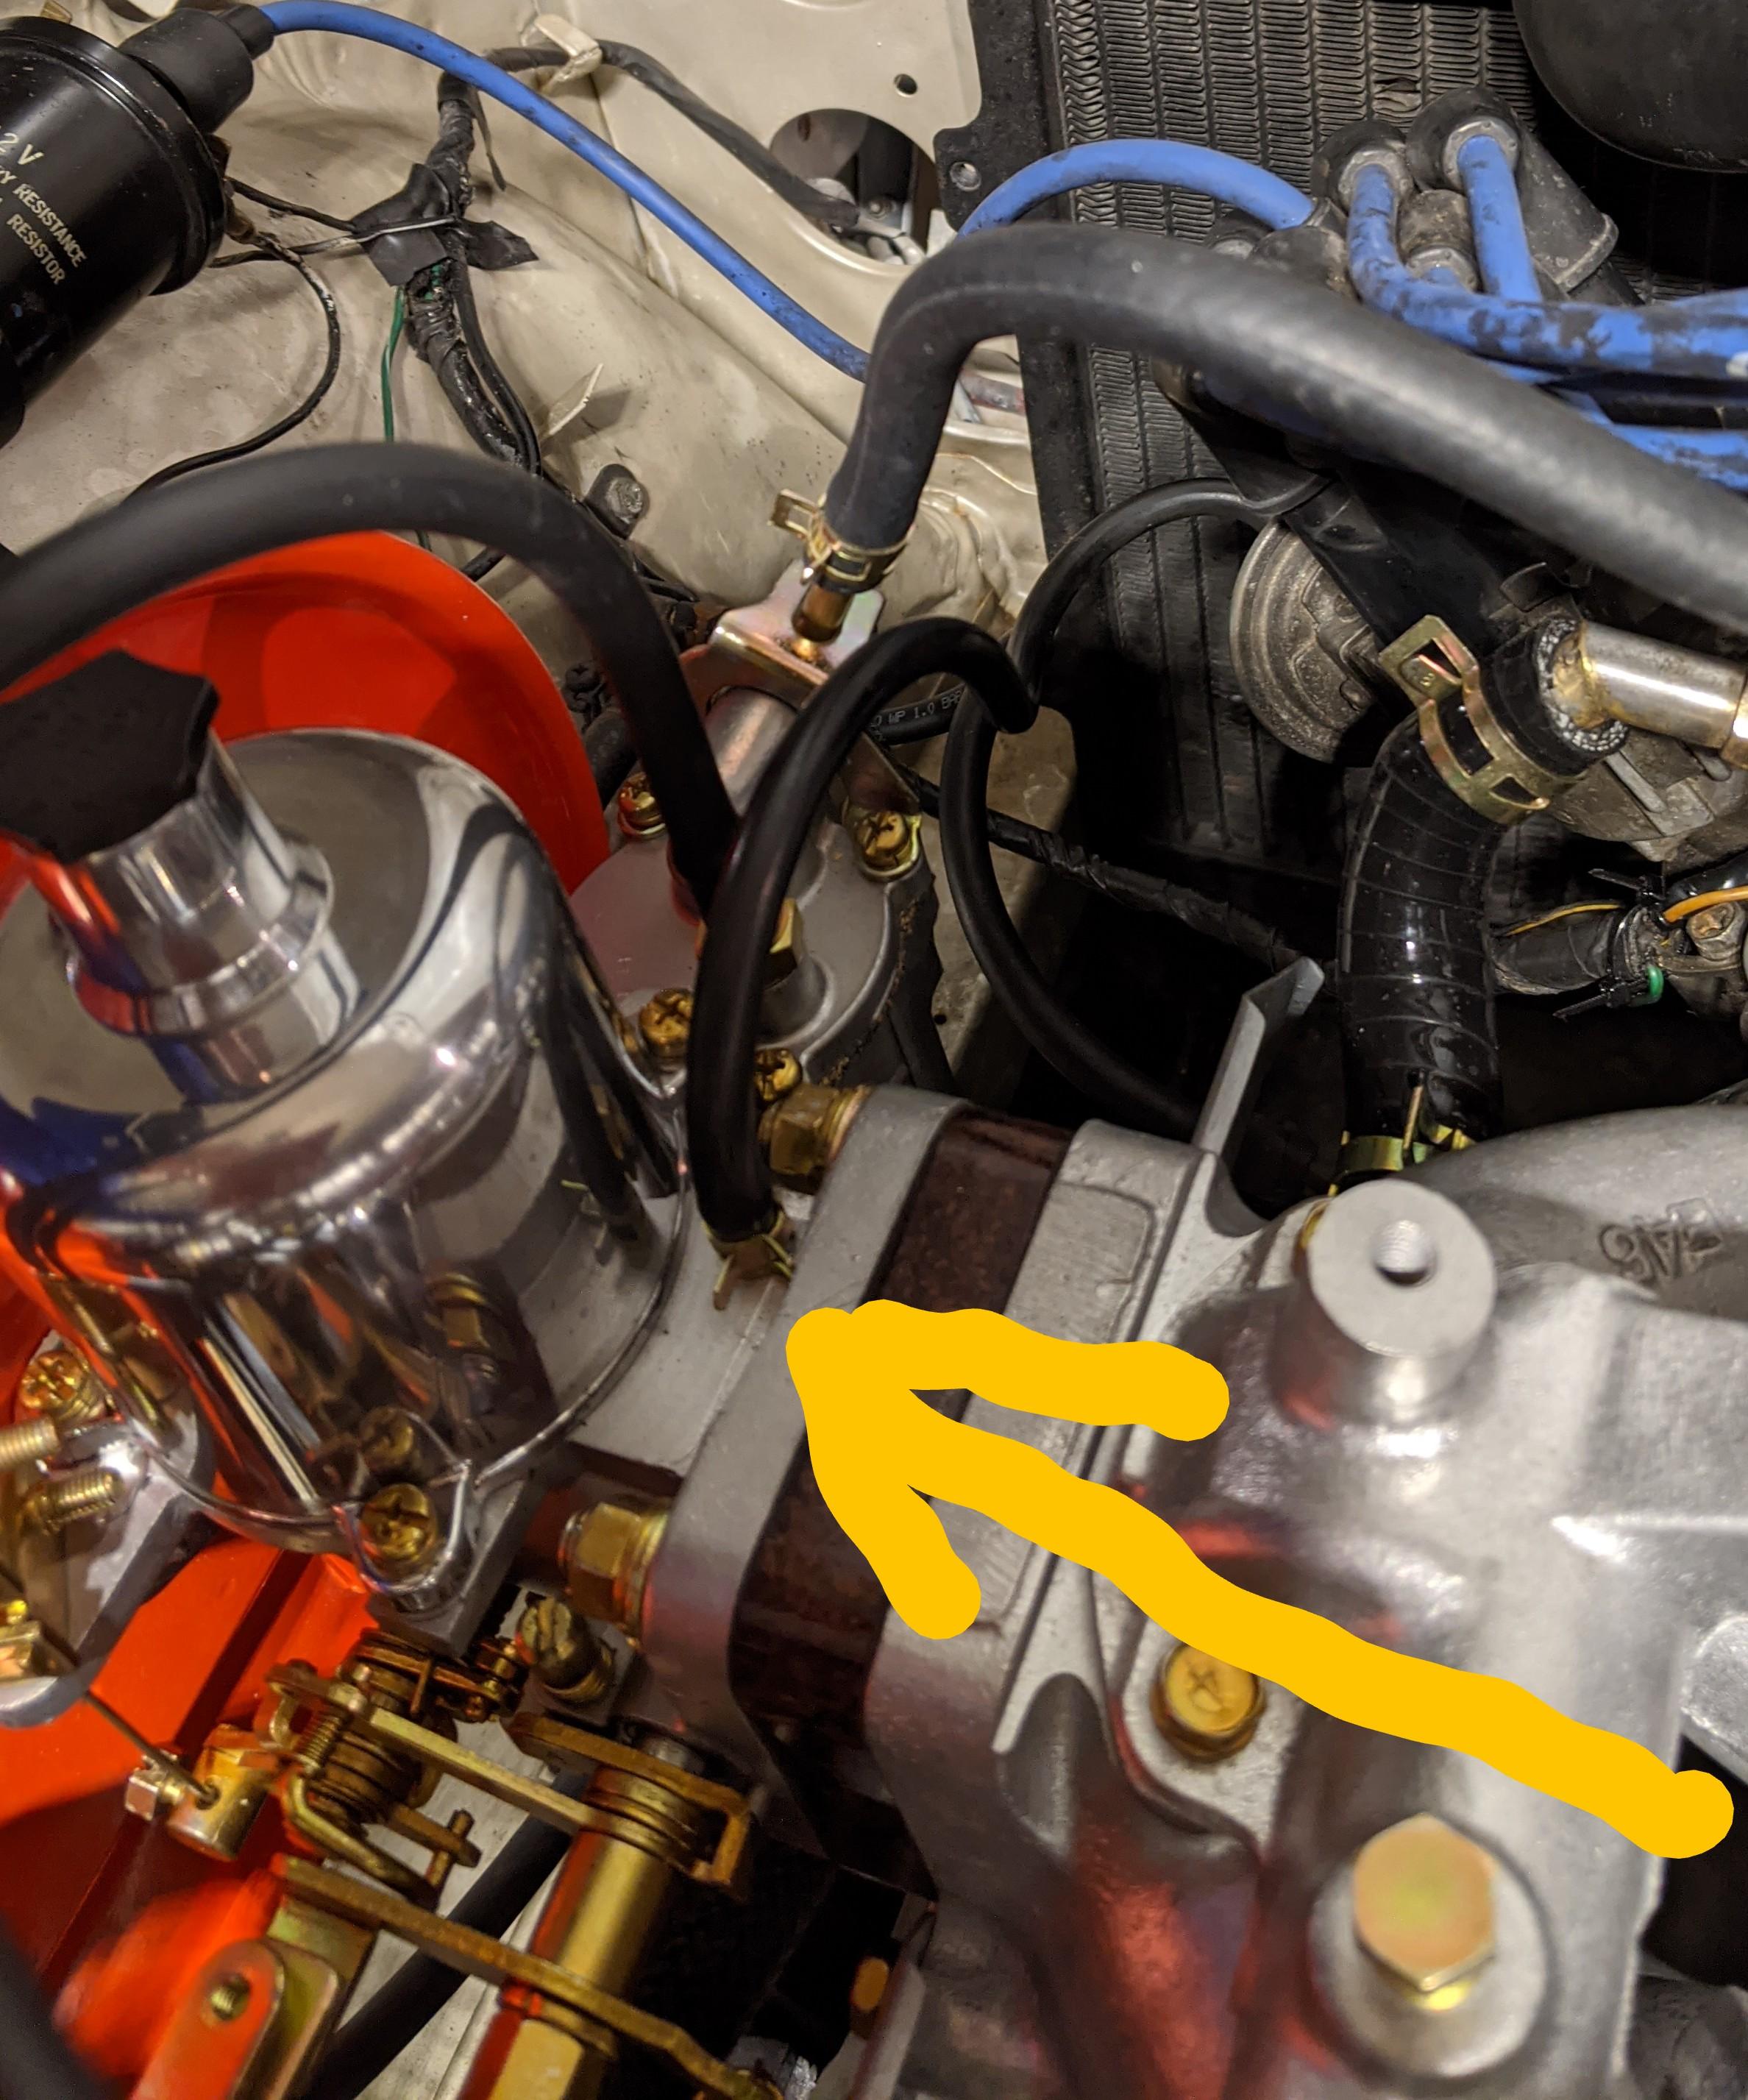
I have a line from that nipple to the distributor, so I think that's the correct setup. See pic.
-
Starting Carb Conversion: Flat Tops to Paltechs
Dadsun replied to Dadsun's topic in Open Discussions
Well, the carbs are on, no leaks, and it starts every time. Progress! Now I need to tune them. I have a Uni-Syn tool that came with the car. I'm getting no air draw on the front carb, just the back. Is that normal? I have a service manual and saw some old threads here on tuning/balancing, but if y'all have a go-to reference please pass along.
-
Starting Carb Conversion: Flat Tops to Paltechs
Dadsun replied to Dadsun's topic in Open Discussions
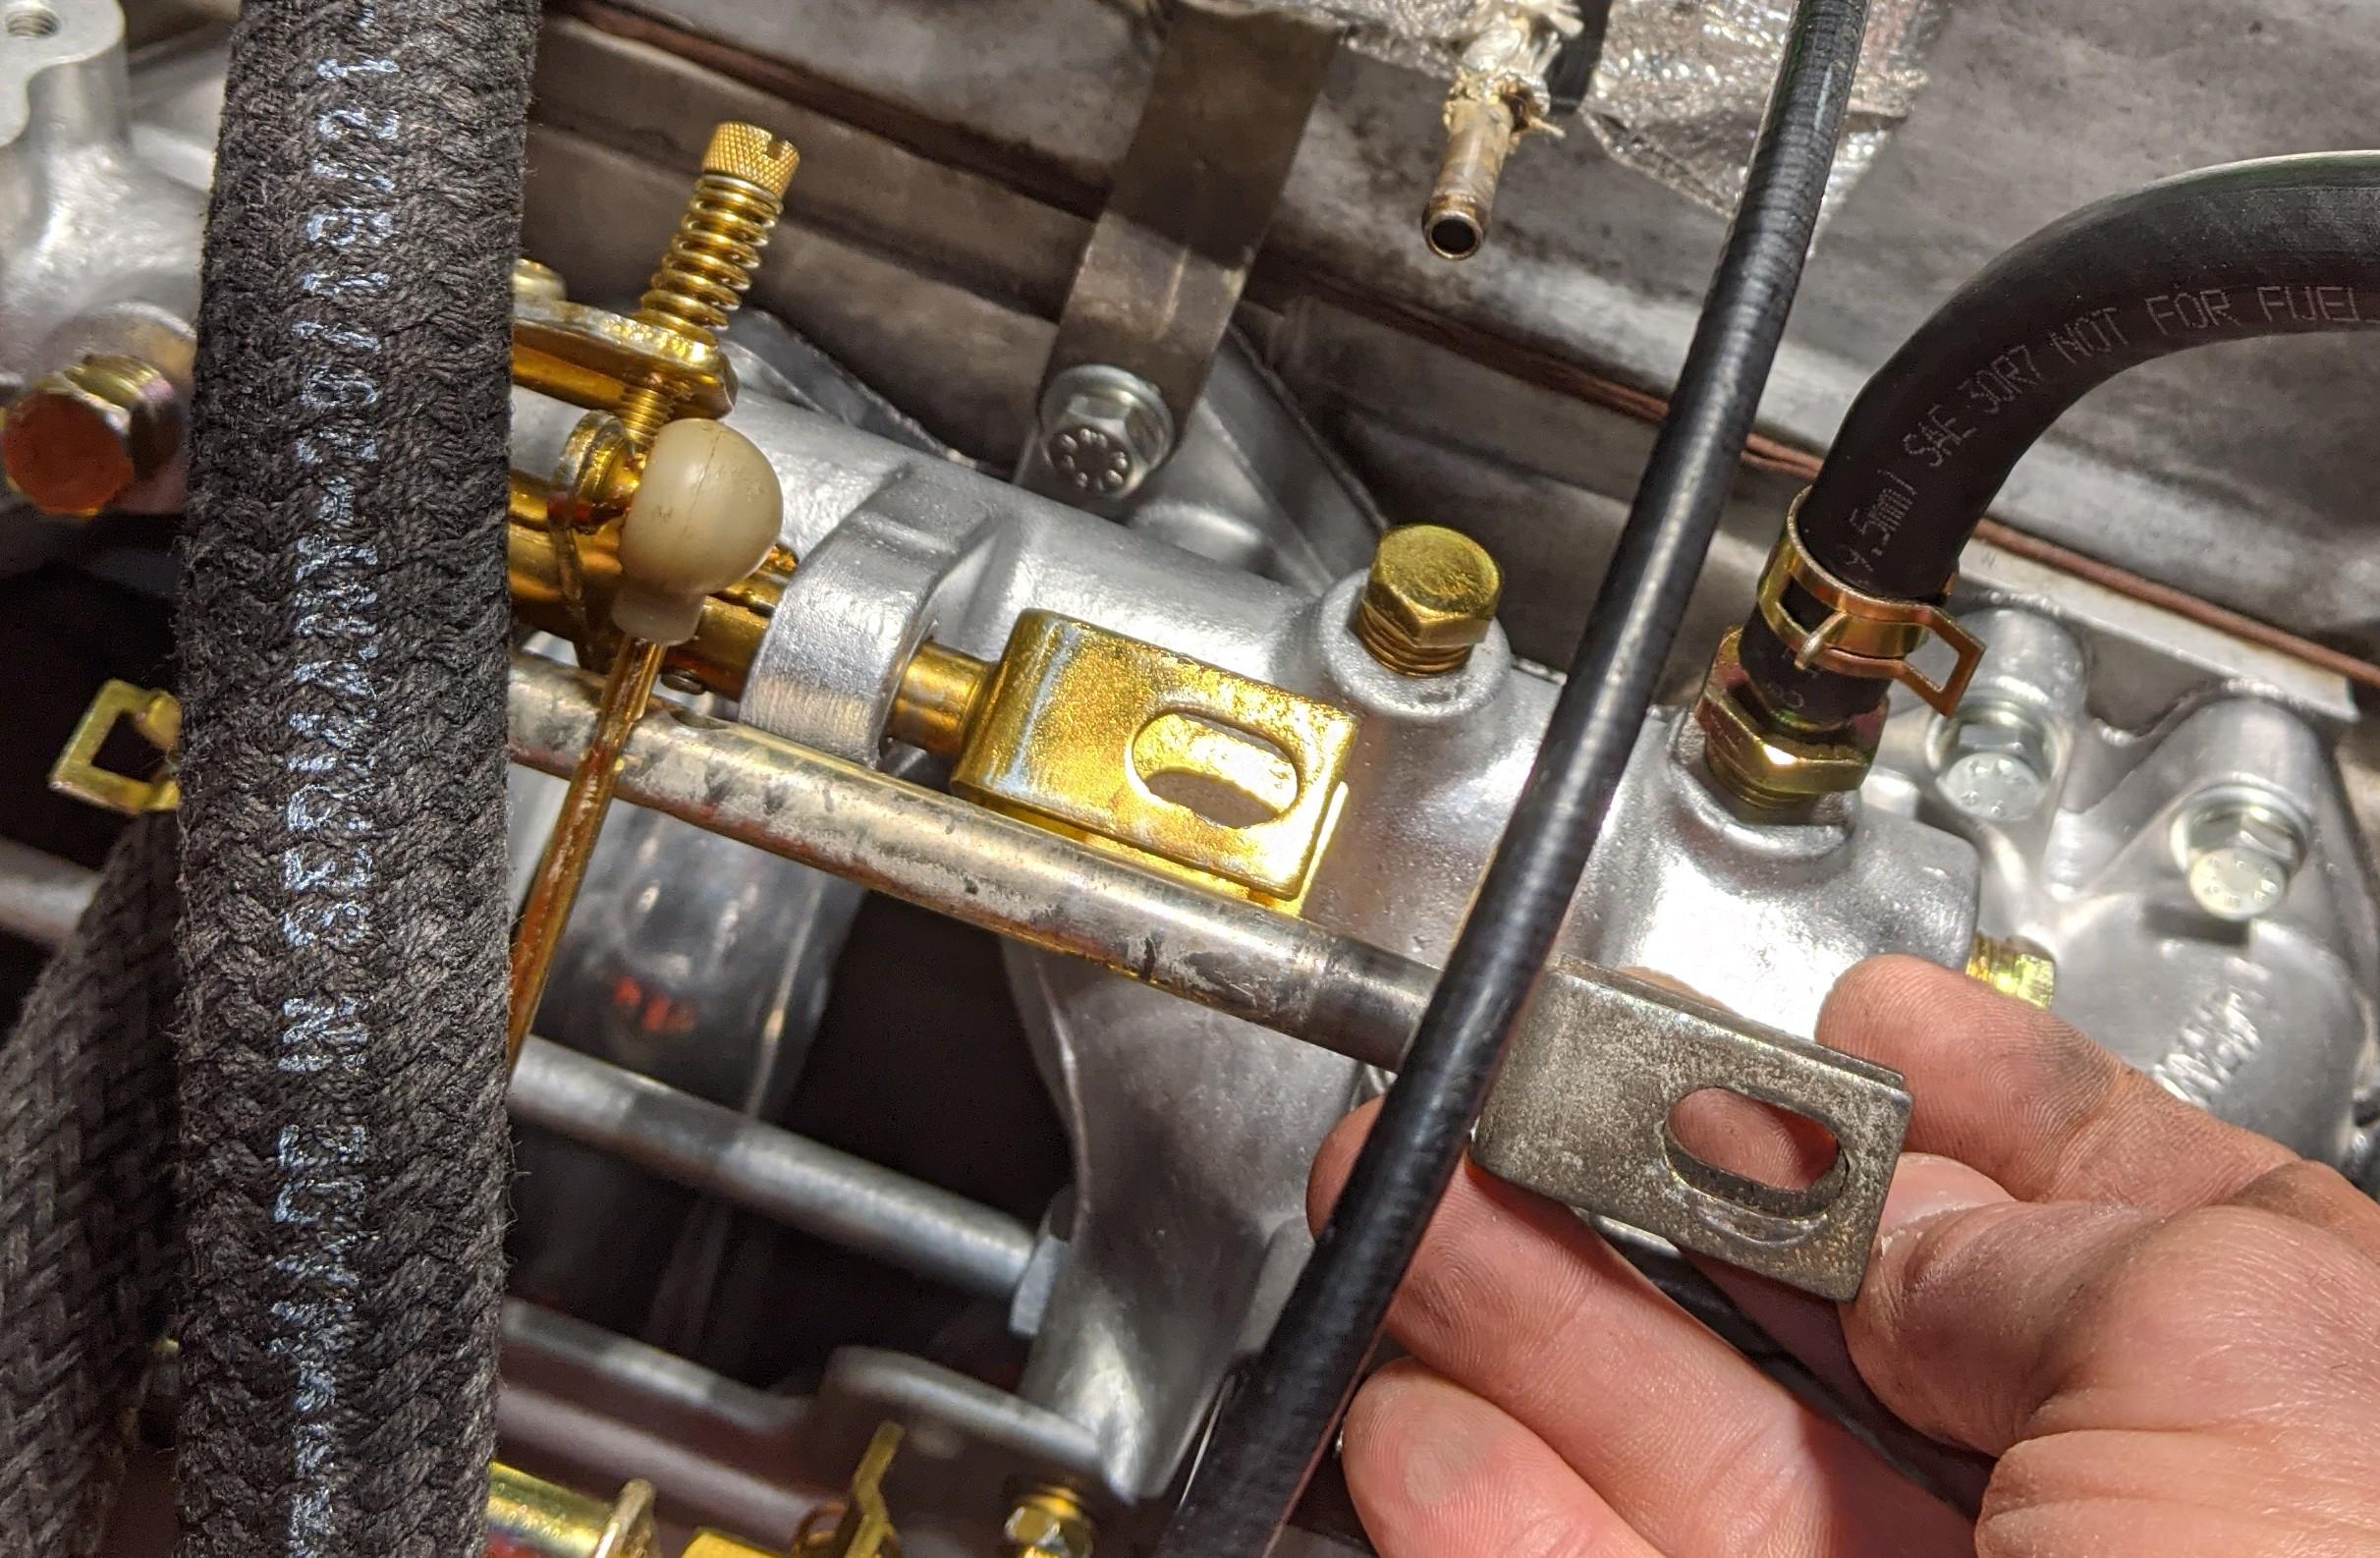
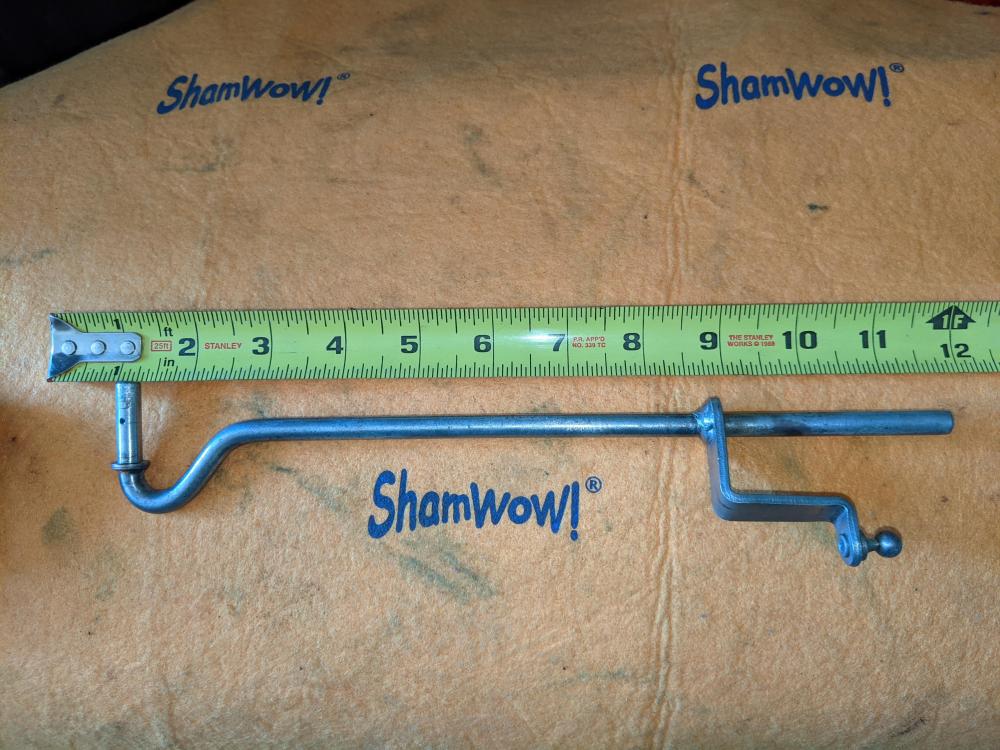
Center to center distance on those two mount holes is 1 9/16".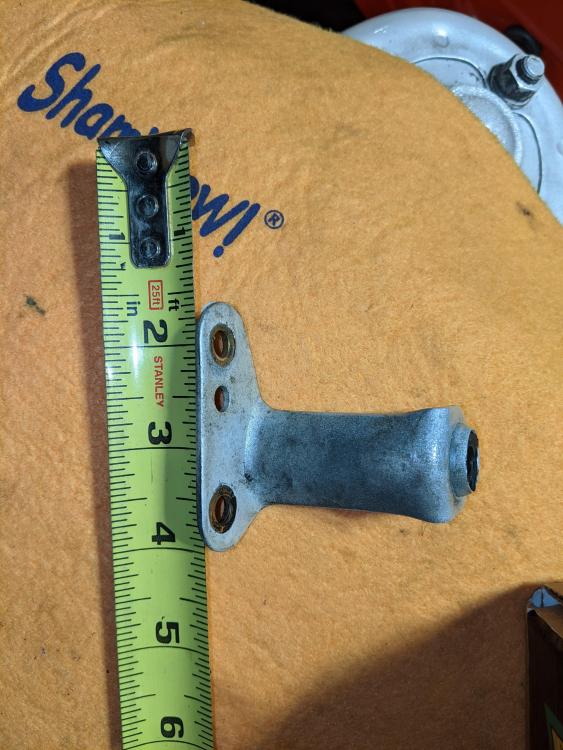
-
Starting Carb Conversion: Flat Tops to Paltechs
Dadsun replied to Dadsun's topic in Open Discussions
Wow,.that's nice. And yes, I'm wondering about the support on the carb side with that longer arm. Here is a picture of the underside. Looks like the middle hole is flipped, but the two outer holes line up.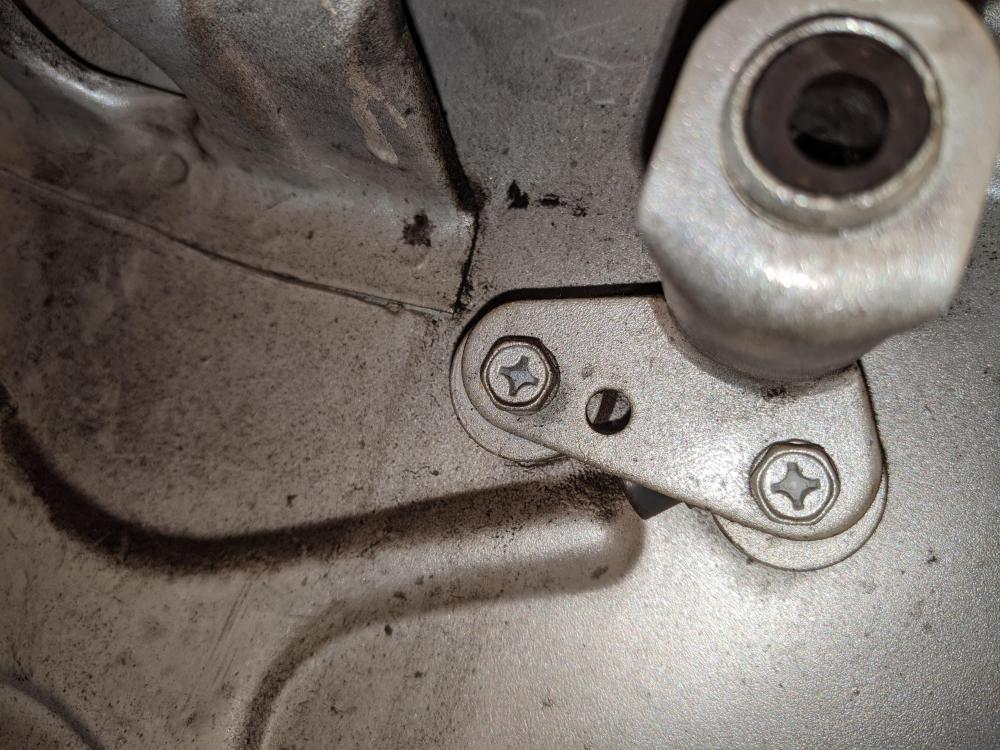
-
Starting Carb Conversion: Flat Tops to Paltechs
Dadsun replied to Dadsun's topic in Open Discussions
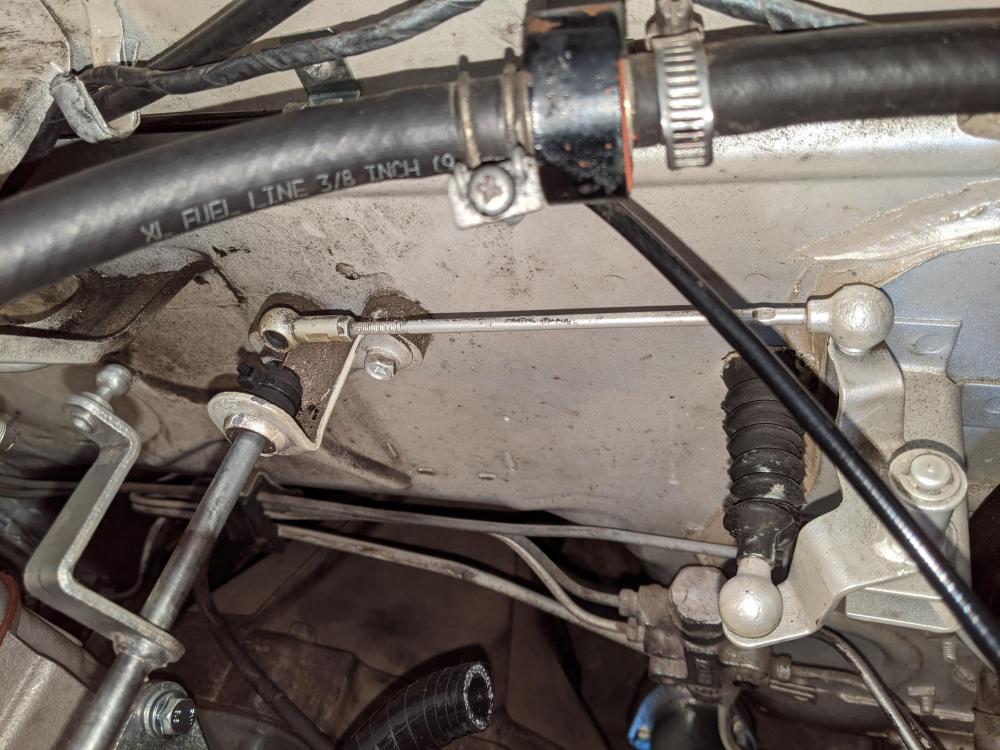
Actually, the old flat top setup's receiving rod adds back the two inches. So, I'll insert that and should be stable enough to do the job. See pic:
-
Starting Carb Conversion: Flat Tops to Paltechs
Dadsun replied to Dadsun's topic in Open Discussions
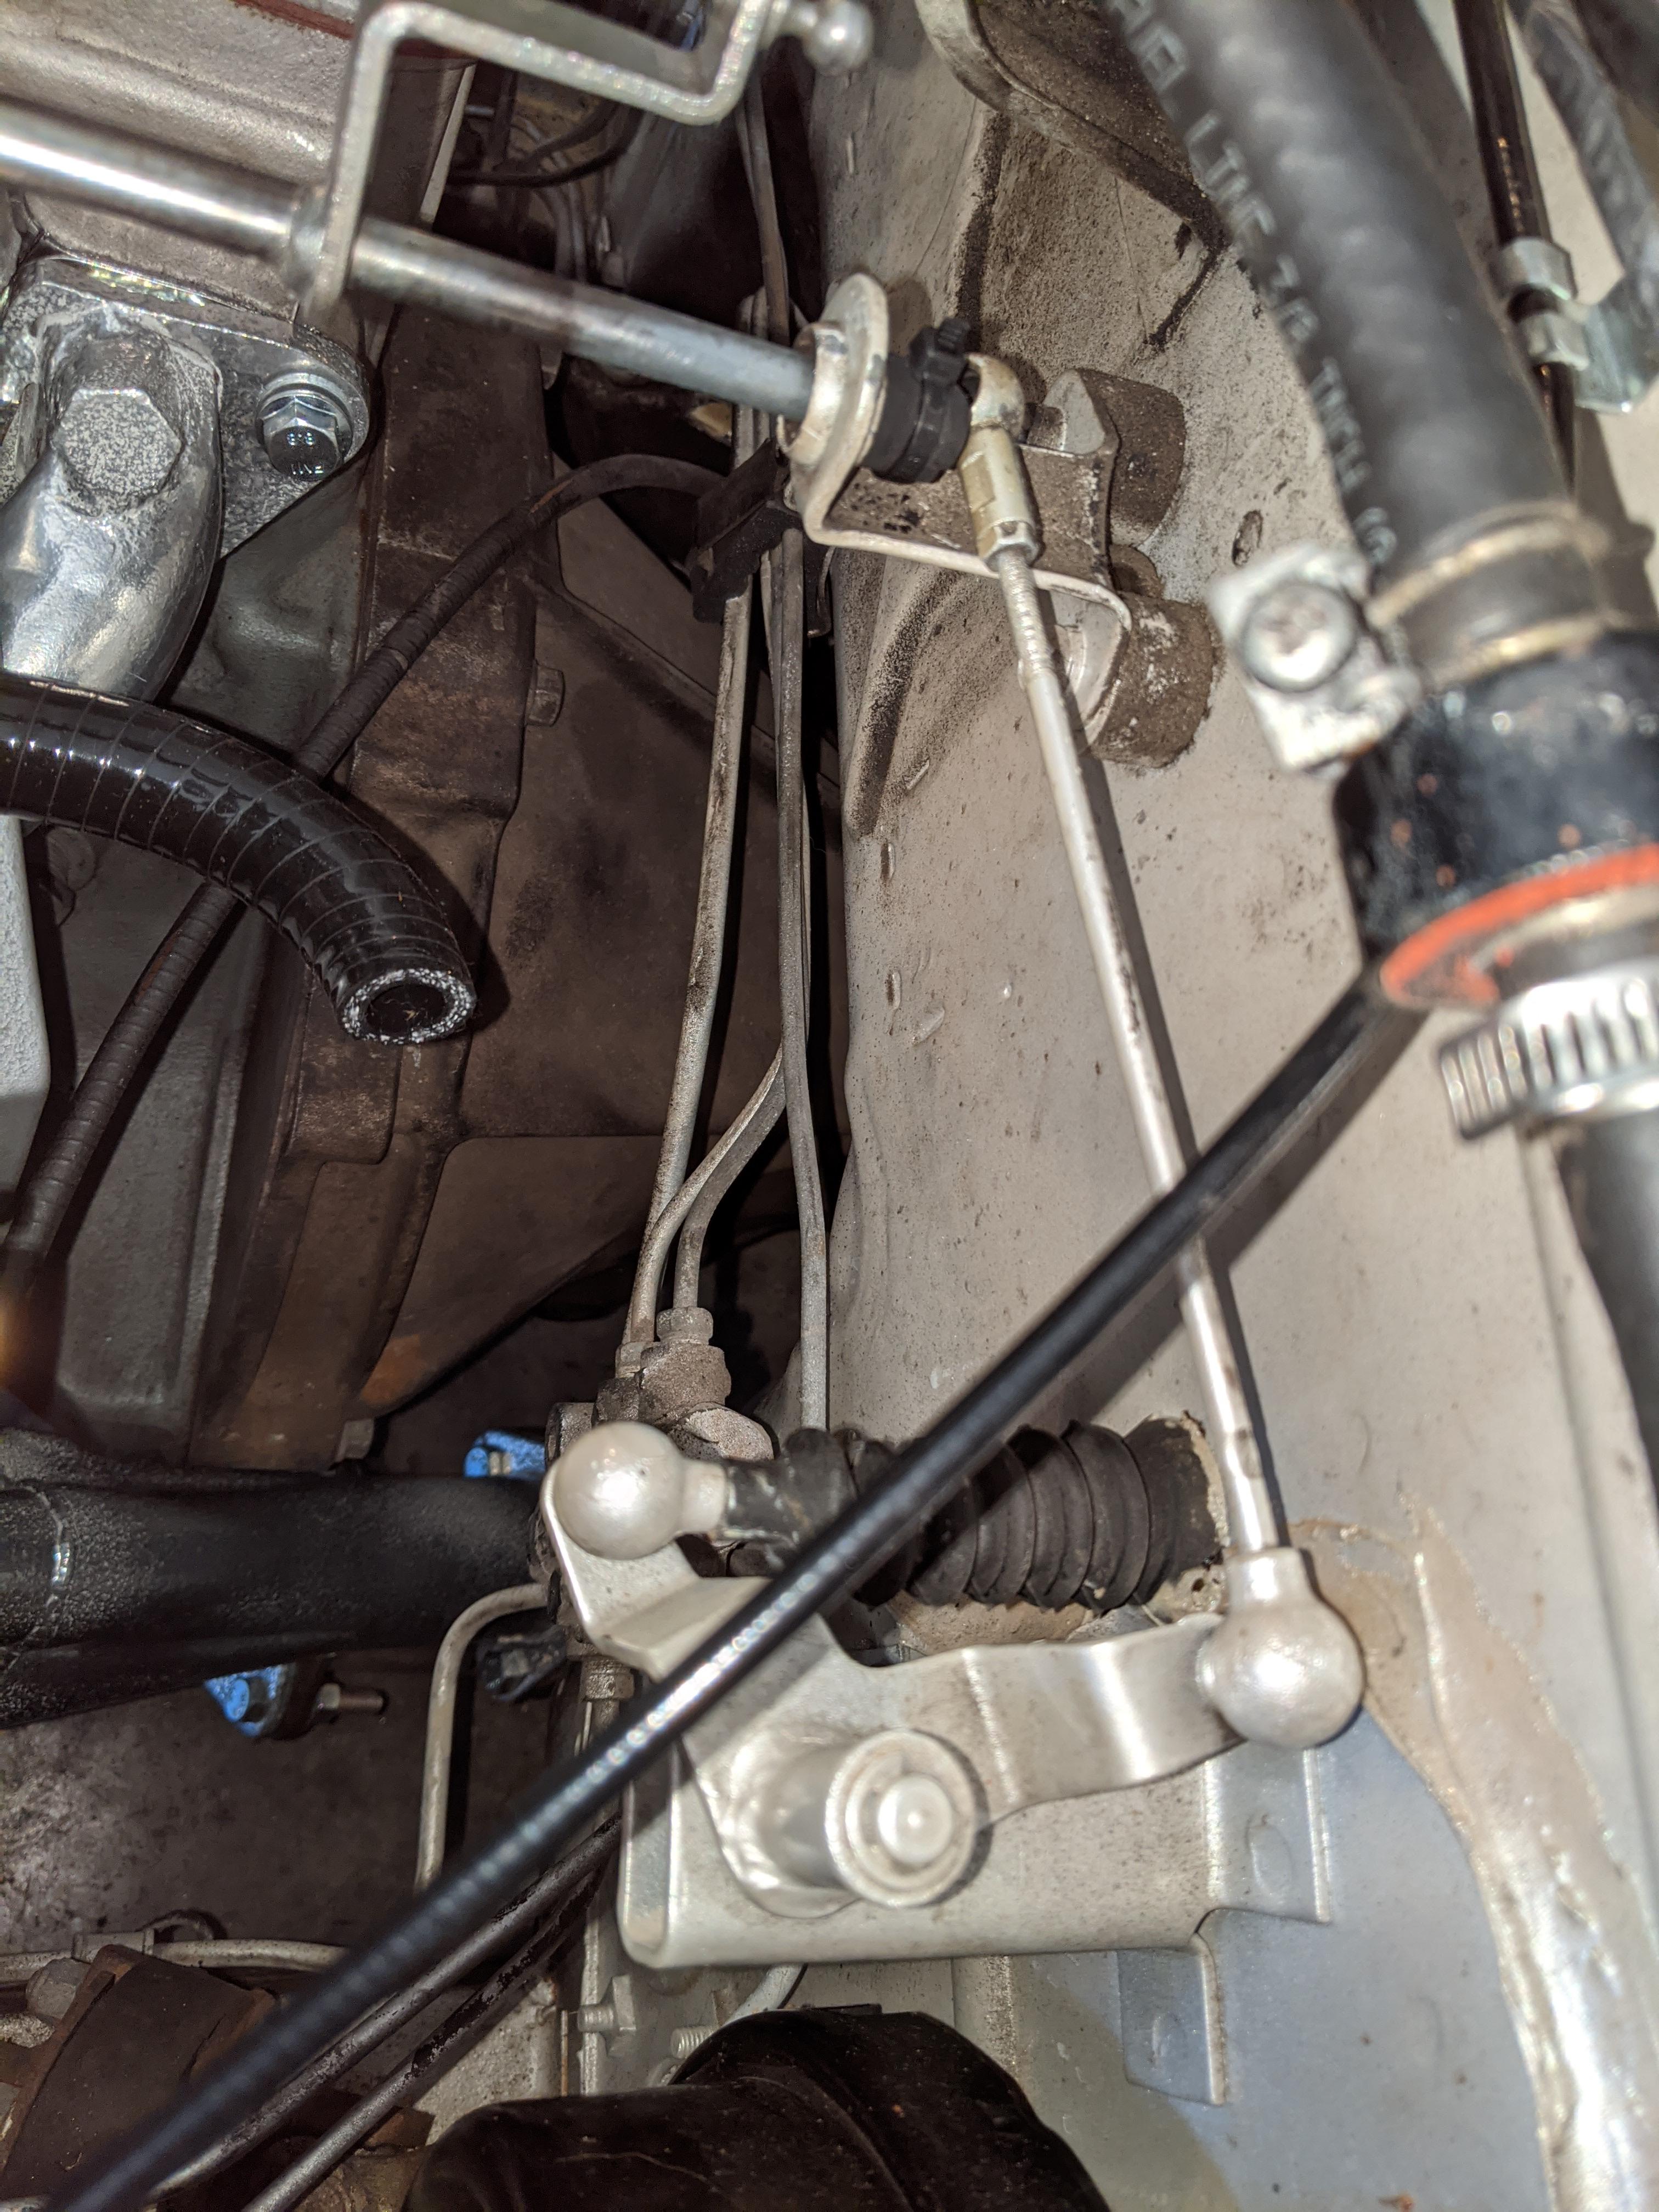
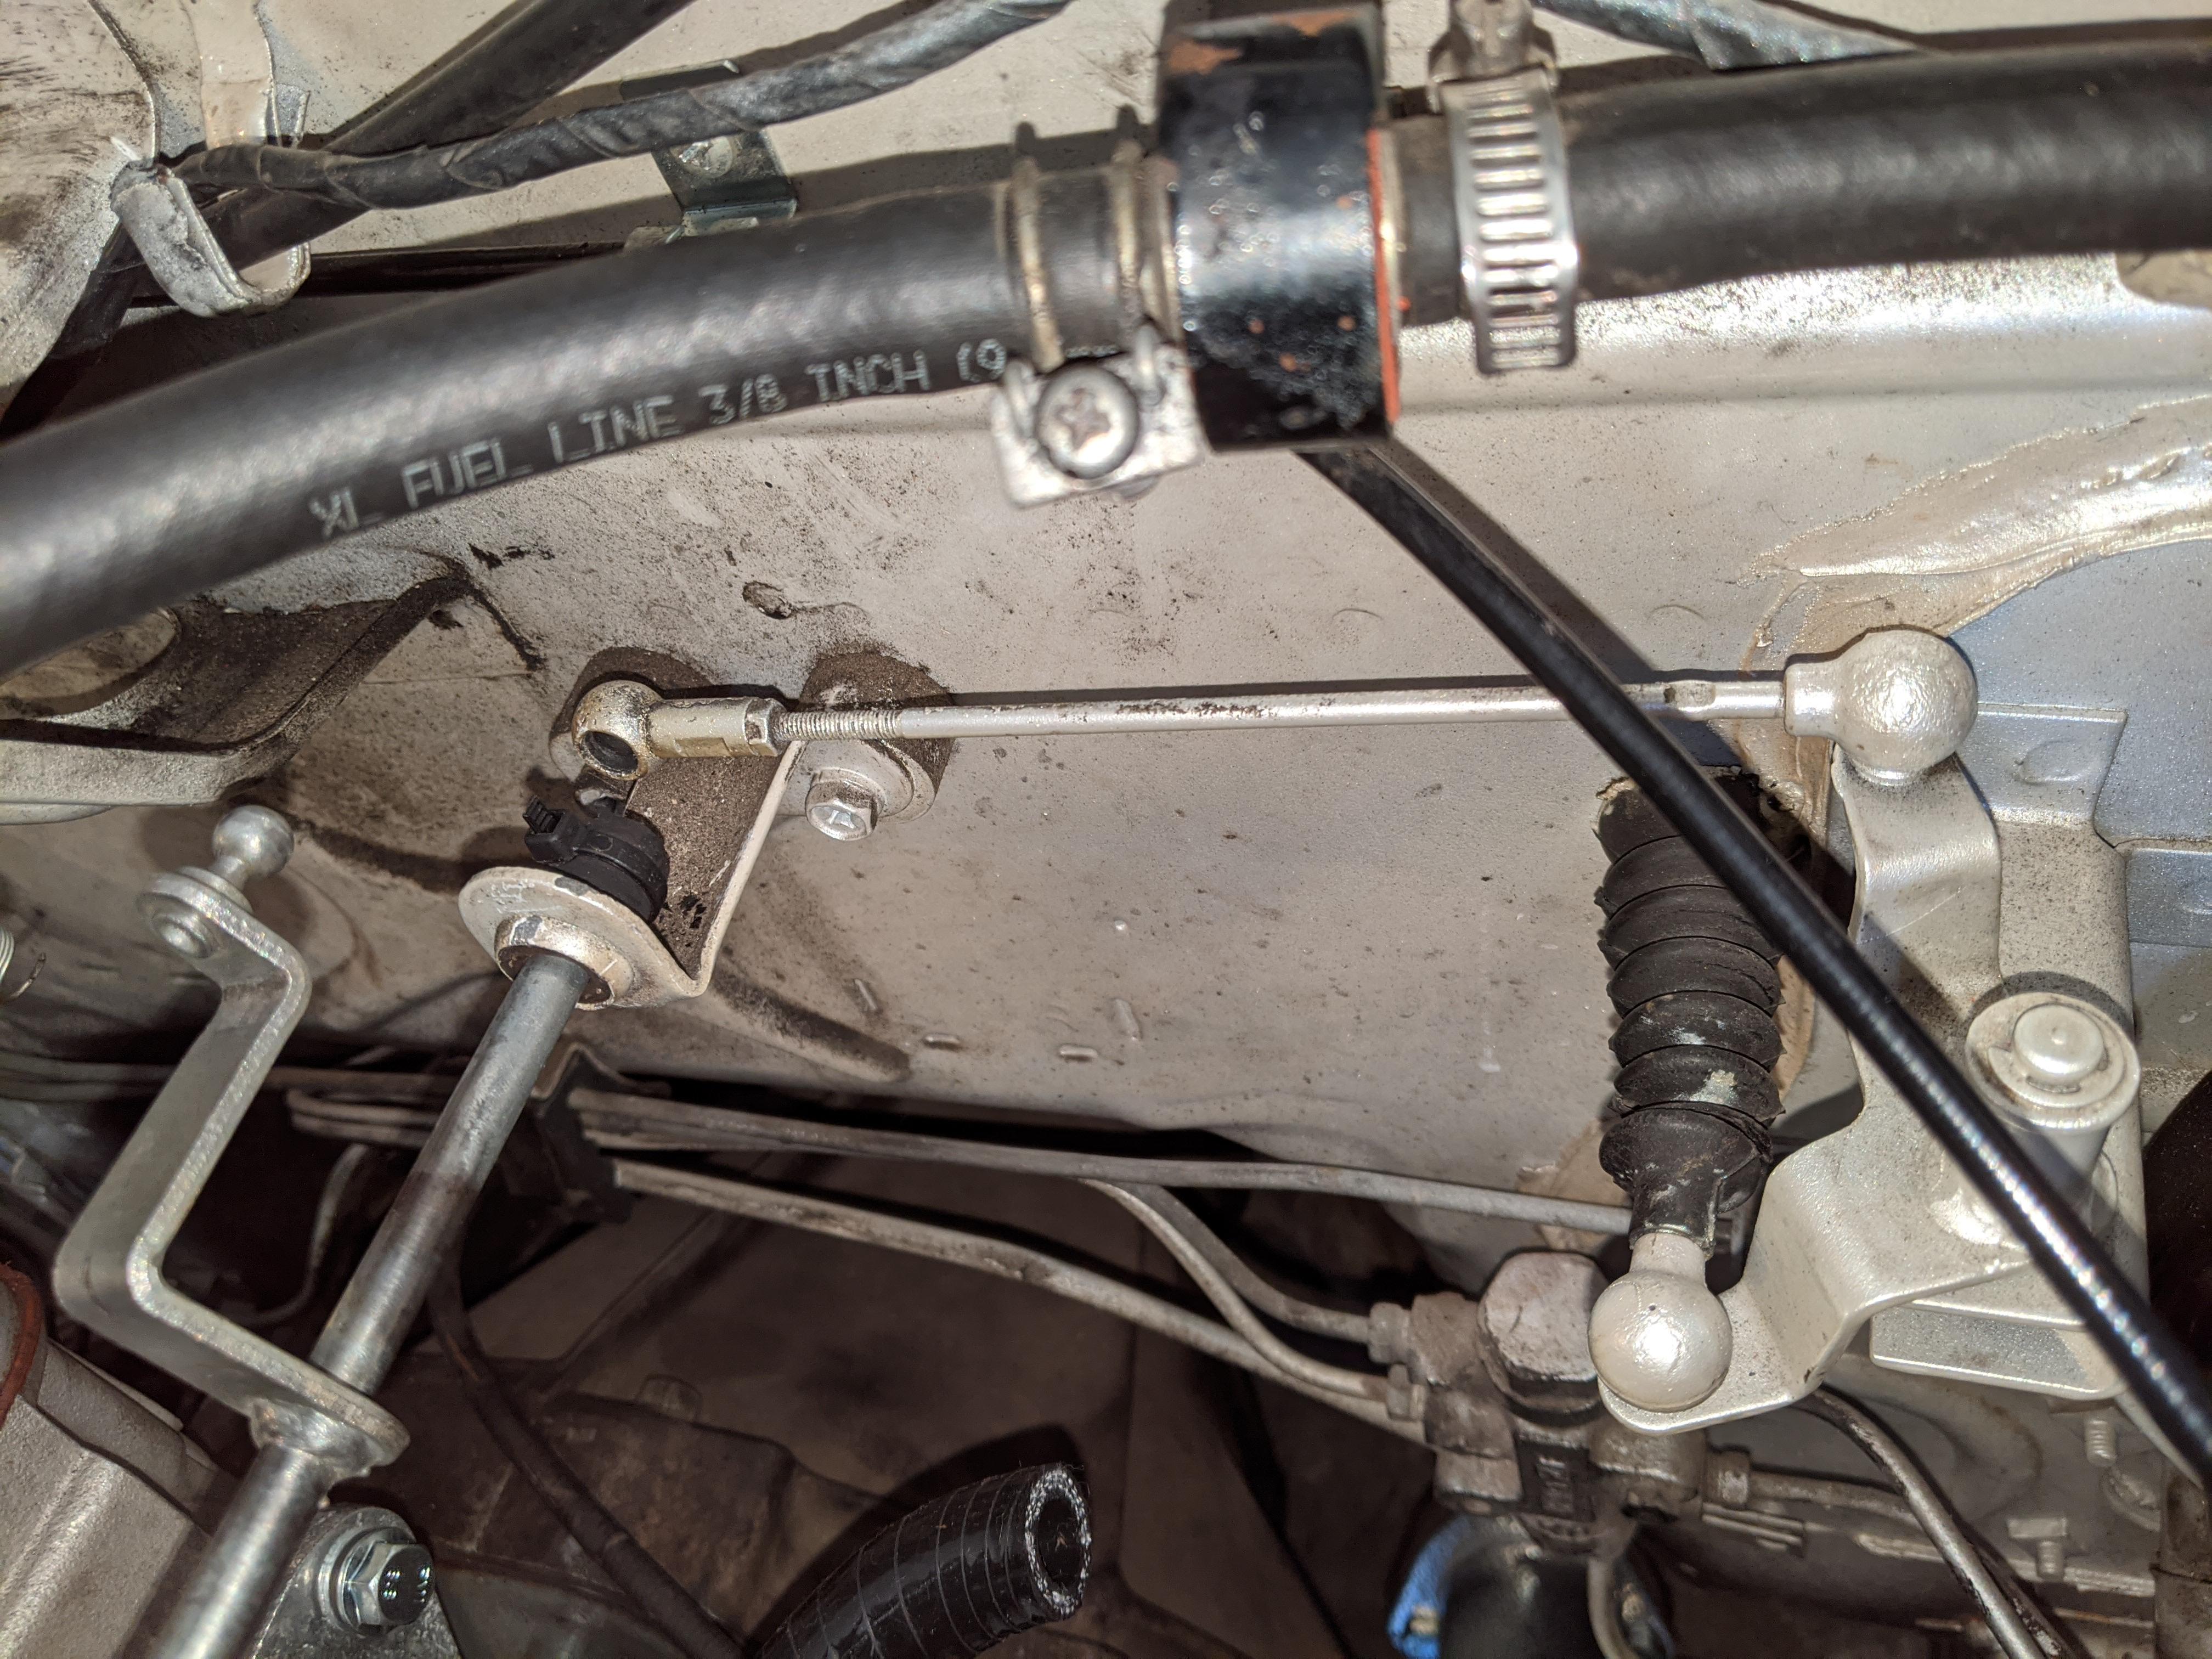
Yes, interested. Thanks. Here are a couple of pics. It looks to me like the shaft is about 2" to 2.25" short on the new setup.
-
Starting Carb Conversion: Flat Tops to Paltechs
Dadsun replied to Dadsun's topic in Open Discussions
Hmmm. Thanks. I was just assuming the way to go for a non-welder like myself would be to affix an extension of the eyes that receive the shepherds hook. -
Starting Carb Conversion: Flat Tops to Paltechs
Dadsun replied to Dadsun's topic in Open Discussions
Getting very close to the finish line. I sometimes, on projects like these, wake up and think about things I've forgotten... Like whether the throttle linkage arm is the same length on both flat tops and round tops setups. Alas, they are not. :-(. Looks like my flat tops arm is an inch or two short for this project. My options seem to be to (a) make an extension, or (b) keep looking for one. In the meantime, here are some pics....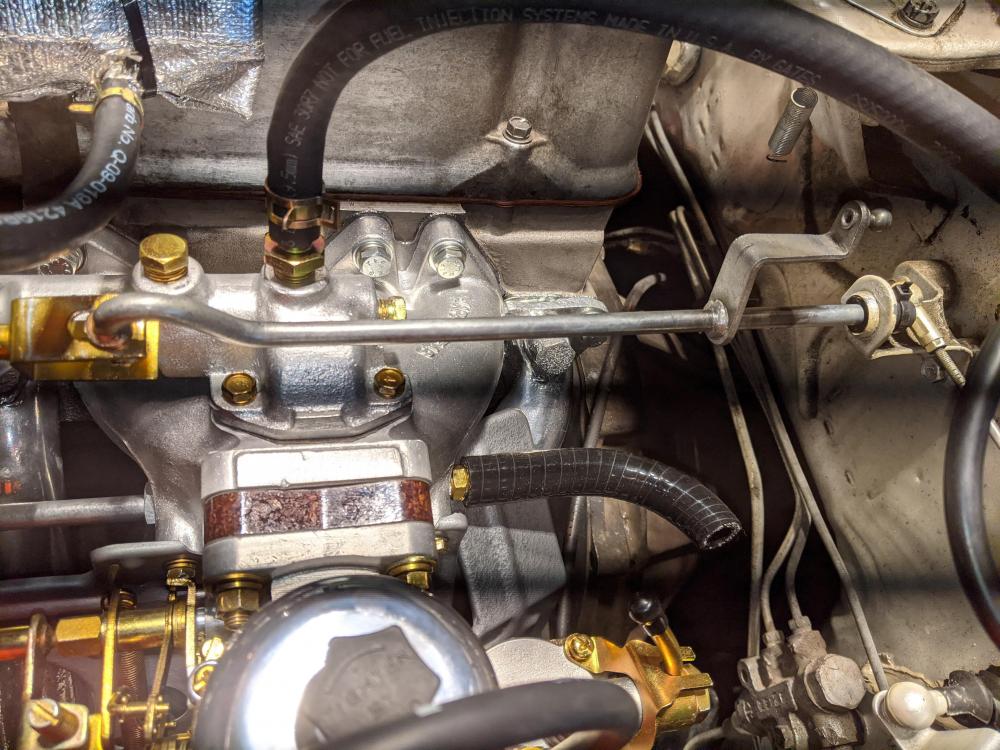

-
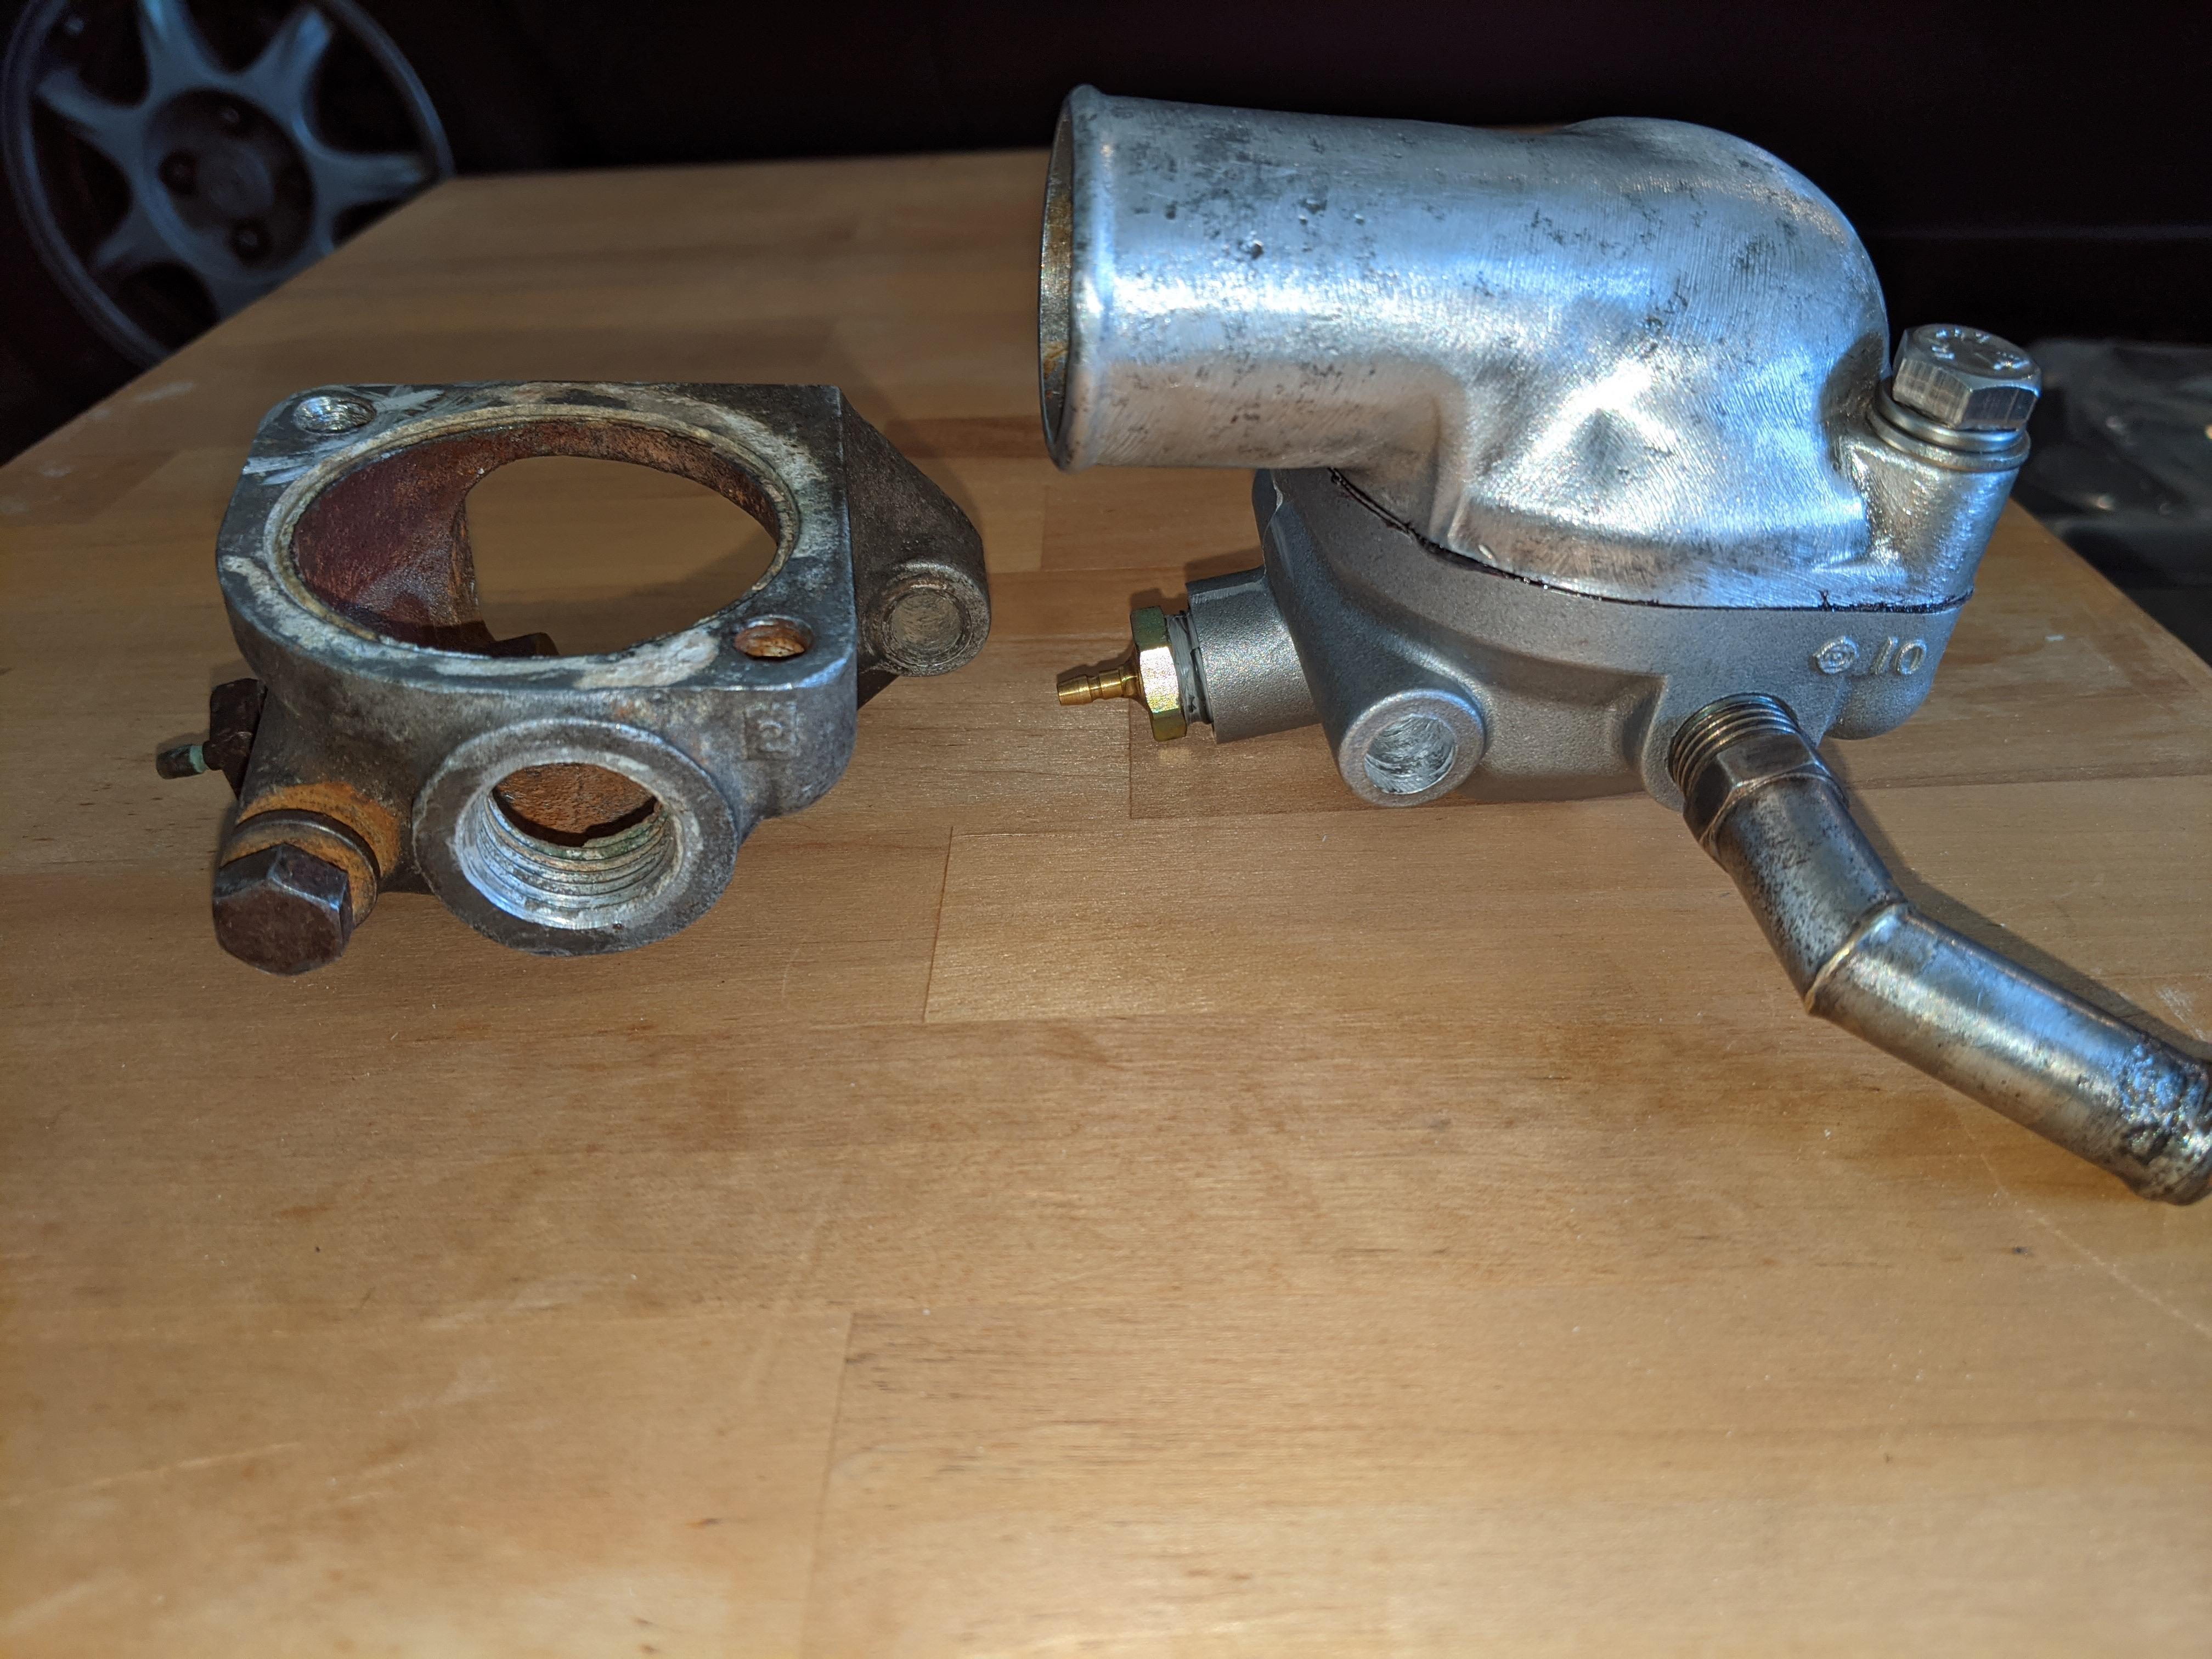
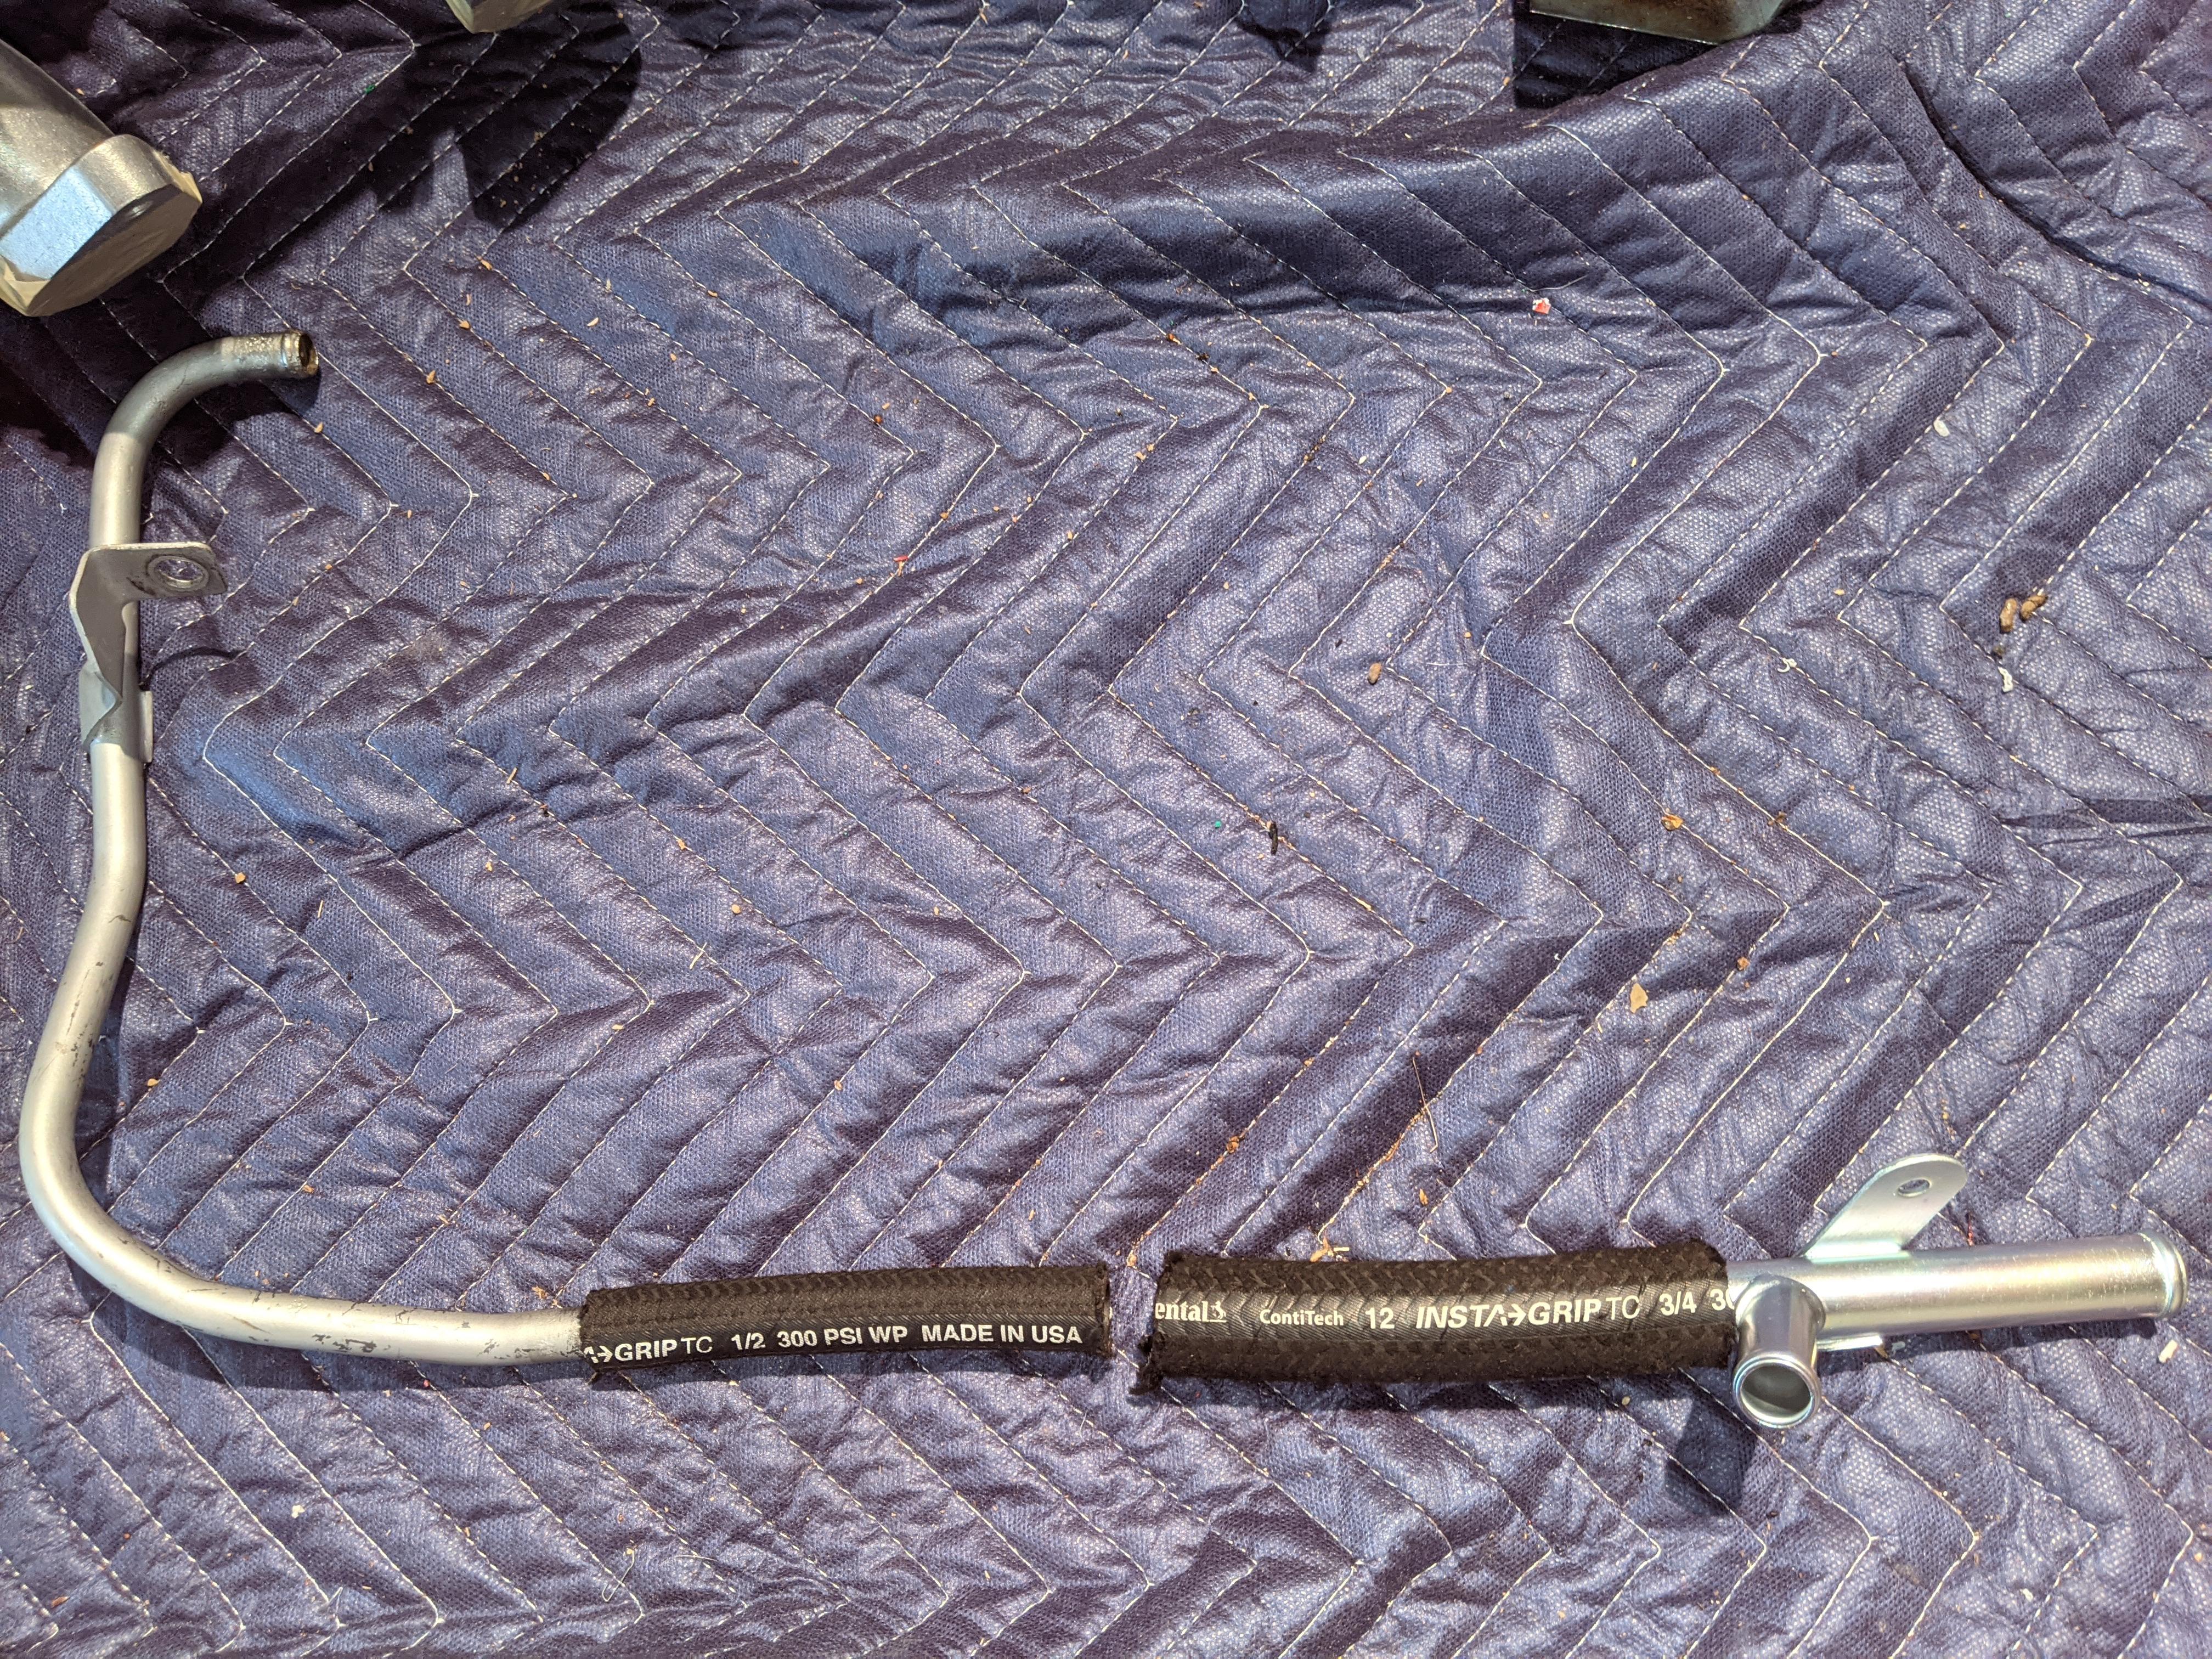
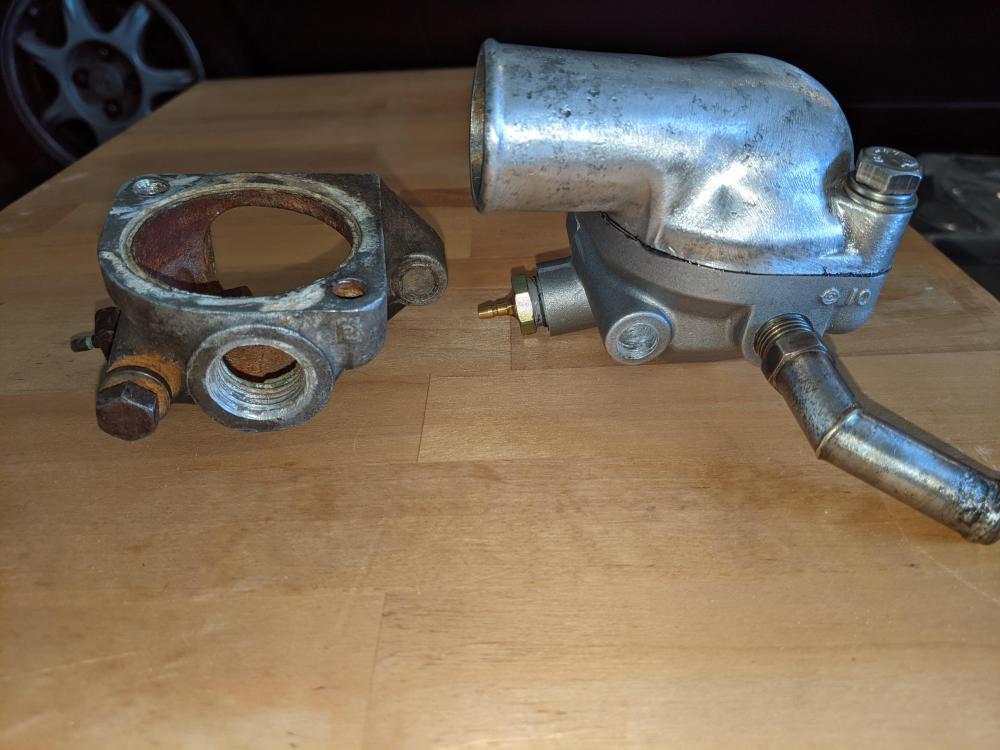
This is exactly what I'm in the process of doing. I came across an old thread where @siteunseen had the very coolant hardline I needed if I wanted to avoid having to plug a bunch of unwanted ports. I was also able to take the old manifold coolant connector off of my flat top setup and screw it into the new thermostat housing I ordered. It was a much smaller threaded opening than in my old thermostat. Pic: All I think I need now is the coolant hose reducer segment to go from 3/4" to 1/2" on the passenger side of the engine. Checking my local industrial parts store. Pic:

-
Yep. I didn't have a 9mm tap and I think the hole was too drilled out to take it anyway. Next size up is 3/8". Didn't want to go higher just to be metric because there is only so much meat on that aluminum thermostat housing. Being a purist has its limits.
-
Starting Carb Conversion: Flat Tops to Paltechs
Dadsun replied to Dadsun's topic in Open Discussions
I bought this replacement gasket from Z Car Depot. Is it recommended to use a gasket sealant on this?
-
I was wondering what that was behind the left bolt hole. At first I thought it was a coolant jacket around the engine or something. Here is a pic. I went into it slightly when drilling, but not when tapping threads. Hopefully it's still in the right position.
-
Wound up having to drill out the broken bolt. It has probably been in there decades and was fused in. Had to tap a 3/8" fine thread into the old hole. Key there is to get the same angle so that the thermostat housing sits flush. New thermostat housing should arrive today or Monday, so fingers crossed.
-
I'm now in this same boat, it appears. The reason is that I need to have room to work straight-on to get out a broken off bolt. The left one that holds the thermostat housing to the engine block. 😞 I really need to be able to get in that space where the distributor is now. But, am afraid of screwing up something I'm not mechanically equipped to easily fix if I get the timing off somehow. As long as I put the distributor back in exactly as the positions are now, we good?