240ZBUILTBYME
Free Member
-
Joined
-
Last visited
Everything posted by 240ZBUILTBYME
-
 no one has seen the car in person and how damn rusty she is. I’m removing a lot of the main panels that provide structural rigidity to the body before I send it to the blaster, so I don’t see it as unnecessary, I see it as insurance. Cheap insurance. No one can say what the strength is of the chassis currently and that the rear quarter panel will remove 5% rigidity to the RHS. No one really knows. So if I waste some 25mm SHS and a couple of days so be it. im not very optimistic about what will come back from the blaster…
 -
I’ve been on a bit of a roll lately working on the car. It feels really good to actually be making some progress. 2/3 more days and the car will be ready for the blaster. today I wrapped up the bracing. I added reinforcements to the rocker panel and tied that into the main brace, then tied the roof corners to the main brace. It might be overkill but I already paid for the steel a long time ago so figured I might as well use it…. the blaster is gonna hate me though… i hope he’s a skinny fellow… also had a bit of extra time so started unpicking the dodgy bros repairs on the rear slam panel. Mmmm crunchy….
-
Well after hours of reading over numerous attempts and lots of admiring of z parts porn photos I finally got through this build thread! what a journey and very enjoyable, Loved seeing all the cool parts you've collected and don't want to know how much you've spent on them all! cant wait to see more progress on your build. Ryan
-
-
This week I removed the sound deadening/tar mat from the car as preparation for blasting. To be honest I was really dreading this job but in the end it was actually not that bad! I ordered 5kg of dry ice for the occasion. This worked an absolute charm for the boot area. Leave the ice on the matting for a couple of minutes and you can start to hear it cracking. Then use a scraper and it comes off in big slabs. the transmission tunnel area is much more difficult, dry ice can be used on the top flat surfaces but doesn’t work on the sides, I tried hanging plastic bags with dry ice in them but it just doesn’t get as cold… for the sides of the transmission tunnel a heat gun and scraper worked great for me, trick was to get it hot enough to lift off the metal but not so hot that it melts completely. and end results… still finishing up the bracing, only managed to add a cross brace for the rear of the car as I’m going to remove the entire rear valance.
-
-
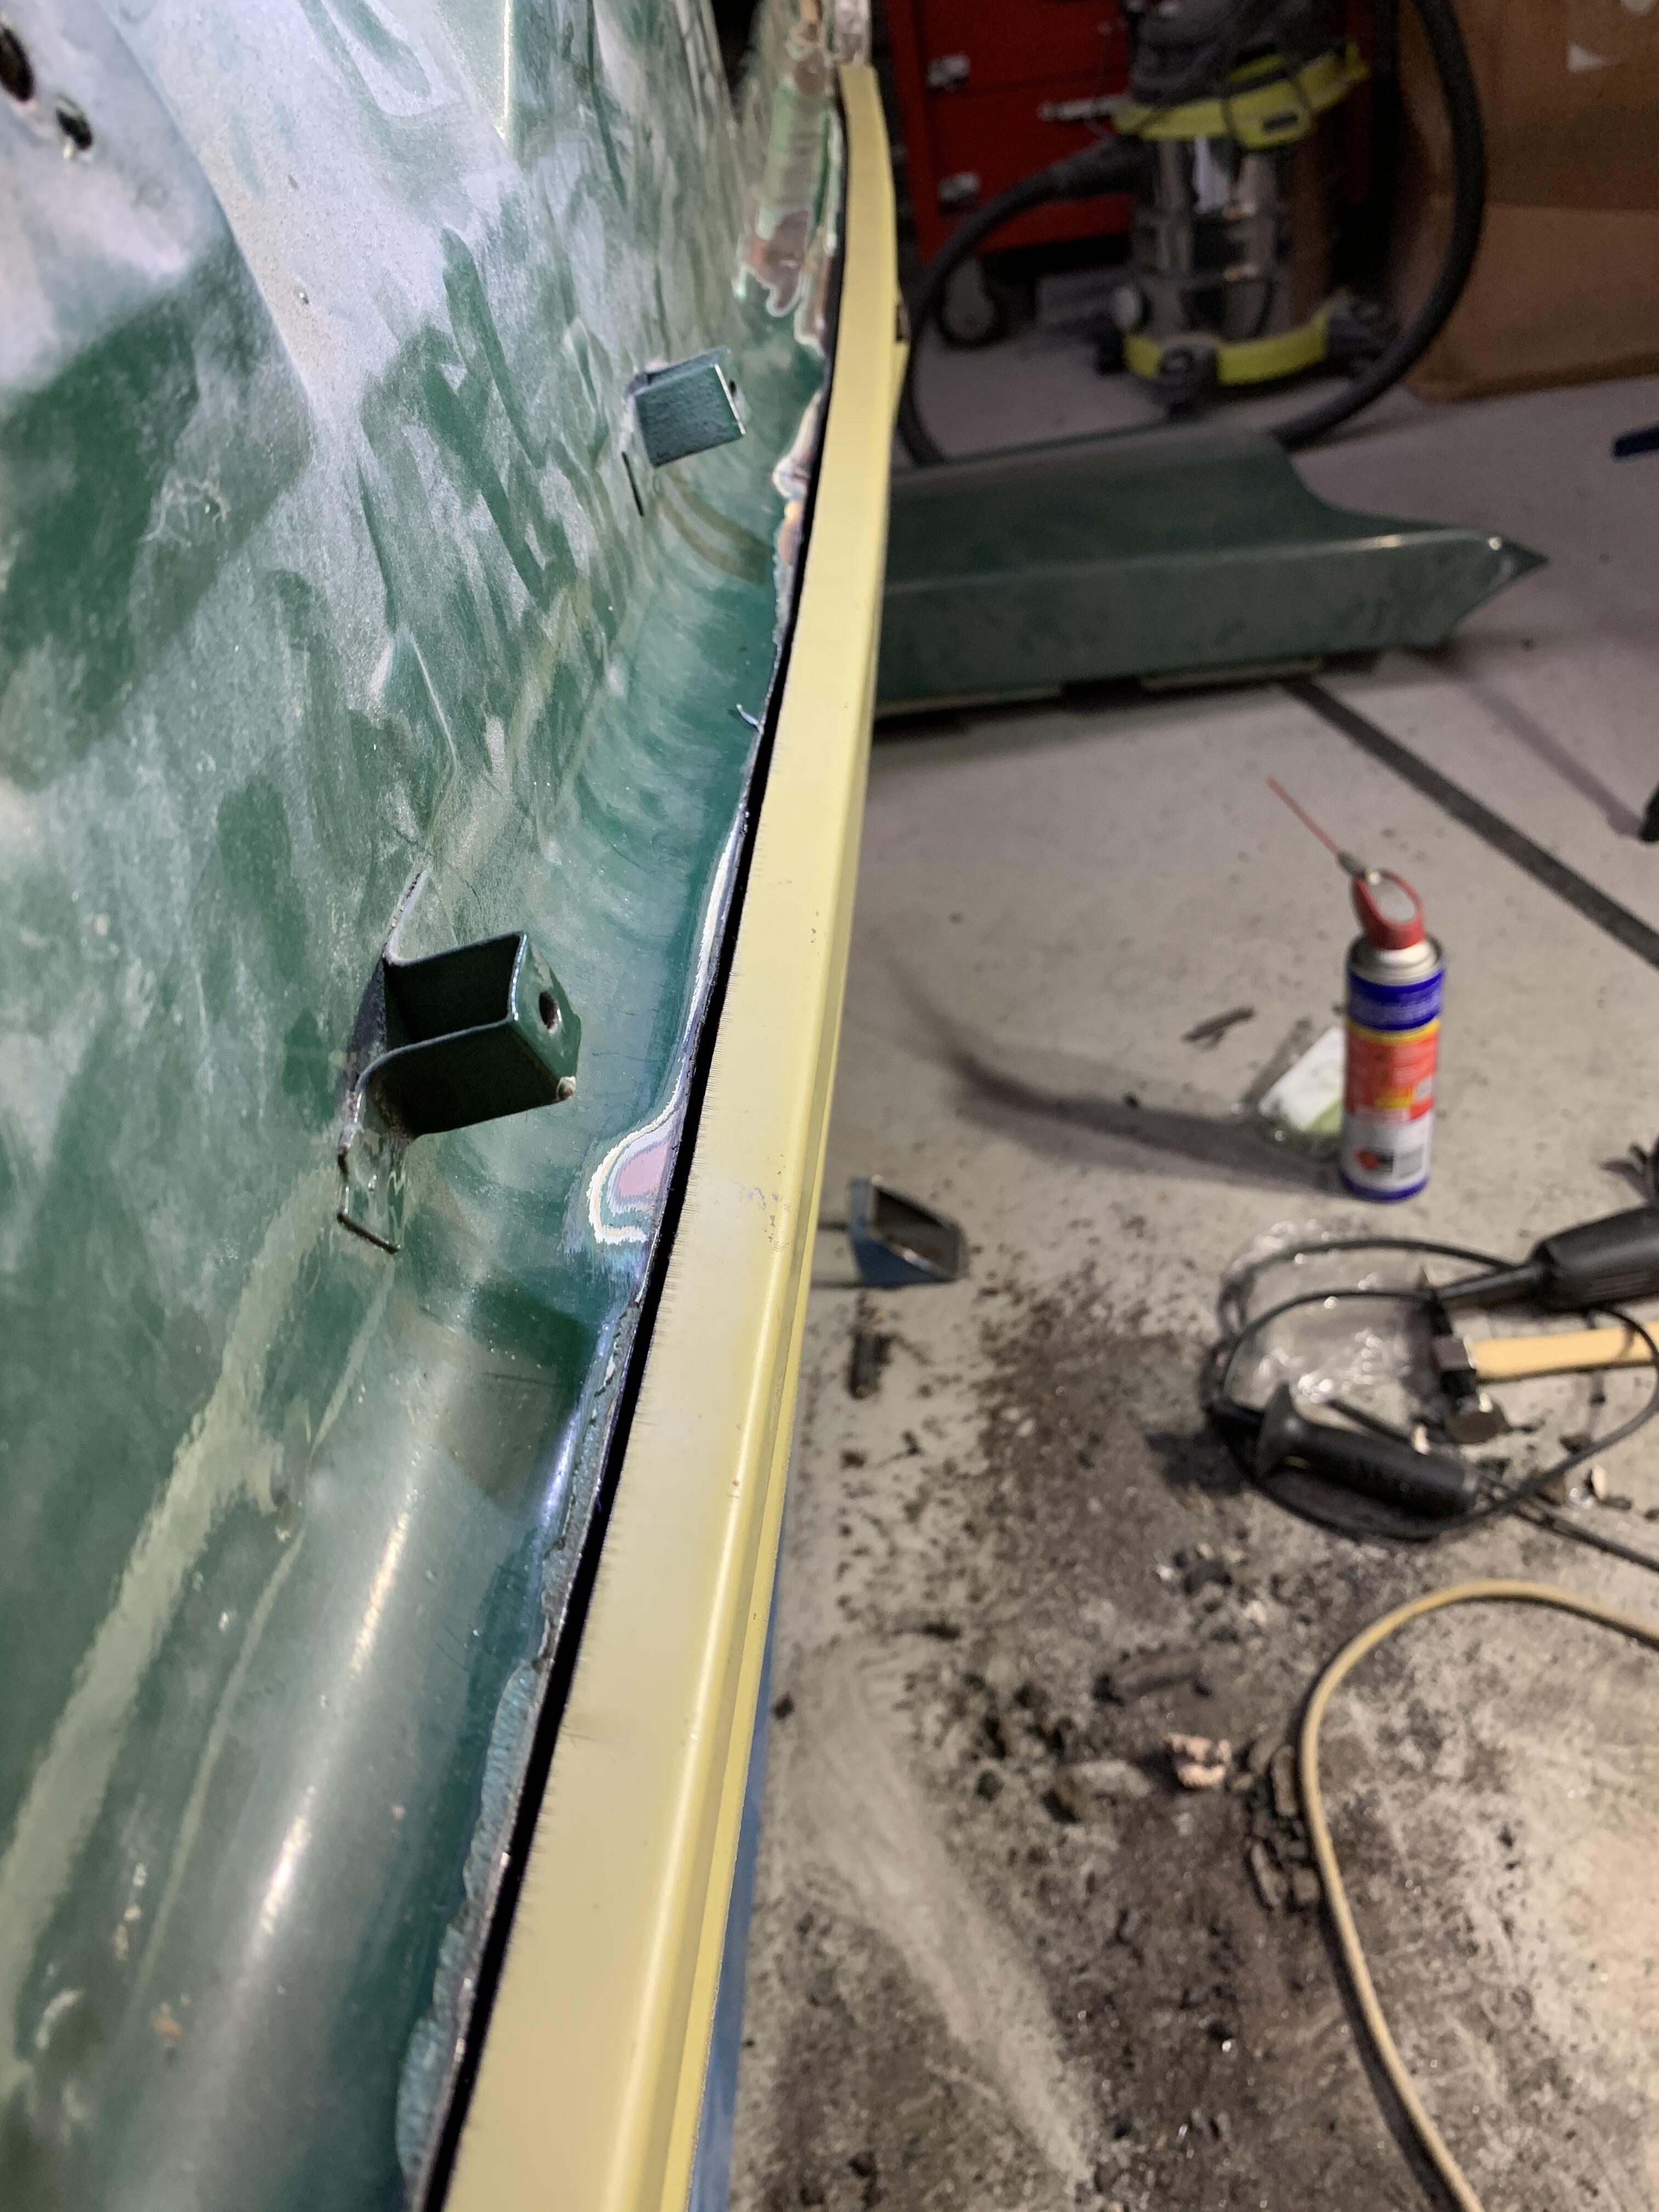
Meeting with the blaster went well, he can take care of the undercoating for me. I just have to remove the sound proofing from the trans tunnel and rear cargo space. he only blasts cars and is a huge car enthusiast himself so this pleases me. He’s booked out till march which is a bummer…. But has mentioned if I get the car ready to go if someone else isn’t ready he can slot me in early. So now I have to get the car ready to go. She’s waited long enough….if I wait any longer there won’t be a car left to restore…. I want to remove the rear quarter panels, remaining rear valance and roof skin and a portion of the outer rockers so the internals can be blasted. So first I’m going to add some bracing so that A) movement is restricted as I remove body panels and when the car is lifted up for the underbody to be blasted there’s a bit more structural rigidity to prevent any bending of the chassis. This thing is rusty AF and I just don’t trust it. I’m probably being over cautious. First I decided to ditch the gasless wire and start learning with gas. I wanted to practice on 1mm first and then practice welding my 25x25x3mm shs bracing onto 1mm sheet. Was very happy with the results for my first time. Turns out watching all those YouTube videos may have helped… first tacks My unimig for some reason has no setting guide for 0.6mm solid wire so I had to guess the settings. I ended up finding 14 volts and 4.5 m/min worked well. Does this seem about right? And can anyone tell me what the brown discoloration is? all stitched up rear of the join, seem to be getting penetration, does this look right? and after some dressing. I got warpage as I wasn’t trying to manage heat, but not too bad for a first go me thinks… Next welding 25x25x 3mm thick shs to 1mm sheet. no blow throughs, great success… I felt ready to weld in some bracing. Decided to go from the rear strut towers to the dash. the welds weren’t pretty, they were awkward spots though, didn’t want to do full welds as I wasn’t confident I could remove the bracing later without damaging something so I went with decent sized tacks. Seems to be enough strength in the tacks as the bracing feels solid. any feed back and thoughts on what I’ve done are welcomed. I really have no clue what I’m doing lol I’m planning to tie in the roof to the bracing and I think that should be enough?
-
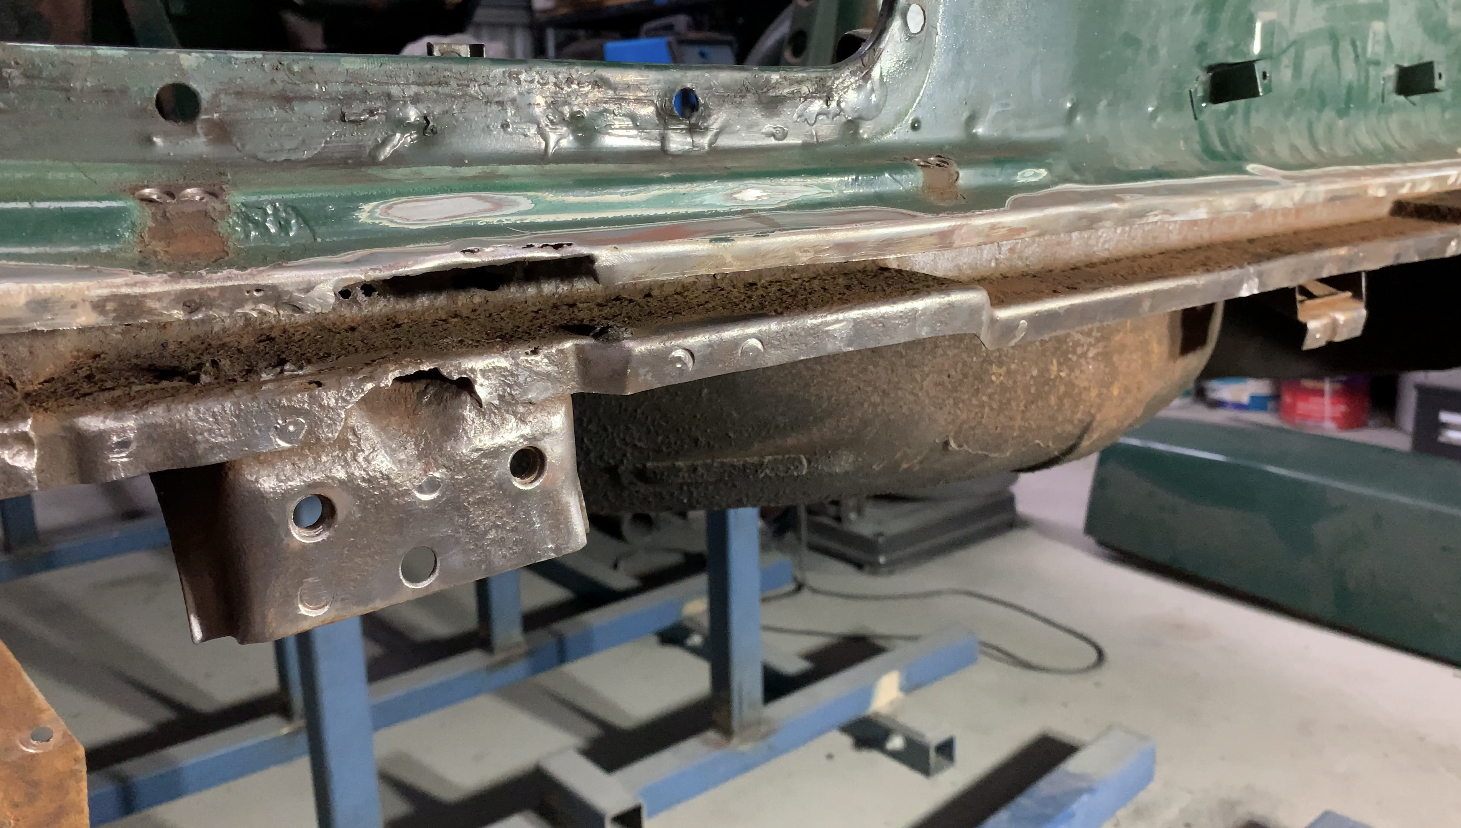
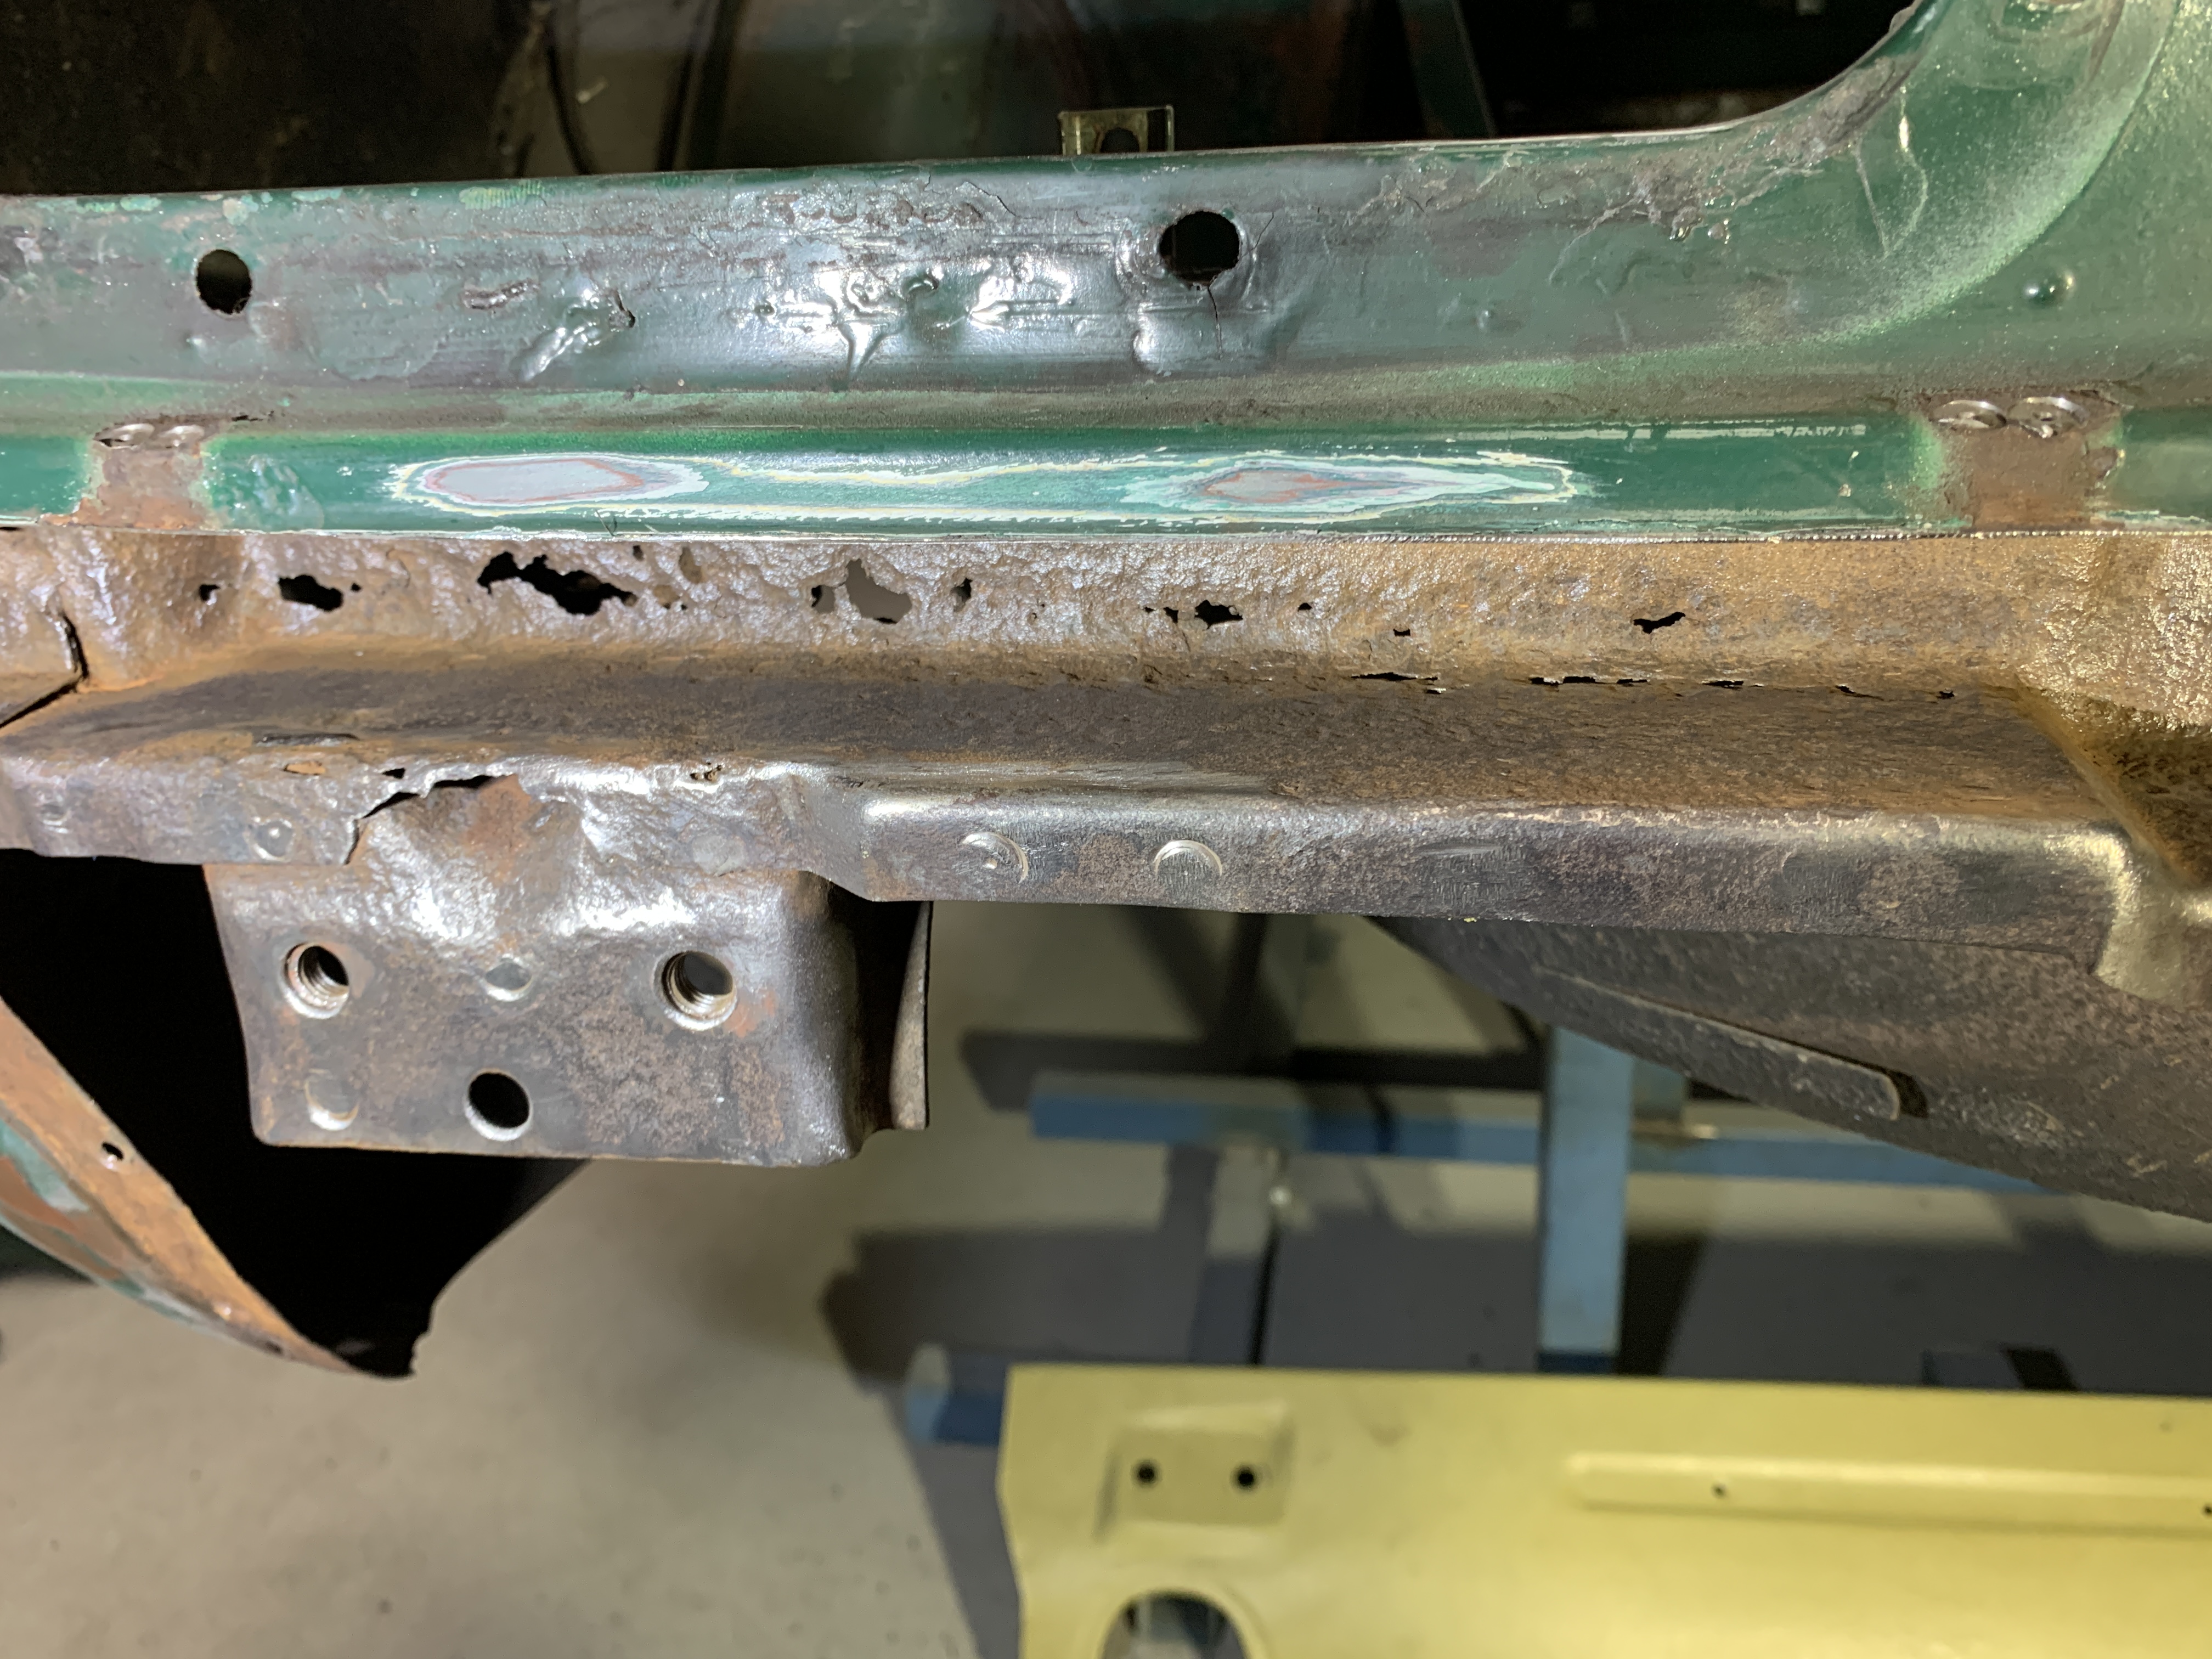
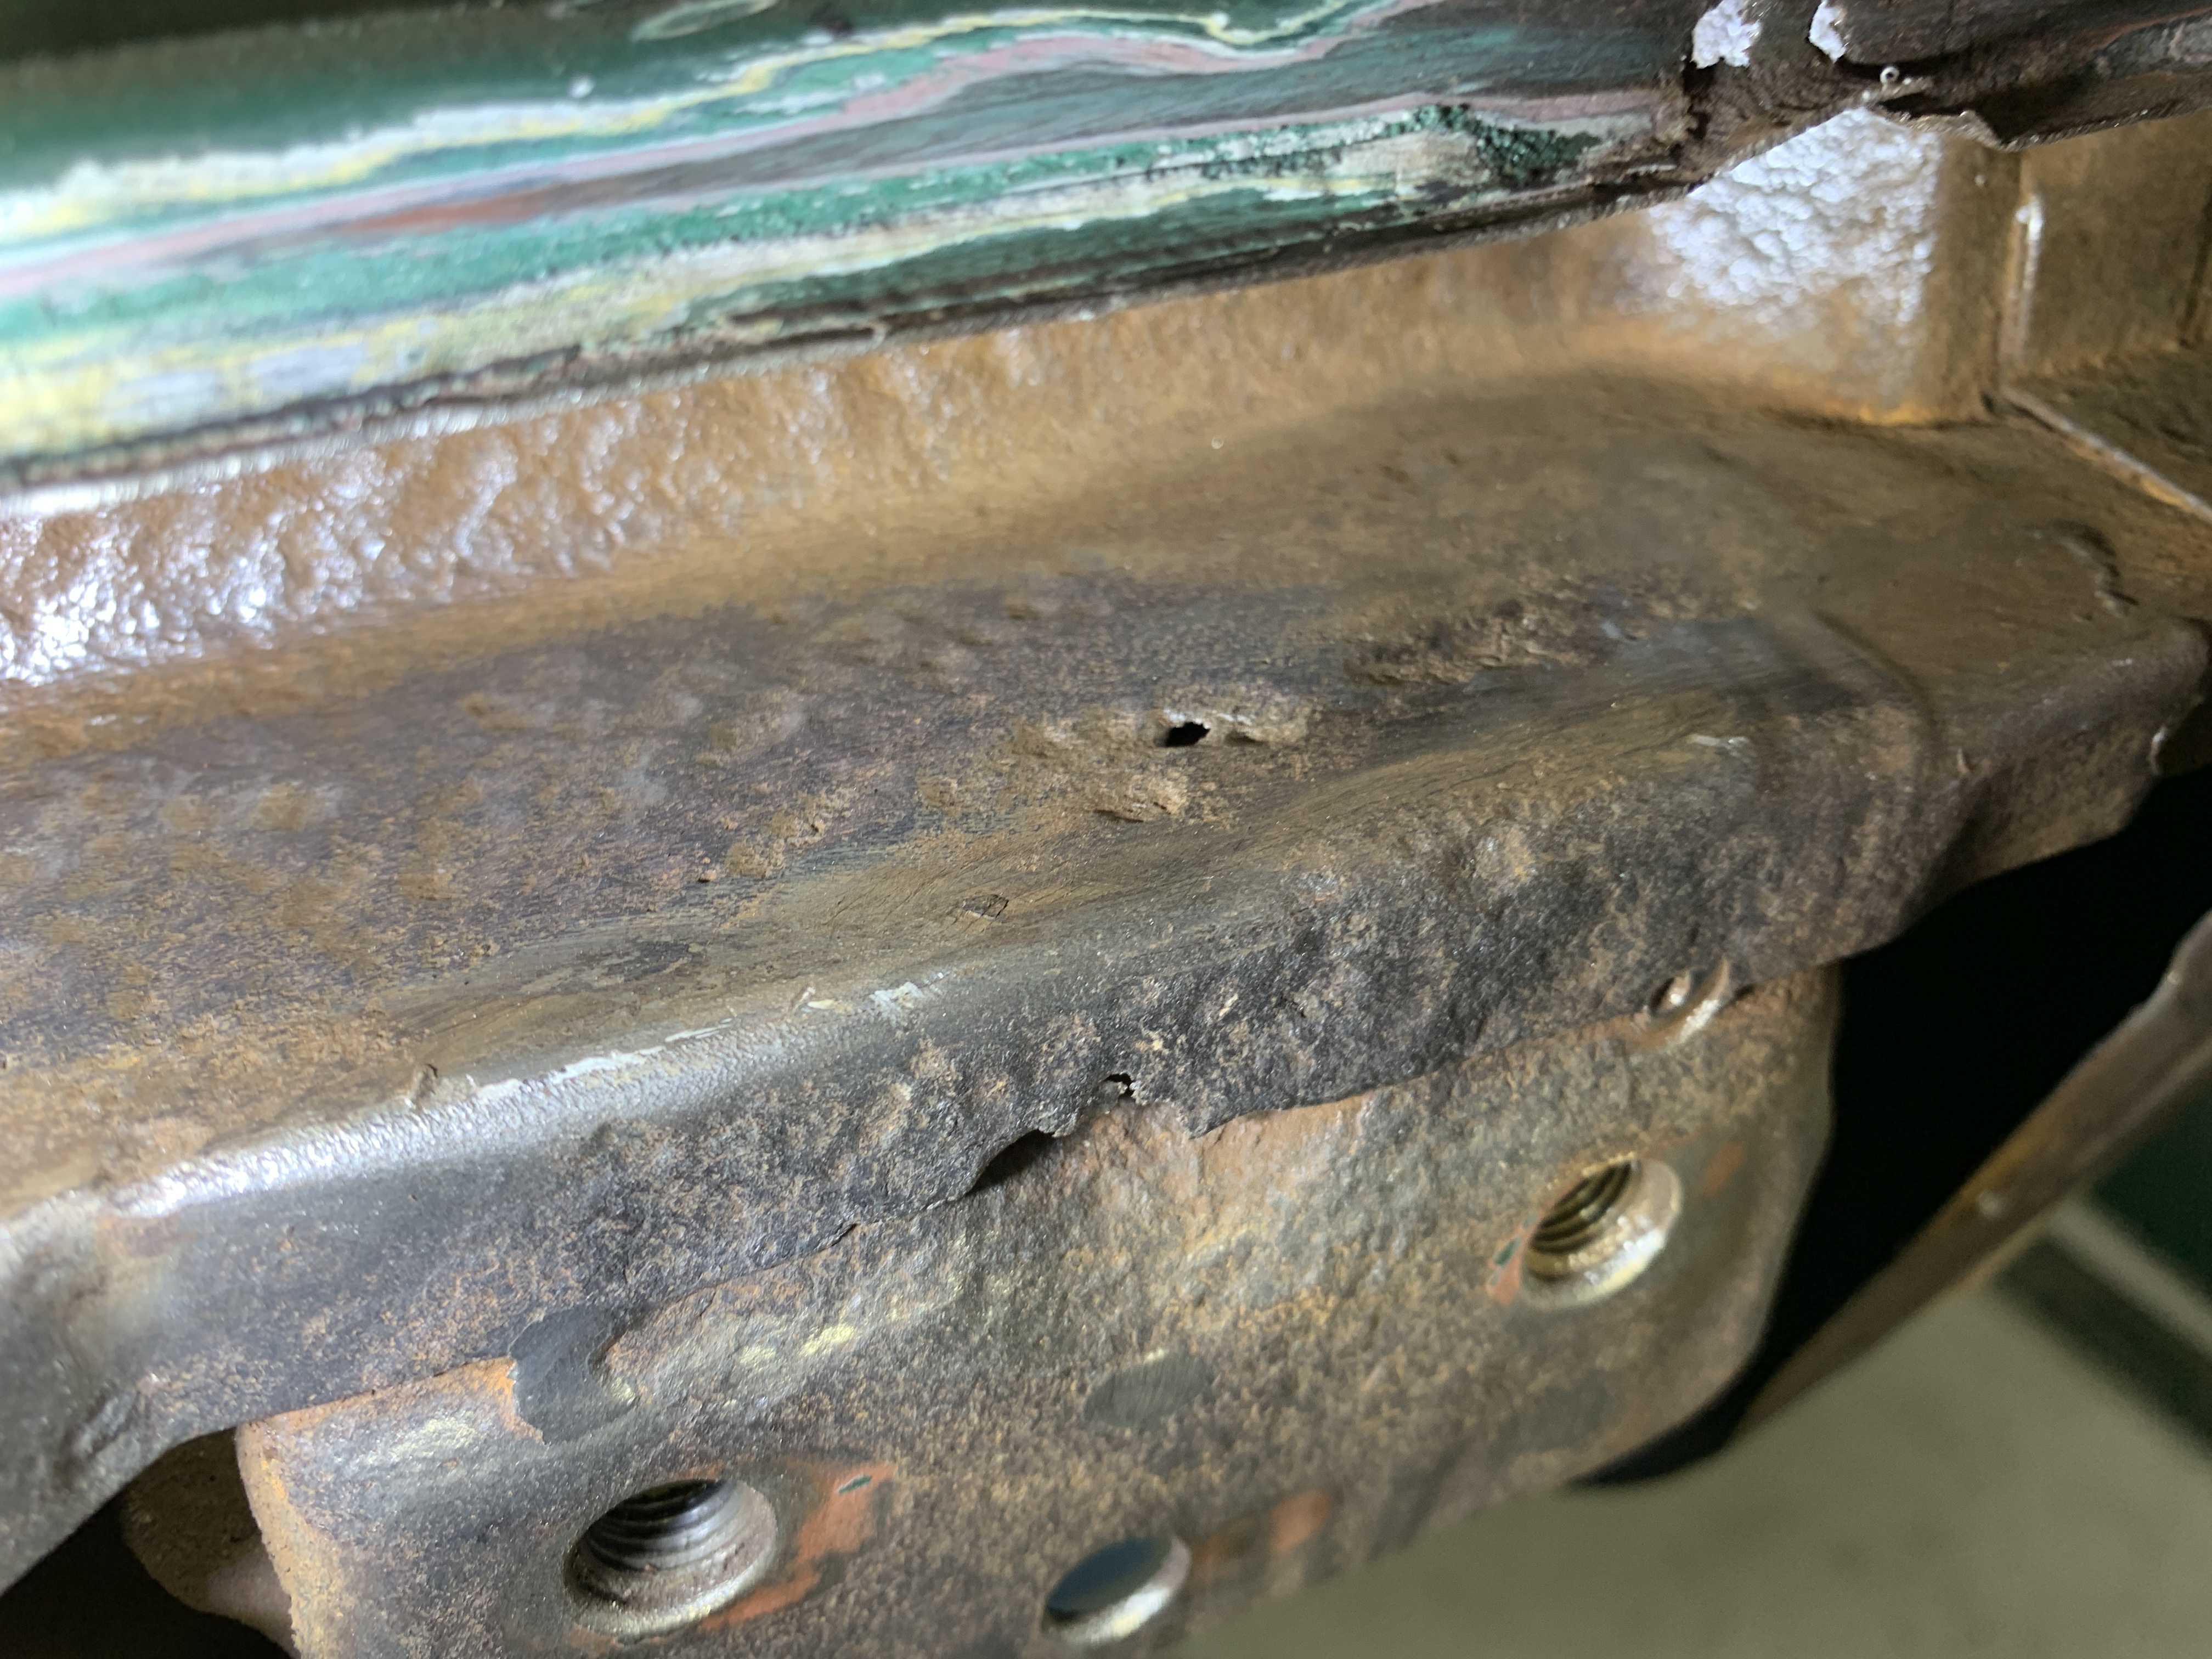
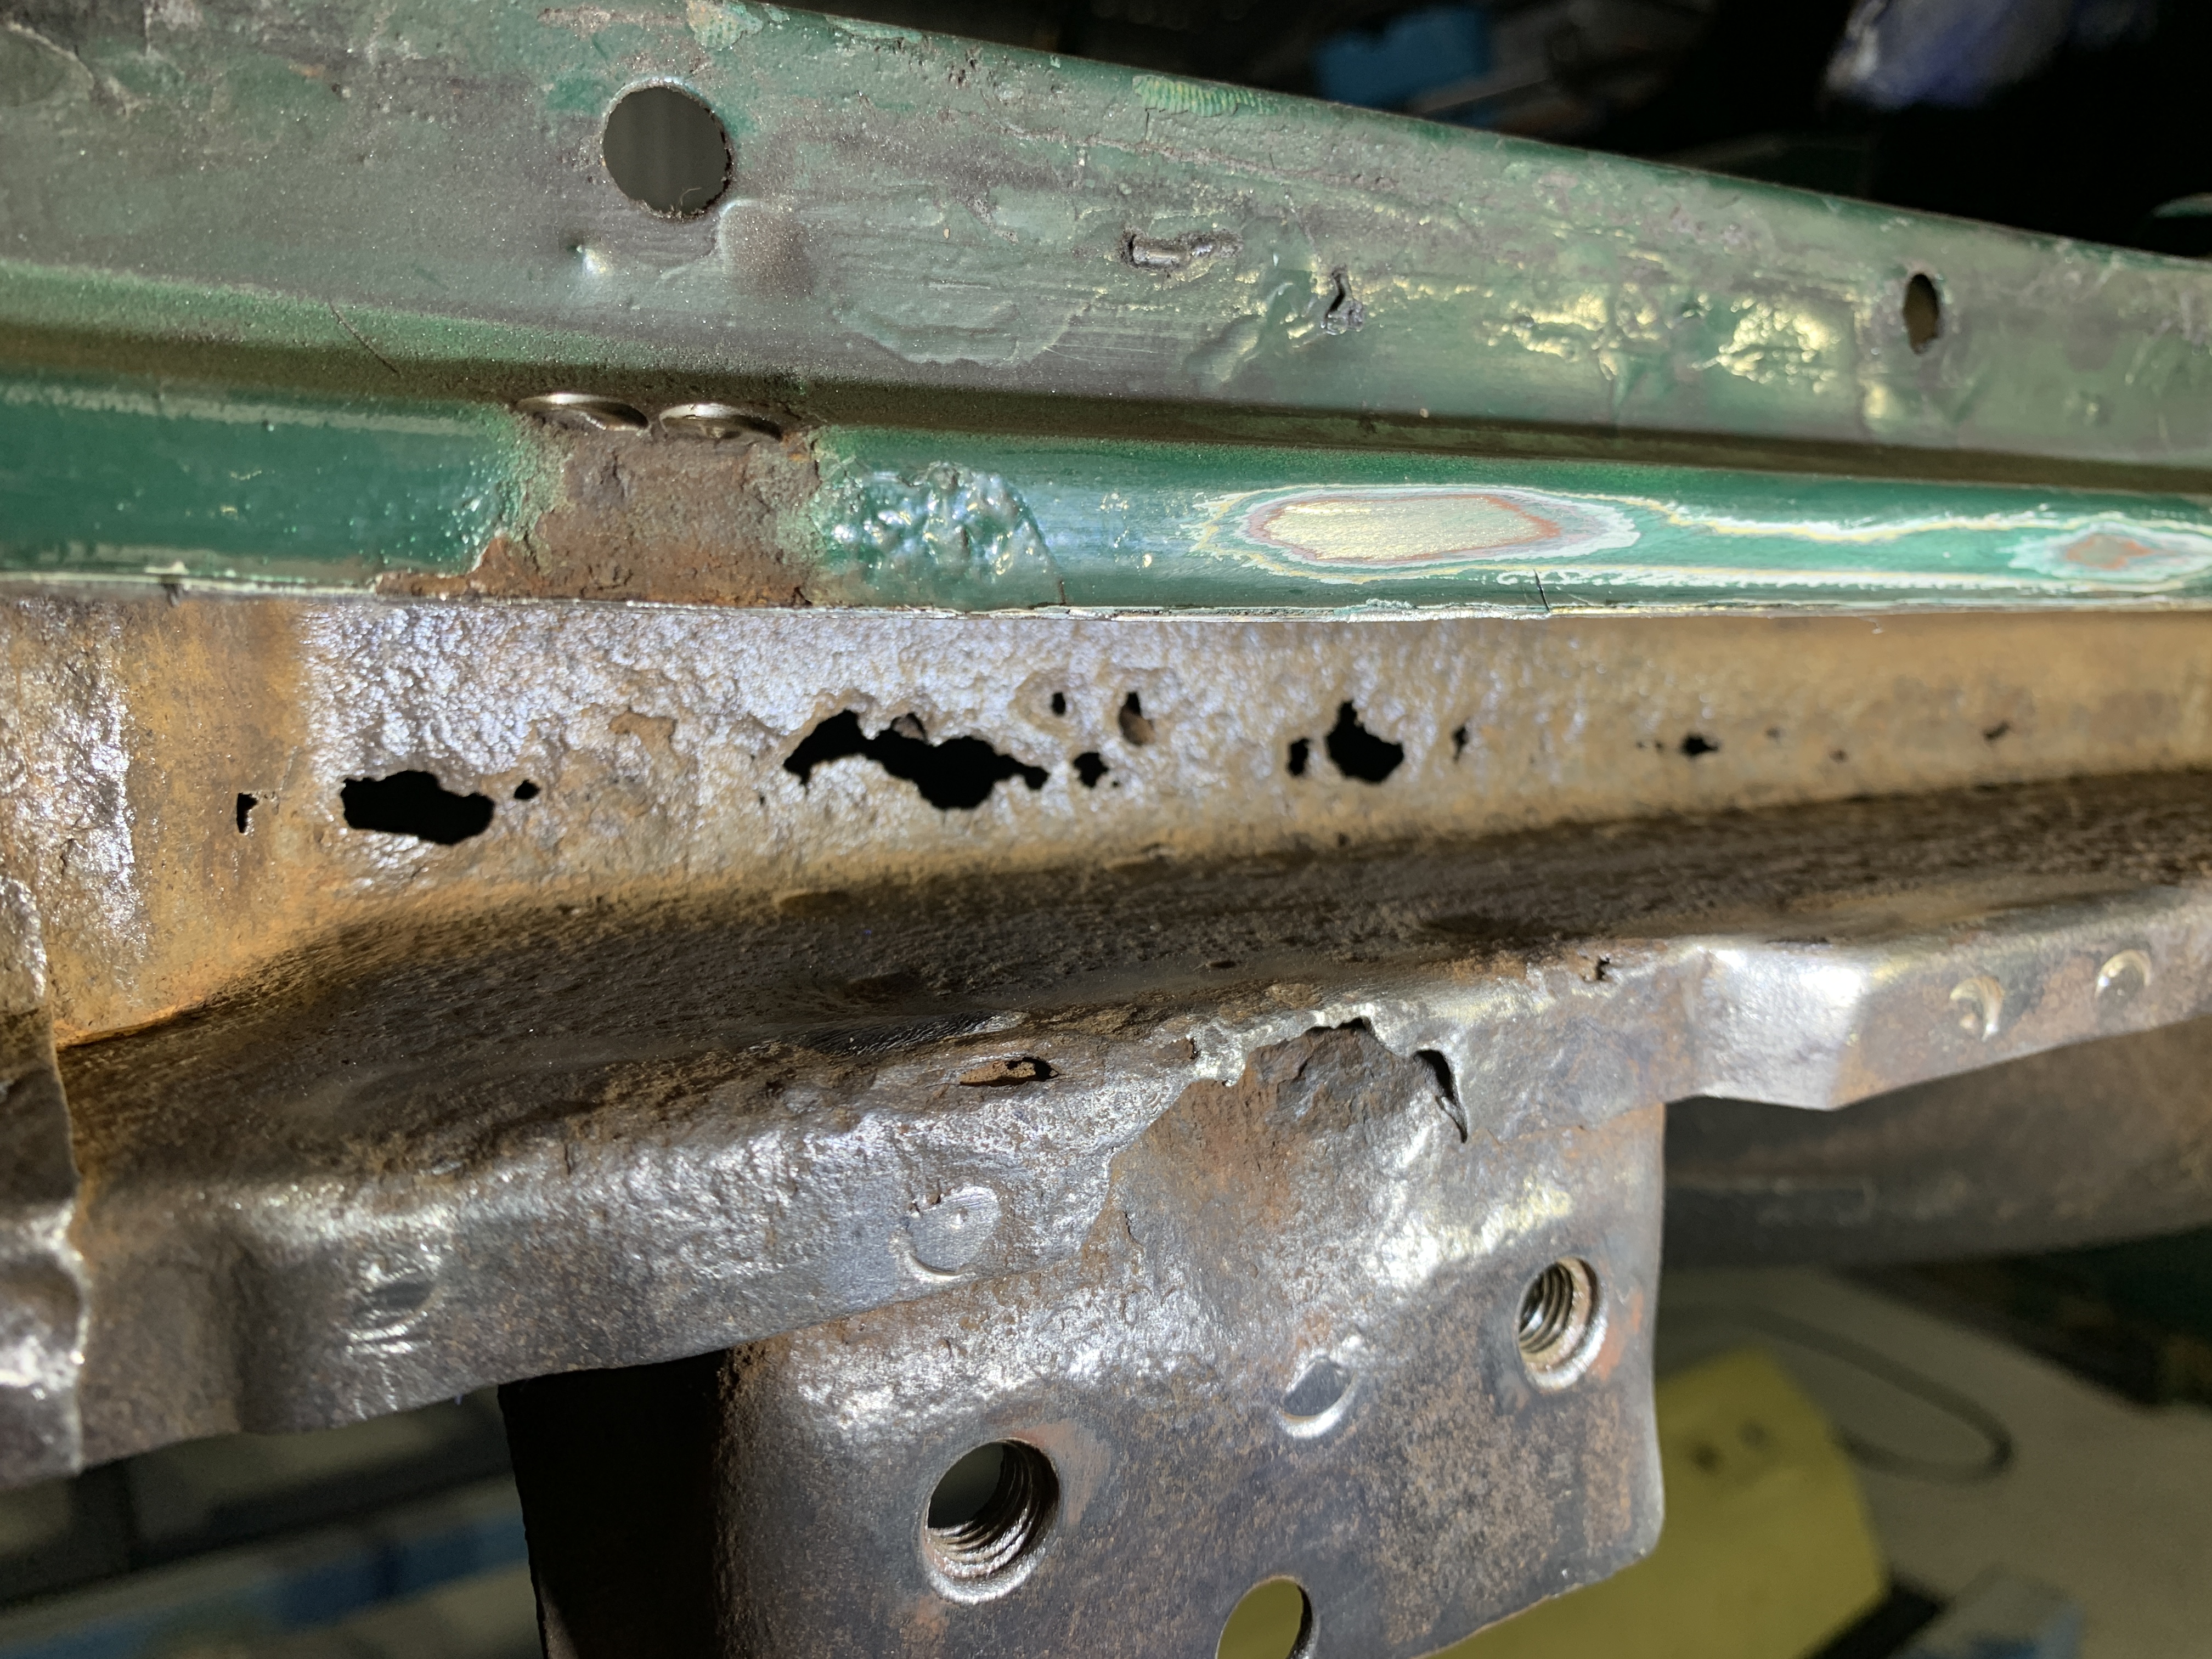
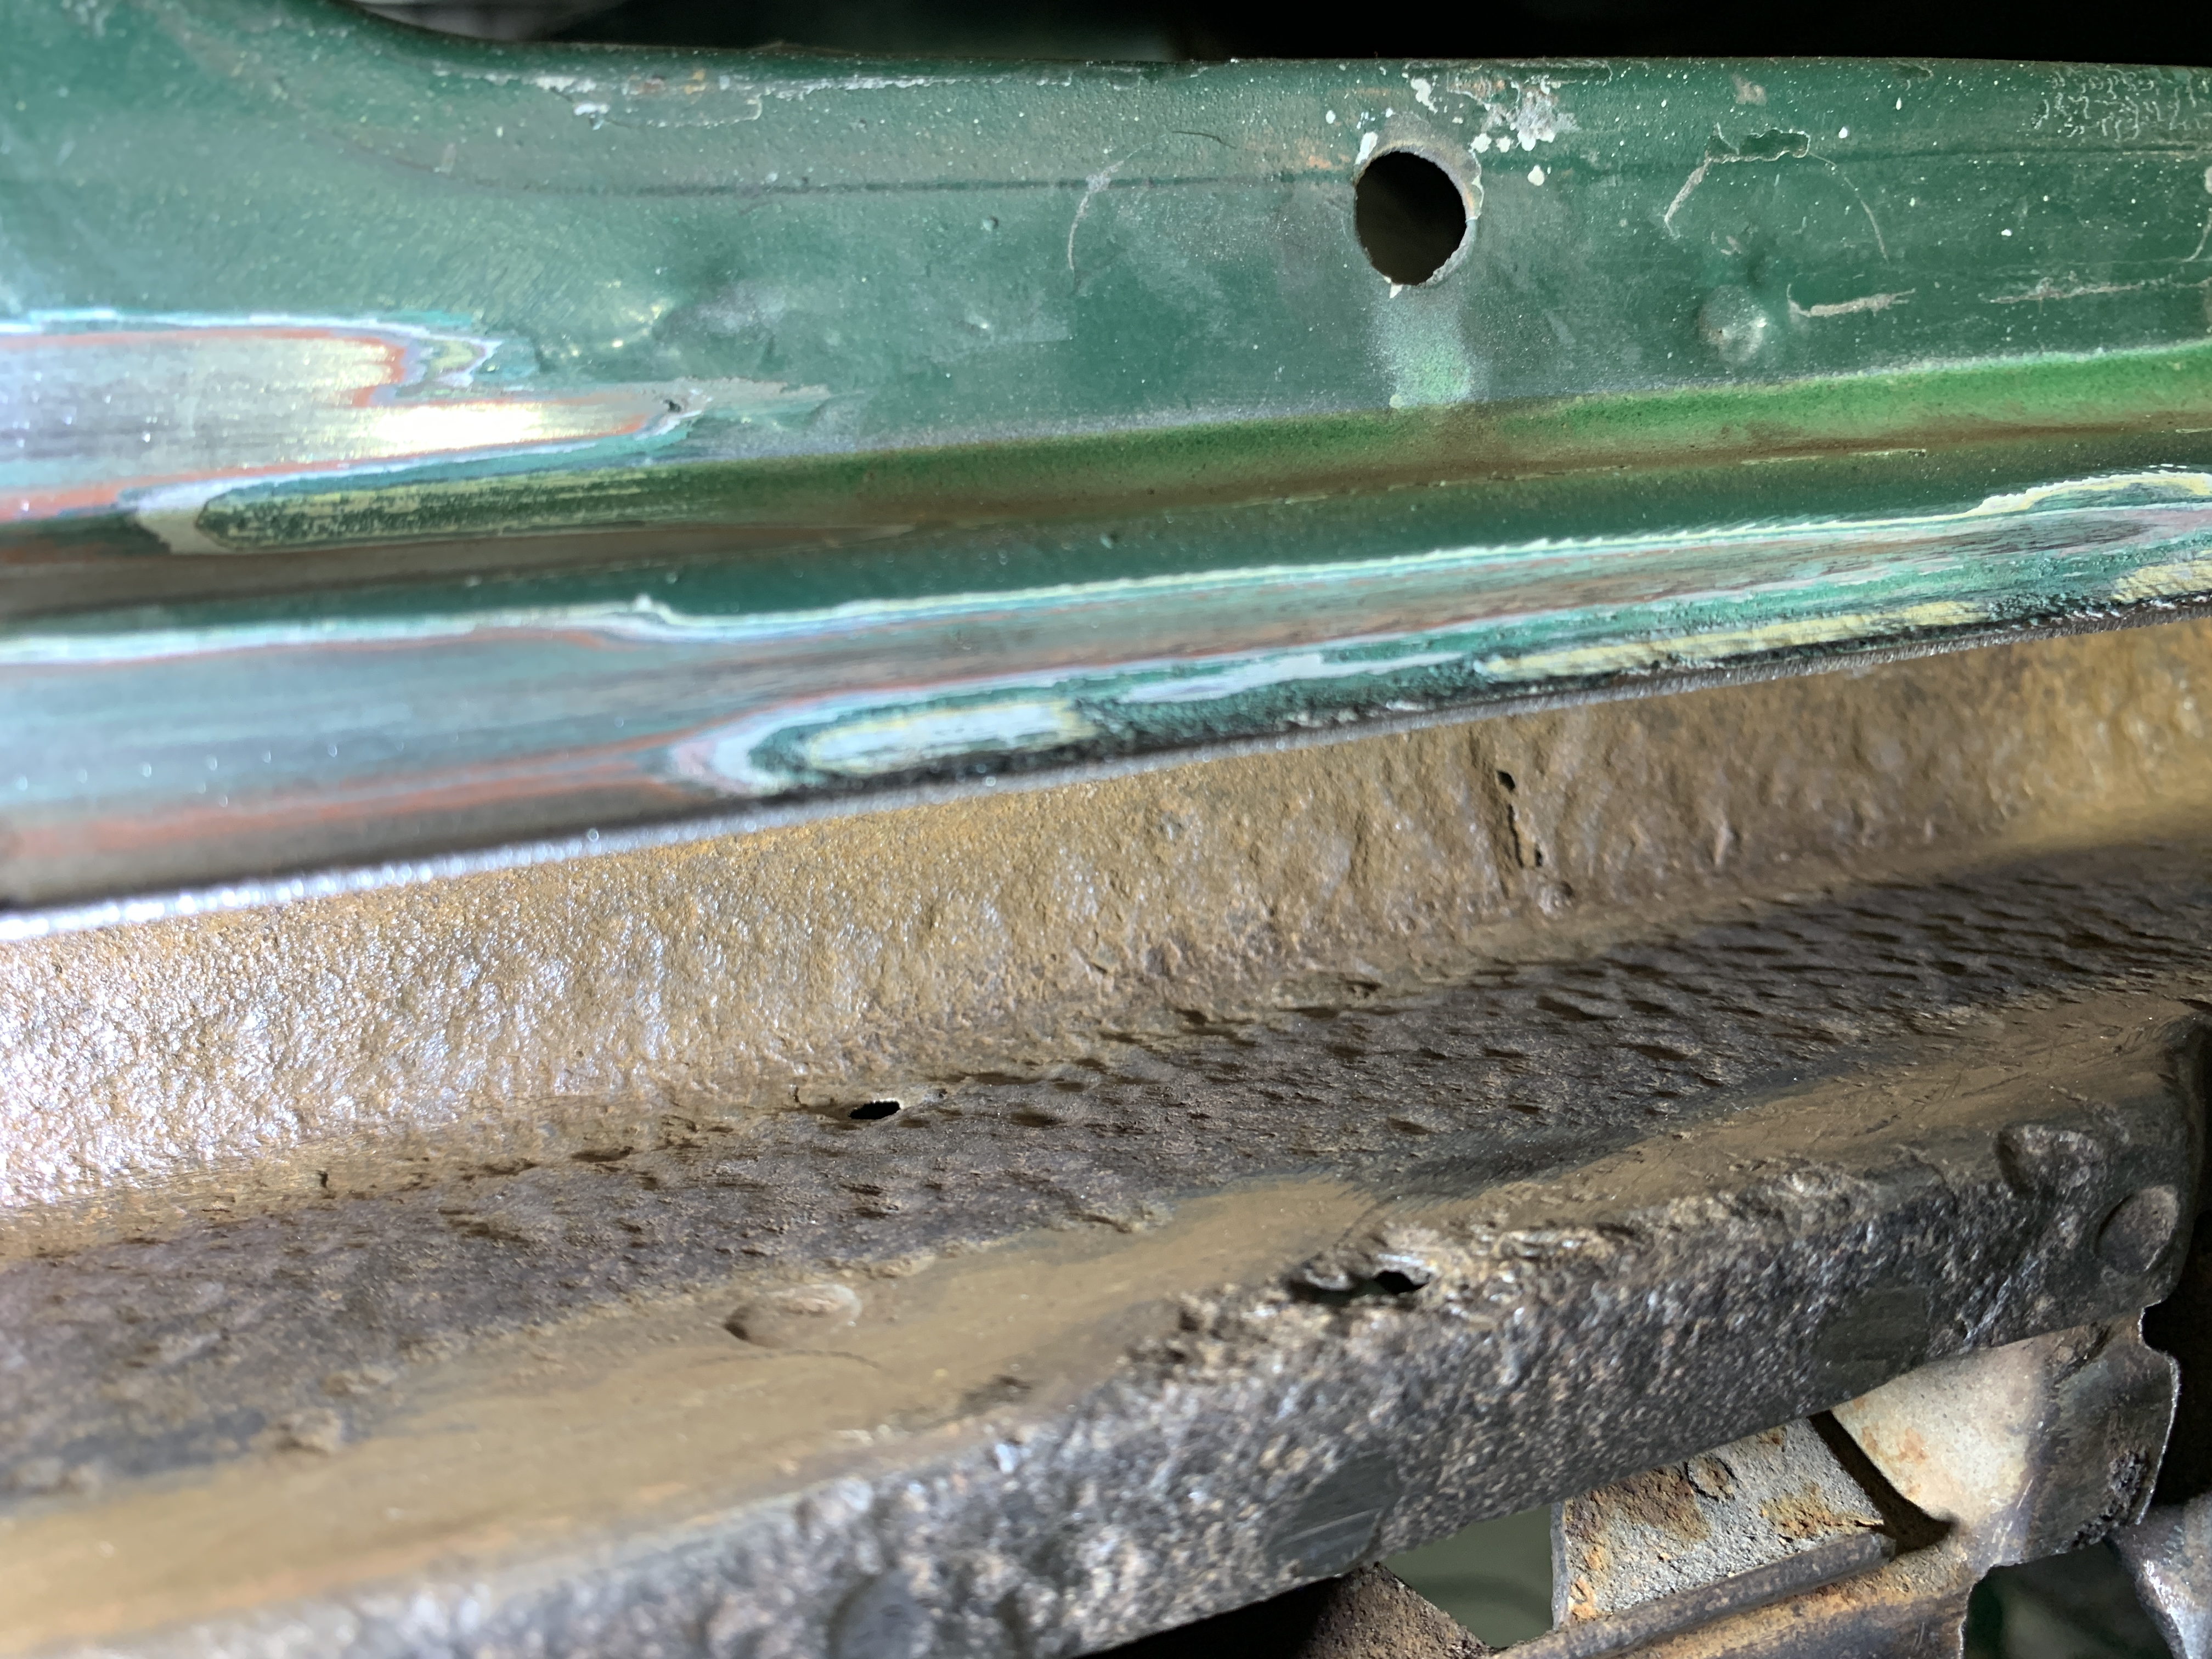
I have a blaster coming to look at the car this week that was recommended by a restoration shop. He’s going to assess the undercoating and if he can remove it with blasting, otherwise I will have to strip it. he has said he can blast the car while it’s on the chassis frame which is awesome. He can lift the whole thing with chain blocks to access underneath. Downside is he’s booked till march next year….. This whole time I have just been trying to work towards just getting this damn thing blasted and in epoxy! and with the severity of the rust and lack of structural integrity I wasn’t confident putting it on a rotisserie until some of the more structural rust was repaired. I have decided to pull all the panels off to expose all the interior sections that I know will be rusty as hell. I’ll remove the entire rear valance, rear quarter panels, roof skin. I have a few other panels I’m considering too like the front panel of the tool compartment and top wiper cowl panel. There’s a lot of rust in both those sections. I started experimenting with a few mechanical ways of removing undercoating used a oscillating multi tool with a scraper attachment on my undercoating it was not overly effective. First photo was just the tool and second was tool followed by a knotted wire wheel. most effective way proved to be a strip it disc, makes quick work of it. the oscillating multi tool and scraper worked well on some of the sound proofing sections. but not so well on other parts yay more rust…. while I had the strip disc out I wanted to see what was under the paint on the rear quarters……there were lots of layers and much bog (bondo for you guys), I dared not do more…. started stripping the rear slam panel as I will need to unpick it, some quality repairs from previous owners. Just a couple of tacks and she’ll be right…. Also managed to knock off the rest of the second rotisserie frame. Now just need to finish the rear mounting assembly and the rotisserie will be done and ready to use when the time comes…
-
Back in business. my shitty cigweld 135 would not weld properly anymore, after several sessions of trying to get it to work I bit the bullet and upgraded to a unimig 185. I think for my budget it seemed the most sound choice, online reviews were all very positive. Every single component of the unimig is far higher quality than the cigweld and it welds amazingly in comparison. Runs much hotter welds than the 135. got a few hours in today and finished up the base of the rear rotisserie stand. still getting used to the welder, some welds were good some were bad… I’m keen to use up the last of this gasless wire….
-
-
-
-
Haha can’t take any credit for the dash, but yes hopefully everything else comes out as nice. Though lately I’ve been trimming my expectations and reminding myself to not let perfection become the enemy of good. It will be a street car not a show car. I actually had a Fs5w71b come with my 240z, as I have a Silvia 71C to go into the 240z I am using the 71B in the zx. Very convenient! Ive cleaned up the 71B and had my Z guy open it up to check it over and replace all seals, he says it’s a very good candidate and happy to put in without rebuilding. I have all other parts required for the conversion already. the diff from the auto will be fine for now but gears will be a little tall. Want to upgrade the final drive for better acceleration. no the zx is not the most nimble particularly around town but once you’re up in the canyon roads it’s so good! With the few suspension and bracing mods I’ve done I’m really impressed with how much fun it is.
-
Thanks Jon my condolences for the loss your mum Jon, I don’t think we can prepare for such a heavy loss. I had 8-9 months where I was preparing for the fact that we may lose her, not thinking negatively but being prepared for all outcomes. Still hit me like a freight train when the day came. hope too that your year brings some respite from the grief and some progress on the car. Ryan
-
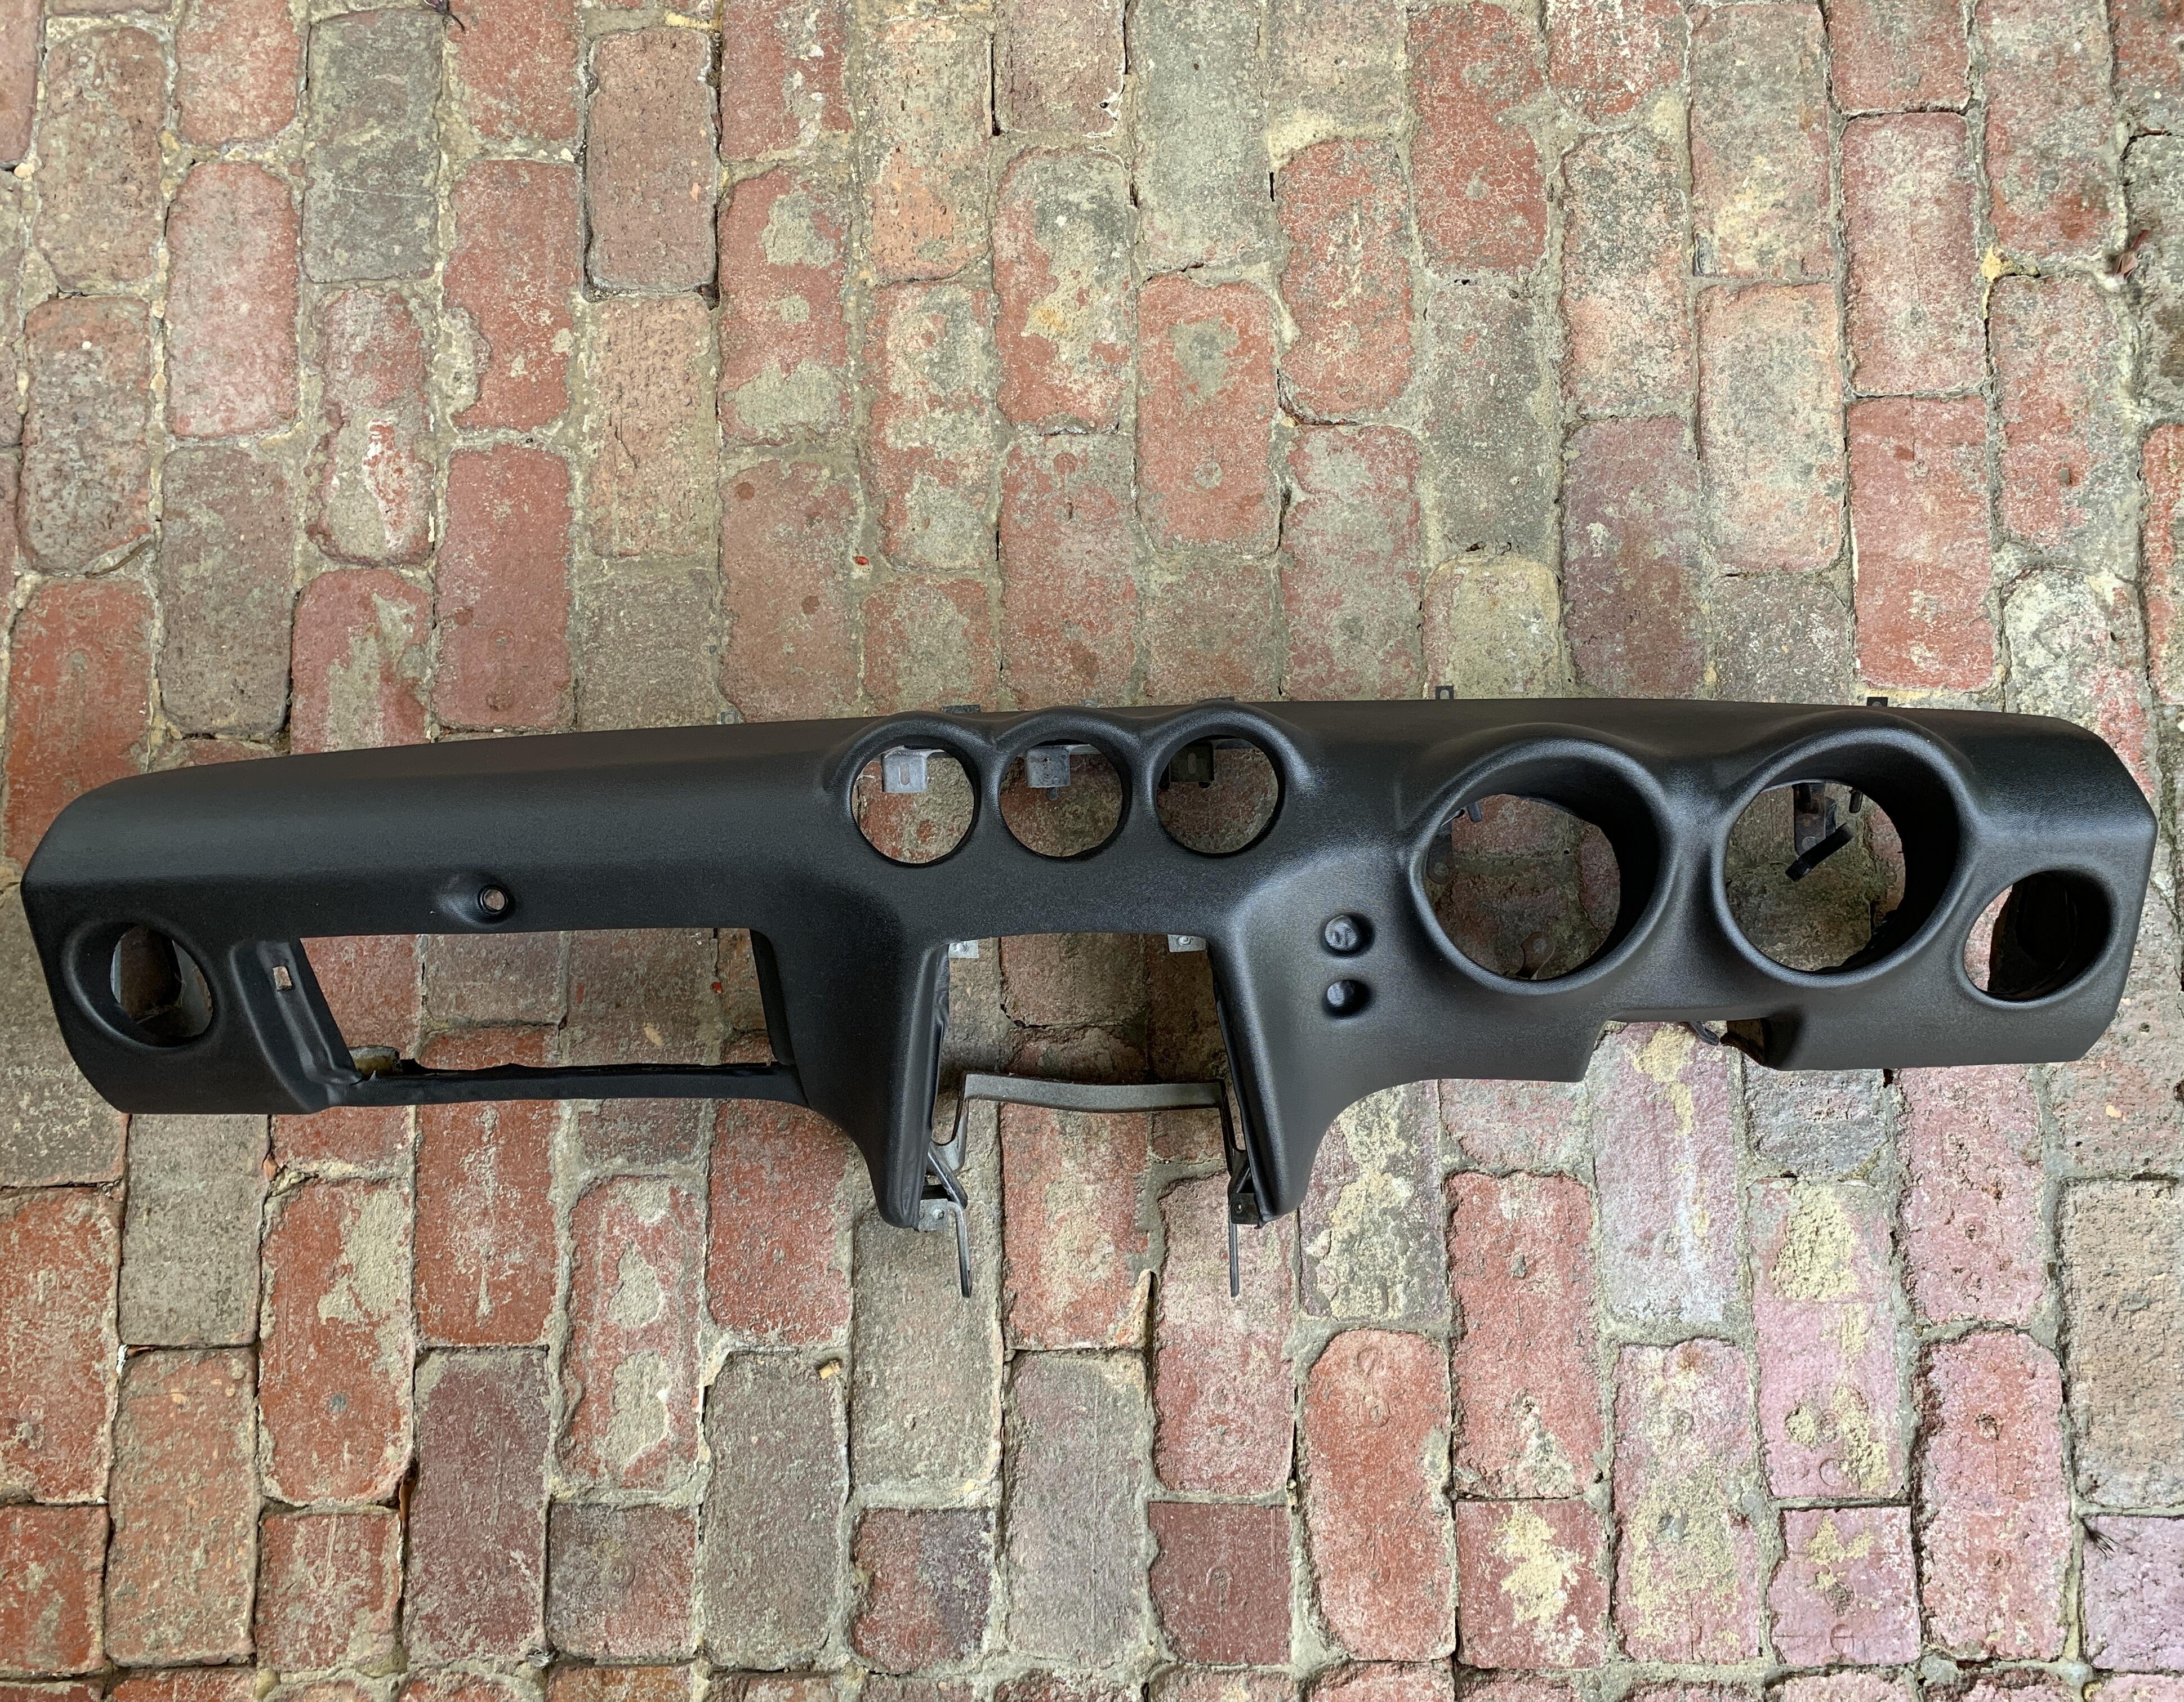
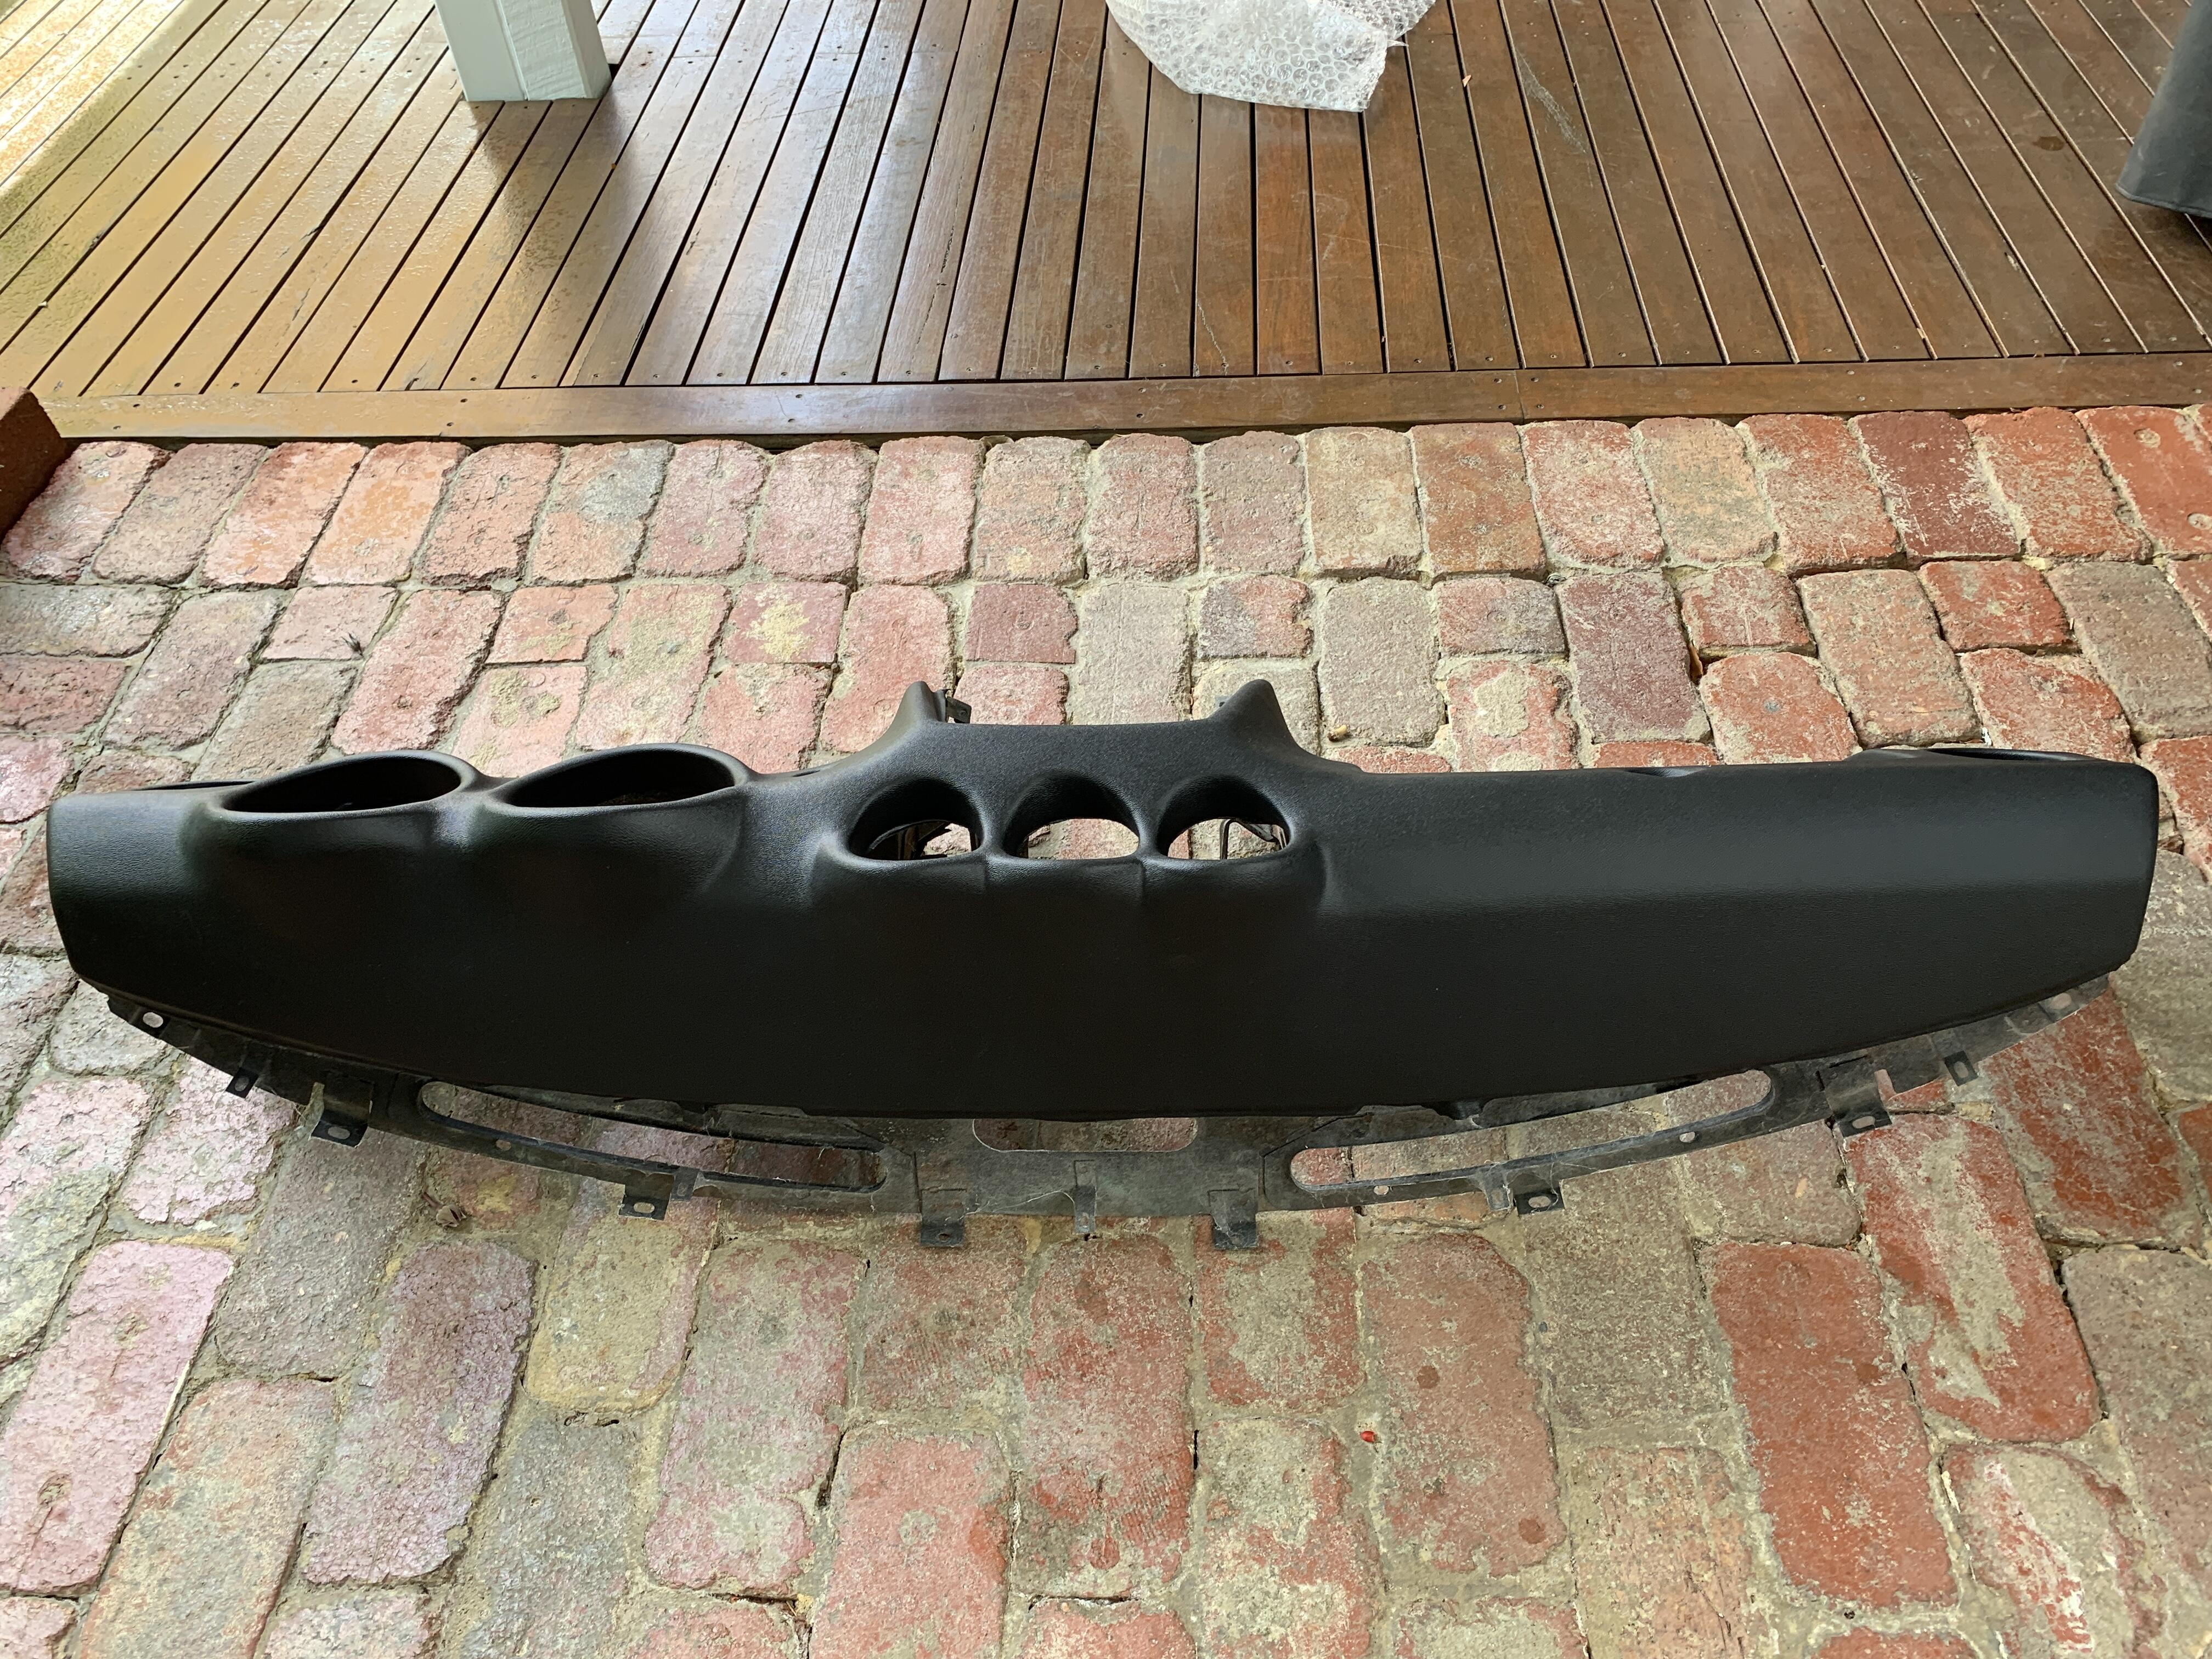
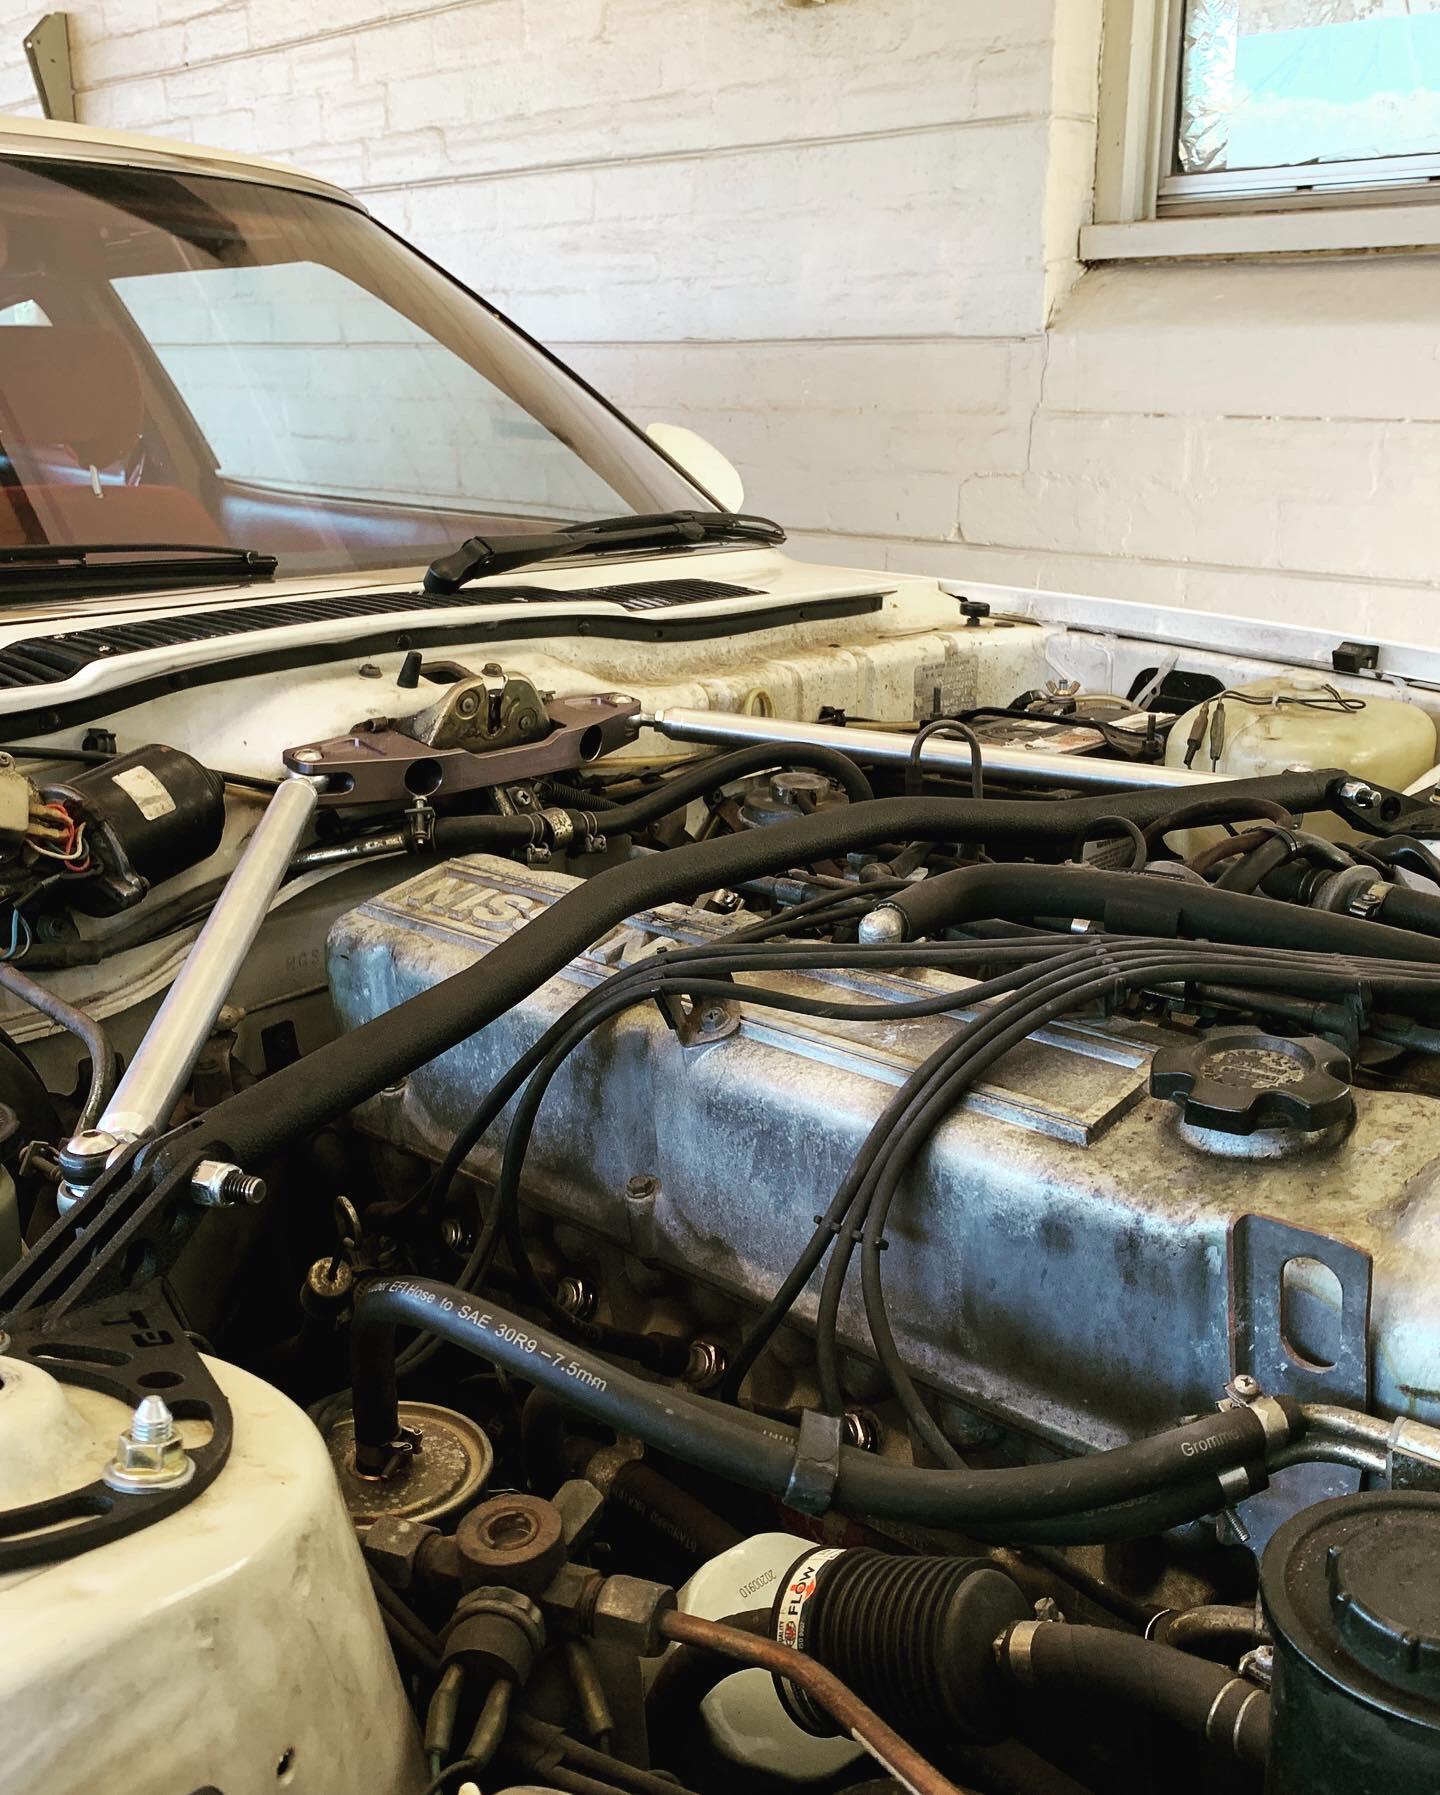
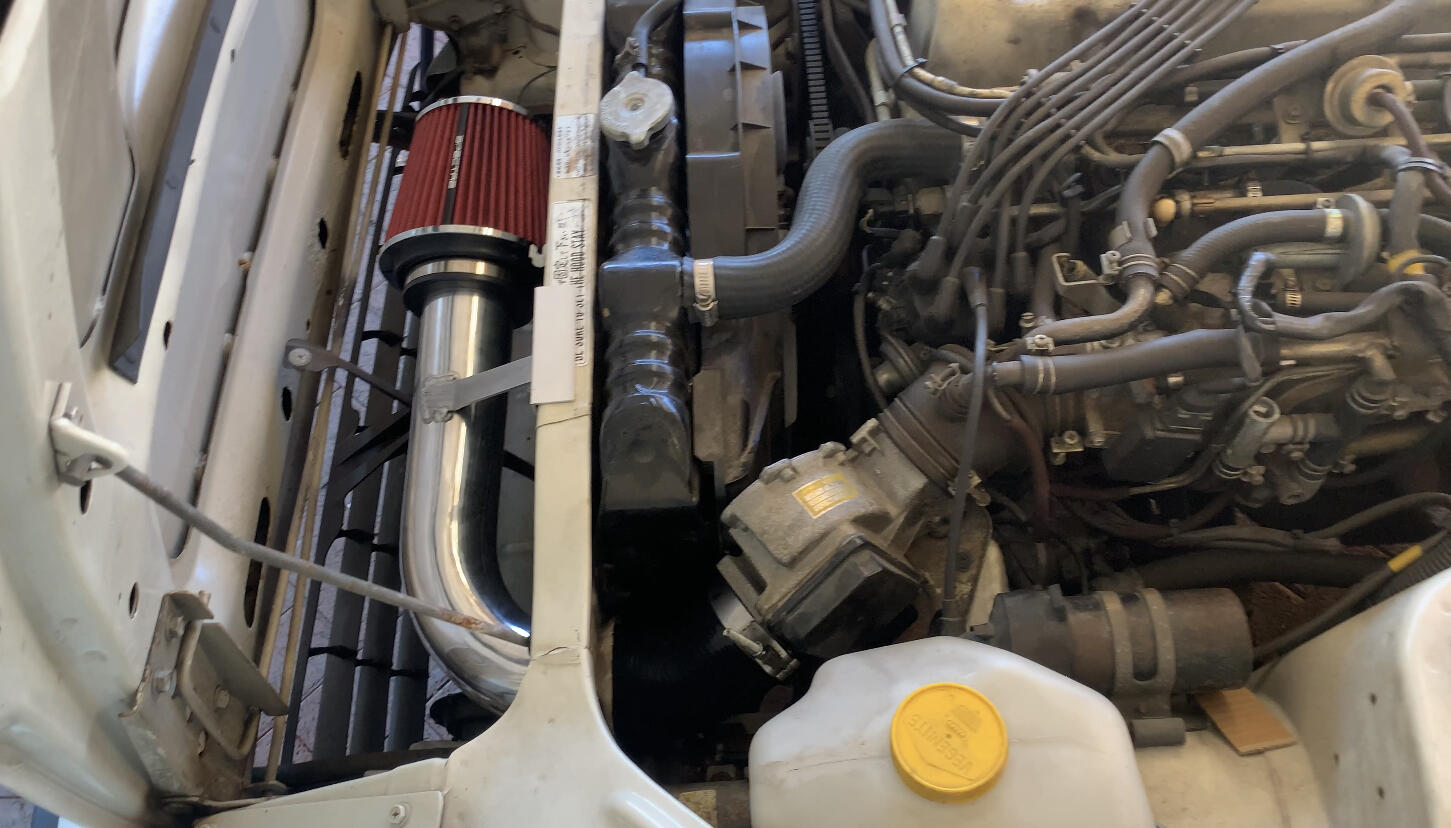
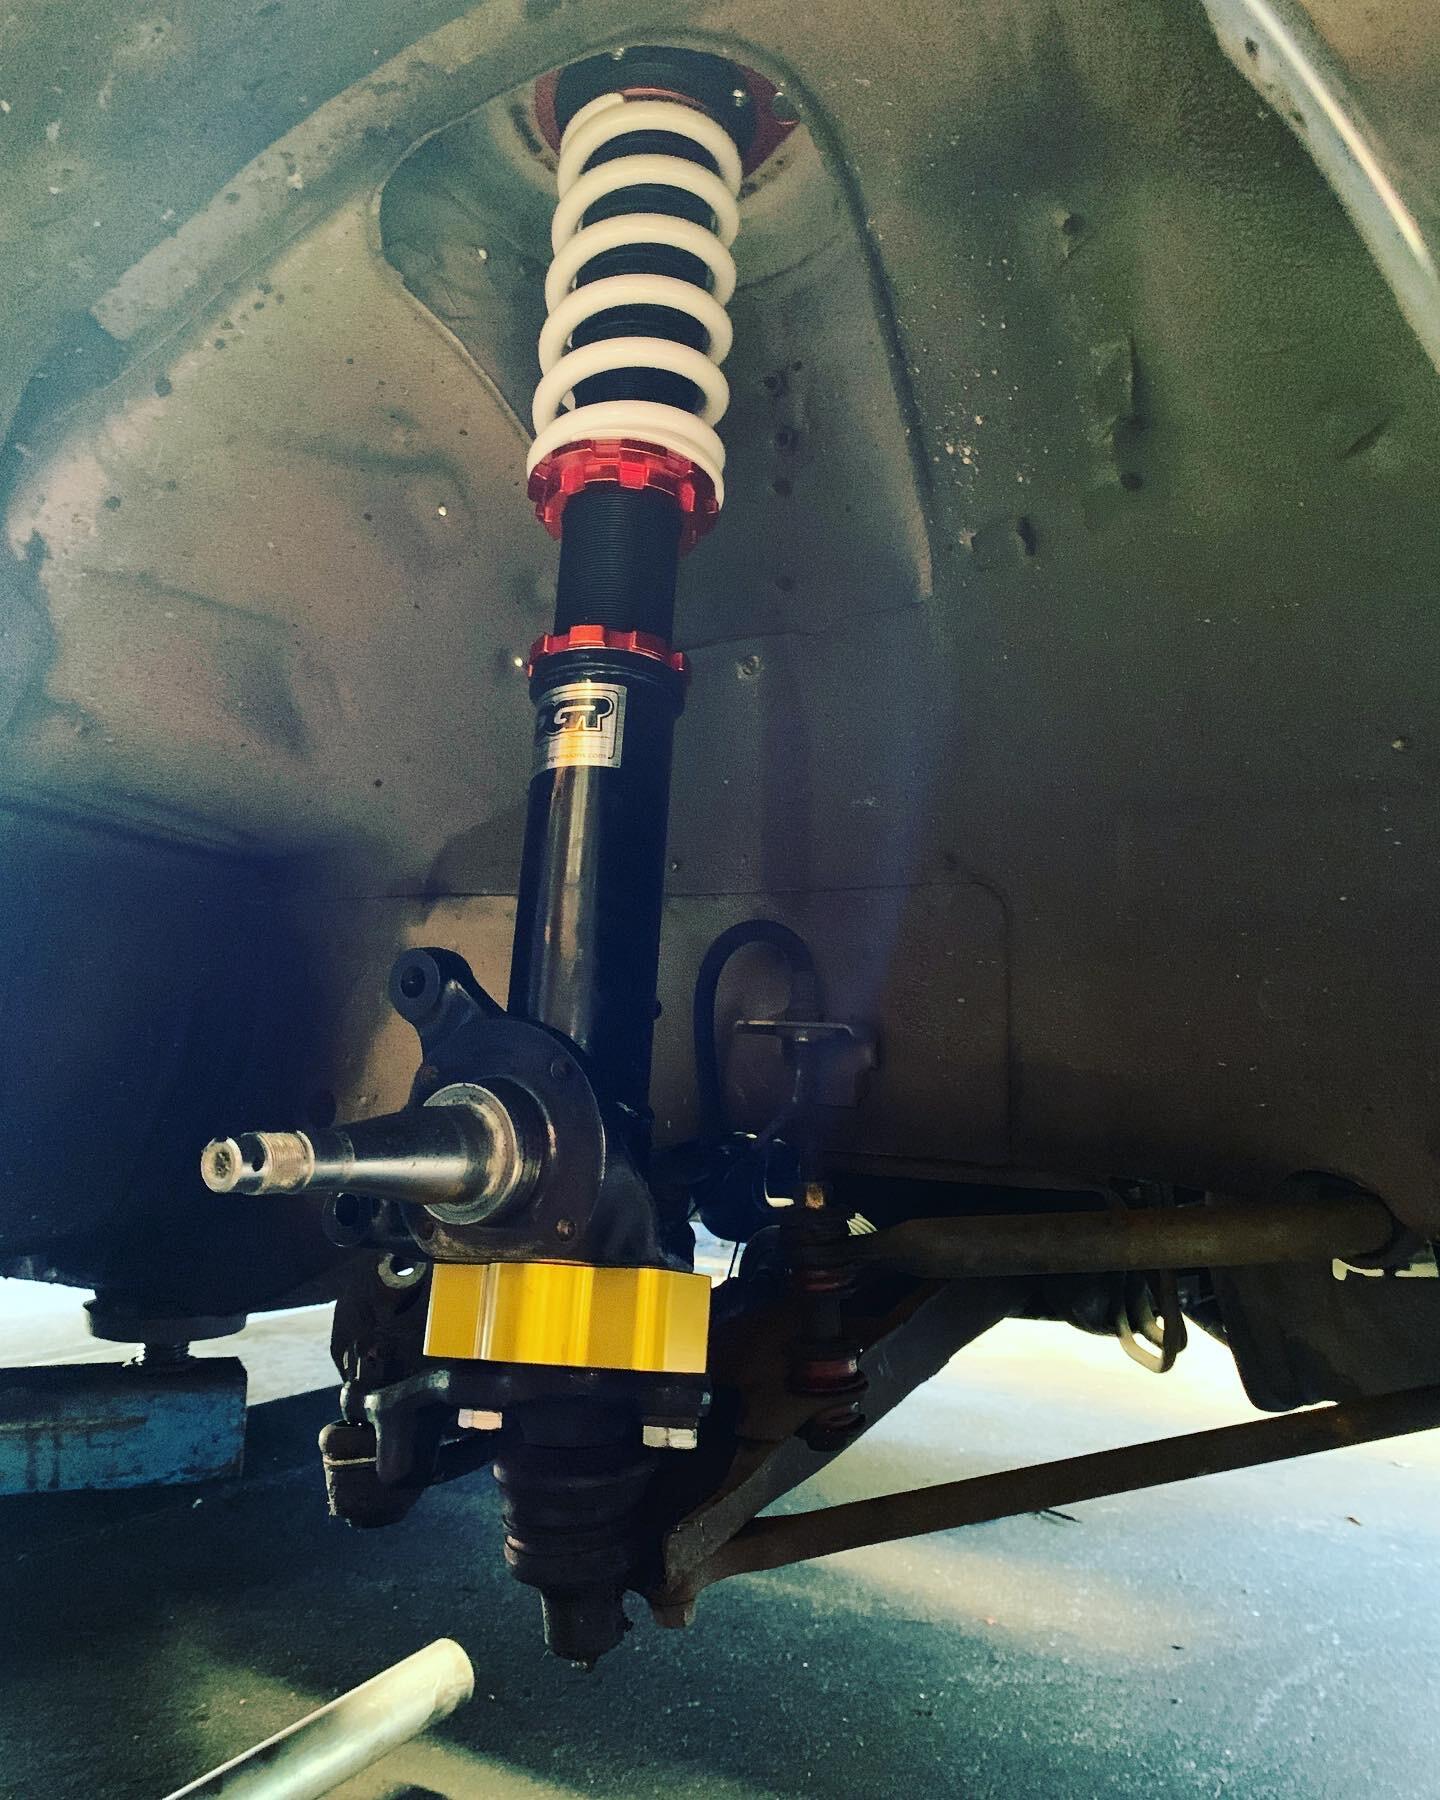
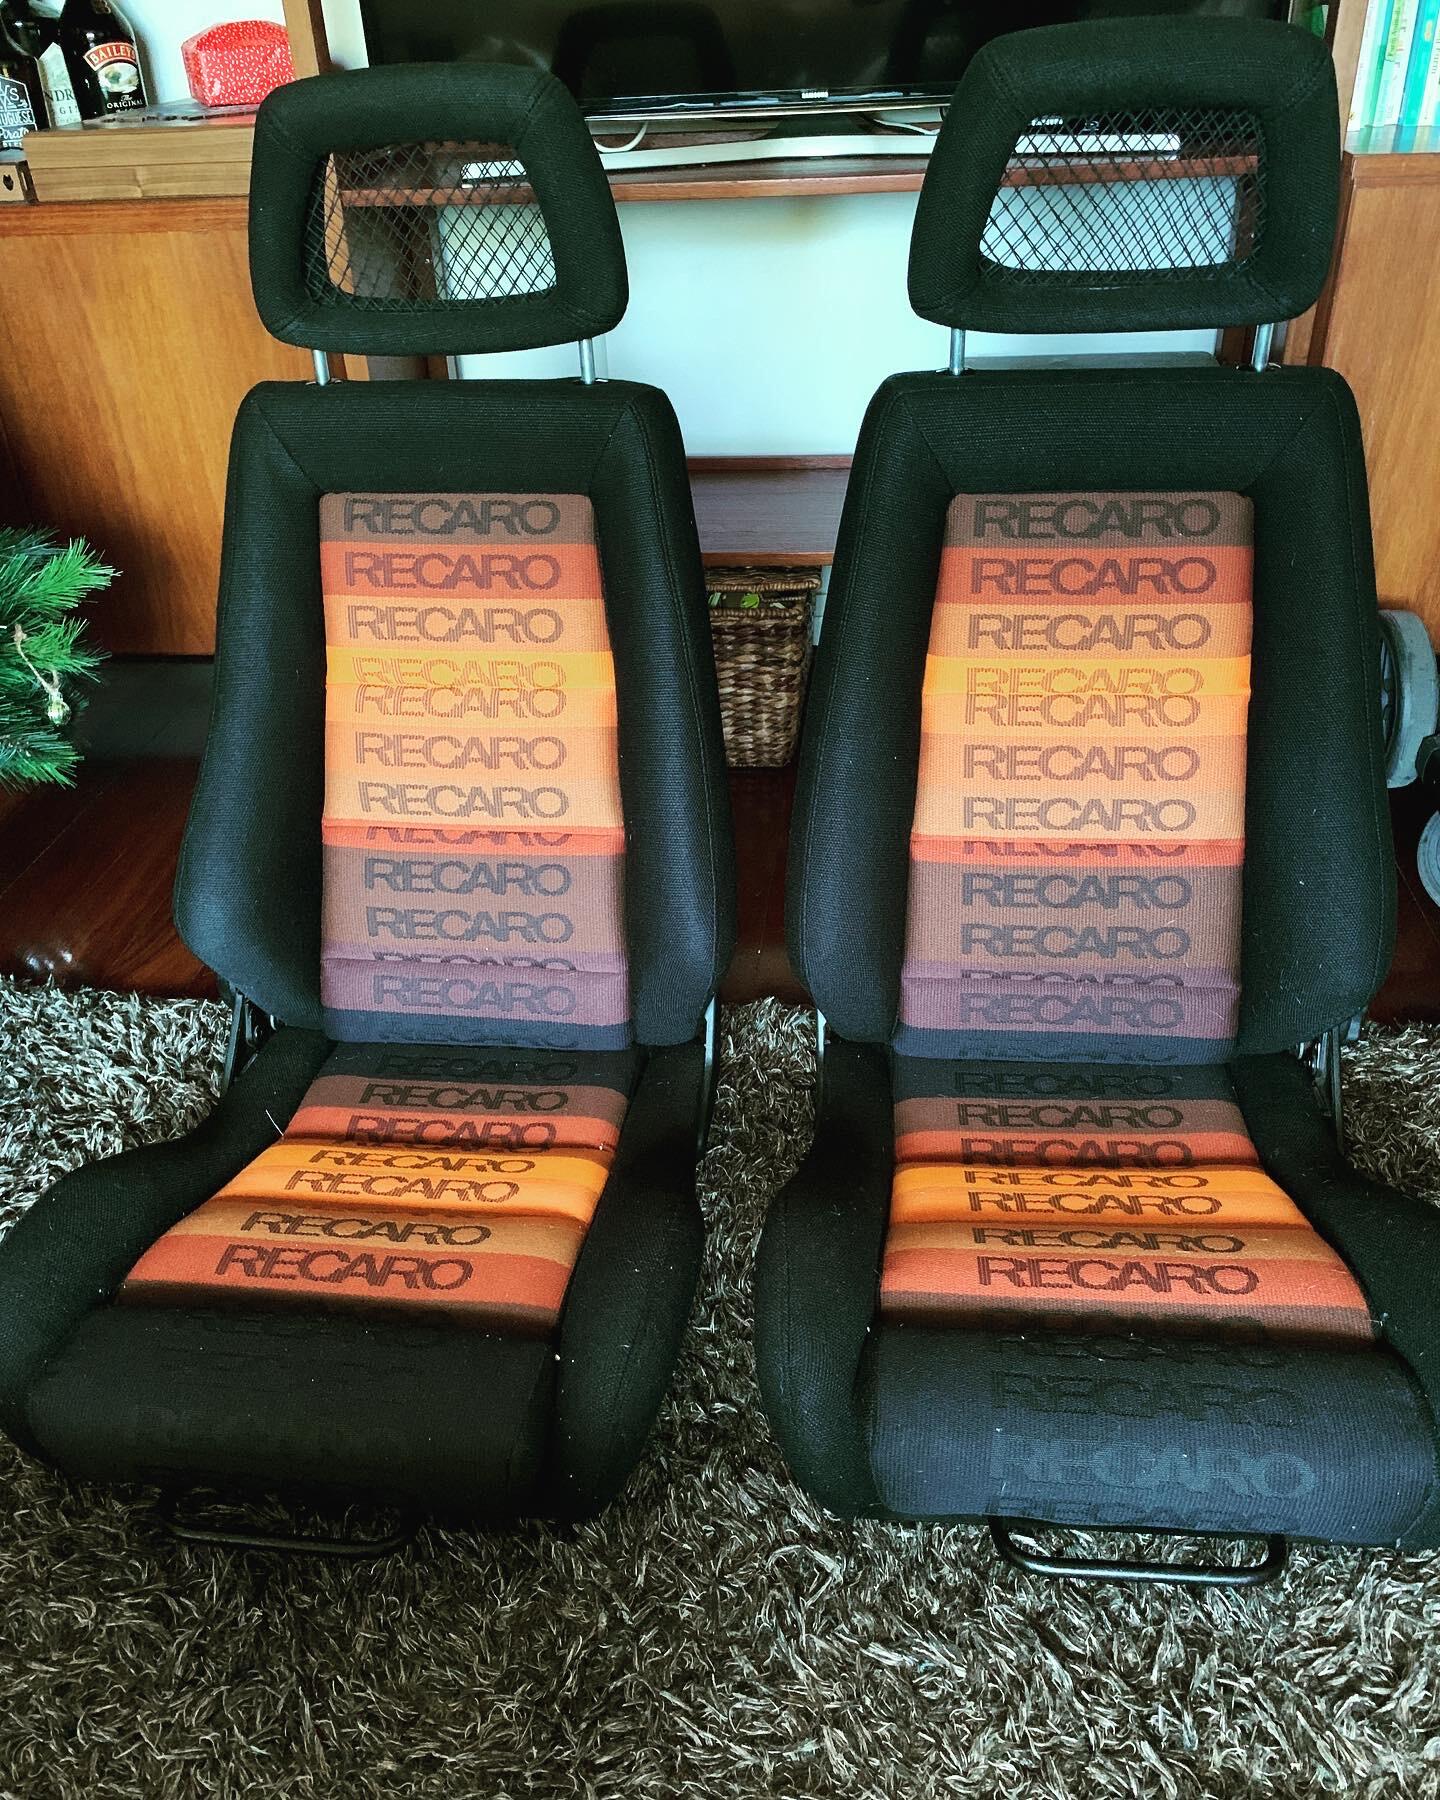
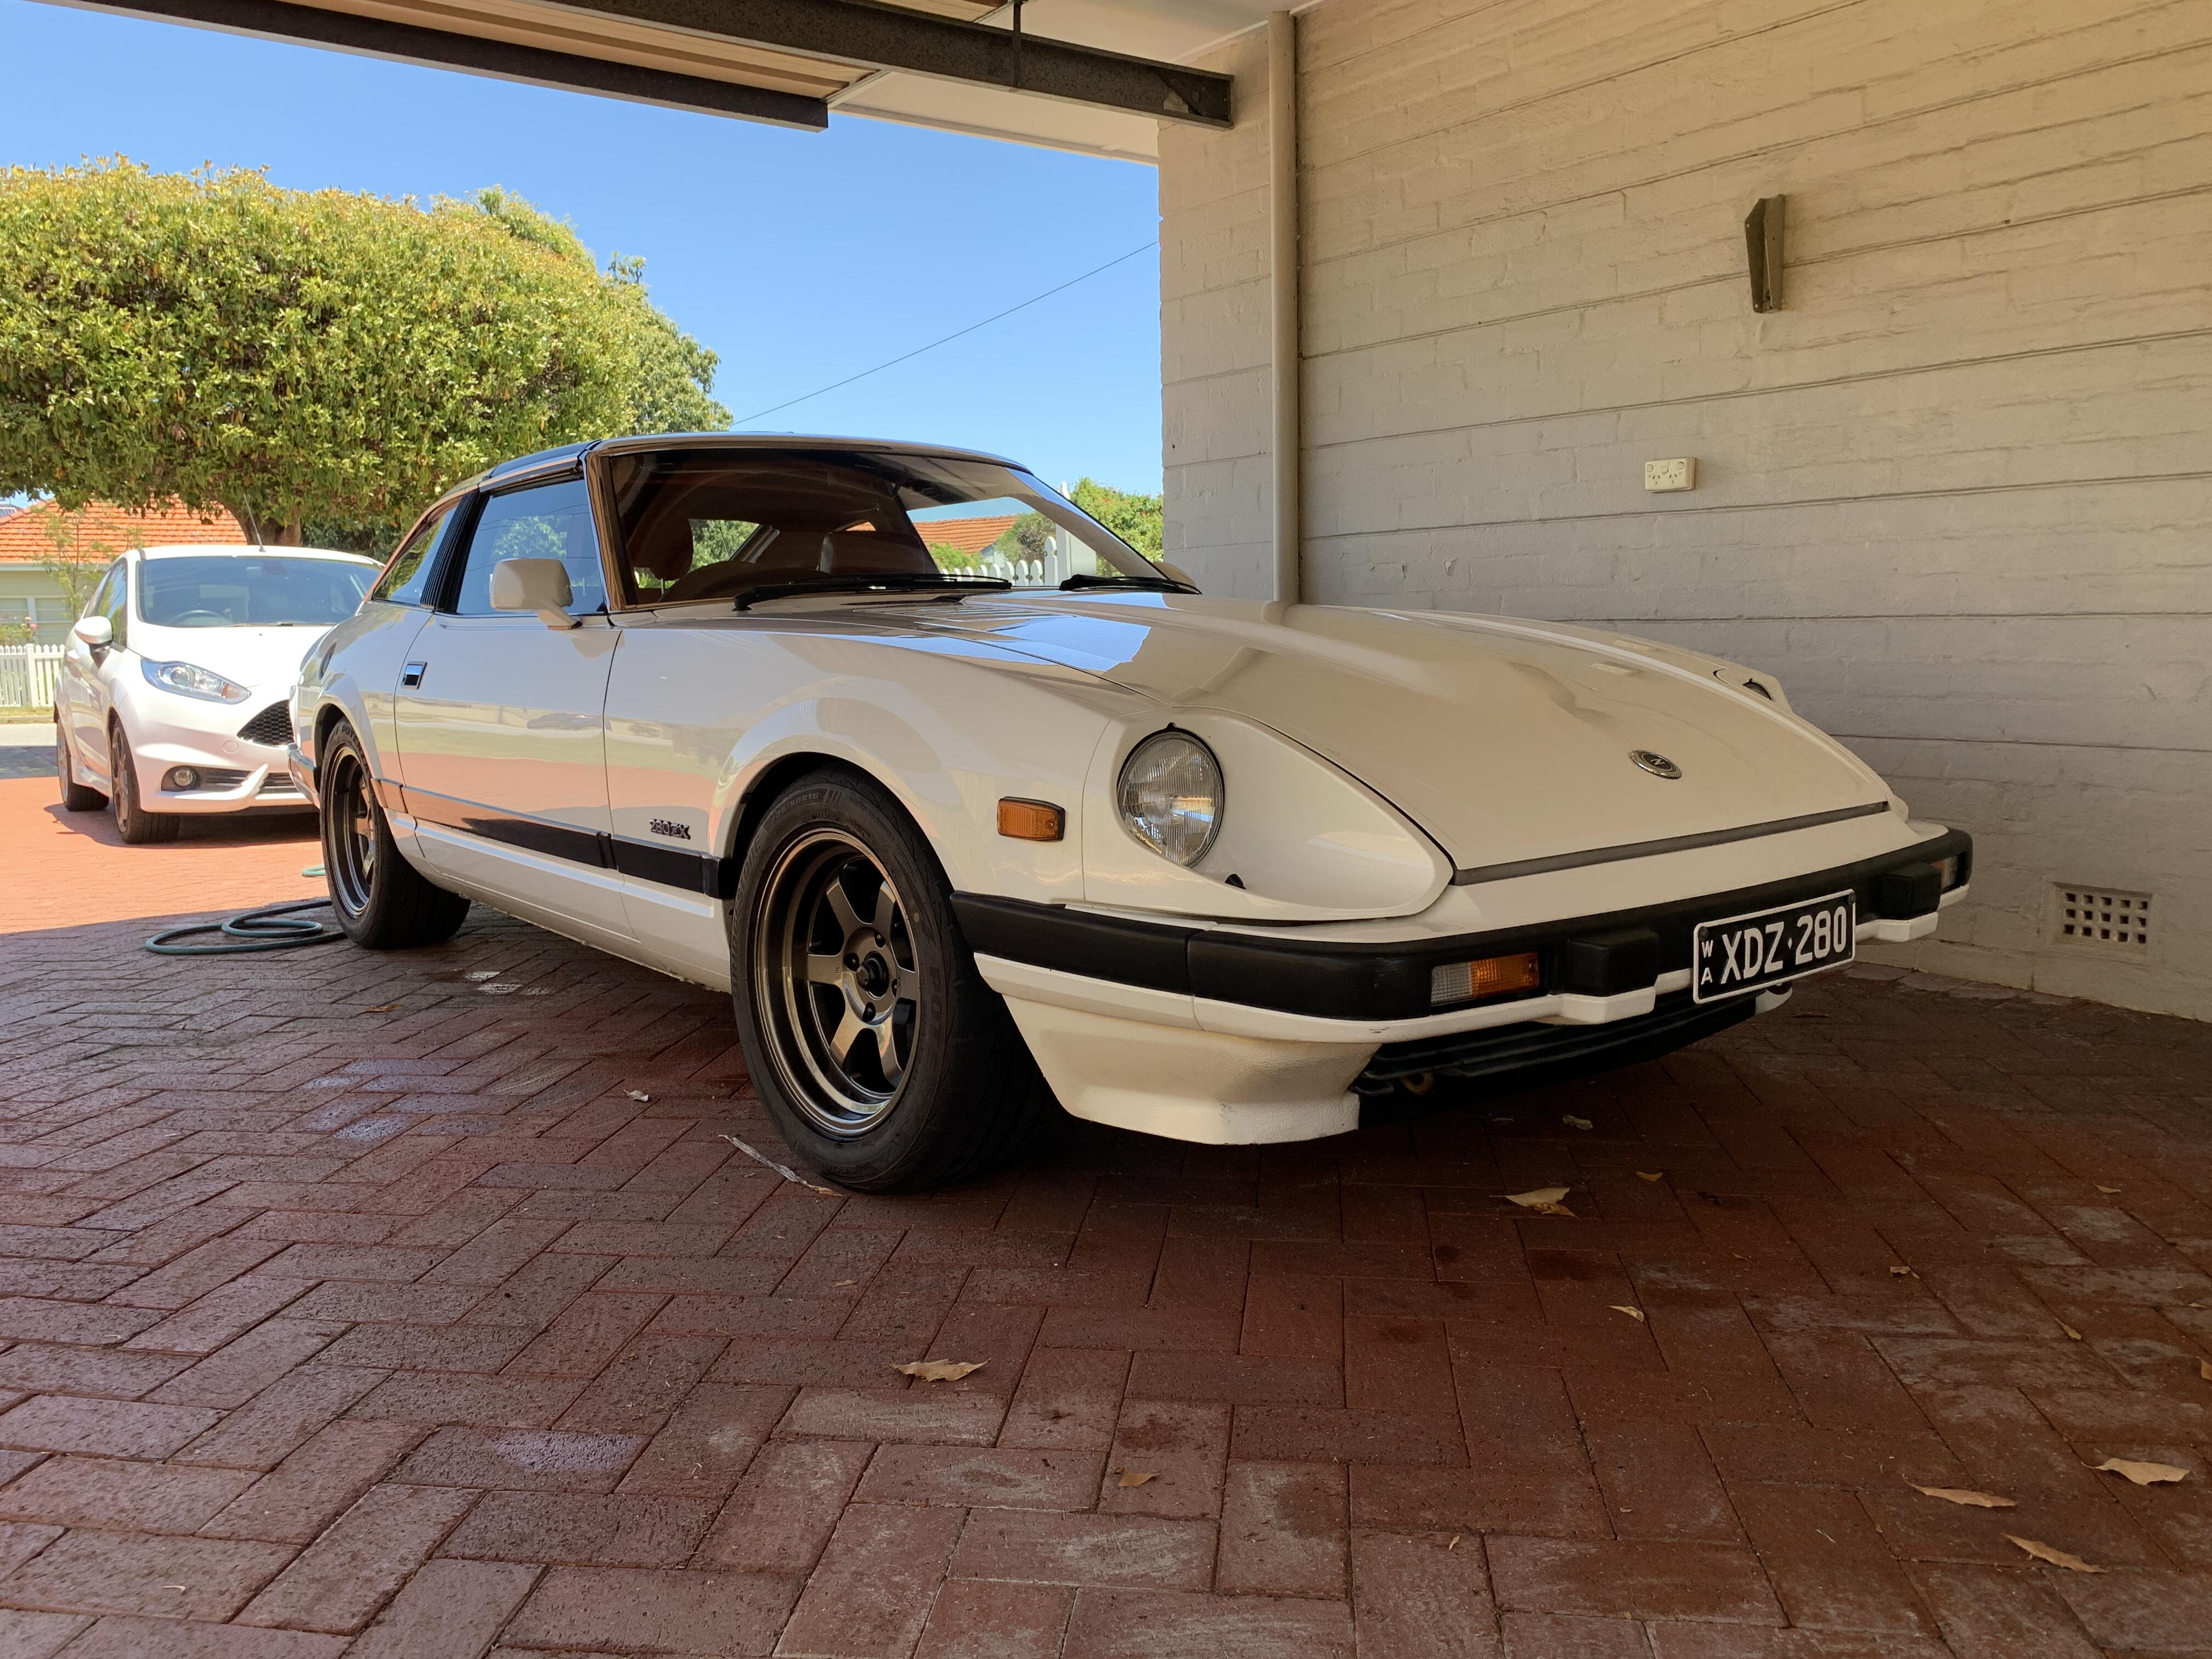
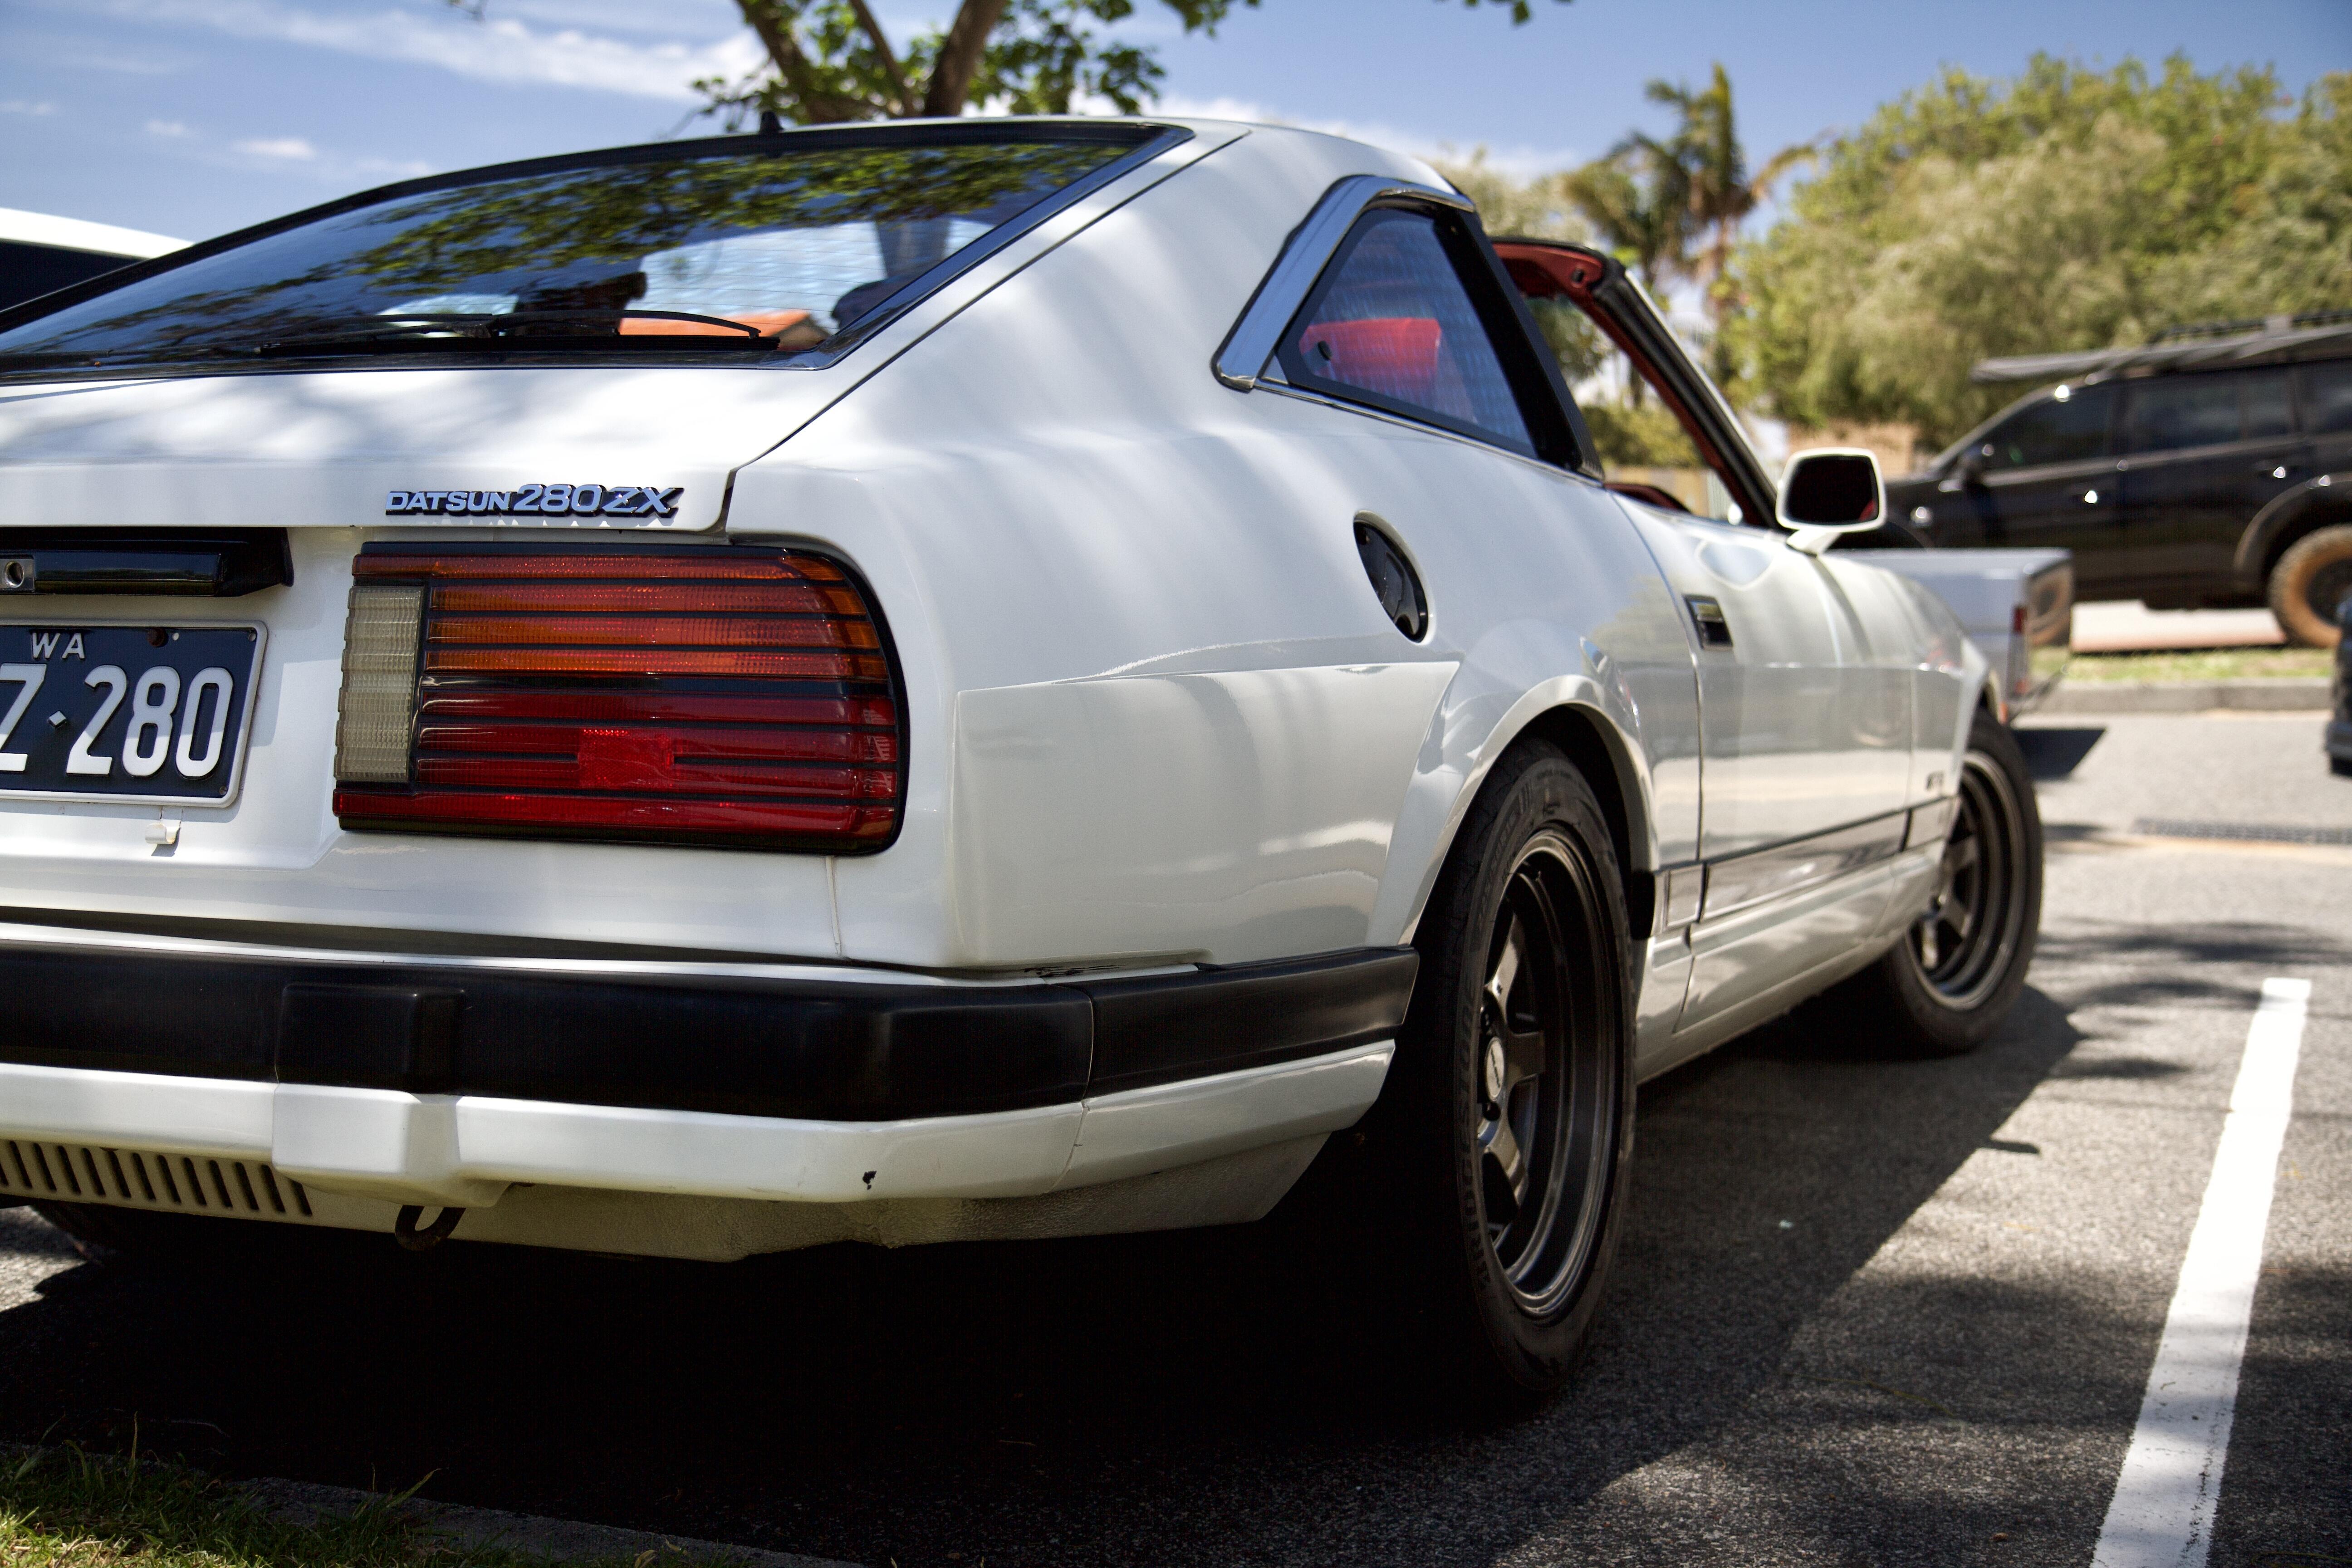
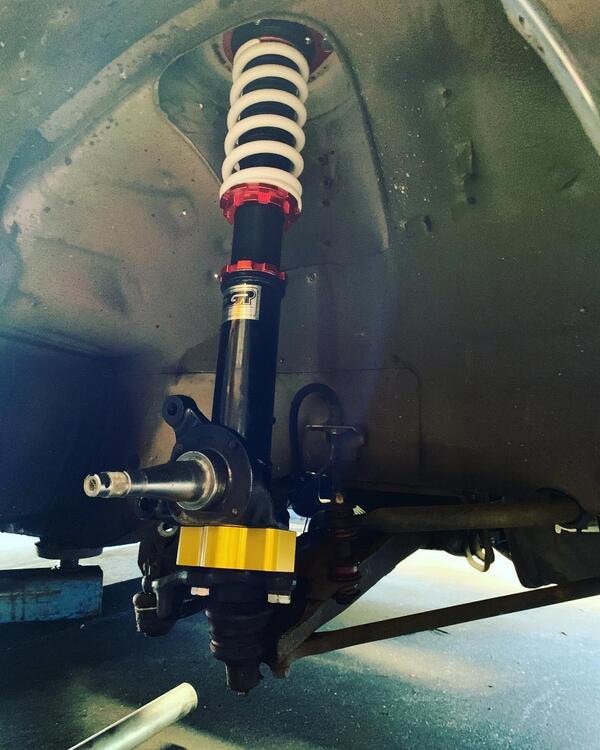
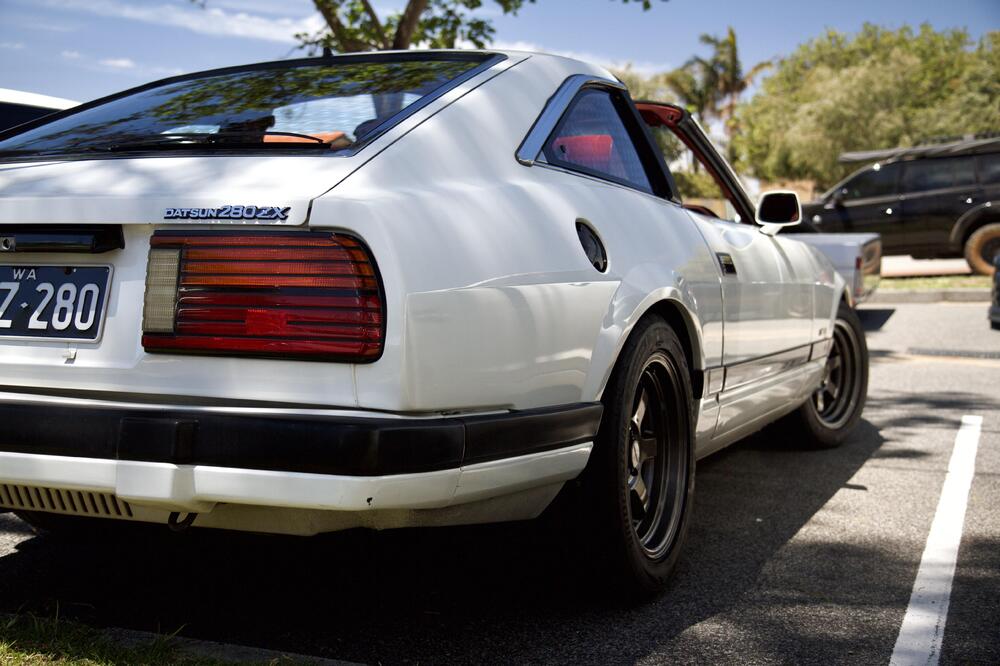
Thanks all I haven’t had any further progress on the 240z. I’ve been umming and ahhing about how to proceed. once I get some time I will head to where the car is and do some thinking. I did get my dash back from the shop. It looks fantastic, has been reskinned. @dutchzcarguy the 280zx however has had some love, it’s just so much easier to get stuff done when the car is with you unlike the 240z… I installed new Rota grid classic wheels and DGR coilovers with some T3 Negative camber roll center adjusters, T3 tri point strut bar in the front, T3 billet steering coupler and the Godzilla raceworks Cold air intake, also bought a set of recaro LXs, but am only installing the drivers seat as I love the stock velour seats but they’re horrible for spirited driving. The recaro LXs are beautiful period correct seats that really hold you in place. I’ve been collecting all the parts for a manual conversion and should be starting that shortly, I have a heavier duty clutch, fidanza aluminum flywheel to go in, only thing I haven’t been able to source is a R180 3.9 or Subaru LSD R160 3.9. But I can do the conversion and put a new diff in later. I’m in love with the zx, loving having a z to drive while I’m restoring the 240z. Can’t wait to be able to shift my own gears though, the auto box is horrendous.


-
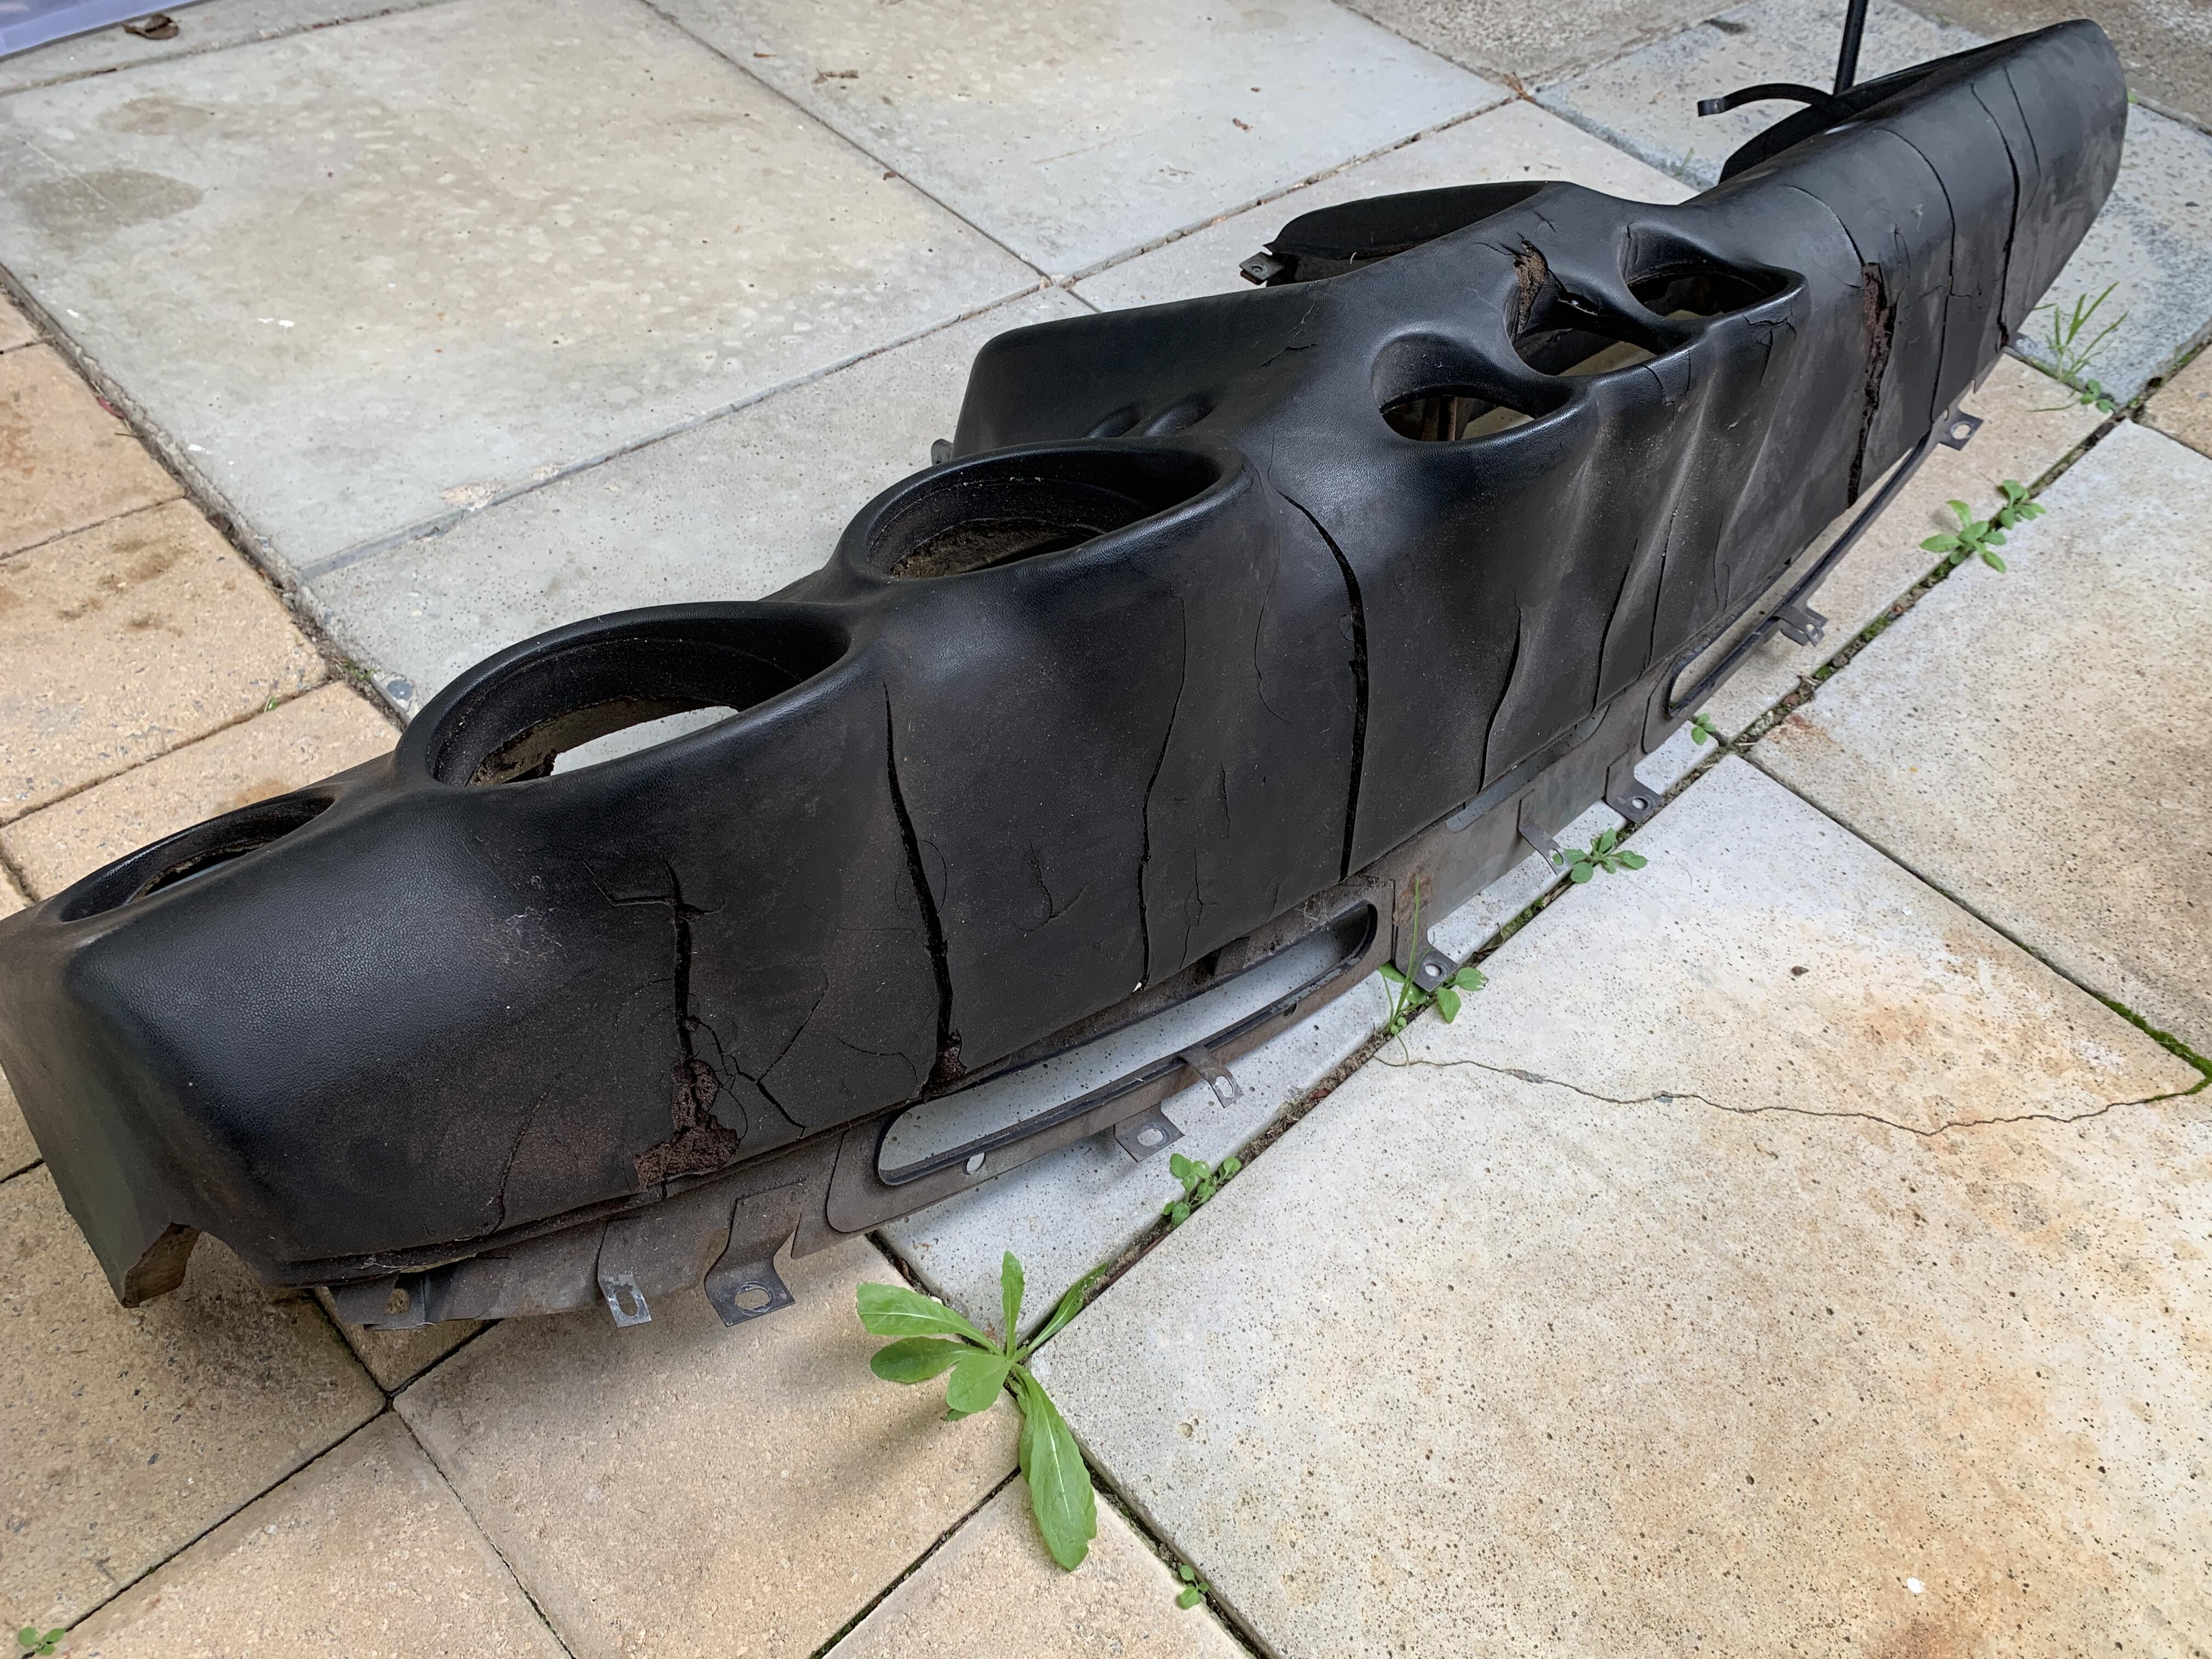
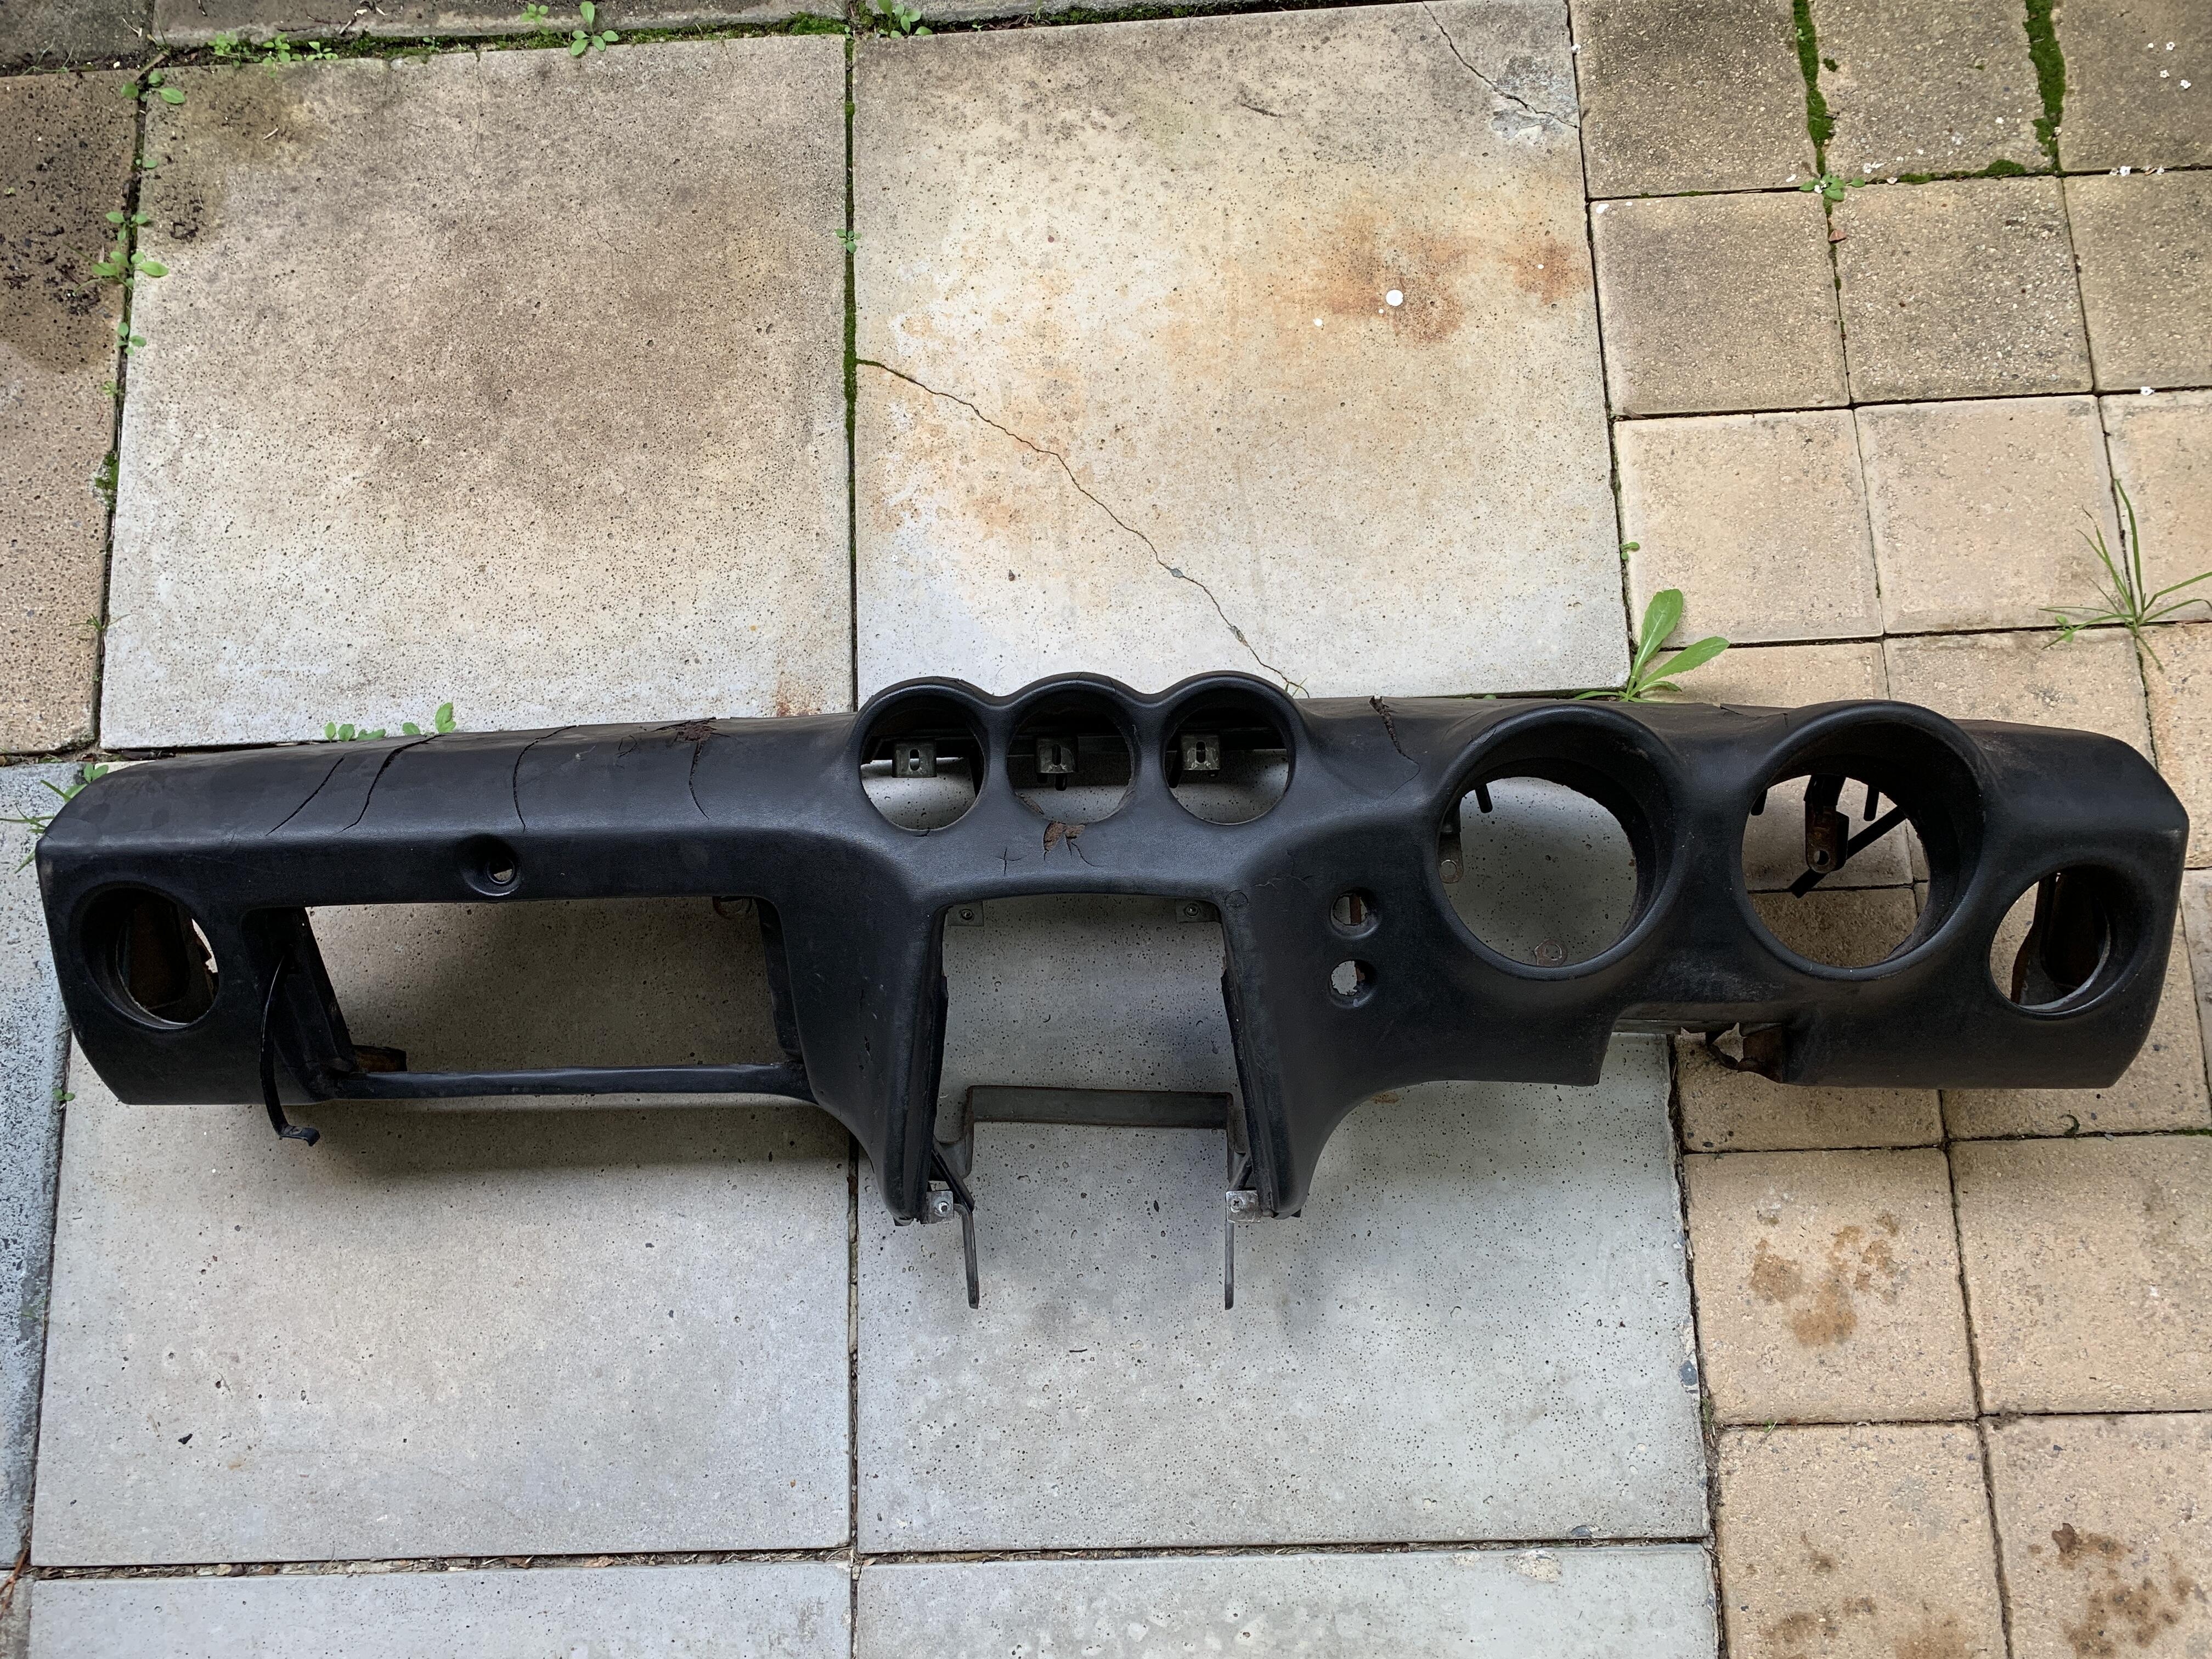
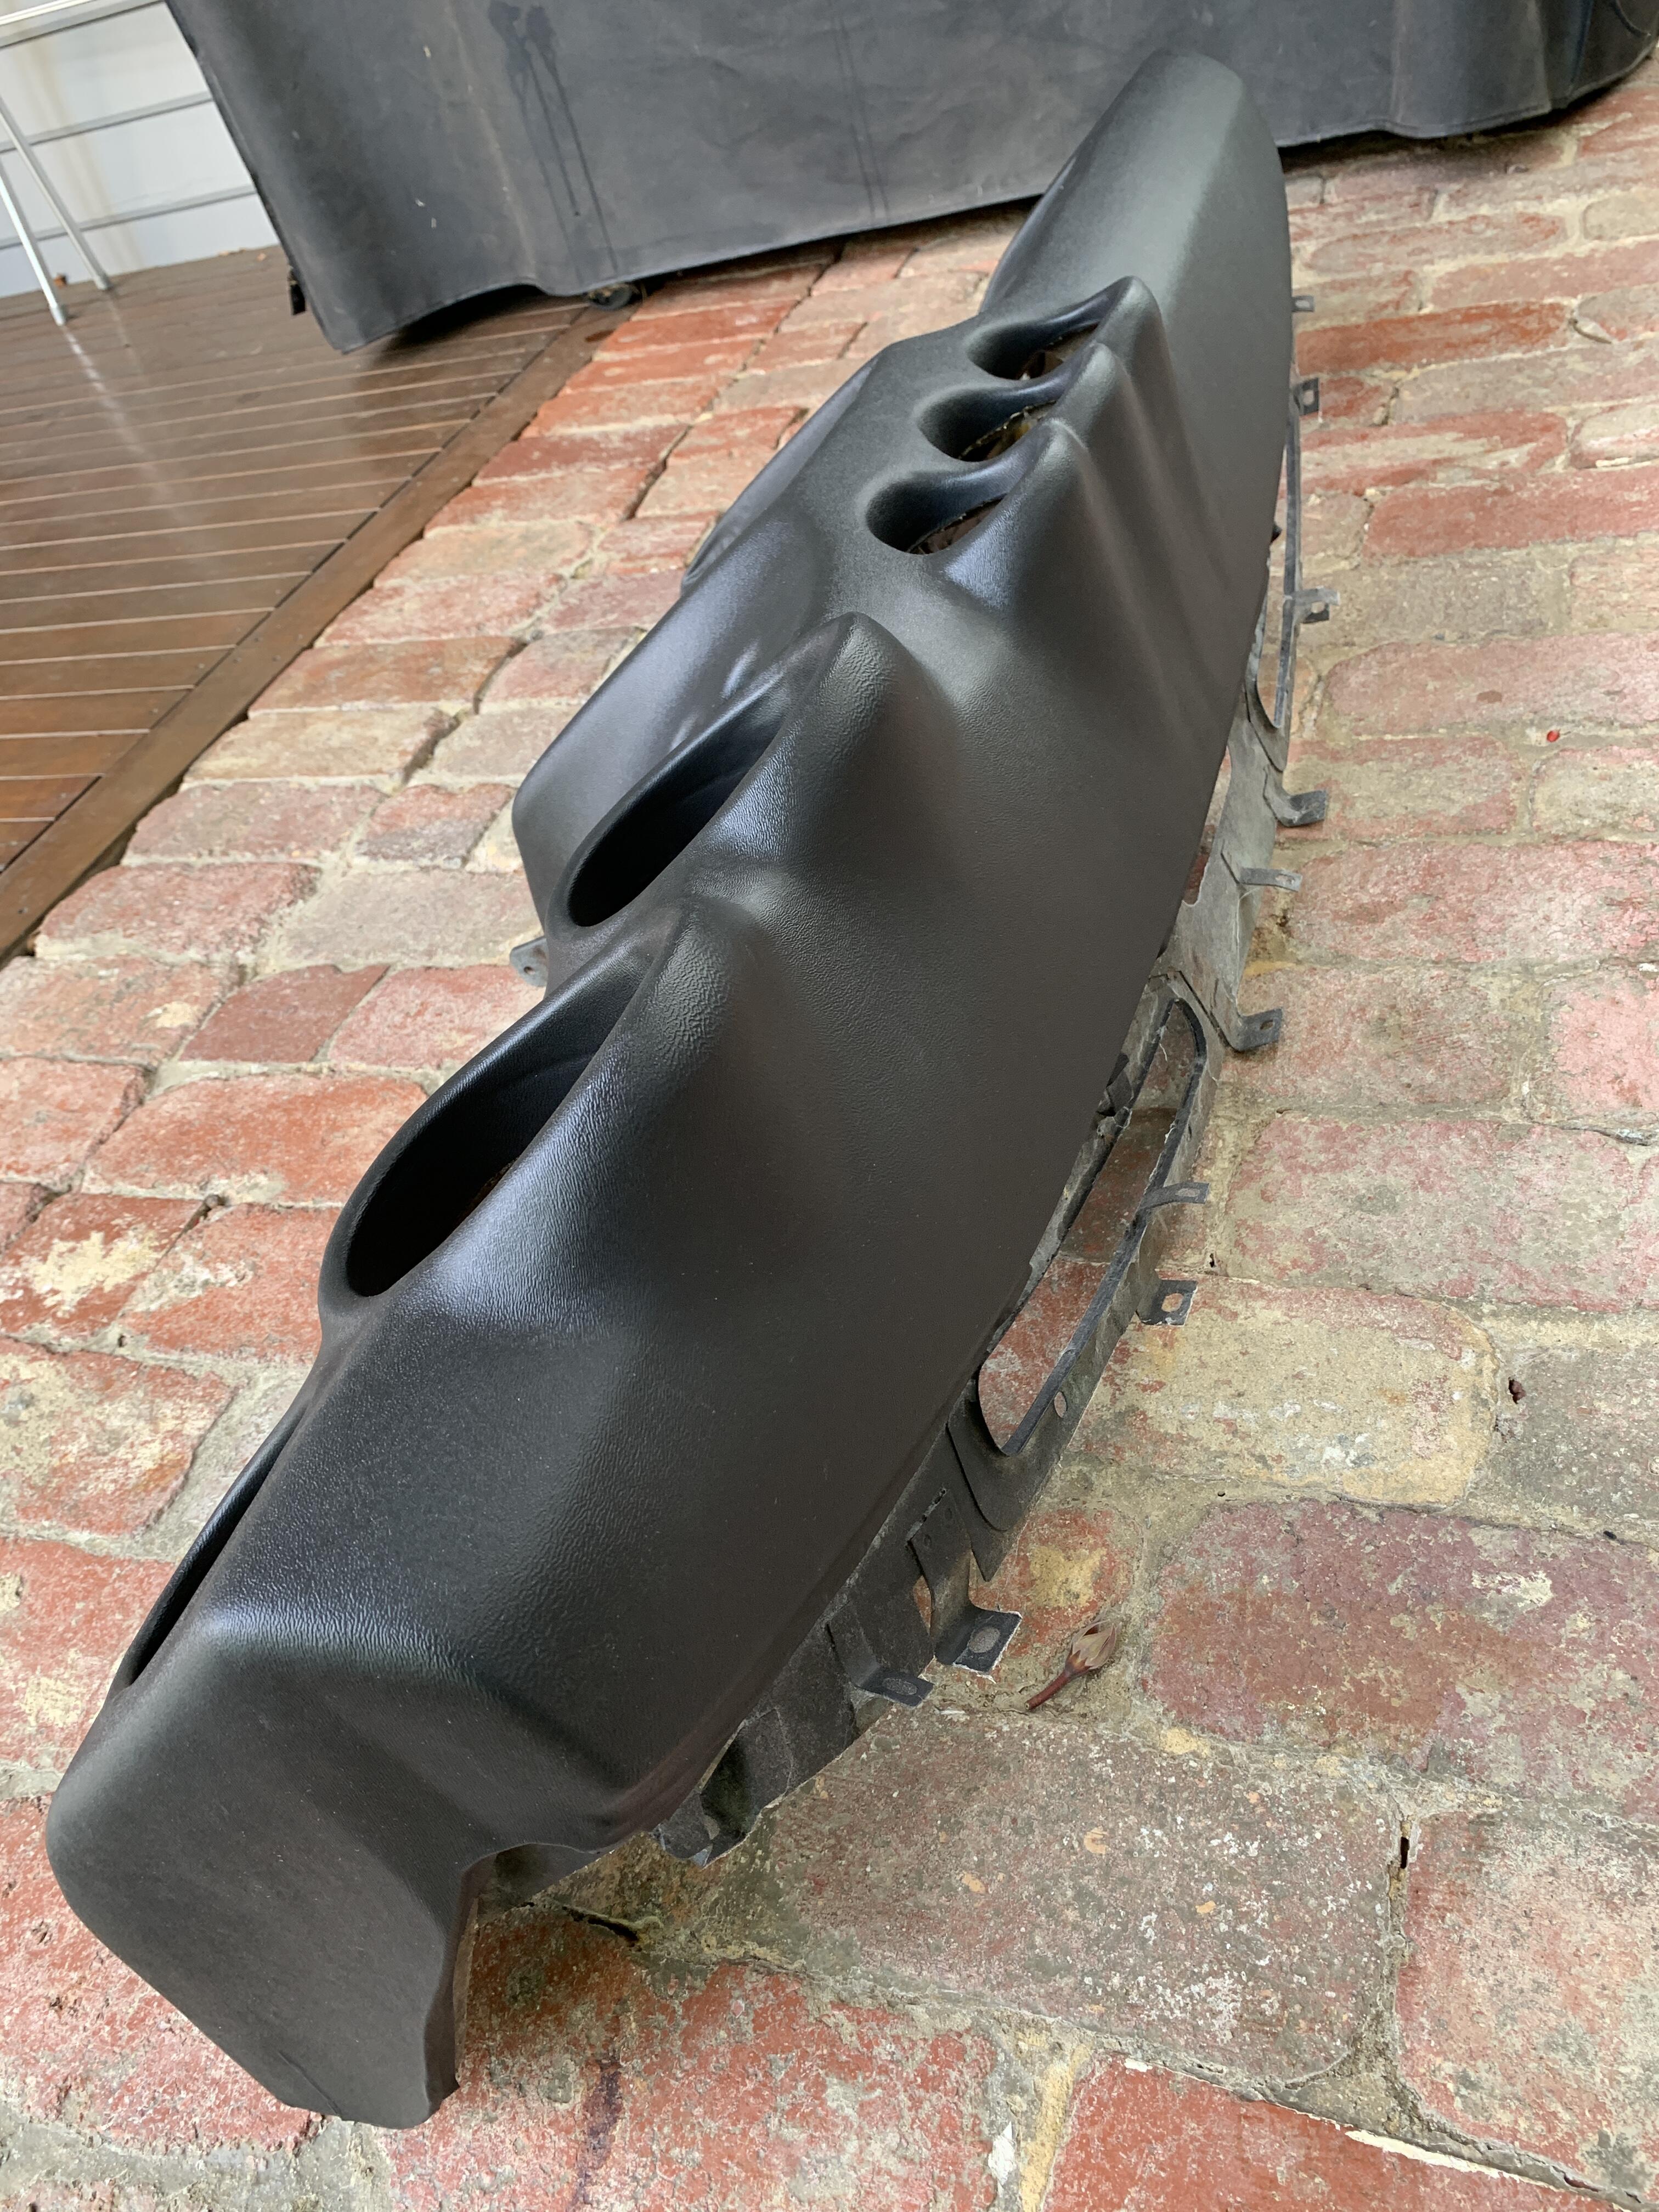
So it’s been a long time since I have worked on the car. 2021 proved to be a the worst year I’ve experienced so far in my short life. My dear mum suffered complications during surgery in January 2021, she fought the good fight but ultimately we had to let her go last year in September. I have never suffered such pain. 6 months on though I’m in a much better place. During her stay in hospital I was still working on the car and it was a welcome distraction for me and a stress release, or maybe more of a stress replacement? I’m not sure. So I will be dedicating this project to my dear mum and will change it to Project Georgia In loving memory of her. then in February we bought a new house and have been flat out preparing the old place for sale and moving into the new place. Bonus is the new place has an awesome man cave two car garage! have made small progress on stripping the dash in preparation for reskinning. It’s a very rough dash so I’m letting the pros deal with it. hopefully get back to working on the car once all this house business is sorted.
-
-
-
Ignorance.... lol out of interest, did you remove the chrome windscreen trim on your 280zx yourself? Is it possible to remove it without breaking the retaining clips? From my research it seems impossible. I recently bought a 280zx and it has a small bubble of rust on the bottom of the windscreen. I want to remove the lower trim to see if I can clean up the rust without removing the windscreen.
-
Nice work!!! where did you source the foam?
-
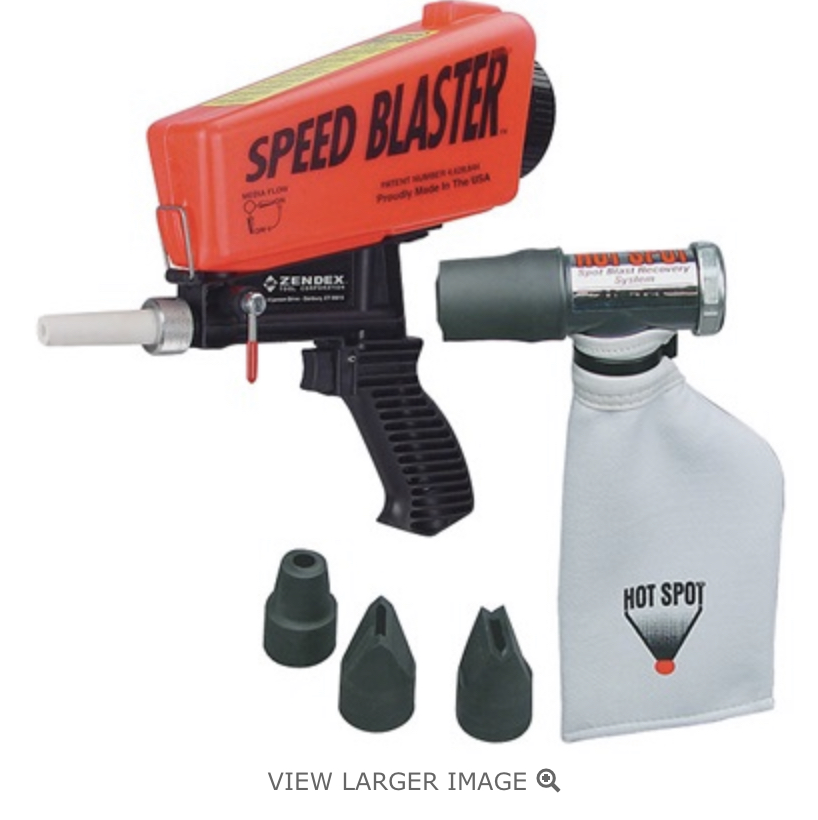
Didn’t get a great deal of time this break, only managed a few precious hours with Sheena. I’ve lost a tonne of sleep lately, tossing and turning in bed scheming and stressing about how I’m going to do this job! Anyone else do that? I’m sure I’m not the only one... I ground down all the proud spot welds and gave the front face and what I could reach a good wire wheeling. I bolted the repair panel in, marked the cut line and made the finaL cut. All the while shitting myself... cut was good with more room for access I went to work cleaning the box section as best I could. Came up ok and revealed many new holes where rust had eaten through. Question. Can I just fill any small holes with the mig? Given I use a rust converter and ensure the welding surface is free of any rust? I was keen to get a coating on the box section but with the rust that needs repairing I figured I would save it for once those were done. I was thinking of trying a spot blaster to further tidy up the unreachable areas in the box section. Has anyone used something like these? I know they’re generally crap but are they good enough to do some small areas? next time I plan to: - repair rusted through areas on the box section (I think I’ll be lucky to get through this as will be my first time welding in patch panels....wish me luck....) - hopefully get some kbs rustseal in there


-
-
-
-