240ZBUILTBYME
Free Member
-
Joined
-
Last visited
Everything posted by 240ZBUILTBYME
-
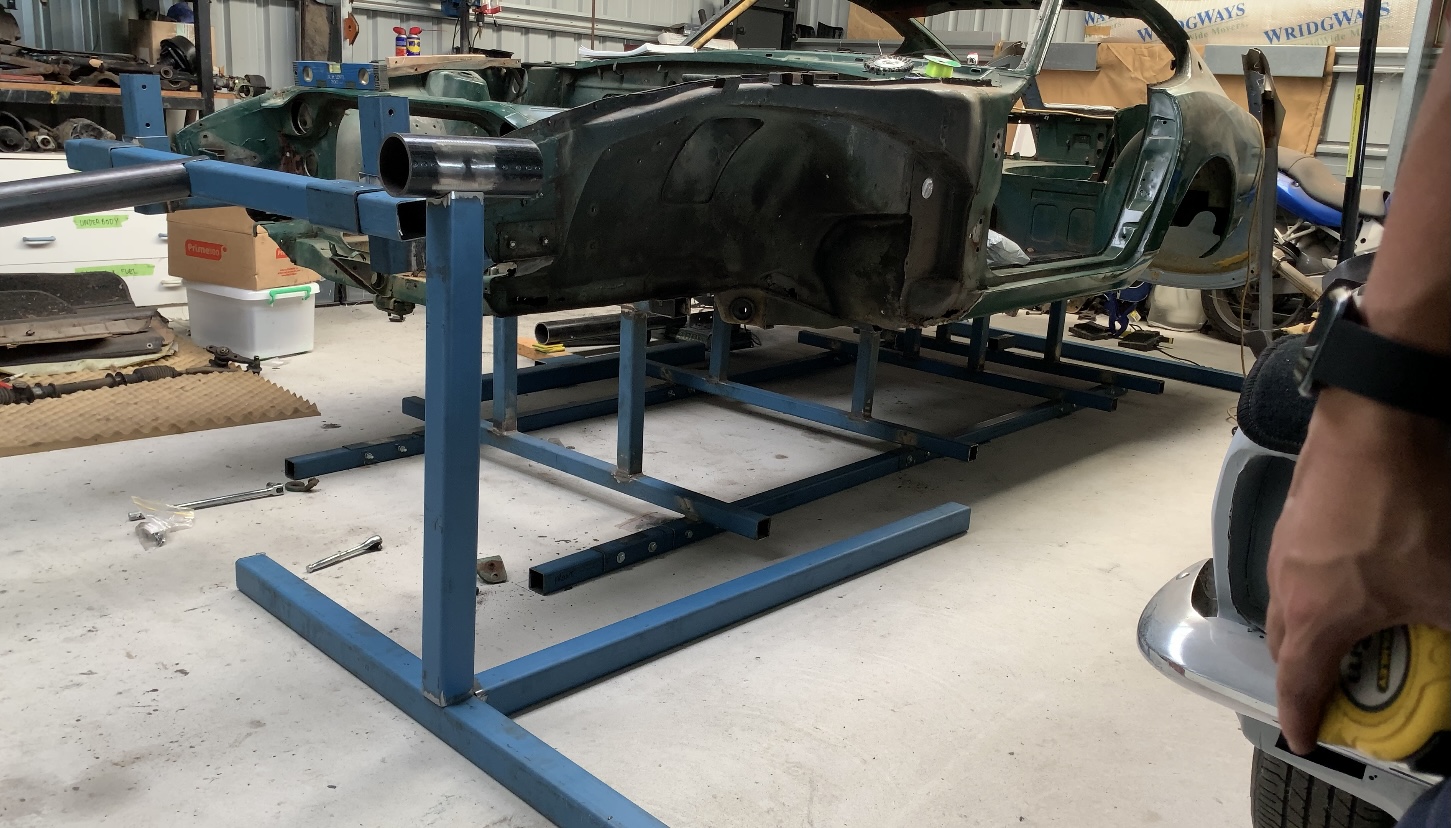
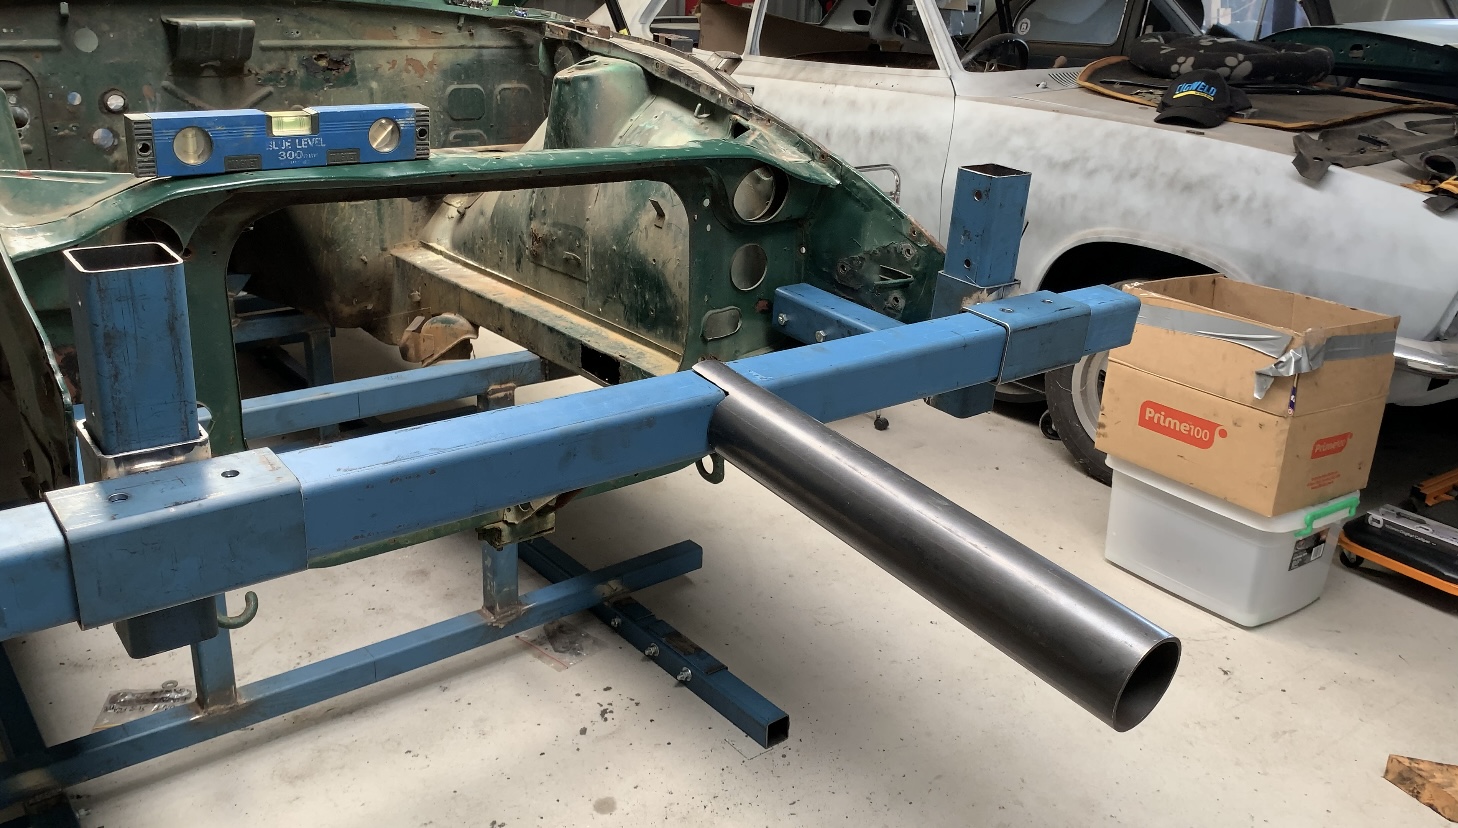
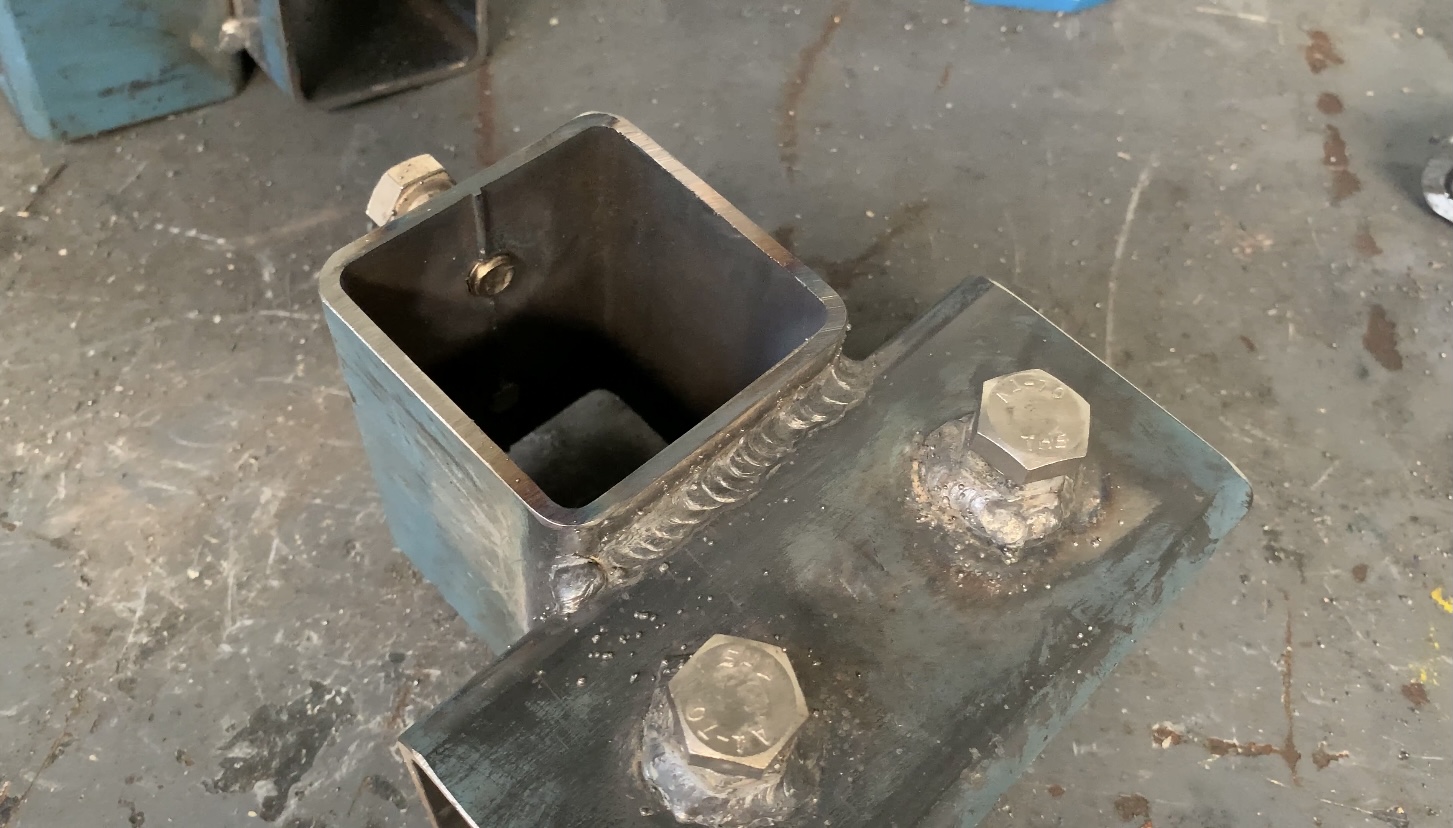
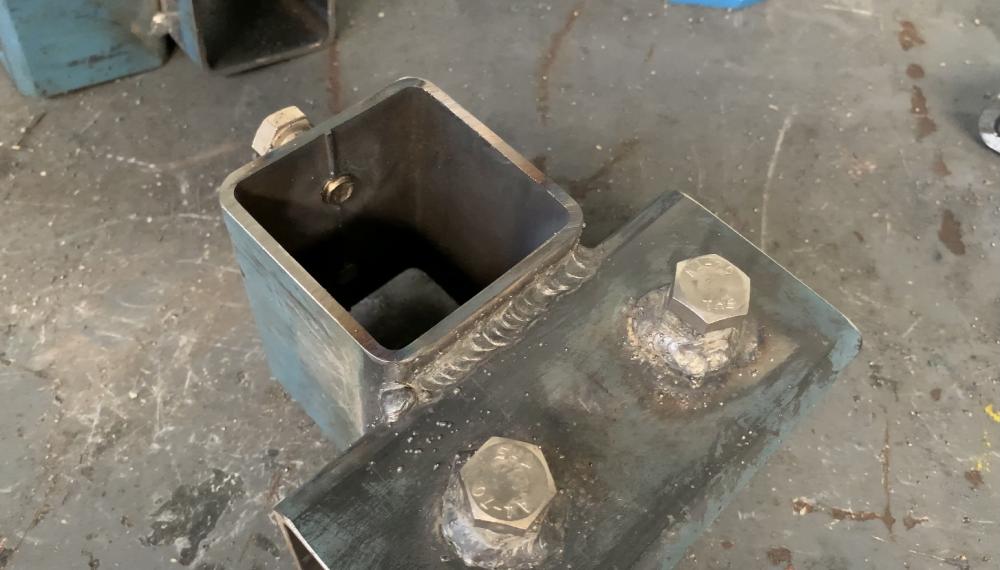
 I decided to plough on with the rotisserie build as I won’t be attempting repair on my front end until I have the car blasted and up to replacing frame rails/removing radiator support. Progress is coming along nicely. I realized that if I flipped my mounts and drilled new holes I wouldn’t have to cut and reweld. So now the mounts clear the nose. I love humanities proneness to be lazy. notched pipe and mocked up horizontal joiner piece. welded up brackets and jam nuts. My welding is slowly getting better, soon I’ll be able boast about stacking dimes 😂 mocked up front base, notched upright for the pipe to fit into snuggly. Next on the list: - tack everything together and add extra supports to the base -install castors - do a mock install from jig to rotisserie, My goal is to be able to transfer the shell between jig and rotisserie with minimal fuss and effort -all going well, weld up front frame and base and move onto the rear.
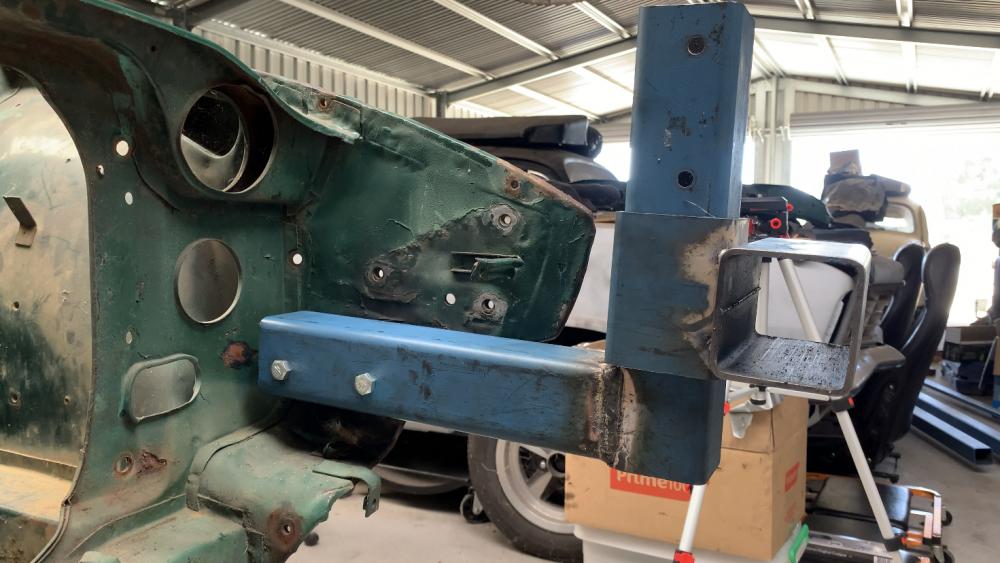


-
-
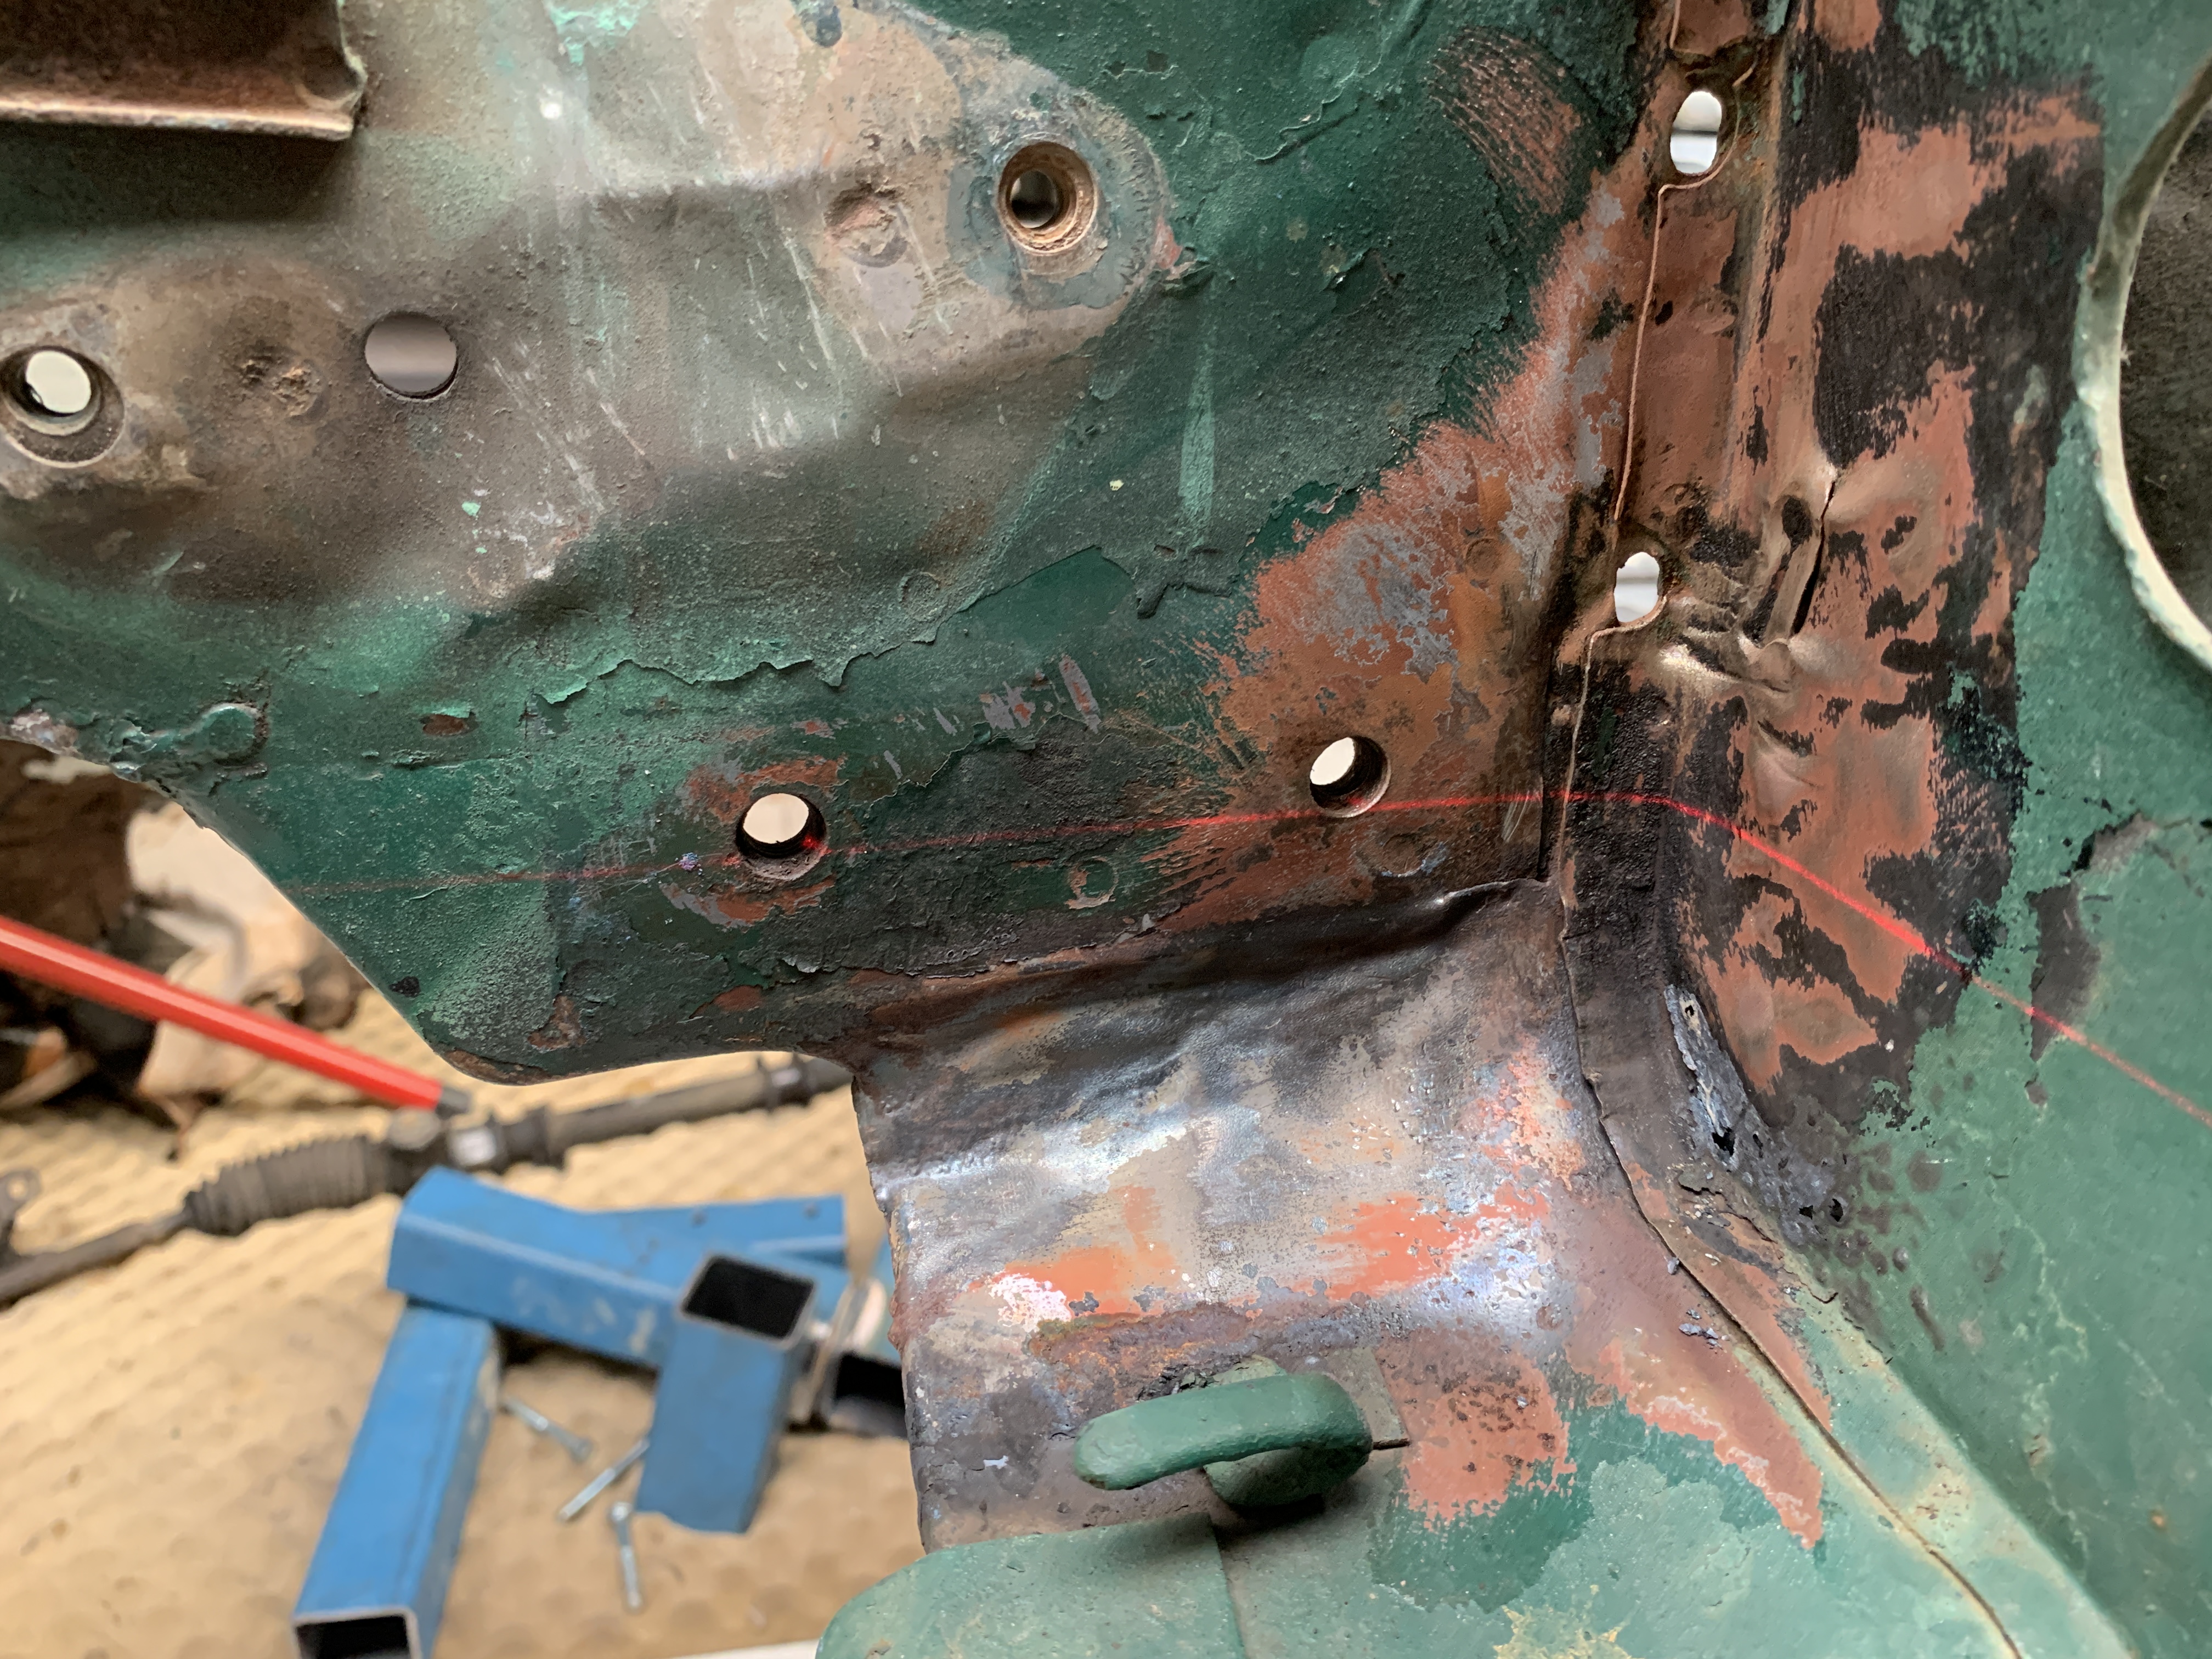
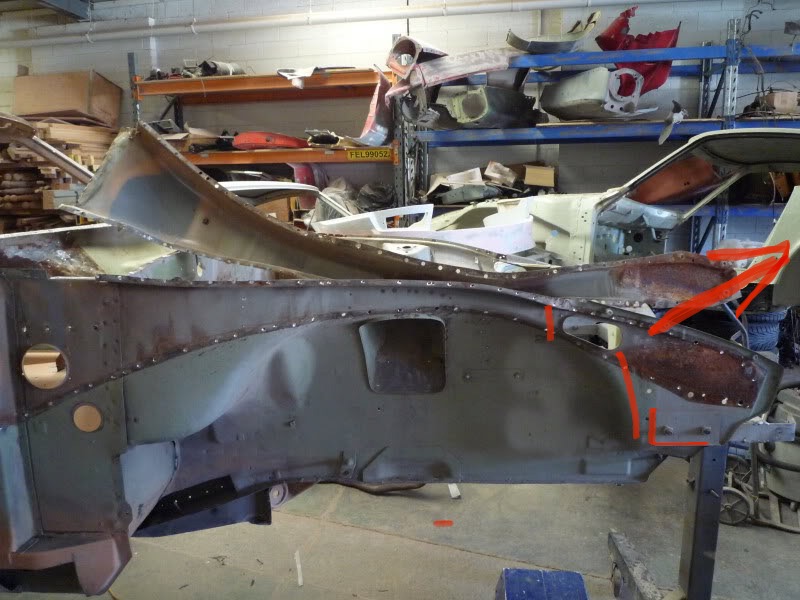
@Patcon @Namerow all great ideas, I wish I could get stuck into it already! my damage is as follows, lines indicate crumpled metal. Arrow indicates direction I need to pull which is why a pulling frame may be the way to go. I do also have provisions to build a frame that bolts into the sway bar mounts but this frame will only be 25mm or 1 inch tubing, but would still bring the force forward. yes I will be removing the doubler panel as you call it, namerow you are correct in saying it is the weak point and if you look at my photos you’ll see mine was folded where that dimple sits. I will be cutting and replacing that damaged section with the clean front cut I have.
-
Yes it does sir, that’s a great idea! Definitely a good option
-
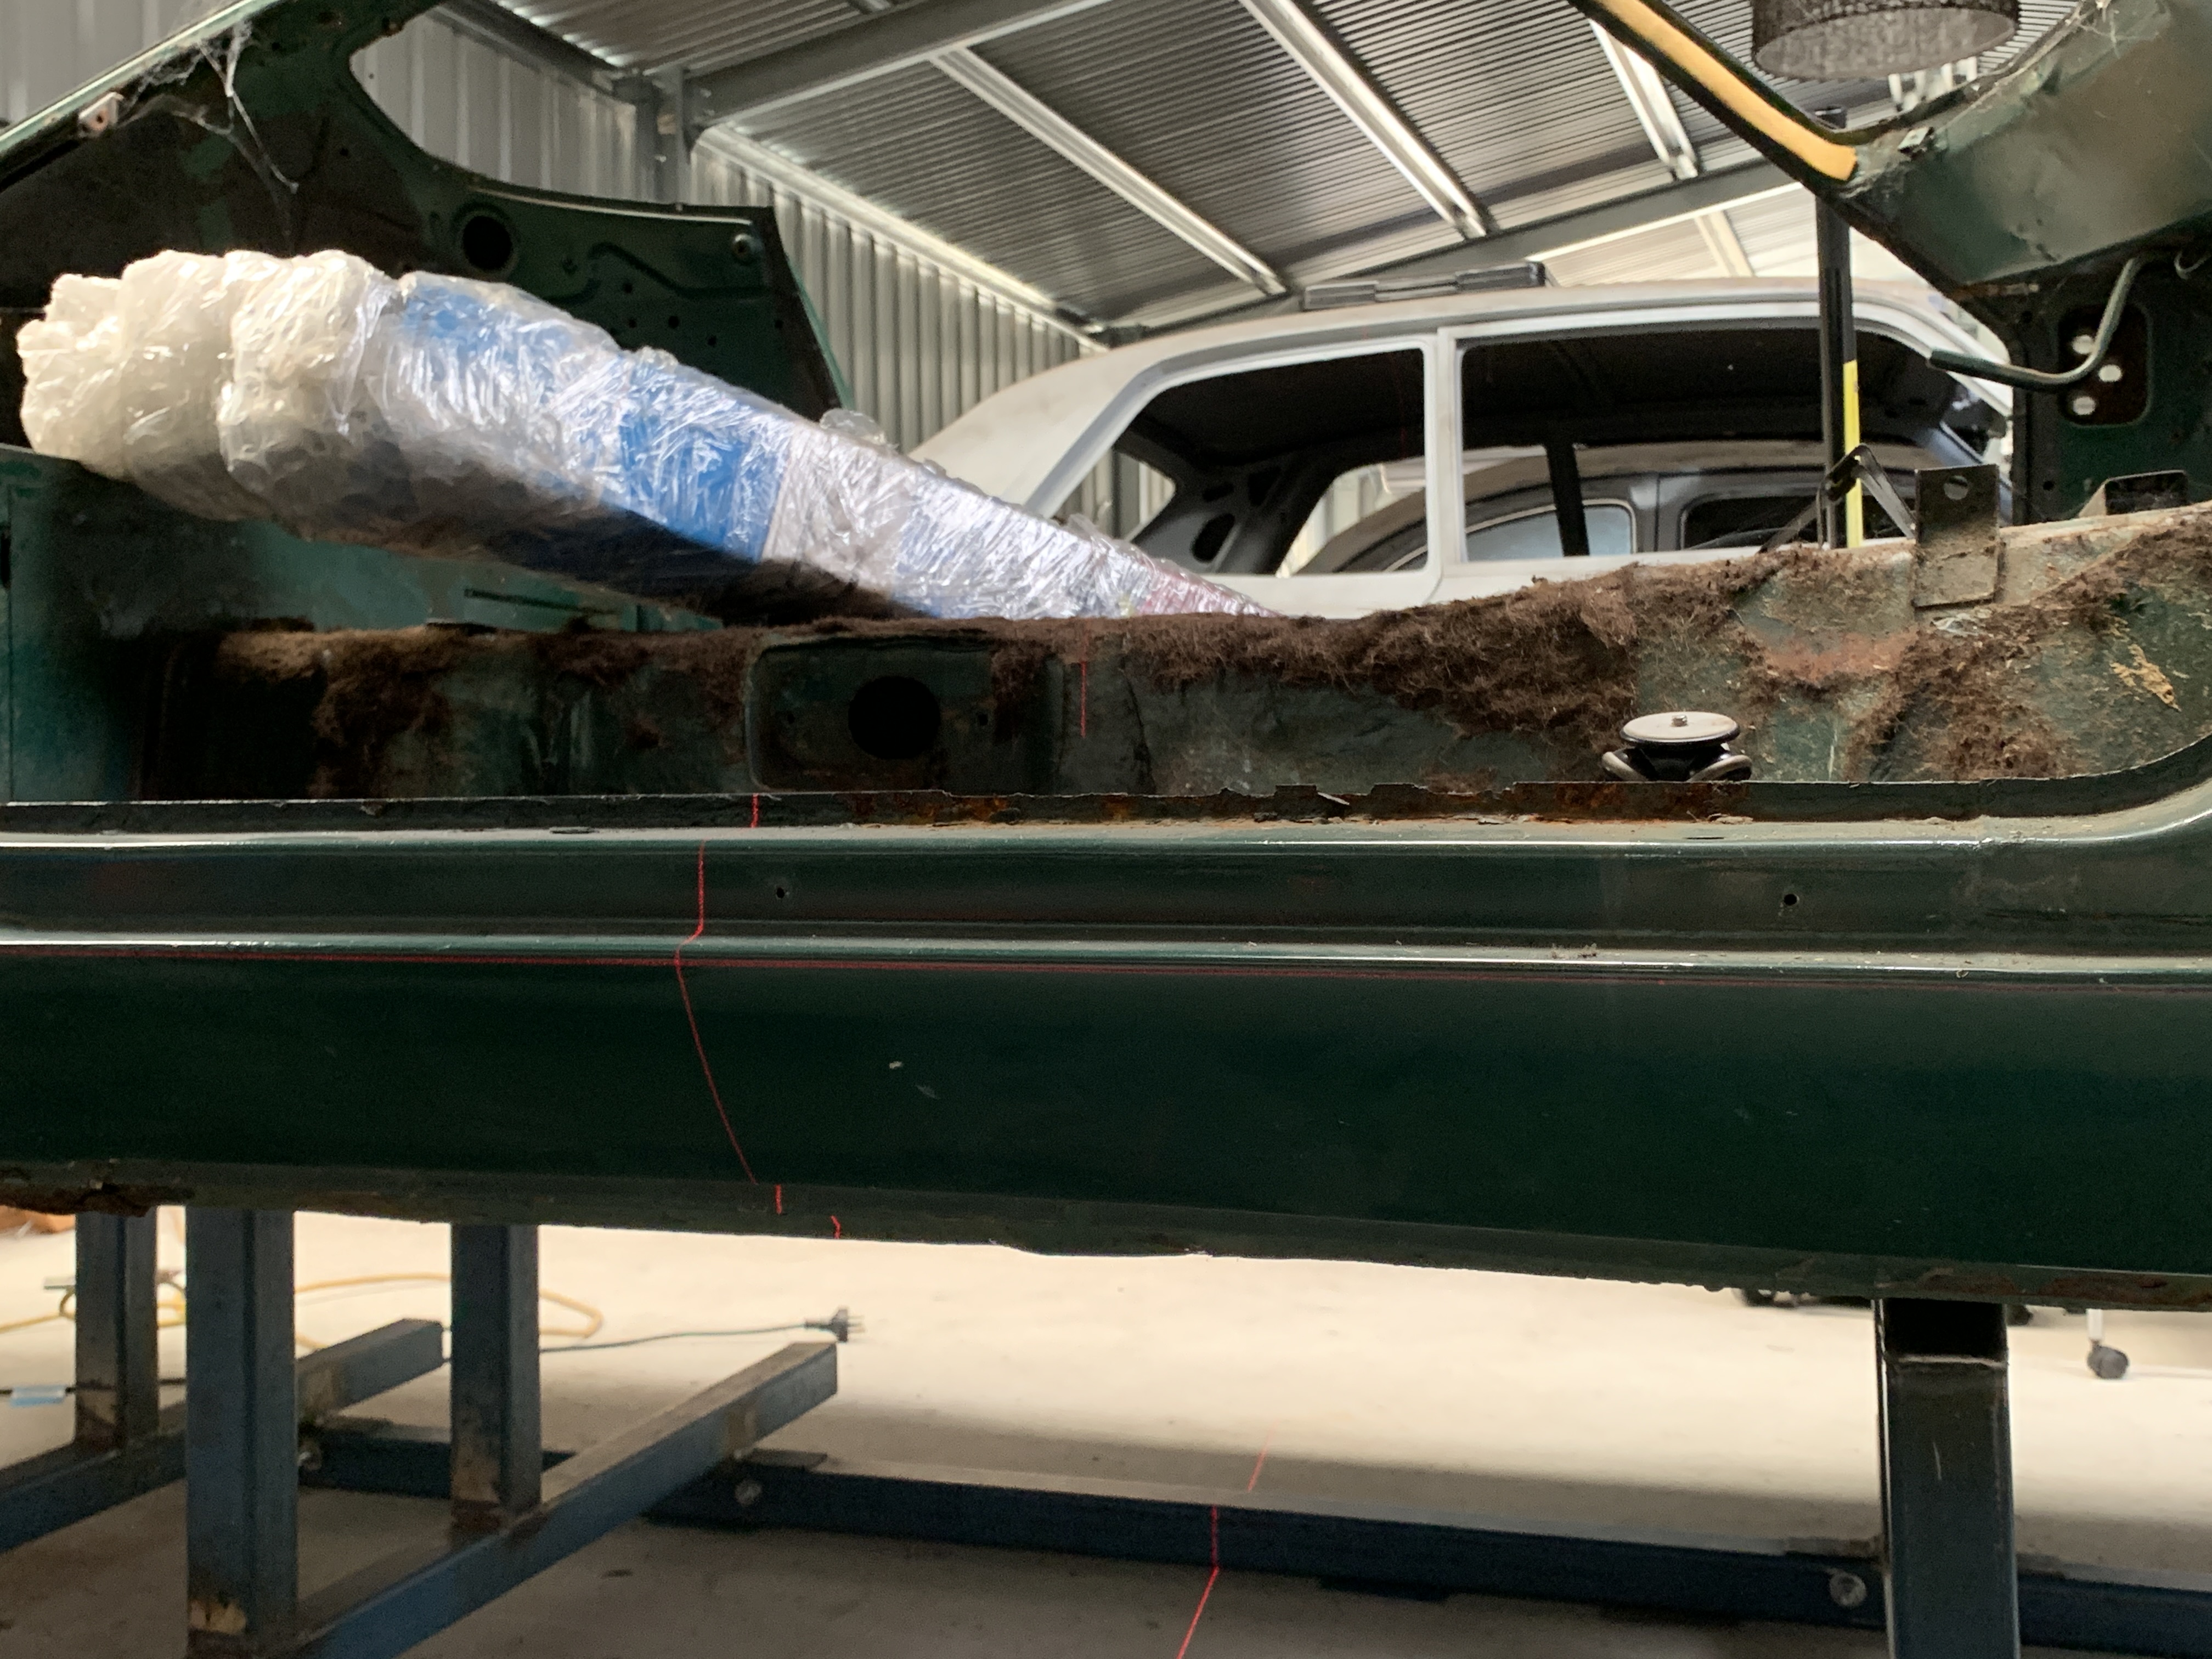
I measured diagonally, so rear left to front right and vice versa. I didn’t go longitudinal as I wanted to make sure it was square and not diamond as you say. But doing a longitudinal measurement as well would be prudent. I like the lever idea for its simplicity, however my front bolt hole needs to come up so may be less effective. As the car will lift before I get enough force on the panel I feel. When I was building the jig I purposely placed the longitudinal 3m lengths in line with the panel that the front fender rests on/bumper mounts onto, as I knew I may need to do some pulling. Also saw in @ConVerTT ‘s thread that he used the longitudinal lengths on the jig to lever a scaffold pole into and clamped a chain onto the nose and did some pulling. Not sure how much force this places though. I had a similar idea of building a 90 degree pulling arm and brace that slips onto the 3m longitudinal length and use a come along and chain/clamp to pull that way. more technical to build but more versatile in directions it could pull in. Place the panel under tension then hammer and dolly damage. I agree that the bubble levels aren’t the most accurate method but I have to take what I get lol A second set of measurements would be fantastic is anyone out there is able to help? Yep that’s the plan Patcon, all structural work will take place on the jig. Rotisserie will be used for blasting and epoxy, removal of undercoating, some stitch weld finishing and painting the underside when the time comes.
-
To be honest I was going to purchase the clean front cut I have found and wait until I am up to replacing/repairing front frame rails, then I will remove the radiator support. My uncle and I will then reassess repairing or replacing or a combination. yes my theory is the same as yours, if the damage is pulled out the front nose/wheel well area the front will lift and bring everything closer to where it needs to be. I think once everything is blasted and the radiator support removed we will Be able to see what needs to be done. At the moment there’s a lot of guess work. I can see areas on the radiator support where the spot welds broke due to the crash it had. I can see where they’ve tacked it back together in places. It was not replaced as the accident damage is very evident. my goal will be to build my rotisserie and get it blasted. Then the fun will begin. Ryan
-
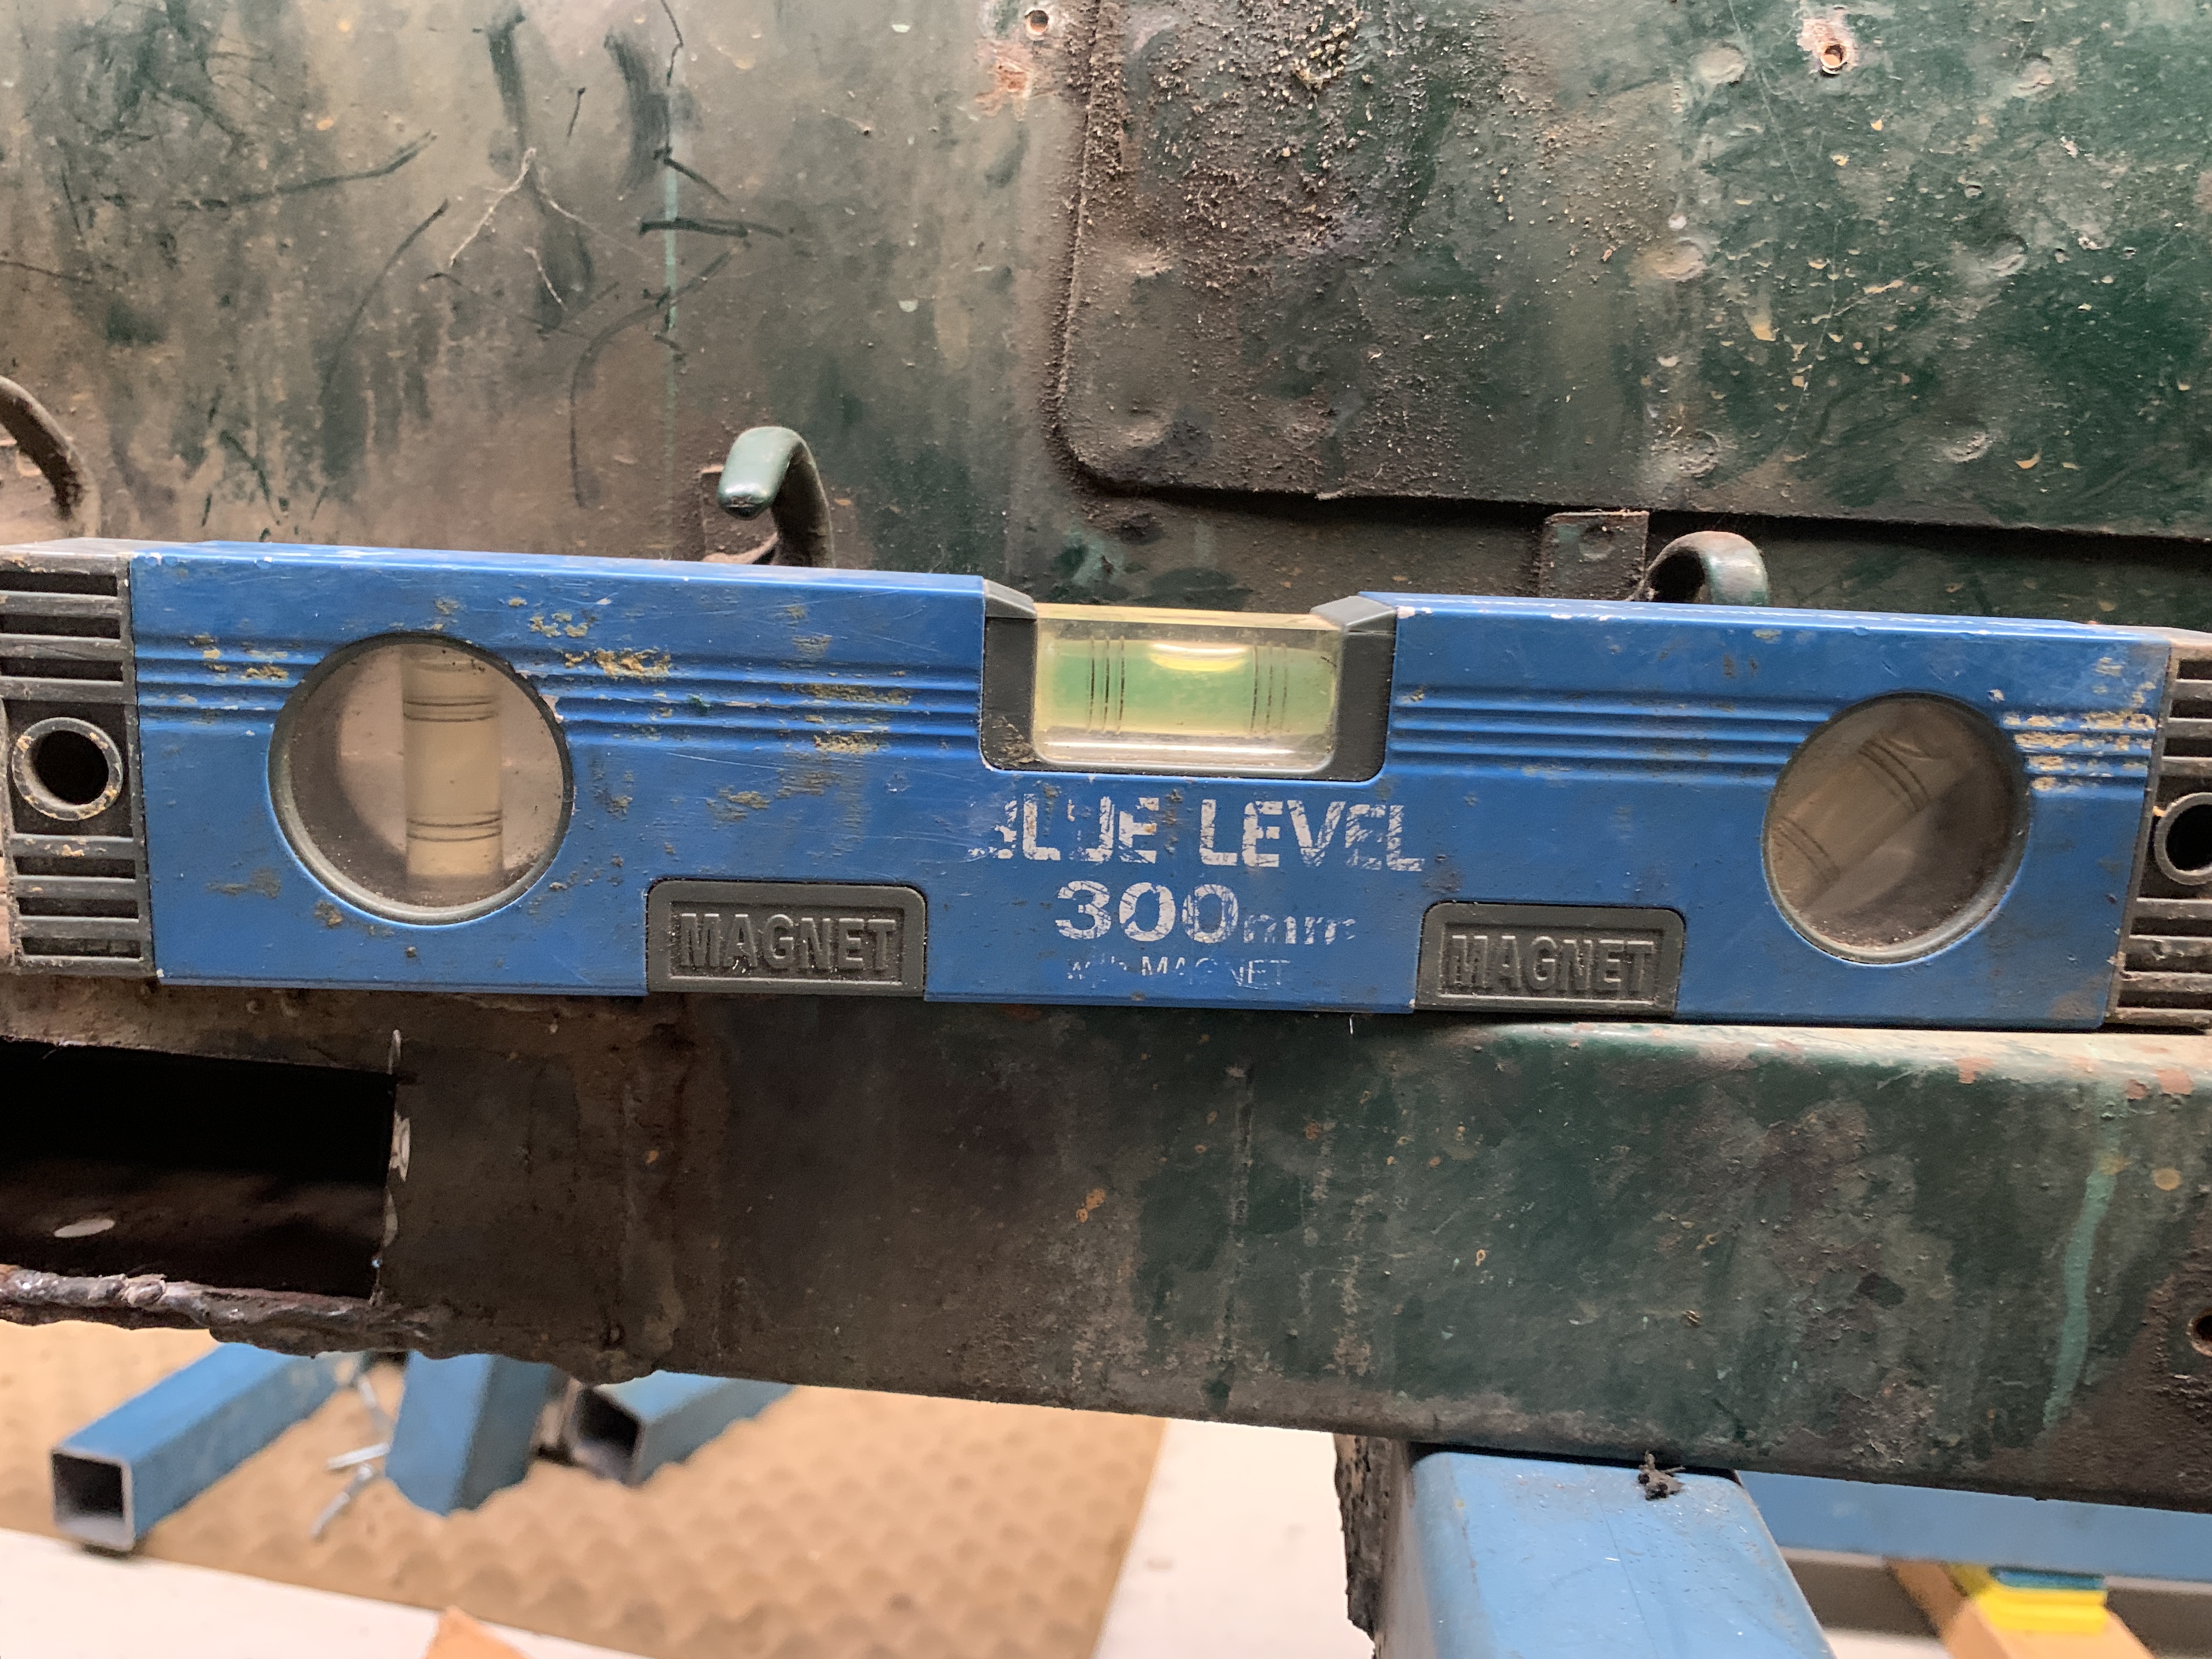
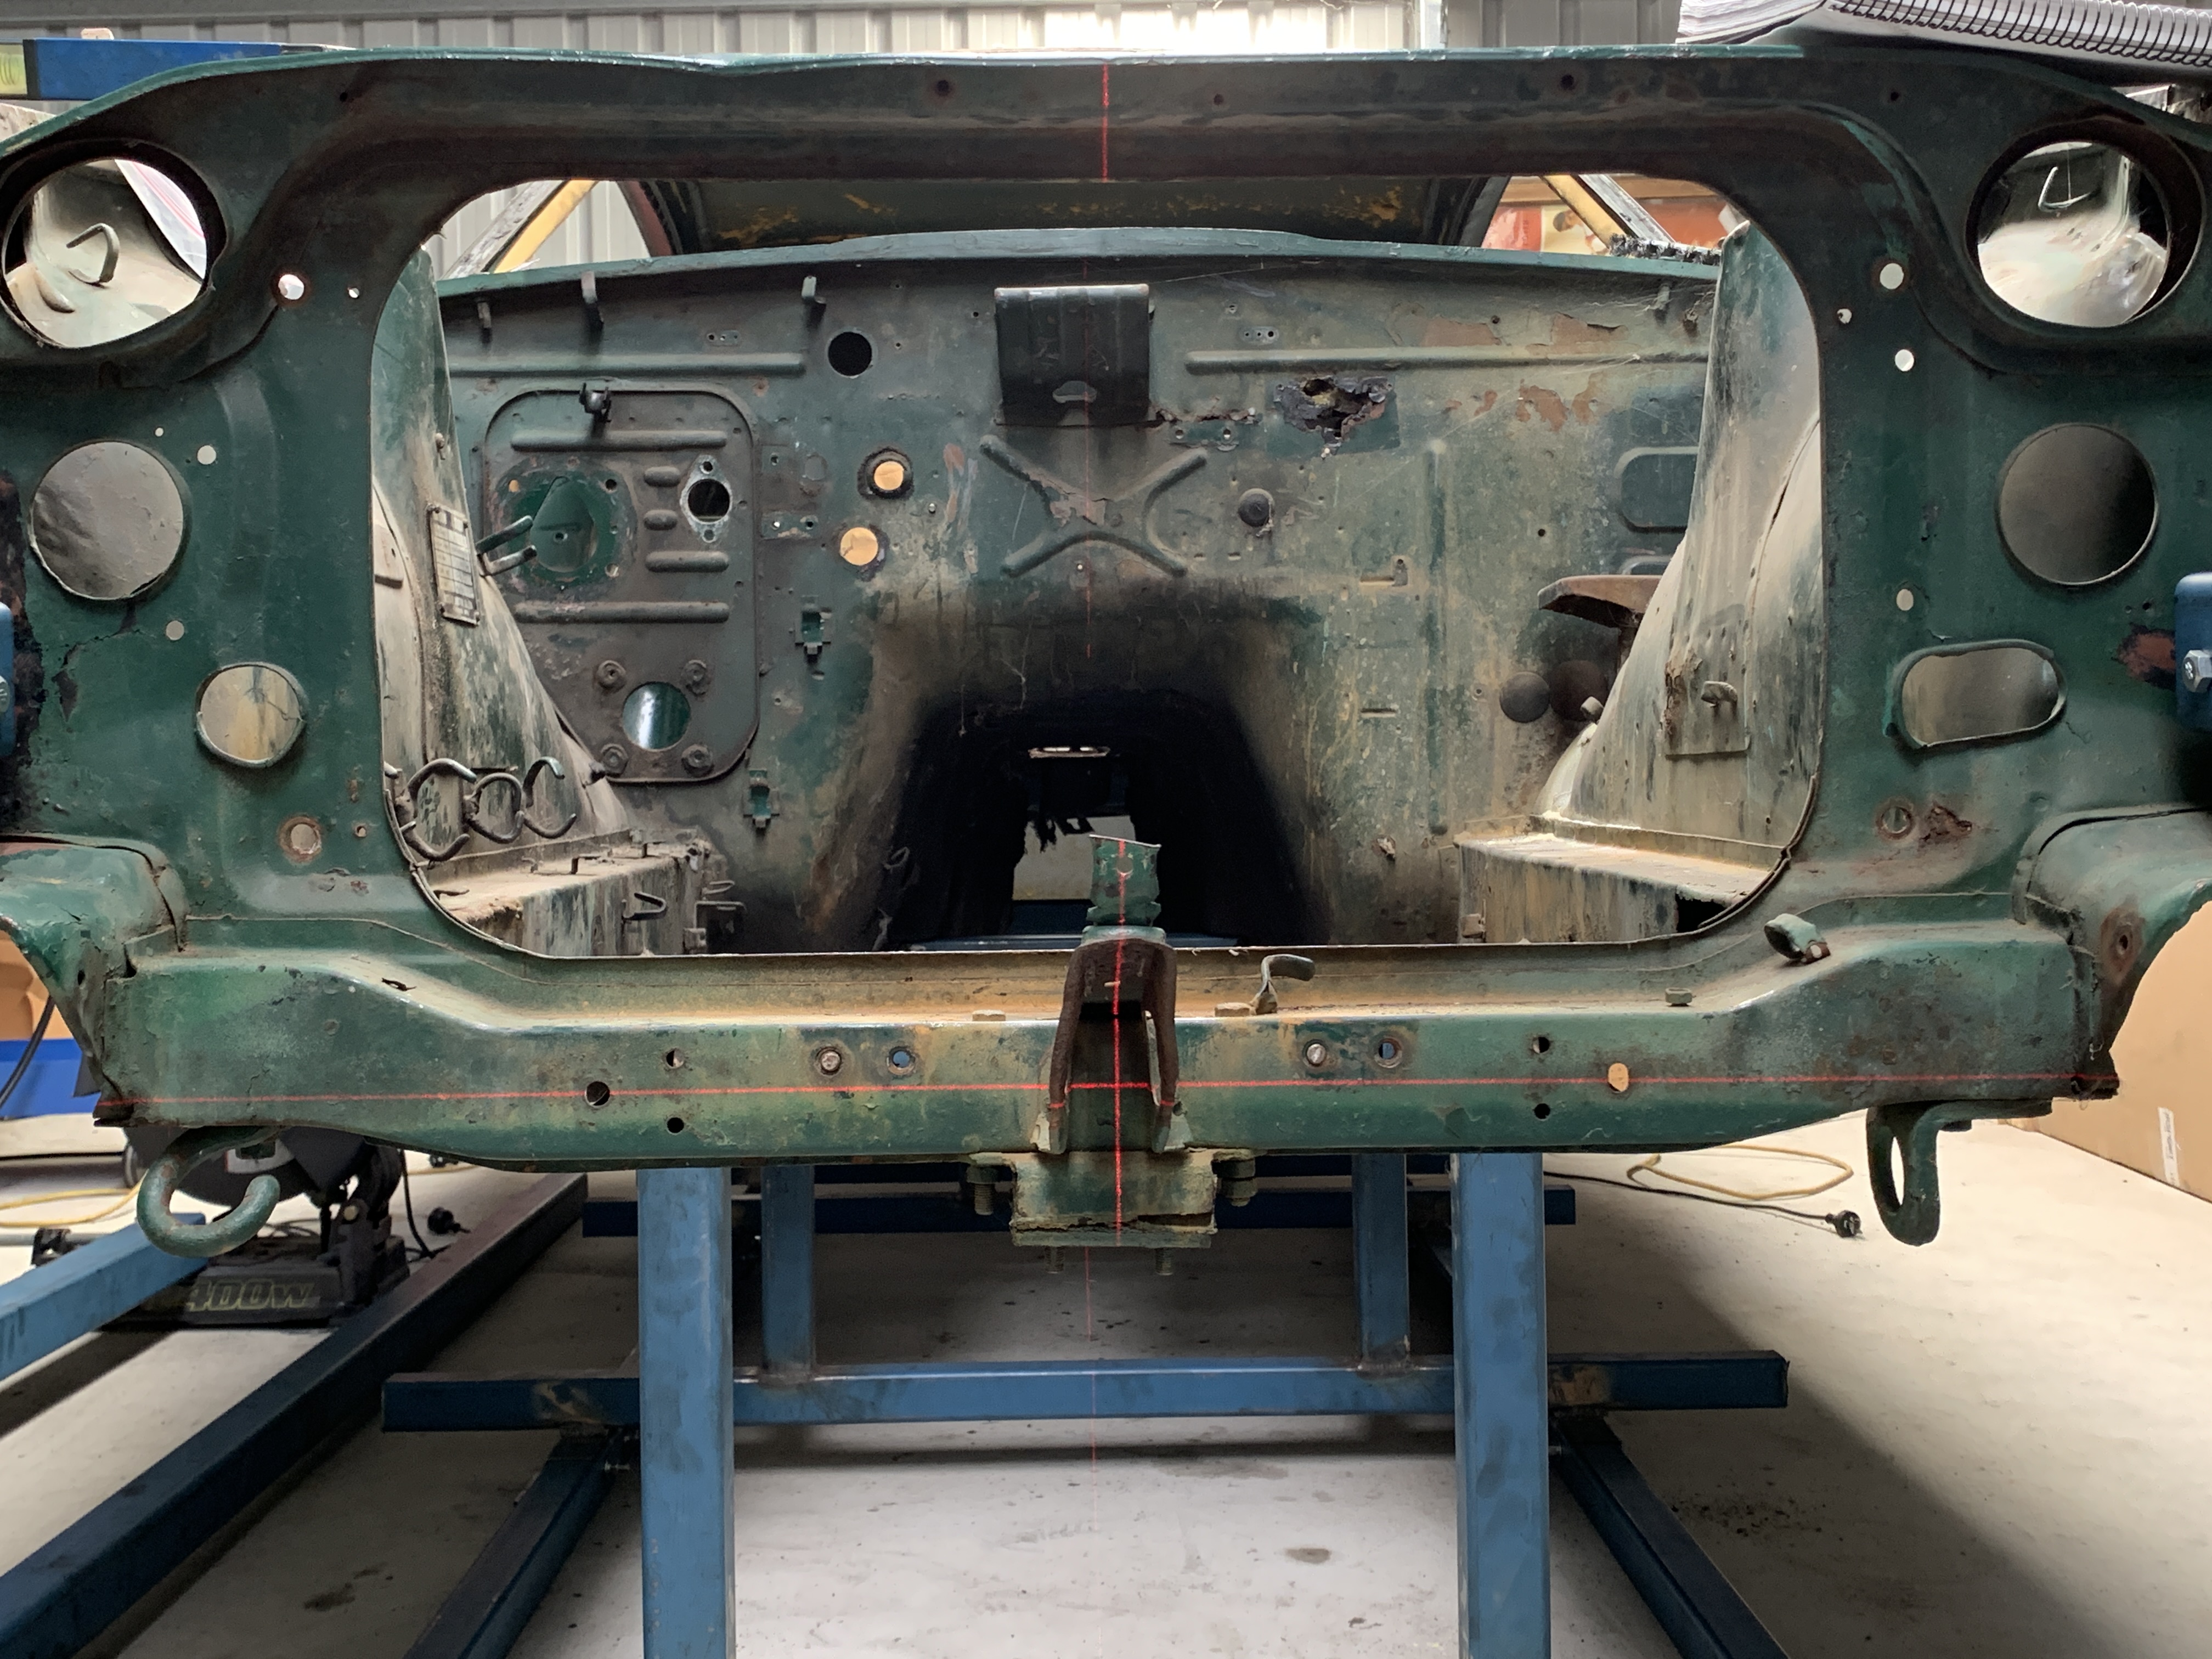
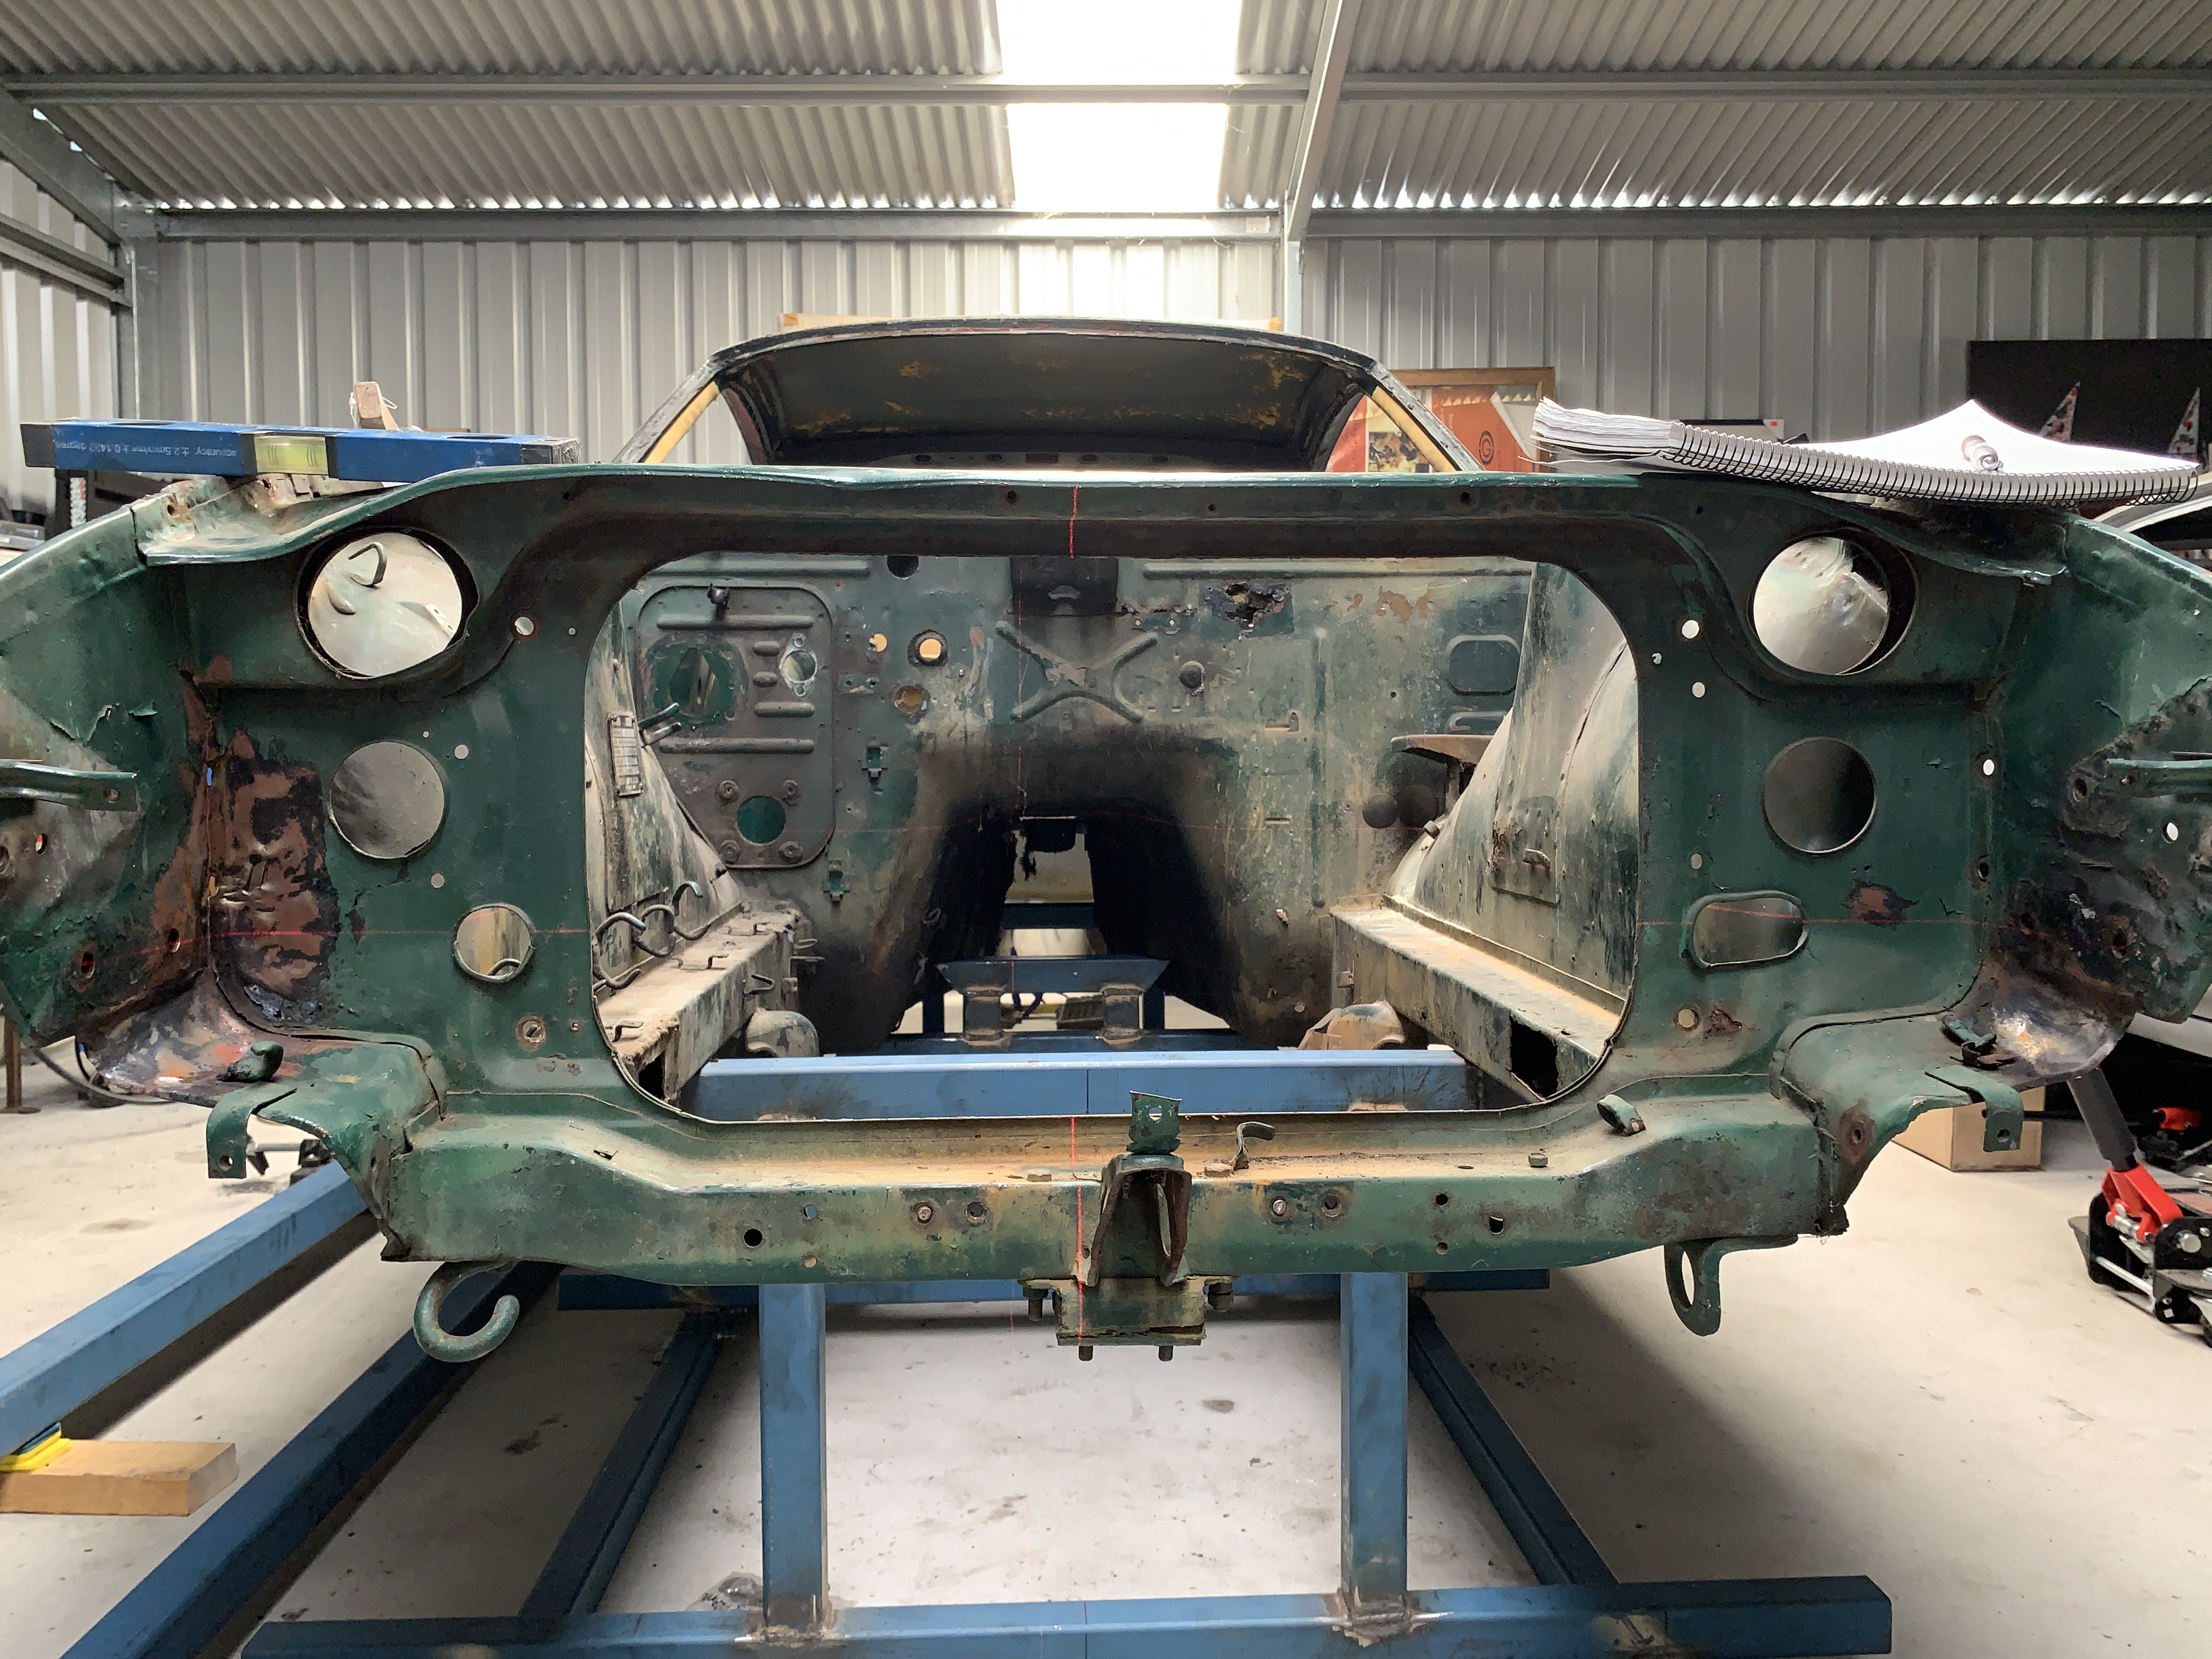
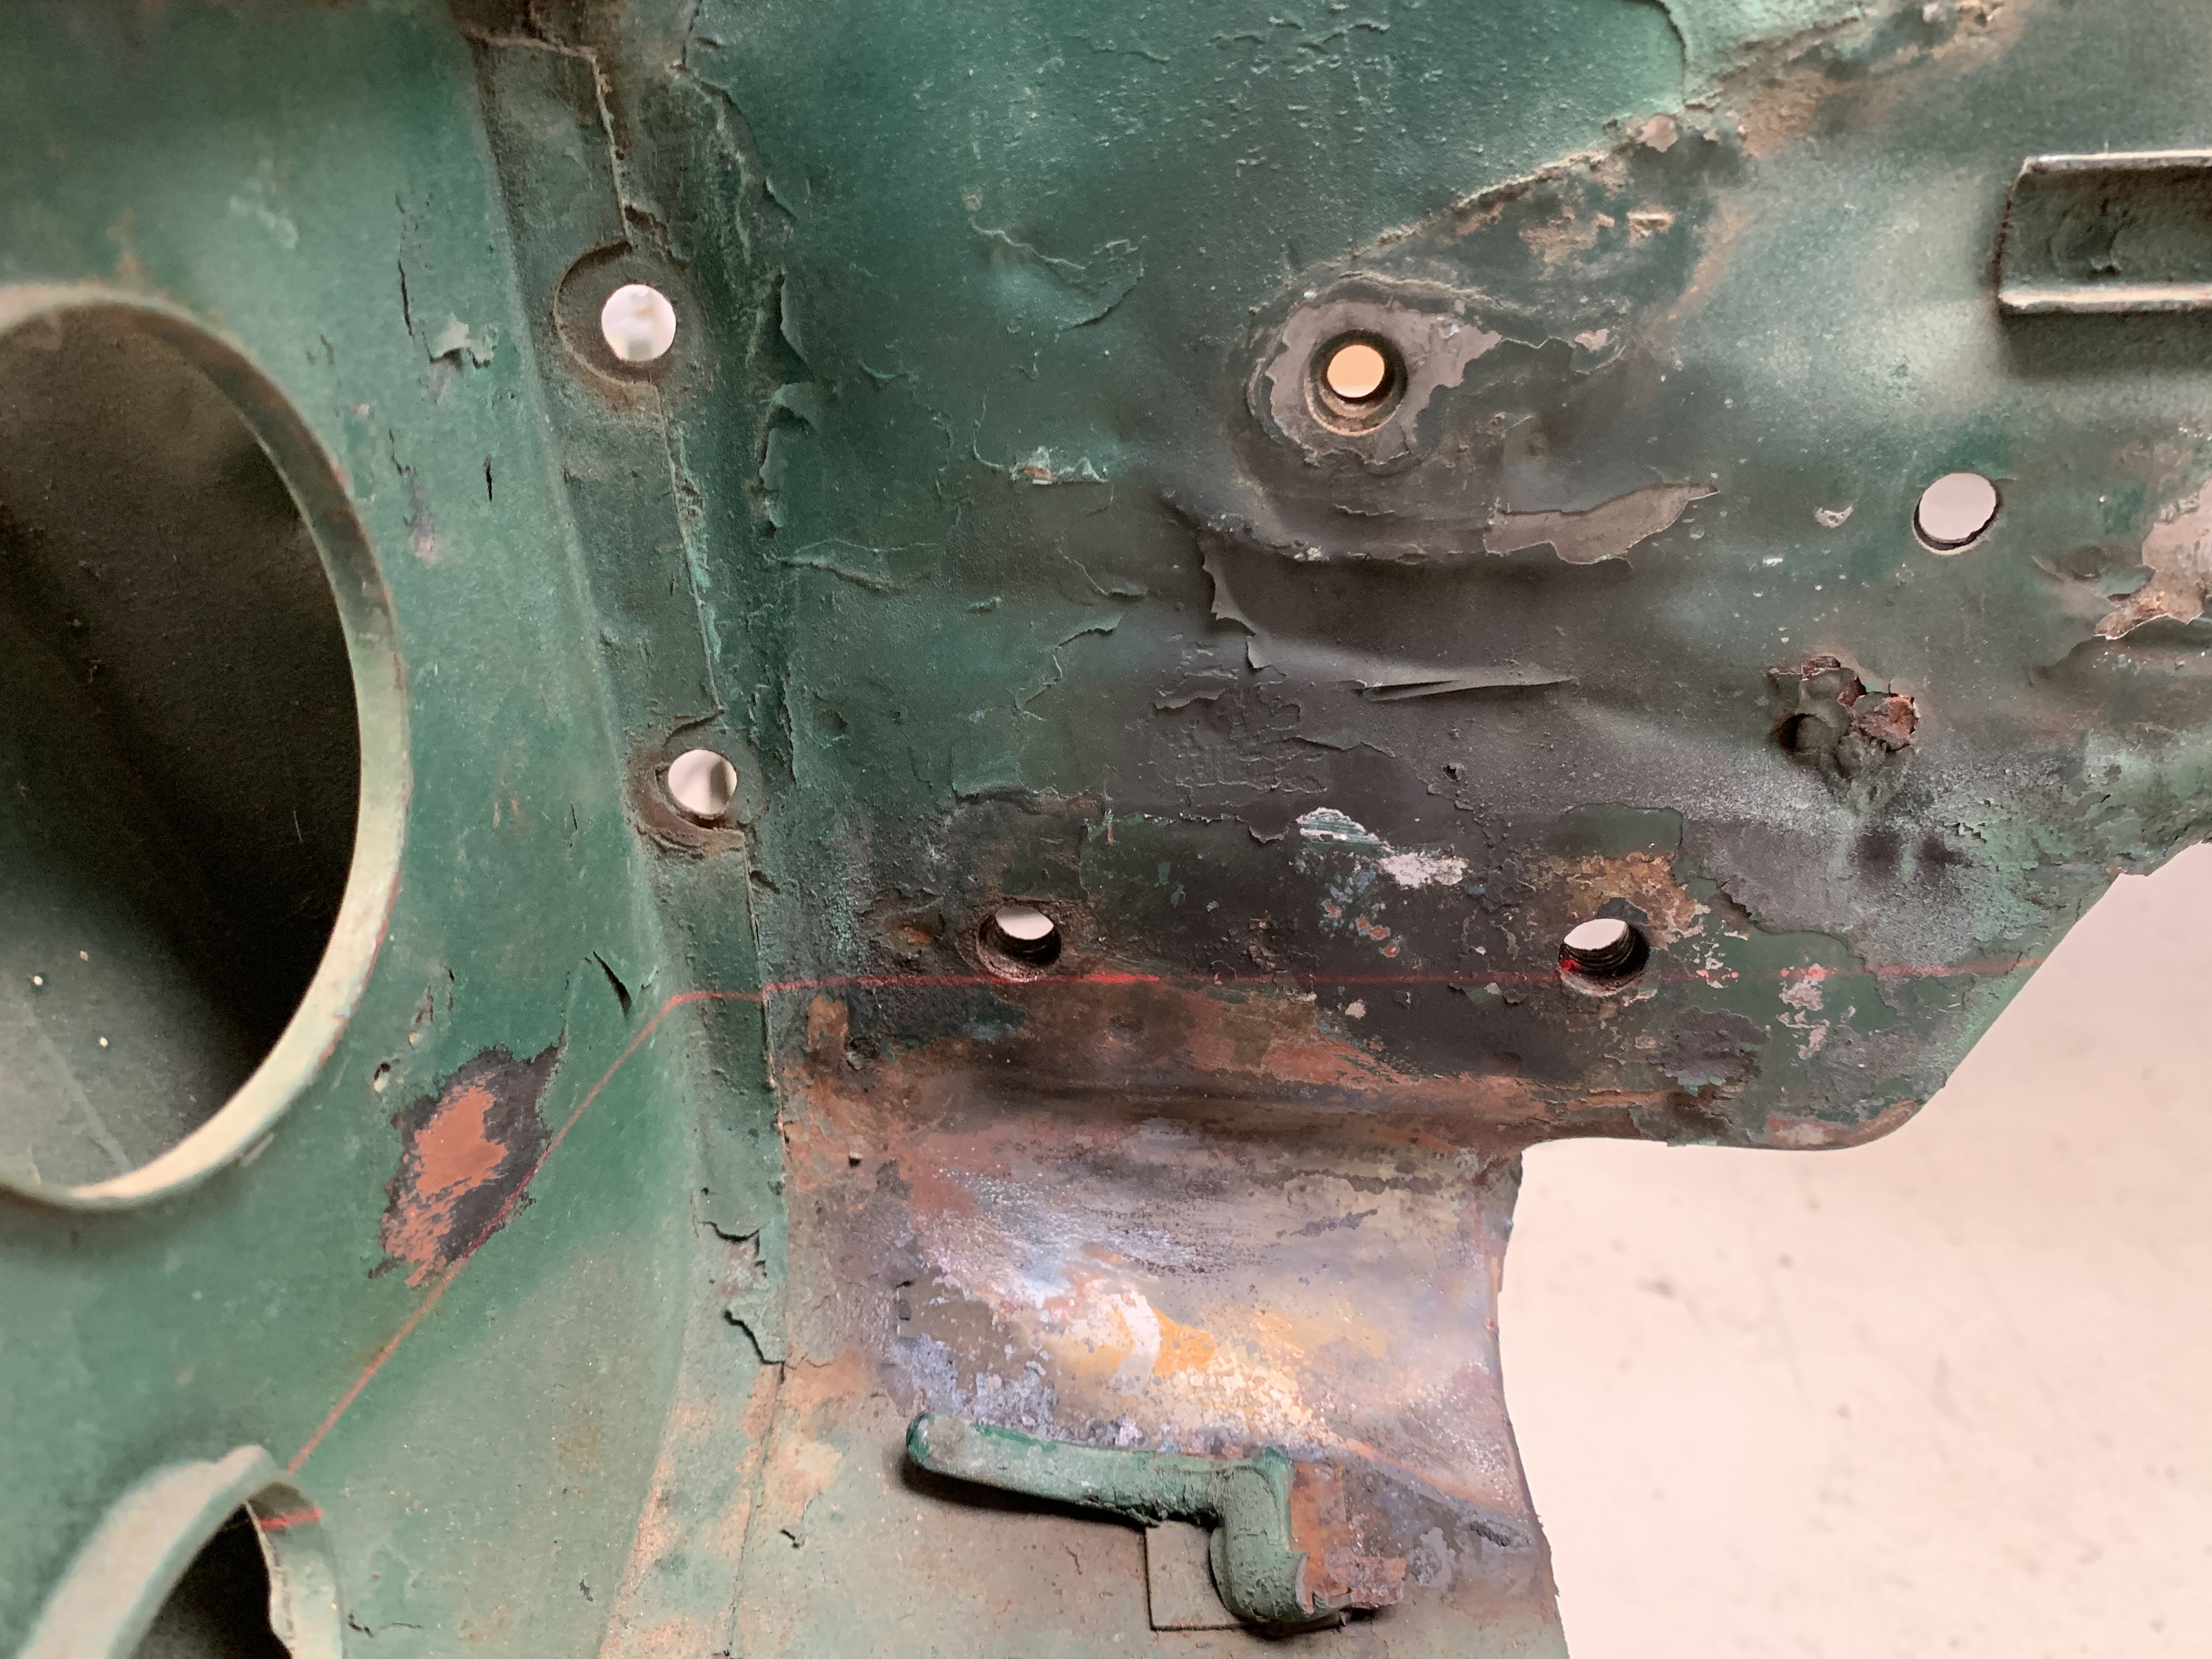
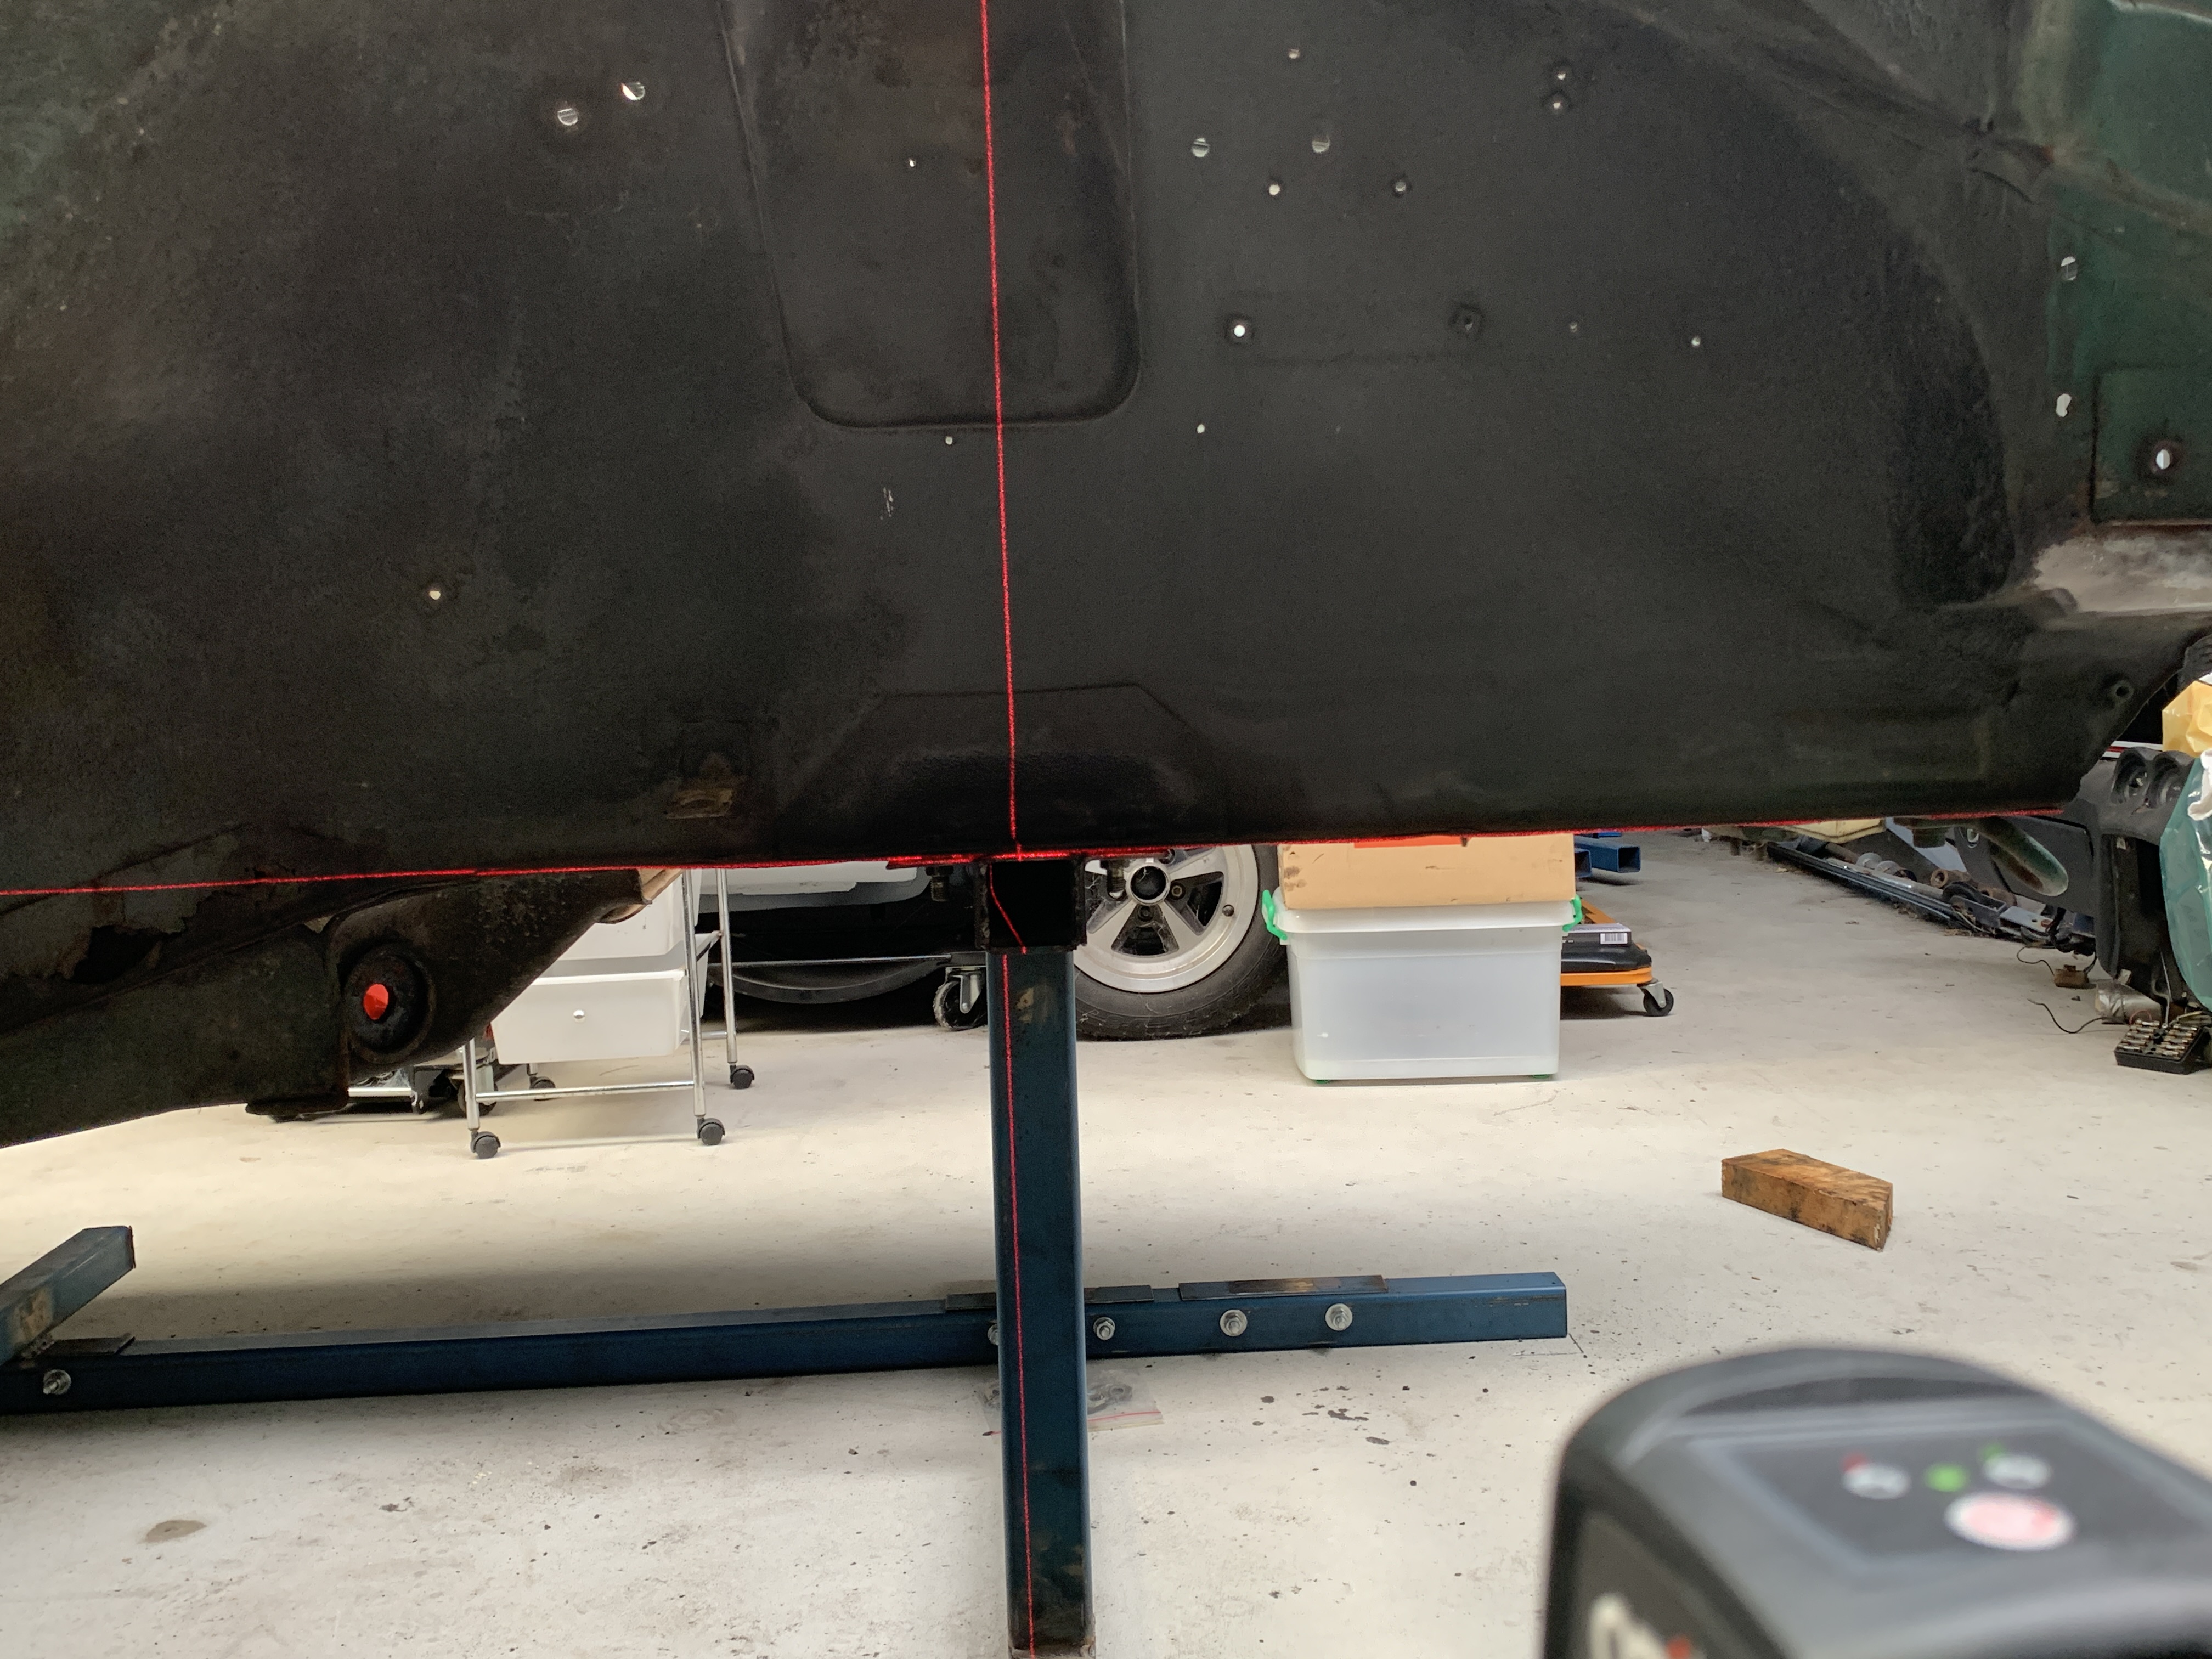
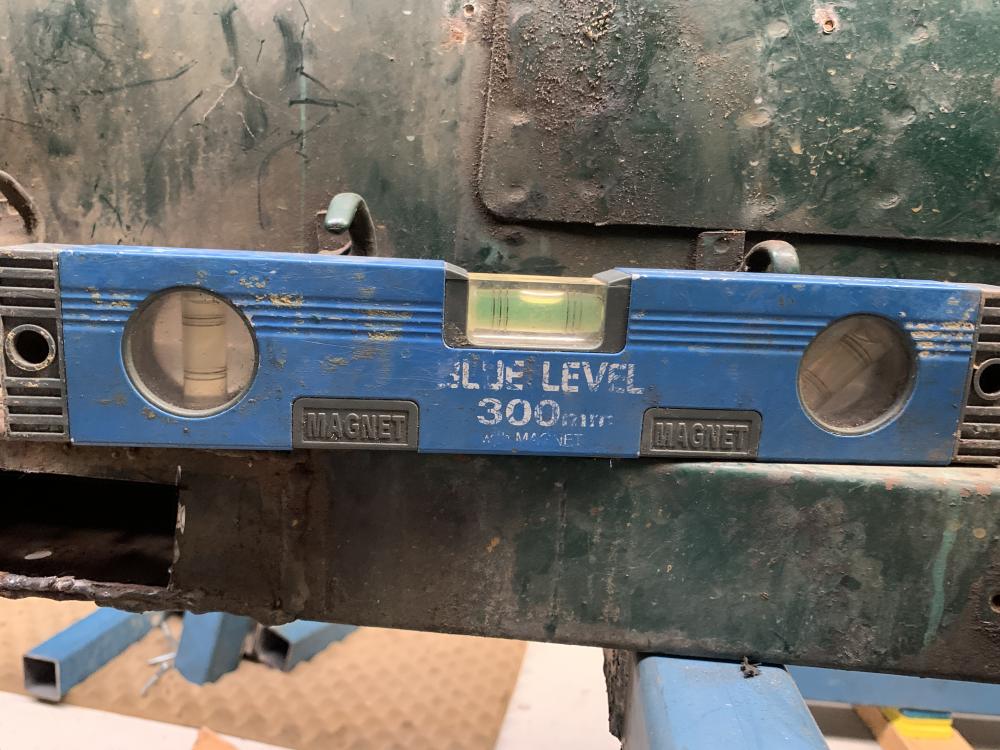
Now... the bad news. The bumper mounts are way off if I go by the level measurements mike gave me. (Frame rails and bumper mount holes should be on the same level) basically the holes are pointing down. My theory is during the accident the nose was pushed down, when they repaired they didn’t bring it back up to where it used to be. Somehow they were able to get all the panels to line up enough to make the car look ok. so now I at least feel I have a frame of reference as to where everything is and where it should be. Now comes the hard part... lol


-
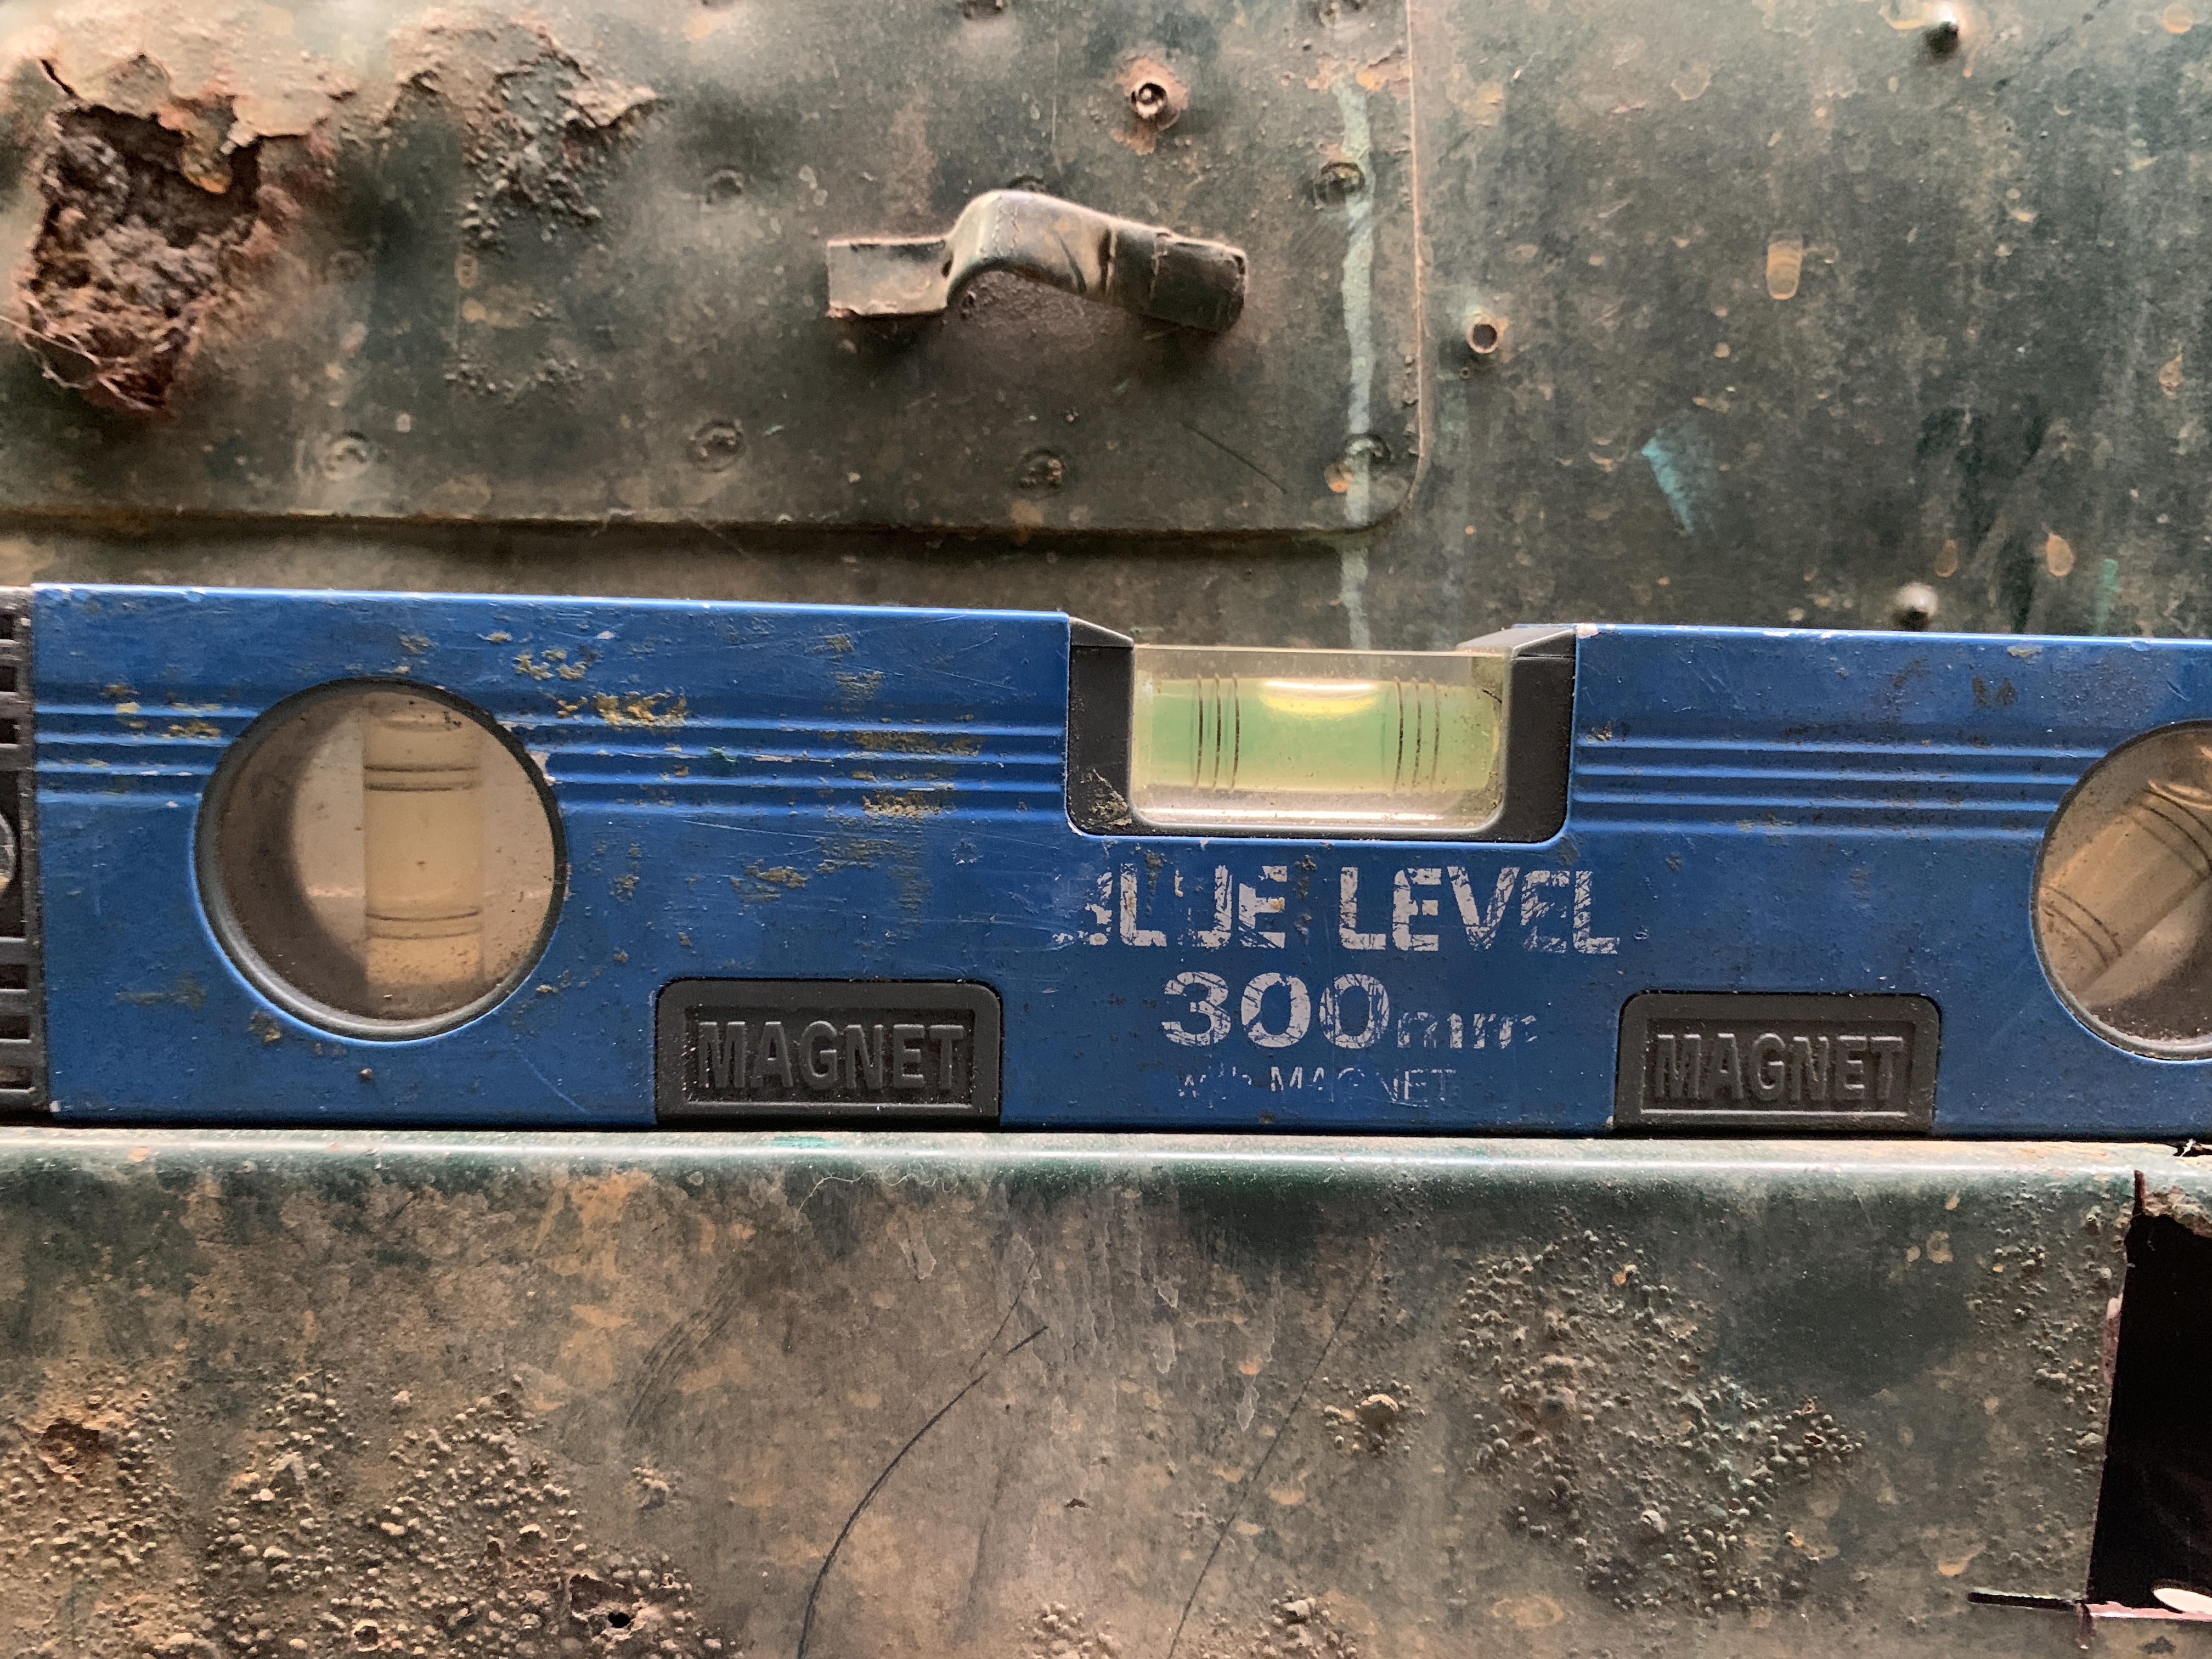
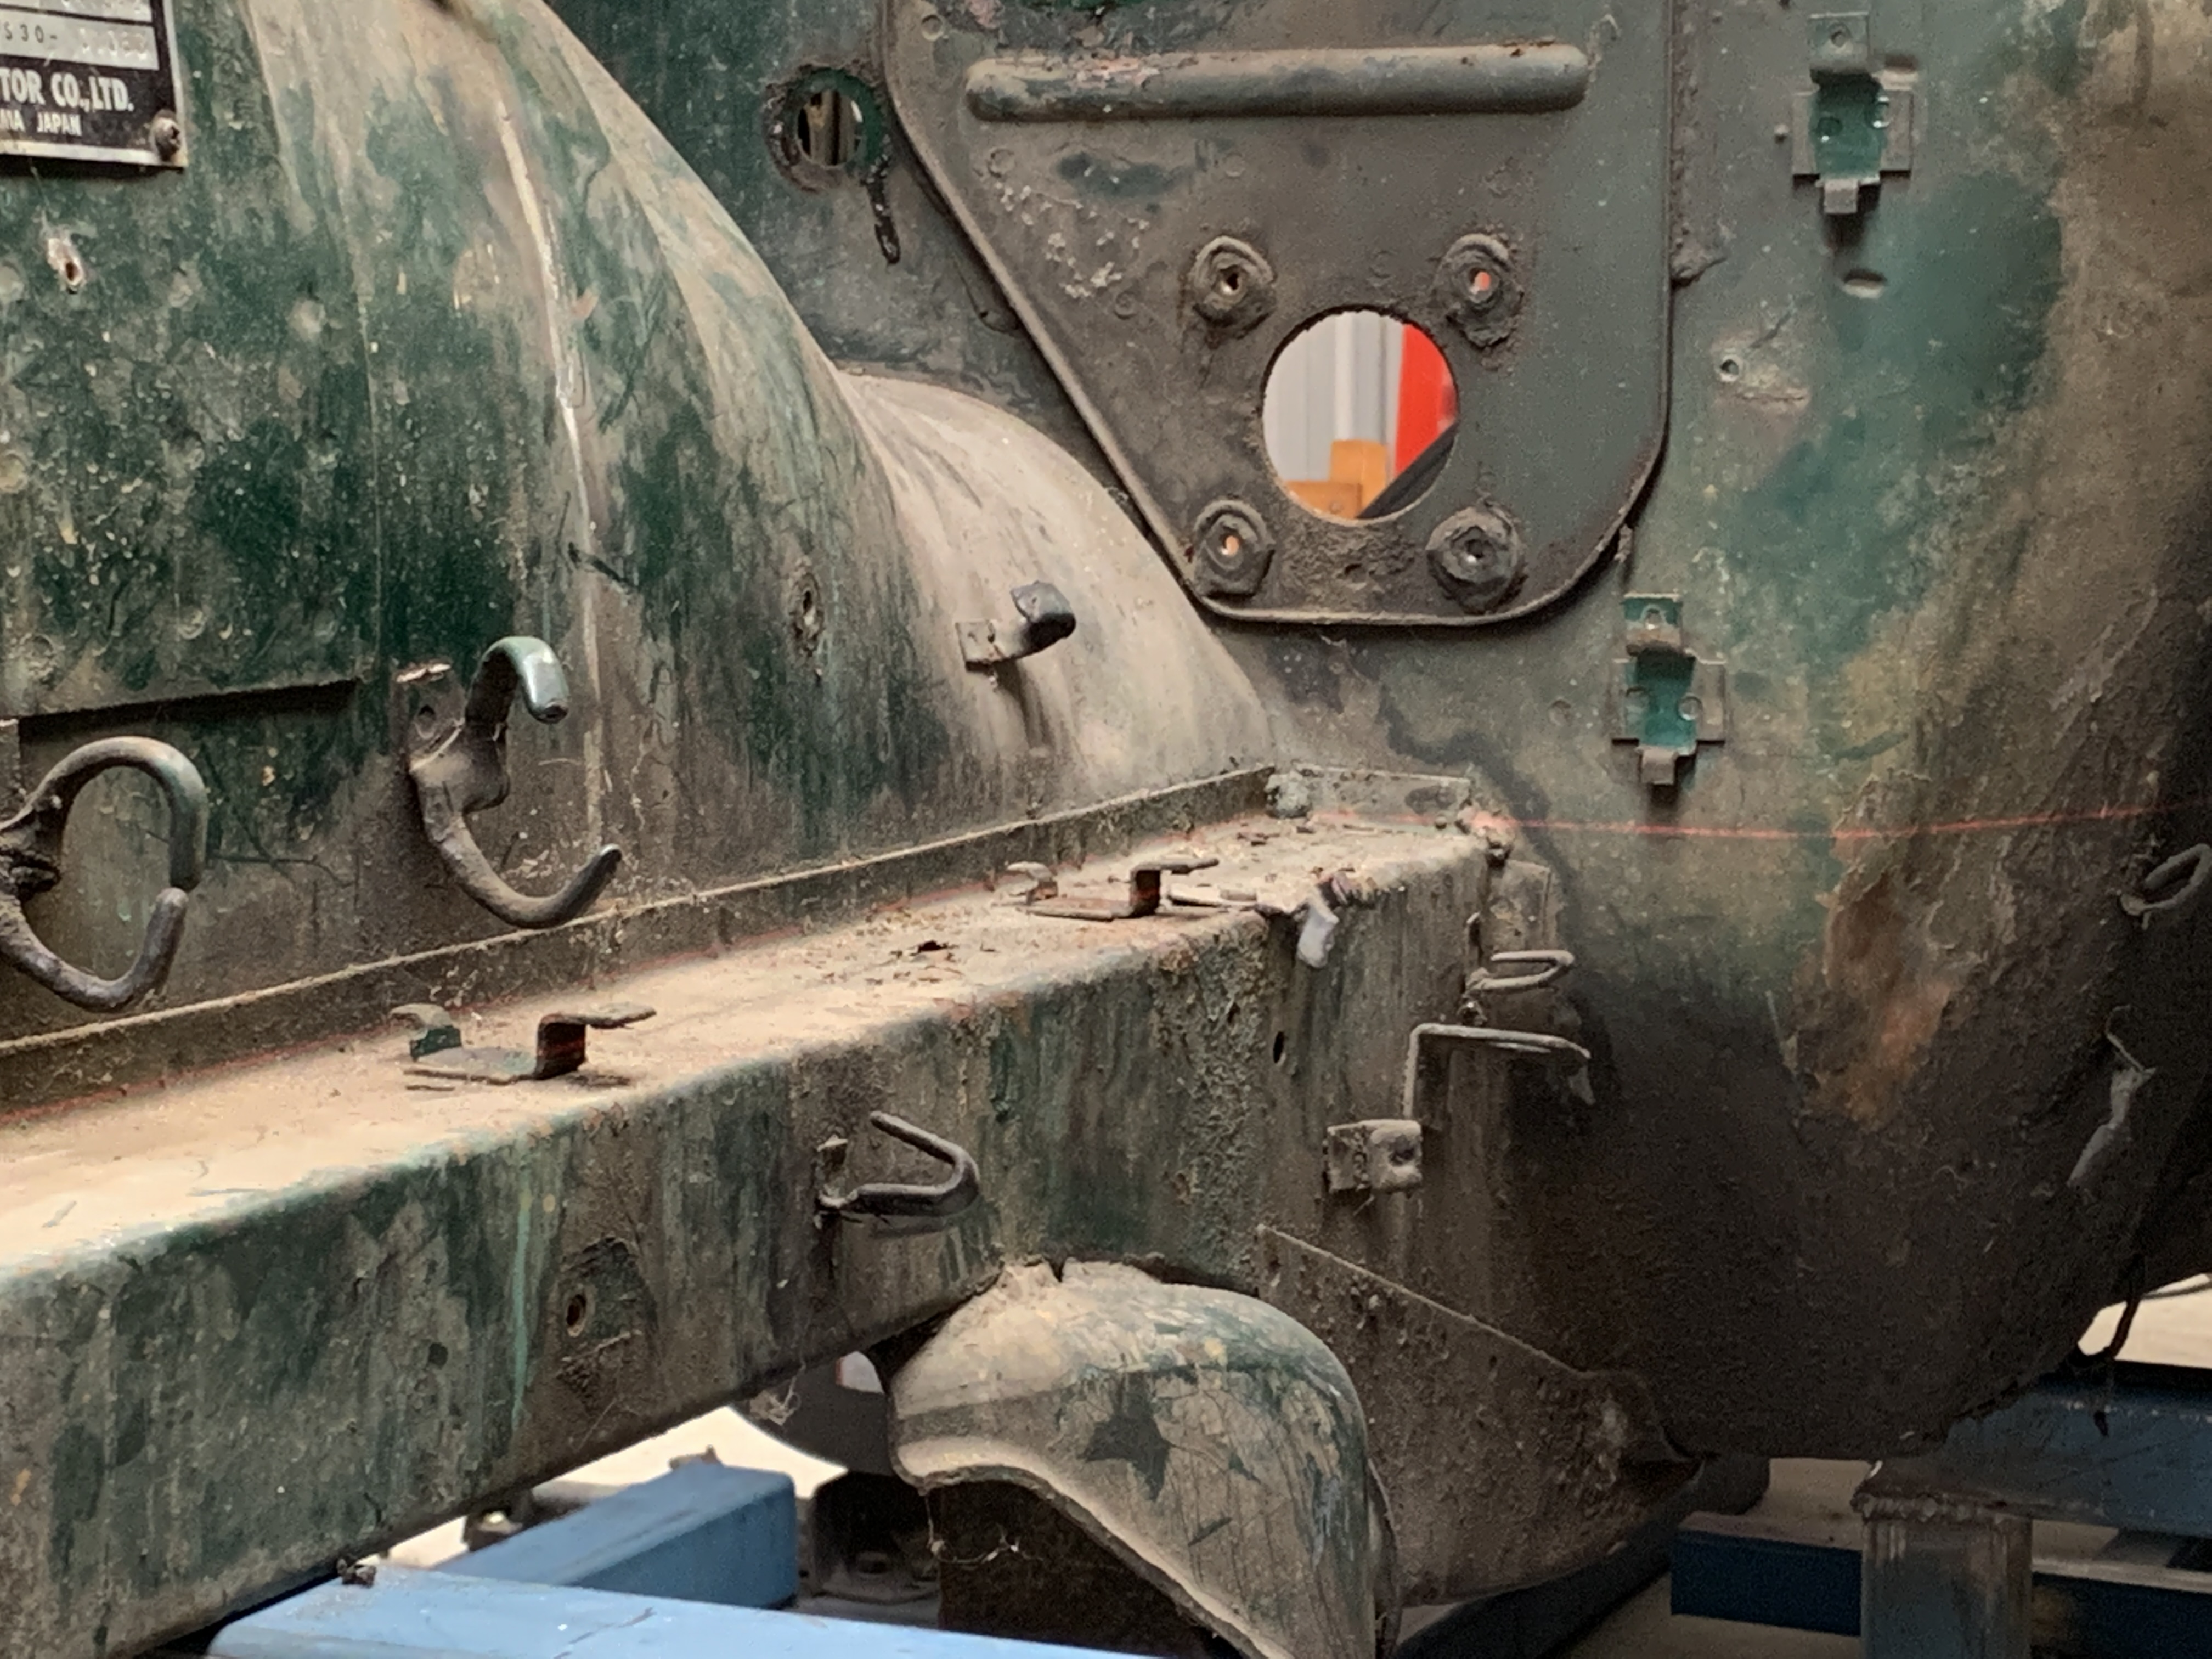
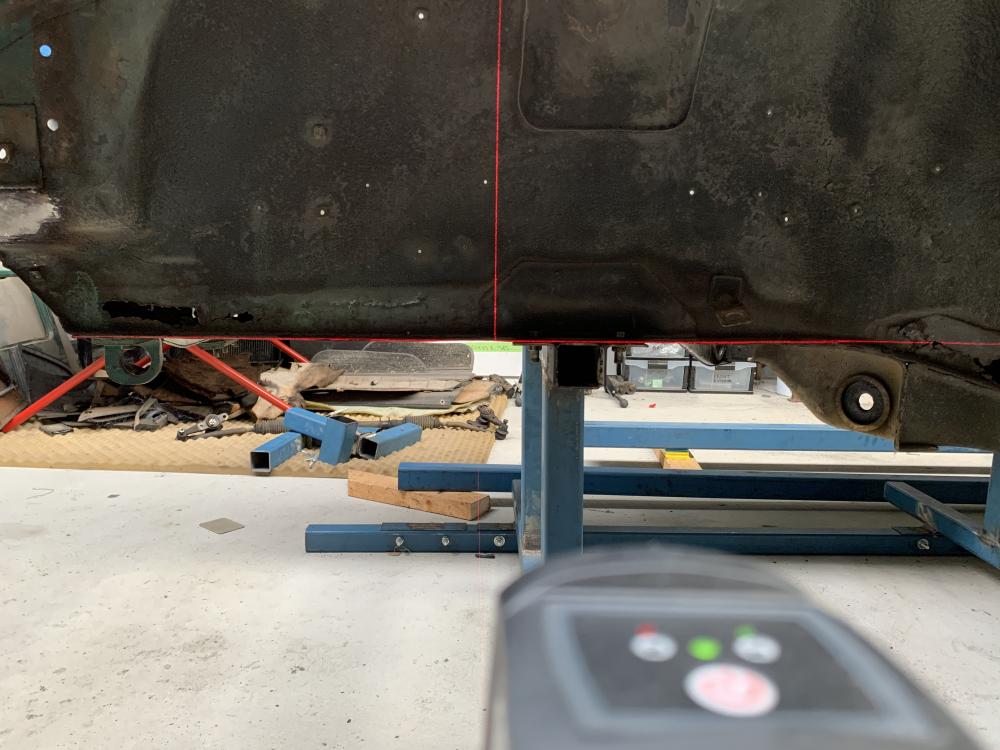
So I bought a cheap self leveling level laser. And surprisingly a) I did a great job of making the chassis jig square b) I leveled the jig well c) my car is not as crooked as first thought basically every point I threw at the laser turned out to be perfectly level. lower radiator support bumper mount holes (we will come back to these later) top and bottom of front strut towers (couldn’t get a decent picture of the top measurements but they were level) Front frame rails all sweet, line is hard to see but it’s there also measured outer rockers which look good and rear strut towers this gives me great confidence that the damage it saw was cosmetic to the front nose and not structural. Before I started building the chassis jig I did drop some plum bobs from the strut towers and measured diagonally to check the chassis was square before commencing building the jig. My measurements were 1mm different so I’m confident the frame is square enough. Is this good enough or would you guys still advise buying a plum laser and checking datum points from chassis diagram. cheers Ryan


-
Just to add to this thread which seems to be the most comprehensive on S30 SS aftermarket bumpers. I requested a price from both Harrington’s and bumper automobile (original vendor @jfa.series1 used) Amy from bumper automobile replied immediately with a price. And offered to quote on shipping. I gave her my address and she provided a total price immediately. Note: If you want the security of PayPal then you will pay a fee, totally worth it for piece of mind IMO. $35 USD total quoted price including shipping to Perth Australia and PayPal fee was $775 USD (the shipping cost may be different for people in the US) This price was $200 cheaper than the TYNDA bumper supplier on eBay. So I asked her to send me the PayPal invoice. She did immediately. I paid and informed her. She thanked me and advised she will send tracking number as soon as she has one. This all happened over about 3 hours. So from my experience emails were replied to immediately even though it was a Saturday. So bumper automobile customer service so far seems excellent, far better than most US Z vendors who take a week to reply. Today 26/04/21 Harrington replies. Too late sorry. And price was £699 including shipping. (Roughly $973USD) $198USD more than bumper automobile. I’m not sure if shipping would have changed had I provided my oz address. But by that time it was too late anyway Group buy price offered by Harrington’s was $750USD. Which means they can supply it for less, but choose not to. Granted they are a business and are in it to make money. But if you don’t stumble upon this thread and use the code you get charged 198USD more for no reason I can see. That doesn’t sit well with me. I will report back with updates on overall experience once bumpers are received Ryan
-
Thanks namerow Yes 👍🏽 this is on my tools list already. I guess I didn’t give an explanation of why I wanted to know the level orientation of the bumper mount holes. At the moment trying to assess the damage and decide on a course of action. If I decide to repair the damage, which way am I going to need to pull the panel? Just forward? Or up/ down as well? Is it easier to use donor panels and patch it? This is what’s swirling around my head computer atm! When I started making the rotisserie mounts I noticed one side was different to the other, as both sides are damaged I wanted a frame of reference to know which side is closer to where it’s supposed to be.
-
Depends on the level and shape of the glass, a lot can be used both ways.
-
Cheers again for your time and effort Mike, I really appreciate your help
-
Hahaha a while, maybe 6-8 months? they’re daddy long legs so not very scary. The only scary spiders in oz are the funnel webs (big and poisonous but only on the east side of oz ) and the white tails (flesh eating venom). But bites are very rare. The red backs can make adults sick and can kill very small children. Again very rare to be bitten. snakes are a risk where my car is stored as it’s on a big bit of land. Mostly dugites which are quite venomous and can be aggressive. I’m yet to see one but my dad has killed a few. but I’d much rather face those than a grizzly or mountain lion lol! When I was in Yosemite hiking I was terrified of seeing a bear!
-
Cheers mike, so bumper bolts are level with frame rail is that right?
-
Thanks again mike! See, bloody legend! Now you’re not parked on a hill are you..... 😂
-
Can anybody tell me if the front bumper bolt holes are meant to be level? I imagine they are. thanks in advance Ryan

-
That’s a negative racer I didn’t touch anything as far as I’m aware... I did copy the text from my page on the Aussie forum.... could that be why? the thought of doing that scares the bejeezus out of me racer! I’d be much more comfortable leaving the main structure intact and patching what needs replacing. I will check the firewall but nothing that I’ve seen so far. I am indeed replacing the frame rails.
-
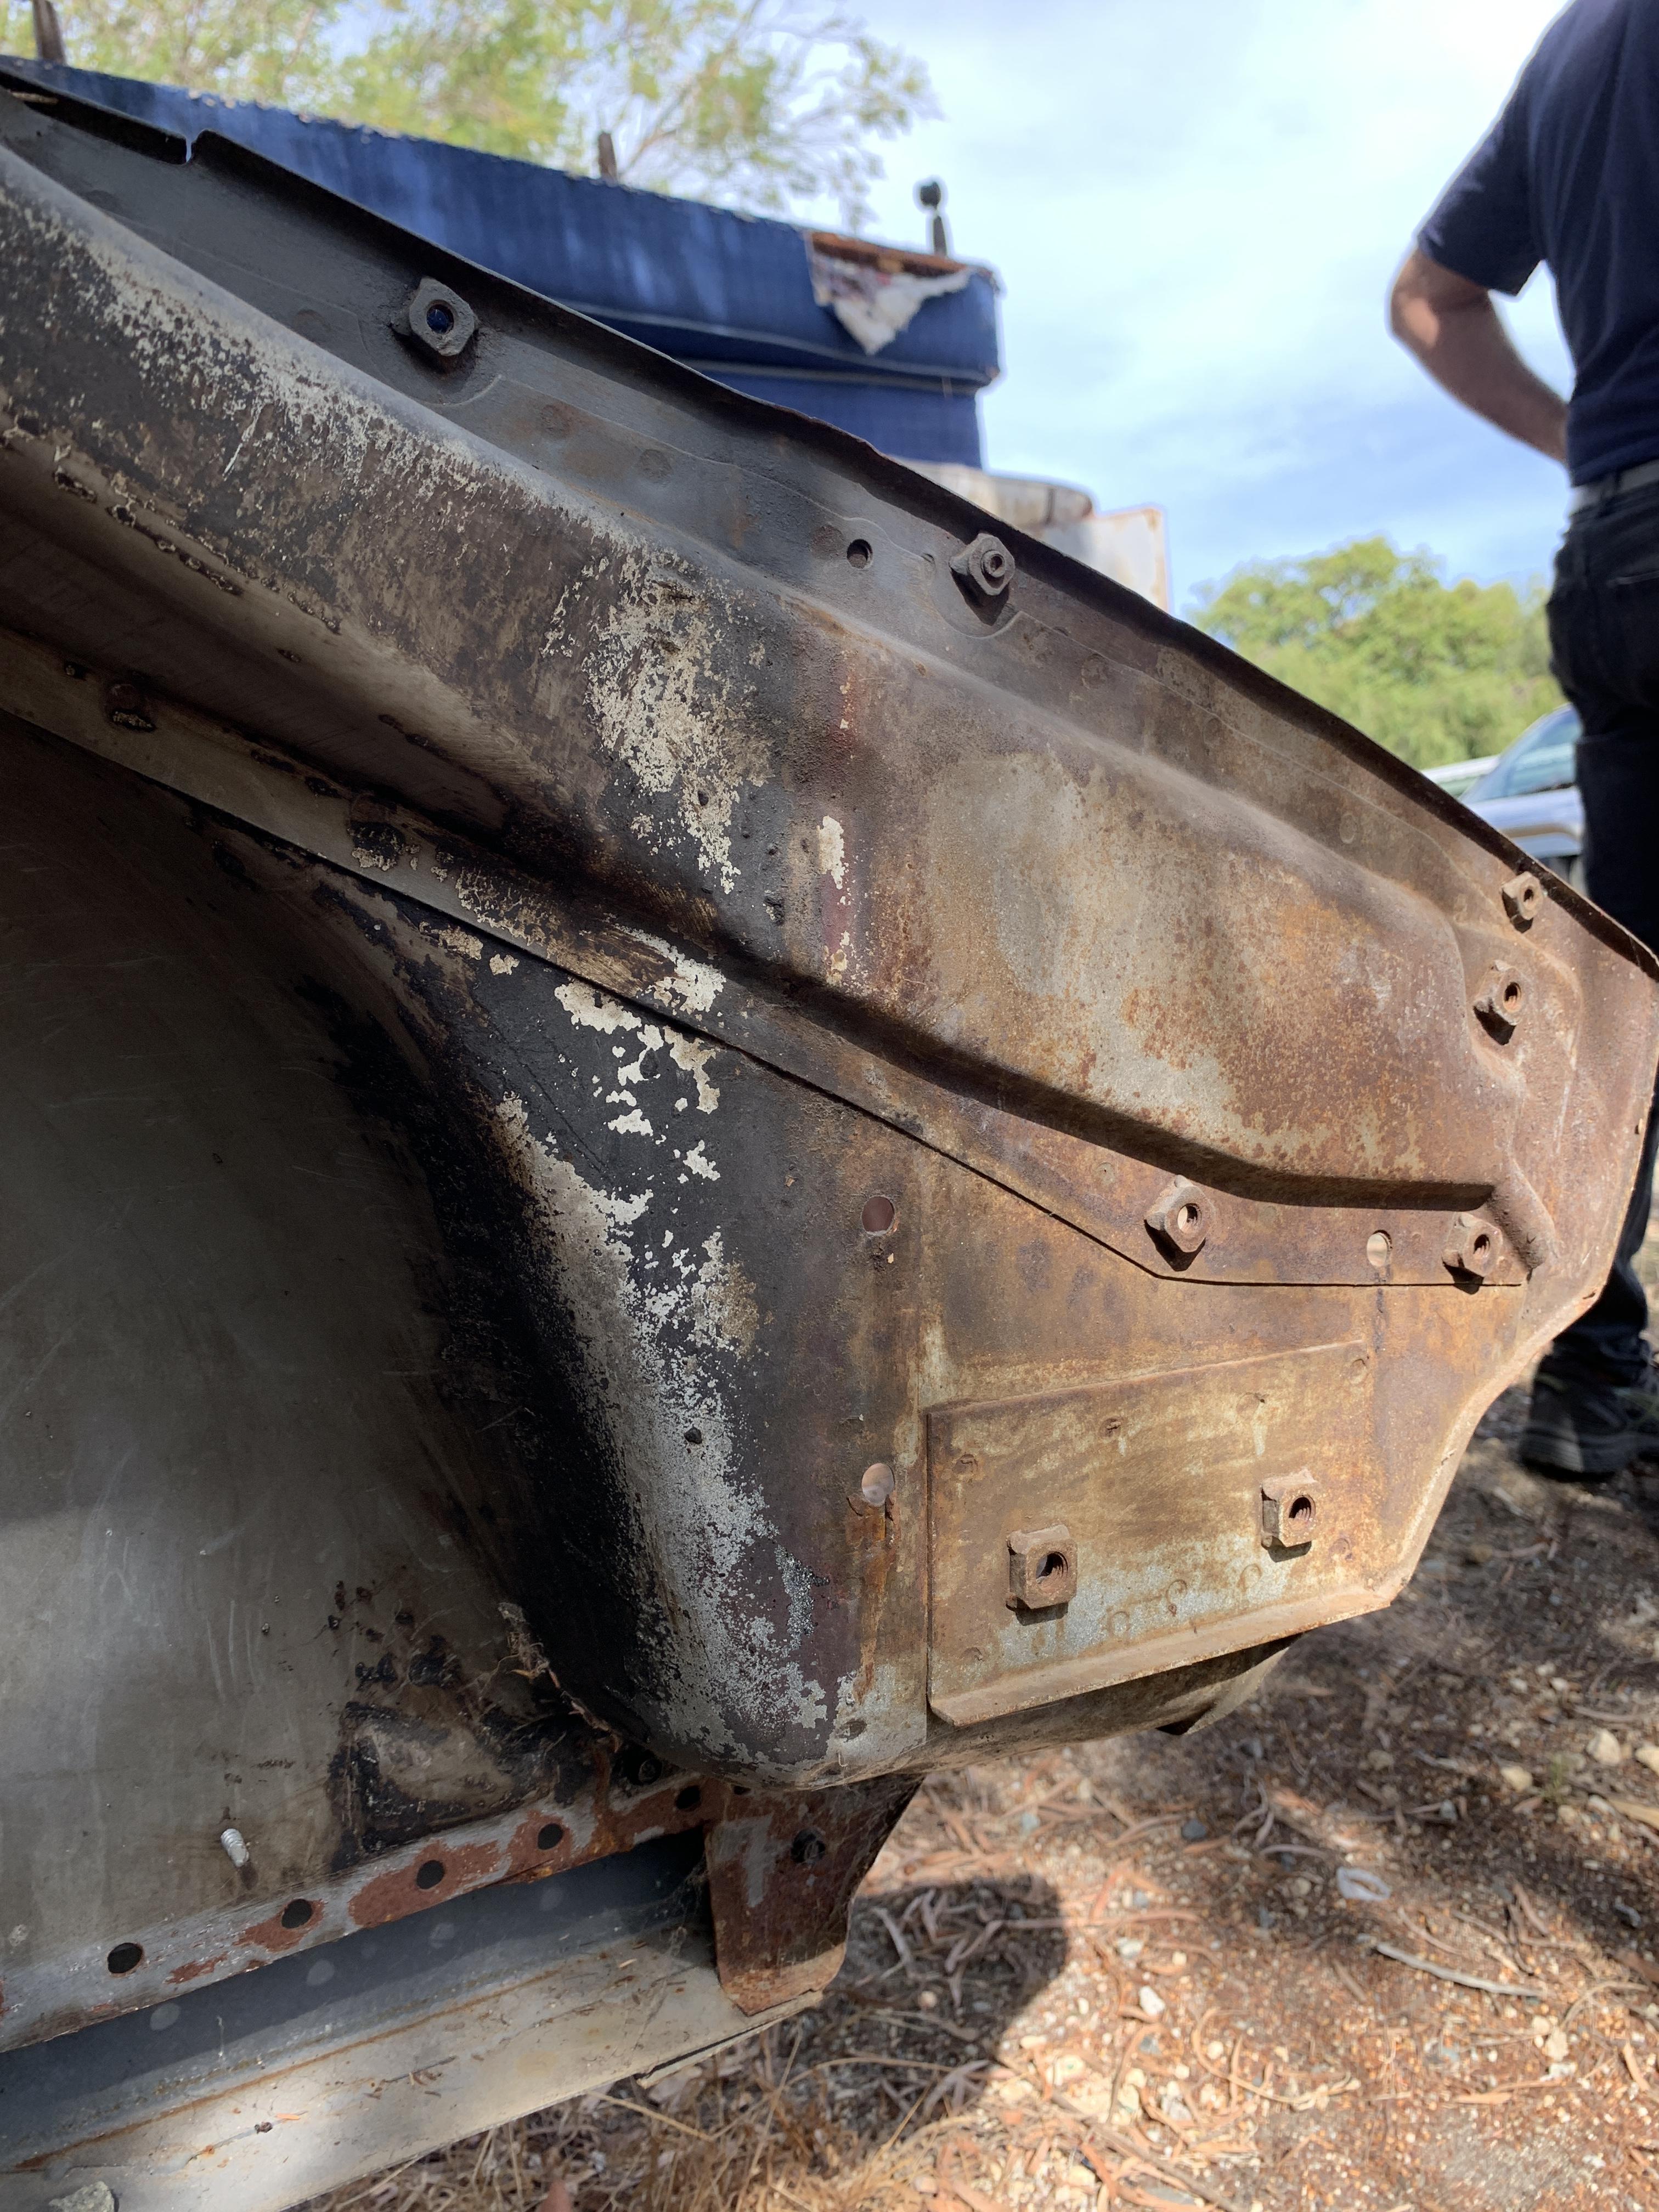
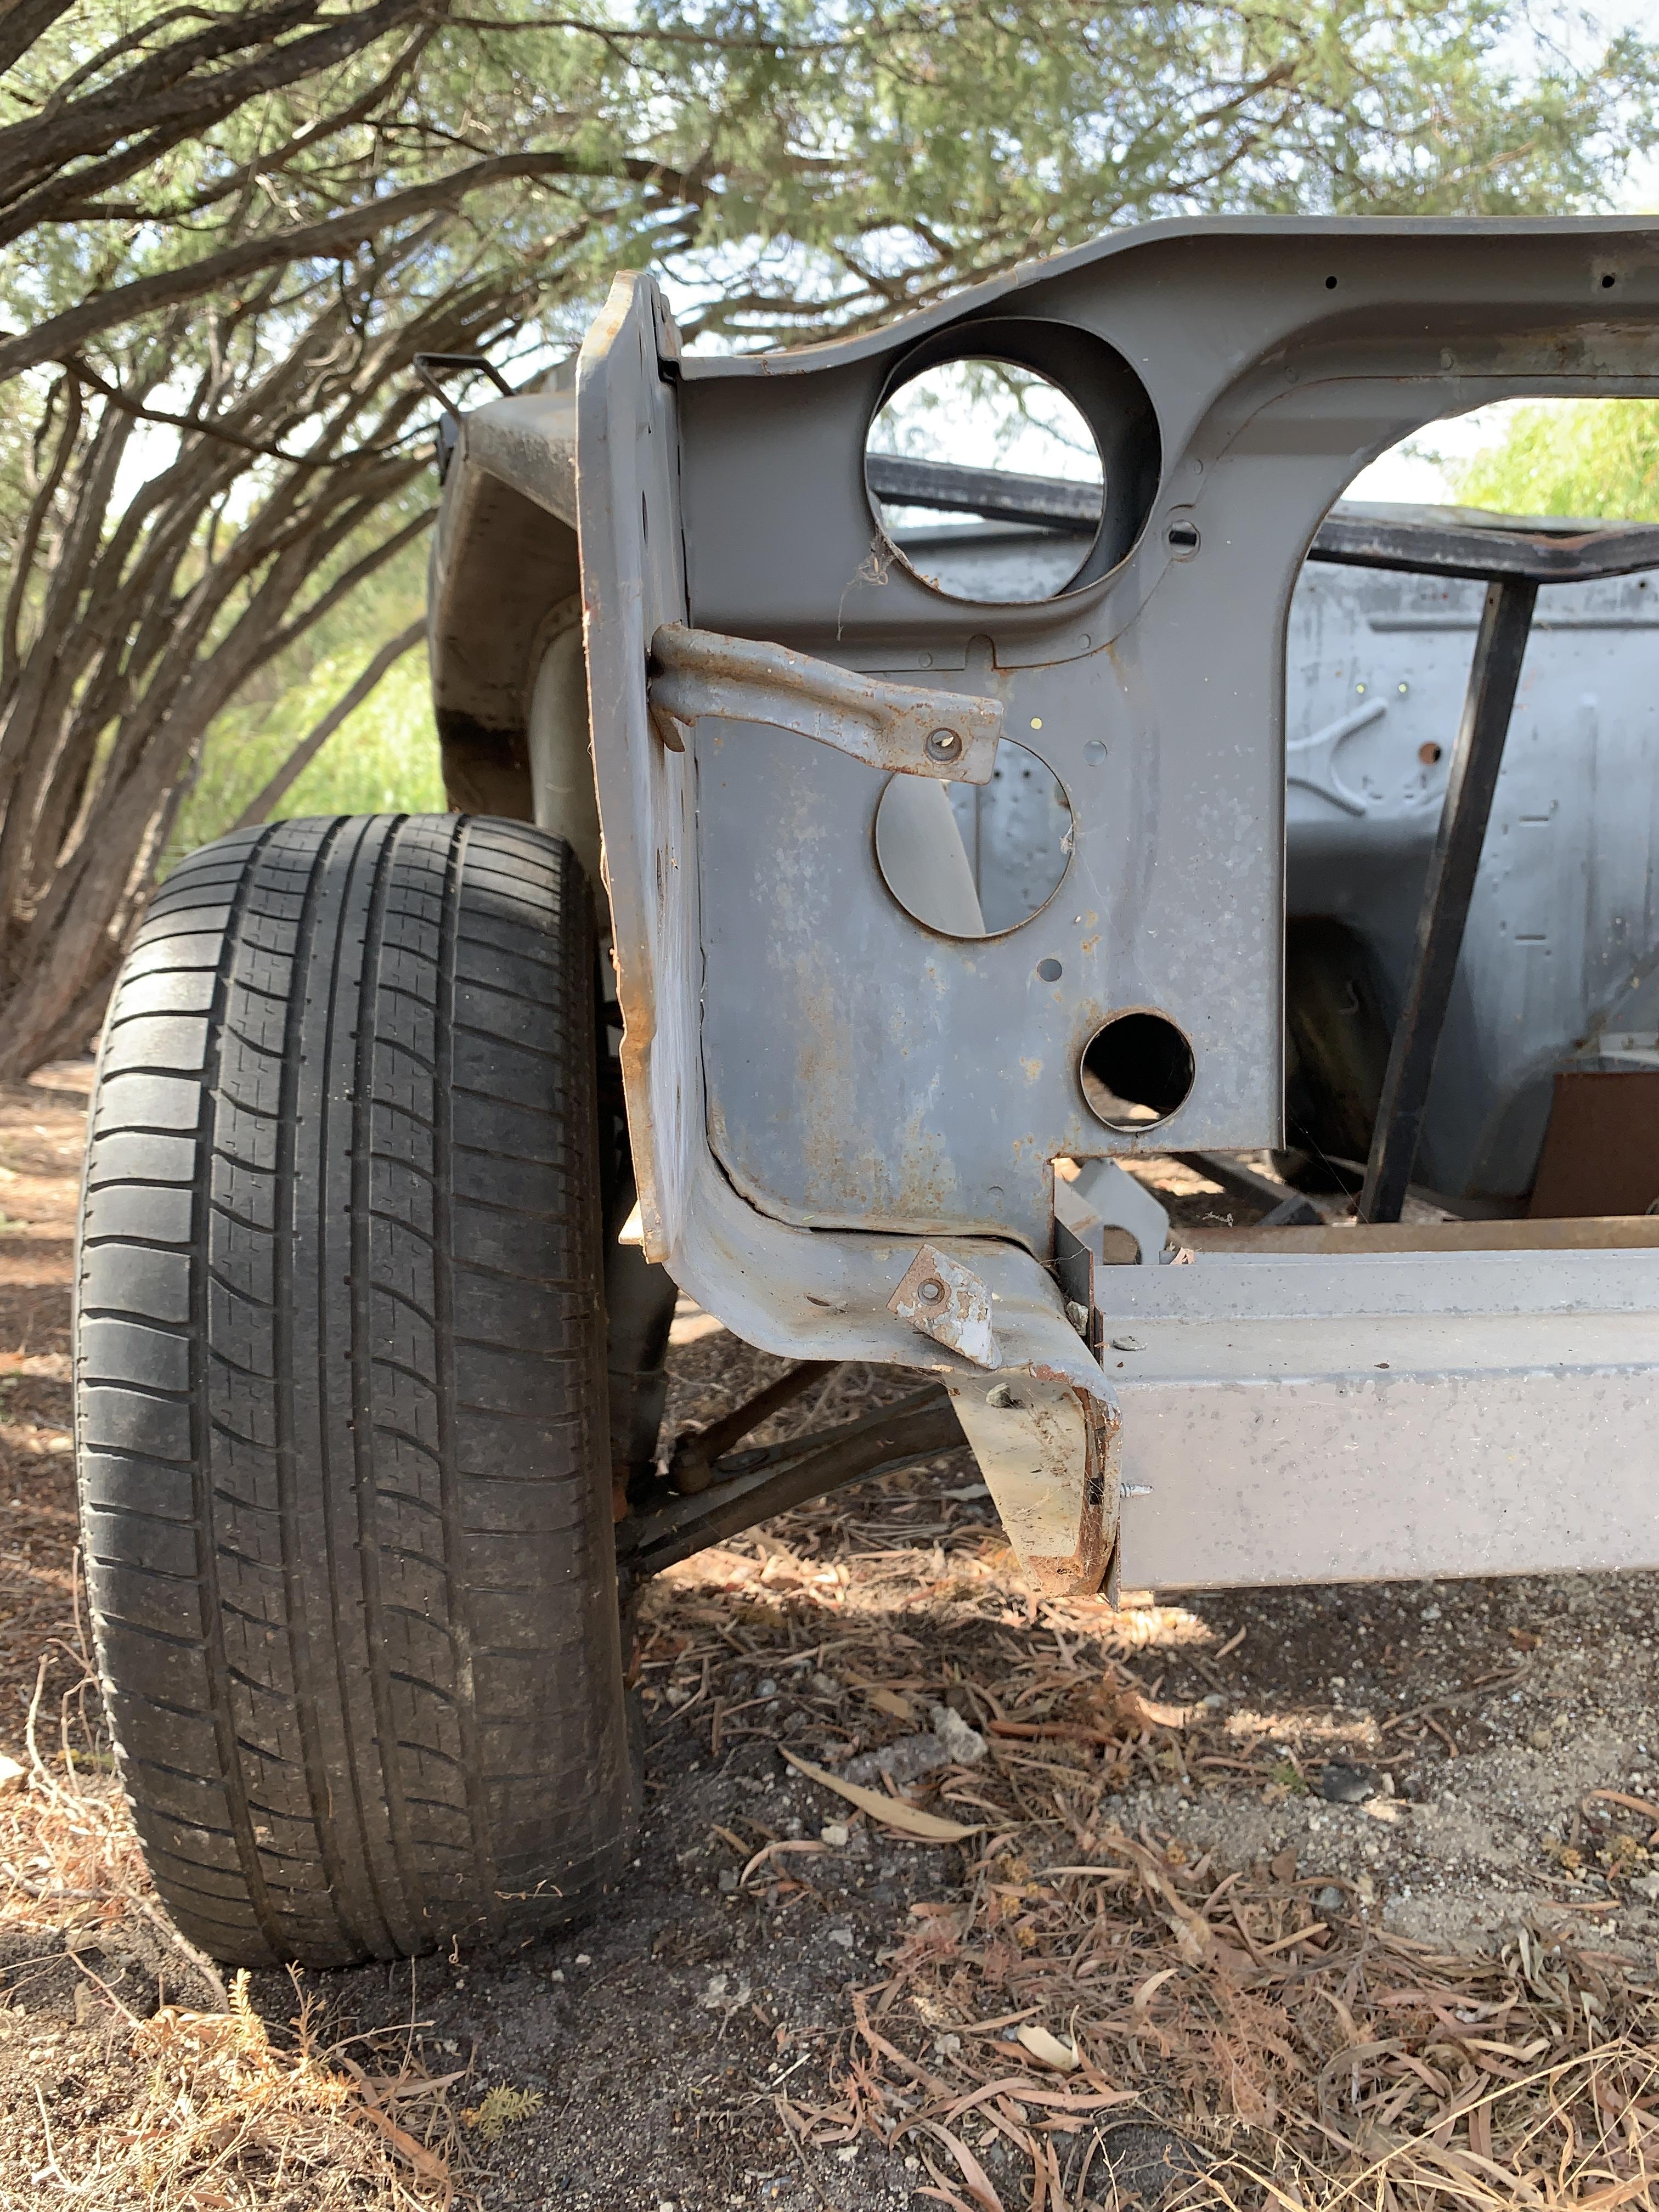
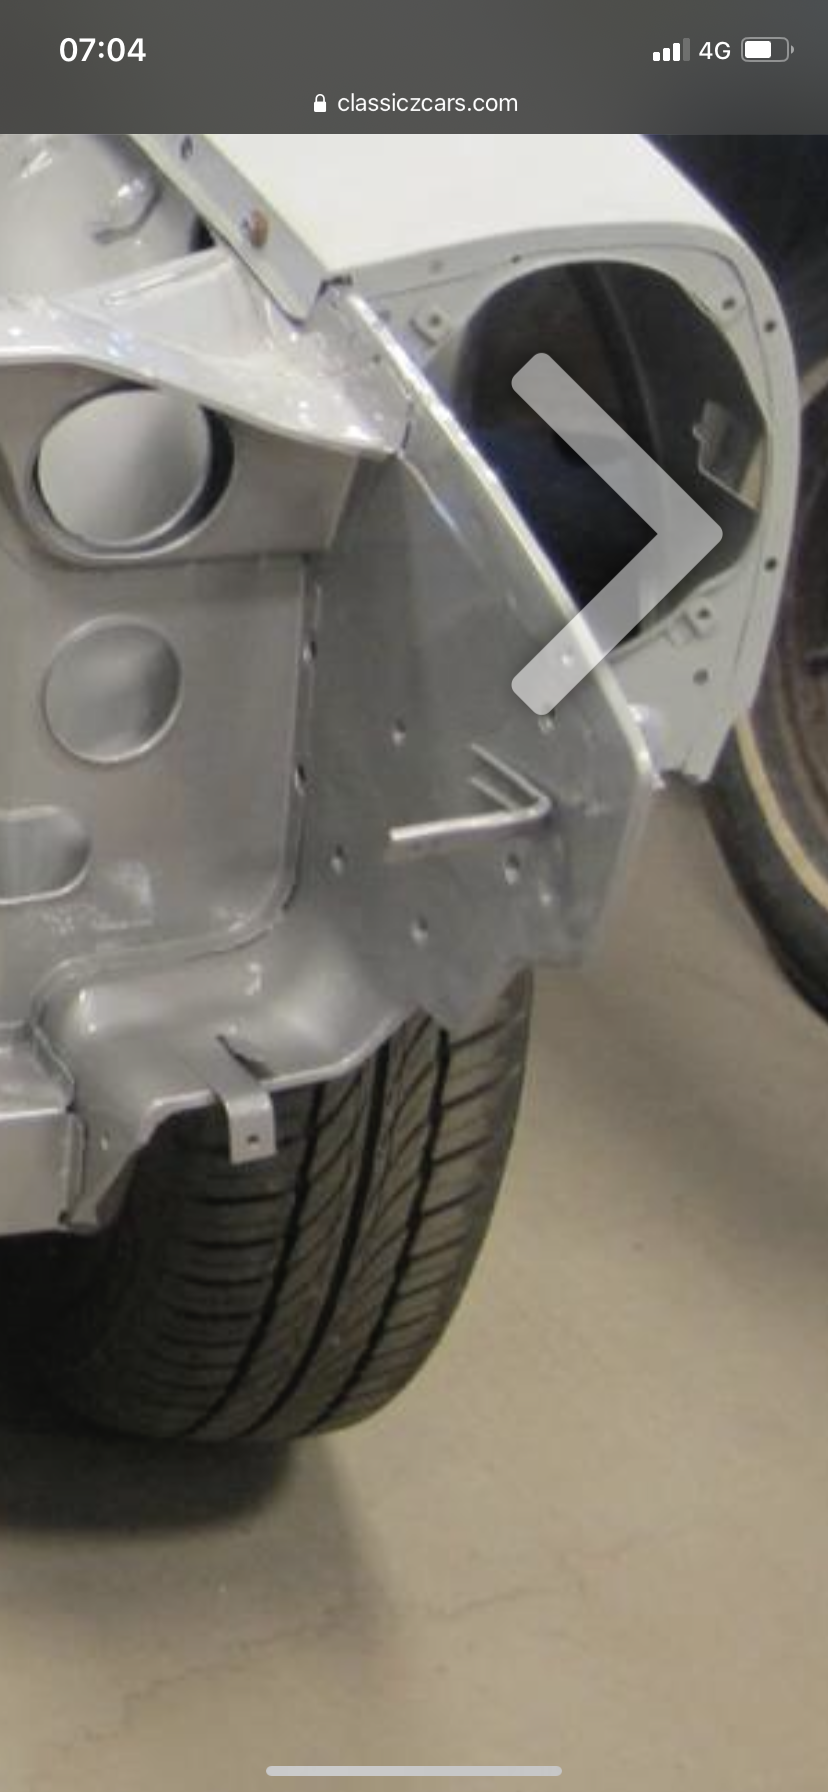
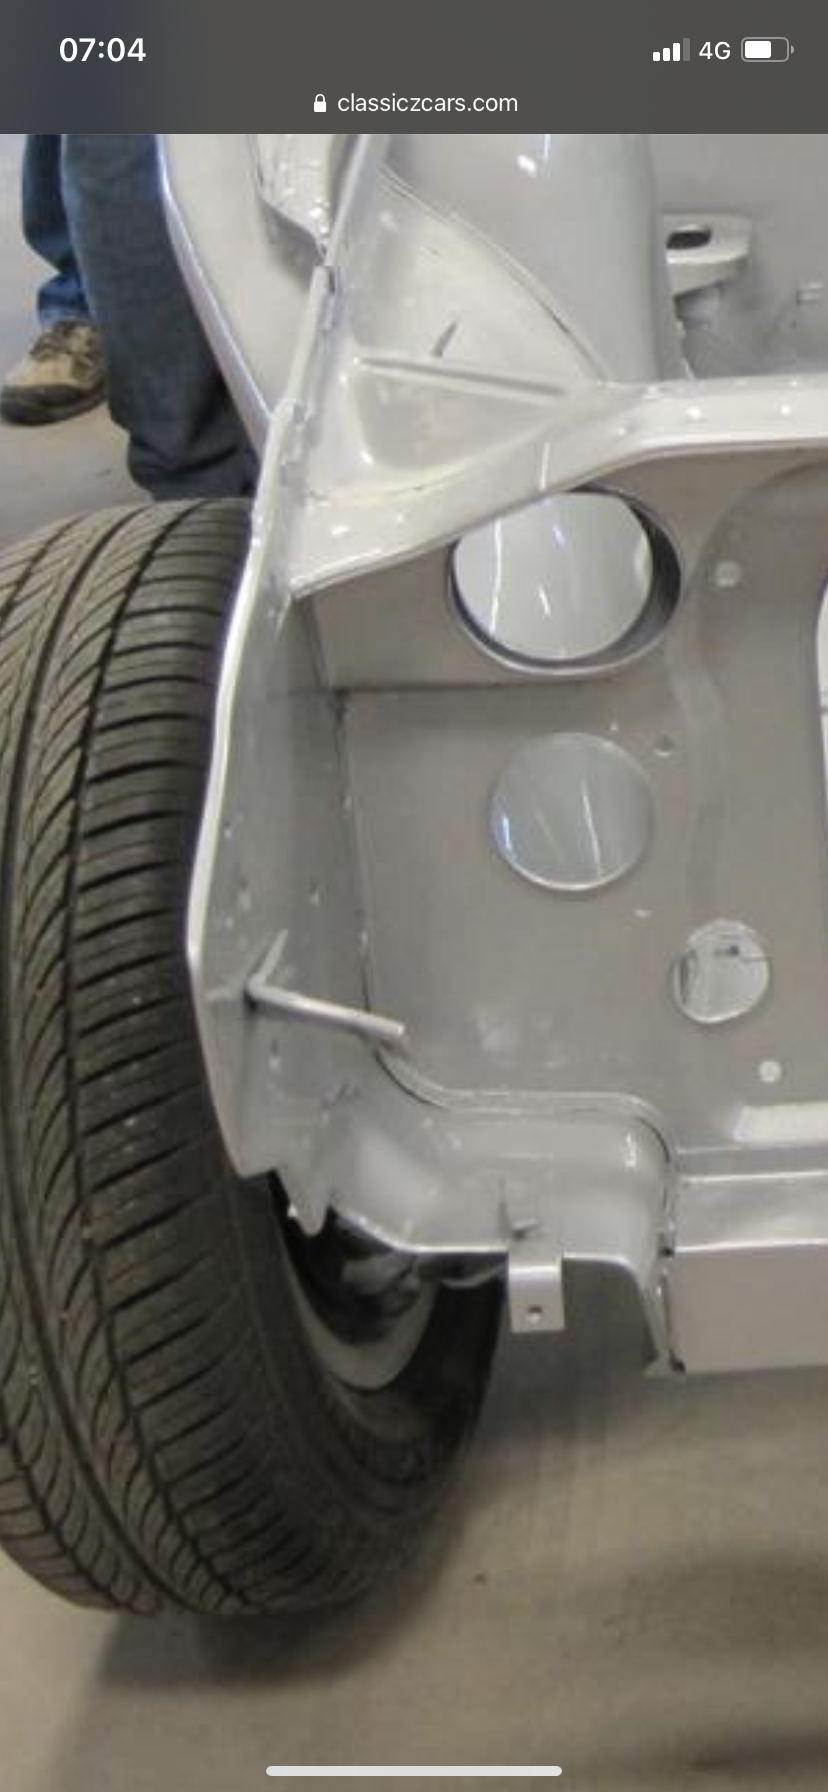
Yes they are non existent anymore, however I am in luck. My Z specialist has a wrecked car with near a perfect front nose on it. The photo I used above to show what the stock area should look like is the same car I got my cleanish roof skin off. Here’s more photos Problem is the radiator support is butchered and the bottom of the wheel arch panel has been removed. But very useable for the repairs I need to do.


-
Kent I could read your thread 1000 times and still be amazed! Yes I think I need to do something similar, but instead of being really talented and making everything I’ll cheat and get donor panels. you said your old thread, do you have a new one? I’ve been wondering what stage your car is at. ryan
-
According to my rudimentary measurements my car is square, I have it on the leveled chassis jig and it is quite level. Front radiator support is not level, I assume due to the damage, the strut towers are level though, which is the main thing. I know you won’t see the damage but I feel like I feel like I’m going to go through so much to get the rest of the car right it would be a shame to not do the best repair possible. I can either transplant the front section from a cleaner car, roughly from the front quarter of the wheel arch forward. Or I can repair the damage. Either way I’m removing the radiator support In my mind doing the transplant seems cleaner and simpler...
-
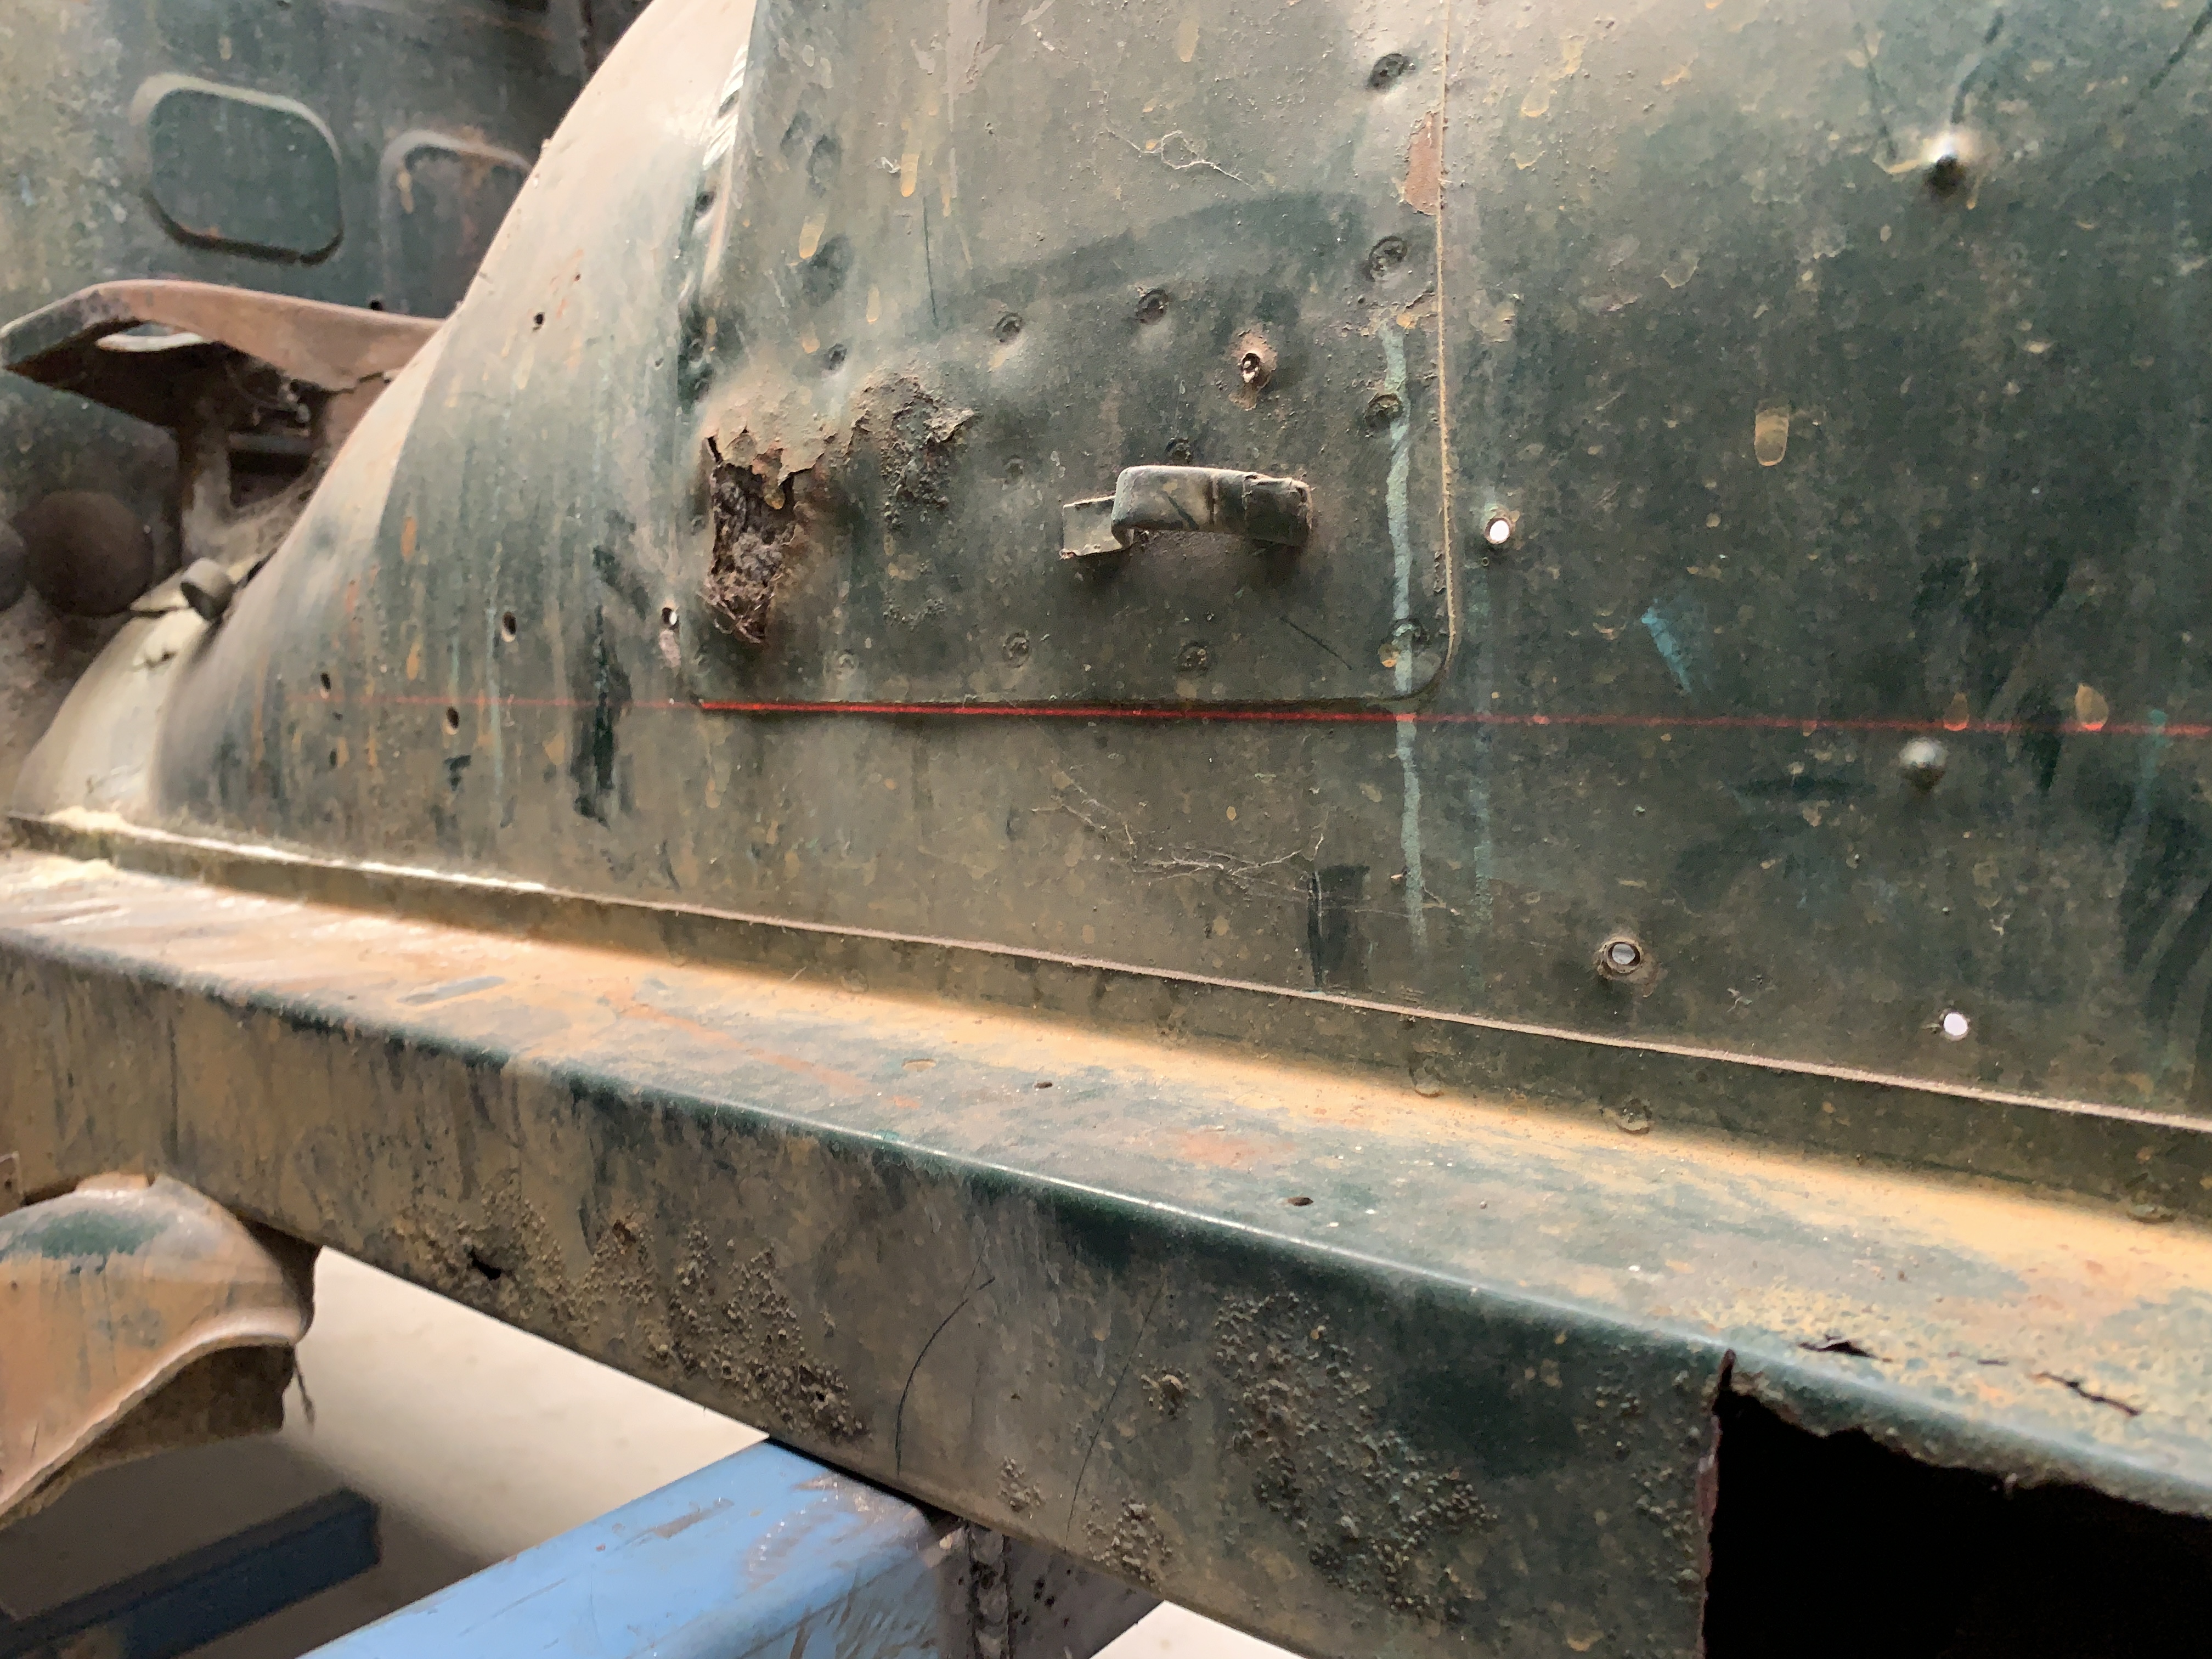
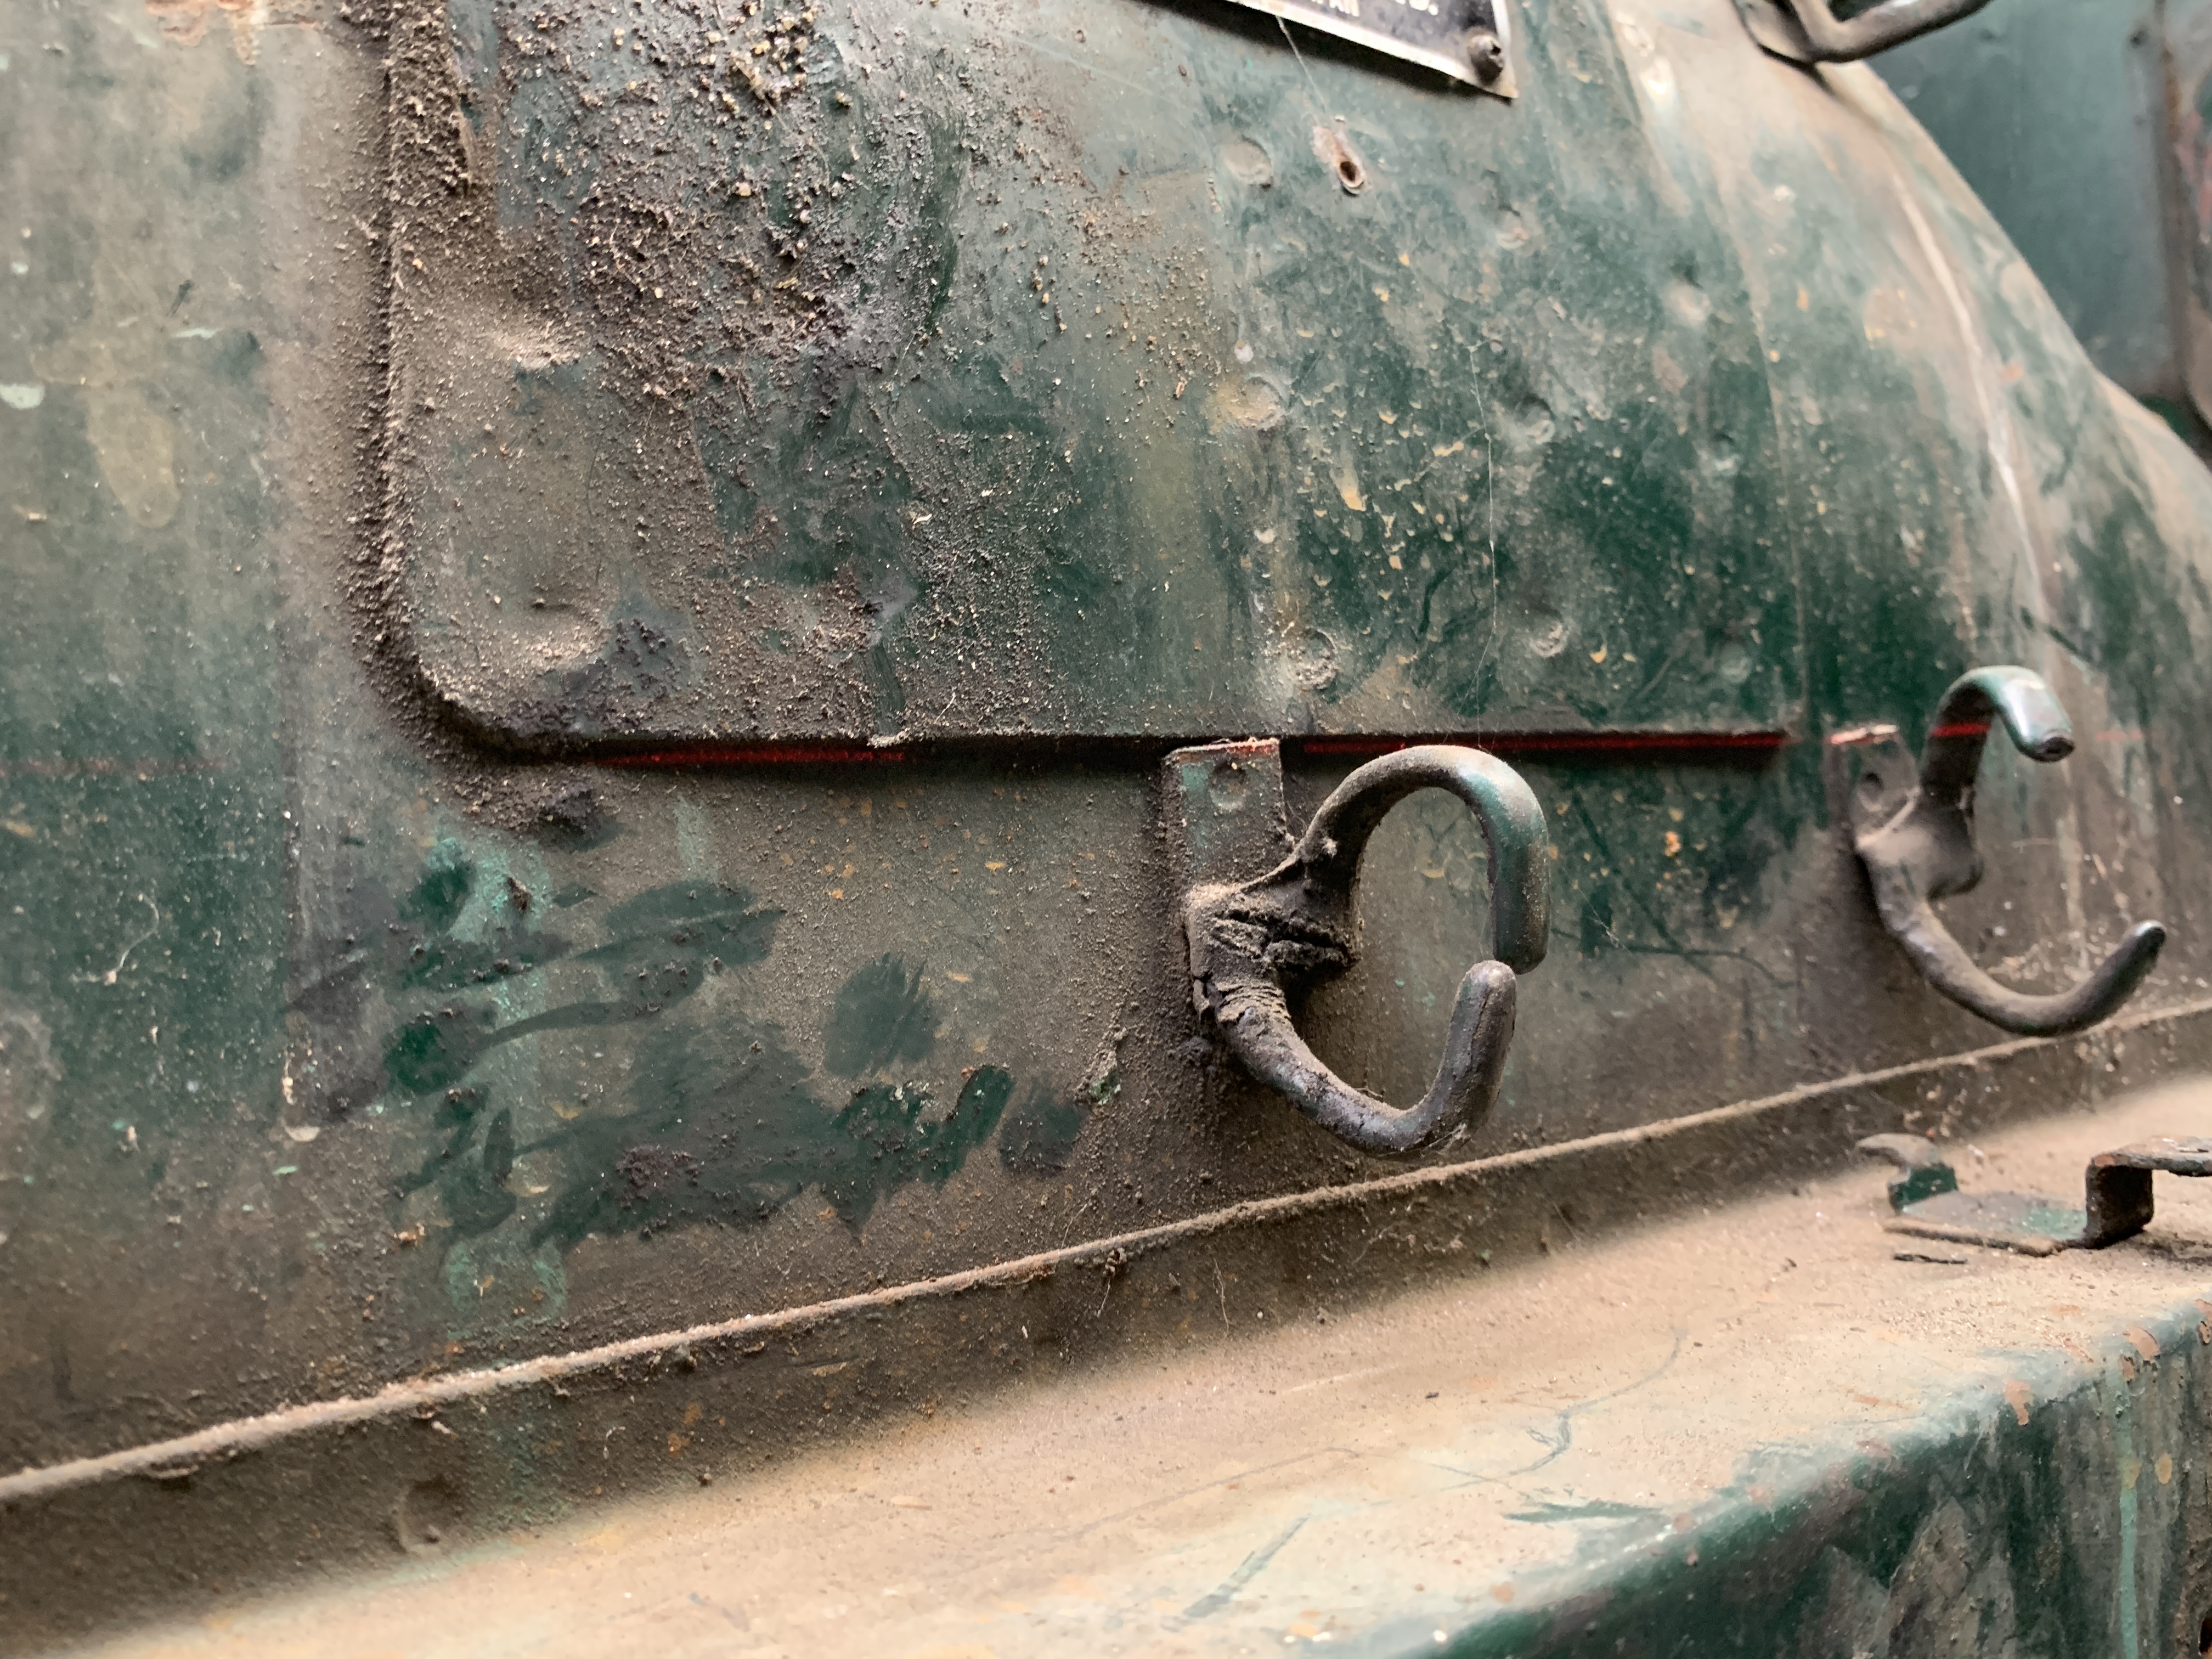
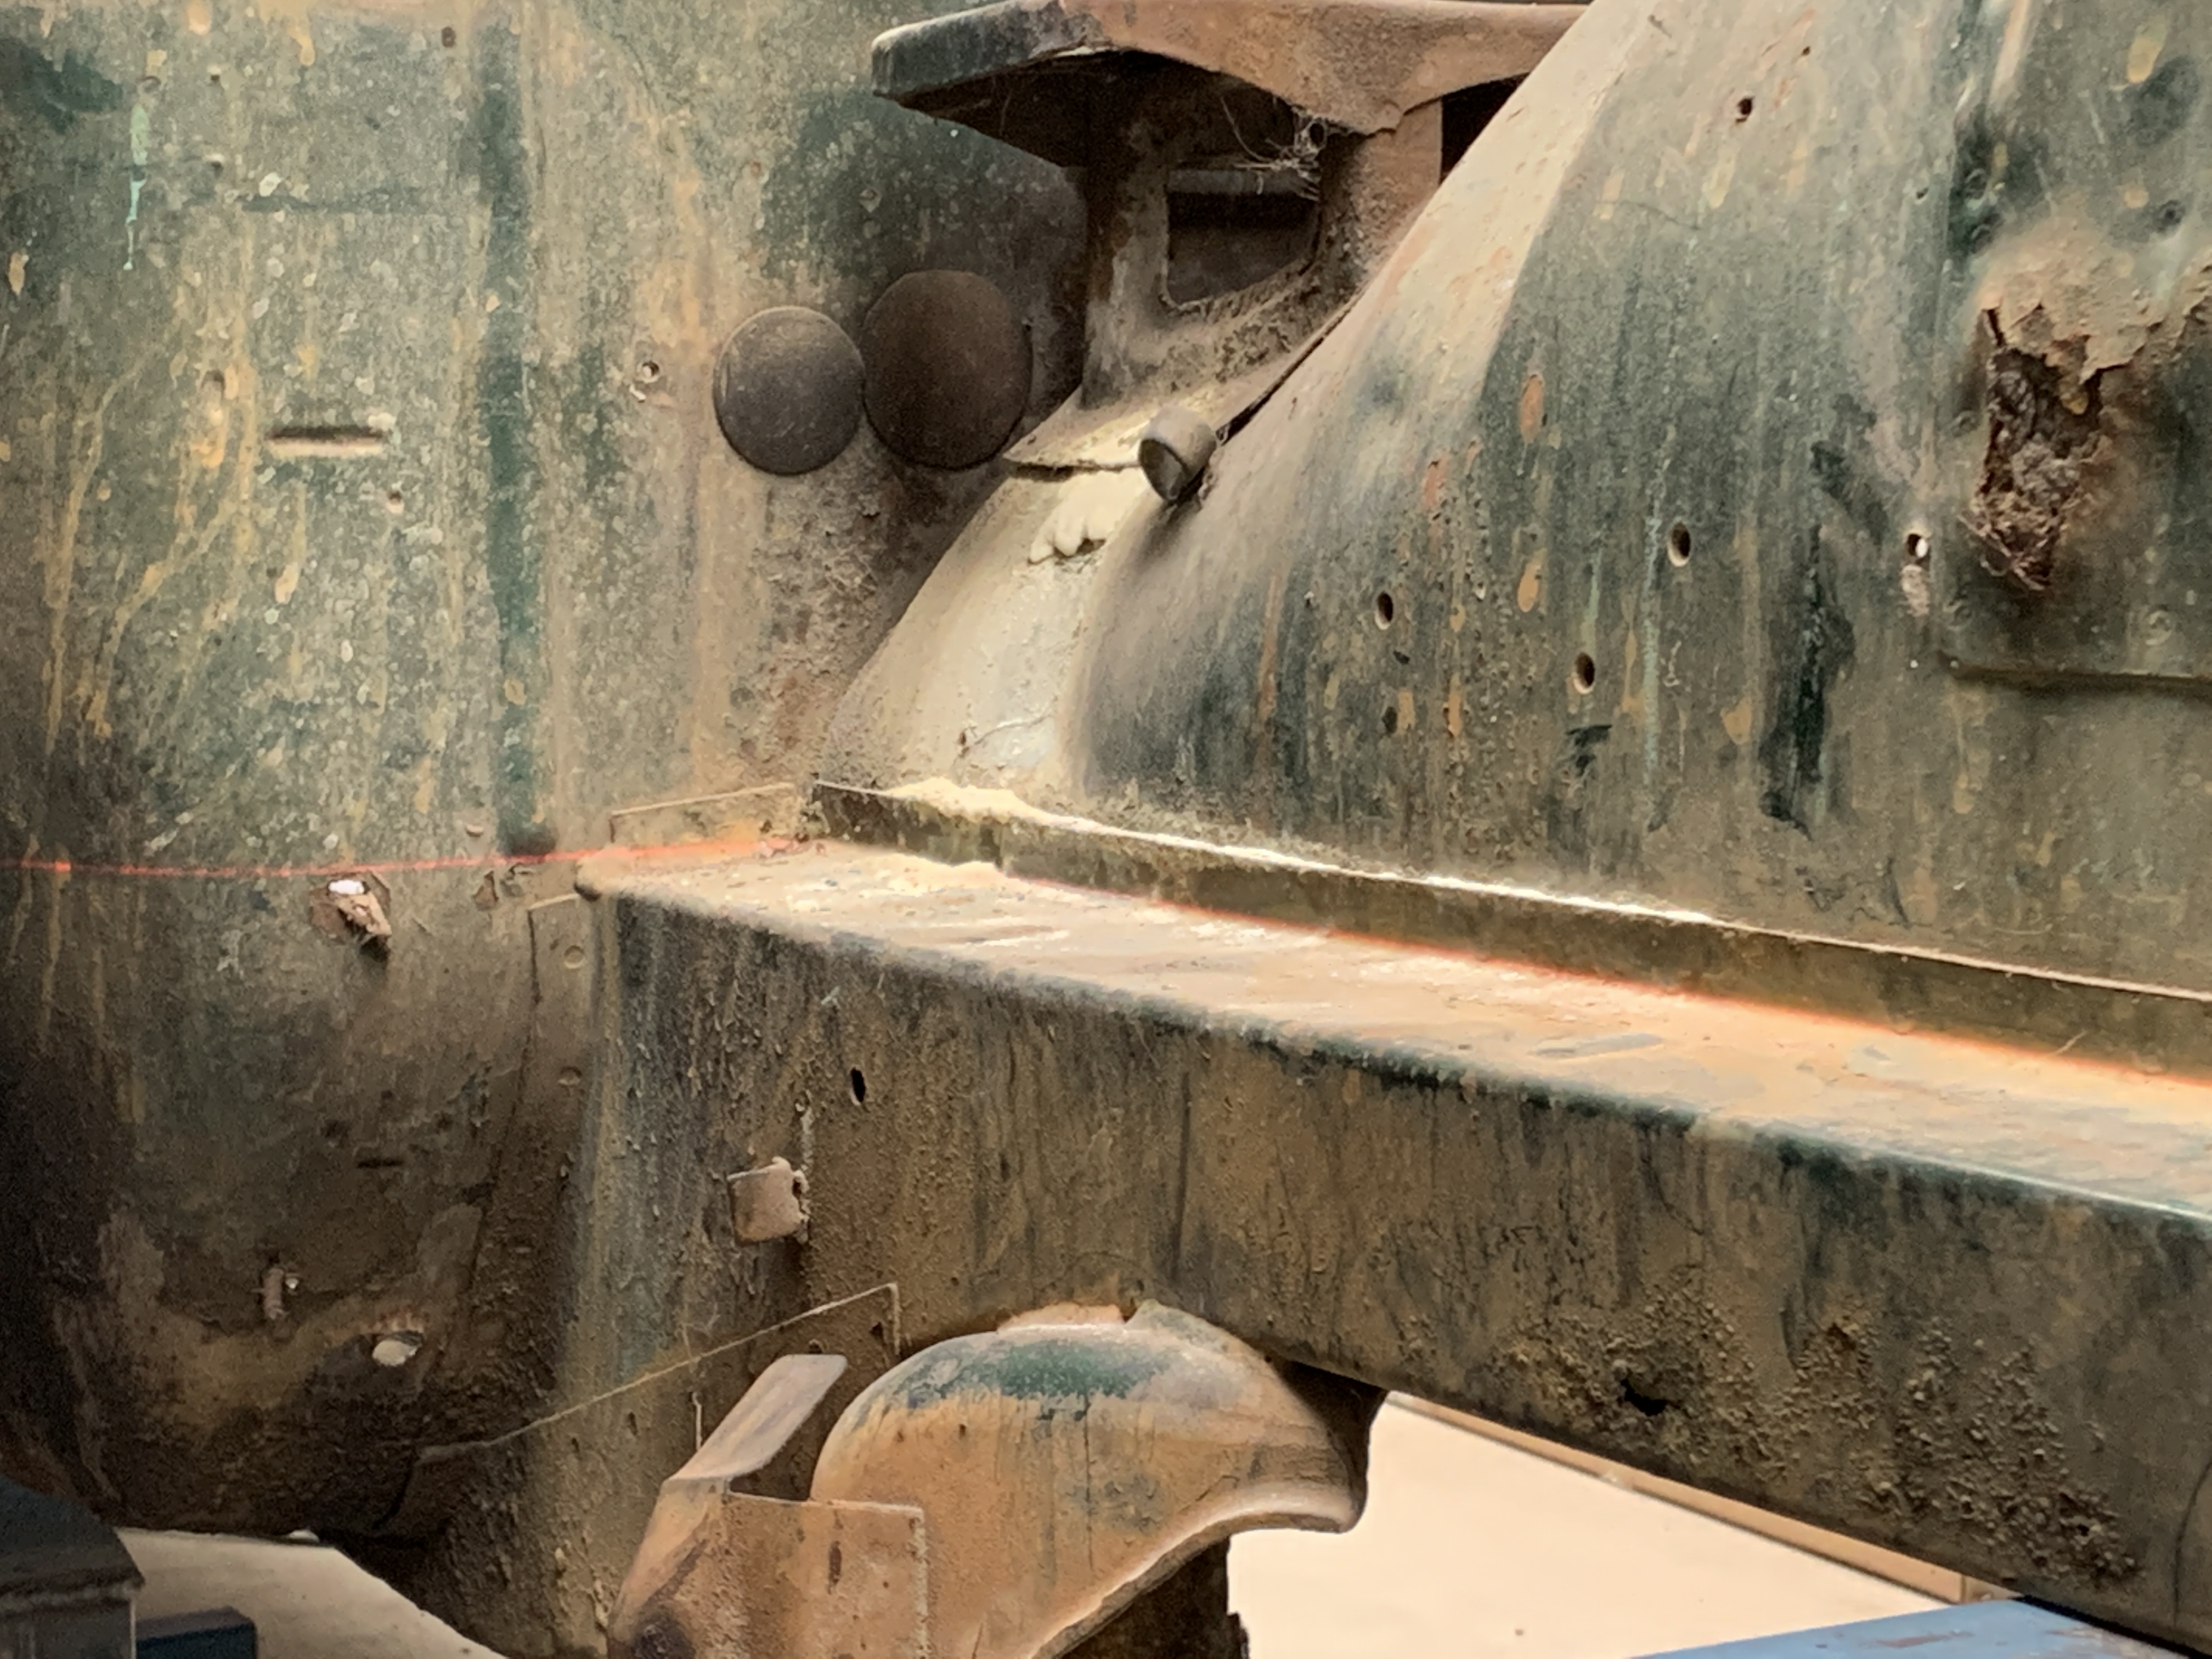
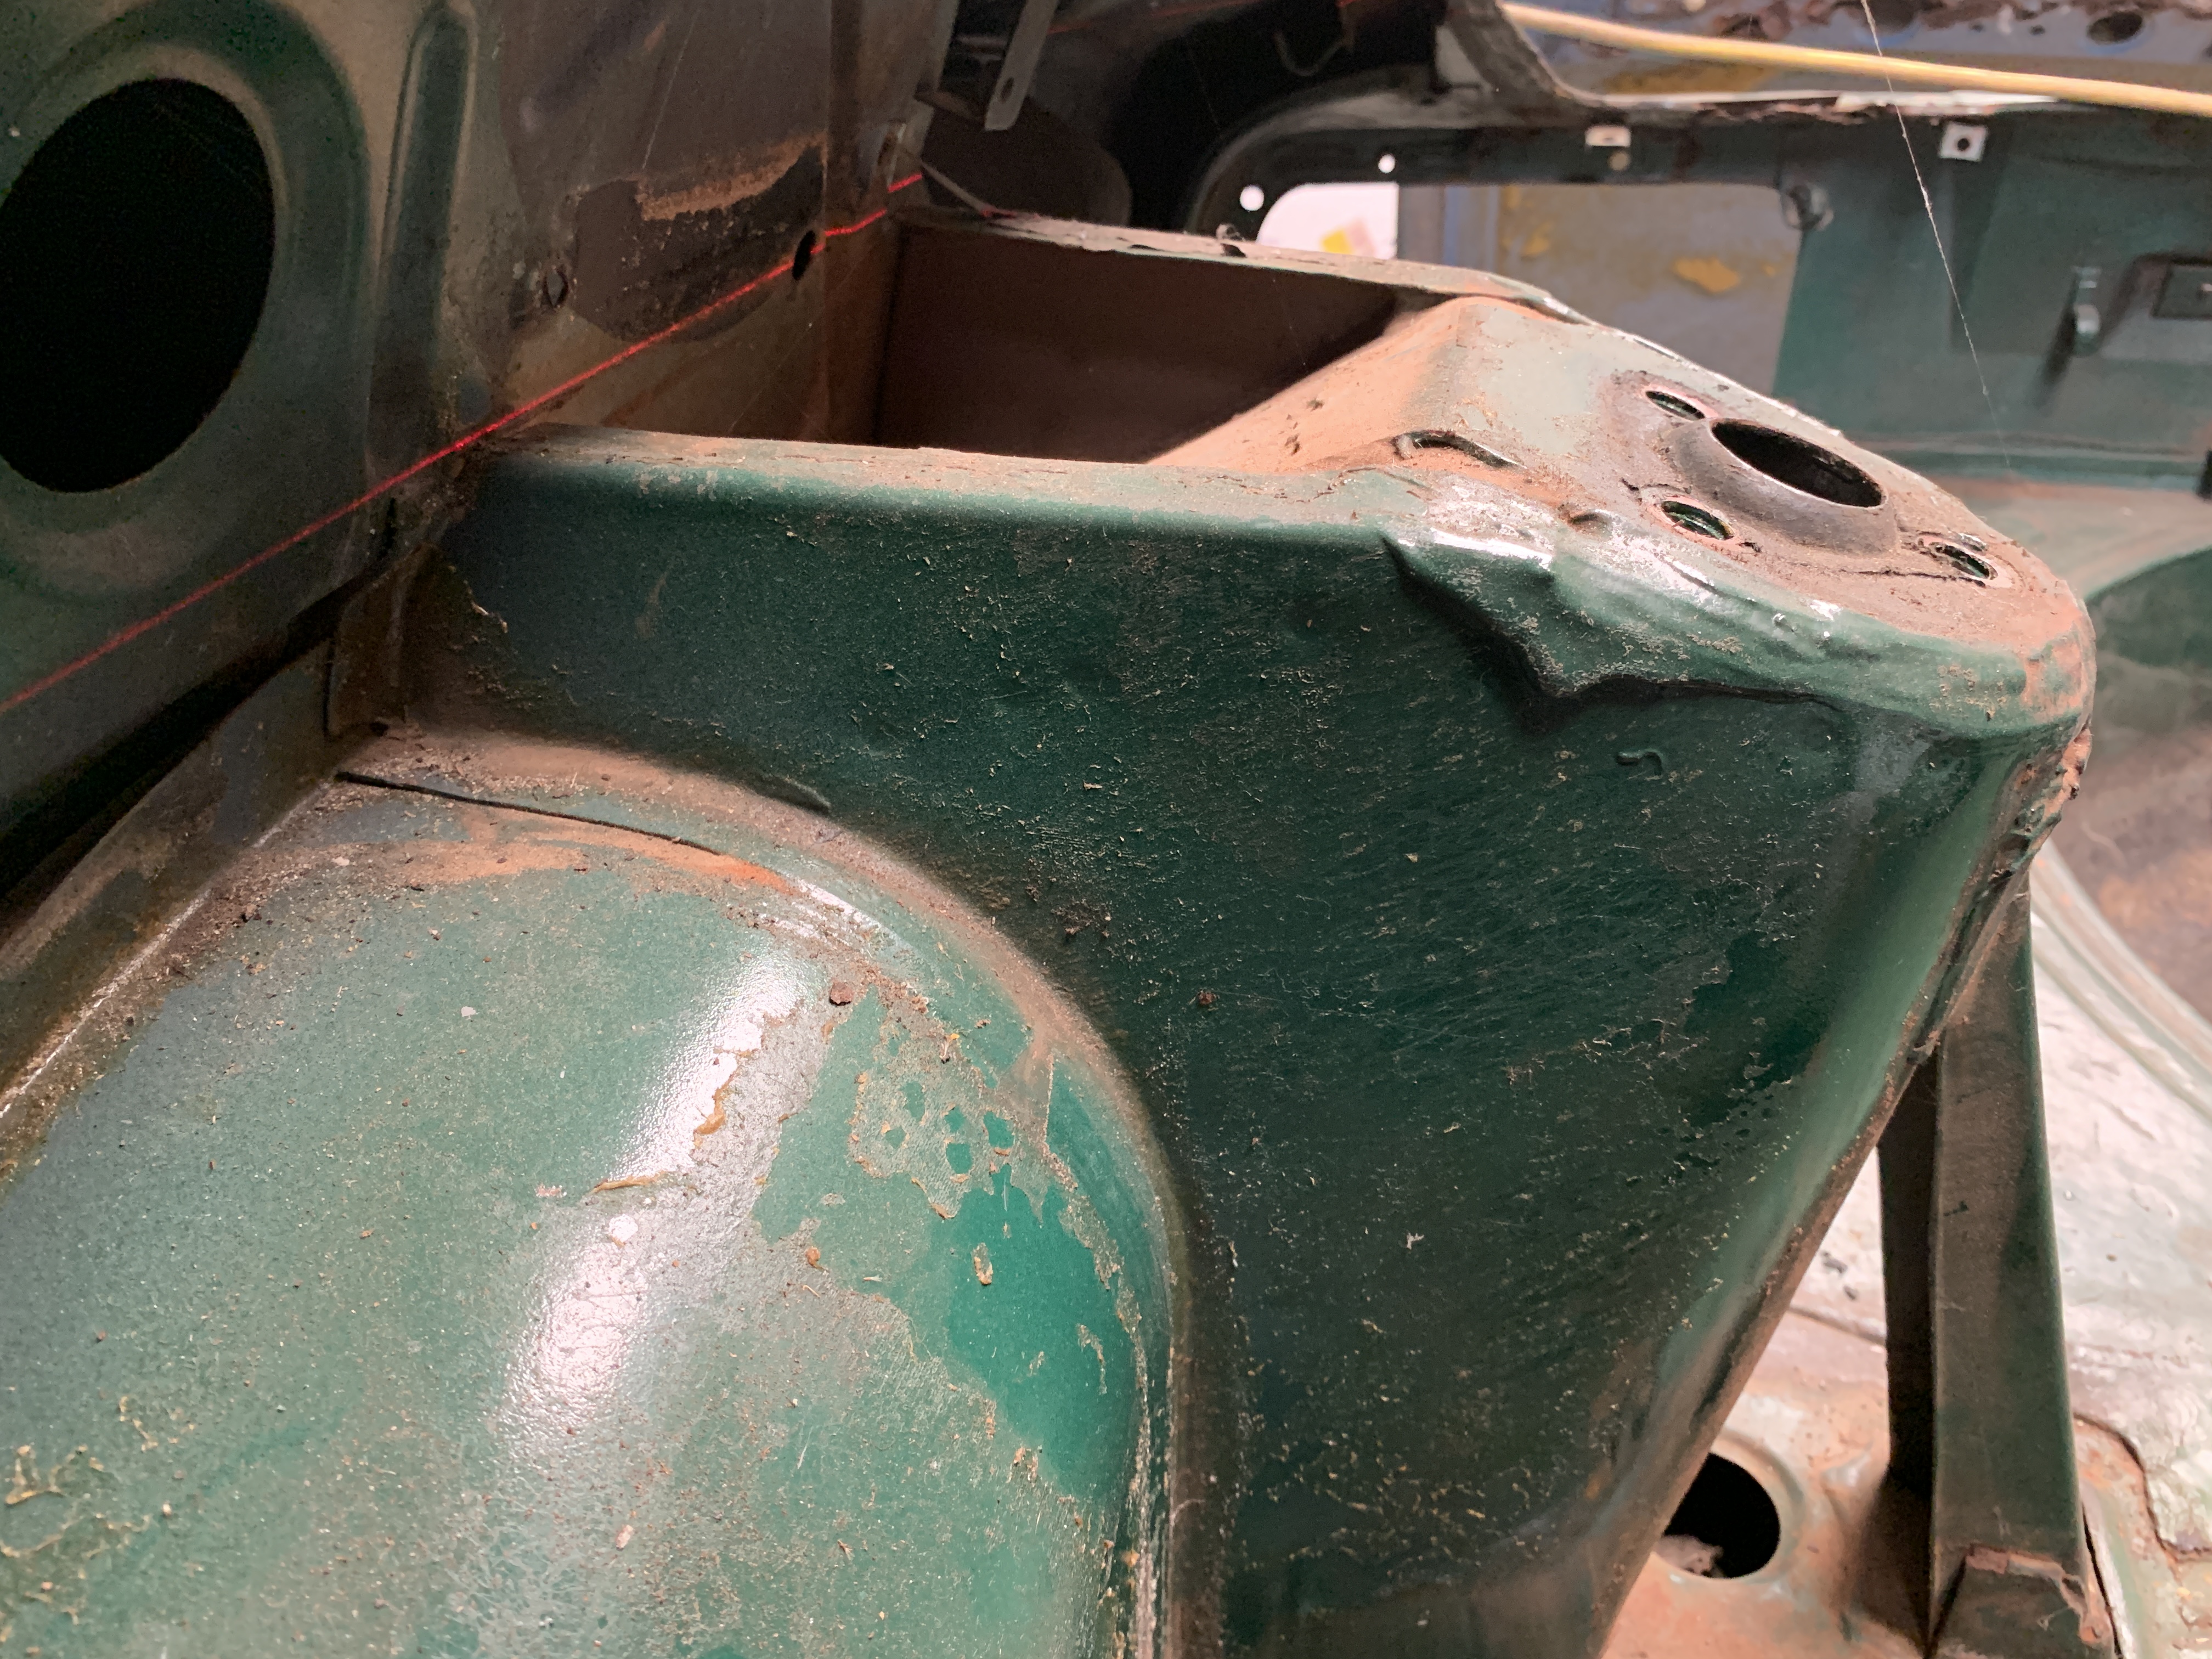
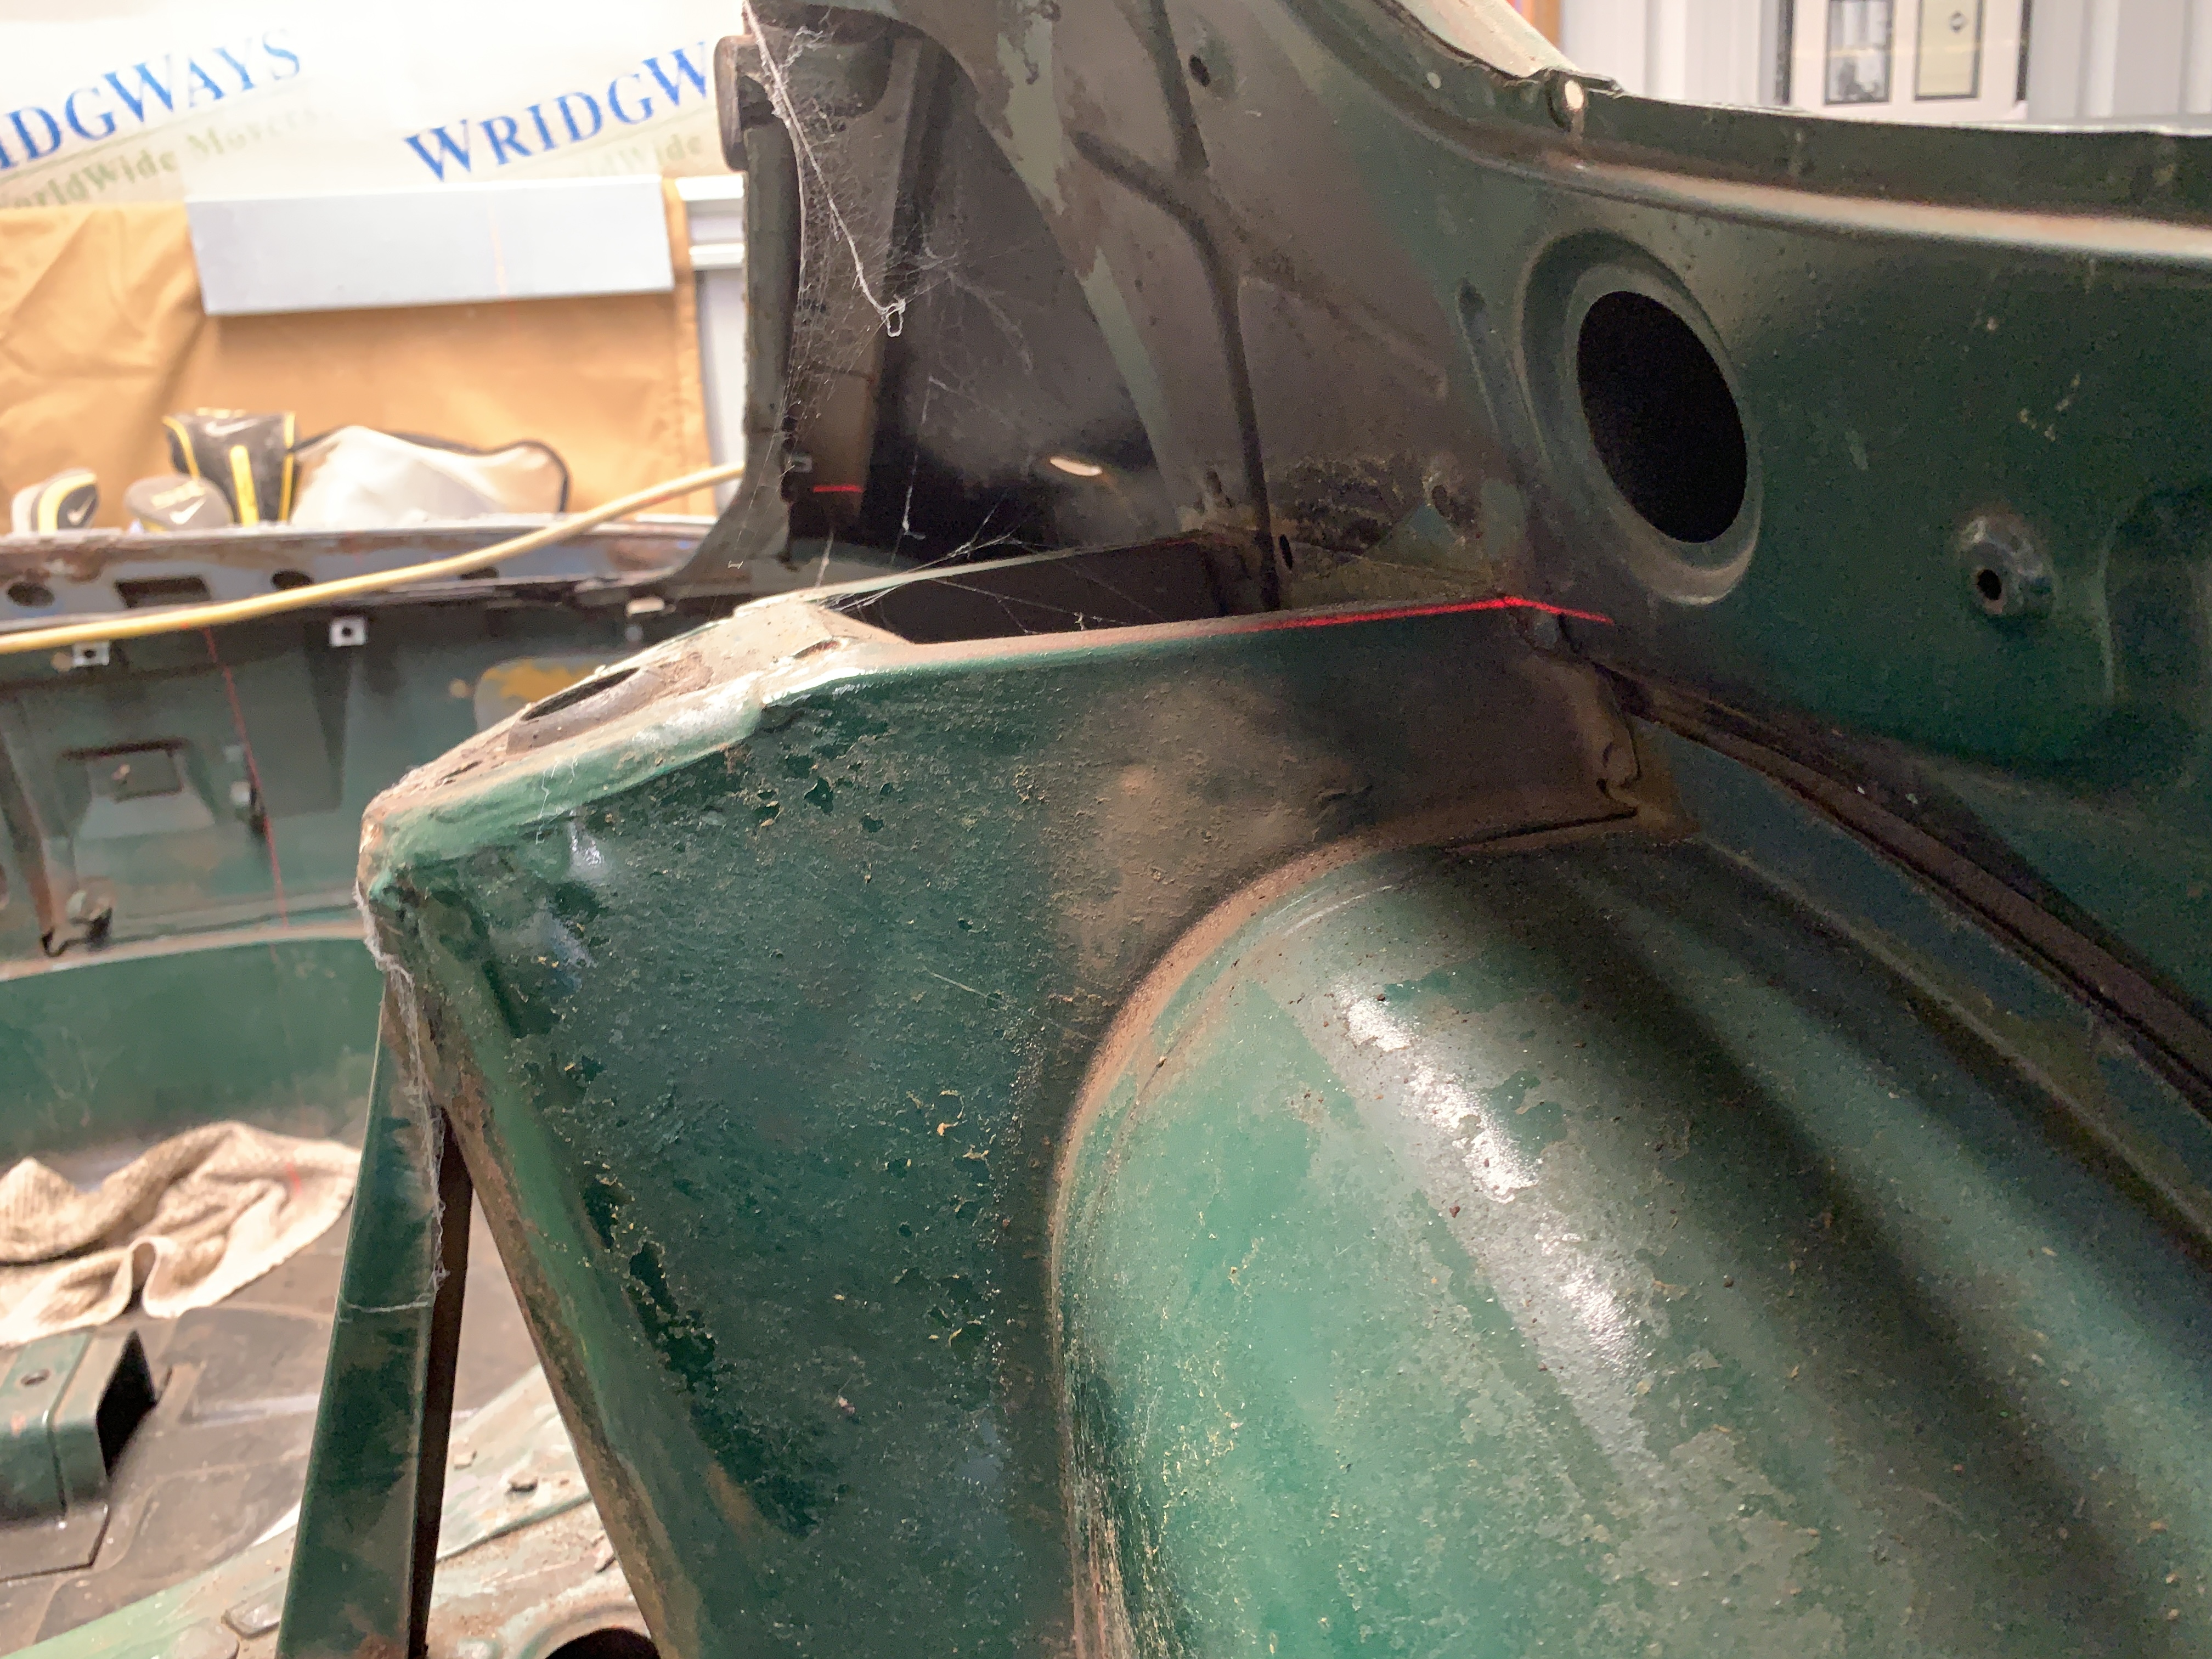
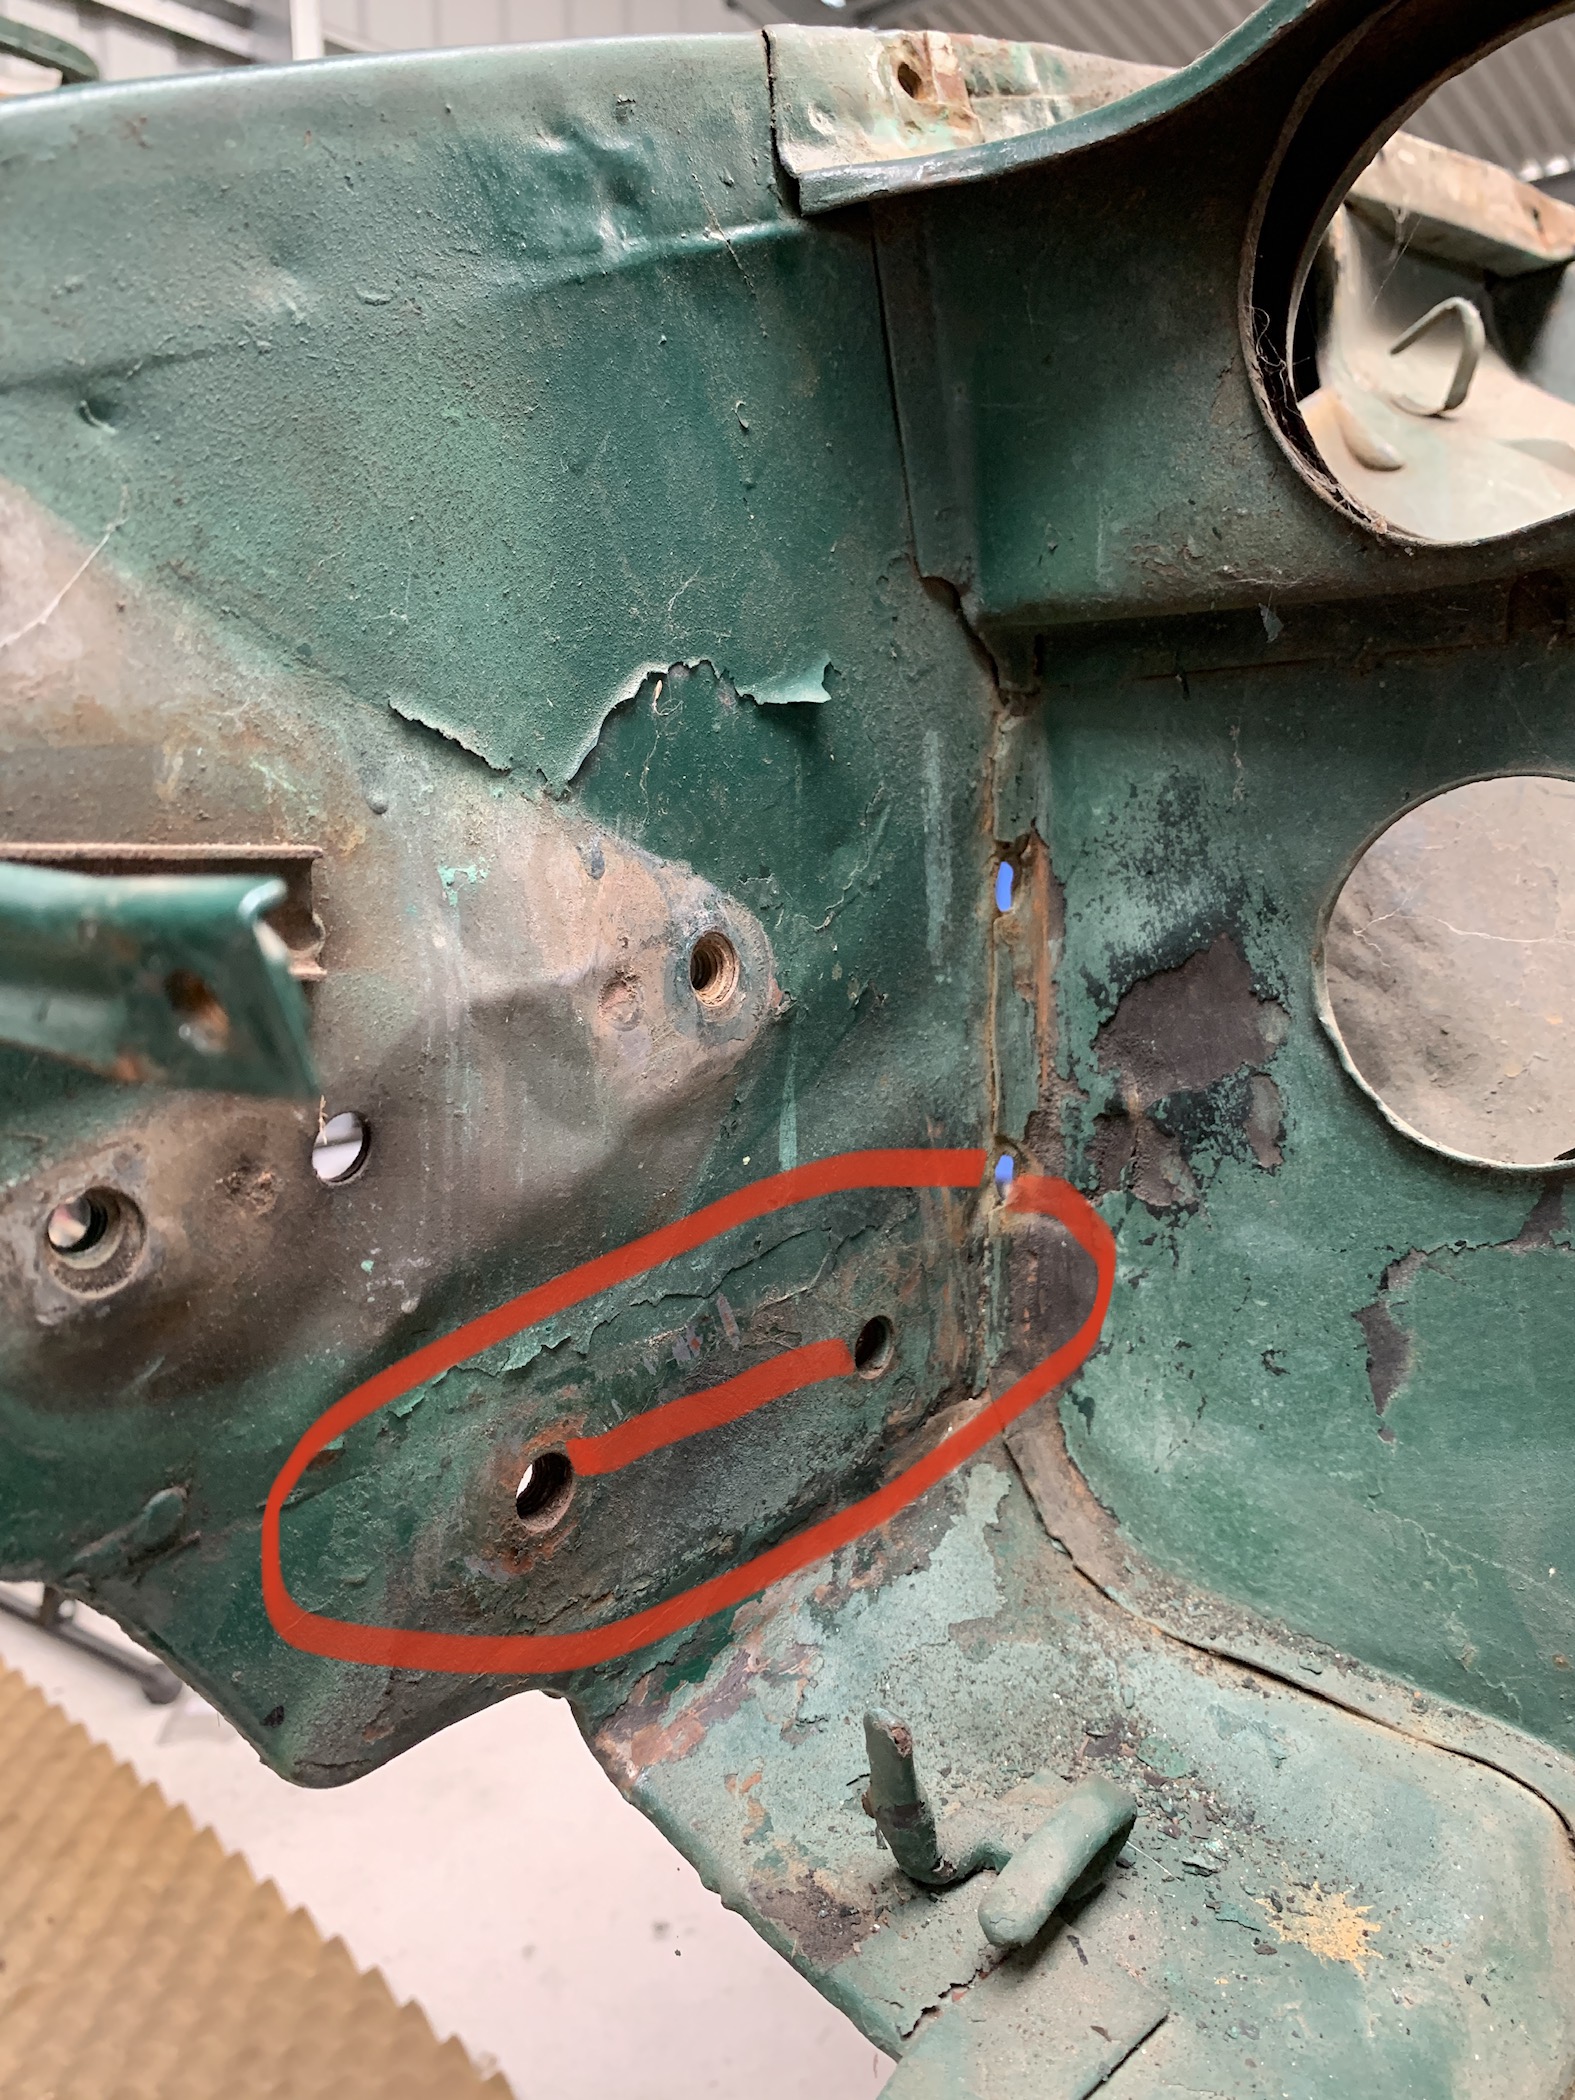
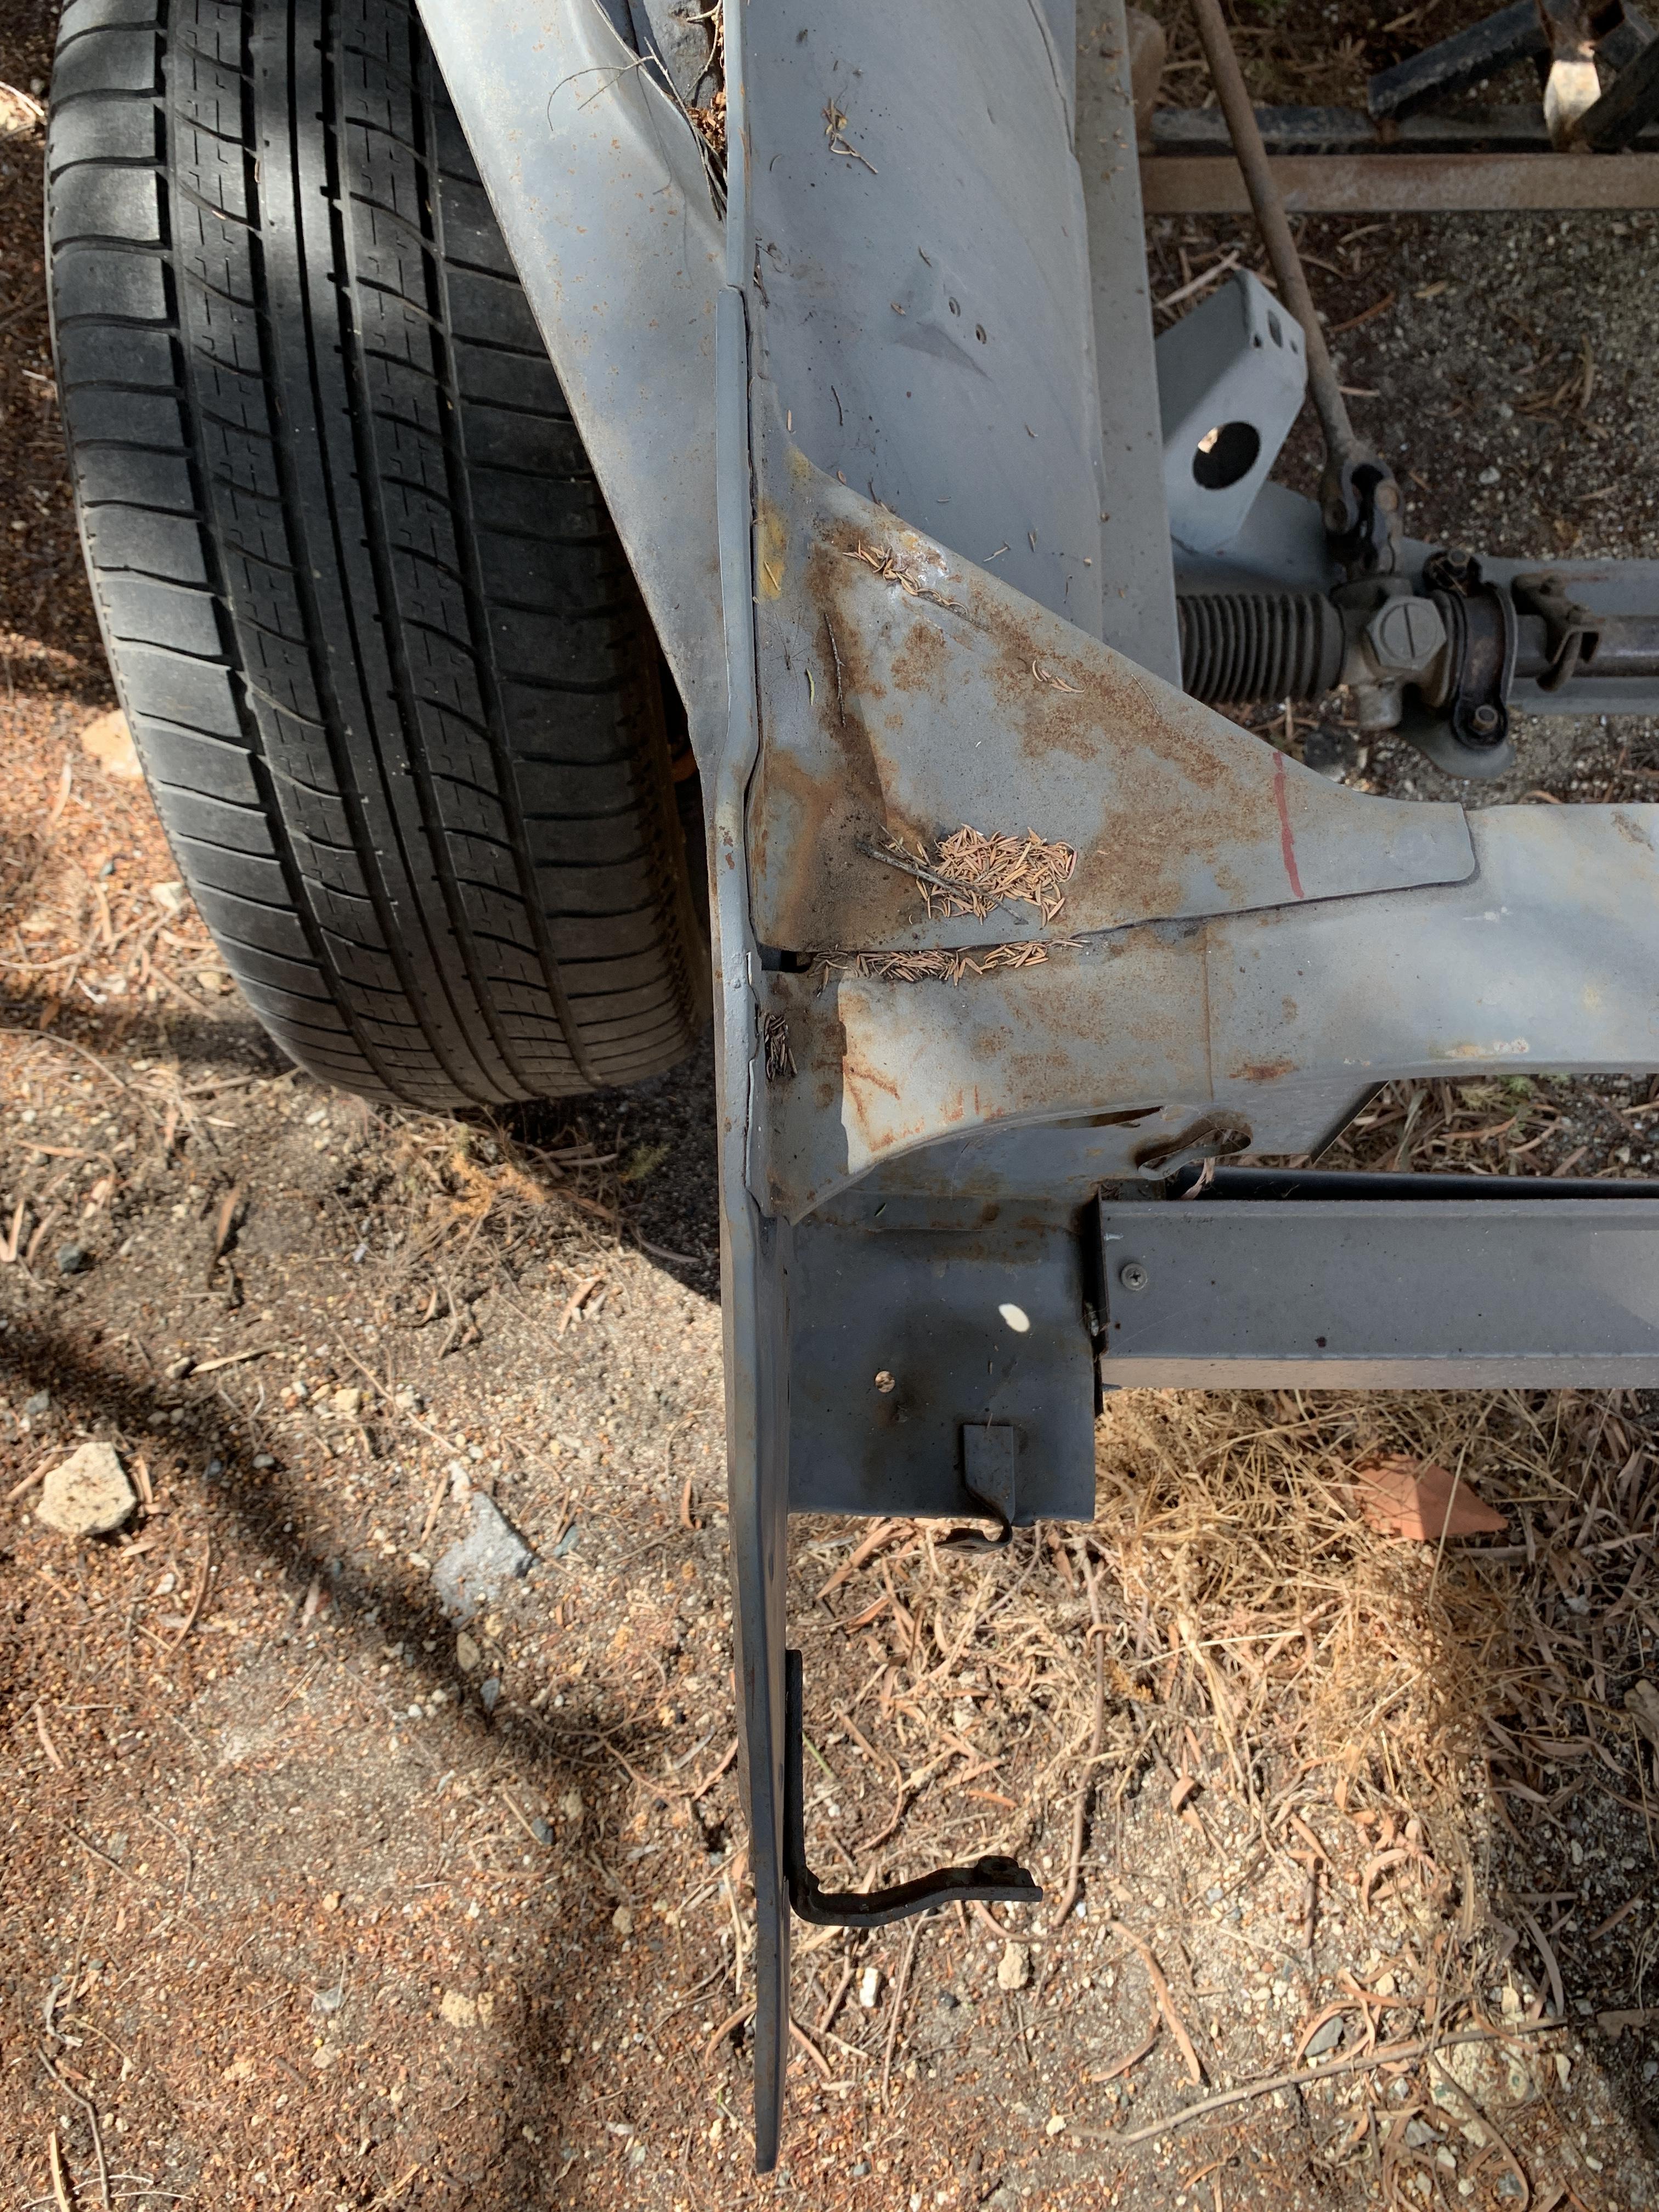
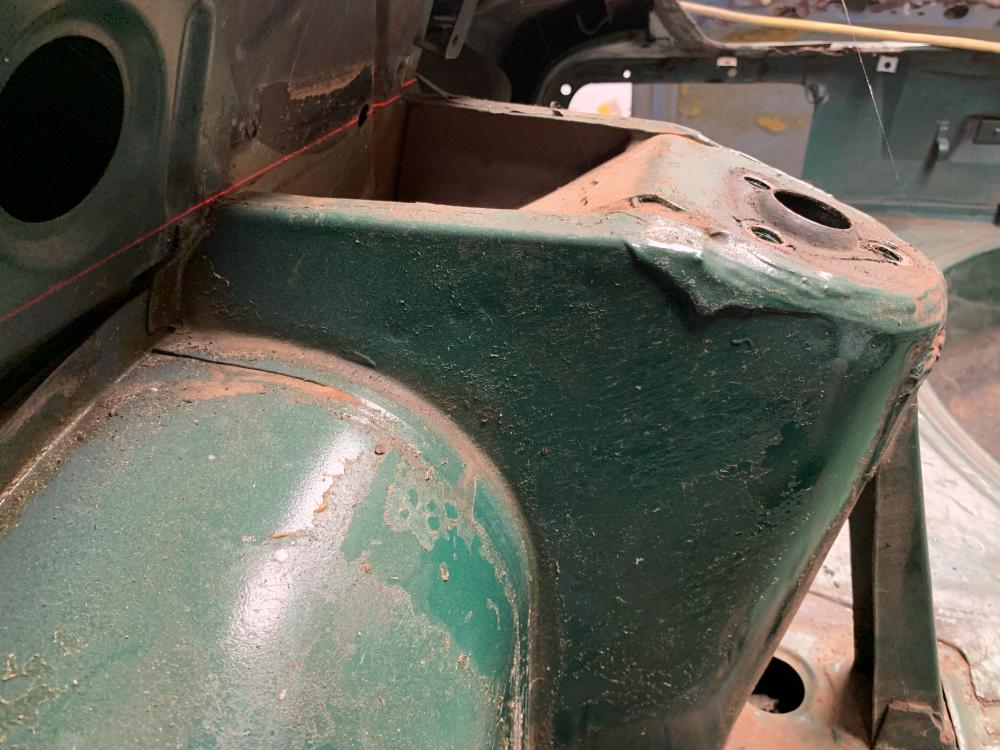
After completing the chassis jig I decided to hold off on rust repairs until the car is blasted. The next step is to build my rotisserie. What I thought would be a relatively simple task turned out to be a nightmare. And upon trying to build the bumper mounts I realized my front end is a dog’s breakfast... Now I knew the car had been in a front end collision but I didn’t realize it was this bad until I really started studying it. Notice the vertical panel kinks outward at the bottom where the front bumper mounts are, it should be straight up vertically, and flat. The radius of the bend should be round (roughly between 55mm radius rear bumper hole 40mm front hole). Mine is almost a 90 degree angle. so my dilemma was how to mount the rotisserie if my bumper mounts were more crooked than a politician. I used heat and a shrinking hammer to try and shrink the metal in the curved area and bring the radius back to pull the bumper mounts back into line. It worked reasonably well, to repair the area properly I will need to remove the bumper mount reinforcement panel where the jam nuts are. This is the after photo. better but a long way to go to get to what it should look like... untainted photo below. The same was done on the other side though the LHS is much worse. I wire wheeled the area to get a better look at the real damage, found some damage under some filler. when it had its collision the impact has sheared the areaaround the edge of the bumper mount reinforcement. LHS front of wheel arch is severely deformed. Air Ducting channel is crushed and misshapen. Area between wheel arch and radiator support has been pushed together, should be a much bigger gap. Rippling in sheet metal. The more you look at it the worse it gets... I am now contemplating transplanting the front nose of a untainted car onto mine due to the amount of damage that has been sustained. Anybody have any thoughts on this? As opposed to trying to pull everything out and repair it? Despite the significant blow to my morale I carried on and ended up starting the front mounts for the rotisserie. I stuffed up and made the horizontal pieces too short.... they don’t clear the nose. What a fool. I had changed my design halfway through and did not account for the larger tube slipping over the vertical length. I can make it work, but not ideal.... still so much to learn....
-
Thanks @Namerow Yes this is also my concern, the metal looks stretched from whatever impact it suffered or from the attempted repair to the area. my thoughts are attempting to use heat and shrinking the area along with stud welder and slide hammer work. My theory is if I shrink the curved area it will pull the kinked vertical section back into line somewhat. I also remember Kent replacing this area in his thread, I might trawl through his thread. I guess failing an attempted repair, replacement of the metal is always an option. Ryan
-
Nope. Still a bloody legend Mike! Haha thanks for taking a further look though! How funny, it looked perfectly offset from your photos. so I think we can safely say that panel should be dead flat & vertical. Thanks again Ryan
-
Thanks DKW. I quickly went through your thread and found these: yours appear from the photos to be dead straight up and down with no offset as Mike mentioned. On another note great work with the rust repairs! I plan to go through and read your thread properly when I get some time. I think I may reattach my bonnet hinge mechanism while I try to repair.


-
Mike you’re a bloody legend mate! Could not have asked for better measurements/references! Thanks so much for going to all that effort! Ryan