Everything posted by 240ZBUILTBYME
-
Z Front Frame Rail Replacement - T/C Rod Bracket
Just went through your TC reinstallation mark! Great job and I liked the addition of the jacking plate. Took me an hour of trawling to find it! (It was around page 40 if anyone else wants to check it out) But I think your installation was not to original? Or is the joiner from chassis rail to frame rail separate on the 280z? We didn't get the 280 in oz. I will be doing this job within in the next 6 months. I agree with the guys @Patcon and @grannyknot if you are trashing the frame rails and keeping the front section of the chassis rails keep the two together and cut the frame rail away slowly. Will be taking detailed measurements and notes before cutting anything on mine! Ryan
- Duffy's 1/71 Series 1 240z build
-
Duffy's 1/71 Series 1 240z build
Hey duff Love your build mate! Safari gold, black RKRs, red calipers! Your taste is impeccable! Few questions for you as looking at doing a few things the same as you, 1. With the 15x8s RKRs did you get any rubbing with the bc coilovers or big brake kit? 2. How have you found silverlines stage 3 kit? Performance wise, done any light track work? Did the brakes hold up? Ryan
-
240ZBUILTBYME 1971 240z HS-001063 Project Georgia
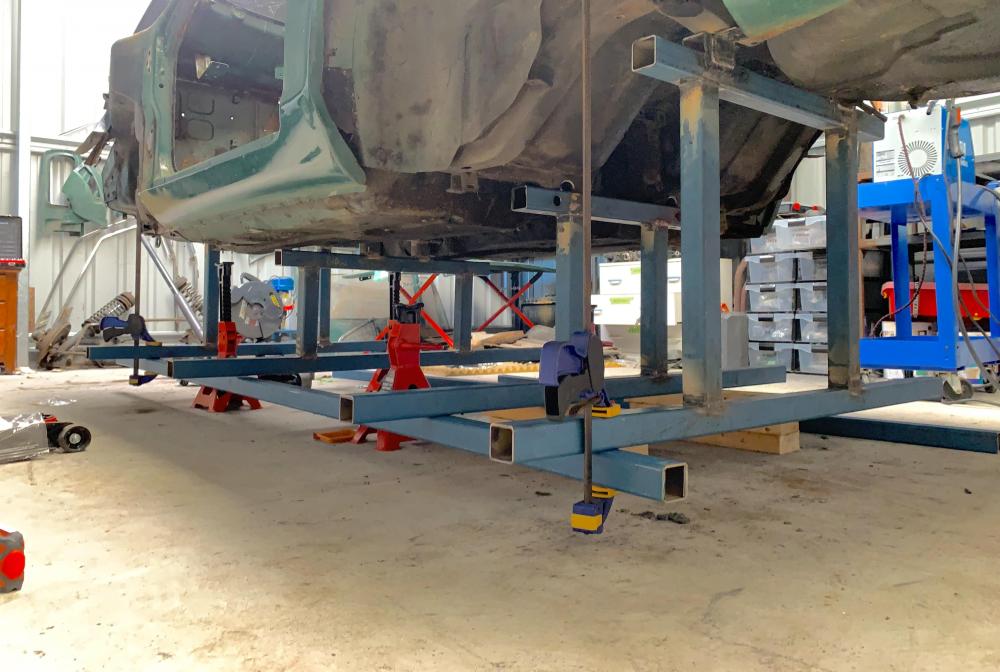
Unfortunately I have not had time to work on the car since New Years . My mum is unwell and I have had to spend a lot of time with her. Managed to put this together. Another massive thanks to @ConVerTT for creating and sharing this jig. I’ve never done metal work before this and if this inspires even one person to give it a go I’ve accomplished something! Ryan
- 240ZBUILTBYME 1971 240z HS-001063 Project Georgia
-
240ZBUILTBYME 1971 240z HS-001063 Project Georgia
Had so much time off over the Xmas/new year break but due to Family commitments, new baby and spending two weeks in Western Australia’s beautiful southwest, progress on the car was non existent. I managed to strip my rear SU, so plan is now to buy a parts washer and clean everything in prep for replating and vapor blasting. Can’t believe how many individual parts make up a set of SUs! All parts very thoroughly catalogued and organized. Does anyone know the best place to source oem or equivalent fasteners for SUs? I have some screws with stripped heads etc I did receive my blemished zstory jdm muffler. Which is a very nice unit, and for 260$ aud including shipping I couldn’t resist. I don’t know what my plan is to minimize the blemish just yet. slight damage during shipping but nothing unfixable, may just need to have a machine shop shave the tip. im hoping I’m able to make some decent progress this year. Wish me luck Ryan
-
240ZBUILTBYME 1971 240z HS-001063 Project Georgia
Happy new year everyone! May this year bring you much progress on your projects or many miles in your z. weatherstrip kit arrived along with rubber and grommet kit all from z car depot. I am 90% confident that the zcardepot kit is straight up the precision kit. All parts are corresponding to precision’s part numbers, arrived in a precision box, some parts did not come in precision branded packets but upon watching some of the precision installation videos on YouTube some of the packaging looks unbranded. Also came with a precision kit packing list. So unless z car depot goes through the trouble of restickering all their kit with precision part numbers. I’m pretty sure I have a precision kit. What I don’t get is the 200 USD price difference? Zcardepot 289 USD and from precision 468 USD! Rubber bumper and grommet kit was a bit of an impulse buy, but contains a lot of parts I assume I’ll need at some stage. My rationale in these purchases is that I will need door seals to start gapping panels and doors when I replace my outer rockers. Zcardepot had black Friday sales which meant the amount I saved covered the shipping I have to pay to get it to Perth. So I pulled the trigger.
- 240ZBUILTBYME 1971 240z HS-001063 Project Georgia
- 240ZBUILTBYME 1971 240z HS-001063 Project Georgia
- 240ZBUILTBYME 1971 240z HS-001063 Project Georgia
-
240ZBUILTBYME 1971 240z HS-001063 Project Georgia
so despite my daughter arriving I managed to make it to the car to do a bit of spannering, stripped the drum brakes and gave them a clean out, also got the front suspension assembly broken down and ready to bring all components in need of a press to my mates shop. I still haven’t decided if I’m going to rebuild drums or go straight to discs. Any thoughts or opinions? not sure which is an original 240z cylinder, anyone know off hand? After wire brushing the crud off the rear control arm looks like some smart fellow tried to put a jack stand under it. I was thinking I would just finesse the dents straight if I can. Outer tie rods were jammed in tight, haven’t tried heat yet but figure I’ll just press them out along with everything else. So just dismantled steering rack at the knuckle. anybody know if the silver brackets from the steering rack bushes are meant to be there? They looked like diy aluminum shims made up.
- 240ZBUILTBYME 1971 240z HS-001063 Project Georgia
- 240ZBUILTBYME 1971 240z HS-001063 Project Georgia
- 240ZBUILTBYME 1971 240z HS-001063 Project Georgia
-
240ZBUILTBYME 1971 240z HS-001063 Project Georgia
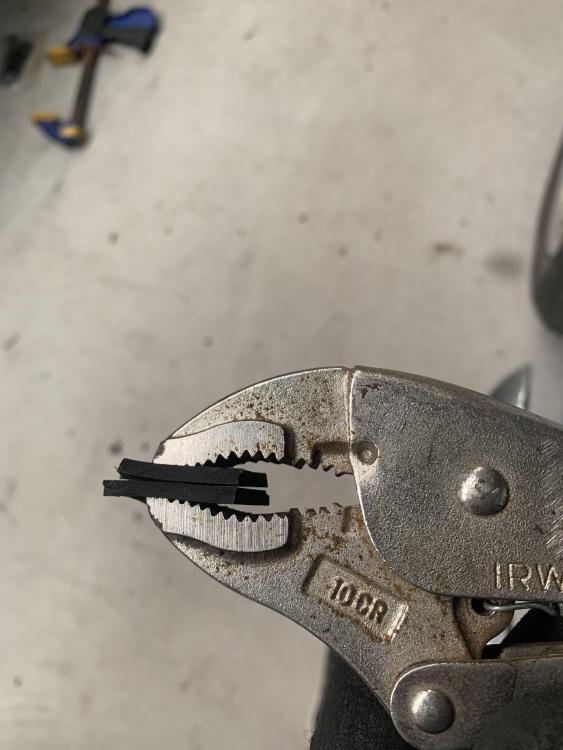
Well sorry it’s taken time to get back to updating the needle sitcho. (Oz slang for situation) but this little thing has been keeping me busy, she arrived last week. 😍 But I did get round to trying to get the needles out, I decided to first try some rubber and some vice grips as it was the easiest to conjure. And long story short it worked! Just needed the grip of the rubber to apply enough torque to twist it free! The second needle came out by hand. One of the needles had N27 on it, the other had nothing. I believe these are 240z needles? Ryan
- 240ZBUILTBYME 1971 240z HS-001063 Project Georgia
-
240ZBUILTBYME 1971 240z HS-001063 Project Georgia
If I can’t get it out trying all these methods I’ll bring it to a carb specialist, Not sure if Ztherapy will hand out free advice, I guess it’s worth a try though Cheers mate sounds like the rubber vice gang wins by a clear majority! I don’t want to damage any of the needle, any damage could make them unusable. I tried using a cloth and light pressure with some pliers but no go, too slippery. Rubber will fix that I think Ryan
- 240ZBUILTBYME 1971 240z HS-001063 Project Georgia
-
240z gets jiggy
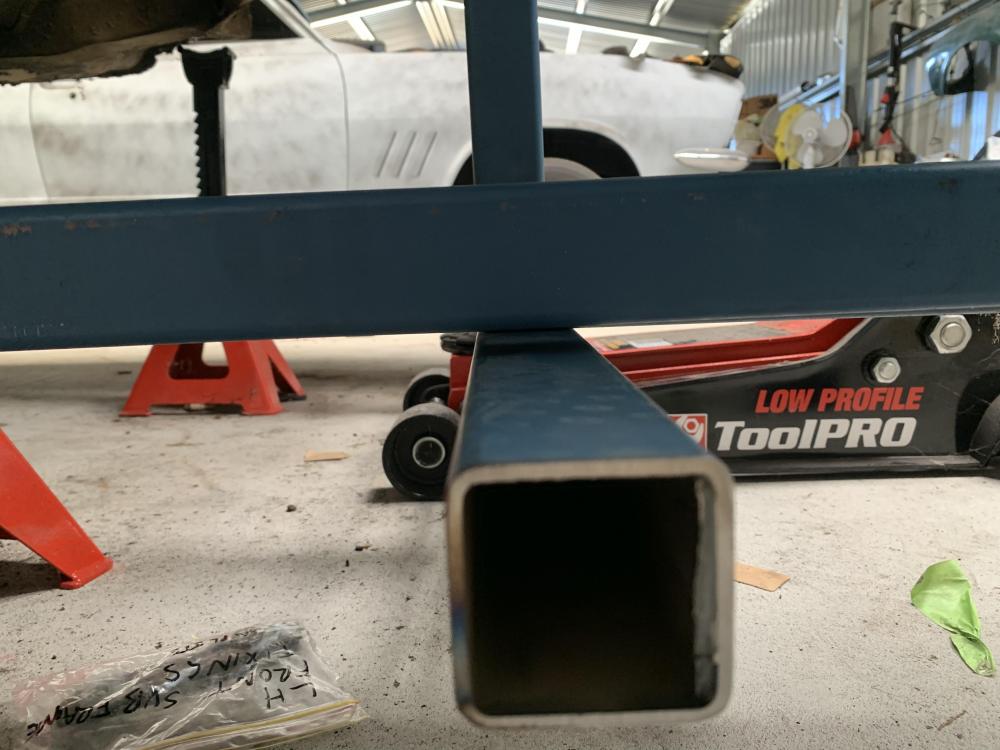
Hi Kent @ConVerTT just wondering if your gearbox support frame was a little short when offering up the 3m lengths up into place? I found the gearbox support frame to be the only one that had an issue, the others were fine. Only a 5mm gap so nothing crazy I PM’d Jon @tyroguru who also had a similar discrepancy with only his gearbox frame as well. I did double check all my measurements to yours and all were correct. Might just be a slight discrepancy between chassis’s? These were handmade back in the 60’s/70’s so slight variation is to be expected in my mind. I’m pretty confident my chassis is reasonably straight as I'm sure yours is too. I’m just going to pack the gap with sheet metal and weld in place. Just thought I would document this for anyone else who builds this jig in the future. I would build the gearbox frame last, offering the 3m lengths up to the other frames and measuring up distance before cutting uprights for gearbox support frame. Thanks again Kent for the plans Some pictures
- 240ZBUILTBYME 1971 240z HS-001063 Project Georgia
-
240ZBUILTBYME 1971 240z HS-001063 Project Georgia
As you all know I’ve never done any of this before so I’m relying on you wise sages to correct my mistakes and give your worldly advice... I was thinking about doing one SU at a time just to have one to reference off when rebuilding but I’ve taken a lot of photos and feel confident I can put them back together using those. Let me know your thoughts. Planning to: -order a Ztherapy rebuild kit -vapour blast intake manifold, bodies and dome -replate hardware -new hoses let me know if I’ve missed anything critical few photos of dismantle on front SU
-
240ZBUILTBYME 1971 240z HS-001063 Project Georgia
So I’ve decided to start doing some small parts restoration at home. As anyone who is following along knows, the car is not at my place but about 35-40 mins away. I only work on it once a fortnight, basically a day of my R&R. So to keep motivation and progress rolling I’m doing these mini projects. First Mini Project is...
-
Restoration of HLS30-12070
Thanks mate, yeah figured that was the basics of it with a few exceptions here and there. Keep up the fantastic work! Ryan
-
Restoration of HLS30-12070
It’s crazy how quickly this restoration is happening.... amazing work! is this your personal car or are you restoring for a client? Just out of interest is there a rule of thumb for what you plate in clear and what you plate yellow? Underbody/suspension fasteners seem to be mostly yellow and interior fasteners mostly clear? Ryan
- 240ZBUILTBYME 1971 240z HS-001063 Project Georgia


