Tweeds
Free Member
-
Joined
-
Last visited
Everything posted by Tweeds
-
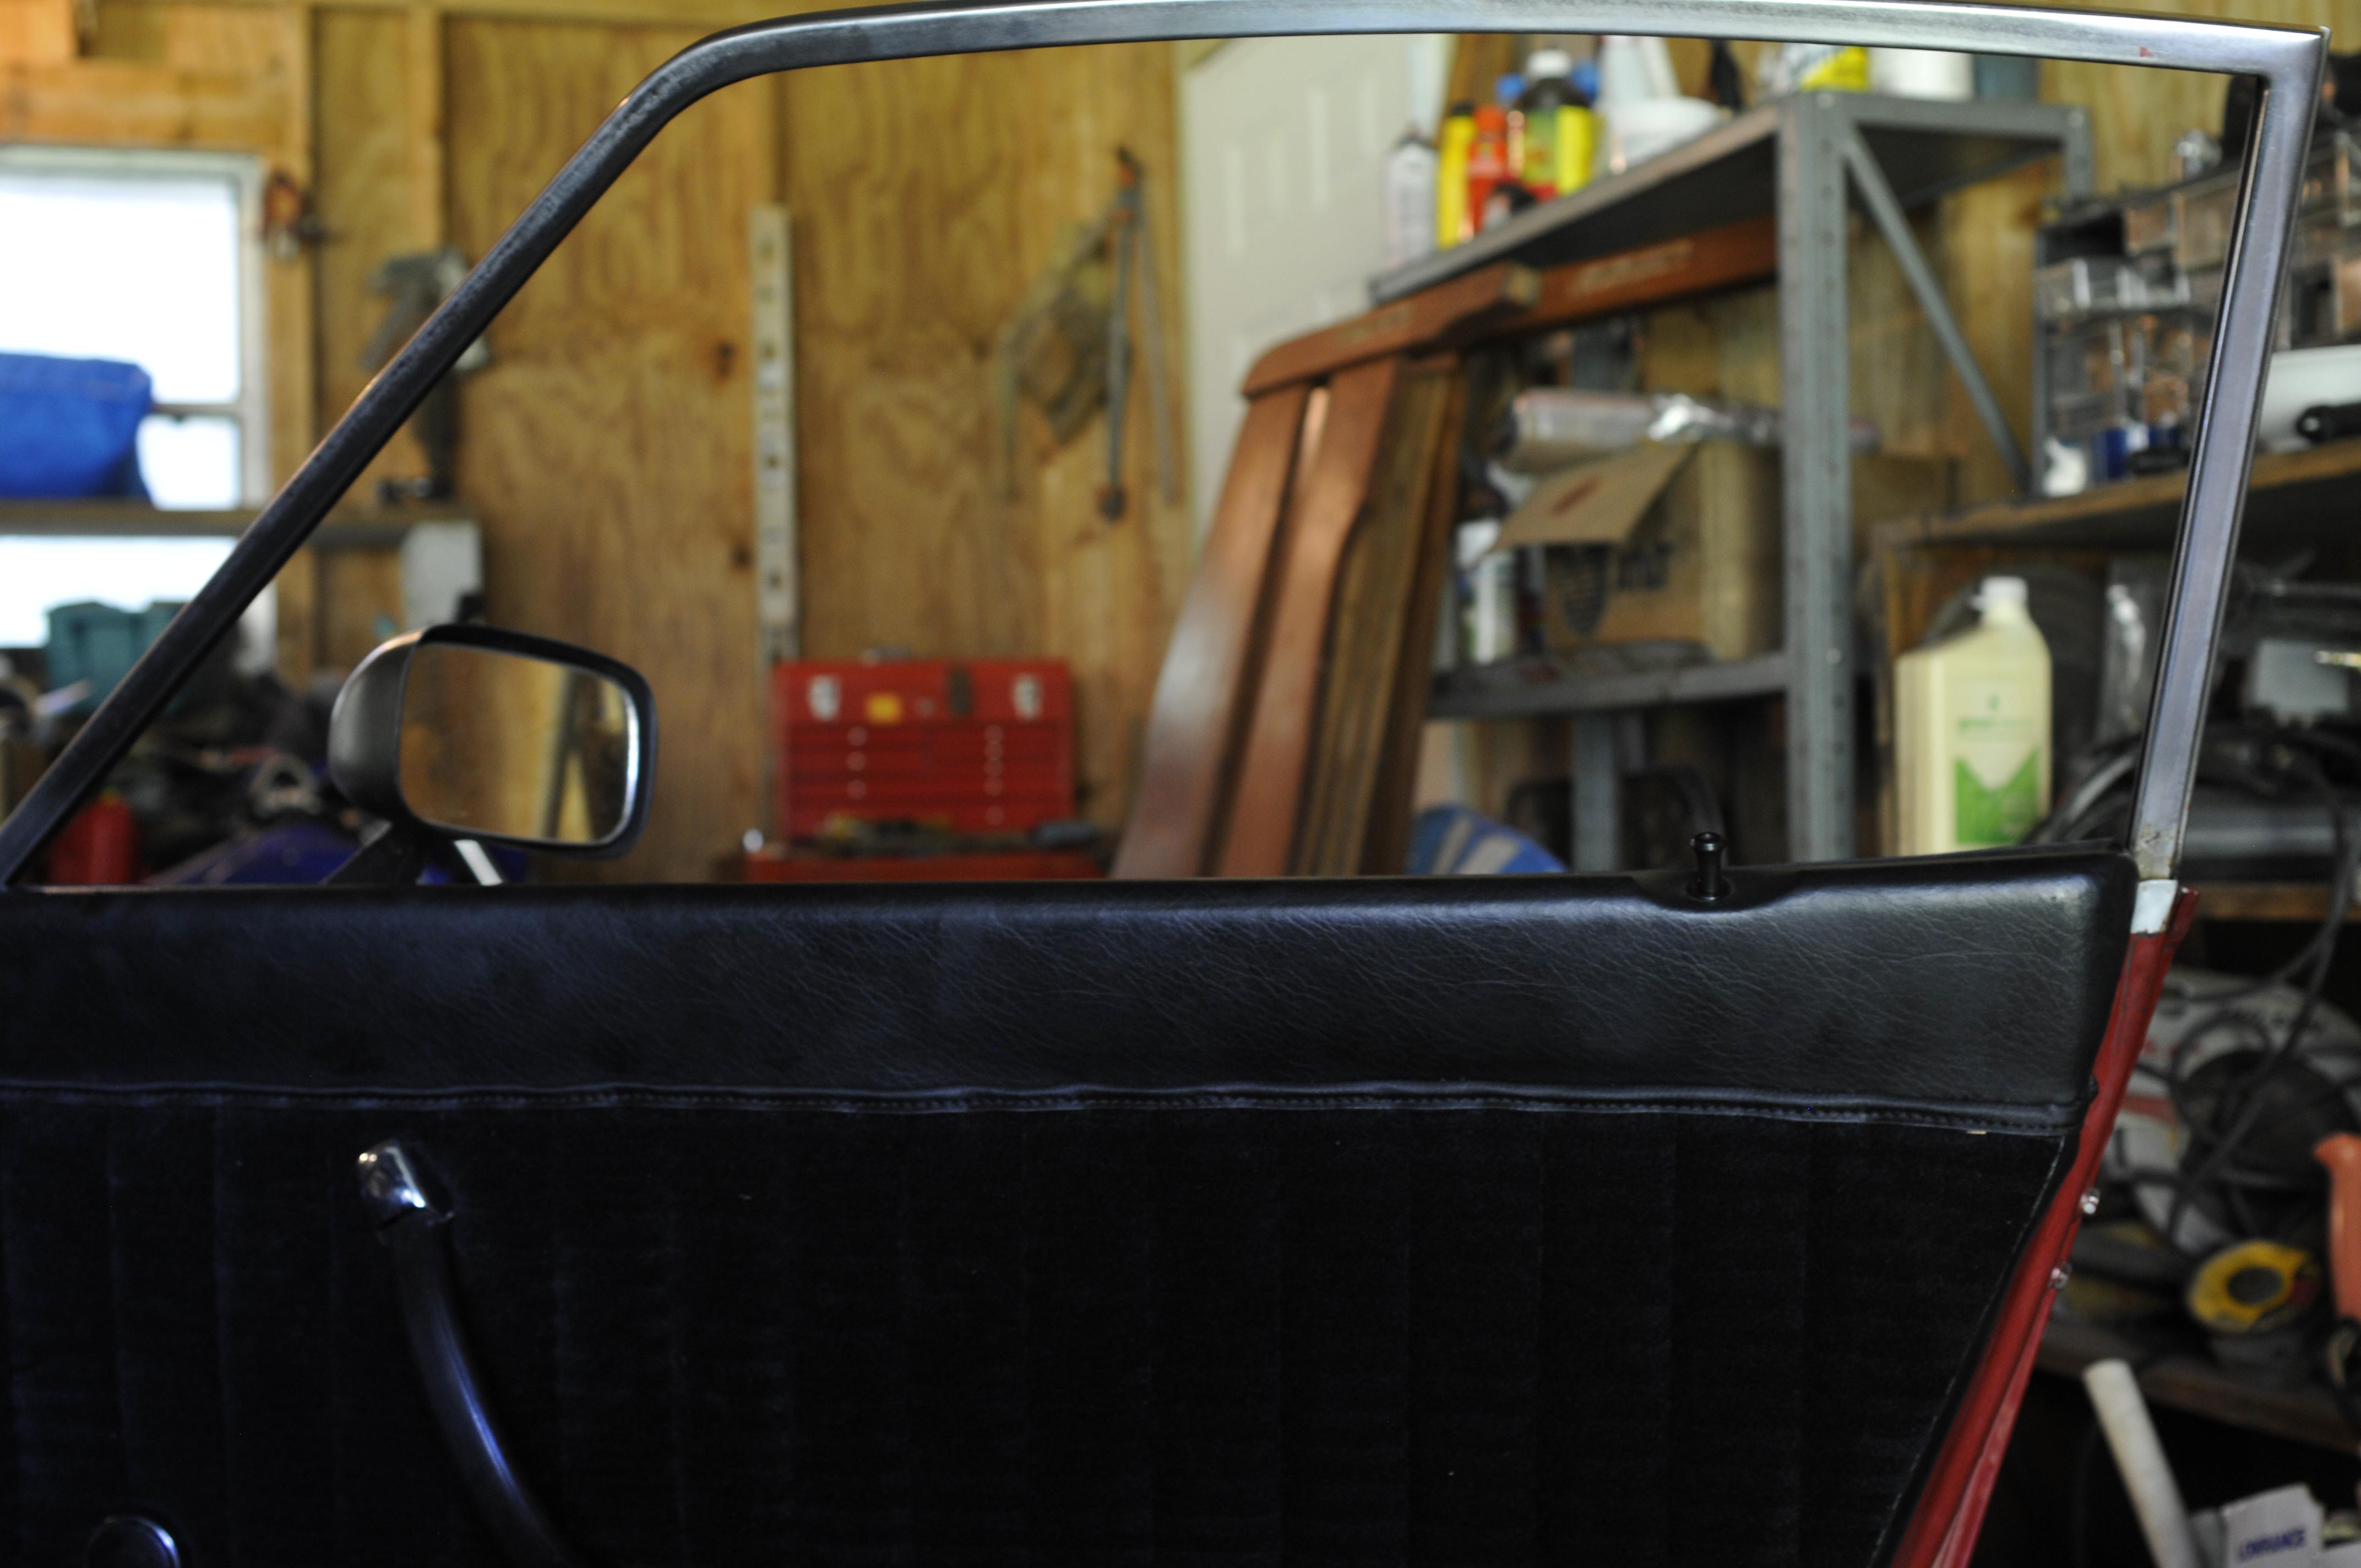
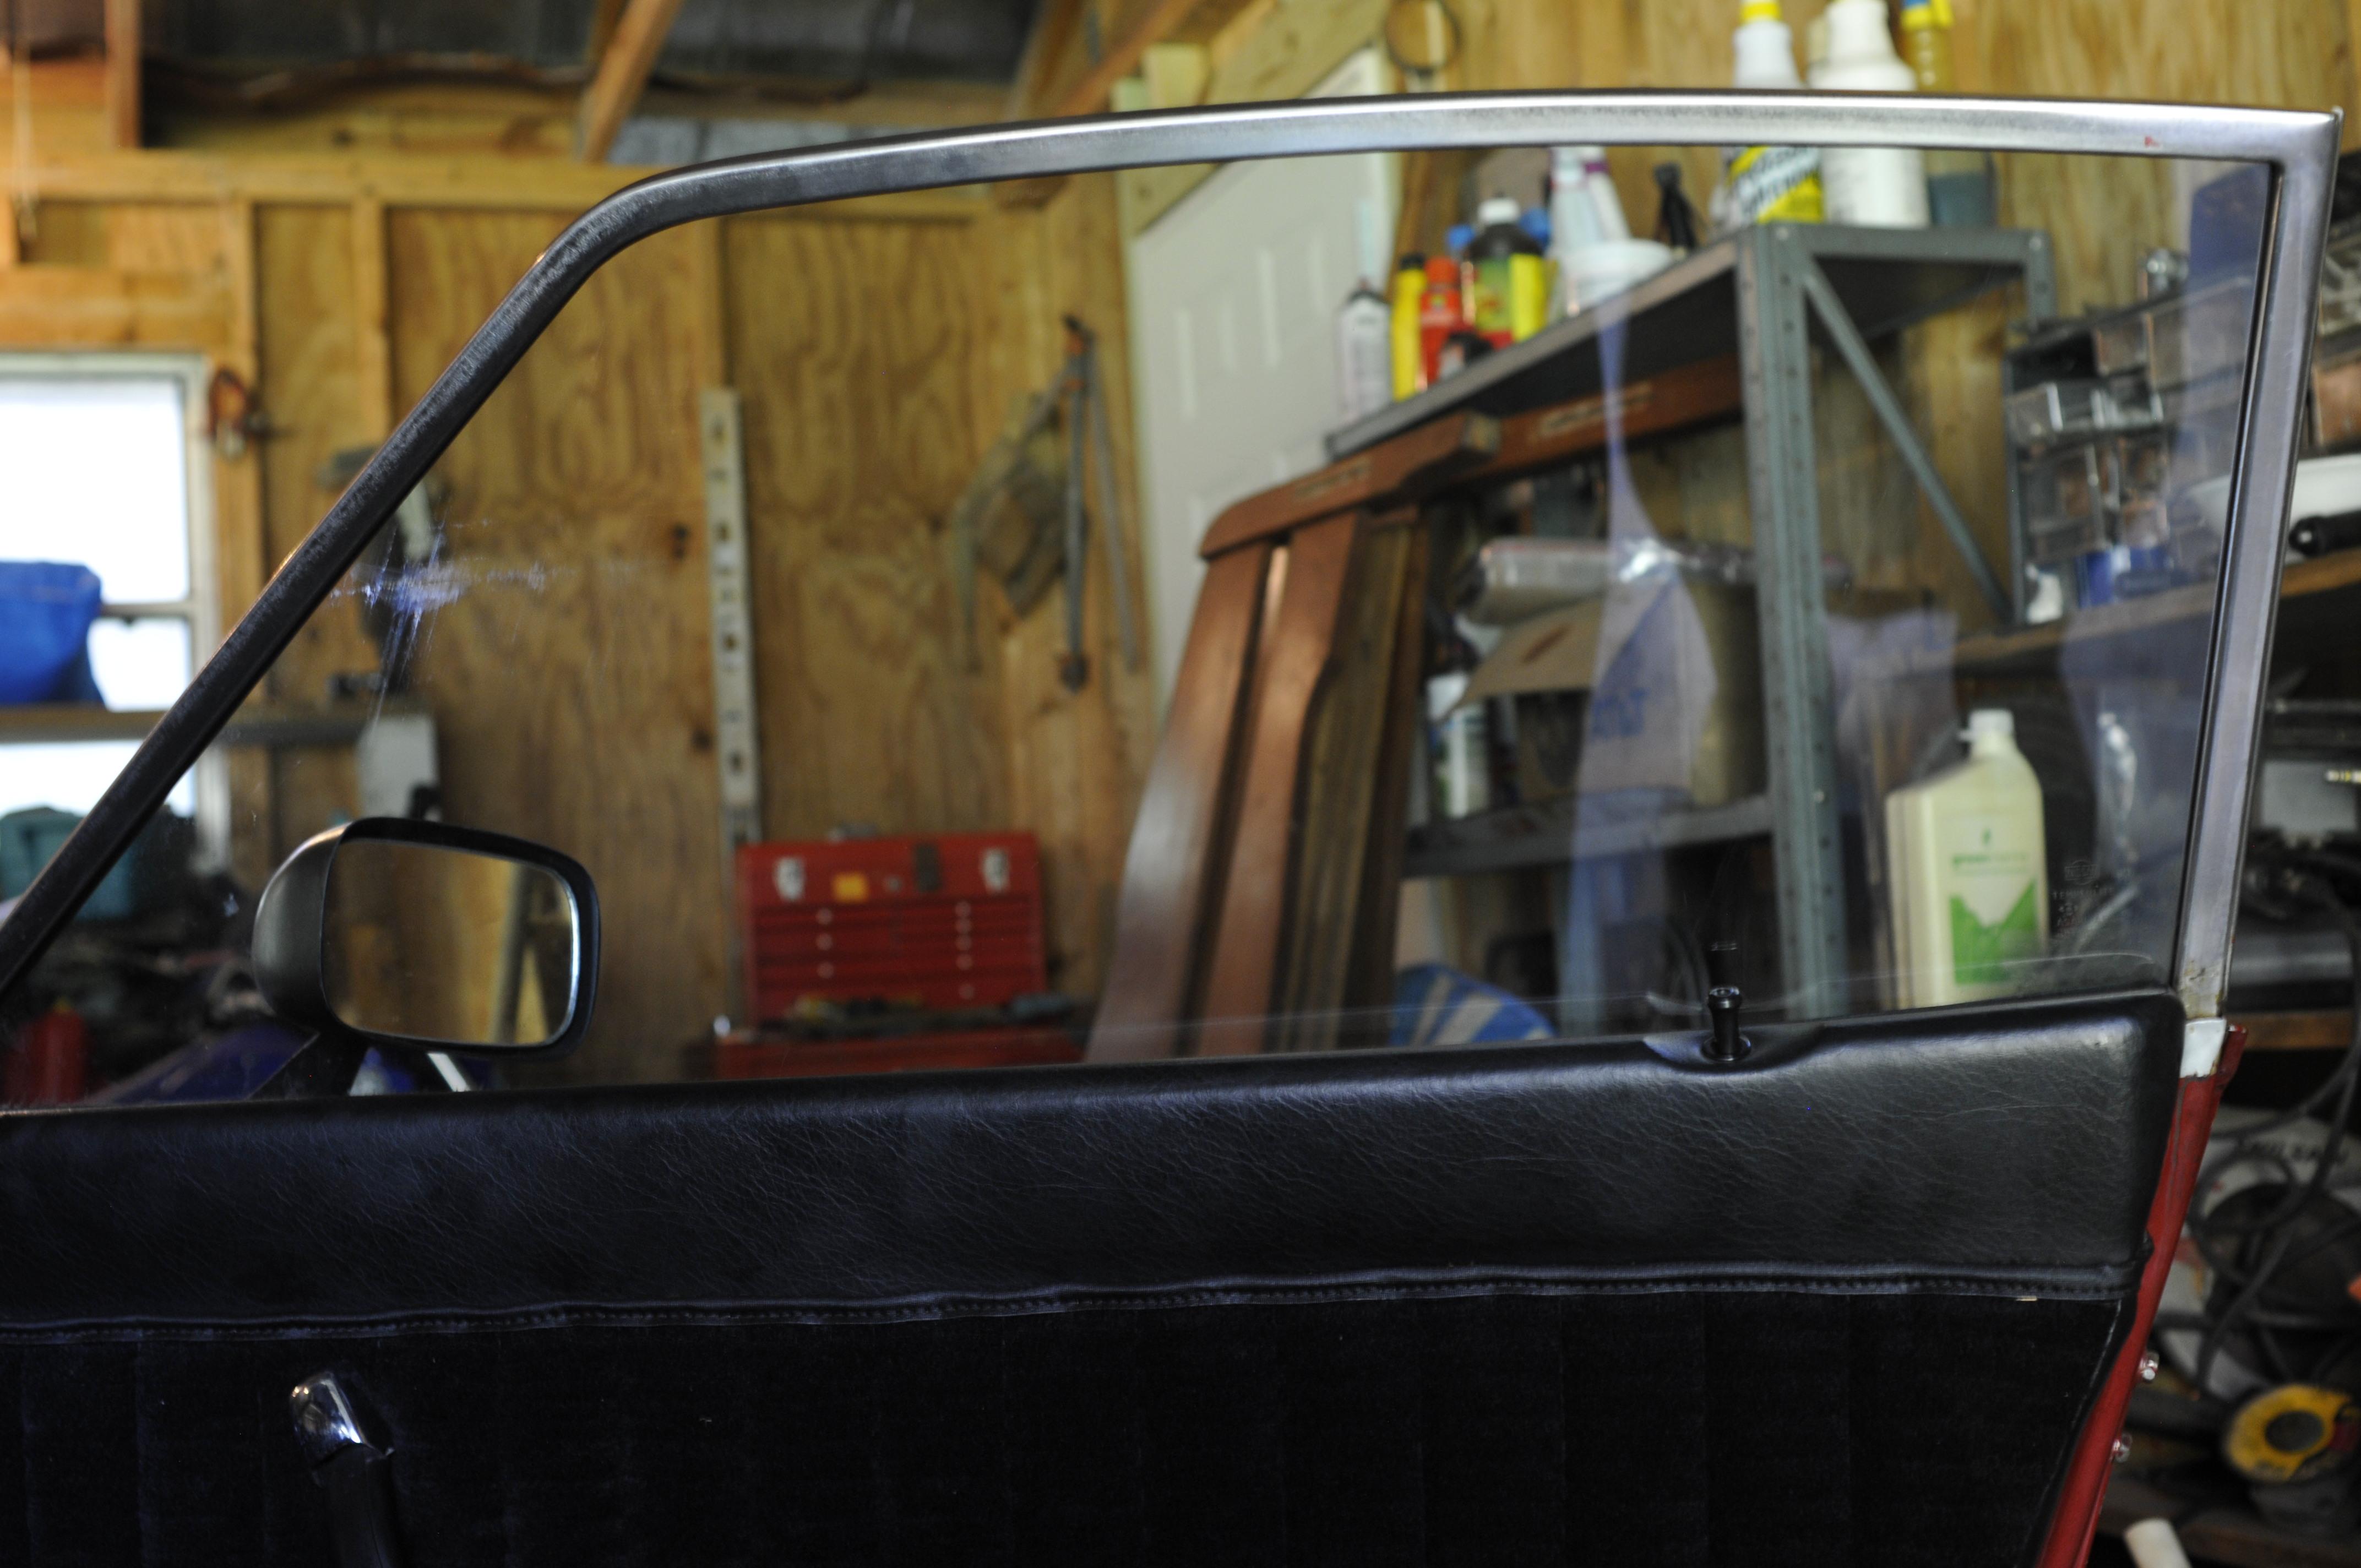
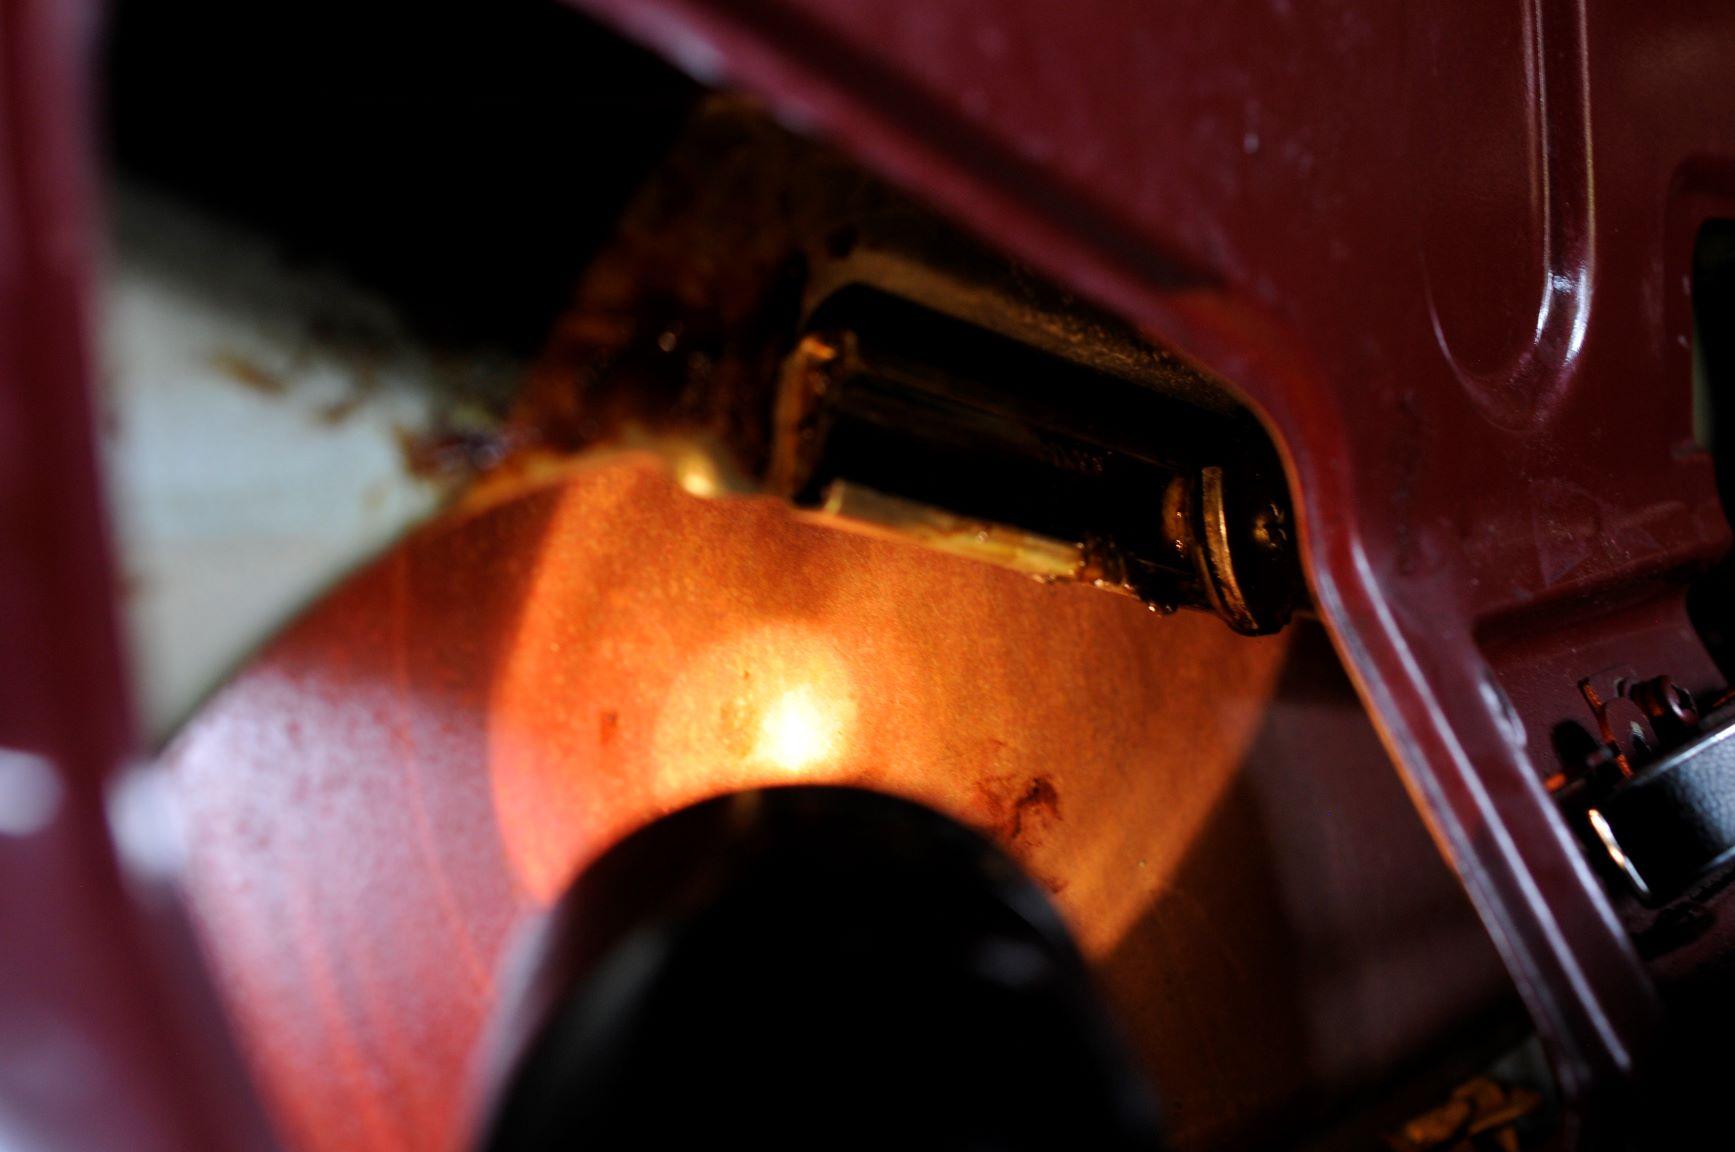
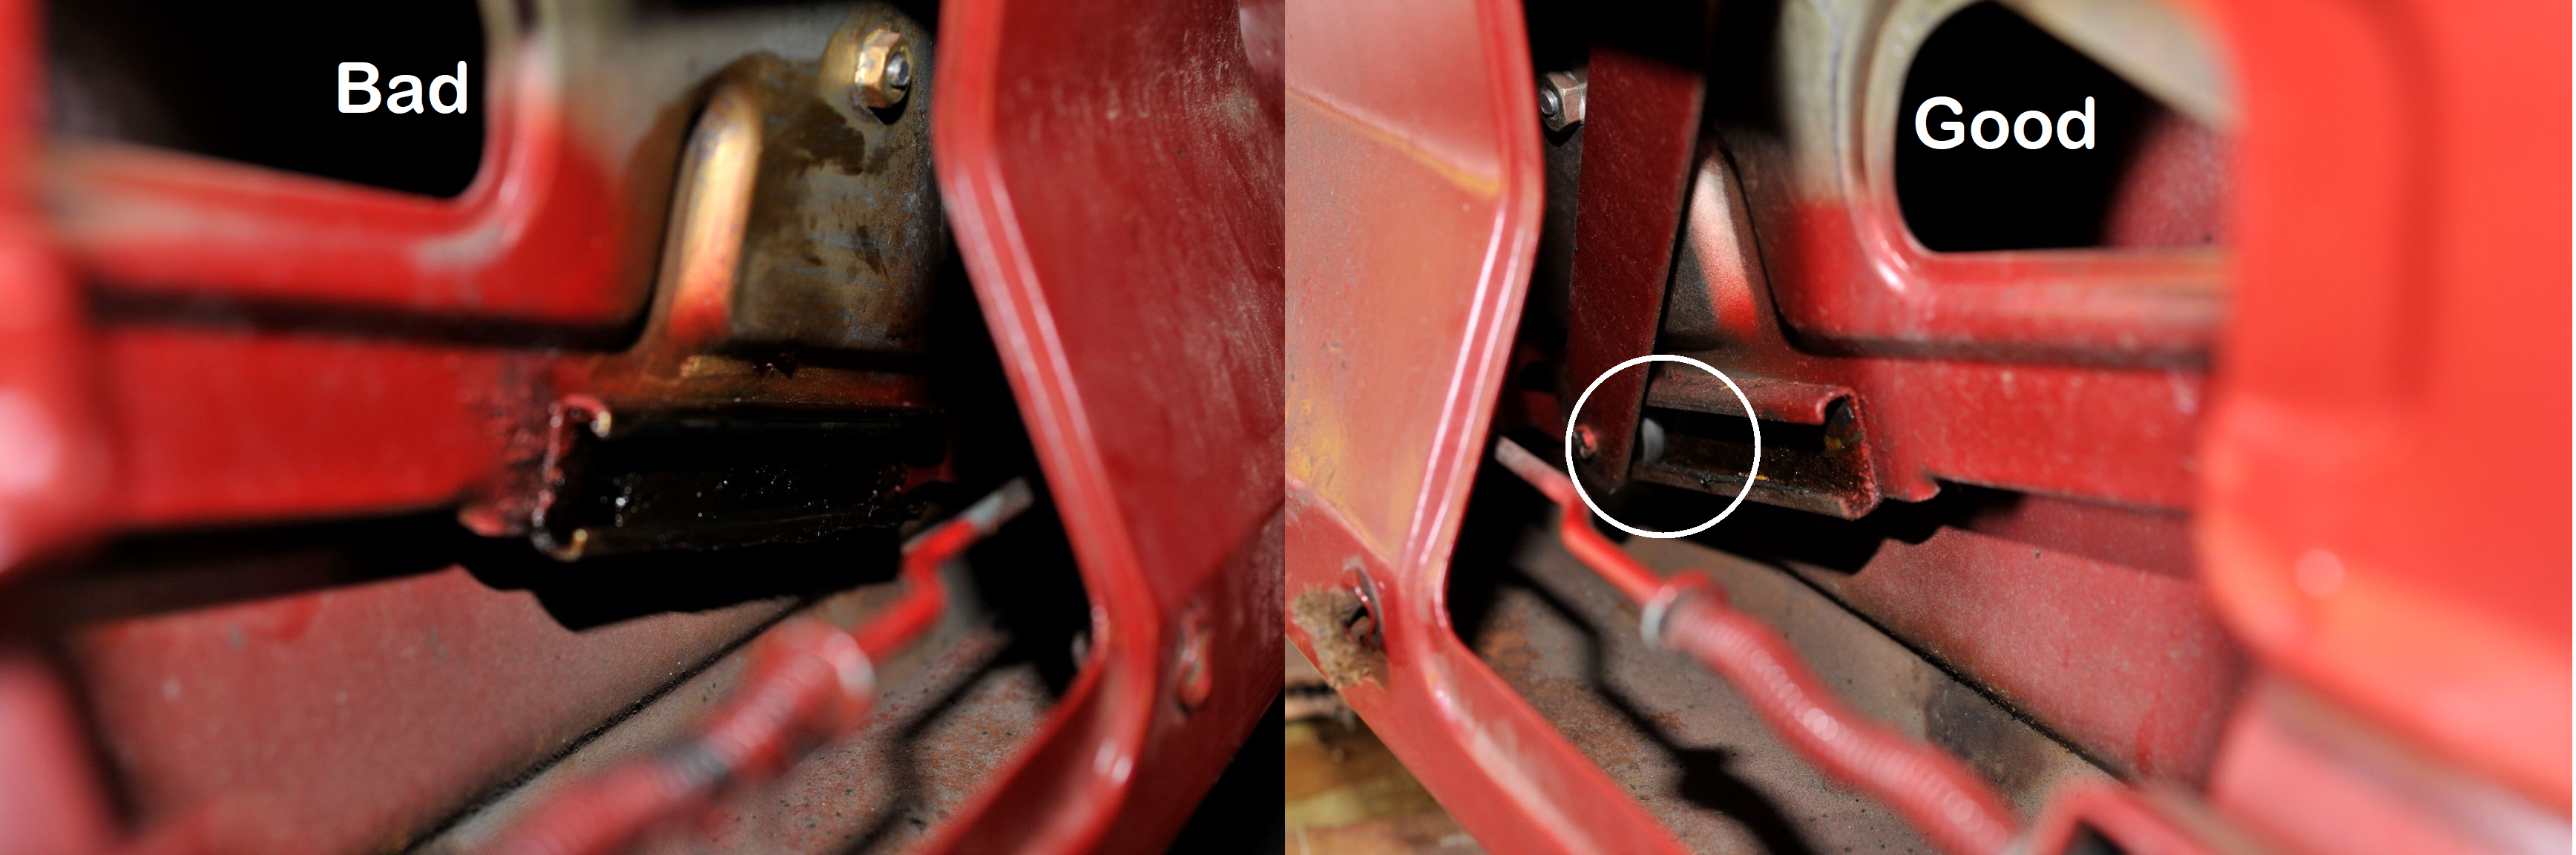
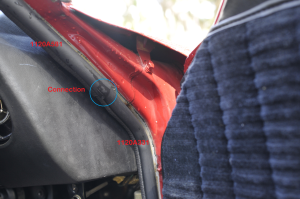
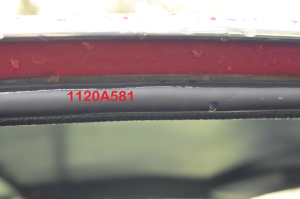
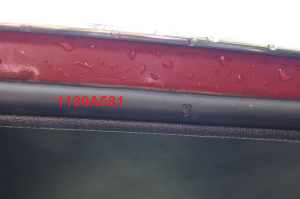
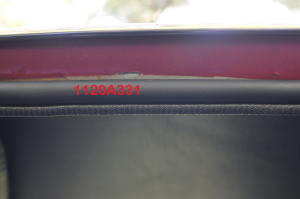
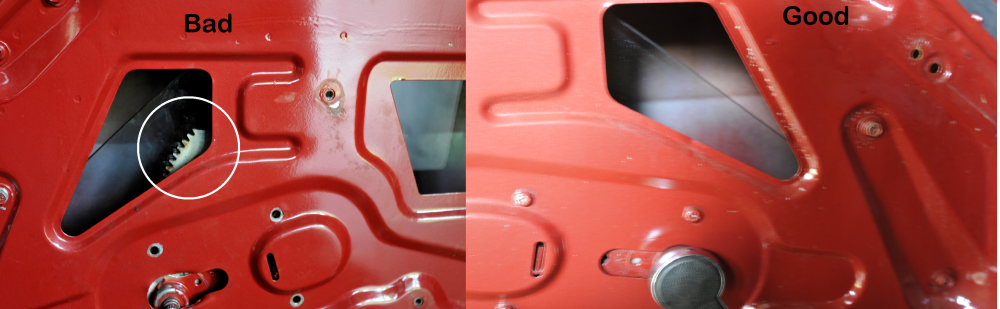
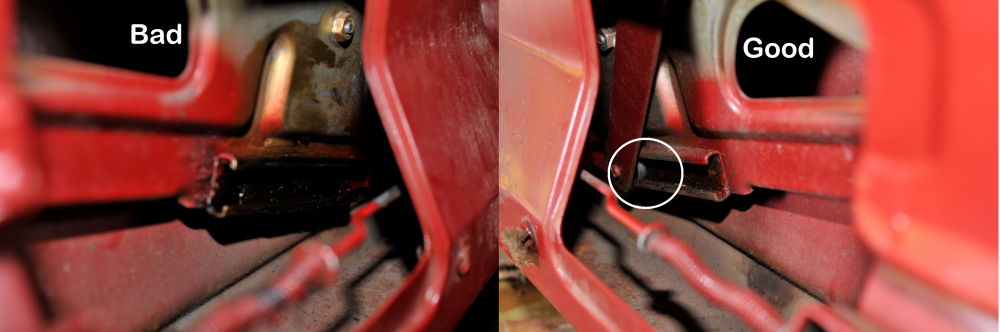
 DISCLAIMER: I did this on a '71 240z - I cannot confirm this works for later models. Preliminary Notes: In searching for new weather-stripping, I came across many forum posts recommending late 90's to early 2000's Kia Sportage weatherstrips. In some of the comment sections there was mention of McMaster-Carr, and one thread dedicated entirely to this stripping. I followed exactly what the guy did in his post, so I am ripping him off, however I thought it'd be worth making a post of my own not only to back up his findings, but also to (hopefully) give this weatherstripping a bit more publicity. Now, I originally had Precision's weatherstripping set, however their stuff made it impossible to close the doors, and was a bitch to get on in the first place. I looked into the Kia Sportage, however the weather stripping was discontinued, making it both very hard to find and exceedingly expensive. McMaster-Carr's weathersrtipping is everything you'd want - it's relatively inexpensive, easy to install (no glue required), and well made. I spent $80 in all (for both doors!) not including shipping, and the weatherstipping arrived 1-2 days after order. I may have bought more than I needed, but even so, it cost around half of anything else. Parts Bought: I bought two different kinds of weather-stripping from McMaster-Carr: 25ft of 1120A331 and 10ft of 1120A581. 331 is a bit smaller than the 581, however 331 is too small for the upper parts of the doors. Originally I only used 331 for the whole door, however, after vigorously spraying the car, water was allowed in at the top of the door - with the 581 this did not happen. This is evidenced by the third picture, where you can see a line of water across the weatherstripping that the water does not go below - if it did, I would have gotten wet. The forth and fifth picture are taken directly below, perpendicularly to the weatherstripping, and you can see quite obviously in the fifth picture that the 331 does not extend far enough to cover the gap of the original weatherstripping (this is where the original silver paint of the car meets the newer red), whereas the majority of the silver is obscured by the 581. Instillation: First, I cut the weatherstripping in half, leaving me with two 12.5 ft. pieces of 331, and 5 ft. pieces of 581. Next, you measure the length from the top corner of the door, down to about where the side window ends. You'll cut a little more than this length from the 581 - one cut will be at a 45 degree angle so the 581's will meet nicely in the corner, and the other end will be where you will connect the 331 to the 581. You connect the 331 to the 581 by cutting about an inch of the vinyl part off of the 331, leaving just the rubber hose, and inserting the 331 hose into the 581. You do the same with the other connection. [NOTE: Before you make the 45 degree cuts on the 581, practice making these cuts on the 331 and connecting them at the corner such that they fit flush together (something like in the picture) as, by the end of this, you will have plenty of excess 331, but you will use all of the 581. Making the 45 degree cuts aren't hard, it's quite intuitive, but it's best to figure it out by trial and error with the 331 before you make any permanent decisions (and mistakes) with the 581.] You make the other 45 degree cut on the longer piece of 581 and run it as far as it goes down the frame, connecting it with 331. Cut the 331 to the necessary lengths such that the tube inserts into the 581, and the vinyls of both kiss each other. It's easiest to start at one connection of the strips, get that one right, and then cut the other half as necessary to acquire the desired result. The stripping holds on to the door by a pinch welt, so all you really have to do is push it on with your fingers, though you could use a rubber mallet if you needed to. Also, don't pull the weatherstipping itself while applying, just press it down naturally - pulling it will allow it to invariably move back to it's natural length, thus not resting in the position you had intended worst case scenario leaving gaps at the seams. Be careful when applying on any curved parts of the door, such as the bottom right and left - you want to be sure they fit snugly on those corners, not letting them come off their grip as you continue farther down the weatherstripping. Conclusory Notes: As you can see in the second to last picture, the design of the Precision stripping is entirely different. The Precision rubber, particularly on the curved bit, is far too thick and rigid, not allowing the door to fully shut. The design of Precision's is a bit more like OEM stripping in that, rather than be a full circle of rubber, it's only about half a circle - not connecting unto itself. Also, the lip where the Precision stripping fastens to the door is far too short to get a good hold, so it requires glue to hold it in place, and then a separate piece of vinyl over top of it to further hold it steady - a piece of vinyl which, if you wish to suffer through installing the Precision stuff, you hopefully kept from the original stripping, and a piece of vinyl that comes pre attached to the McMaster. The door closes all the way with McMaster (evidenced by the door being locked in the final picture as the lock won't engage otherwise), though it does require a bit of force. This, however, could be chalked up to the fact I only just installed the stripping, so it hasn't had time to 'break-in', as it were. The corner piece with the 45 degree cuts may also need some slight pruning. When testing the reliability of this stripping, I absolutely blasted the doors with a hose, subjecting it to forces and quantities of water no storm short of a CAT5 hurricane could posses. I even blasted directly into the seams of the doors, but the stripping still held strong. Water did, however, just barely find it's way into the bottom of the door, but I think this is because I need to replace some gaskets. At any rate, McMaster-Carr survived my brutal tests. Hopefully the weather-stripping stays as resilient as it is now after it breaks in, otherwise I have jumped the gun on this post. I have yet to do the driver side, so if anyone wants me to make a video of that installation to better explain the process, I'm willing to do so - but you'd better ask fast because I plan to do it tonight or tomorrow. If you have any questions, feel free to ask.
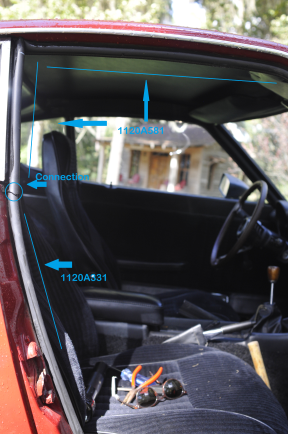

-
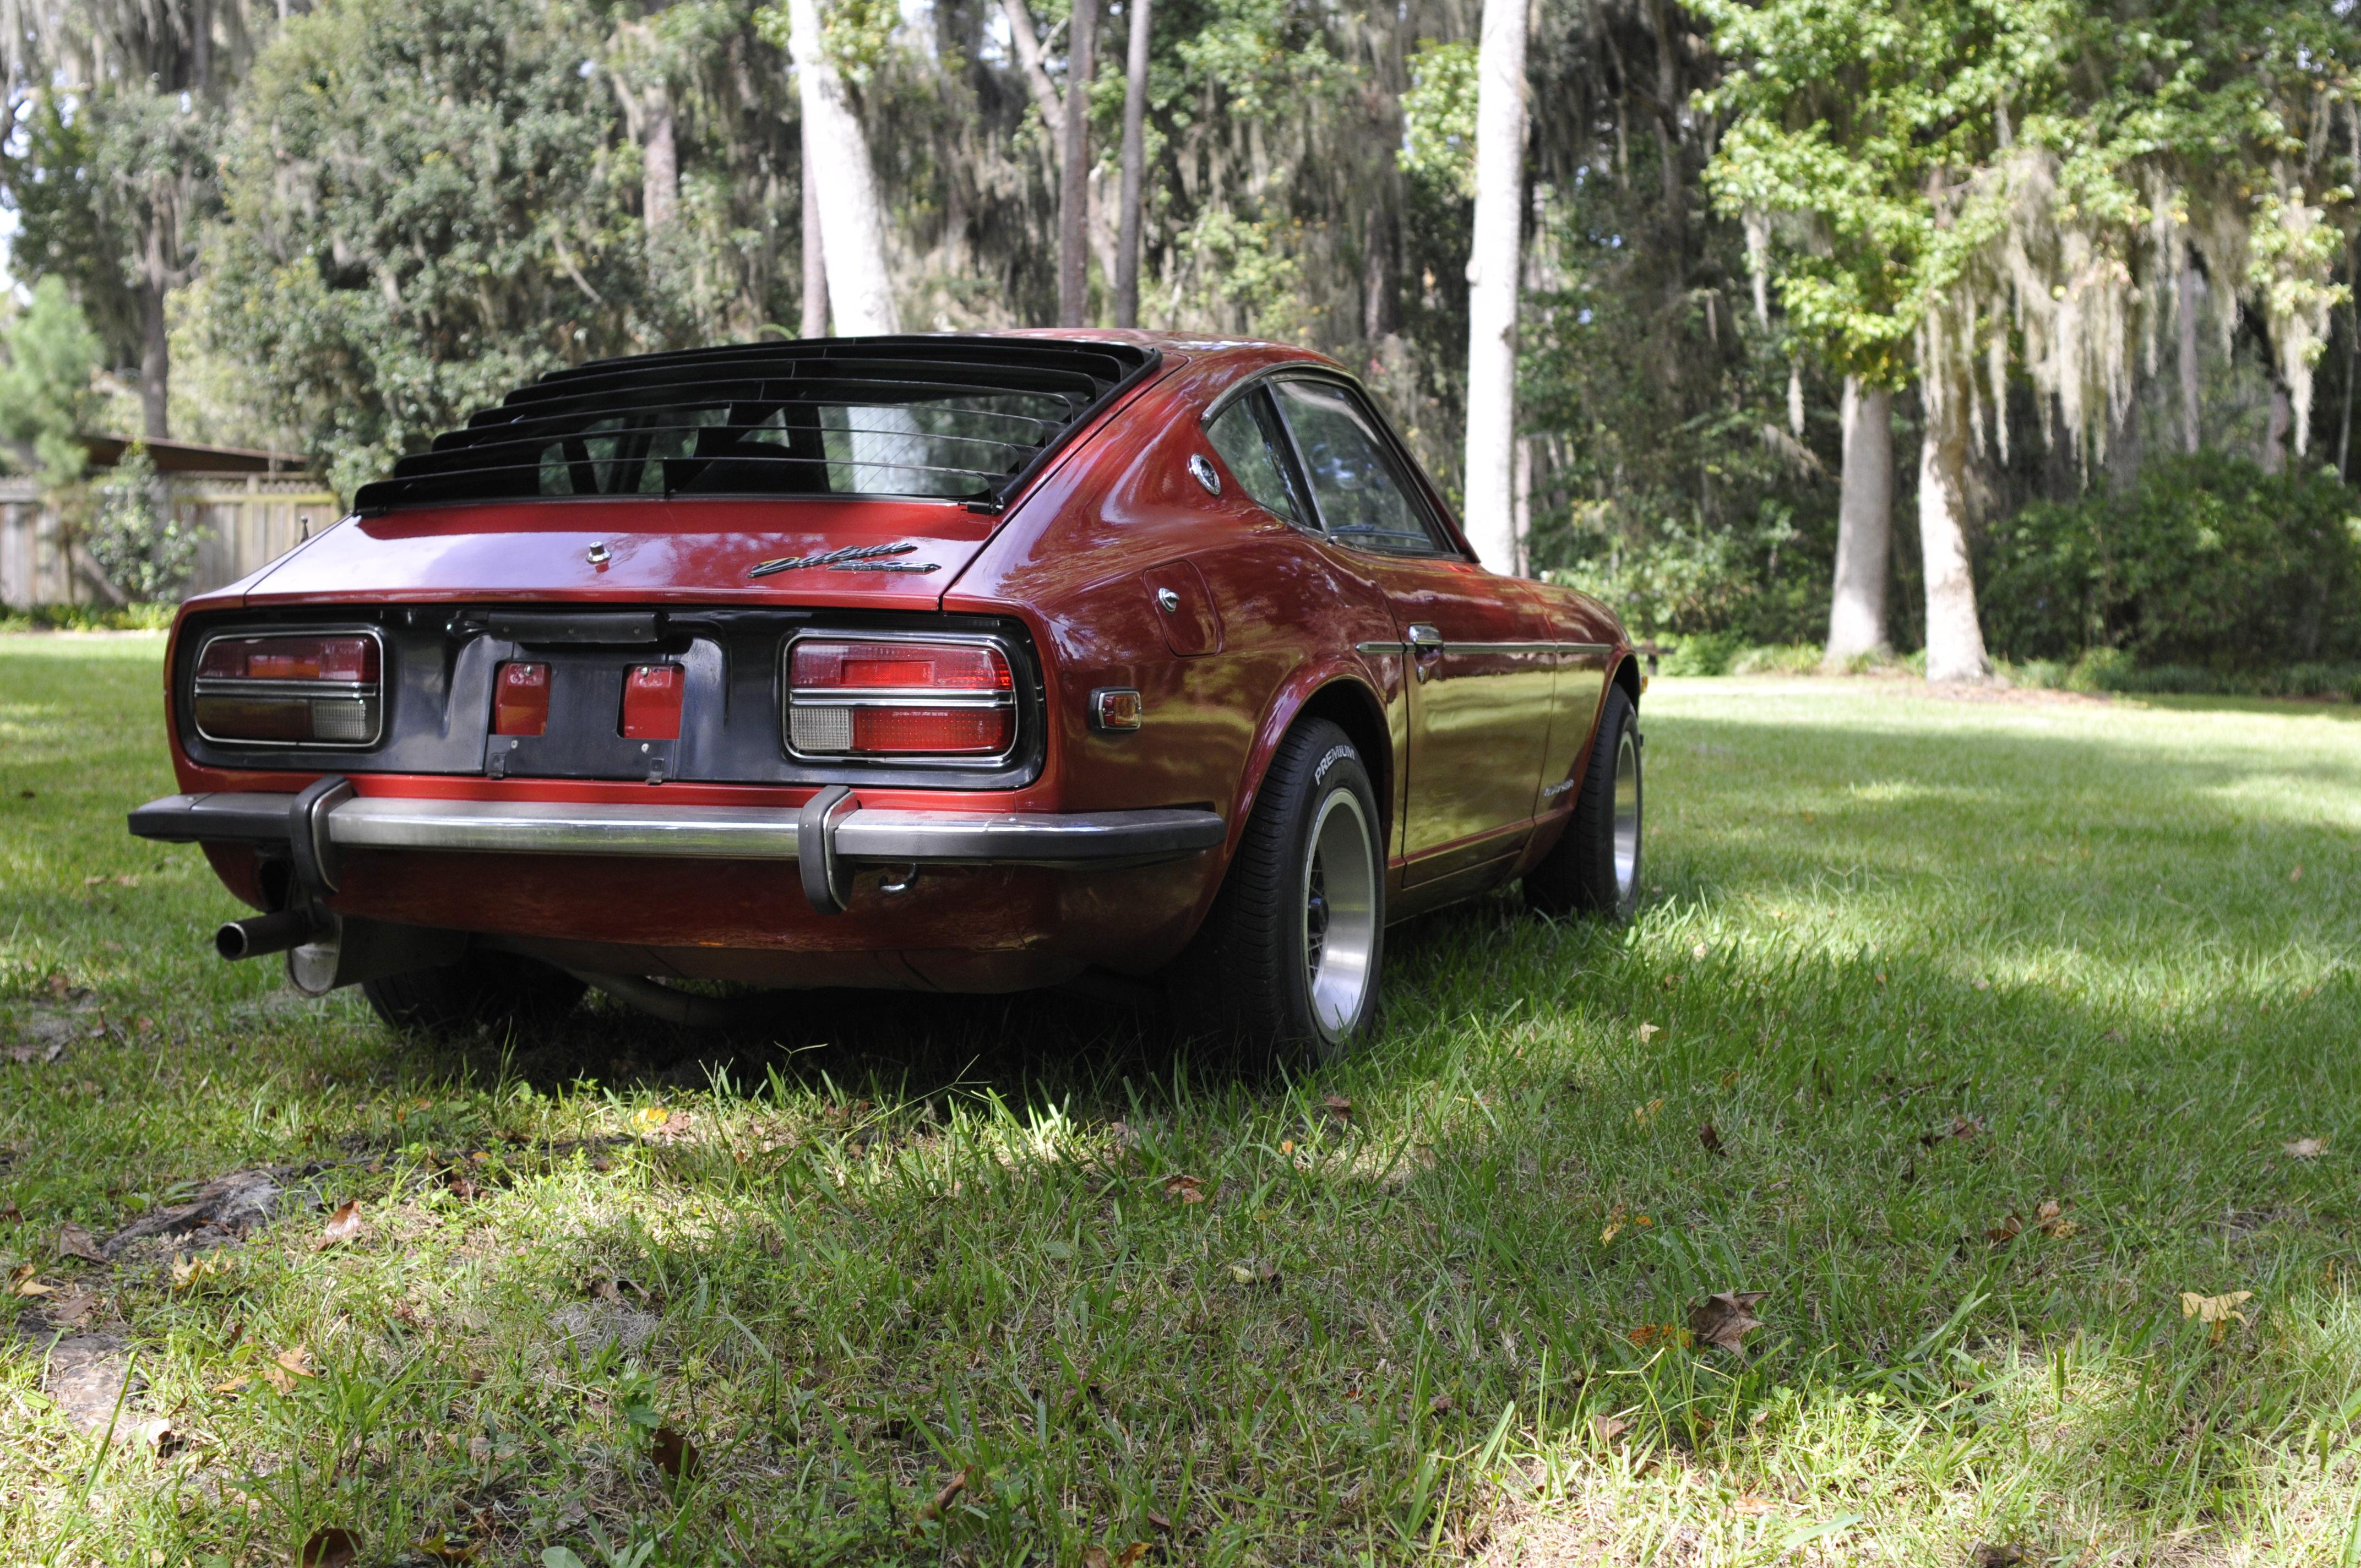
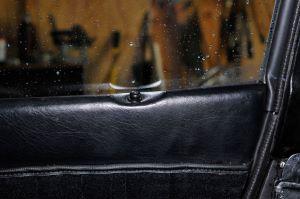
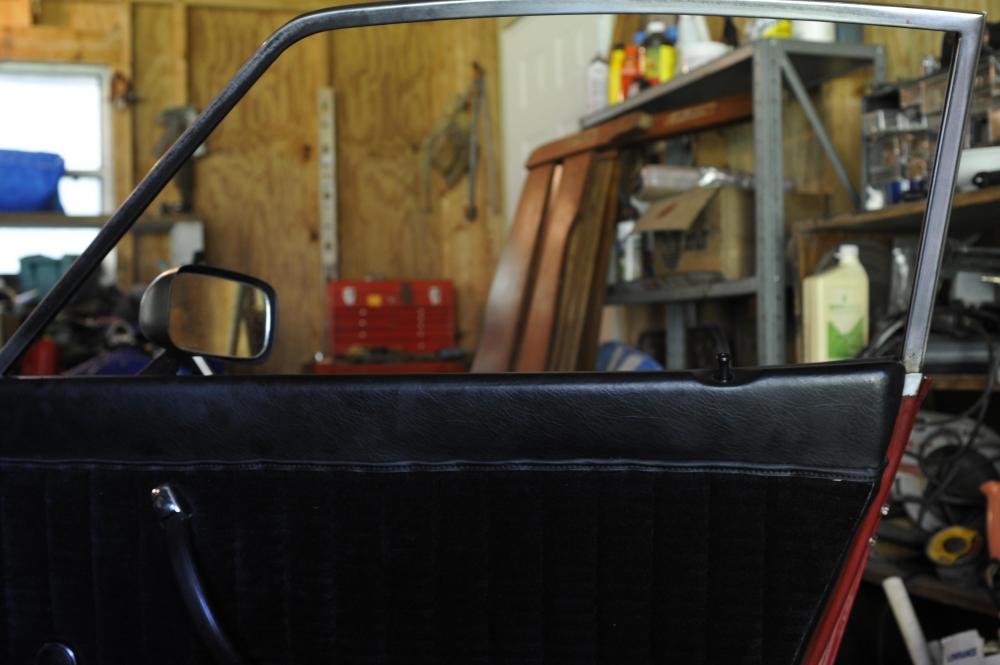
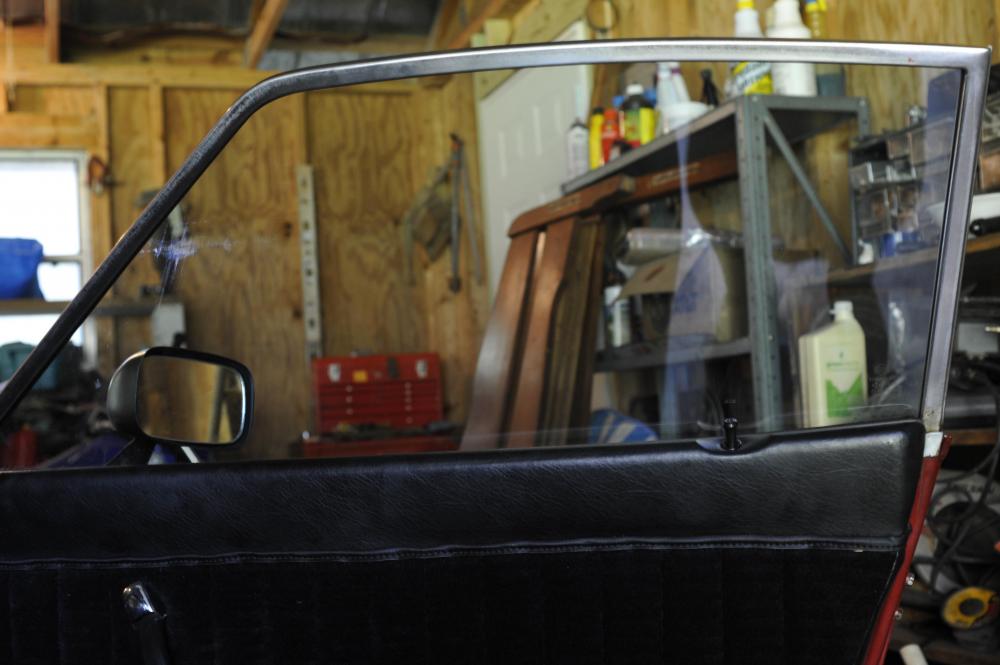
It's all reinstalled and working properly! Put it everything back in the door yesterday, but didn't have the opportunity to takes pictures until today. I believe the smudge you can see on the window is from excess grease - not a scratch. Thanks everybody!
-
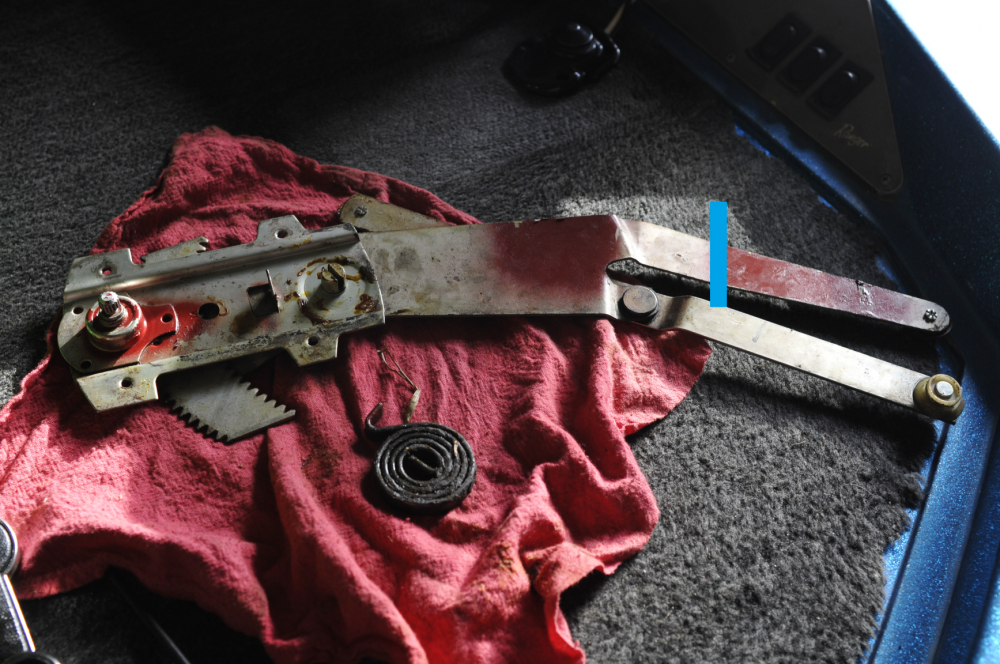
I don't think there's a bend in the arm, especially not one substantial enough to be noticed in the picture. There is a slight (and I mean very slight) contour on the arm that has an apex where the red meets the grey, but this deviation is so minute, I wouldn't have noticed unless I was dubiously inspecting for it. I think what you mentioned is correct - it's just the camera angle. Rereading what I said, I realize that it might have been misleading because there two segments where red meets grey, I'll attach a photo with a light blue line roughly at the point I was referring to. And to be clear, when you say, "spin the head way down", you mean that, with relation to the picture, the head would be towards the bottom, and more of the gear would be exposed abov?. Better yet, whereas in the picture the head is in the middle of the gear, in your proposition, the gear would be showing above the head rather than below? If that doesn't make sense, I'll take a picture of what I'm trying to describe tomorrow. As of now, I have completely removed the window, and everything else needed to do so. I'll see if I can't get everything back in place tomorrow. 7tooZ, by 'felt in the channels', are you referring to the bit of weather-stripping at the base of the window frame (where the window emerges from the door), the top of the door, or both? Oh! I got the mirror on, too. They were a REAL bitch, though. Trying to thread the nut onto the bolt required a silk touch, and was a real test of my finger dexterity. There was hardly enough space to fit my hands in there (and I have long, skinny fingers to boot), and even so, I got the bolt on with the tips of my fingers. Having three hands would have helped. After all that, I found the metal bracket that goes inside the door. After doing everything to get the window out, I found that bracket and looked at it not knowing what the hell it was, thinking I might have broken something, or found a mystery part I didn't know I had unscrewed. It wasn't a piece I'd seen in any tutorials, so I was awfully confused. It wasn't until after I spent a while getting those bolts threaded, and looking at everything I'd taken off that it dawned on me what this mystery piece was. To think, all this happened for the damned mirrors!
-
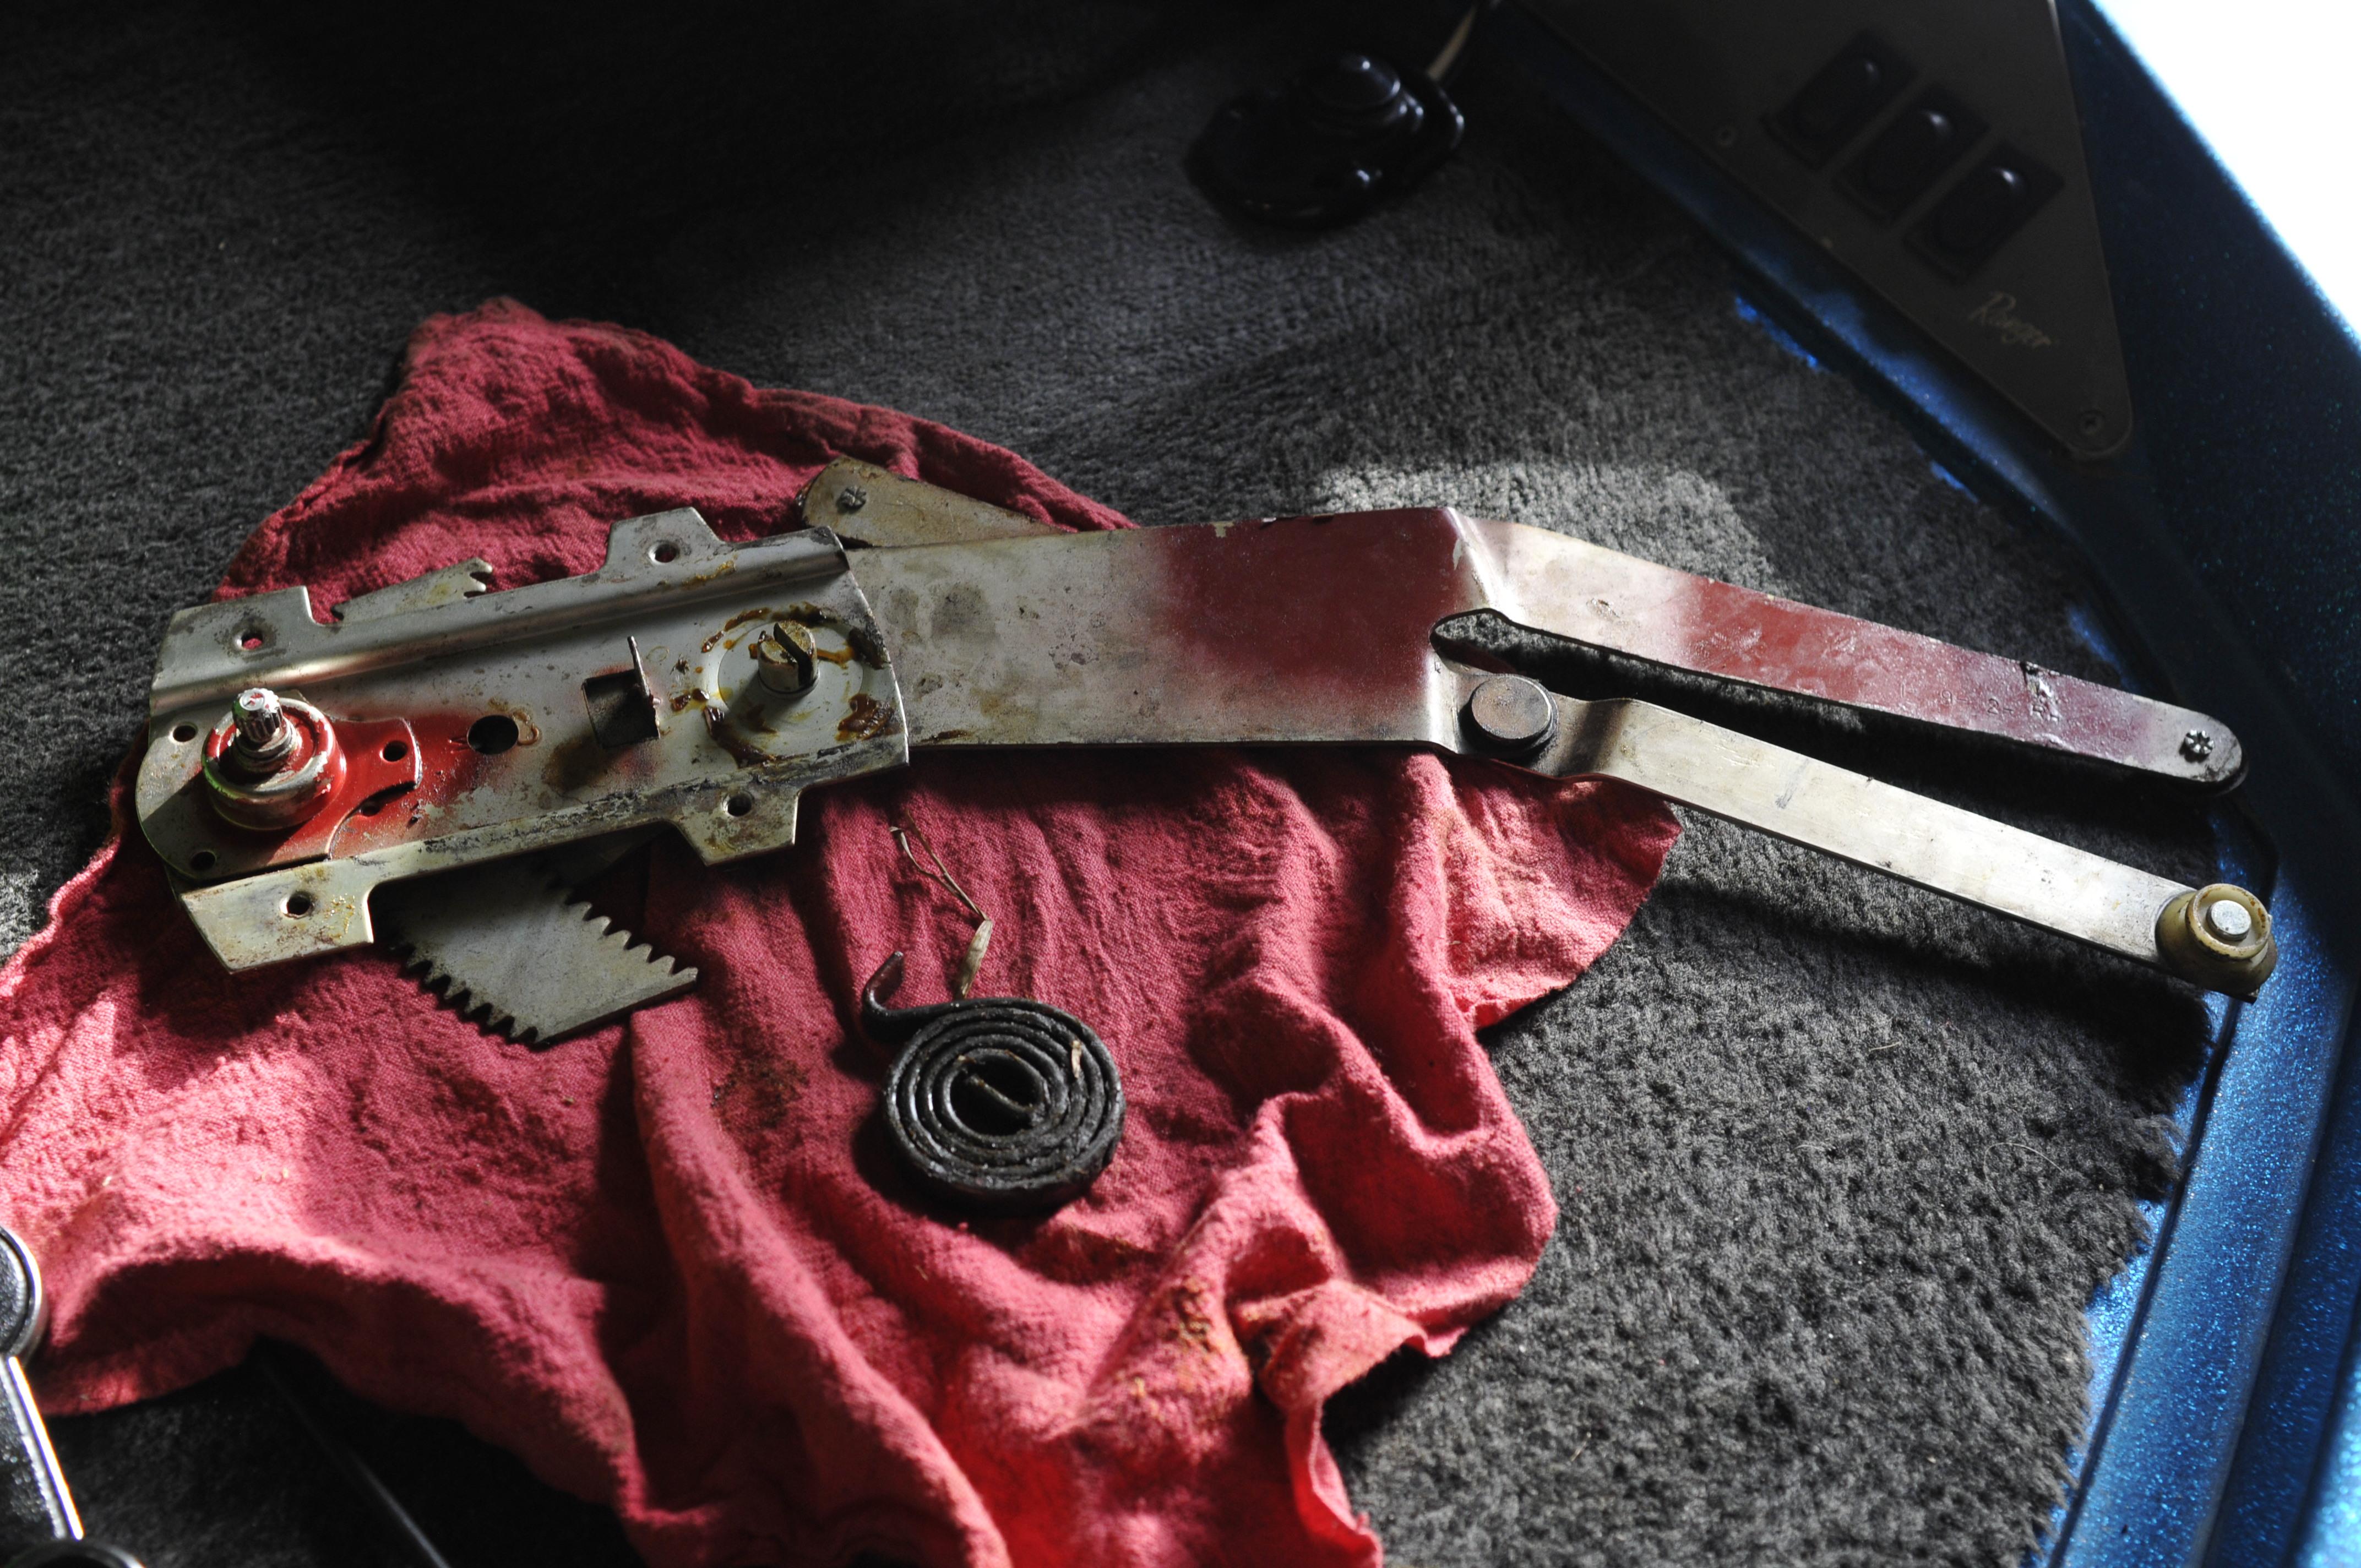
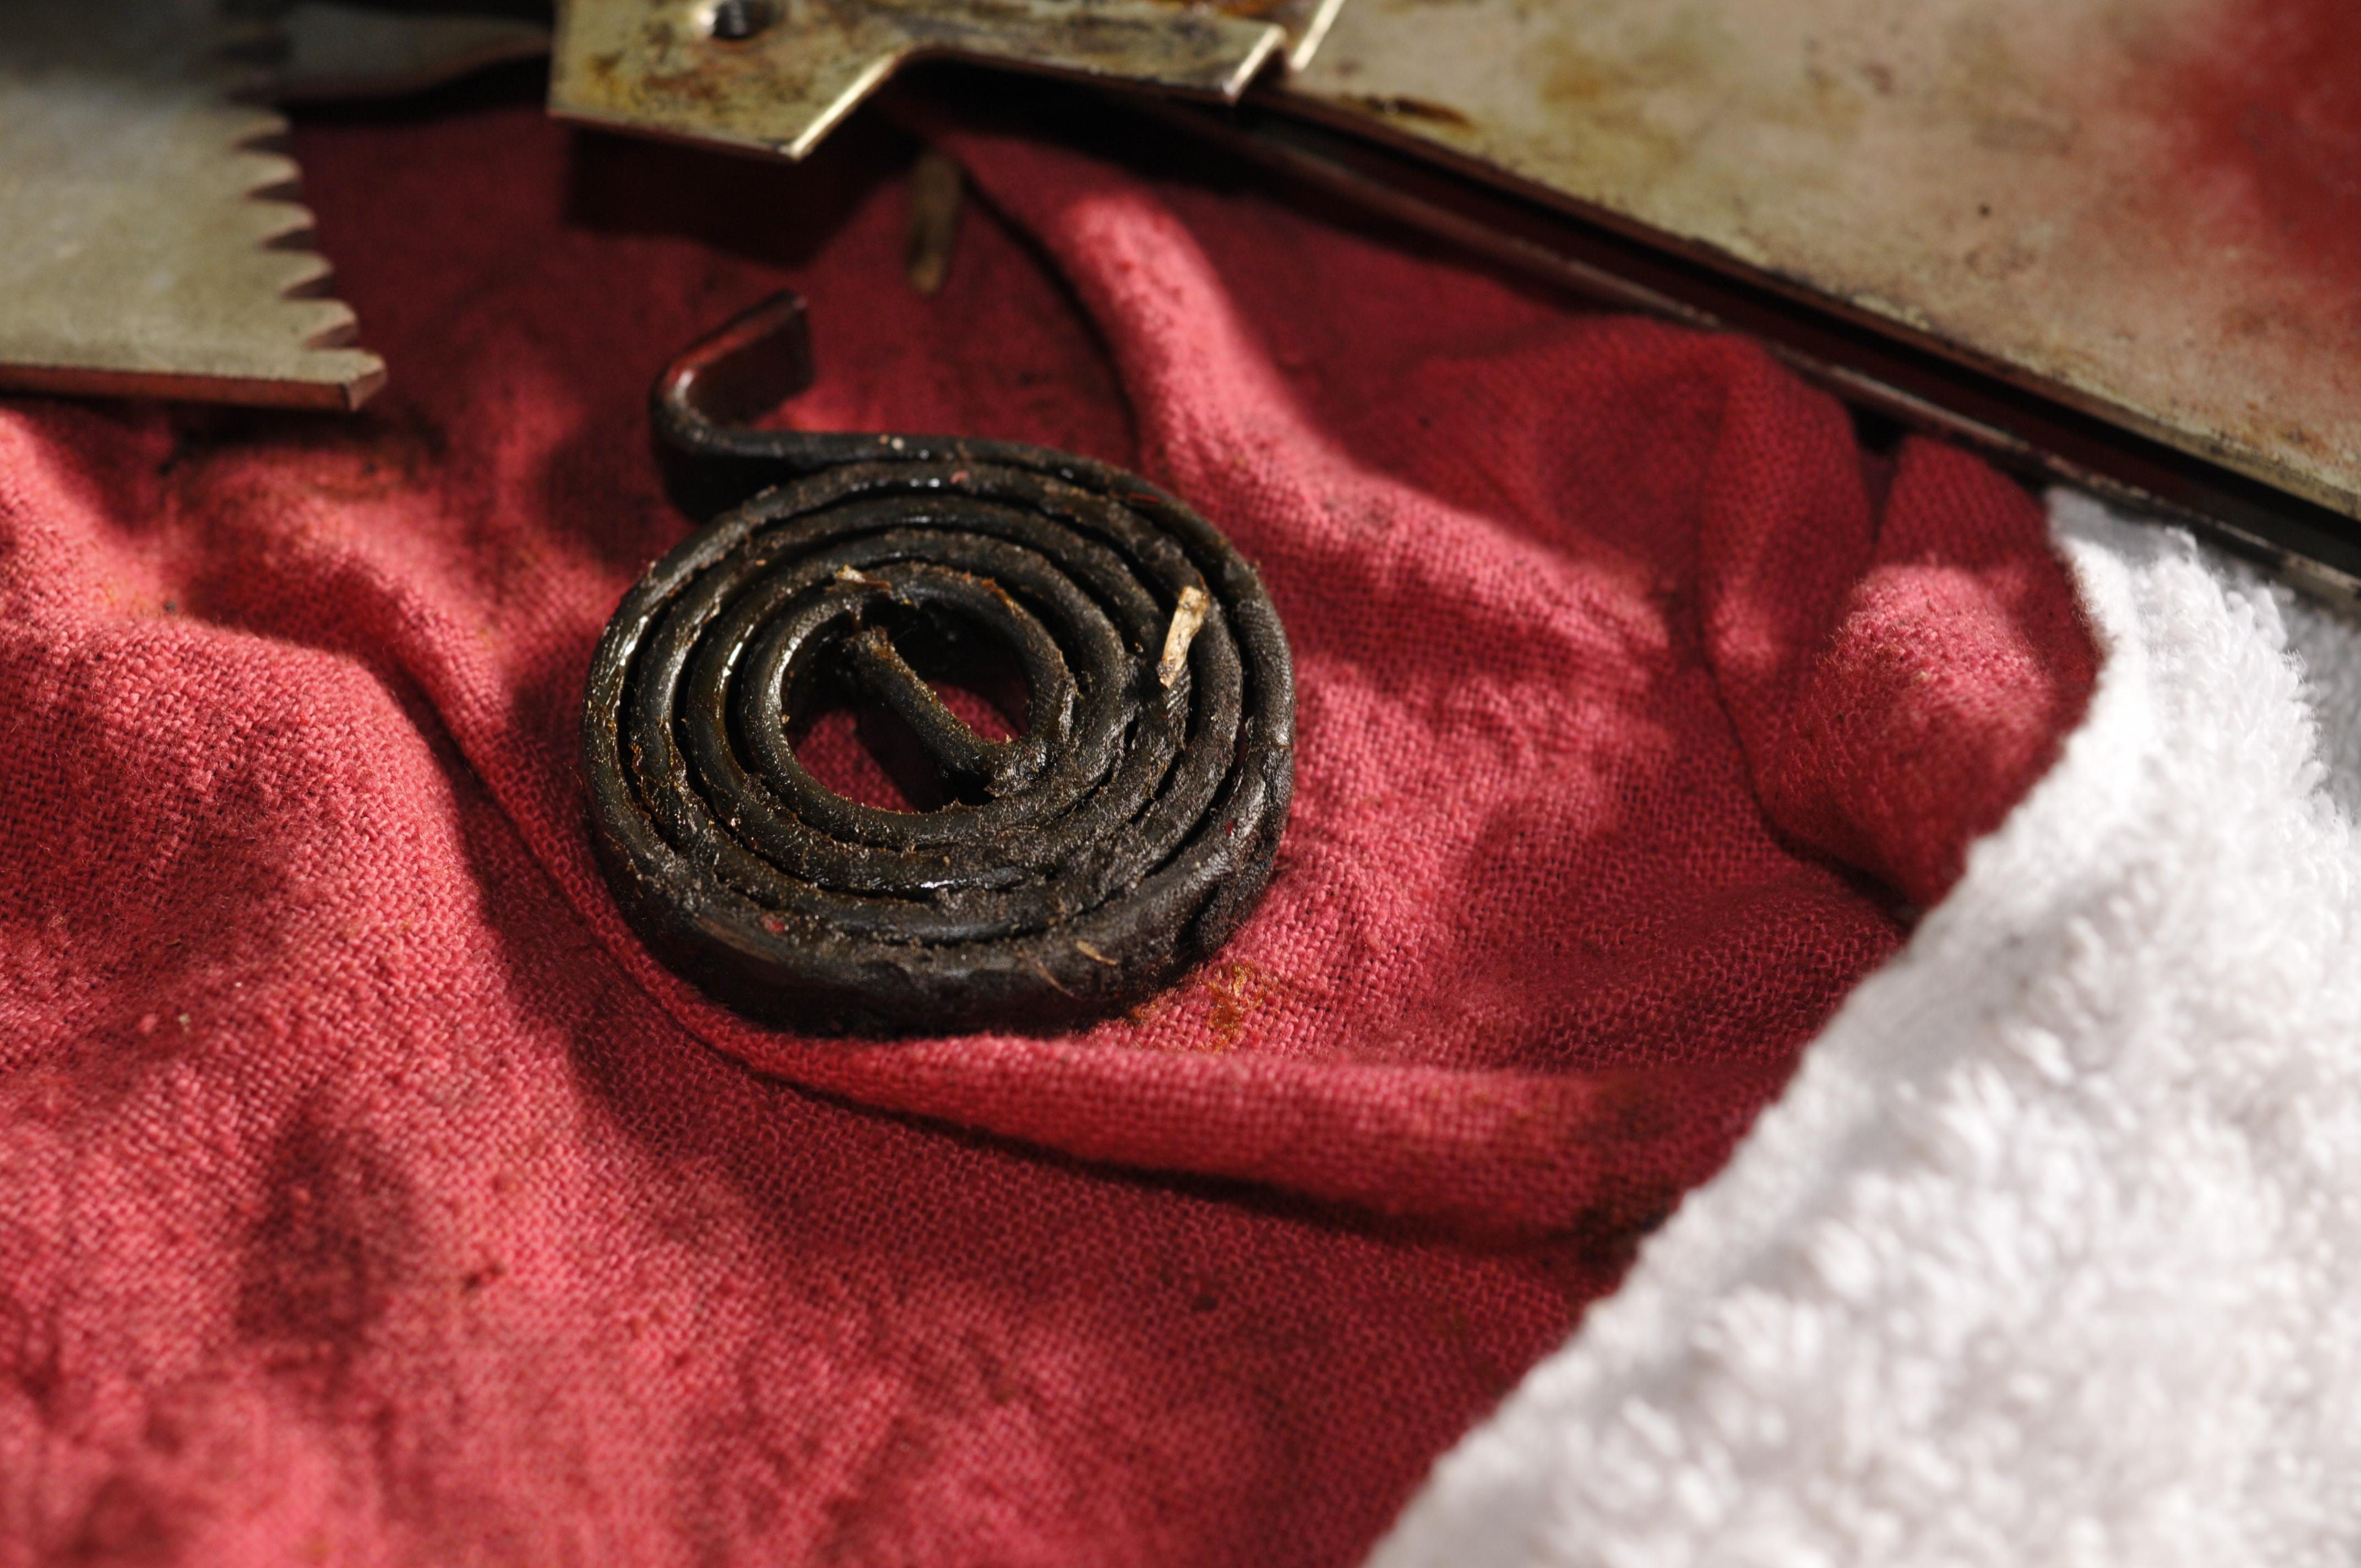
Update: Got the window regulator out. I mentioned previously that the handle would go one way, would make a banging noise but wouldn't turn the other way. The reason it made that banging noise was because there the driving gear that the handle itself rotates was at the end of the driven gear, causing the couple of teeth on the driving gear to forcibly lift up the driven gear, the banging coming when the driven gear snapped back in place. Point is, Terrapin was right that the drive gear was overturned. I brute forced the handle in the direction I said it wouldn't go before, which allowed the teeth of both gears to come back in contact, however this (I think) released all the tension in the spring. As you can see in the pictures, the spring came right out, in fact it fell out when I flipped the regulator over. Also, the window itself can be pushed up and down, so it is still aligned in the door, and the rollers (what I had been calling bearings) all rotate with ease. The gears now crank smoothly in both directions, only thing now is getting the spring back on. So then, anybody know how to get the spring back on? I can tell already it's going to put up a fight - lots of tension in that thing!


-
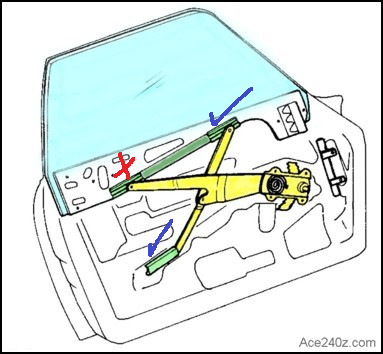
Update: I messed with the window mechanism for a few hours again, and, while I haven't solved anything, I have learned quite a lot. There are three bearings which slide right and left along rails with normal operation of the window. You can see where these bearings are, as well as their position with relation to the the mechanism and the door, in the diagram. Note that the diagram depicts the mechanism with the window all the way up, where in my case the window was all the way down, therefore, the top left and right bearings were positioned towards the bottom of the door for me, not the top. Only one of the bearings was seated inside it's rail when I started, and I managed to get one more in as well - this bearing is shown in the first picture, and, in the diagram, is the one in the top right with a blue check. The third, however, I never managed to slot in - this is shown in the third picture and has a red x in the diagram. In the second picture, you will notice that the gear itself is showing on one door, but isn't in the other, furthermore that gear is pressing up against the glass. I tried winding the window, and unlike yesterday, the window does not go up or down at all. In fact, the handle will only rotate one way (albeit with a lot of force), and at some point the mechanism makes a banging noise, and sort of jumps around (I think the gear is grinding). I digress - note that the the bearing which fails to catch the rail is connected to the core of the mechanism (the gear). For whatever reason, I think the gear is locking the arm, and keeping it from rotating or moving enough for the bearing to slide into the rail's grooves. Originally I said that when I removed a third screw, I hear a loud bang, and the window ceased to function. I believe here is when that third bearing came out of it's rail, and with great force. I imagine the bearing came out because something either went wrong with the gear, or the spring. At any rate I think Terrapin was right, and the gear disengaged. At this point, I will take the window regulator out and try to fix it. Moving stuff around while the regulator was in the door was not only tedious (trying to get my hands in such a tight space), but, at this point, improbable (or else hopelessly inefficient). I'll update later once the regulator's out. The mirror on the driver side did have a bracket on the inside of the door - I felt it - but the passenger mirror does not, nor did the mirror come with one. There is a gasket that goes between the mirror and the car's body, that's it.

-
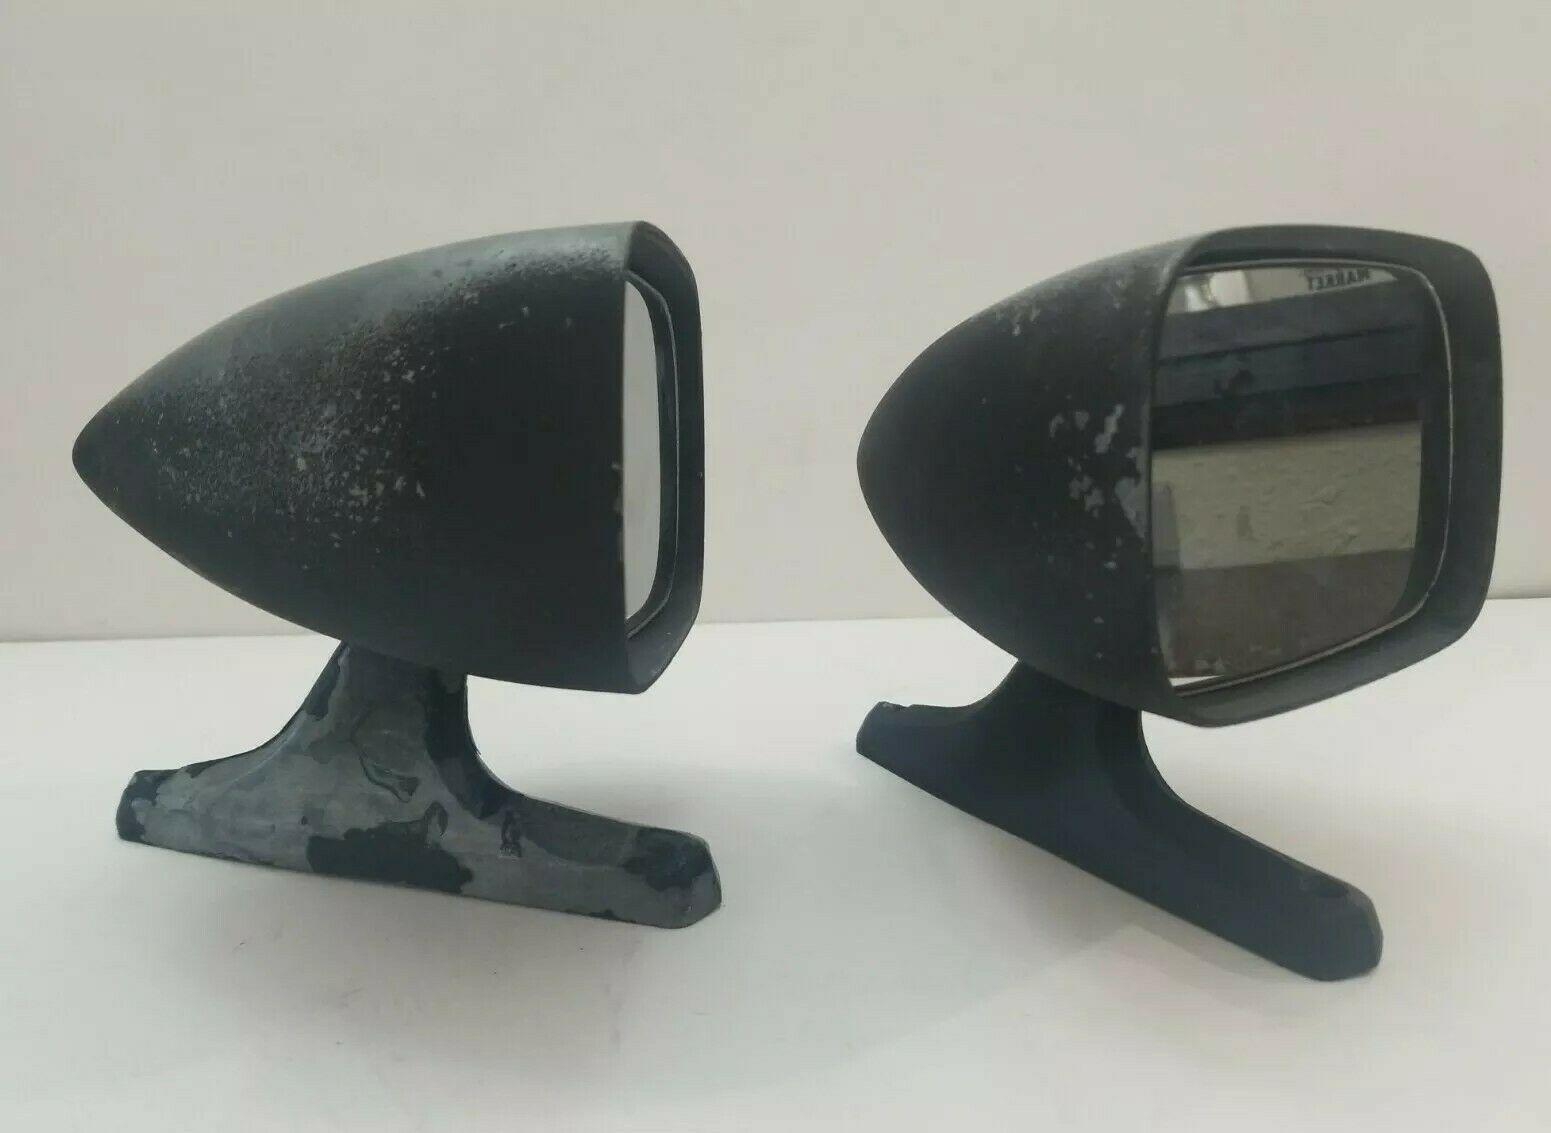
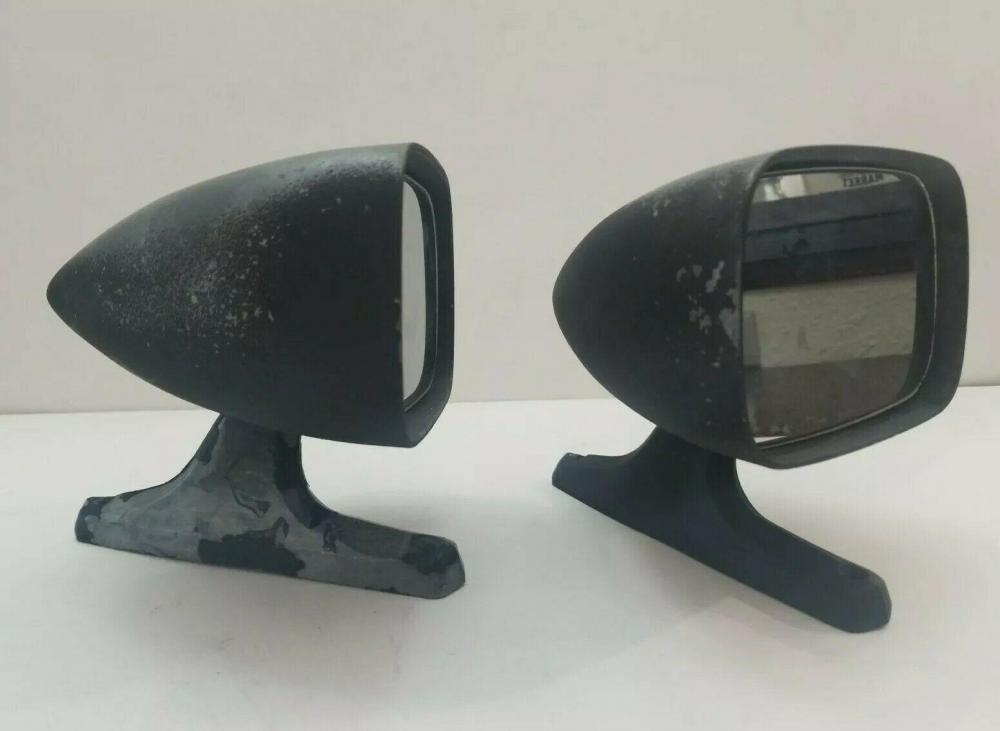
Update: I fiddled with the ole' Datsun for a couple hours - half the time trying to figure out the window situation, the other half was taking off the old weather-stripping (it was, from what I gathered, glued on originally, and so sections of it were a real nuisance to get off). I think I made the situation worse, but, there's a silver lining - I think I figured out what was wrong, and it is along the lines of what @Terrapin Z said. The gear itself was very high, for lack of a better word. From my tinkering, I think what happens is that the gear moves freely without pushing the window up or down so long as those four bolts aren't in. However, of this I'm not sure. I wanted to take the door panel off of the driver side so I could compare, but it was much too dark for me to do that. I was working alone, and the lighting in my garage isn't great so not only was it hard to work on the window, it was damn near impossible to get the window crank off because I couldn't find that little clip. The whole time I had to use a flashlight, and I usually needed both hands. At any rate, back to what I found out. Regarding the position of the gear, I think what happened was when I put the bolts back on the first time (as in the picture), that gear was at the position it ought to have been with the window most of the way up, thus explaining why it could go up only slightly. Another possibility, and this one sounds more plausible, is that the gear itself, by a similar principle as the last sentence, was pressing against the glass itself, not allowing the gear to move, therefore not allowing the glass to rise. However, I was not paying attention to the position of the gear initially, so I don't know if this is the case with my original dilemma. Either way, I need to see what's going on with the functioning driver side window as a point of comparison, and I can't do that 'til tomorrow. I'll update then. After reading your last question a couple times, Terrapin, and being thoroughly confused, I realize that I'm dyslexic - this is news to me that 240z's did not originally come with passenger mirrors. I suppose, then, it is an add on. The mirrors are not stock from any z as far as I can tell, attached will be a photo of them (not taken by me but stolen from the internet). From what I can find on these mirrors, they might have been used on the 280z, but were discontinued. Other listings describe them as racing/rally mirrors. I'm not entirely sure what the truth is, as there wasn't much mention of them anywhere. Maybe other people would know? MSA also sells similarly shaped mirrors. Either way, one of the owners before me must have bought these mirrors, and that probably explains the horribly drilled holes the passenger mirror is supposed to go in.
-
I read two of the articles, @Zed Head, and shall keep your advice in mind as well, @7tooZ. I'll go see what I can do, and give an update after.
-
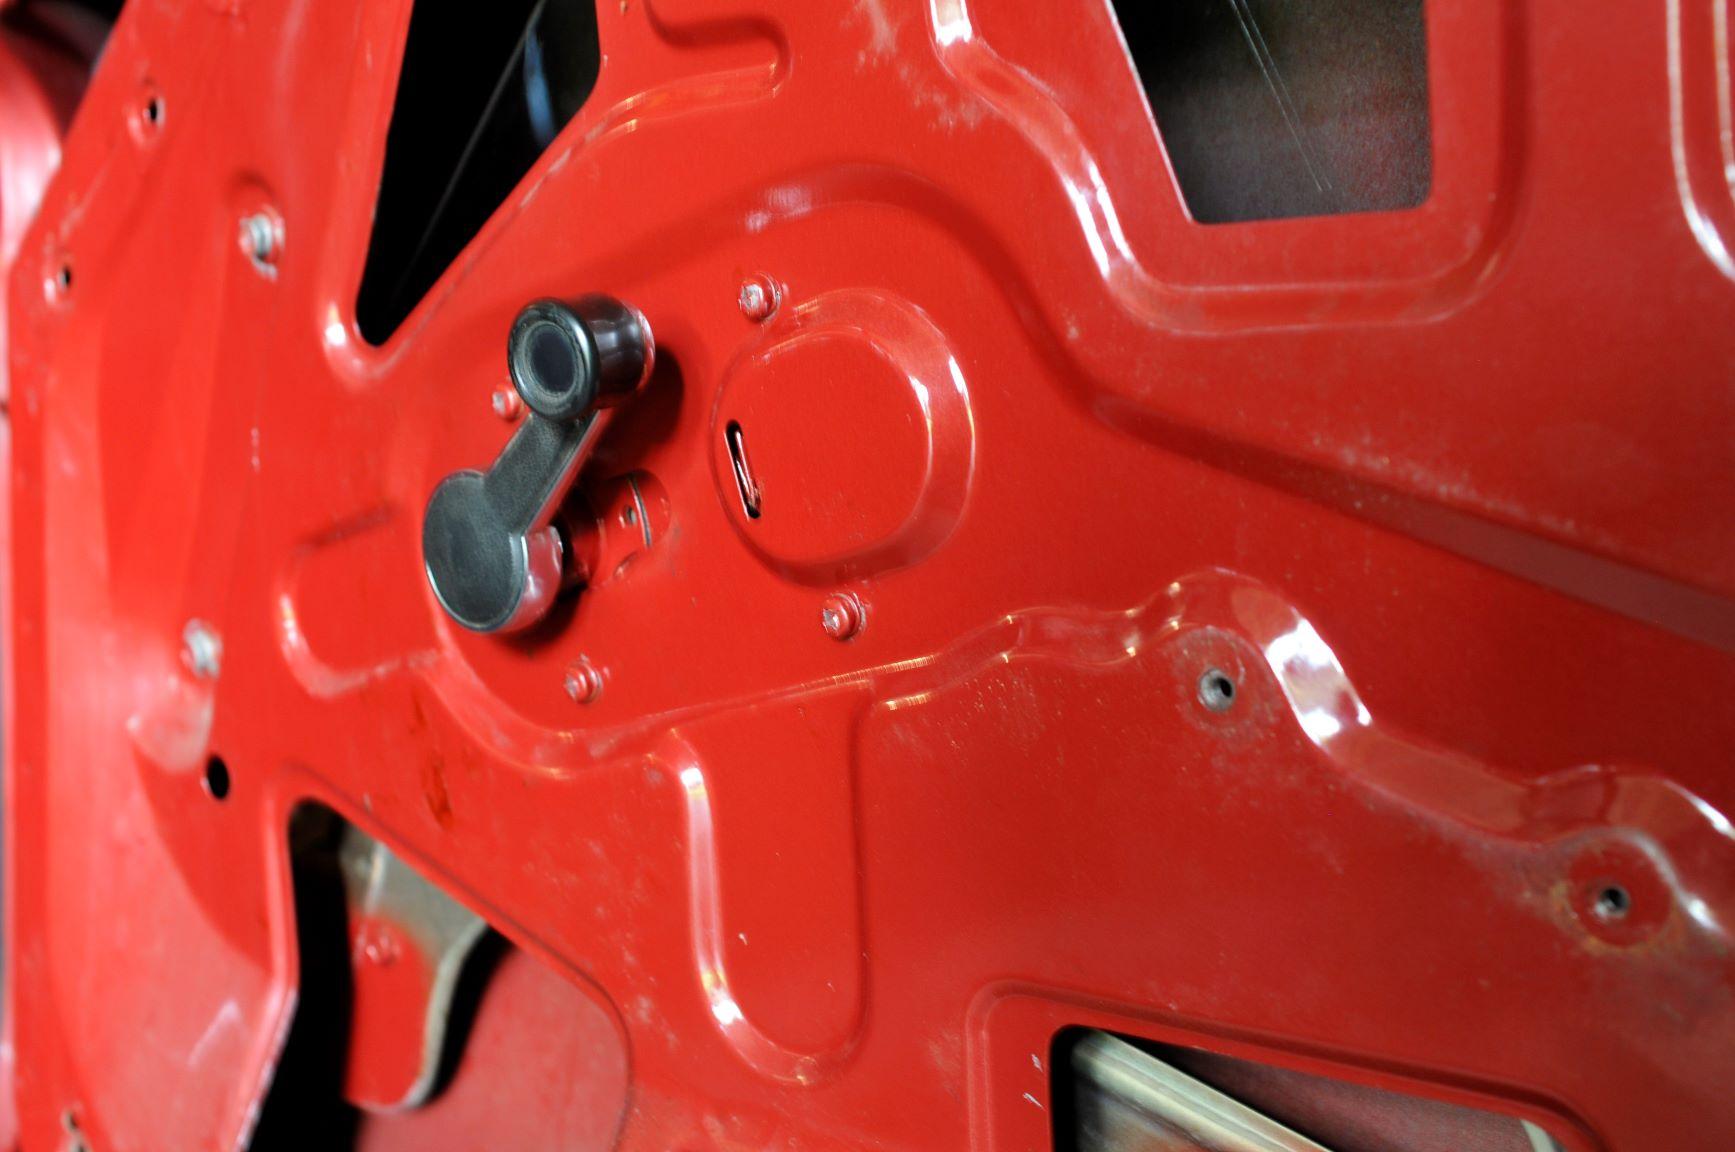
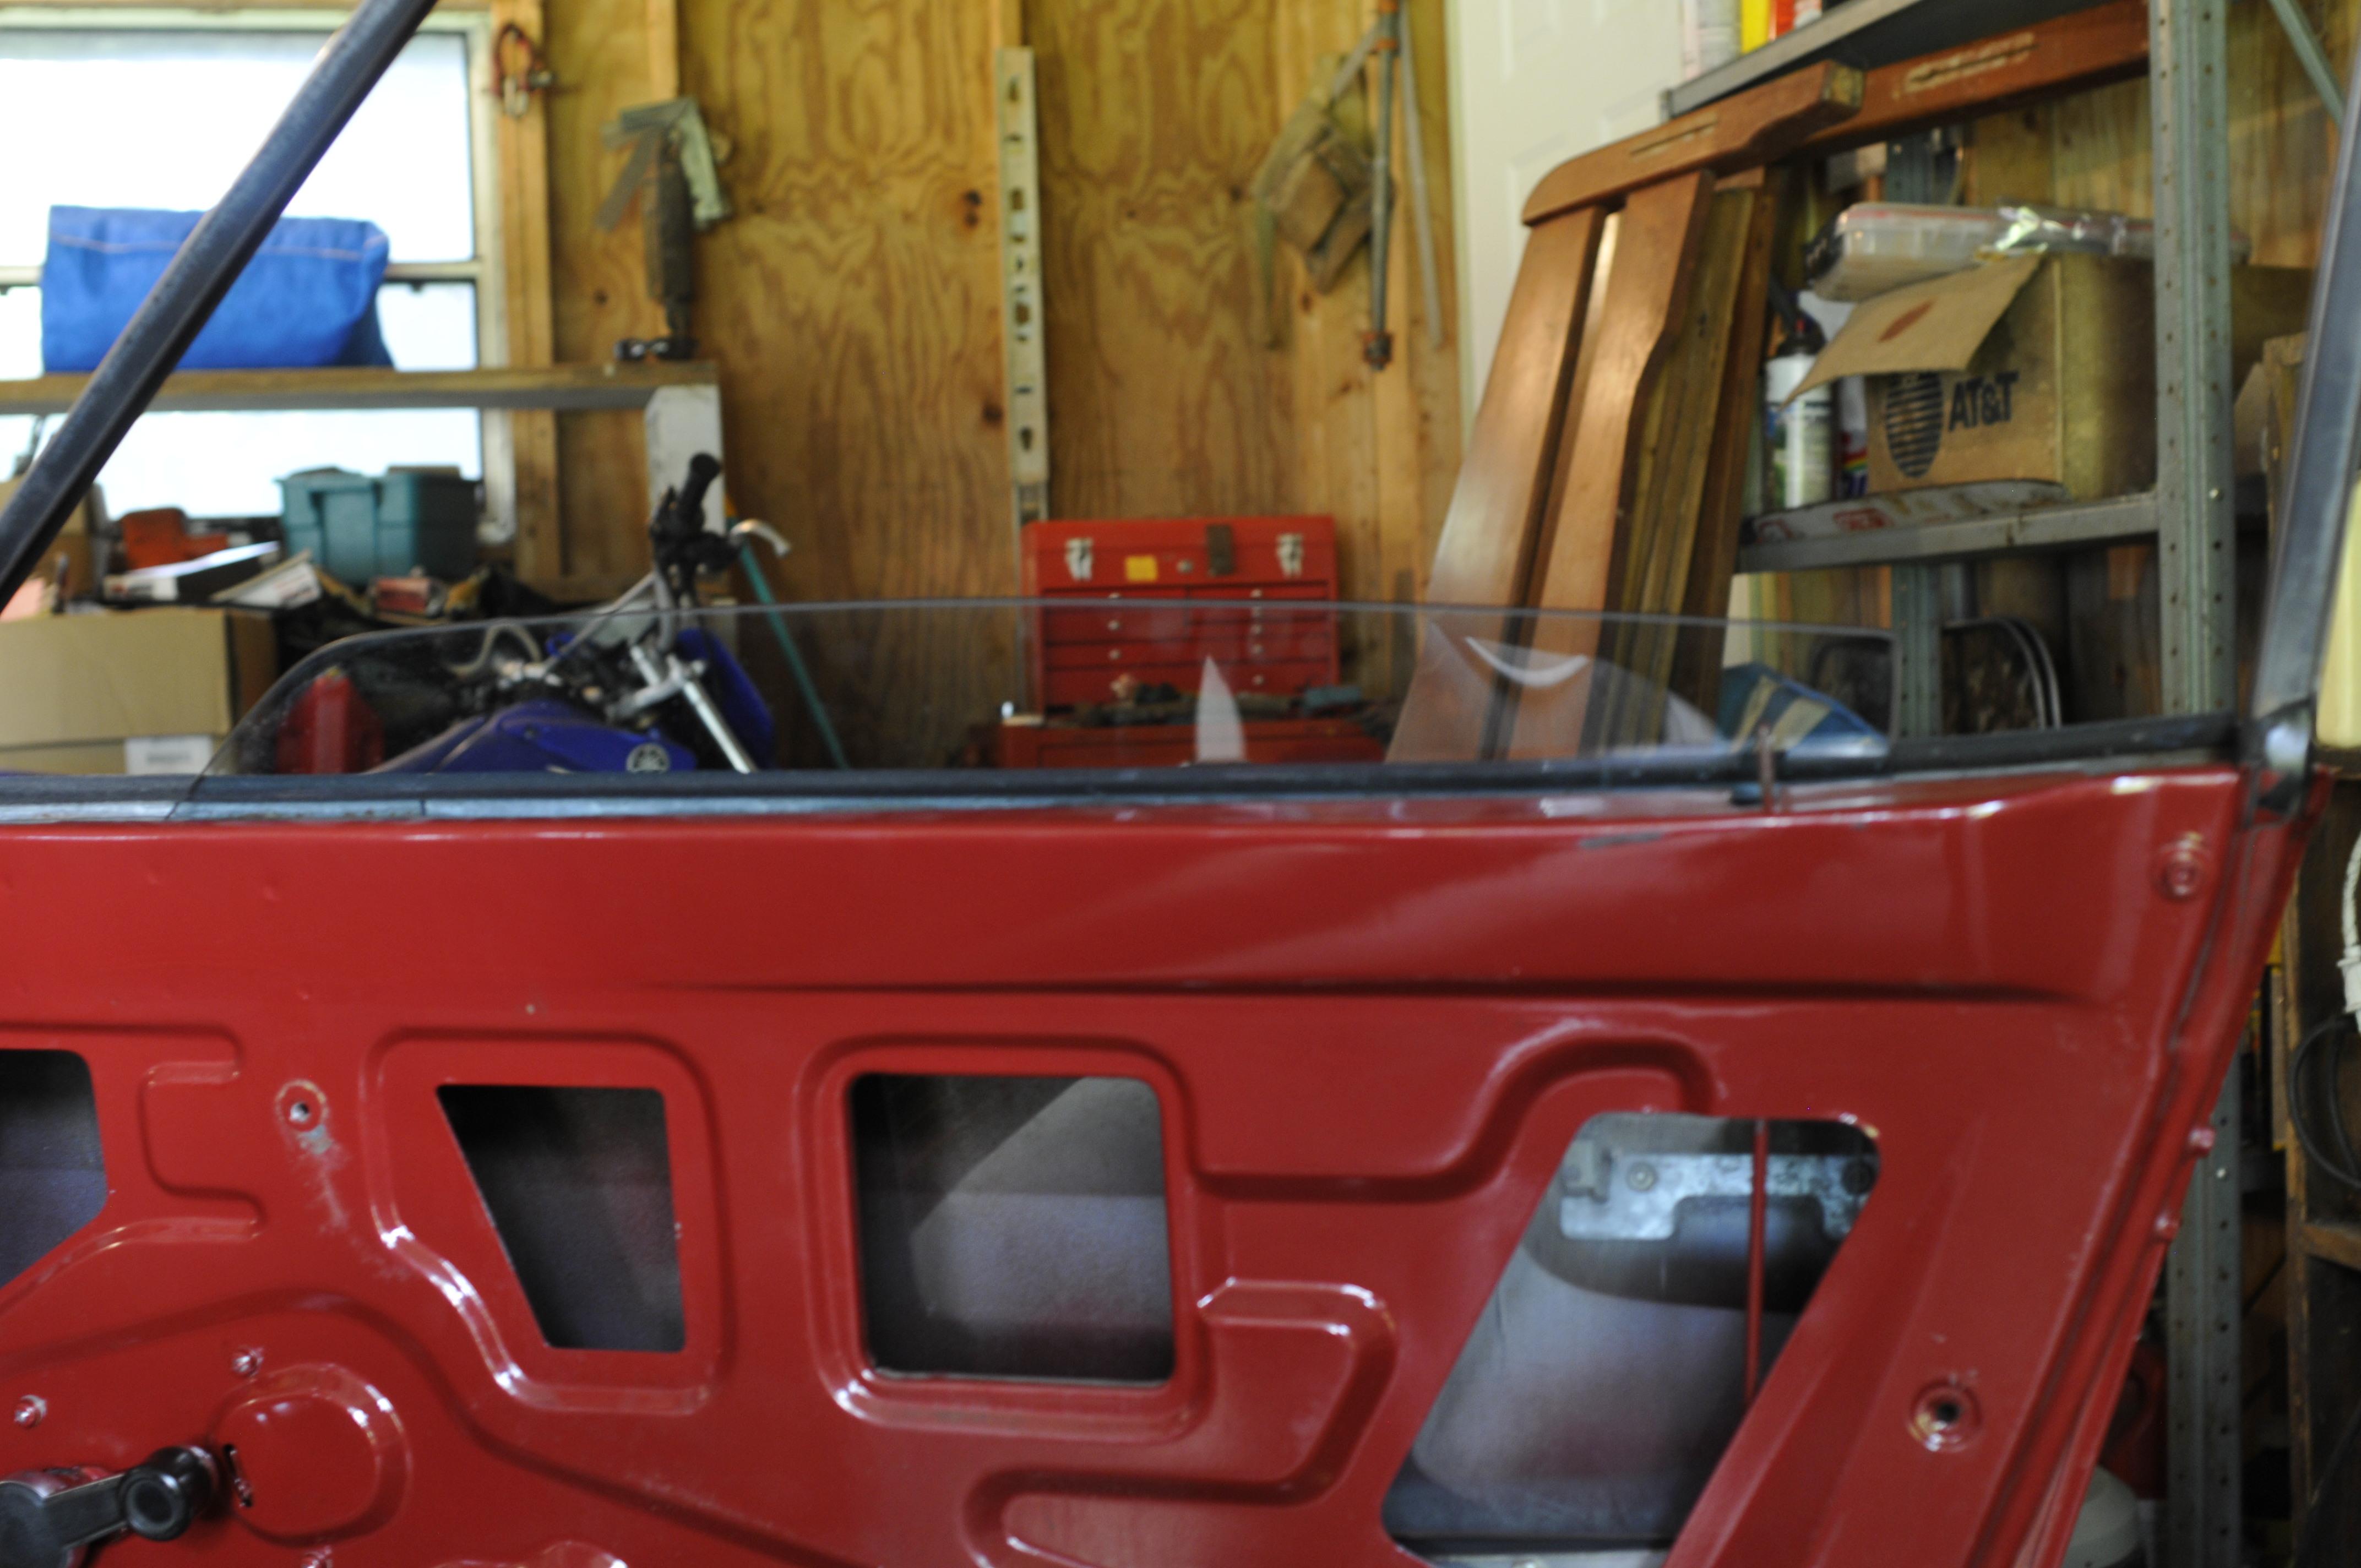
Made the classic mistake of doing something without knowing what the Hell I was doing today. I was trying to take off the metal part of the door that is obscuring most of the window so I could put a nut on a bolt to attach the passenger mirror (the holes where the bolt goes in to attach the mirror to the door are too large - the bolt wont thread, so I needed a nut on the inside of the door to keep the bolts, and in turn mirror in place). I couldn't reach the bolts to put a nut on, so I thought I'd have to take the metal off. What Happened: I figured I'd have to take off all the bolts and screws I could find to get the door apart, and I started with the four screws surrounding the window crank, pictured in the first image. Going into it I figured it had something to do with the window mechanism, so I rolled the window all the way down in the unlikely event something went wrong. I removed the bottom right screw, then the top right, and just before I got the top left off, I started thinking that this was a bad decision. Unfortunately, I didn't stop there, despite my better judgment. Once the third screw came off, the window assembly seemed to fall about half an inch. No good I thought. At this point I tried rolling the window up, it didn't seem to do a thing, so I didn't try very hard for fear of making the situation worse. As you may have noticed, the screws are back on, though. I noticed that a metal bit was rotating slightly with the window crank, and on this metal bit were three holes that lined up with where the screws go. So, I turned the crank just enough to thread the screws back in. Such is every detail I can remember leading up to my failure. What Happens Now: The window rolls up as far as shown in the second picture, at which point there is a lot of tension in the crank and it won't go any further. The window rolls down all the way as well (though maybe goes down further than before?). The crank only rotates about one full, 360 degree revolution between the window's highest and lowest point. Furthermore, when rolling it back down there's about 1/4 or 1/2 of a revolution where the crank seems to turn freely, and doesn't effect the window's position. Also, the gear (the internal part with the teeth) rotates as well. That's about everything I can think of that might be of help. I'm too scared to tinker with it anymore. I can take more pictures if you need me to. Thanks!


-
This thread has been making me sick. Just to think that there are poor, innocent z's out their begging for someone to end their suffering. God turned his eye from a few z's (one of his proudest creations) for but a moment, only to turn back and see these monstrosities!
-
@Zed Head @siteunseen @EuroDat @AK260 @Yarb Thank you all for your information, and I'm pleased to say that the problem has been resolved. While the problem is fixed, I'm not sure what caused it in the first place so I'll explain what I did. In neutral, with the brake pressed to the point where the light came on, I pulled the emergency brake all the way up and then put it all the way back down. Why I didn't think to do this before making the post is beyond me. Before, when the light did come on, there was a point at which, while depressing the brakes, there was significantly less resistance thereafter (probably about 80-90% of the way to the floor). Now the brake pedal has resistance all the way, and I'd like to say that the brake pedal doesn't even go down as far, but there's a chance that last part is false and I'm just tricking myself into thinking the pedal's range has changed. What might have caused this problem, and why what I did fixed it is beyond me. Whether this was a small, benign issue, or something systemic of a bigger problem may be worth looking into, but I am not knowledgeable enough to pose anything beyond ignorant conjecture. I appreciate your guys' inputs, and I'm sorry if I wasted your time by not experimenting more before seeking advice. Hopefully someone with the same symptoms and a real problem will benefit from your guys' suggestions. Until then, we could all throw in a couple bucks and buy me a Dunce hat!
-
The title about says it all, but I'll put a little more detail here. A few things first: the car's a '71 240z, I've only owned her for about two weeks now, and I've put about 200 miles on her so far (mostly driven in the day time). Today I noticed that the emergency brake light on the speedometer comes on when I fully press down the brakes. The key word here is fully as it only comes on when the brake pedal can go no further. Now, I've only seen the light when I'm in neutral (whether it's because I'm at a complete stop, or in the middle of downshifting). It might be able to come on when I'm in gear, but I haven't tried this yet since I'd rather not lock up the brakes or otherwise cause unnecessary wear. I checked multiple times to see if my hand brake was partially engaged by pulling it up and putting it back down, which solved nothing. Those are the facts, but now I'll give some more uninformed thoughts, and non-cold hard facts. There's a chance this has been going on longer than I know since I mostly drive in the daylight, and only felt comfortable downshifting within the past few days. Meaning, either I never had the opportunity to notice the brake light coming on when it does because the sunlight drowned out the relatively weak emergency brake light, or, fingers crossed, this is something standard amongst the 240z's and is no cause of alarm. Nonetheless, I think I would have noticed this sooner. However, I read in the manual that if the emergency brake light comes one while depressing the brakes, then there is likely something wrong. As mentioned before, the light only seems to come on while in neutral because the brakes, while in gear, have, what seems to me, a bit more resistance, by which I mean that (and these are just random numbers) the brakes depressed 80% in gear slow the car at an equal rate as the car in neutral at 87% depressed. This could be a product of engine breaking, or perhaps the brake pedal in neutral is a bit softer, as it were. Thanks for your time!