


72SLOZ
Member
-
Joined
-
Last visited
Everything posted by 72SLOZ
-
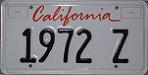
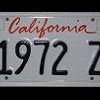 View Advert 72 240Z in North Carolina Description Long time owner (since 1985) -- restored 2.5 times (just dropped new rebuilt engine in) classic 240Z. Most of it's life in California, but now in North Carolina and ready for it's next loving caretaker. Extensively upgrade with complete new interior in 2006; New (mid life crisis red) paint in 2004 and garaged most of time since then. With rebuilt engine, I went back to original SU carb setup, but have Weber DCOE 40 carbs as part of price (with manifold too) Molded in body kit (see pictures) - has a minor fiber glass ding in front left under headlight that will need refurb otherwise all is in great shape as you can see! Recaro powered seats + have original Z seats that were reupholstered in ~1995 as part of price; Also have a new right tail light in box that I have yet to swap in. Original wood steering wheel if you want to go back to to retro Car is not registered in NC as I have had it in storage largely last 5 years but it is time to finally part ways (I do have a love affair with this car!). Love this car, but it needs a new owner for the next phase of it's life -- will be happy to find an enthusiastic caretaker for this. Centerline wheels are premium as well! The first picture (in the gas station) is recent in North Carolina (even though CA plates...). The rebuilt pain color is an Acura NSX Red (What I call mid life crisis red...). Original color of car was Orange. Engine: Rebuilt bottom end -- less than 400 miles on it; Head is a Maxima Head (higher compression) with about 15K miles on it Raleigh, North Carolina - United States Advert Actions Report this Advert 1 Question 0 Reviews Report reply moritz55 26 Posted June 30, 2019 Hey .. I live in Brier Creek , Raleigh NC .... if I know of someone interested I'll send them your way. Any engine pics? Is the engine bay Stock Orange or Red? Mark ... cell: (507) 208-0140 ... 72SLOZ 0 Posted September 6, 2019 The engine compartment is same color as exterior! This advert is now closed to further questions. PREVIOUS ADVERTWanted: 5 speed striking rod NEXT ADVERT240Z Radio Mount Plate OTHER ADVERTS FROM COMPLETED-ADS FOR SALE COMPLETED Refurbished Inspection Light (#2) By jfa.series1 $120.00 FOR SALE COMPLETED NOS Hand Brake Center Arm By jfa.series1 $75.00 FOR SALE COMPLETED 240Z Fan Pulley By jfa.series1 $25.00 FOR SALE COMPLETED NOS 240Z Window Regulator - LH By jfa.series1 $175.00 FOR SALE COMPLETED NOS 240Z Window Regulator - RH By jfa.series1 $200.00 FOR SALE COMPLETED For SALE: $40 - free shipping , Master Brake Cylinder - 15/16" Bore - 78 280z Datsun/Nissan By moritz55 $40.00 FOR SALE COMPLETED For SALE: $3.00 , 70-83 Z/ZX SHORT Oil Pan Screws , plus shipping By moritz55 $3.00 FOR SALE COMPLETED Throttle linkage pieces - SOLD By jhm $20.00 FOR SALE COMPLETED 1978 280Z modified - ON Canada - SOLD! By 240Ziggy $24,000.00 WANTED COMPLETED WTB: 1973 240z Radio (Hitachi KM-1520ZC) By Craig24 NO VALUE SPECIFIED FOR SALE COMPLETED 240Z Vietnam SS Bumpers By chiefmd NO VALUE SPECIFIED WANTED COMPLETED 280 Power Antenna Part By S30Driver NO VALUE SPECIFIED FOR SALE COMPLETED 1970-72 240Z Steering Column Clamshell Set By jfa.series1 $100.00 WANTED COMPLETED Wanted Early Series Ash Tray By Mike NO VALUE SPECIFIED FOR SALE COMPLETED New rear carpet pieces (two) - SOLD By jhm $25.00 RECENTLY BROWSING 1 MEMBER 72SLOZ Expiring Soon Need a 82-83 280zx turbo distributor By Dat 20 hours and 10 seconds $500.00 Need 240z Windshield - without blue tint By inline6 1 day and 2 hours $11,500.00 1982 280ZX coupe- 5 speed By Thecarnut 3 days and 5 hours Various 240Z parts By Richard McDonel 5 days and 5 hours $16.00 Datsun Z 50 years key ring fob By Sean Dezart 5 days and 22 hours Advertiser 72SLOZ Date 07/19/2020 Price $16,995.00 Category Cars for Sale Year 1972 Model 240Z Vehicle Identification Number (VIN)
 -
View Advert 1972 240Z for sale Long time owner (since 1985) -- restored 2.5 times (just dropped new rebuilt engine in) classic 240Z. Most of it's life in California, but now in North Carolina and ready for it's next loving caretaker. Extensively upgrade with complete new interior in 2006; New (mid life crisis red) paint in 2004 and garaged most of time since then. With rebuilt engine, I went back to original SU carb setup, but have Weber DCOE 40 carbs as part of price (with manifold too) Molded in body kit (see pictures) - has a minor fiber glass ding in front left under headlight that will need refurb otherwise all is in great shape as you can see! Recaro powered seats + have original Z seats that were reupholstered in ~1995 as part of price; Also have a new right tail light in box that I have yet to swap in. Original wood steering wheel if you want to go back to to retro Car is not registered in NC as I have had it in storage largely last 5 years but it is time to finally part ways (I have threatened to sell it many times !!). Love this car, but it needs a new owner for the next phase of it's life -- will be happy to find an enthusiastic caretaker for this. Centerline wheels are premium as well! The first picture (in the gas station) is recent in North Carolina (even though CA plates...) The second image is from the paint process in 2004 -- Color is an Acura NSX Red (What I call mid life crisis red...). Original color of car was Orange. Engine: Rebuilt bottom end -- less than 400 miles on it; Head is a Maxima Head (higher compression) with about 15K miles on it Advertiser 72SLOZ Date 06/09/2019 Price $19,950.00 Category Cars for Sale Year 1972 Model 240Z Vehicle Identification Number (VIN)
-
Schematic for hookup: Visio-240z fuses.pdf
-
I was able to resolve my tach connection by going the Chrysler dual ballast route across the trigger and switched power from the tach. With a 280ZX distributor setup to fire the MSD, I was able to bypass the stock ballast and remove the condensor (no points in this setup!). My setup: 280ZX disty with E12-80 ignition box MSD 6A MSD Blaster 2 Coil Stock 1972 Tachometer (Current Driven) Removed condensor Removed stock Ballast Chrysler dual ballast (5 Ohm side used) Short across original stock ballast resistor (optional, but this ballast resistor is not needed for the 280ZX disty setup) This means connecting the green/white wire and black and white wire at the ballast resistor together. Note the black and white wire at the ballast is NOT the same as the black and white wire originally hooked up to the coil positive...) 280ZX disty wired to MSD: Brown wire from E12-80 to MSD 6a red, one side of Chrysler 5 Ohm ballast resistor, original black/white wire from tach Blue wire from E12-80 to MSD 6a white trigger and other side of 5 Ohm ballast resistor MSD 6A Black wire to coil (-) and MSD 6A Orange wire to (+) of coil. These should be the ONLY wires connected to the coil, per the MSD manual. You're good to go...assuming that you have also hooked up the power and ground to the MSD box per the instructions. I found mounting it along the wheel wheel under the coil to be the most convenient, which meant extending the power lead (use a larger guage wire to extend the power lead...). I also mounted the chrysler dual ballast right above the MSD in that location. This makes doing all of the hookup at the coil and disty much cleaner at the tradeoff of have a bit longer power lead...but I found no issues with the performance of the unit this way. I will post a schematic of the above to help.
-
Beezee, Thanks for your post. My tach is like the picture with the wiring harness attached. The picture on the right is apparantly a 280z tach and is NOT the same tach as the one on the left. They look similar though... Question is: Are the 240Z tach internals the same once you remove the white wire inductive loop that is looped around the stud on right? Also: Is the resistor you refer to the original ballast and if not/what value is it? hopefully the FSM indicates this. Thanks for your help.
-
Actually I would prefer not to swap... Some of the solutions posted refer to using a chrysler ballast acroos the coil...while others refer to an adapter (8910) from MSD. Also I am not sure which solutions apply to '3 wire' tachs and which apply to '4 wire tachs' (like mine. 3-wire tachs originally hooked up to the (-) term on the coil; whereas 4 wire connected to the (+) terminal. Options: 1) figure out how to make my 4-wire tach work 2) swap out for a newer 3-wire model 3) convert to a Autometer tach (least desired)
-
Zup, Any resolution on this? I would like to swap in a newer tach into my 240z as I have converted to a MSD 6a ignition system. Somewhere else I have read that all one has to do is 'remove' the inductive loop on the 240 tach and connect directly to the MSD tach output signal...presumably to the stud that the inductive loop is fixed to. any insight?
-
Troubleshooting electrical problems on older Z's is often an art. Schematics, such as the Haymes manual are good clues, but often not exact. I thought I'd post a help note for those trying to fix brake light problems as I recently did on my 72. The circuit for the brake lights is more than just power though the brake switch at the pedal. The brake lights share function with the hazard switch as well as the individual left and right turn signals. Therefore, the circuitry involves routing through the hazard switch as well as the turn signal controller. Power for the brake lights is direct from the battery (it is not gated by the ignition/accessory key) through a 20A fuse located at the bottom left of the fuse box under the center console access plate under the radio. This green/red (on my car) wire feeds the hazard flasher and hazard switch. In the "OFF" position for the hazard switch, the brake lights are directly controlled by the action of the switch at the brake pedal. That switch will CLOSE when the brake pedal is depressed and removes pressure from the switch (opposite of how you might imagine it). When in the OFF position, the hazard switch makes a simple connection from the incoming power (terminal 6) to another 'outbound' wire connected to terminal 7. This wire connects to the turn signal combination switch located within the plastic clamshell cover surrounding the steering wheel. Turn Signal interaction ================= When the turn signals are not engaged (left OR right), the brake 'power' is connected directly to the left and right brake lights through the combination switch. When either of the turn signals is 'ON' a different circuit is connected through the combination switch which allows the corresponding turn signal to flash while the OPPOSITE light is controlled by the brake 'state' - ON or OFF depending upon the brake pedal switch. If you have a Haynes manual or other schematic, study the connection logic diagram to understand in more detail. Other than the wires that make the run back to the actual turn/signal brake lights from the combination switch, most of the cicuitry is readily accessable from under the console. Problem areas =========== Obviously, 30+ year old switches are the most likely to have an issues (corrosion, wear and tear etc.) The brake switch at the pedal is the easiest to check. A simple ohm meter can be used to check the operation of the switch once you unplug it from the green/red wires than come FROM thehazard switch and TO the combination switch. The switch will be OPEN when the brake pedal is in it's non deployed state and closed (shorted) when the brake pedal is pressed. Remember, pushing the brake releases pressure from the brake switch mechanically, but closes the electrical circuit. Hazard Switch =========== This is where my problem was. In the 'OFF' state, this switch connects the brake switch to the combination switch. It was in this 'OFF' state that I had an intermitent connection and the brake lights did not work when the brake pedal was pressed. Corroded contacts to be fixed by replacing the whole switch. In the 'ON' state, the flasher switch controls the lights directly independently of how you have the brake pedal. Combo Switch =========== This is fairly accessable, once you remove the four screws holding the plastic clamshell cover at the steering wheel column. The green and yellow wire coming from the hazard switch (through a modulare connector) is easy to test for 12V when the brake pedal is depressed (with the hazard switch 'off'). If you are not getting 12V (or whatever the battery is putting out depending on it's charge state) at this terminal point on the turn signal when the brake is depressed, you problem lies 'upstream' from the combination switch. If you are getting battery voltage at this point when the brake pedal is depressed, your problem lies 'downstream' in the wiring that feeds the actual lights. This combo switch is a weak point in the Datsun design and gets a fair amount of 'abuse' from those that follow the law and actual use turn signals :paranoid: ! Next on the list of problem areas are the numerous pin in socket connectors used to connect up the various modules/connectors. Check that these are well seated and give them a light wire brussing on the male connector if you have such when you pull them apart. Obvious, check that your bulbs are functioning before you start debugging the switches and wires. They can be checked by turning on the hazard switch (as well as the turn signals with the ignition 'on') If the lights are working when you turn on the hazard switch, all of the circuitry past the combo switch is in order. Last on the list is the actual wiring. 30 year old copper can corrode, particularly if the insulation has been nicked or cut in any way. My experience is that wire itself is not too likely a culprit, but rather the connectors and switches. The fuse controls the hazard switch, so if that works, the fuse is OK. If the hazard and brake switches do not work, then check the wiring between the fuse box and the hazard switch. Your mileage may vary...