
ckurtz2
Free Member
-
Joined
-
Last visited
Everything posted by ckurtz2
-
I would agree it is oil-related. I did switch to the 280zx Turbo Oil Pump, but that did not help. I have also changed the oil and that helped, but noise was back within a few starts. It is internally oiled with external oil bar blocked off. I am running Valvoline VR1 Racing Oil that is 20w50. Yes, for now just try and focus on the noise at startup. Sounds kind of like a clack clack clack before going away. in the MP3 it is from 019-022. I wish I had a better microphone, but the fan drowns out the noise. It is concerningly loud if I could find a device to pick up the noise properly. When the noise comes back when the motor is hot (not in any of the videos I provided) like I have done the screwdriver test many times and it definetly comes back to the head where the cylinder 1 intake valve is, or maybe one valve further back. Could also be in Cam bearing area around there. However, the rest of the valve cover is quiet.
-
Hey Guys, I have been trying to tackle an elusive problem on my Z that has been happening since late last Spring. The issue is that During a cold start, the engine taps extremely loudly for the first few seconds, then goes away and it sounds normal. Then once it is warm it seems to just slightly tap, but not nearly as loud. If I let it sit for a little and then start it hot it will tap loud again during startup. However, sometimes about every 10 starts (different days) during hot or cold start I won't hear any noise. I tracked the tapping sound to the head toward the front of the valve cover. I am thinking 2 or 3 valves back from the front. However, I have set valve lash multiple times (confirmed good by other peers) and it still taps. I even tightened much tighter than spec (temporarily) and the tap is still there. Rocker pad, lash pad, cam are smooth and not damaged. Rocker arm was replaced, and no difference. My thought is whatever the problem is, it is oil-related, because it happens during a cold start and oil isn't in the head yet, or when the oil film is thinner when hot (just my guess). Keep in mind this head was rebuilt not too long before the noise appeared and was good for several hundred miles until this started happening. Can someone share insight on what else it could be and how to test it? maybe exhaust leak? (I don't think it is, you can be the judge from the video/ audo recording). Could a valve spring or guide do this? Maybe the rocker pivot (do these even go bad). I am kind of stumped. I did have a valve rocker pop off the lash pad around the area where I heard the noise. But the noise started long before that happened, and the rocker hasn't popped off since, so I would not think they are correlated, but not sure. Here is link to that thread. 280z engine sound.mp3 Thank you in advance.
-
View Advert 280z Seatbelt to Shock Tower Small Trim Tab Really in need of this small trim tab for my seatbelt. I am rewebbing mine, and the one I currently have has a broken tab and thus doesn't work. I don't want or need the retractor mechanism. Ideally, hopefully, some kind soul on this forum has an old belt that can be cut so this piece can be removed, or disassemble their retractor so u can remove it. This would be a huge help for me!!! I also need the little Nissan button caps that go on the seatbelt reciever, but I don't need the recievers! Advertiser ckurtz2 Date 12/11/2023 Price Category Parts Wanted Year 1977 Model 280z
-
I will keep you in mind if anything changes. Out of curiosity what would you have wanted for it?
-
shoot just came back to take this post down, didn't think I would get a hit that quick. Bummer.... Thank you though @Terrapin Z, that one looks really solid. That silk face would have cleaned right up, the problem is usually around the charge light where it rusts.
-
@Captain Obvious beautiful! Thank you🙂
-
Hey guys, I am rewebbing my seatbelt and ran into a problem For the life of me I can't get the new webbing through the small slot that is available. Is this thing supposed to disassemble further before I put the webbing in, or does anyone have experience on how to do this? I have tried tying twine to the belt and feeding it through the mechanism. Then I would tug on the twine to pull the belt through, but I still can't seem to do it. It is just too tight to get the belt to feed in that tight of a circle. I found this @Captain Obvious , but unfortunately, pictures are no longer available. I have pulled off the plastic pieces, but my latch mechanism works great, and the spring is in good order (was quite surprised when it exploded into a spaghetti mess. Did some reverse engineering to get it back. All good now). Any help is appreciated, thank you!

-
View Advert 1977-1978 Voltmeter Looking for a voltmeter in really good condition. Outside can show wear, but the gauge face and internals need to be perfect. I can restore the backing and plastic, just not the silk lined face or plastic internals. Advertiser ckurtz2 Date 12/05/2023 Price Category Parts Wanted Year 1977 Model 280z
-
@240Znomad bummer. Well looks like I am next on the list to take a stab at it. You can check up on my most recent thread to see what goes on.
-
Okay now for some preventative action. Now the only lead I have so far all circulates around the cam. I am running the 260s comp cam https://zcardepot.com/products/performance-camshaft-comp-racing-cam-240z-260z-280z?variant=19279549825137 I am still using the stock springs that the car had when I got it. So lets assume they are 45+ years old. Should I do something like swap to new 280z springs or slightly stiffer Gen 1 300zx springs? Do the valve springs really loose stiffness over time. I have read so far Isky or Schnieder springs are too stiff for such a small cam, but the 300zx ones are the best medium. Now the comp cam did require a different lash pad. I forget the size now. Anyways, I read up that different lash pads require a deeper valve spring retainer... I am using the stock ones. I looked at photos of a stock valve train and the lash pad is indeed sitting deeper than mine. I am thinking this is maybe causing excessive play in the lash pad area. Mine did look pretty cockeyed where the rocker had pushed off it in the previous post. Here are photos for comparison of stock vs my lash pads and the rocker. Does anyone have experience with this? Not trying to shotgun buy parts at all. @Zed Head you are good, hah. It would have been on me if I pulled the head. You at least got me off the EFI trend, man that was a dark hole... always is.
.thumb.jpg.a01d4fd2c6590fa4fd517704cc9d14af.jpg)
.thumb.jpg.9e5f0525121440a5dd3be4daecf75df0.jpg)
-
@240Znomad What ended up being your issue? Experiencing the same type of issue and I am curious how you resolved yours.
-
Mystery solved @Zed Head @SteveJ thank you both. You got it, Steve. Pulled the valve cover again and took a look. The rocker had jumped off the lash pad to rest on top of it. Not sure how I missed this obvious problem. Anyways, popped it back in place, cleaned the spark plugs, and it now runs like a top. It is cammed and I checked the valve lash and it actually looked perfect for the stage one Comp Cam. Not sure how it popped off then? Must have happened on start-up yesterday, somehow. Any ideas on why this may occur? I will see if that ticking noise is gone for good once it's cold. I haven't heard it since during this process. It is possible that maybe the rocker had been working its way off for a while, and reached its final straw. Still no conclusions for the oil on plug. Could be that the rocker wash pushing valve at an angle. No smoke out tailpipe again. People be wary of going straight to EFI for diagnosis, the loss of compression was throwing off the vacuum and AFM vane enough to cause woes in that system.
.thumb.jpg.ad8463e6052d60128de8fa5bfba01bb4.jpg)
-
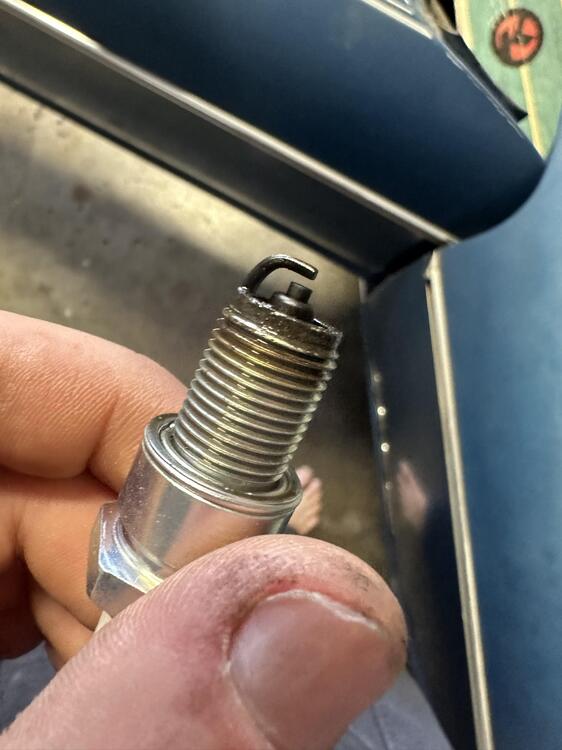
Will check it out later today. Darnit just retorqued the valve cover. Here is a photo of the plug. Really at this point head has to come off anyways:/
-
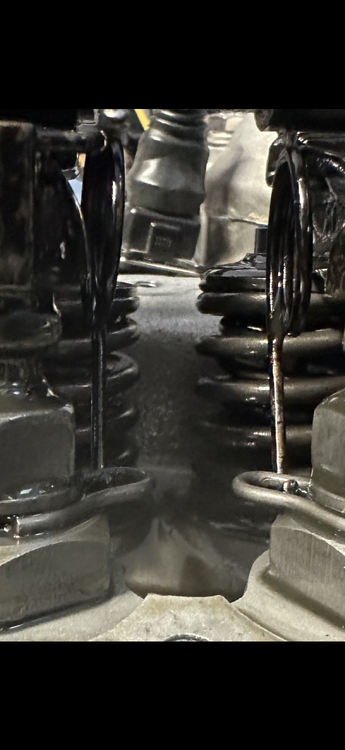
You got me onto the right track @Zed Head. Sad to say it is a bad day, a very bad day. Anyways, pulled #1 plug again and really paid attention. I determined the fluid was oil and not gas. The head gasket looked possible. Okay, compared the smell to the dipstick, and man it matched, so the fluid was indeed not gas. Did a compression check and shows 0psi with the throttle fully depressed. Really was thinking head gasket at this point. All other cylinders showed close to 160psi. Should have just done a compression check first, but the motor has like 300 miles or less on it since a head rebuild, and usually its the Bosche system giving me hell. I pulled the valve cover again and performed a closer look. To me, it looks like the intake valve on #1 is stuck slightly open. I have a photo showing the spring looking like it is not all the way up when both cam lobes aren't touching.. I Wish I had a leak down tester to properly diagnose. I am thinking that the valve is bent. I would assume this would be from valve float, but I really did not push the engine hard yesterday, and that would cause immediate damage, not appear once parked. Now, the car was going to be sent to a shop for a ticking noise I had been hearing on startup for half a year. It was kind of loud, happened when cold (however I did hear it a few times with warm engine), and only happened on startup for about 2 to 3 seconds. I figured it was just the engine building oil pressure, or maybe timing chain slap. Either way I was going to have a shop check it out to make sure. I noticed no issues with the noise besides the sound at startup. I still can't confirm that this noise was #1 or a separate issue, but I am betting they were related. Now if it was the valve wouldn't that bend or get stuck while driving and then the engine would run like crap? I find it super odd that the car pulled into the driveway perfectly, sounded great. Then the next morning it has 0 compression. Maybe when the car cooled down it froze the valve? What would that entail is wrong with the head? Oh, so many questions.
-
@Zed Head good point, 1 was very wet with fluid all over (smelt like poorly burnt gas) and 4 had little dots of moist stuff on them, but weren't soaked. I think I will do a compression test this week to see if a head gasket is possible. No mixing of oil or coolant, so only failure would be from cylinder to atmosphere or between cylinders. Oops my fault, forgot to mention I am running the Pallnet fuel rail with an aftermarket FPR. I can check to see if anything is leaking through the vacuum line.
-
Could be, hope not. Wouldn't this cause white smoke out the tailpipe? I would admit the exhaust smells very odd from the usual, but its running so bad I am not alarmed by it. What would the plugs look like? I pulled 1 and 4 earlier today and 1 was wet and black and 4 was black and damp. This is after attempting to diagnose all day with lots of poor running and cranking, so I would think the wet is gas.
-
Hey Guys, Back again, always with a broken car 😕 Anyways, I have been redoing my interior over the past six months with dash/ dash harness/ gauges etc all pulled. Over this time period, I have been starting and warming up the car under the pretense that the entire EFI harness is separate from all that stuff. It has started and idled well countless times during this several-month process. Anyways, I got it together yesterday enough to get a seat in and go for a nice cruise around the neighborhood (still with no dash/gauges etc) to get the diff oiled and such. It ran perfect, no hesitations, good idle/part throttle/ WOT etc. Pulled it into the garage and left it there overnight. Started it this morning, because I was all of a sudden very proud of the car again after all the interior work. Anyways it was almost slow to turn over, but then the starter sped up and sounded like normal. Kind of started like a locamotive, puff puff puff then died. It will stay running under part throttle, but sounds like a 2 stroke running on 1 cylinder. Anyways, typical. Started by checking if it had gas, put in 5 more gallons just to make sure (don't have gauge). Checked fuel pump, runs good under start and "on" when I open the AFM vane. FPR works good holding constant pressure. pulled the supply wire off the dizzy cap and put it next to ground. Turned over engine and saw the spark zapping so I know I have decent spark (looked really good). Pulled out the ole EFI Bible and popped the ECM module harness off. Did the full diagnostics, every ground checked in speck, AFM marked good at the harness, CTS read proper Ohm for the ambient temp, throttle sensor good. Did voltage tests, all good as per EFI Bible. Ok well just to make sure, checked voltage at injectors, all good which means dropping resistors are good. Both pins on each of the injector clips read +12.6 volts with one clip connected at harness and one at chassis ground. not sure if both should read voltage or not, but they did. Ok started it and held throttle open. Pulled injector plugs at each cylinder 1 at a time. Affected RPMs on all cylinders, so all my cylinders firing just like crap. Ok, so I decided to peek mechanical timing, popped valve cover off aligned at TDC and cam sprocket looked good with notch in proper place as per FSM and had the nice dog ear cam lobes. Dizzy rotor looked also like it was in right place. Sweet, so I am getting spark, getting some sort of fuel, definitely air, etc. Pulled plugs and slightly wet and freshly black which means running rich. Interestingly enough, no black smoke or other smoke out the tailpipe though. Any ideas of what could be going on here? I am not running a cold start valve, Thermo time switch, or BCDD. It is definitely very weird that I parked it and over night it has gotten this bad. I think some sort of contact got hot and then disconnected when cooled. Not sure. As always, thank you
-
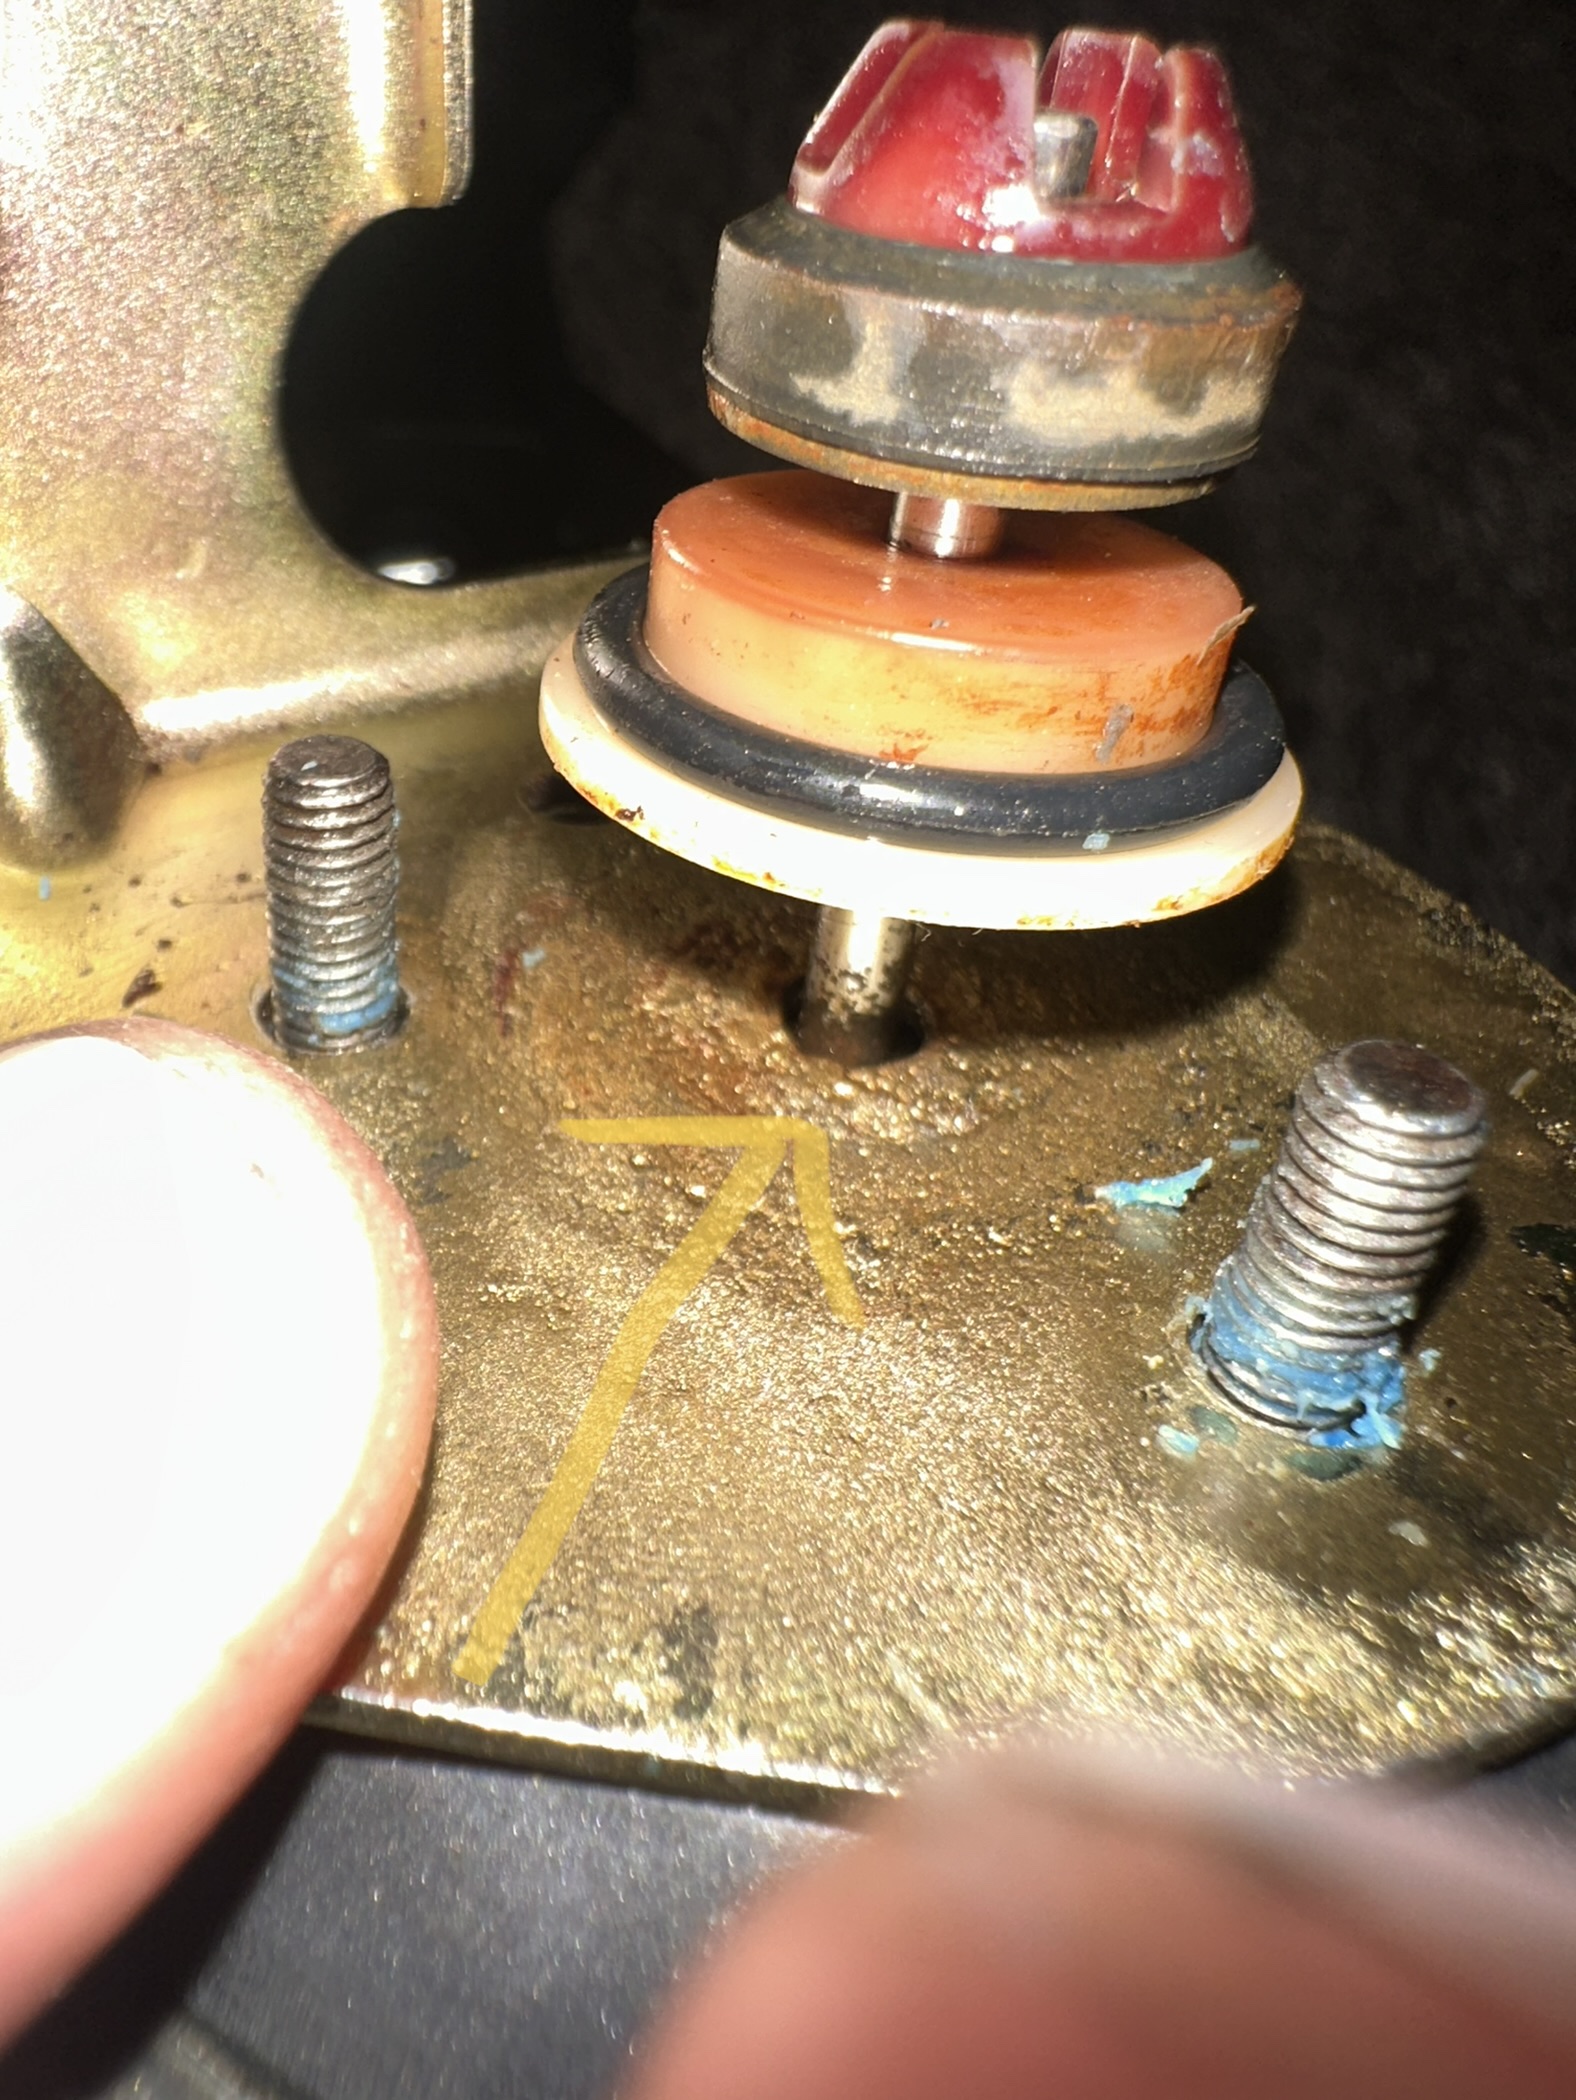
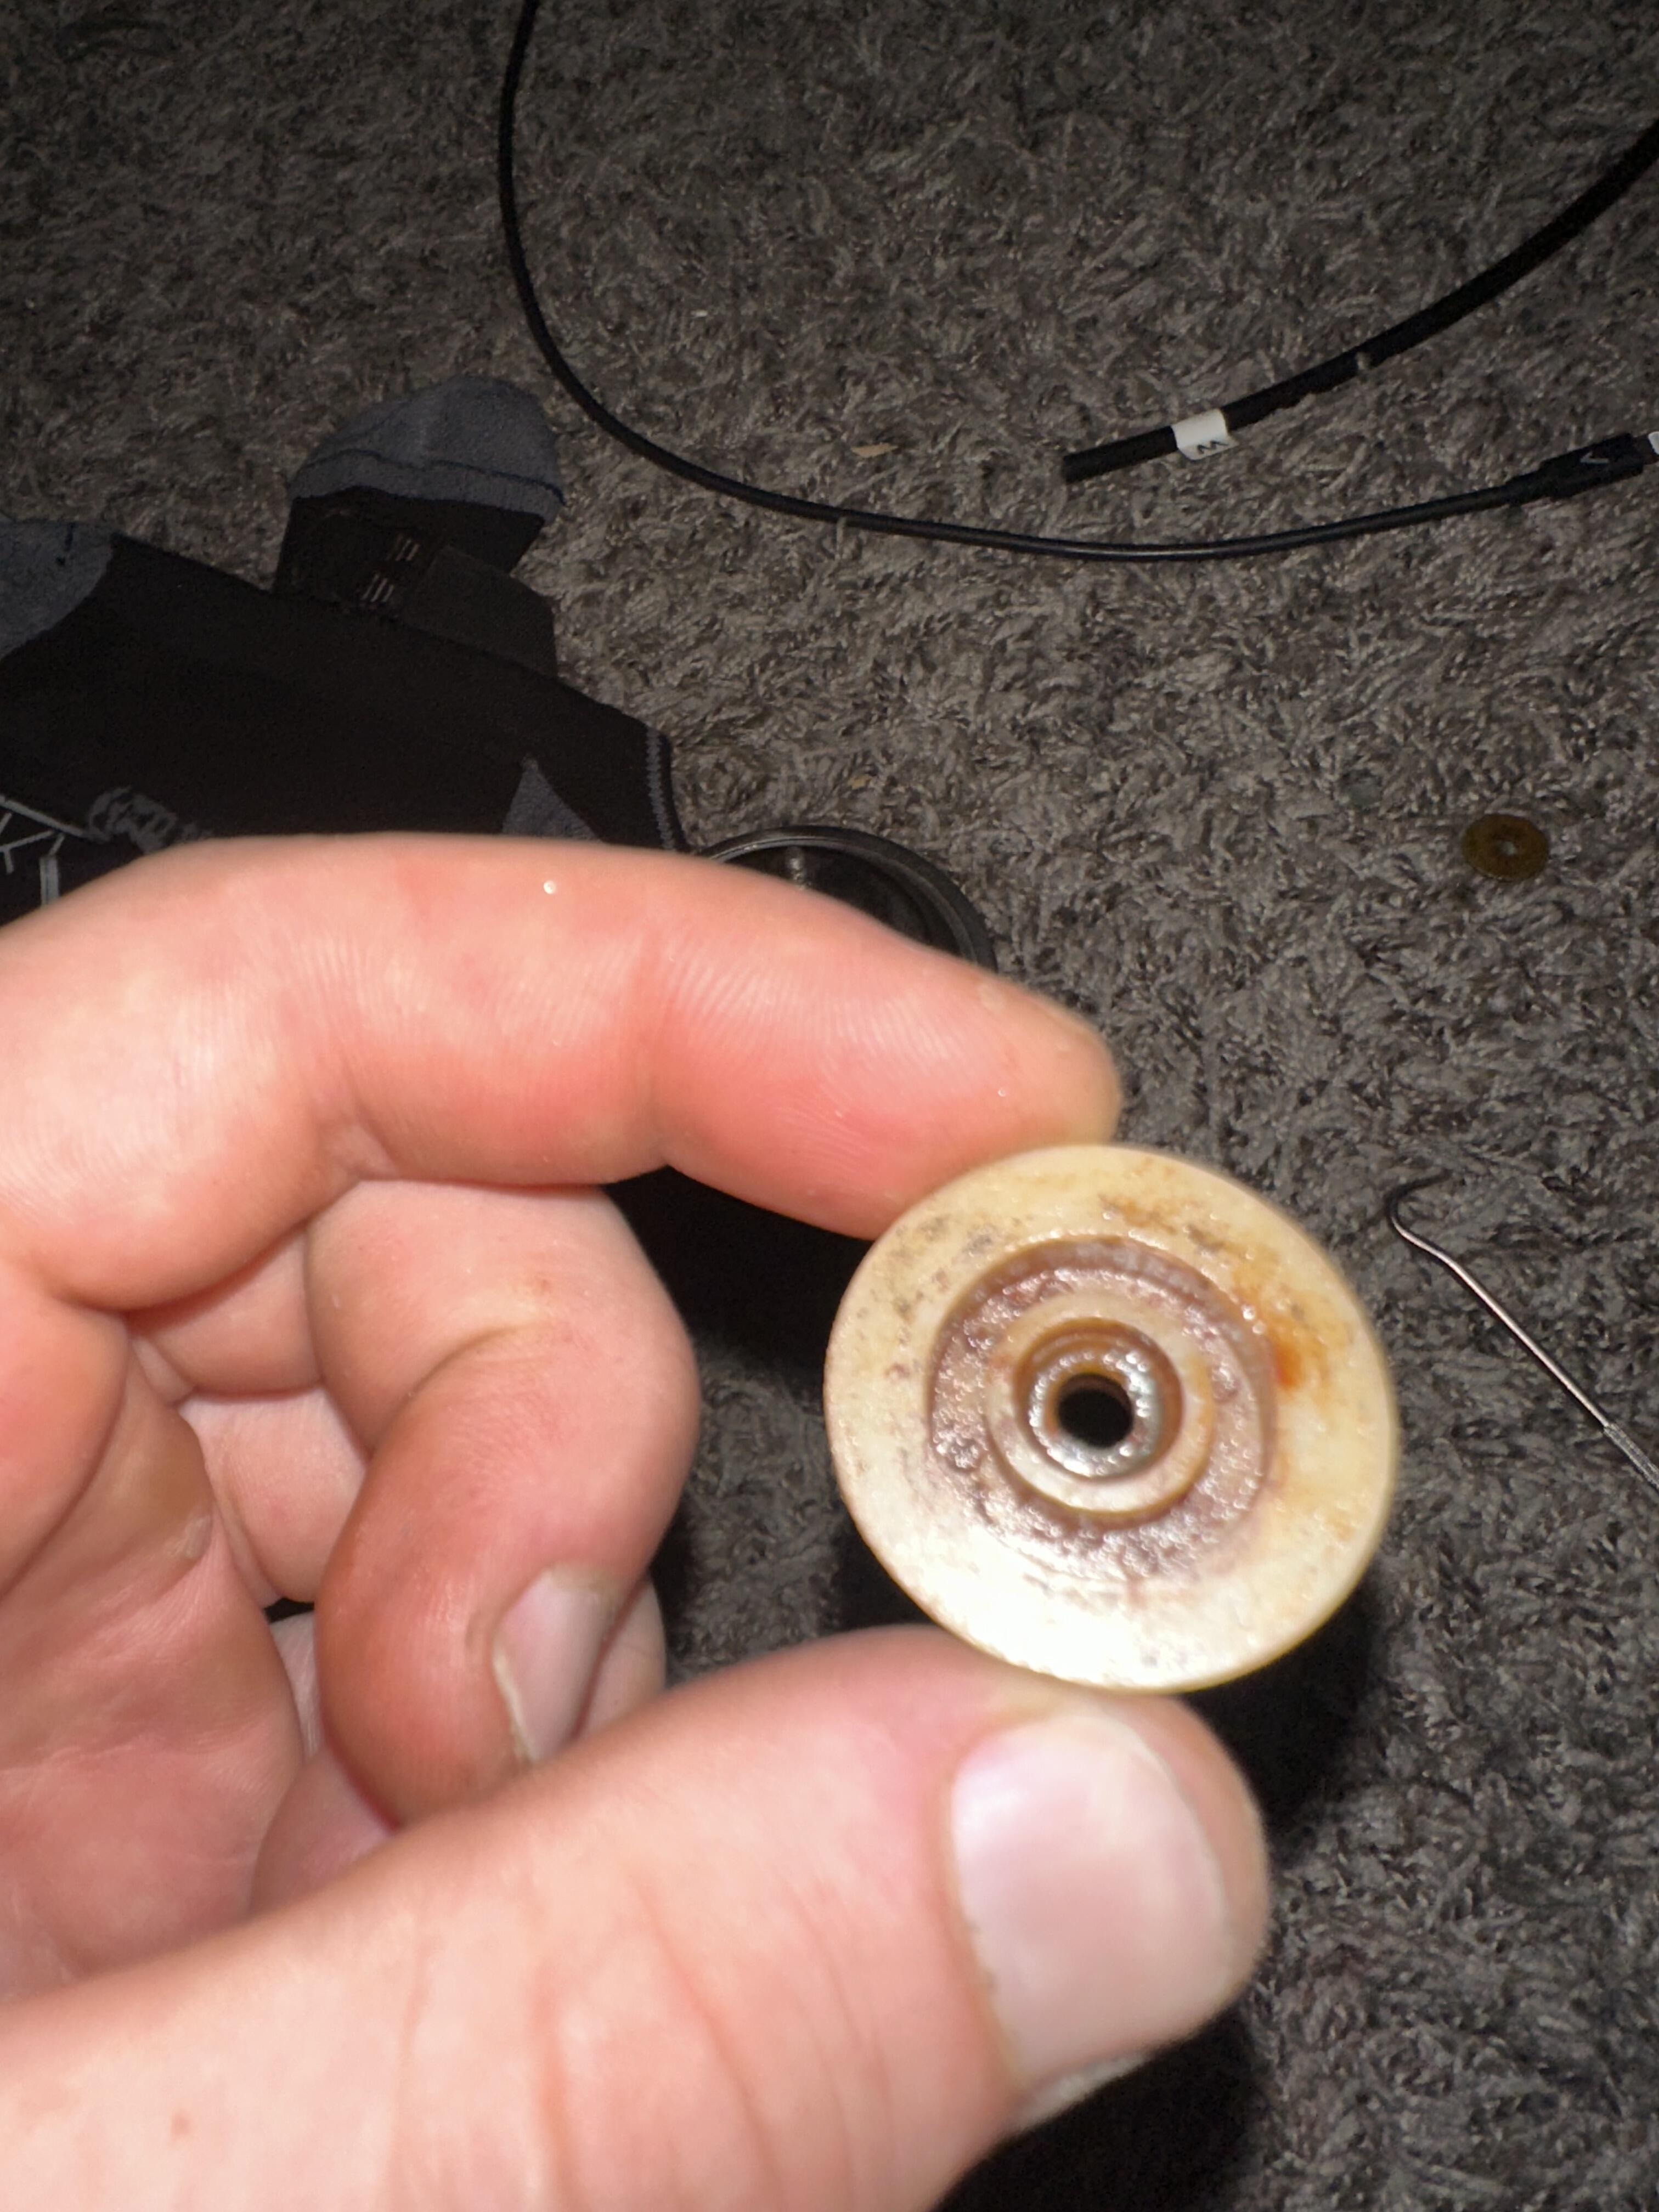
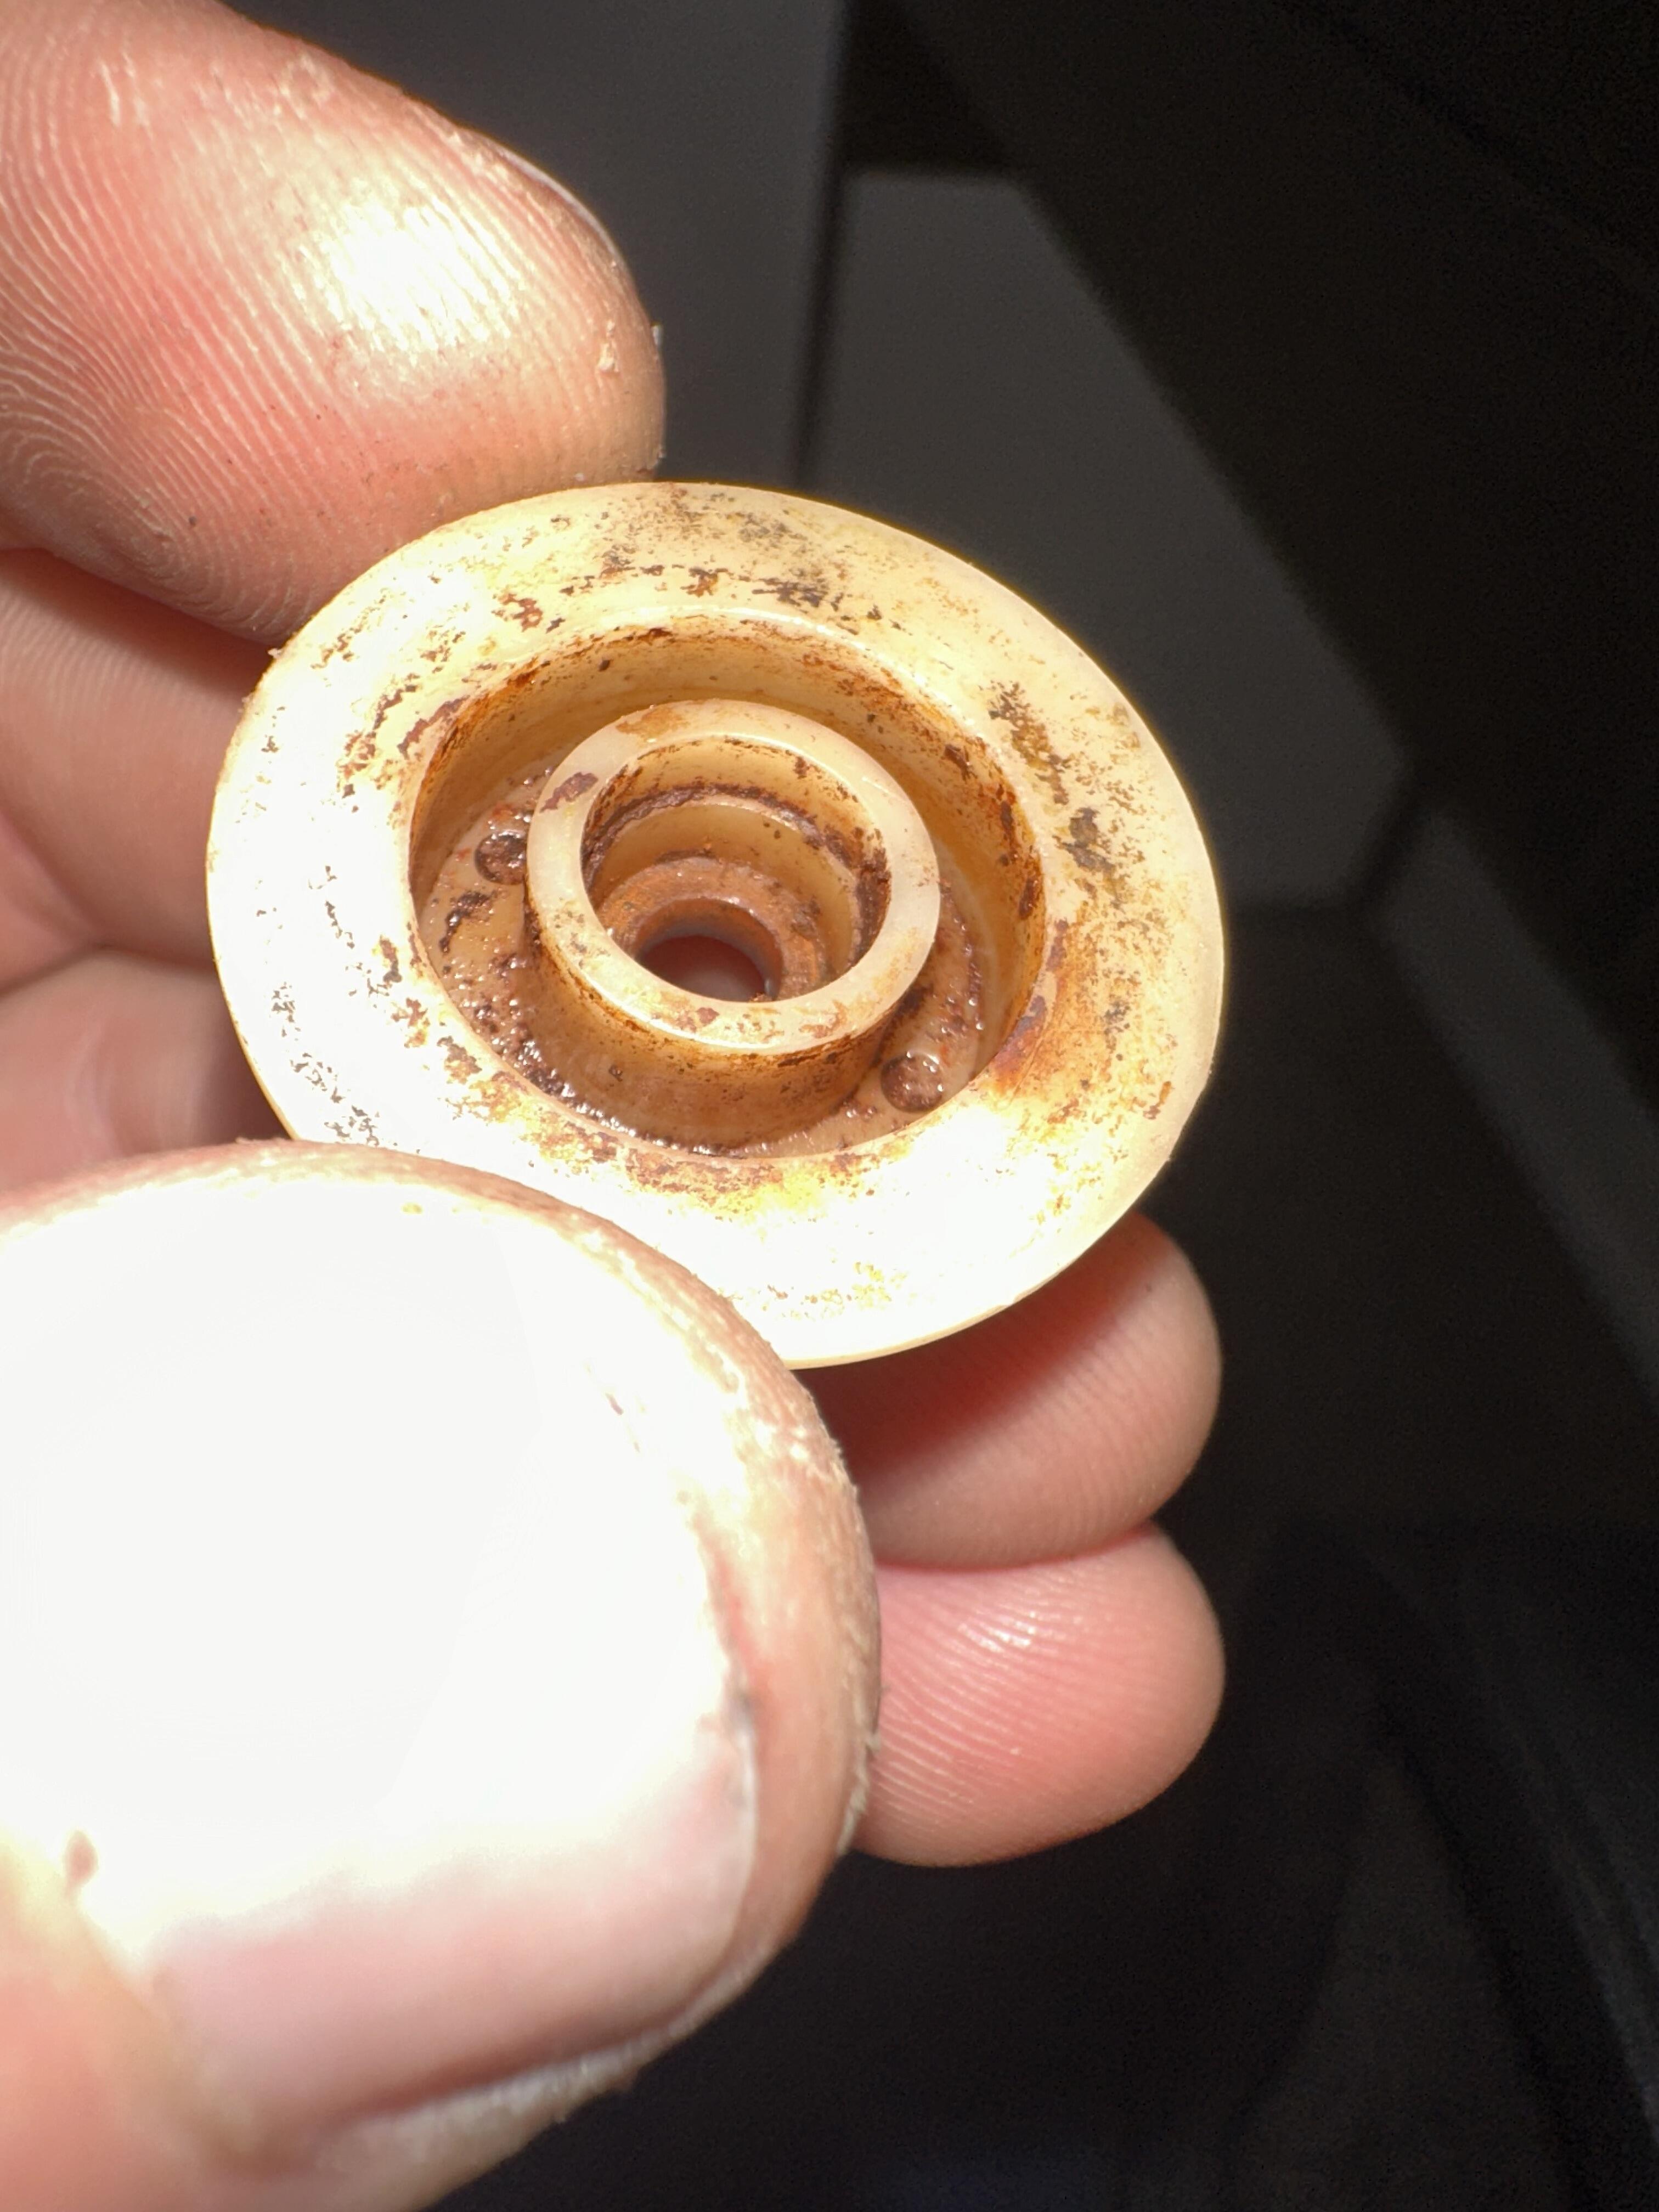
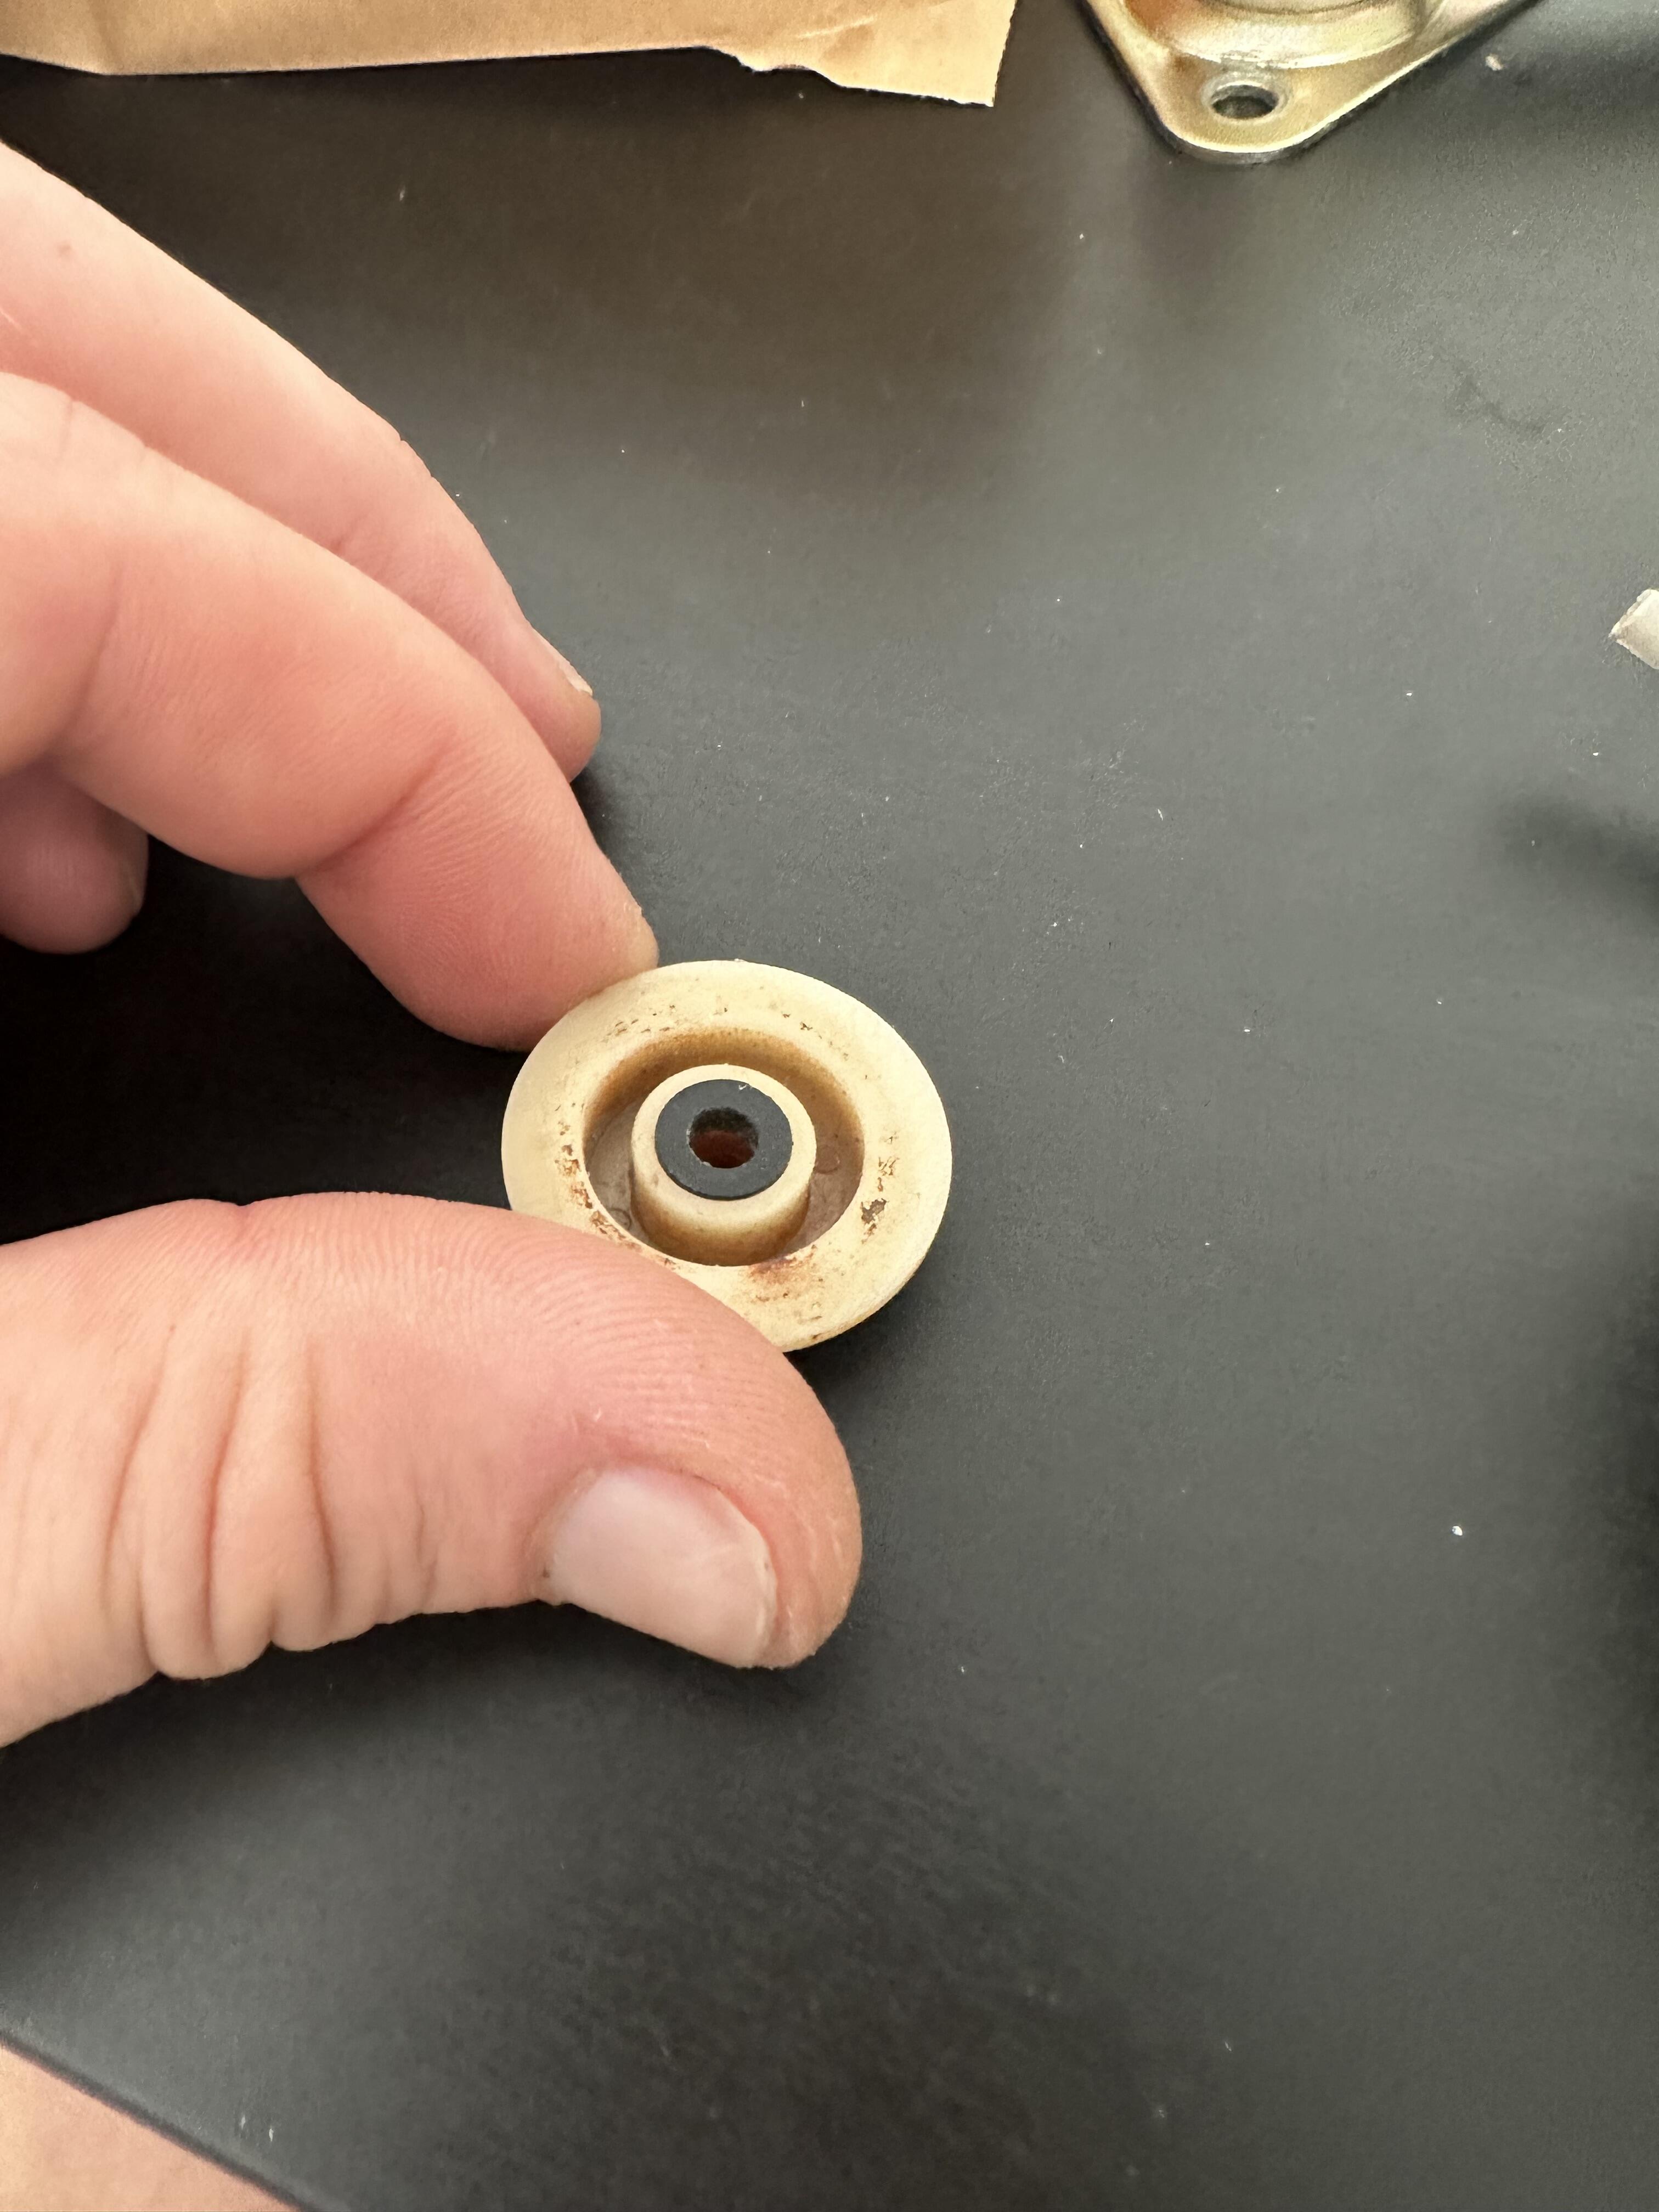
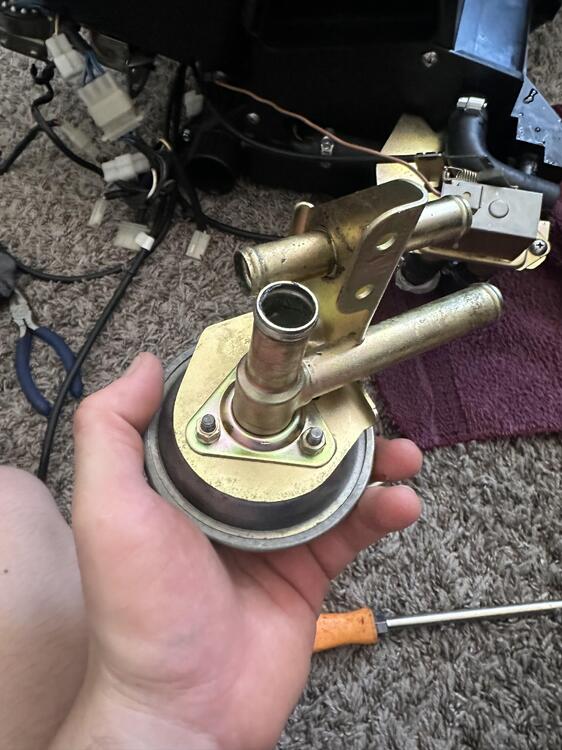
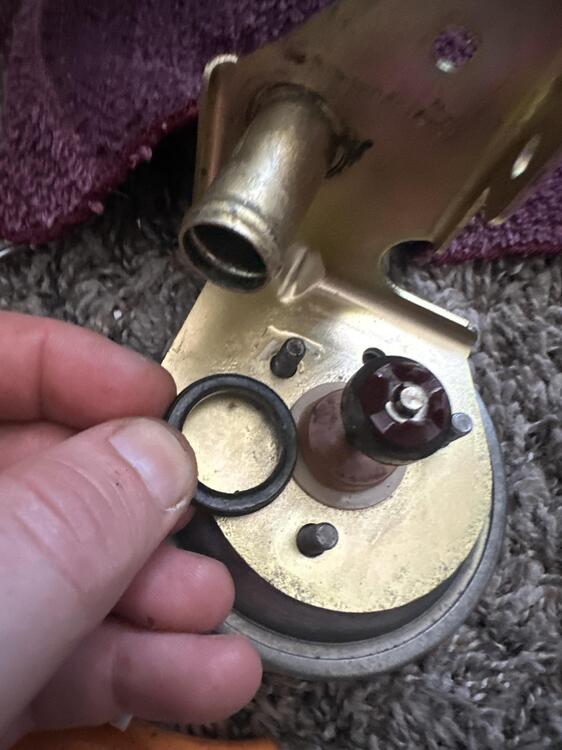
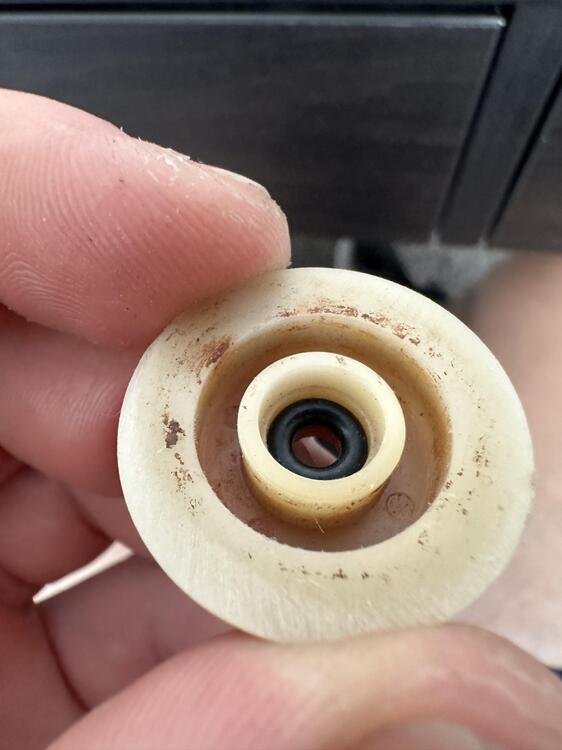
Hey guys, Just figured out how to rebuild the vacuum water valve on a 280z without having to send it off somewhere to be restored or buy a stupid expensive one online (If you can find it. I couldn't). This one is off a 1977 280z. The valve in question is the valve that is actuated when the climate control is put into the heat position and vacuum is sent to open the valve to allow coolant to flow to the mechanically operated coolant valve (That one is operated by the temperature setting). Anyways, mine was leaking super bad like a faucet. I did some research and came across this youtube video. Not sure why its age restricted. Here is the valve out of the car and off of the heater box. (I had it recently replated). Here is the outside seal the video explaned to remove/replace at the base of the valve. I replaced the seal with this O-ring. I found it at ACE hardware. Don't remember the size. Ignore the yellow arrow. I put back together the valve, put it back into the spagetti mess of hoses and vacuum lines on the HVAC unit, then put the whole HVAC unit back in the car. It honestly seemed to leak even more coolant. Wasn't stoked. Removed from the car again, tried a bigger o-ring, and then put everything back. I also torqued the three nuts down much more. Now it leaked even more. Took everthing out of the car again, and decided it must be leaking somewhere else. And then lightbulb, I realized it must be leaking through the center shaft, and not from that outside seal. There are two c-clips that hold the plunger together. Remove the bottom one first, slide the plunger down the shaft, then you can remove the top one. Everything slides off from then on. Sure enough, at the bottom of the plastic base peice at the shaft is another very small seal. Mine was rock hard. You can see that the seal just rides on the lower part of the plastic shaft. The o-ring has nothing to retain it, so I found that really odd. The o-ring in theory could just ride down with the metal rod and seal absolutely nothing when the vacuum is applied to the valve. To correct this flaw I went to ACE again and found an o-ring that fit the shaft tightly and fit inside the plastic peice snug as well. I also went into the hardware section and found a nylon bushing that I could file down to fit inside the plastic base. Thus, it would sandwich the o-ring in and not allow it to move down the shaft. Here is the nylon bushing placed over the oring. I put everything back together and it has sealed perfect so far. One thing I forgot to mention was that my shaft was slightly pitted where it had been leaking at the o-ring. As long as its not too bad it can be fixed. I lapped it with 600 grit, 1000grit, 2000grit, and then never dull. It smoothed the shaft out just fine. IF YOUR VACUUM POT DOESN'T WORK IT IS NOT FIXABLE. You will have to source a different one.


-
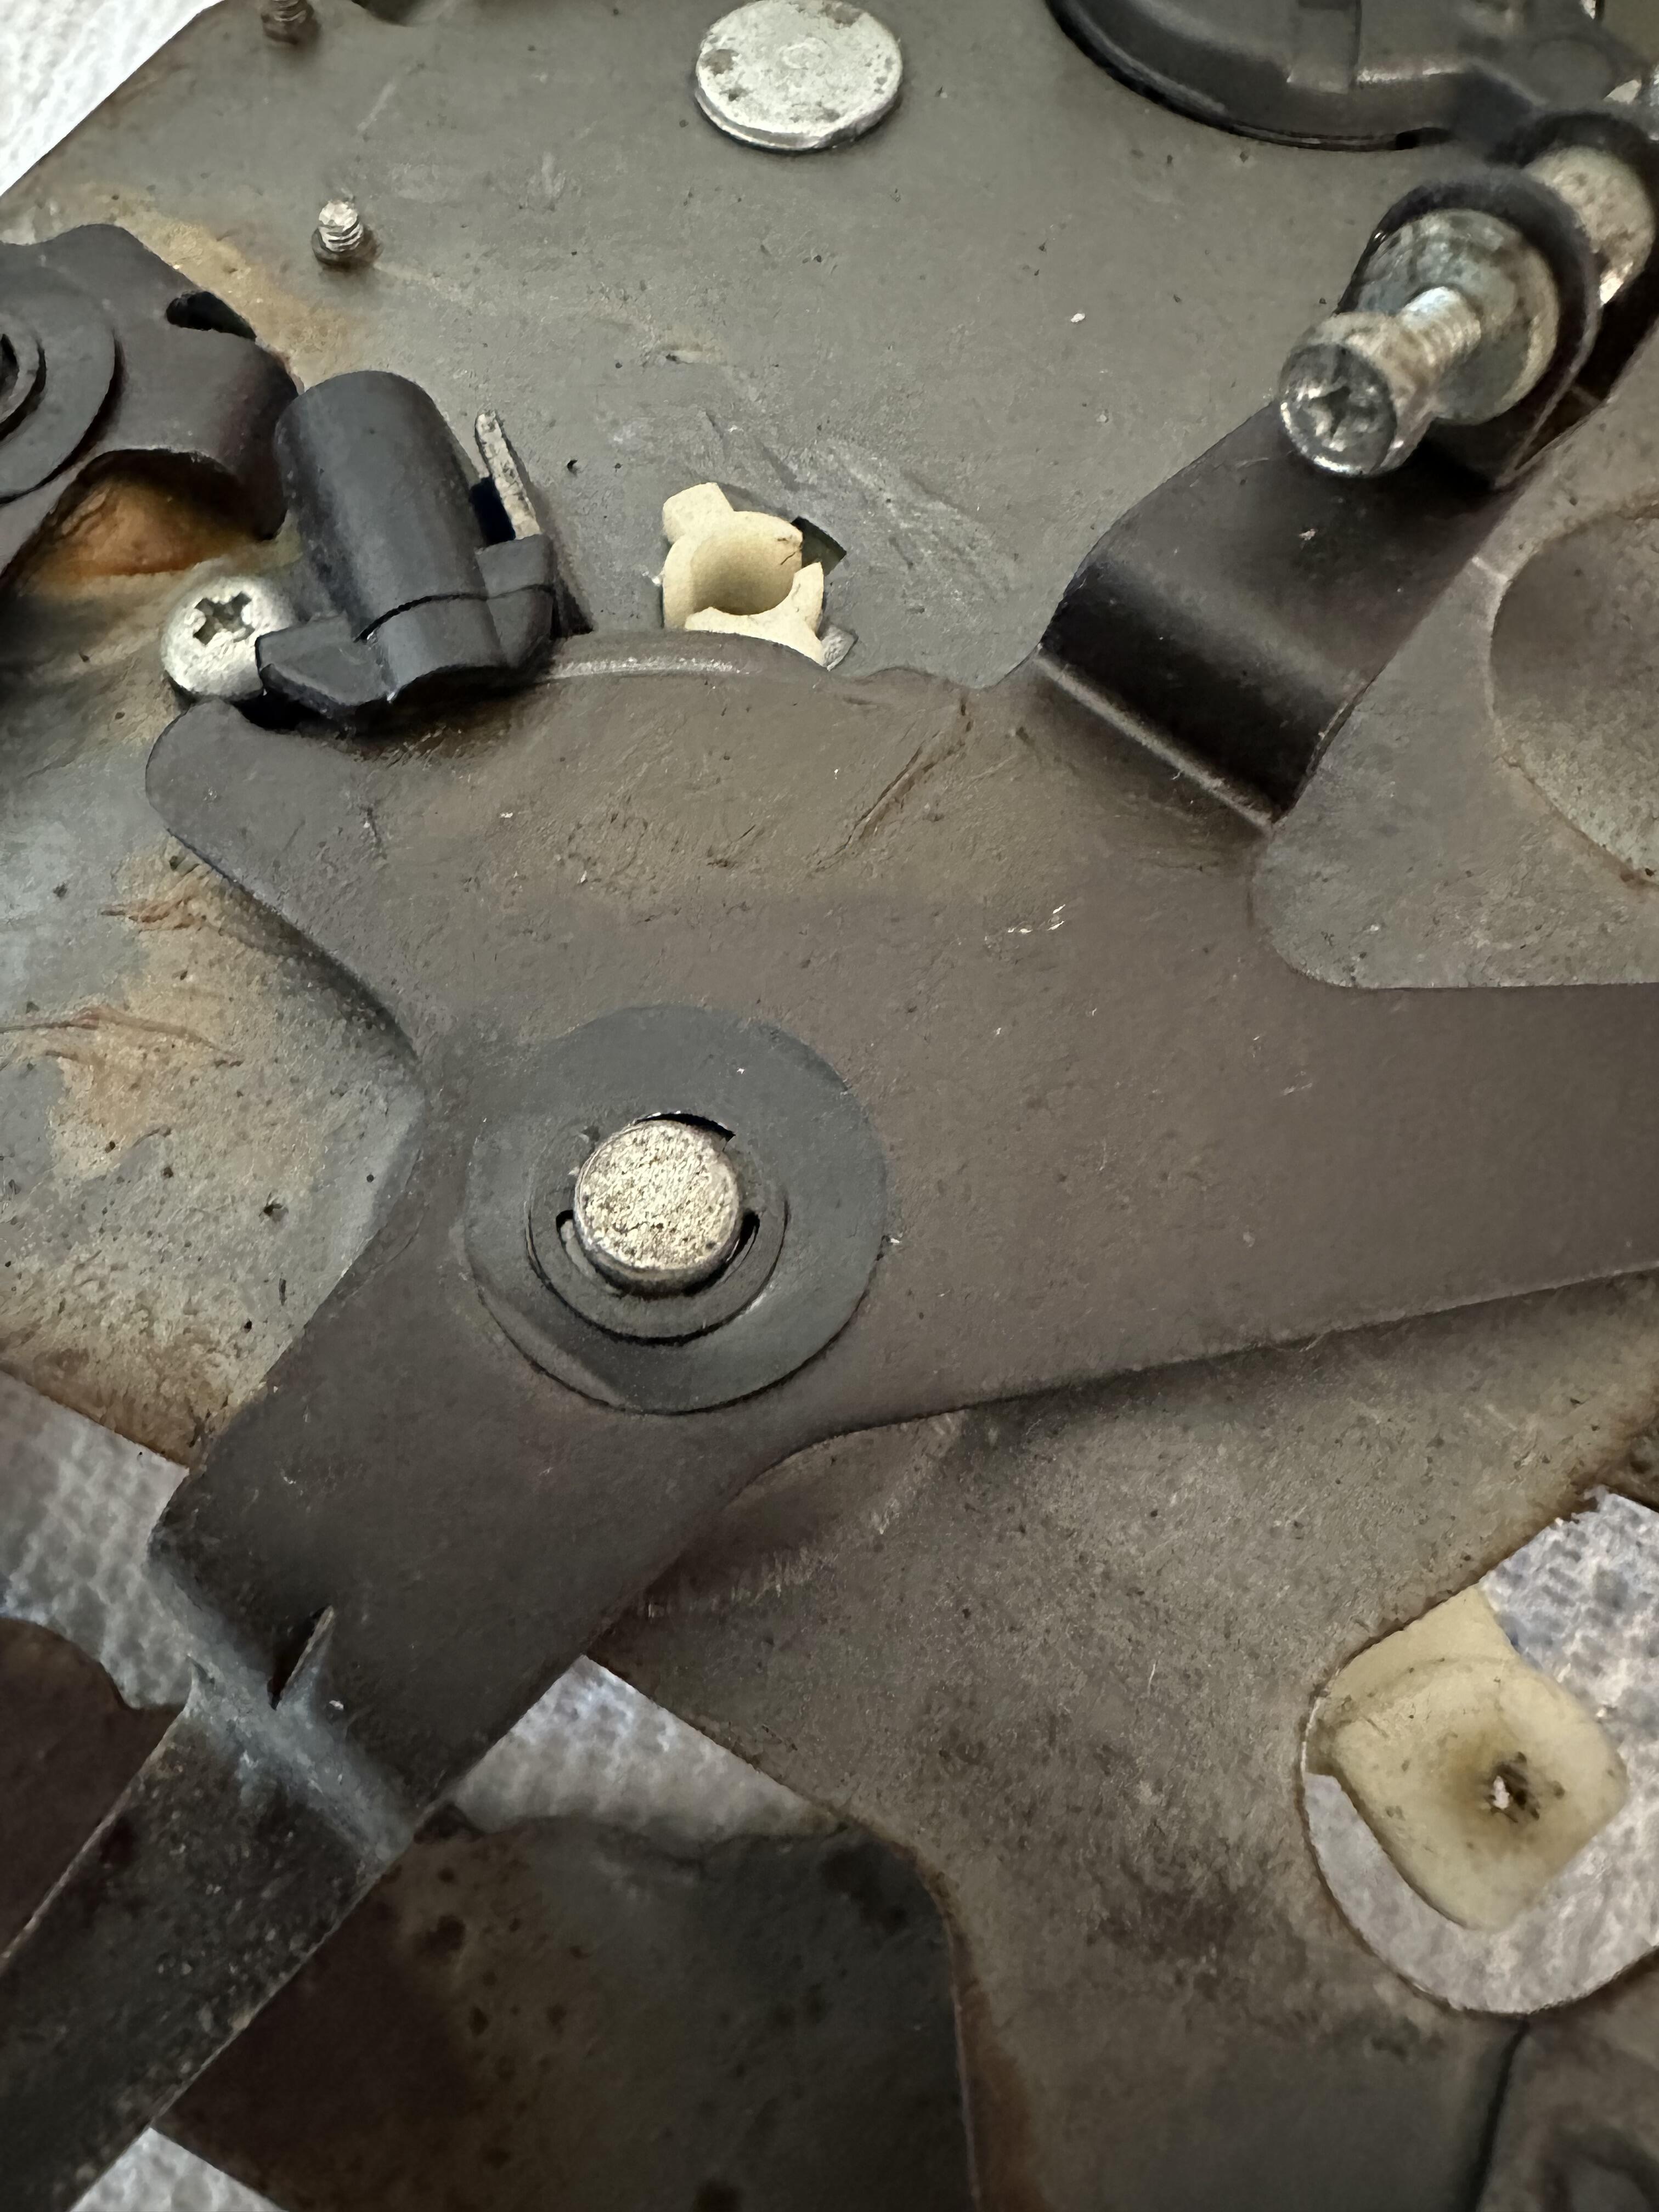
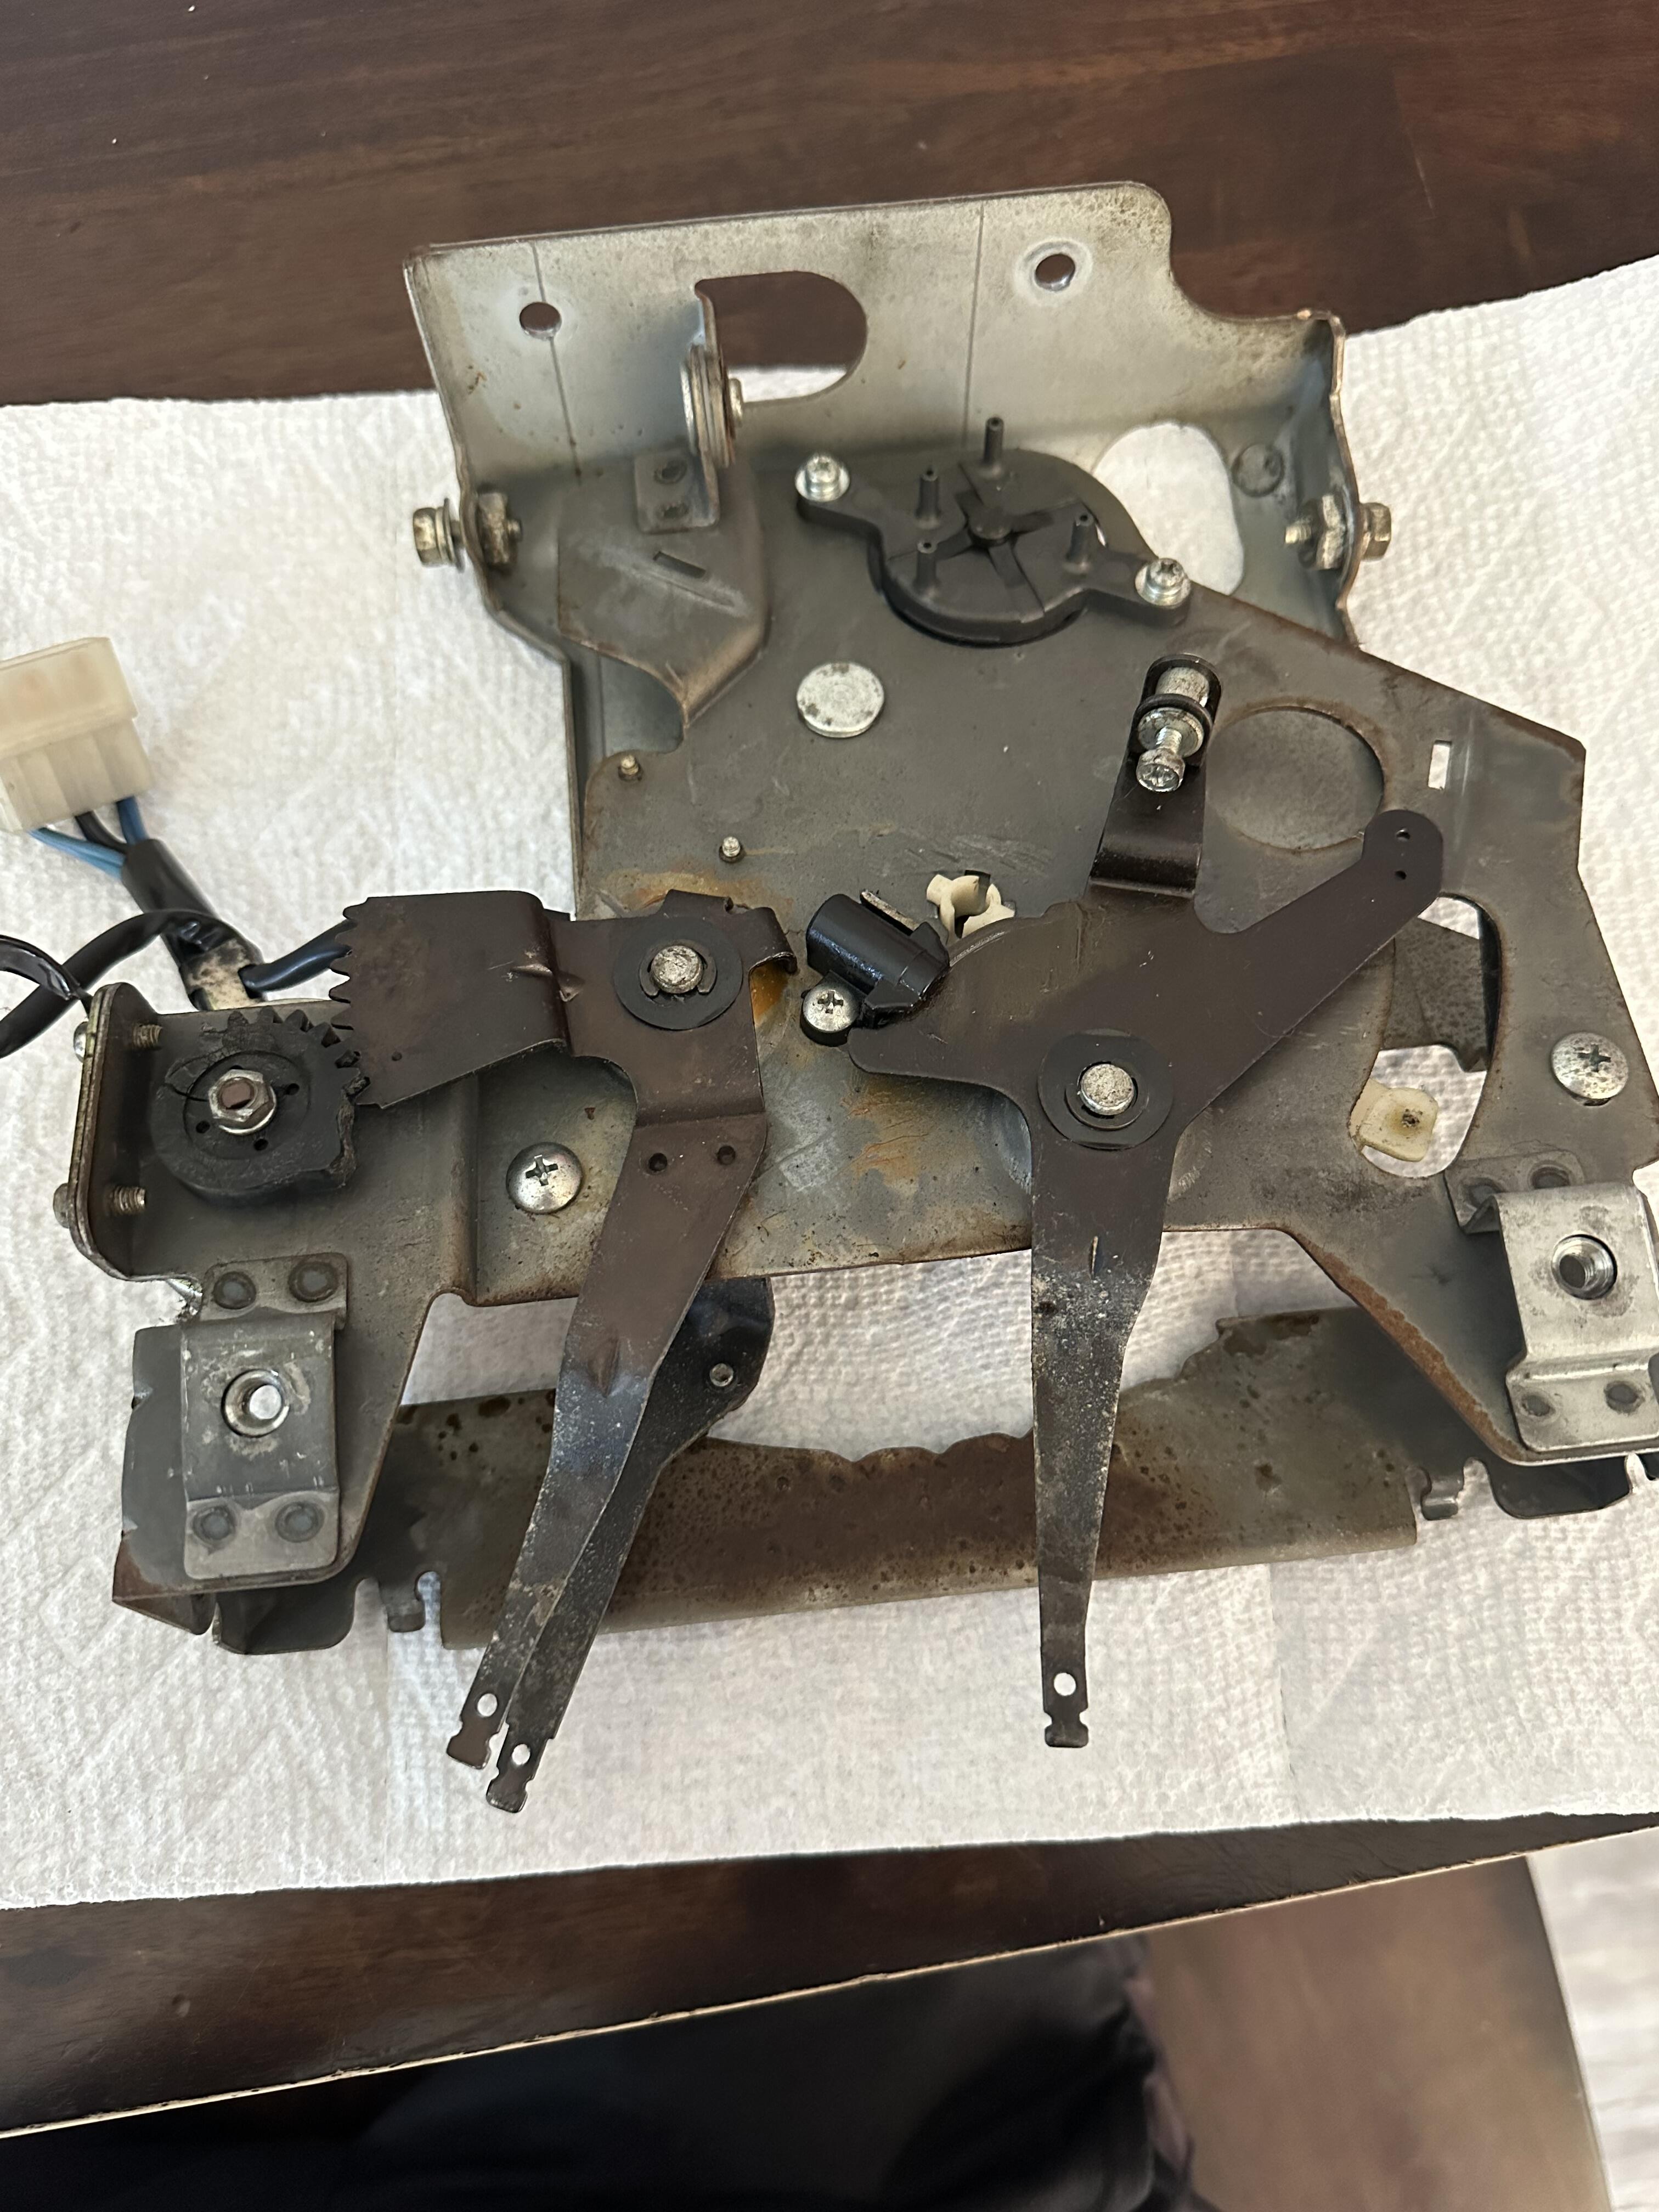
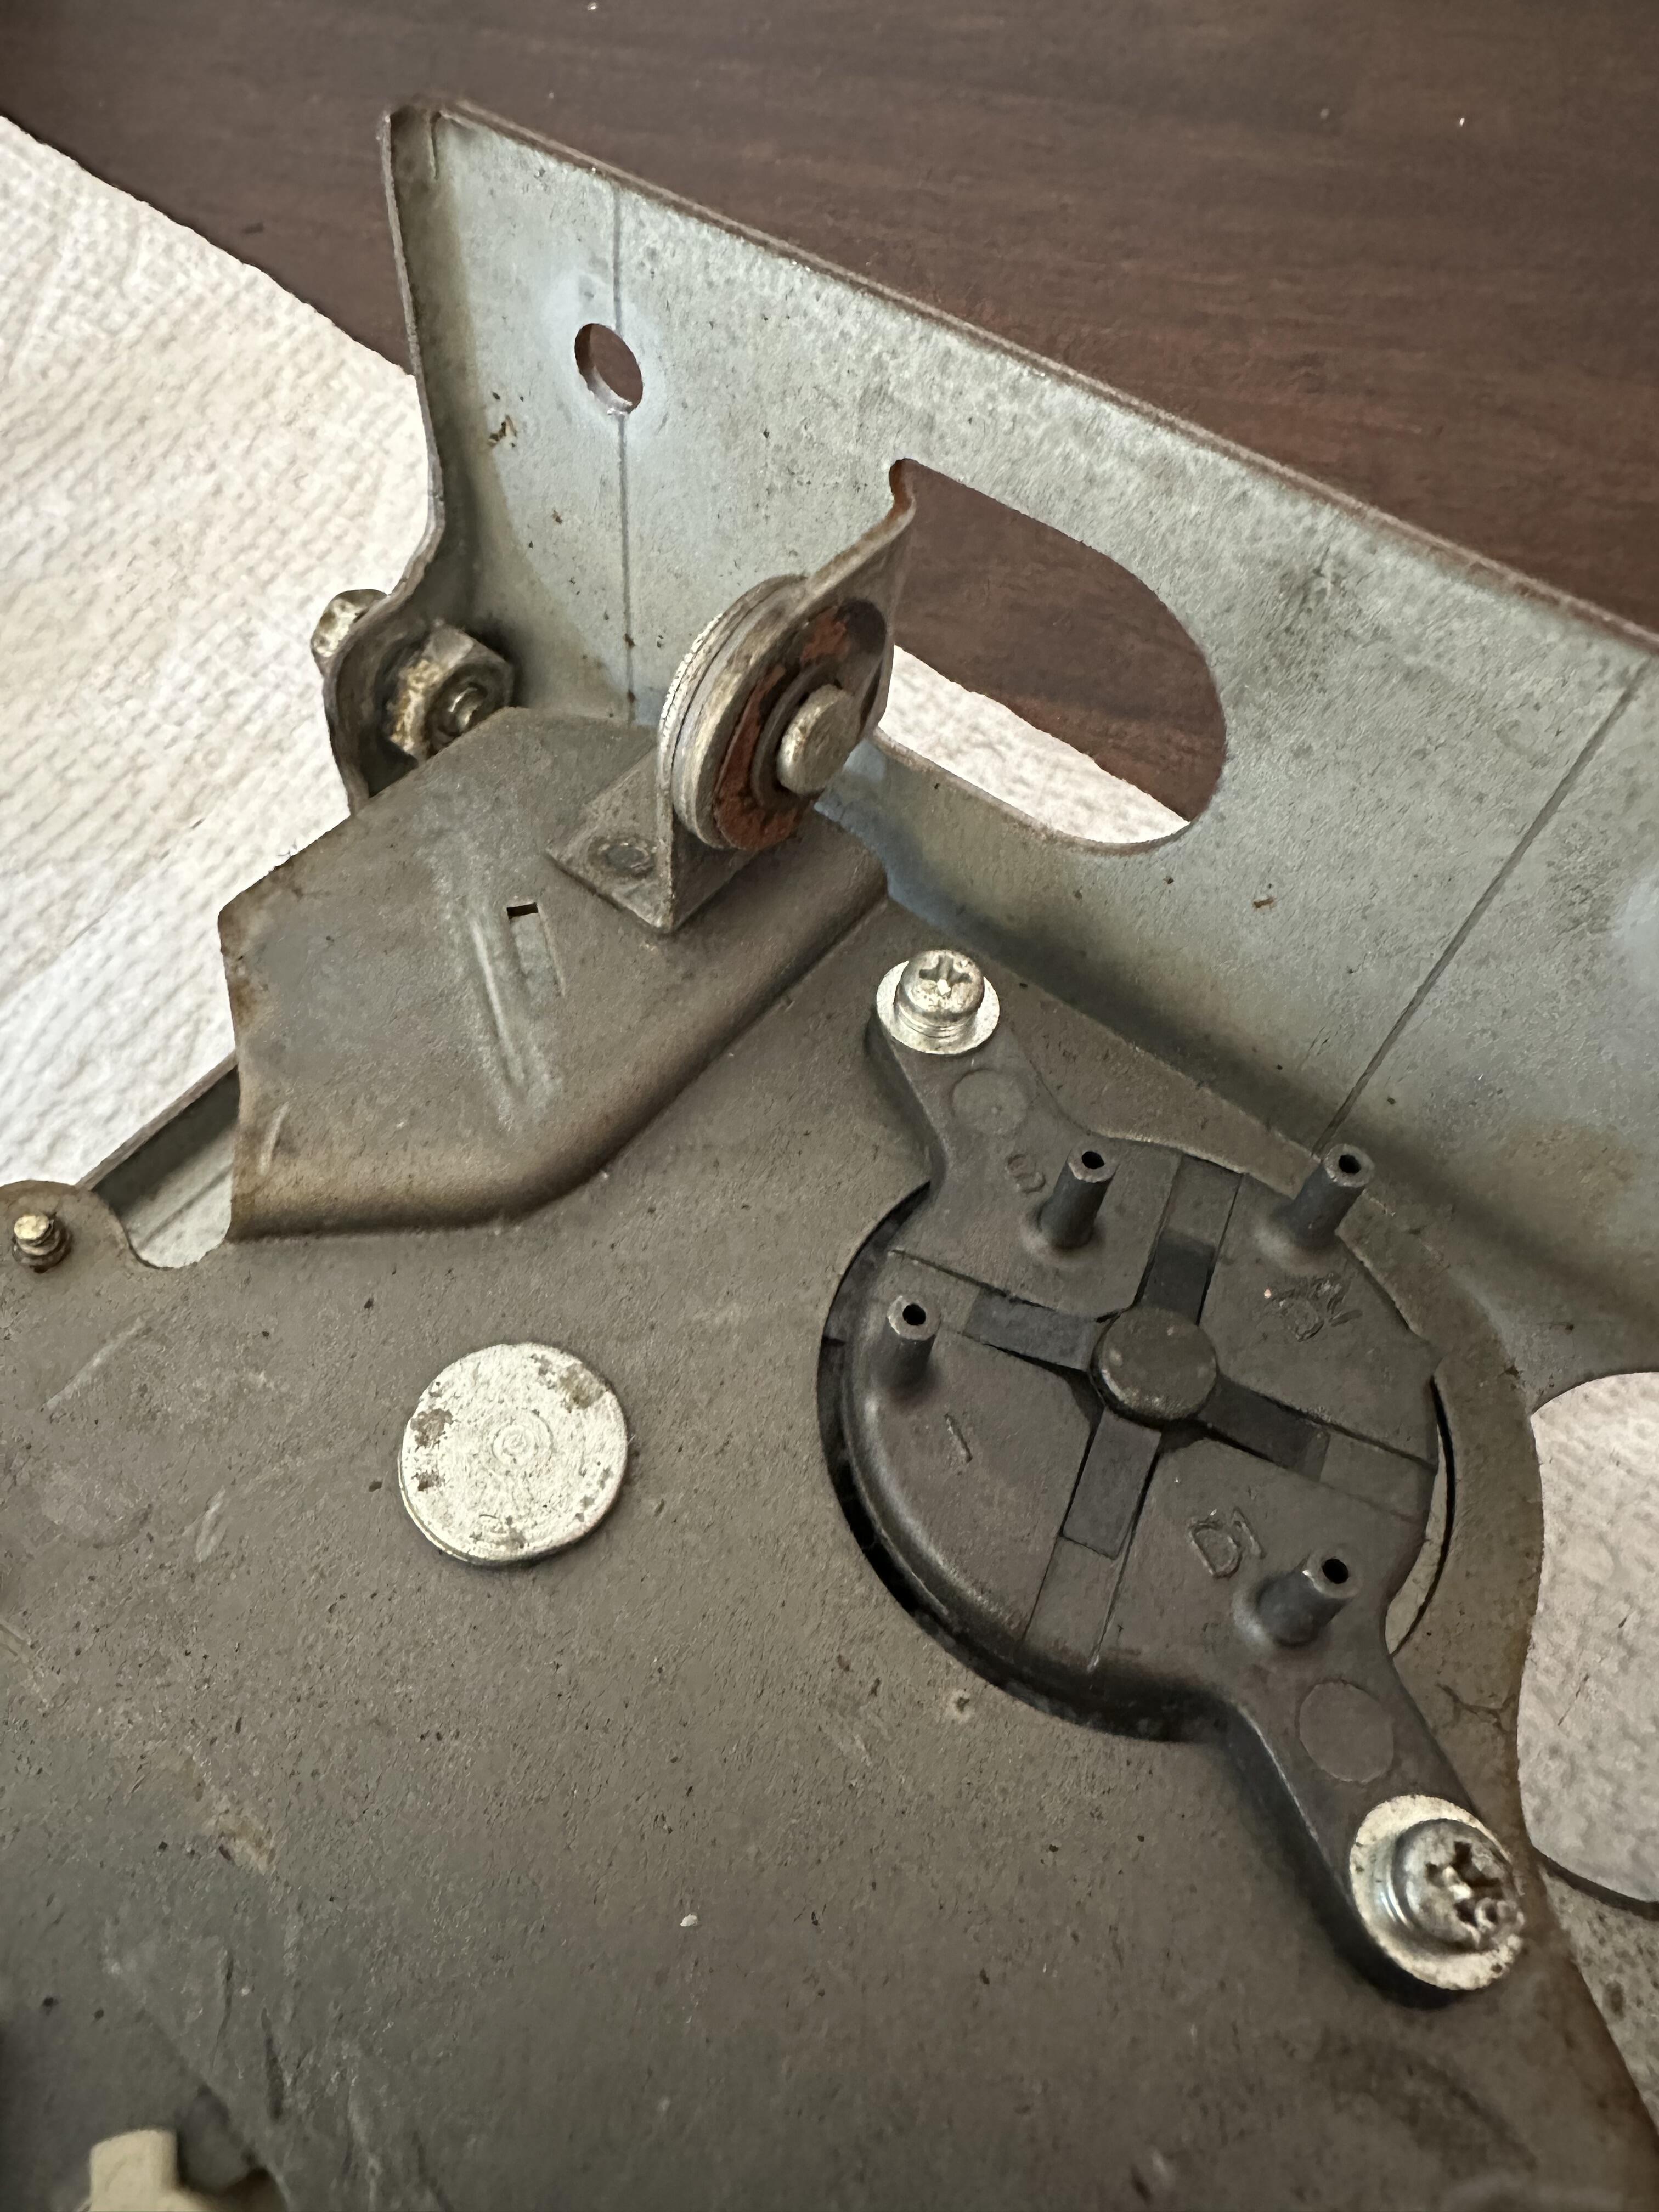
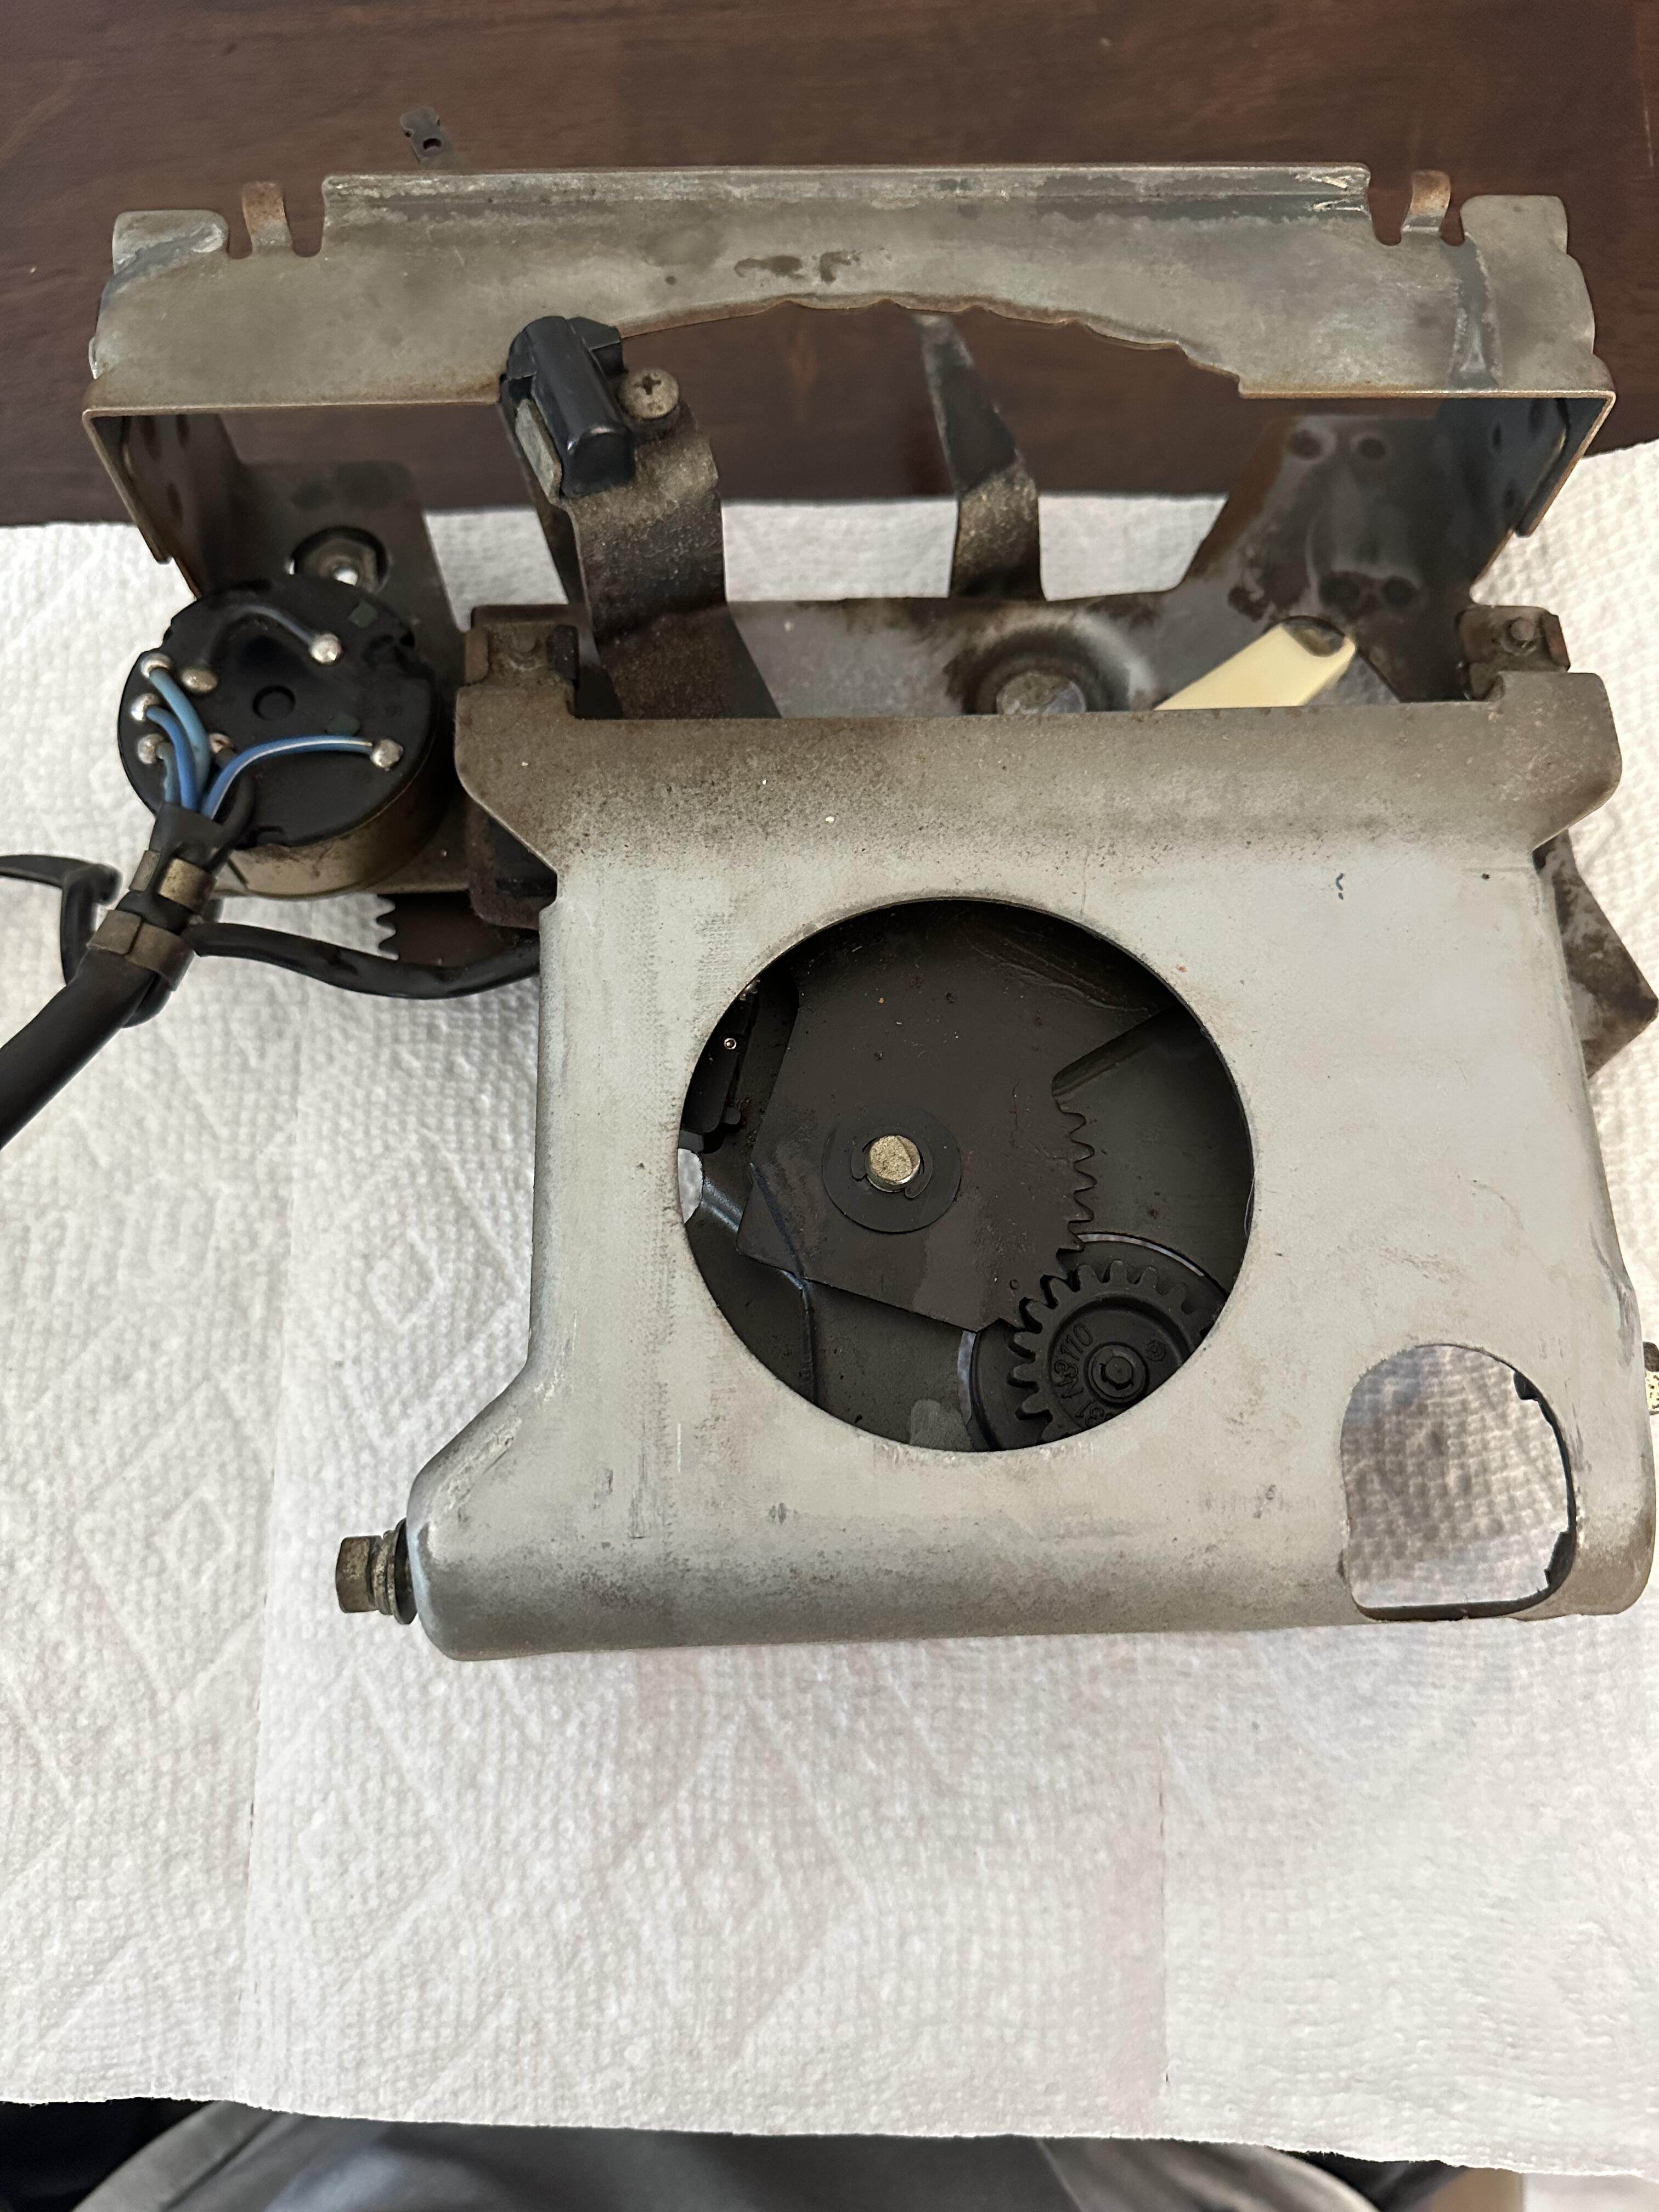
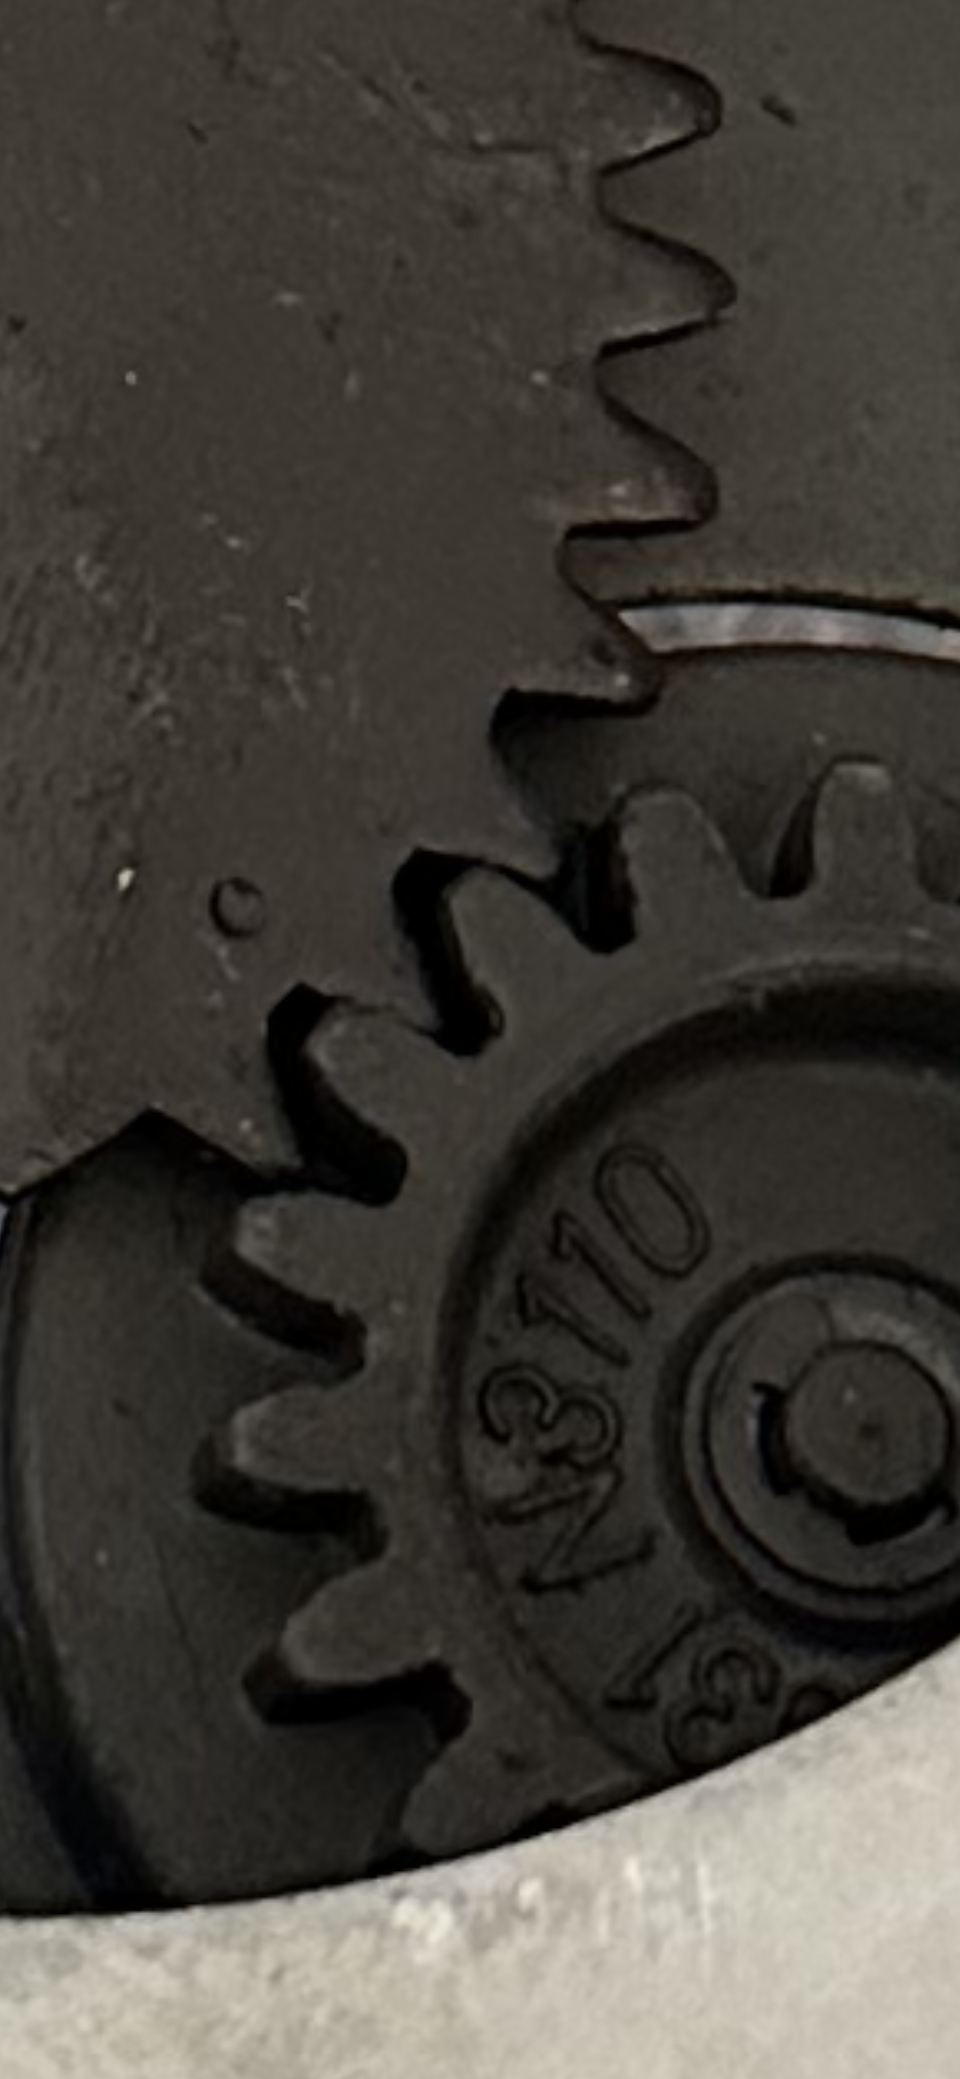
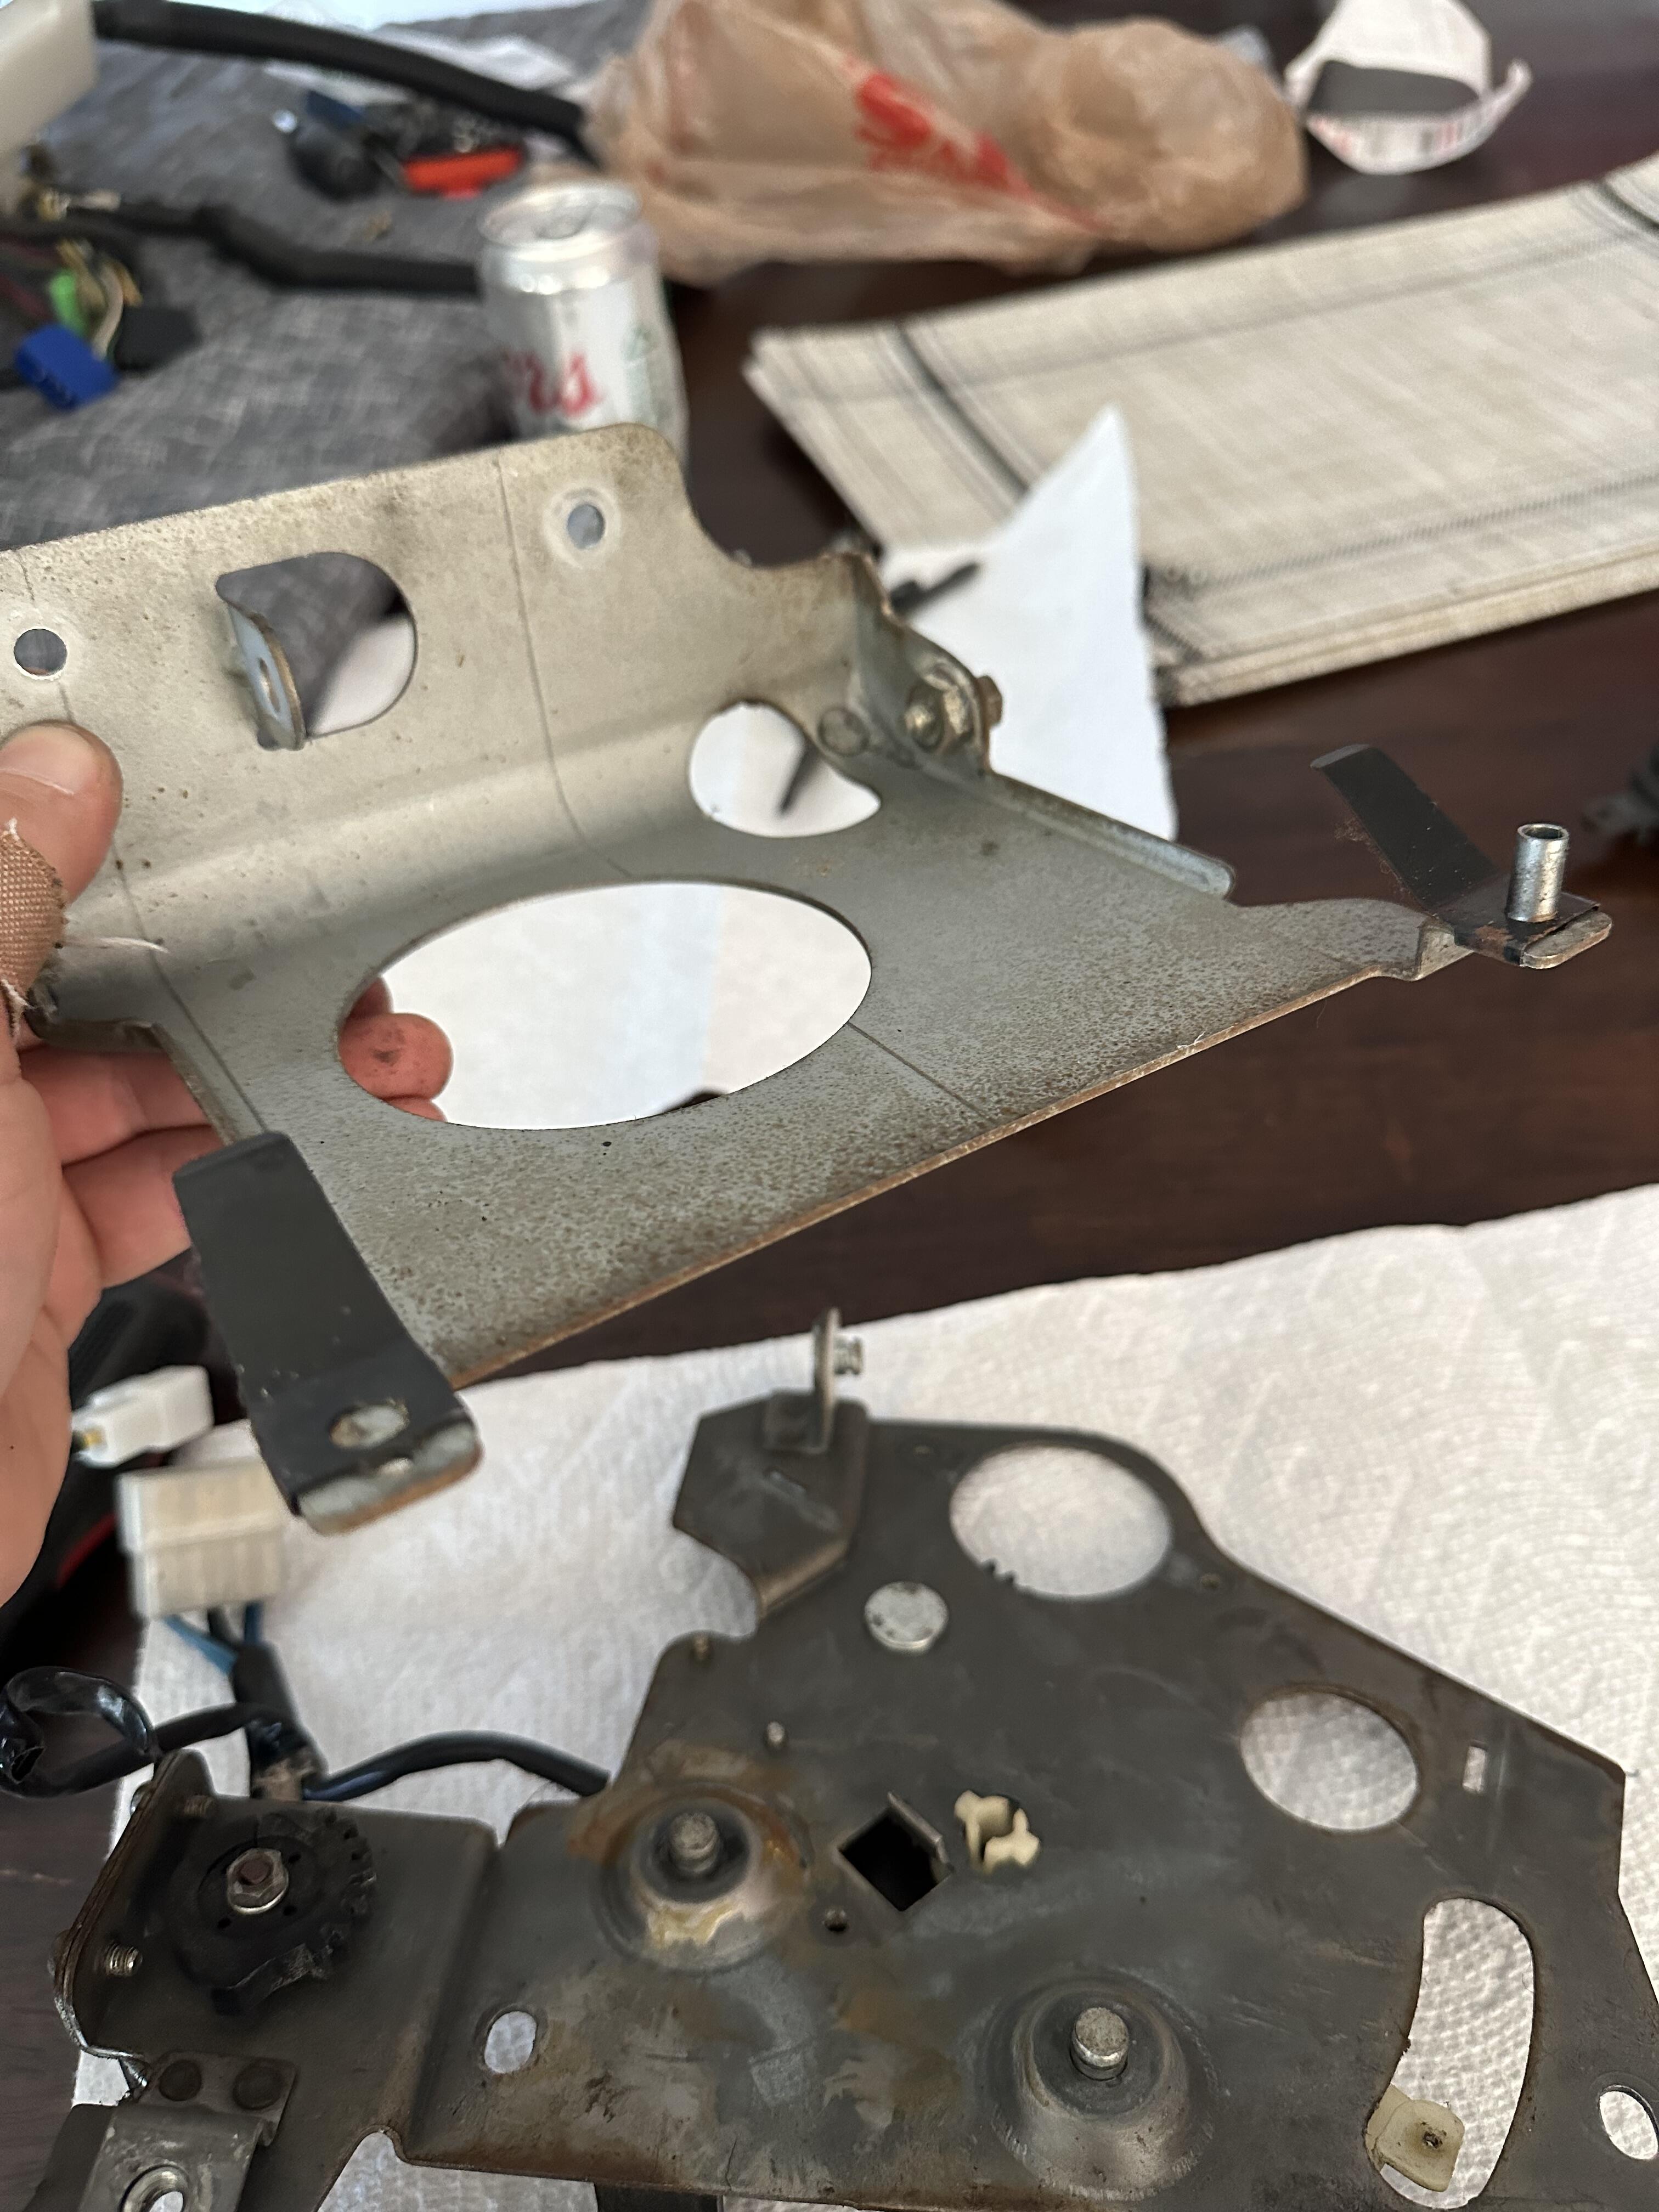
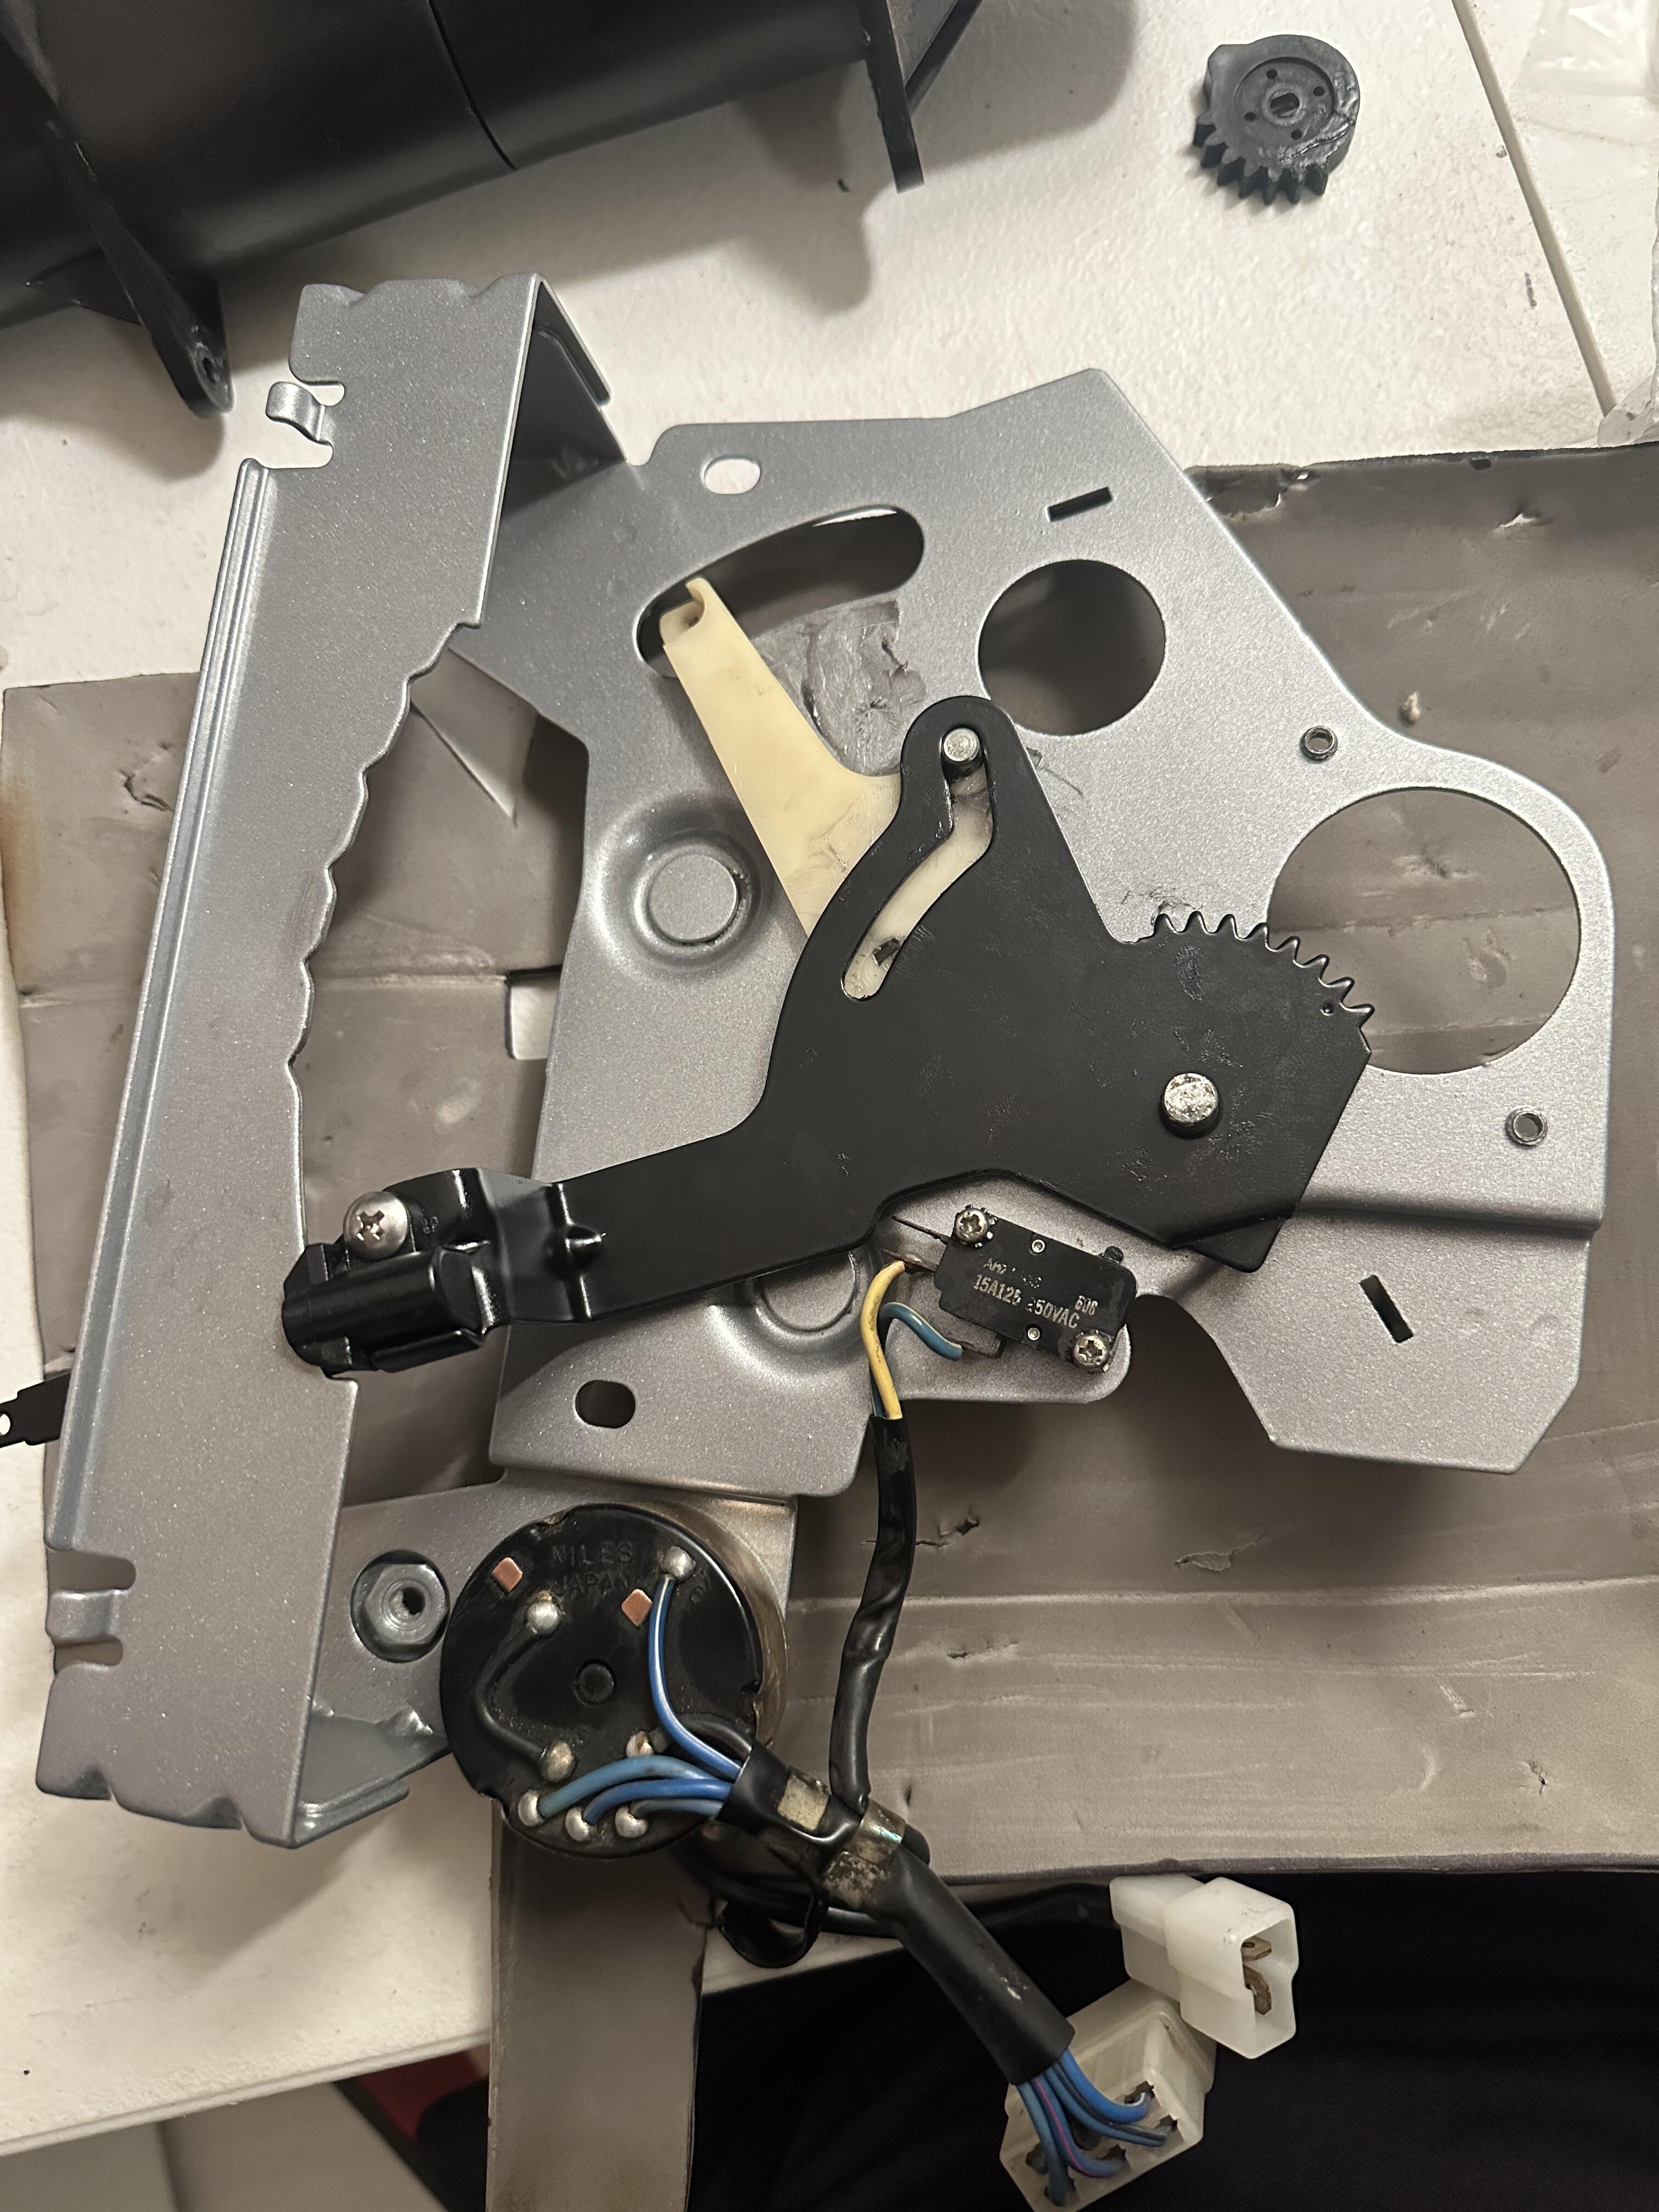
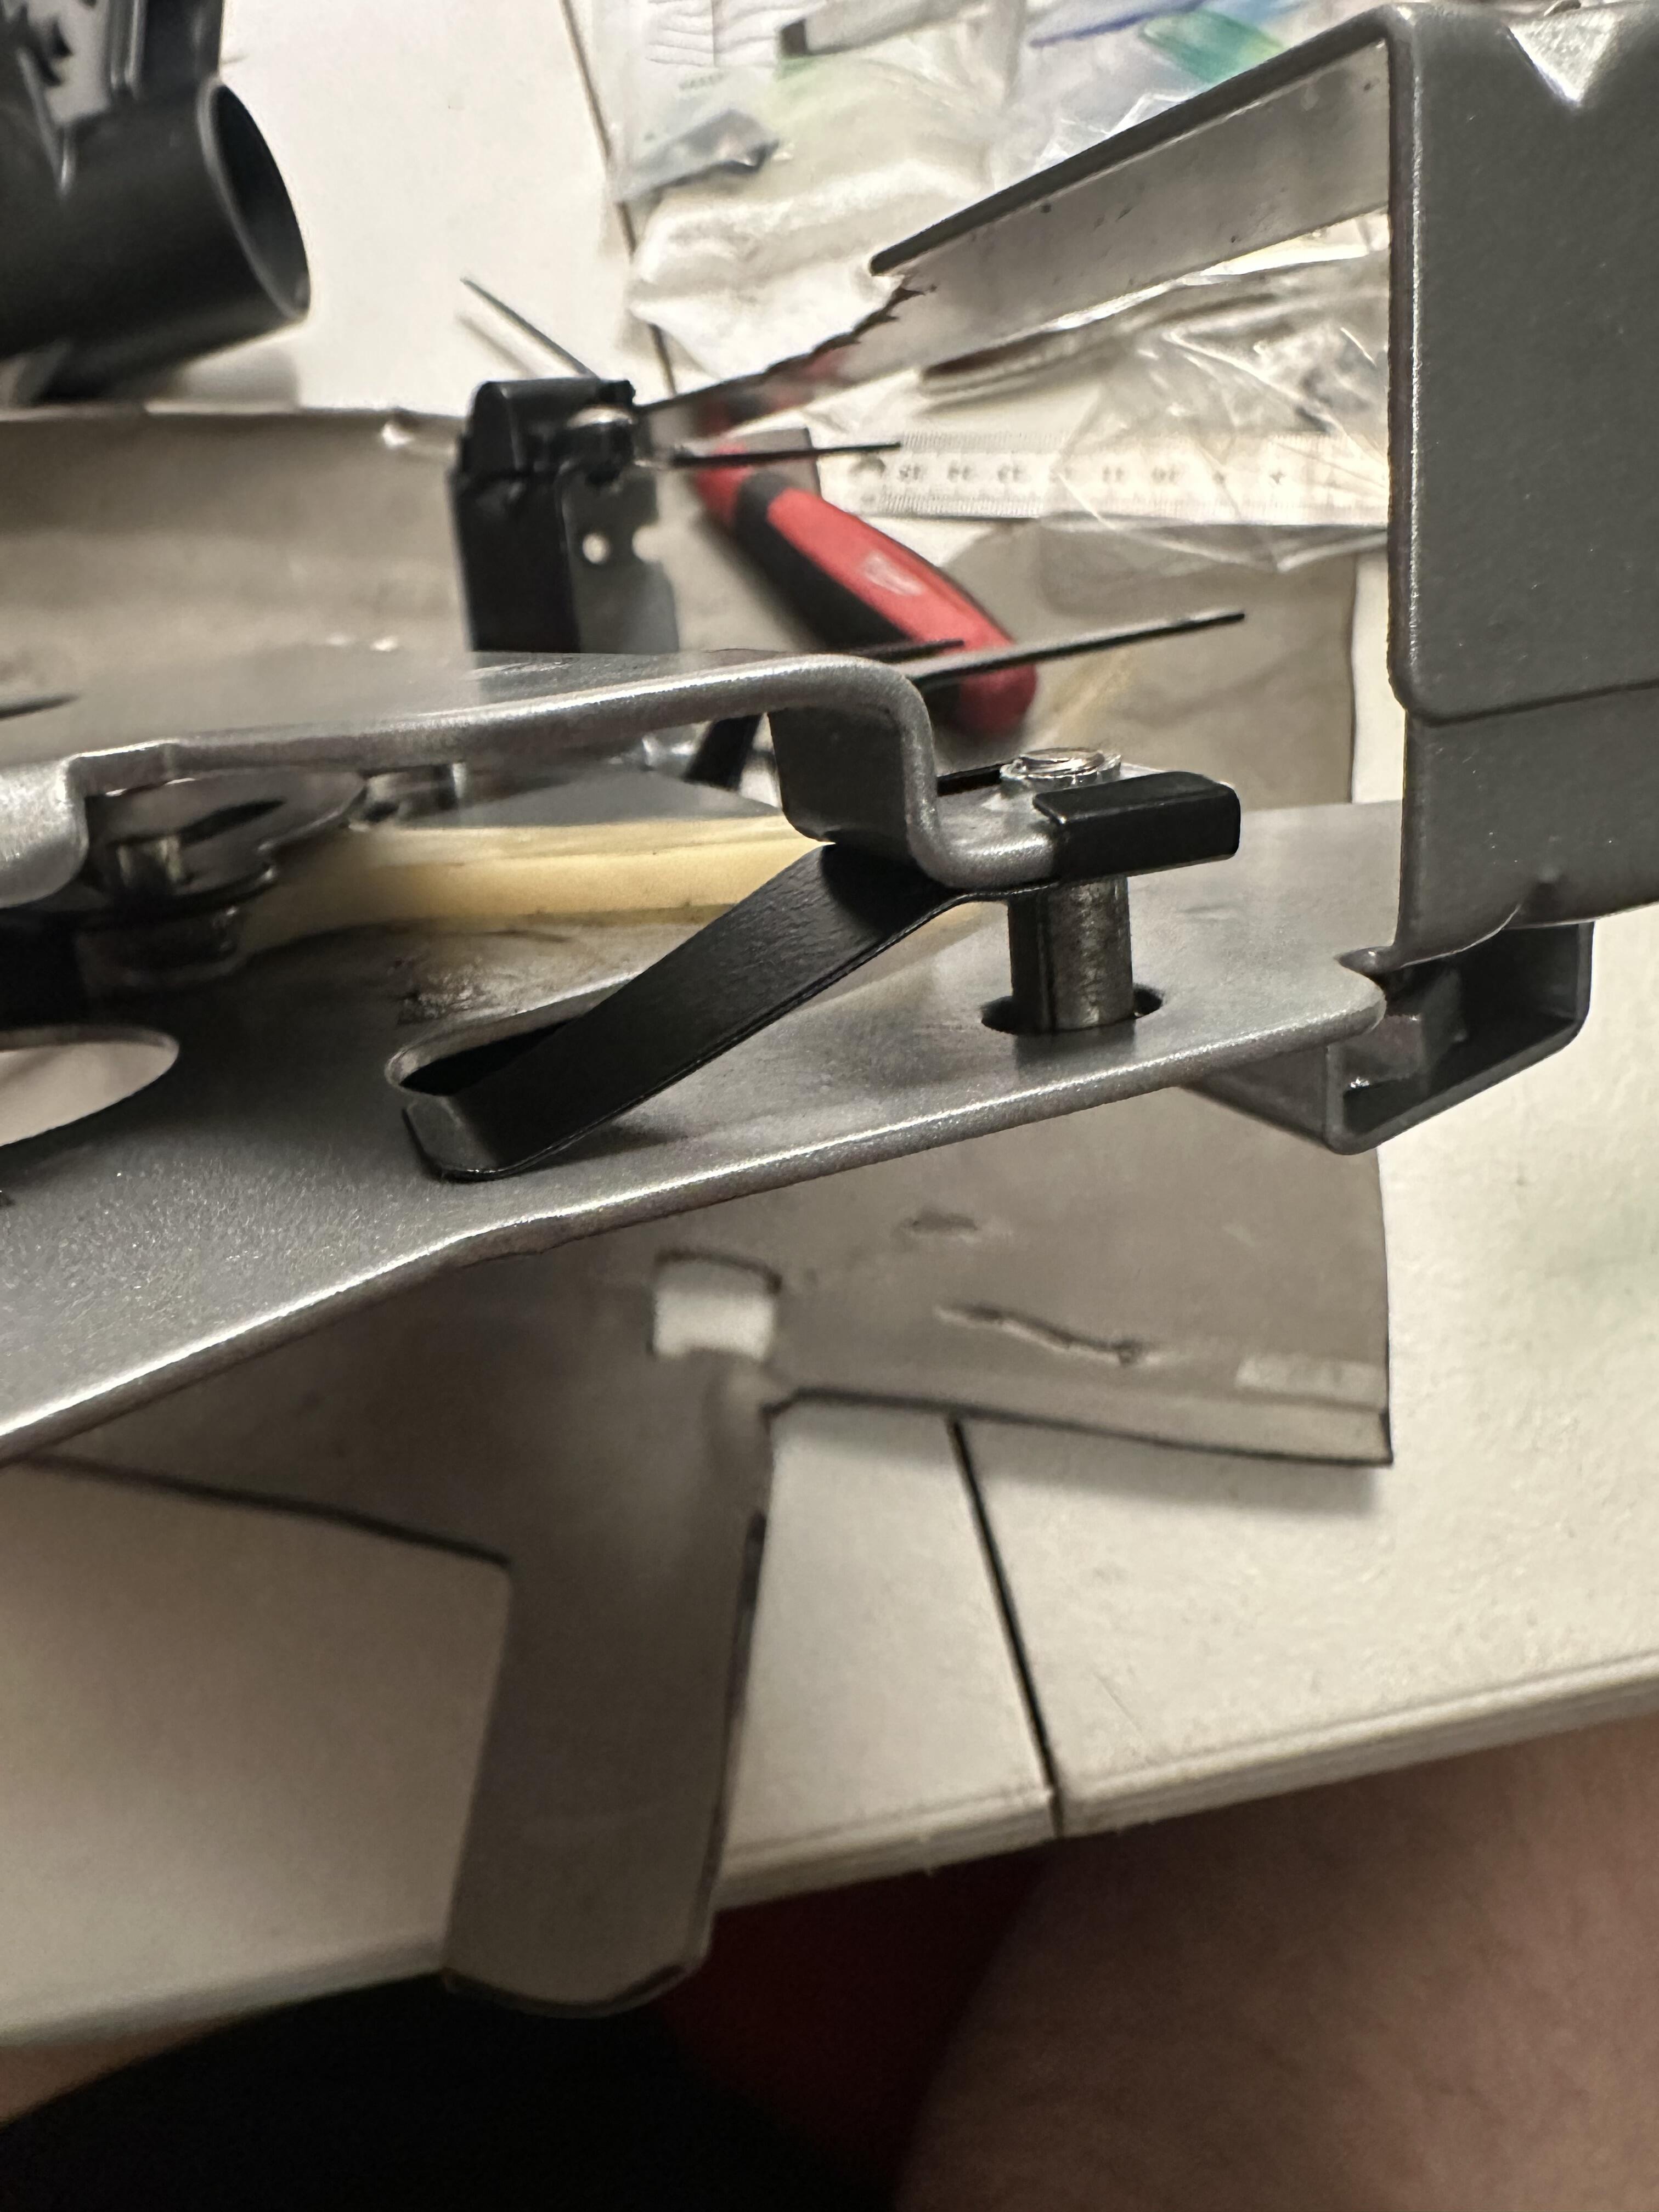
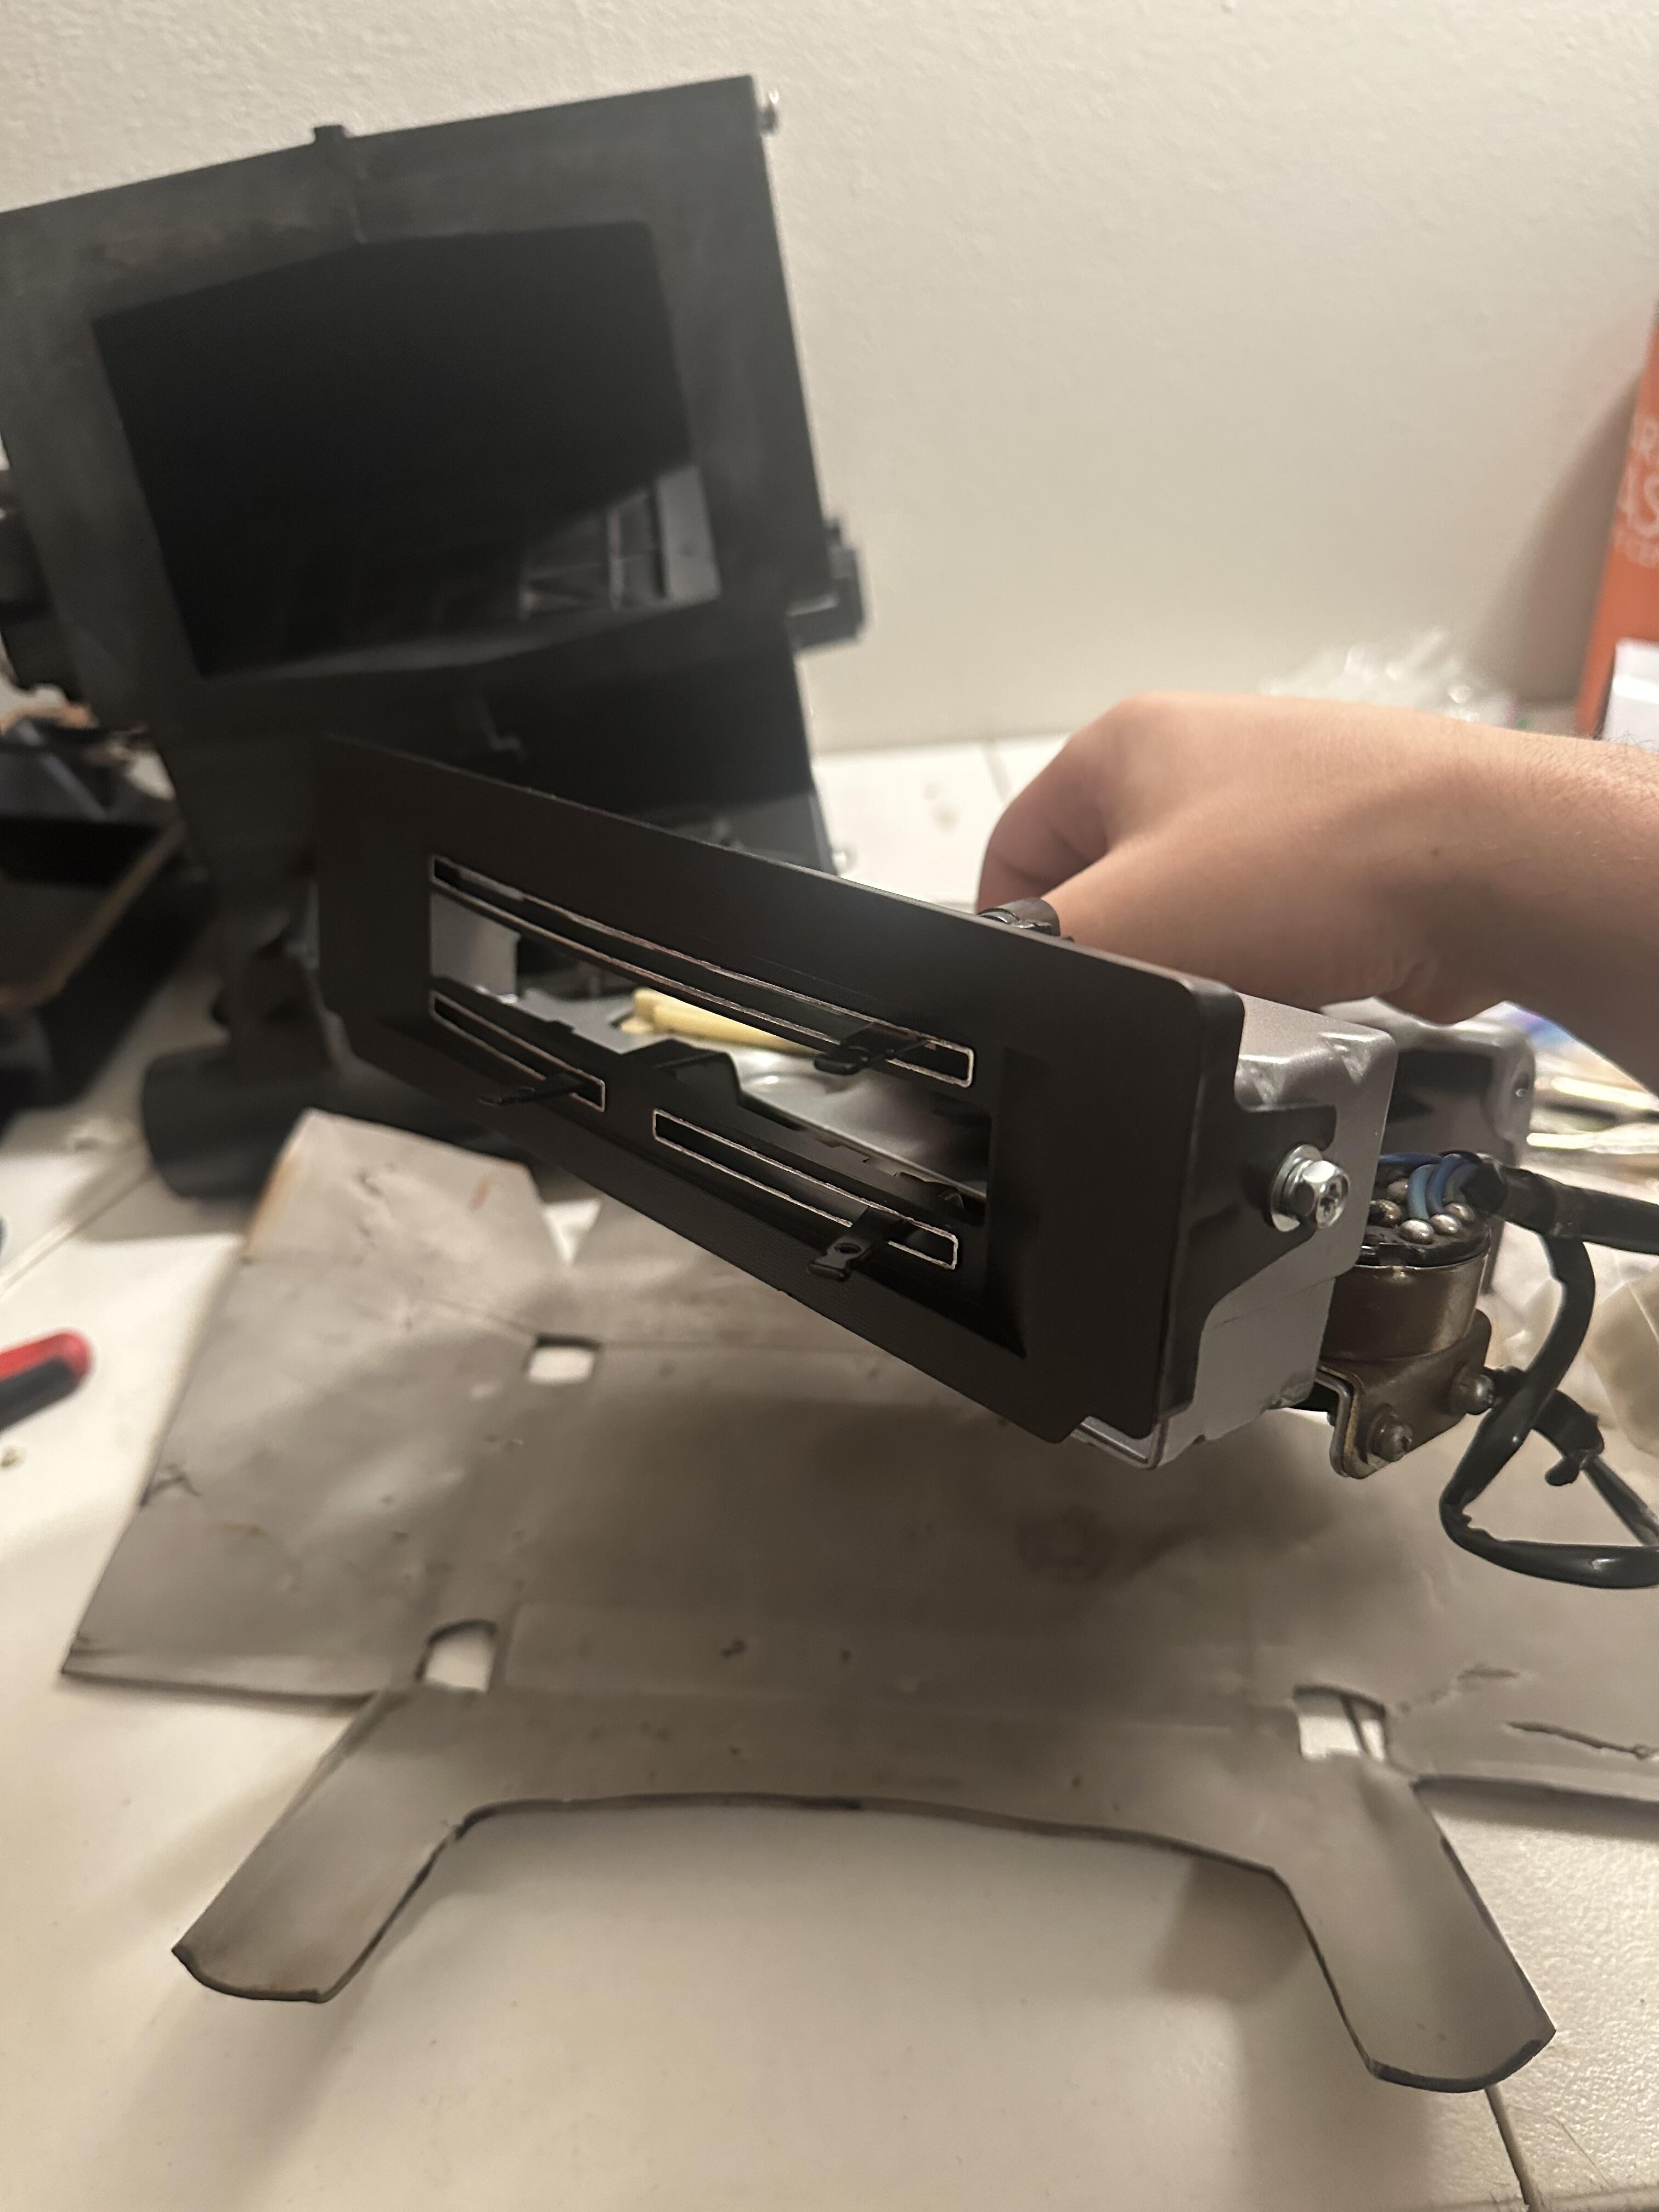
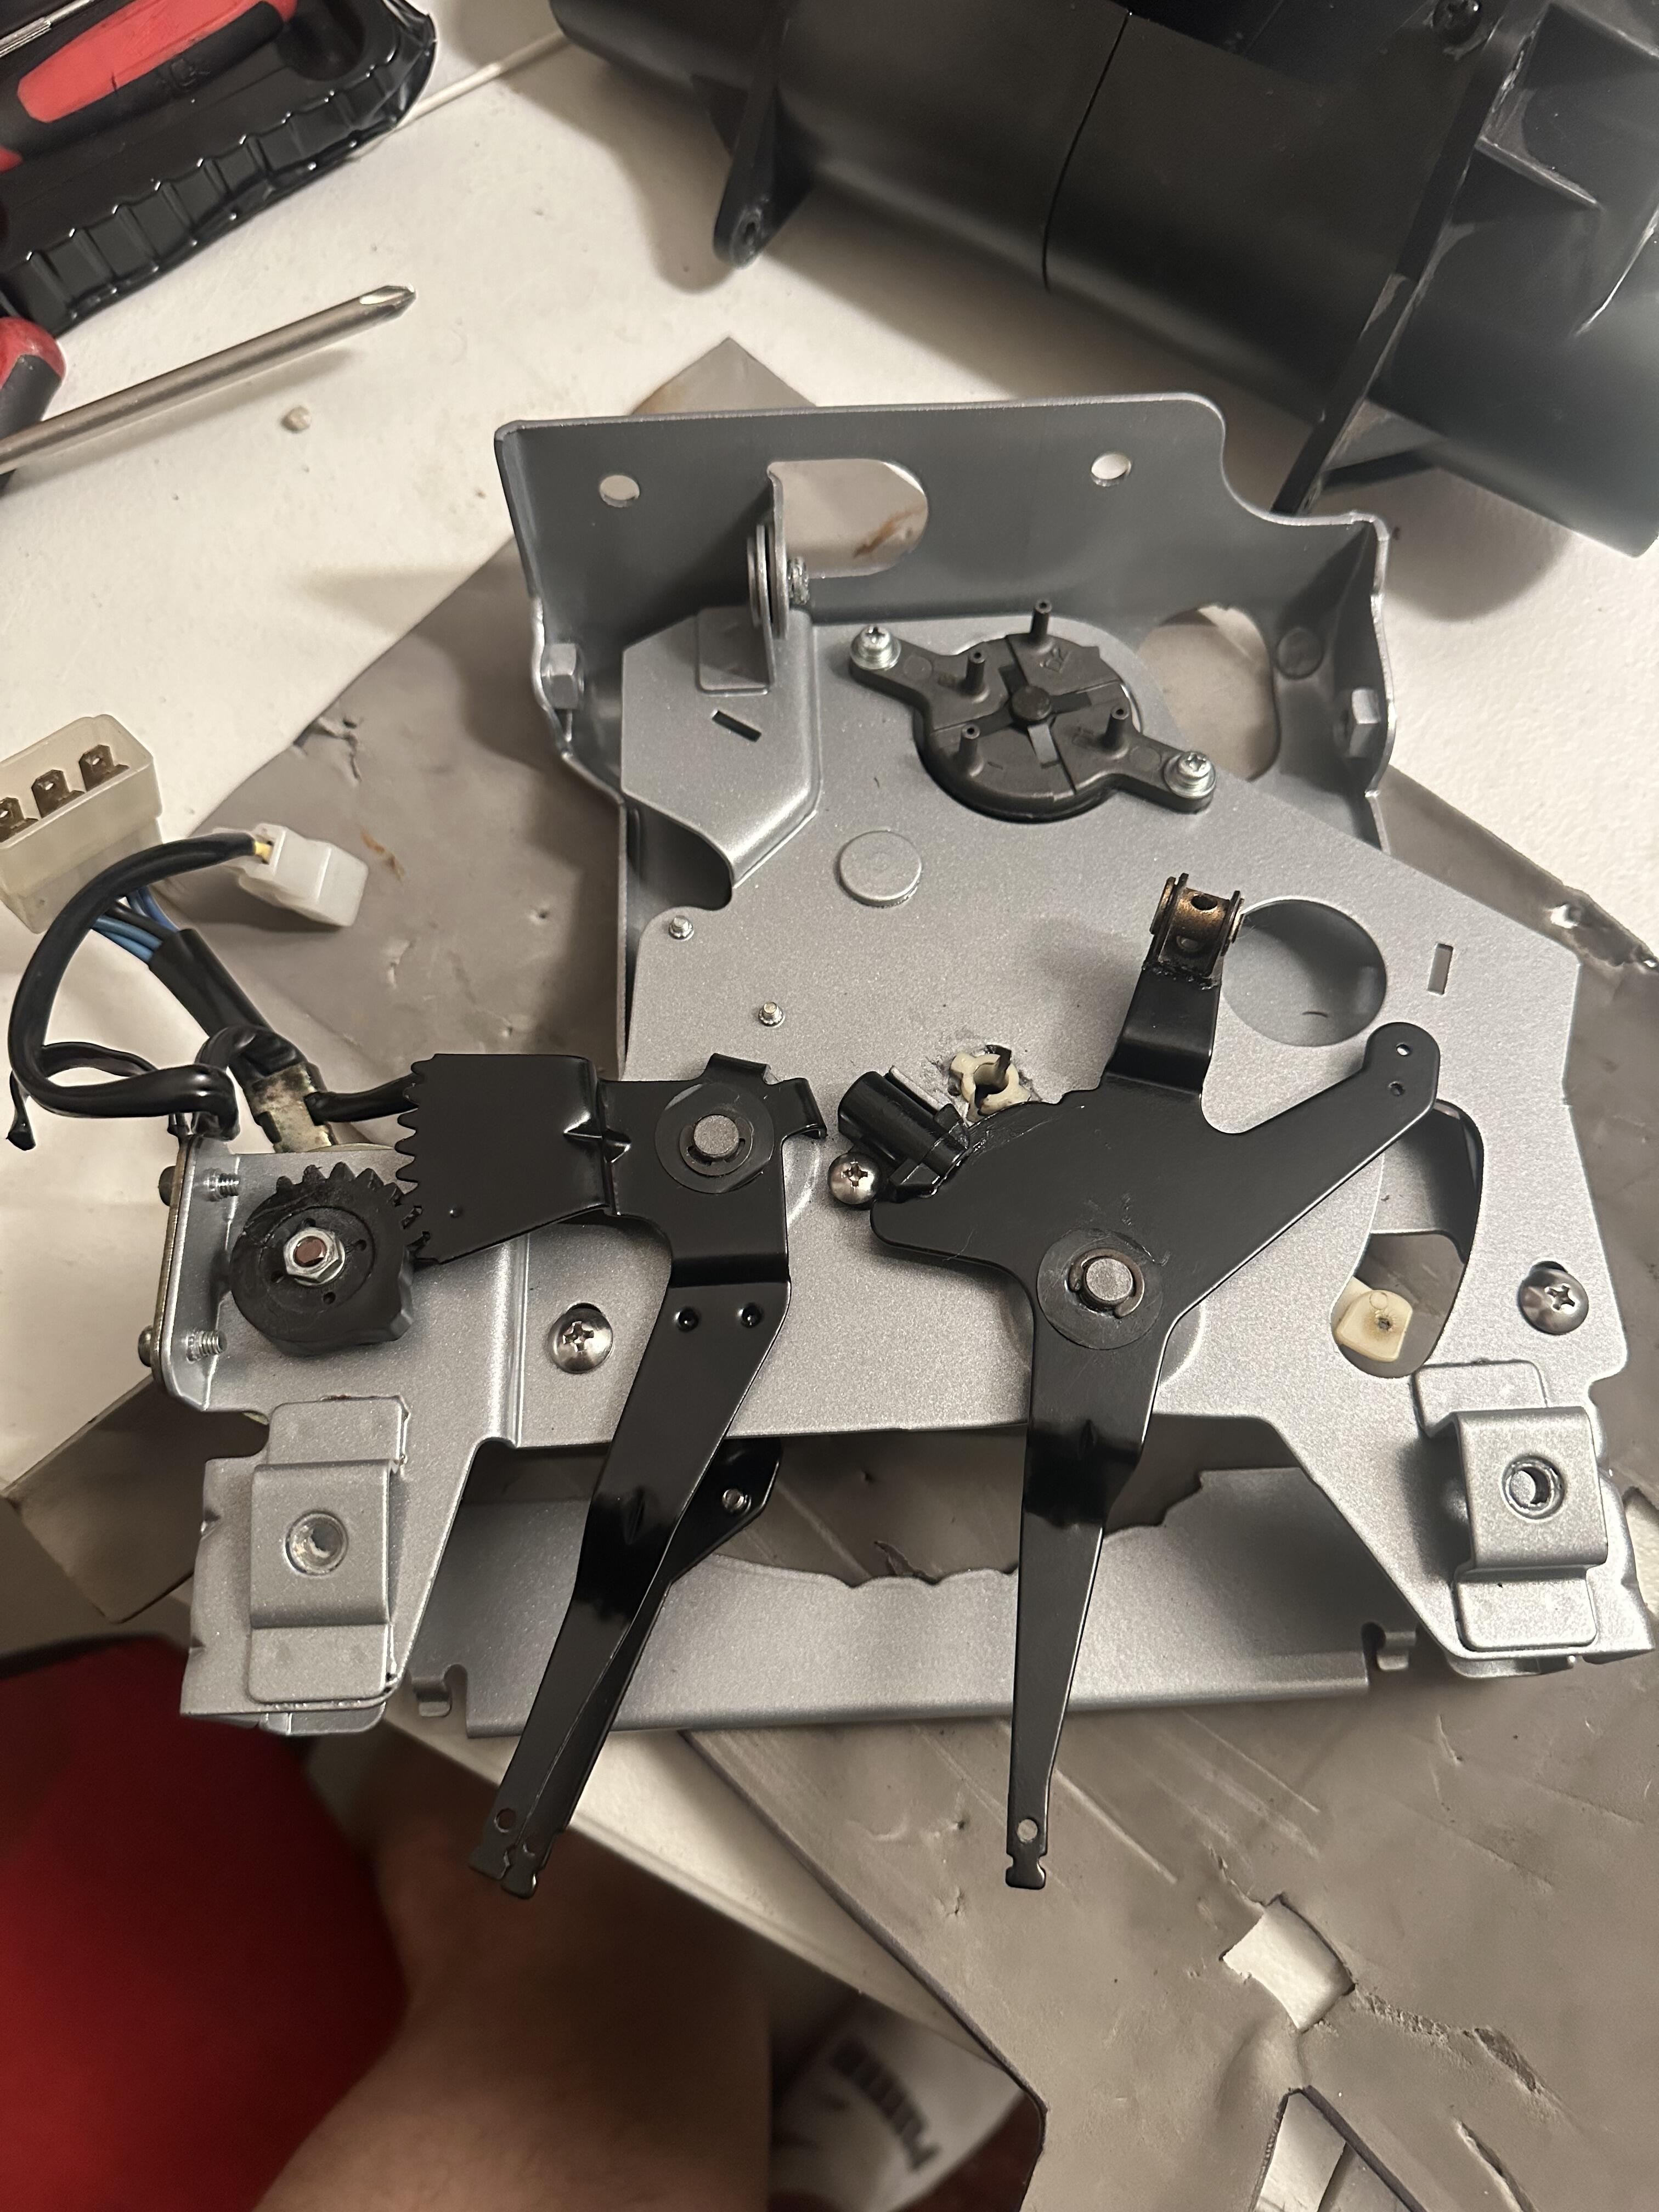
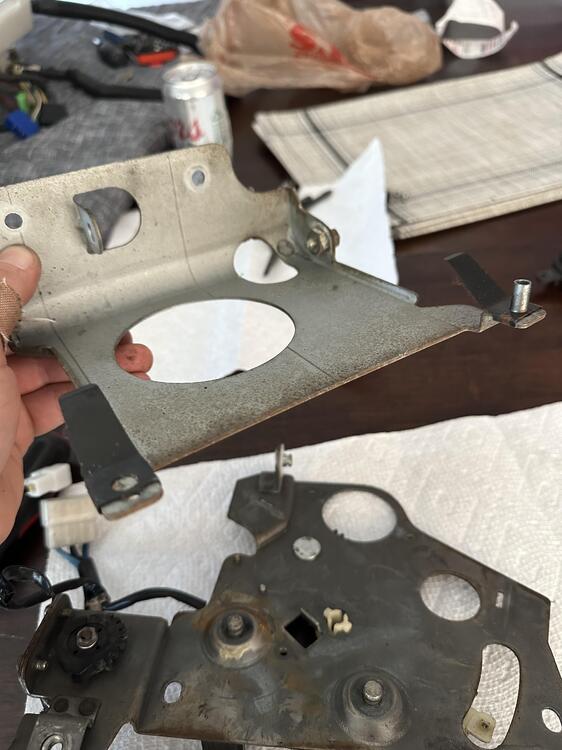
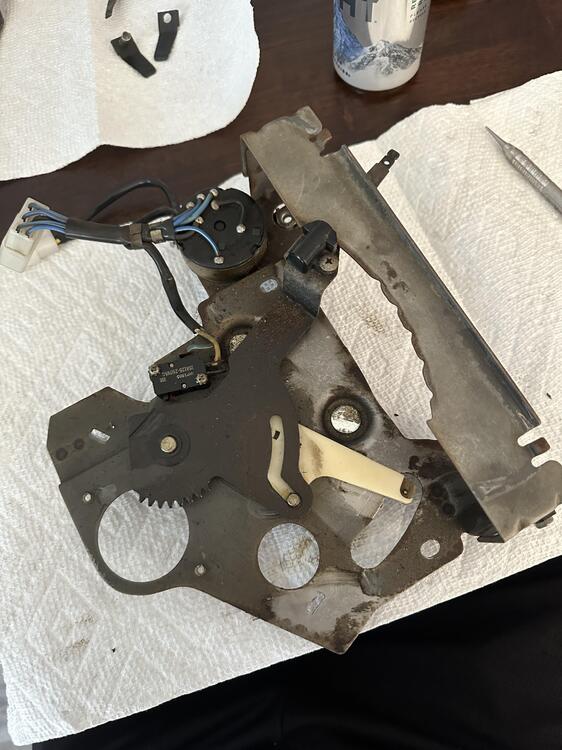
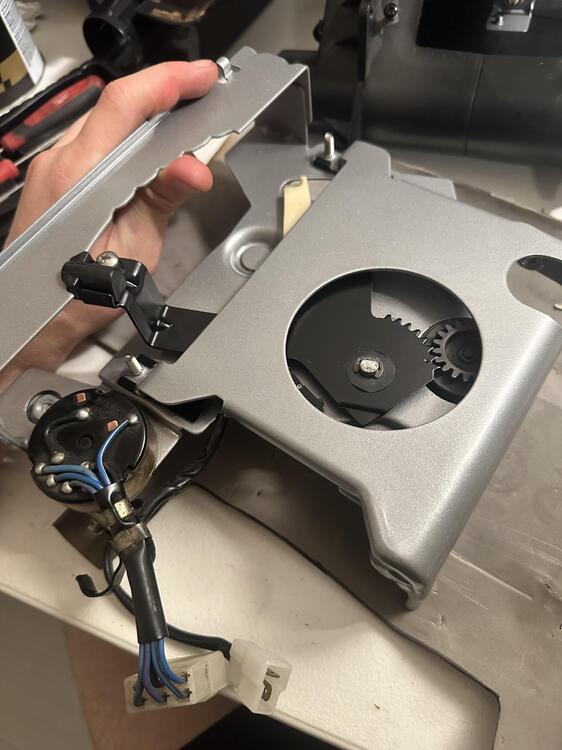
Hey guys, this was my take at restoring my old climate control box. Hopefully it helps someone in the future in case they didn't take good photos:) This is on a 77 280z. I am not sure if all years are the same. My module was really sticky, which was presumably caused by rust and lack of lubrication, so I went the extra mile and redid everything so as to never have to touch this box again. Here is the start take note that I swept every lever to the left so that everything is in sync. The module is upside down. Next is a close up photo of the Hot/Cold switch. It is held on by a pressure washer and snap ring. There is a black mechanism with a spring and ball bearing inside pressed against it. MAKE SURE NOT TO LOOSE THESE! The spring can cause the ball bearing to fly out and dissapear when removing, be careful. Although not in this photo, the Hot/Cold switch is connected to a mechanical wire that travels to the heater valve. The fan switch is removed by removing the nut that holds the black gear on, and two screws on the side of the module. You can then remove the arm by removing the pressure washer and ring. Torwards the rear on this side another pressure washer and snap ring are clipped (holds two halves of the module in place) you can also see the two screws to remove the vacuum selector valve. I will not cover how to rebuild this valve, however to do it you just need to pop it apart and put vacuum grease on the inside so it seals. Very simple mechanism. Here is the top side of the module. Take note of the relationship between the throm arm gear and the vacuum selection switch. This is its relationship with the throw arm pushed all the way left. Unscrew the two screws that hold the control module halves together. You can see them in my first photo. It pops off and you can see the two black spring tabs that hold it together with the metal spacers (0ne is missing from this photo). Take note of the coors in the background and follow suite. Here is a good view of the throw arm mechanism for the selector switch once the half is removed. The arm is attached by a snap ring and pressure washer. Although not in this photo, below the arm is also a plastic circular spacer. It is easy to forget during reassembly, but don't. The black arm also has a tab that controls the plastic throw arm. This plastic arm can crack, so if it is just fill it with epoxy or other strong glue. remove this arm, the plastic peice, and then unscrew the spring loaded pressurre tab from the arm making sure not to loose the spring and ball bearing. Next, Just remove the fan switch and its correlating electrical thing if you haven't already (sorry mine worked perfect before removal so I did not research its proper name. Simple as that. I then proceeded to powder coat all my parts and get new matching hardware. I found Misumi to be a good source for hard to find hardware that matches the original. Ace hardware didn't make the cut, haha. If you wan't you can also go more OEM and plate the parts, but I wanted a more permanent solution.... hopefully. Reassembly is just the reverse of this! Here are some helpful photos. Make sure to grease any areas the control arms pivot on. If you want a guide on how to restore the HVAC plastic faceplate a guide to do that is here (done on the radio bezel). Same principles apply. At some point in the future I will post heater and AC box restorations, and I will cover how this module connects to everything else then:)


-
Looked at radio and started looking at all the odd wiring. Can indeed now confirm this radio is to a 260z or early 280z. The PO cut off the wires from the 260z radio connector and spliced it to the late 280z connector. Matches the wiring diagrams for wiring colors, go figure and good catch @grannyknot
-
@grannyknotit is tempting.... My radio works perfect. I am honestly torn as wether to keep the original or go with something like this. https://www.retrosoundusa.com.au/index.php?l=product_detail&p=2530 Judging by some of the shotty wiring you are probably right. Weird thing to change though.
-
@grannyknot the clear would be to protect the chrome, not the SEM. SEM stuff is a beast when it comes to durability. Yes I noticed that too when looking up 77 280z radio faceplates. But that is the faceplate and radio my car came with. My car was made in very early 77 with the sloped rear deck if that maybe changes things.
-
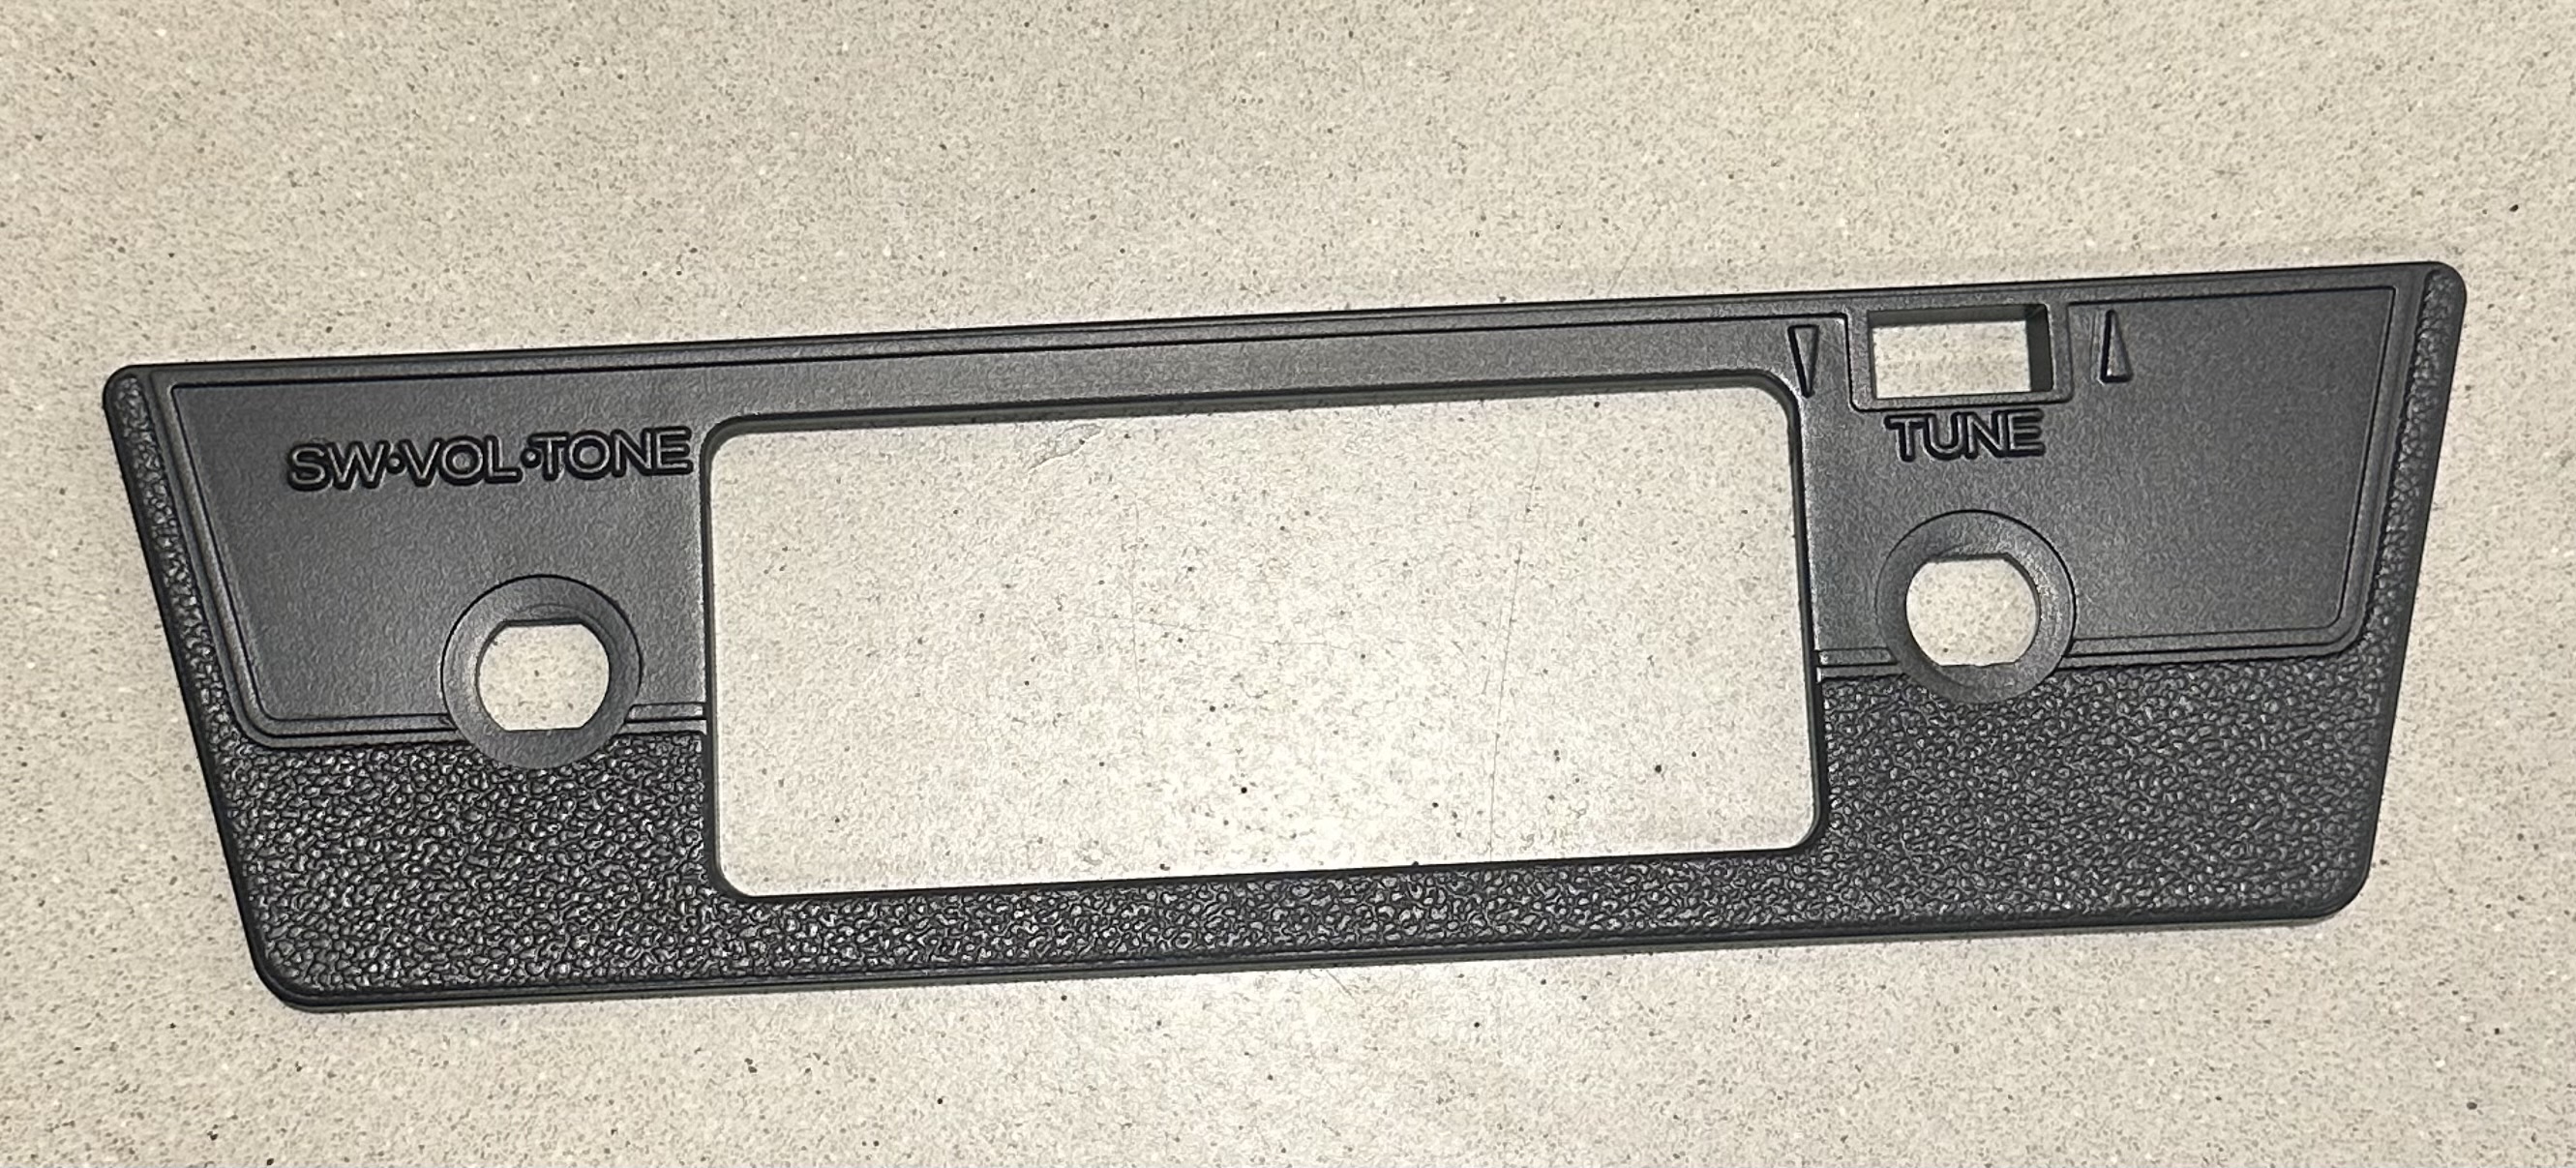
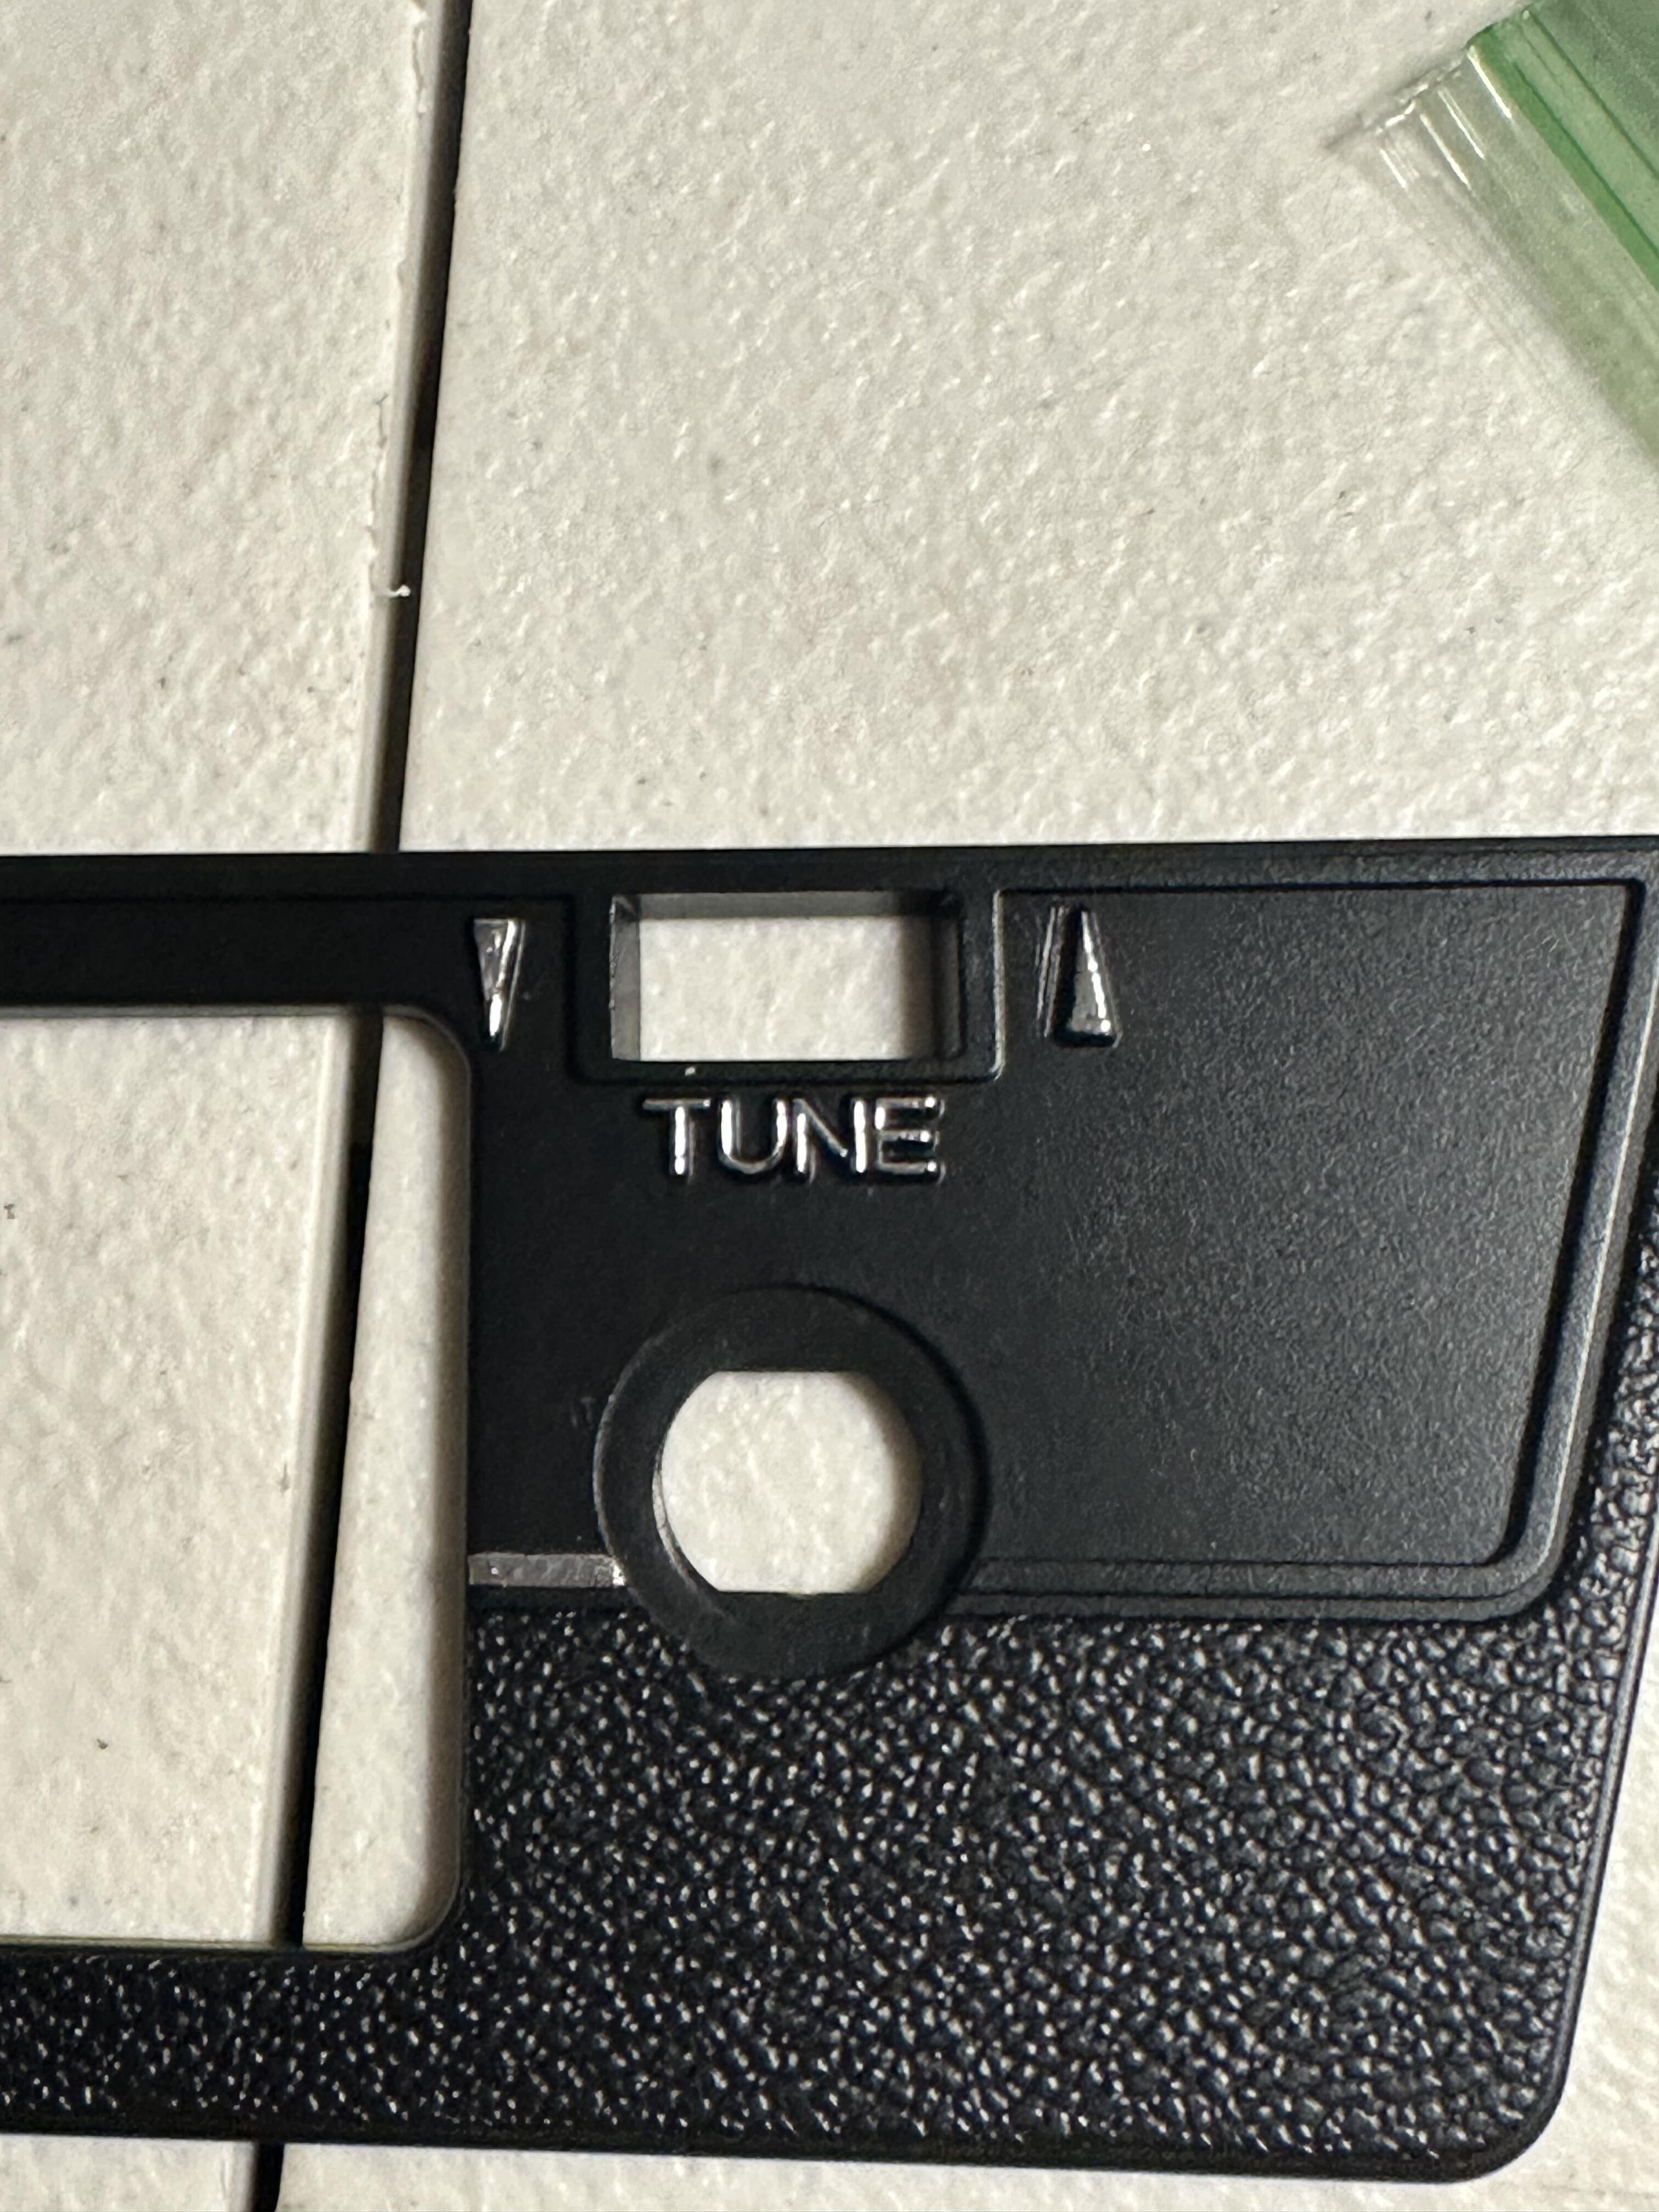
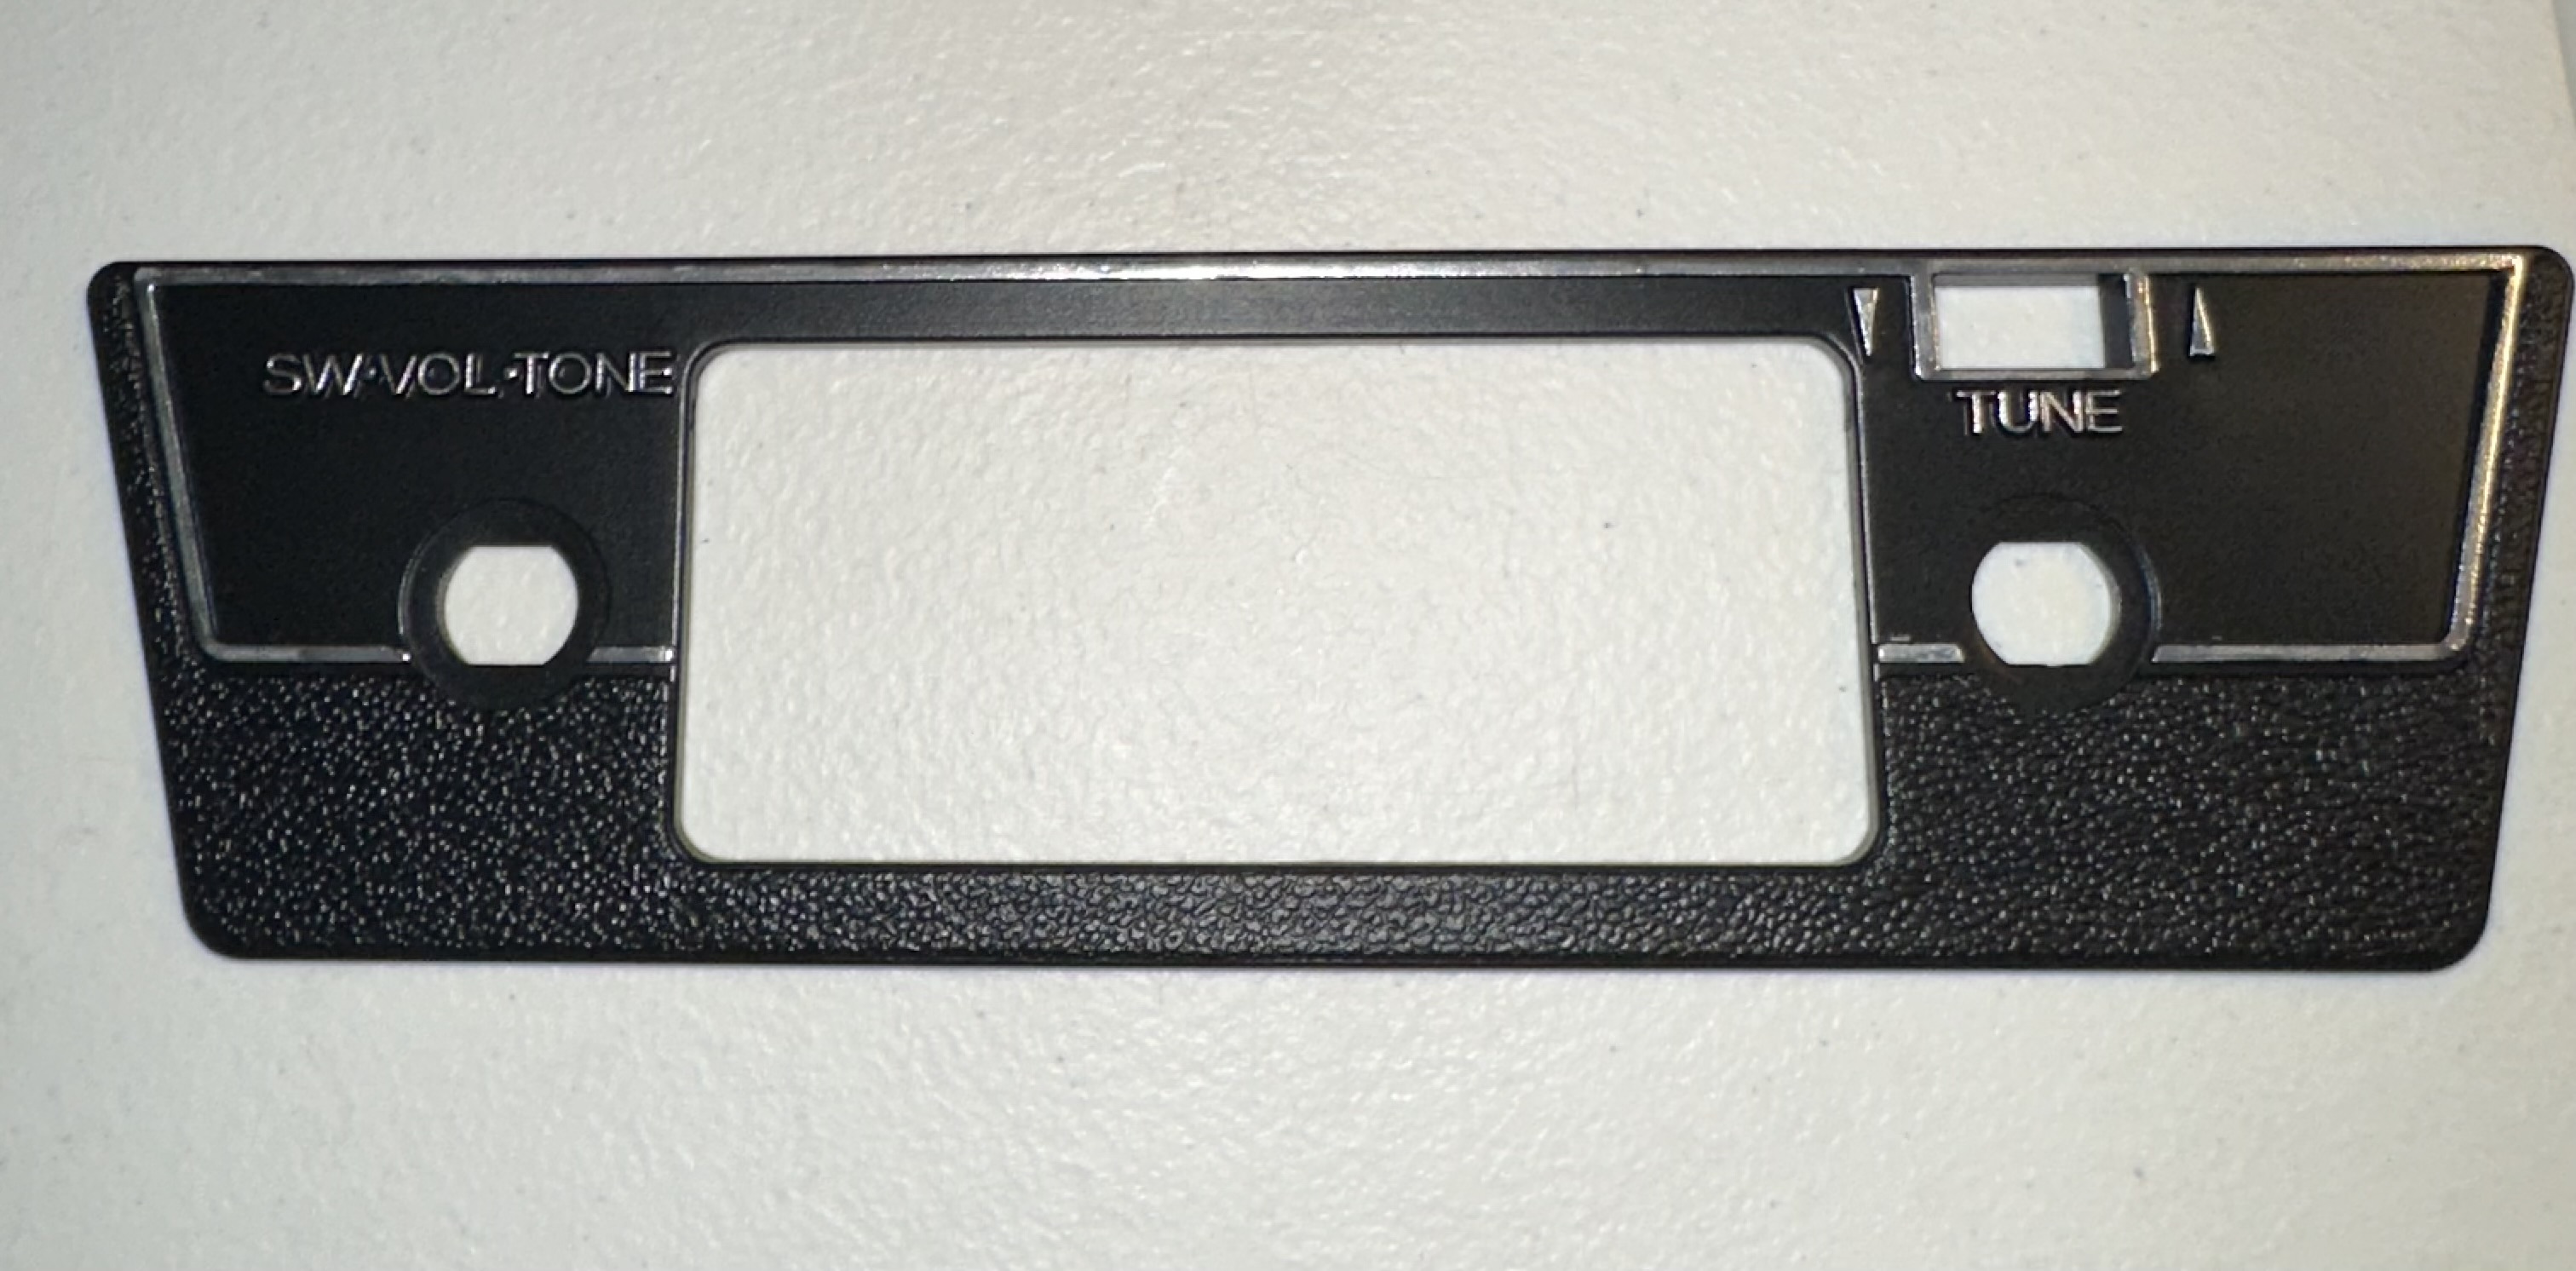
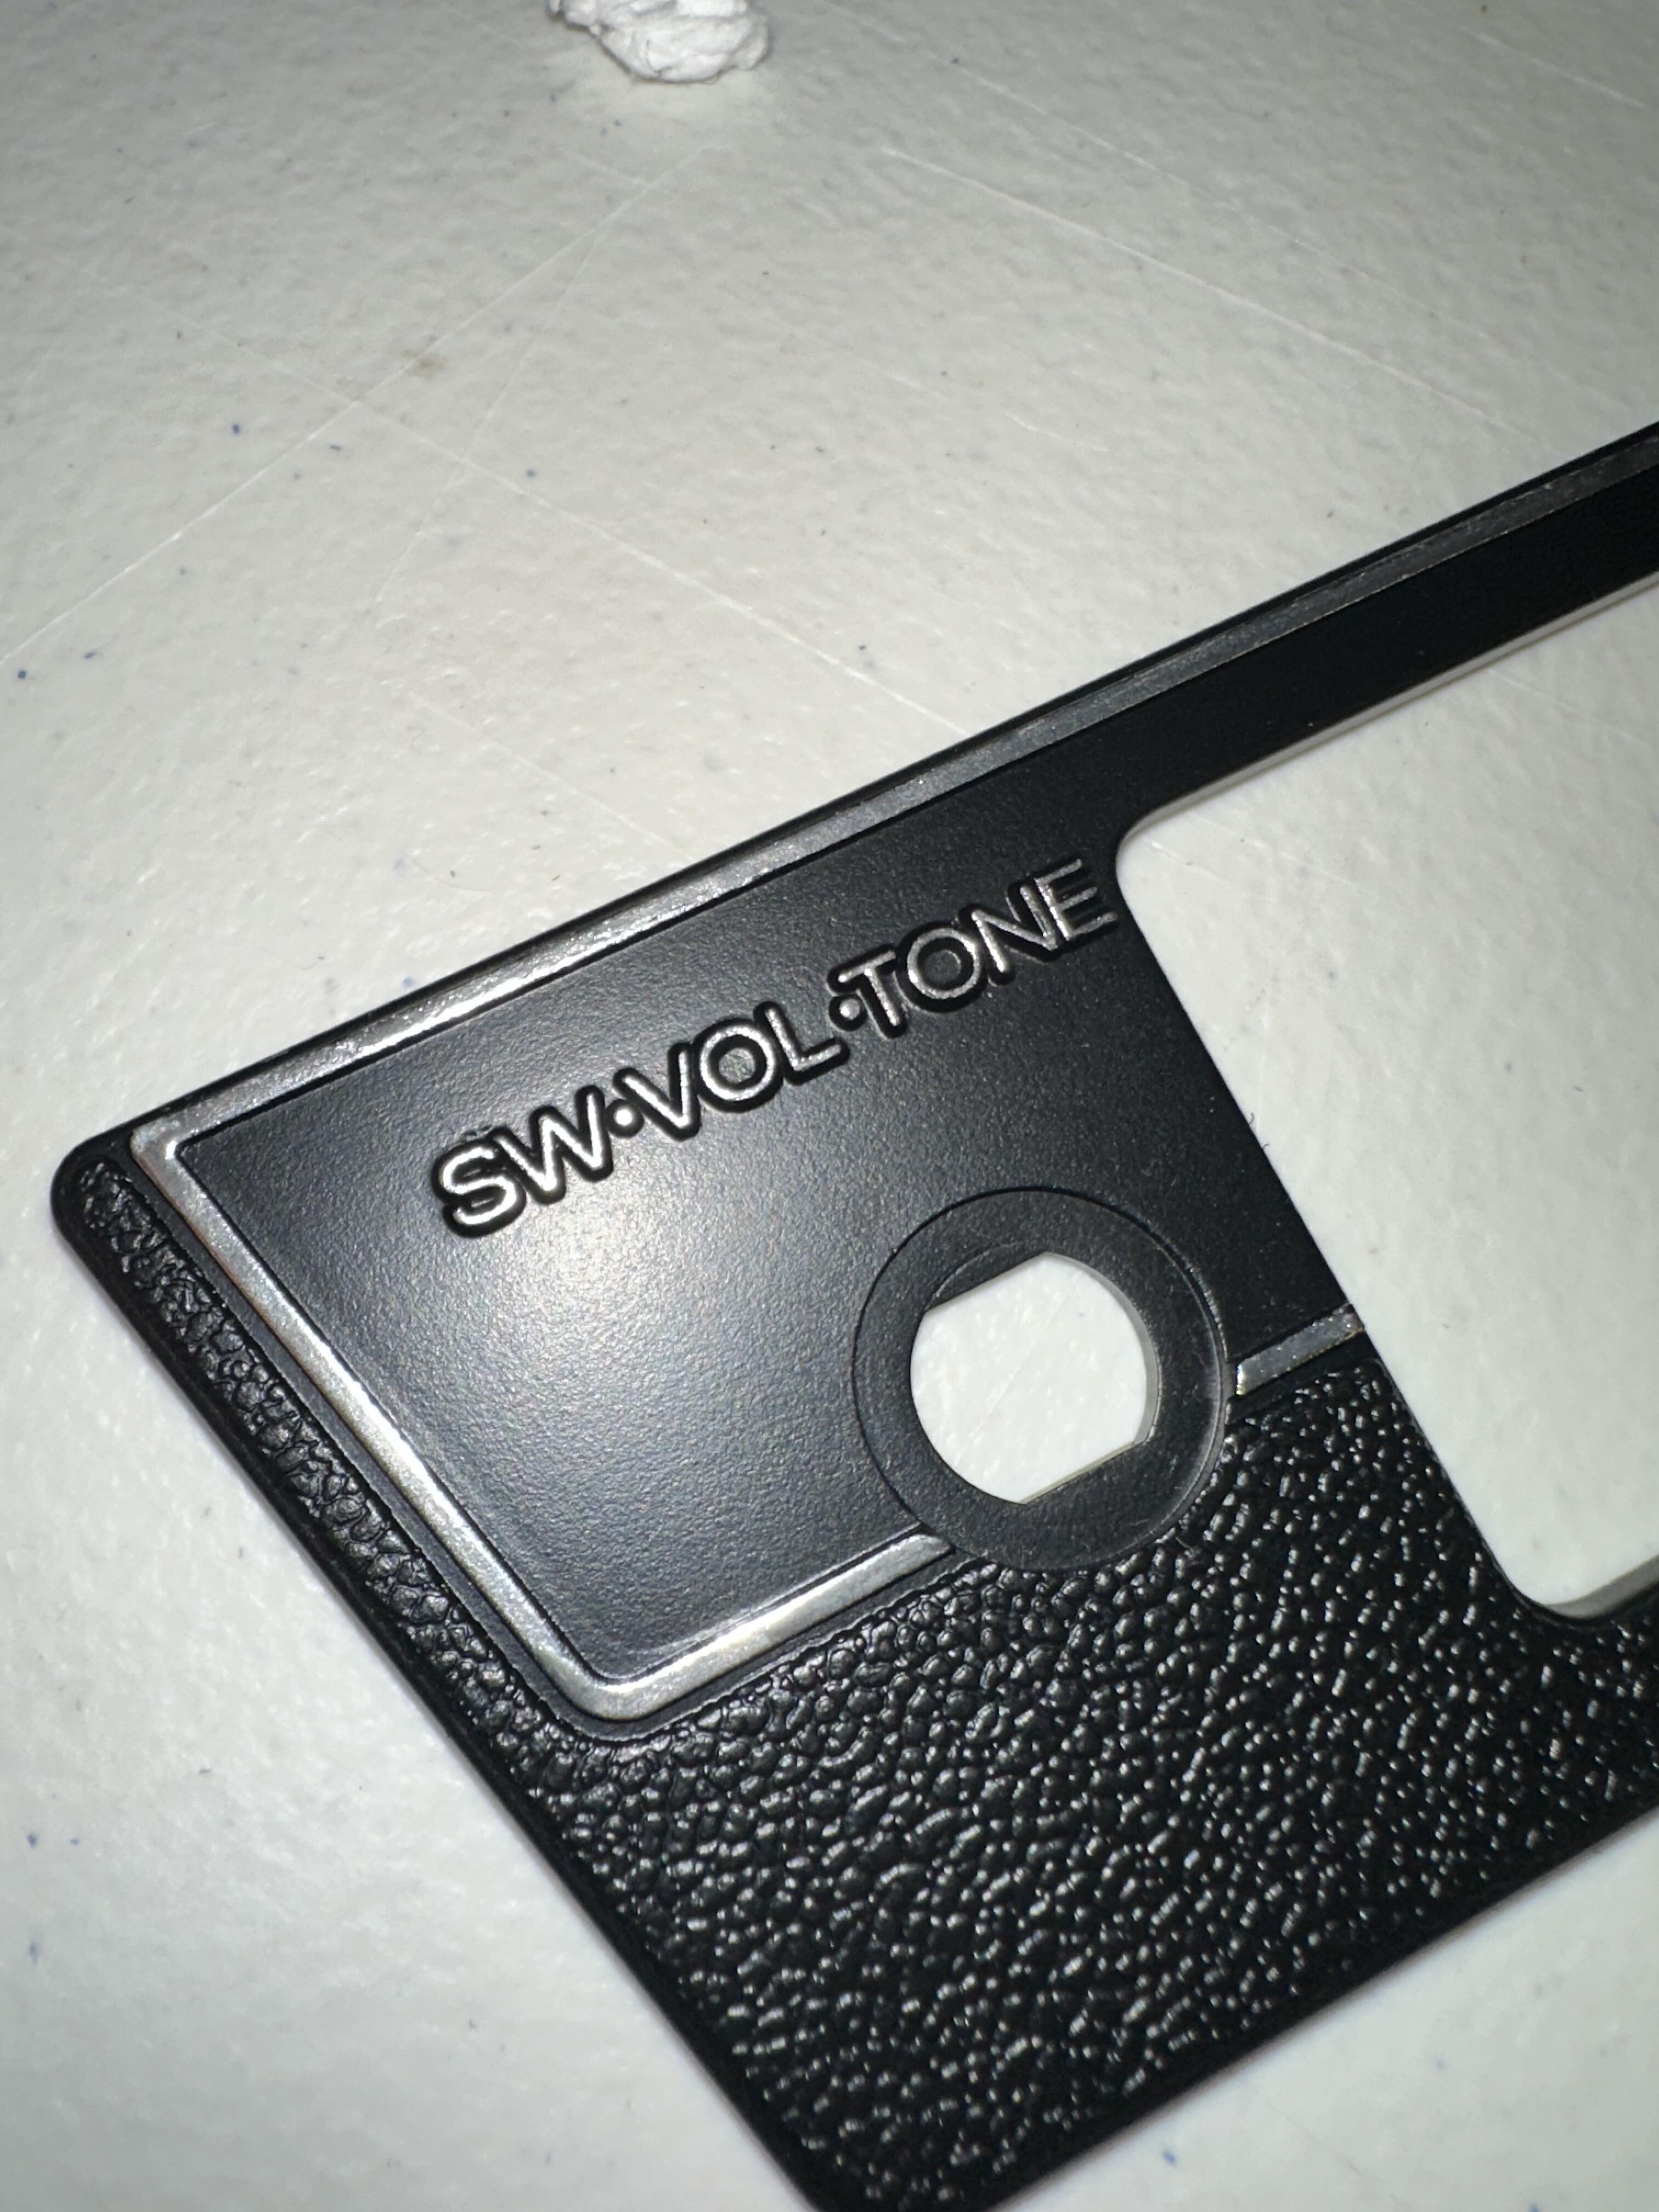
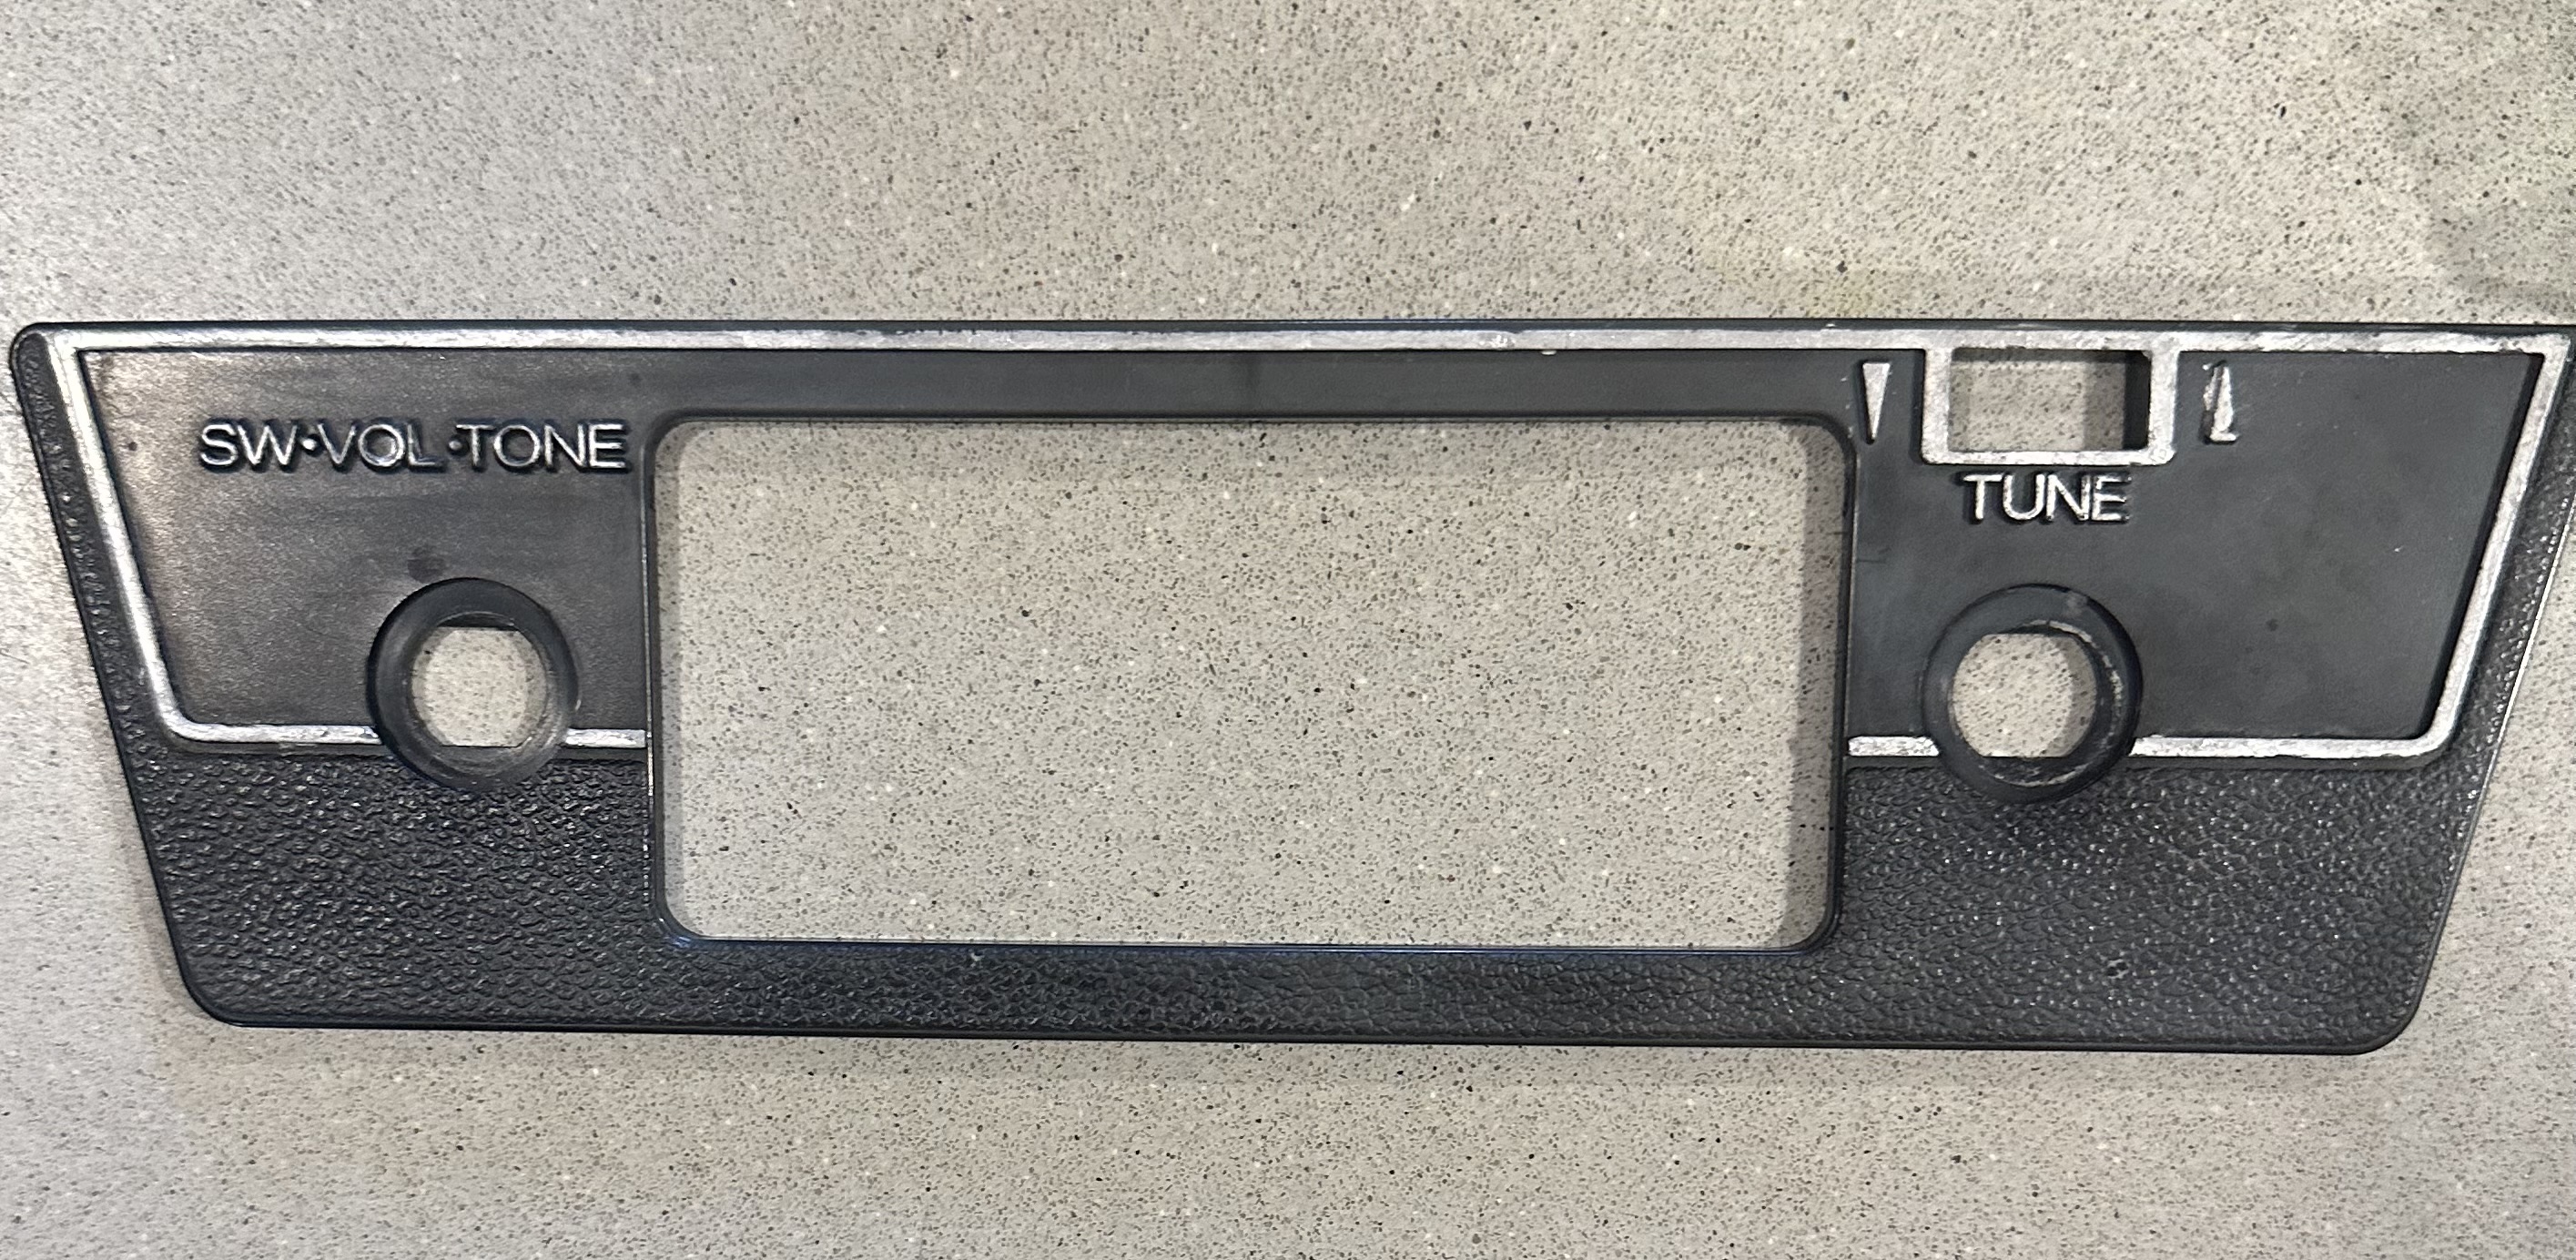
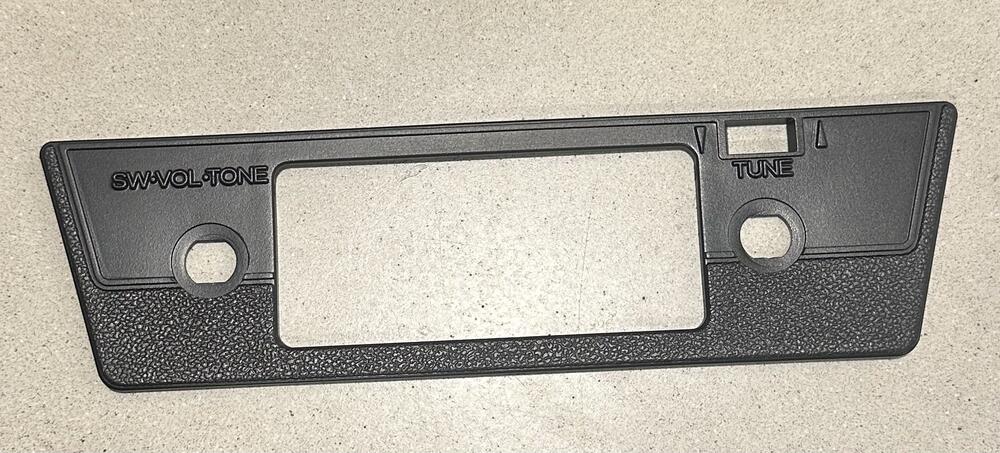
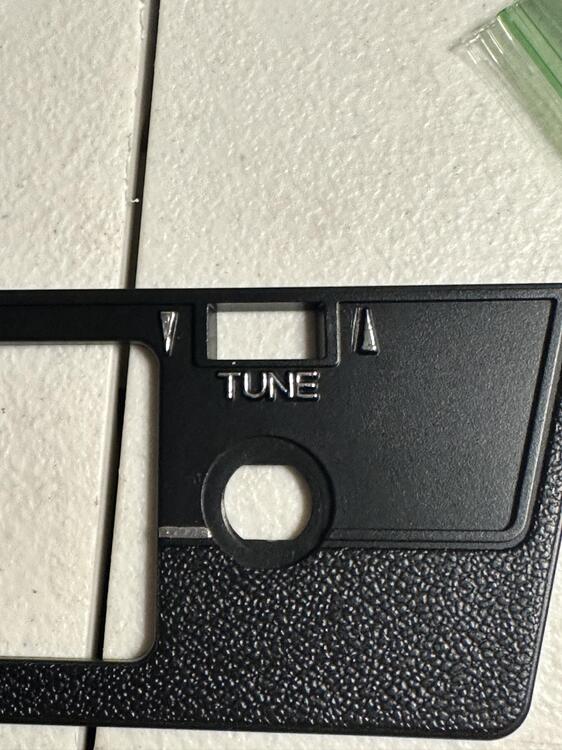
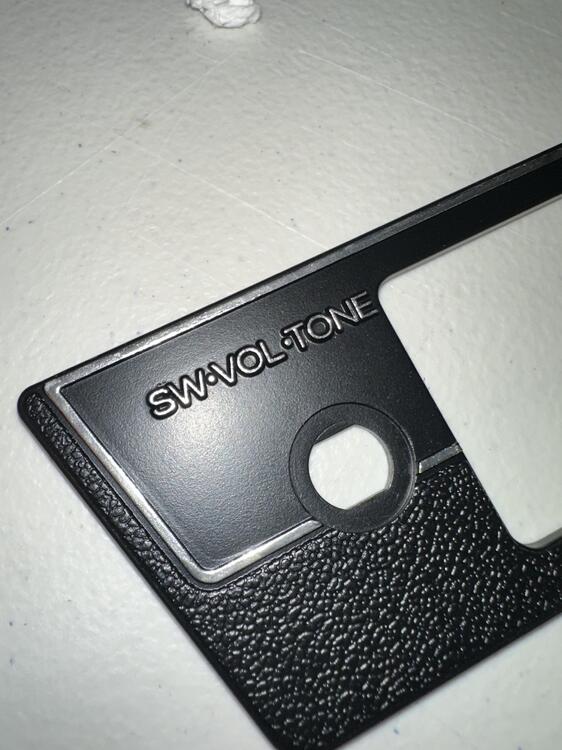
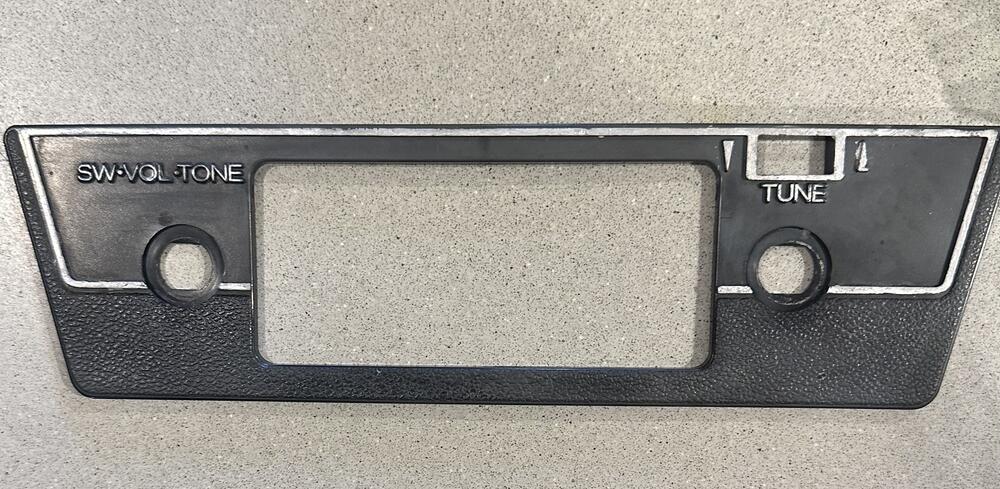
Here is my attempt at restoring the radio faceplate on my 1977 datsun 280z. I used this same process for the climate control bezel. Not perfect, but better than before. Items Needed: SEM 39863: Plastic Adhesion Promoter SEM 38353: Plastic Prep SEM 15013: Landau Black- Color Coat 3M Scuff Pad Chrome Paint Marker https://www.amazon.com/dp/B0B212M89Z?psc=1&ref=ppx_yo2ov_dt_b_product_details you can probably use any marker of this type, this one was just cheap and worked pretty well. Starting Peice. Chrome had faded, been scuffed off in areas. The sun had also caused fading in the black plastic and blotching as well. To Start I first washed the peice in the sink with dawn and scrubbed it. I then went at it with the 3M scuff pad and removed all the chrome, as well as roughed up the surface in preparation for SEM. I then washed it again. Next, I hung it outside and used the SEM plastic prep to clean it, and wiped it down again. After that just follow the directions for the SEM adhesion promoter, then I did about 3 coats of the Landau black with about 6mn in between each. Came out smooth and consistent. I then waiting a day for it to dry and came back at it with the chrome marker. Just spend your time going over the lines and it will turn out decent. The ink comes out a little fast though, so be careful to not hold it in one place too long. FInished Result I didn't clear coat the whole thing as it didn't occur to me until now. Would be nice to hopefully make the chrome paint a bit more durable for when you detail the car. Unfortunately the color coat is long past it's dry time so I am not sure if clear coat is an option now. If anyone has experience on this let me know.


-
View Advert 280z Map Light Assembly Anyone got a map light assembly in good condition? The white housing plastic on mine quite literally crumbled after being touched. I also am ok with some in "poorer" condition. such as faded black plastic, faded lettering etc. The plastic just can't be brittle so I can pull it all apart and restore it. Advertiser ckurtz2 Date 07/11/2023 Price Category Parts Wanted Year 1977 Model 280z
-
Looks incredible, I PM'd you the address and some questions. Thank you!
.jpg.af7a42a6e0293f4c2ad60946d05b37c9.jpg)
.jpg.f85c6b44d38816c3a65e18bdf702ae4b.jpg)
.jpg.915ab3838a90021720bcd75cfde2b045.jpg)