
ckurtz2
Free Member
-
Joined
-
Last visited
Everything posted by ckurtz2
-
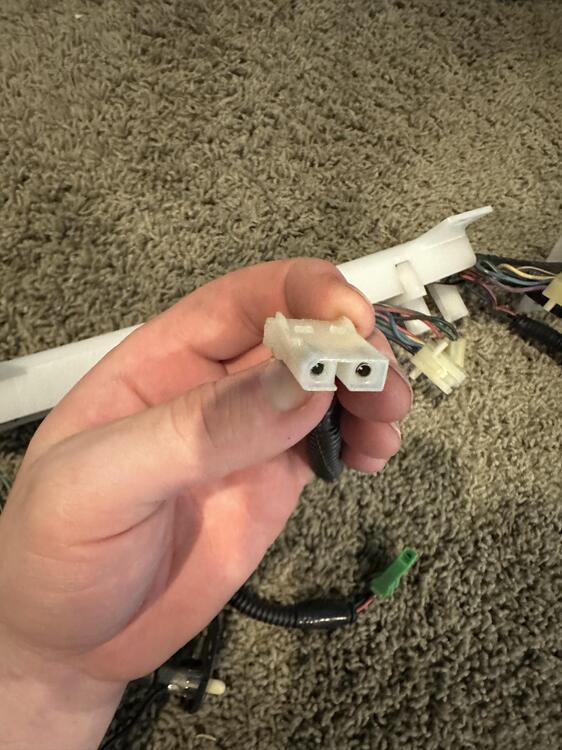
I will have to double check my measurements when I get home, but yes that sounds about right. Most of the plastic is super thin on the connector. Out of curiosity what material are you printing with? I think PBT is what normal automotive manufactures use for connectors but I forget. That is really depressing to hear about the tabs, nothing good comes easily though.
-
@crayZlair Thanks! Not to bad at all for the first try, maybe slow down the print speed and decrease nozzle temp to prevent oozing? It has been a very long time since I've played with a single filament printer, so you probably know better than me. @Captain Obvious I agree 100% I have been using this forum for years, and its always been a great atmosphere. Let me know if those tabs work well. Put them through the ringer and see how strong they are. Anyways, to finish designing the other connector as well as really perfect the dimensions on this part I need to remove the wires from the connector. Does anyone have a tried and true tool they bought to depress the two prongs that hold in the wire to the connector? I am tired of stabbing myself with a dental pick haha.
-
Thank you for taking the time out of your day for doing this, I appreciate it.
-
@Terrapin Z send me a photo of its condition, thank you!
-
Sweet. Let me know if the STL works 280z gauge female connector STL.STL
-
Awesome, thanks for the support guys! Out of curiosity what type of 3D printers do you have @crayZlair and @LorenB667. Well, I spent a few hours and made a prototype of the female 6 pin connector. Let me know if anyone here can actually view the part in CAD. Not going to pursue this further if members can't access the parts I make. @Captain Obvious My old highschool had extremely nice 3D printing equipment ( I was extremely privledged to have acess) and I often made small intricate parts, was hard to tell they were even 3D printed. However, the printers I used were like $40,000 plus each. I have used many printers all the way back to the old Makerbots, and I think it is strongly dependant on the material and settings used in the software to break down the part into tool paths. 280z gauge female connector.SLDPRT
-
@SteveJ This is a great lead, pretty similar to the original, thank you! I was just looking at them a little further and they seem pretty specialty, as to where they are designed with tabs so that they can lock onto the dash itself (the big white plastic box). I wonder if anyone on this site would be willing to expirement with a 3D printer. I am decent at CAD so I bet I could design the connectors without too much trouble, I just don't have access to a 3D printer to do trial and error.
-
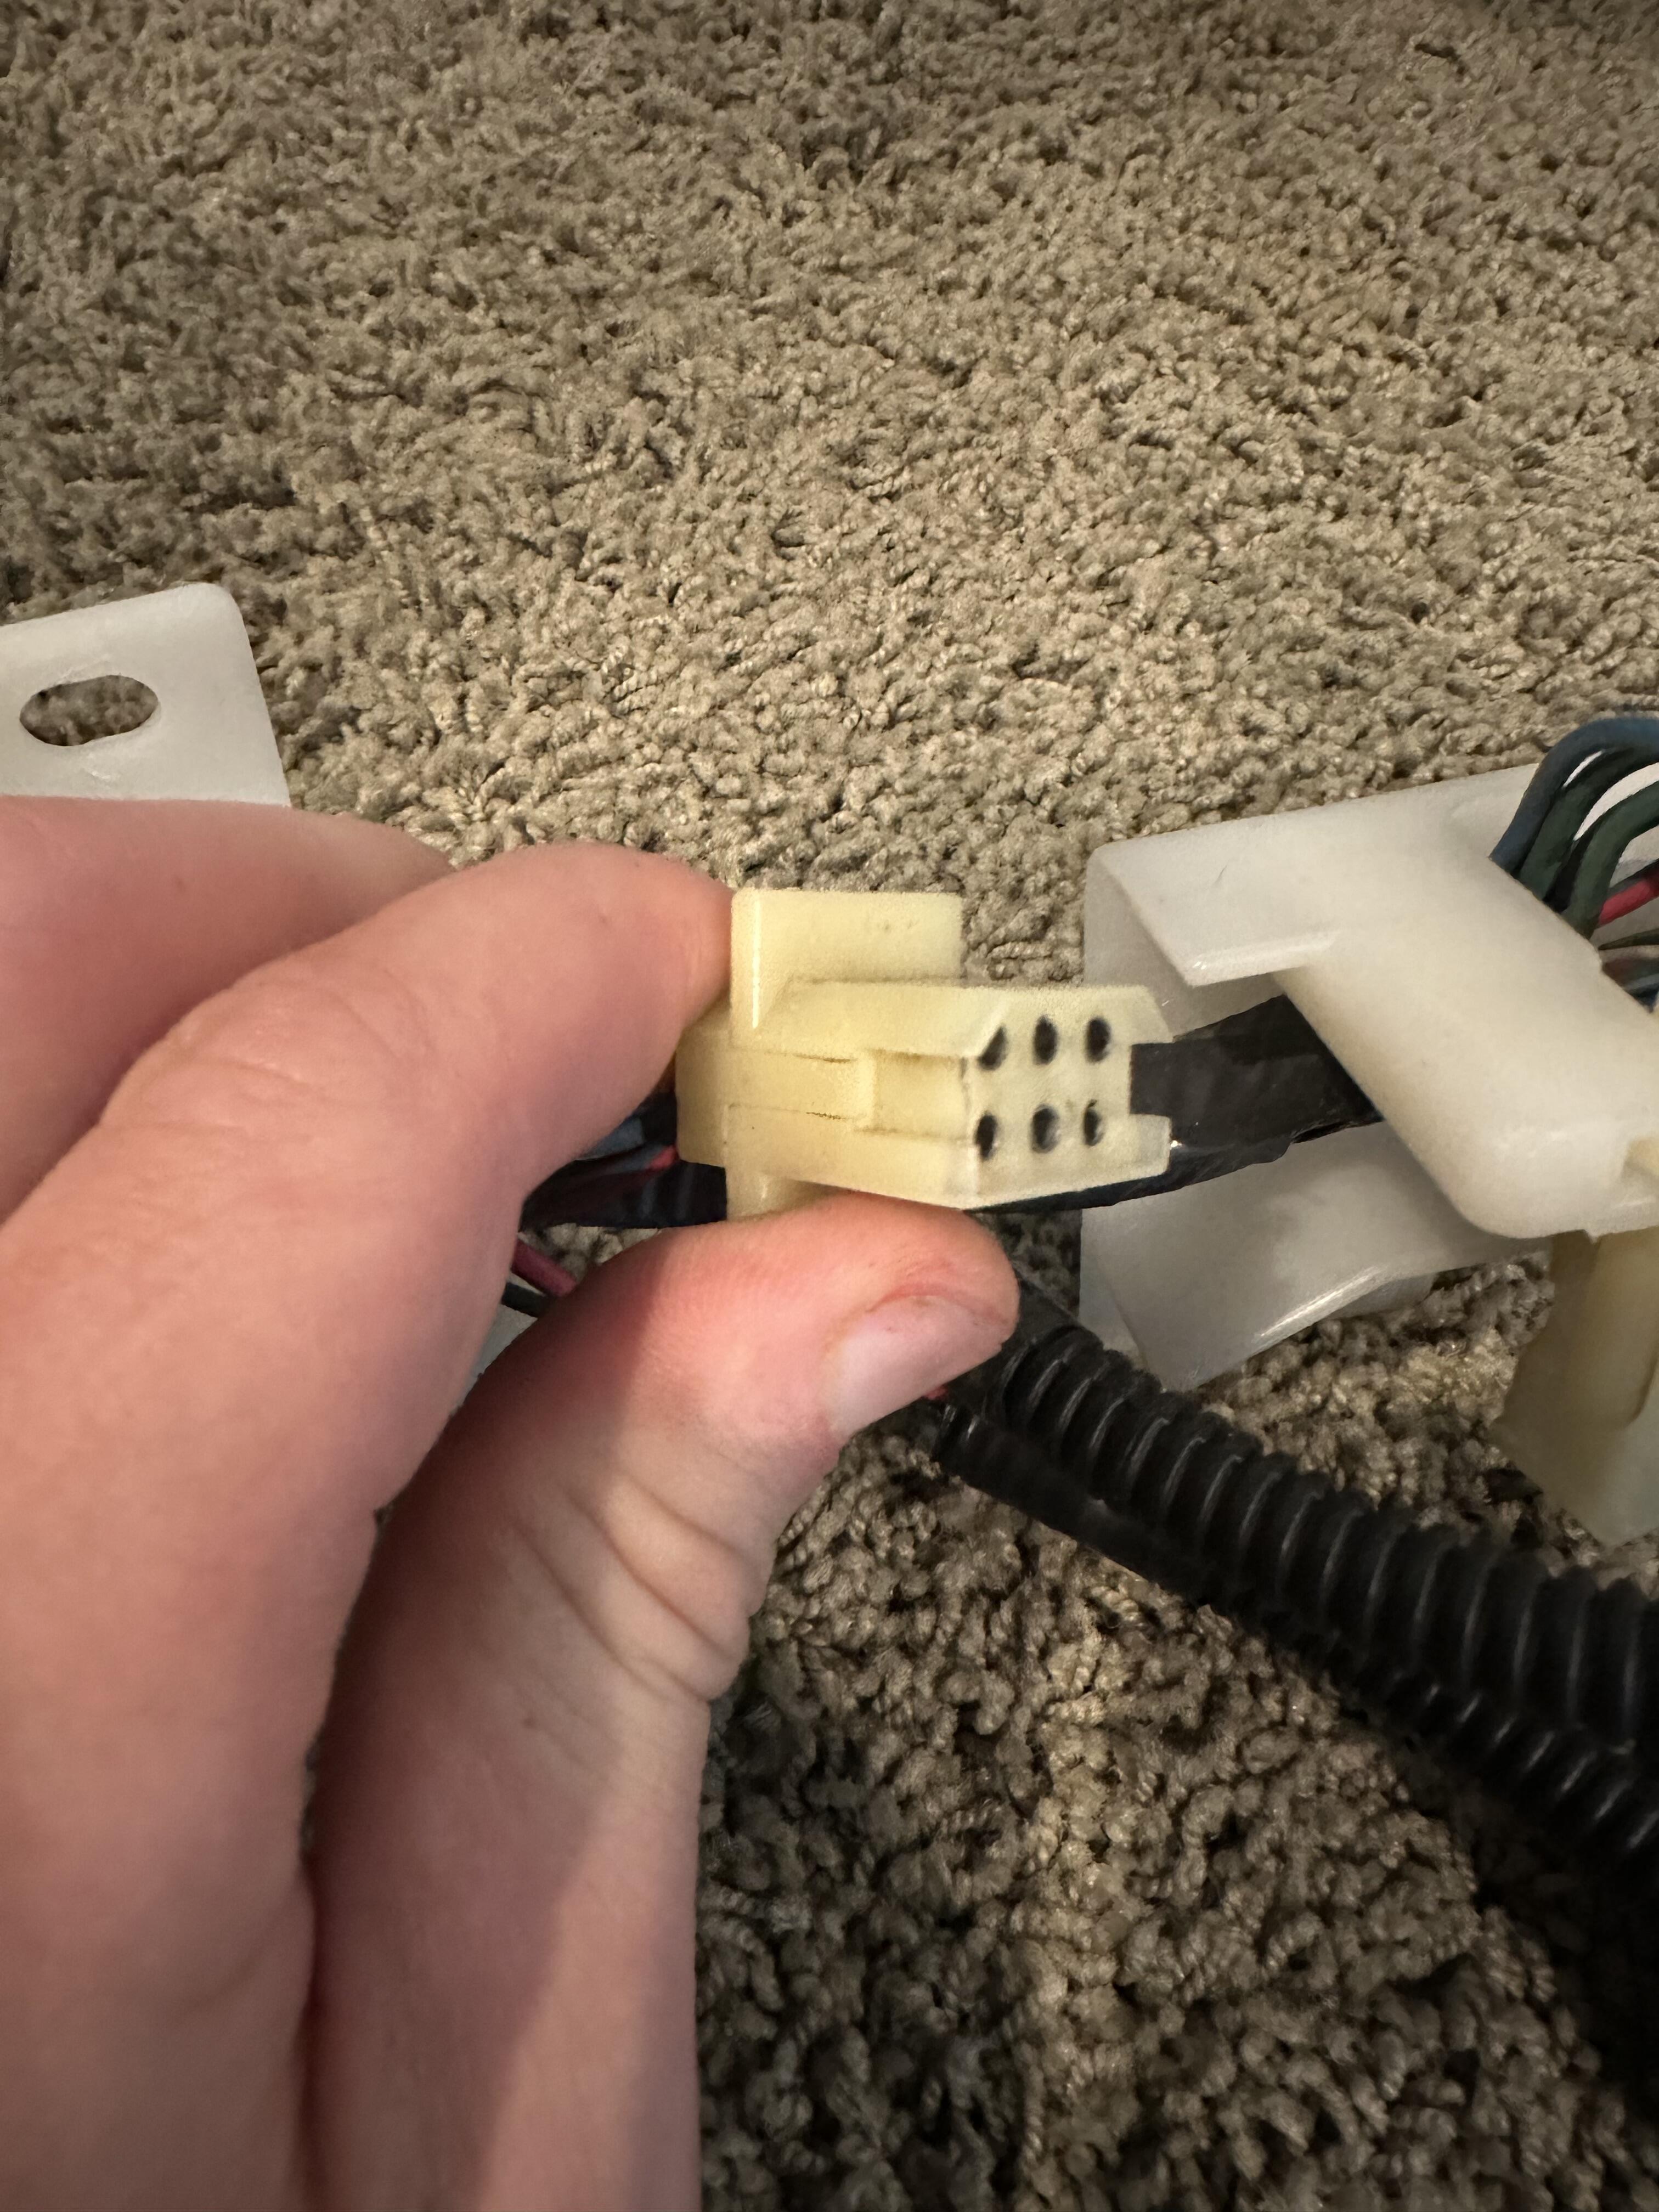
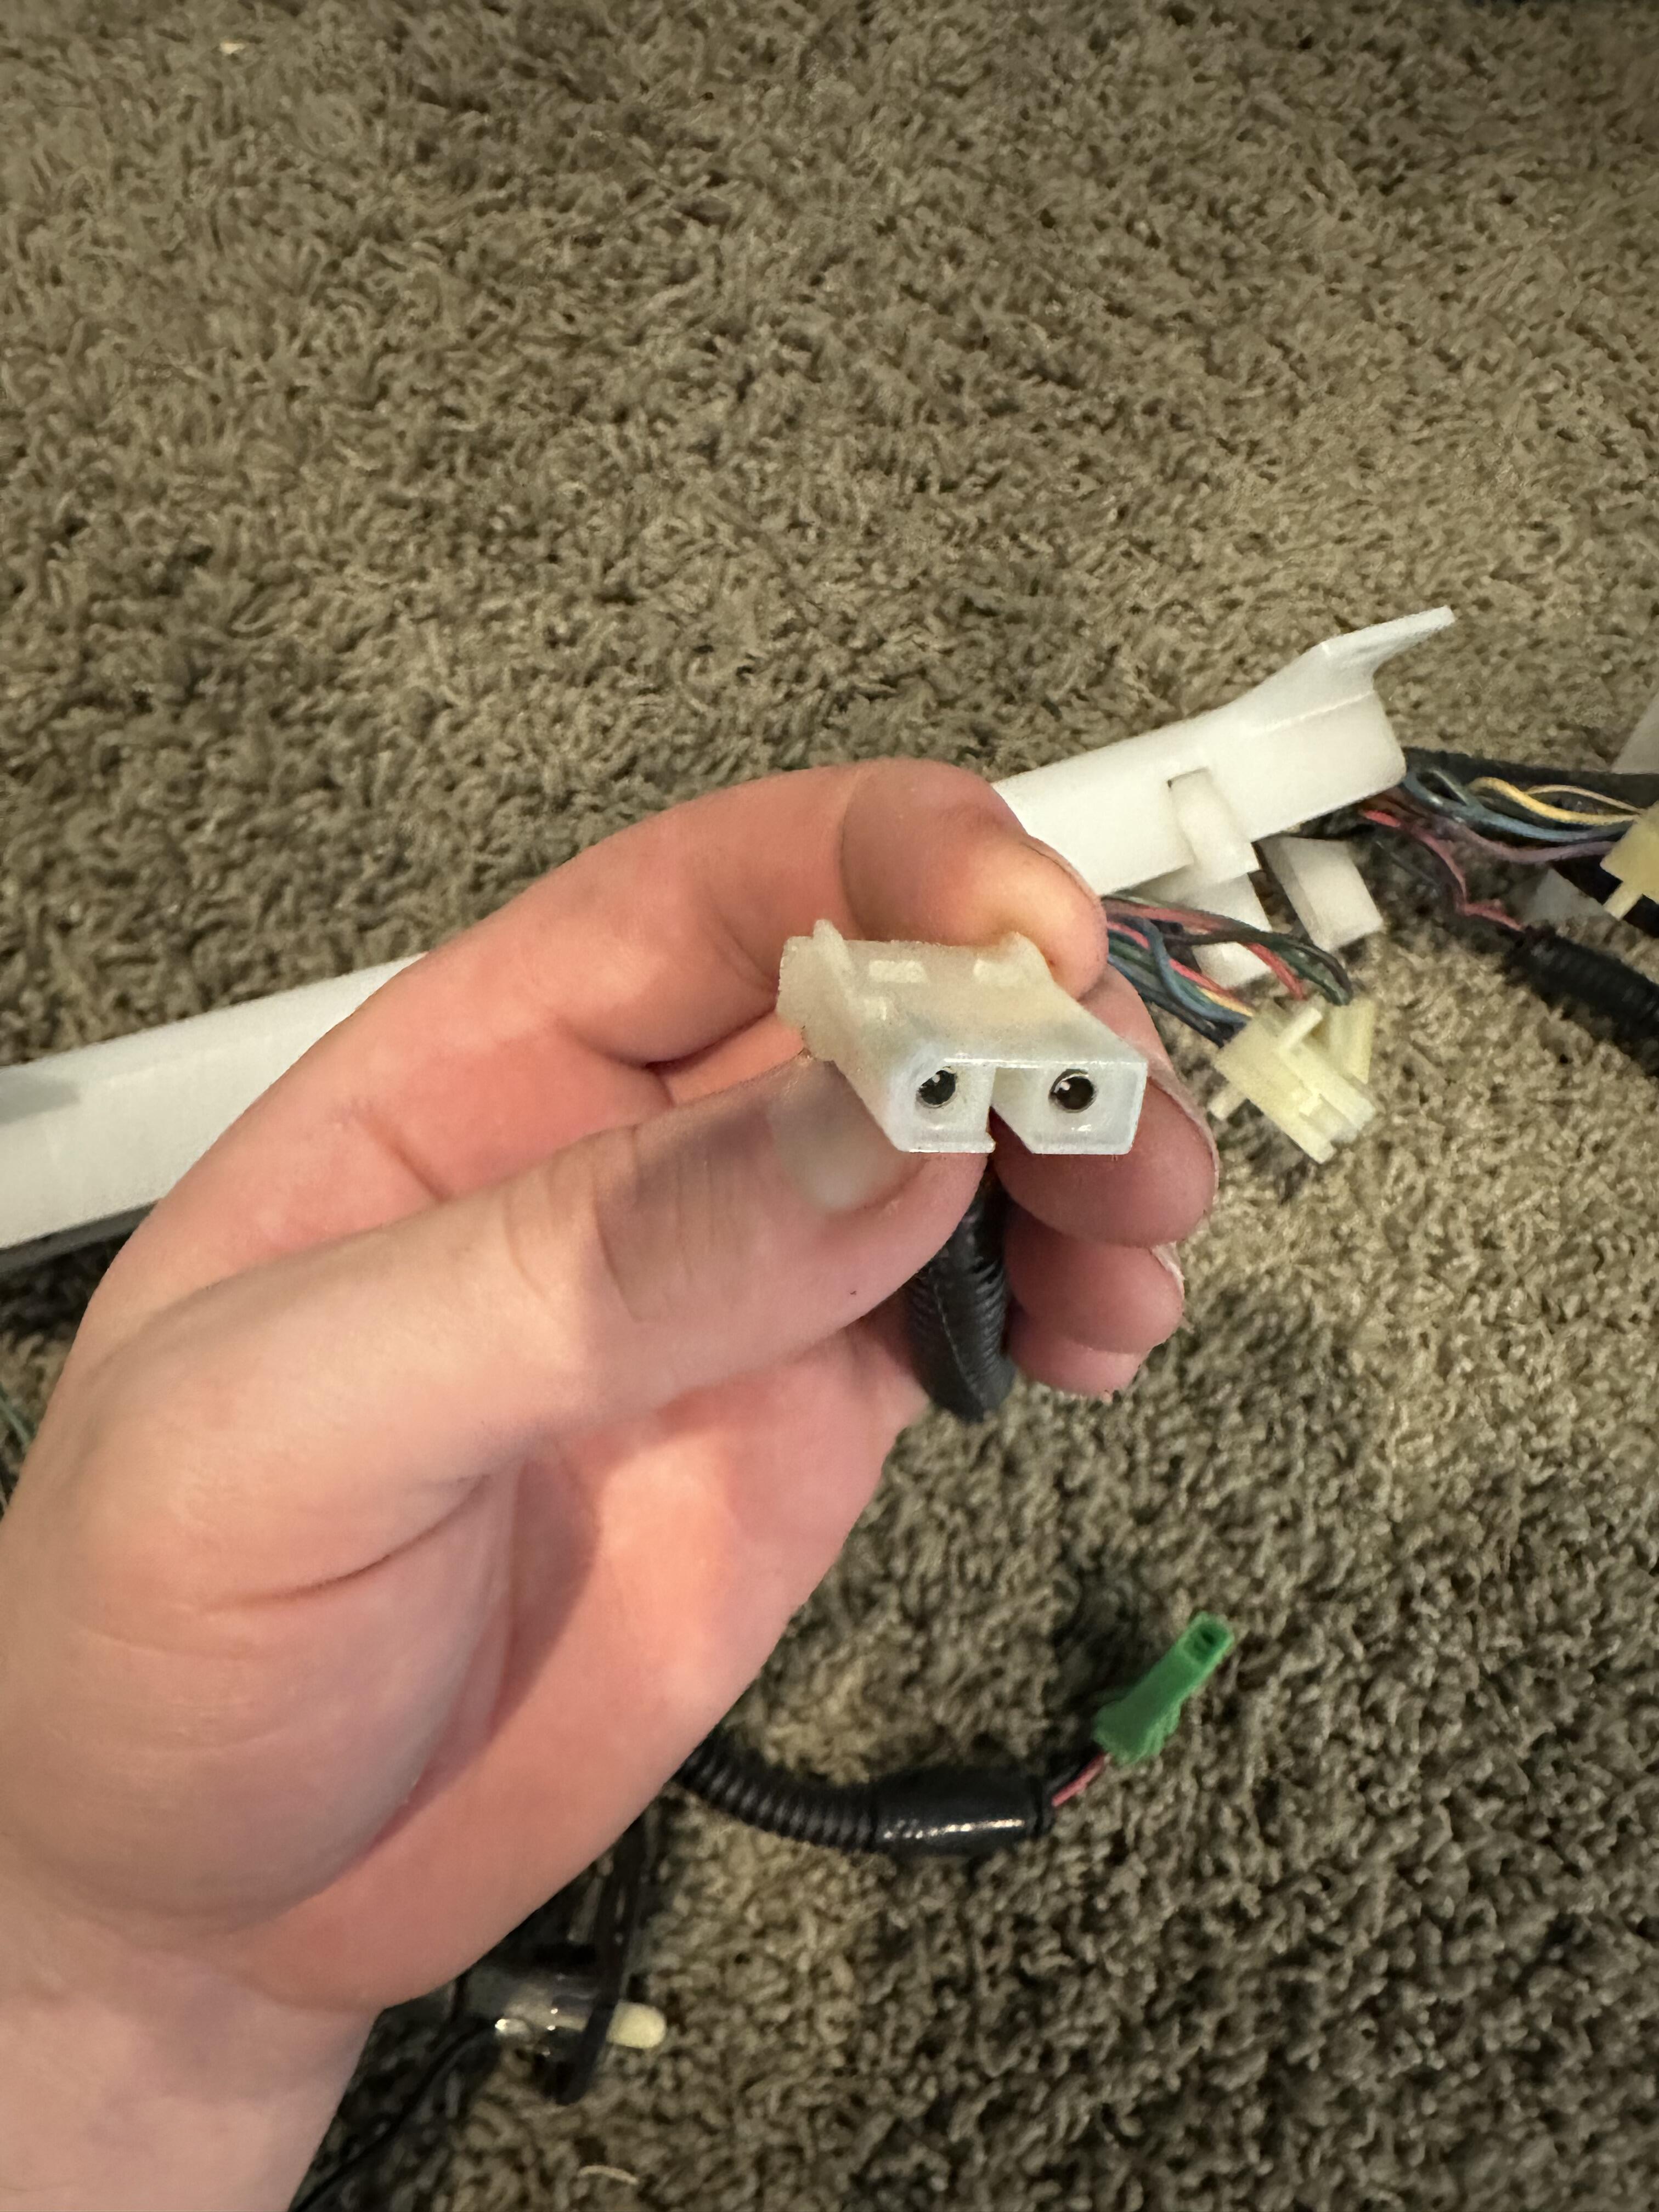
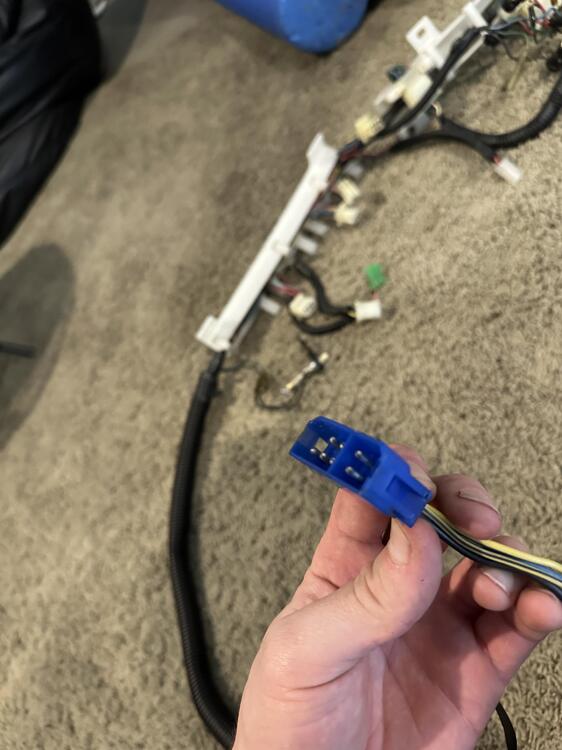
Hey guys, I am reassembling my dash and my next obstacle is replacing all the broken connectors (have broken locking tabs) on the dash harness. I have heard vintage connections carries datsun connectors, but they don't seem to have what I need. My connections seem to be bullet connections inside the connector instead of spade. I am sure many people have ran into this problem. Should I just repin the connectors for spade connections and go with one of the vintage connectors. I would prefer to find the proper connector and save the hassle of repinning the harness, so let me know if you know where to get these connectors!


-
View Advert 280z Climate Control Faceplate. I need a new faceplate, because unfortunately the tabs are broken on mine for mounting it. I don't need the center portion. Advertiser ckurtz2 Date 06/26/2023 Price Category Parts Wanted Year 1977 Model 280z
-
Sounds Like that is the way to go. Fun project, good thing I am good with solidworks:)
-
View Advert 280z HVAC gear Hey guys, looking to replace the little black gear on the climate control position selection switch. As you can see mine has grown old and is cracked. Advertiser ckurtz2 Date 06/16/2023 Price Category Parts Wanted Year 1977 Model 280z
-
You guys are great! Thank you:)
-
That forum is a god send. THANK YOU so that guy in WI was able to rebuild both your vacuum water valve and the temperature valve it seems? In addition, do you know where I could get my heater core outlet cut and bended like you said you did? Also could you direct me to @Captain Obvious post that you keep referencing in your thread about the heater core?
-
@Yarb do you know were he sent it to? And does it refer to the valves or the heater core.
-
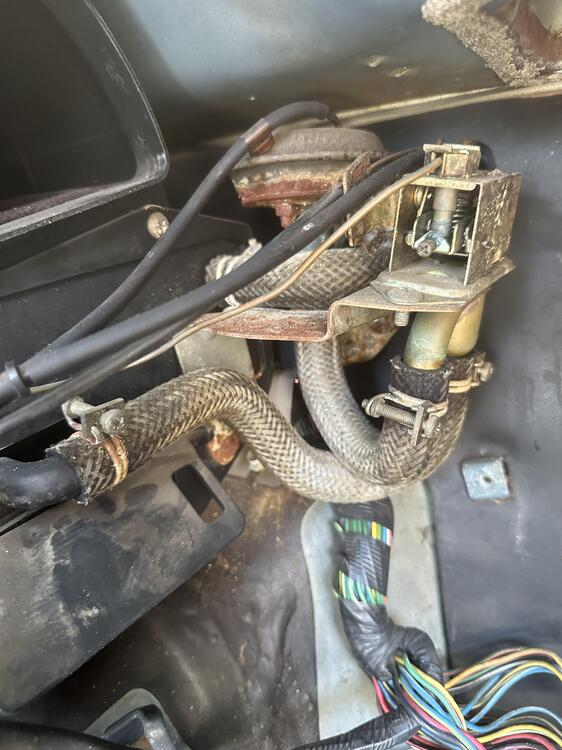
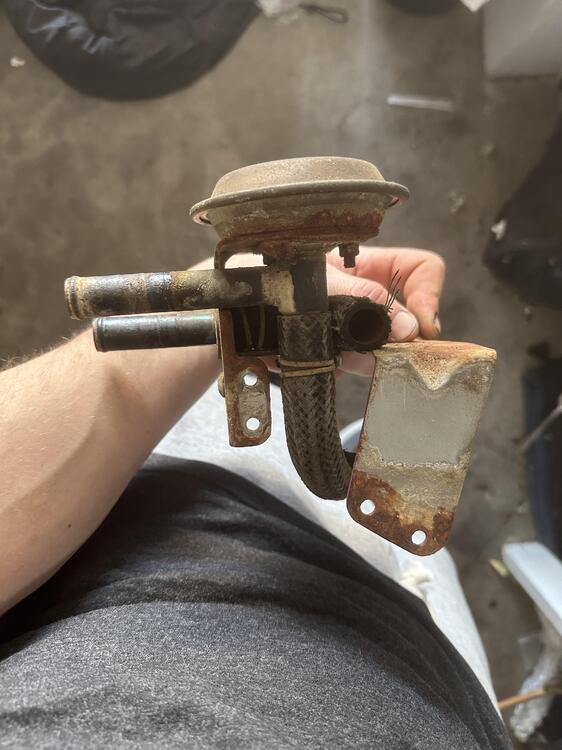
hey guys, my 1977 Z is under the knife again, this time for a complete interior restoration. Currently I am doing a full rebuild of the HVAC unit inside the dash down to the bolt. (AC box, heater box, climate control module, etc). I have everything apart and have a plan for pretty much everything except the heater core/vacuum water **** and the temperature control water ****( apologies if this is not those valves actual names). As you can see my vacuum water valve was leaking bad (I actually previously capped off the heater core from the engine bay due to this) and everything just looks old and corroded, and shouldn't be left unadressed. Anyways it is no secret these parts are no longer availabe. I have done lots of forum digging and found NAPA 660-1000 can be used to rebuild the temperature control water ****. However, the vacuum water **** is still a loss for how to pull apart and restore (might be too rusted anyways). Then there comes the weird temperature control thing (has a copper wire going into the heater box) attached to temperature control valve that seems functionless. My question to you is... Is it worth the hassle to try and source parts for these or completely restore with replating stuff and finding seals etc. Or is there a known and cheaper/better method on how to just improve the system and ditch these valves, but leave the rest of the system relatively unmodified. Also wondering if the brassworks heater core is worth the price, or if I should just get the SPECTRA PREMIUM 94741 from a ford escort and save some $. Any advice is amazing, especially if you have done the work on your Z!

-
Sorry for the late reply, it has been a rough finals week. Anyways, yeah the lumpyness is caused by the "vacuum formed" carpet instead of the sectional ones like the original. It is suposed to conform to the body of the car easier. Regarding your padding. I honestly have no idea, I unfortunately already threw all my old stuff out, so I have nothing to reference for you:(
-
Anyone else rocking the MSA molded carpet kits? I am curious if they look ok installed, or if I truly messed up and people tend to avoid their carpet kits.
-
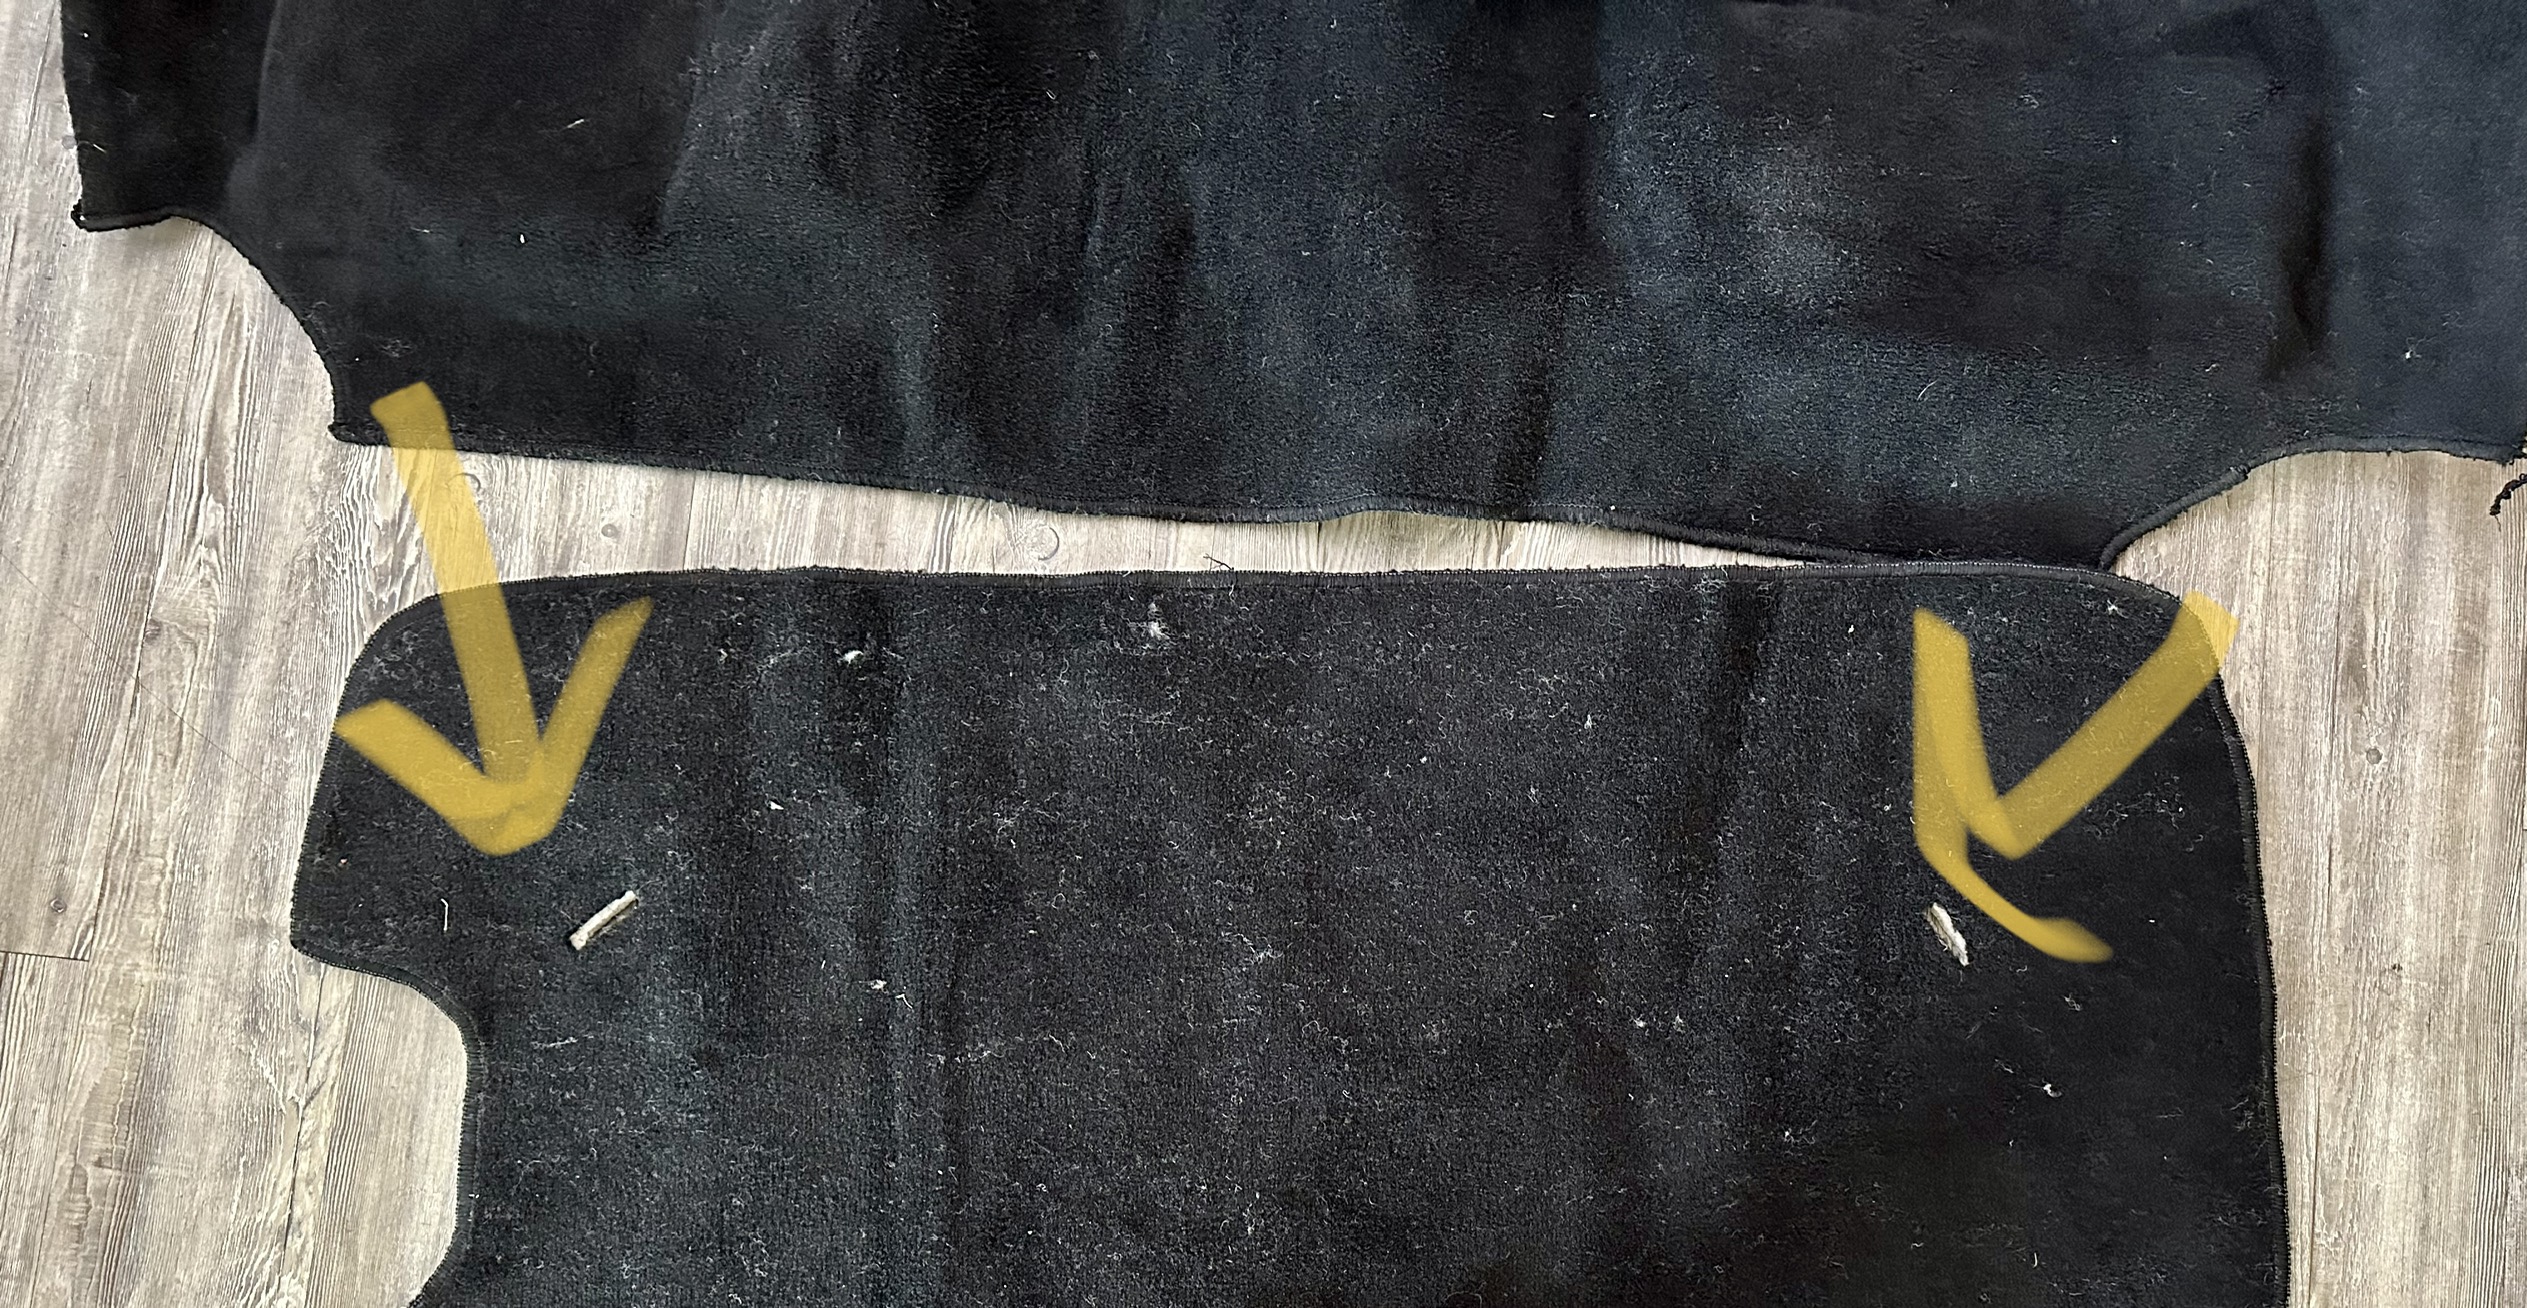
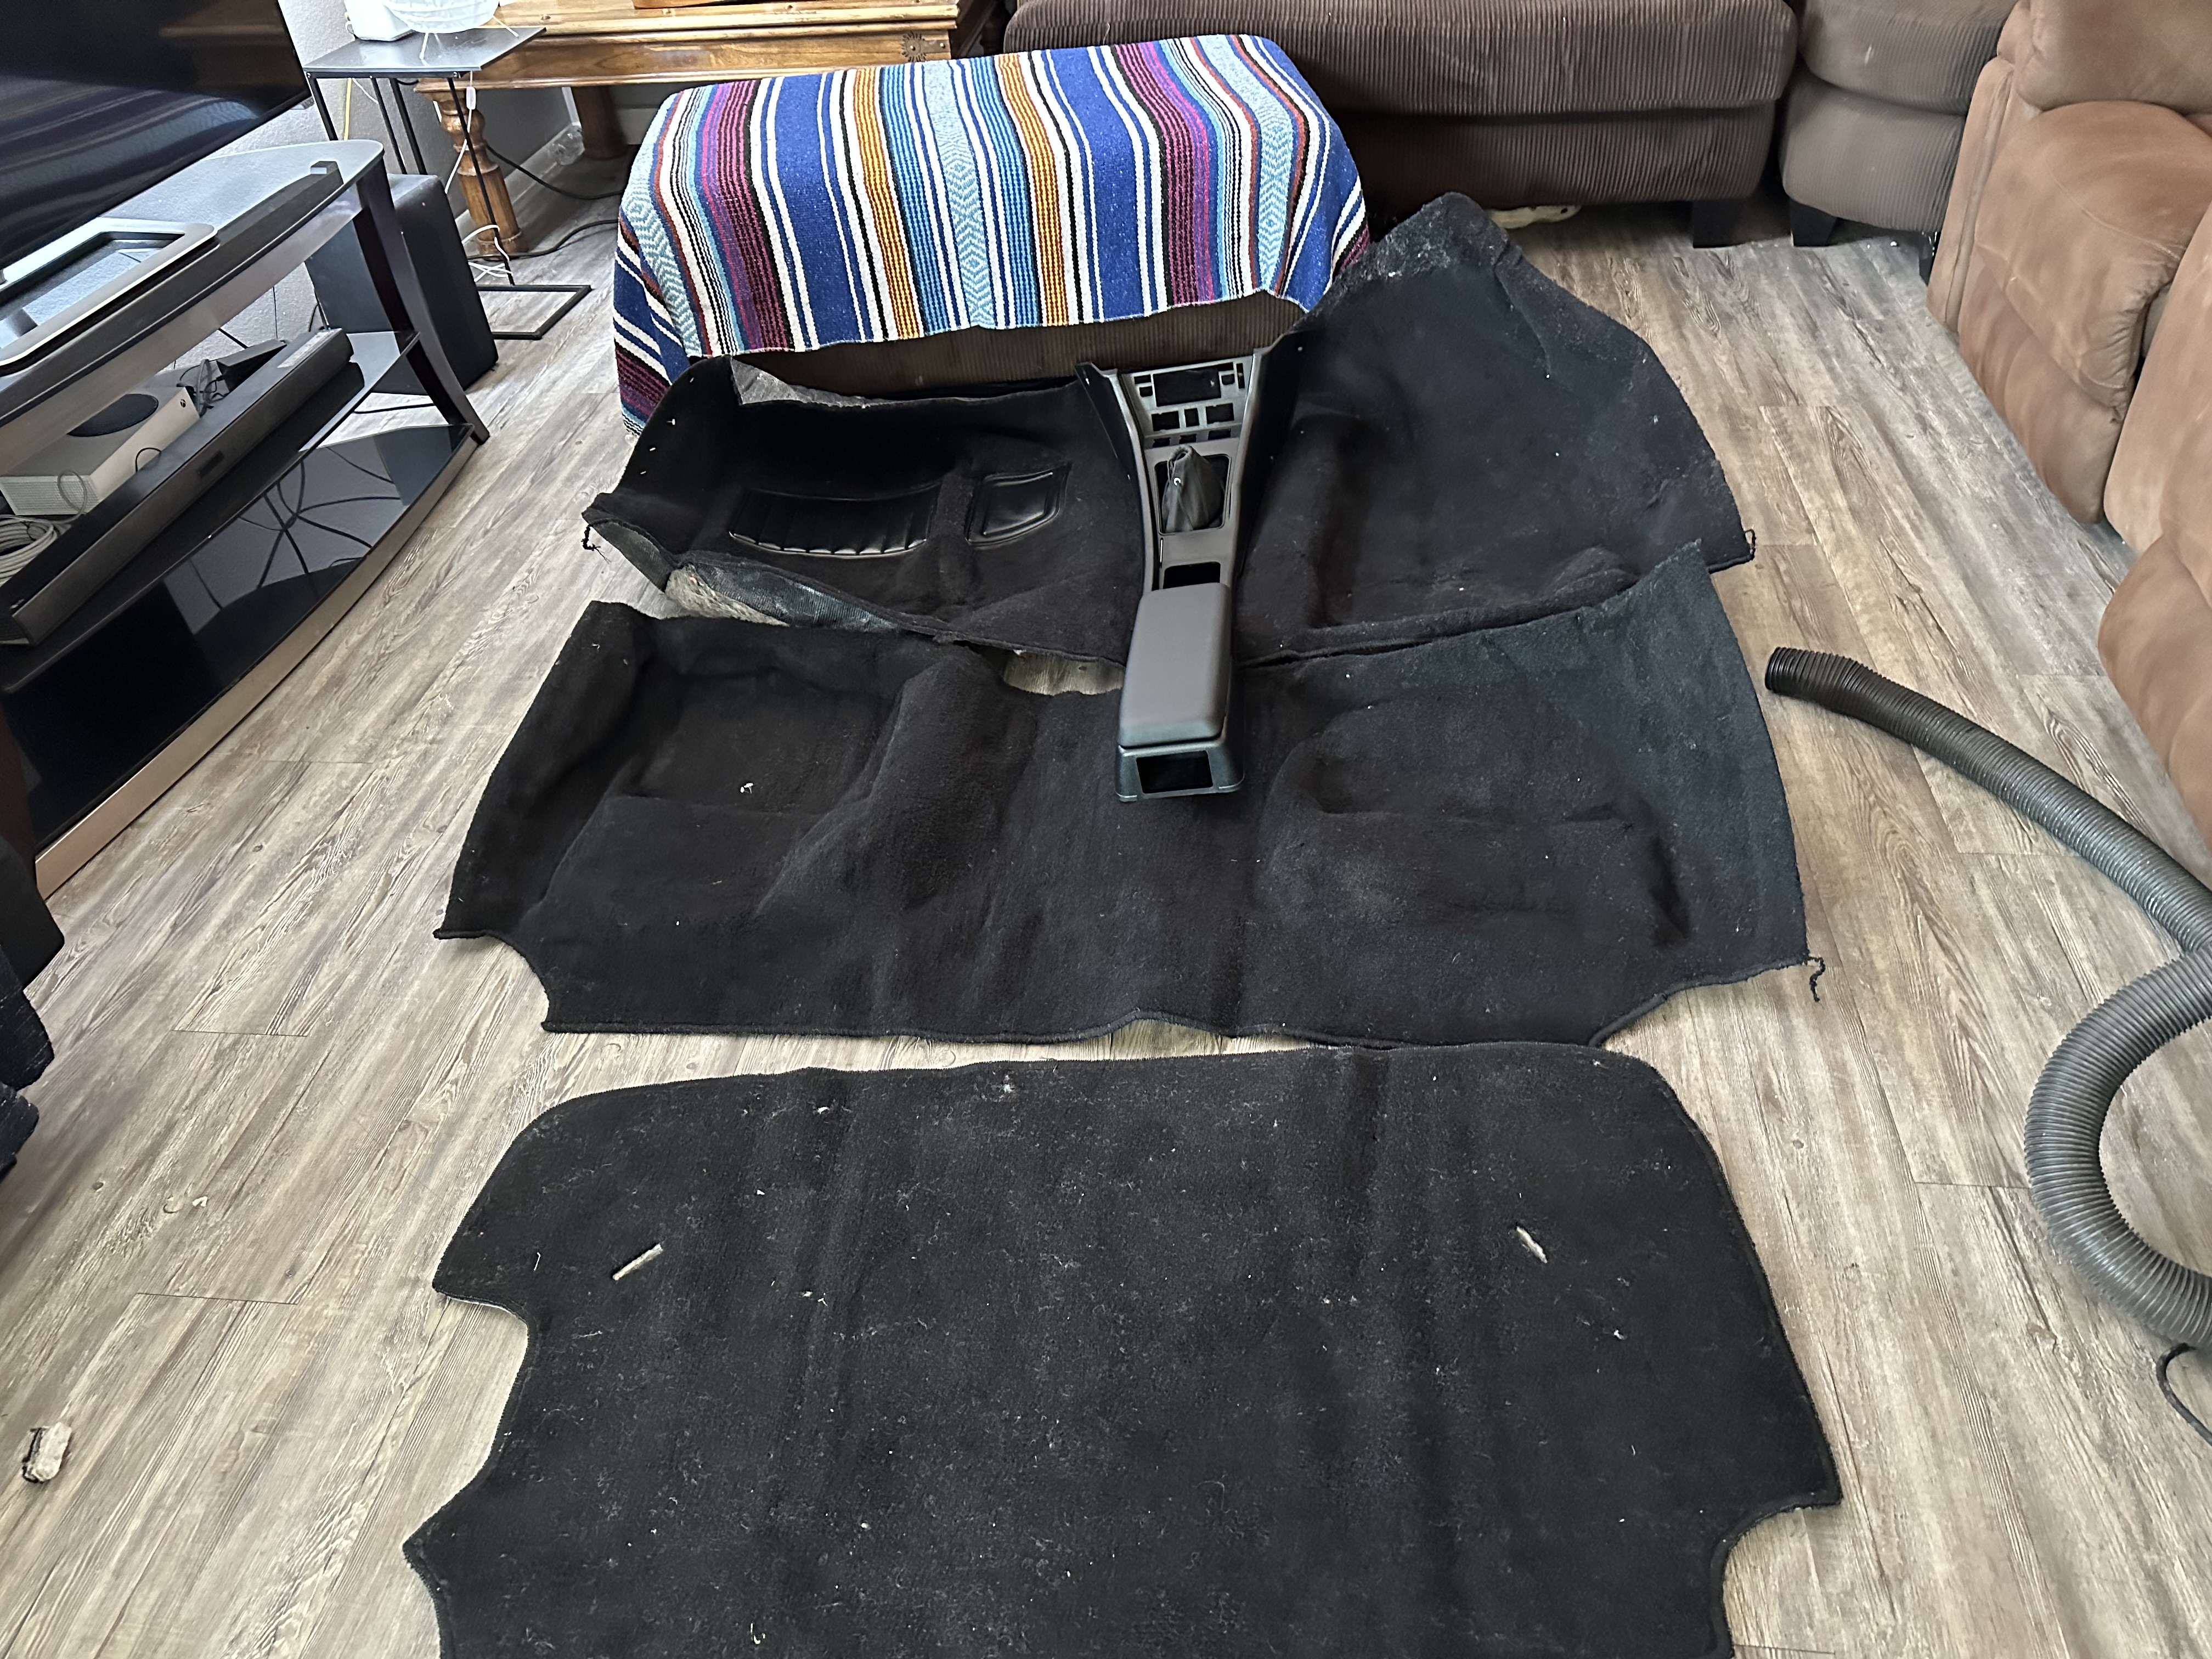
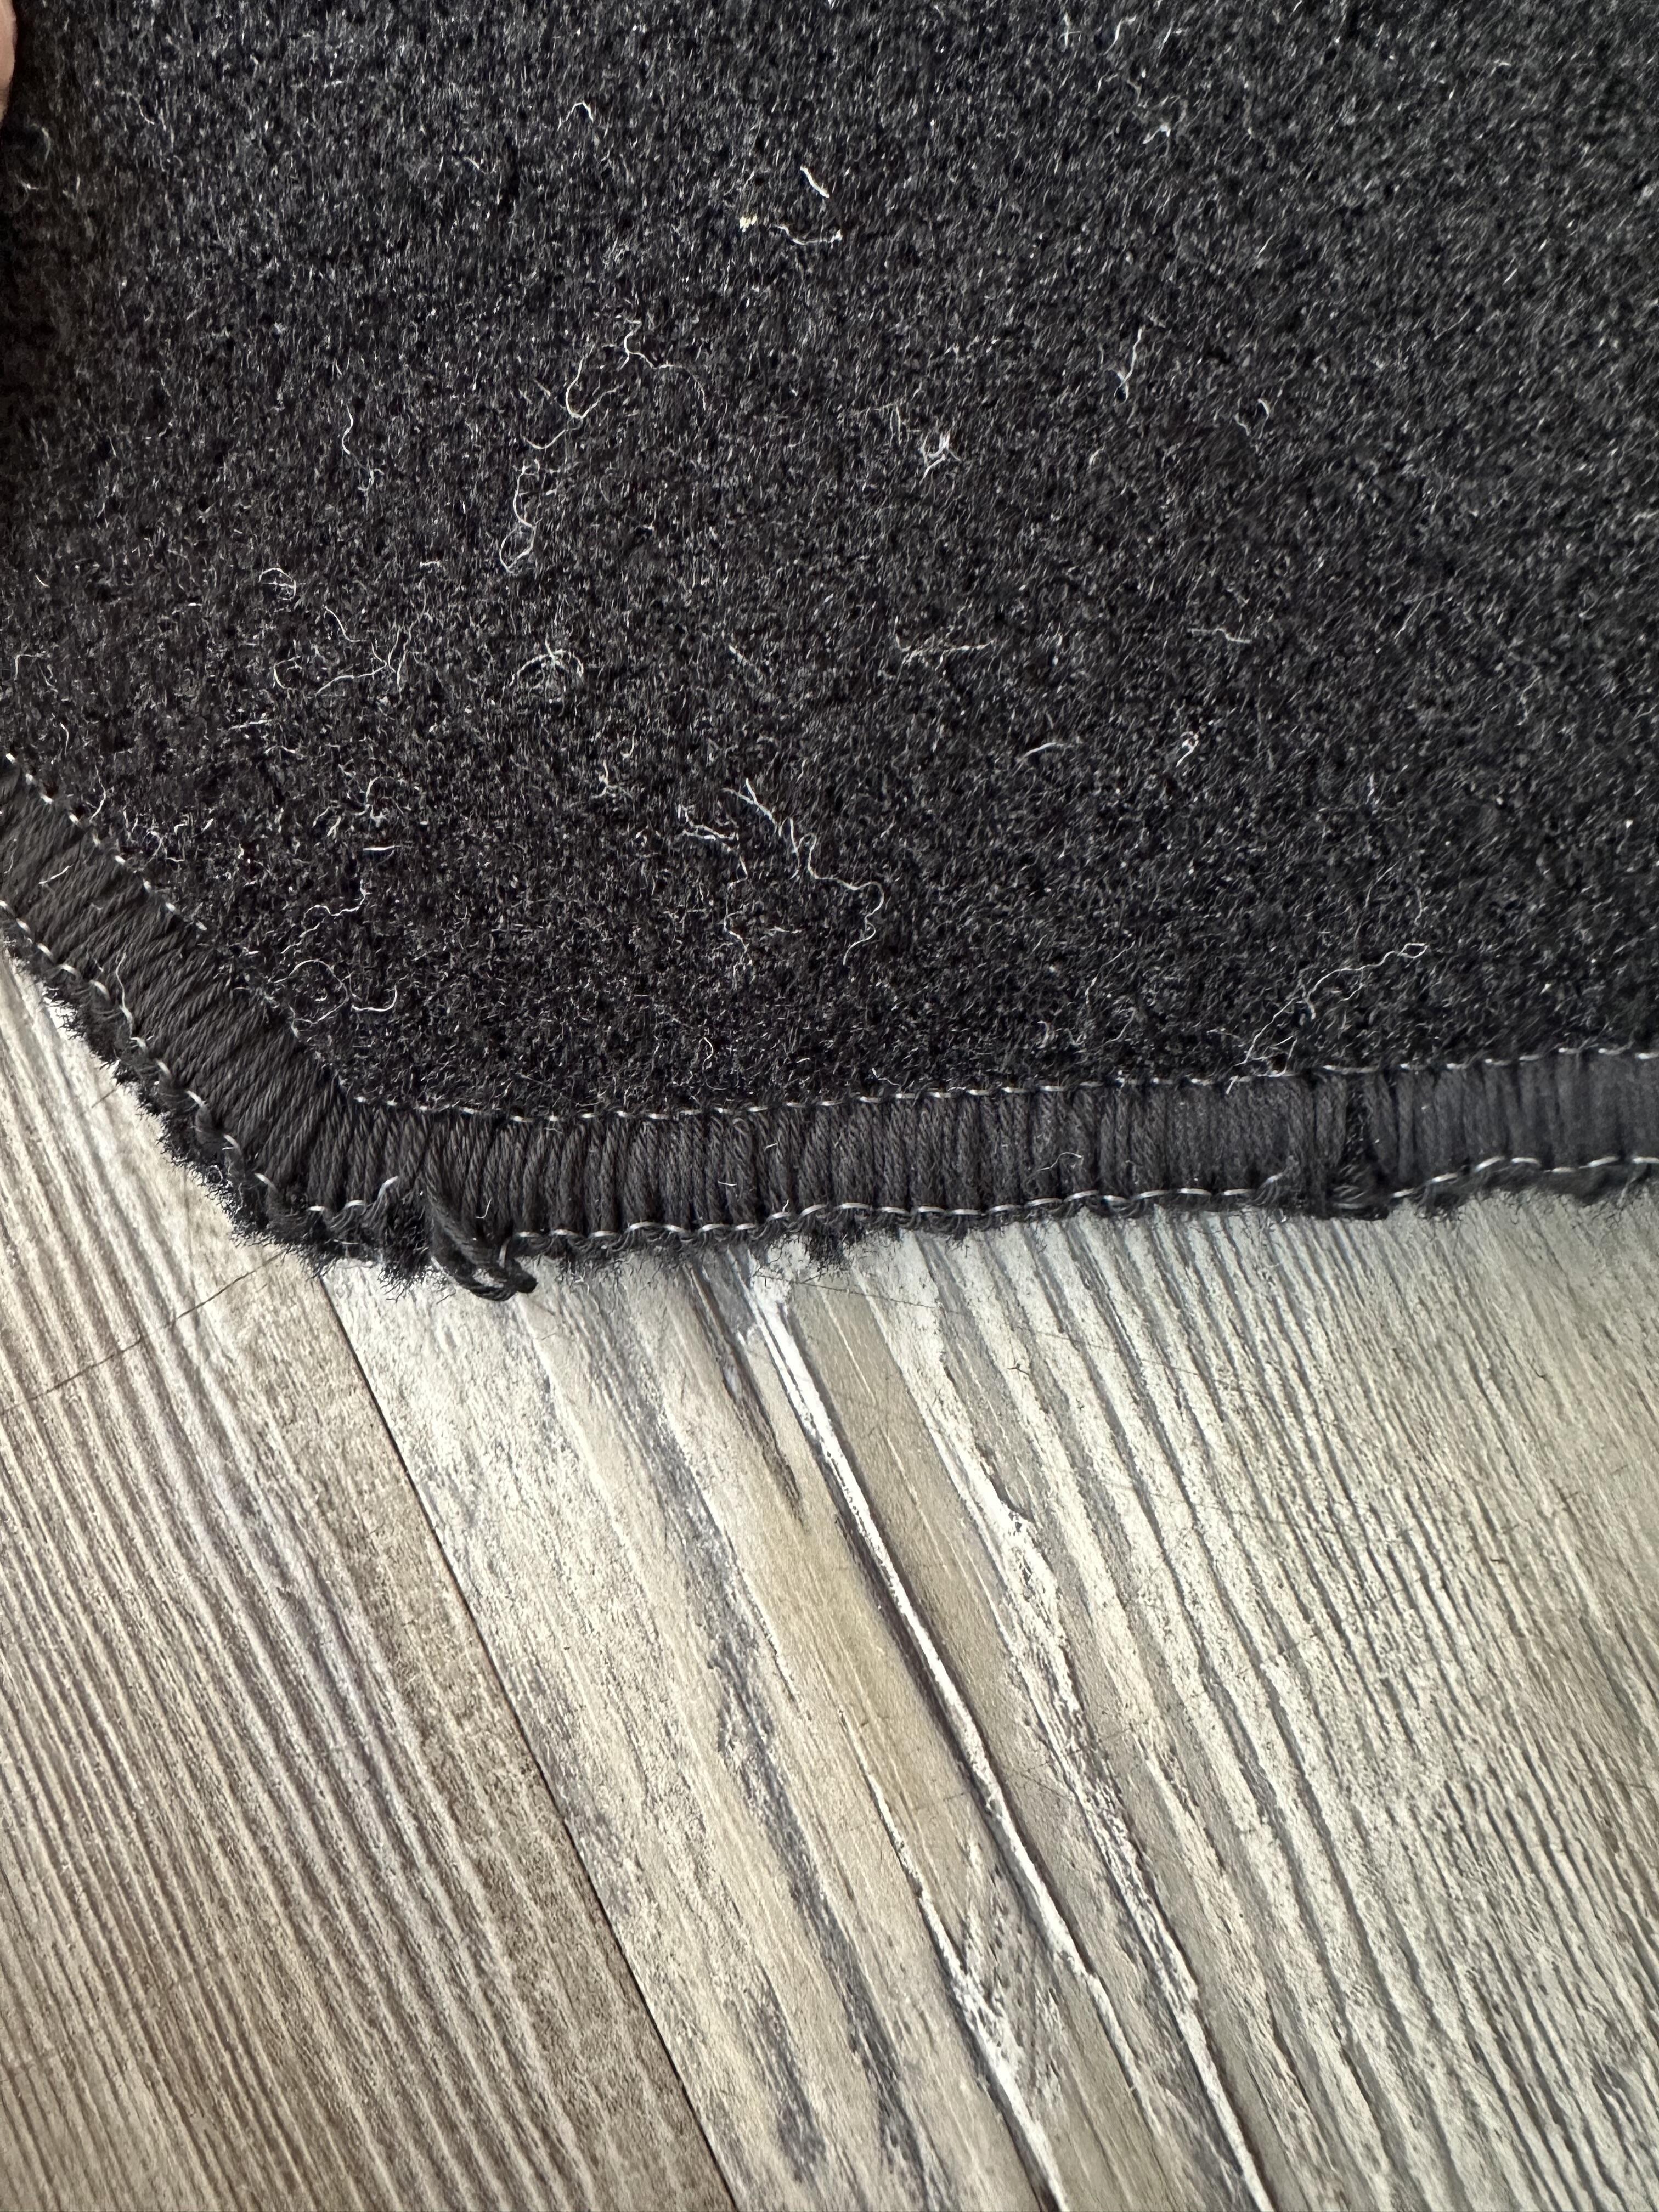
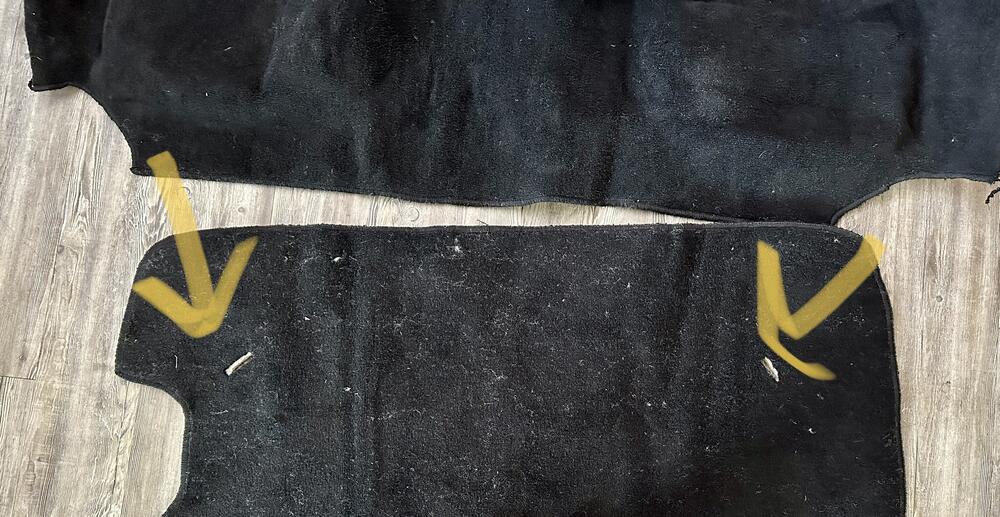
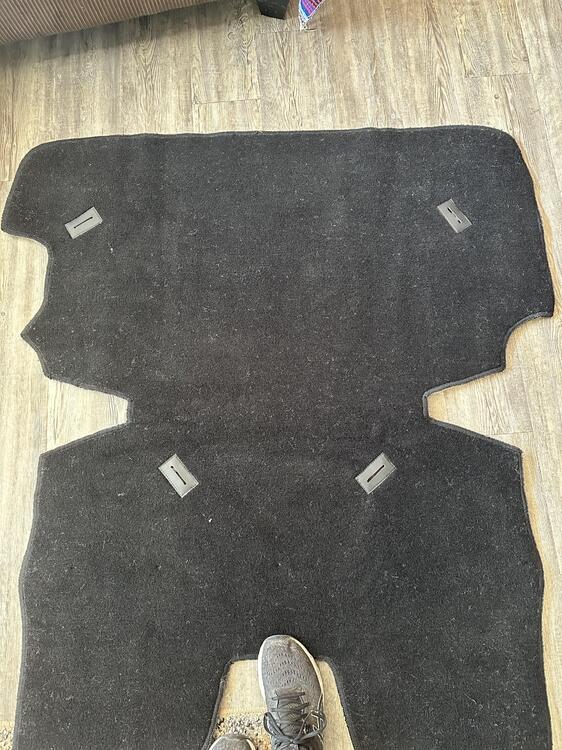
I wish I would have gone with the Newark Auto kit honestly. I got convinced to do the molded kit from MSA and I am so far unimpressed. The big convincing factor to me was that it had the slits cut out for the cargo strap reinforcements. However, I thought it would include the vinly inserts like my original carpet, but it did not, just some sloppily cut slits. Also, the carpets showed up extremely dirty and full of fuzz. My final complaint is that even in the box the sewn edges are already falling apart. I'll provide photos of the whole kit as it arrived, and what i had an upholstery shop do to it. Here is how it arrived. Here is the edges coming apart Here are the inserts I had an upholstery shop do over the poorly made cuts.


-
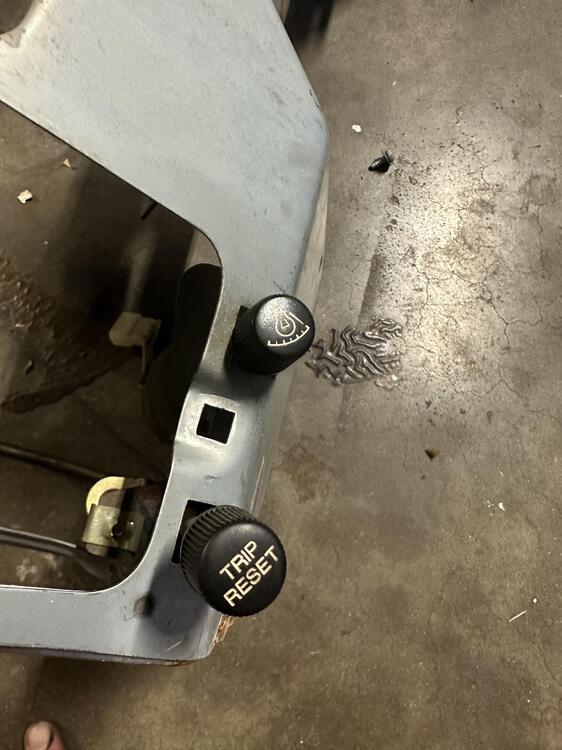
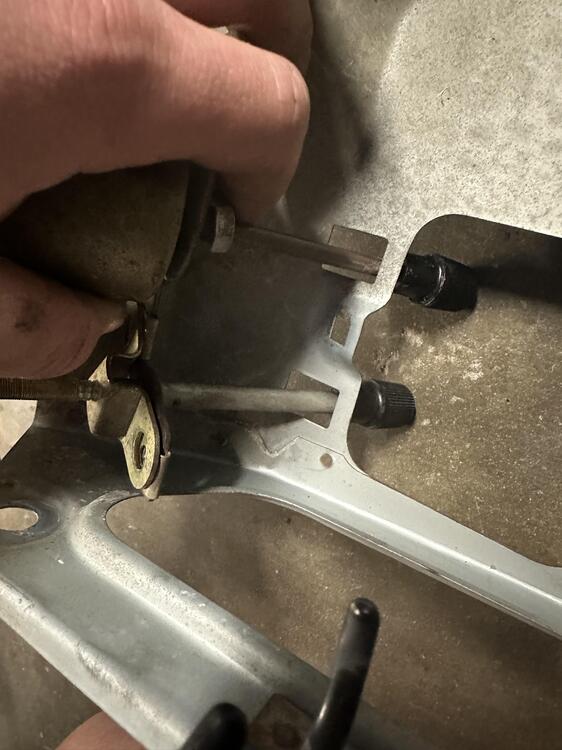
You guys rock. Yes, I was talking about the knobs. After watching this i pulled as hard as I could with my body weight and they broke free. Holy cow they were on there good. @SteveJI actually tried one of those tools but unfortunately had no leverage due to my dash pad being off. Next time tho:)
-
Hey guys, Feel free to educate me on what these two knobs are actually called, but I can't seem to get them off. I am replacing the dash pad/getting the frame powder coated. The last thing holding me back are these two mechanisms from being removed. Thanks as always

-
View Advert 280z Rear Deck Rubber Support Looking for one of these little rubber peices that support the rear deck in a 280z. Thanks! Advertiser ckurtz2 Date 04/06/2023 Price Category Parts Wanted Year 1977 Model 280z
-
Yeah I think the carpet faded from the sun and someone tried to redye it or something, did a real POS job:) When I replace the carpet the vinyl will be replaced too due to the unfortunate overspray evident everywhere.
-
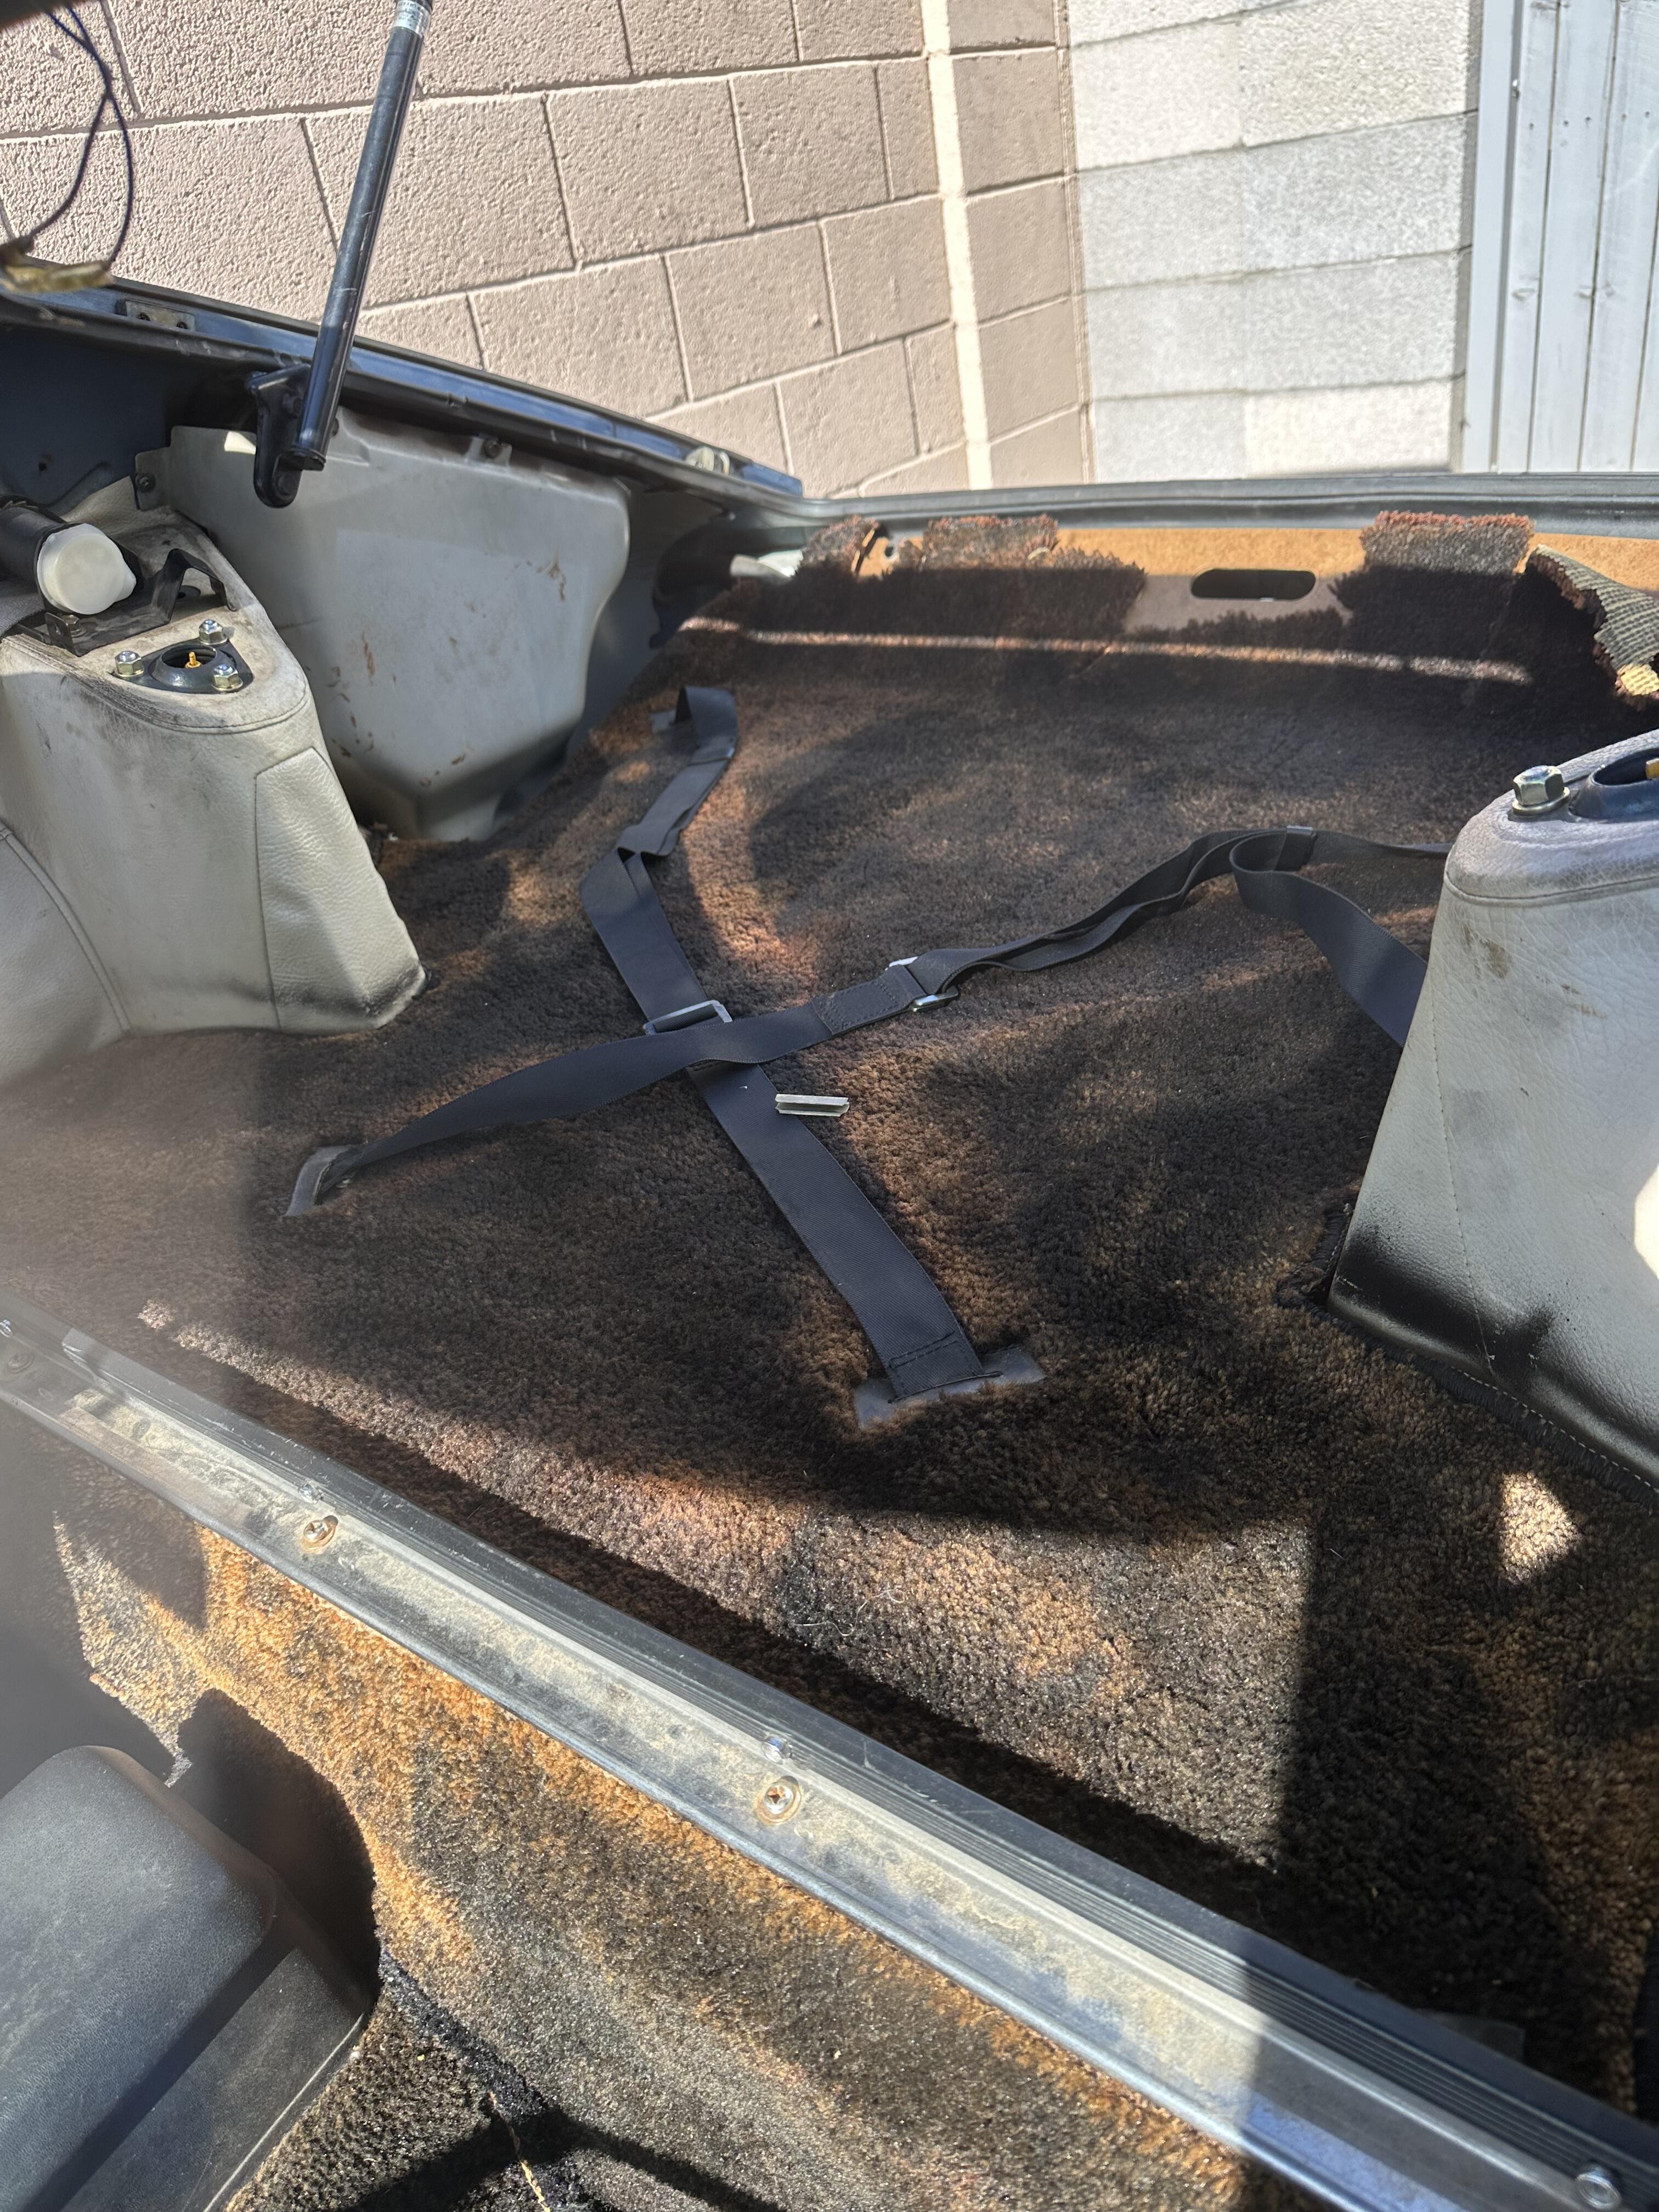
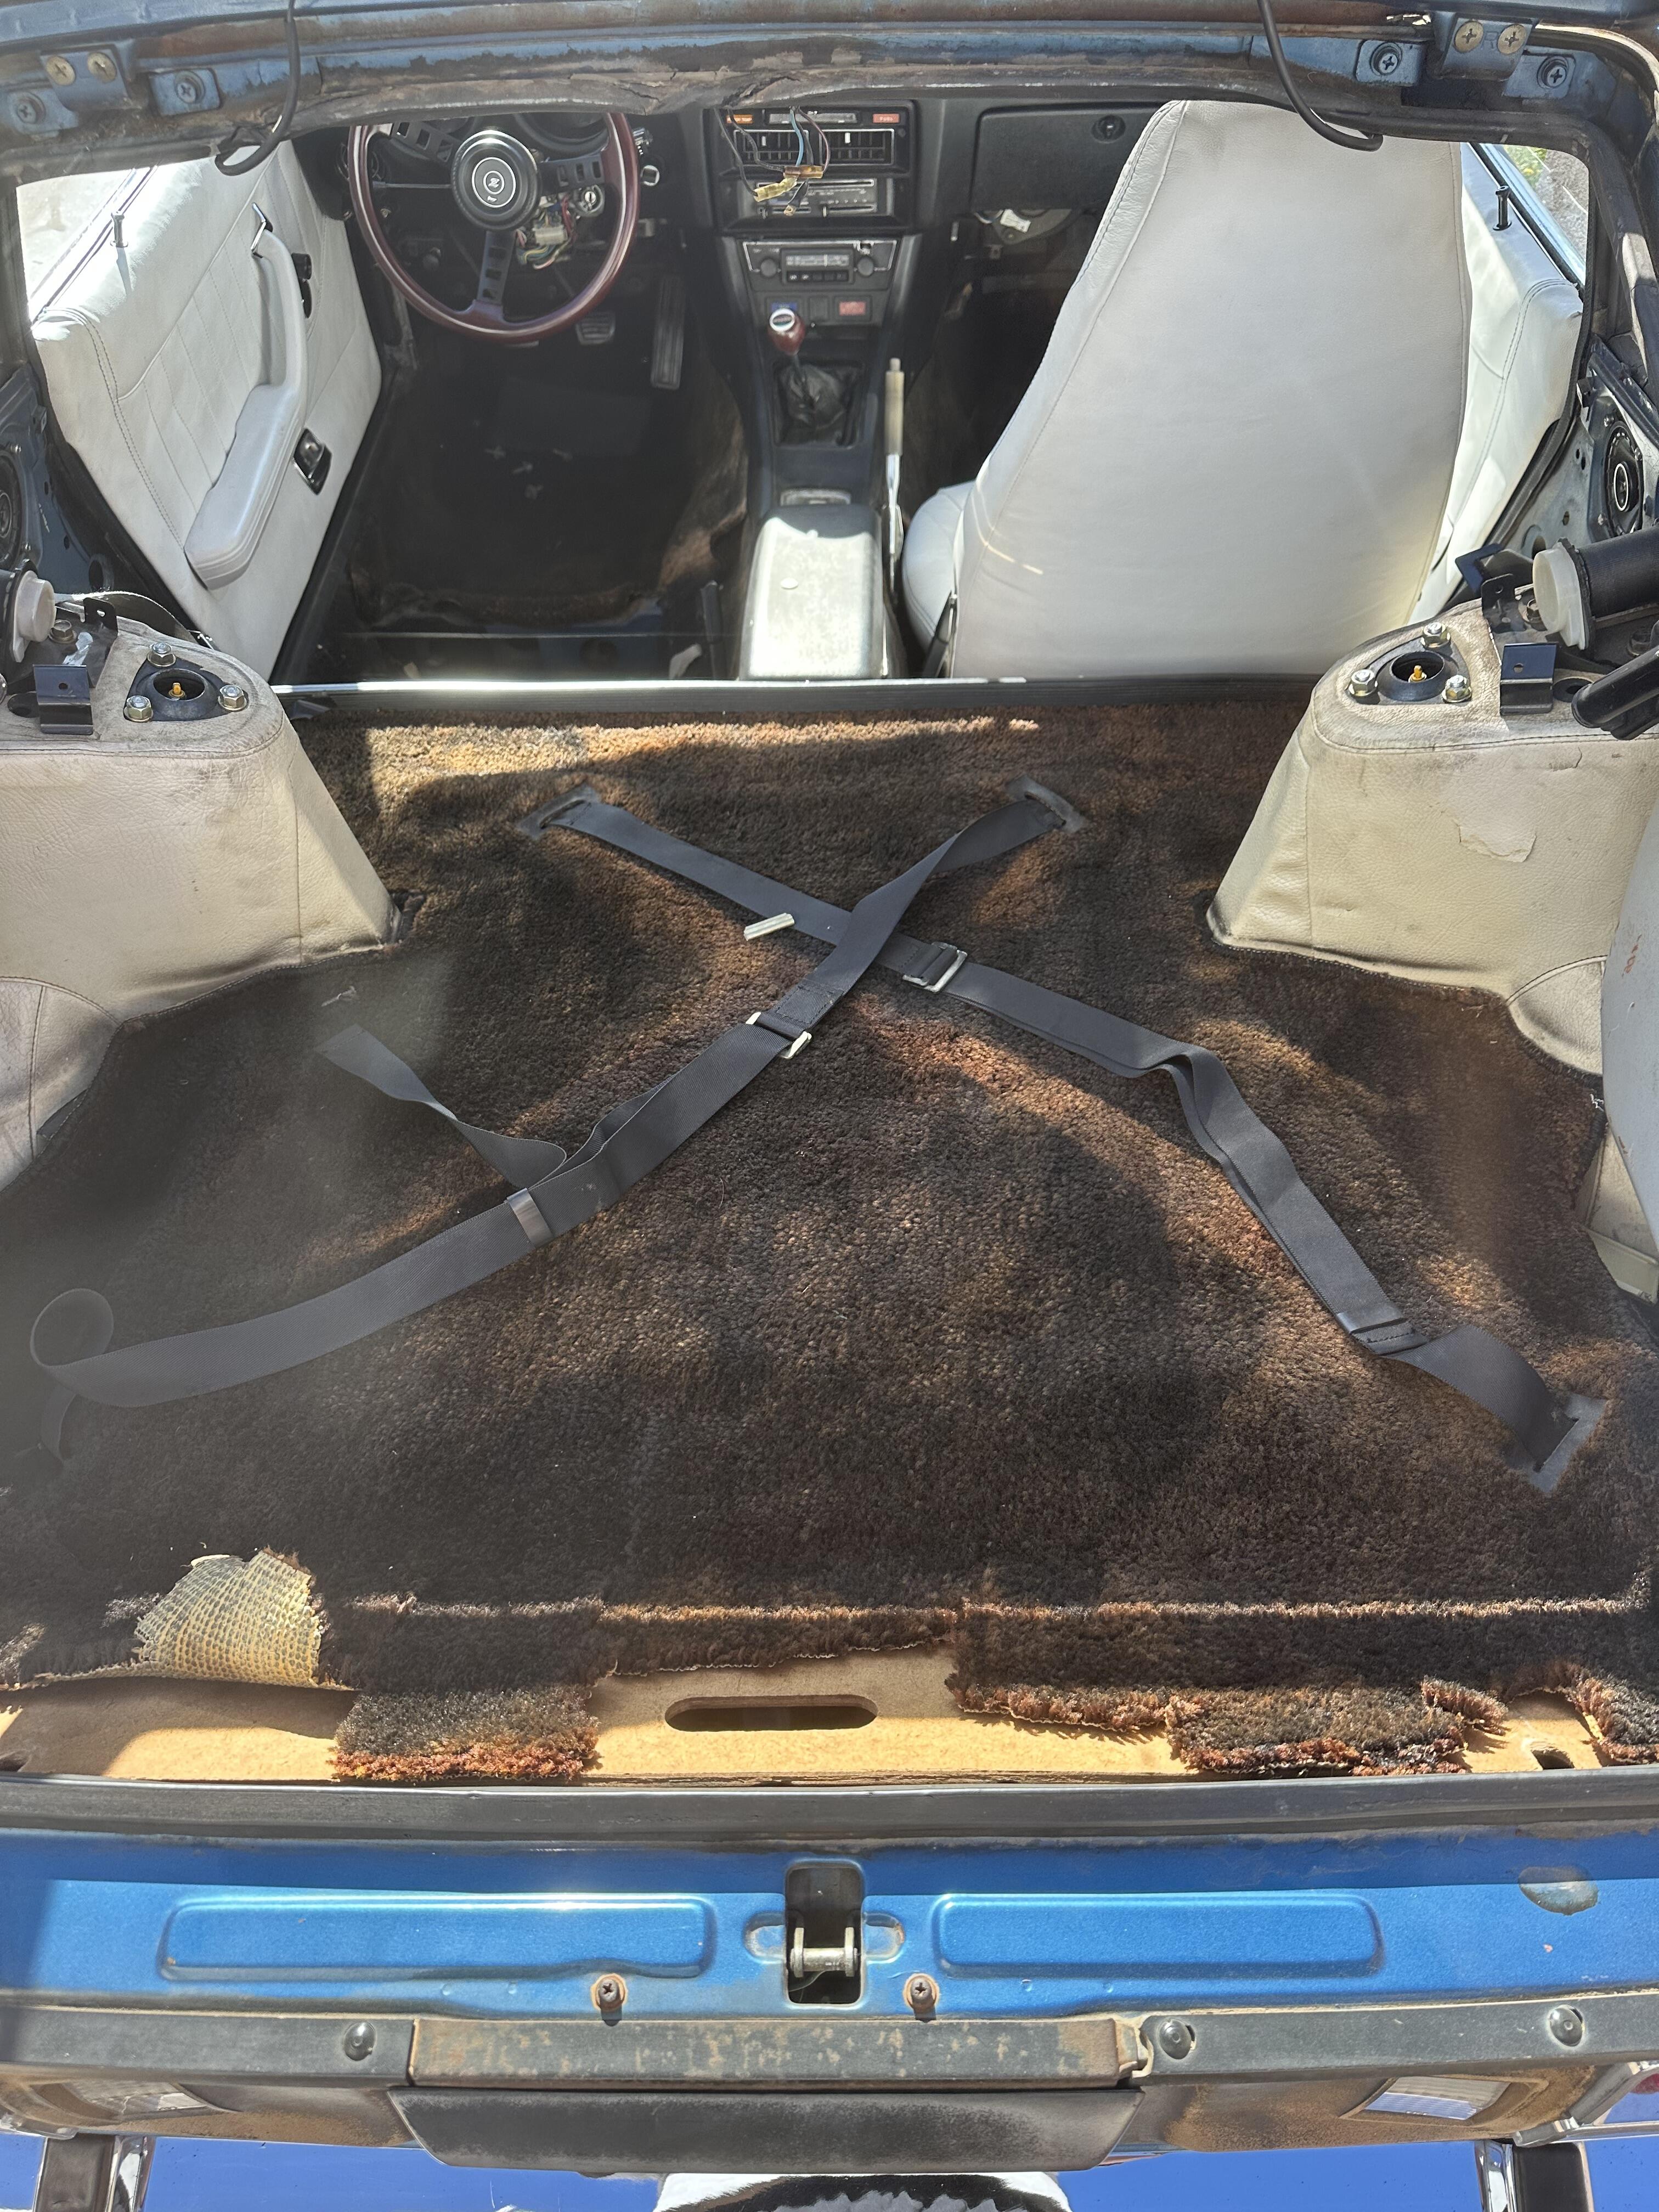
Hey Guys, Looking to get new carpet put in my Z. The rear carpet is specifically giving me trouble. My car has the special "raised" deck, which I don't know if that makes a difference. Anyways I was wondering what company makes the most original looking carpets for these cars. In addition, does anyone know if I can get new carpet to work with these straps? I am not sure if they are original or not, but they are a cool feature, just unfortunately sewn into the carpet. Getting tired of looking at this faded, dusty, torn and ratty rear carpet. Thank you in advance!


-
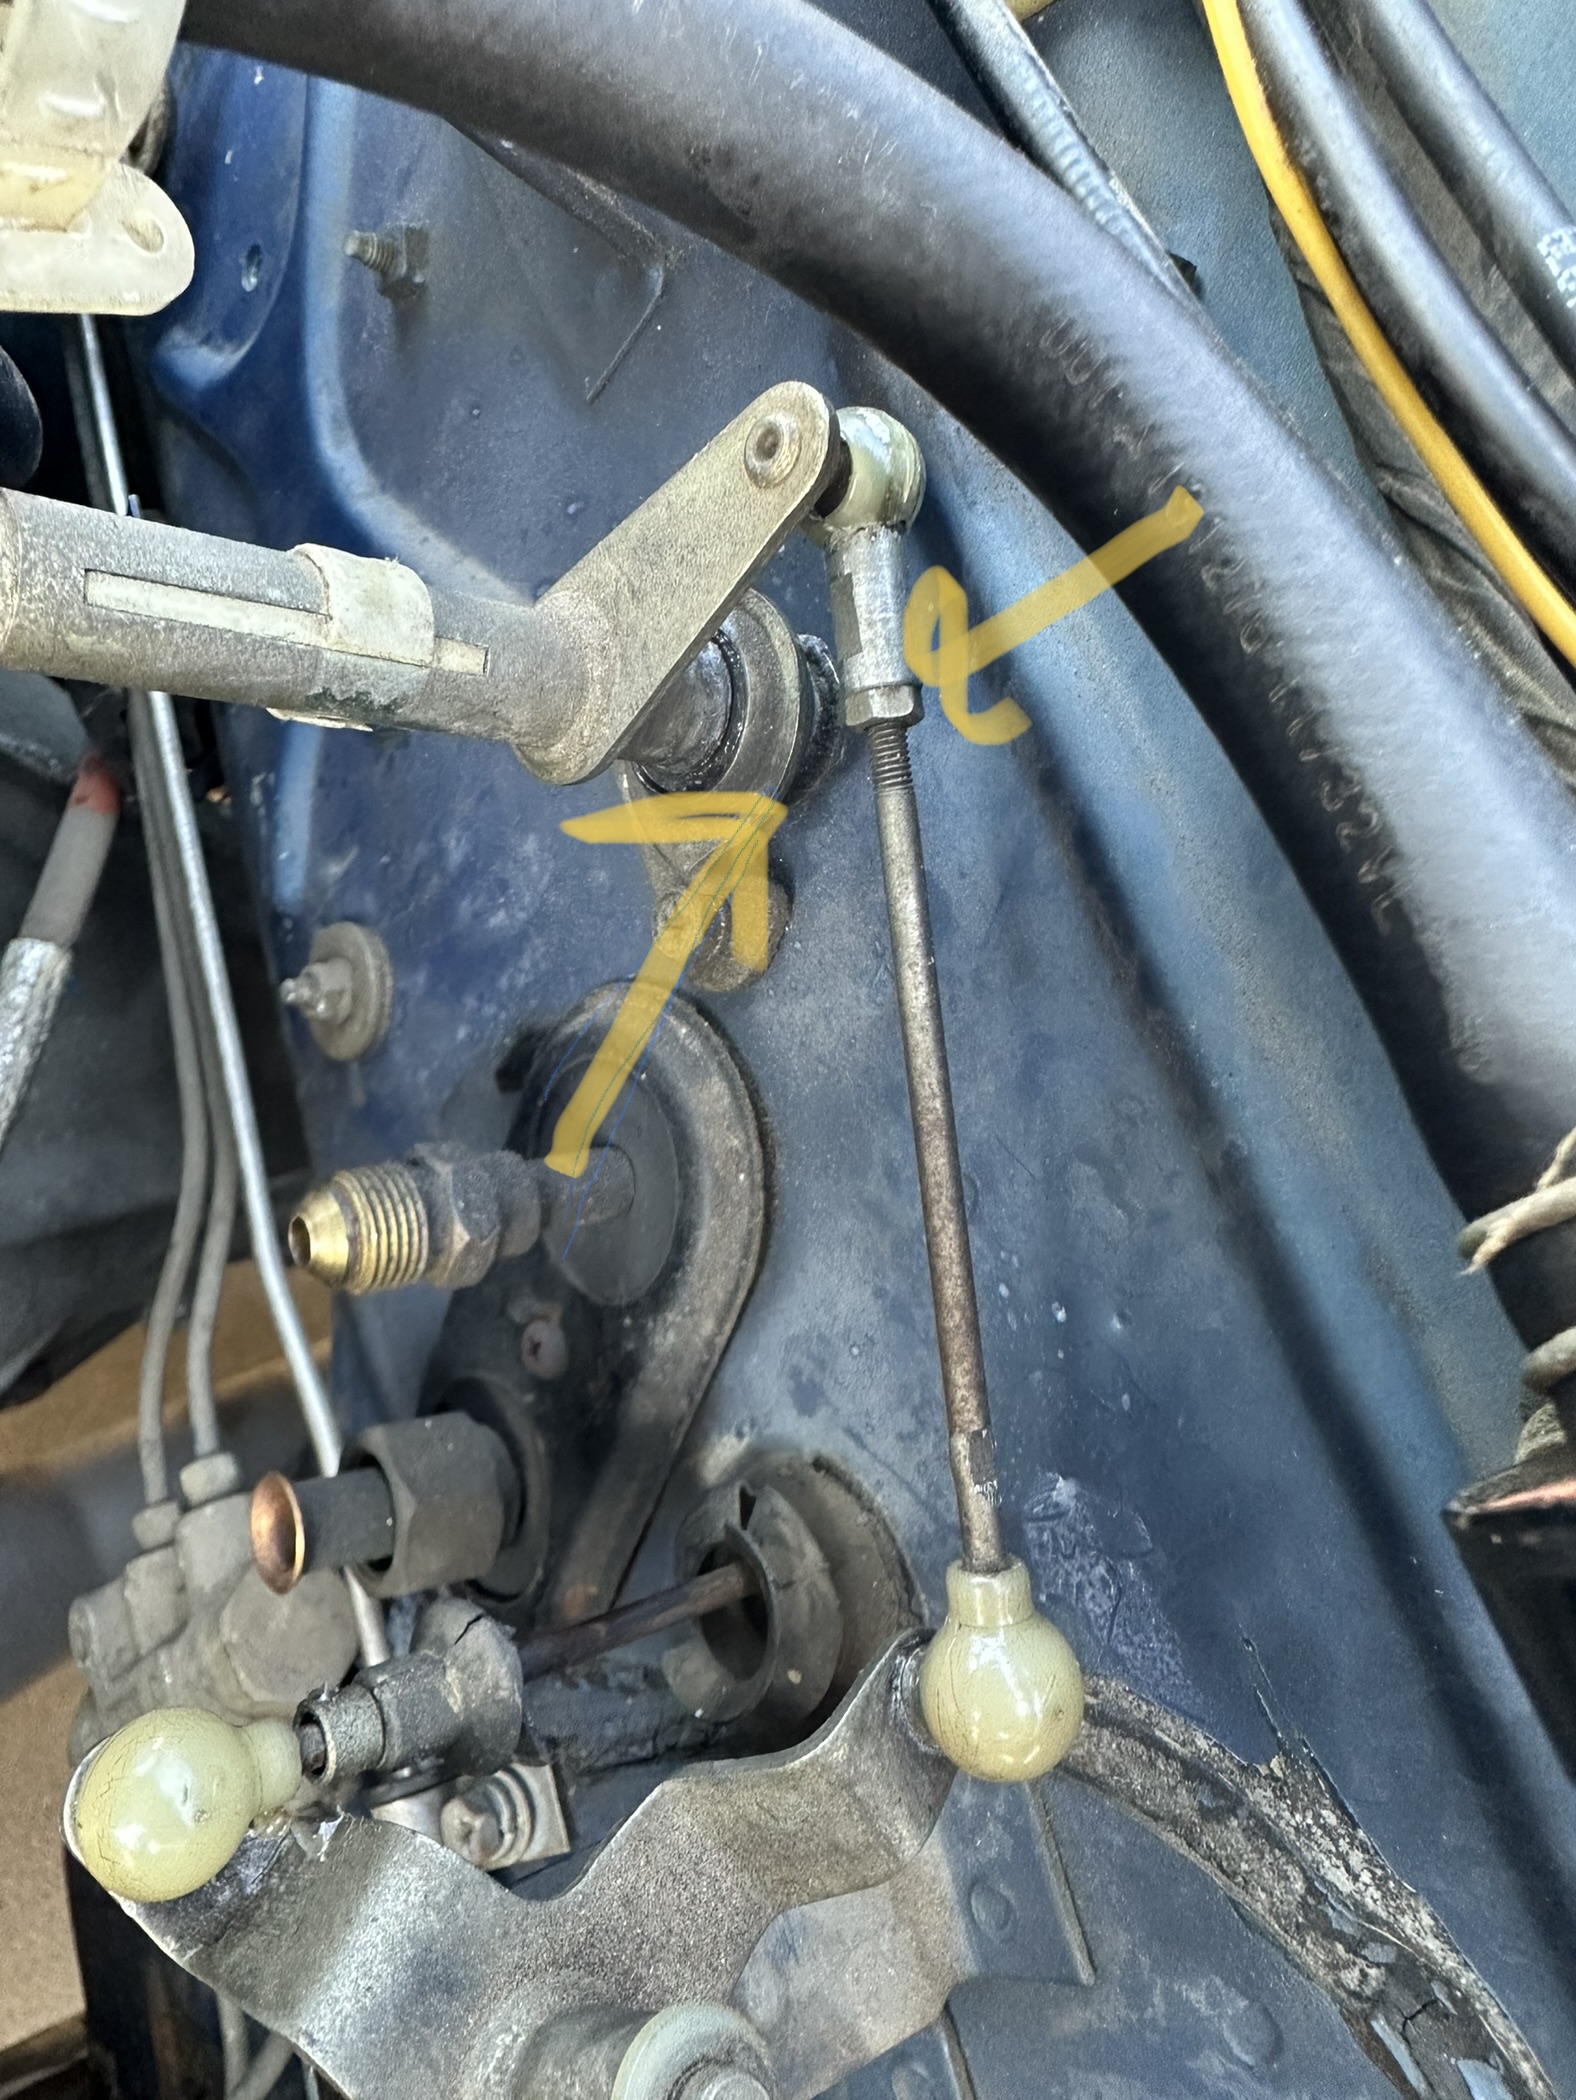
Whoops, forgot to post my solution. The mechanical linkages all have a threaded portion at the ball socket in order to legthen or shorten the rods. Thus, I tightened these and no more slop at the pedal:) One day I will probs switch to a cable, but this fix postpones that for at least a few years!

-
Well last push to see if you guys have any other tips to fix the slop. I was able to tighten the connection at the two rods with washers. However, I noticed that there is play at the two ball sockets where the actual throttle vane connects to the throttle rail. Is there anyway to remove play here. Of course I provided a video to make things easy. 🙂