


Roberts280Z
Free Member
-
Joined
-
Last visited
Everything posted by Roberts280Z
-
-
-
Not sure why I didn't find that on my search, but that looks fantastic! I will be happy if I can do that in 30 hours, but I'm lacking in the home-ec seamster training.
-
Has anyone attempted to restore a 280Z steering wheel? I've seen plenty of 240Z wheels, but the only mention I can find of a 280Z wheel is from 2004. I'm thinking of stripping it down to the bone, then wrapping it with layers of fiberglass, topped by a cover.
-
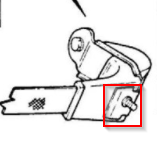
Ah, thanks. I saw your reply on my phone when I was outside working on the Z, and I couldn't see the part on that parts diagram Then I tried the 'blind-man-jigsaw-puzzle' approach, and came up with this: Then I looked at the parts diagram again on a larger screen, and indeed I see it there now: It's some sort of shim or spacer. I have two pieces, and they only fit the driver's side, so I suppose both pieces were installed there, with none on the passenger side.
-
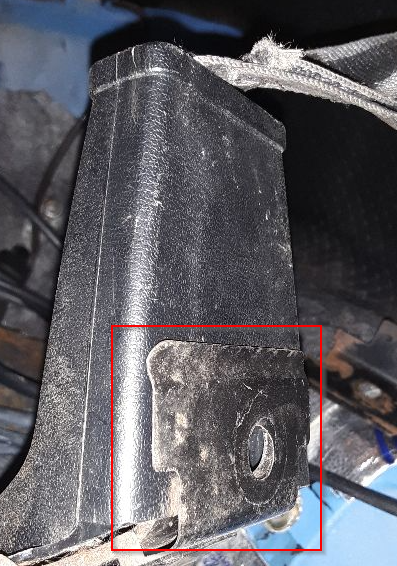
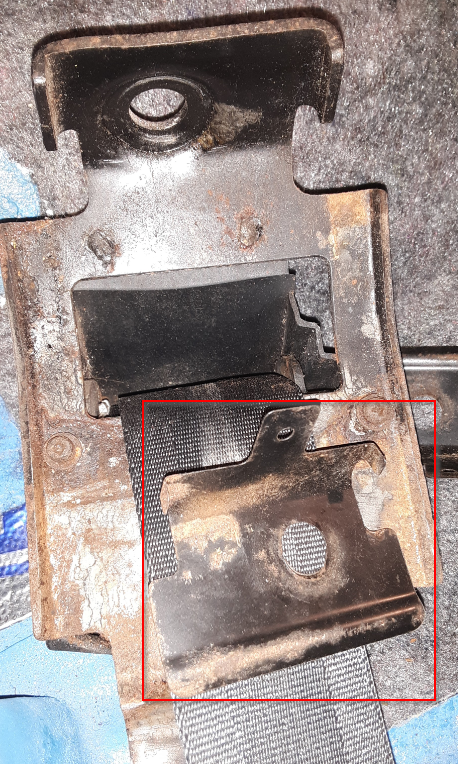
I removed the seat belts 3 years ago when I started some restoration work. Now I'm trying to put them back in, and I cannot determine where this part goes: This is a view of the lower retractor with the plastic cover removed. The unknown part is in the red box. I assume they go in the lower retractor, but I'm not even sure of that. There are two of these, and they are identical (i.e. not mirror image). The FSM doesn't show these. Does anybody know what these are, and where they go, or are they even needed?

-
I didn't even realize that part was there. Those have totally 'perished' from my 76, and I thought the spring was retained merely by a little nib at the bottom.
-
Thanks, guys. ZCarSource did confirm from the photos that they cannot rebuild this because I broke off one of the studs. I will just plug the heater lines. Someday, if I get really curious, I will open up the unit to see what exactly failed, causing the limited cawk extension.
-
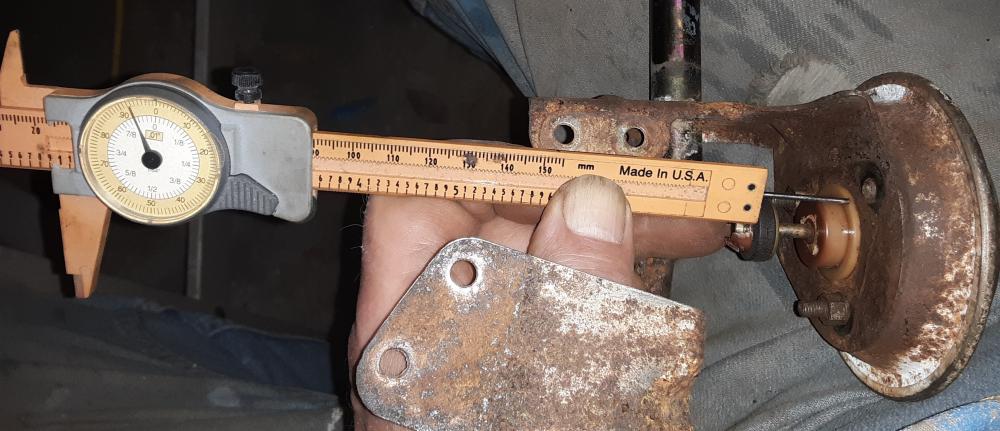
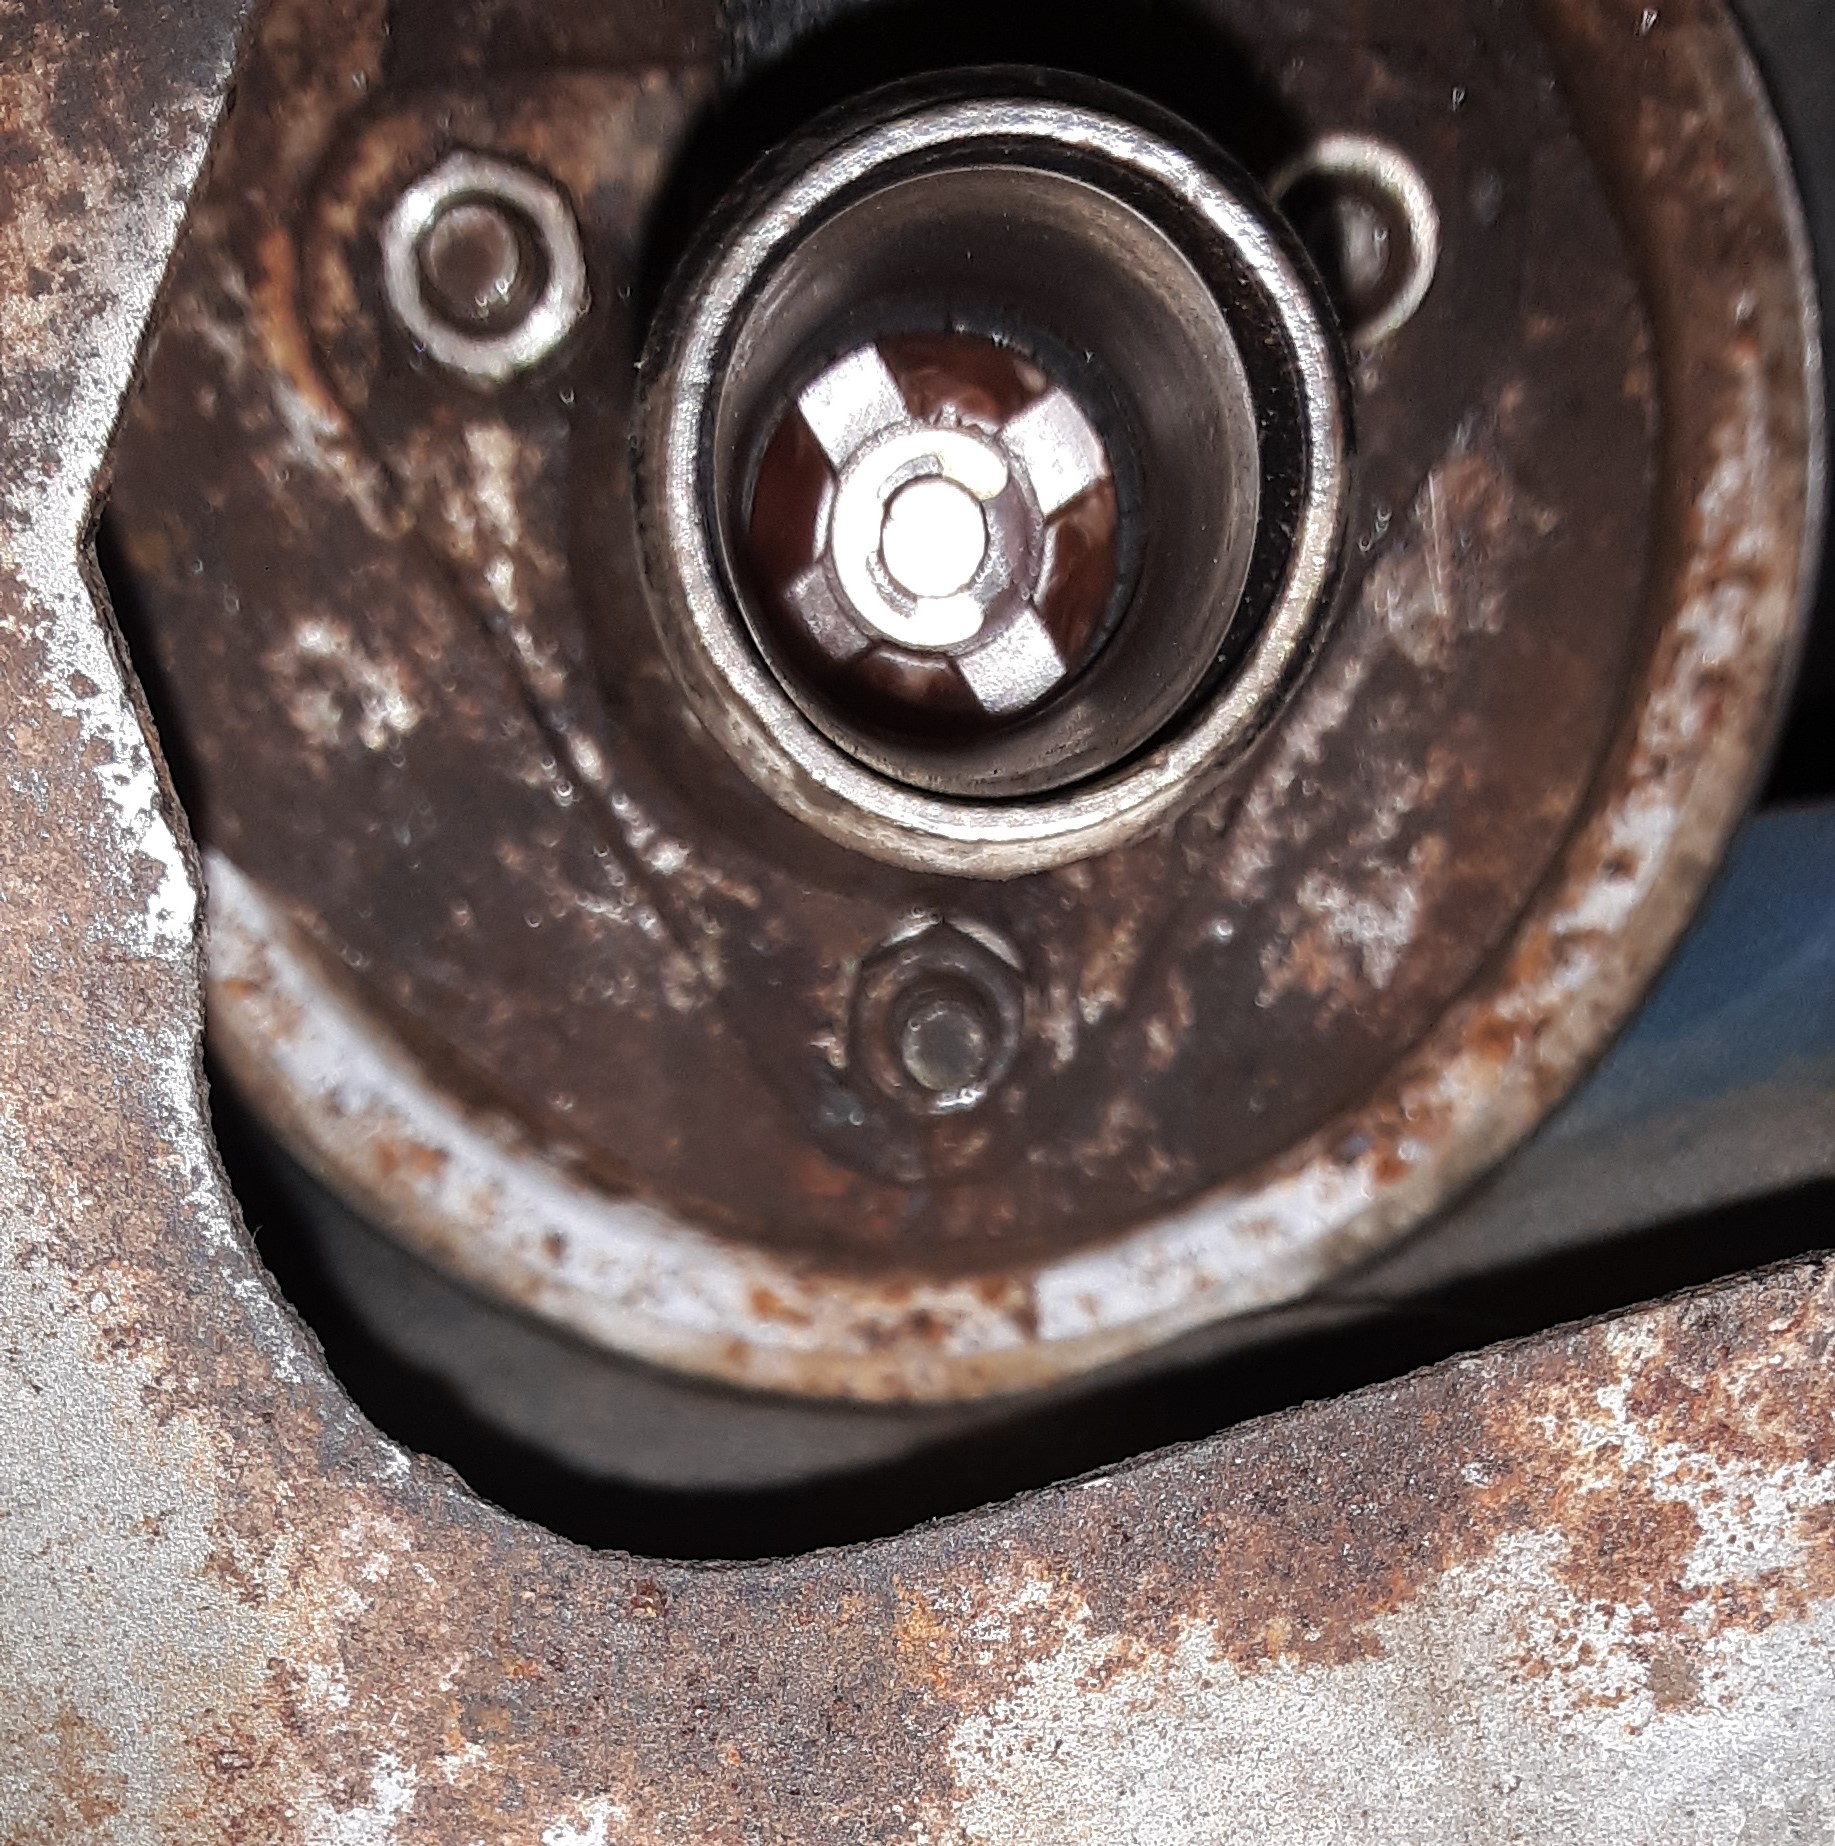
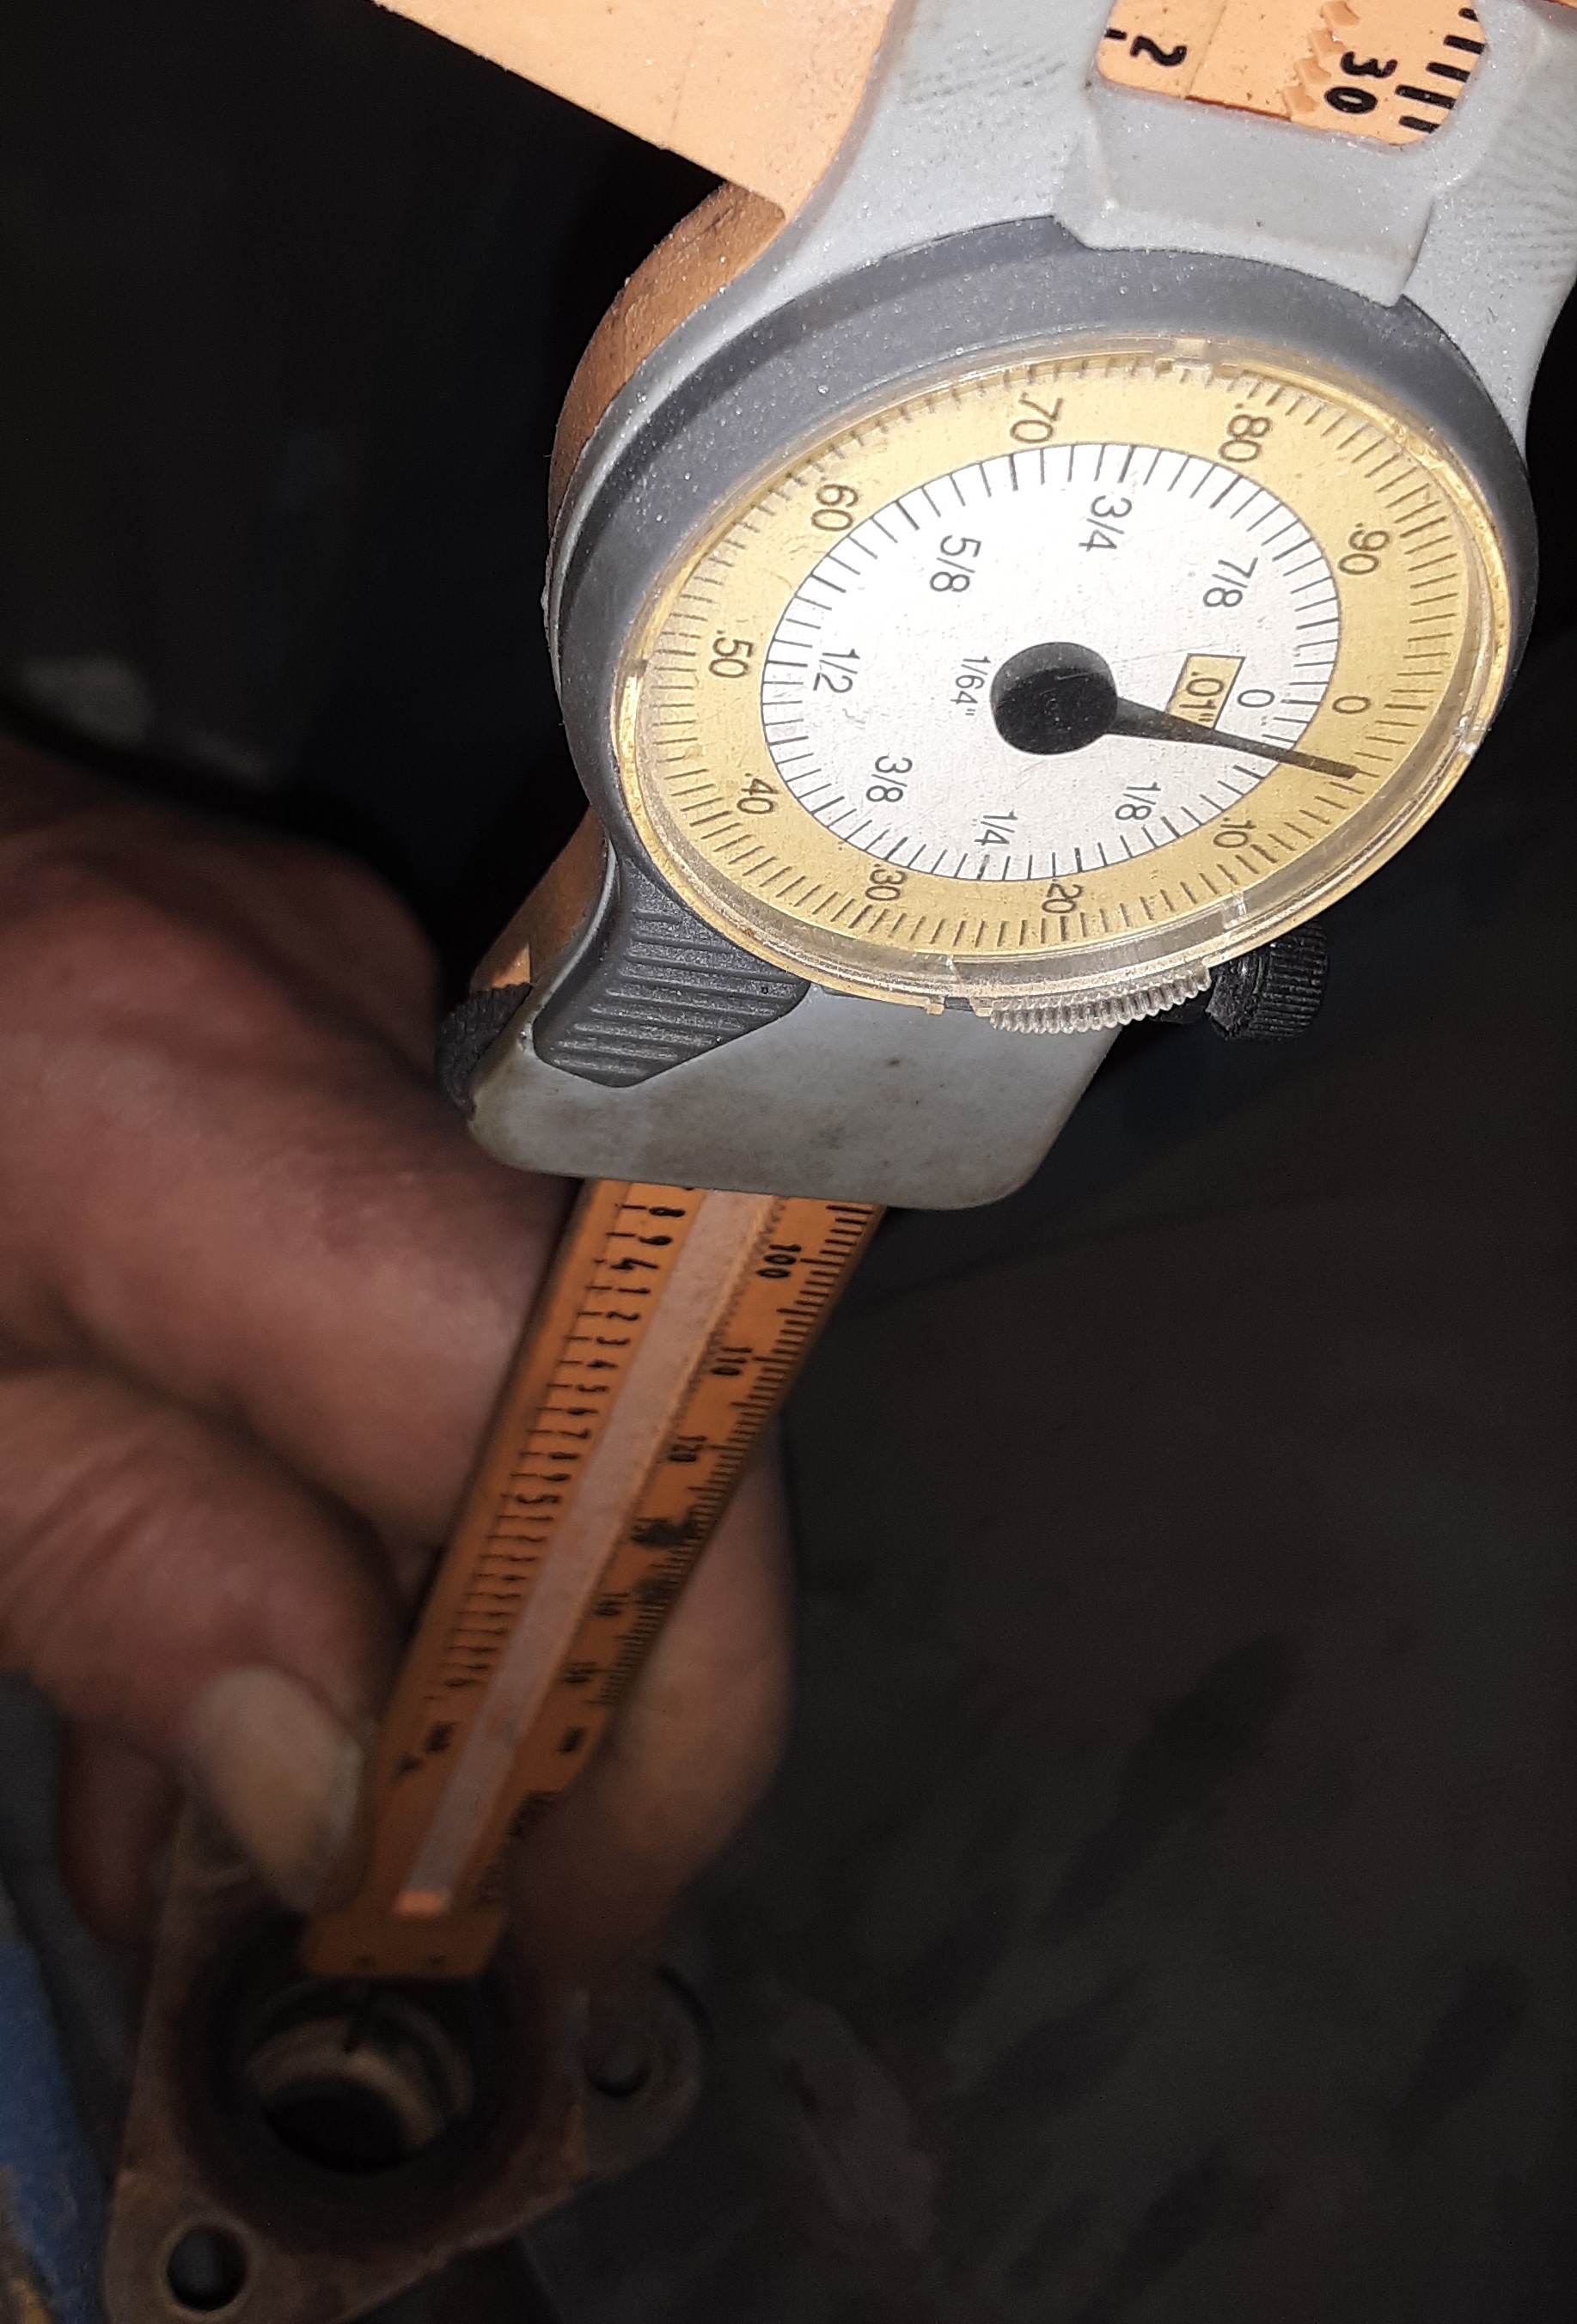
I have the dash out and have removed the blower. I thought I would replace the original heater hoses while I was there. To access them, I removed the heater valves. I thought I would check the operation of the vacuum heatercock. The vacuum will retract the cawk, but in its deactivated position, it will not block the flow as it should. I have attached a view up the exit pipe. It's hard to see, but the cawk does not seal at all against the pipe seat. With the pipe removed, you can see that the cawk extension is about 0.92", but the pipe seat is 1.04" deep. I see that ZCarSource offers to rebuild these, but I managed to break off one of the 3 mounting studs on the vacuum mount, so I don't know if they would accept my core. I have studied the purpose of this valve, and it is intended to totally block water flow into the heater core in all modes except heat and defrost, thus blocking flow in 'Vent', and 'A/C' modes. However, in vent-A/C, there is no airflow through the heater core. So, the vacuum heatercock apparently functions only to limit any stray heat which might radiate or conduct from the heater core. Datsun did not think this was necessary in their non-A/C Z's, which would have benefited in the 'vent' mode. I also checked the heater control valve, which is operated by the 'temp' lever, and it does not seem to totally block water flow at its coolest setting. I could just re-install the non-functional heatercock (perhaps after leak-testing it), to retain heater/defroster operation, and tolerate the unwanted stray heat in other modes. Or I could just totally block coolant flow into the heater, avoiding the stray heat, and leaks from those valves, hoses, and core. Note that here in Houston, even on my daily drivers (which this will not be), I rarely need heat. Any thoughts will be appreciated. Thanks.


-
Thanks again. The urethane primer is over a variety of surfaces - an older, roughed-up repaint, some filler topped with rattle-can high-build primer, etc. The primer was sprayed on a couple of weeks ago. I'm looking around for more drying solutions. At the moment, I have a small desiccant dryer at the gun, feeding a regulator at the gun. I was indeed able to sand down the donuts with some clearcoat left.
-
Thanks for the comments. Patcon, you have a good point about the air. I'm using a cheap in-line drier right at the gun, and the humidity here in Houston has been 110% for the last few days. I have had situations where the gun would literally drip water droplets, making huge puddles in the paint. But perhaps there are other variations on the water problem. Better drying solutions are a good bit more expensive, but I will look into it before I do much more. Mark, I've had fish-eye experience before as well, when I didn't properly prep the primer with a proper wipe-down with liquid sander or the equivalent. But my experience was that the fish-eyes formed immediately while you're spraying. I've got the inside of the doors that I can experiment further on before I do the more critical parts.
-
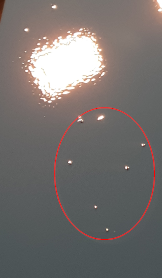
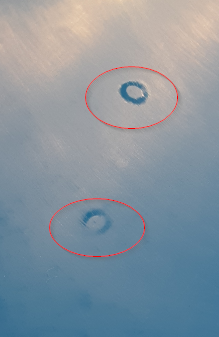
I'm trying to paint my 280Z. I'm painting individual panels so that hopefully I'll develop better technique when I get to the main bits. I've done urethane primer, and have just started the basecoat/clearcoat on the liftgate. I think the basecoat went on well enough. But, after the second coat of clear, I noticed some imperfections. Here is a picture looking into a floodlight reflection that accentuates the imperfections: There is, of course (for me), a bit of orange peel, but I would be happy with that if that's all I had to cut. But you'll notice the 'big dipper' star constellation just below that , which appear to be a set of stalagmites rising up. After some 1200 grit, the stalagmites are reduced to donuts: This is an extreme close-up showing 2 of the stalagmites. I've tried to read everything I can find on this, and I'm concluding that these are air bubbles caused by inadequate atomization, which itself is caused by too-low gun pressure, or holding the gun too close to the surface. I don't think it's fish-eye-style contamination (been there and done that). Does that look right, or is this something else? Thanks in advance for your help. Robert
-
I envy your ability to keep your Z garaged - unfortunately mine suffered while it was #4 in line for a place in my 3-car garage. It now has a temporary (3-yr!) spot in the garage during restoration, but when it's completed it will again have to go to the driveway.
-
That's impressive!
-
I was late to this party with my 280Z, but I am curious who else on here is the original owner of their Z?
-
Given the fact that I'll be driving this car only infrequently, and will likely never park it or leave it unattended, I'll forego the bumper. Thanks.
-
Good point. If I wanted crash bumpers, I should have kept the ugly crash bumpers.
-
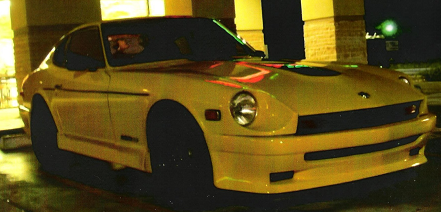
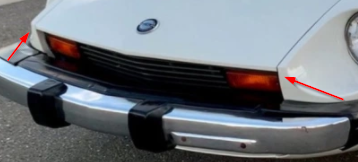
I'm 'restoring' my 280Z. Years ago, I removed the big bumpers and put on a full aero kit, as seen here: I assume that this kit was designed to go over 240z bumpers, but I ran for several years with no bumpers at all. Now I've removed the rear part and filled in the holes, and removed the sides, which I think contributed to rusting out the rockers. But I think the front will still look good. So my question is, should I fabricate a bumper to fit under this fiberglass, perhaps from tubular or angle steel? I'm thinking it might provide protection to the radiator and A/C condenser in the event of a minor tap.
-
OK, thanks all. The last I looked, I don't think the lens alone was available, so I was prepared for the LED $100 replacement.
-
Do you have a good extra plastic lens you would be willing to part with? Not sure what parts of the switch you still have, but I've had a bit of success in making contact and springy bits out of a sheet of phosphor bronze.
-
I can do that with my old GM A-bodies and Chrysler E-body. Nearly 1-inch up/down play. But my Z hinges are still very tight! I guess if I want it better, I'll have to slot the hinge-to-inner-fender mounting.
-
Now this one looks like it has great hood/fender alignment: ...unlike the silver ones. I'm envious.
-
I'm currently struggling with panel alignment on my 280Z. It looks to me like the front edge of the hood is too high on this silver car (like mine is). I've tried to raise the fronts of my fenders, but I'm fairly certain that the fenders weren't that high originally. I must also admit that I had to patch my fender tops for about 18" back from the front edge, so that might also be messed up.
-
This is what my Z looked like in 2006, when it was my younger son's driver. It's too bad I couldn't have garaged it to keep it from turning to crap. It's currently in primer, and my current plan is to paint it Mustang Grabber Blue, with all the chrome bits powder-coated black.
.thumb.jpeg.e4688815695e00404e436bb17c4665b5.jpeg)
-
Now you've made me feel bad, and I'll have to go back to HybridZ.


.jpeg.9c50b65c287d1dc9612b648dbd19b312.jpeg)
