Barefootdan
Free Member
-
Joined
-
Last visited
Everything posted by Barefootdan
-
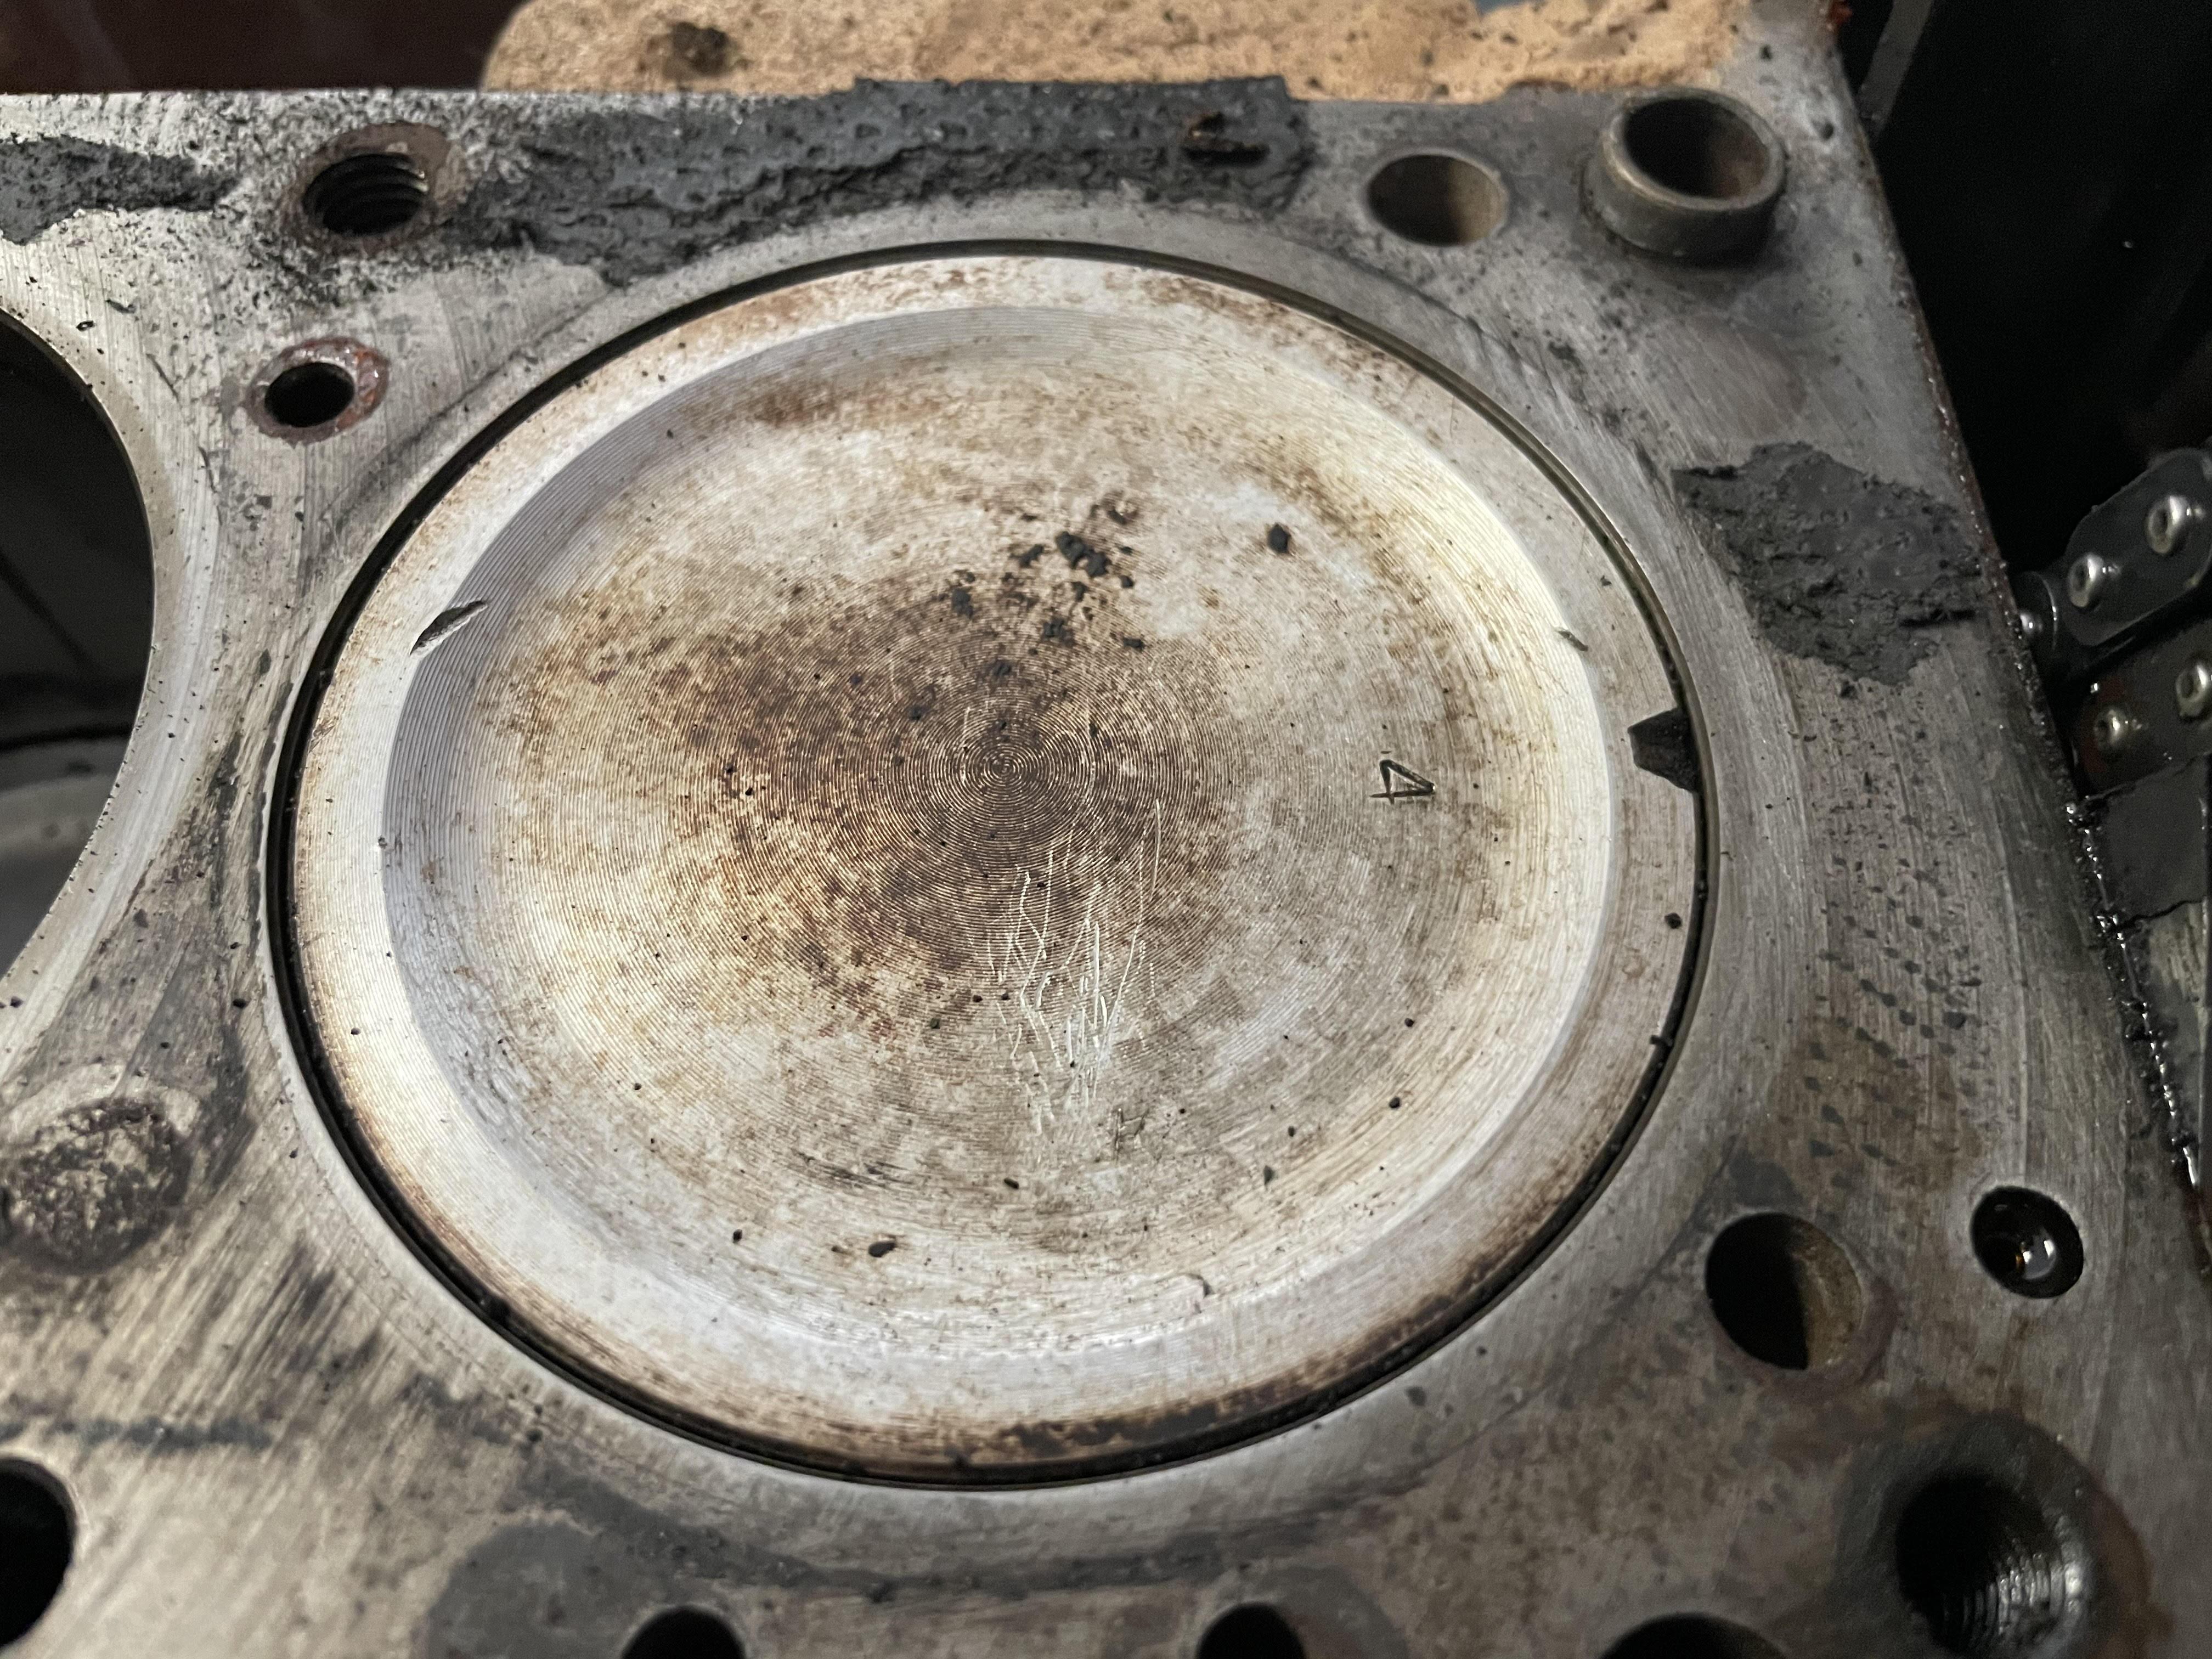
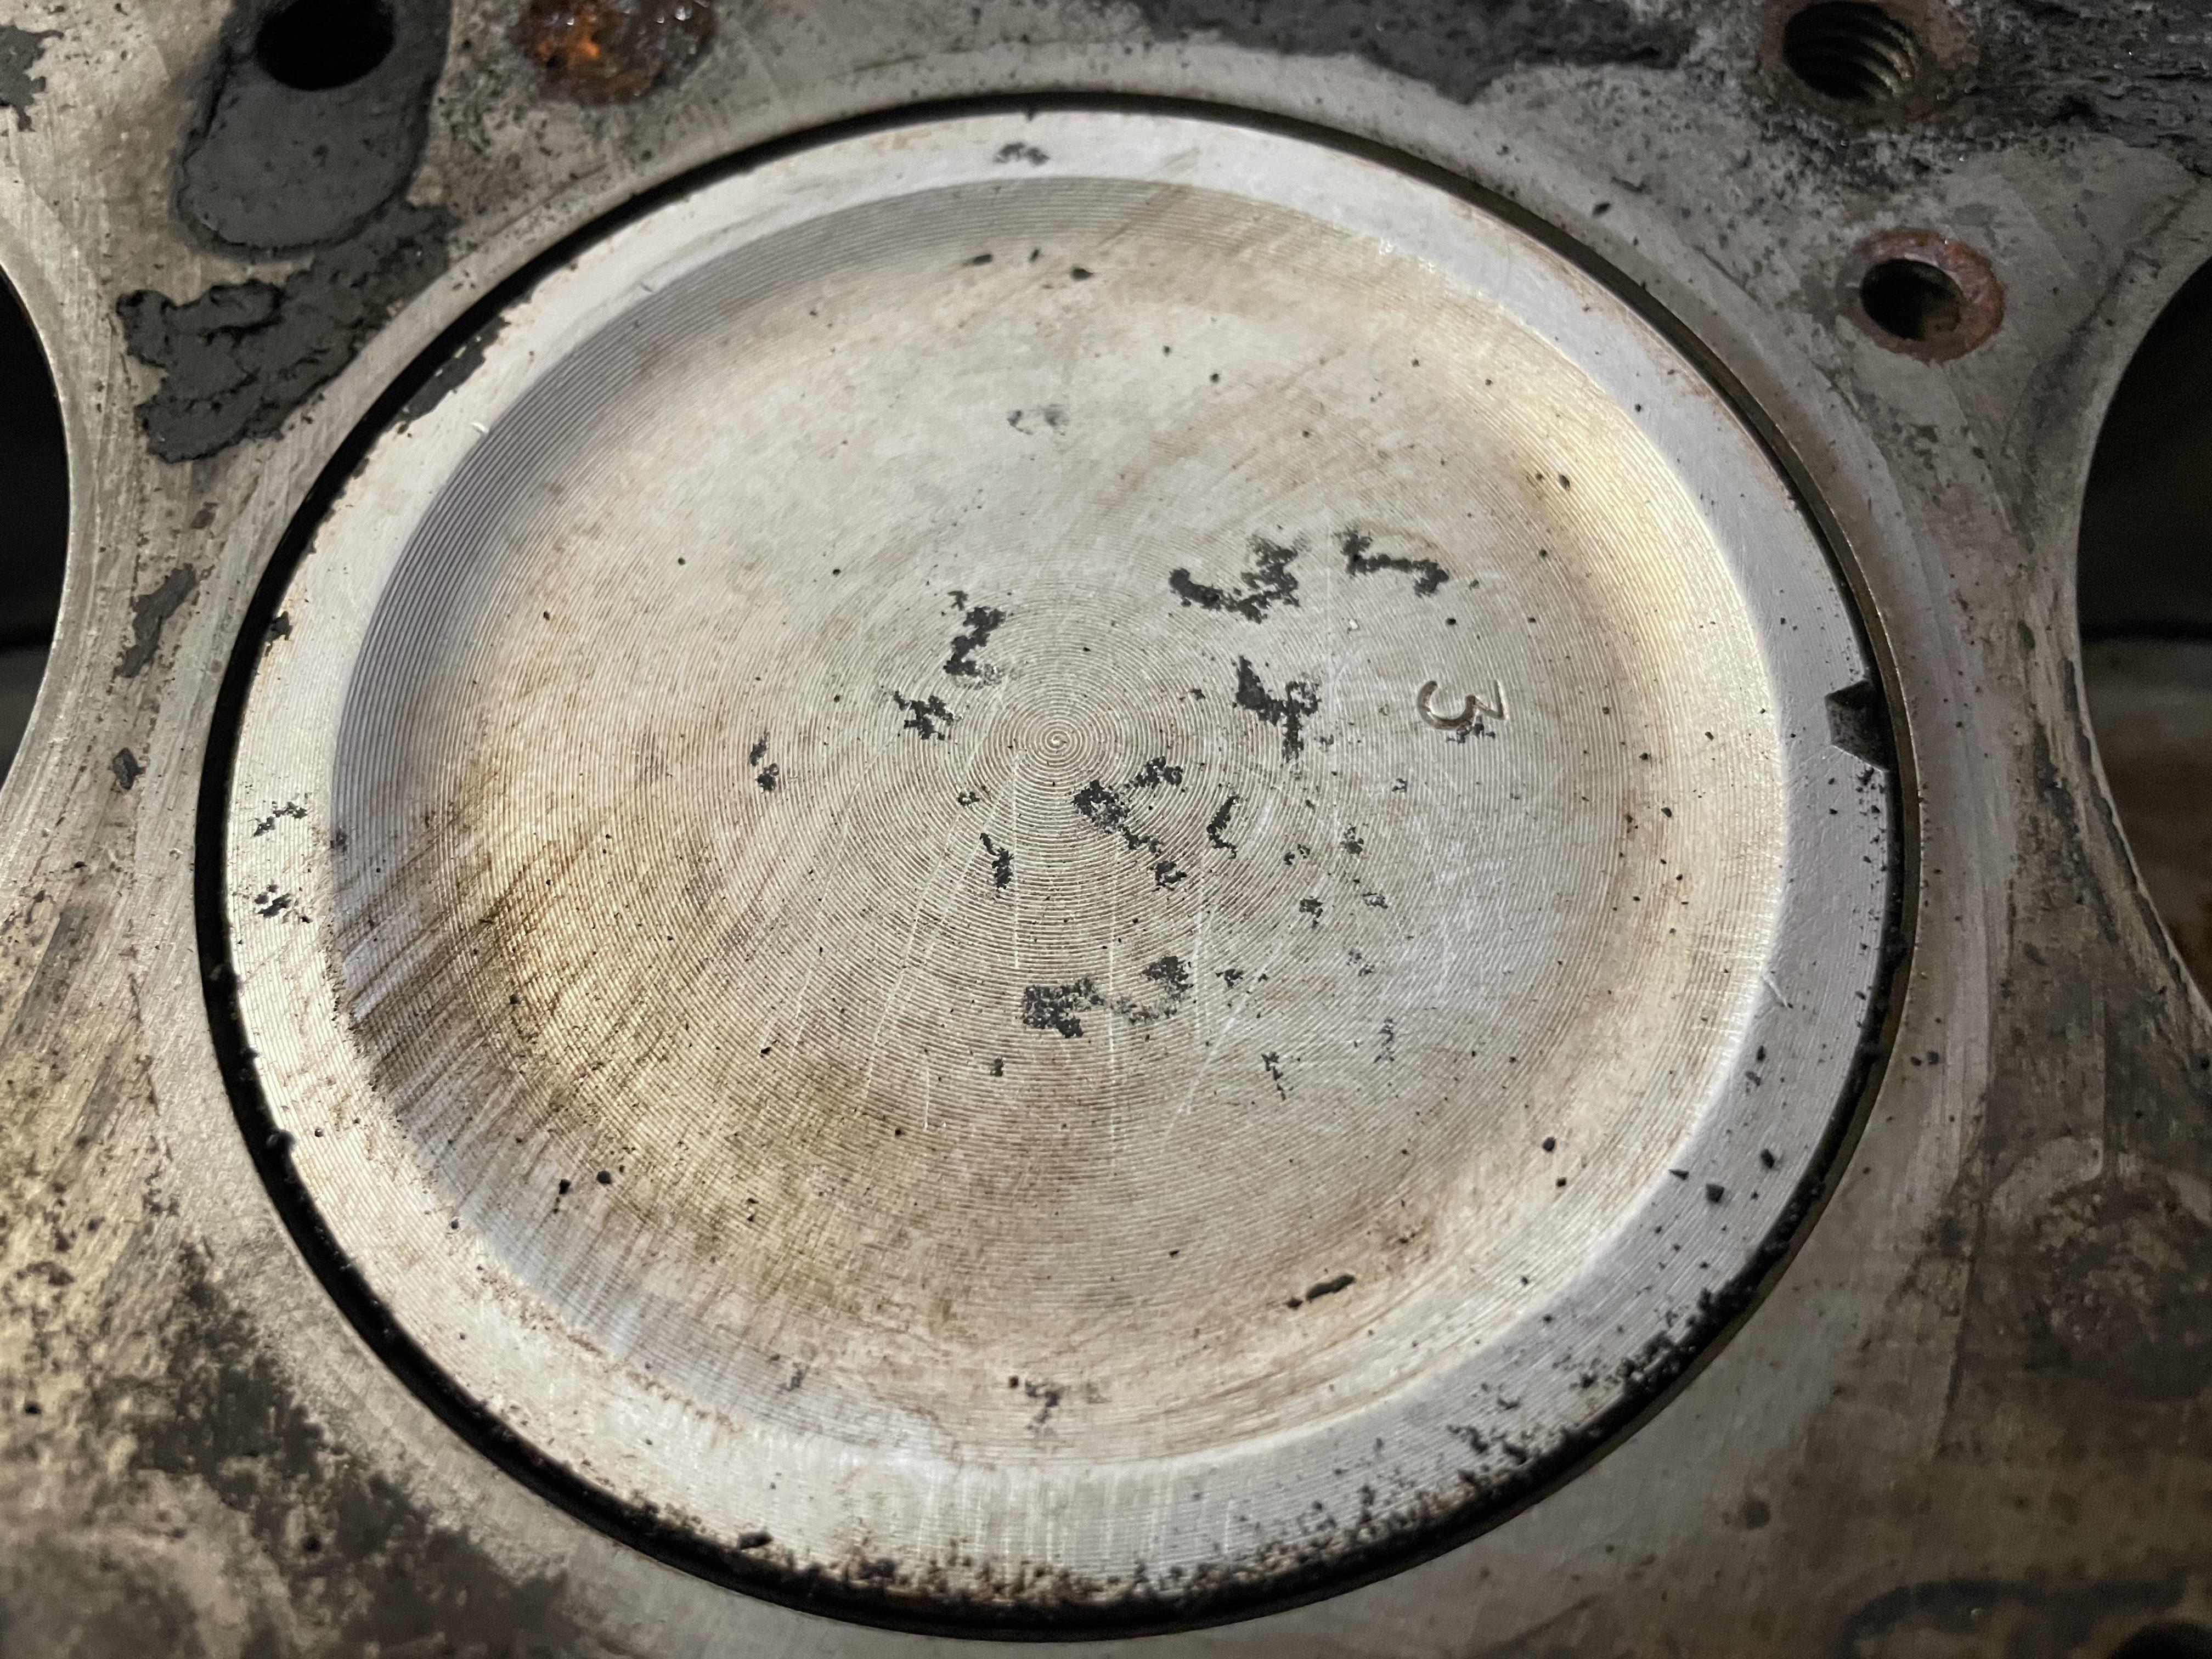
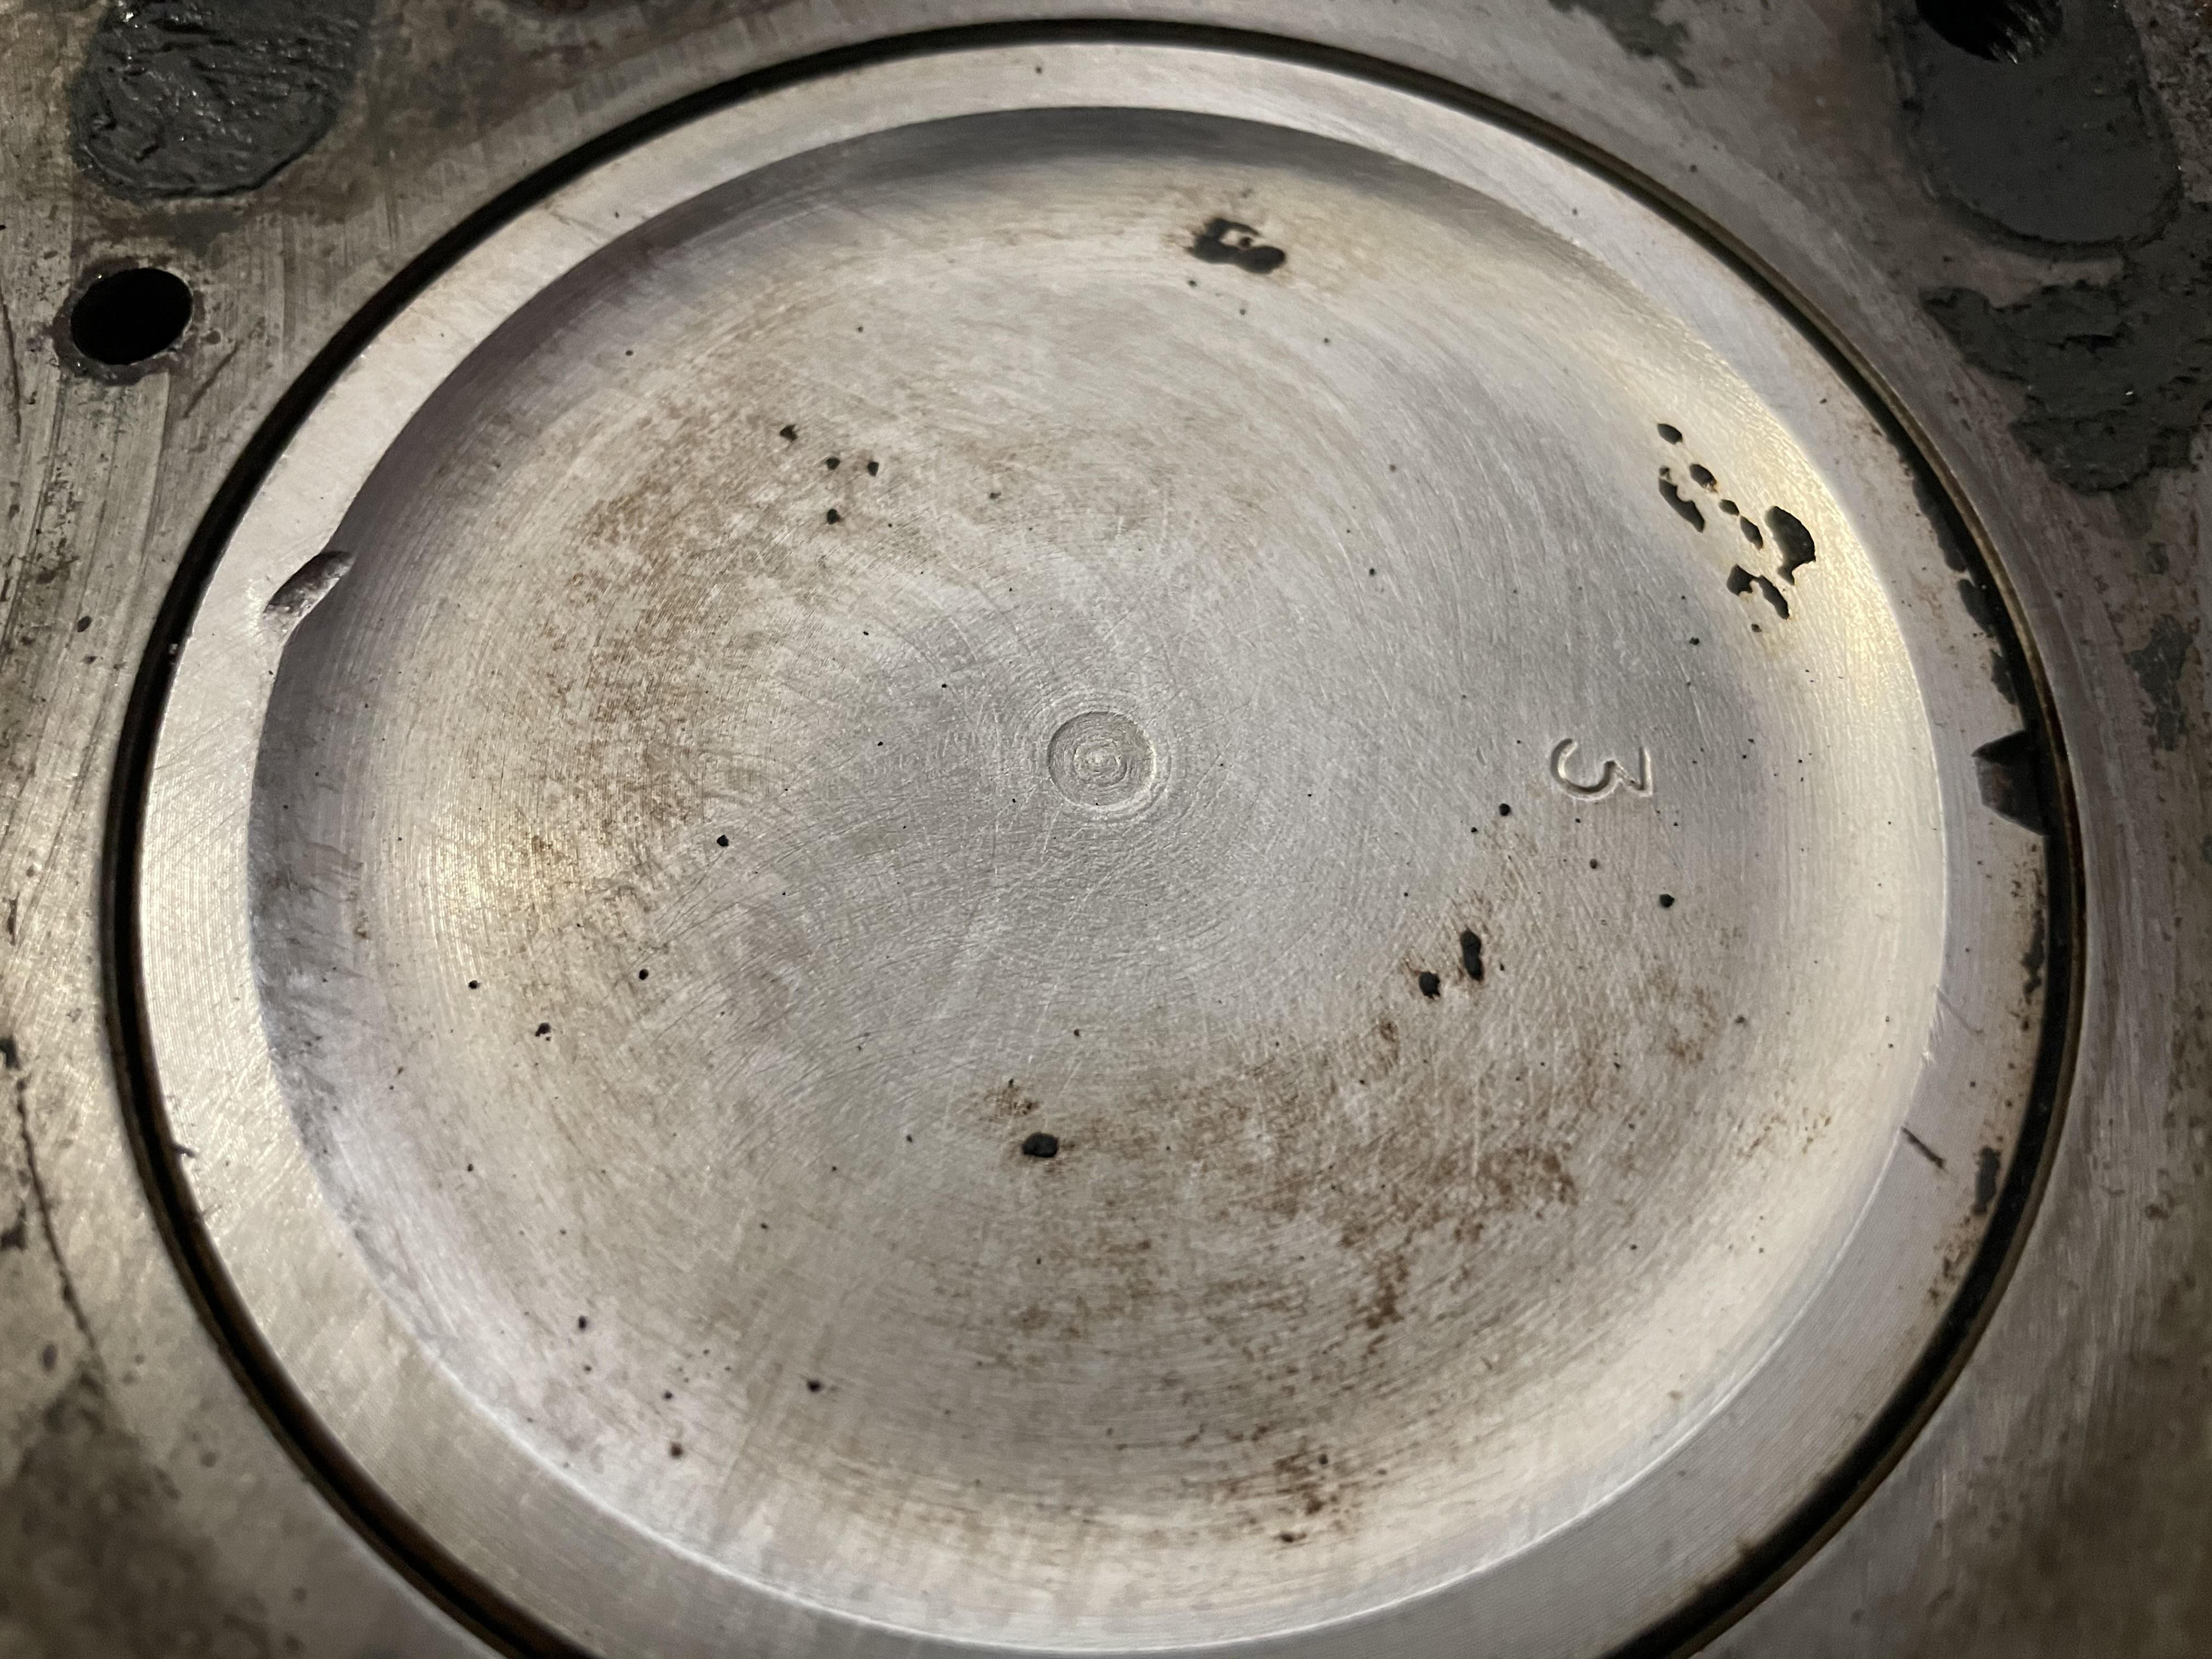
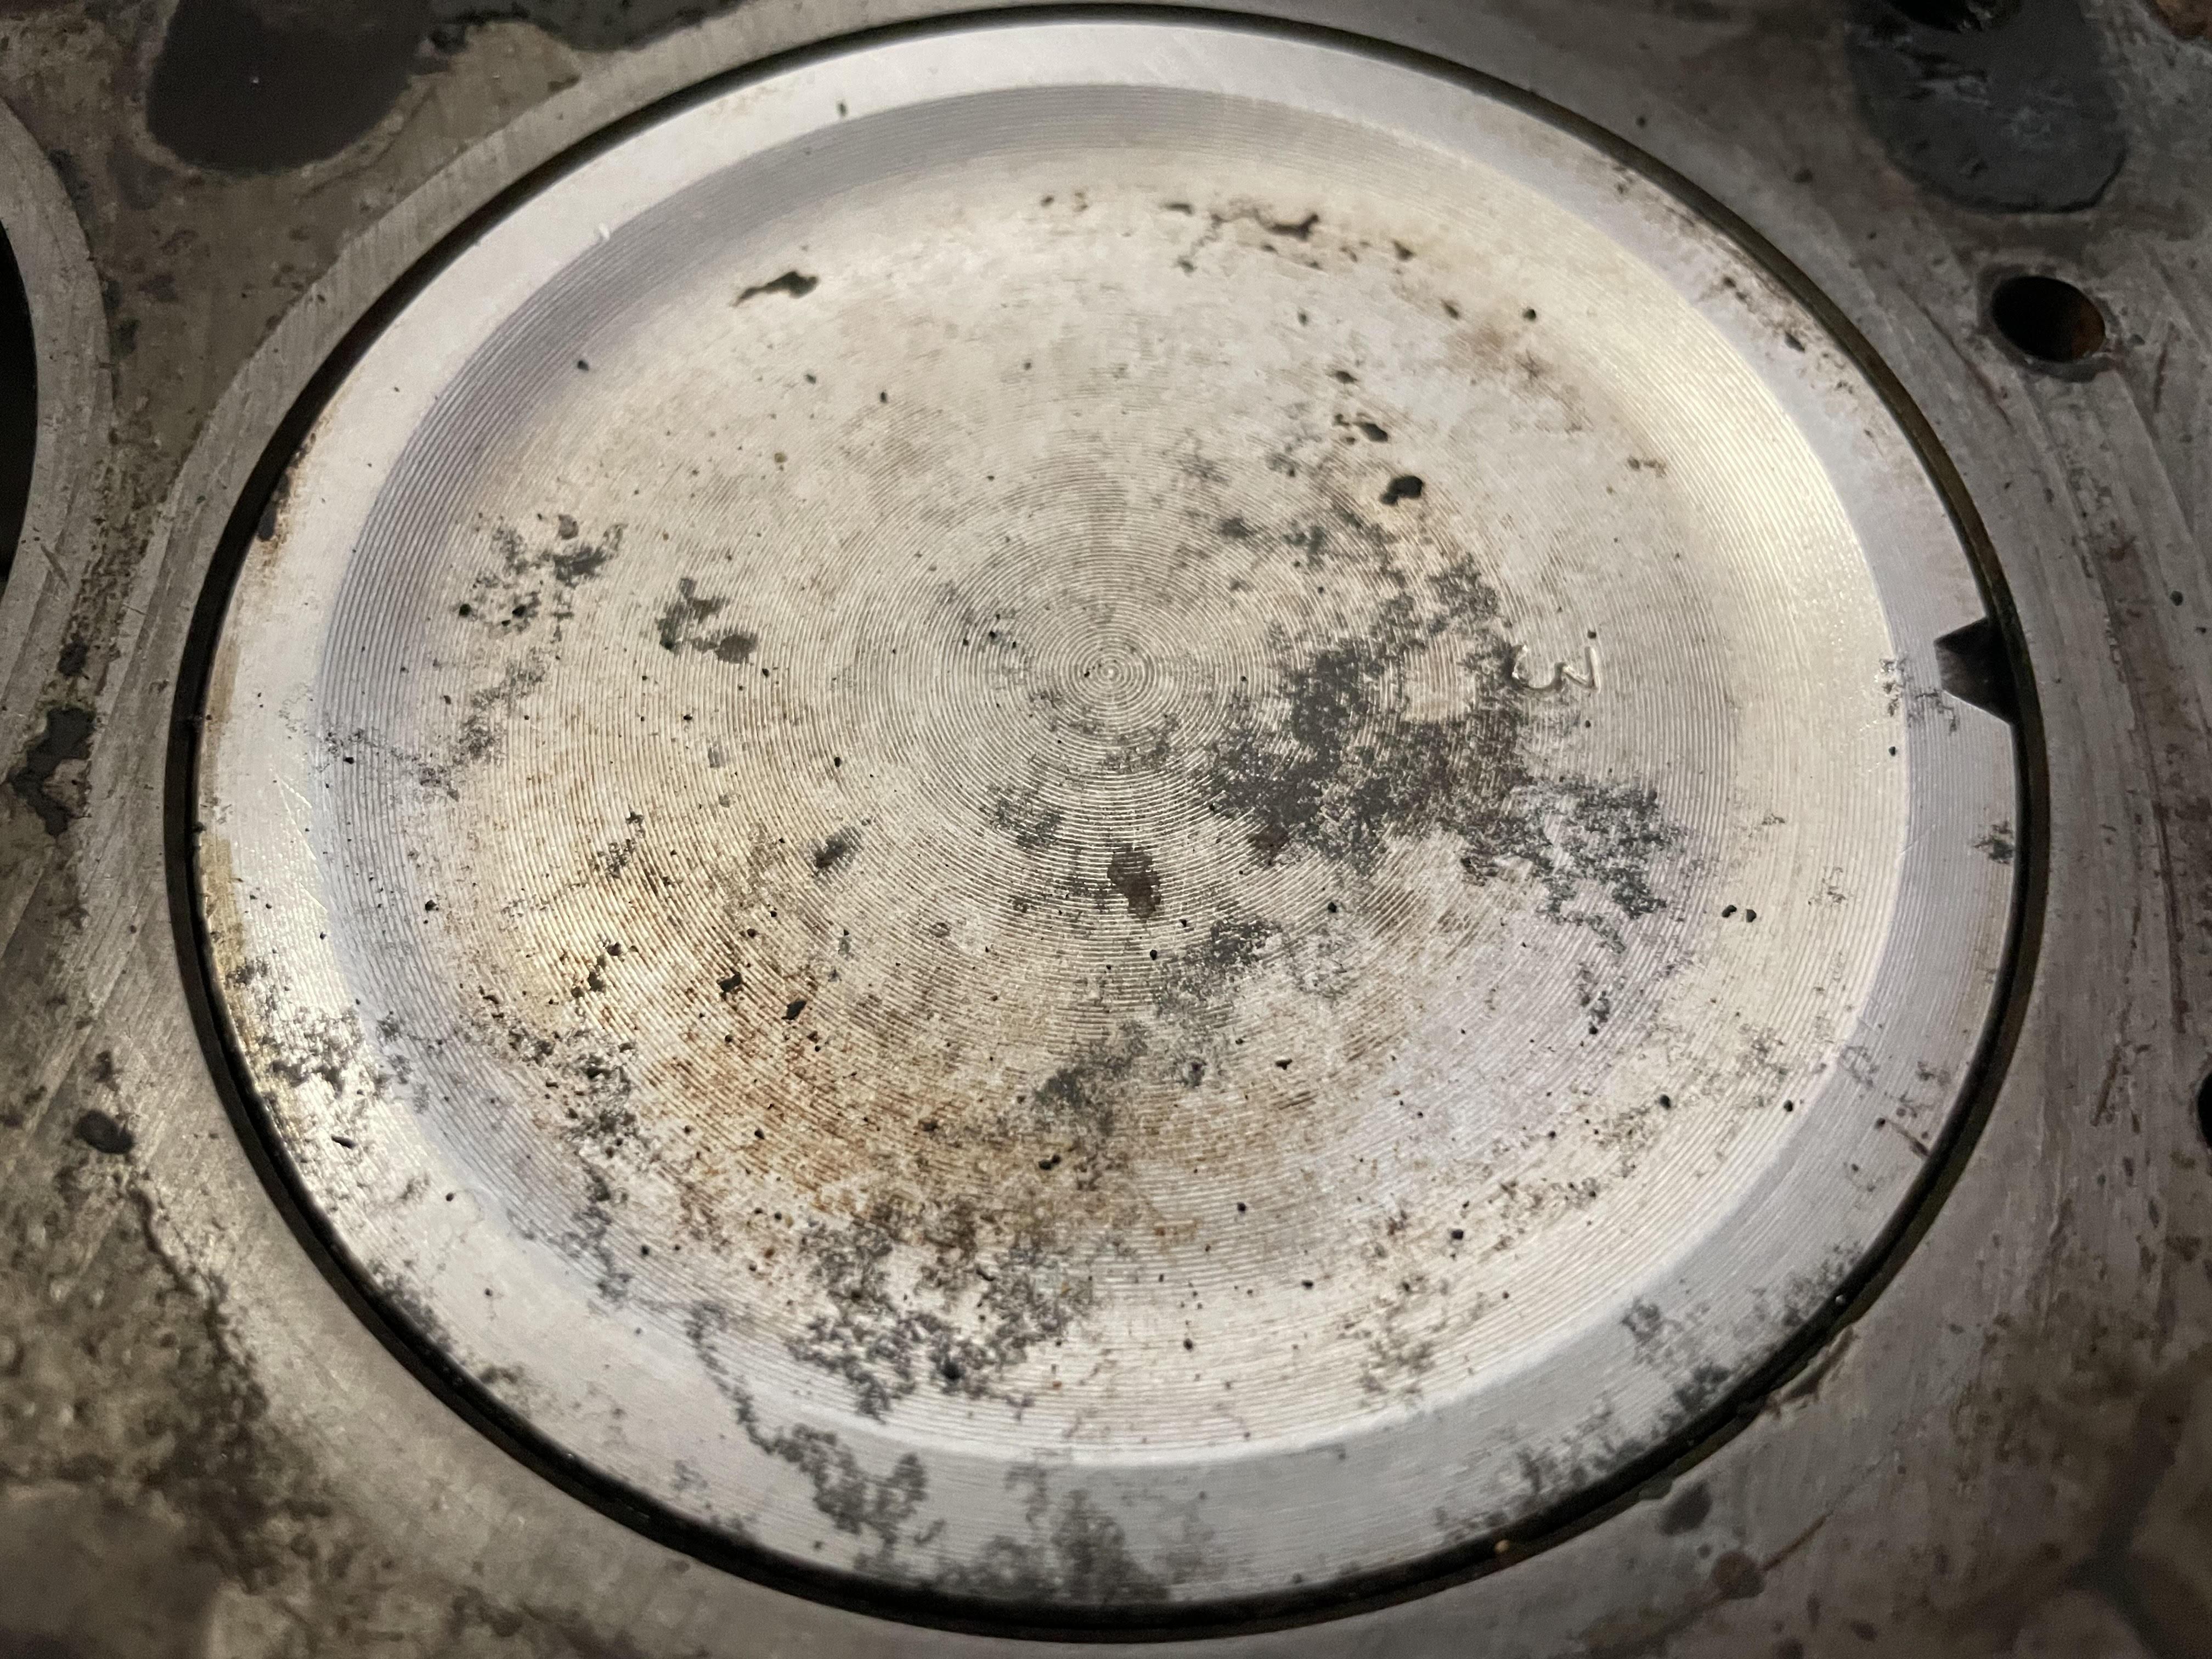
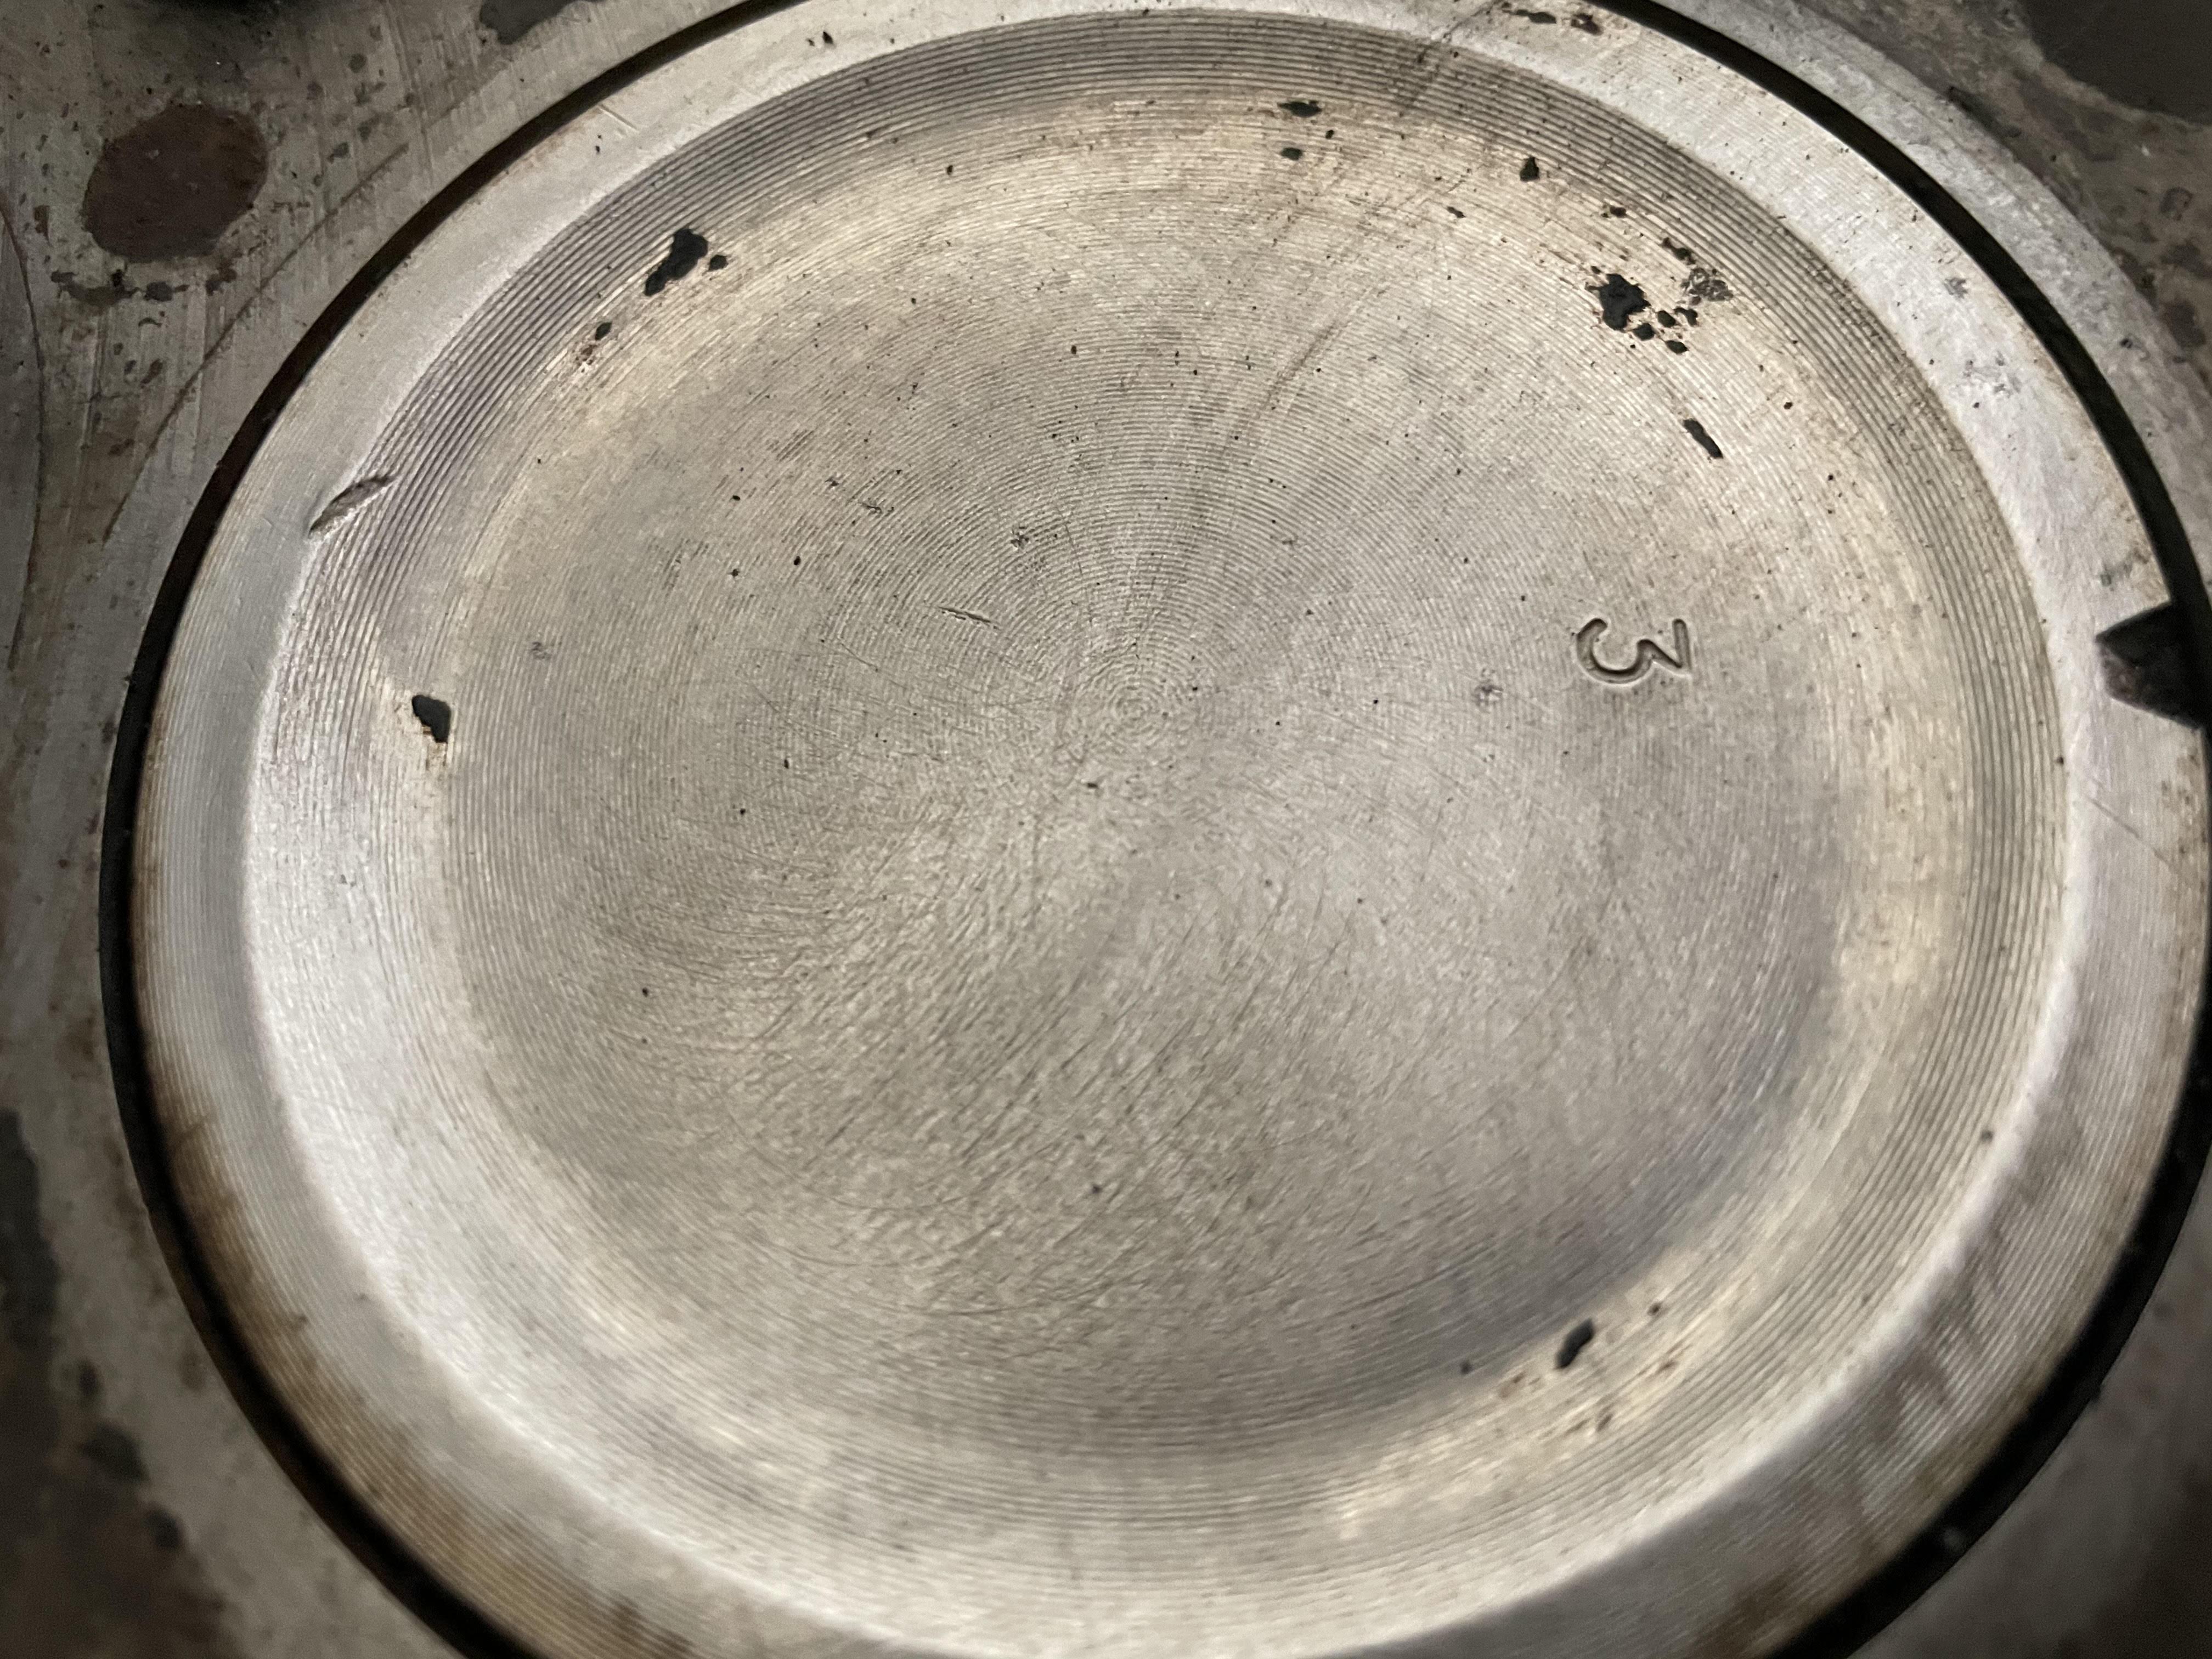
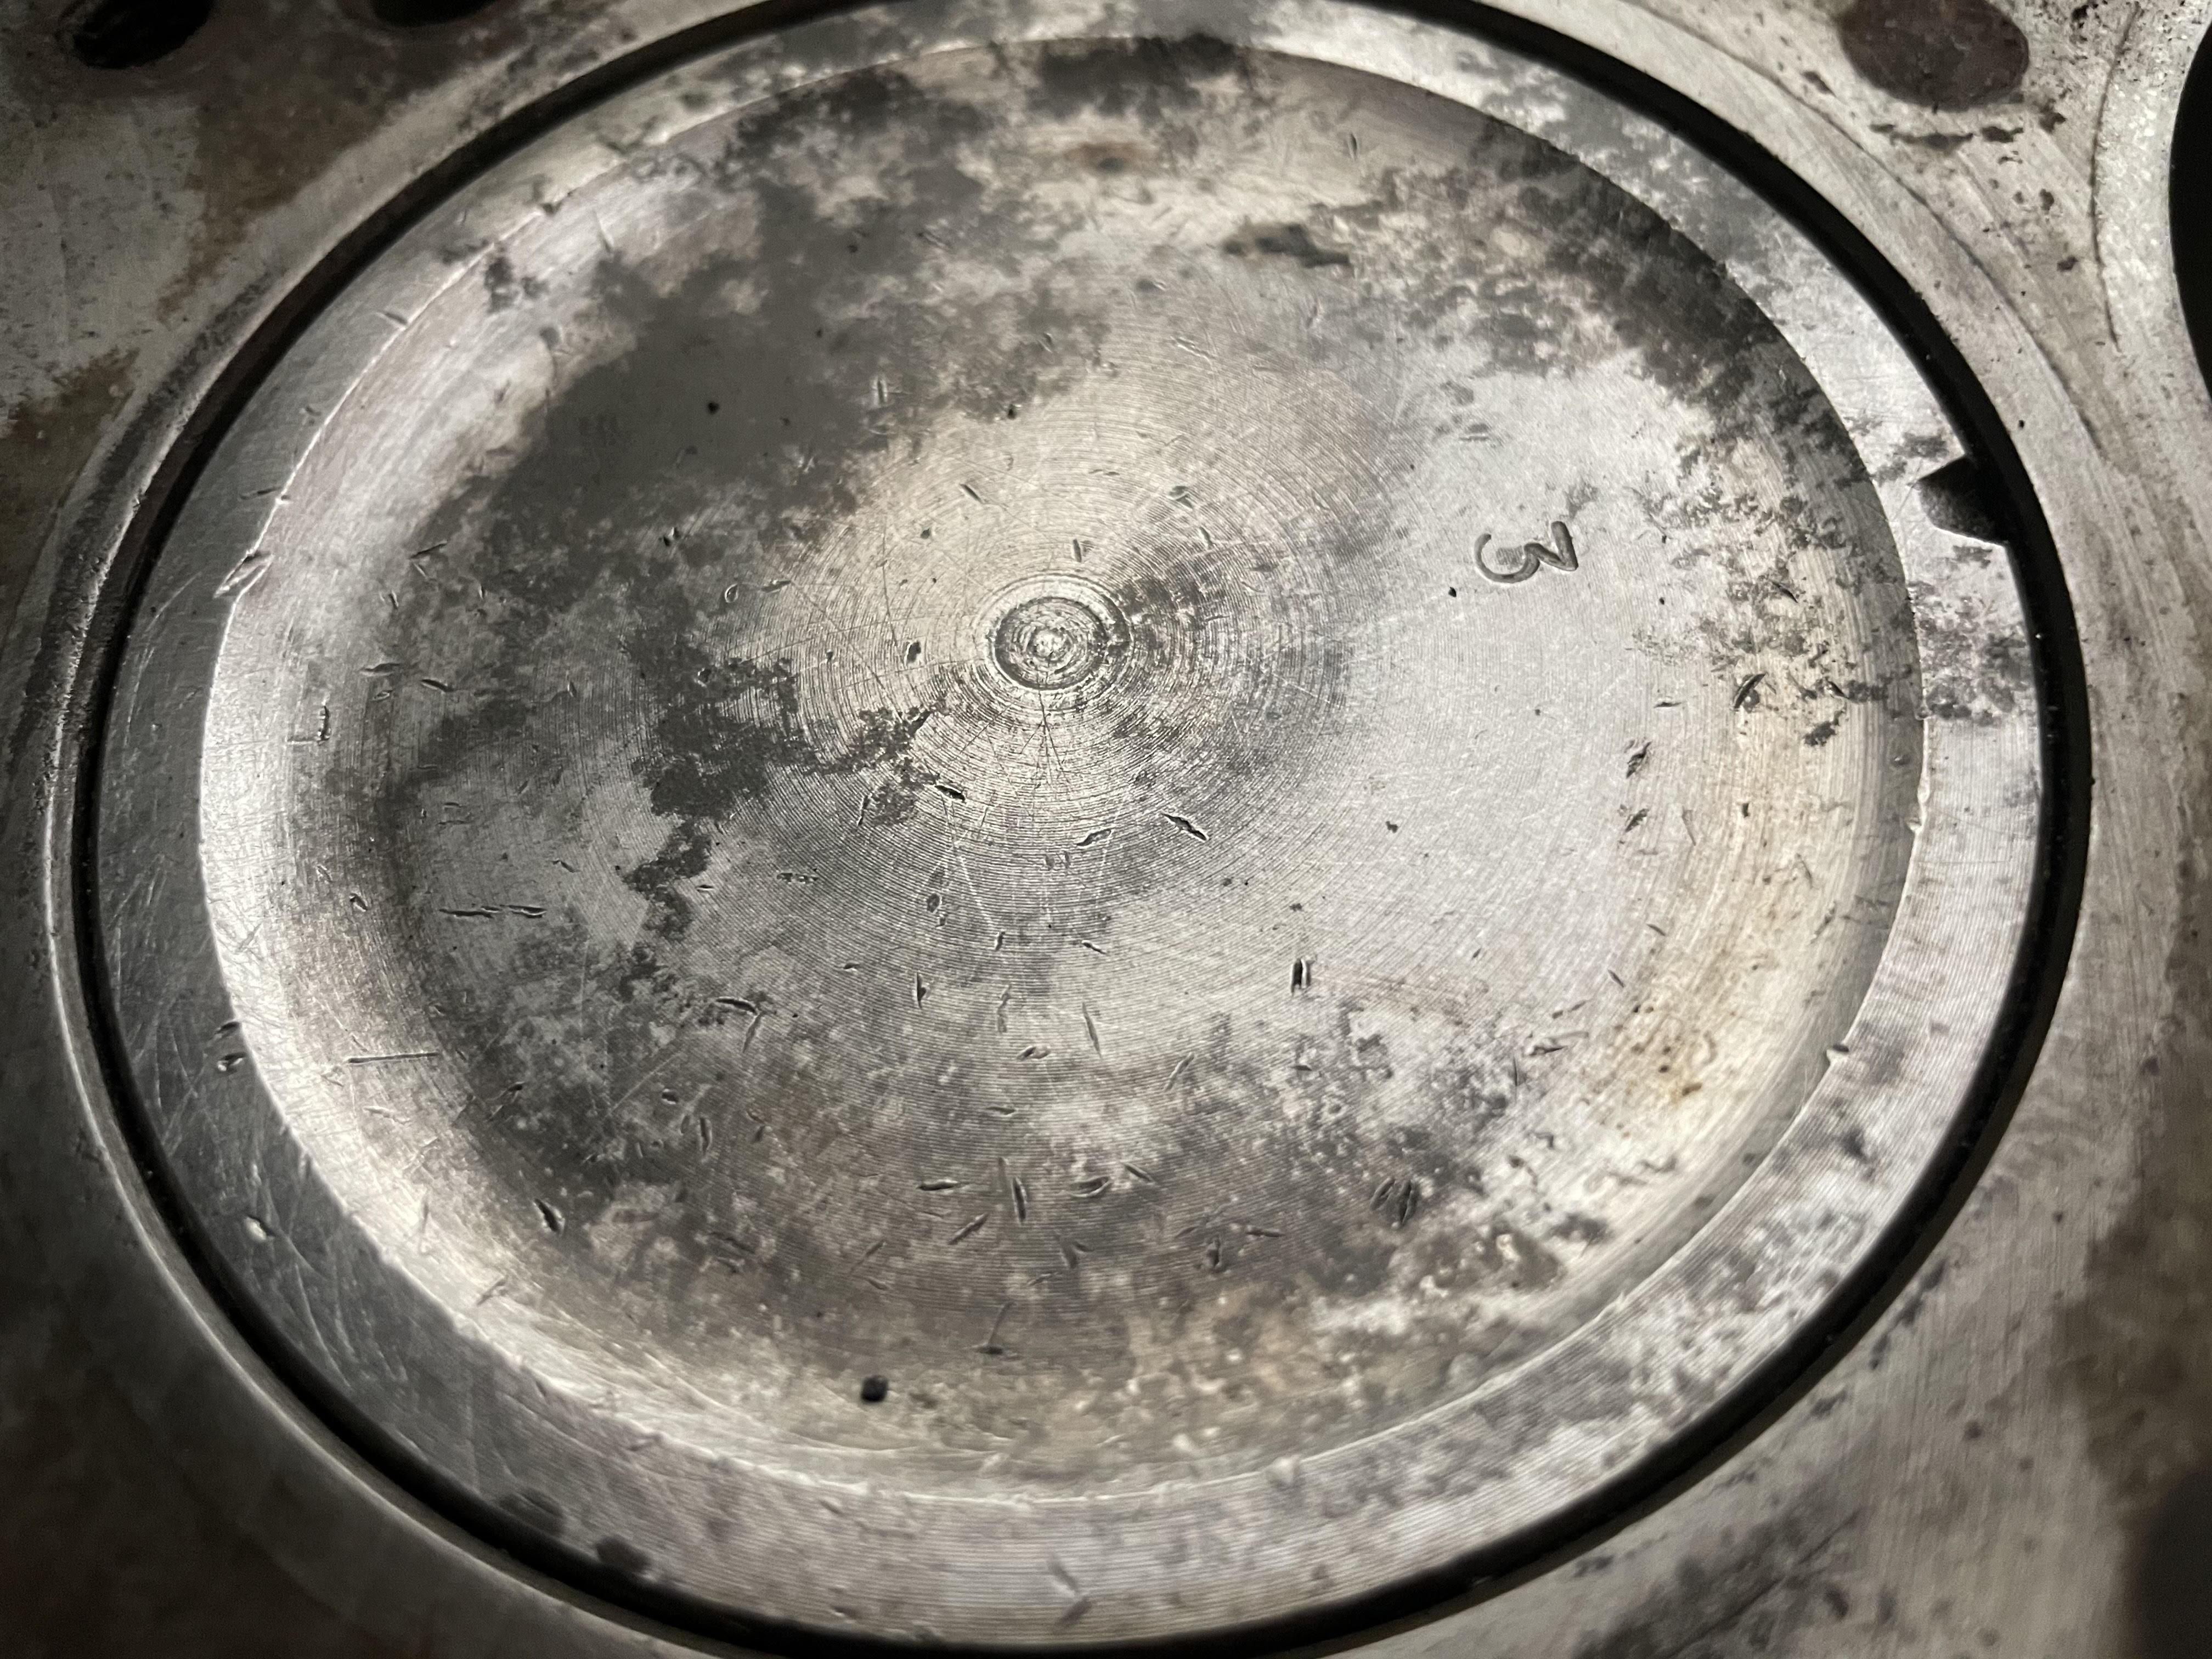
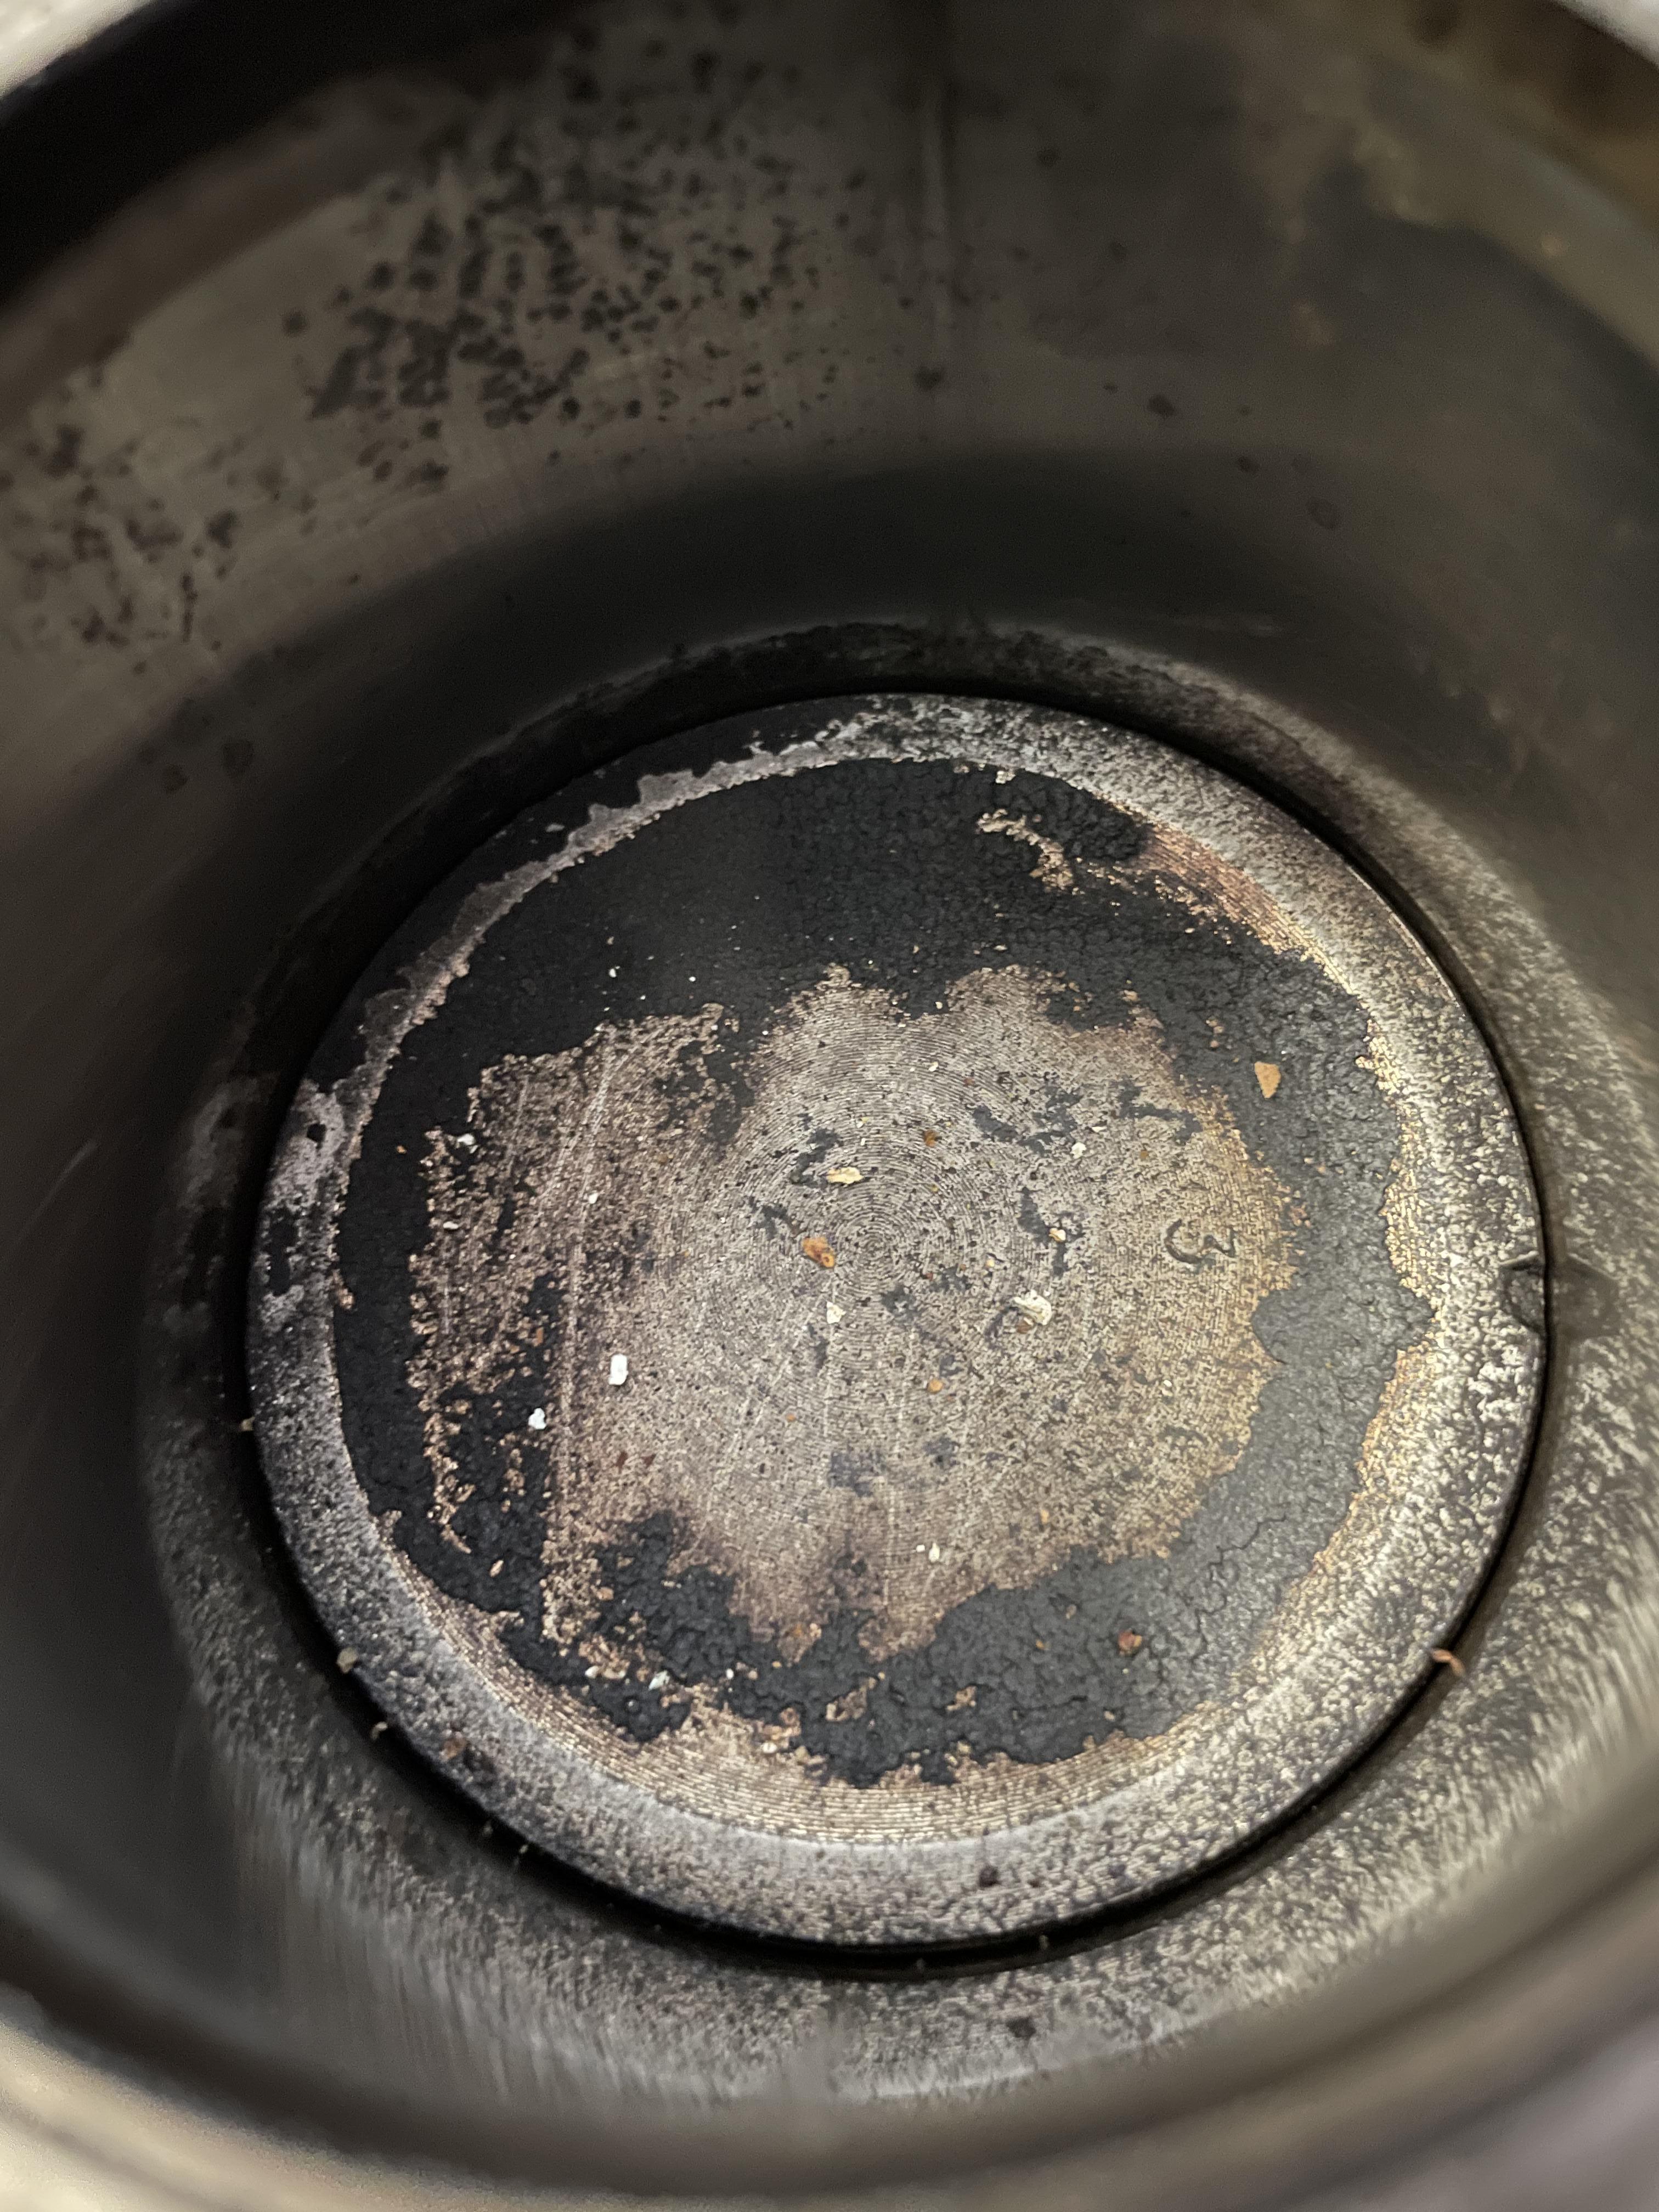
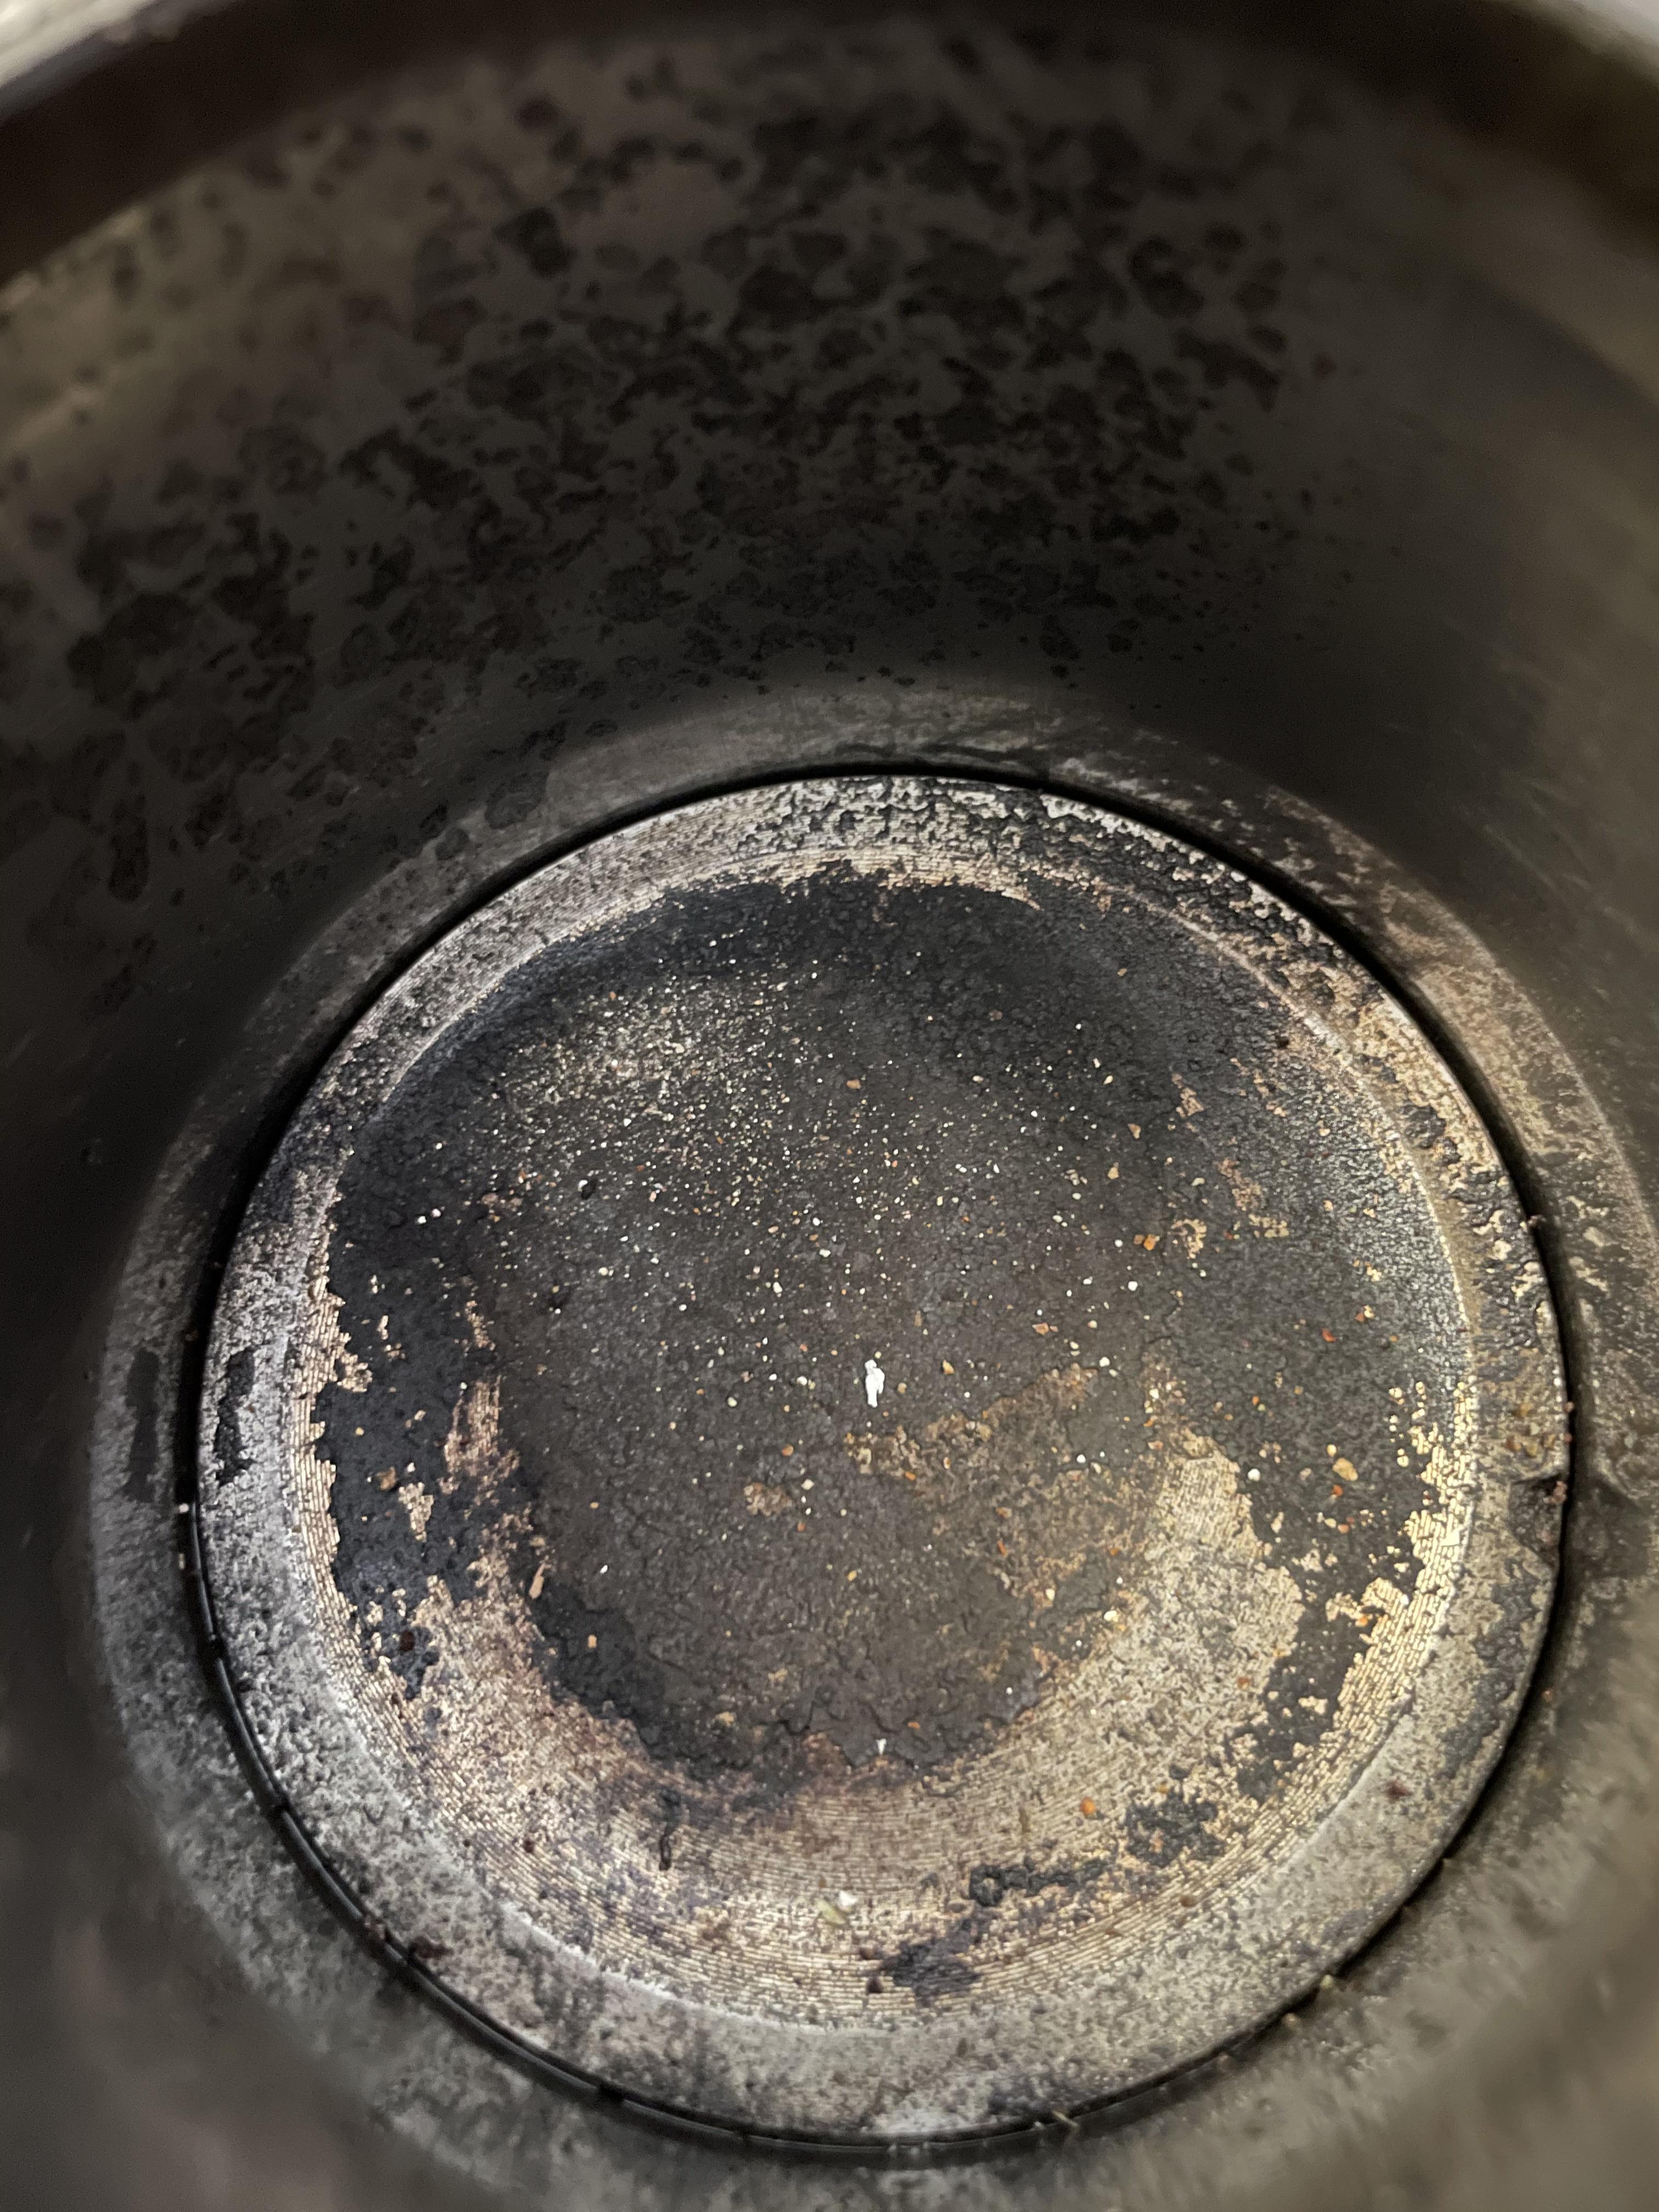
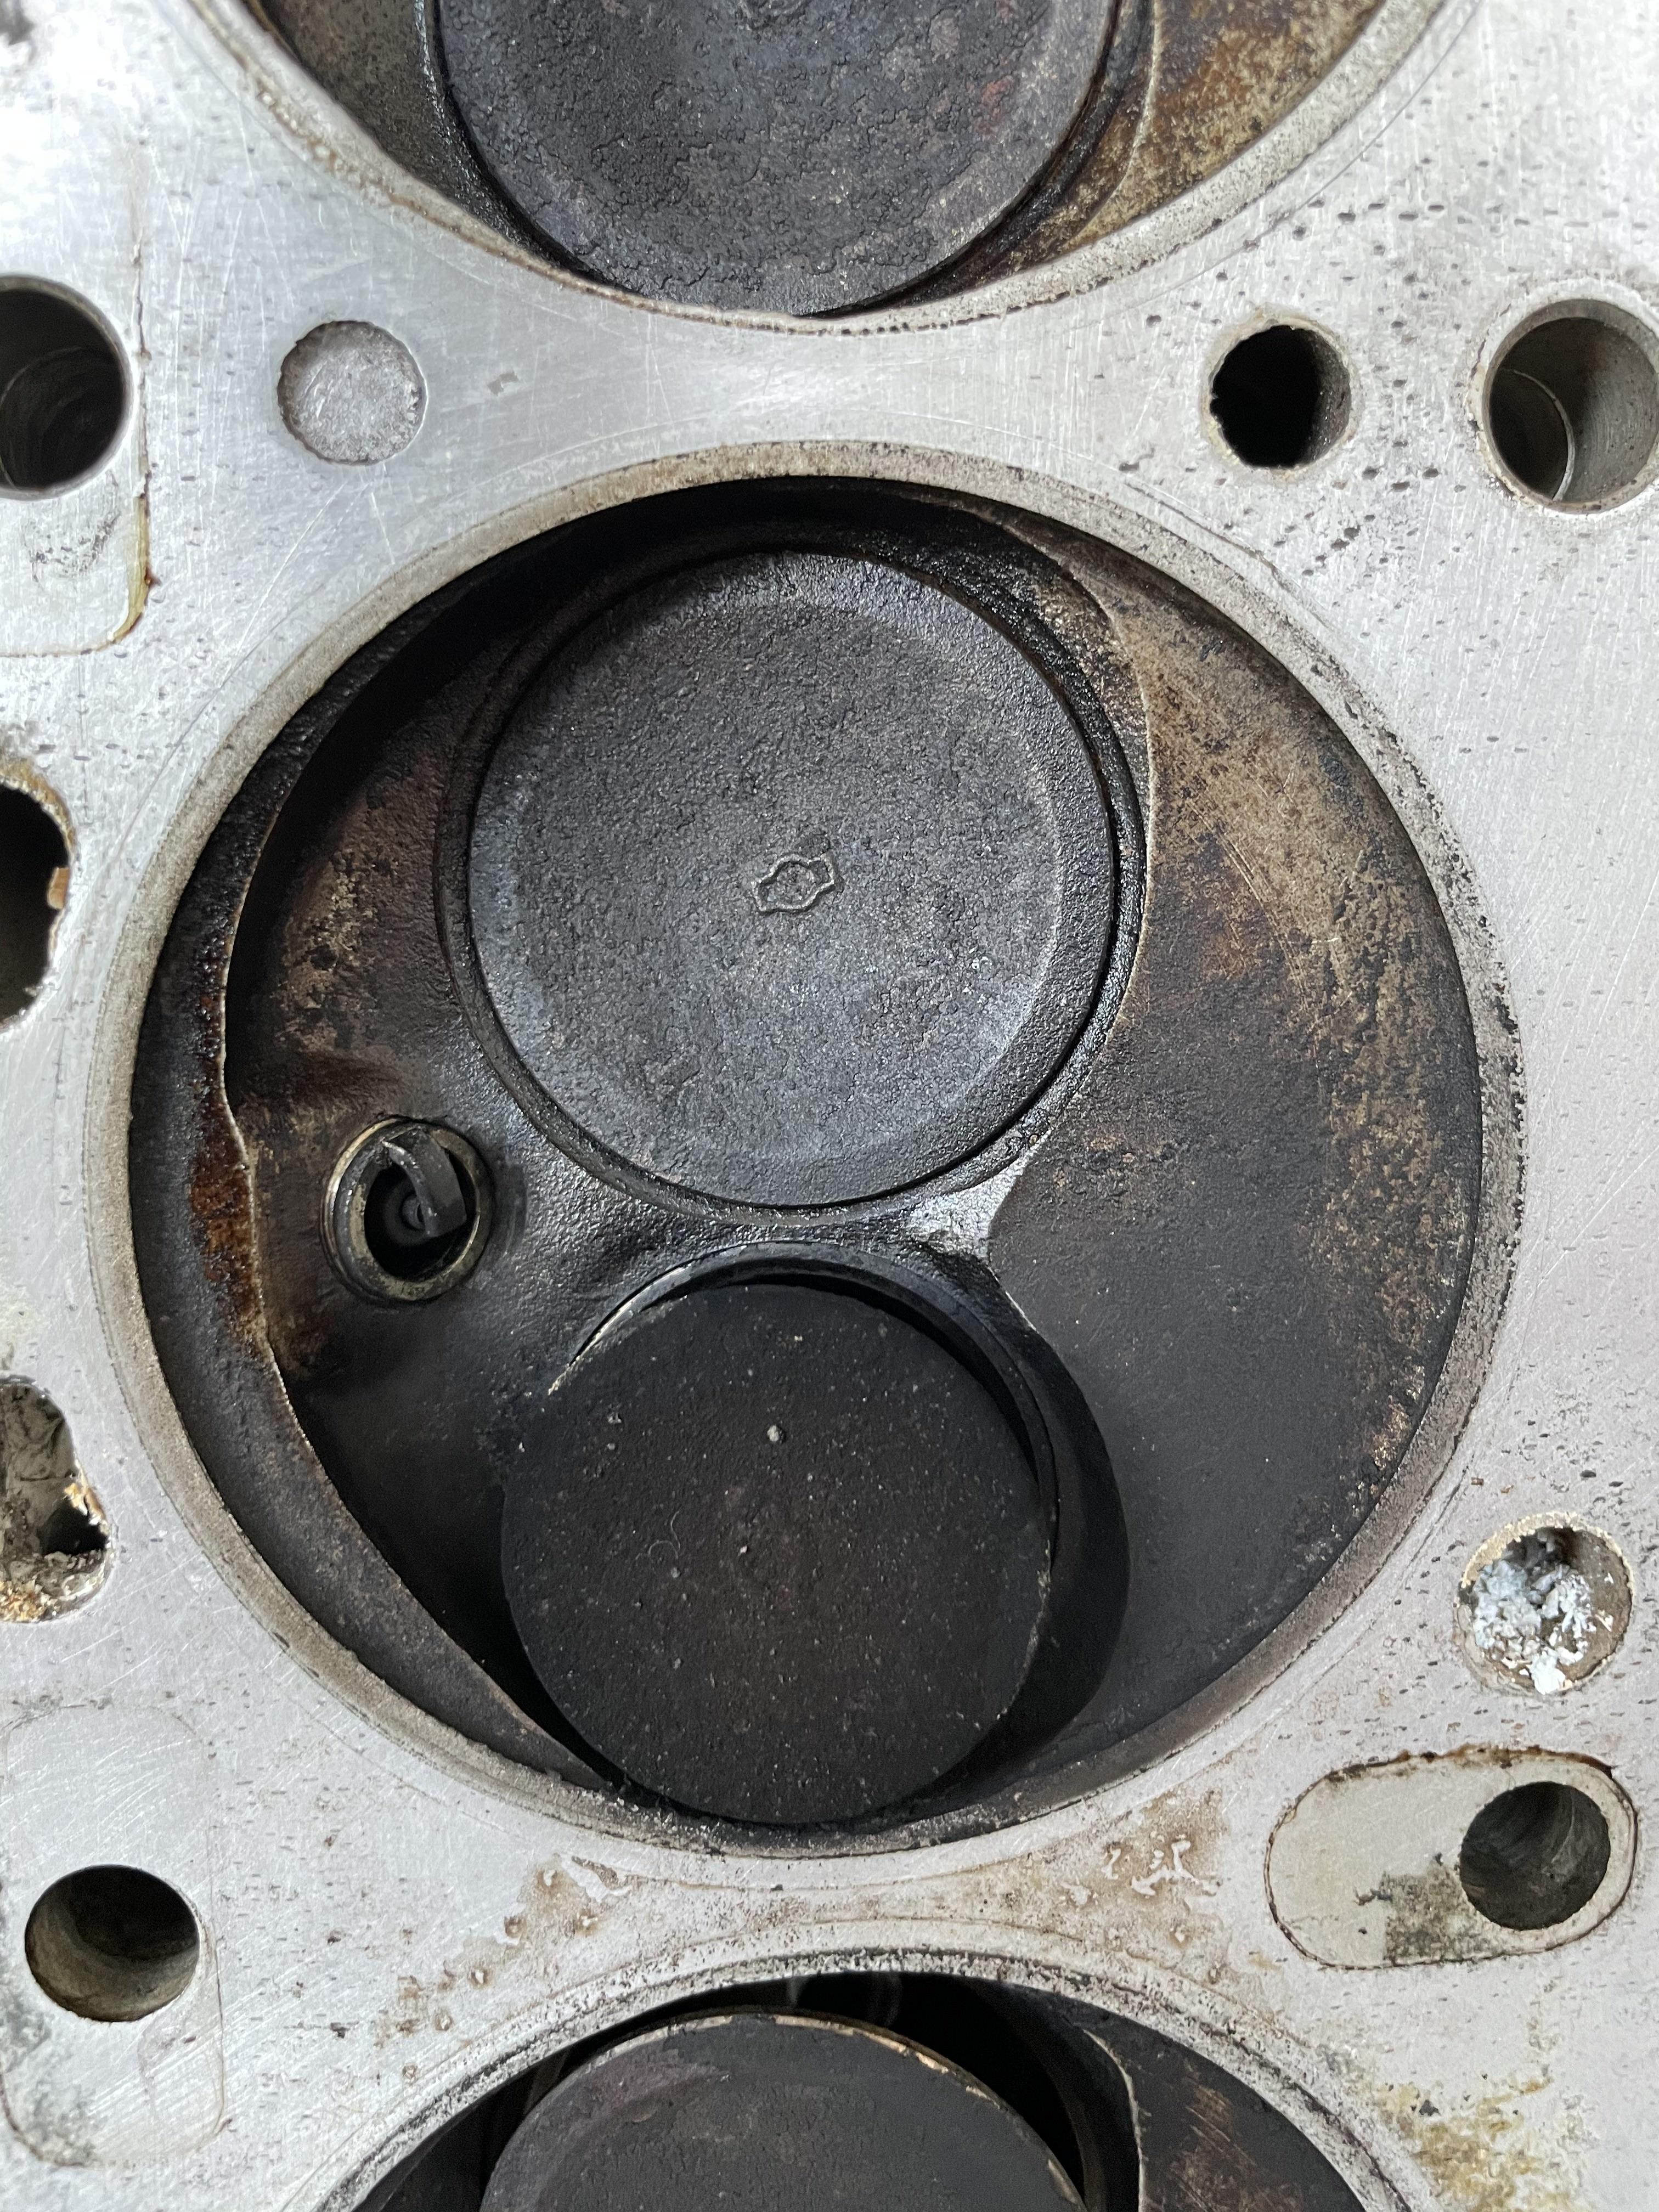
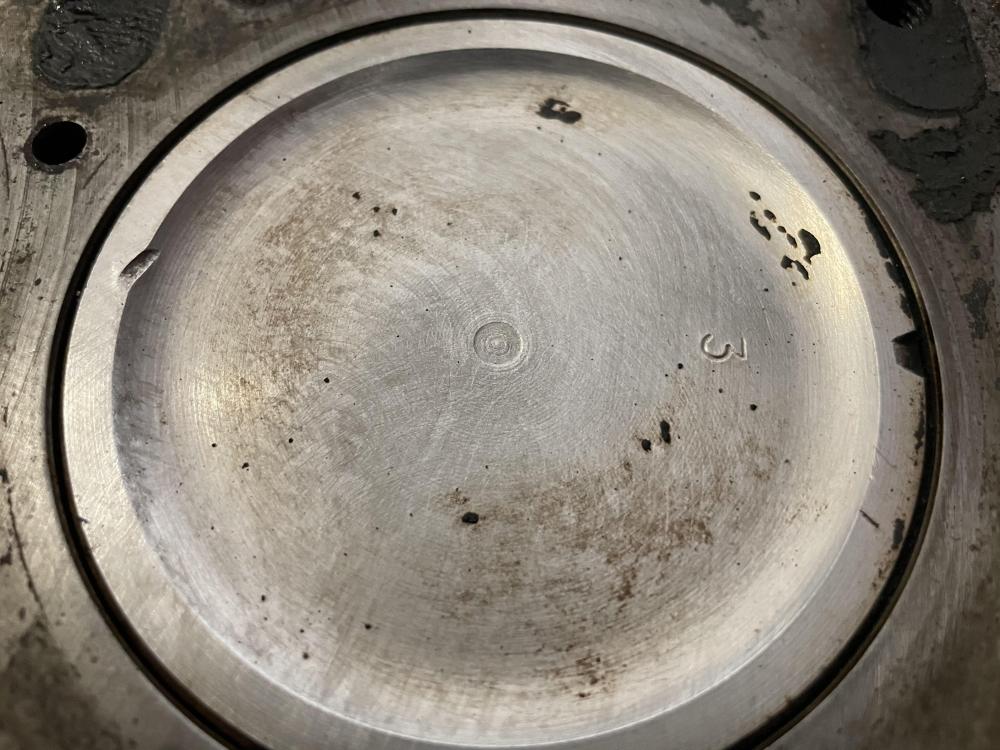
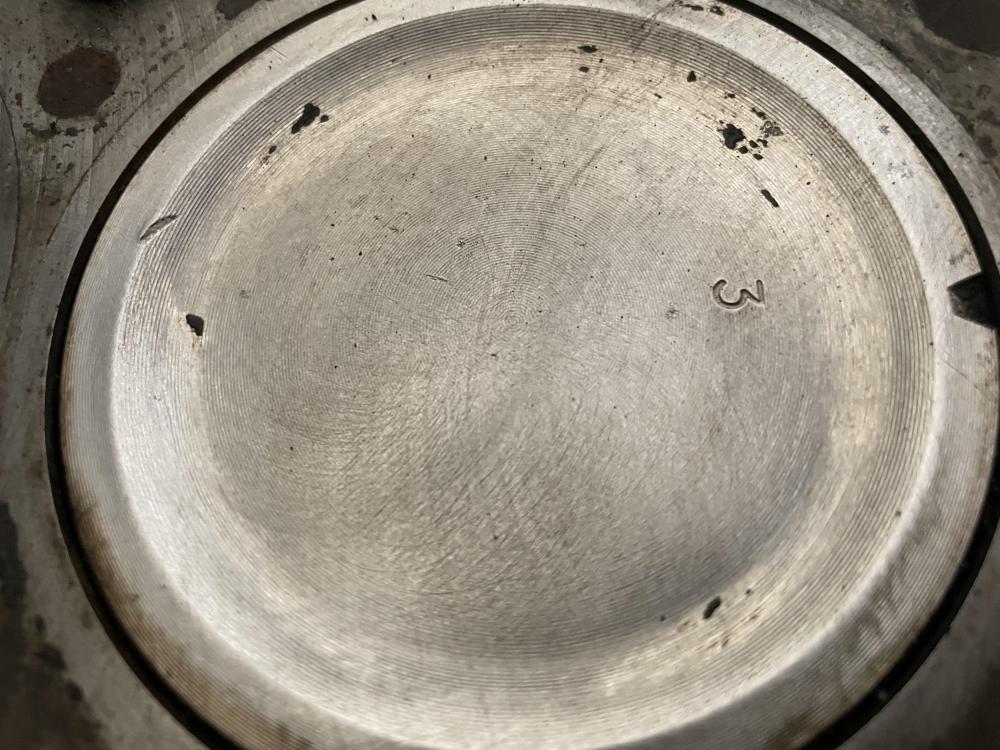
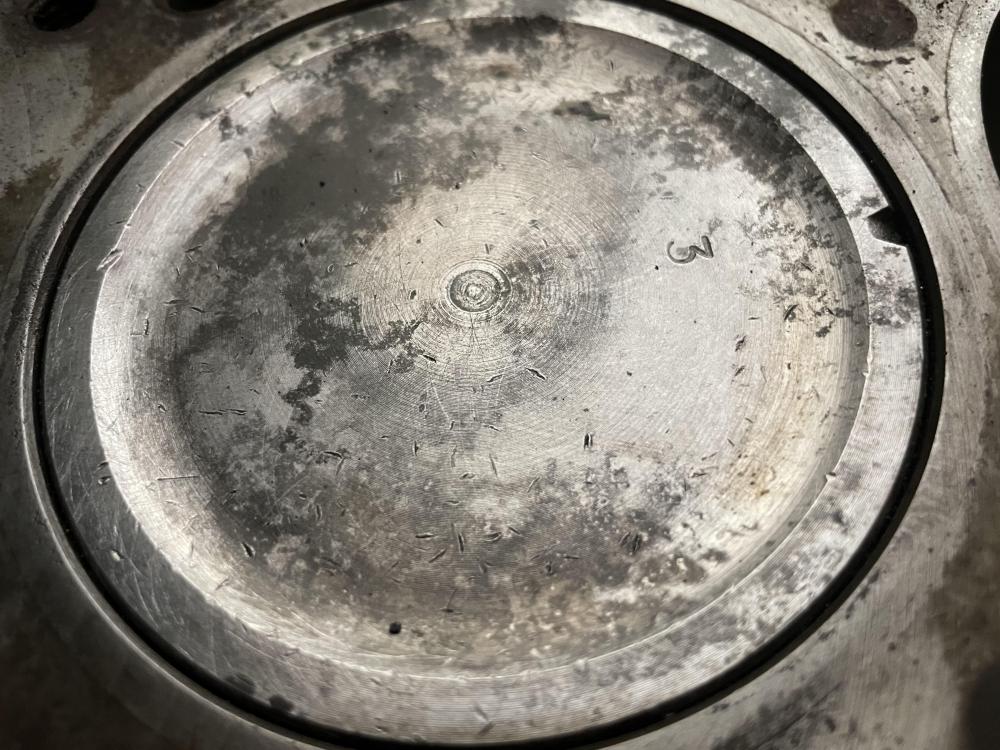
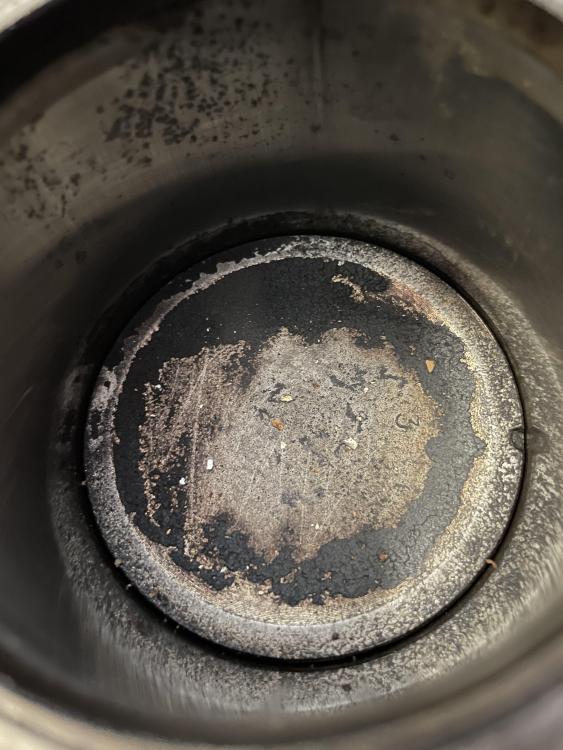
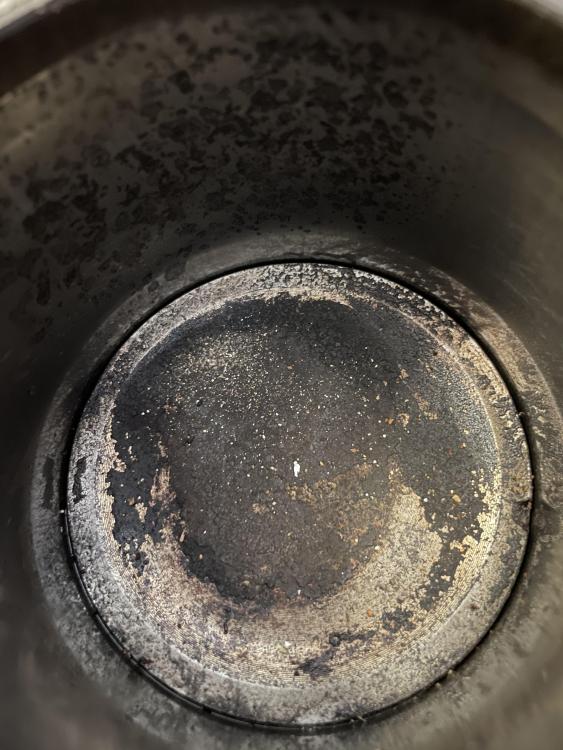
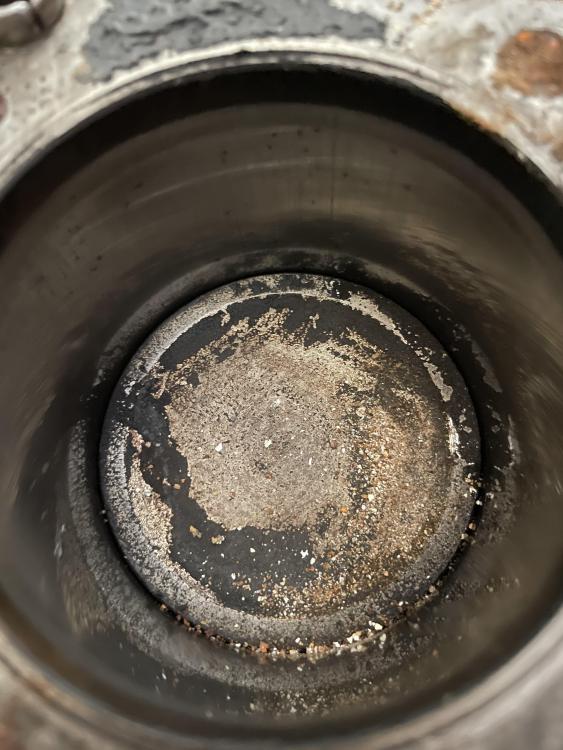
 Did a quick clean of the piston tops. @Captain Obvious thoughts? Im no expert on internals yet, but #6 definitely looks like something was flying around in there. The rest look okay for what they are. Looks like #5 and #6 also had a run in with a valve! (Hopefully they upload in order starting with #6)
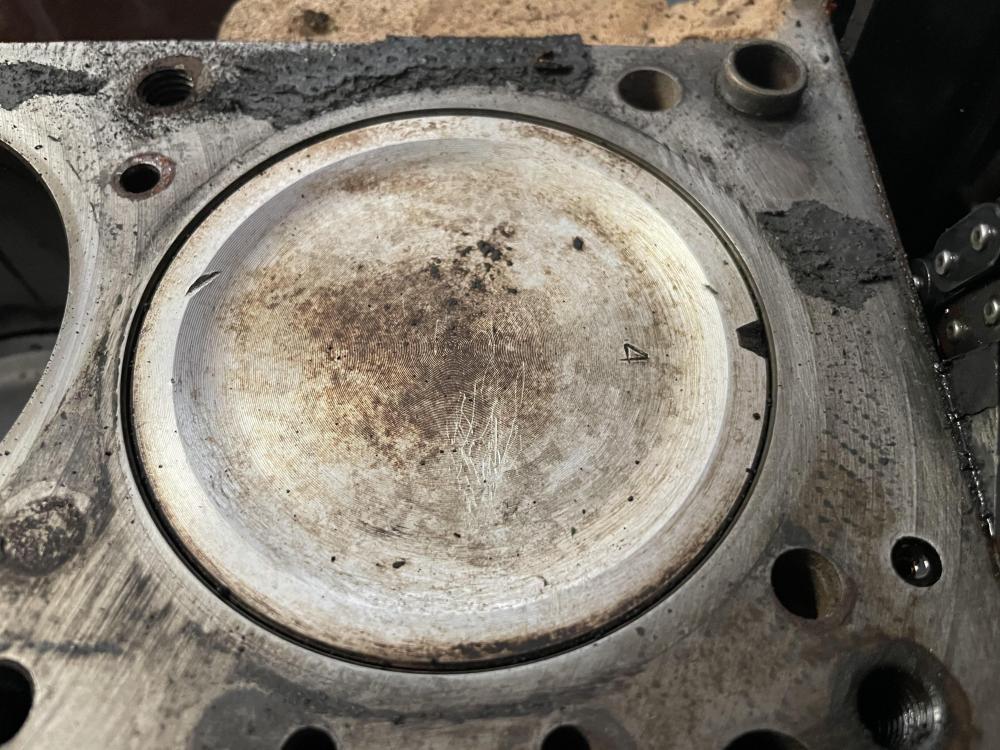


-
I'll be sure to give everything a good wipedown and check. Now that you pointed it out, I can totally see the difference between 1 and the rest. Thats a good idea. There is a local 280z and tranny combo for $450. But its been sitting out of the car for a year or two. I'll probably pull the pistons first before jumping on another engine. I dont want to risk having two bum engines.
-
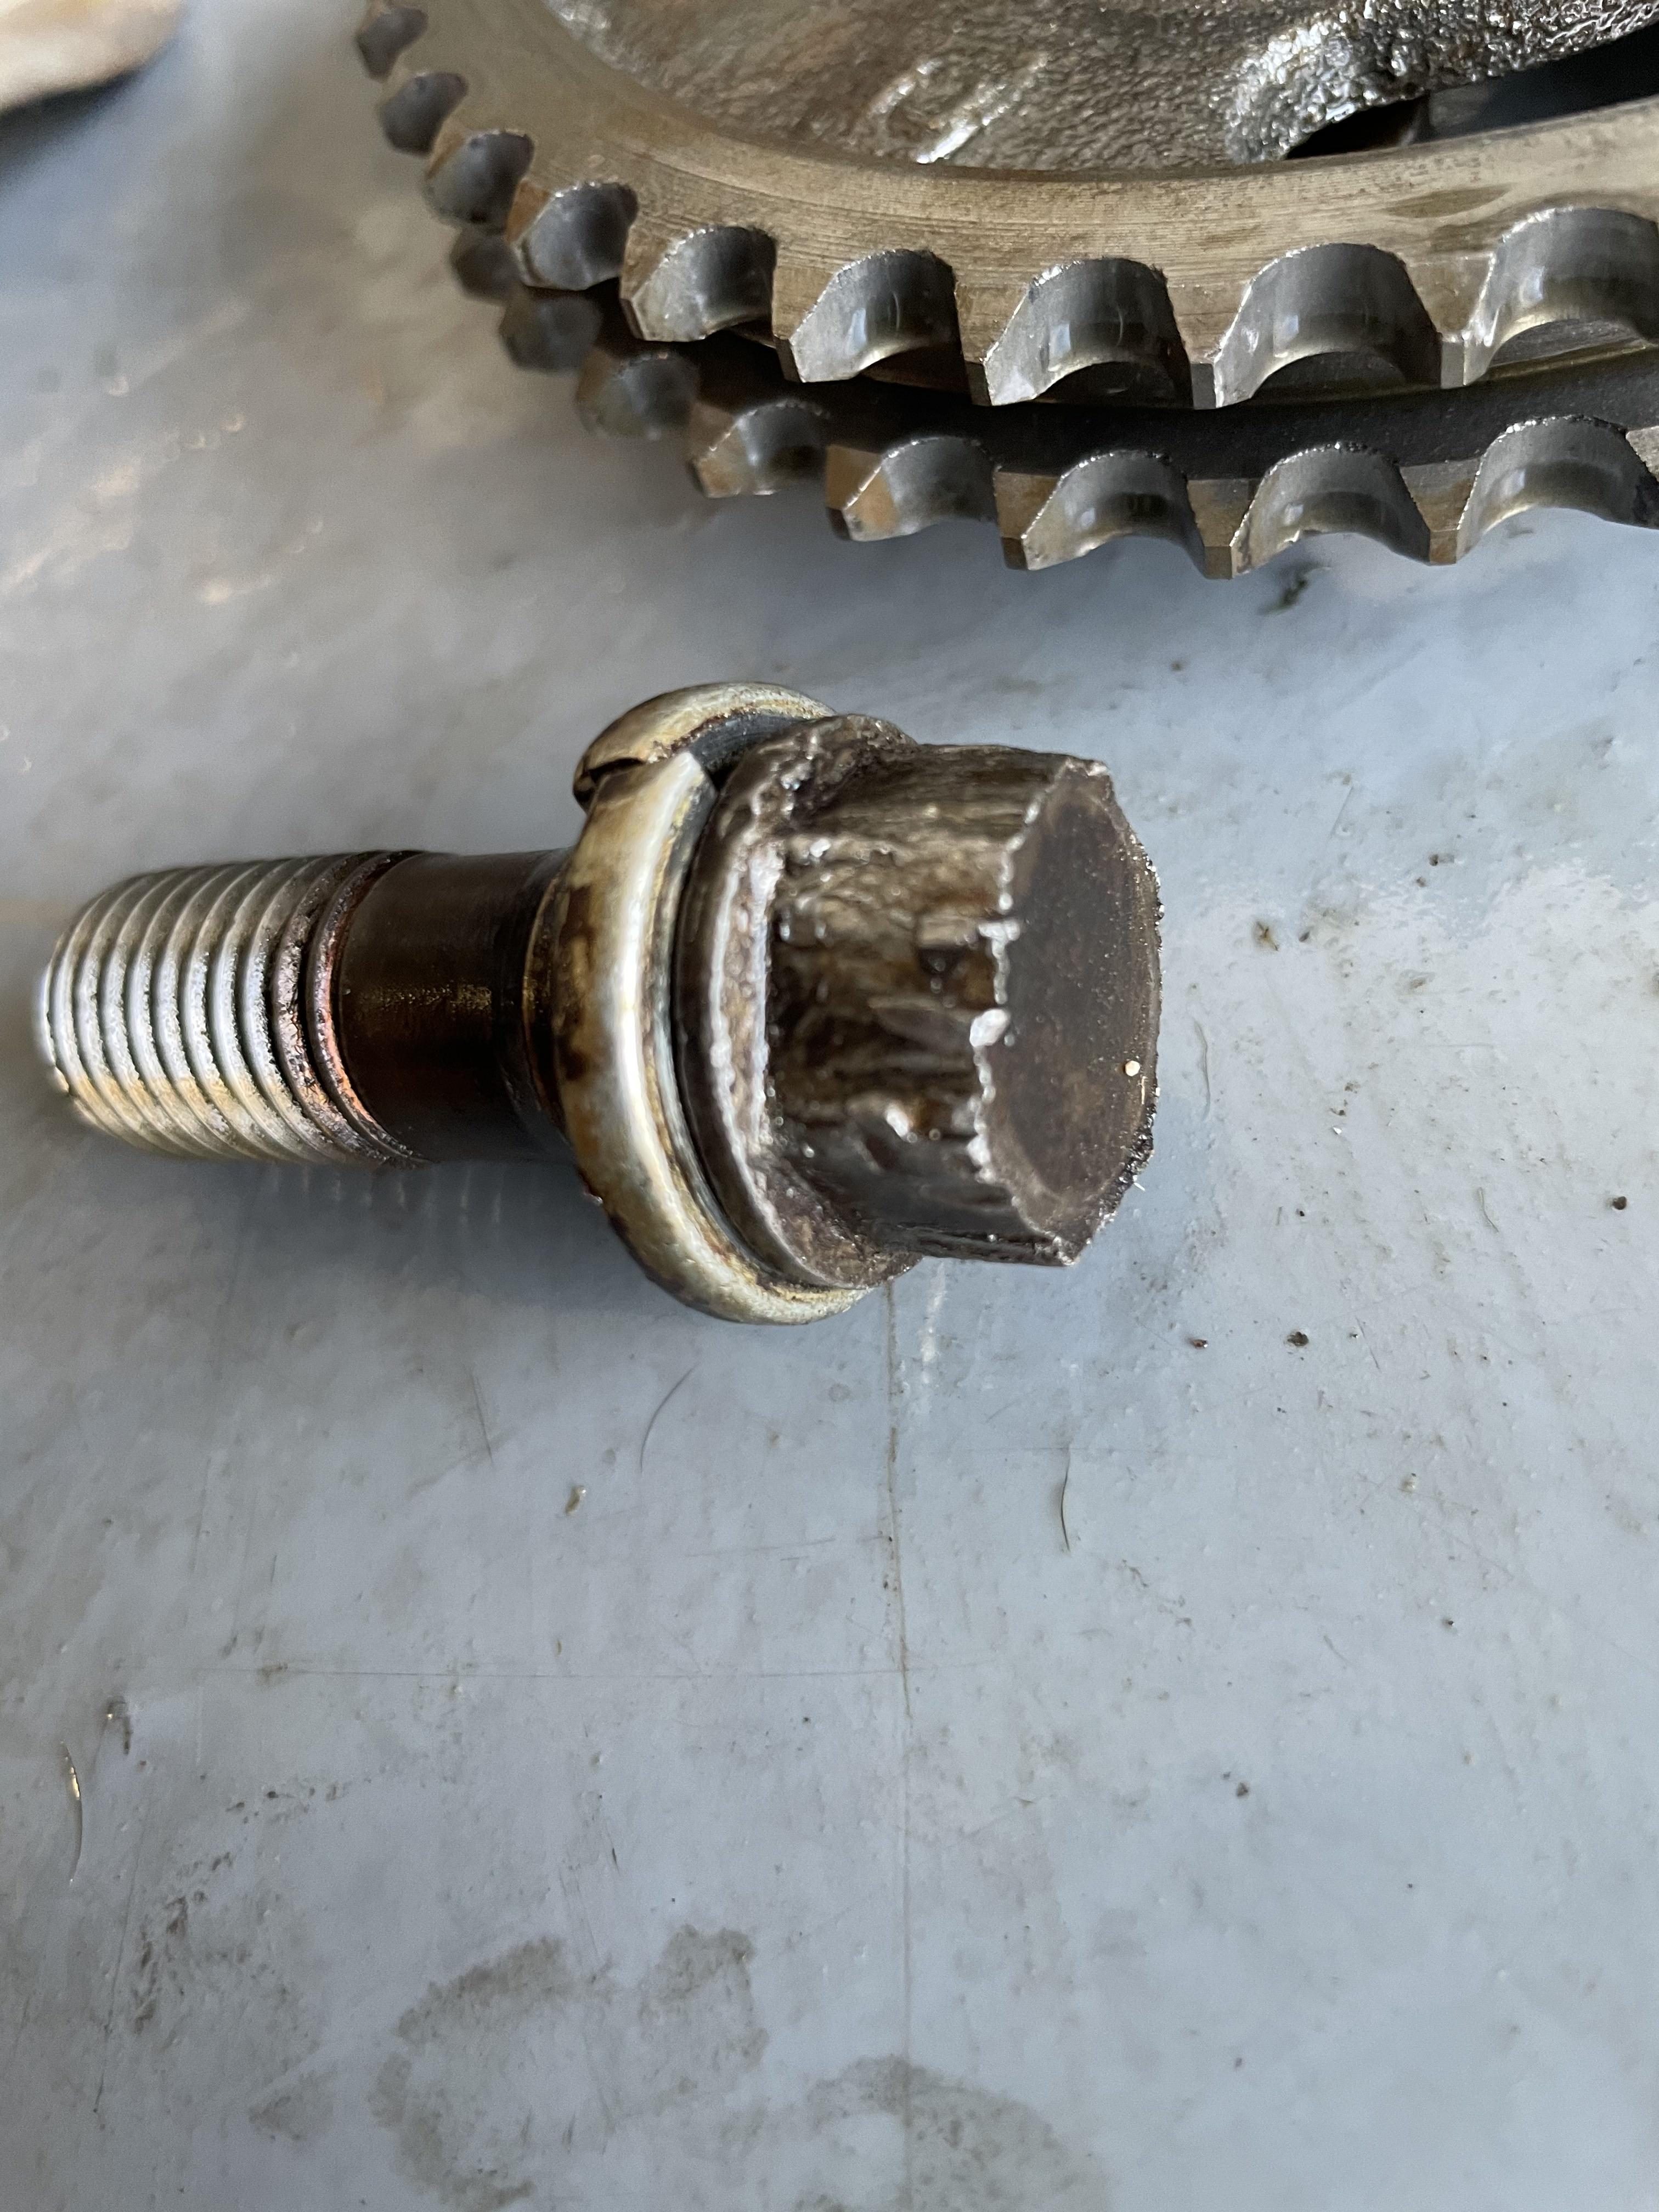
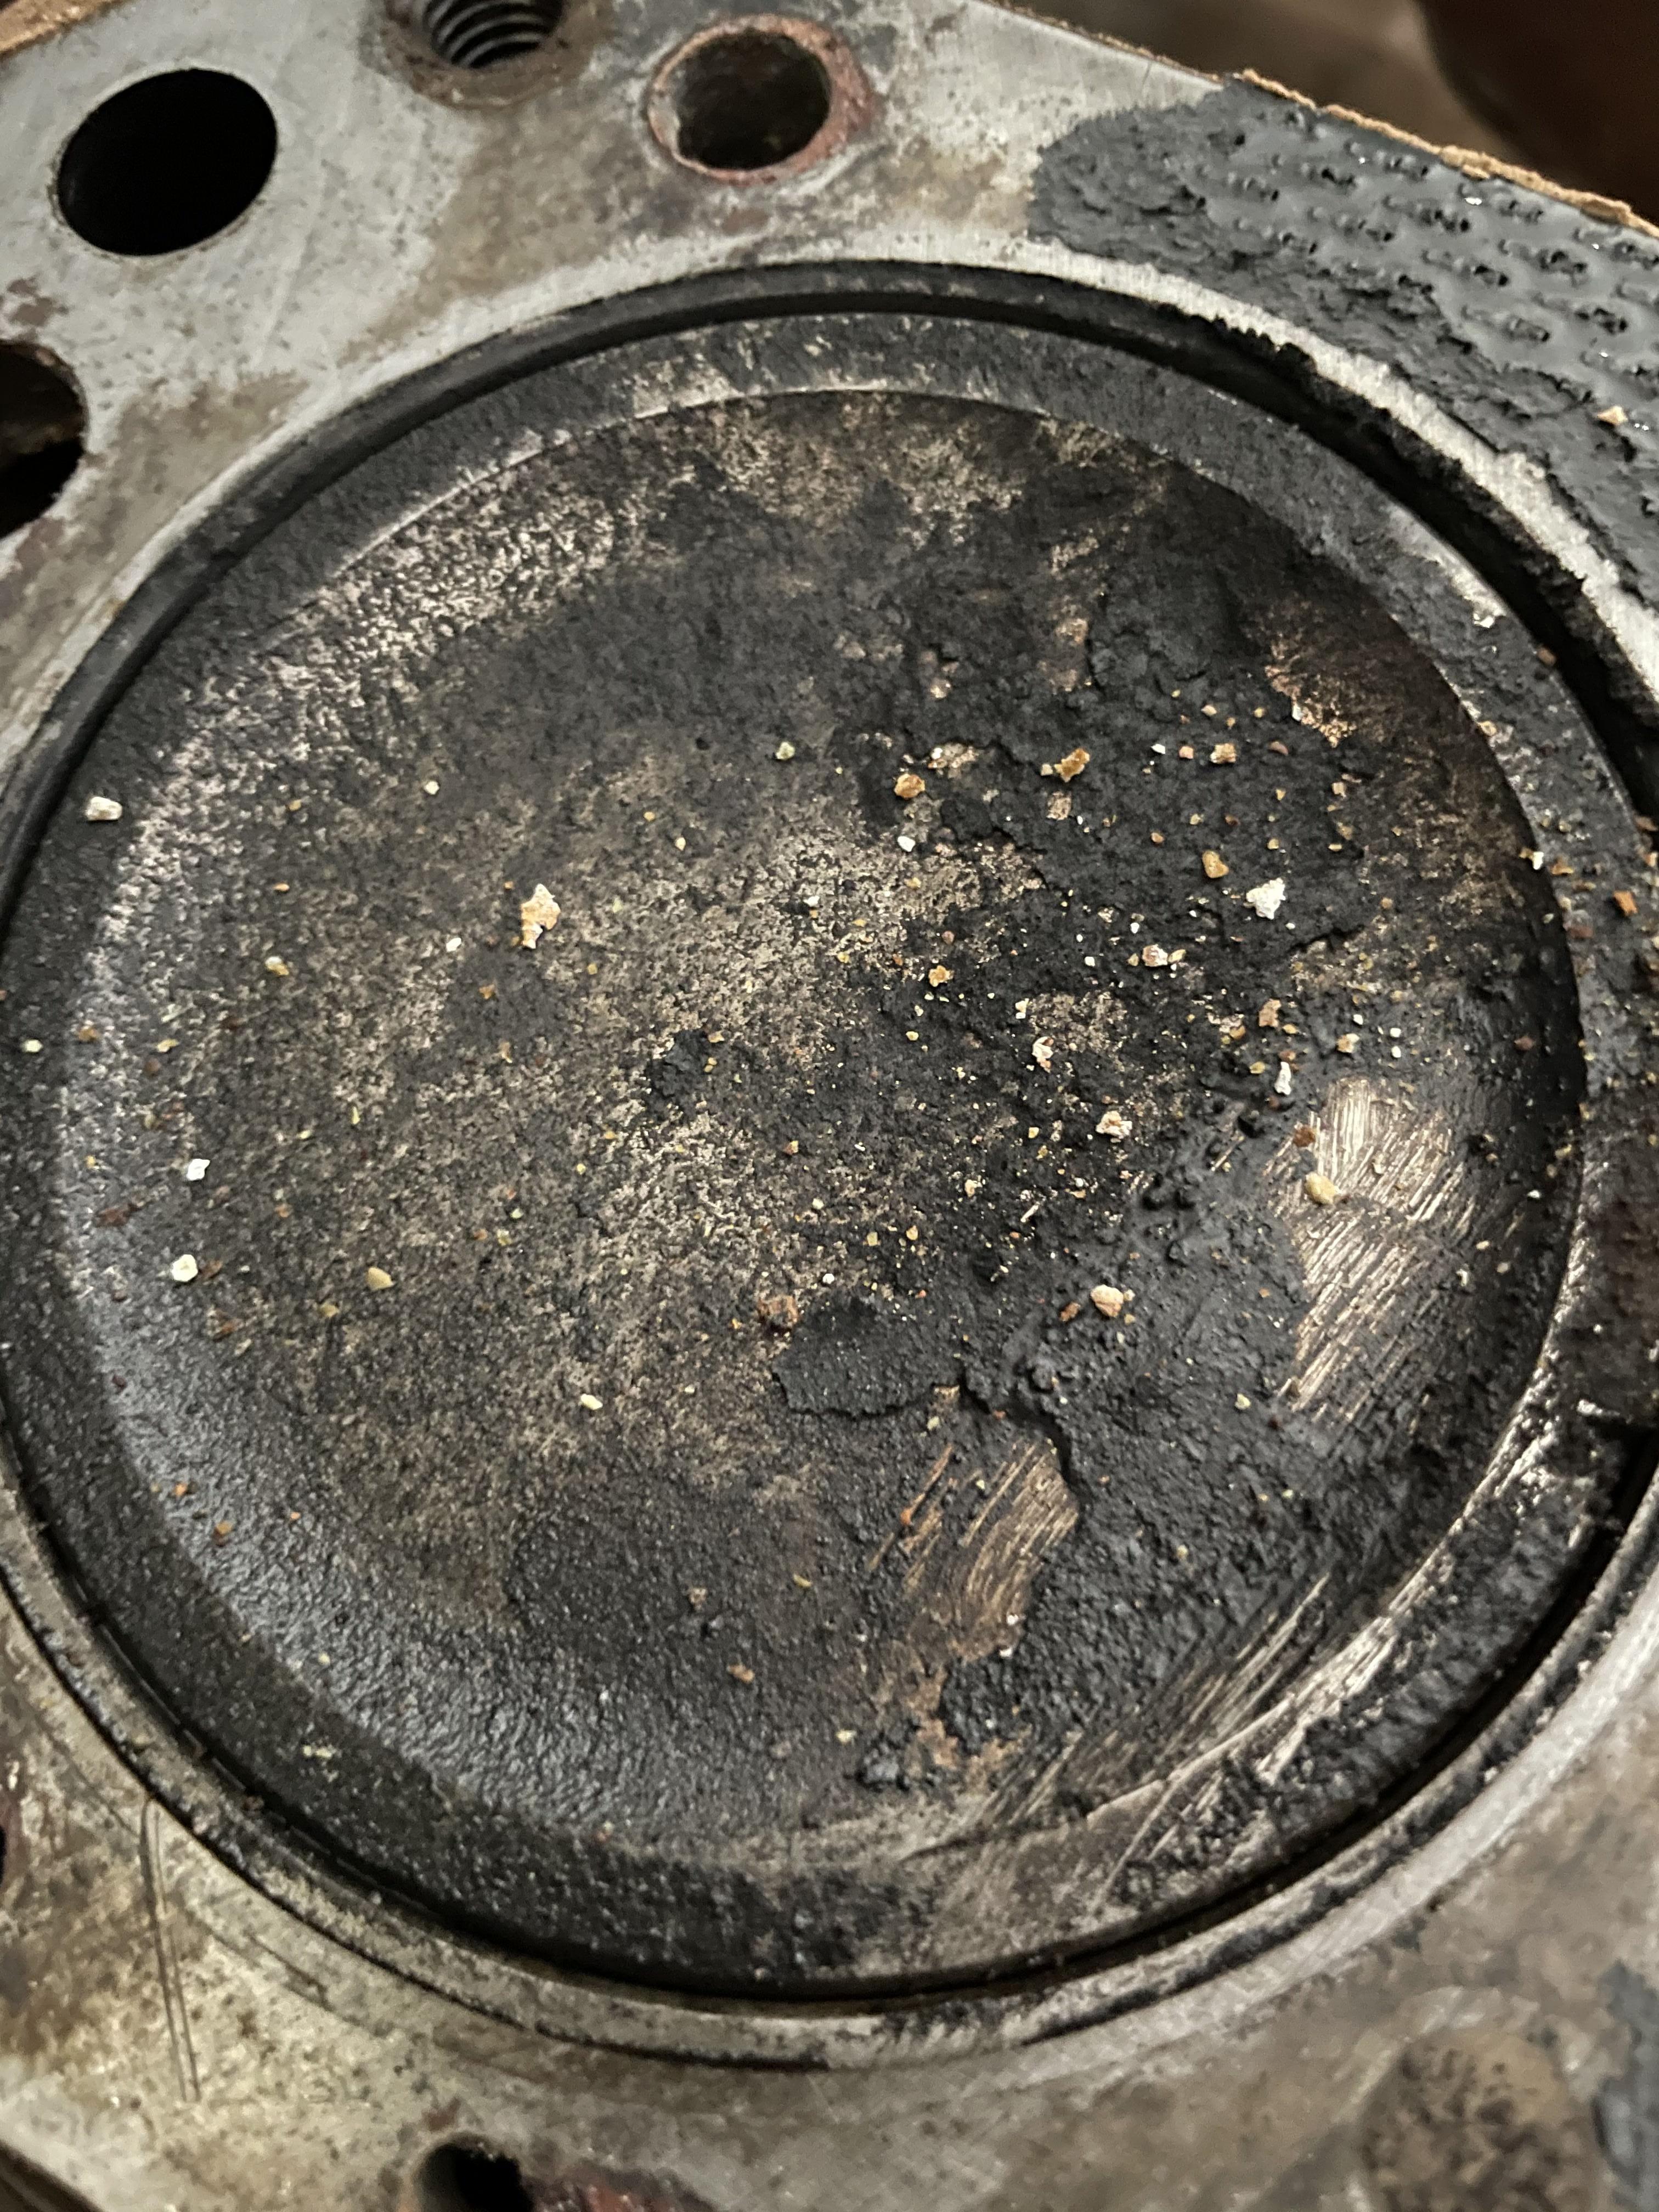
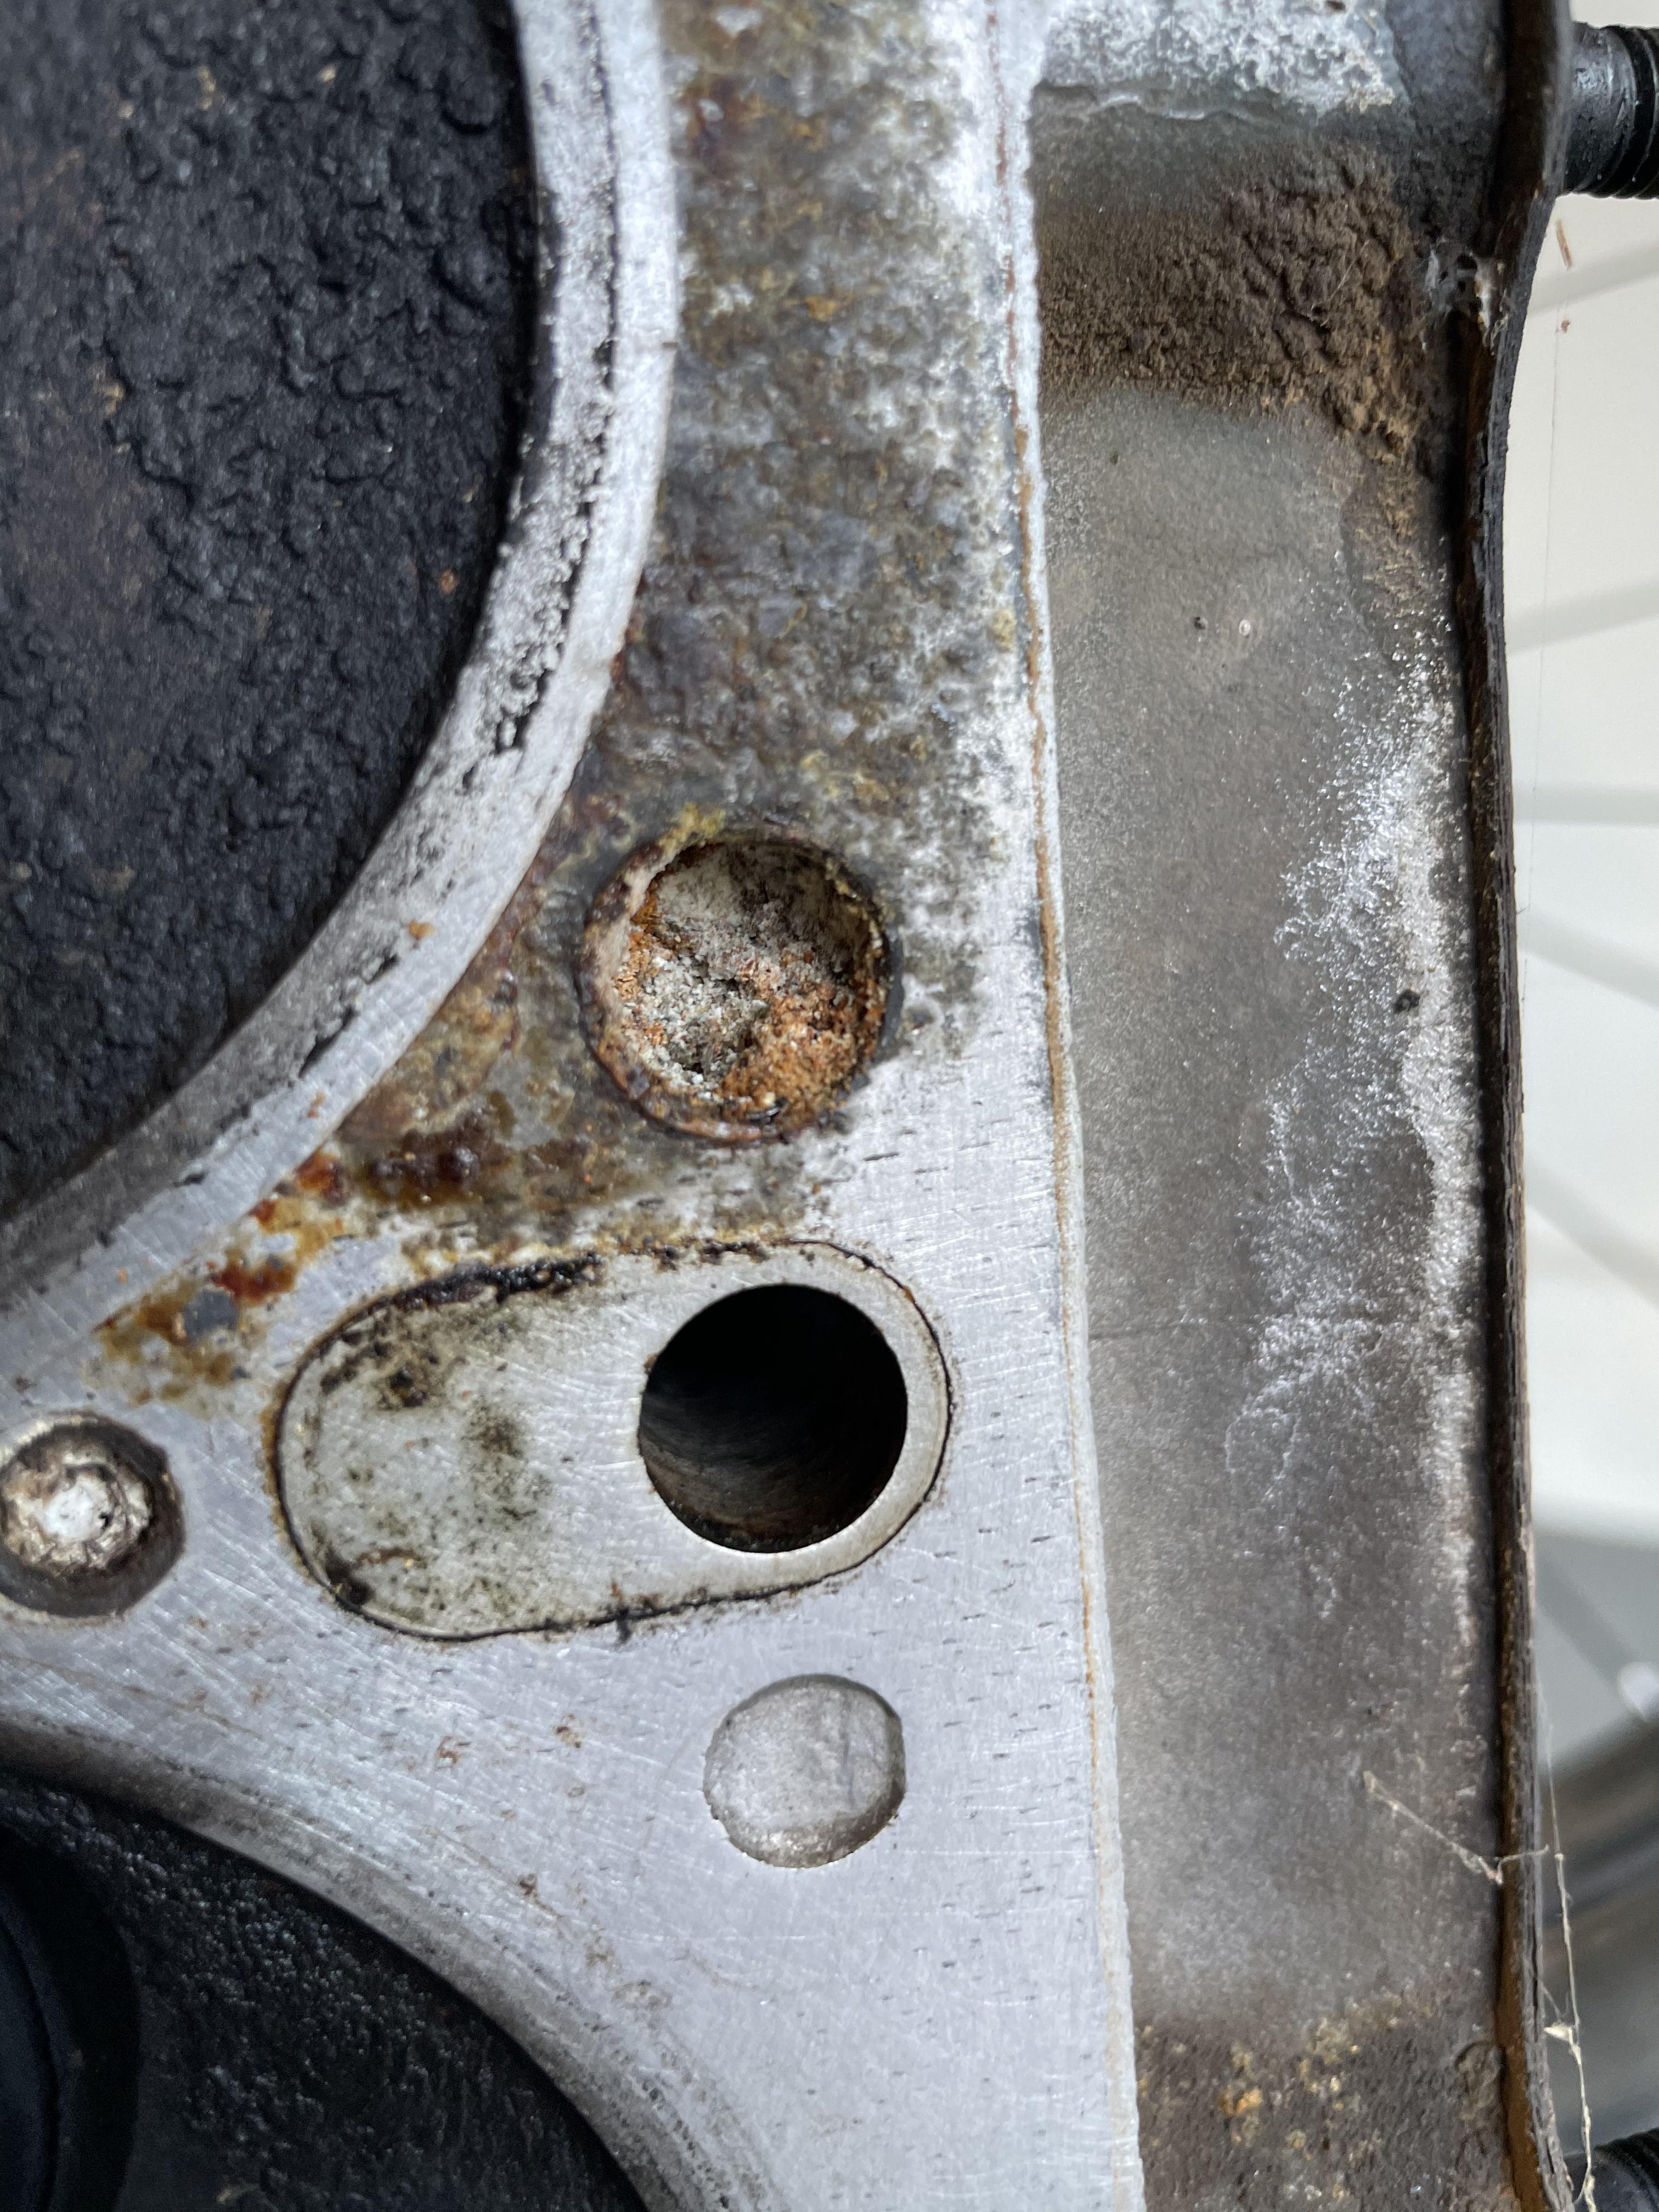
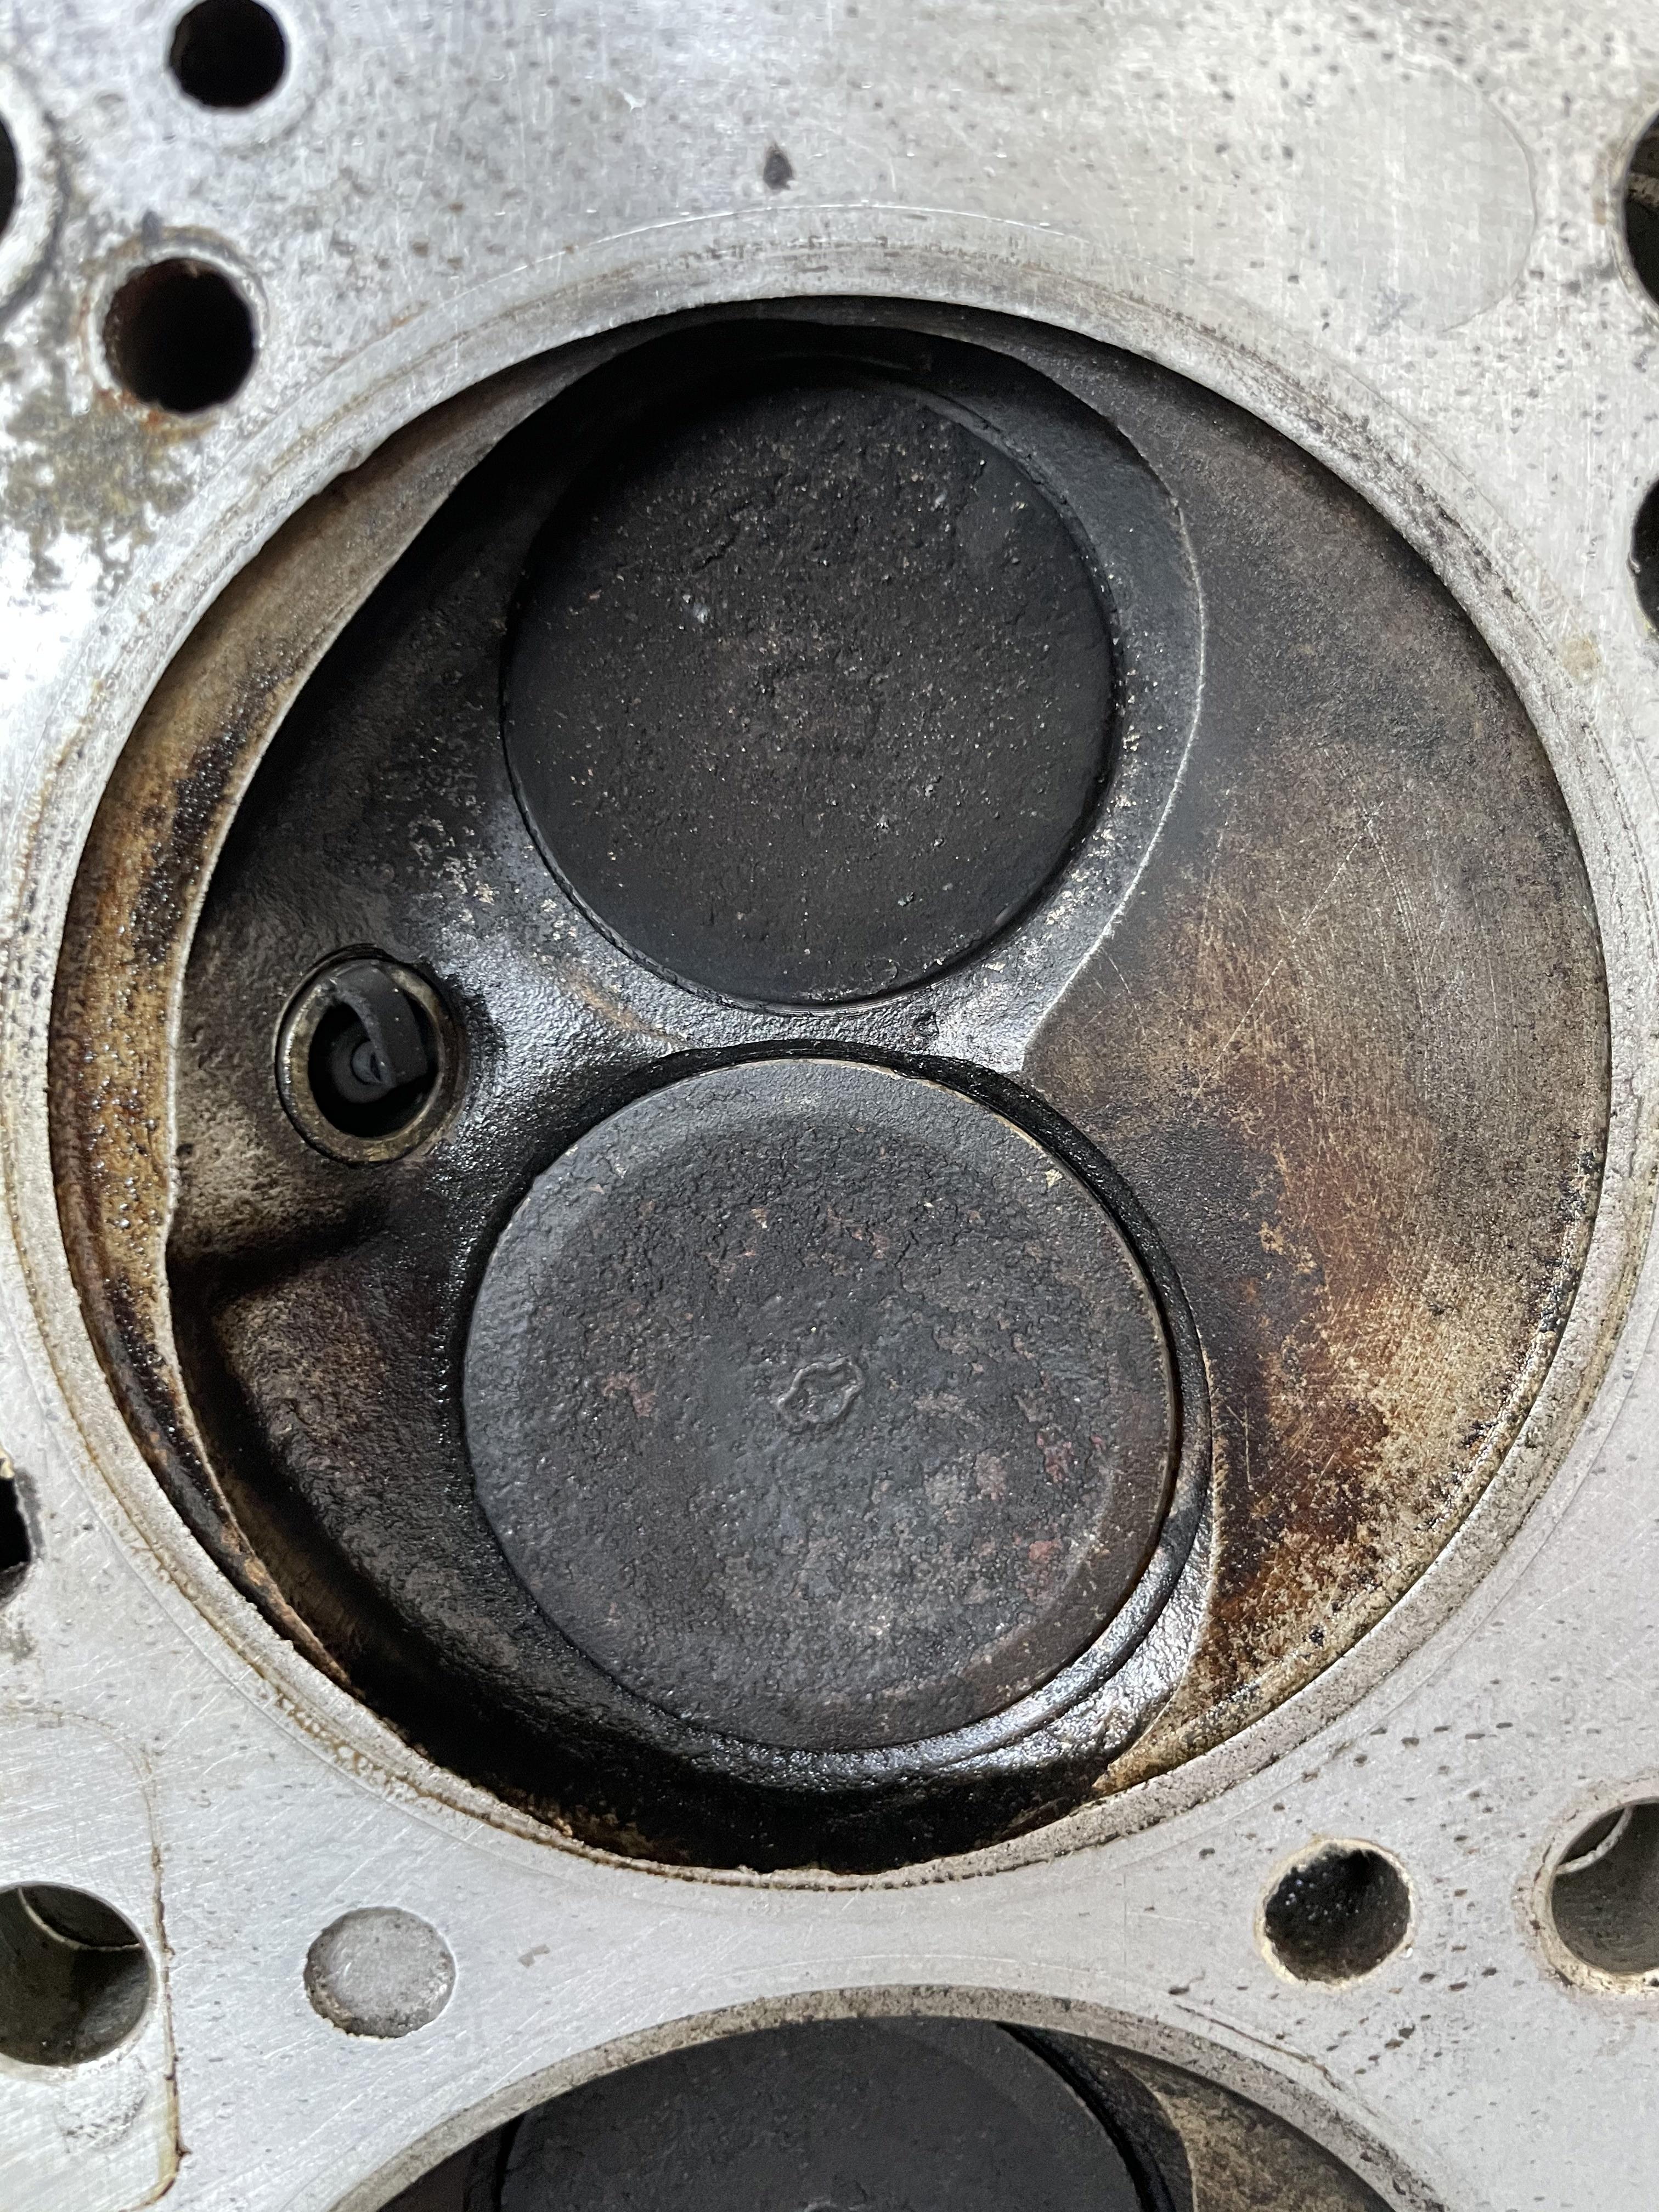
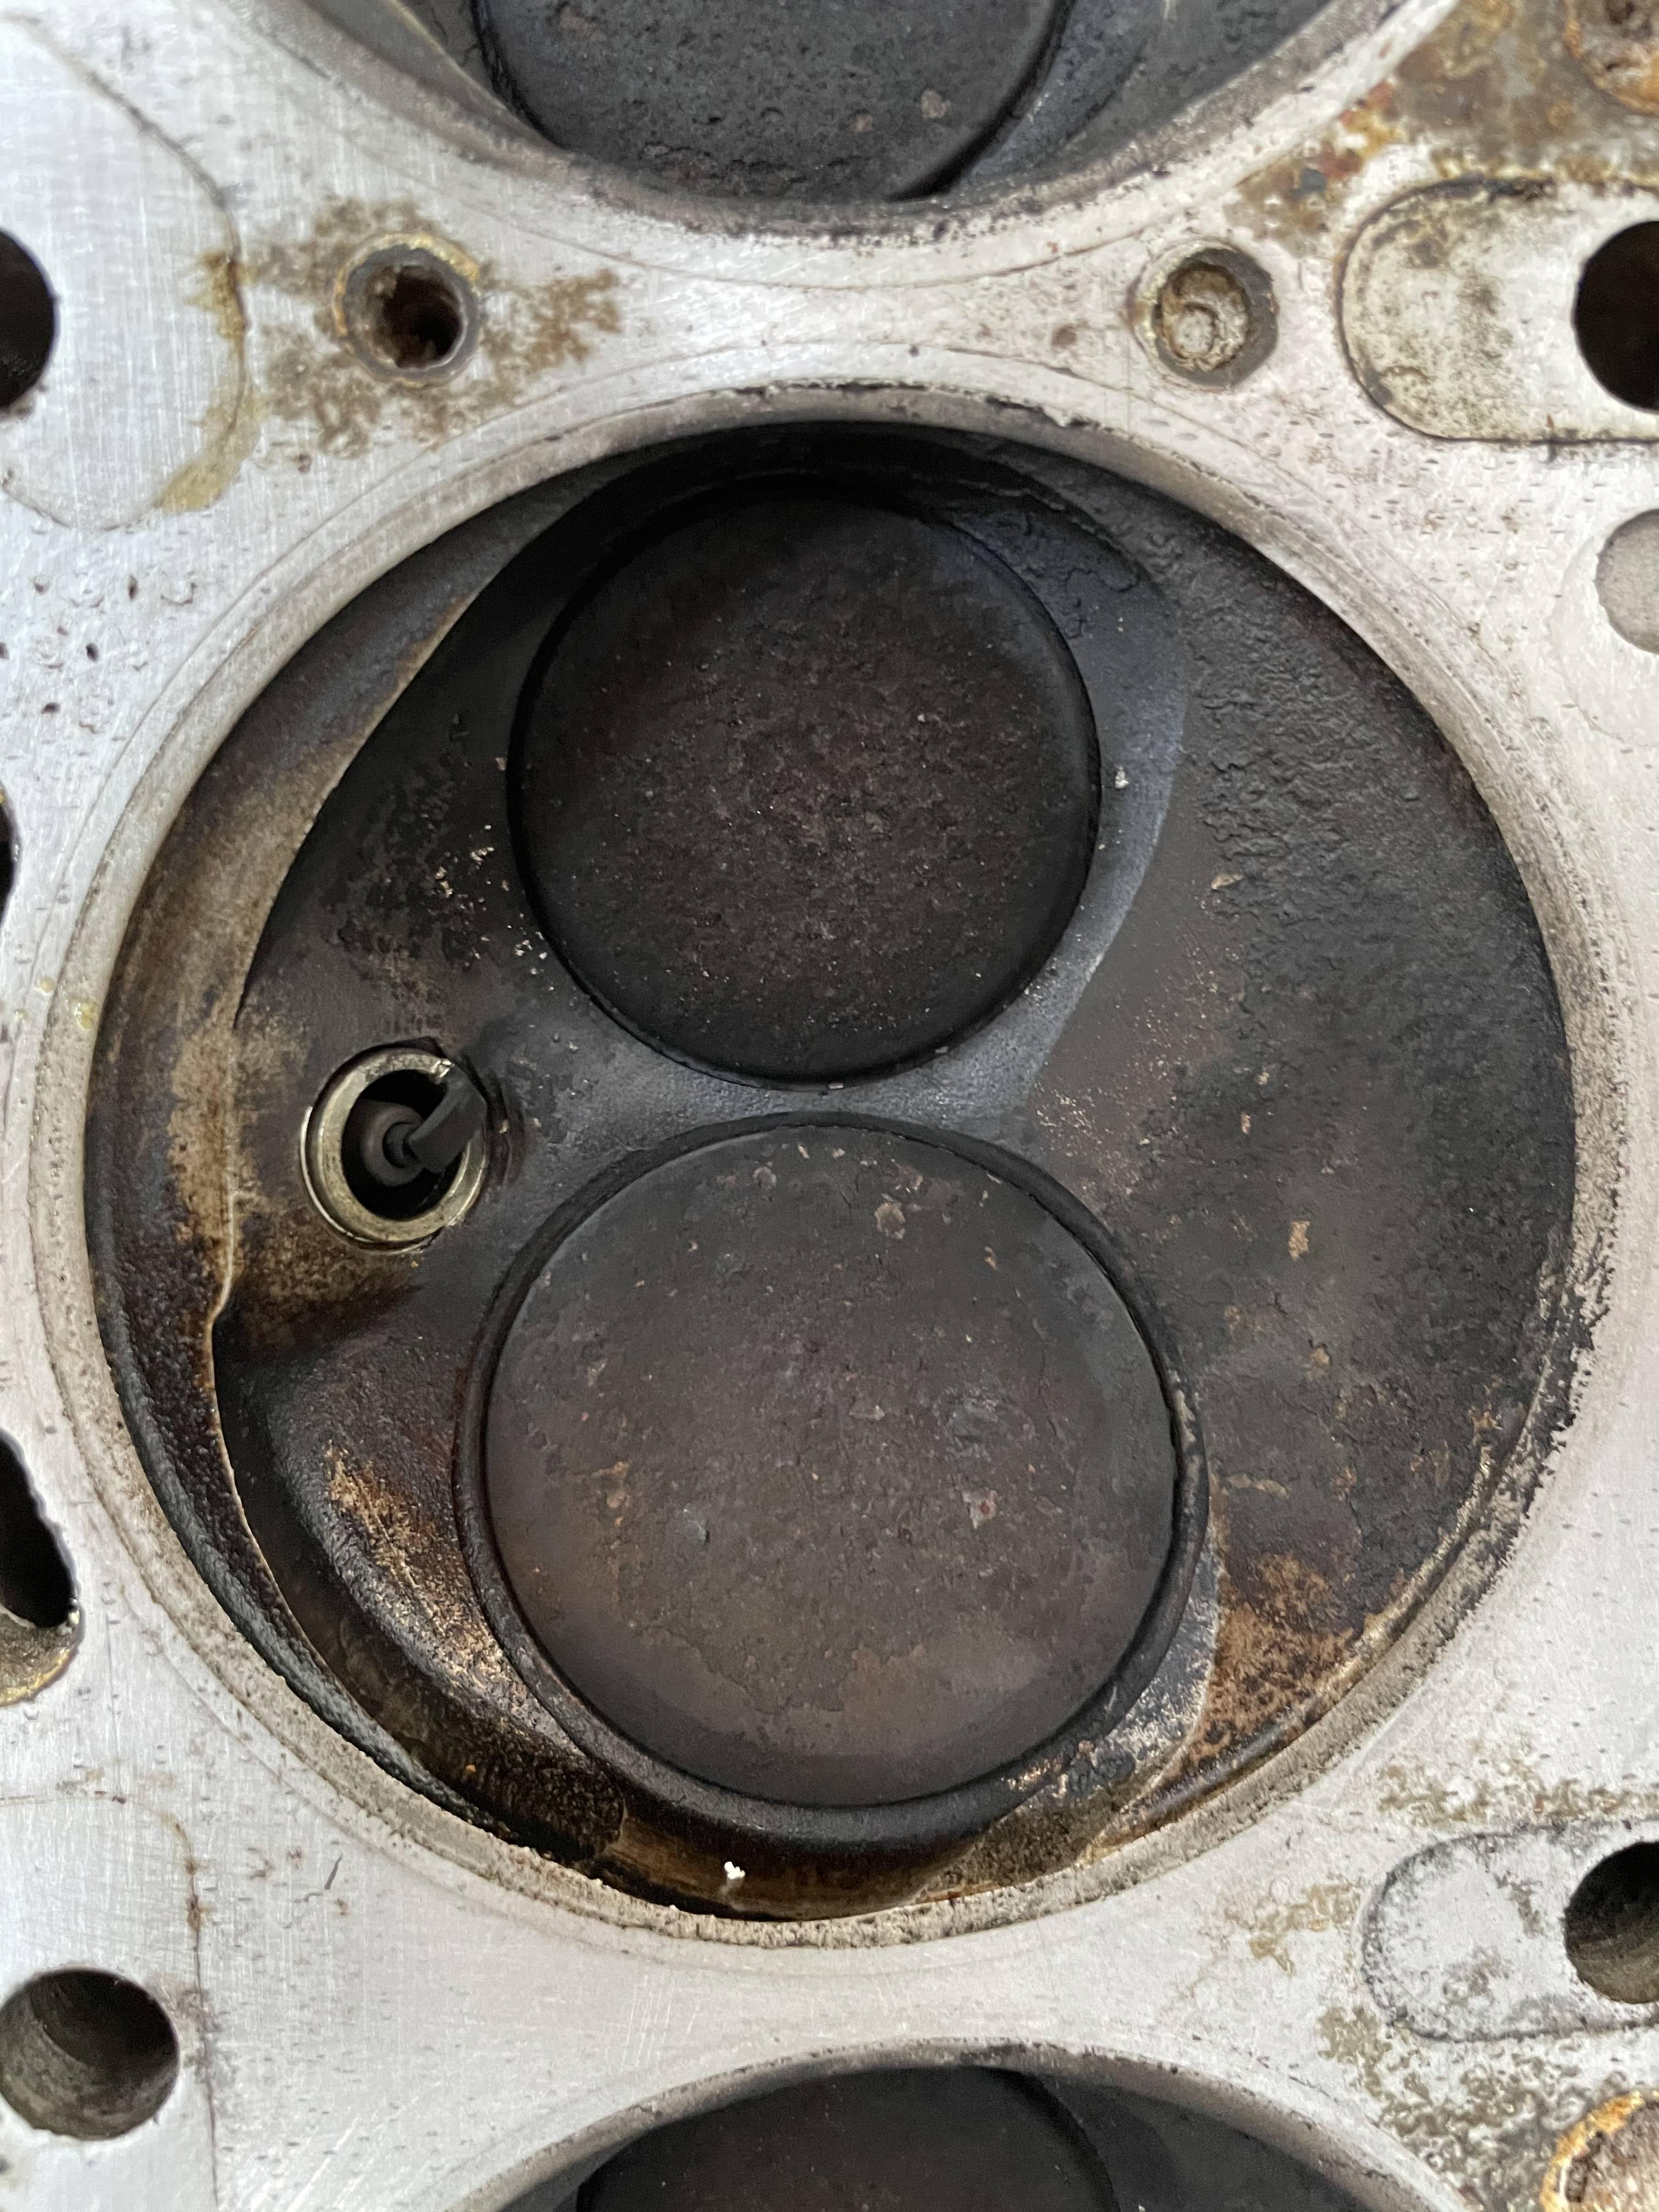
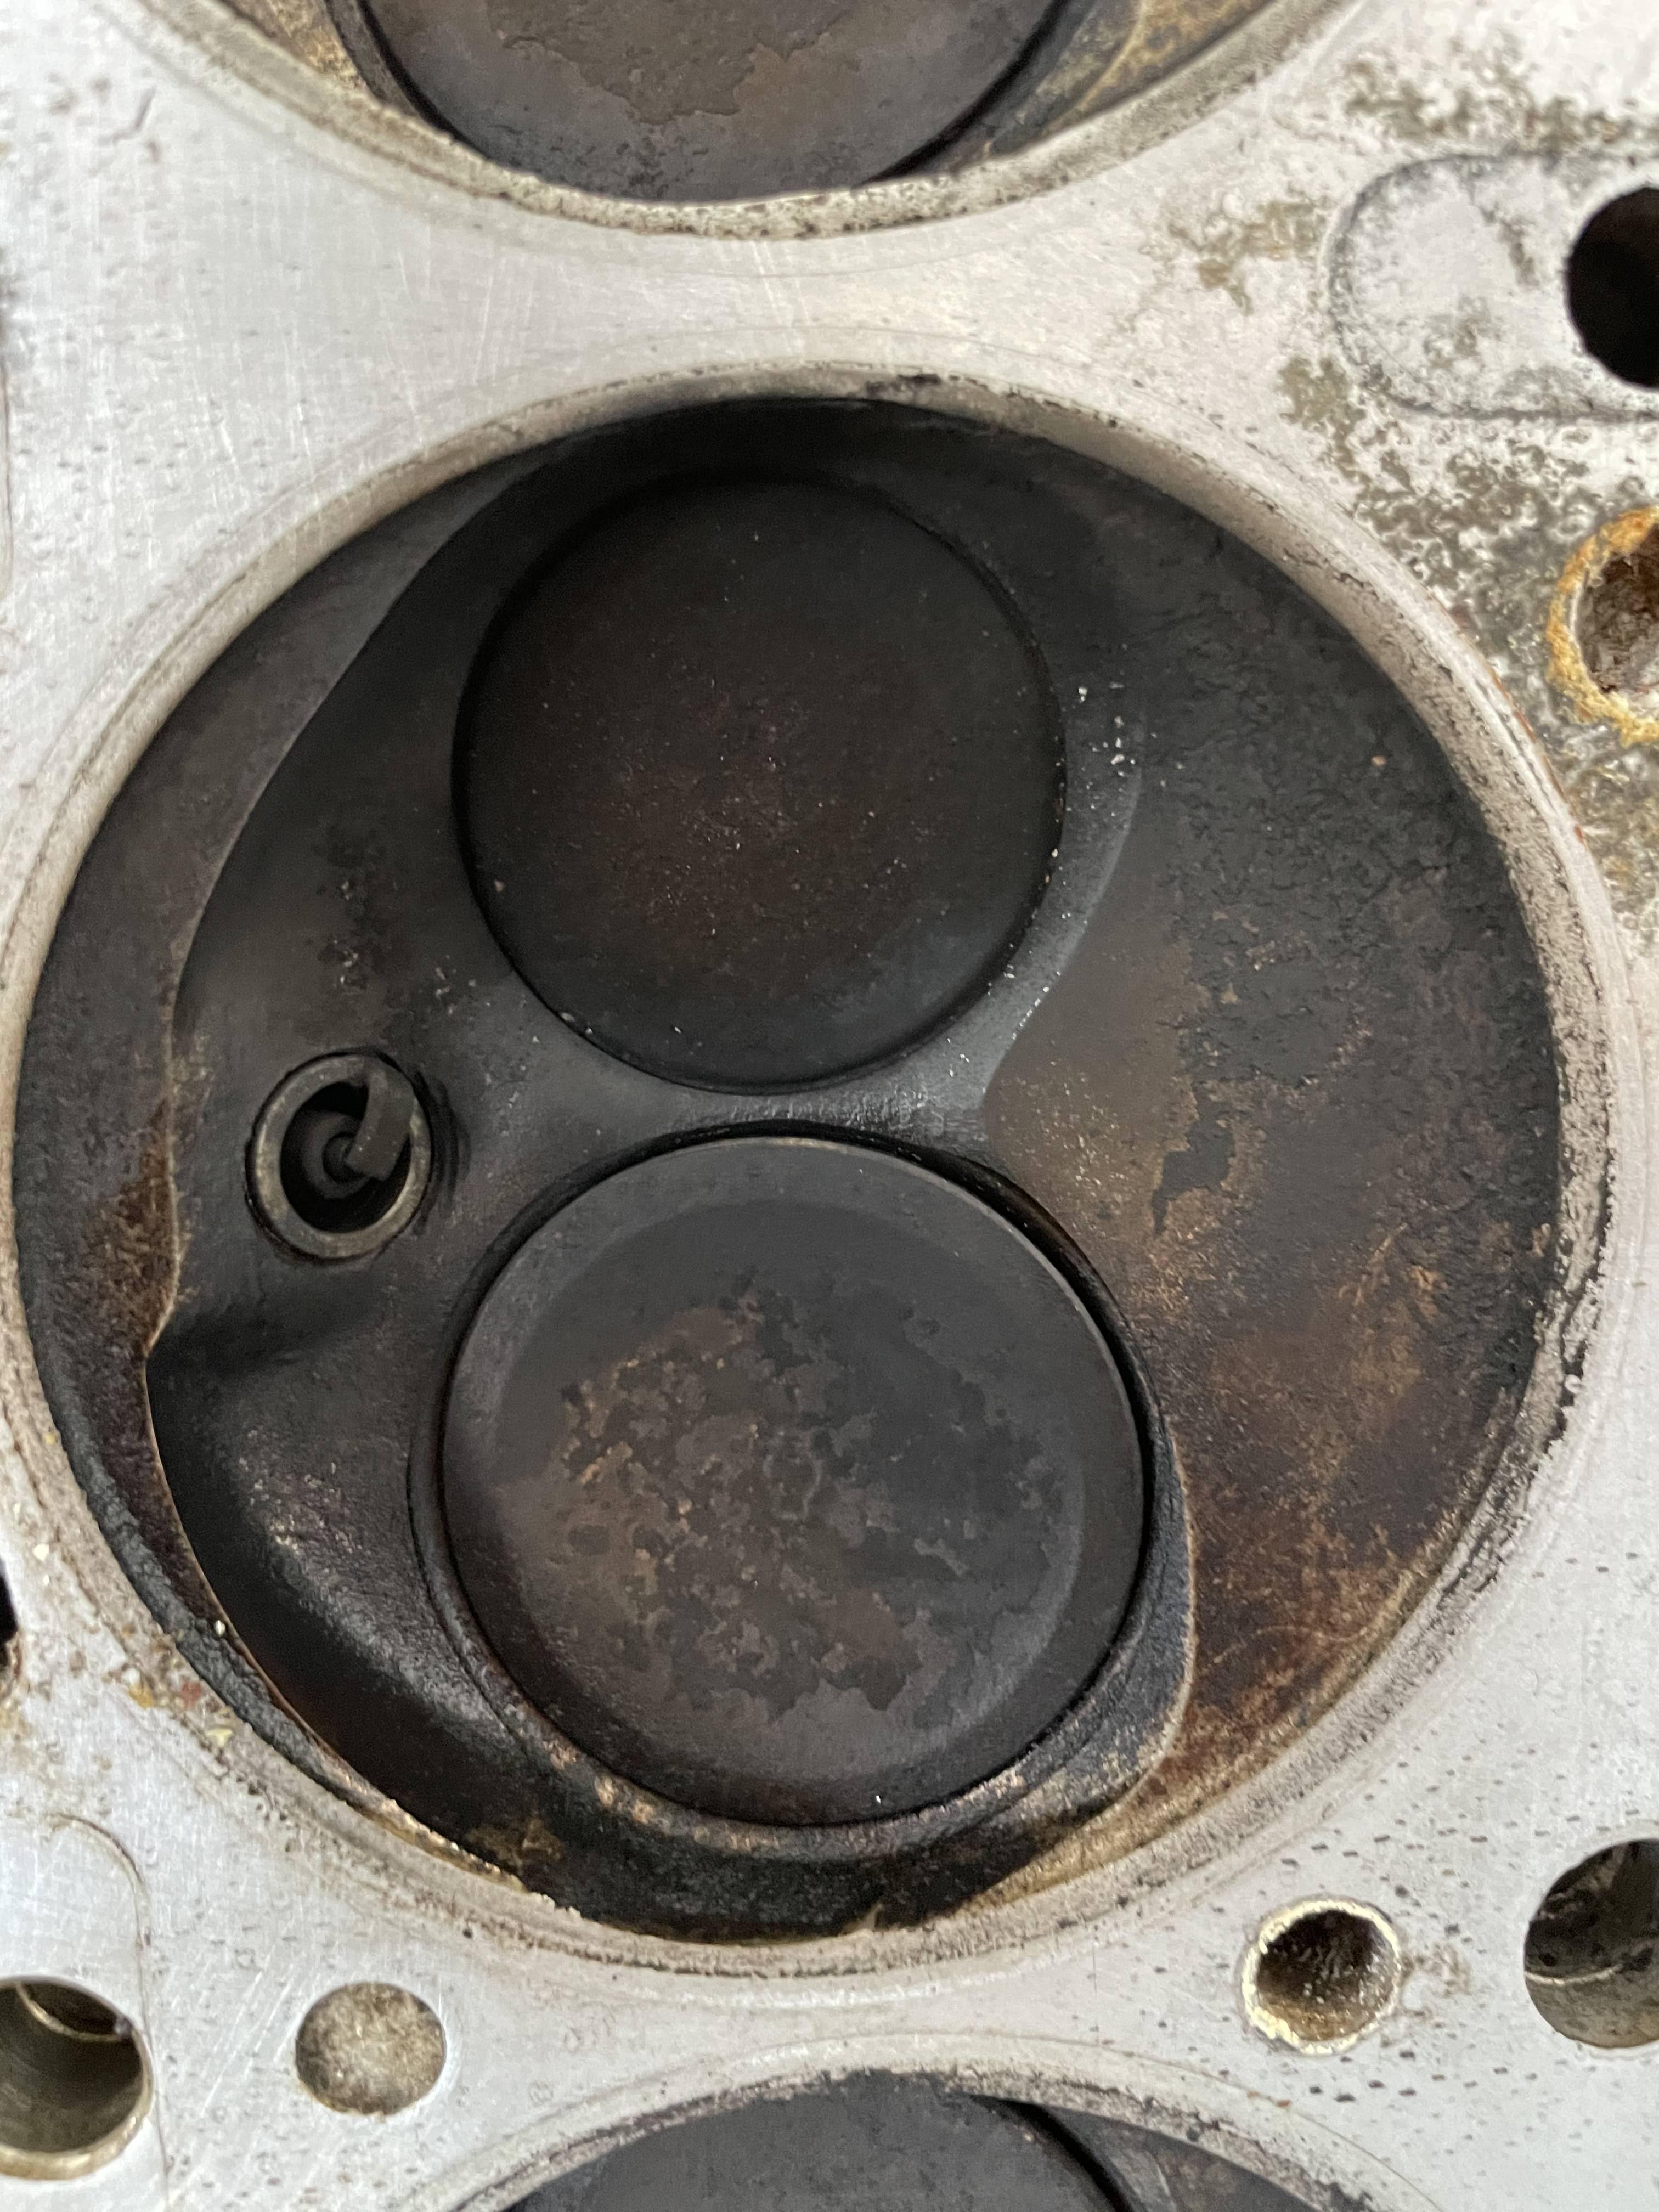
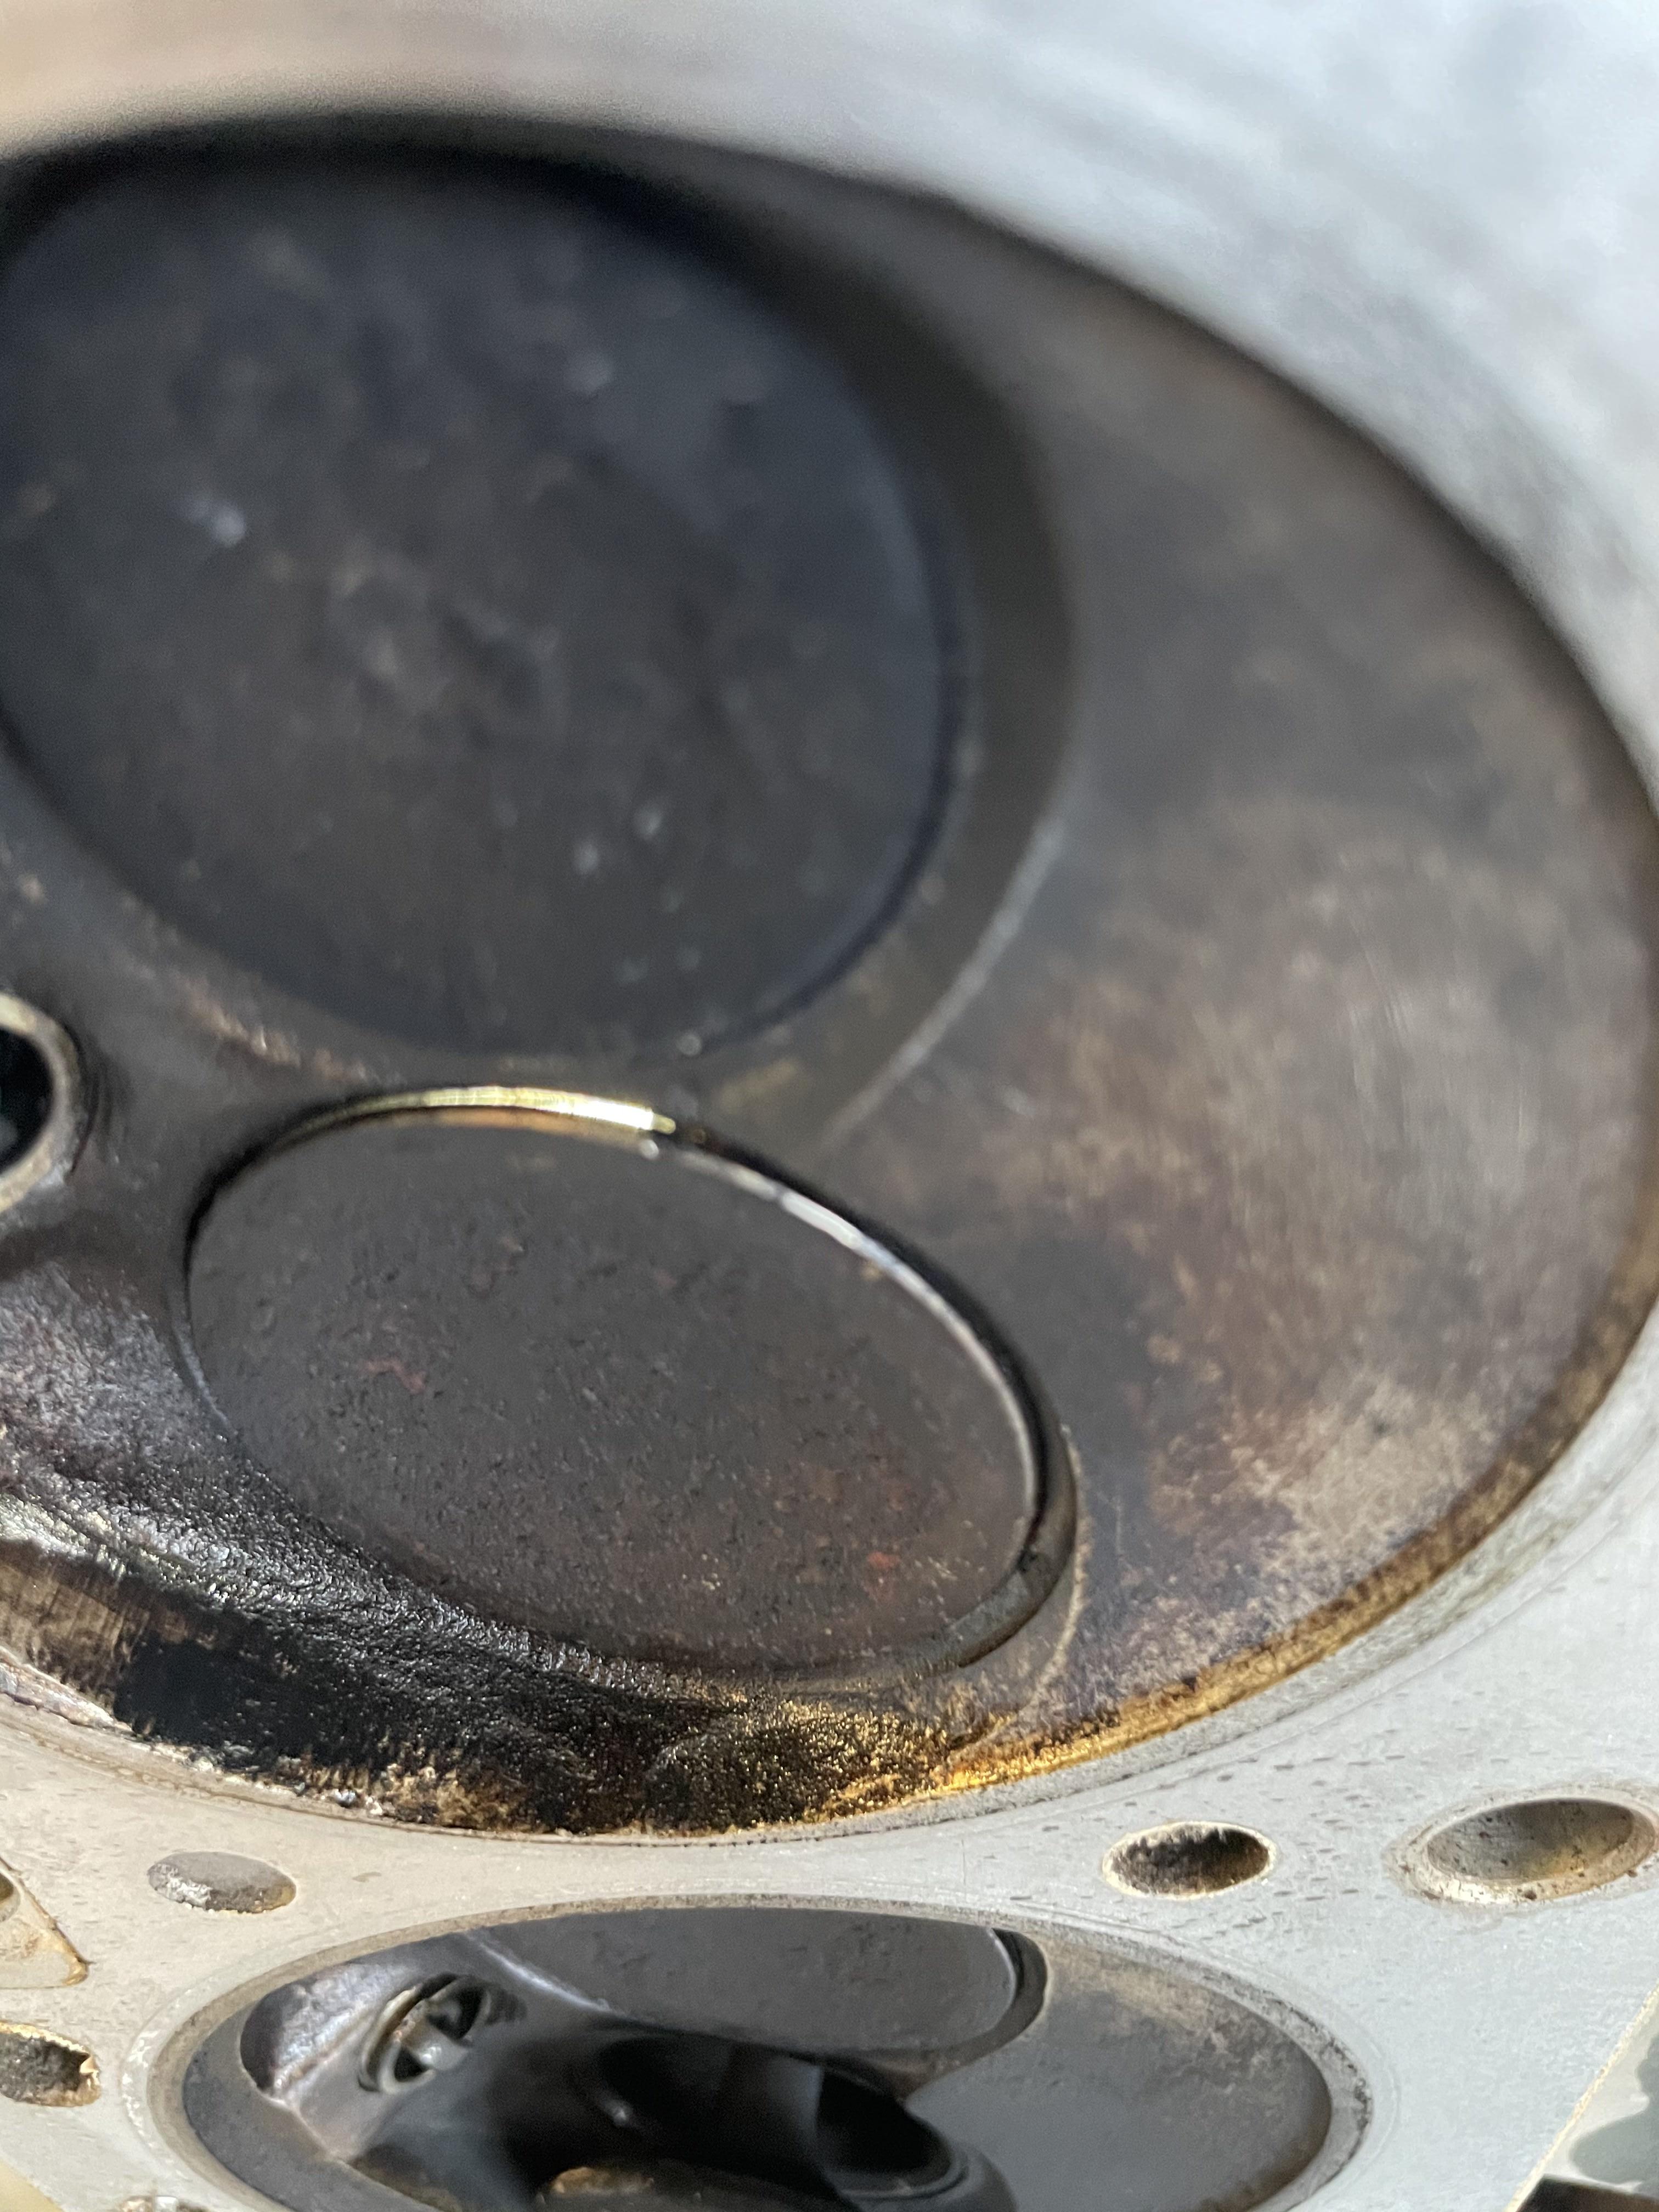
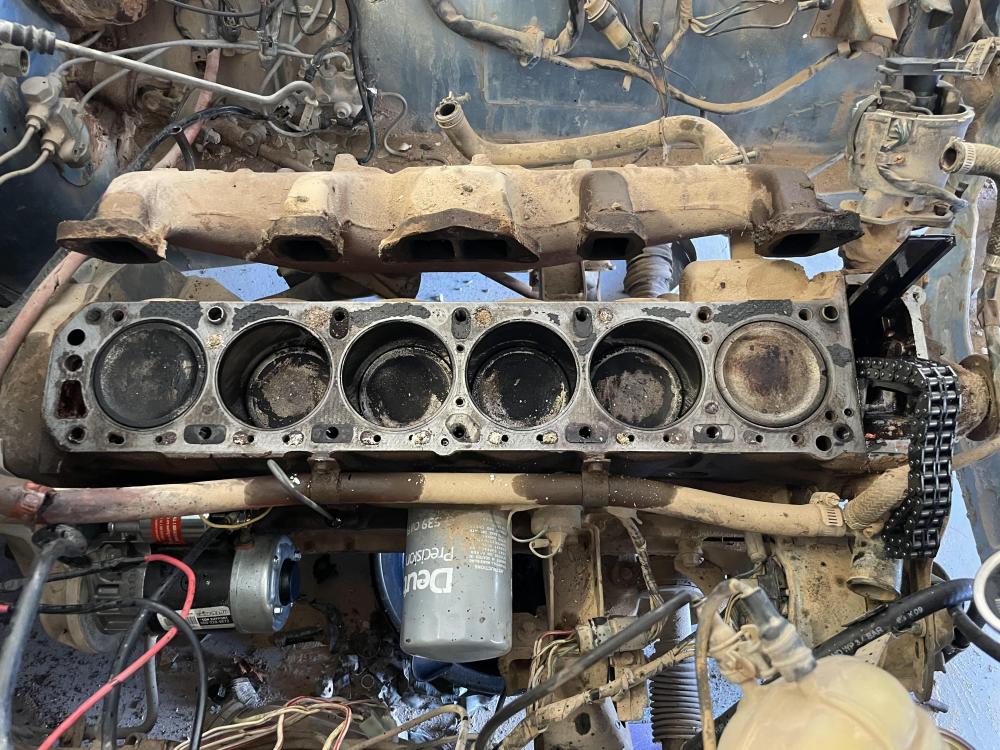
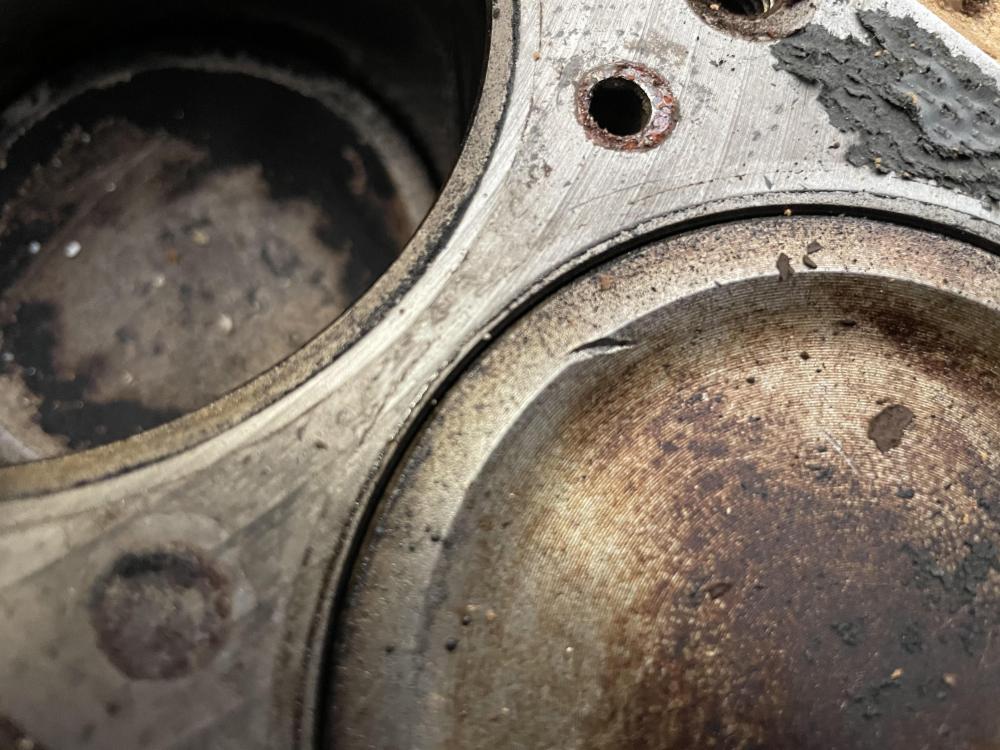
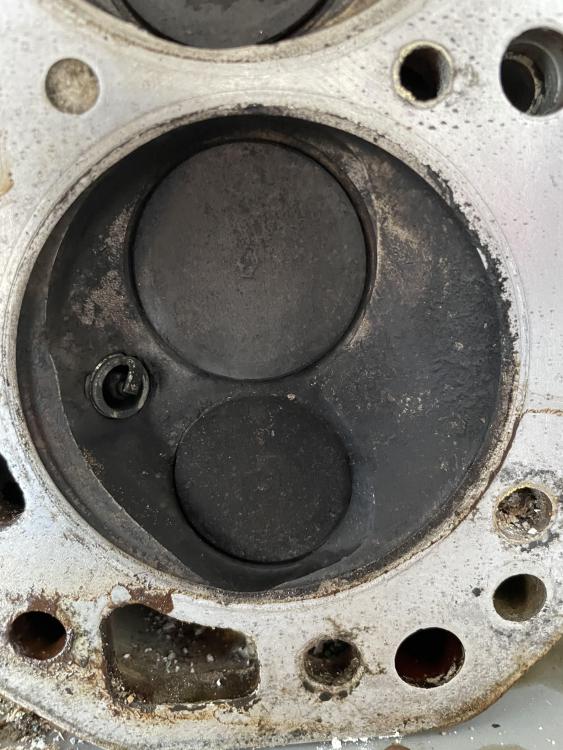
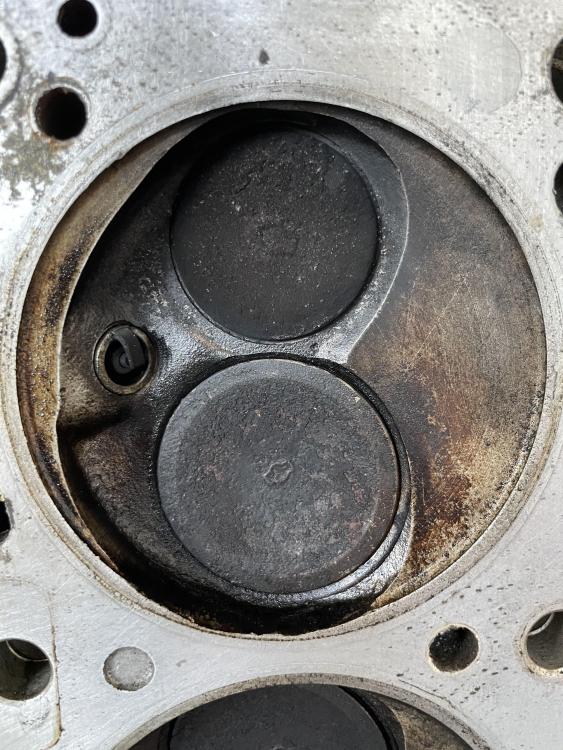
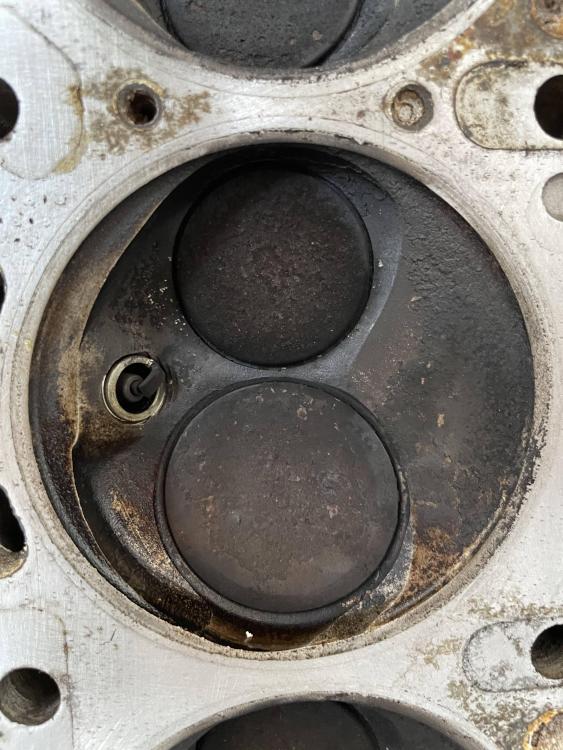
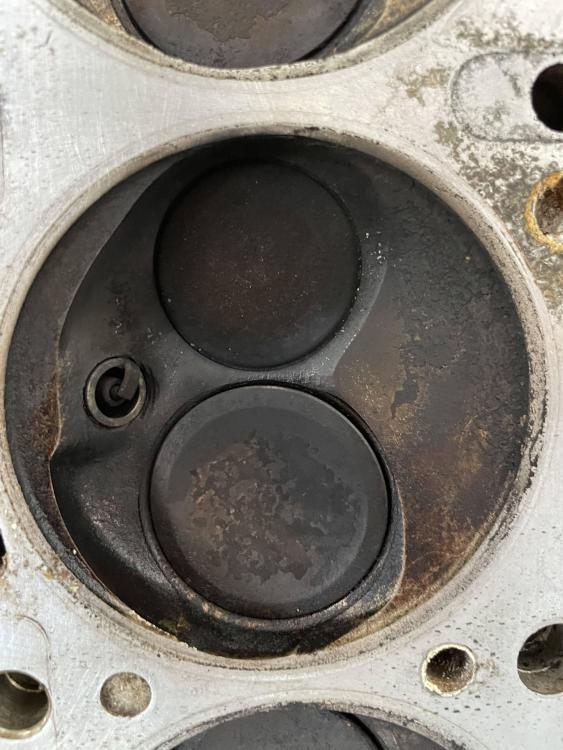
So OFF WITH YER HEAD! Check out that cam bolt. Probably torqued to 30ft-lbs only. Im glad I was able to get it off: We can see #1 and #3 both had some run ins with their valves: The rest of the pistons look...okay? I did notice that the numbers on the pistons dont match up with the cylinder count (#3 is in cylinder #1) is that something to worry about? The head had some gross coolant passages too: The valves: And of course the trouble makers of #1 and #3 could easily see a flashlight: And well...that brings us to today. The head is off, and time to decide the build route. I am sticking with the oem efi system for now, so no crazy builds. My thoughts are a stage 1 cam, headers, exhaust, new valves, seals, etc all in the head. Thoughts? Maybe i just stick to a refresh for now? Then I am debating pulling the pistons to do rings "while im in there". And of course a new timing chain and tensioner/guides to wrap it up.


-
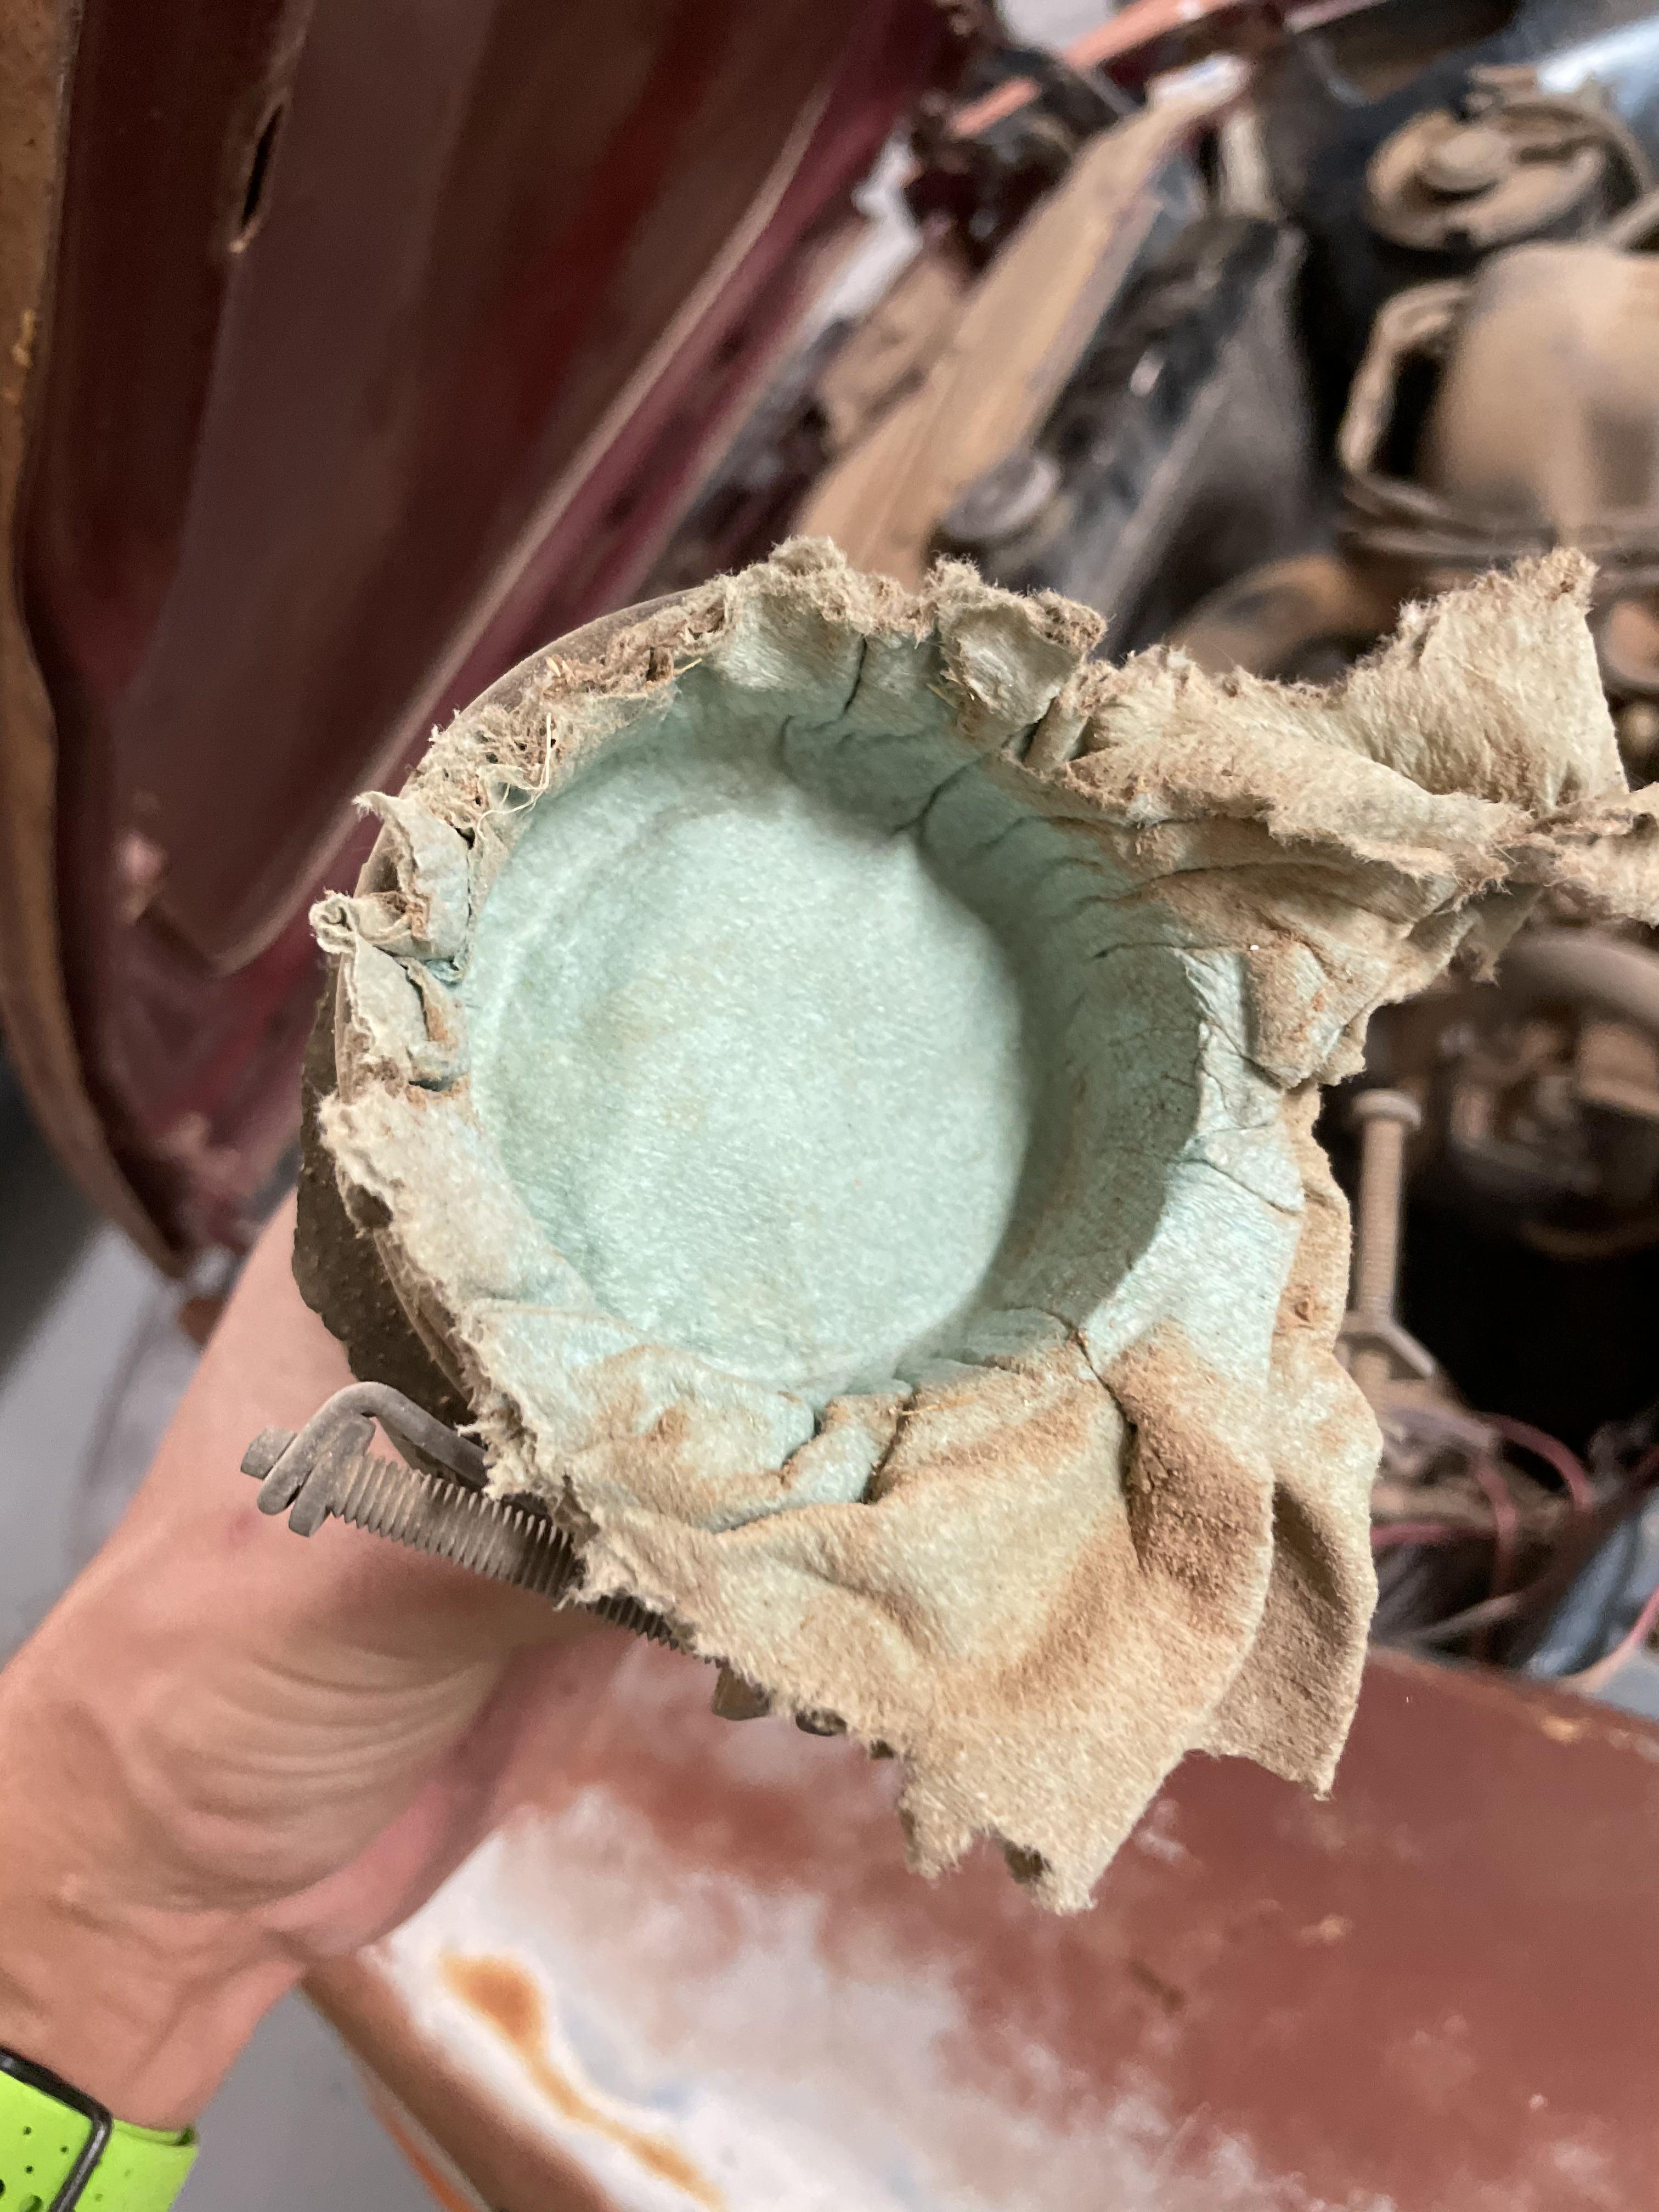
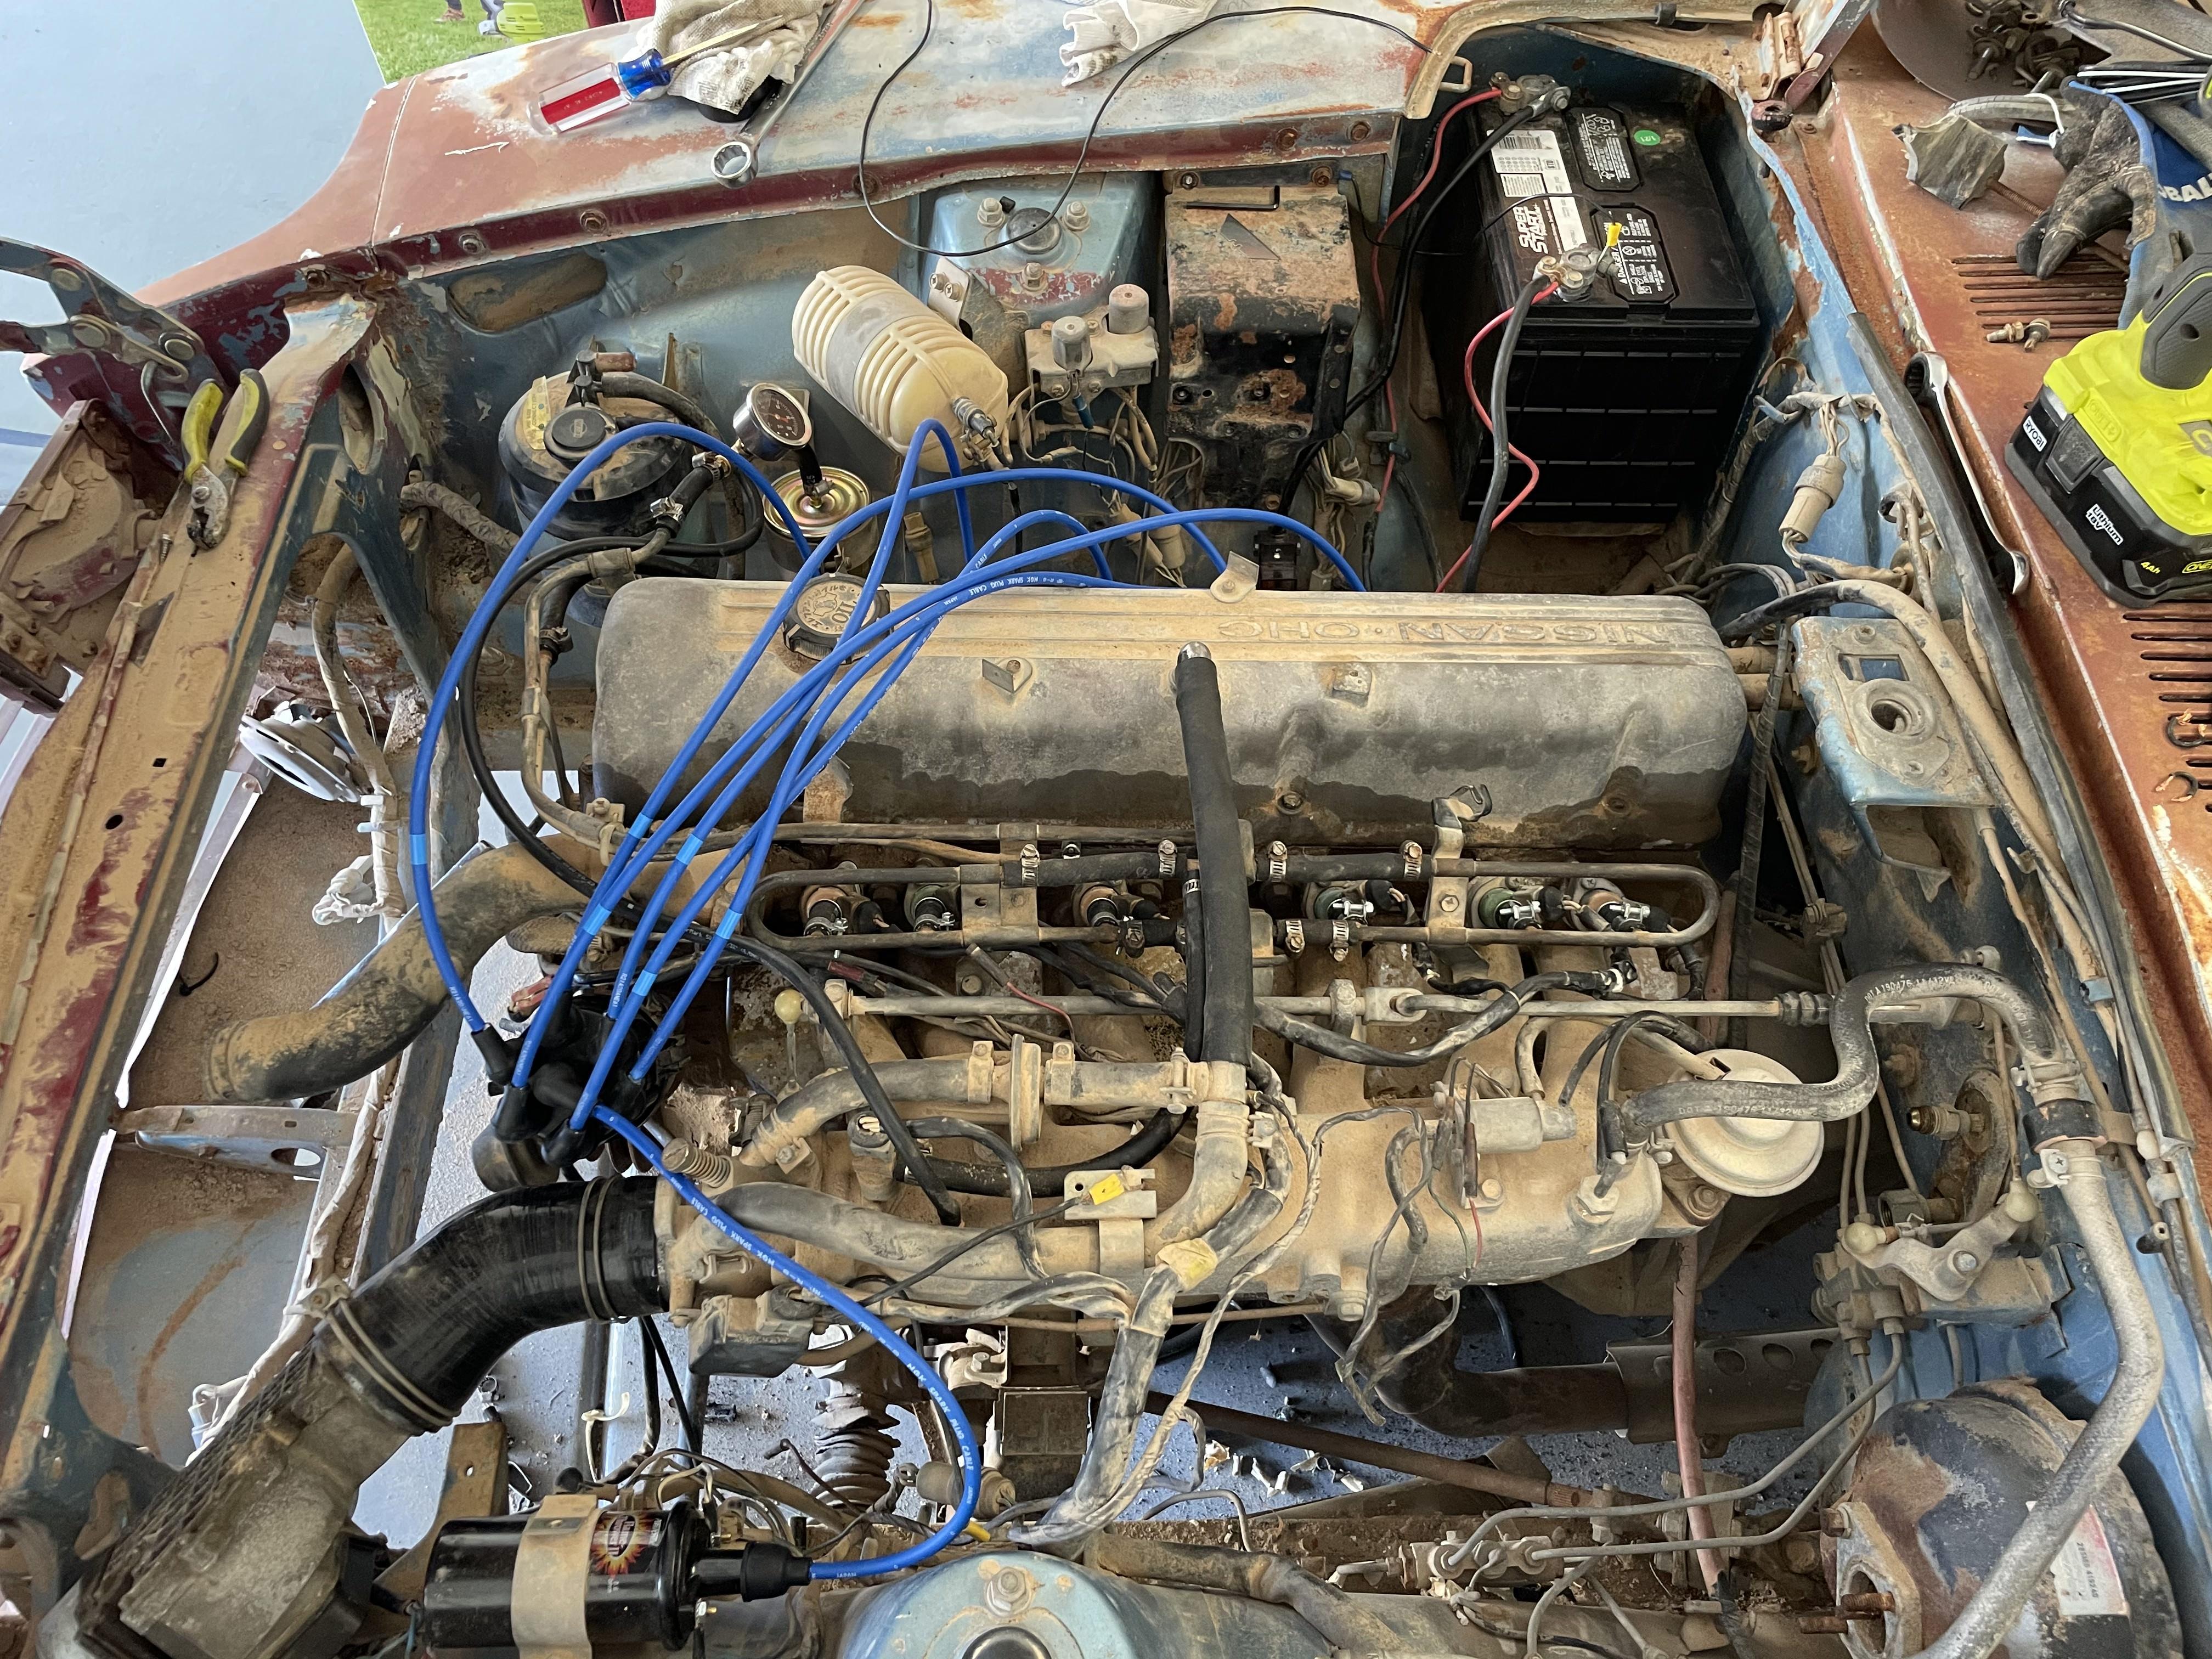
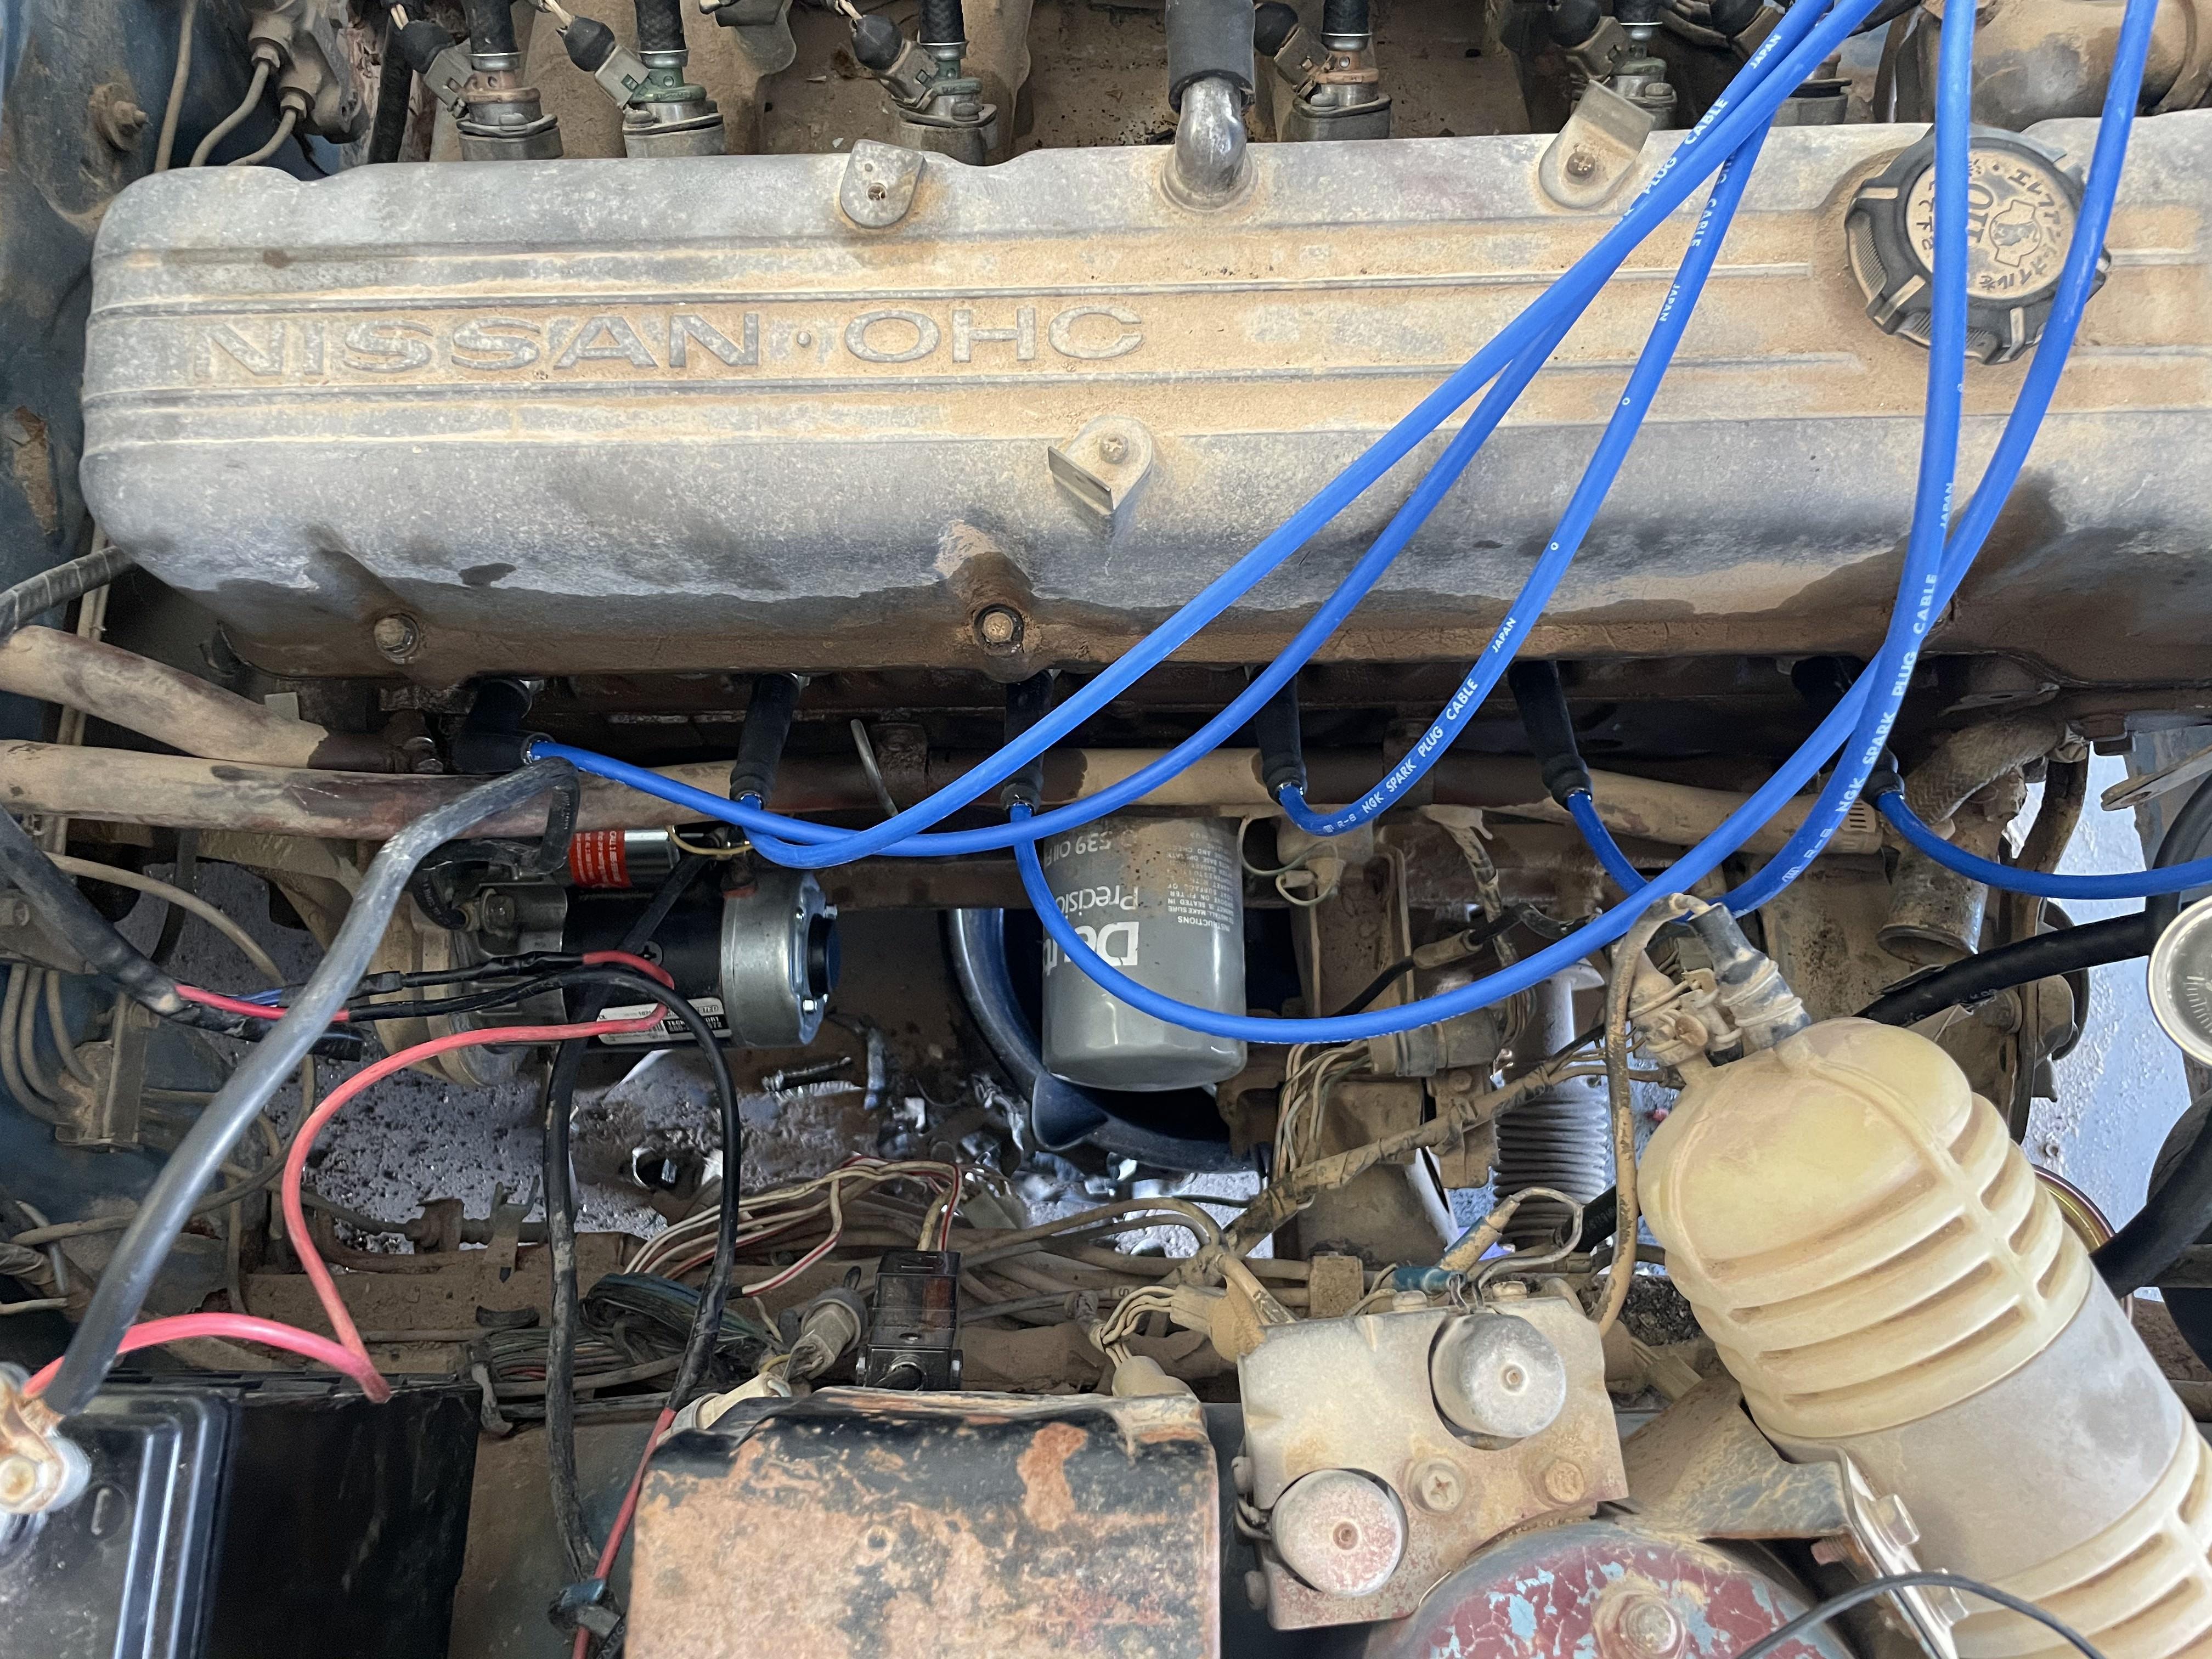
Next was to see this girl run! Even the engine bay has a nice coating of dust on everything! Luckily the previous owner capped the intake, I think they knew it wasnt going to run for a bit: Here is the bay after sourcing an AFM, coil, plugs, wires, battery, starter, and some new fuel lines. The oil around the valve cover is from the missing 4 or 5 valve cover bolts! Started to seep as soon as I filled it. It didnt bother me as I knew we would be diving deeper soon. This is when I joined the club and started to walk through all the electrical gremlins. @Zed Head was a huge help walking me through the FSM and EFI bible. We encountered numerous loose connections, all 6 injectors were bad, fuel pump needed replacing, redid the fusible links, etc. But we got it running! After nearly 30 years, its back to life: Unfortunately cylinder #3 had 0 compression. a valve adjustment yielded no improvement. Maybe this had something to do with that? Found this guy in the trunk. I've never seen this before!


-
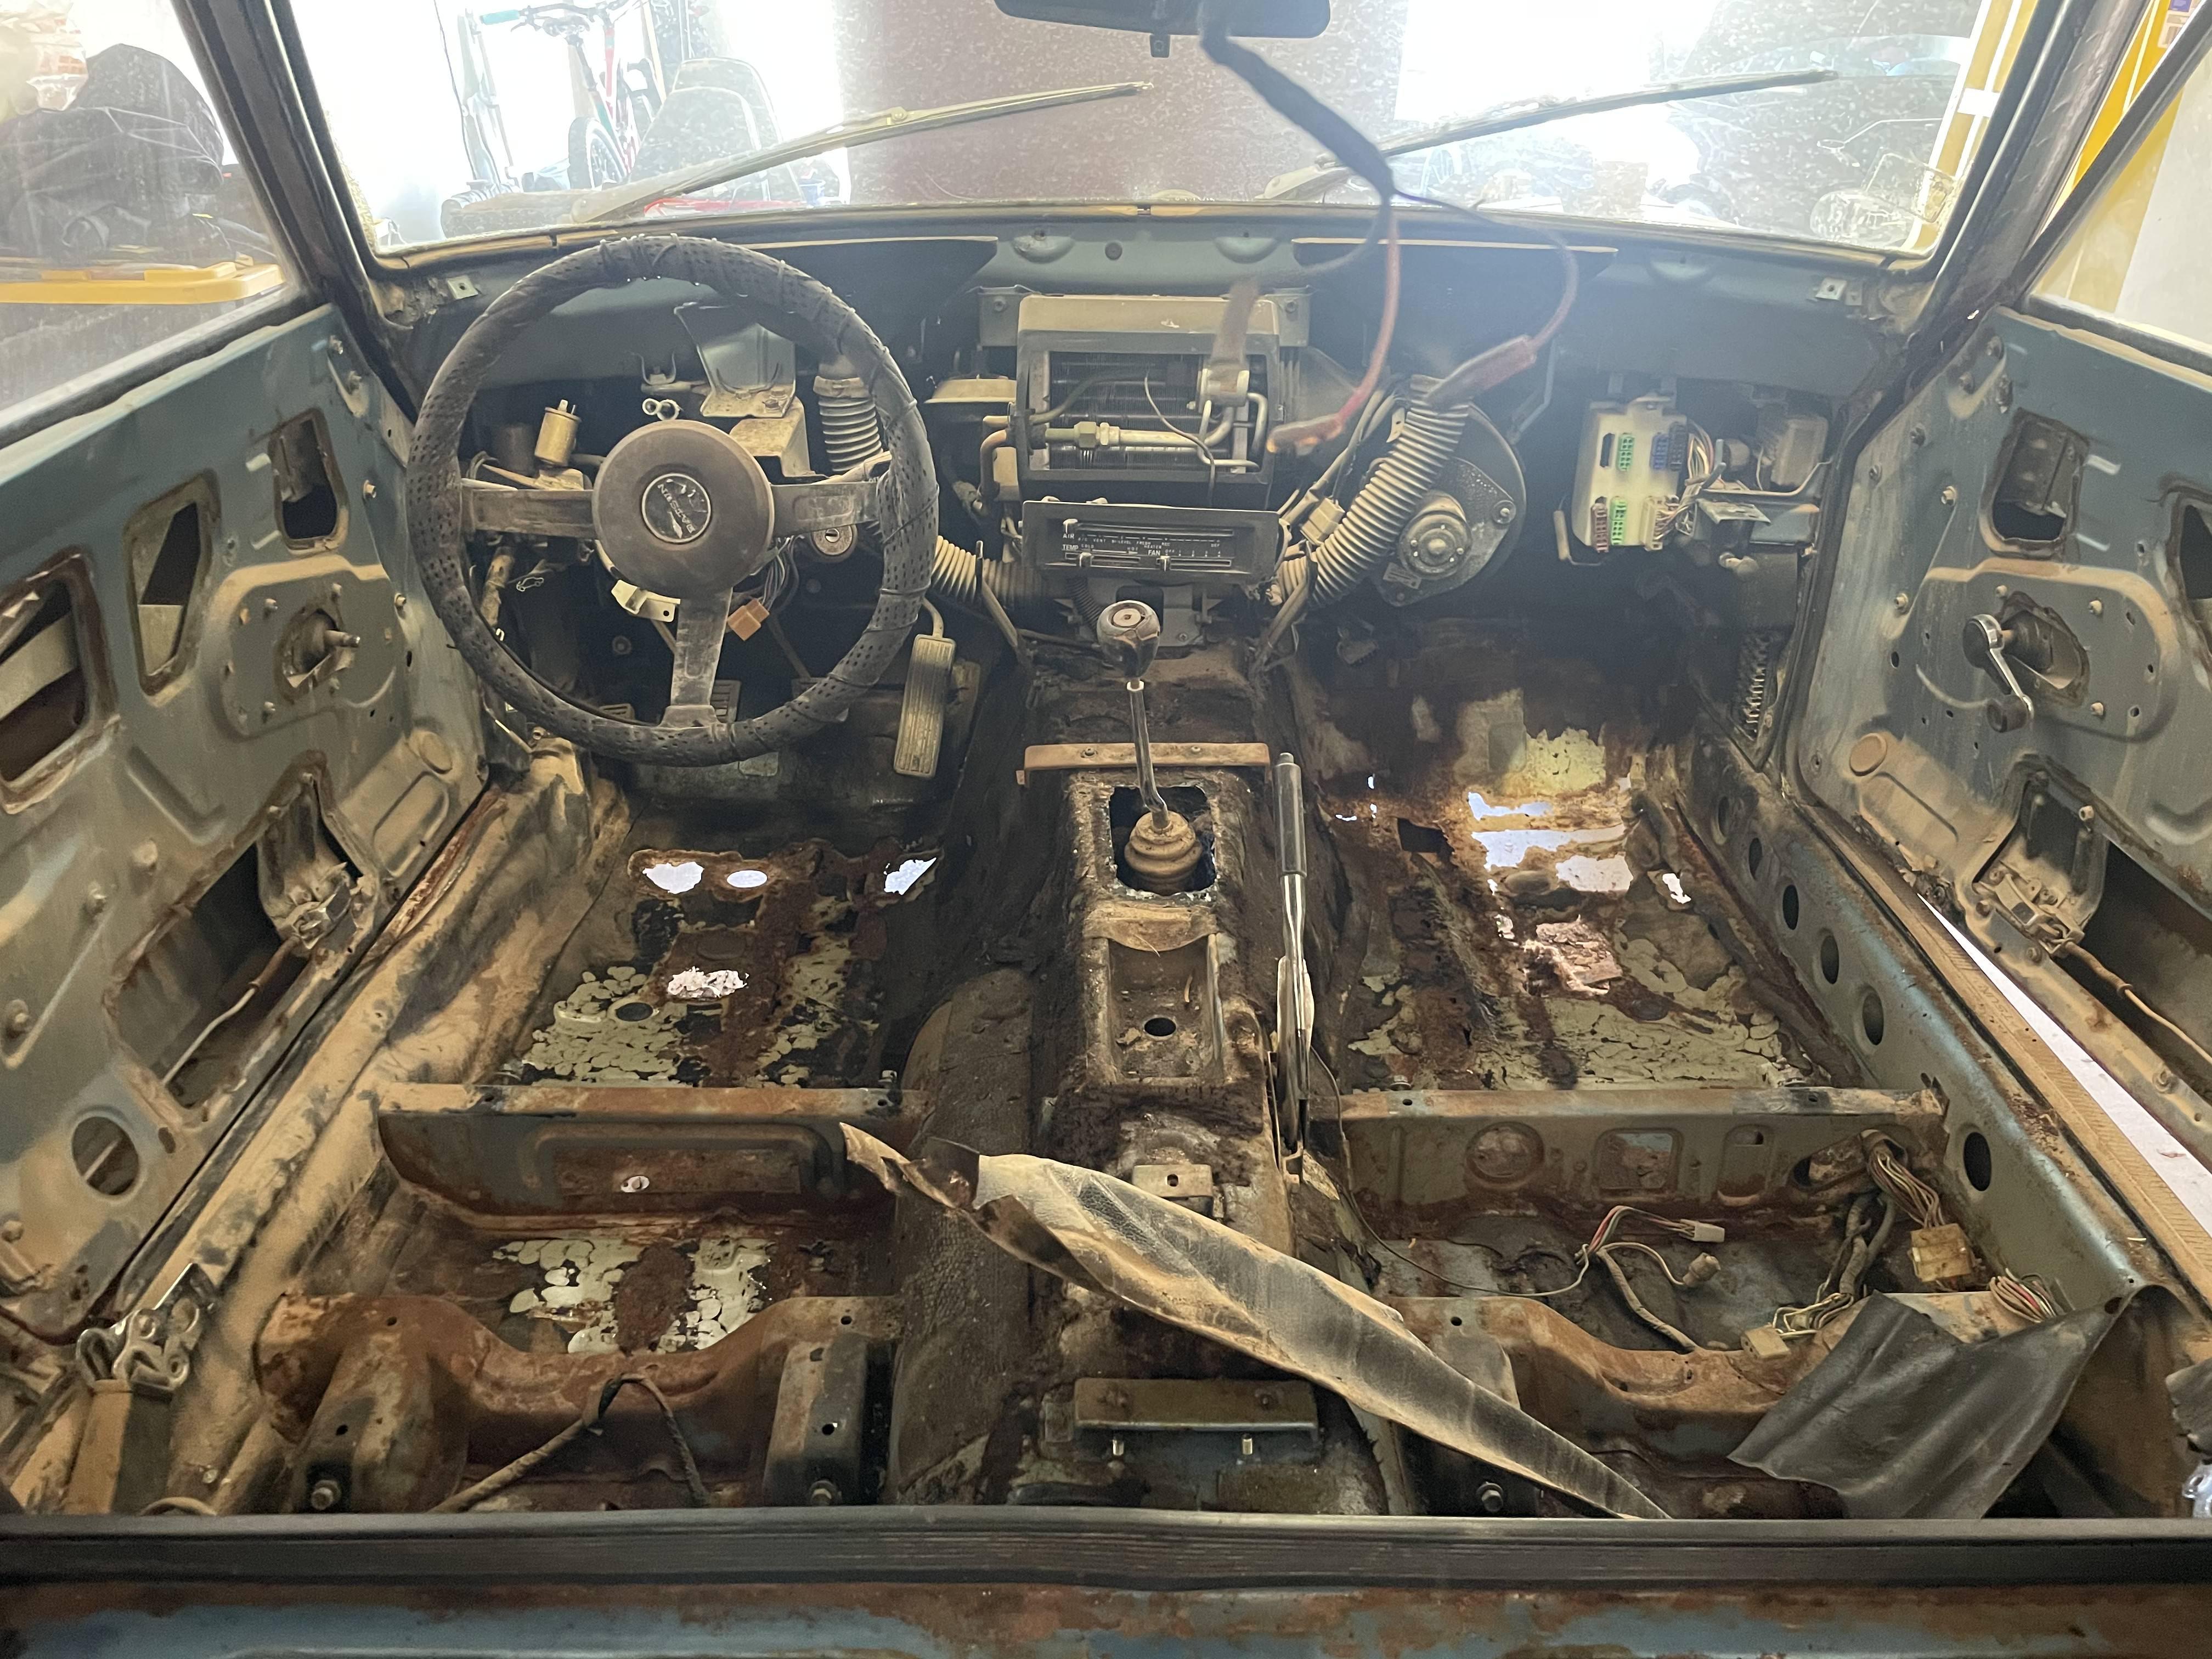
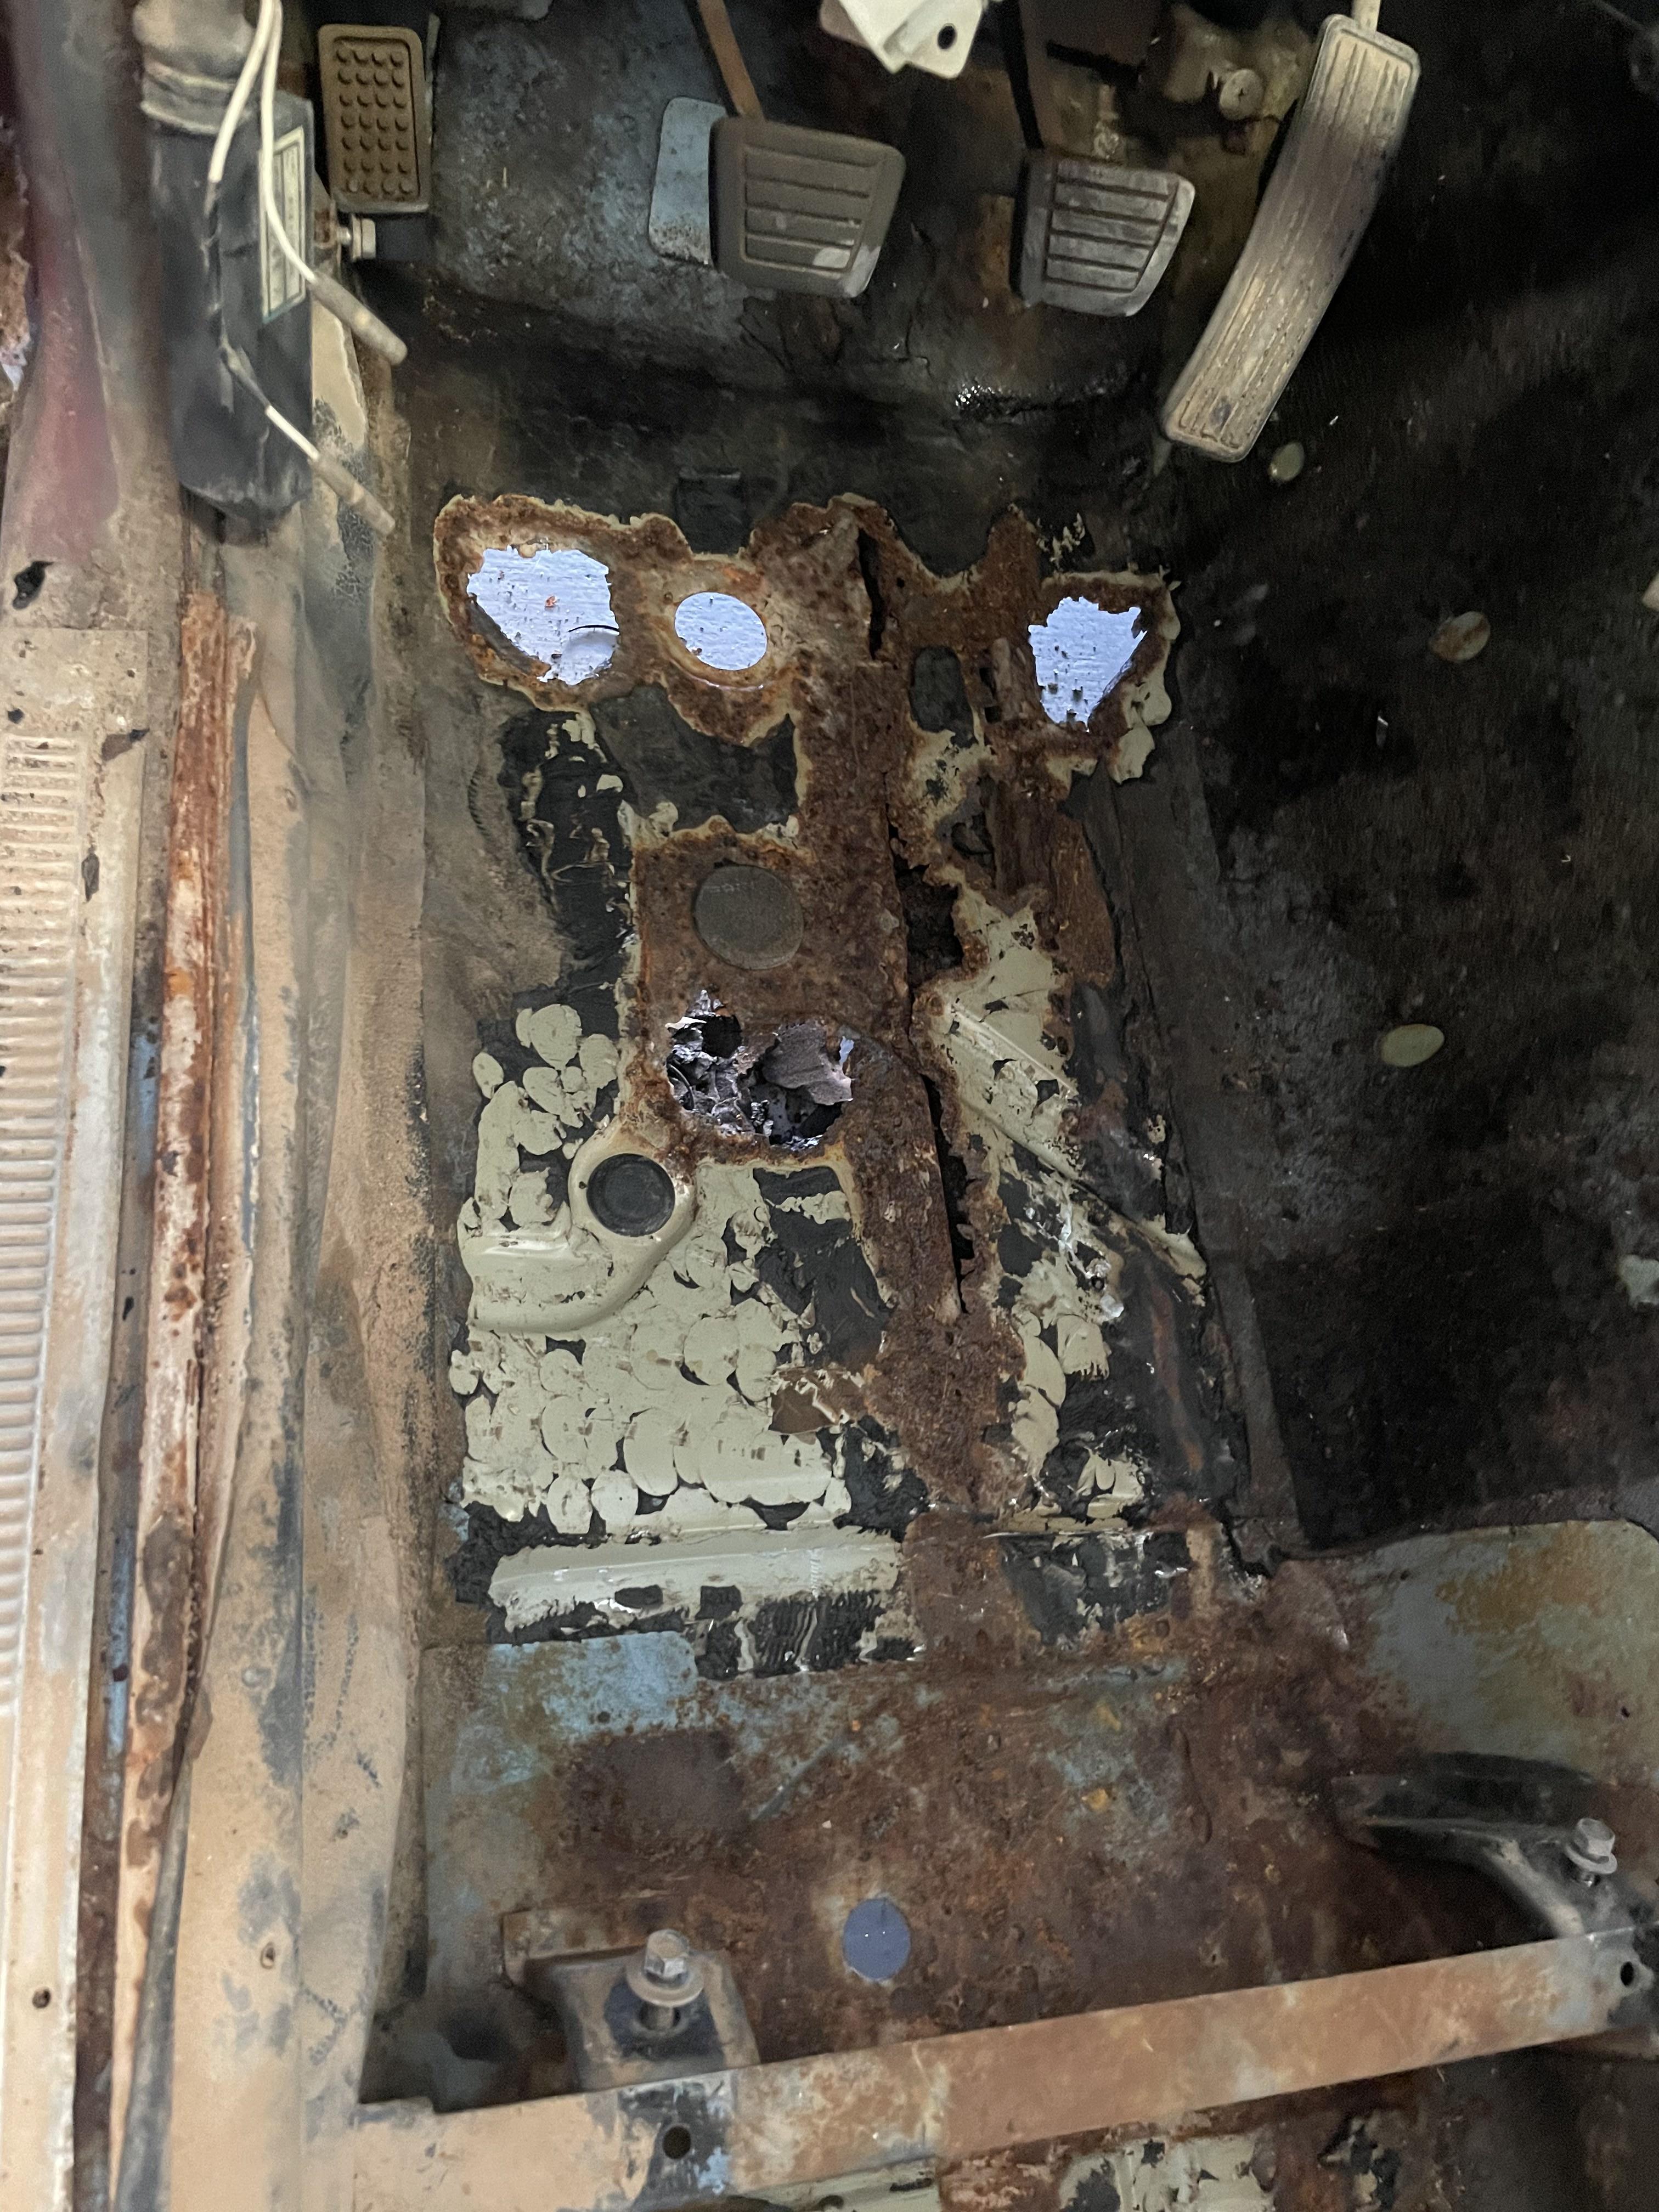
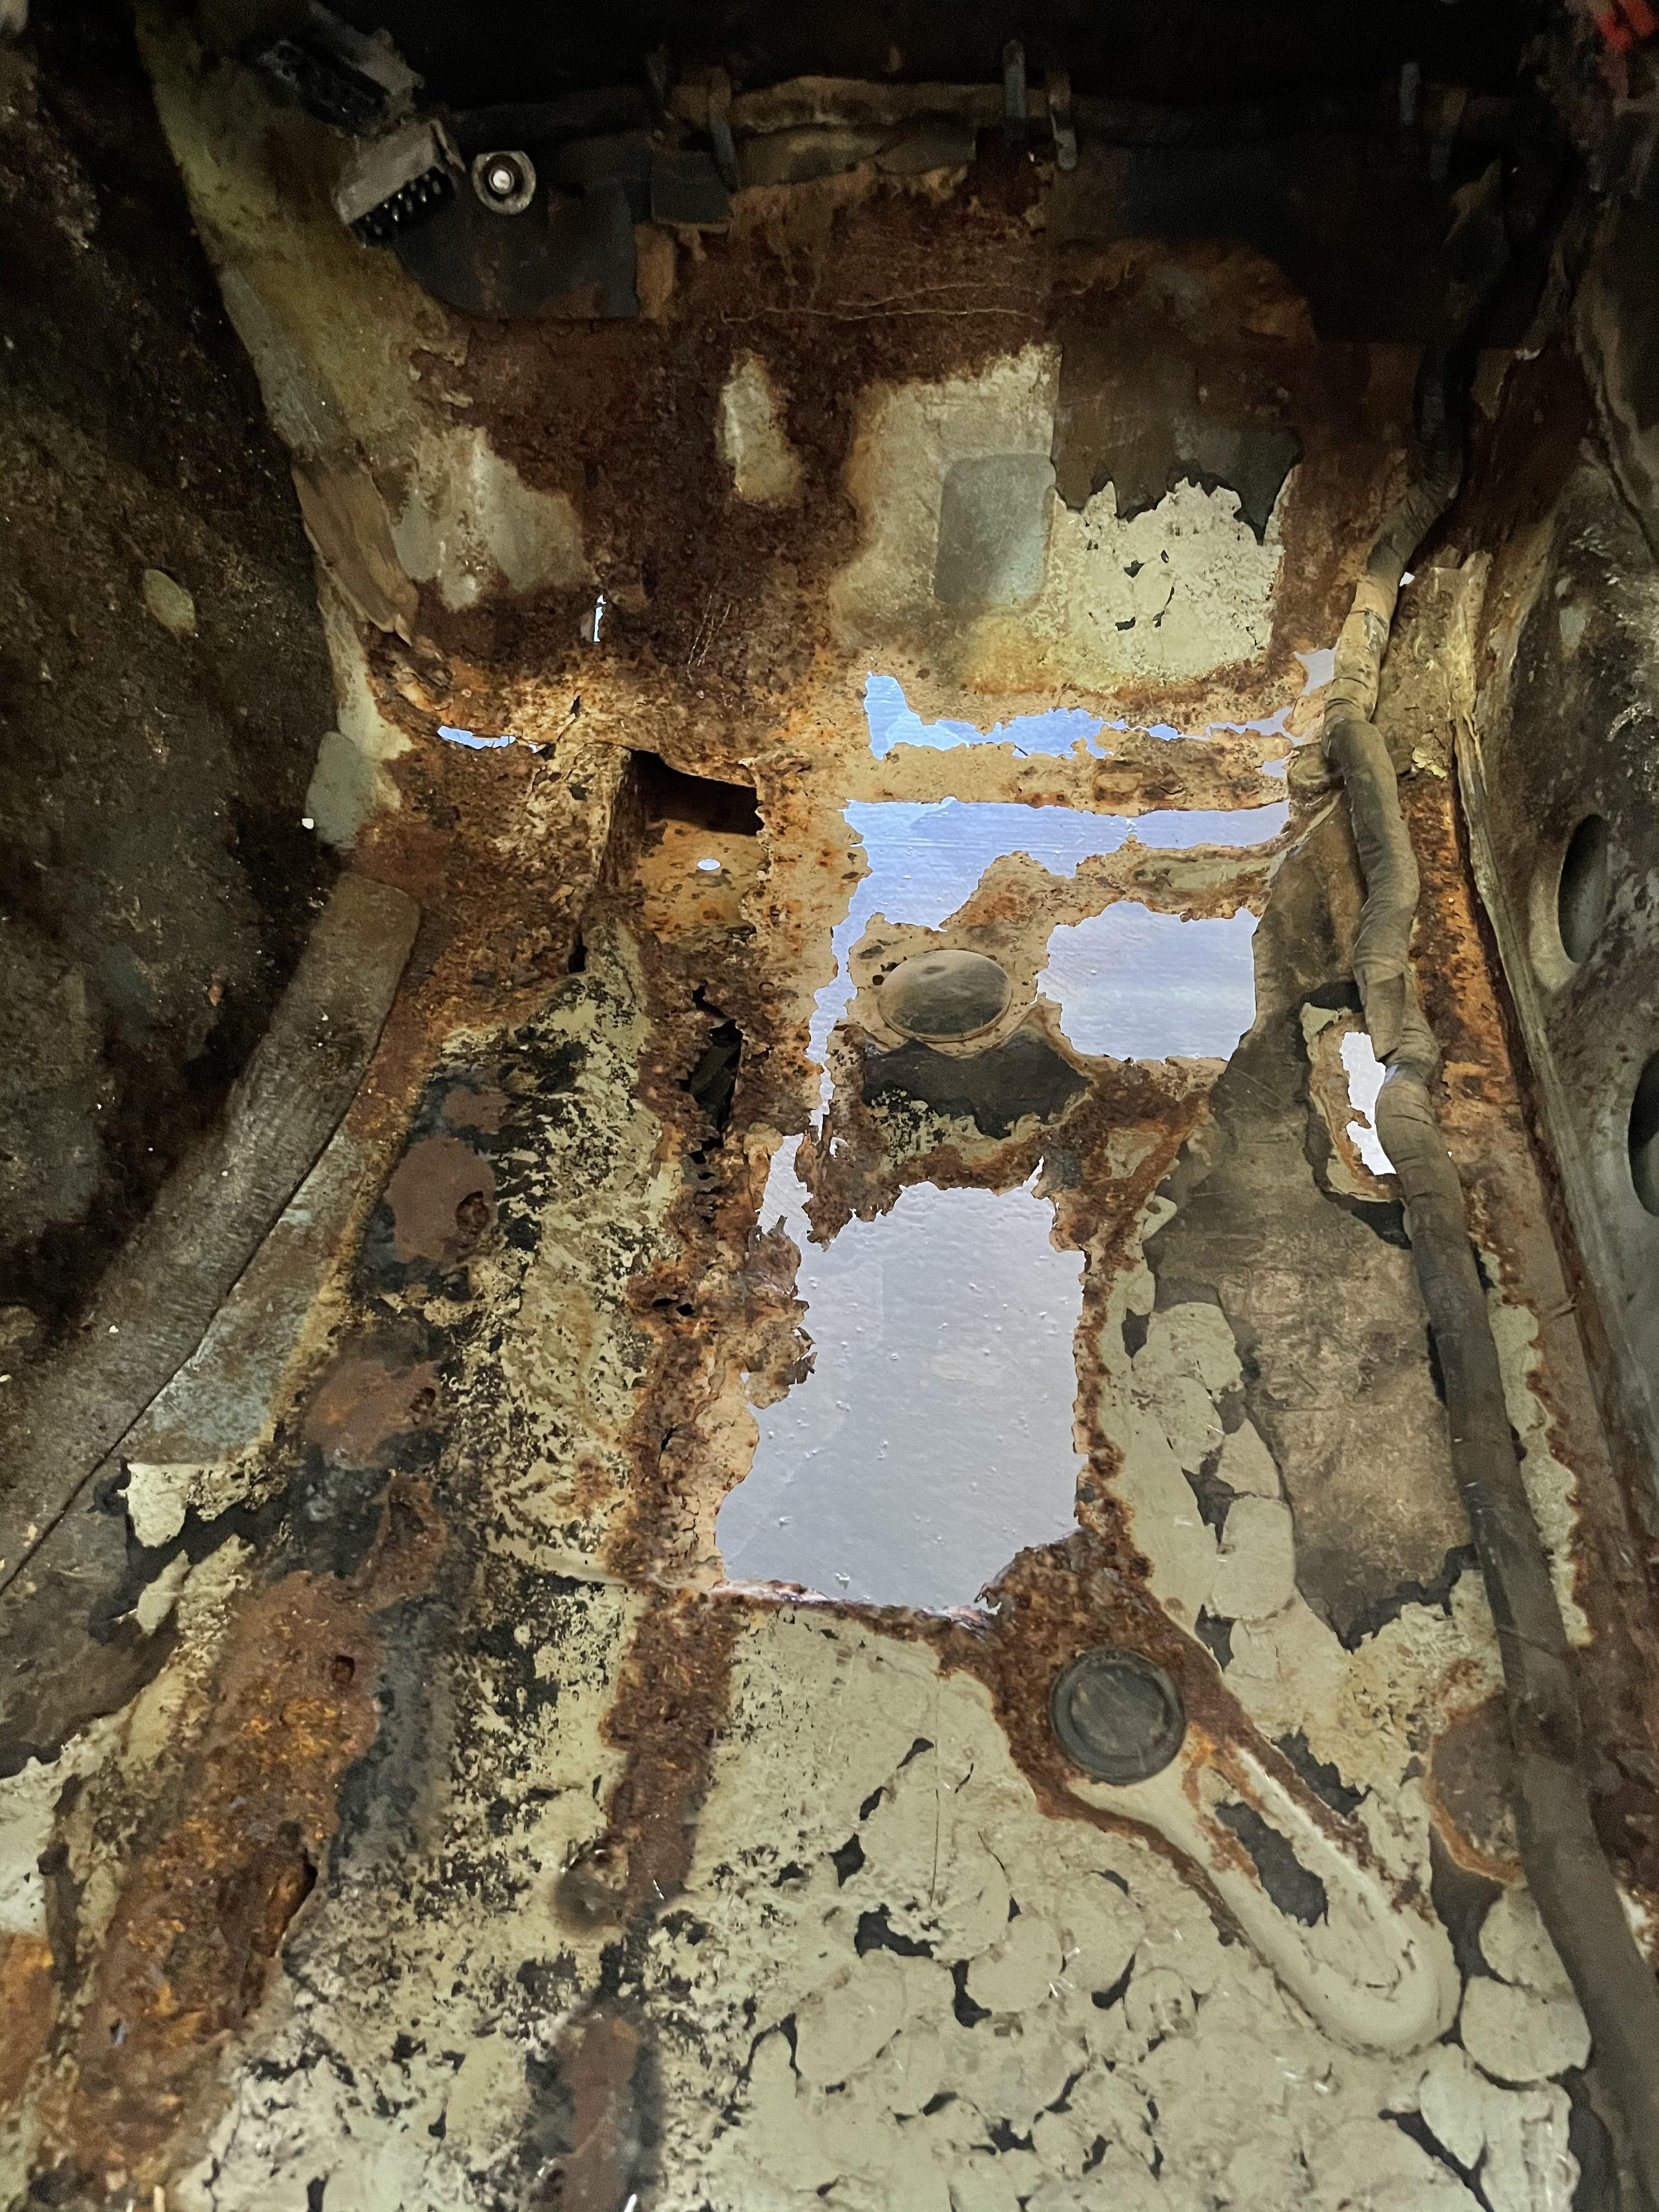
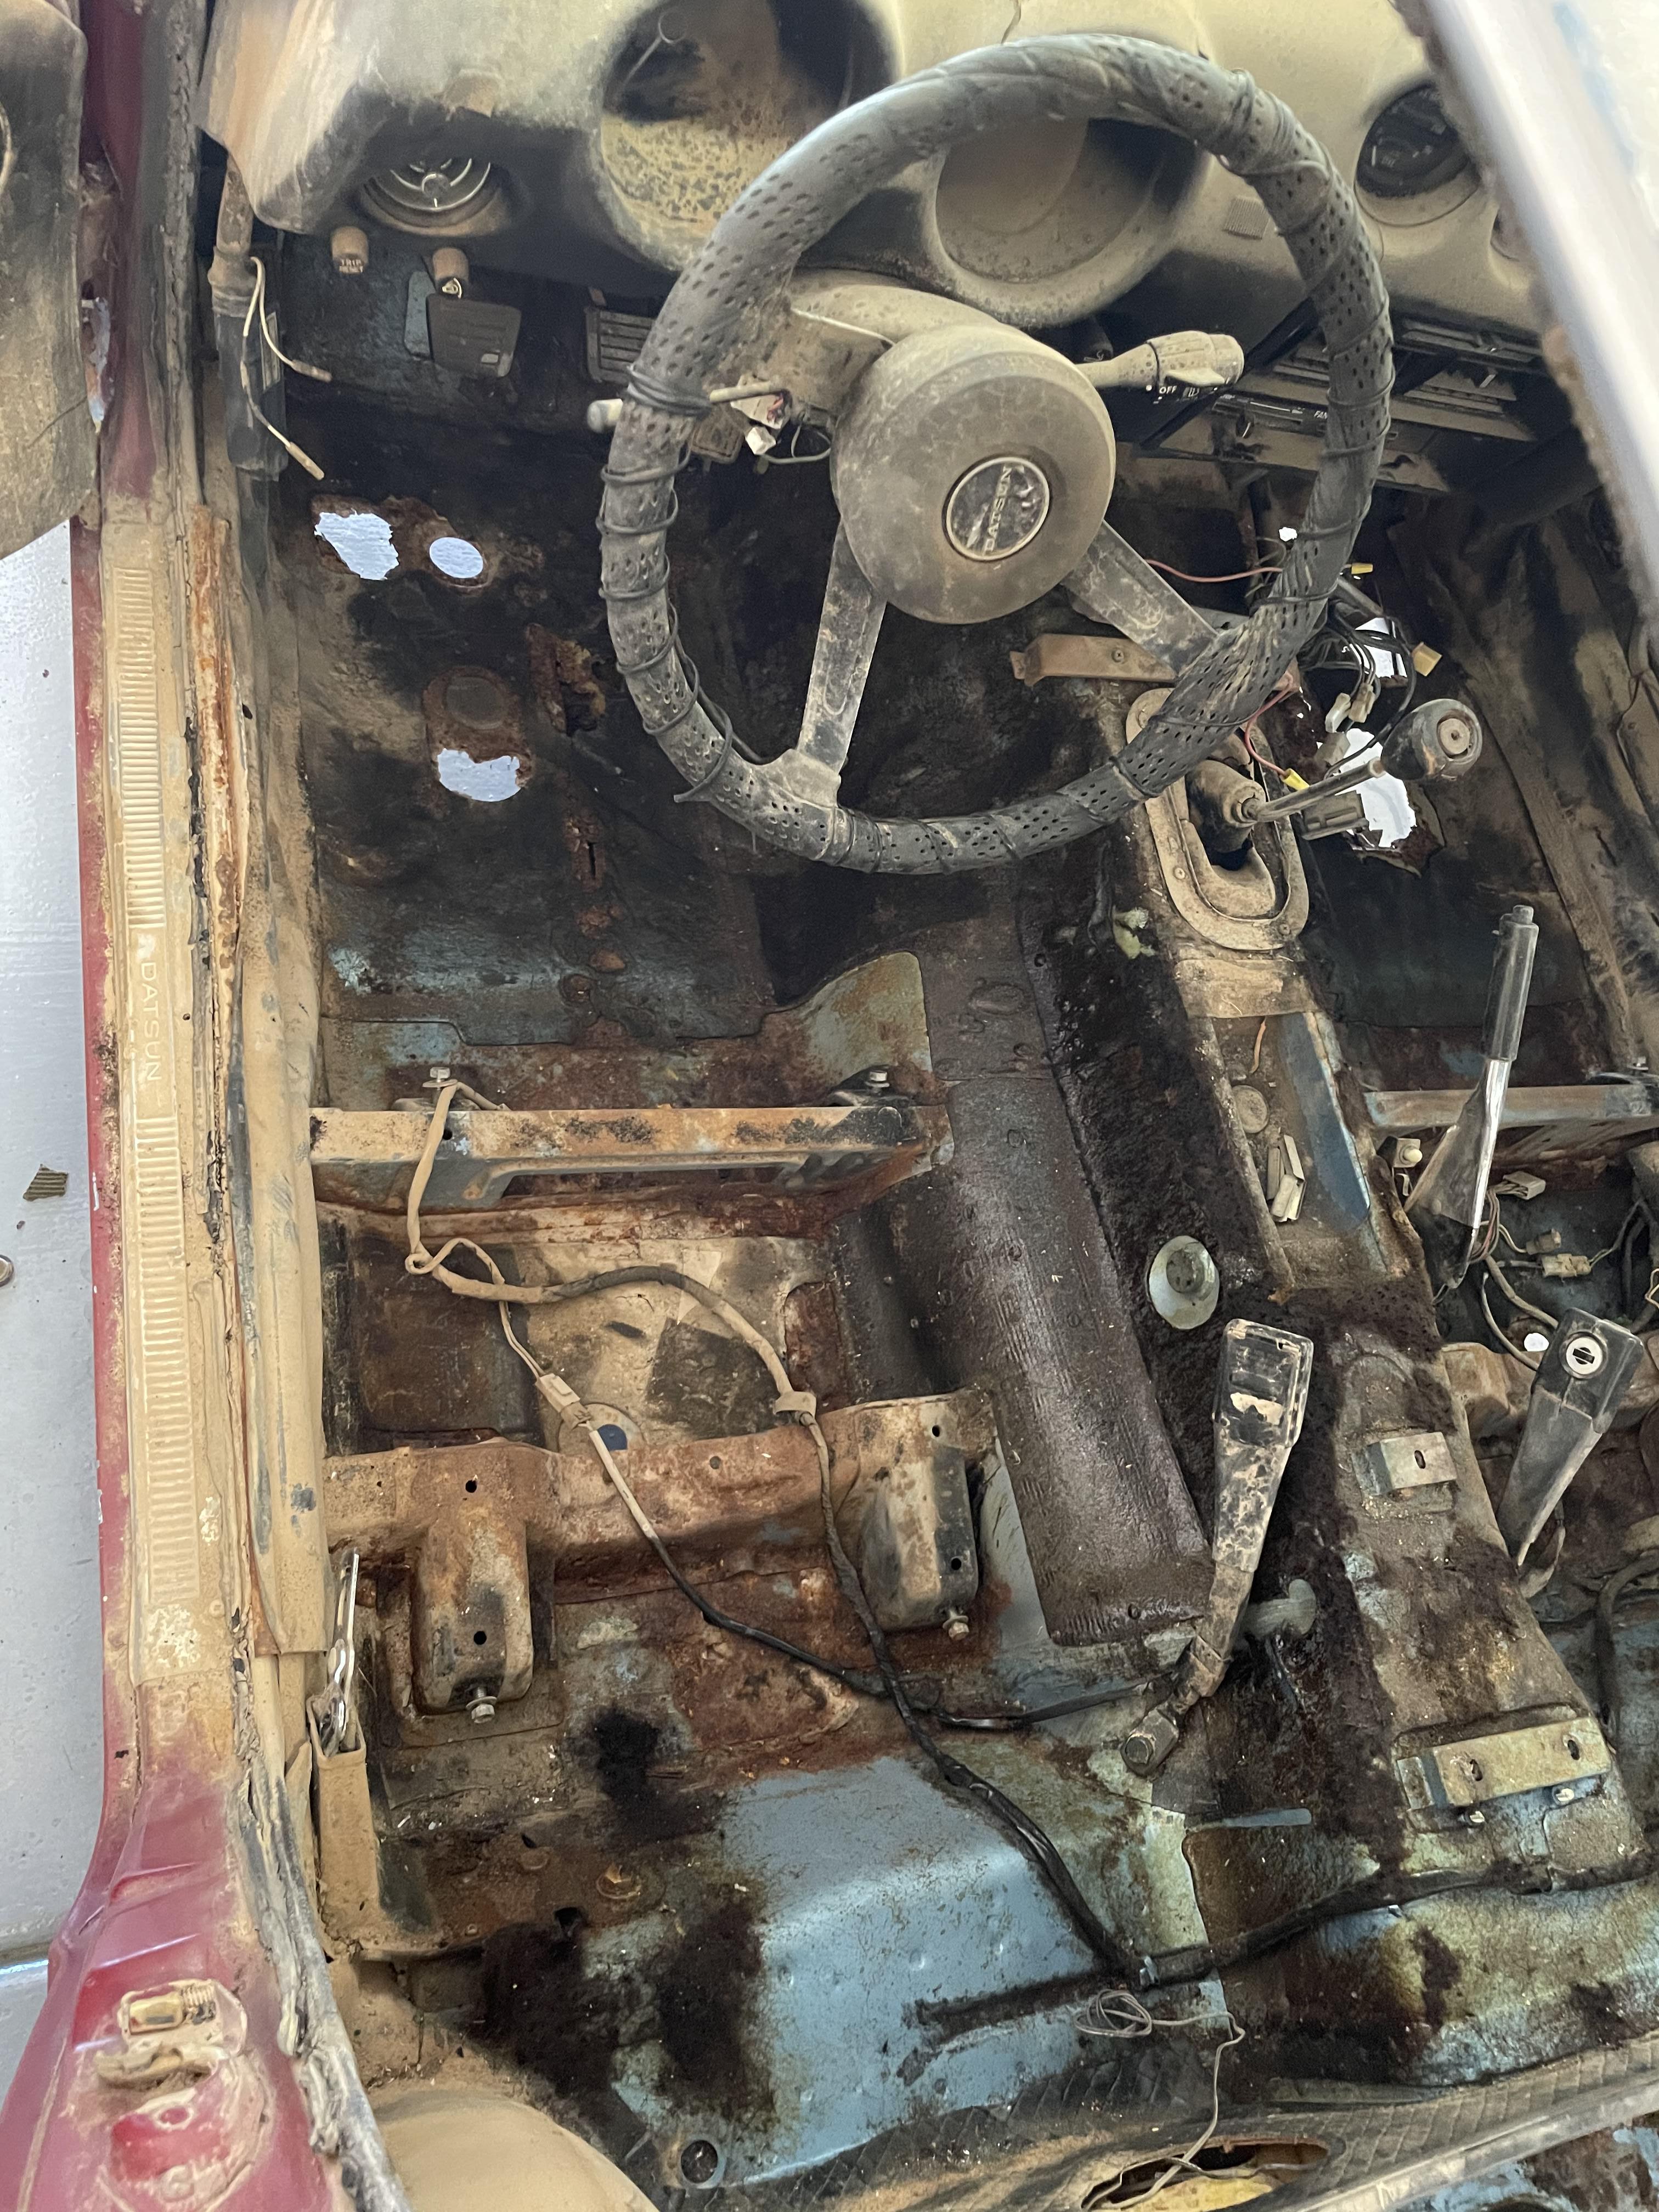
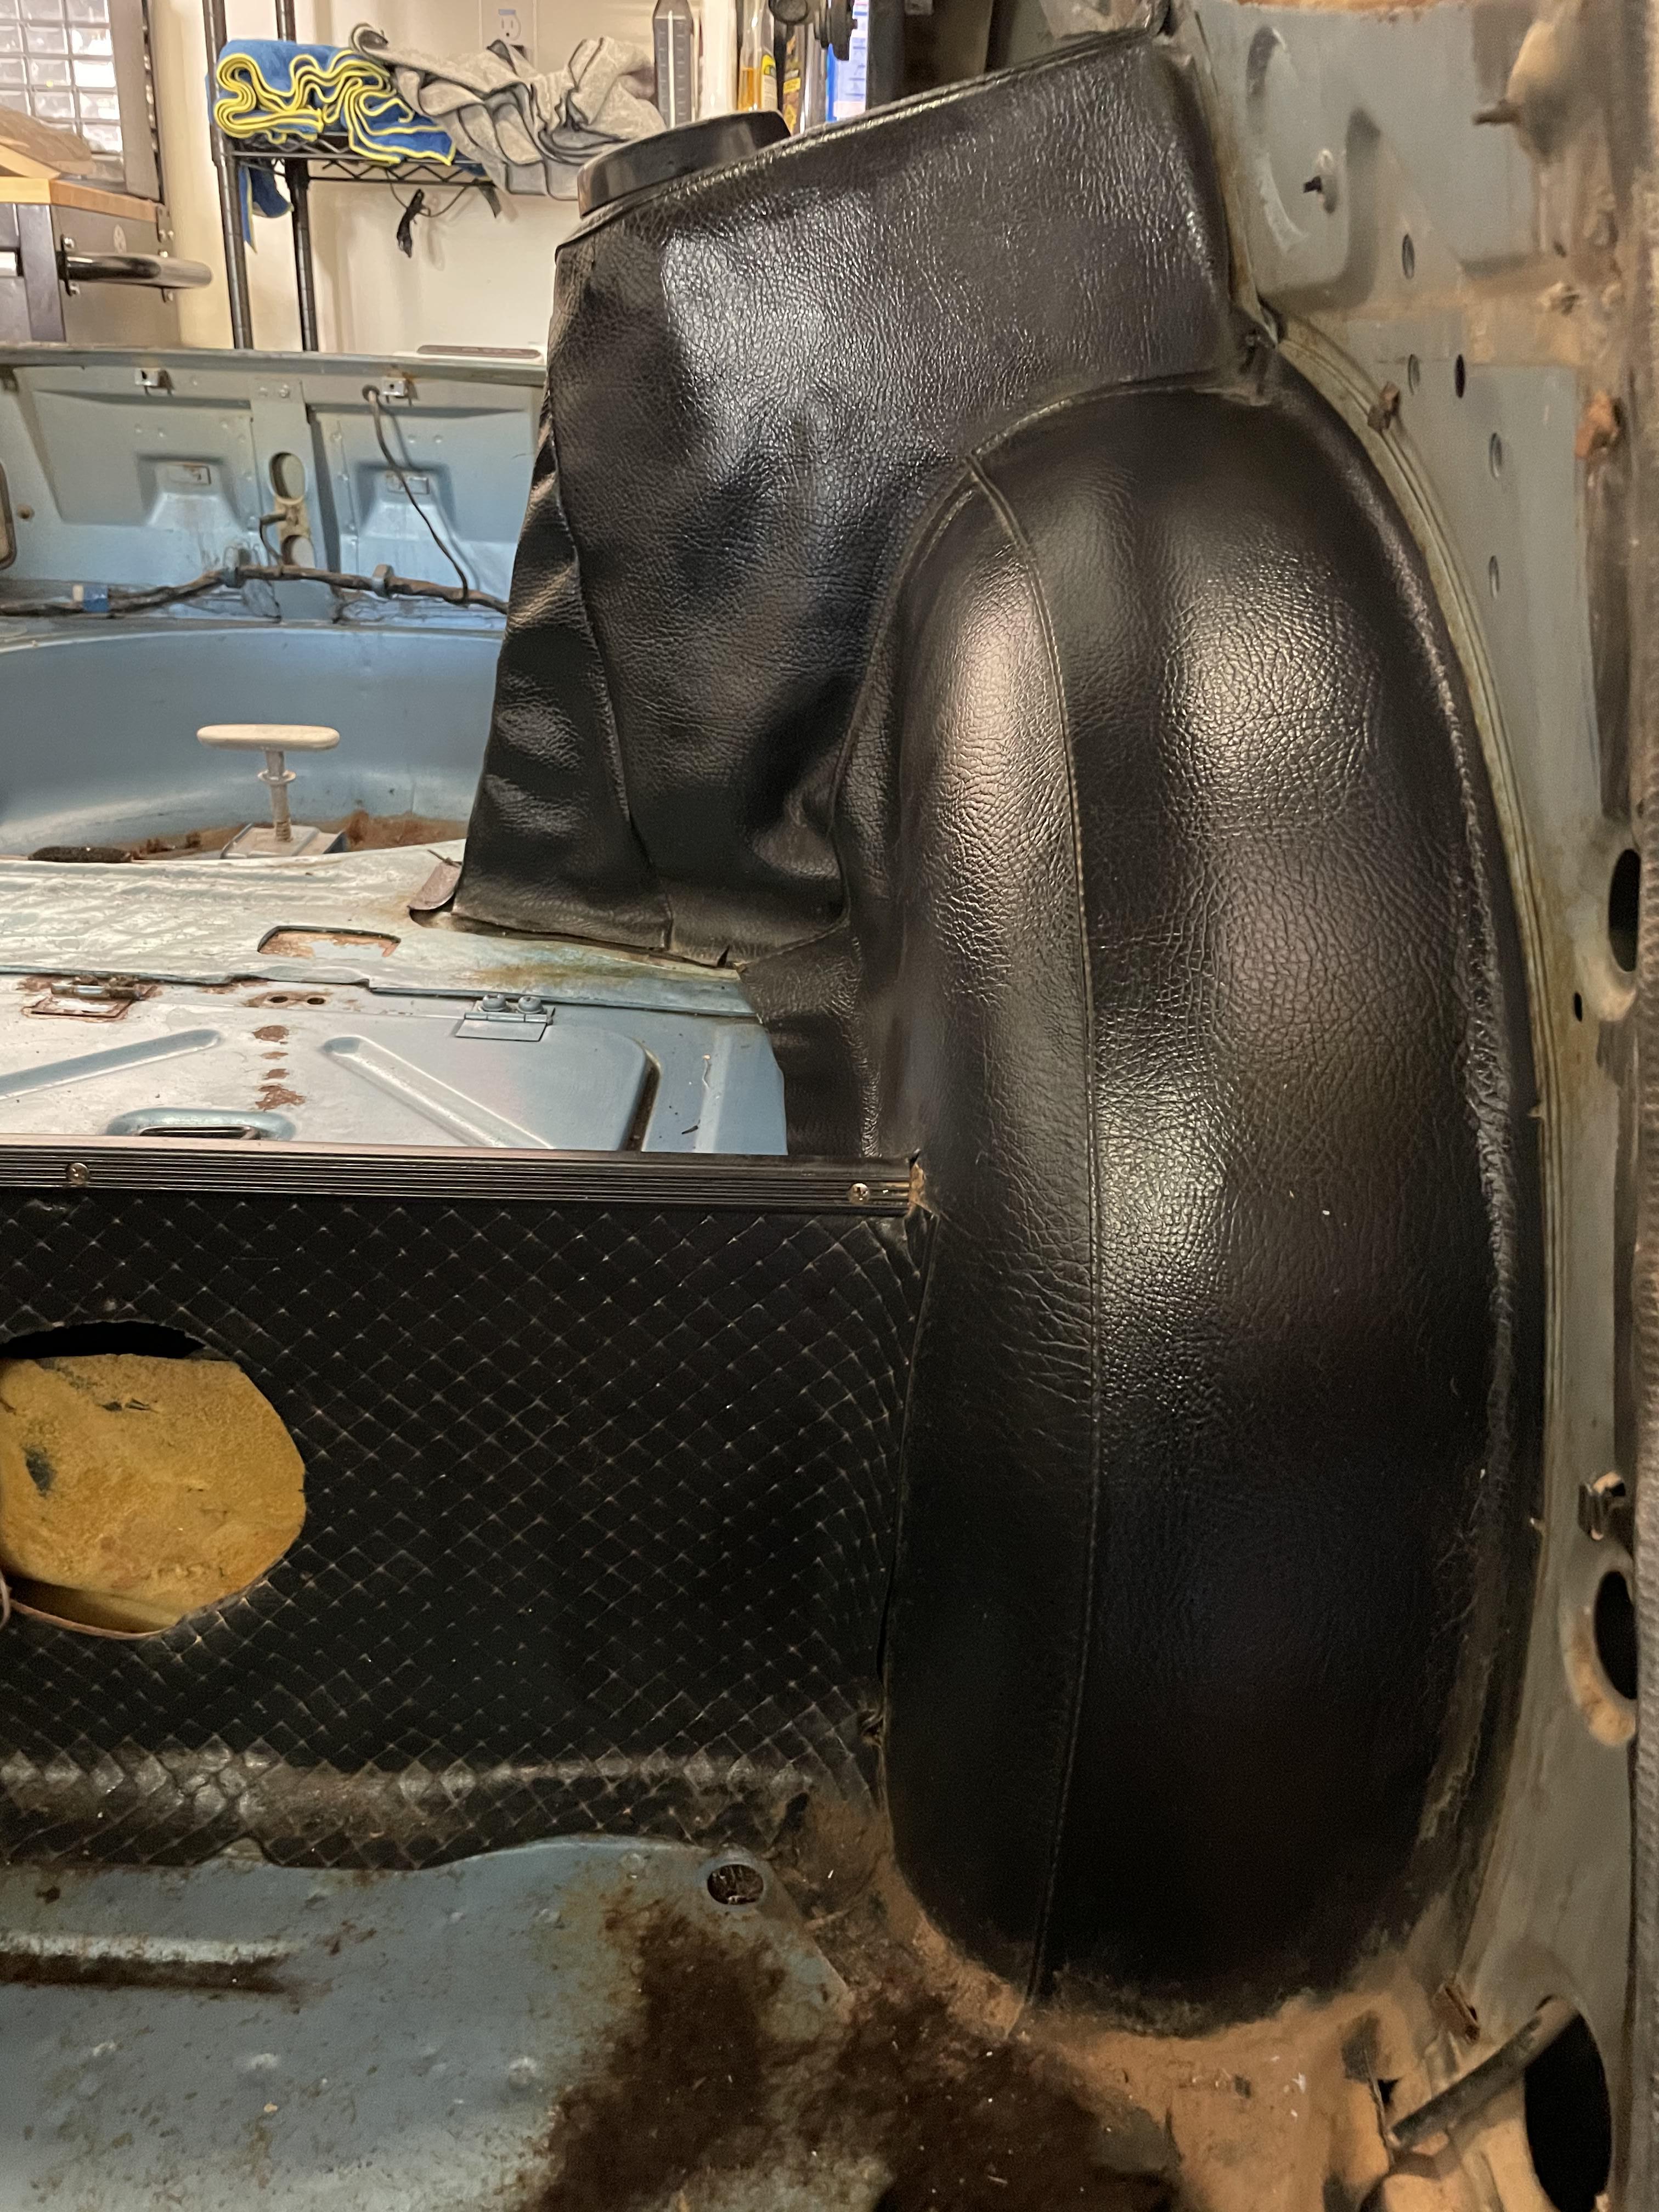
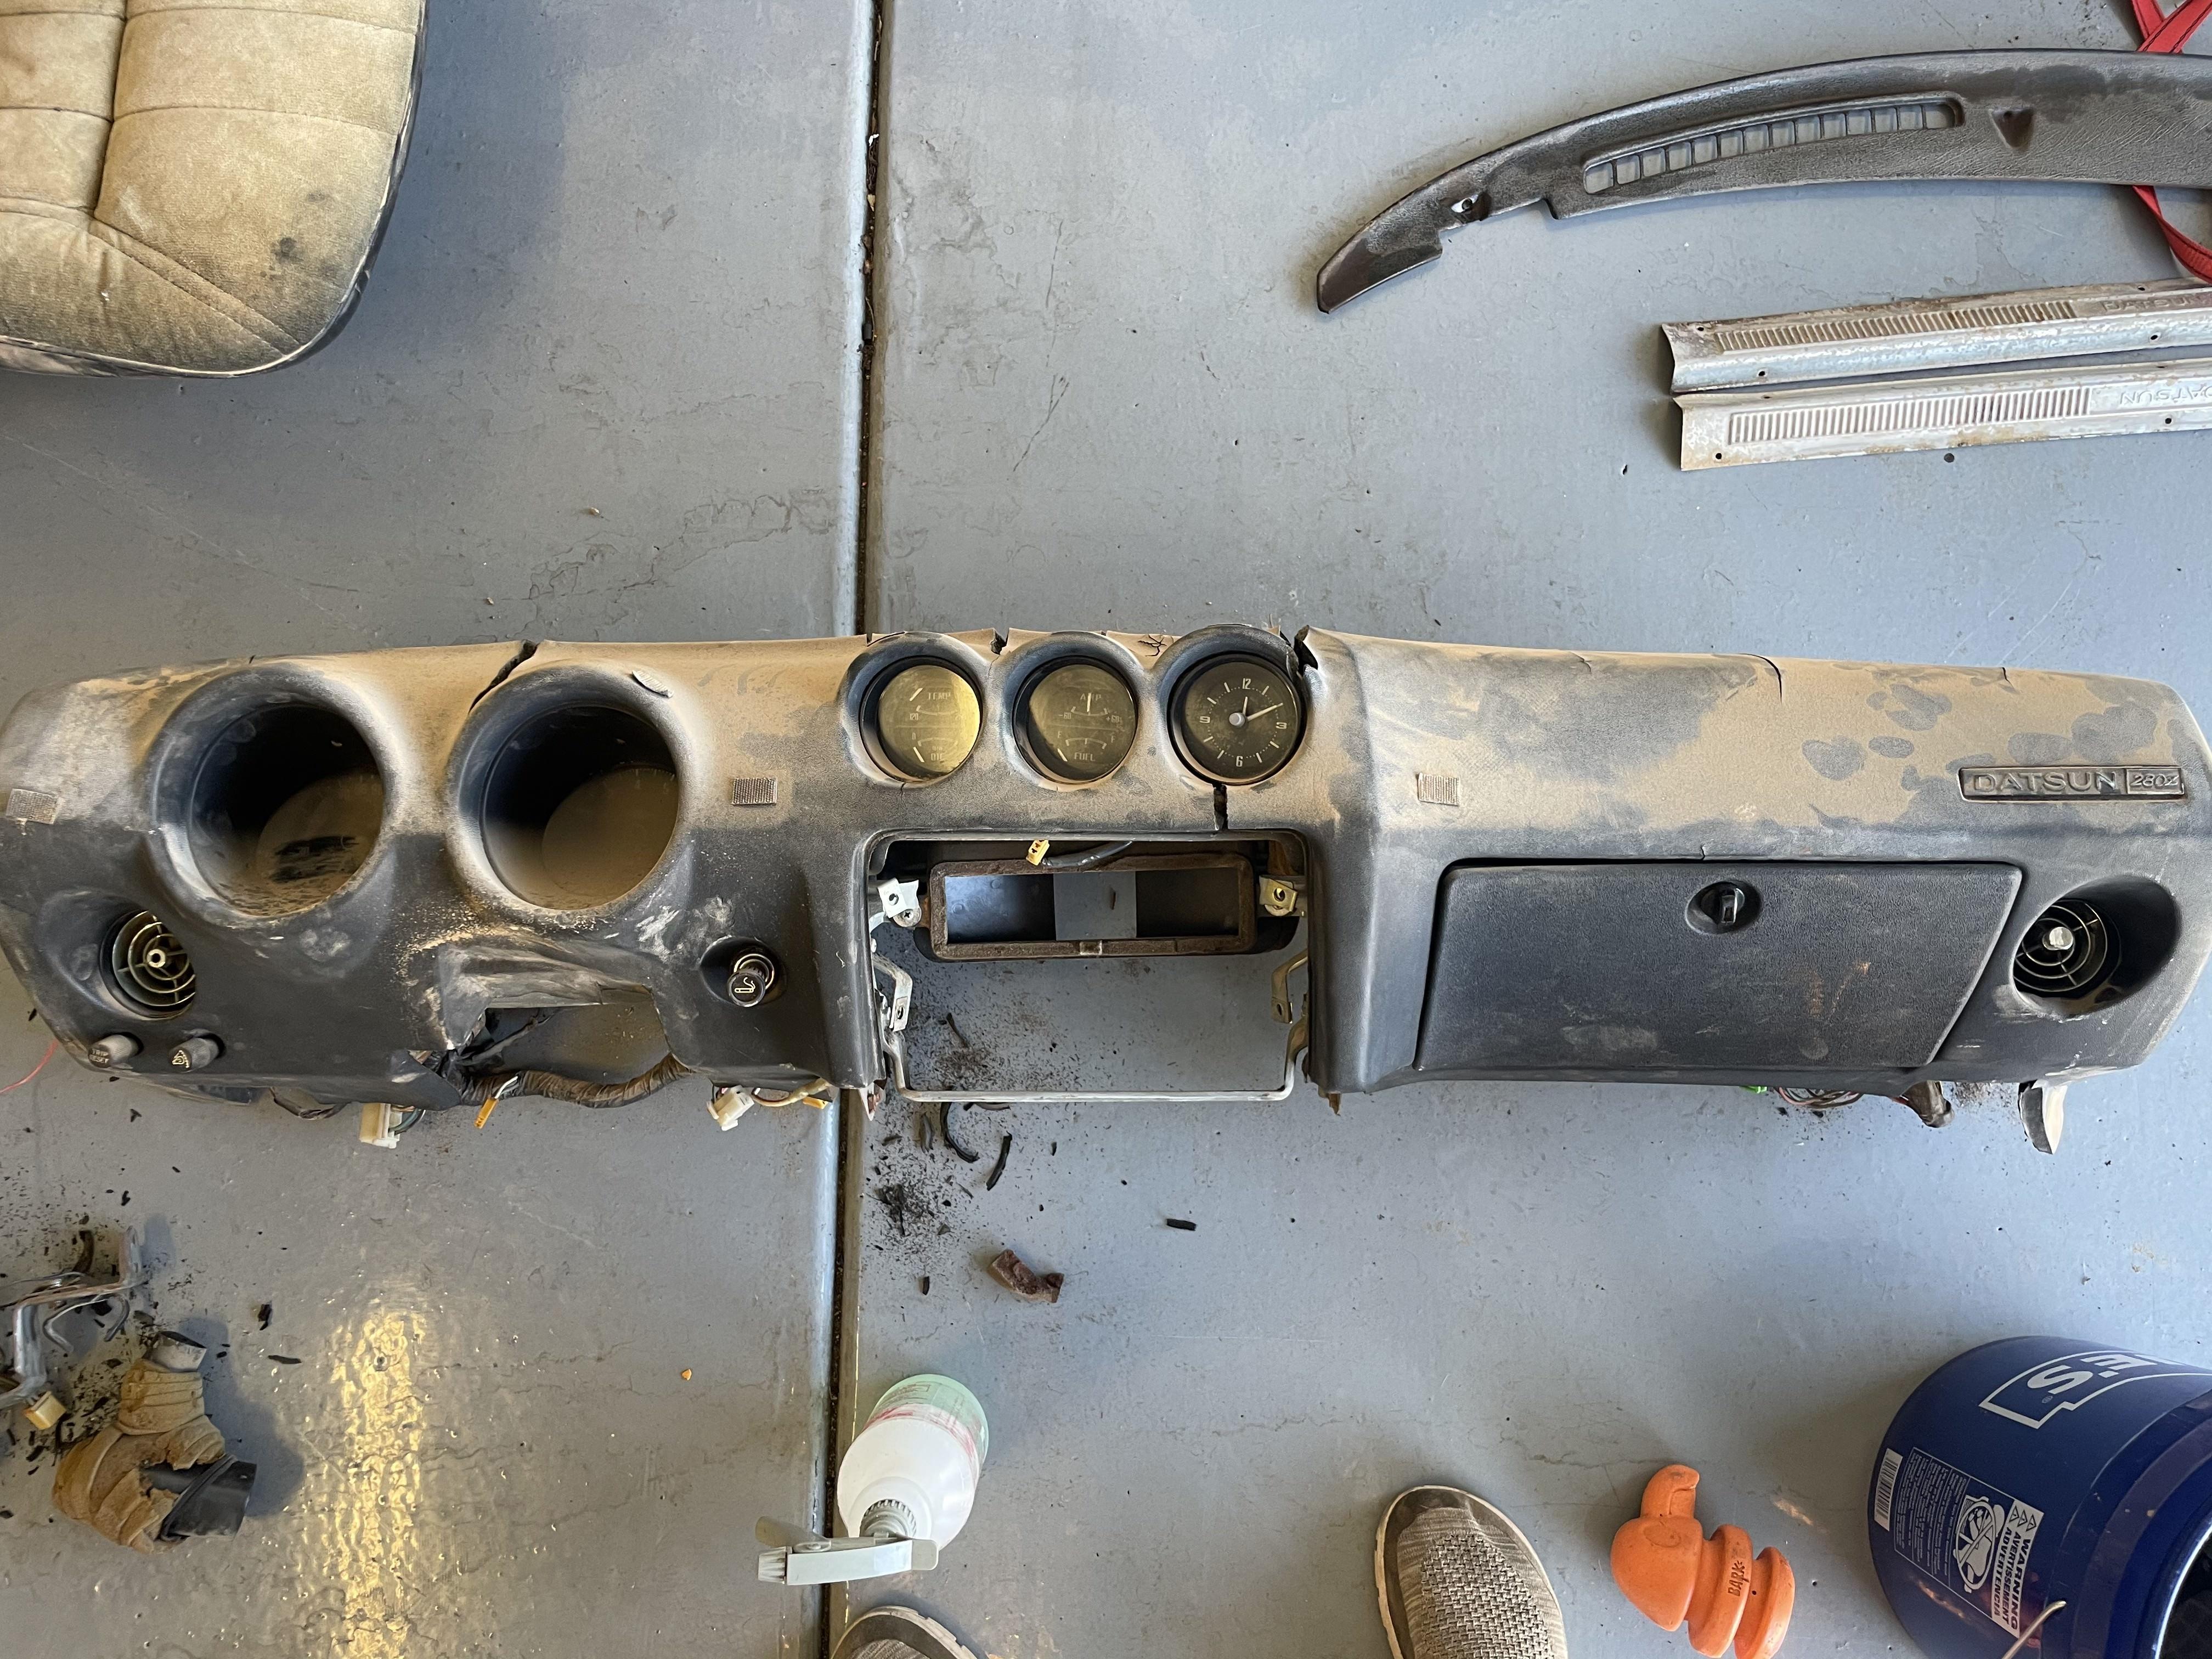
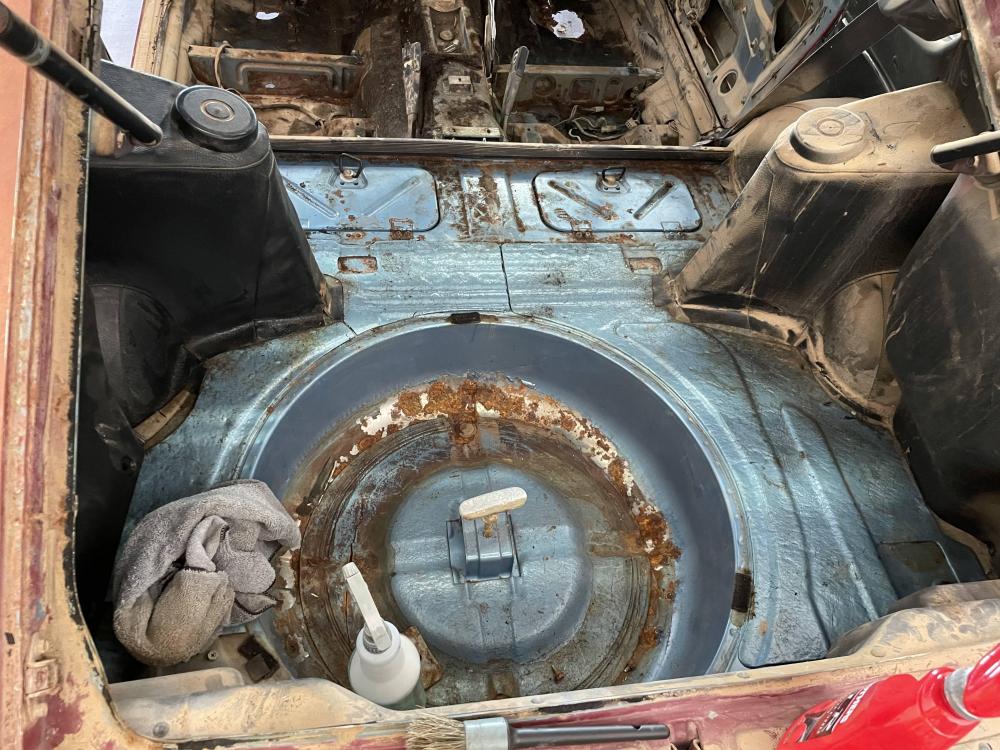
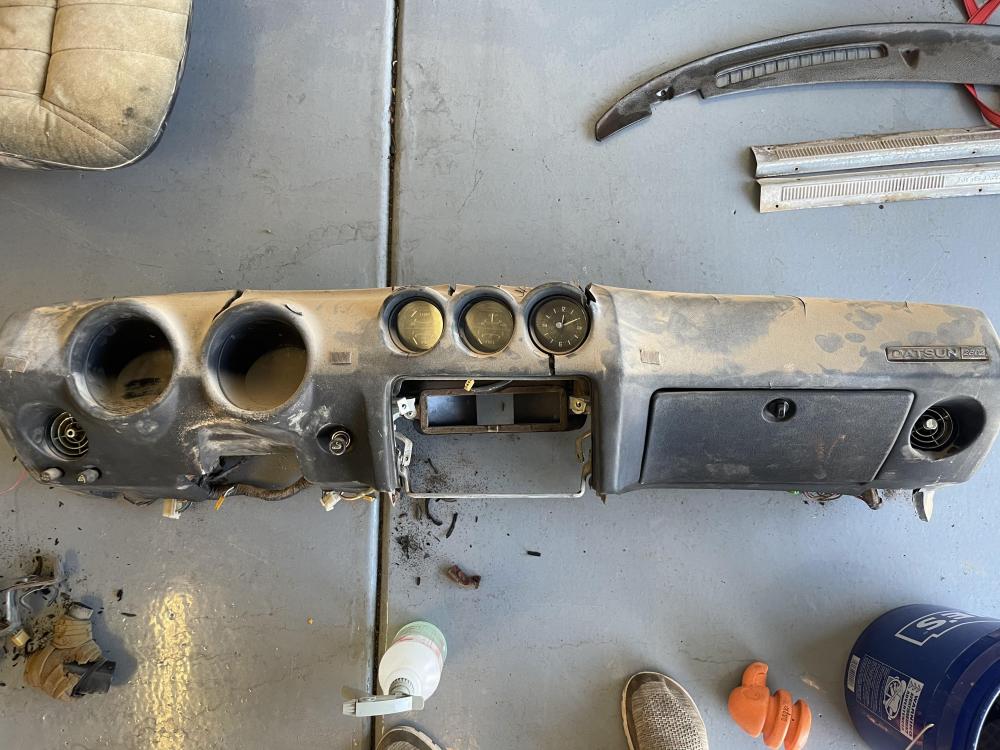
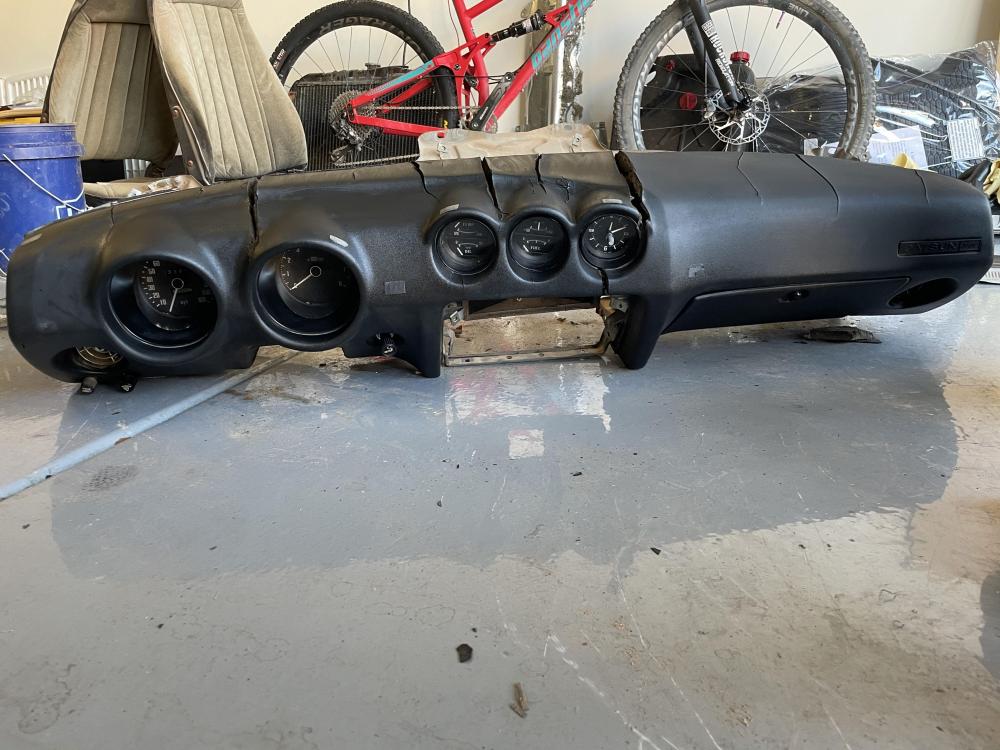
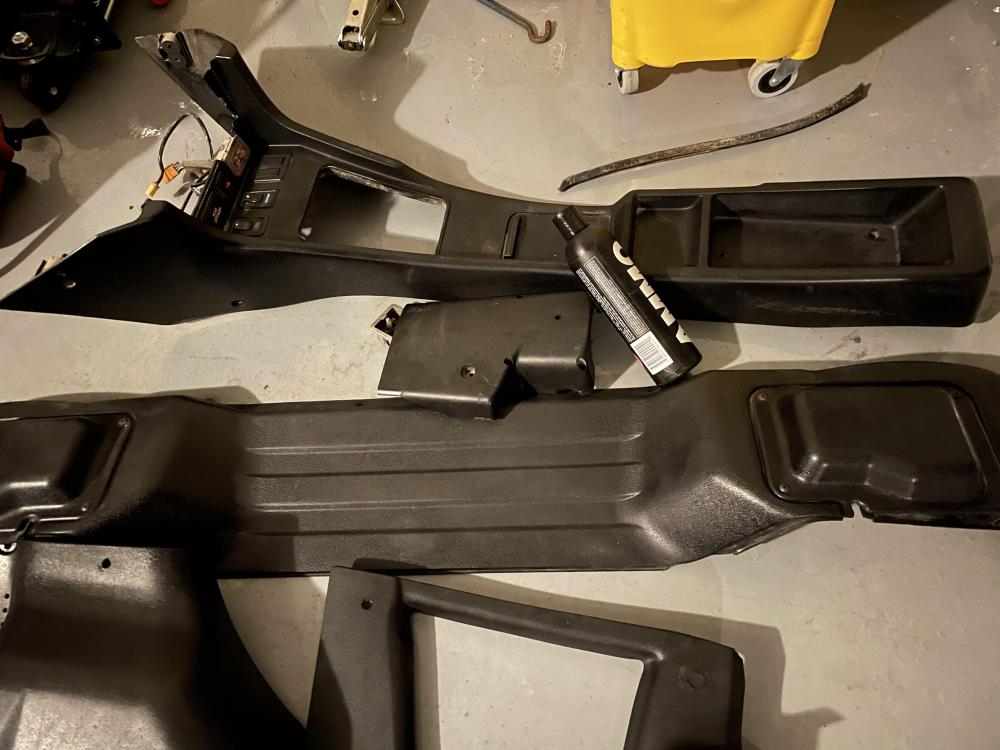
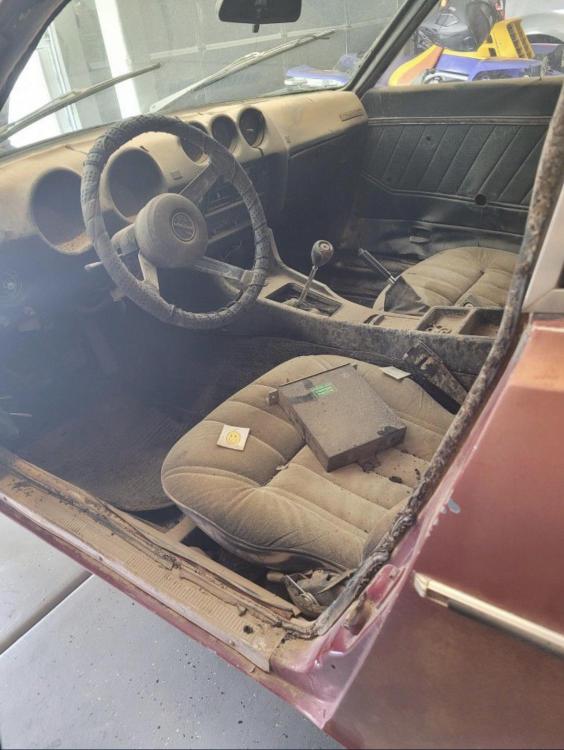
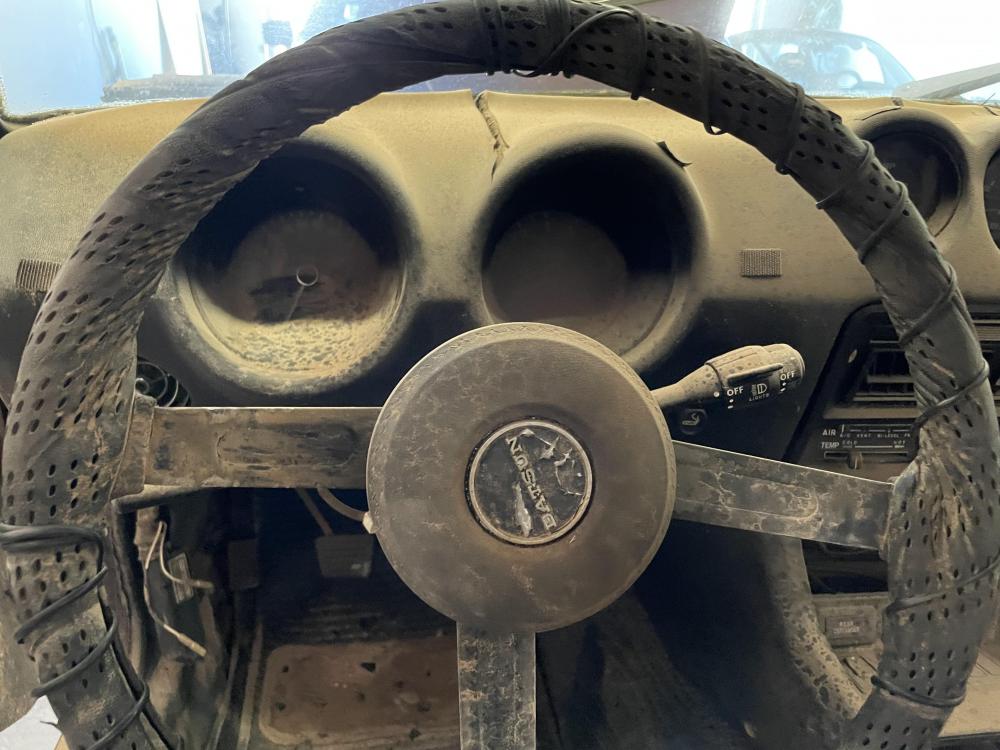
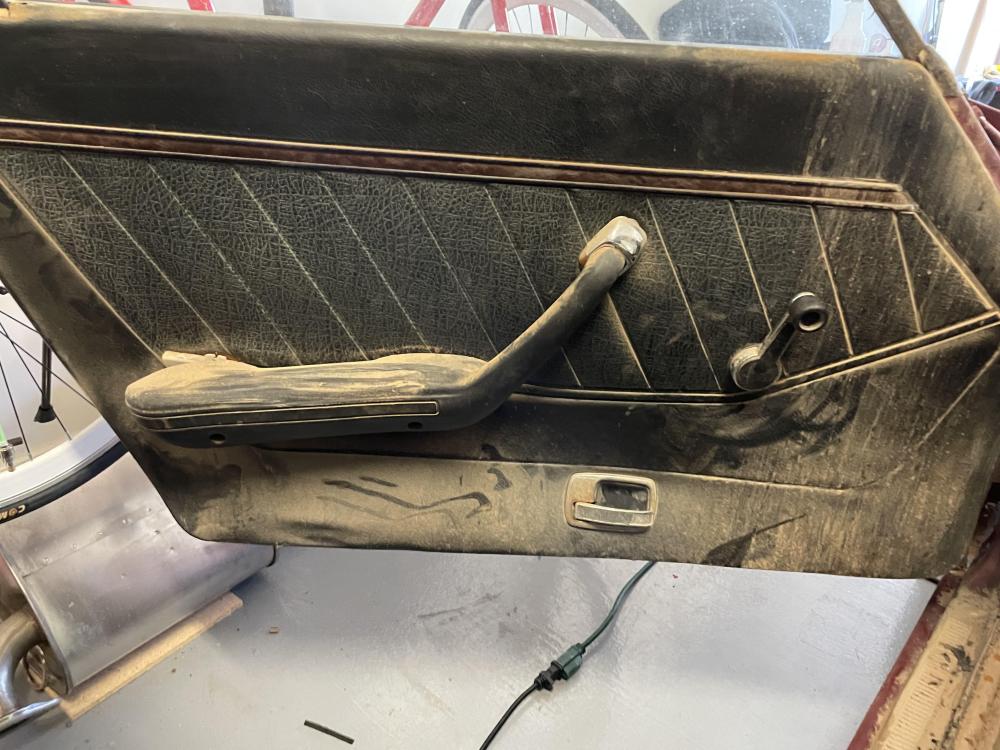
First order of business was to clean out the interior. I tore out all the panels and carpet to see what we were working with. 🤢 Drivers footwell has a few holes of rust: But the passenger side got the metal cancer pretty badly: This will be addressed at a later date, but its nice to see what I am working with. The trunk wasnt too bad, just some surface rust and that original blue: Some cleaning while I waited for parts: Maybe the dust acted as a UV Barrier 😂 Dash is out, cracked and crusty. I'll be ordering a new cap soon: But for now, some elbow grease is good enough: Misc panels after a nice scrub:


-
I created a new thread to track the progress going forward:
-
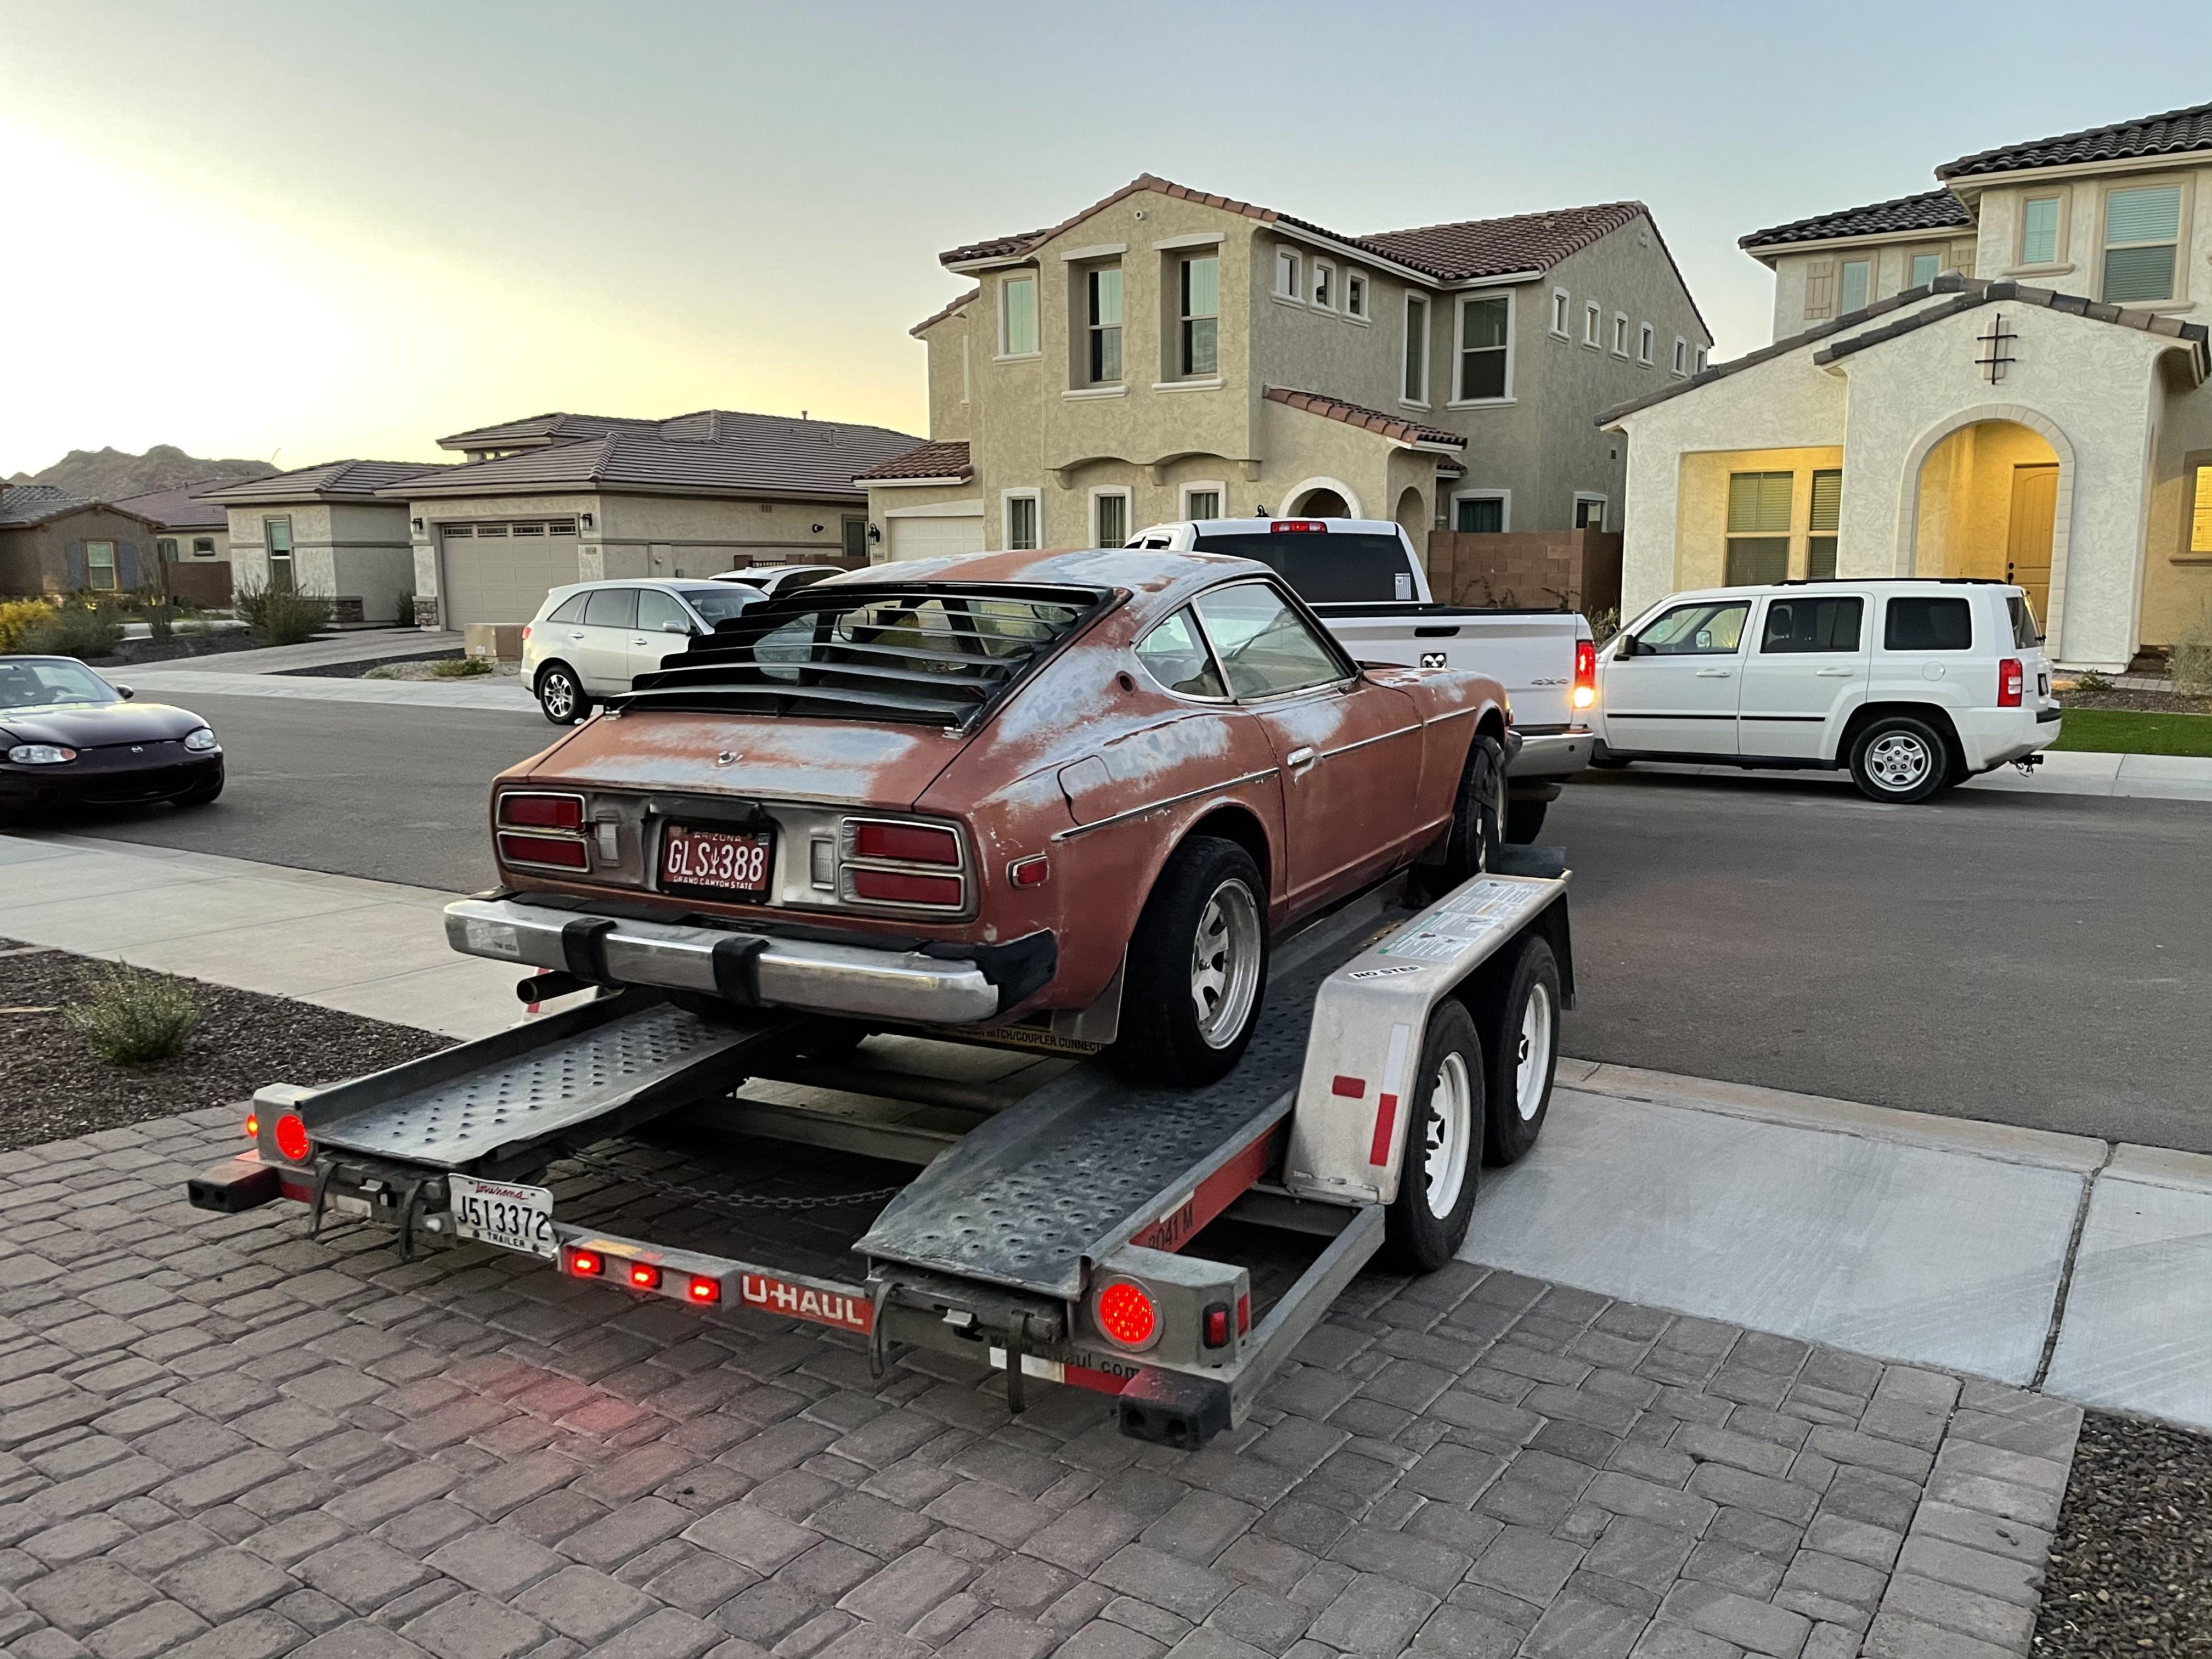
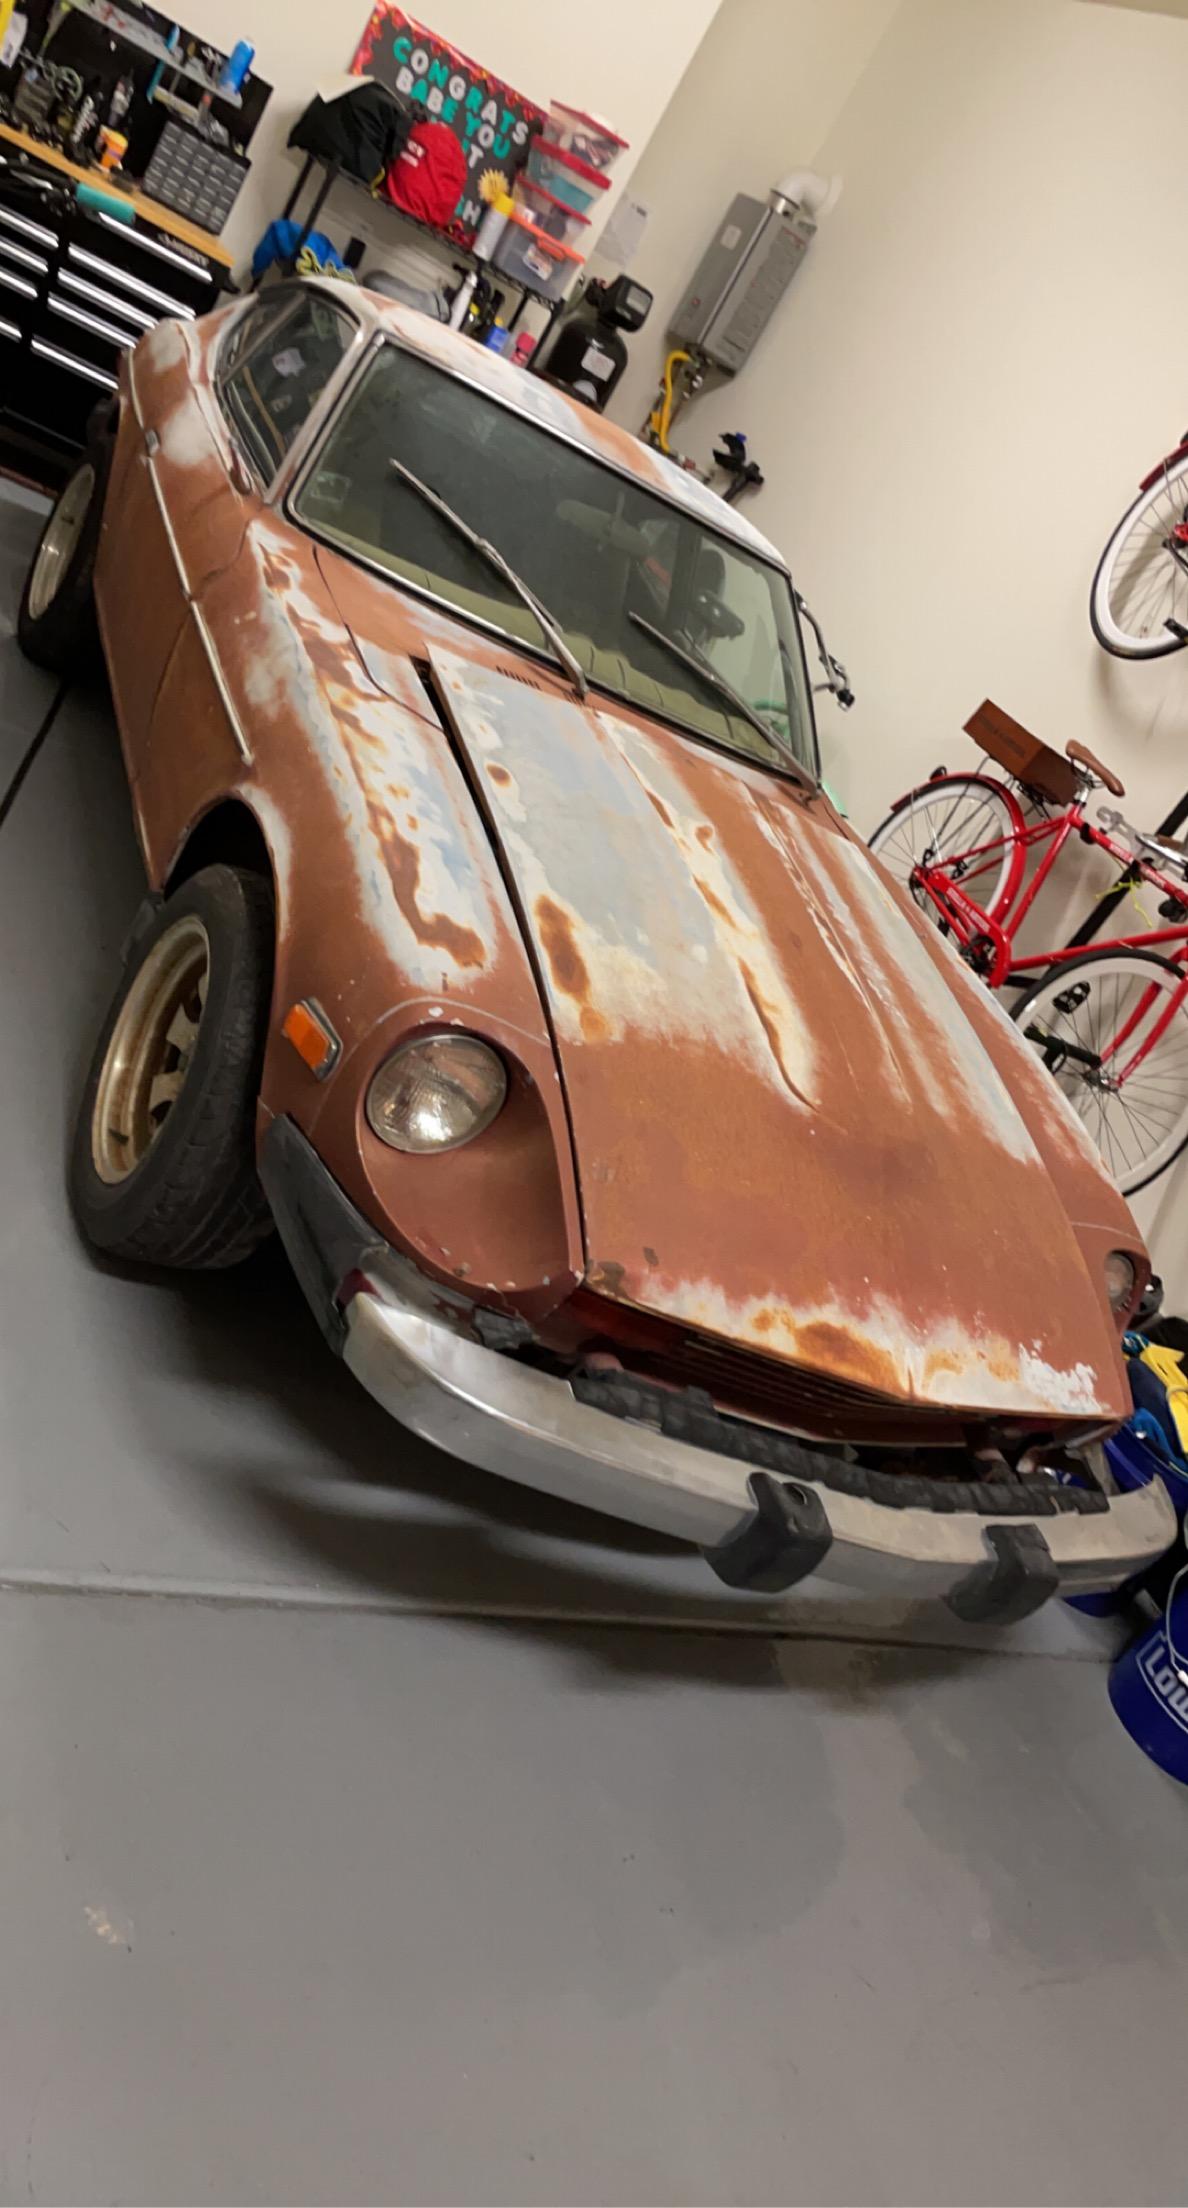
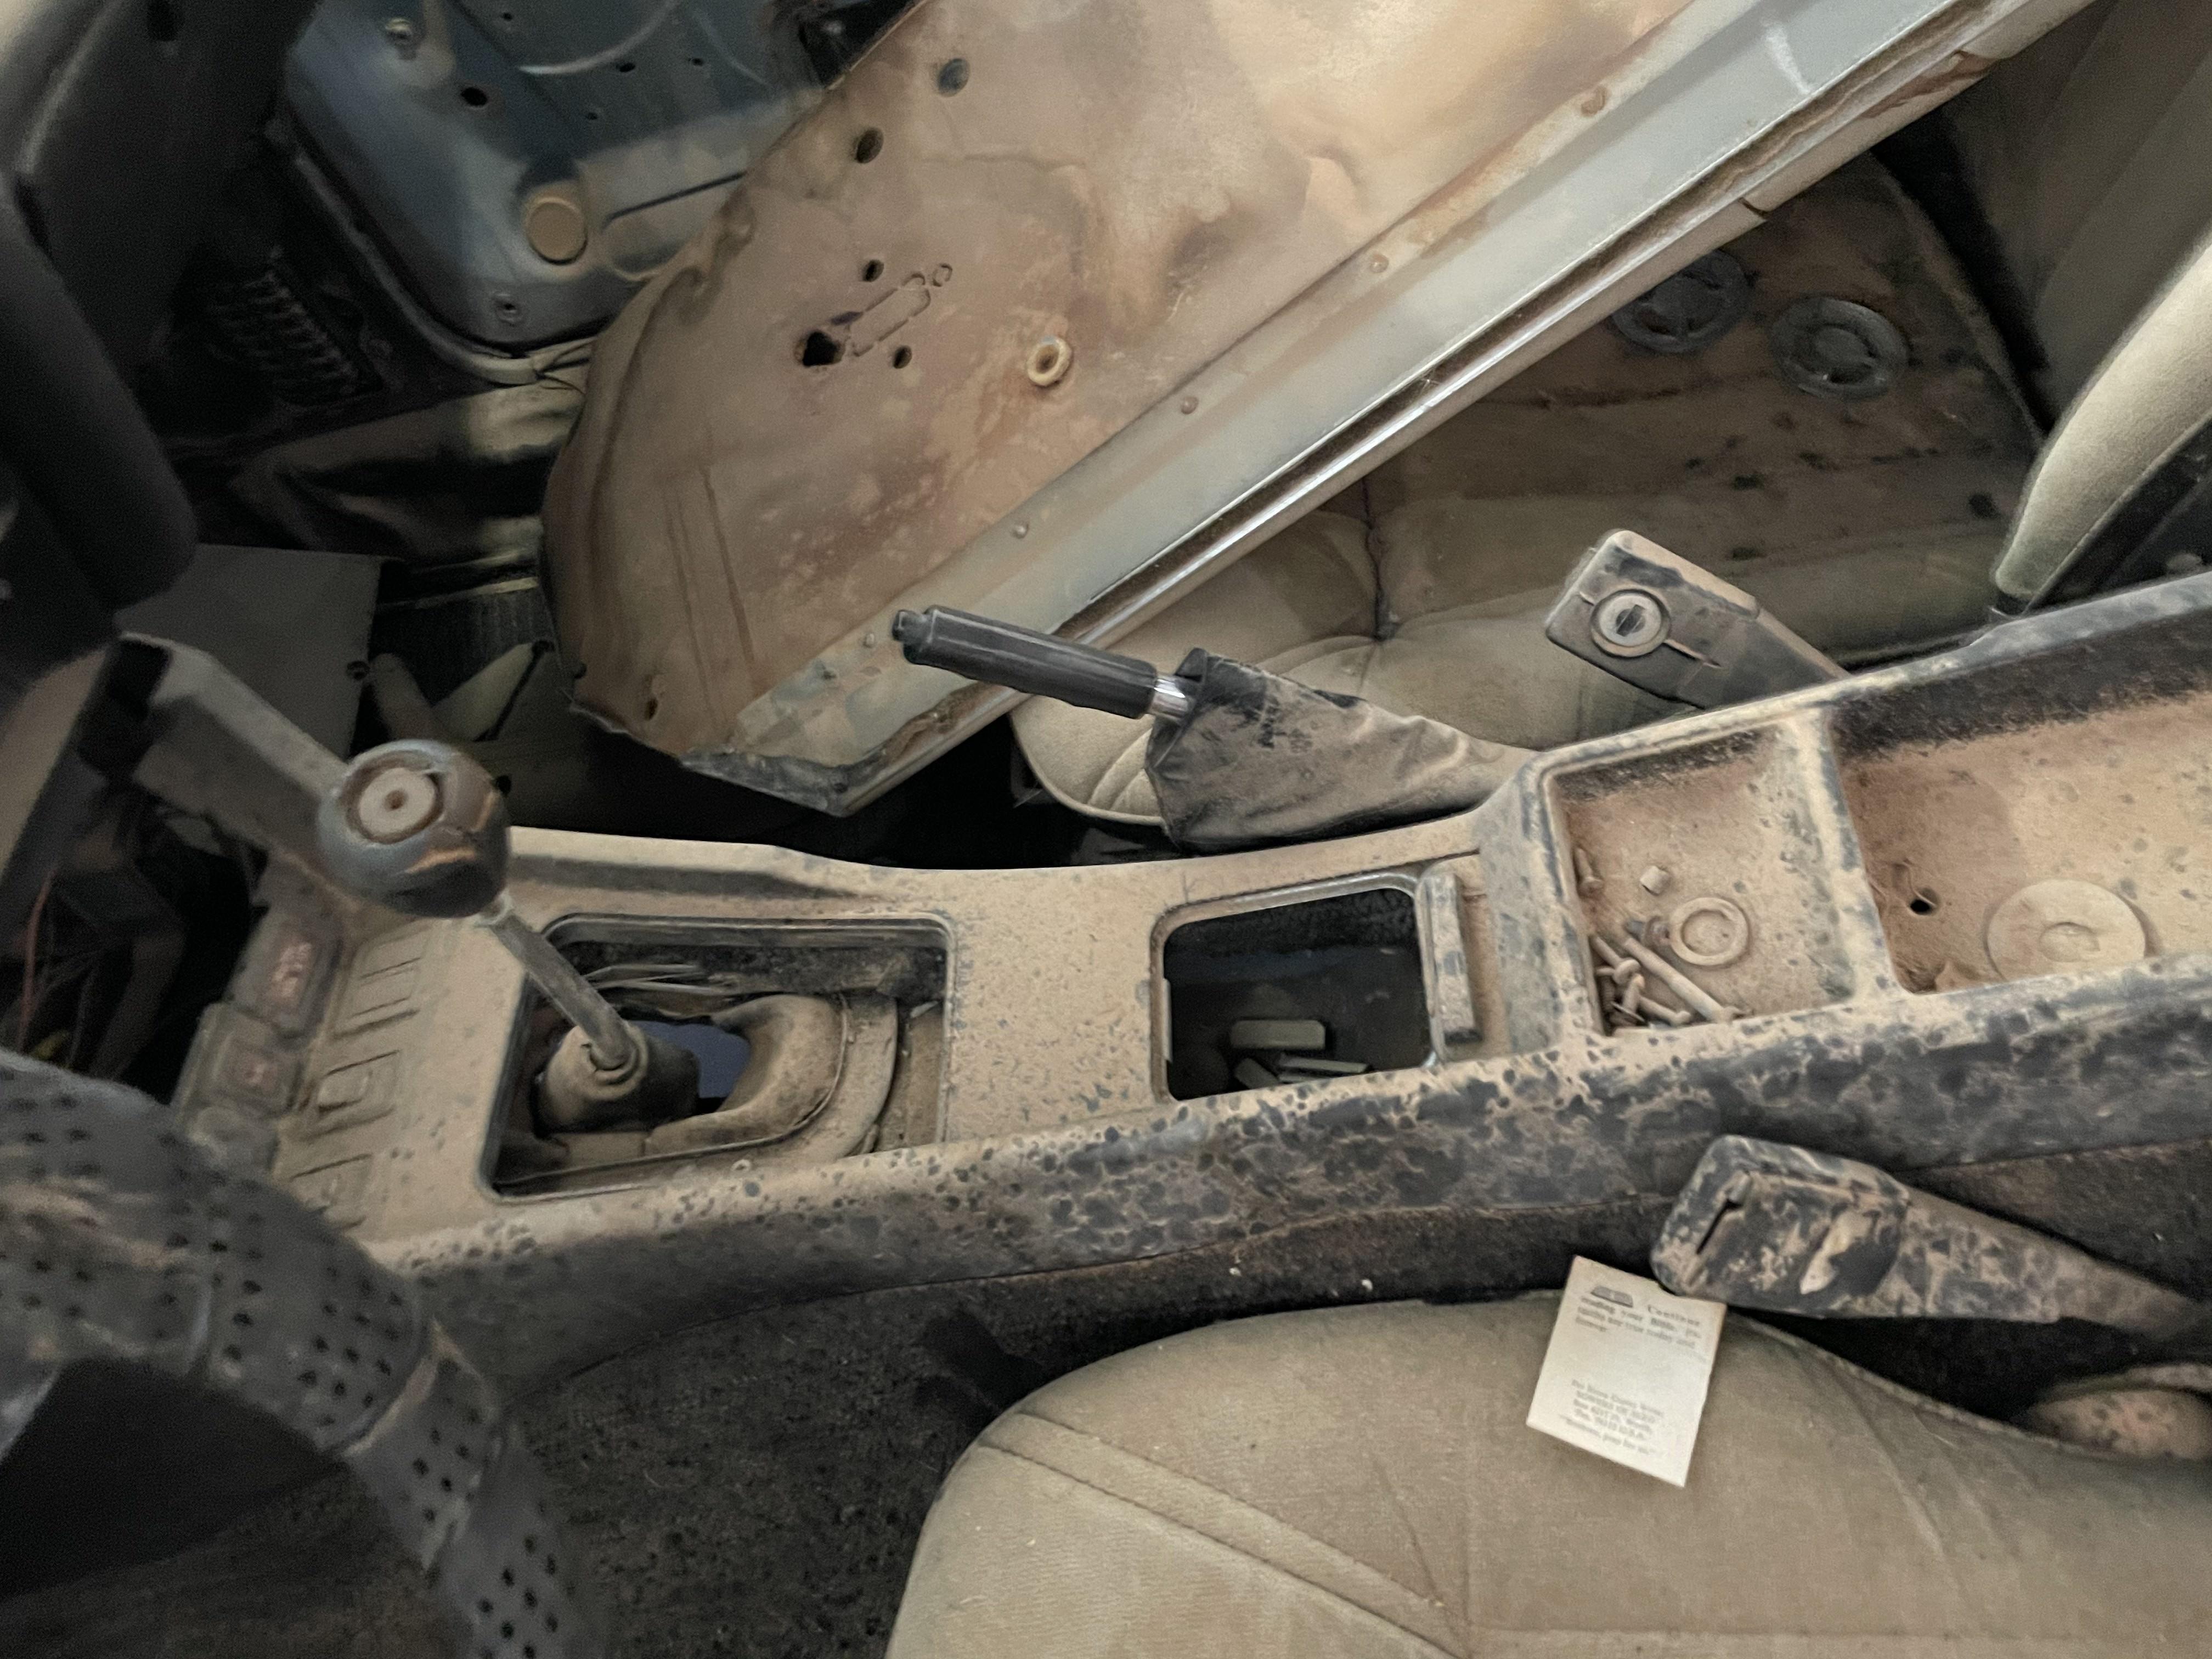
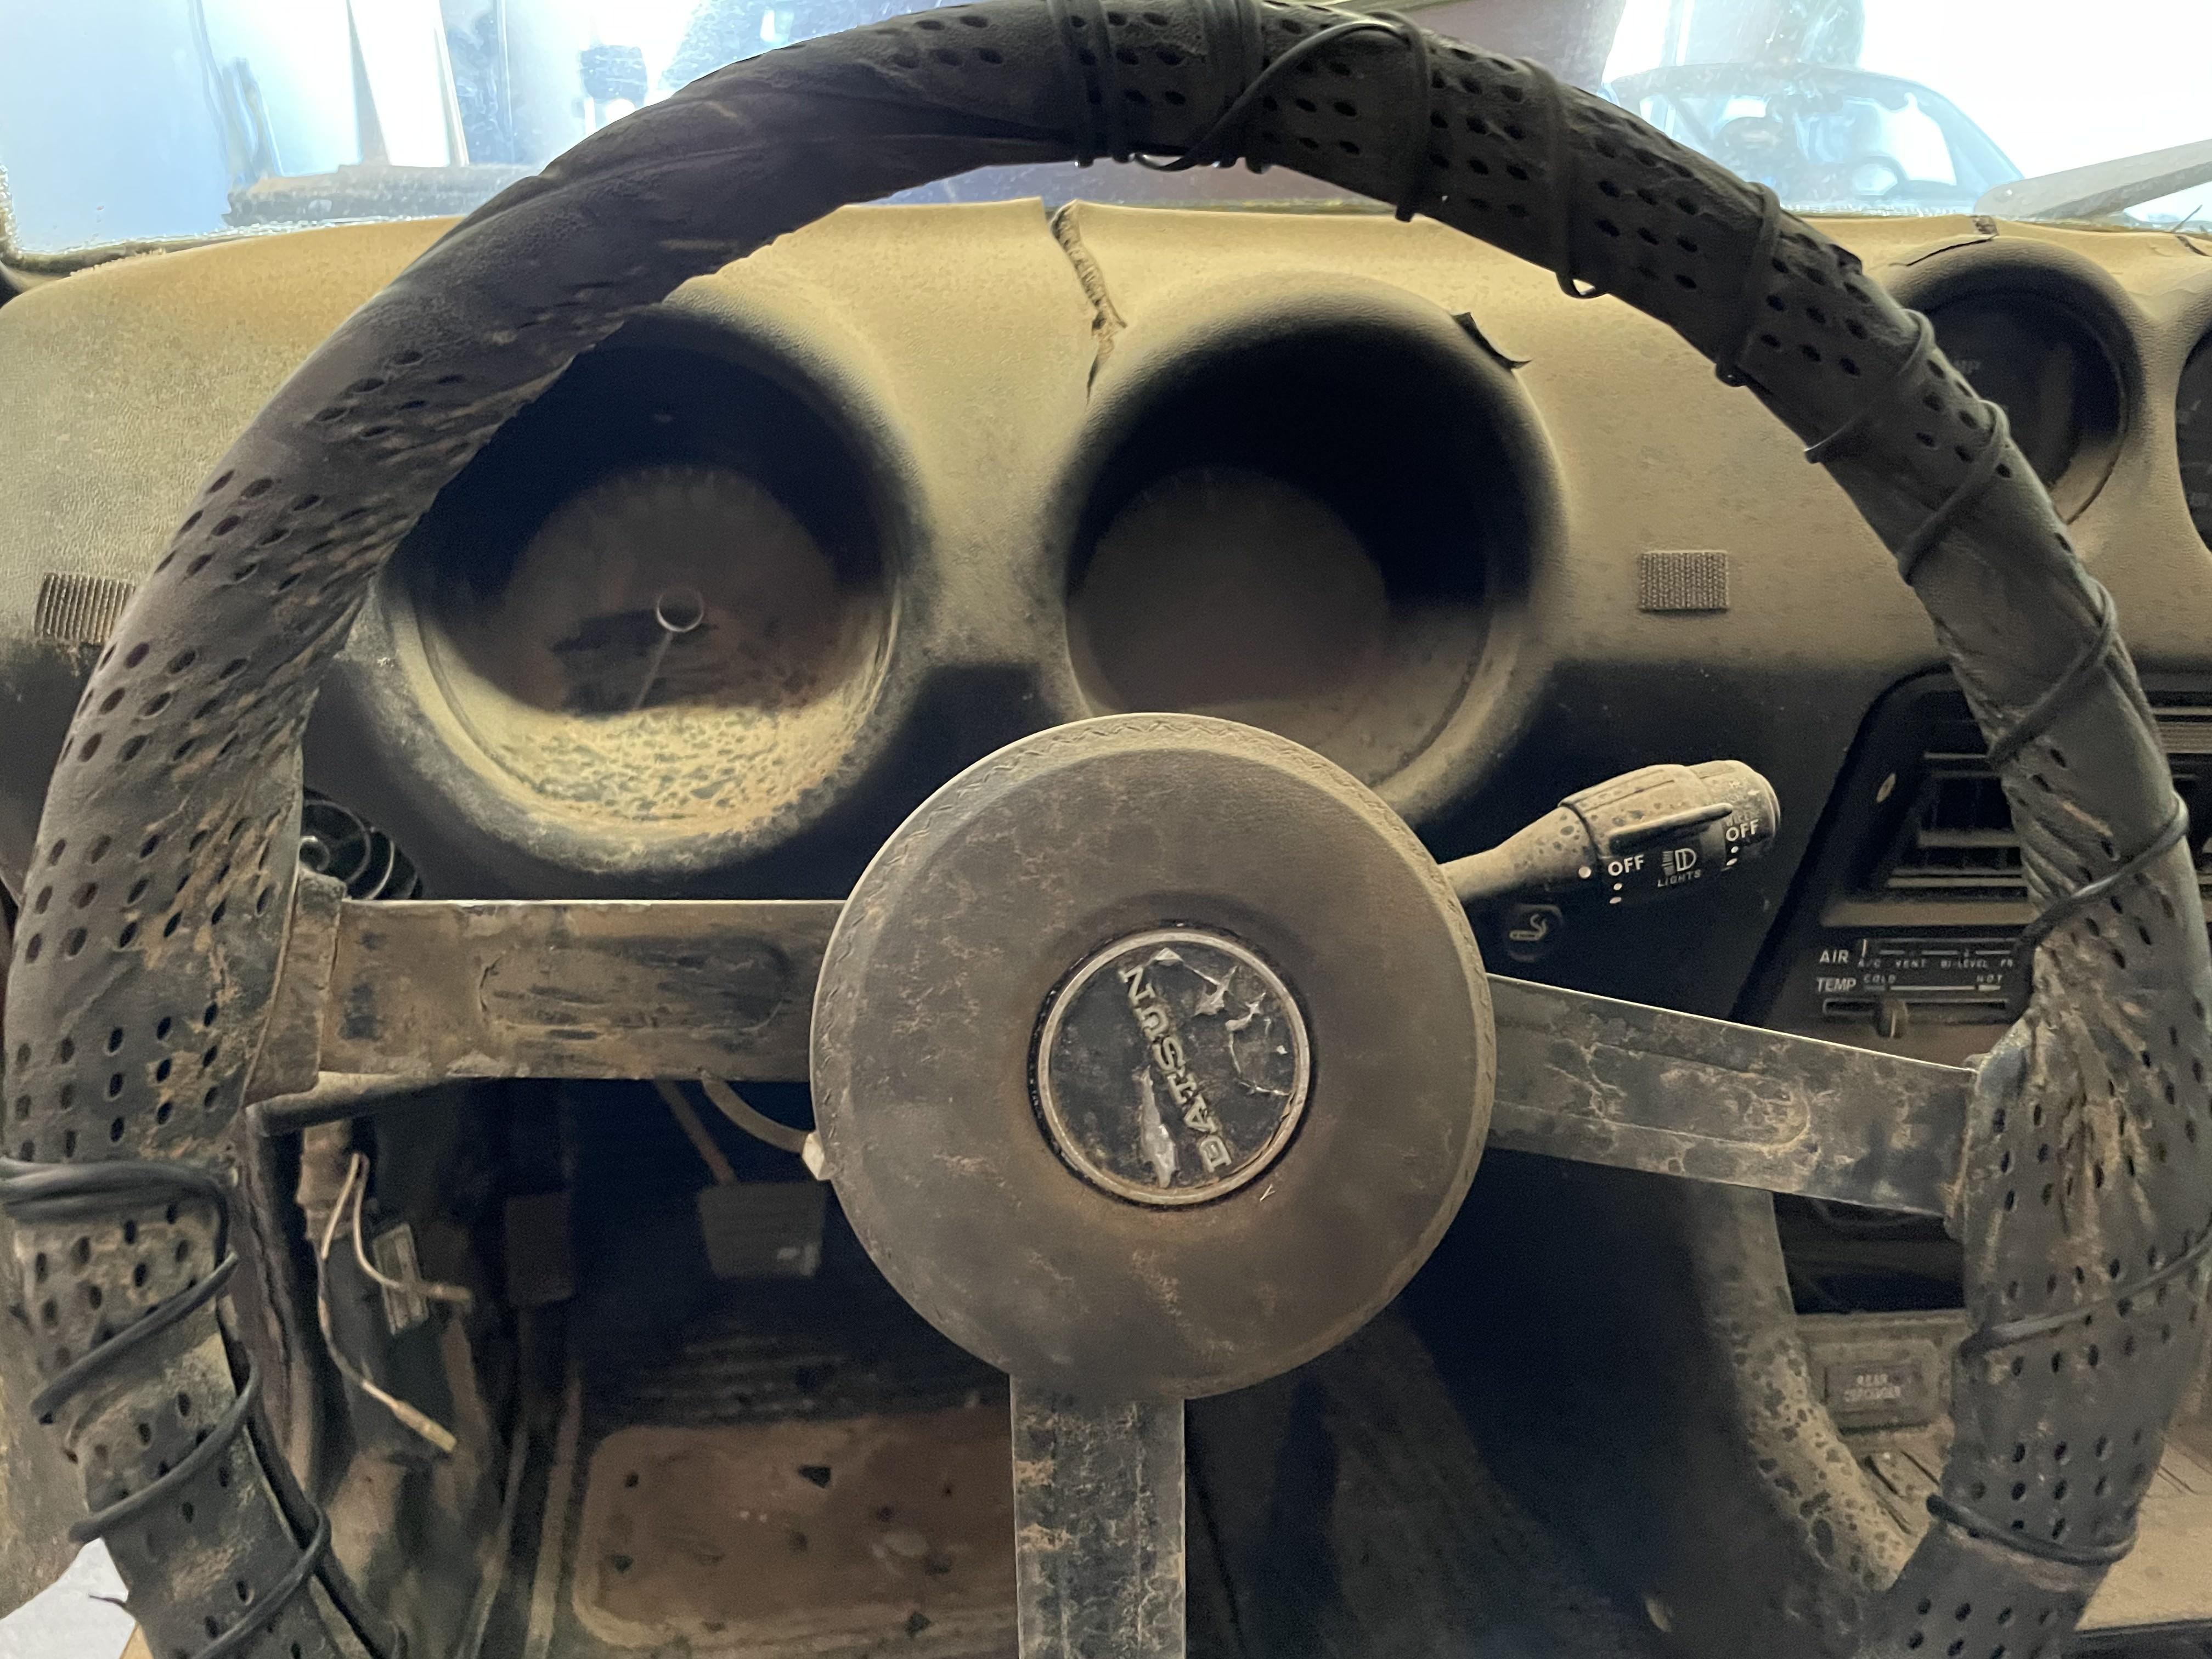
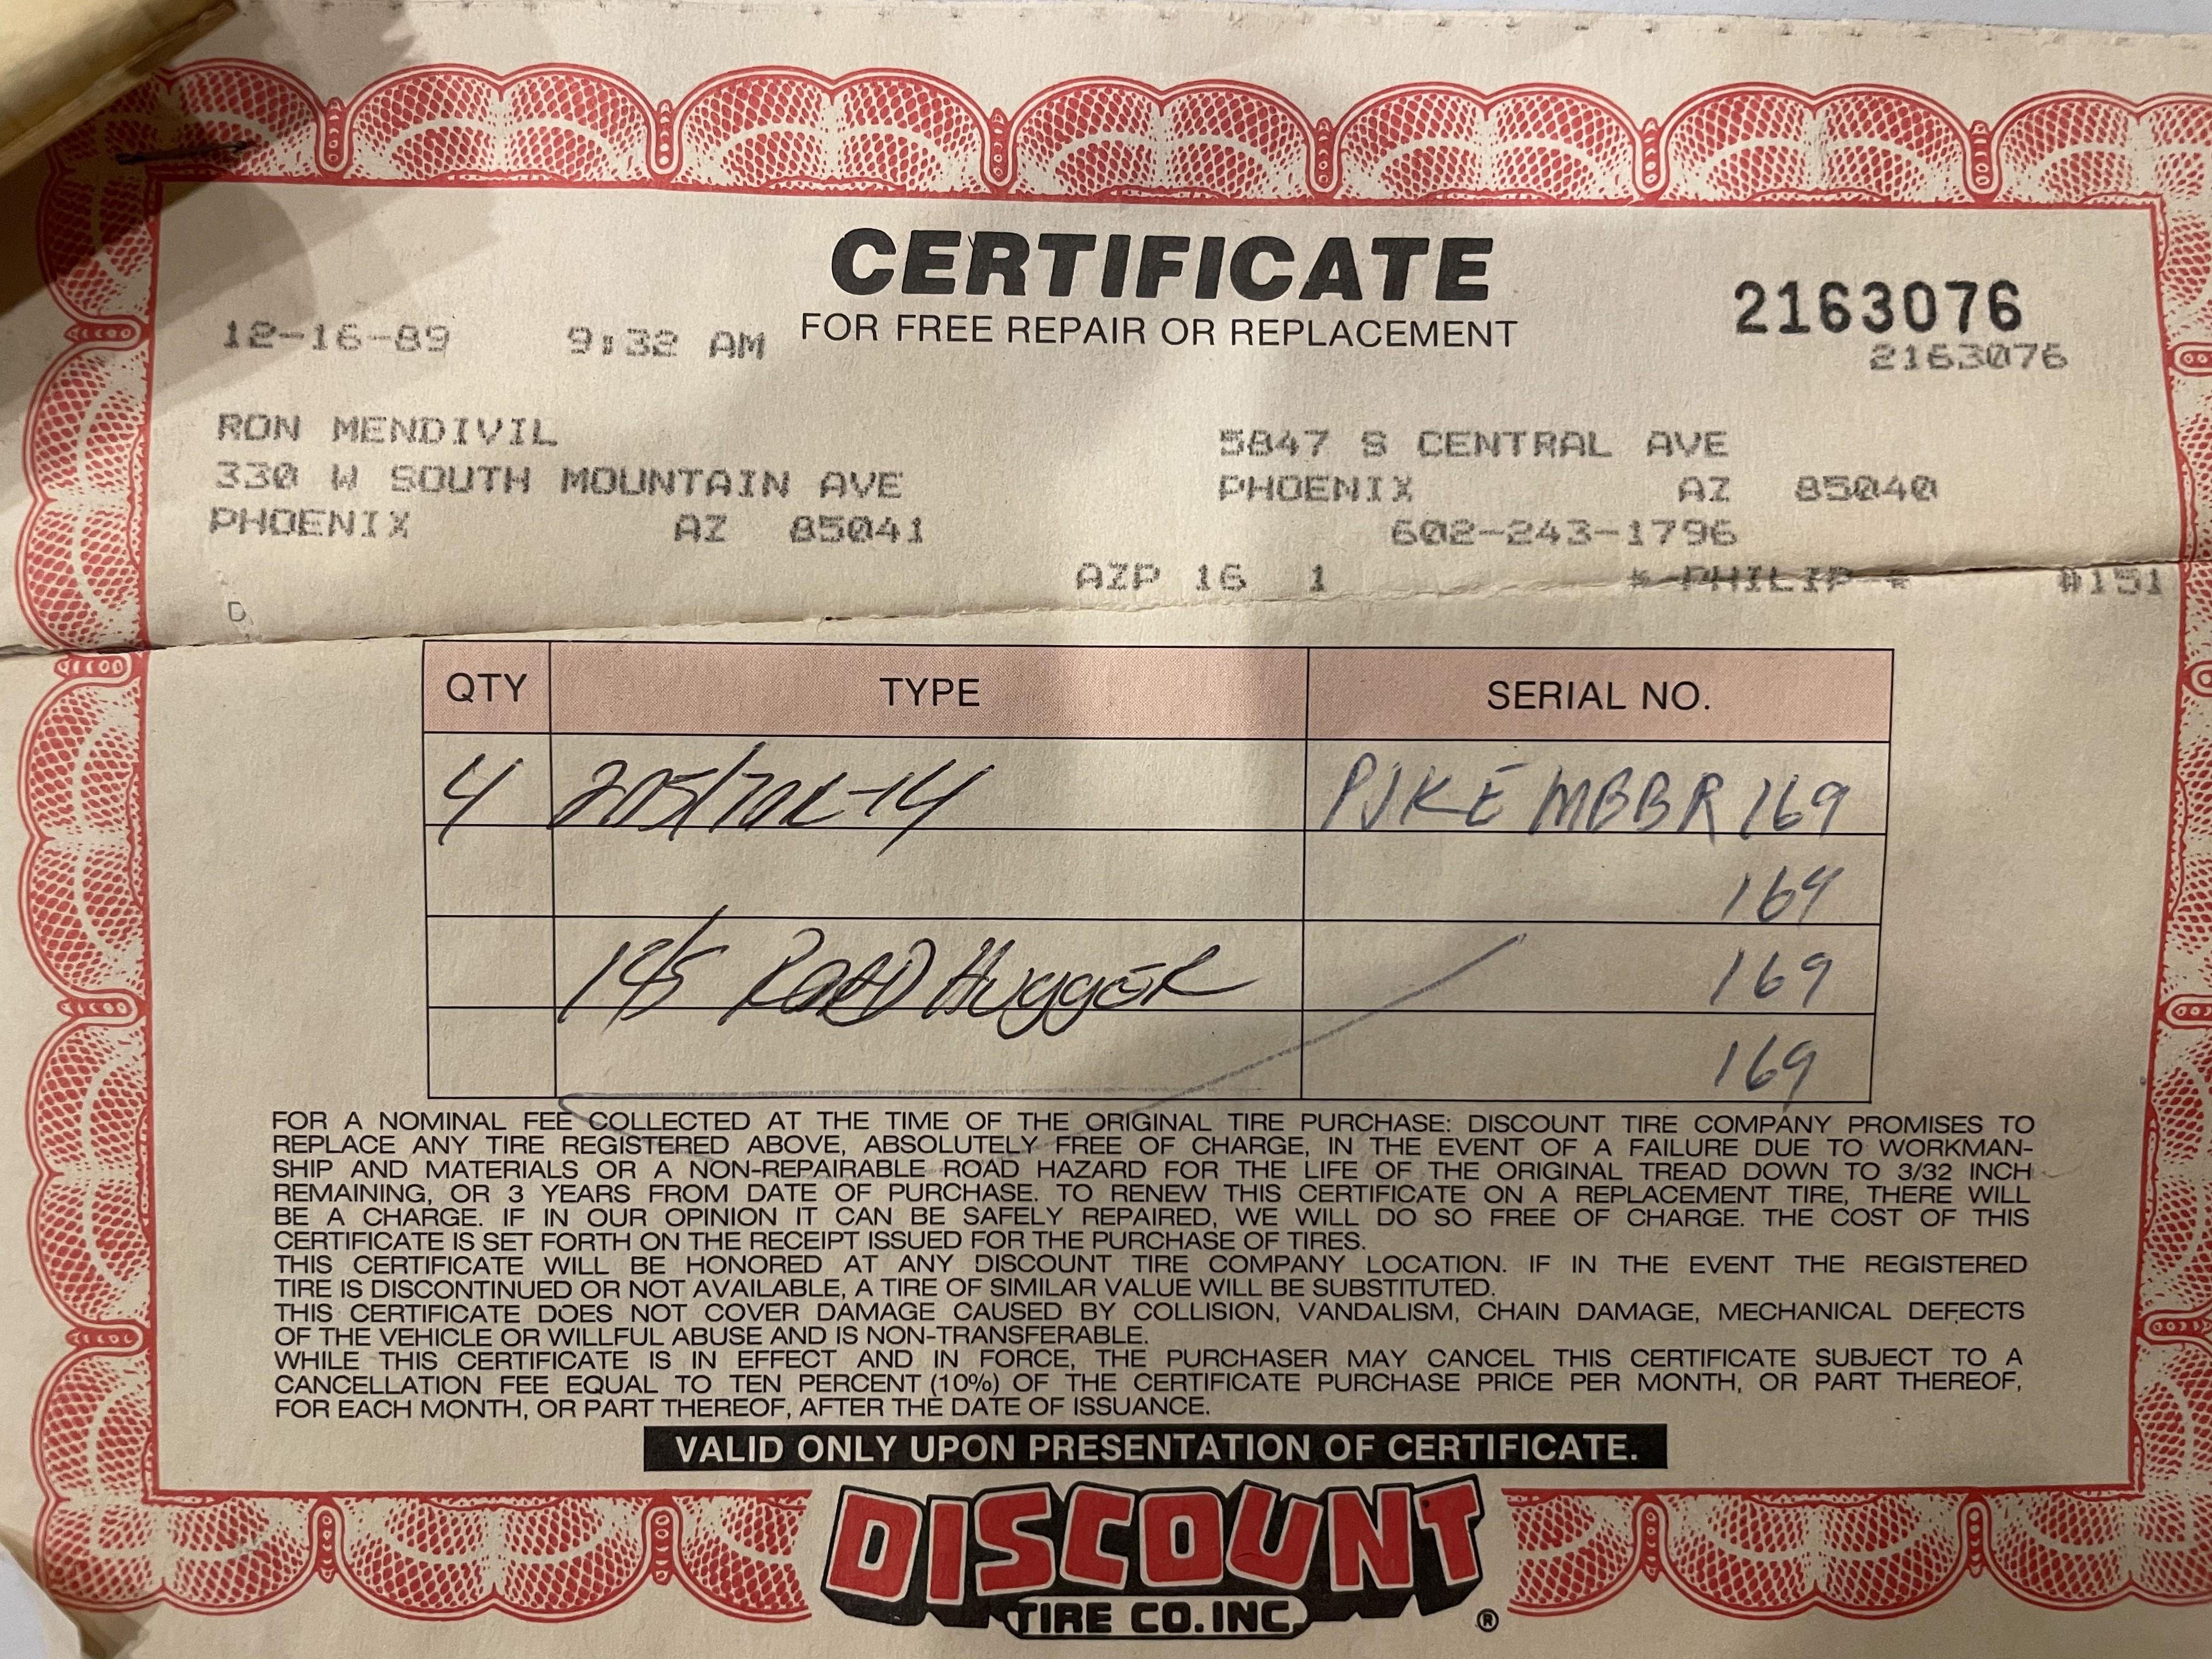
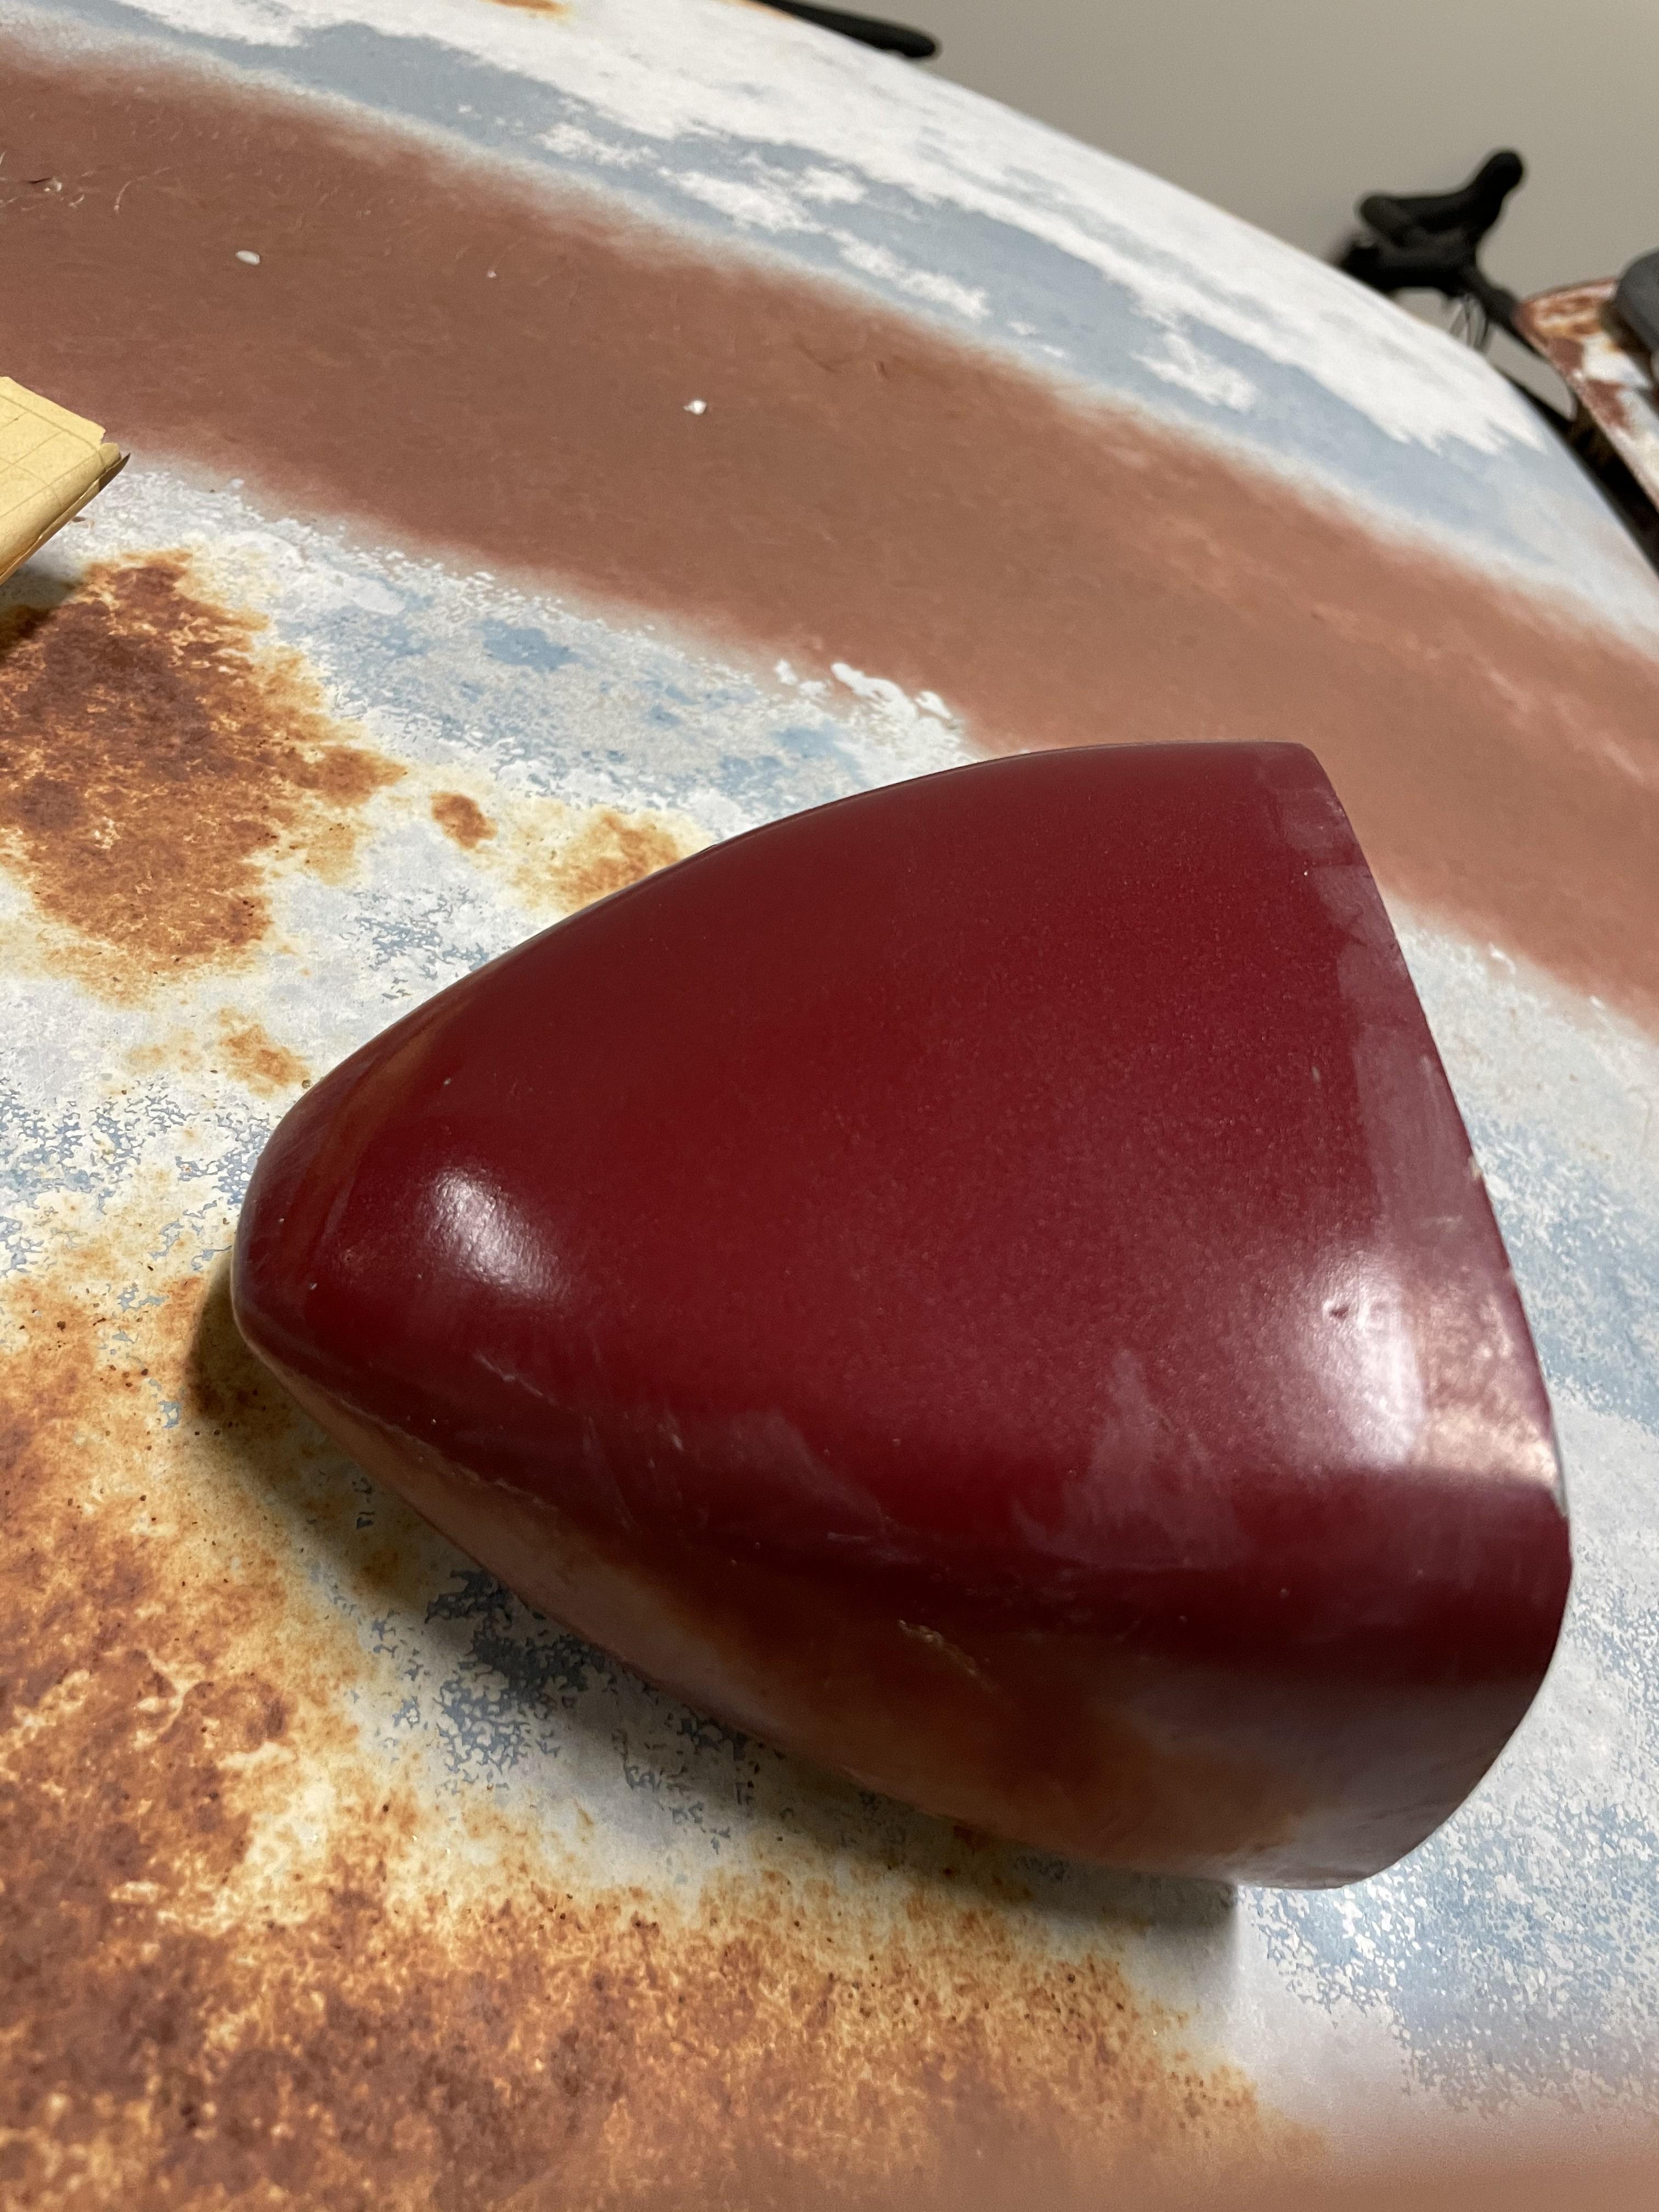
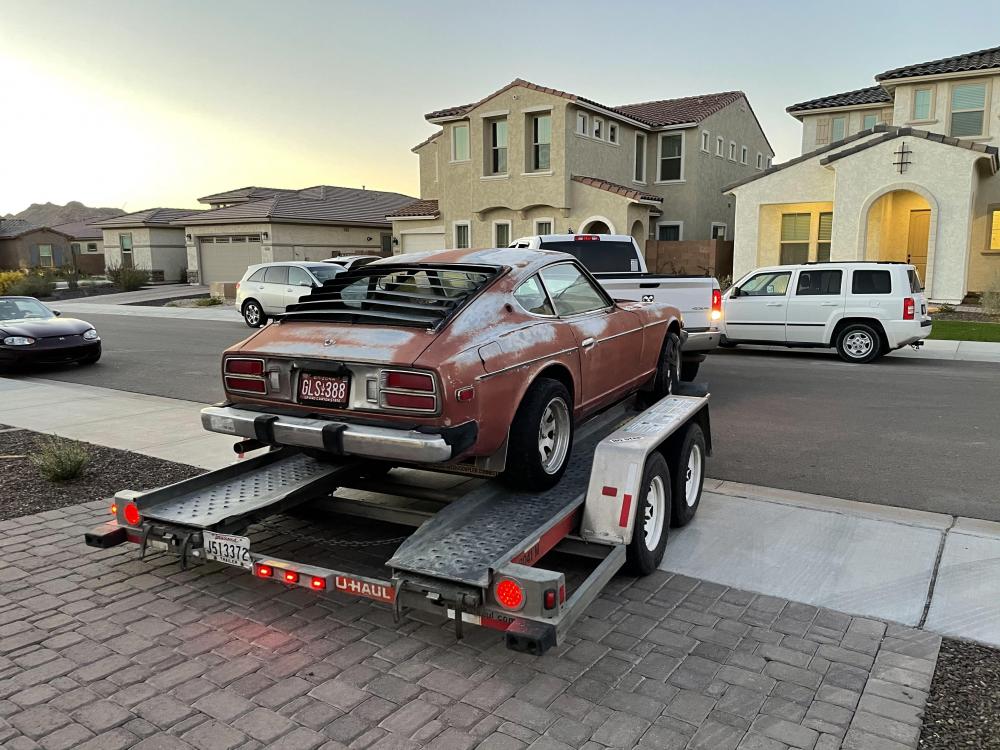
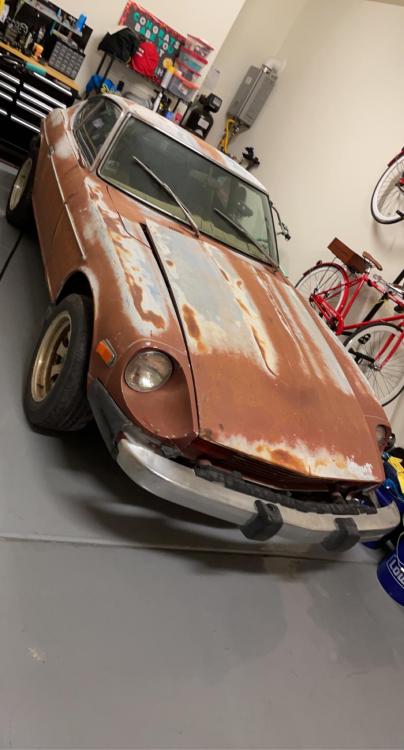
Well after spending the past month in the "Help Me!" section, my 1975 280z lives! I figured it is a good time to start a build thread in the proper section to showcase my next steps. Lets see, where do we start? The story goes that this 1975 280z was an Arizona car for the majority of its life. The owner parked it sometime around 1993 (last registered tags) due to an "ignition issue". It certainly looks the part for sitting nearly 30 years. Odometer says 80k miles, but maybe this is 180k? Looks like it was the silver blue originally then repainted, and finally the fading took over. The engine turned freely and nothing seemed to be seized. It was a clean title and only missing the key, an easy fix. Towed it home: And parked her to start tearing into it: The interior was coated in a nice layer of dust, the window was cracked down a few inches...so the weather made its way inside. The ECU was indeed on the chair like that! The speedometer was unreadable from the dust! But its all there which was nice. These cards will need a full replacement: Found some cool discount tire receipts from 1989 🙂 And the color it was SUPPOSED to be!


-
Yea, thats my main worry going into it. Maybe I'll stick with a good freshen up for now and worry about cams if I go with a stand alone.
-
I'll be sure to upload more soon. You'll get to see a chewed up cam bolt (definitely was not torqued down either!), healthy amounts of orange RTV, and soot... lots of soot. I do recall it is the N42 head. I'll take more close ups of each cylinder, walls, and valves too. I'm starting to get the "while im in there" syndrome. My suspicion is the same as yours with the over-rev. With how cylinder #3 rocker jumped on the lash pad, it seems like an ideal case.
-
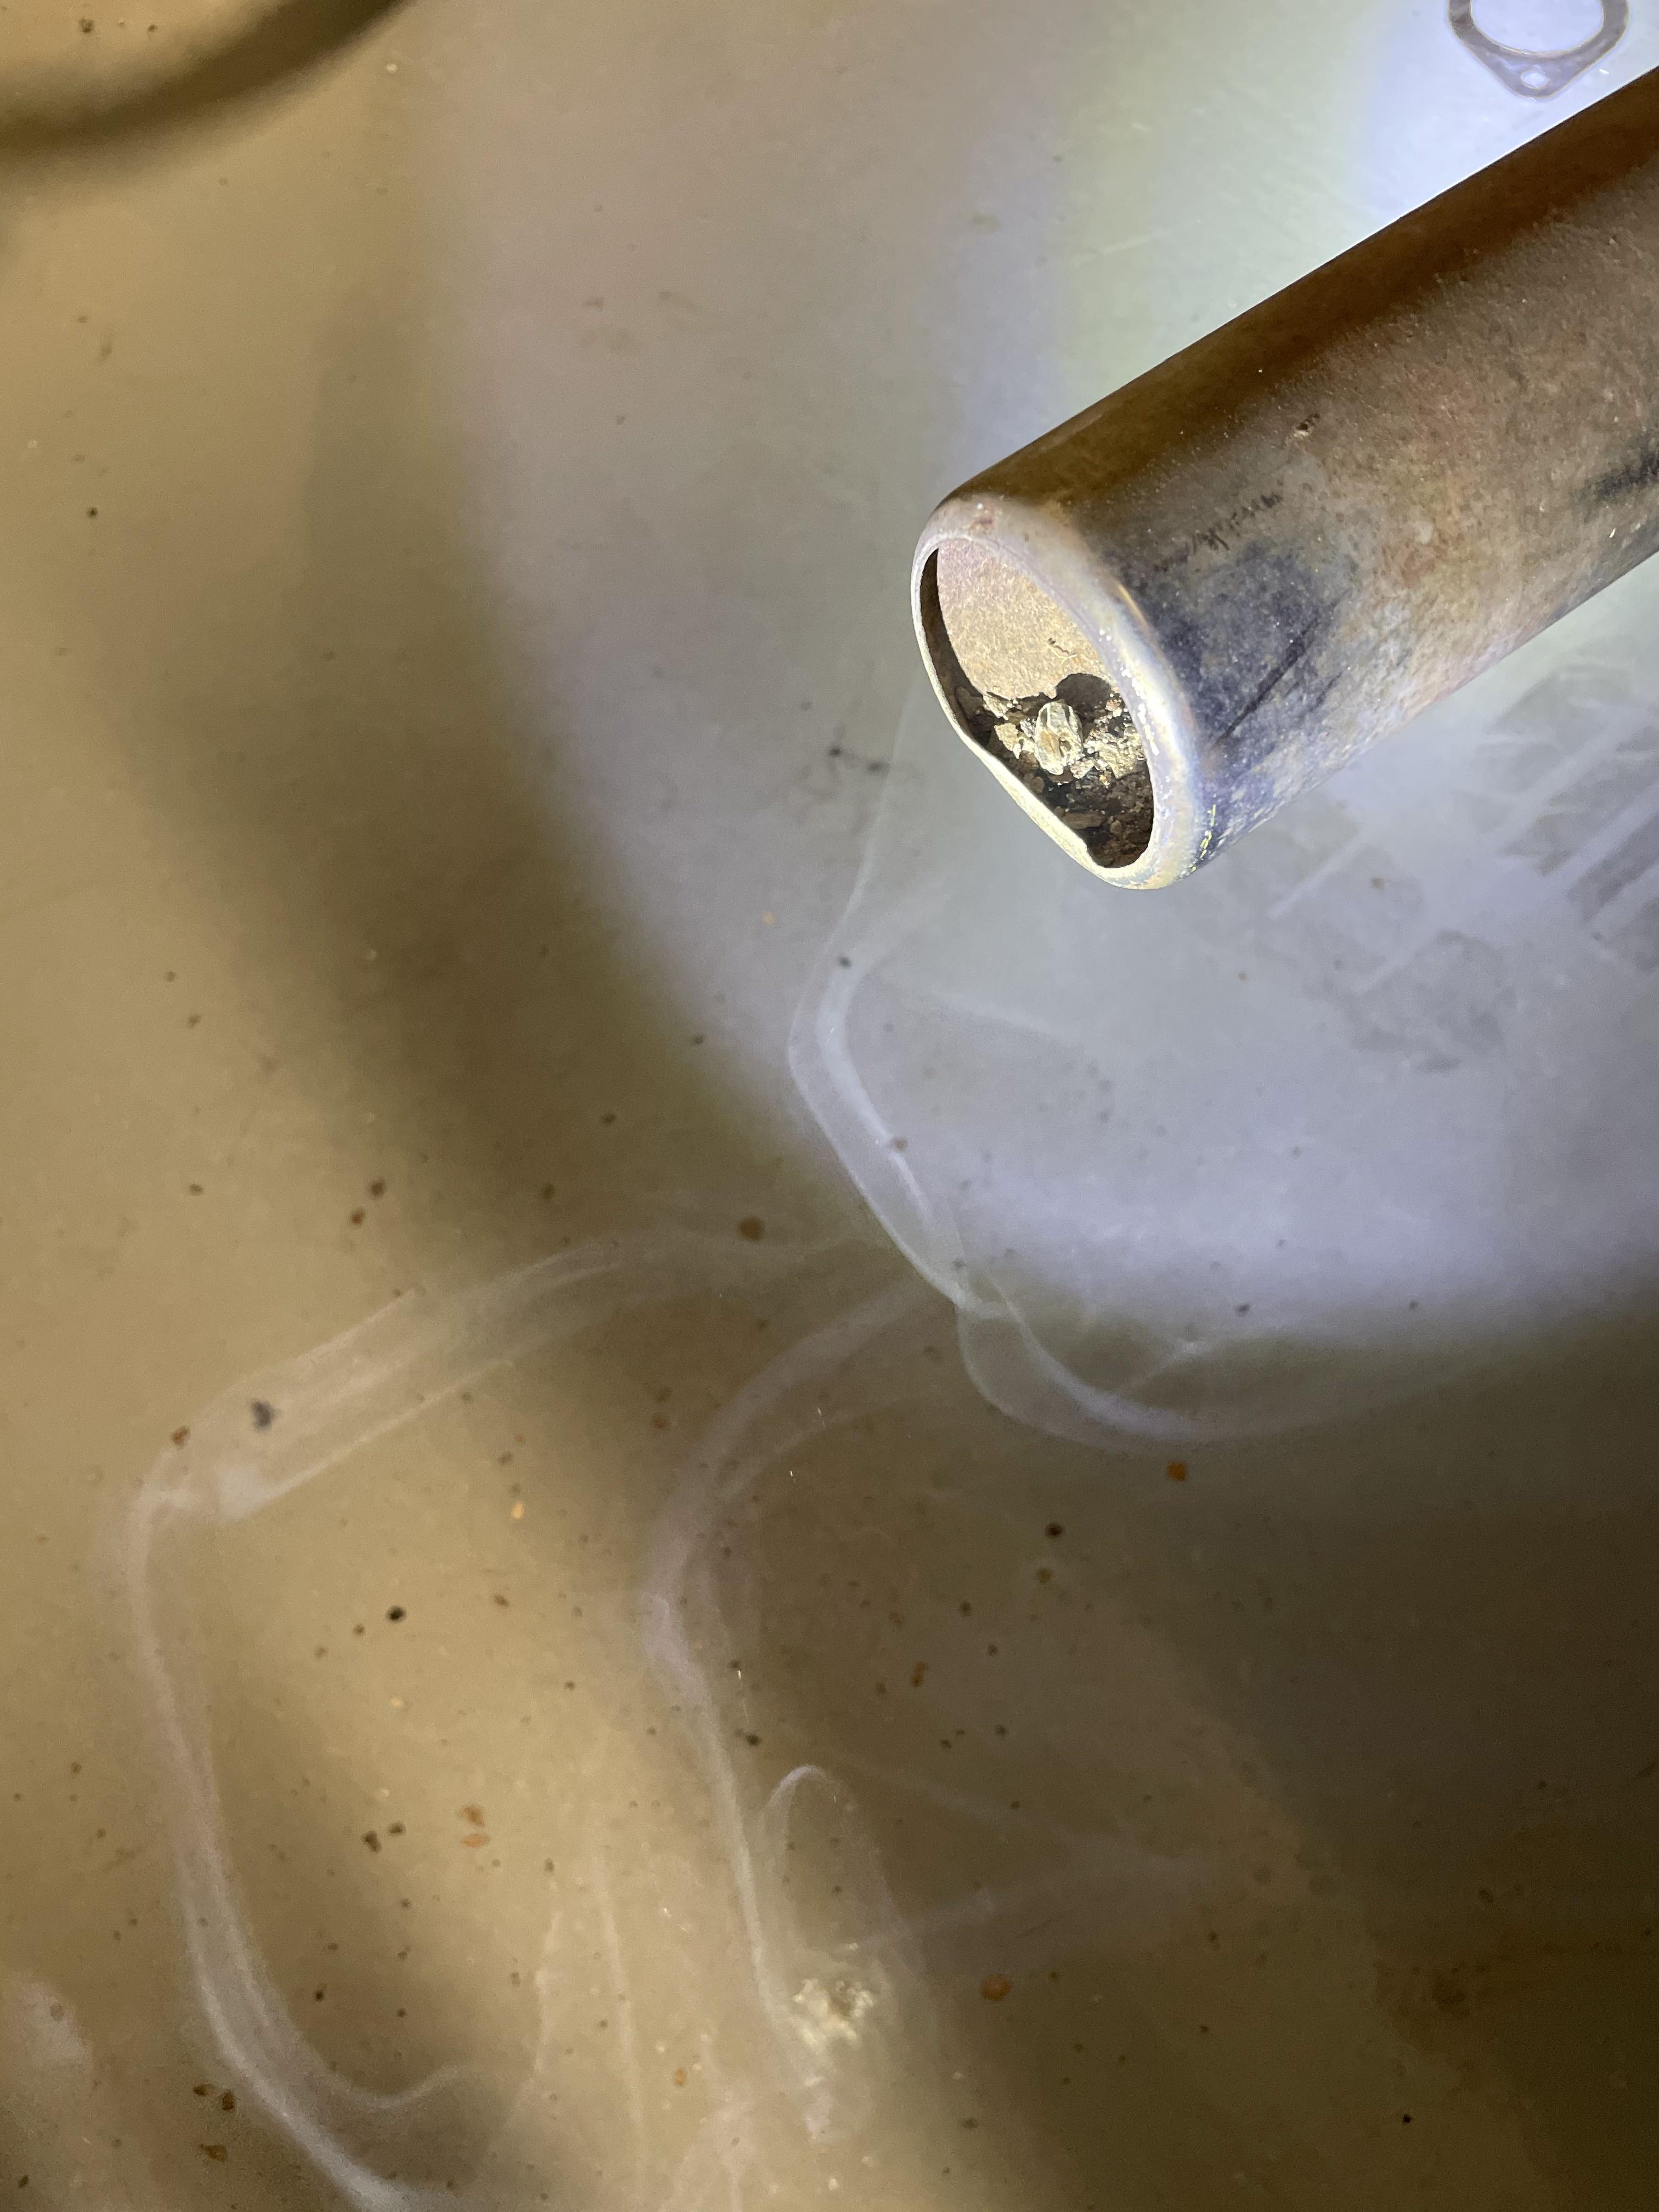
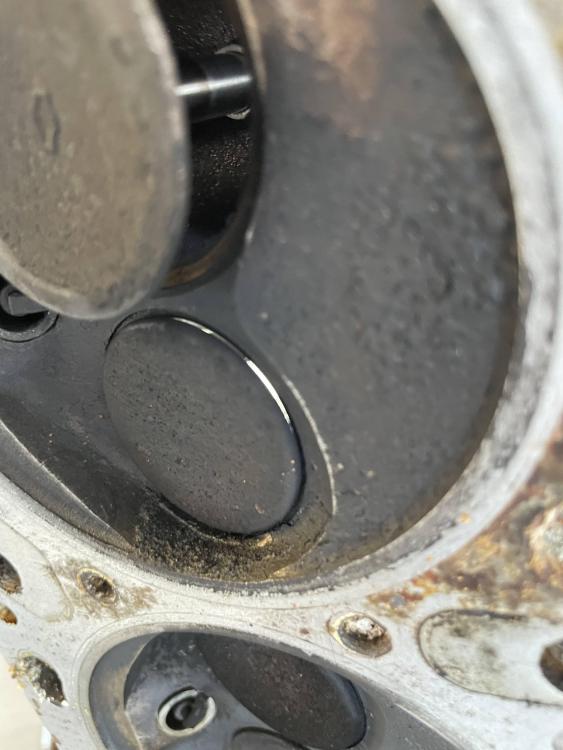
Long weekend and made tons of progress. There is no radiator, so cant fill it up with anything yet. But I was able to get it started easy everytime. Not sure exactly what the issue was, but I did fix the dizzy timing and now she runs great...for 5/6 cylinders. I verified I am still not getting compression in #3, and thats after the valve adjustments and running it for a handful of 1-minute runs. So off with the head! Glad I did so, nearly every bolt minus the head studs were not torqued. Maybe this is a blessing in disguise as taking the manifolds off was cake. No seized bolts, which was my big worry. The coolant passages are rough too so I am glad I took this off. I think I will start a build thread, but this thread deserves some pics first! Here is the block with the head off. Everything looked good, gasket was fairly fresh (i think) and no major issues that I spotted. Cylinder #3 was the problem child and I expected a larger "kiss" from the valve than what is there. I noticed that Cylinder #1 actually has a bigger impact from the valve. but it had compression. Now is my time to start thinking of how I want to approach this build. It will always be a weekend car, never tracked or daily. I am leaning towards a cam, headers, and maybe flat top pistons. I want to stick with the original EFI for now for cost, so I'll need to keep that in mind with my cam choice.


-
I got the distributor aligned correctly now. Only took a couple tries thankfully. New issue!! Got it started again today and ran it for about a minute before cutting it on purpose (no coolant yet, dont want to overheat). I went back to crank it and it doesnt even try to get going. This is the second time after the initial start that it wont run. It seems like sitting overnight is the only way to get it going. After that, its just endless cranks. I unplugged the injectors, gave it WOT, and it will run for a few seconds before sputtering out. My thought is it is getting flooded. But even after re-connecting the injectors, its a no-go. I unplug the injectors again, runs for a couple seconds. rinse and repeat. I can only get about a handful of attempts before my poor battery gives out and I need to wait for the charger to give it back some juice. Thoughts?
-
Oh thats right! isnt the cold start valve only getting a signal while cranking? So just the initial start. Good point
-
Im fairly new to the 280z world myself and currently working on getting mine running. But a thought could be the cold start valve or thermotime switch? Checking with a multimeter would be a good start.
-
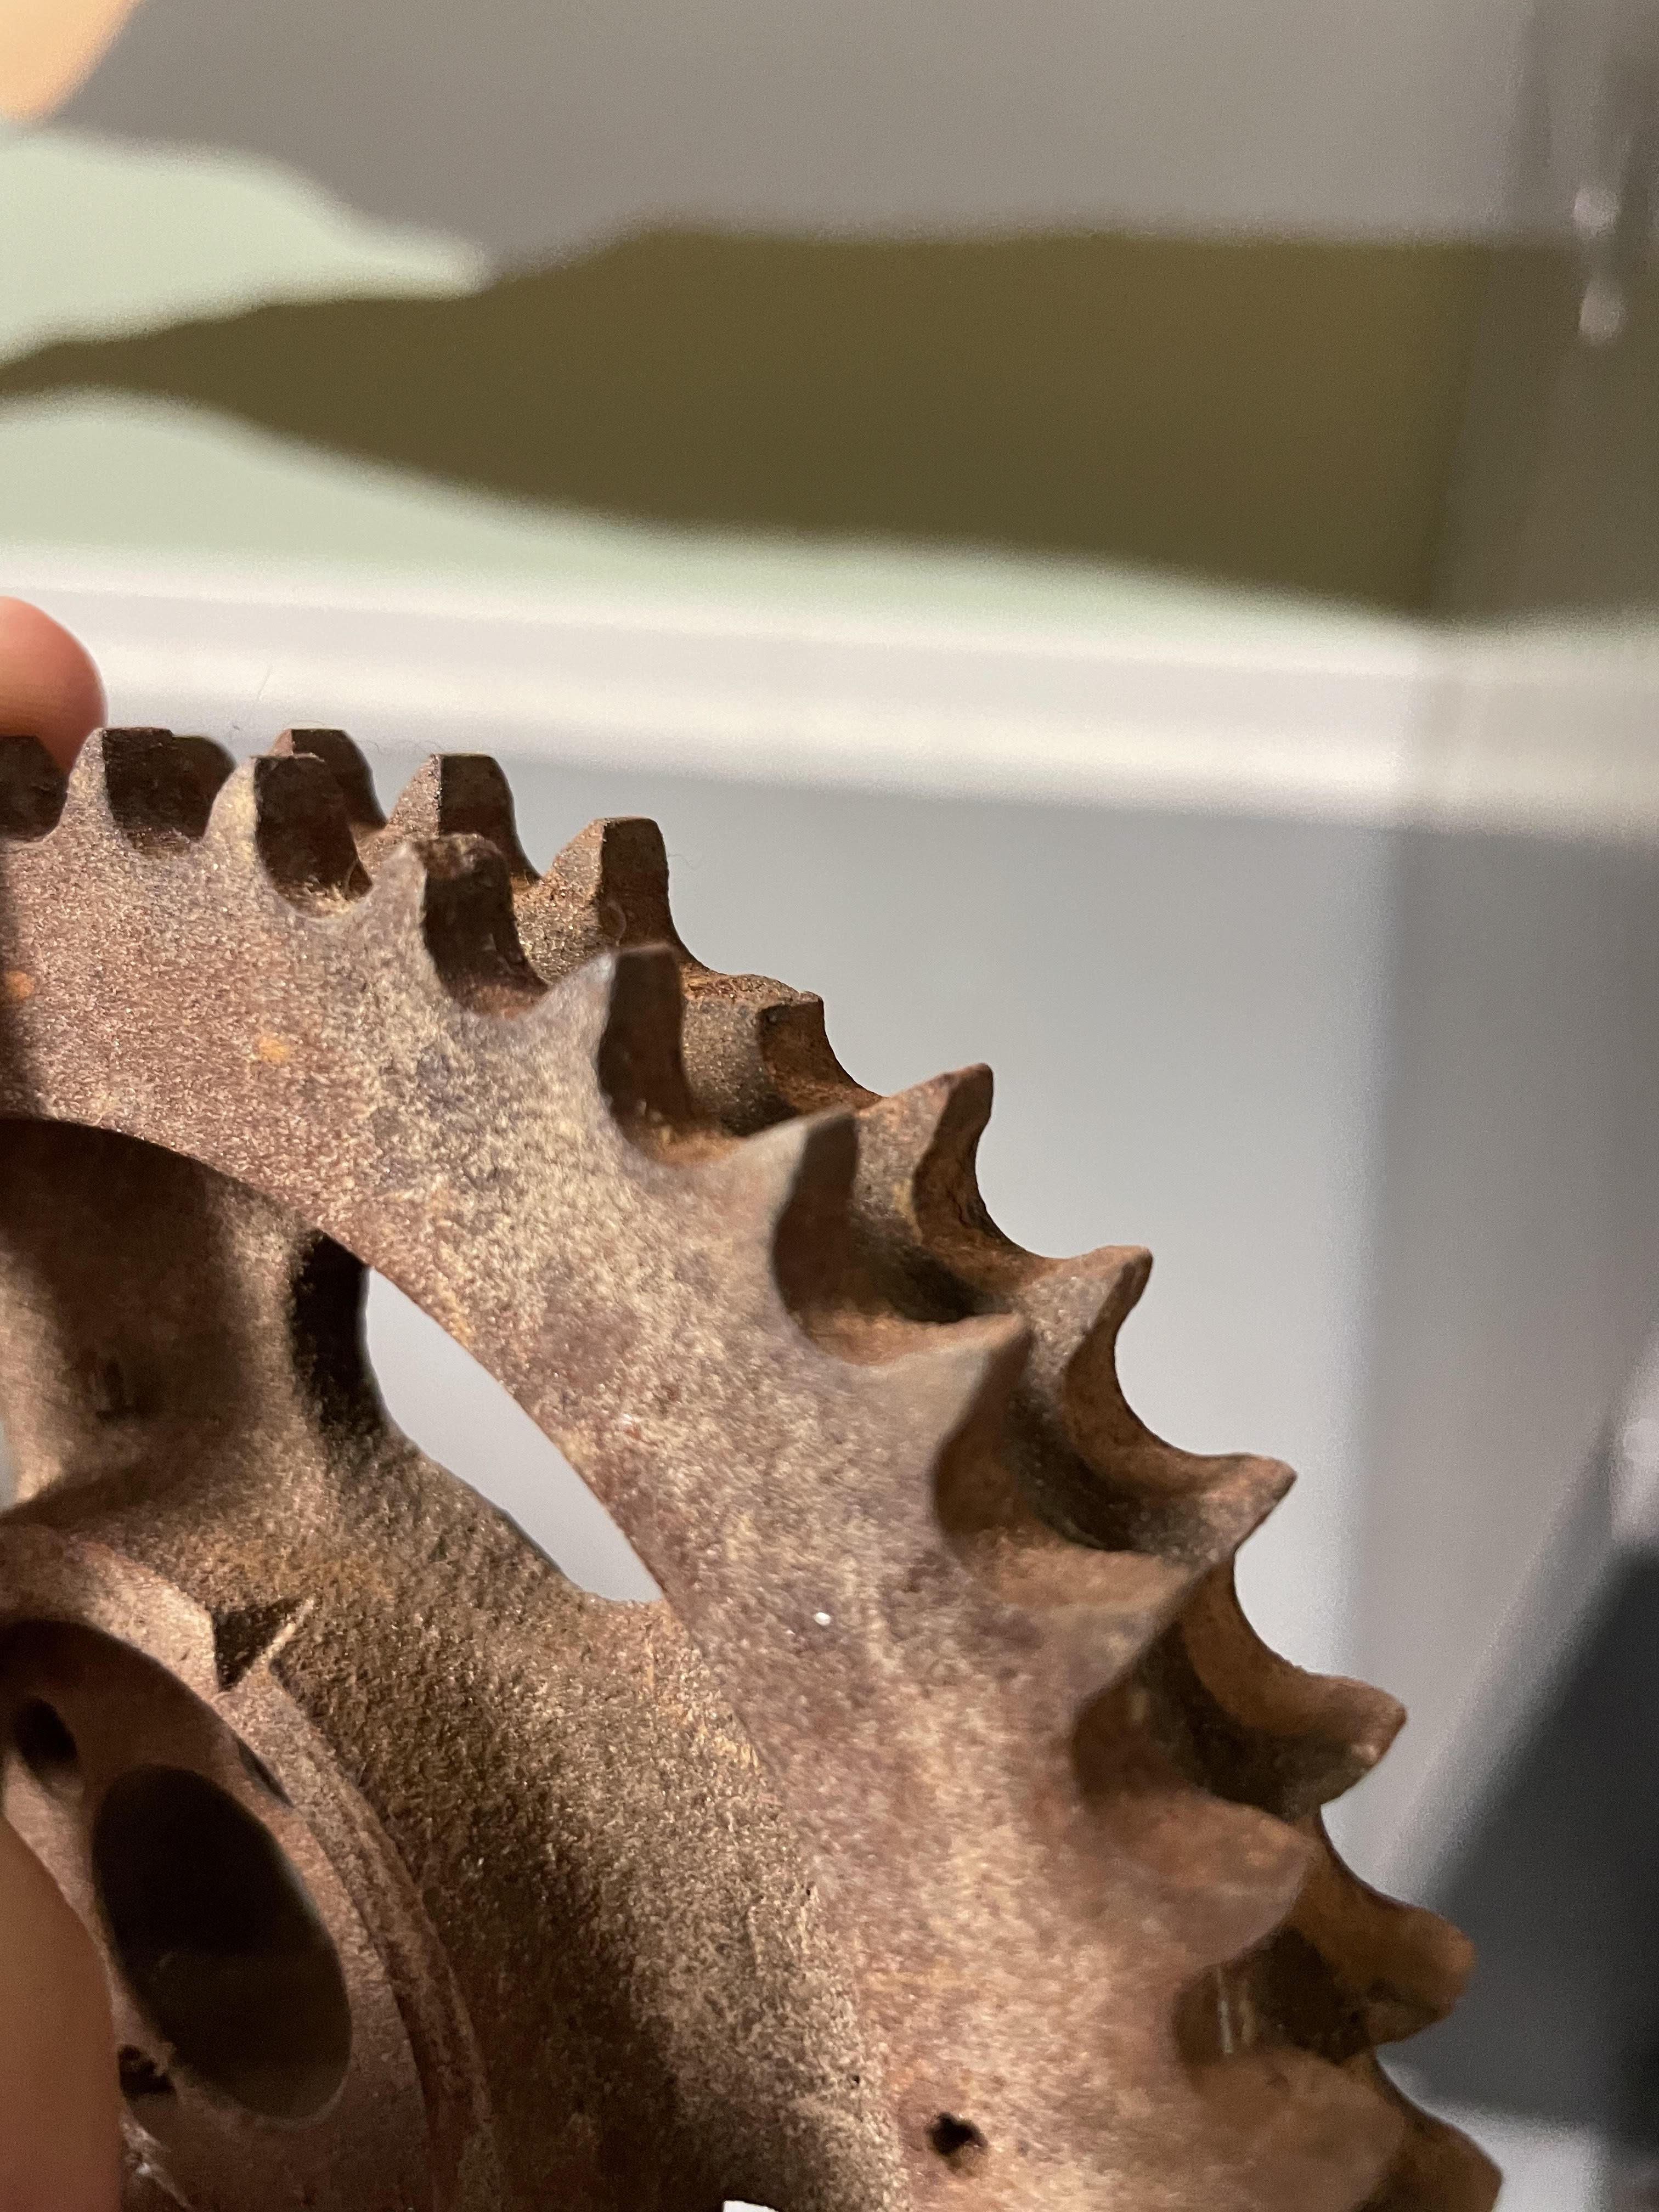
Also, I was rummaging through the box of parts that came with the car and I found the OE cam and crank sprockets. They look rusted as can but no major signs of damage. Maybe they replaced these when doing the timing chain as preventative maintenance? anyways, the OE has the 4 holes and a clear timing mark. Mine has 3 which looks like a Cloyes S462 Sprocket below: I see no timing marks, so I may need to resort to counting links. Can this be done with only the valve cover removed?
-
Interesting, mine looks to be flat head. I can snap a photo later to ensure it is the right one. But it is big and has knurling to grab by hand.
-
Timing is definitely way off. When the distributor points to the real #1 plug location, cylinder #6 is at TDC. Looks like the previous owner had it backwards. I tried looking for my cam timing mark, but I dont see the same Camshaft Gear Sprocket as in the FSM. Mine has 3 view points, not 4. Regardless, at TDC for cylinder #1, no view point is at the top to let me see the timing mark on the cam. Is there another way to time this? I'll search in the meantime. I see some high temp gasket maker in random spots, so someone has definitely been in here. The came bolt is also chewed up. Definitely going to get a new one. Bright side, I got it running! Sounds like a tractor probably due to the cylinder 3 issues and timing being so bad. But it was running! I was able to keep it alive for nearly a minute by having the throttle cracked a hair. I needed to adjust the idle screw but it died before I could grab my flathead. Thank you all for the help. My next steps will be to re-time the engine in hopes it runs smoother. Then we can dive into the cylinder 3 issues.
-
Excellent idea. I had it going for a couple seconds!!! But then it died...probably because I didnt replace the AFM back in line after spraying starter fluid. I assume that fixing the 180 off will make it run smoother/longer? Or should I continue to try and start as is for the time being
-
Still no go on the compression even after fixing lash unfortunately. Burnt valve perhaps? Moving back to the starting issue. I think my ignition timing is 180 off. When I was adjusting my valve, i placed #1 at TDC (Bunny ears) and pulled my distributor cap. It was facing the cabin of the car, not the front (plug #1). Is it possible to install this 180 off? I thought they were keyed?
-
I was able to get cylinder #3 lash dialed in. It looks like the rocker was sitting on the lash pad. Perhaps a very loose valve lash and high RPM caused it to jump on the side and get stuck? Well, all better now. Ran out of time on my lunch break to test compression. I'll report back soon.
-
Should I continue to try to get it started in your opinion? Good idea. I ran out there and all looks okay from initial observations. No missing lash pads. I quickly grabbed my feeler gauge and use the .008" since I was short on time. But I did notice that cylinder 3 had one valve that even the .008" couldnt fit in. I'm hopeful that this is the cause! Keeping the valve cranked open would make sense...and a simple repair. Edit: Even my thinnest, .004mm feeler wouldn't slide through
-
Well I have some good news and some bad news. Good news, perhaps I dont have anymore fuel/electrical problems (thanks @Zed Head for the help!). Bad news... While I was waiting for the cylinders to dry out, I decided to run a compression test. I think you know where this is headed (pun intended). In order, 90 PSI, 90 PSI, 0 PSI, 90 PSI, 70 PSI, 90 PSI. The low overall pressure doesnt bother be since its been probably 28 years since it last was registered and the rings are probably dry as can be and the added fuel didnt help. But the dreaded 3rd cylinder is a dead...flat...zero. I'll start by pulling the head...wish me luck! I may just need to start a build thread 🤔
-
Thanks, I'll check the cold start valve. I imagine this is probably shot too since all 6 of my original injectors were bad. But it doesnt hurt to rule it out! Im new to the classic cars, is there another way to verify running rich? Or is the fouled spark plugs a surefire answer? Just want to make sure I am not leading us down a wrong path! I like the testing layouts of the EFI manual, it helps me keep focused and methodical.
-
I am sitting at 2550. I think... I see 2.55 when I have my multimeter on the "20K" setting.
-
Injectors are in and working I believe. Still no start... I checked for spark again and do see it. Plugs are also wet and smell of fuel so it is no longer fuel issues I think. I tried spraying in starter fluid, still no luck. I'll get a rare backfire out the intake. But I cant duplicate it on demand. This makes me think it is a timing issue? I checked the distributor and plug order twice. No issues there. I placed my cap midway in the adjustment slot. Next step is compression test...then check for correct timing? Not sure what else to do. One thing of note is that the new plugs look awfully charred after just cranking. Too much fuel?
-
Thank you all for being so helpful. I ordered up a set of injectors the other day. They should be in soon 🙂