Barefootdan
Free Member
-
Joined
-
Last visited
Everything posted by Barefootdan
-
 That looks awesome! I'm way jealous of how well this is turning out 🙂 I've seen alot of different methods for interiors on the Z's. Is vinyl (whether that be diamond stitch or just plain vinyl) the OEM method on the center console area and door sills? I need to order my carpet kit soon so just curious! I am loving the look of the diamond stitching so far and how affordable it is.
 -
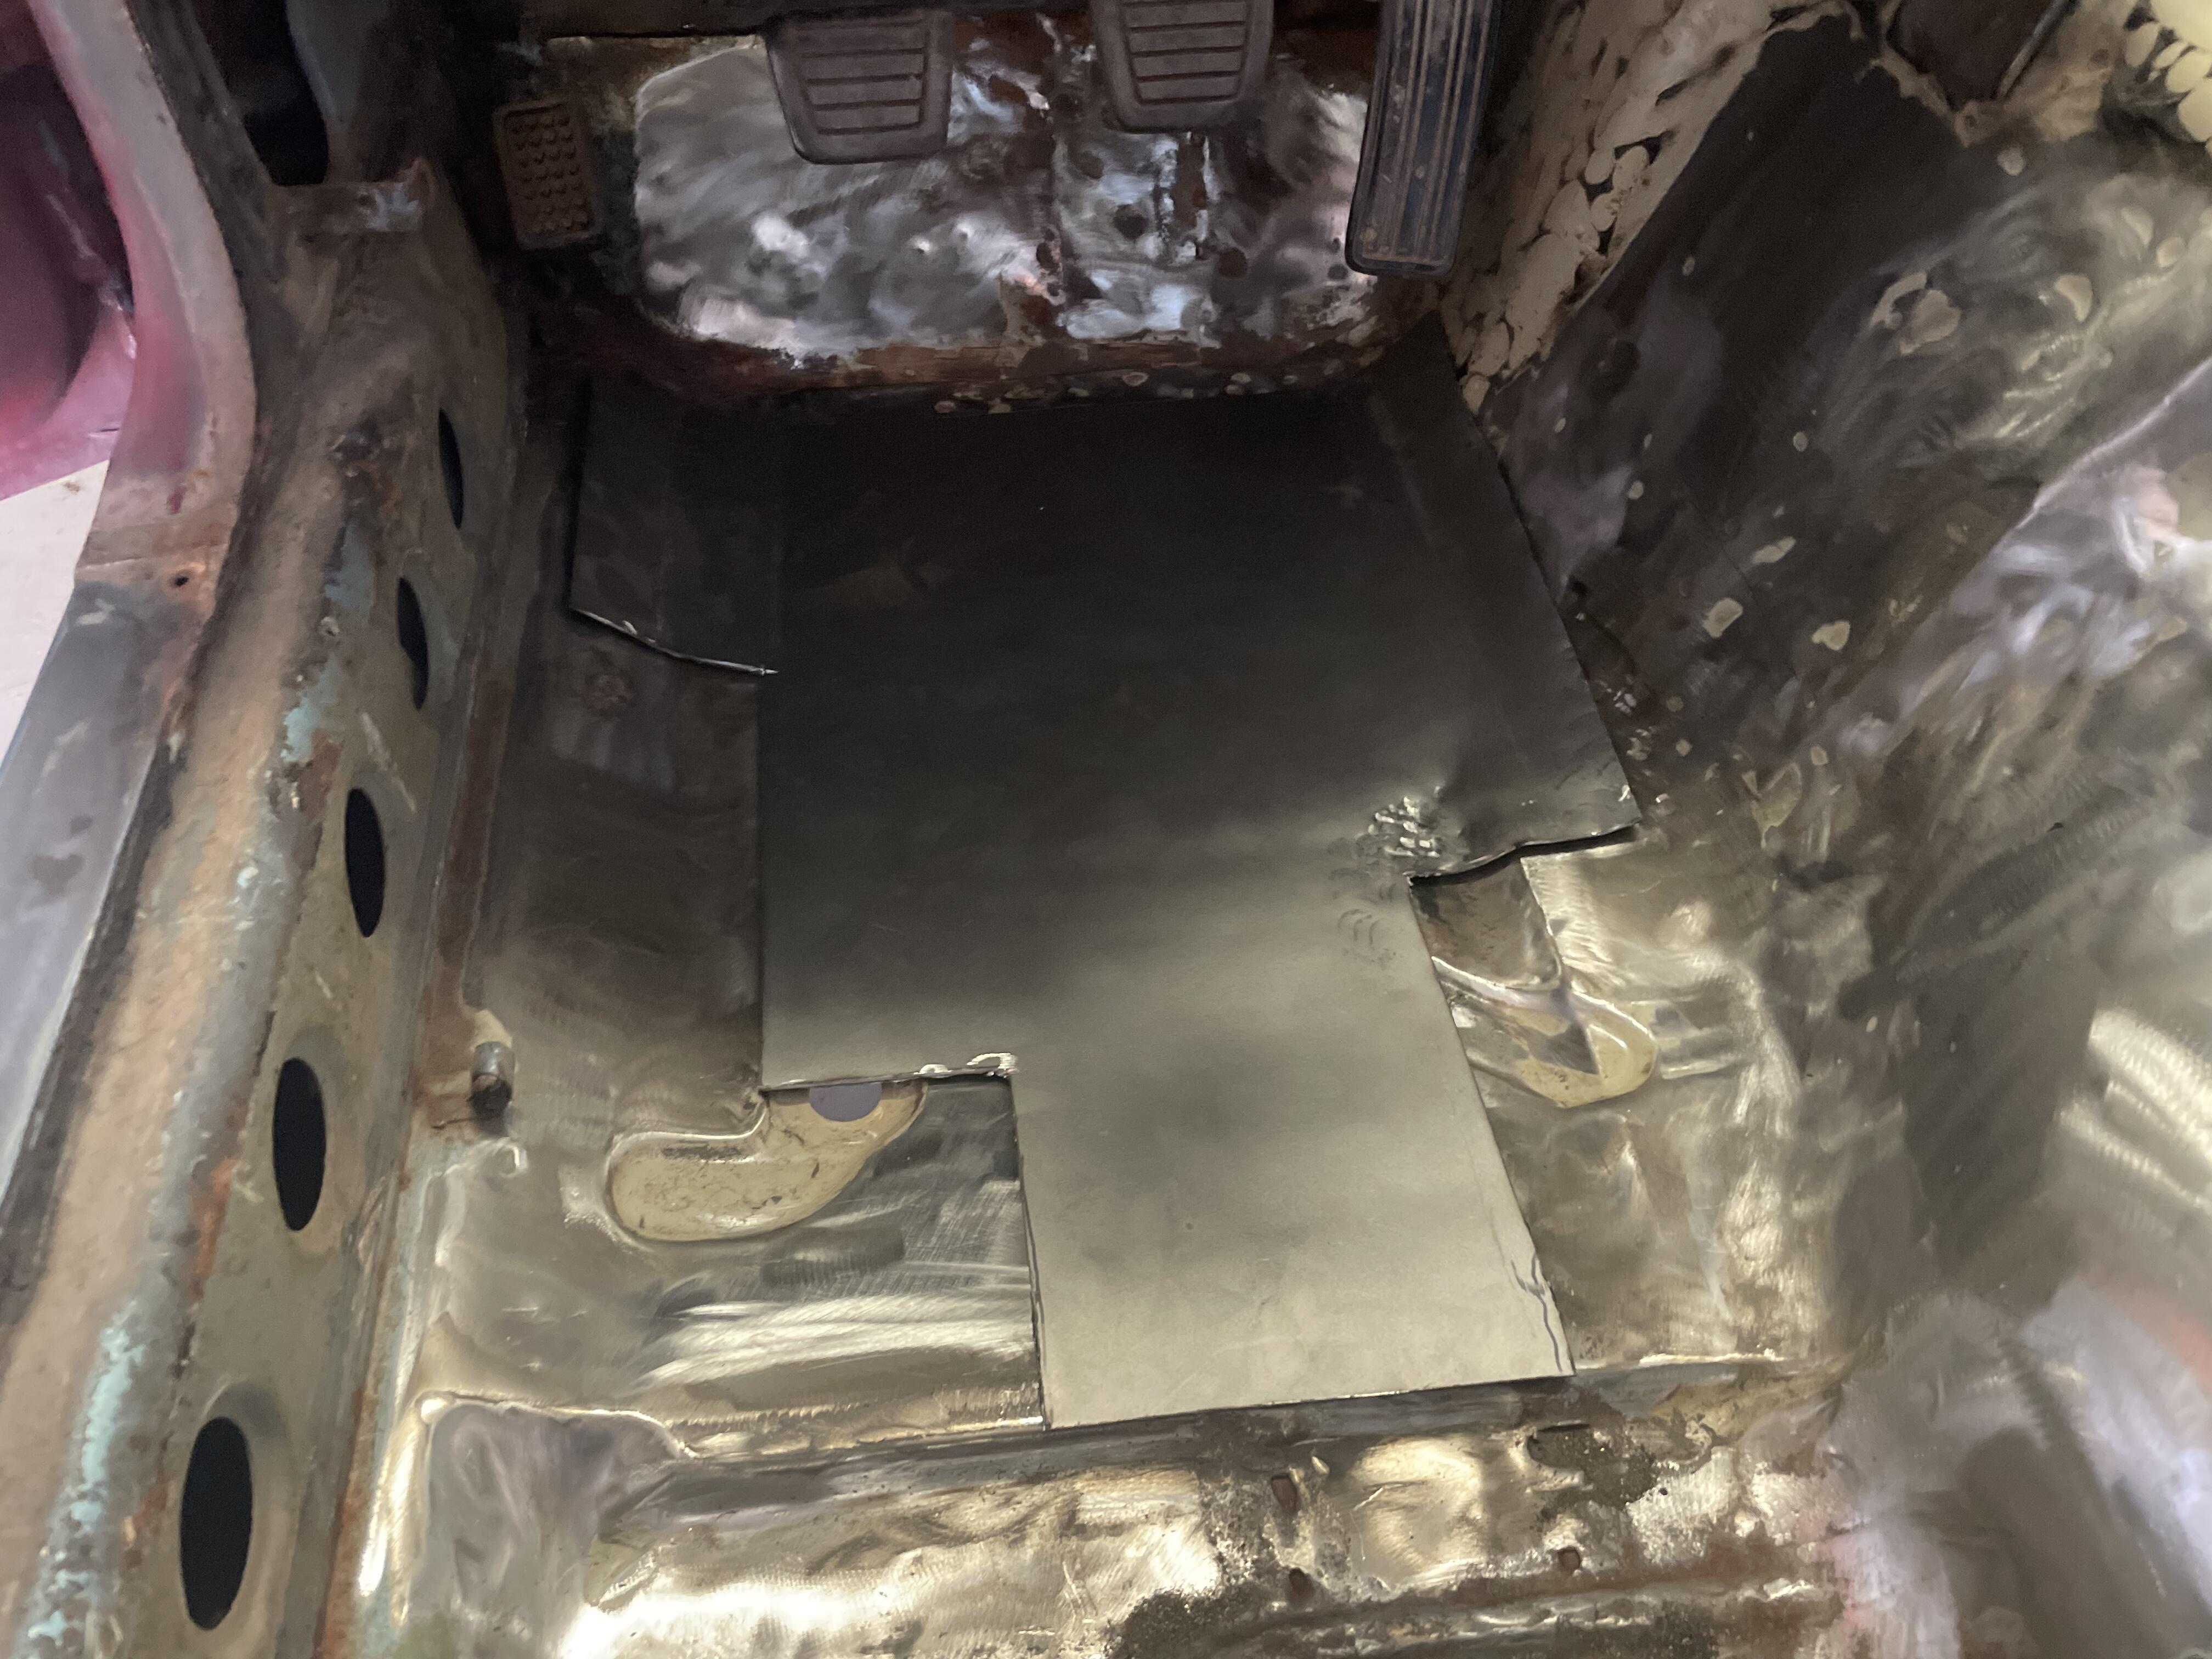
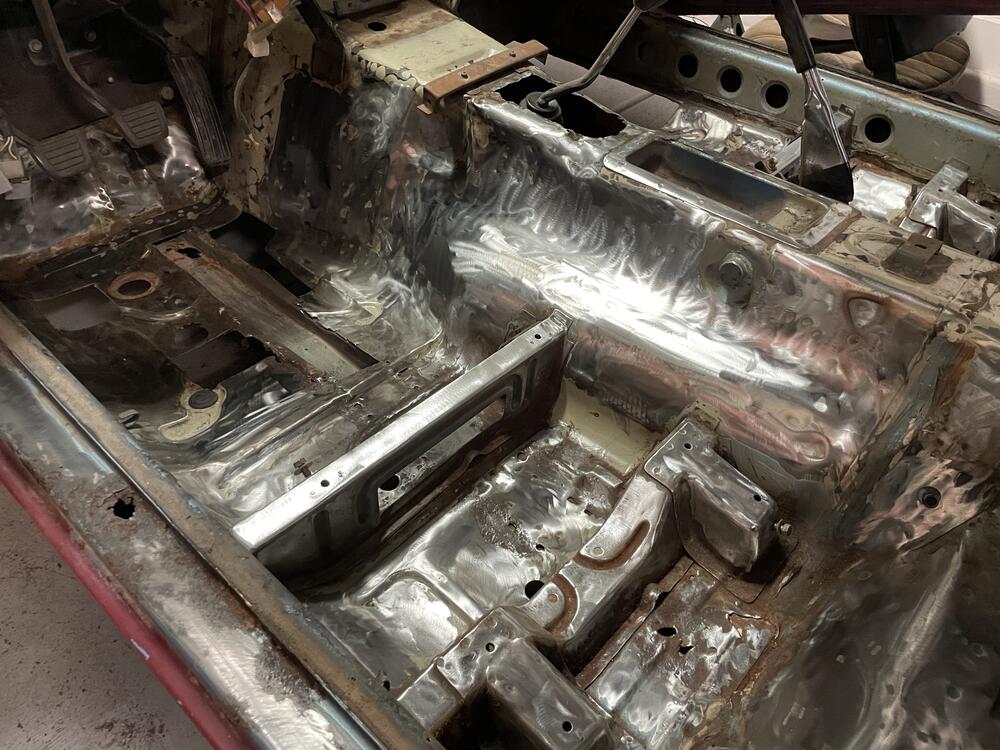
Finished getting in the panels this weekend. Feels super good to have floors again! The patches went in really smoothly with the 3M panel adhesive hardening like steel in my test cup. POR15 is on order so that will be my next step! I gotta figure out how to get the Datsun out to wash the floor without it running... I began to pull the rear sub harness out but realized it has quite the runs behind permanent panels and such. I was going to run string to pull through but I thought that there really isnt anything I am removing from the rear sub harness like I am with the front. So I may keep it OEM for now. Then just update the main plugs that go into my new harness. I'll share photos after POR15...white seam sealer doesnt look great 😄
-
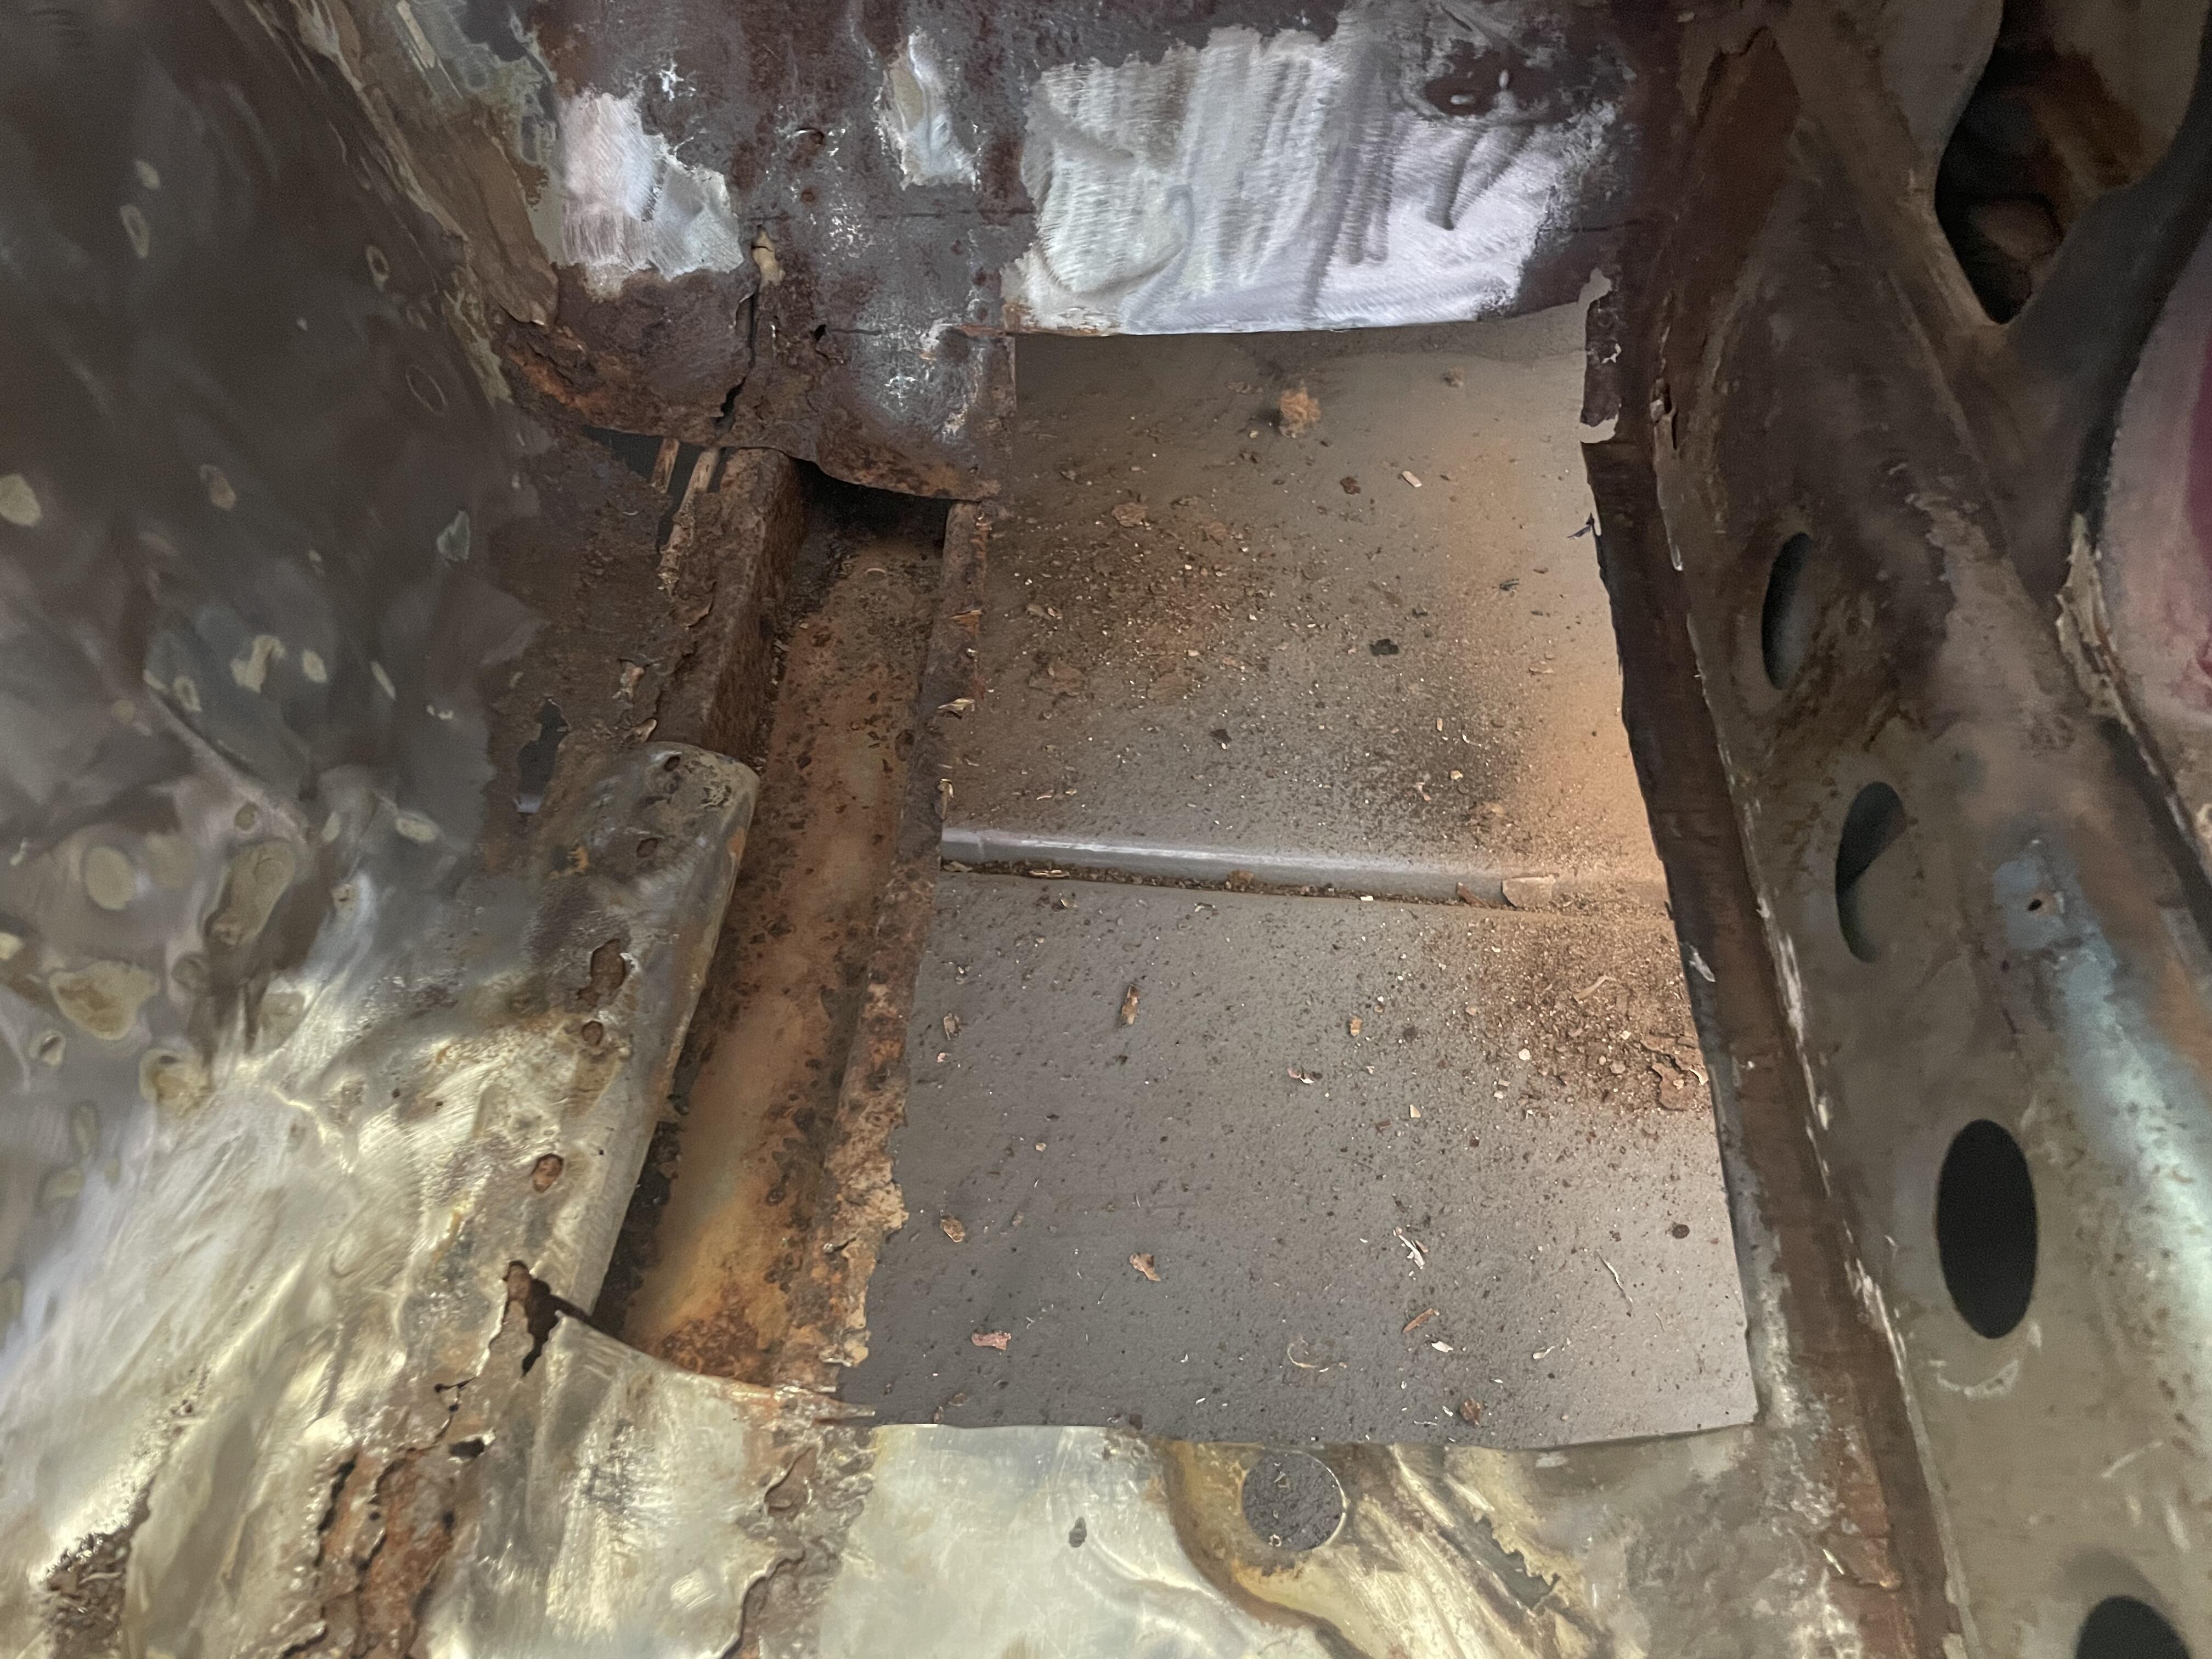
I started off chiseling away with a flathead and hammer. It works fine but is so slow. I then picked up some dry ice and it was so much faster. I crushed it in a bin and used isopropyl alcohol to help spread the freeze. A rubber mallet cracked it off pretty easily. Speed Academy on YouTube has a great example of it working on their Celica. Then I used a paint stripper disc on my grinder to get the remaining goo and paint off. I liked that I removed it so I know there wasn’t anything hiding underneath. POR15 will be my coating of choice too and probably just a general undercoating for the bottom side once I’m all wrapped up inside 🙂
-
Admittedly, I do jump to worst case scenarios too 😅
-
So awesome! You can do a few things that are fairly easy. Take the valve cover off and make sure your valve lash is within spec. My car sat for a while before my rebuilt engine ran and I lost a rocker from a sticky valve. From there if everything is back in spec, you can switch your attention to your injectors and spark. Not sure if you drained your gas tank but there could be a possibility your injector clogged and it’s not firing. But you could also just smell your plug to see if it’s oil or gas 🙂 Spark is a quick and easy test. Start with the valve cover and lash and report back! edit: you can also do a compression test to check for your rings. I don’t suspect this is the issue but it’ll be another quick check!
-
Definitely not the best option, welding would always be my number one…if I had a welder 😞 Since I can’t, that’s why I’m doubling up on the 3M panel bond (chemical bond) with rivets (mechanical bond) and top it off with seam sealer. I did some research on panel bond and it’s a fairly popular form of construction in newer OEM cars, specifically in the German market. I’m not worried about it failing if I ensure proper preparation. It’s not that I don’t trust using only panel bond but I want the rivets since I don’t trust myself 100% and if I don’t get a perfect adhesion, the rivets will hopefully give enough support. I’d like to get the car body work done right when I paint it, so if it should only last a couple years and I’ll be satisfied. Bottom will of course be seam sealed as well and undercoated. @grannyknot I hope to get in a couple nice cruises before summer hits here in Phoenix. I’ll need to get the floor done, wiring harness completed, and then interior put back together. I have a few months!
-
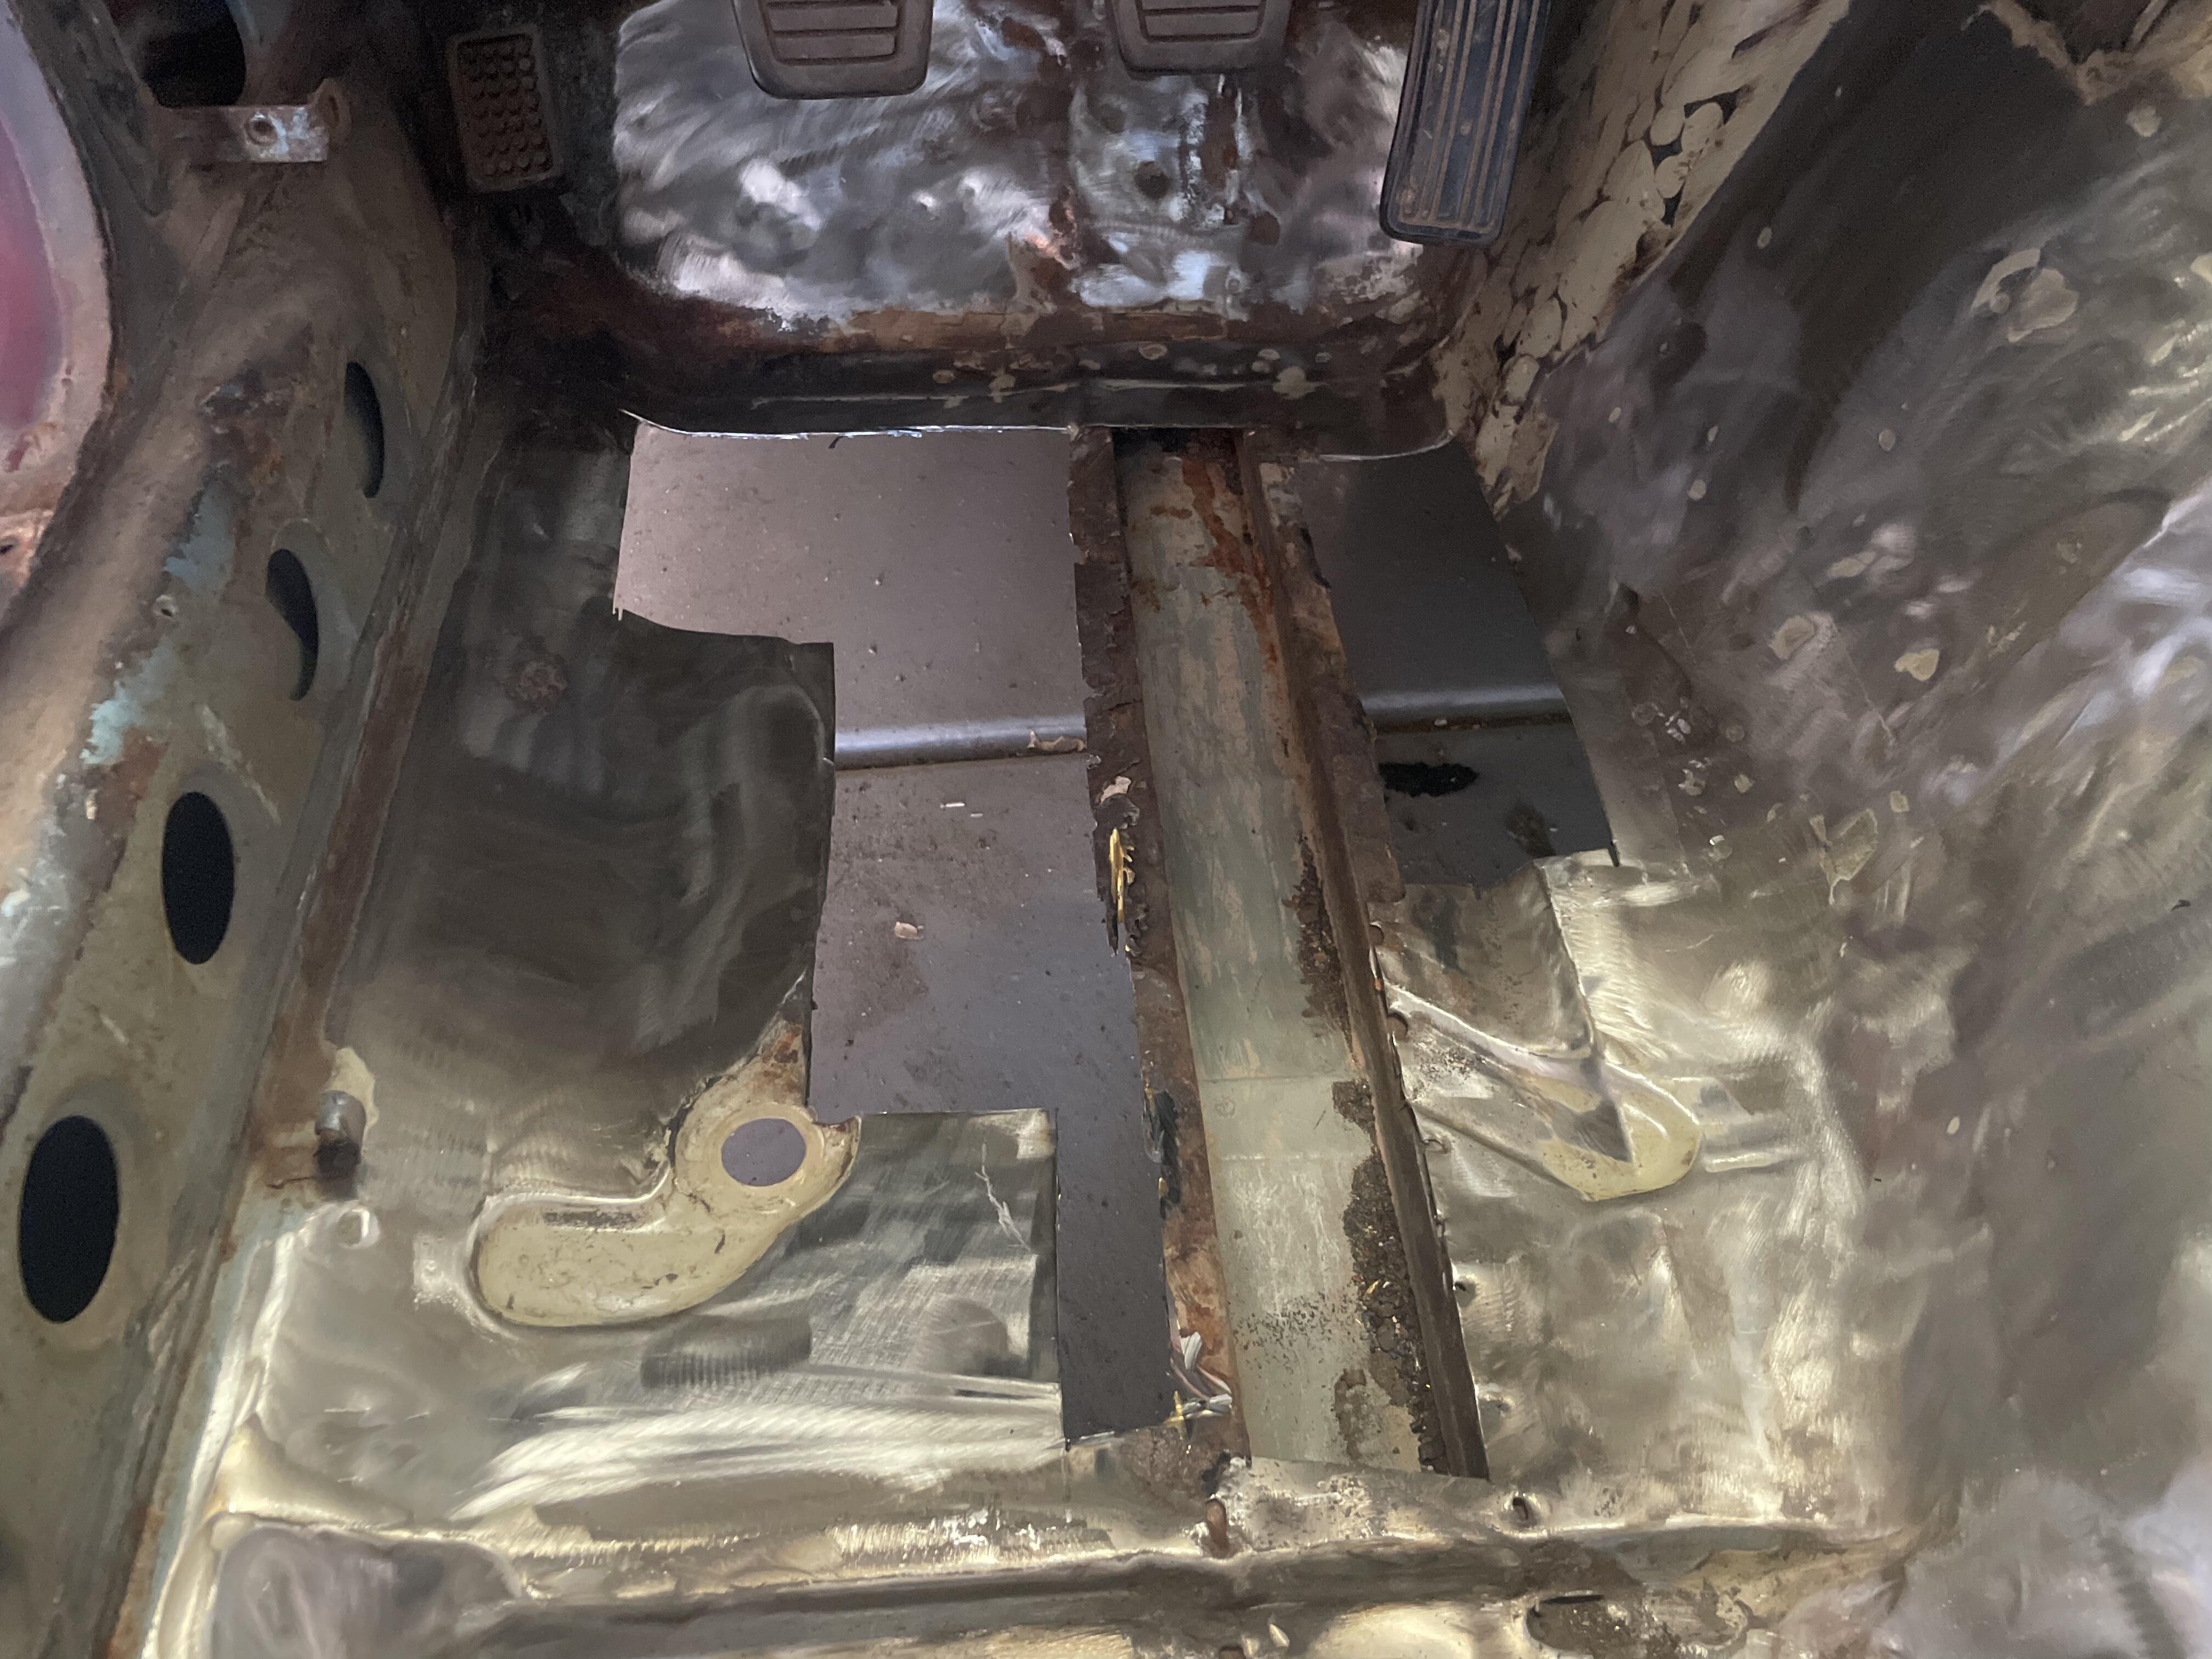
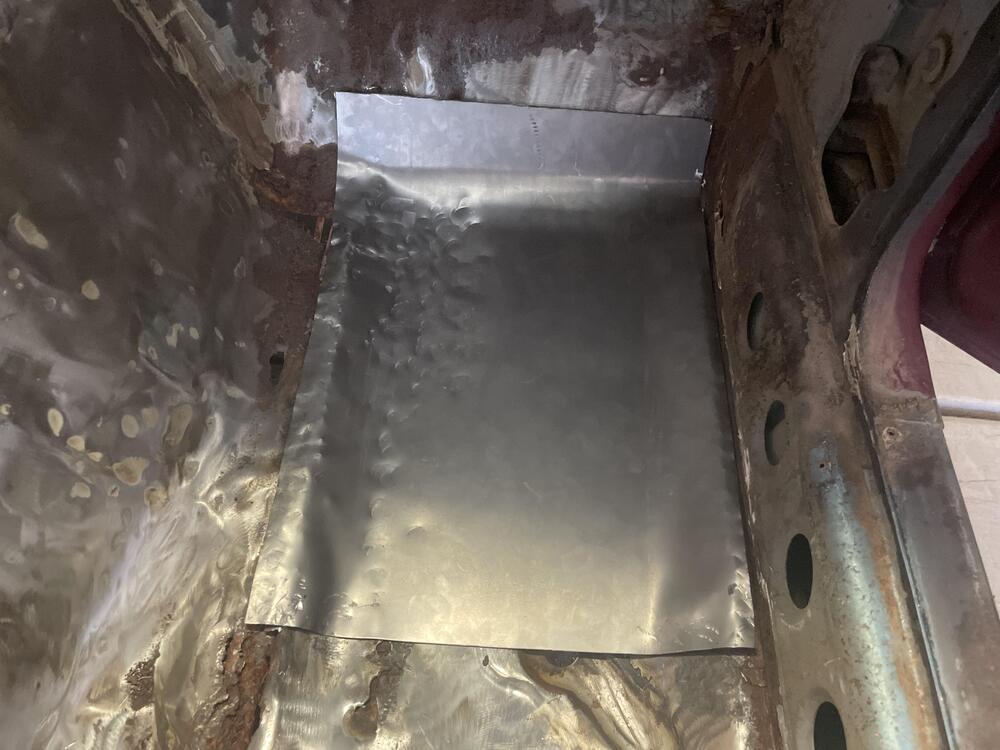
Spent some time getting a grasp on the floor pan patches. If you’re scared of shoddy body work, look away now! First time ever doing something like this so I’m just aiming for function over form 😅 I originally had about 4 small cuts in the driver panel but then I realized it is probably way easier to just make one large cut looking back I should have made it a nice square but I was trying to keep as much original floor as possible. I used 18g steel sheet to get my panels. A trusty hammer to form it and a lot of hand bending for the curves. I really need a bench vise… I warned you to not look didn’t I?! Well if you’re still reading after THAT then I’ll let you know I’m about 80% there. A few more bends I want to get straighter and closer, I’d like to smooth off the corners and edges, and cut out my holes for the drain plugs. I’ll then use rivets in the corners and down the frame rails to hold down the sheet. This, combined with 3M panel bond and seam sealer should give me a decent patch….functionally. I could probably get away with only panel bond but the old school in me begs for a mechanical bond in addition to the chemical bond. Once the seam sealer and panel bond cure I’ll be doing POR15 over the entire floor to hide my “body work”. Happy Thanksgiving 🙂


-
It is the orange rubber piece in your last photo. This goes at the base of your valve in the head to block oil from seeping into your combustion chamber. Example: This isnt a 280z exactly but it will give you the idea of the order of operations 🙂 :

-
Hard to say just from a visual. If the valve was really sticky I could see it being pushed up and sticking up without bending. You'll need to get a hold of the valve itself to see if it spins and travels freely or not. Yes If the valve is not bent and the cylinder is okay then yea you could get away with new clips and retainer if they arent damaged. Although, I'm not sure how to go about replacing the stem seal. Someone with more knowledge can chime in if it is possible to do so with the valve installed.
-
Thanks @Patcon and @Av8ferg! That makes me feel better about not getting every nook and cranny. I ended up doing most of the front half to make sure the scraps of tar were also taken care off. I stopped in the center console after reading the feedback. Not sure if it looks better now or worse since we can see all the rot 😅 I’ll POR15 the nearly everything except the rear hatch that has sound deadening still. It’s solid back there so no need and it’s under carpet. Ill do the front by the storage compartments and spare tire well for uniformity and there’s slight surface rust. The annoying part of over at least!

-
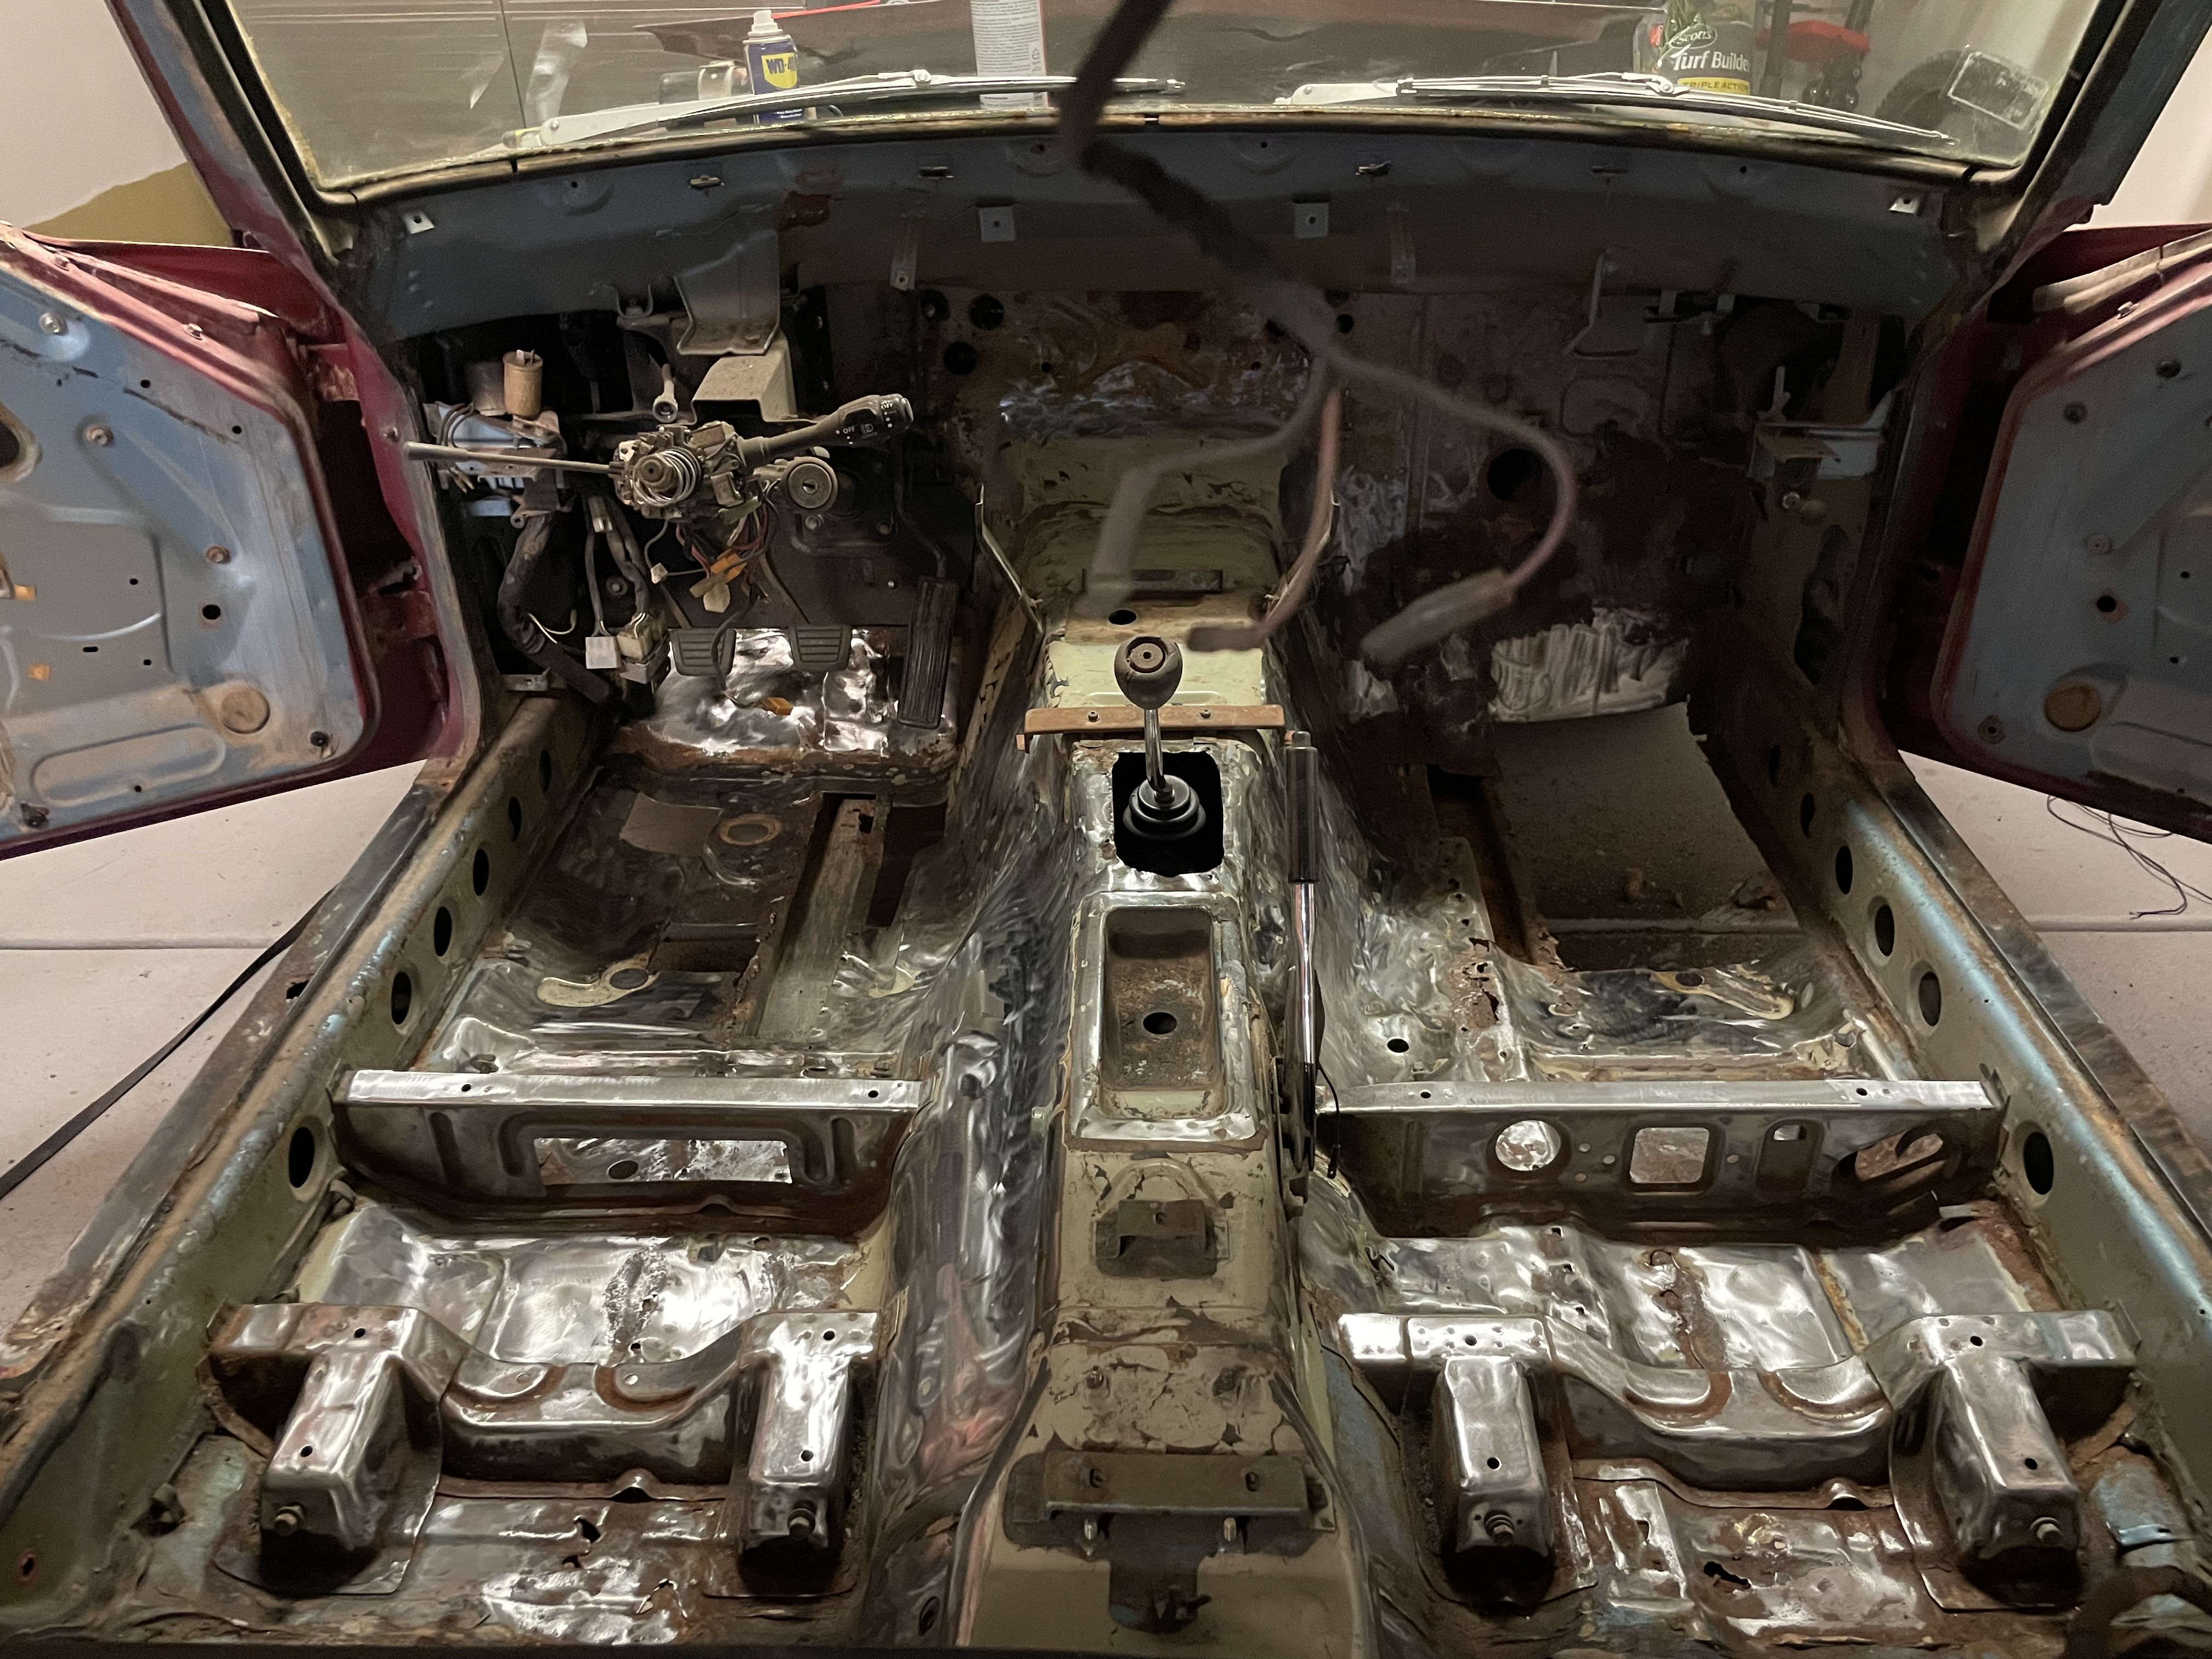
I have started the prep for cleaning out the interior rust and patching my floor pans. I have the full interior out, wiring harness and heater core included. I started to strip away the surface rust and also the paint in preparation for POR-15. Although, the more research I do, it seems like stripping the paint on non-rusted areas is not needed? Am I doing any benefit to stripping the paint or just wasting time?
-
I'll be the first to admit not to jump to conclusions if the motor isnt running 🙂 As @Zed Head mentioned, I had a rocker arm come off and I immediately thought my newly rebuilt engine suffered a head gasket failure. Lets see whats under the valve cover first and work our way through it. I am also in Phoenix too! I just finished rebuilding my L28 so it is fresh in my mind 😄
-
Looks like a sweet starting point! @dutchzcarguygave good advice with the FSM and jacking points. I'll add the EFI bible (if yours is still running fuel injection) https://www.atlanticz.ca/zclub/techtips/efisystem/280zfuelinjectionbook.pdf and this book helped me alot too L Series Rebuild Welcome! 😄
-
Thank you!! I’ll be sure to do more videos when everything is sorted. I can’t wait to hear it a couple thousand rpm higher 😈
-
Hahaha you nailed it!!! Got back and showed her my video and she asks “How fast did you go?! Sounded like you’re speeding!!” Luckily the Speedo was not plugged in so I said “not sure 😉”
-
After nearly 30 years, she has been brought back from the dead! So much still to do but wow is it an amazing feeling to actually drive it. Brakes need another bleed, throttle sticks at around 2k rpm, it rides like a boat, but I couldn't be happier!
-
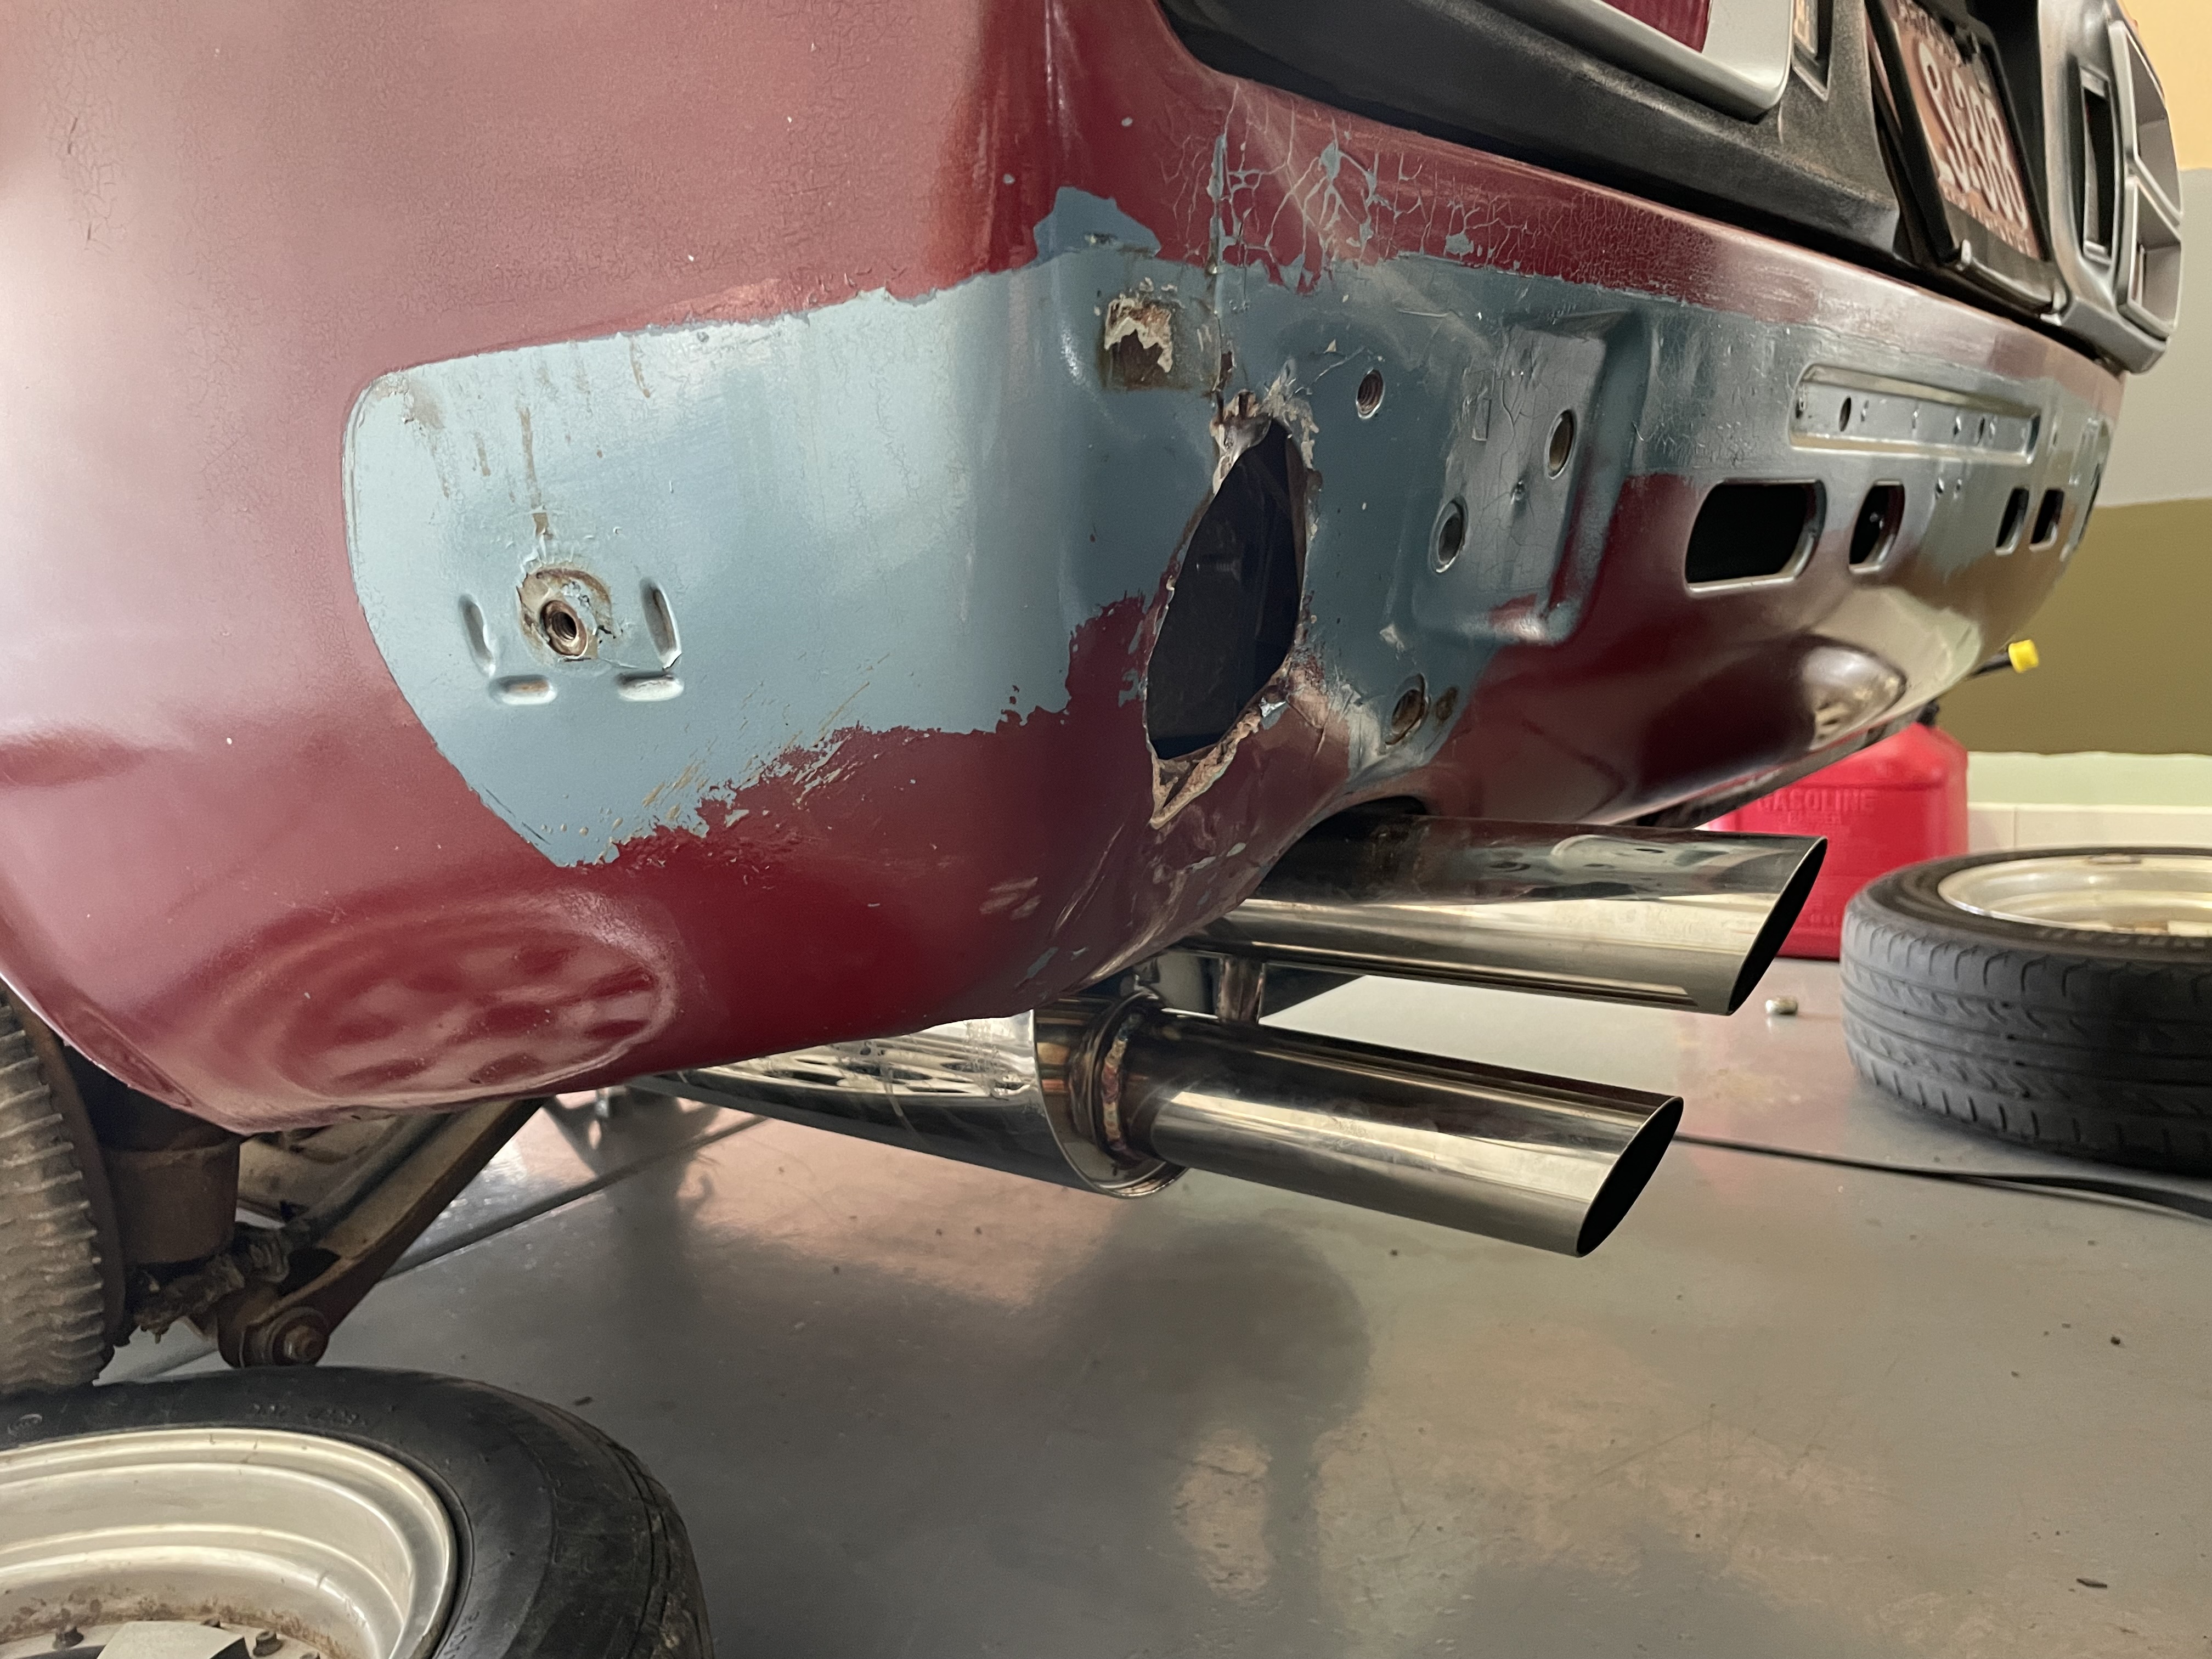
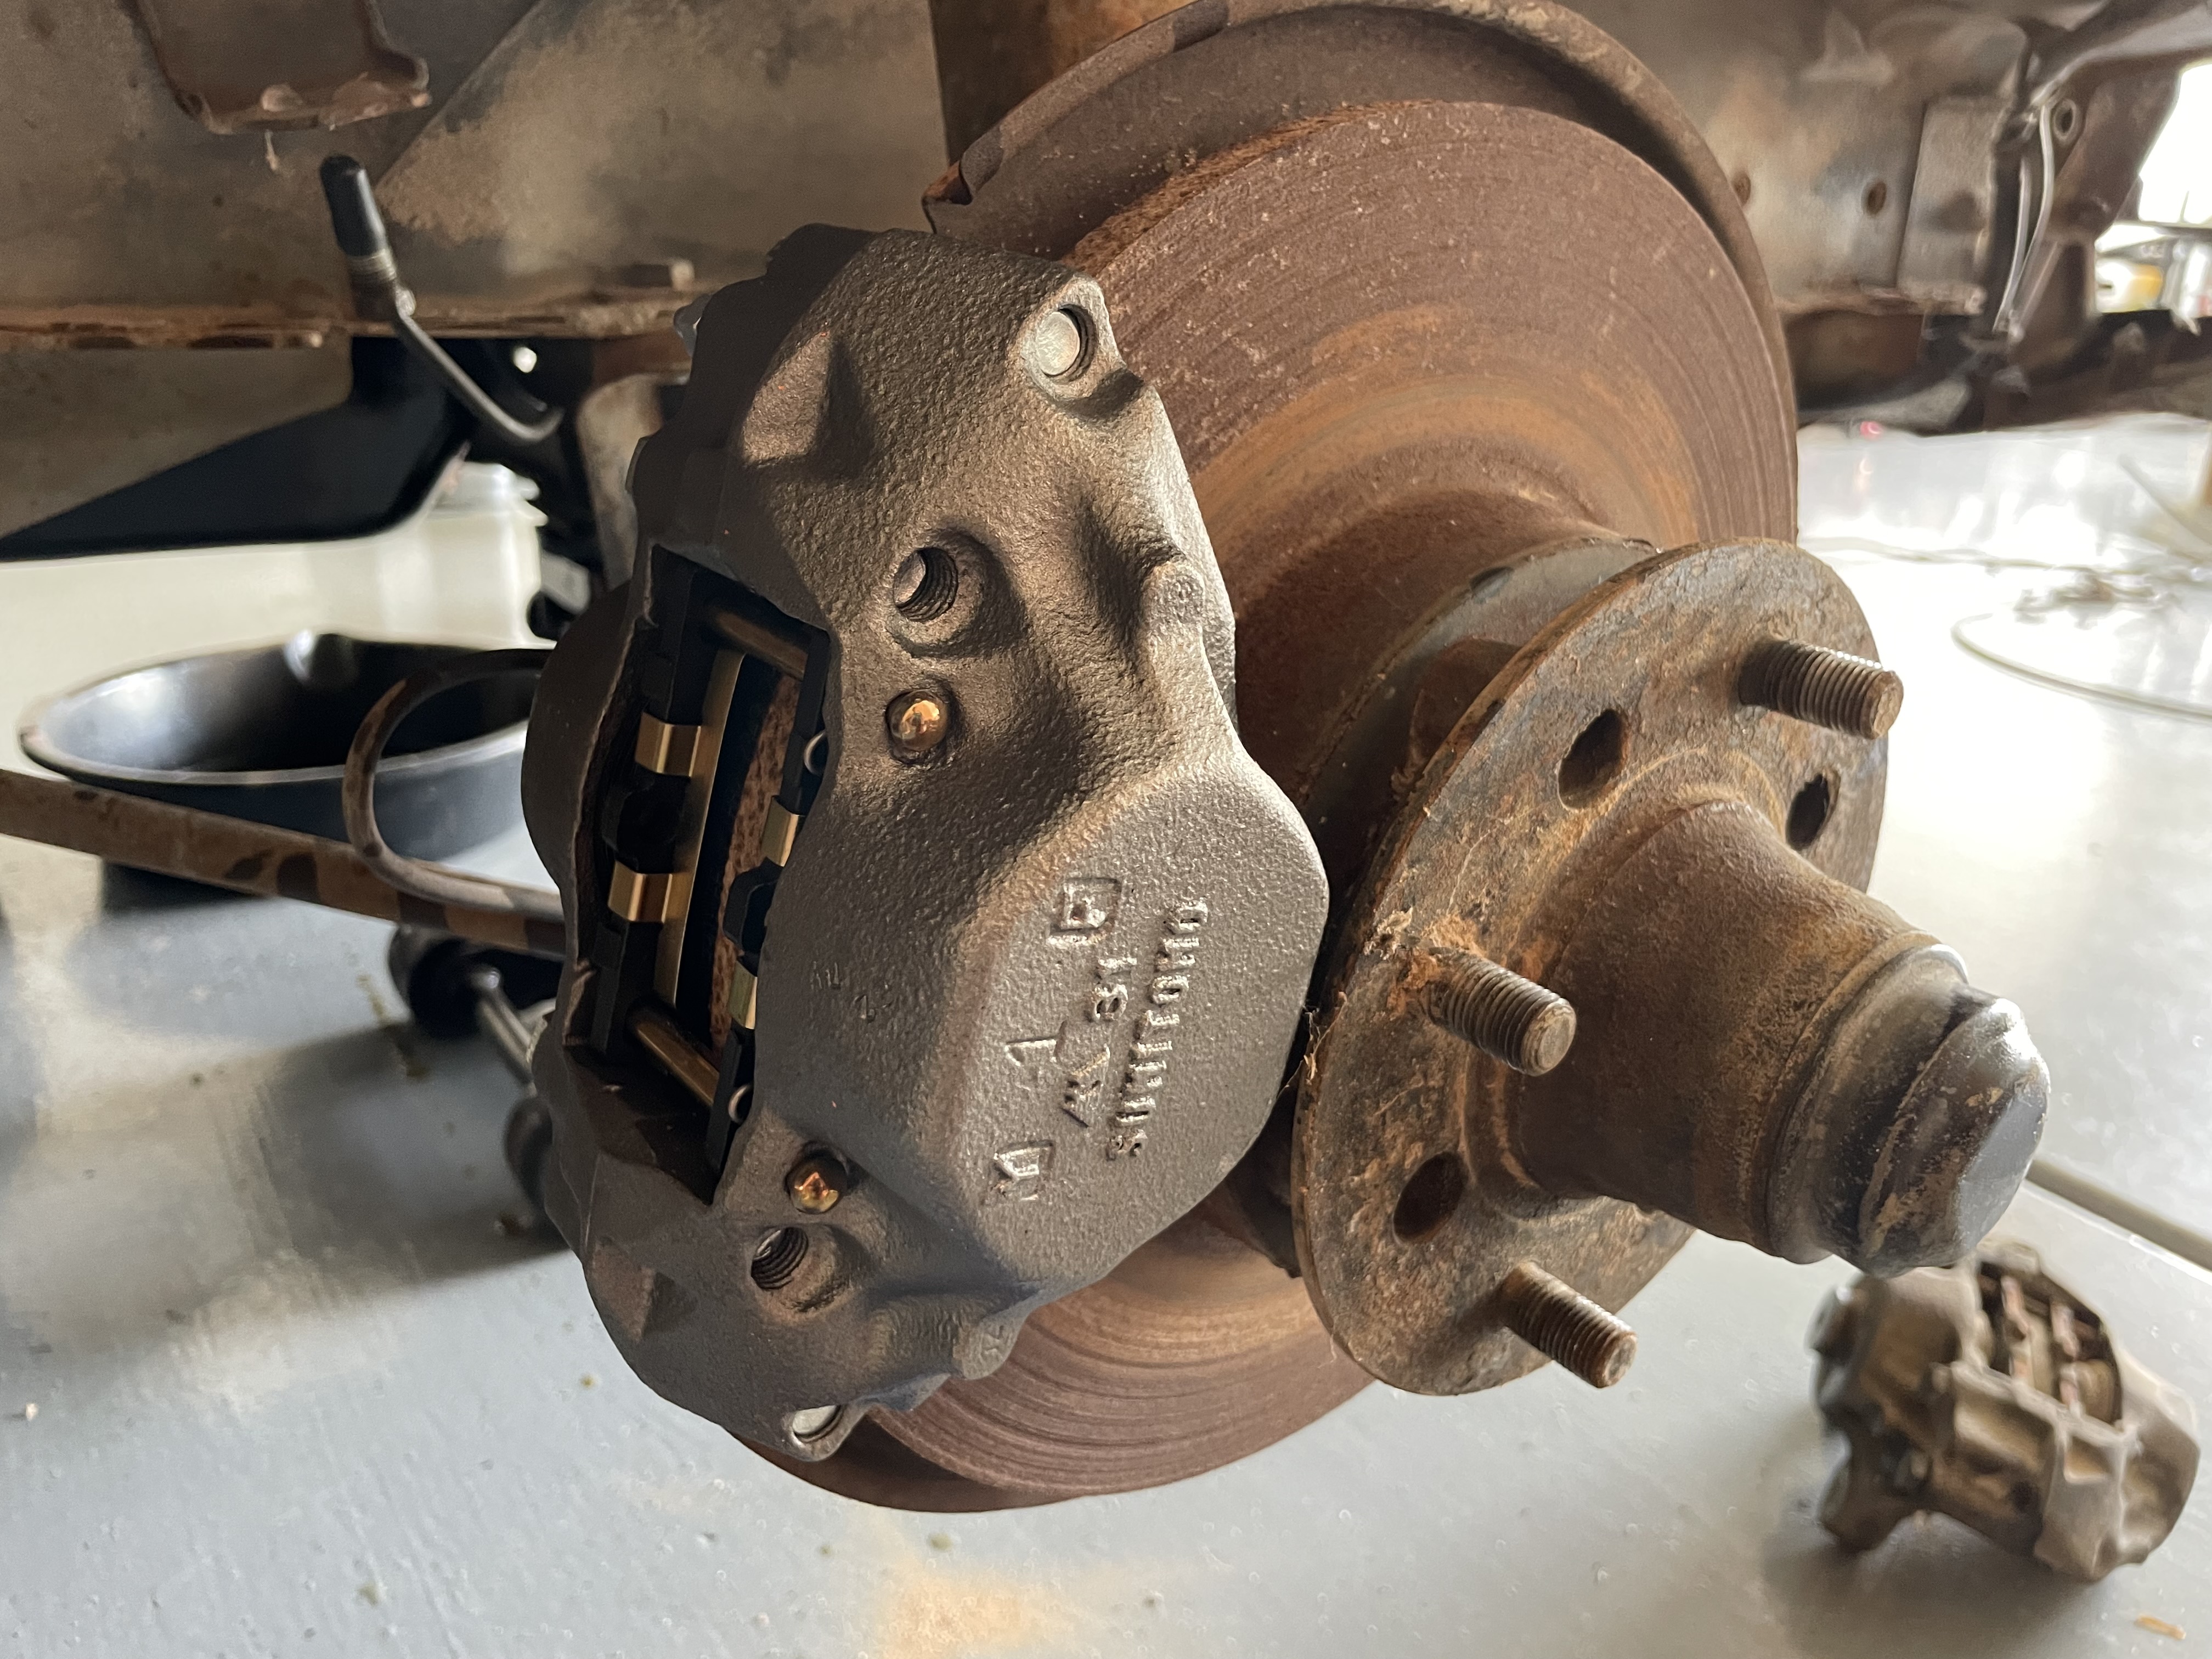
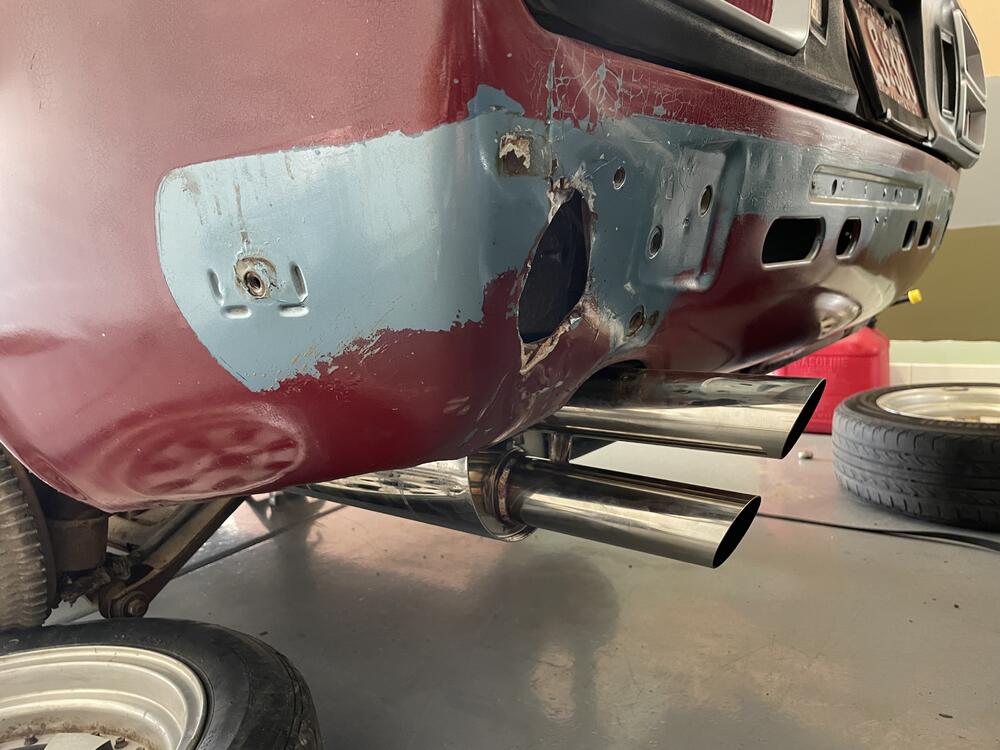
I realized I never posted my exhaust photo! Its too good looking for the rest of the car! I will dial in the fitment once I take it to the shop for a proper flange to be installed. Currently it sticks out a couple inches too far for my liking. But I can start the car in the garage without my ears bleeding so its a win 🙂 I finally moved my attention to the brakes as its the last thing needed for a test drive. I finally got the front bleed screw unclogged but it was sticking. So rather than spend time and money on a rebuild build...a remanufactured unit is only $37! Got one for each side with new pads. New rotors are in the mail so dont mind those rusty discs too much. You might also notice the soft lines are disconnected. After replacing the calipers, I thought its better to be safe than sorry, especially for brakes! So those are on order too. Once brakes are done I will be ready for the maiden voyage! Maybe just to the neighborhood park and back for now 😉 I want the satisfaction of driving her before tearing into the interior and wiring harness.

-
Whew time flies! I’ve been on strict orders not to work on the rotsun…I mean Datsun this past month 😆 since I got married on the 23rd. But! We are free again and able to spend my weekends in the garage again. Today I was working on brakes. It’s the last thing I need to get her “running” around the block and I’ll be damned to get one ride before I start the interior. Front brakes bled well but the rear was not flowing any fluid. I back tracked the lines and found the clog in the one coming off the master. Blew that bitch out with my pressure washer and let it dry before bleeding the rear. Of course both lines leaked ( at the flexible connection) so new line are ordered. I also order two new calipers and lines for the front because safety. Sorry for the sparse updates but we are back on track! The engine started first crank today after nearly a month of sitting. So excited.
-
Fixed the valve and it started right up nice and smooth again. Still smoked for a few minutes but it eventually died off...what a relief! Crisis averted👍 Now back to our regularly scheduled build 😄 I was able to get the muffle hooked up which helped tremendously with listening for any strange noises. I'll grab some pictures this afternoon. The last piece preventing a spin around the block is brakes. I was able to start bleeding the front but my driver side bleed screw is clogged. Going to soak it or grab a new one if that fails.
-
Thats a relief. Thank you. I was jumping to worst case scenarios and didnt even think of the vapors from an open valve. The valve lash of all other cylinders was in spec, so I think it is safe to assume this one was too. I'll keep an eye...or ear 😉 ...out for any strange sounds next time I fire it up. Open headers doesnt make it easy, so that could be my next project in the meantime.
-
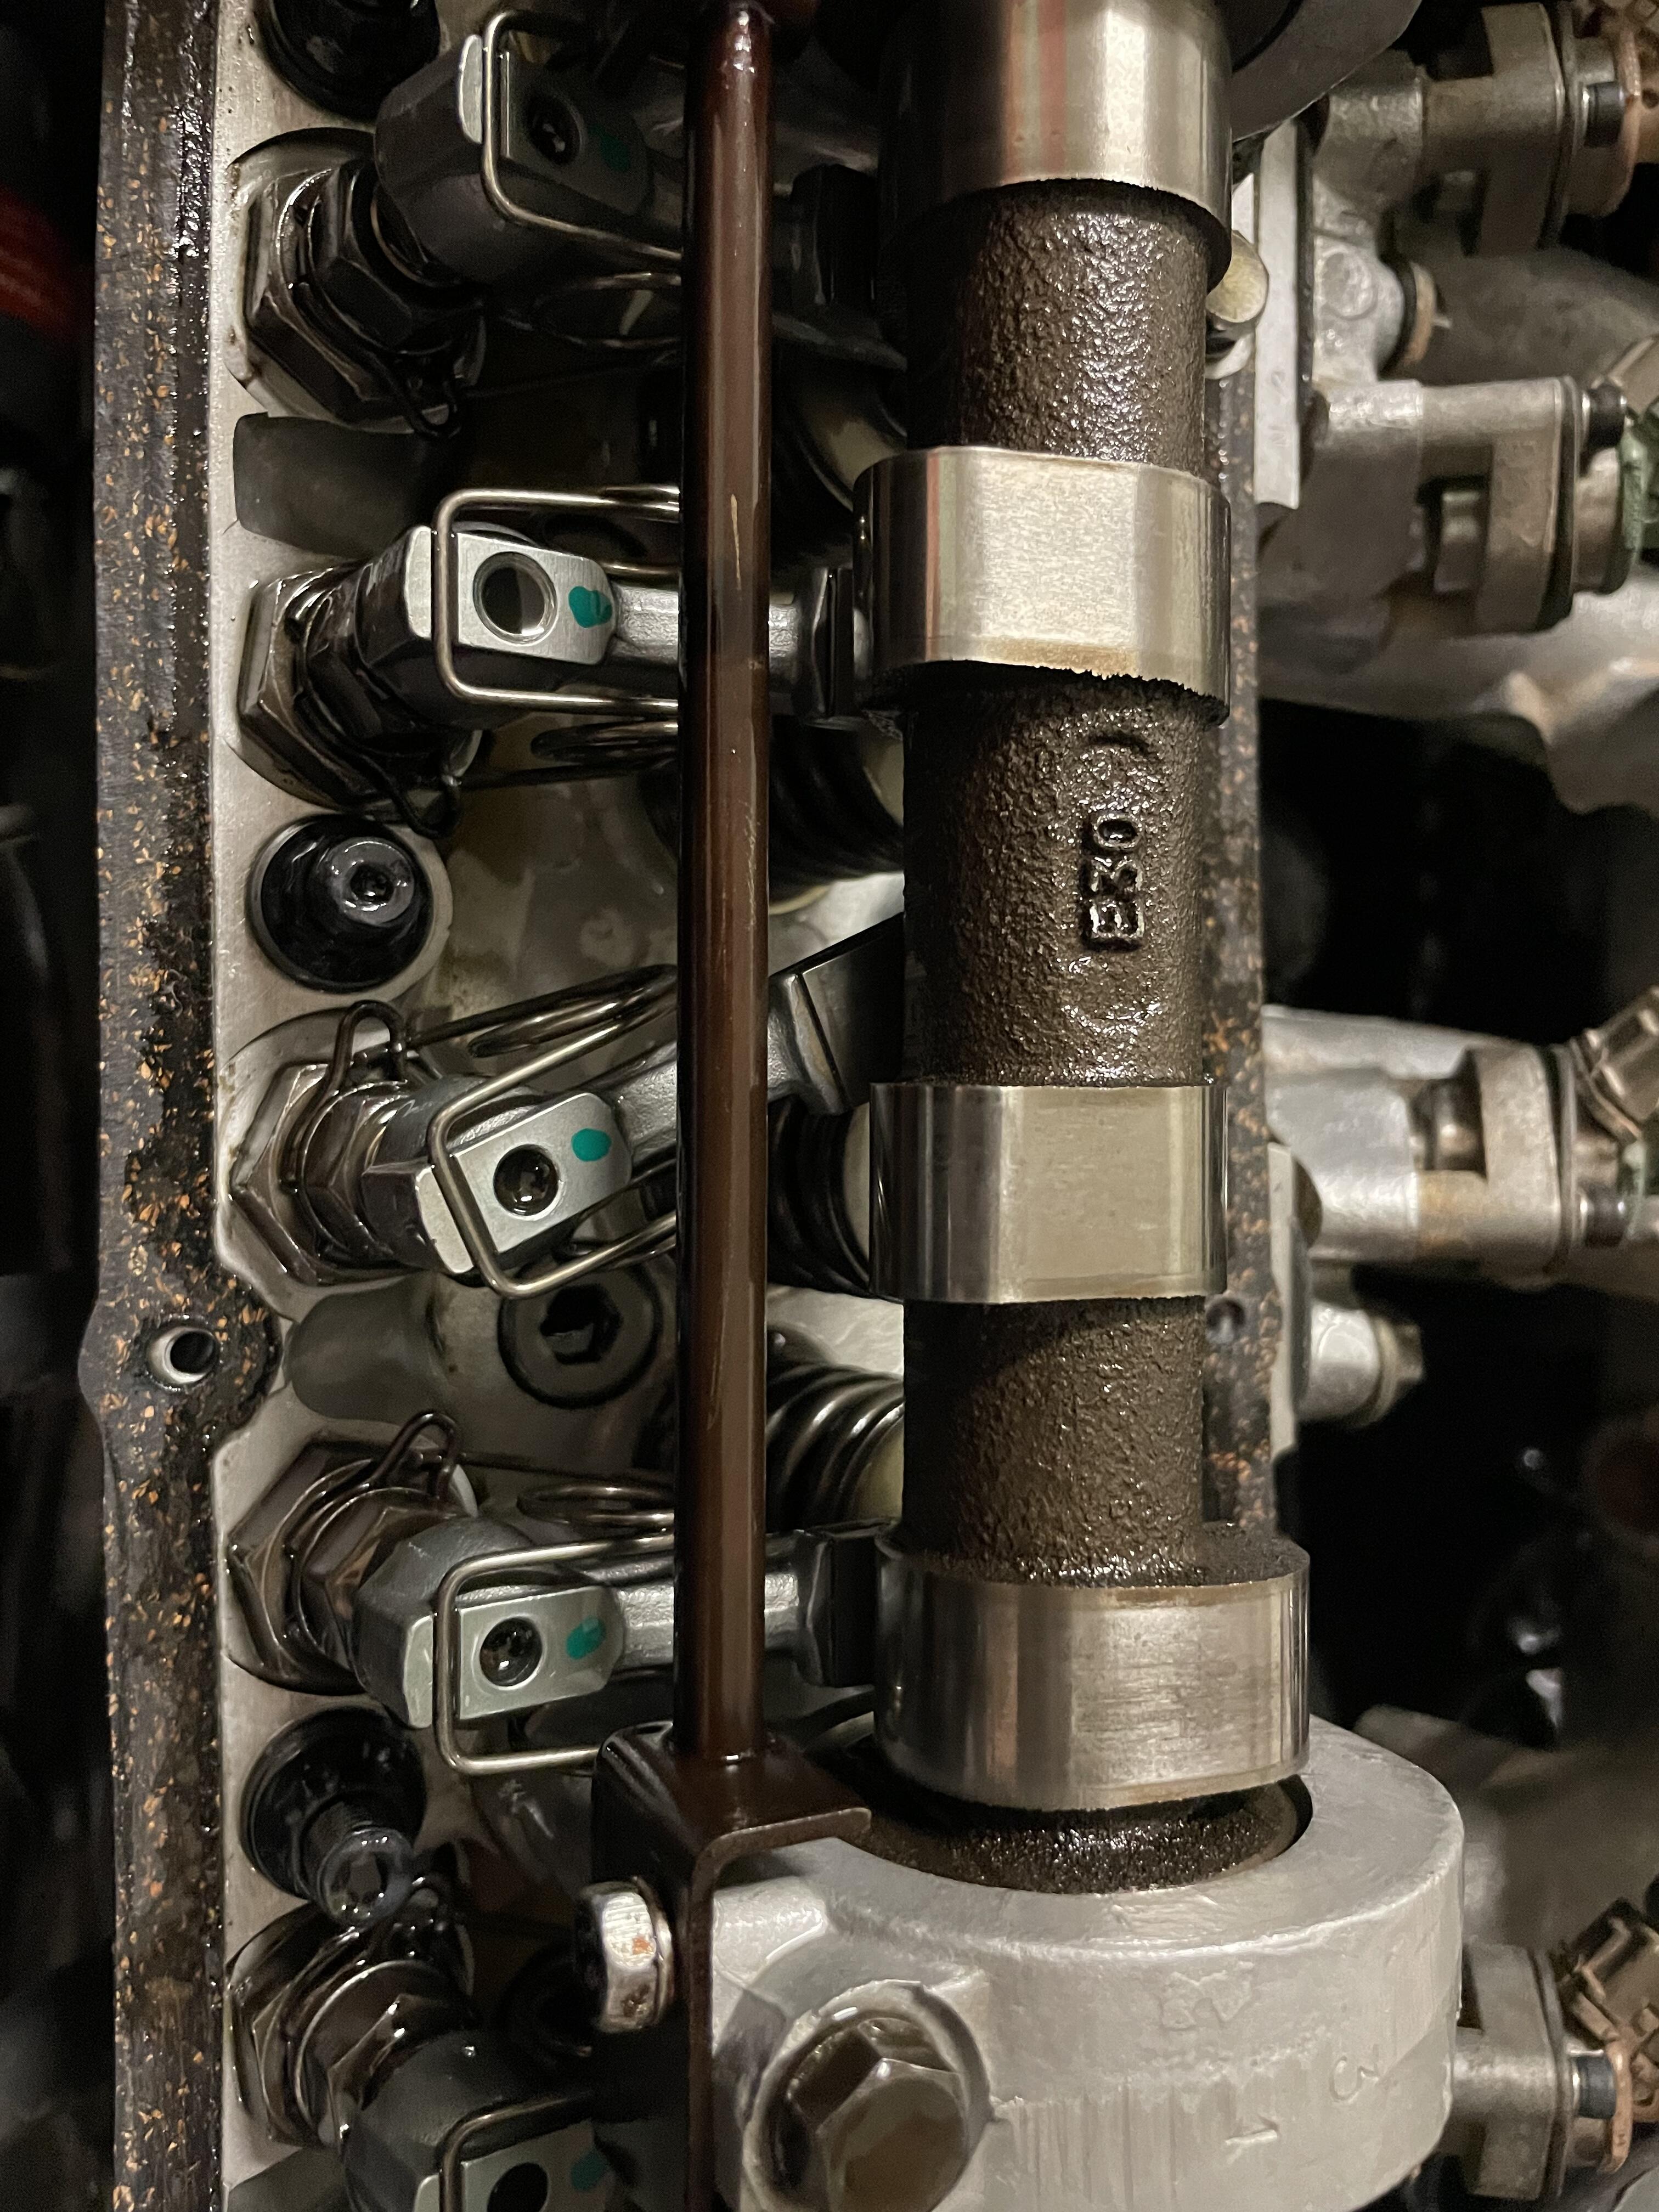
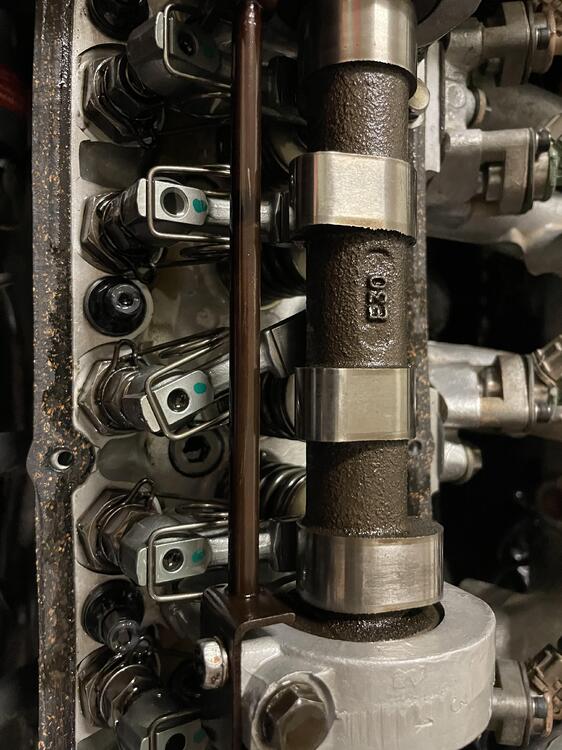
Took off the valve cover and what in the world!!! And intake rocker jumped on #4. Luckily nothing is scored and the retainer was easily found. could this be the culprit? Maybe the fuel was building up in the chamber and steaming off? But this would probably have been black smoke? I’m hopeful but doubtful…other thought is the increase in vacuum was pulling oil through the seals causing the smoke.
-
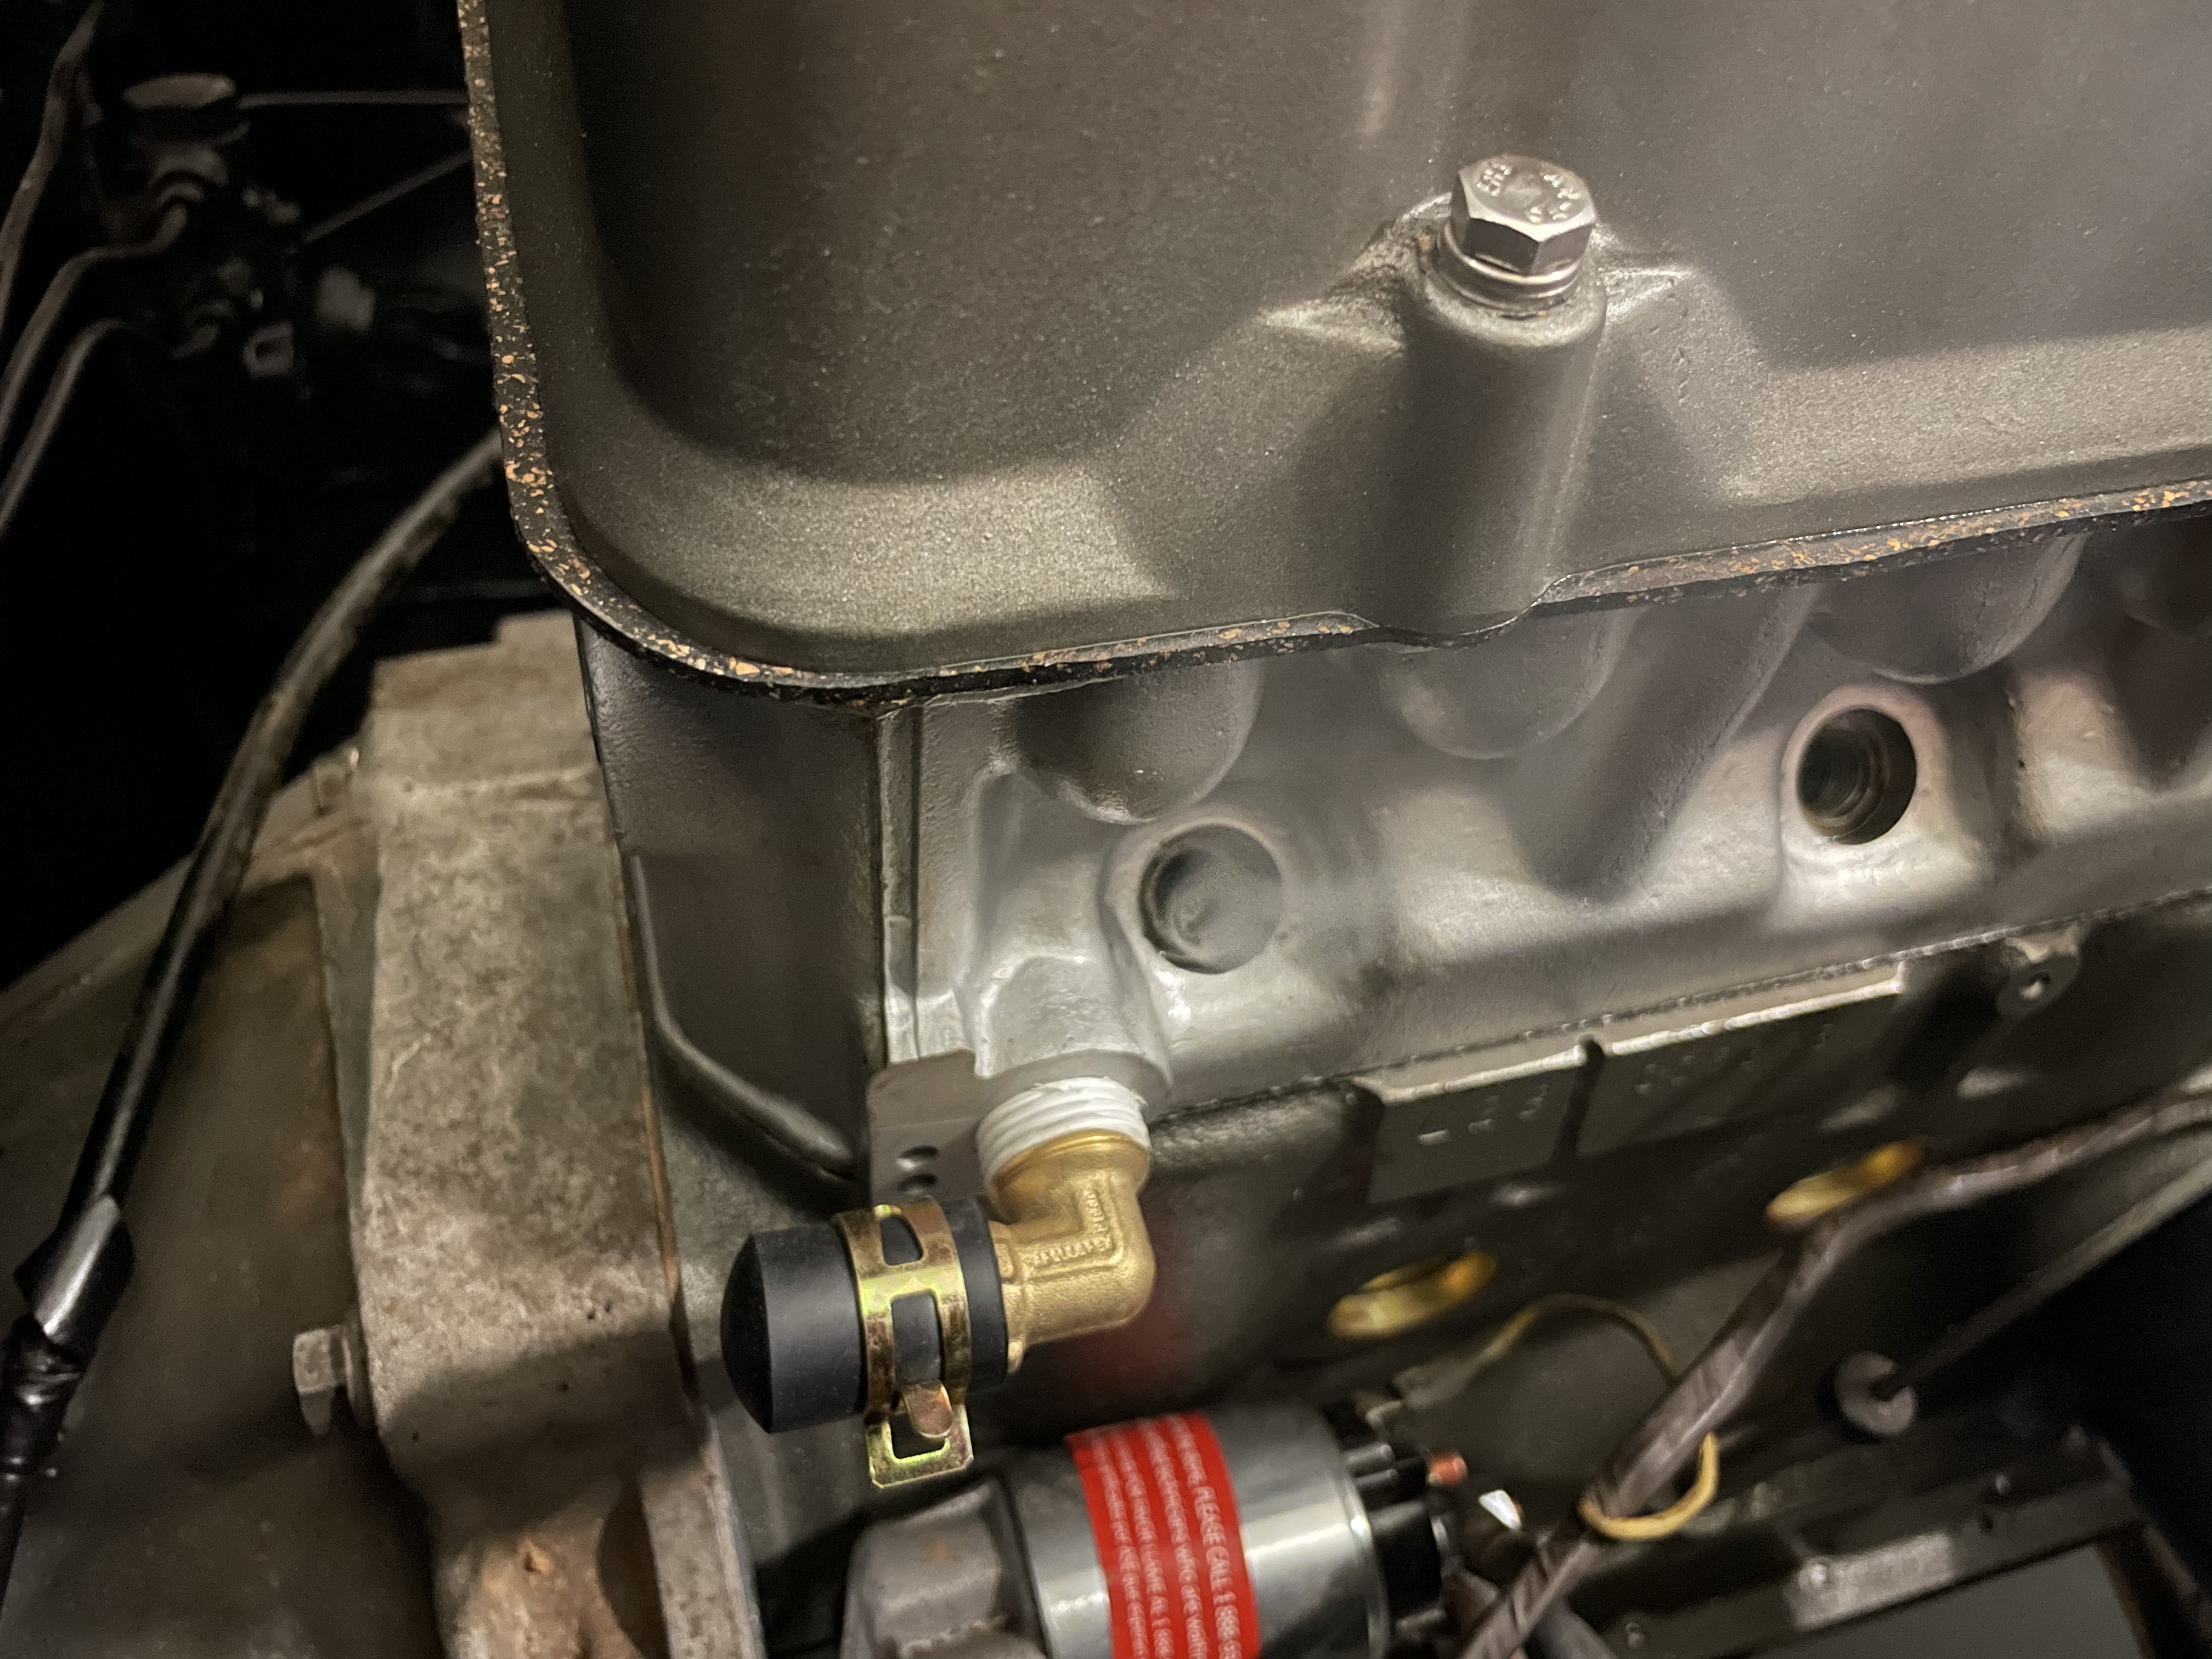
Well… the highs are high and the lows are low. Today I changed the oil and retorqued the ARP studs. A few needed about an 1/8th turn to get back into torque but nothing felt odd. 60ftlb per the ARP slip. I ensured I was going in the correct sequence as well. Started up fine and I started to let it warm up. Not even a couple minutes later the idle became strange. Wouldn’t want to rev either. Then the dreaded smoke started coming from the tailpipe. It definitely was not even at operating temp yet. I thought maybe I spilled something and left it at that as I bled the front brakes. I came back to start the car and still smoke. The car is filled with water in the coolant system for reference so no odd smells. I pulled cylinder #6 plug and well…. I have no idea how this could have happened but I think the head gasket just blew. Someone please tell me there may be another answer but all of my car knowledge points to this 😅 Edit: first thought is perhaps an air pocket. But I do recall the fitting in the picture blowing off during my first warm up since I forgot the clamp. I cant imagine air getting trapped when that happened, unless it made its way back there...just odd that it happened when the car was not up to temp. Second thought is maybe one of the coolant passages is blocked with gunk? Hard to speculate though without removing the head. Such a bummer, right as it was done! The bright side is that if it is the head gasket, it is a cheap fix and can be done in a day.

-
Hahaha that’s perfect!
-
A little more detail on yesterday: I started first by draining the fuel tank. The fuel was getting dark, presumably from sitting in the tank for about 6 months, breaking down whatever my cleaning didn't wash out. I was able to pull out about 2 quarts of fuel. From there I headed to the front of the car and drained the fuel rail. I still had 35ish PSI in the line, but cracking open the line I had a nice long hiss of air, followed by a few oz of fuel. So there was definitely a major air pocket up there. New fuel went in, primed the lines, and it started right up 😄 I let the car warm up to start working on the idle. I couldnt get it down below 1200 for the life of me. I placed new vacuum plugs on all fittings, replaced all vacuum lines, and started using starter fluid to find any leaks. Nothing was present. Luckily I found a Youtuber who was encountering the same issue. The BCCD block off plate cant just be placed on. You need to plug one of the holes to not let the air pass through the throttle blade. A quick plug and boom, problem solved! I dialed up the idle to be 800rpm. Set my timing to 12 degrees BTDC. I will probably back this down to 8-10 since I am running a higher compression flat top piston. I can finally clean up my cobbled up wiring job for my fans 😄 I had the car pulled out of the garage during my testing and was tired of pushing it back into the garage. I slapped a plank of wood inside to sit and precariously climb in. Clutch felt great, brakes not so much. But I slowly went into reverse and backed her up into the garage. A very anti climatic first drive of 10 feet...but it was the first time moving under its own power in nearly 30 years! I do have a minor leak at the oil pump (I think). I am surprised no rtv was called for in my manual for this gasket. I will do a thin layer and hopefully that will fix it. New oil and a filter will wrap up the engine work. The floor restoration is up next...stay tuned.
-
I was out of gas….what kind of timing is that! folks just because your fuel pressure gauge shows pressure doesn’t always mean you have enough fuel to run 😉