Barefootdan
Free Member
-
Joined
-
Last visited
Everything posted by Barefootdan
-
 Dang, my Z is still apart or I would gladly pull fuses. If you need any reference photos, I can take some for you.
 -
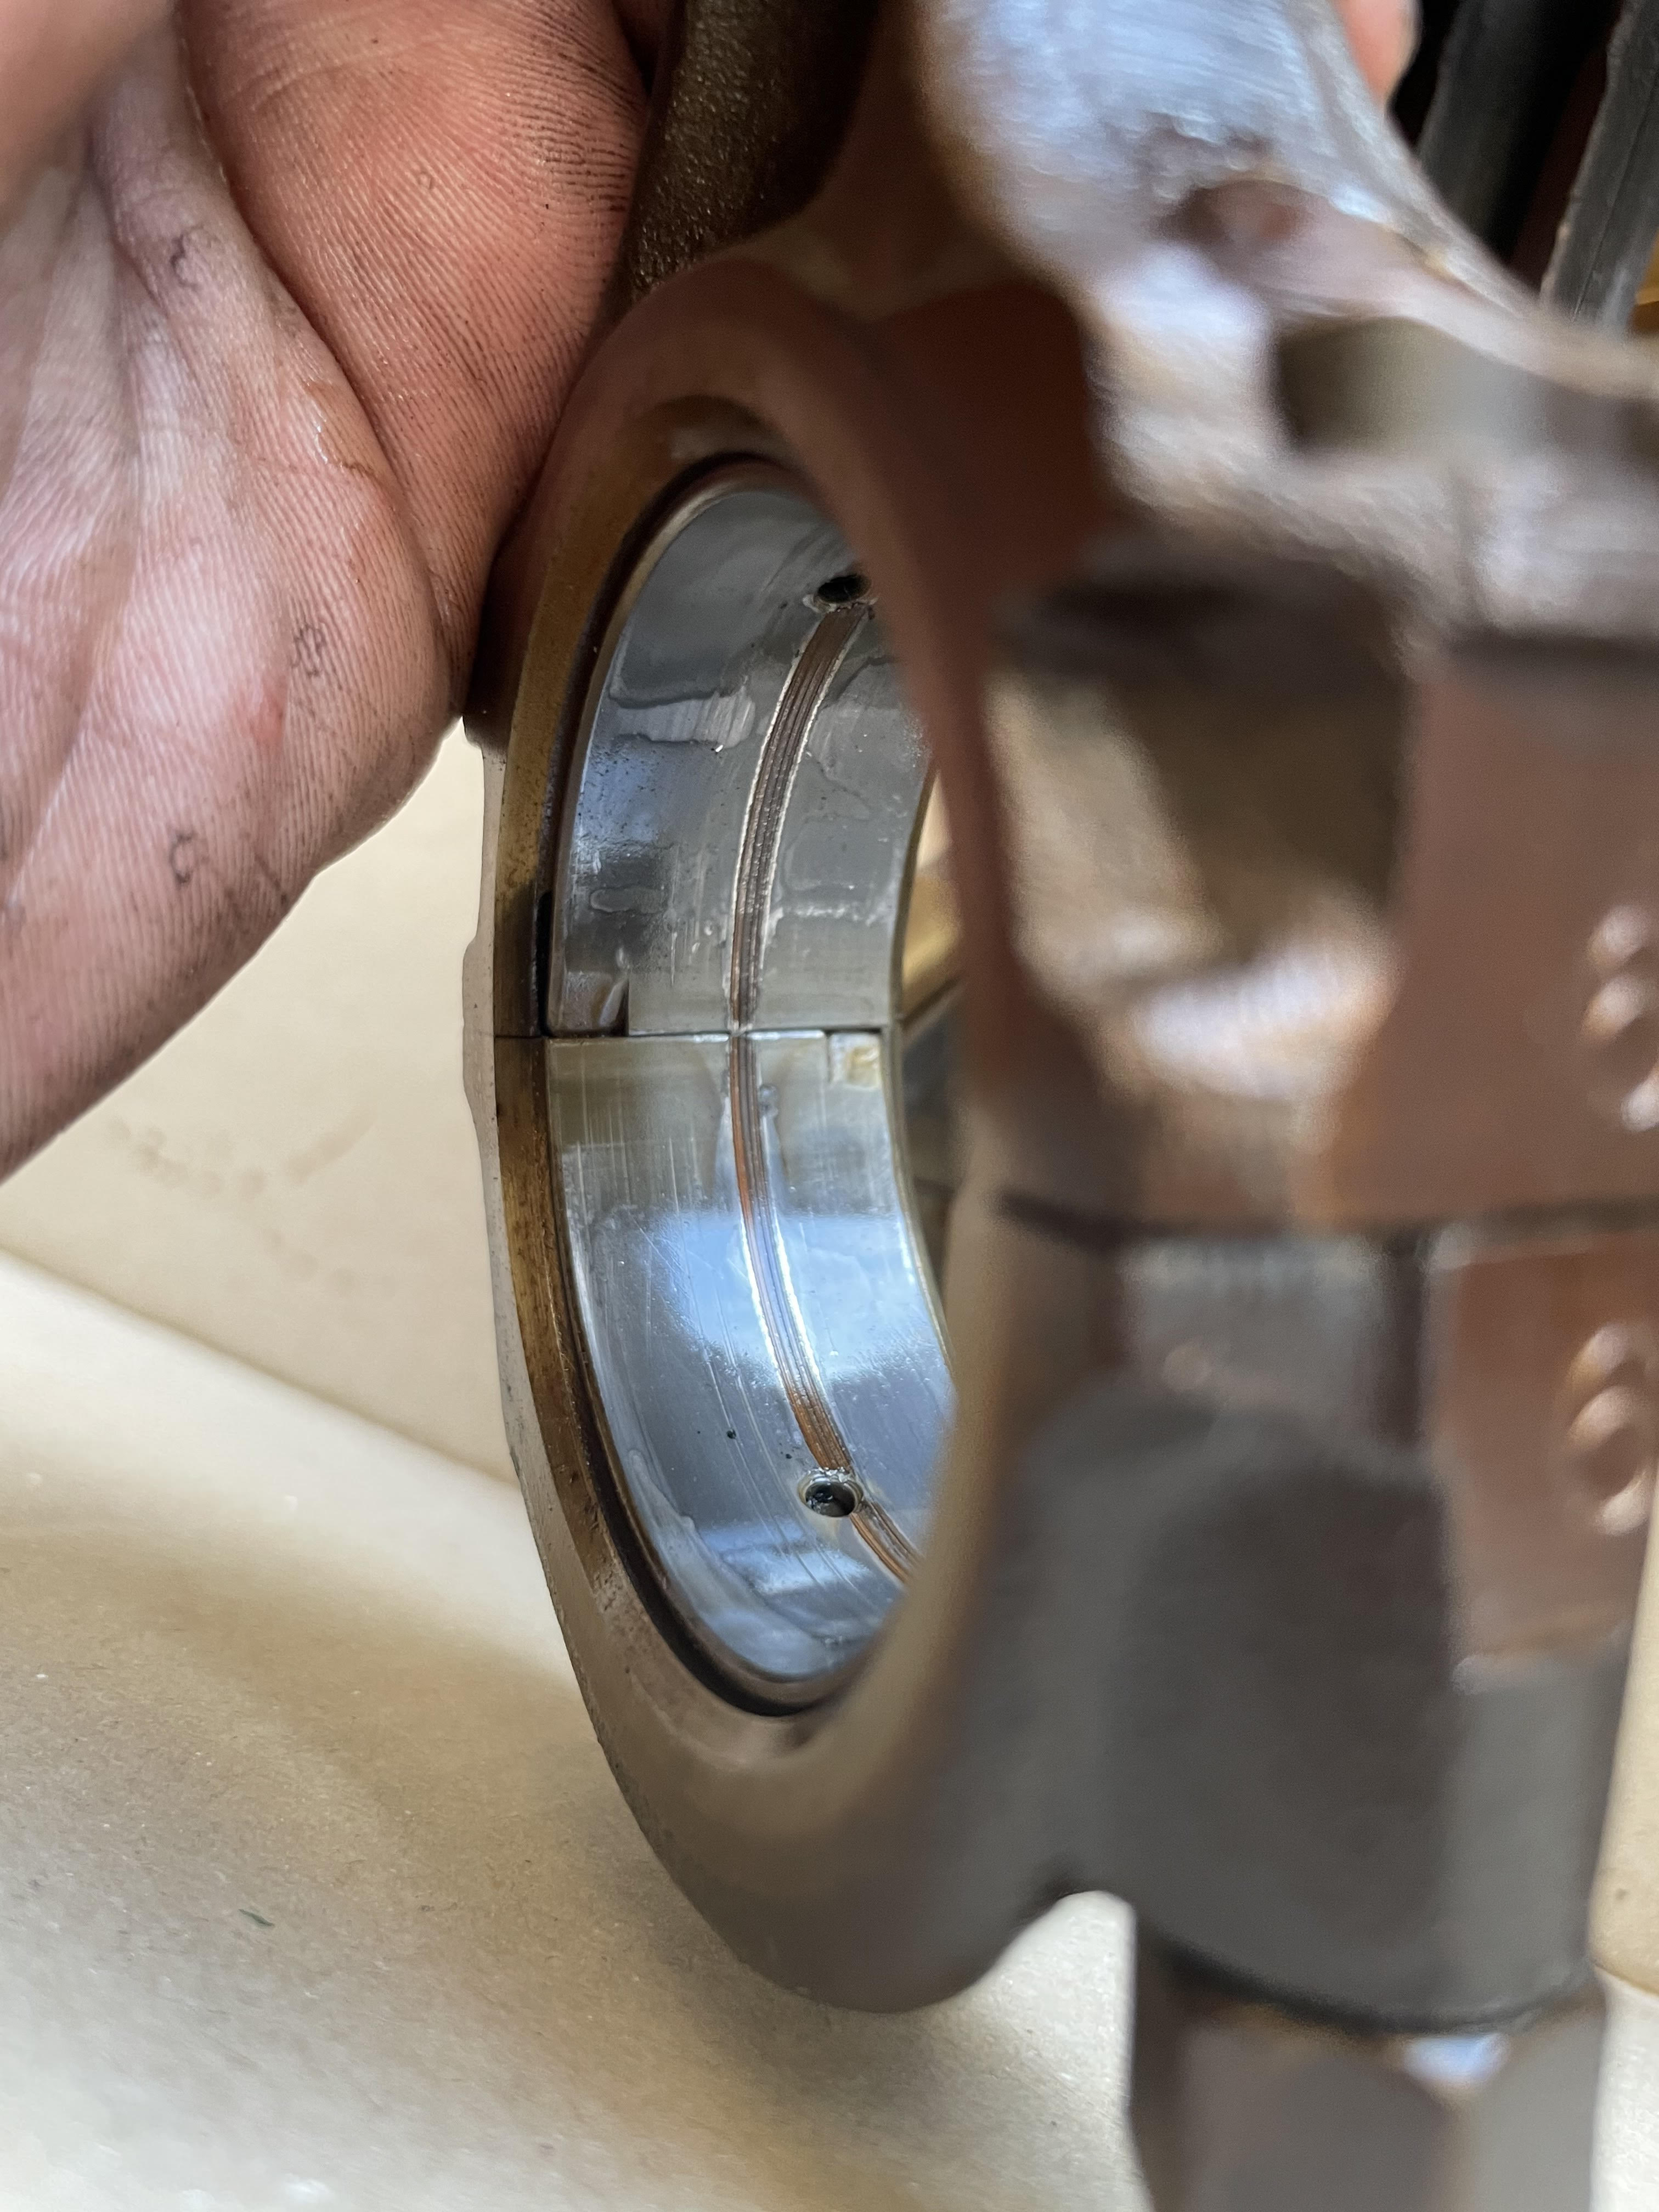
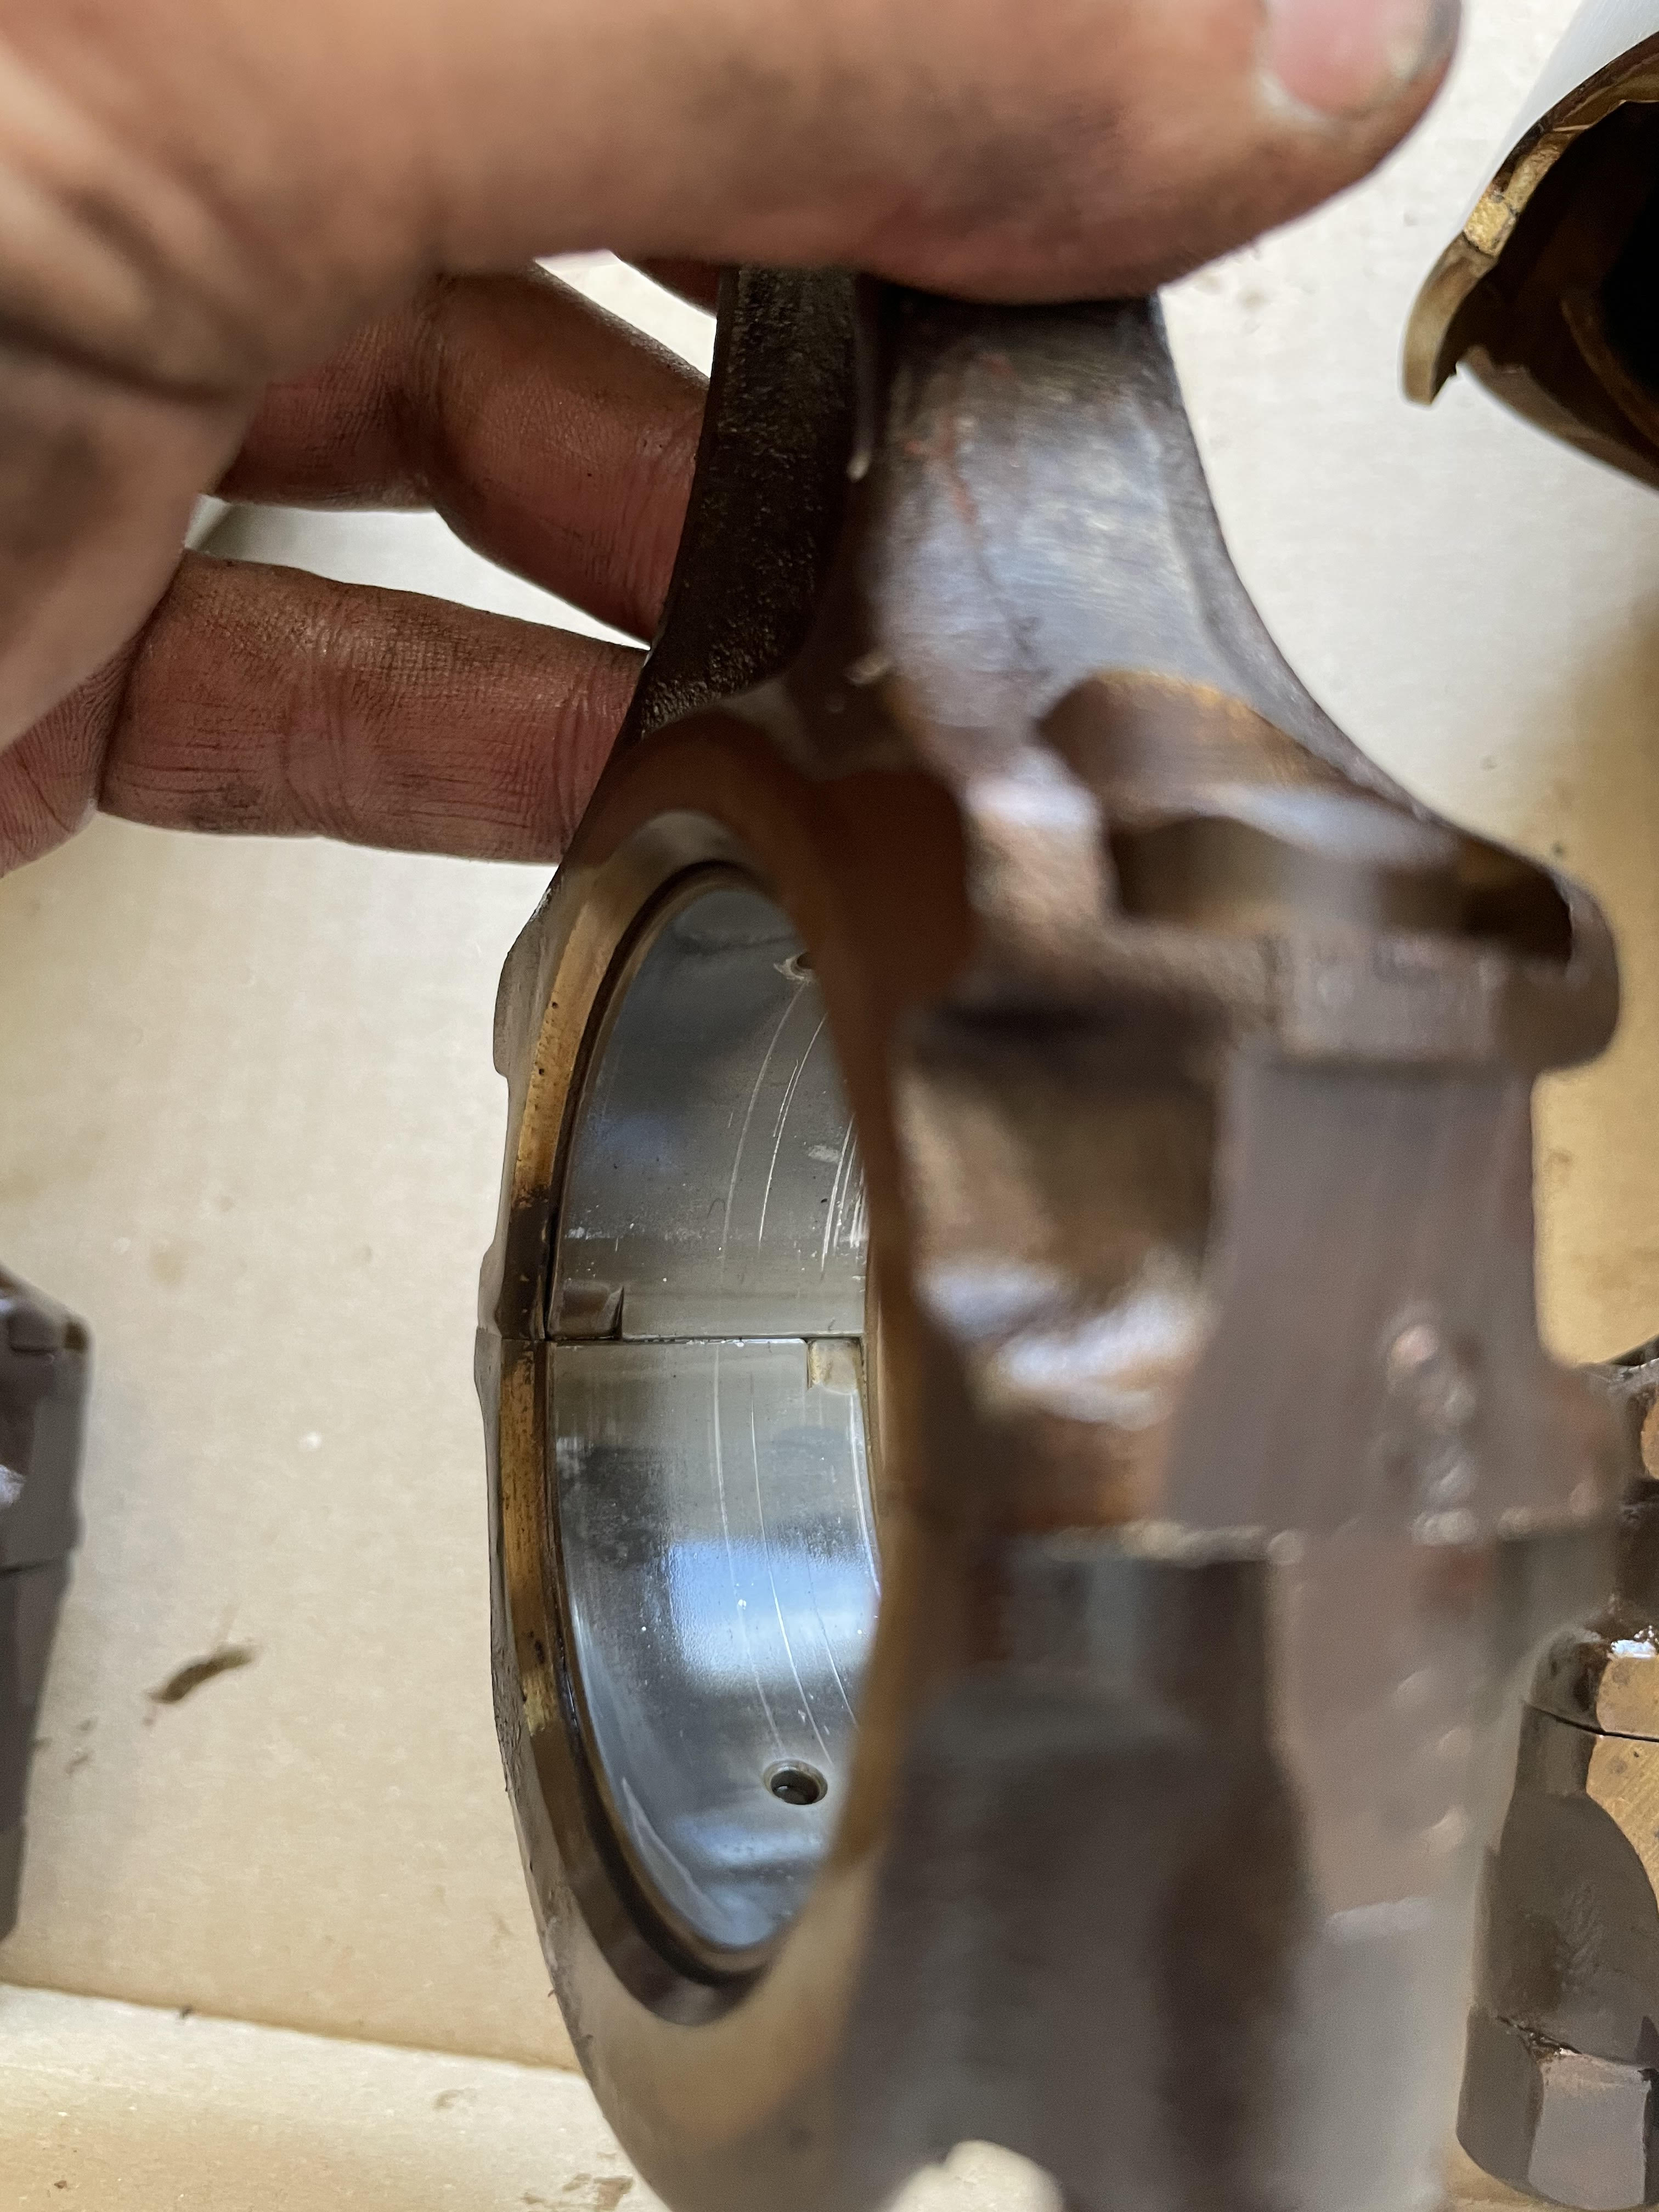
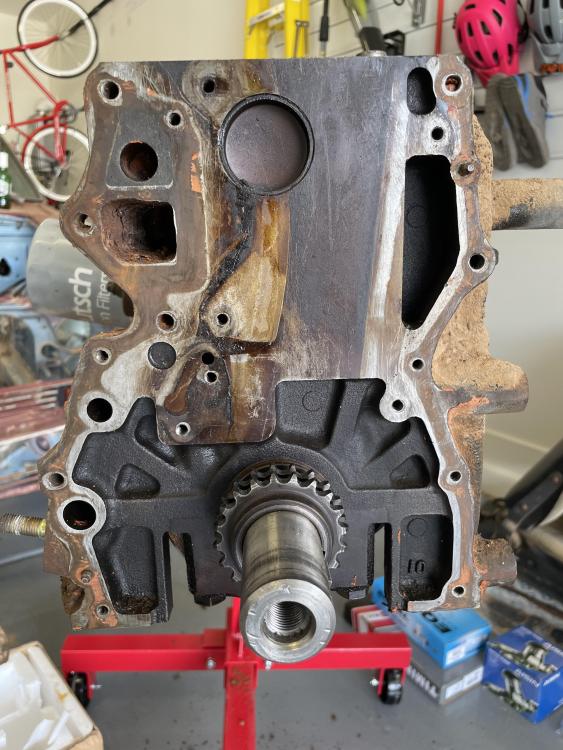
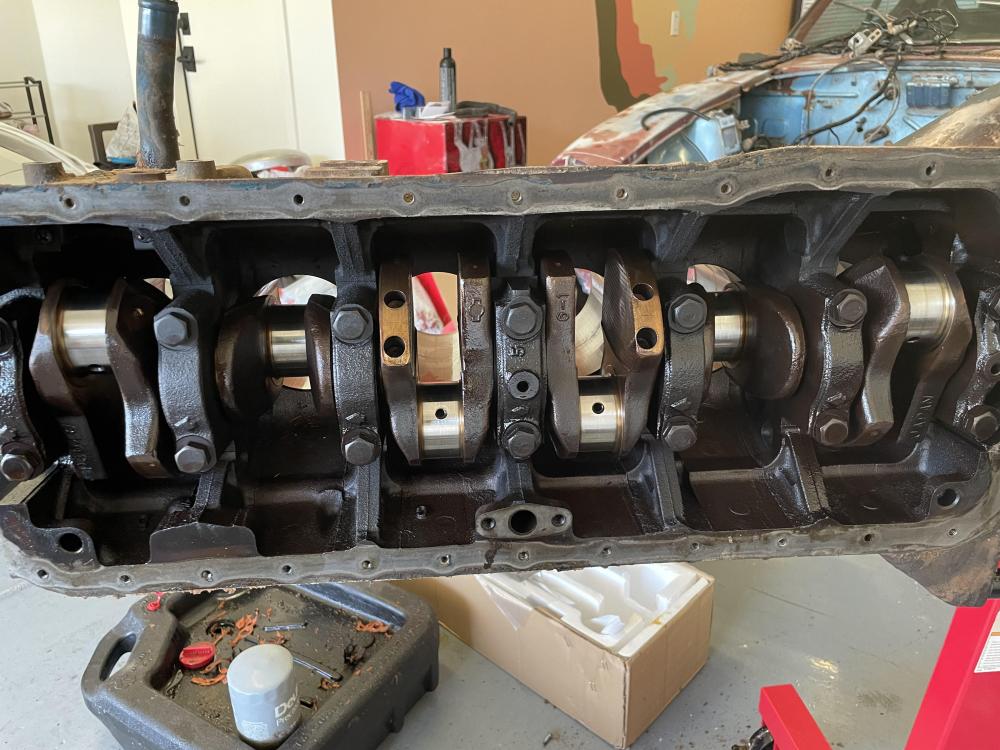
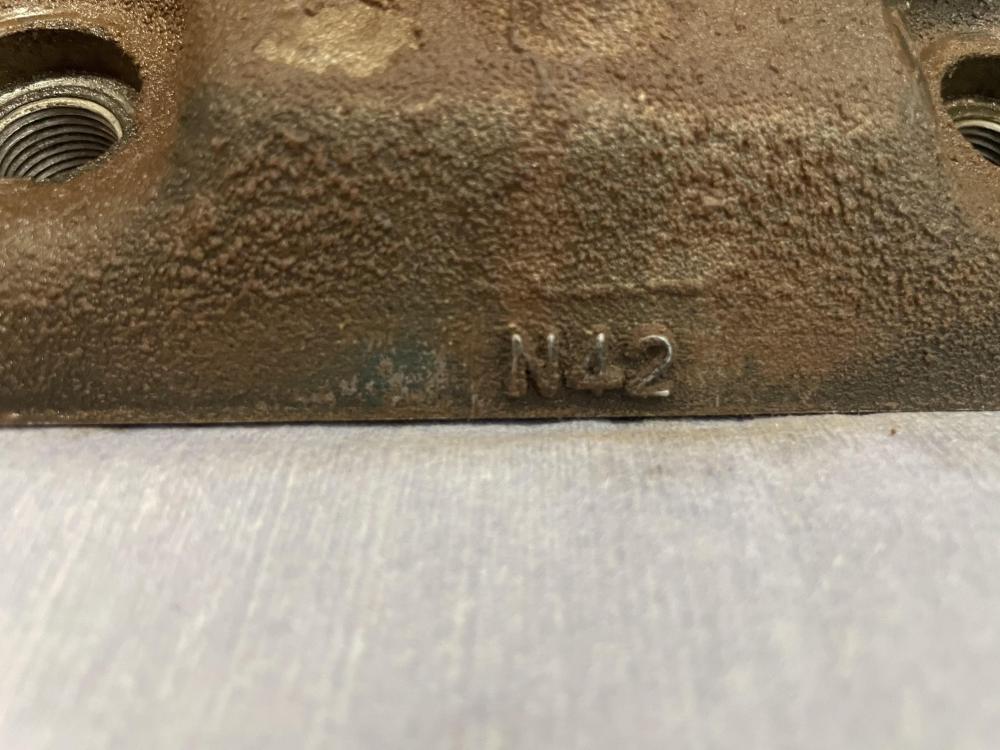
Been slowly making more progress. the crank is fully out and the journals look surprisingly well in comparison to the rod bearings. I was worried for a bit...Next step is to drop the block off at a machine shop for a thorough cleaning. Unfortunately I will be out of town for the next month for summer so the build is on pause for now. AZ summers dont make it fun to work in the garage! It was 117 out yesterday
-
Someone was definitely in the front and top. But the bottom looked fresh from any marks.
-
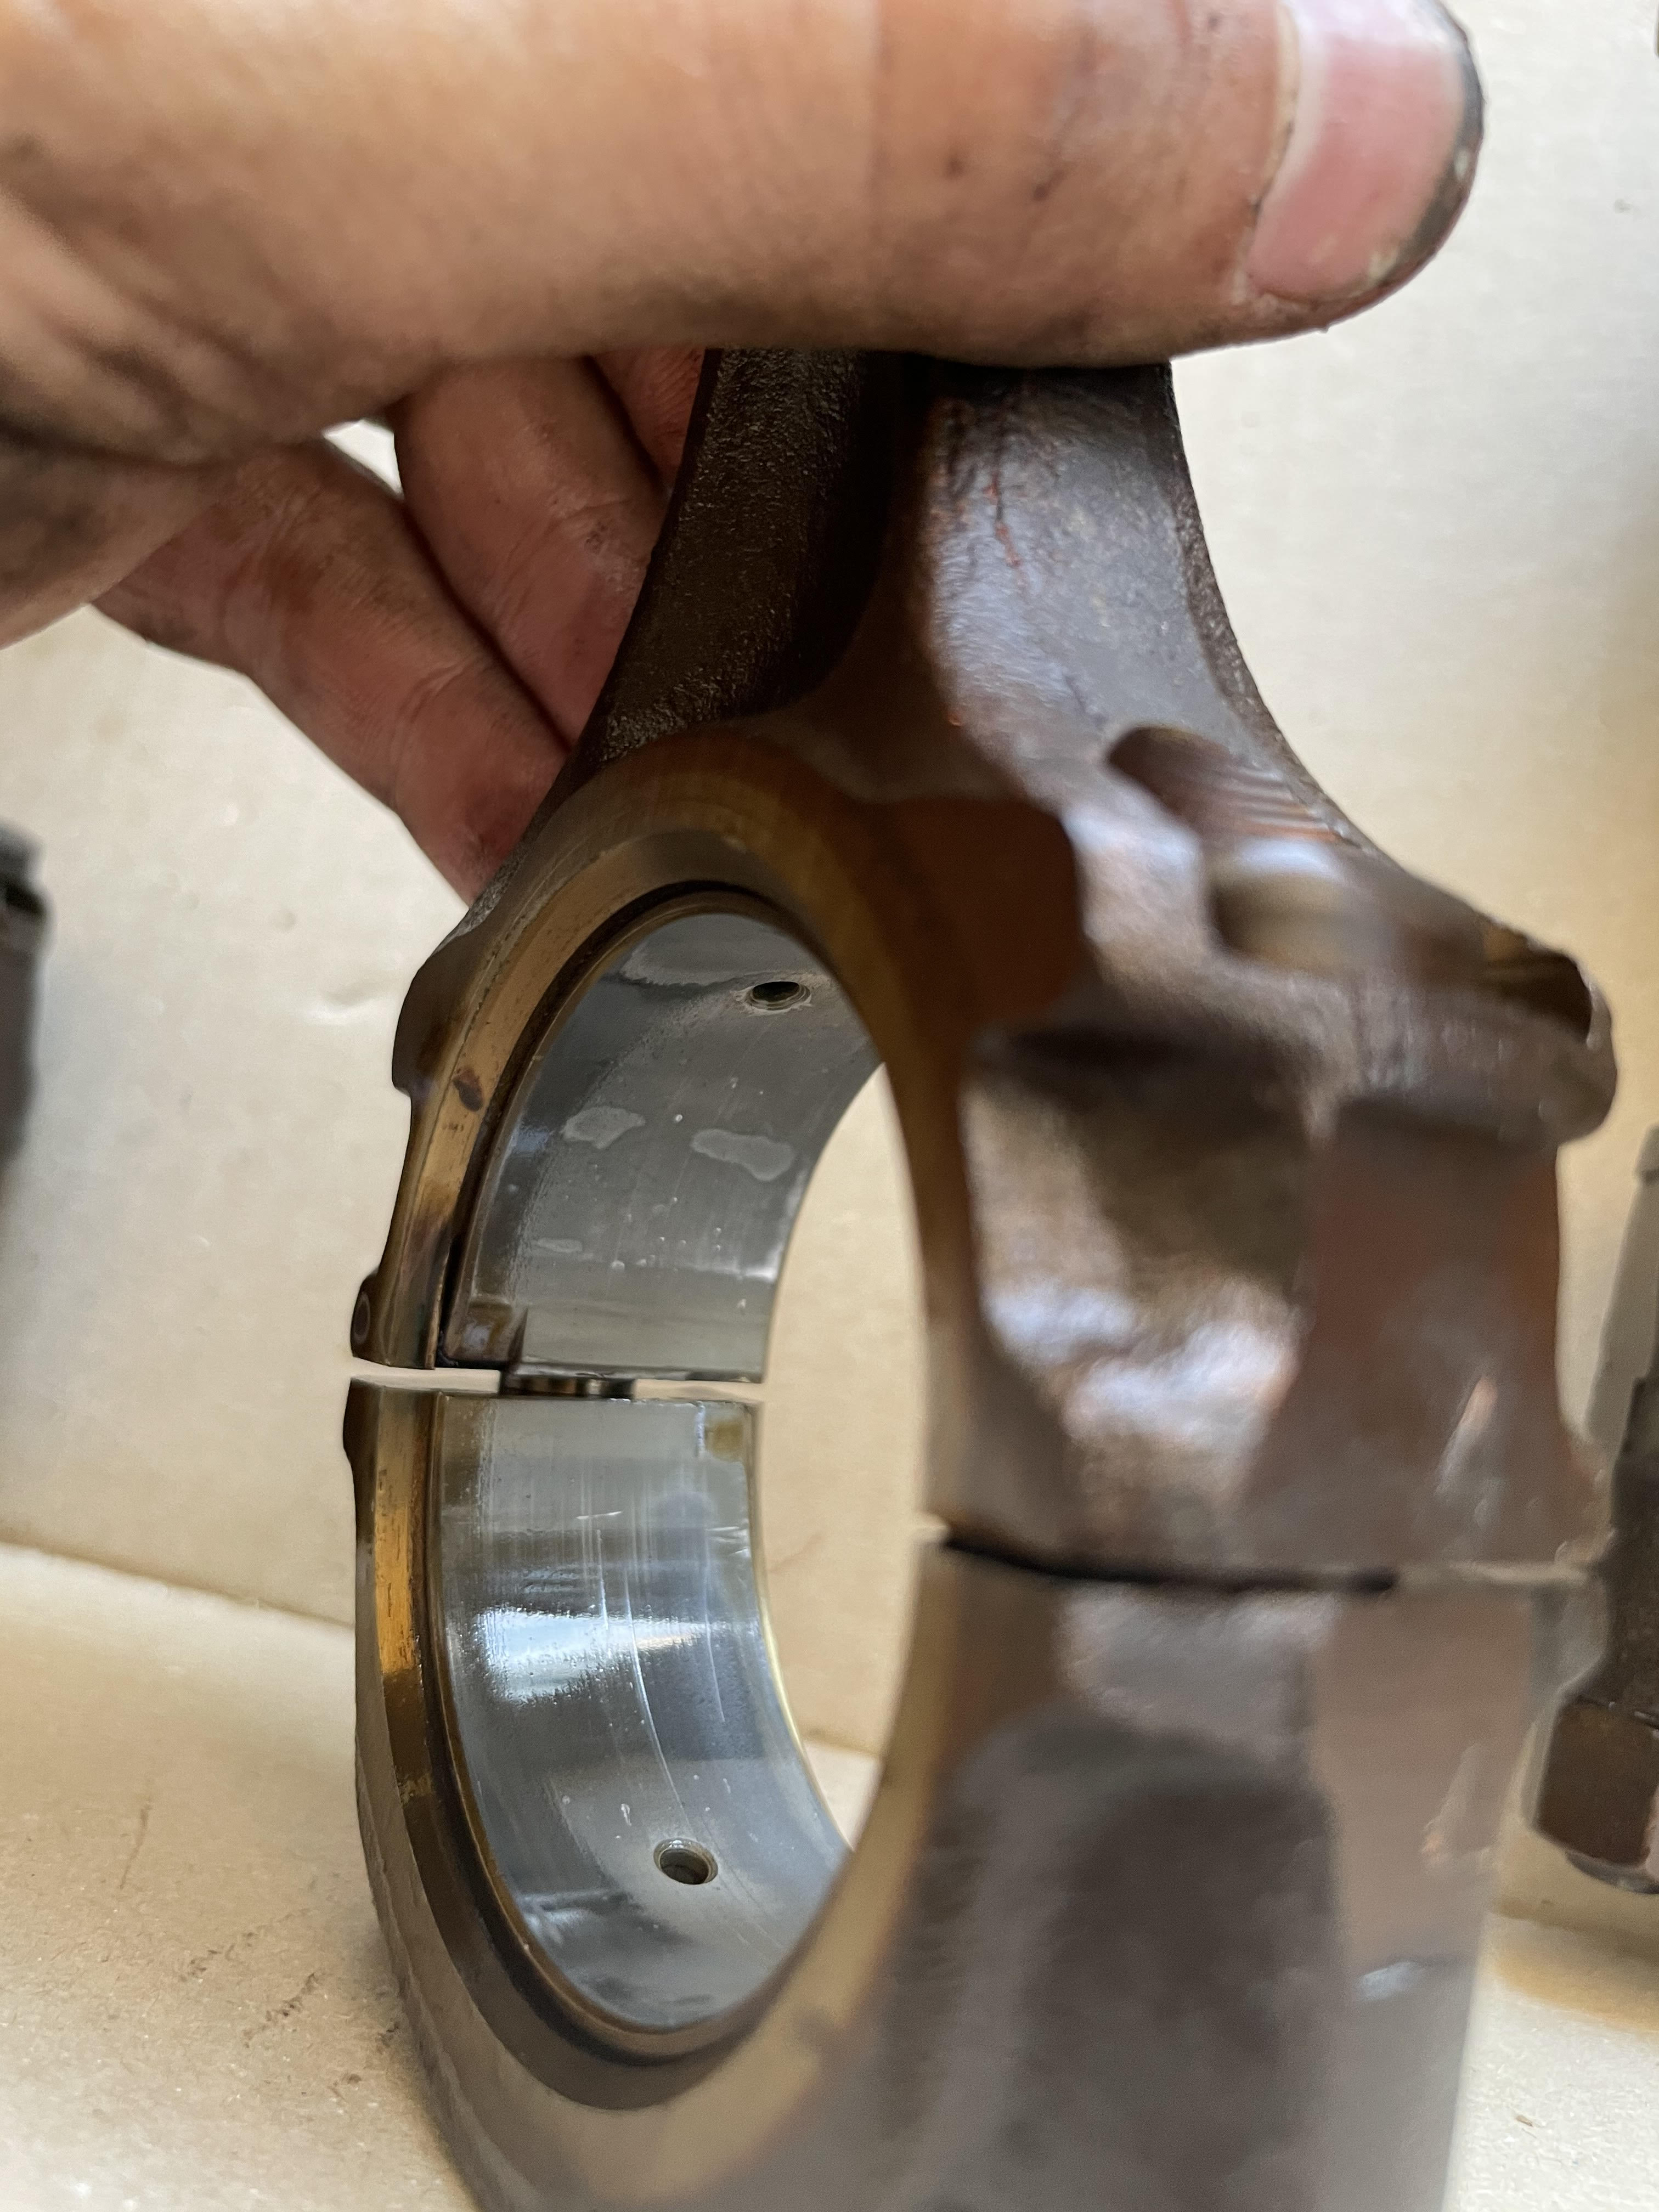
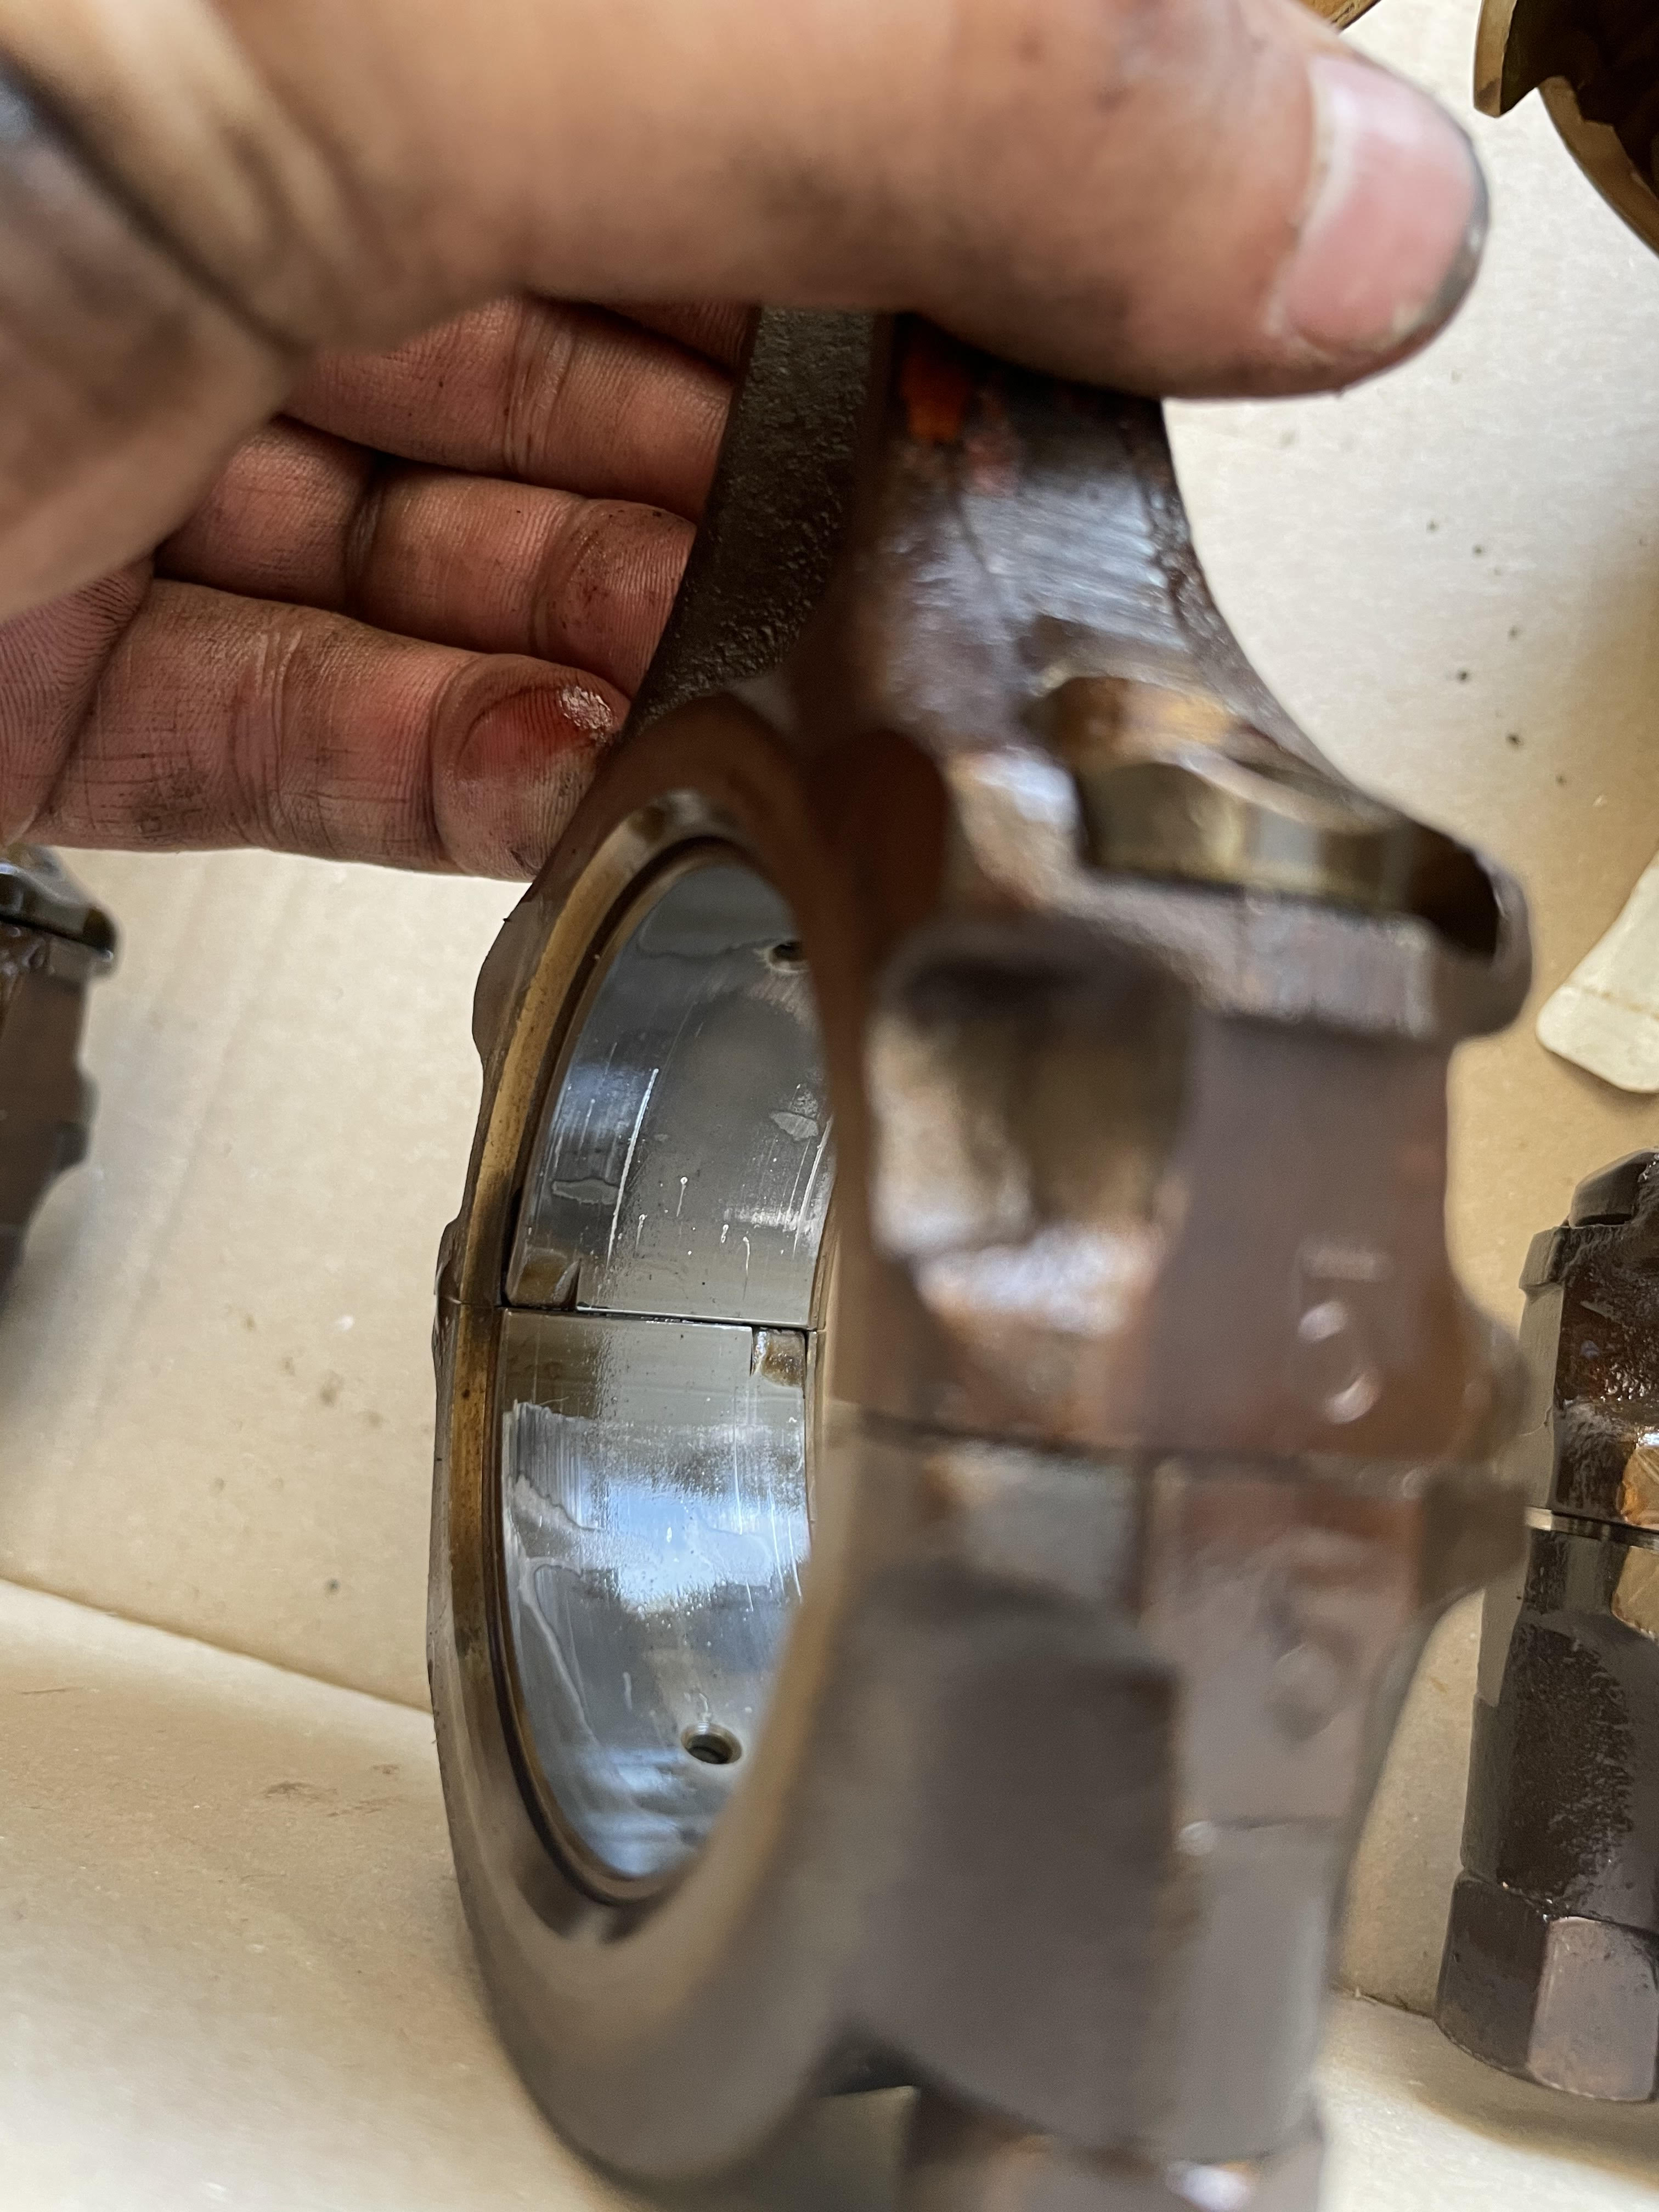
Surprisingly well in comparison to the rod bearings. I haven’t undone the main caps yet though. there is a very slight score in one of the journals but I’m optimistic it came be polished out.
-
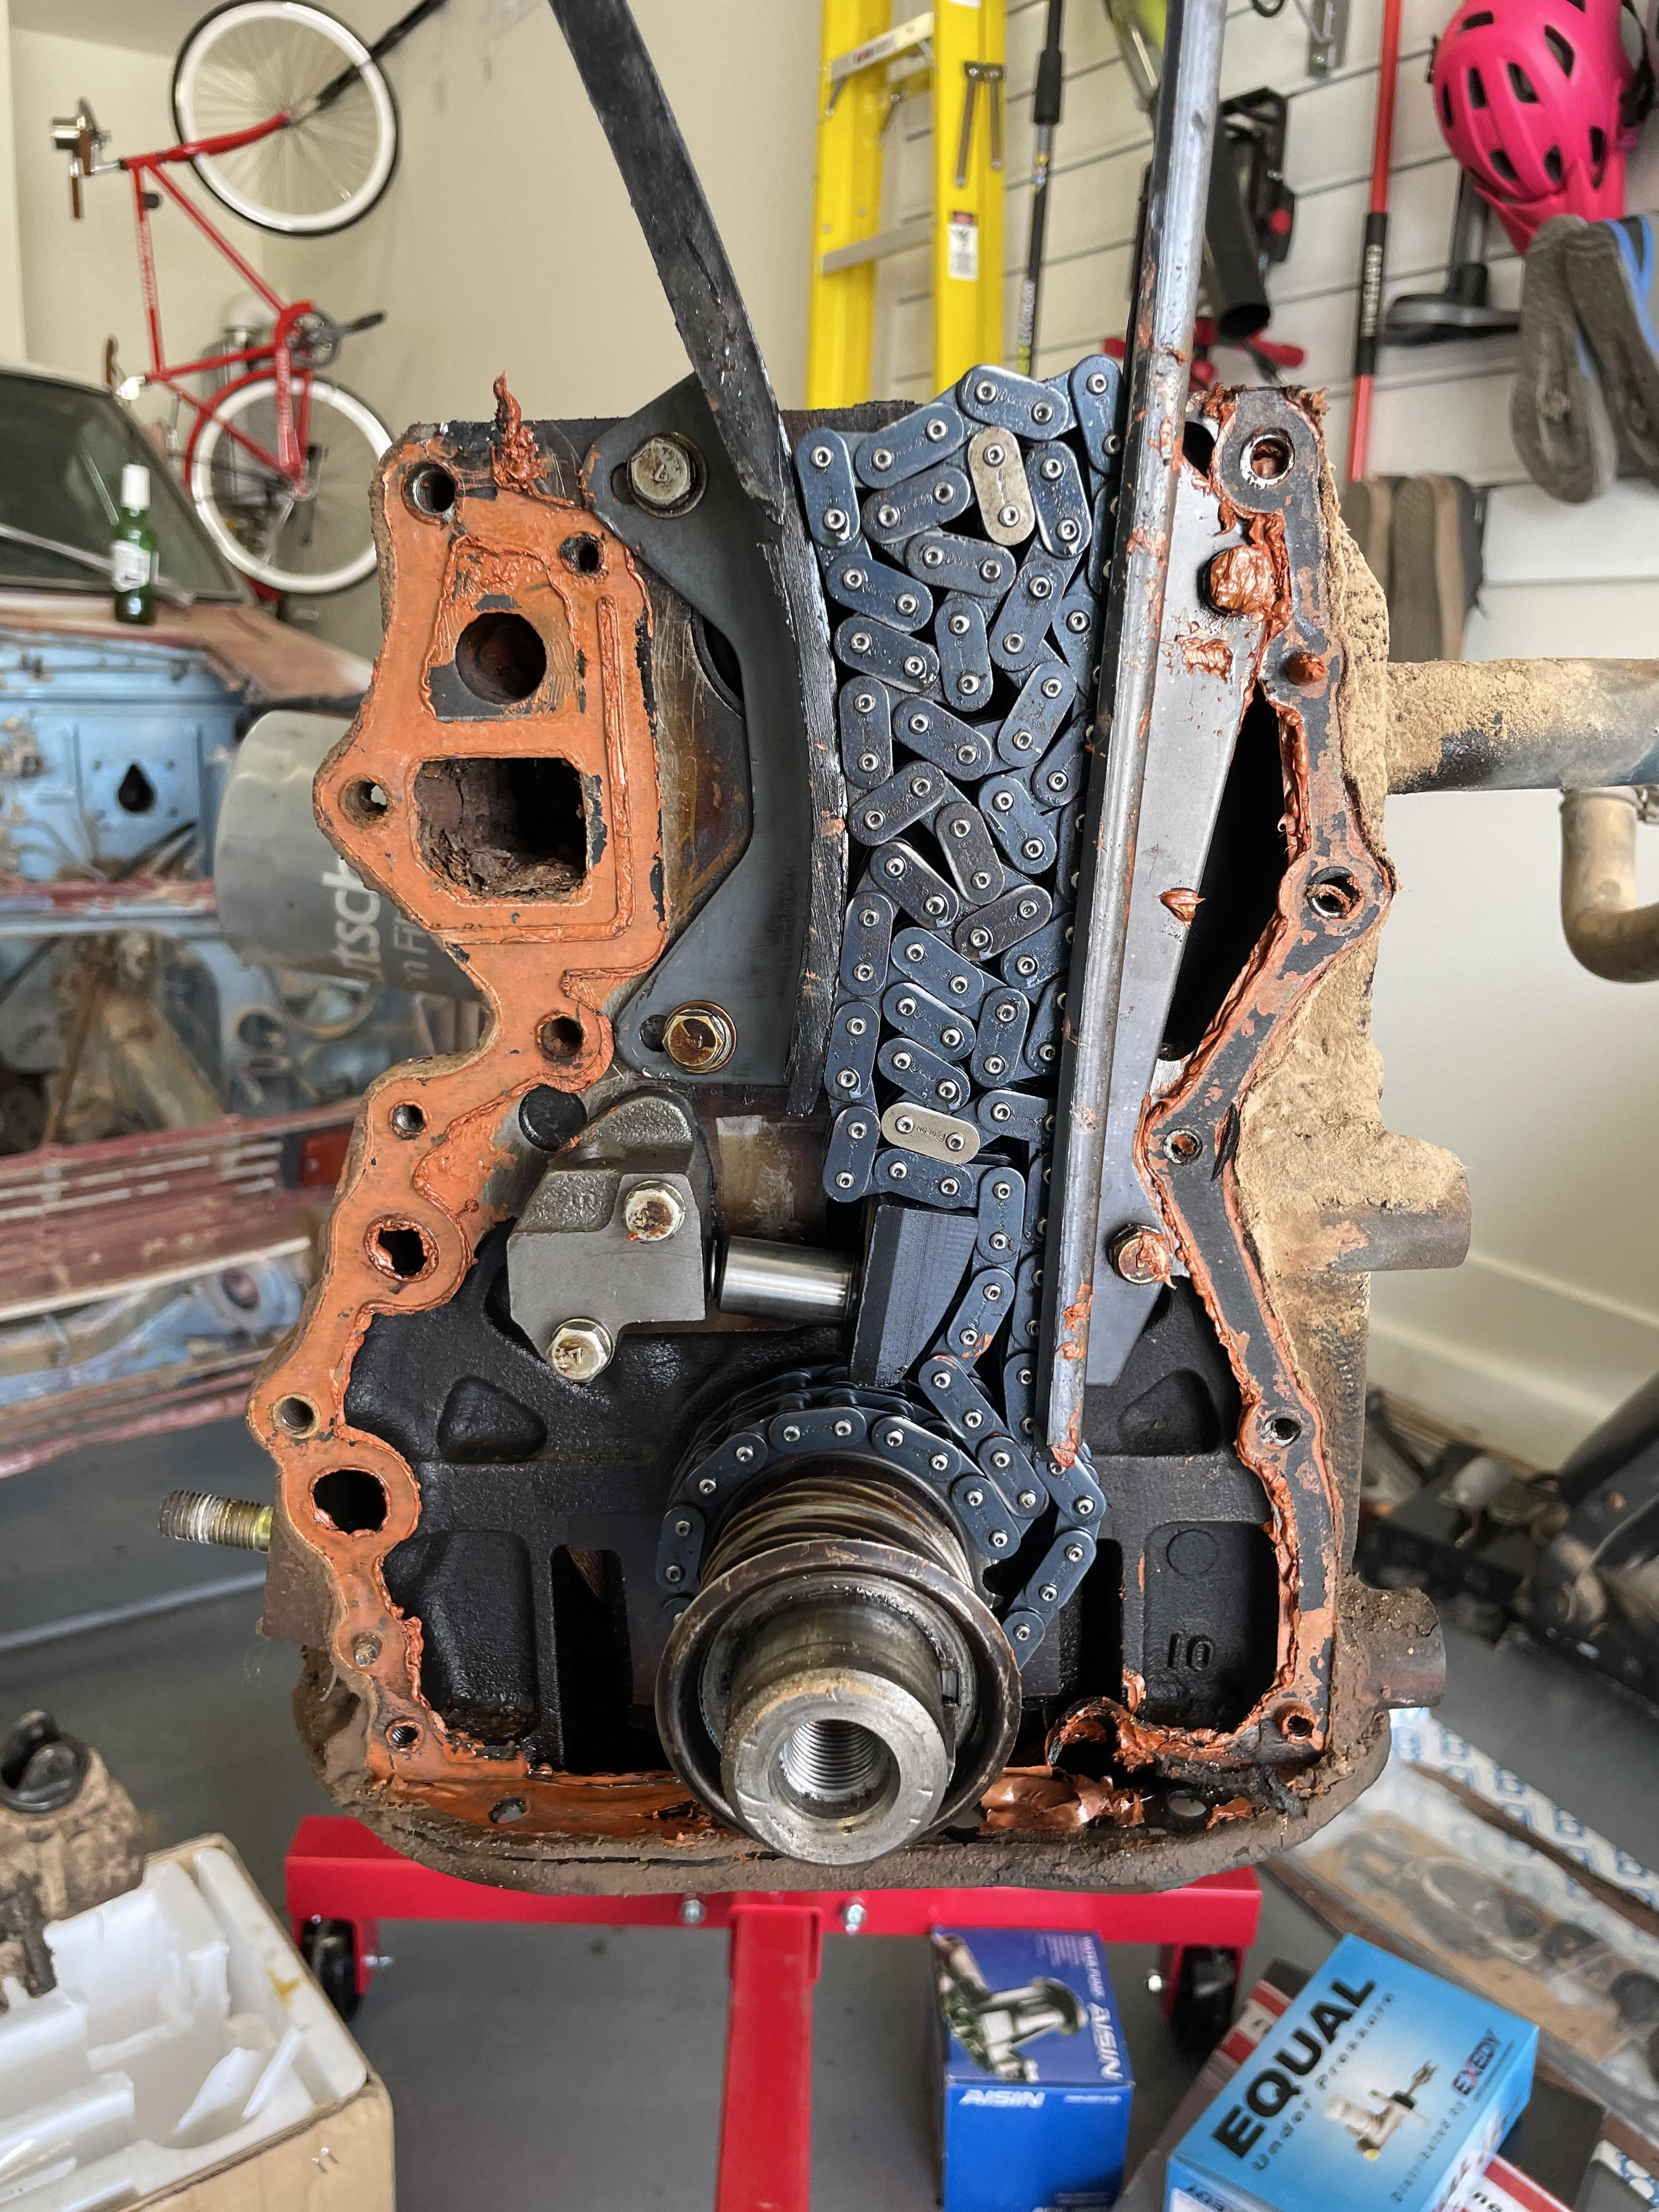
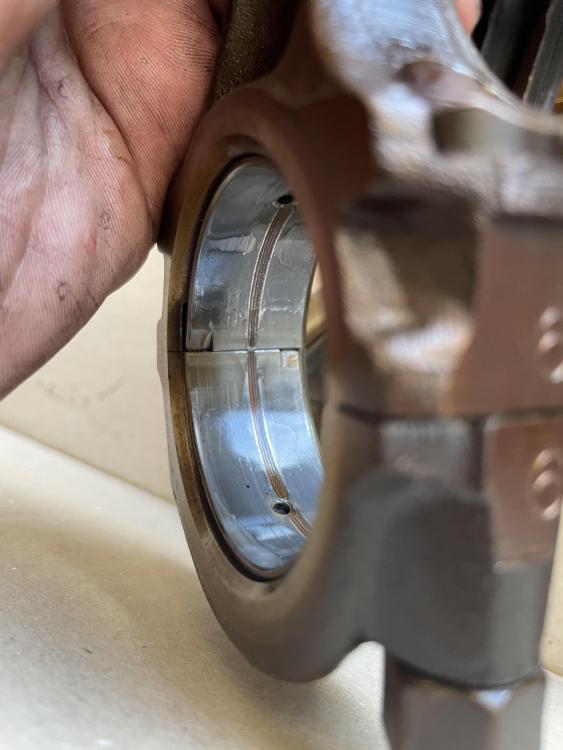
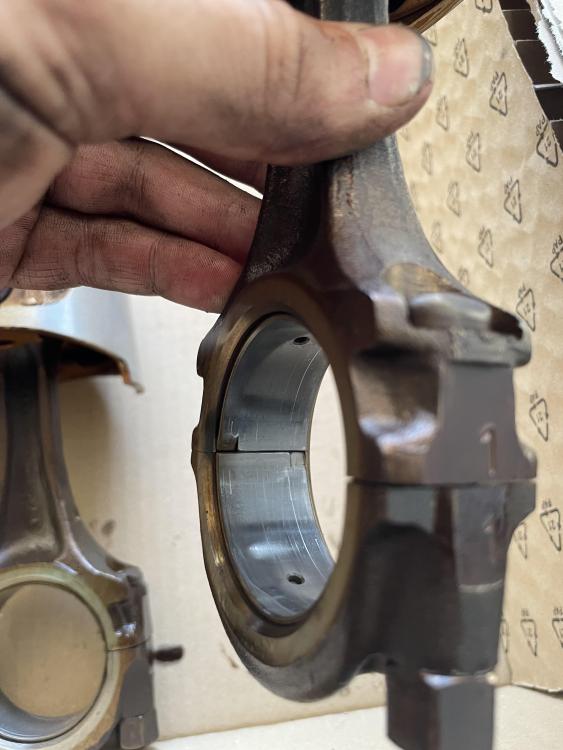
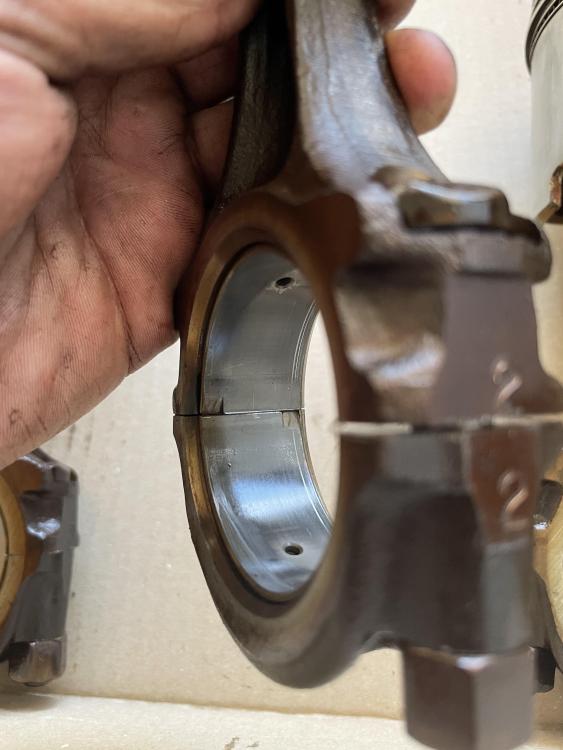
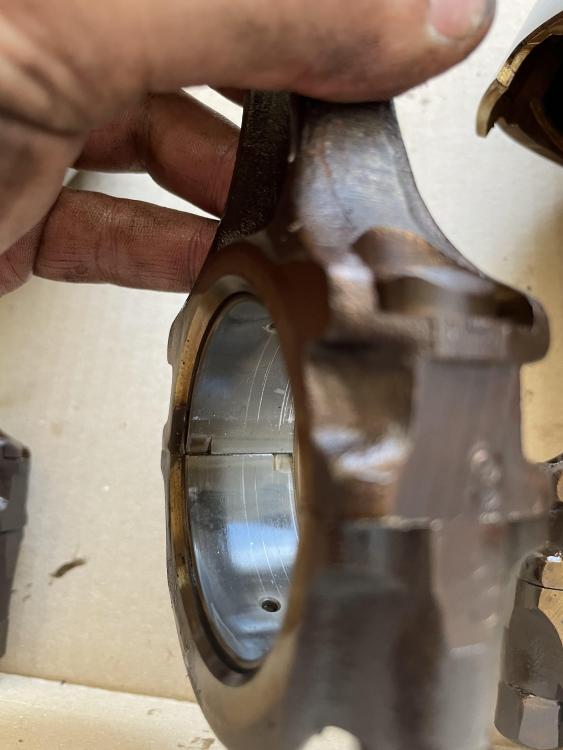
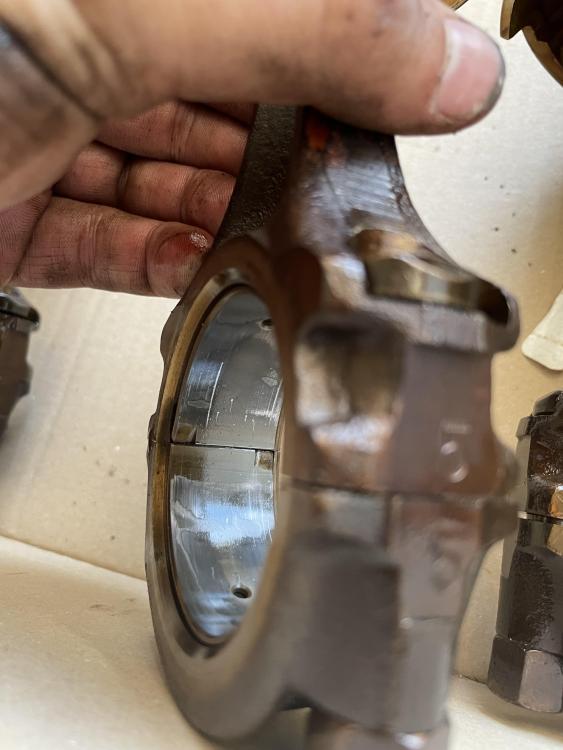
Got the bottom end all torn apart. Someone LOVES red RTV...Bearings are not looking hot. Going to definitely replace them.


-
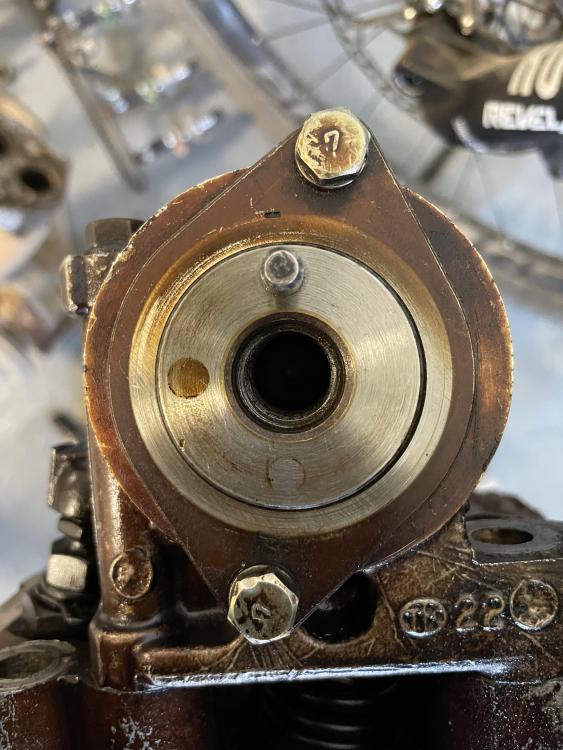
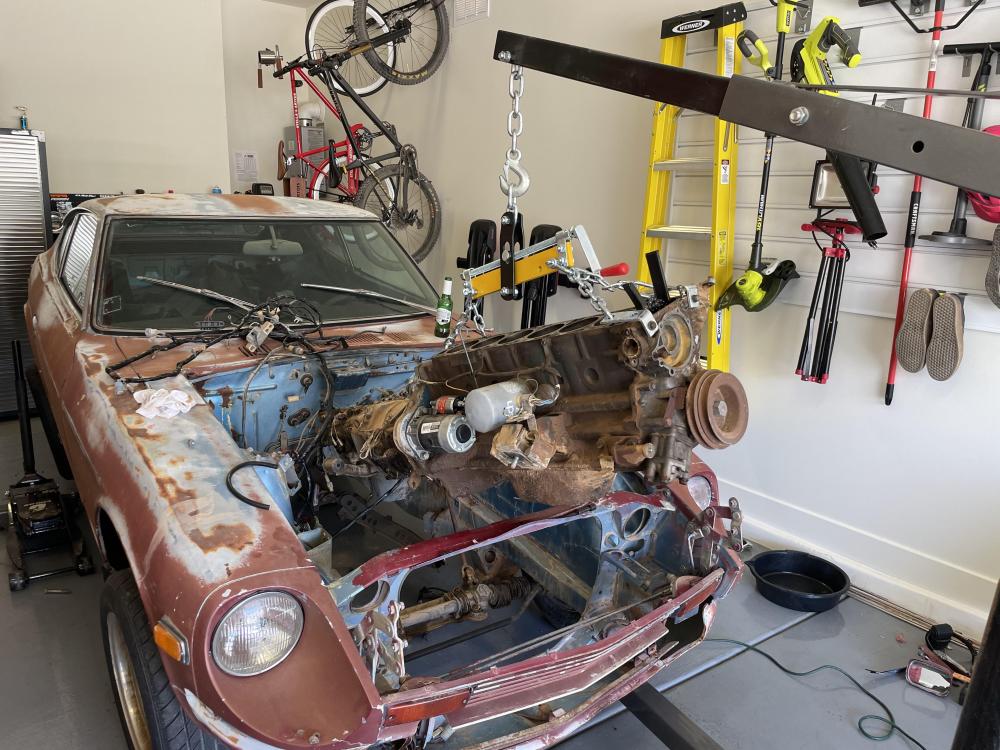
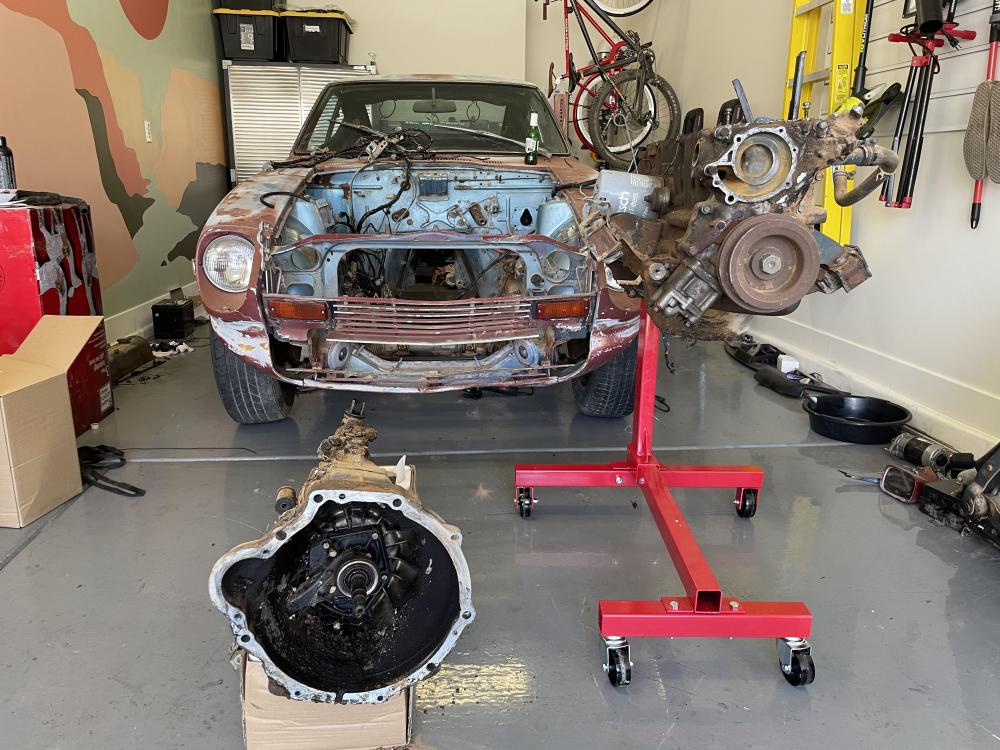
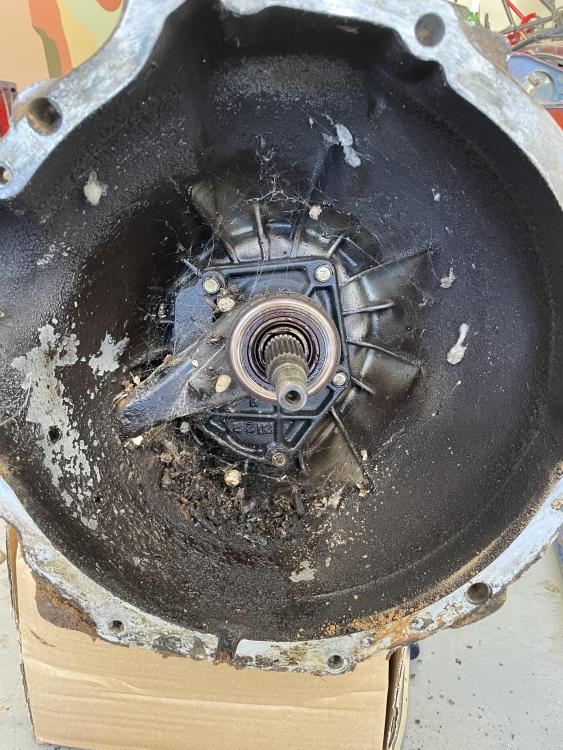
Big milestone for me today! My first engine removal. Took about 2 hours solo. Zero issues along the way which was awesome. No seized bolts, no rounded bolts, nothing broke! I ended up using two water pump bolts for the front as I didnt have a short enough bolt for the head bolt holes. I cant wait to start cleaning this up and refreshing. Check out the spider nest in the bell housing 😨
-
Oh DUH. I don’t know why that never crossed my mind. Thank you!
-
Bought a bunch o parts from Zcardepot to get the engine refresh going. They should arrive today. Also picked up an engine stand, hoist, and leveler. Preparing to pull the block tomorrow and trying to decide where to hook up the chains as my head is already off. I plan to use the driver side bell housing bolt then unsure for the front passenger side. Any recommendations since my head is already removed?
-
Thanks for the kind words @siteunseen & @EuroDat!! I noticed the difference in valves too, but not until I left. I may give him a ring on monday to see why he chose those. I know it was $10 per valve so its not like I much overall. Maybe he had them in stock already. I dont believe he used bronze seats. If I recall correctly, the old bronze seats fell out when he was doing the cleaning? I probably took that as "replacing the bronze seats with new bronze seats". But they all definitely look uniform throughout now. The receipt says "SBI SEATS" as parts and "6 INTAKE SEATS" as labor. I'll leave the pitting as is 🙂
-
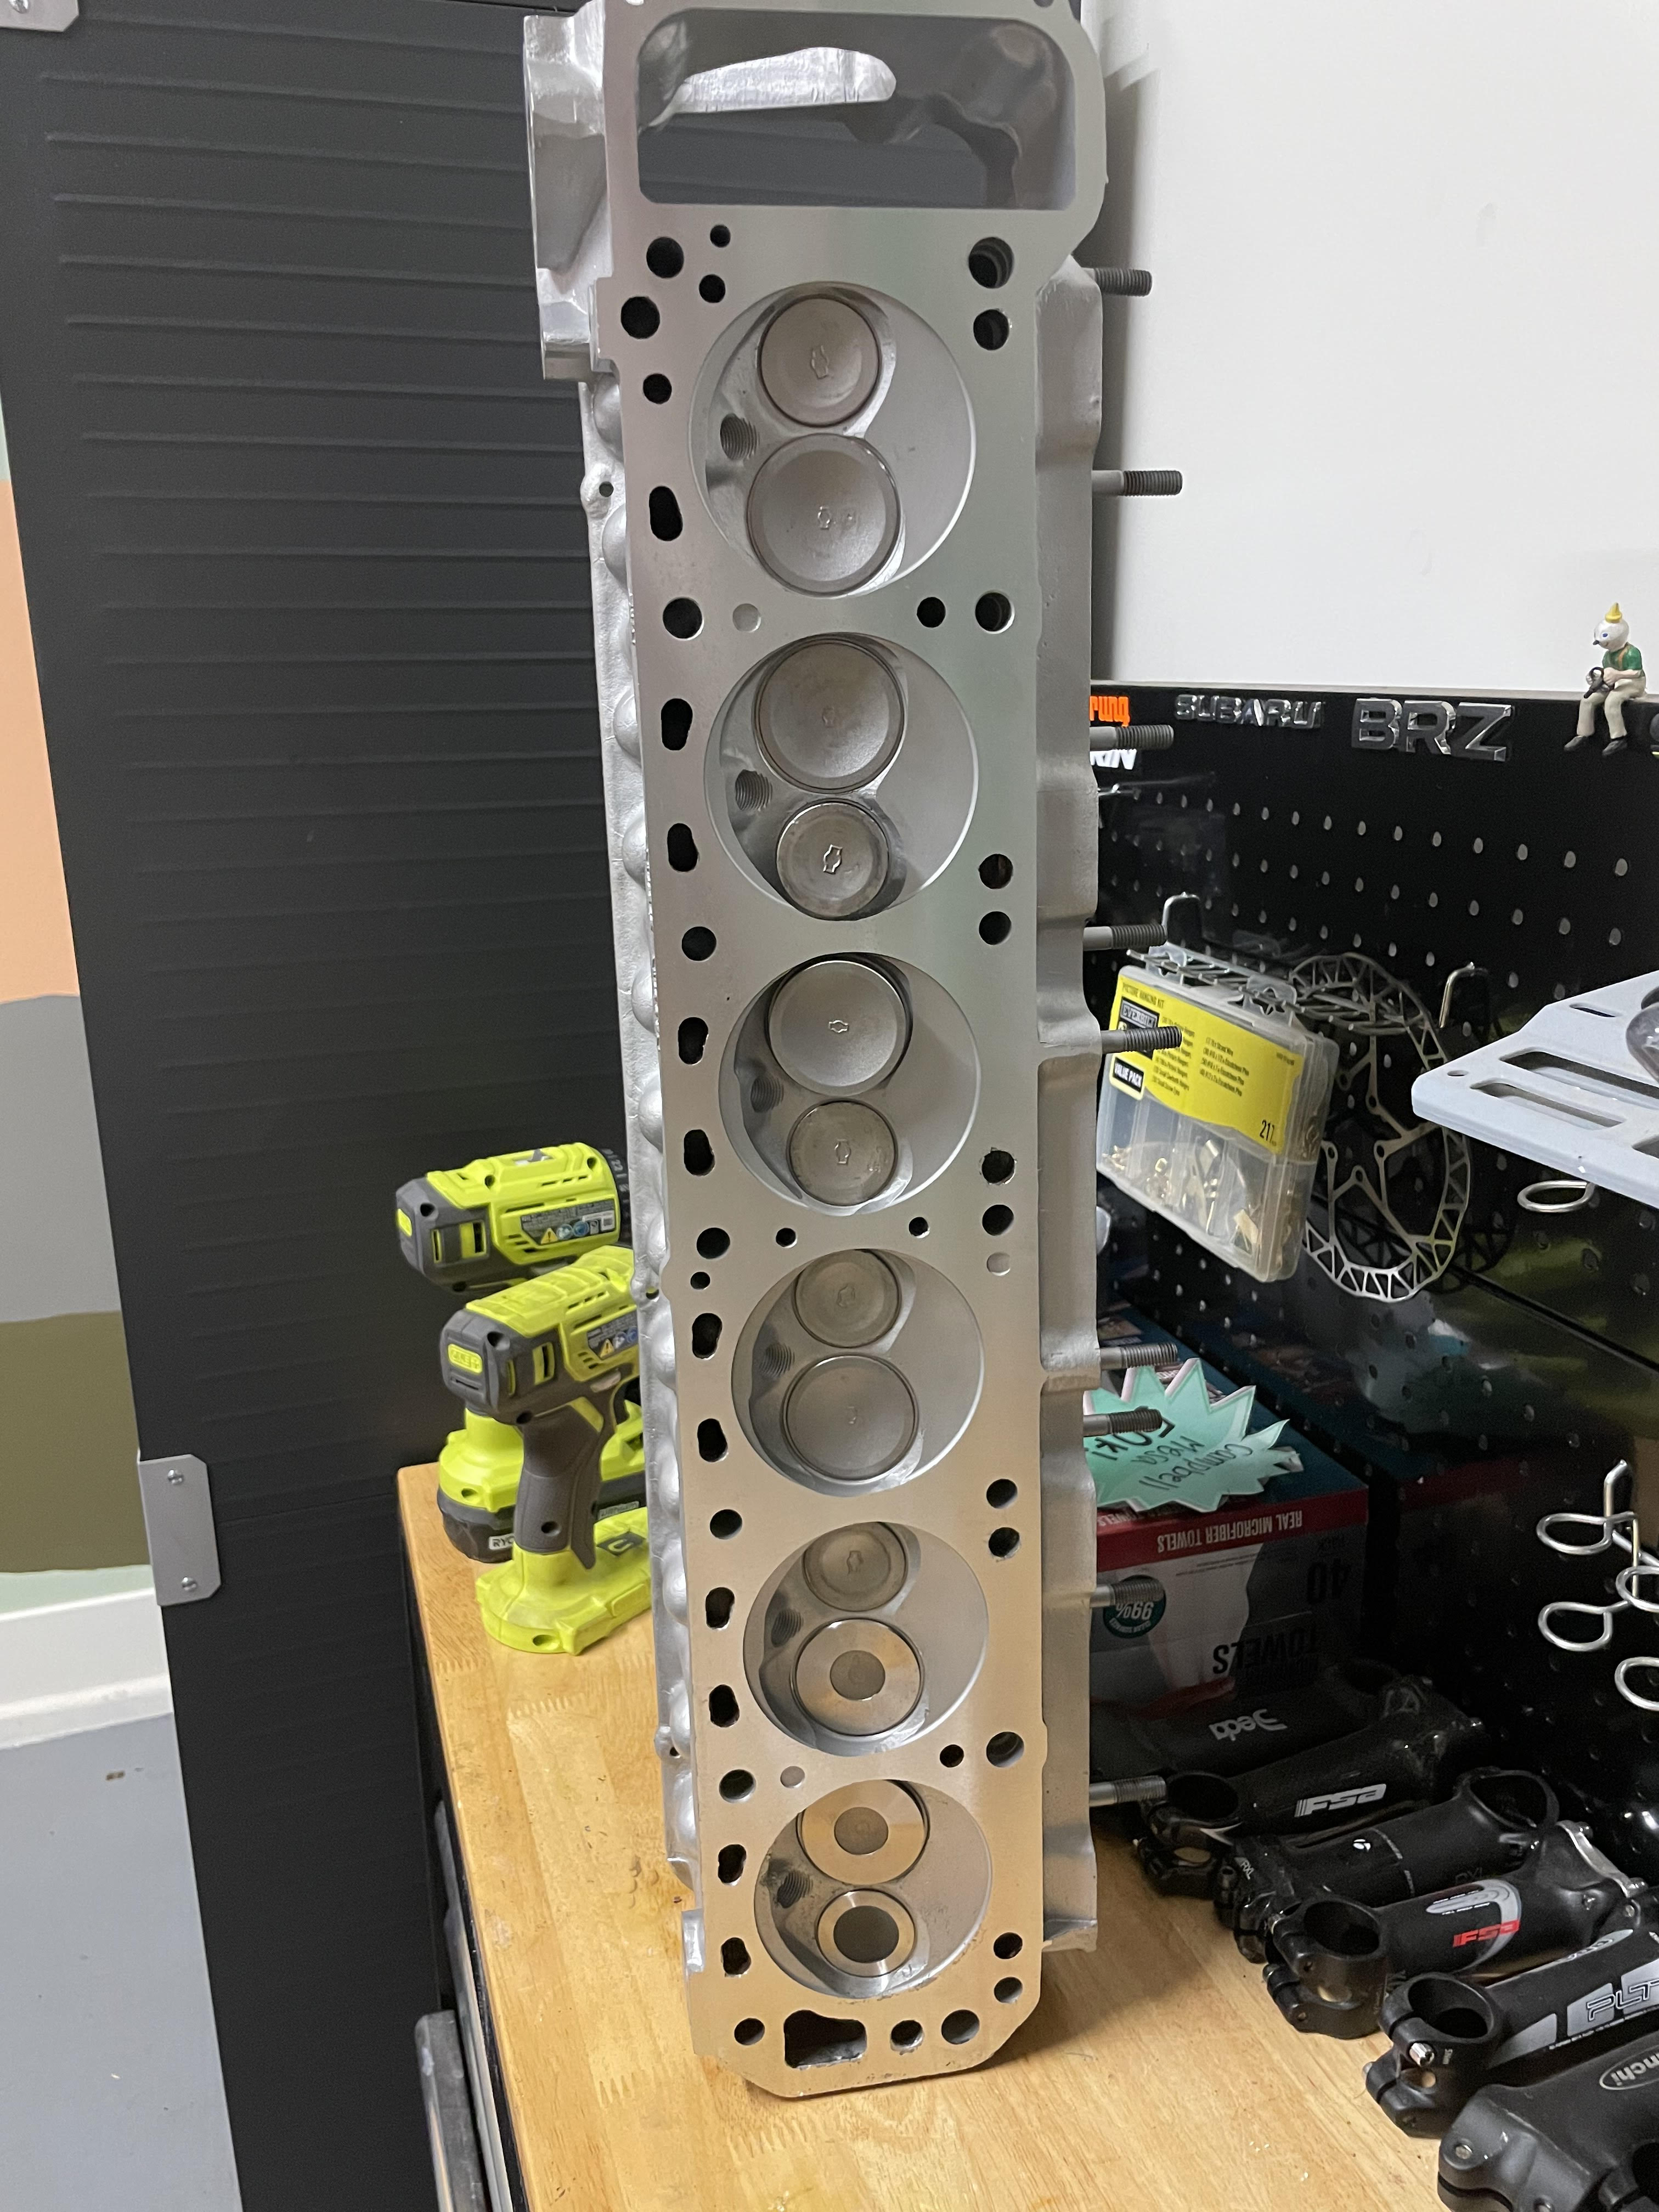
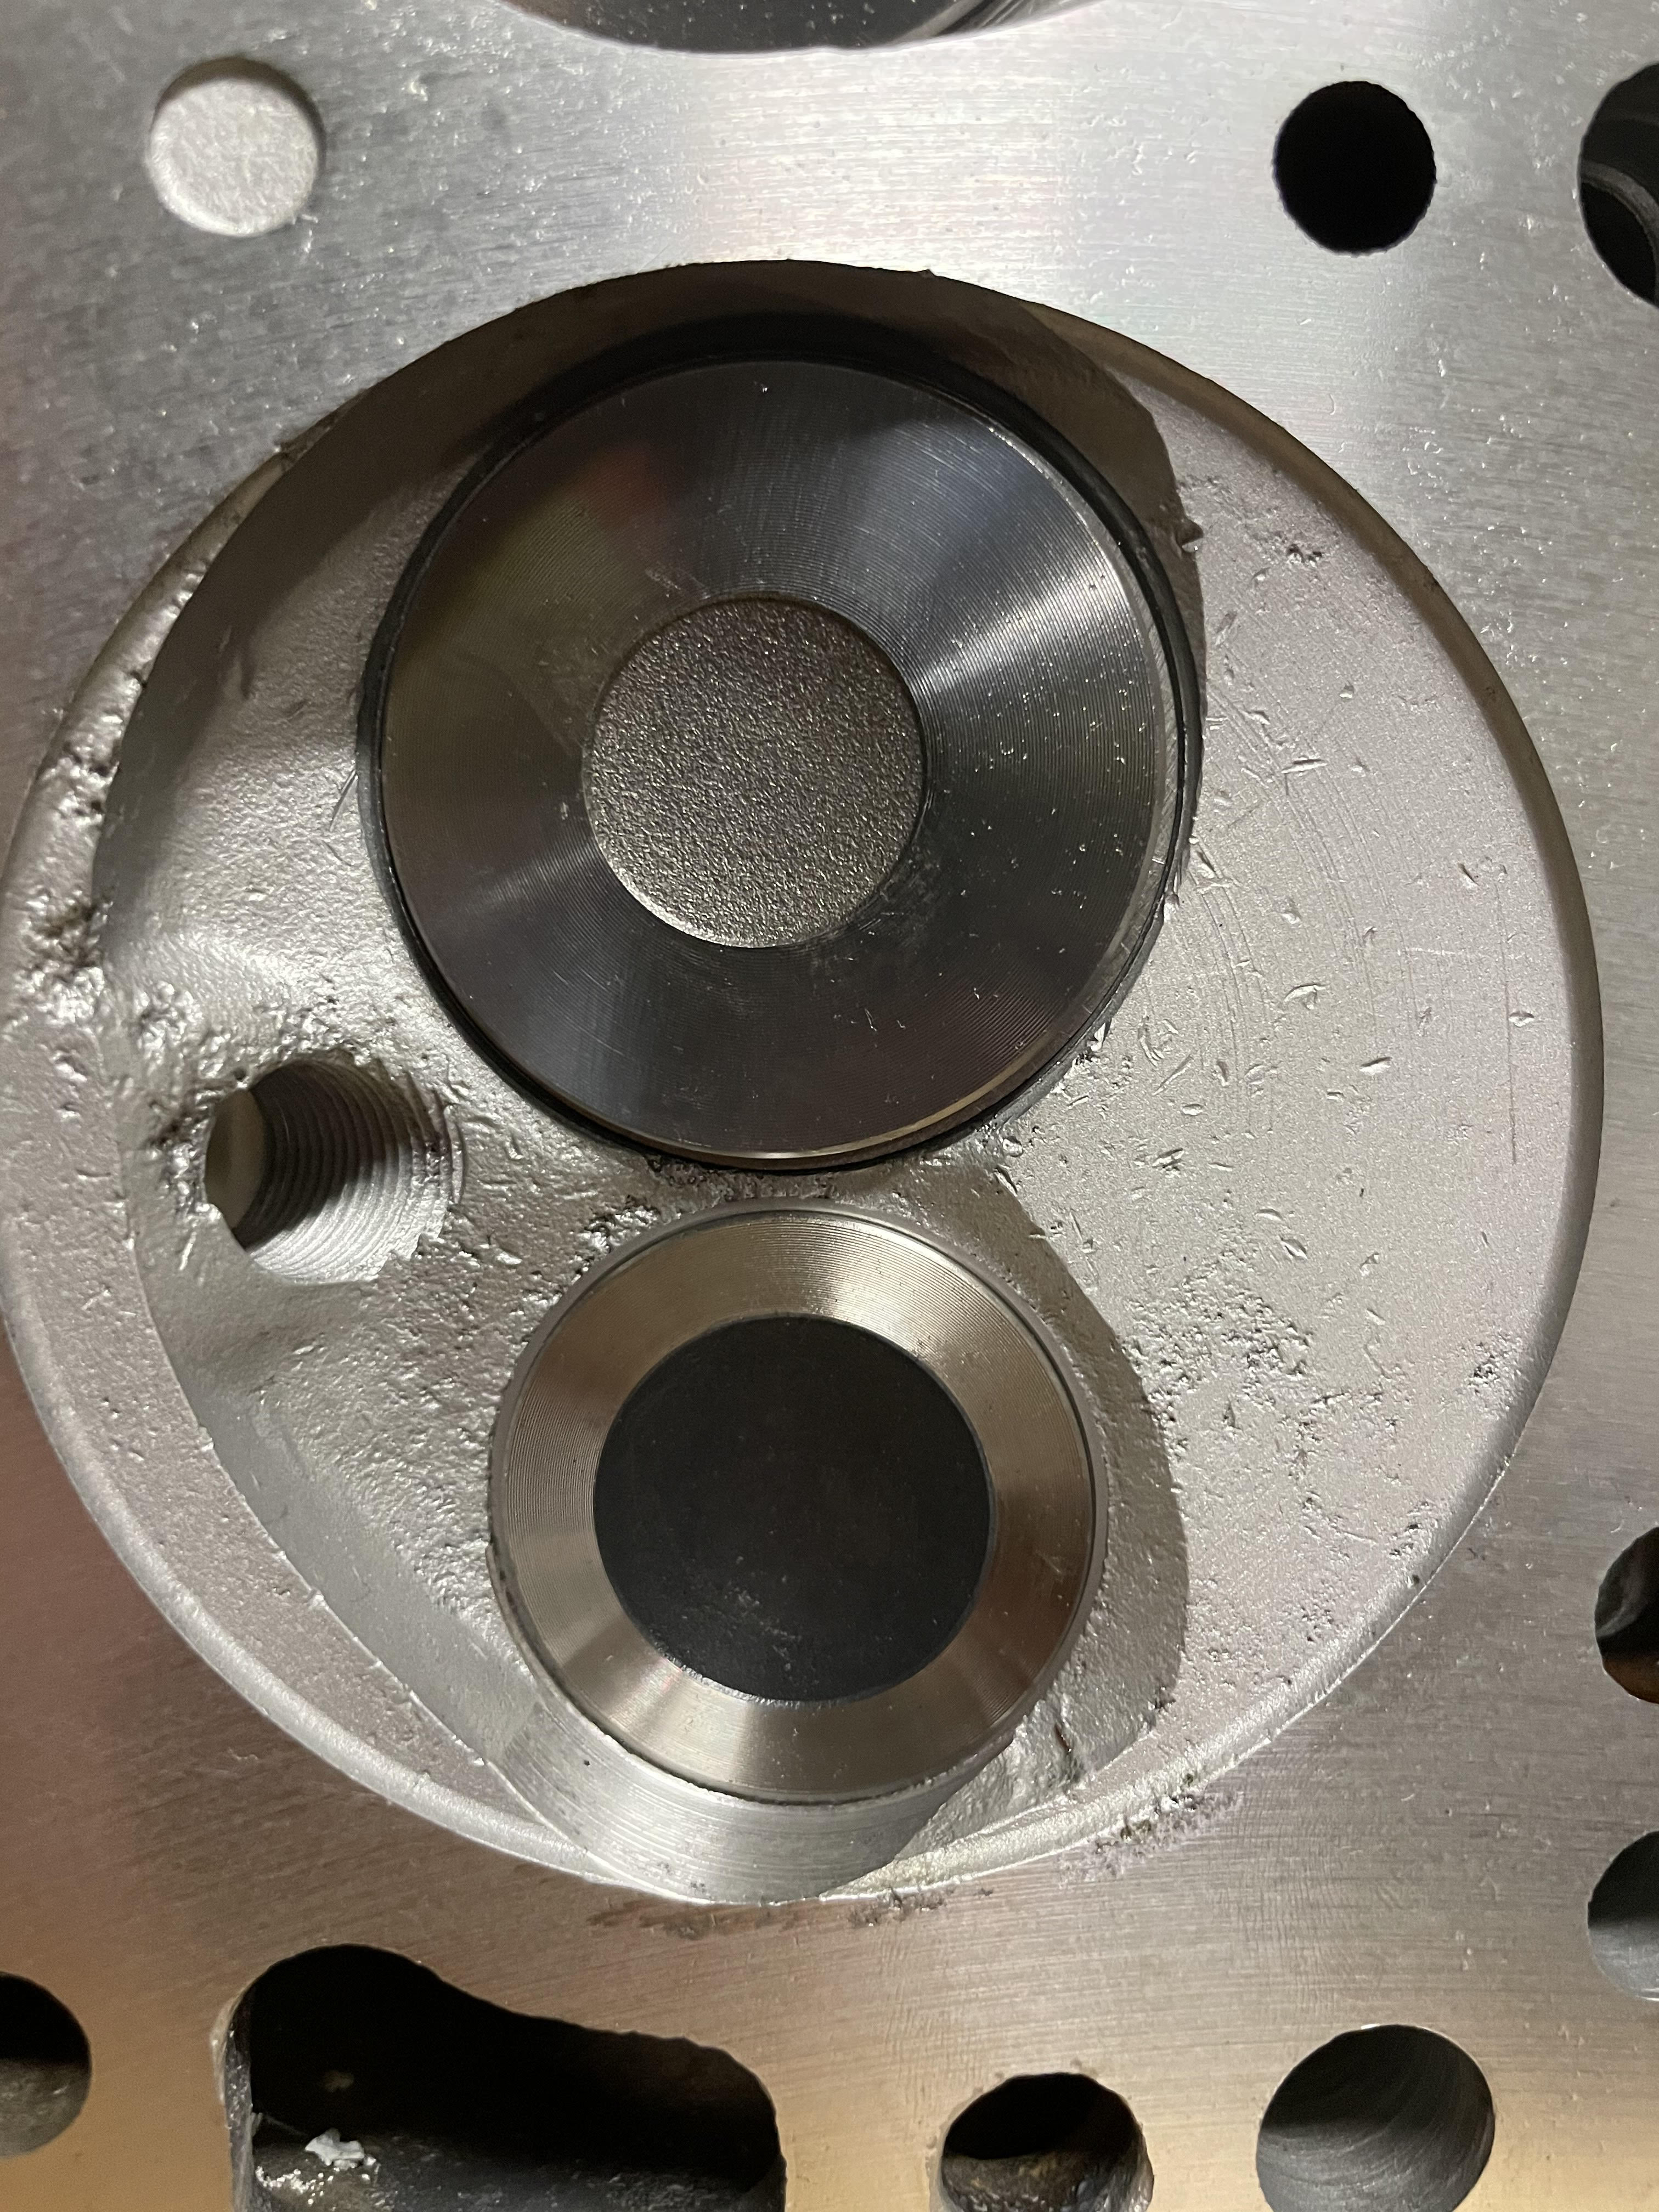
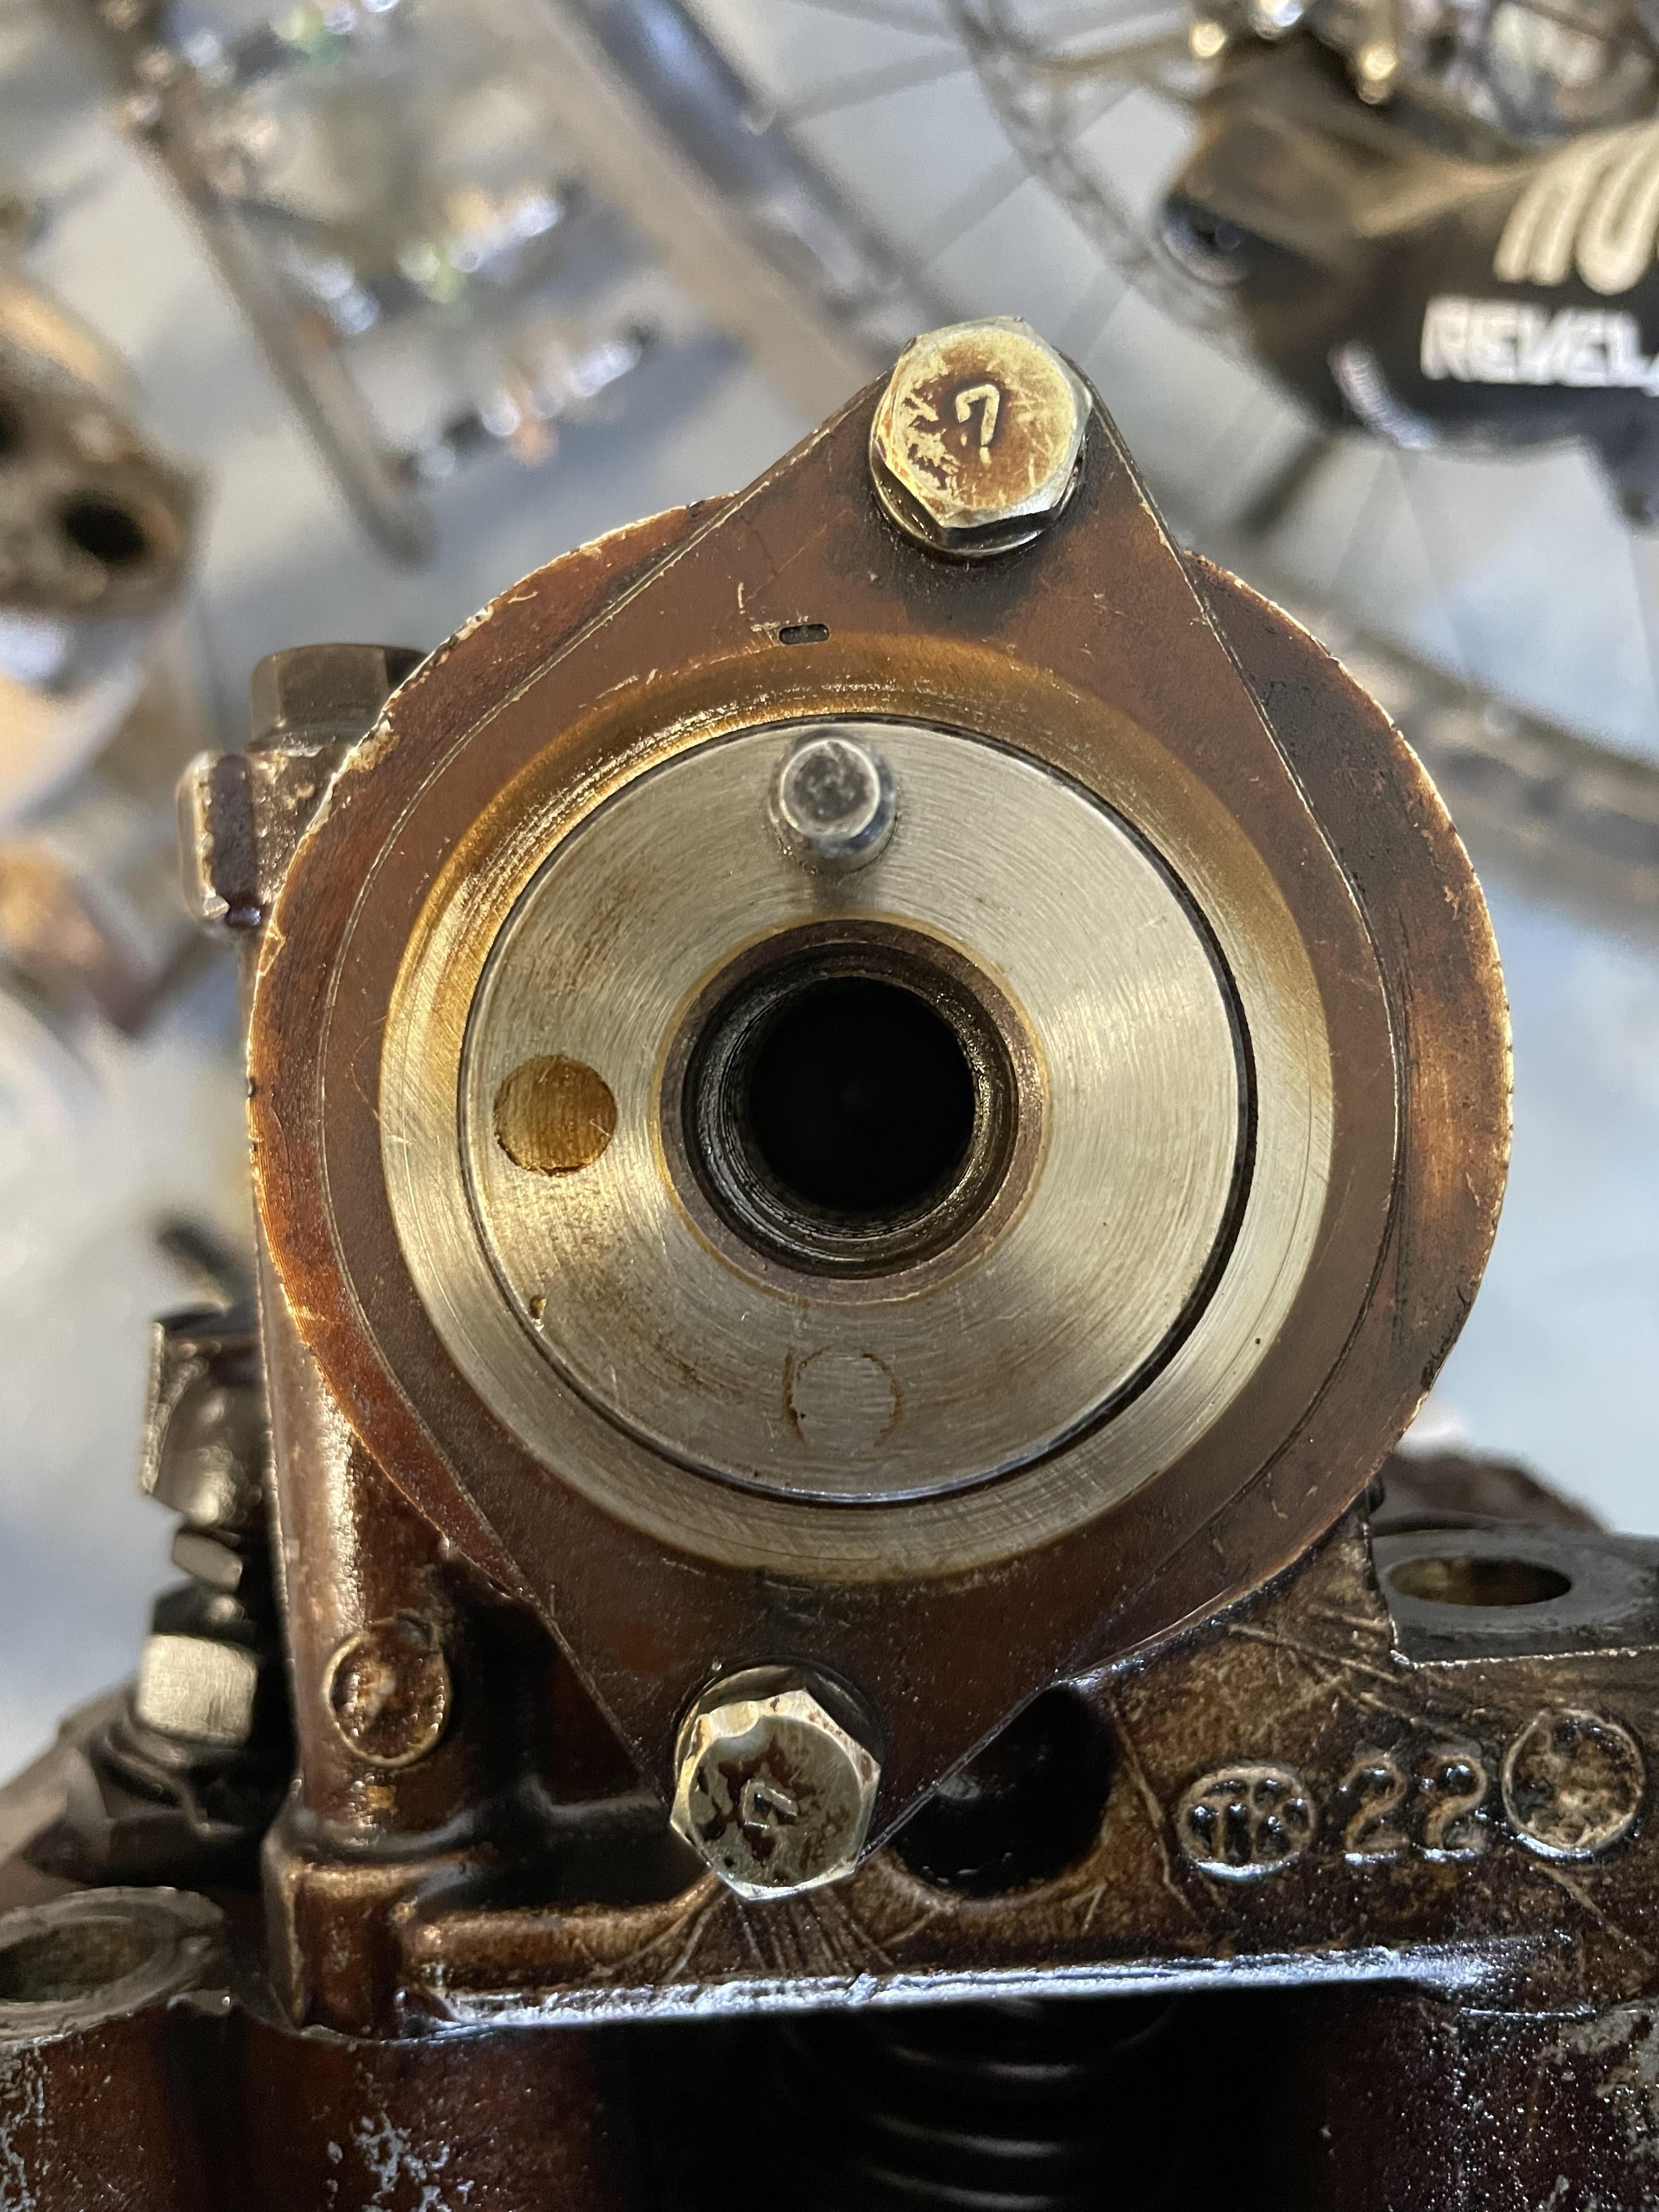
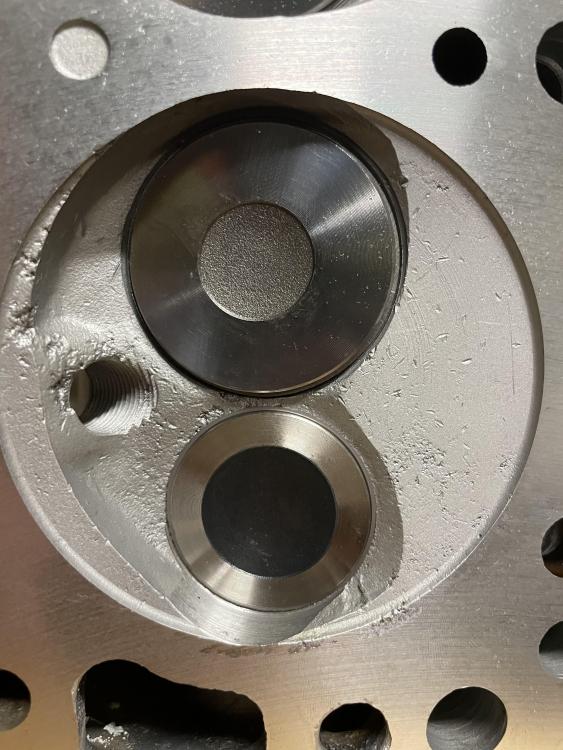
Wow....I am DEFINITELY going to need to pull the bottom end now. There is no way I can put this crispy clean head on that grimy block....anyways enjoy the pictures! Check out that pitting in Cyl #6 though 😲 Would it be worth it to grind these smooth or is it more hassle than need be for a stock build? 3 new valves, shaving of 8 thousands, and a DEEP clean later: ,.;


-
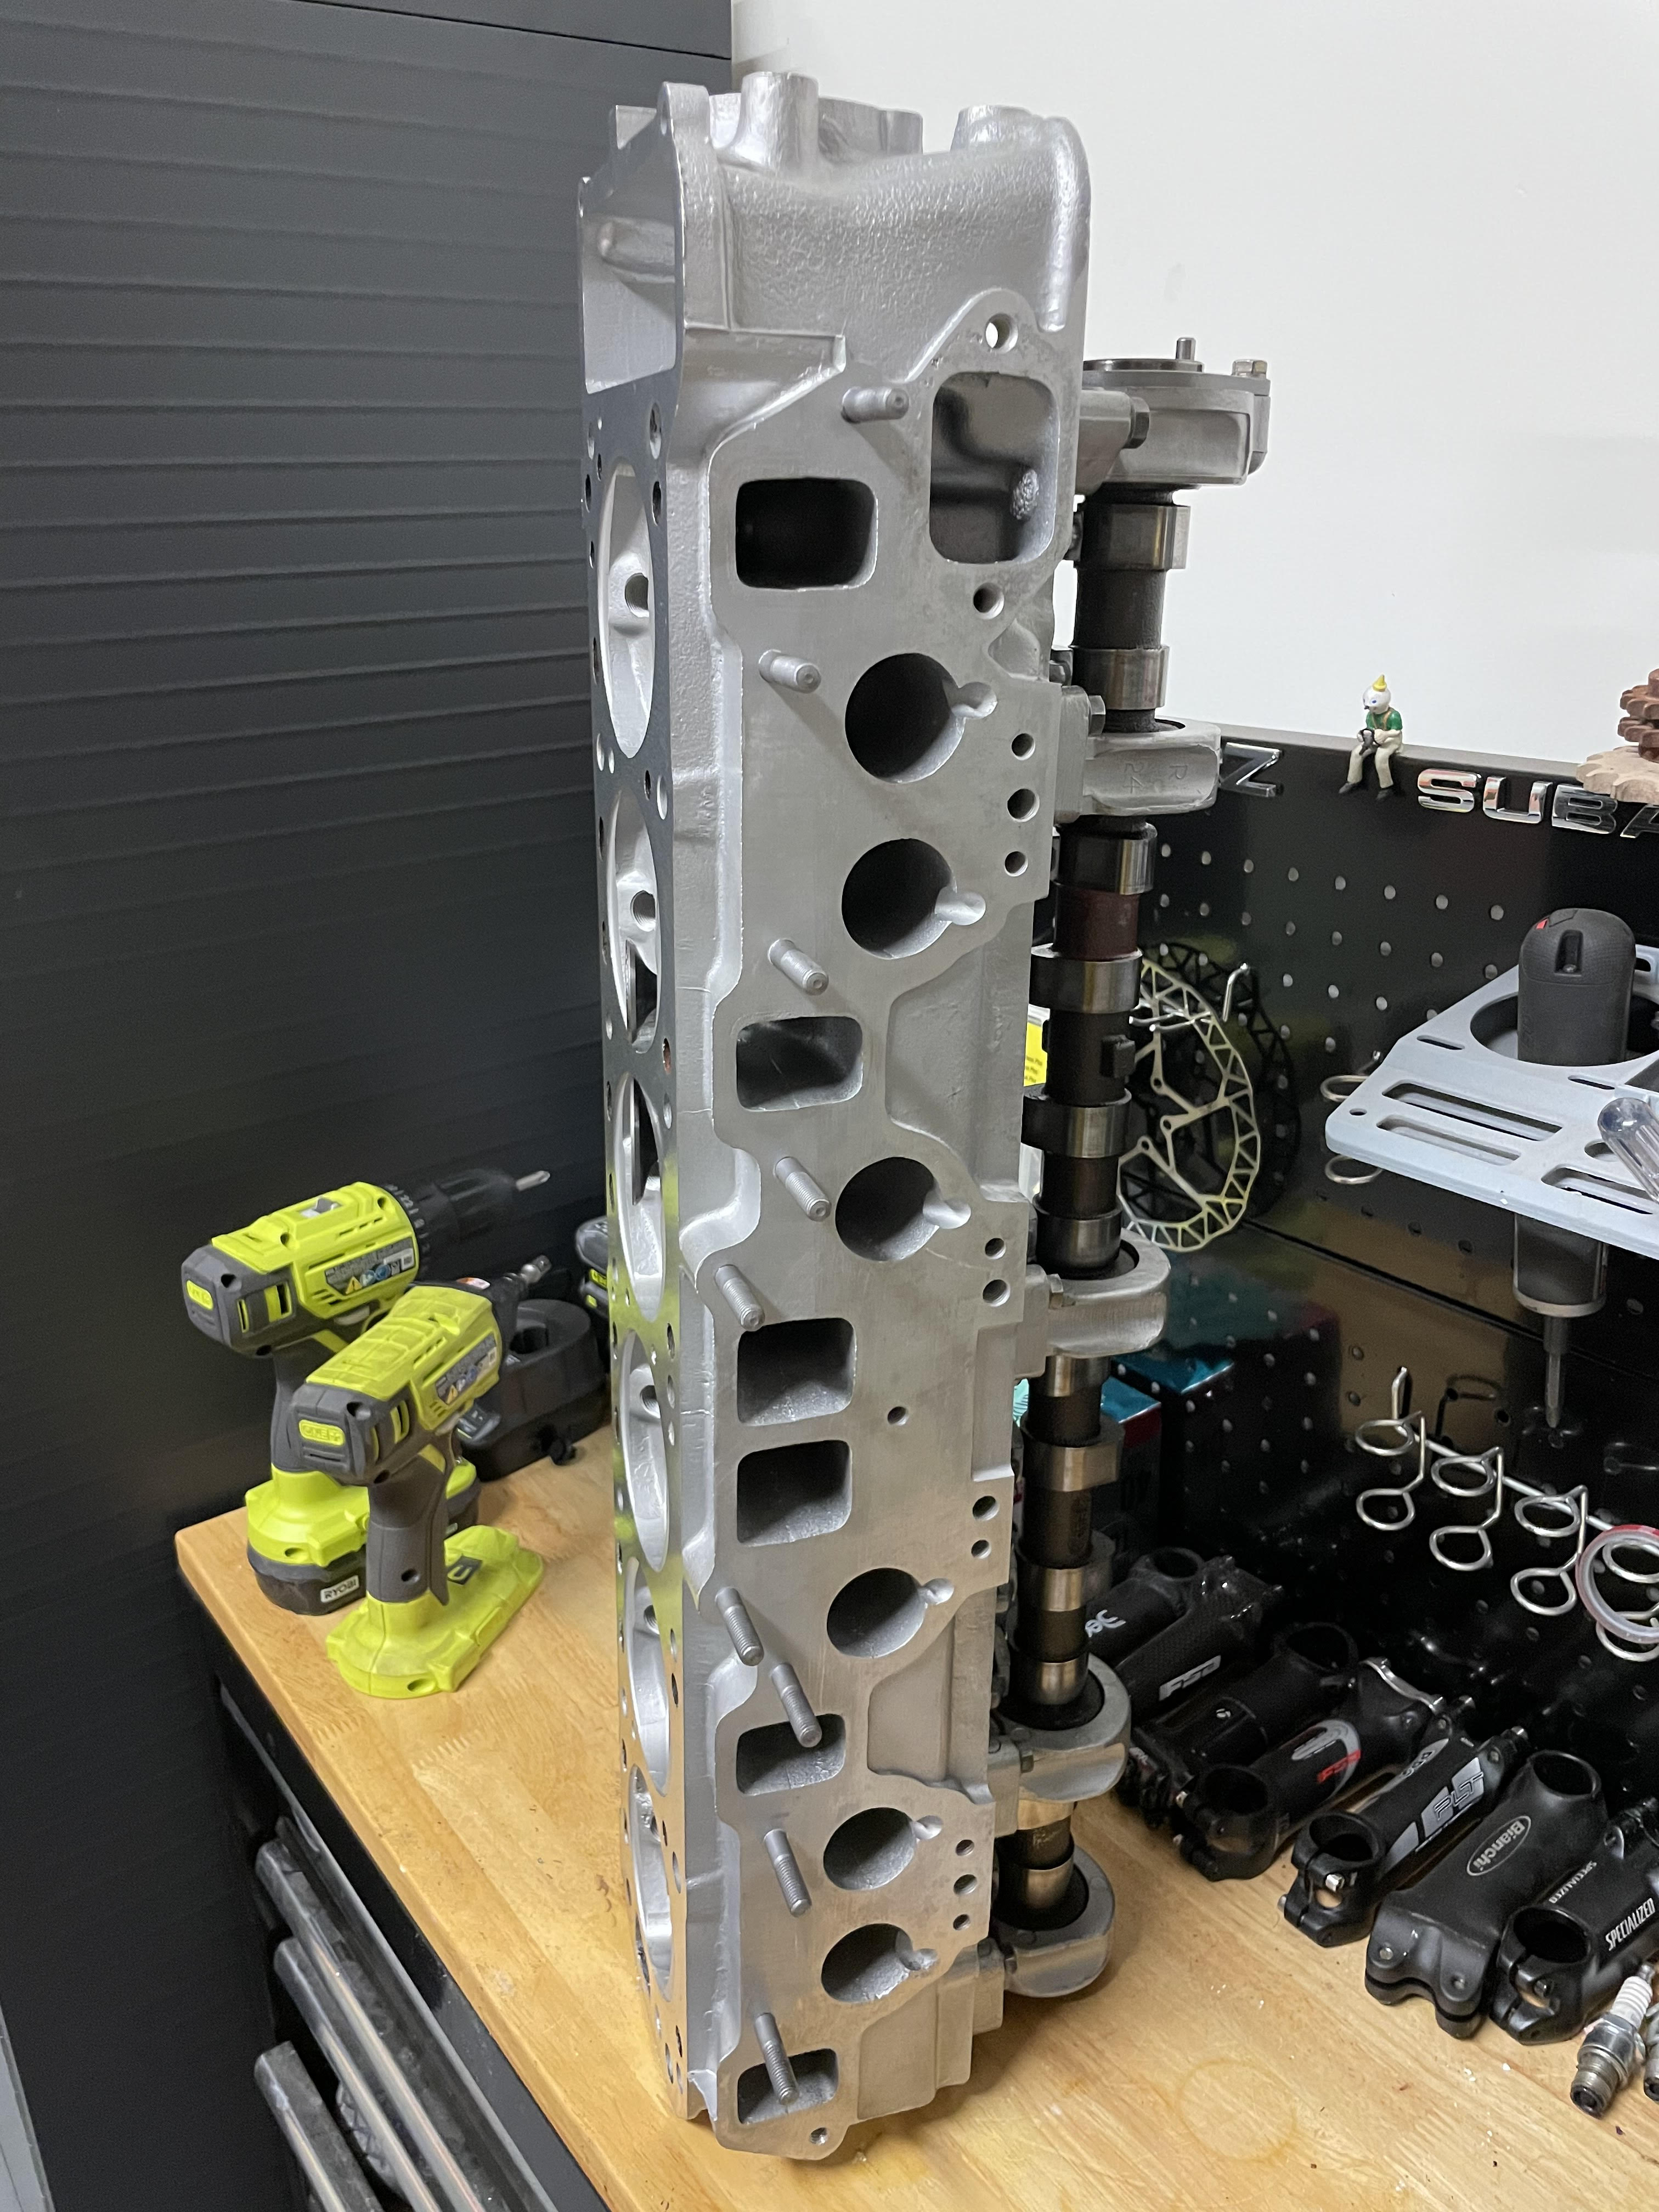
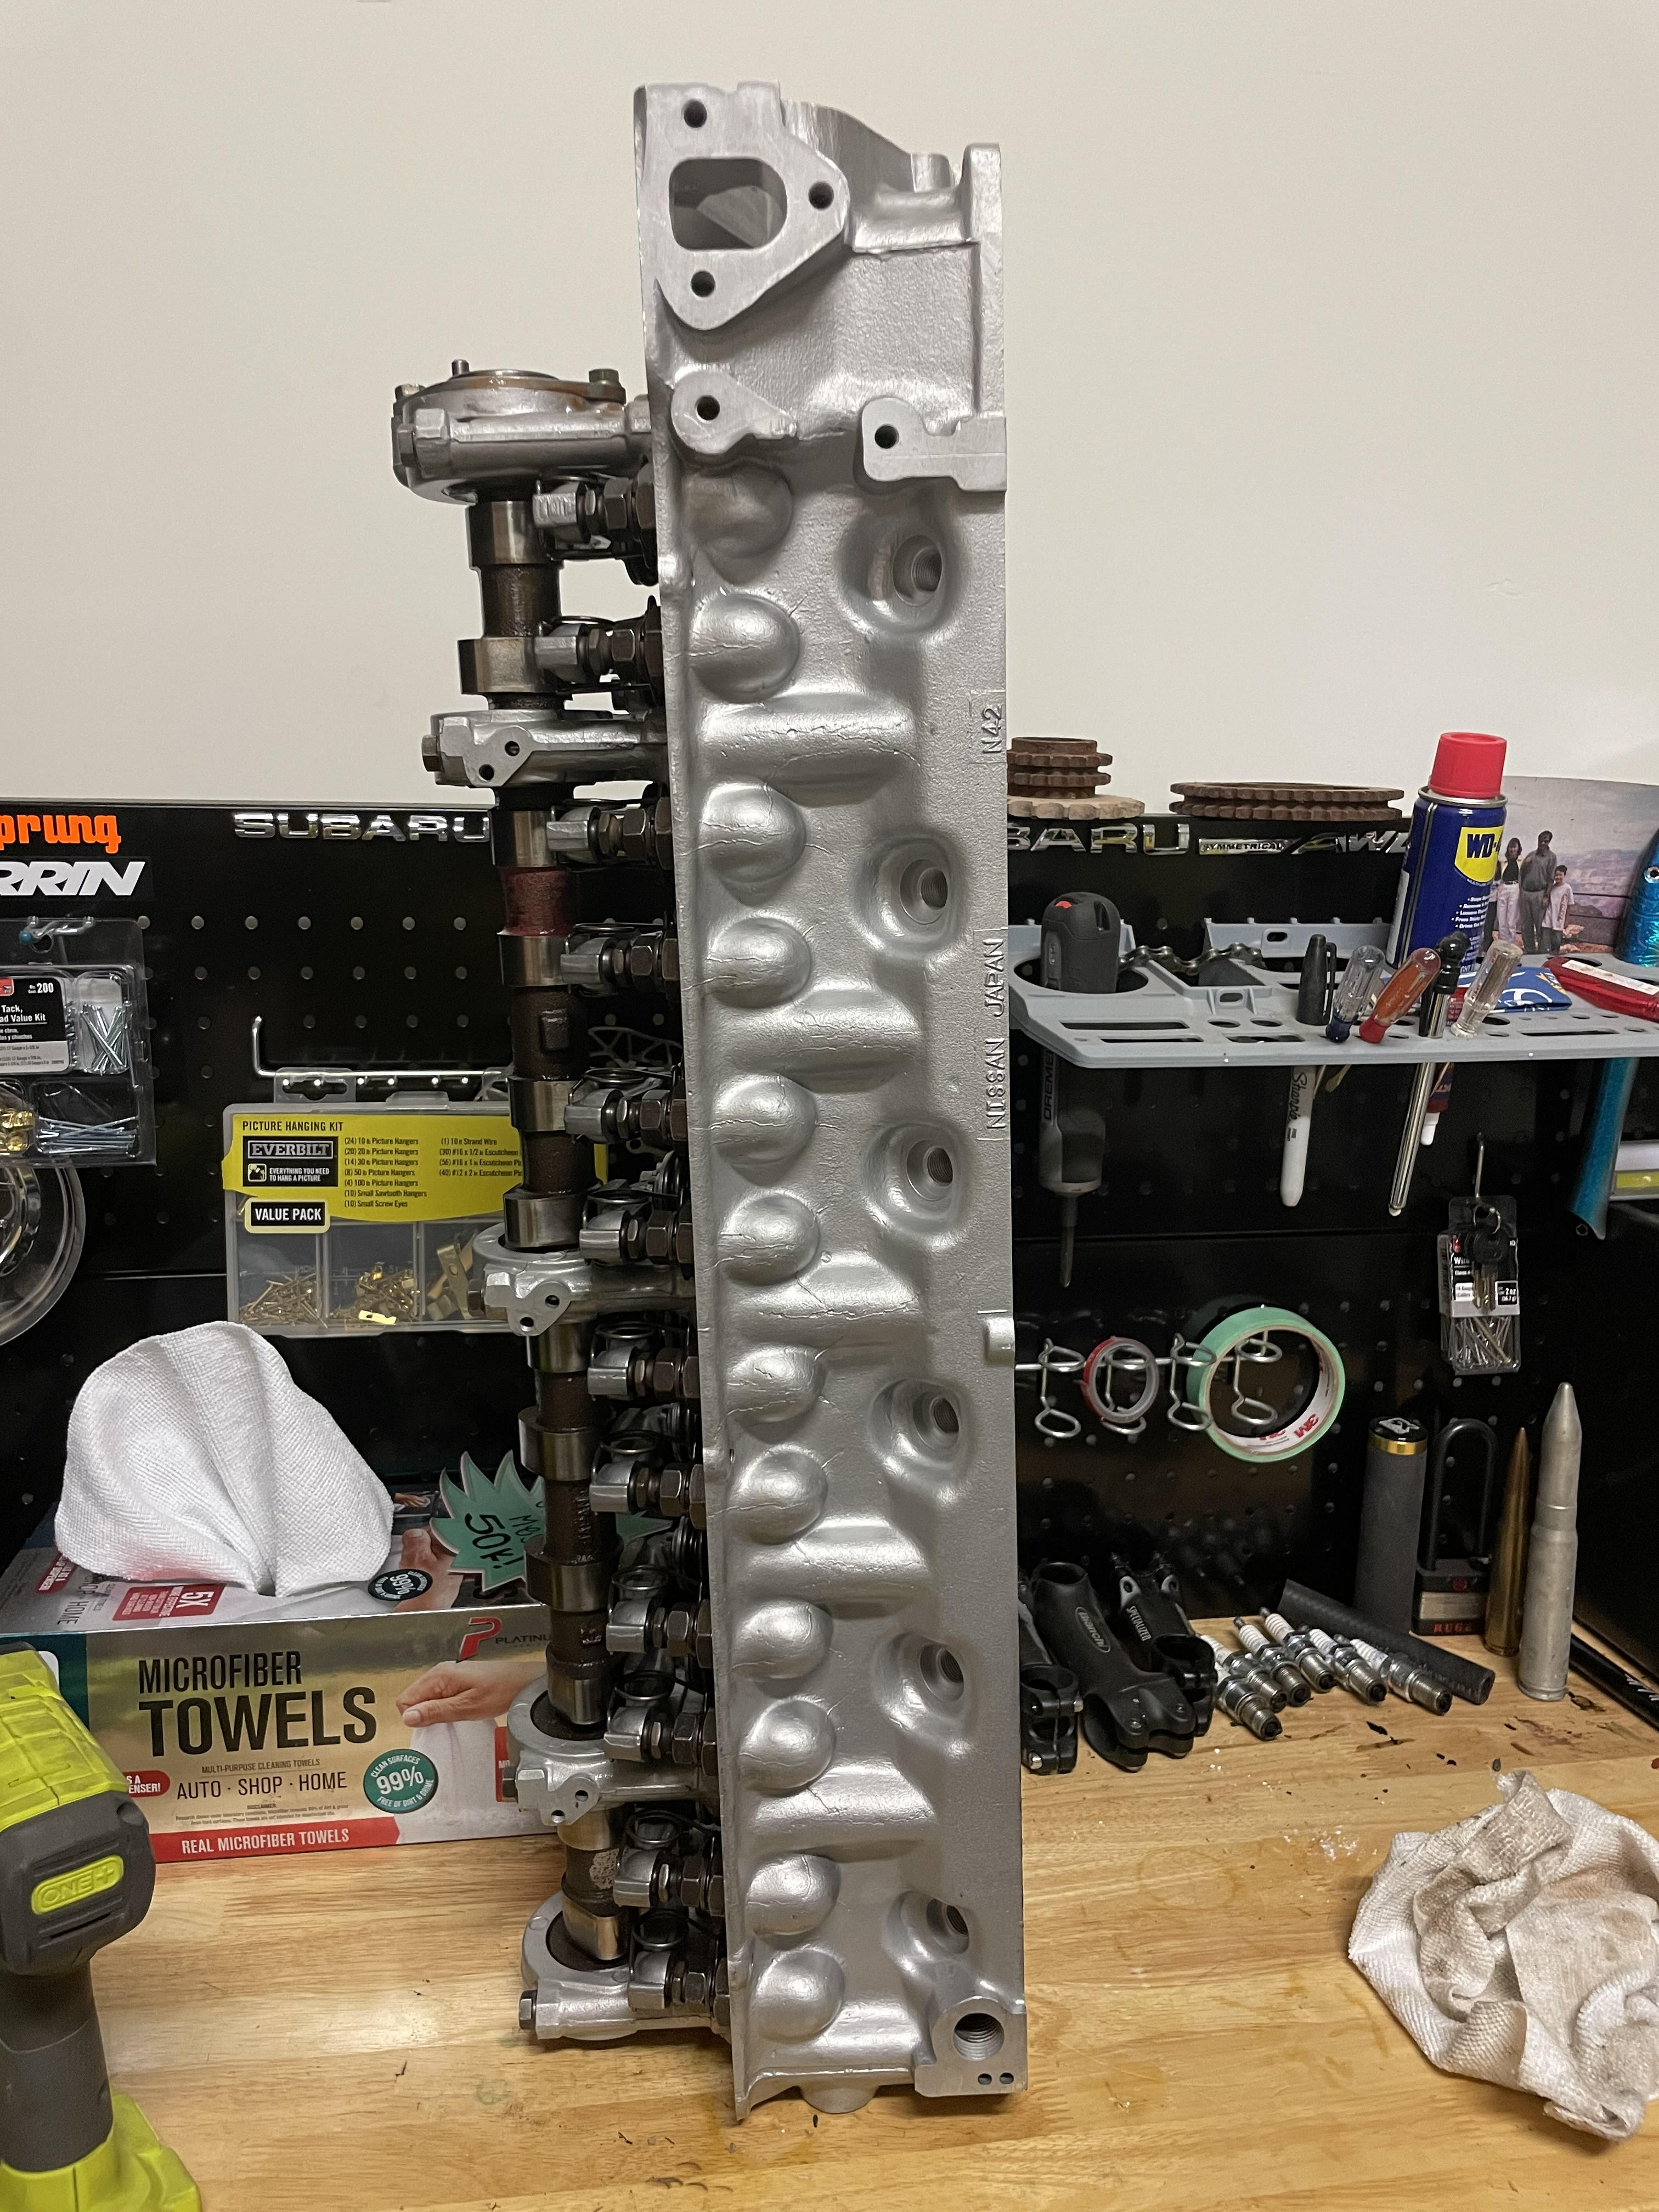
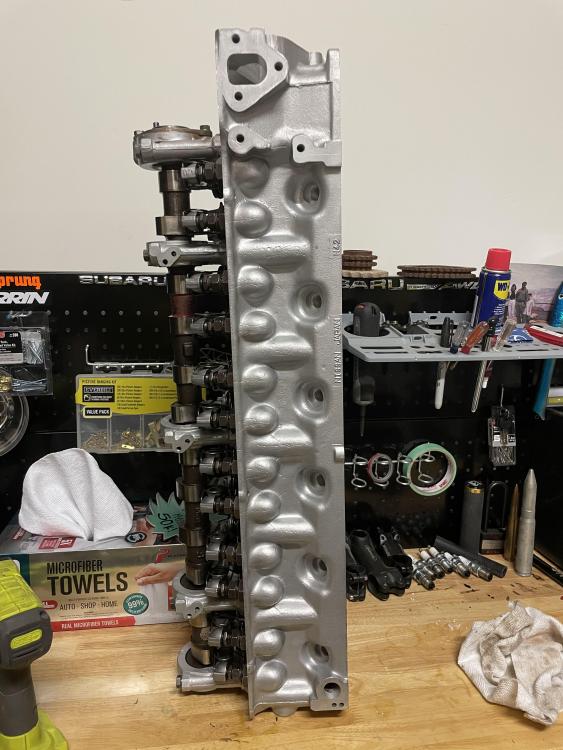
Been a bit since my last update. The head was dropped off at a local machine shop who is familiar with the L28. Head needed shaving, 3 new valves and some new bronze valve seats. Among other work such as full cleaning, shimming of the towers, and seals. I came out just under $700 for the work. More than I was planning (originally tried to stay under $500) but I am glad that they were familiar with the head and knew what to do. Well worth it in my opinion. The head should be done this week and then I will start planning on pulling the block to do the ring job. In my spare time I have pulled mostly everything from the engine bay in prep for painting. I will be getting new master cylinders for both the clutch, brake, and then a new brake booster. One thing I am curious on is the lines. Generally is it okay to reuse the hardlines? For reference the clutch line was connected while the brake lines were open while it sat.
-
Totally agreed with both comments above. But at this time (and with my current budget), my main focus is getting the car driving. I fully understand it is not the cure, but it should last me a couple years before I do a full strip down. Theres a couple other spots of rust (hatch lid corner, lower fender, for example) that I would want to tackle at the same time. Luckily Arizona is DRY, so fingers crossed no new spots come up
-
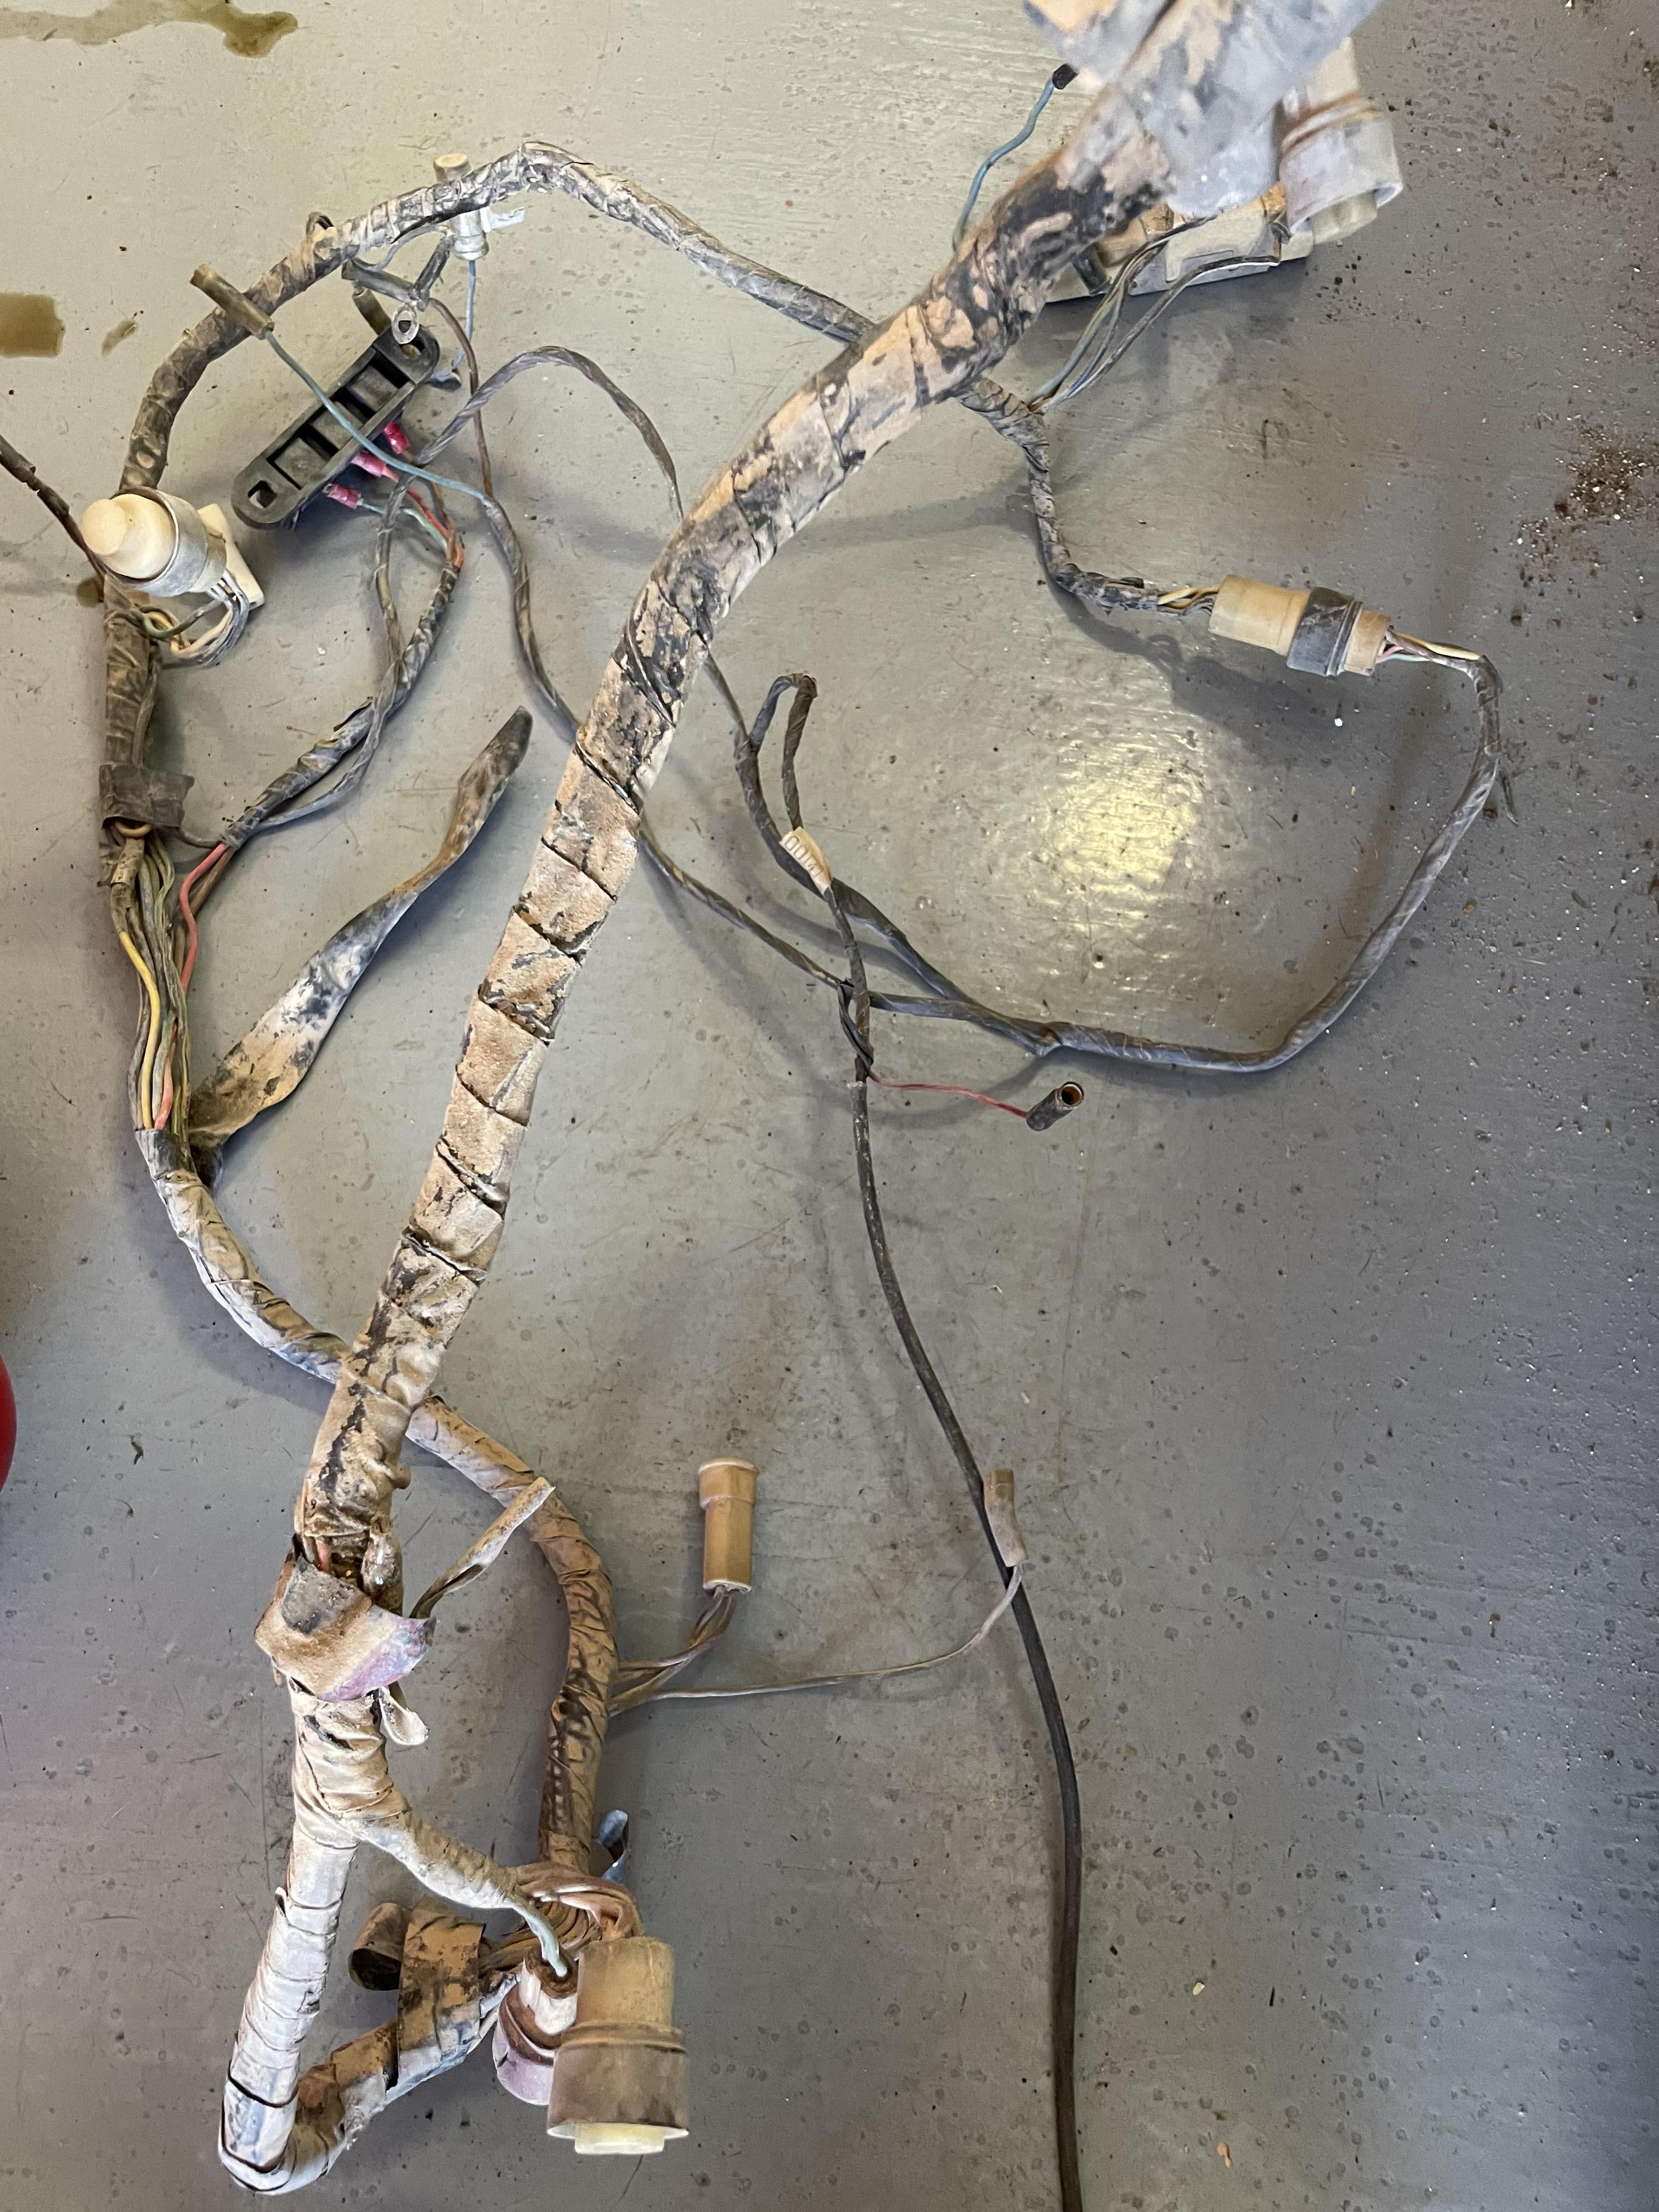
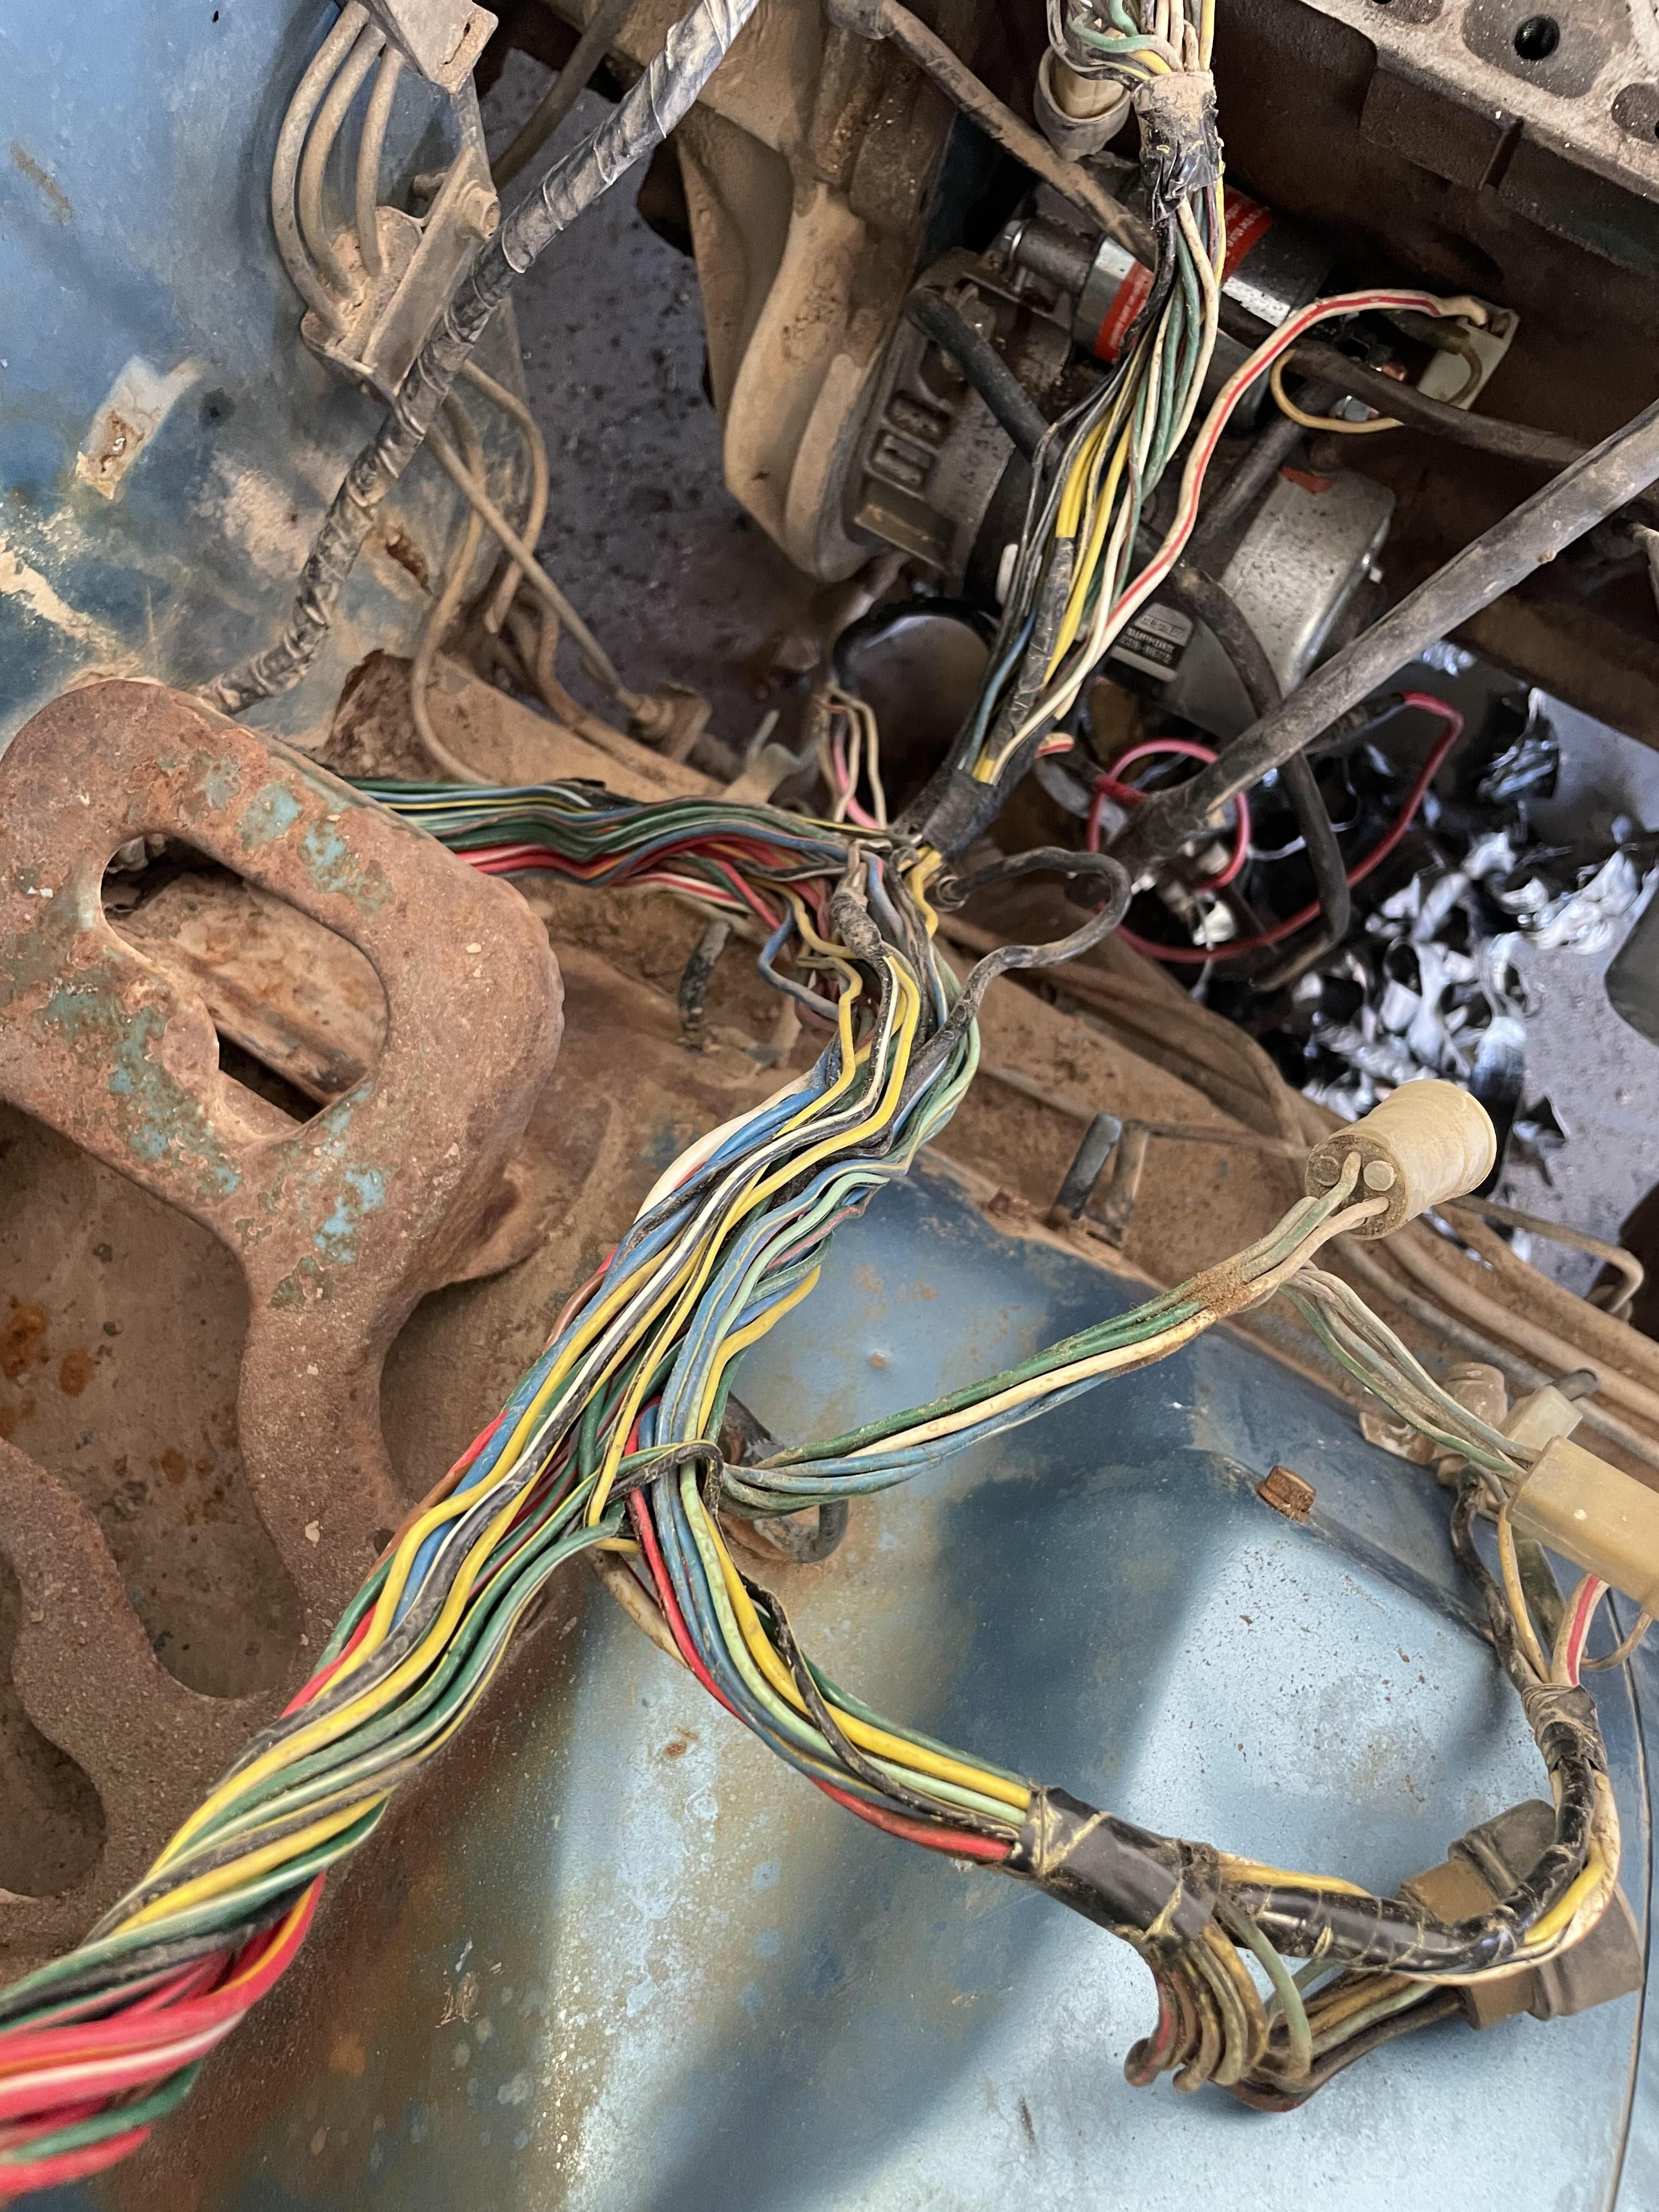
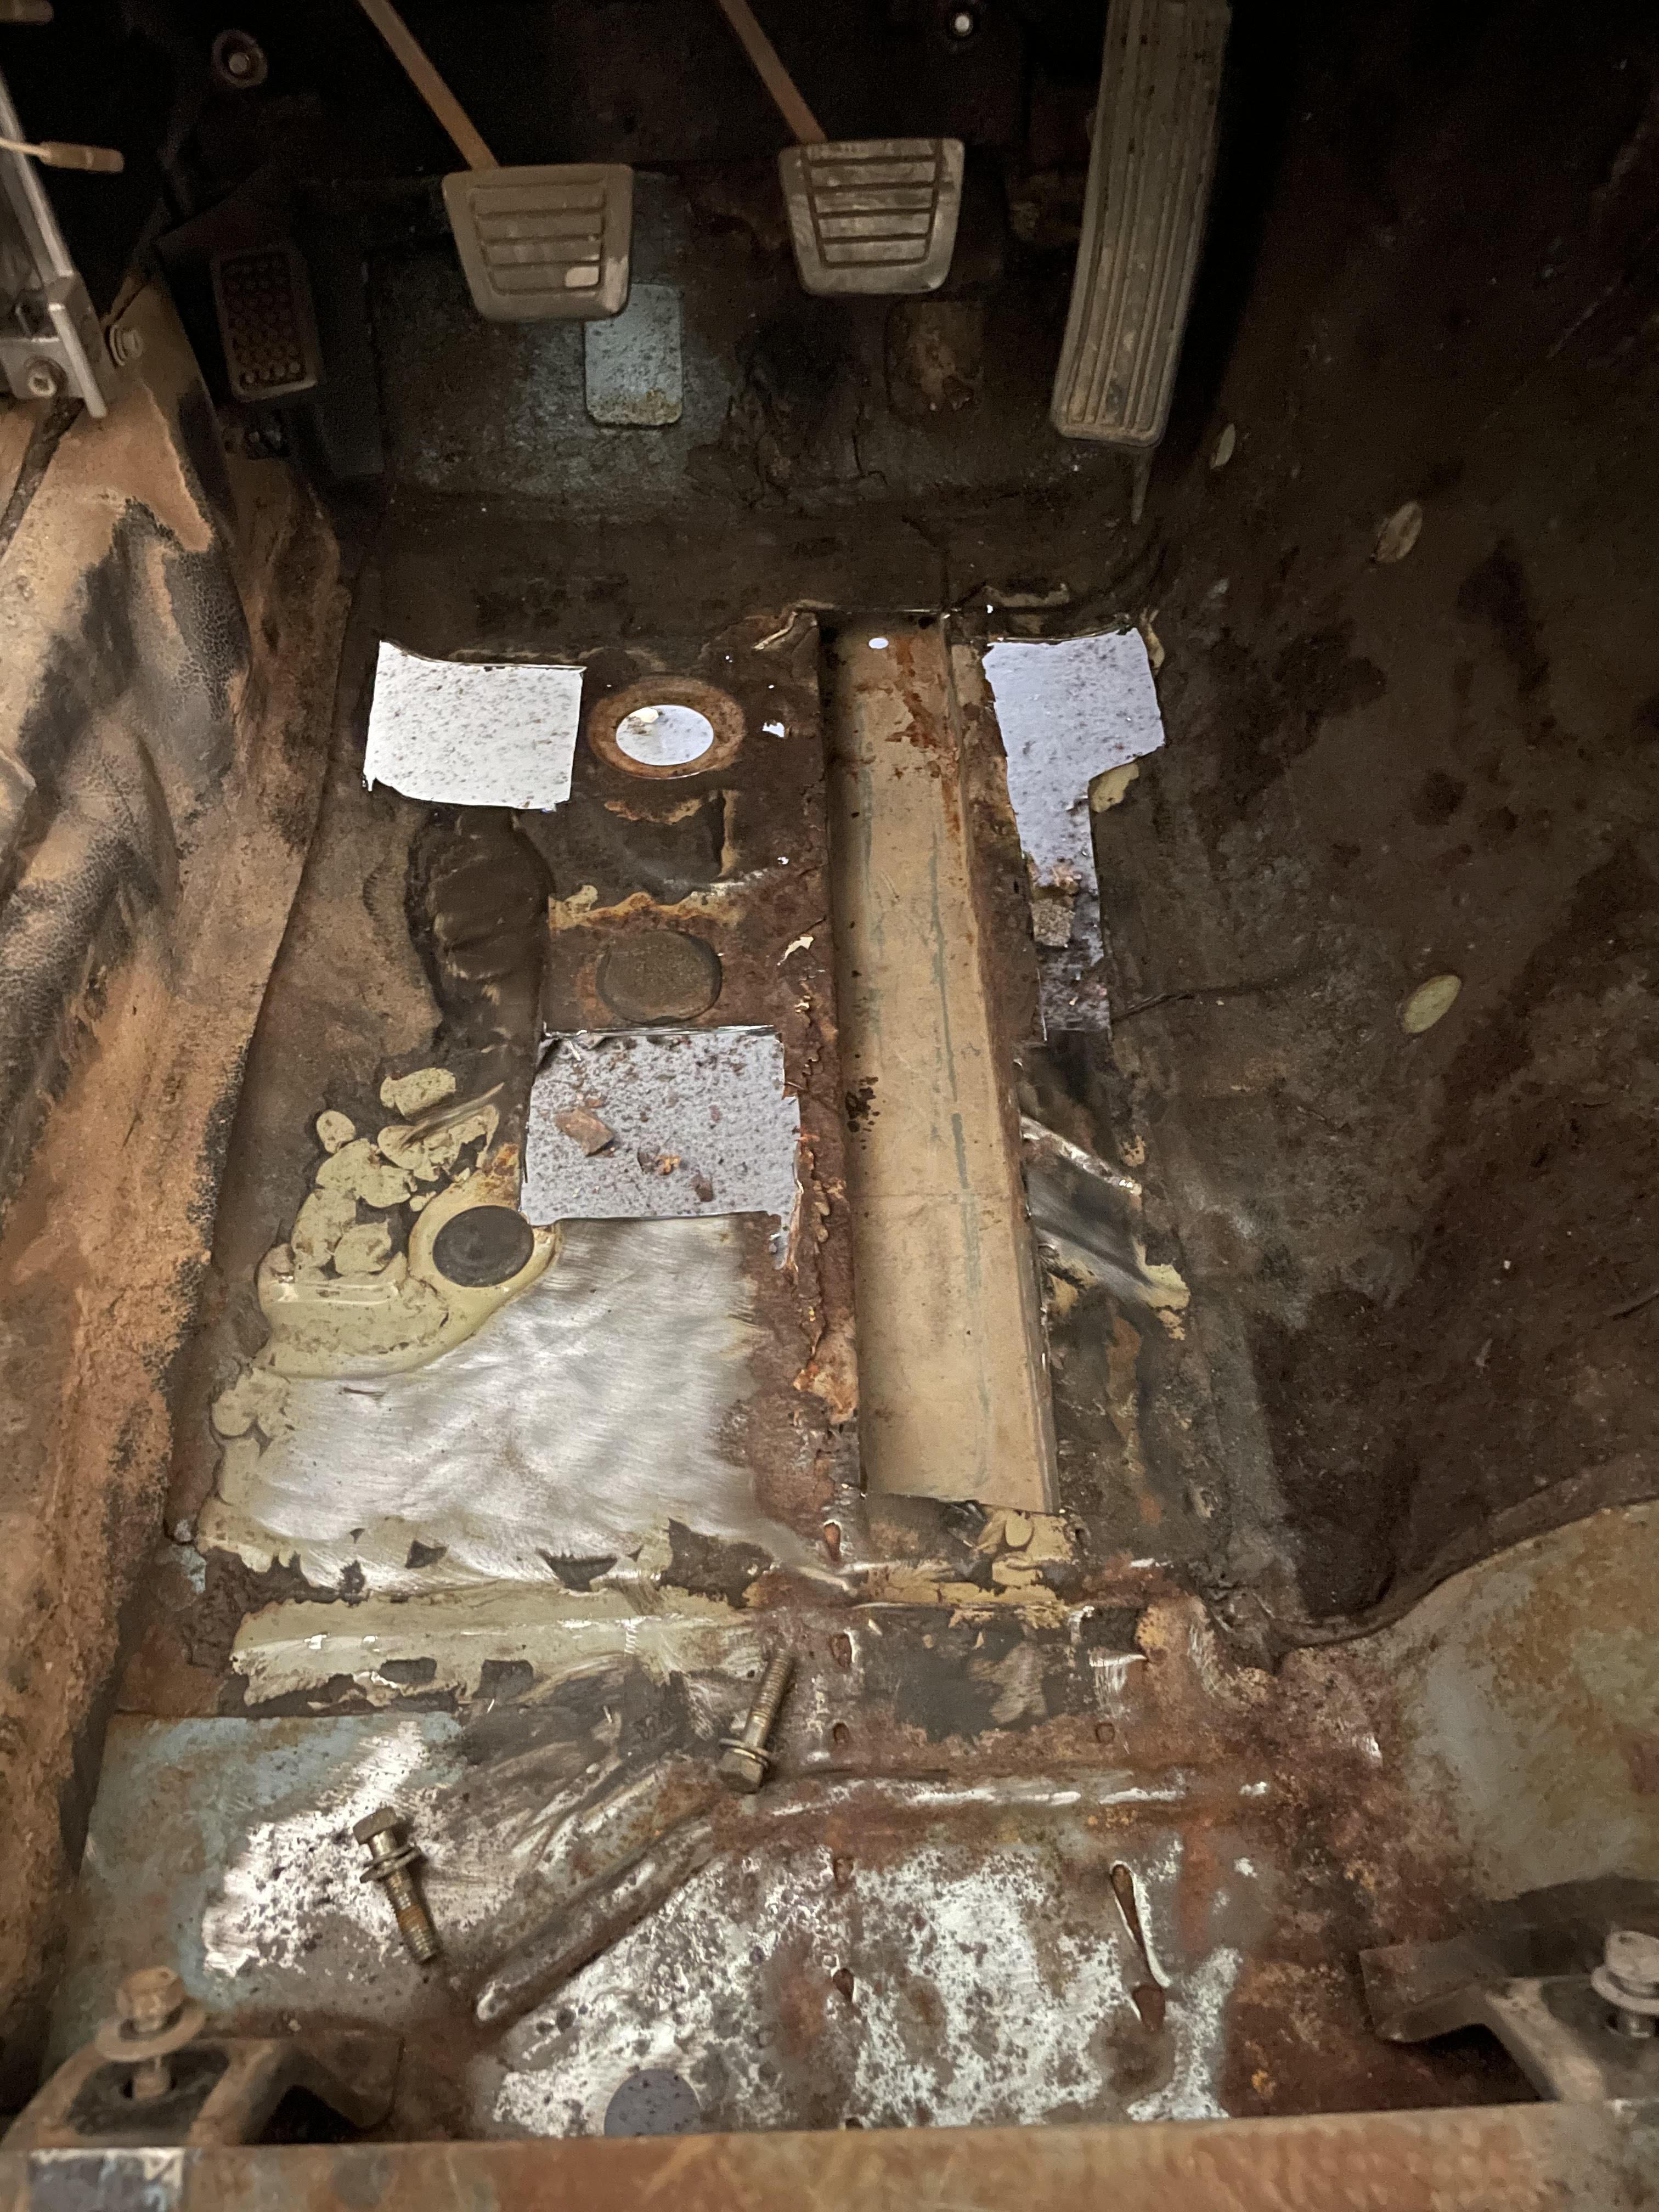
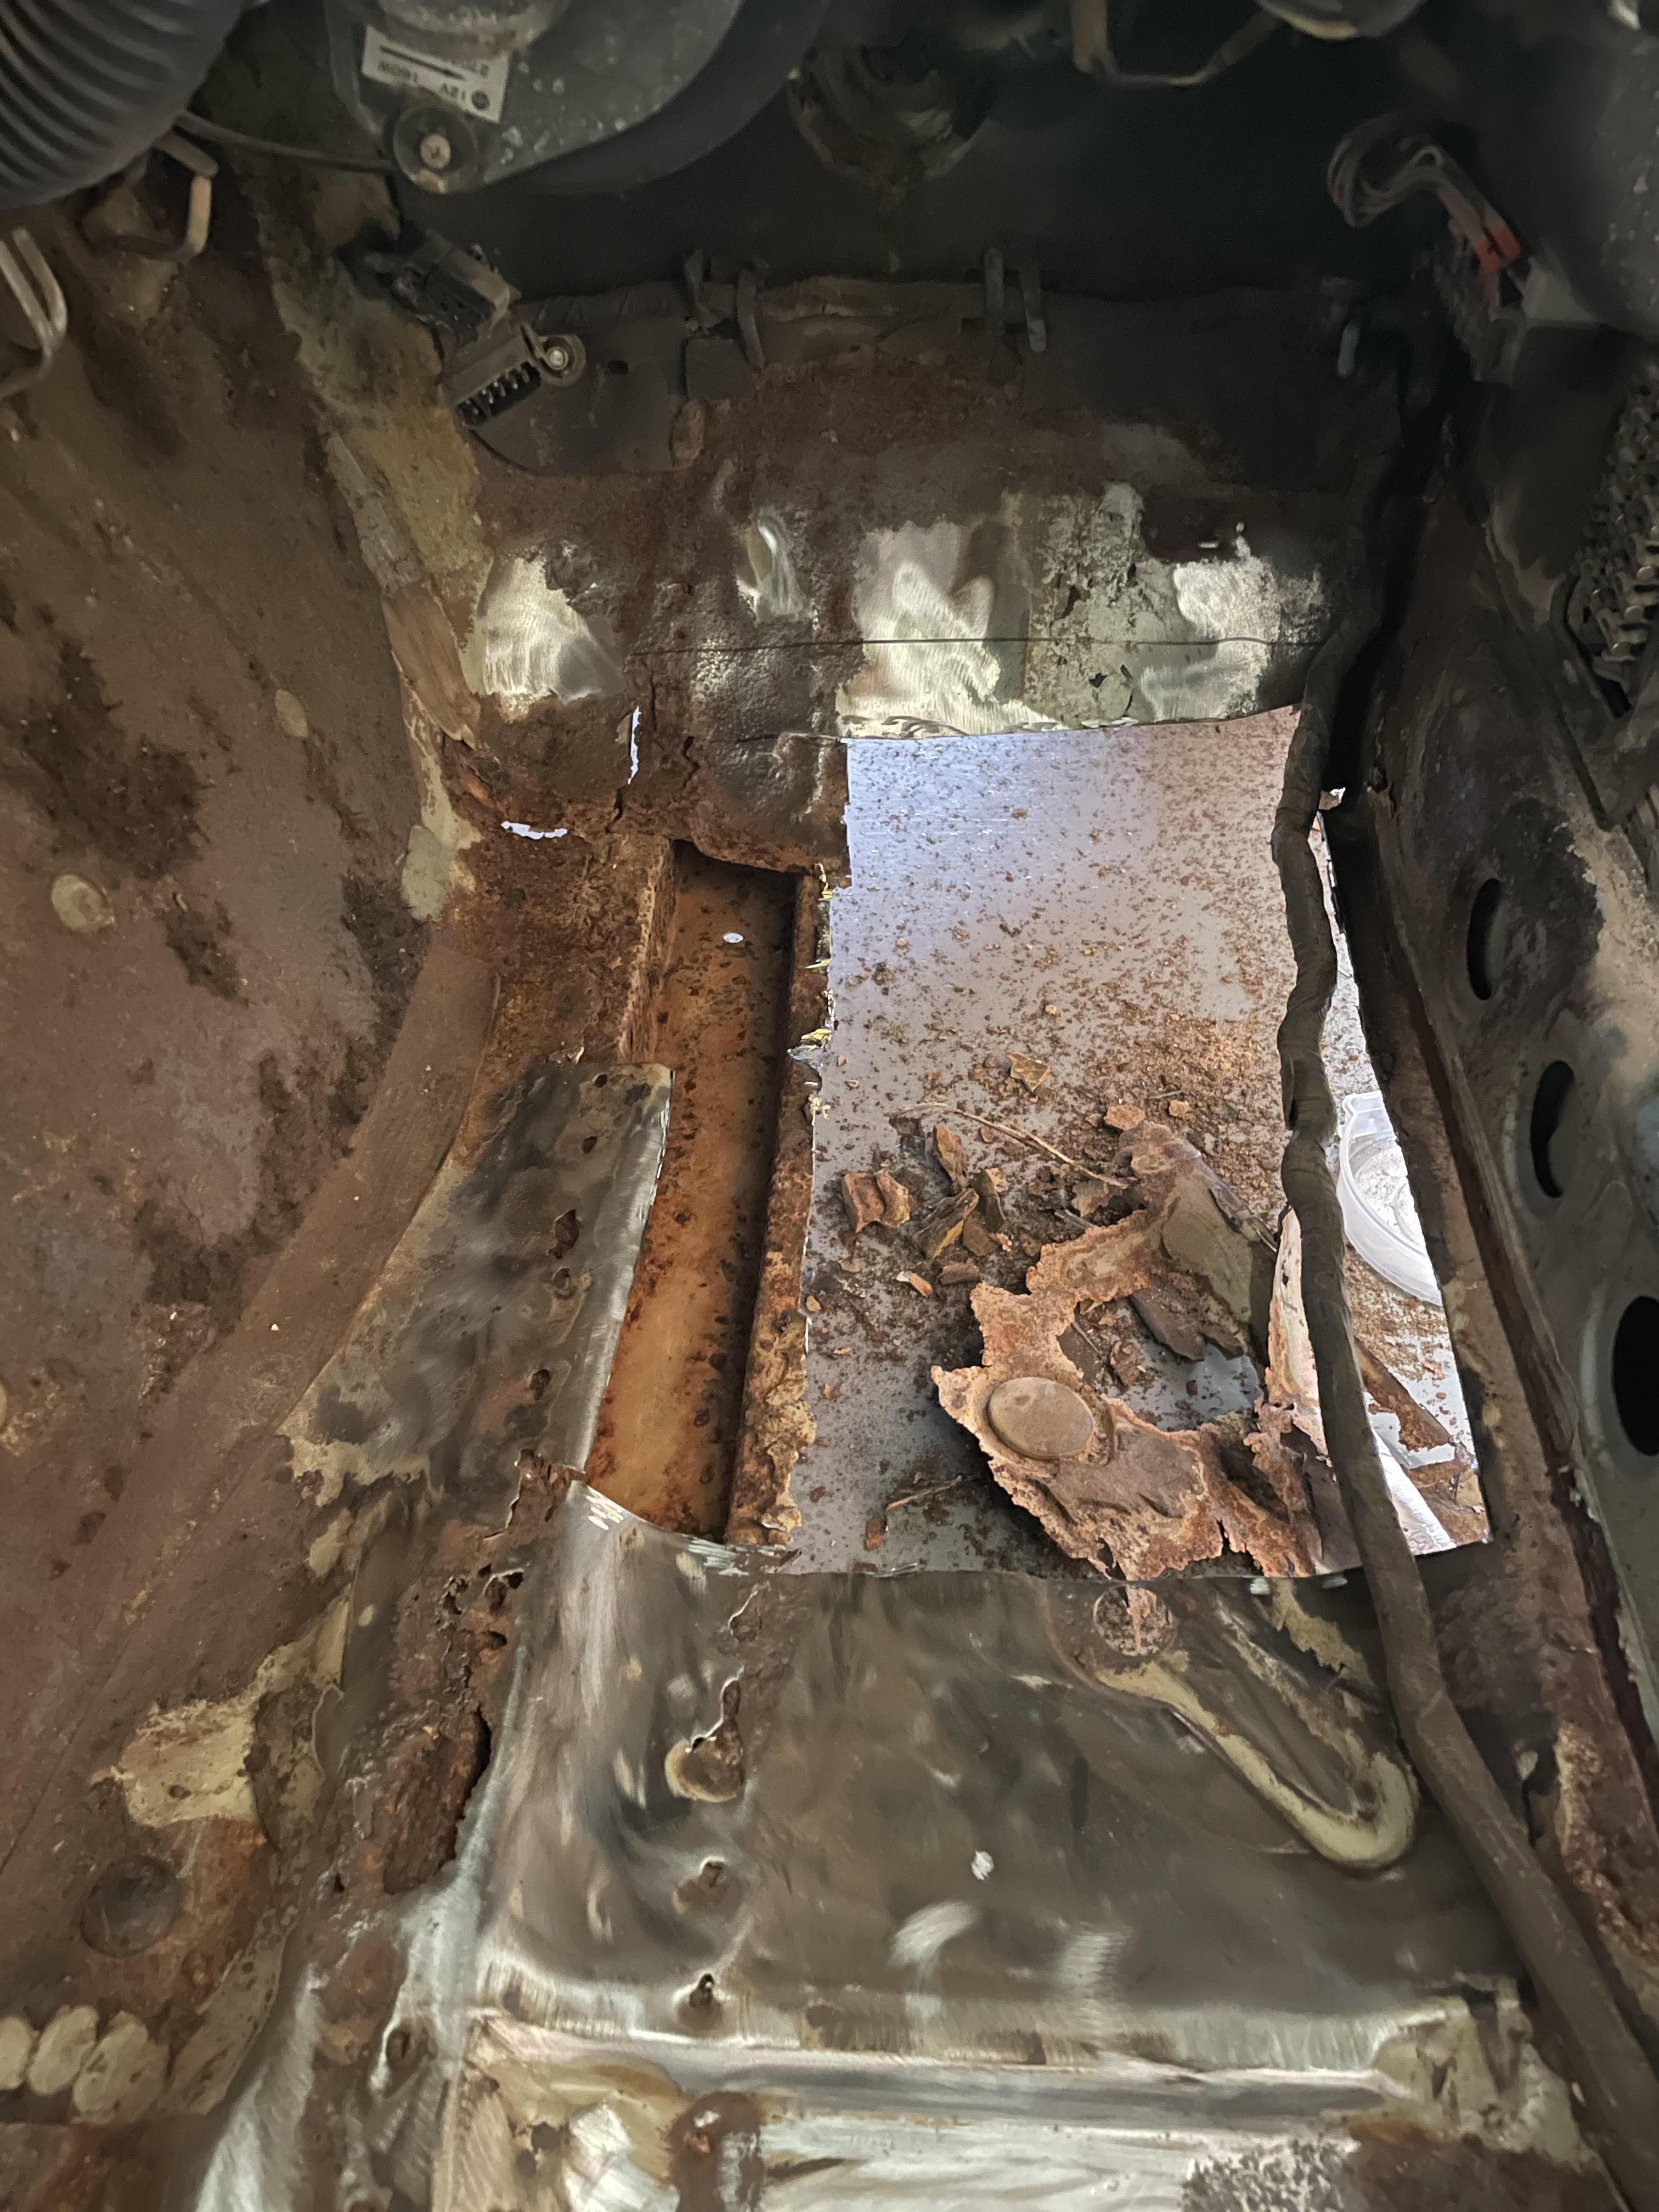
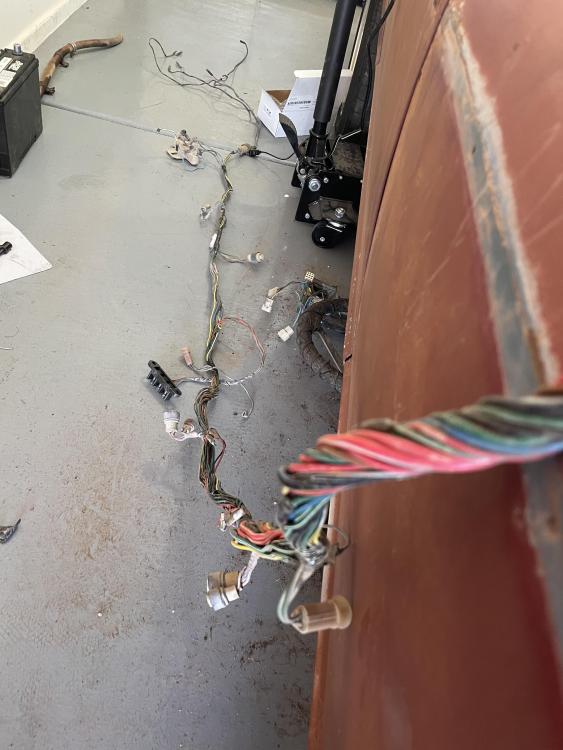
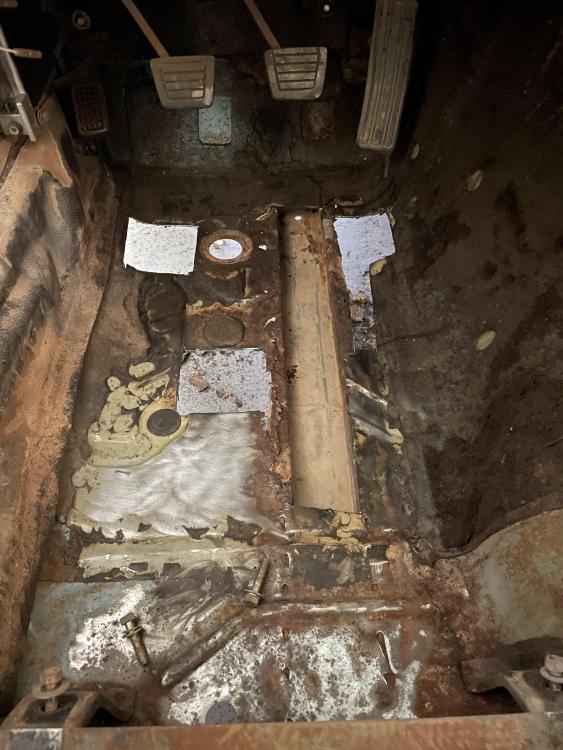
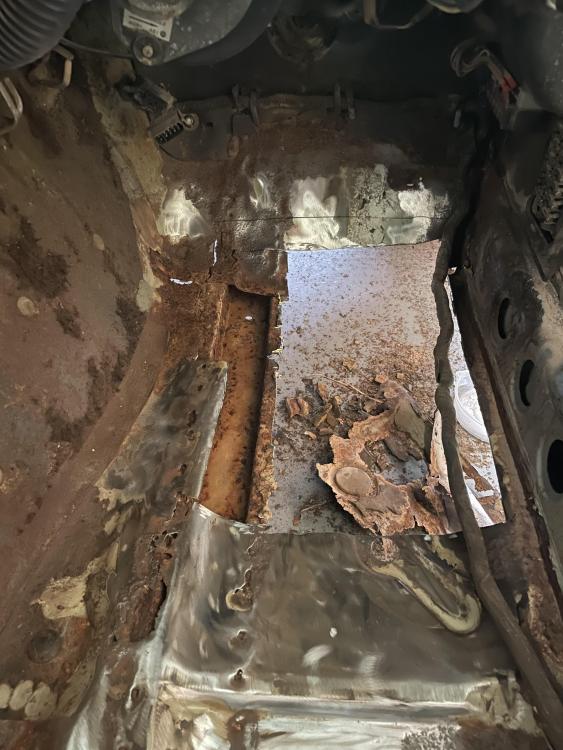
Some recent photos from the work I did over the week. As I mentioned before, I stripped that grimy wiring harness. Just did a quick electrical tape to get it back together. I forgot to take and after photo...oops! And then I got around to some more floor pan cutting. Its ugly and theres still some pinhole rust, but I think the major cancer is out. I'll use the POR15 fiberfill for the small stuff and patch in a new sheet for the big cuts. The passenger pan near the firewall has another spot I may take out. But it is a bit more complex shape and curve. I dont want to go out of my abilities. And no, the floors arent fully surface rusted...I just didnt vacuum before I took the photo, hah!


-
Haha thats great
-
Yea I may resort to buying one...I should look at it like I am able to get a deeper clean in and replace the clutch if needed too. I'm this far in already!
-
Small project update. I was able to finally decide the direction of the build. I'll be rebuilding the current head (if the machine shop approves) and use the stock cam for now. I figure it is not worth the money for a stage 1 cam and the original EFI. Later on I can decide on megasquirt or carbs and worry about power then. I'll slap on some 6-2 headers and some twice pipes out the rear. I was debating in my post above to not worry about the rings, but I did a quick test by pouring some gas into the cylinders to see how bad they are. Welp, good thing I checked. Within 15 minutes there was a noticeable drop in 4 of the 6. Maybe 30 minutes later they were empty except for Cylinder #6 which held great. SO out they will come. Next debate is pulling the pistons with the block in the car or finding a hoist and stand. Not so much a money issue, rather the space of the two is annoying. Has anyone had experience pulling pistons without pulling the block? Lastly, I made some progress in the engine bay while everything was out. I pulled the wiring harnesses back to the firewall and re-wrapped them. Cleaned it up the best I could and was planning to do a quick paint. But I am just not happy with how unclean I got it. I'll need to push it out front for a pressure wash before I go painting. I wish I took photos of this...there was dirt thick enough to match the brake lines on the frame rails!
-
Thats a good point. I almost wonder if I should just toss the head back on after fixing the bent valve to see where it puts me.
-
I'll get out there and measure to be sure. I think 107.9mm is the spec. I dont recall if it had bronze valve seats, but it did have the spray oiling bar for sure. I am leaning towards a valve job on mine. Buying a different motor seems like the easy way out 🙂 Would it be worth the time to have the head shaved to increase compression? Then shim the cam towers of course. I wouldnt run flat top pistons if I went this route for cost savings.
-
Hmm, time to decide now which route might be best. Picking up the longblock with unknown psi (it does spin freely) or rebuild mine. I've got some thinking to do!
-
It looks like there is about a 1/16th of an inch. Head is definitely not flat. I was able to slide a .3mm feeler, granted my straight edge is not super precise, but it (straight edge) felt flat on the block. On the head, it rocked on the 4/5 cylinder wall regularly. I different angles and positions of the straight edge to try to rule that out. Is this too much to shave?
-
Ill check out the thermal switch and warming plate removal. thank you! I agree, tps is better left on. Is BCDD pretty mandatory? To be honest, that is a bit of a wizard device to me (like carbs!).
-
Eh, not a ton. But I dont mind spending more to know it is done right. Rather than picking up the $450 combo, see it also needs a rebuild 😅 As you can tell, I am not a betting man. Id be happy if I could freshen up mine for under $800. Rings, deglaze (bore/hone if needed), regrind the cam and refinish rockers, new seals throughout, misc block off plates, new timing kit and waterpump, new head bolts.
-
Oops, i guess a better term is just overall running of the engine. Trying to remove as much unneeded stuff as possible while still retaining whats *needed* for a smooth experience. I read that you can also take out the TPS and AAR but it start to have negative impacts. Is that right?
-
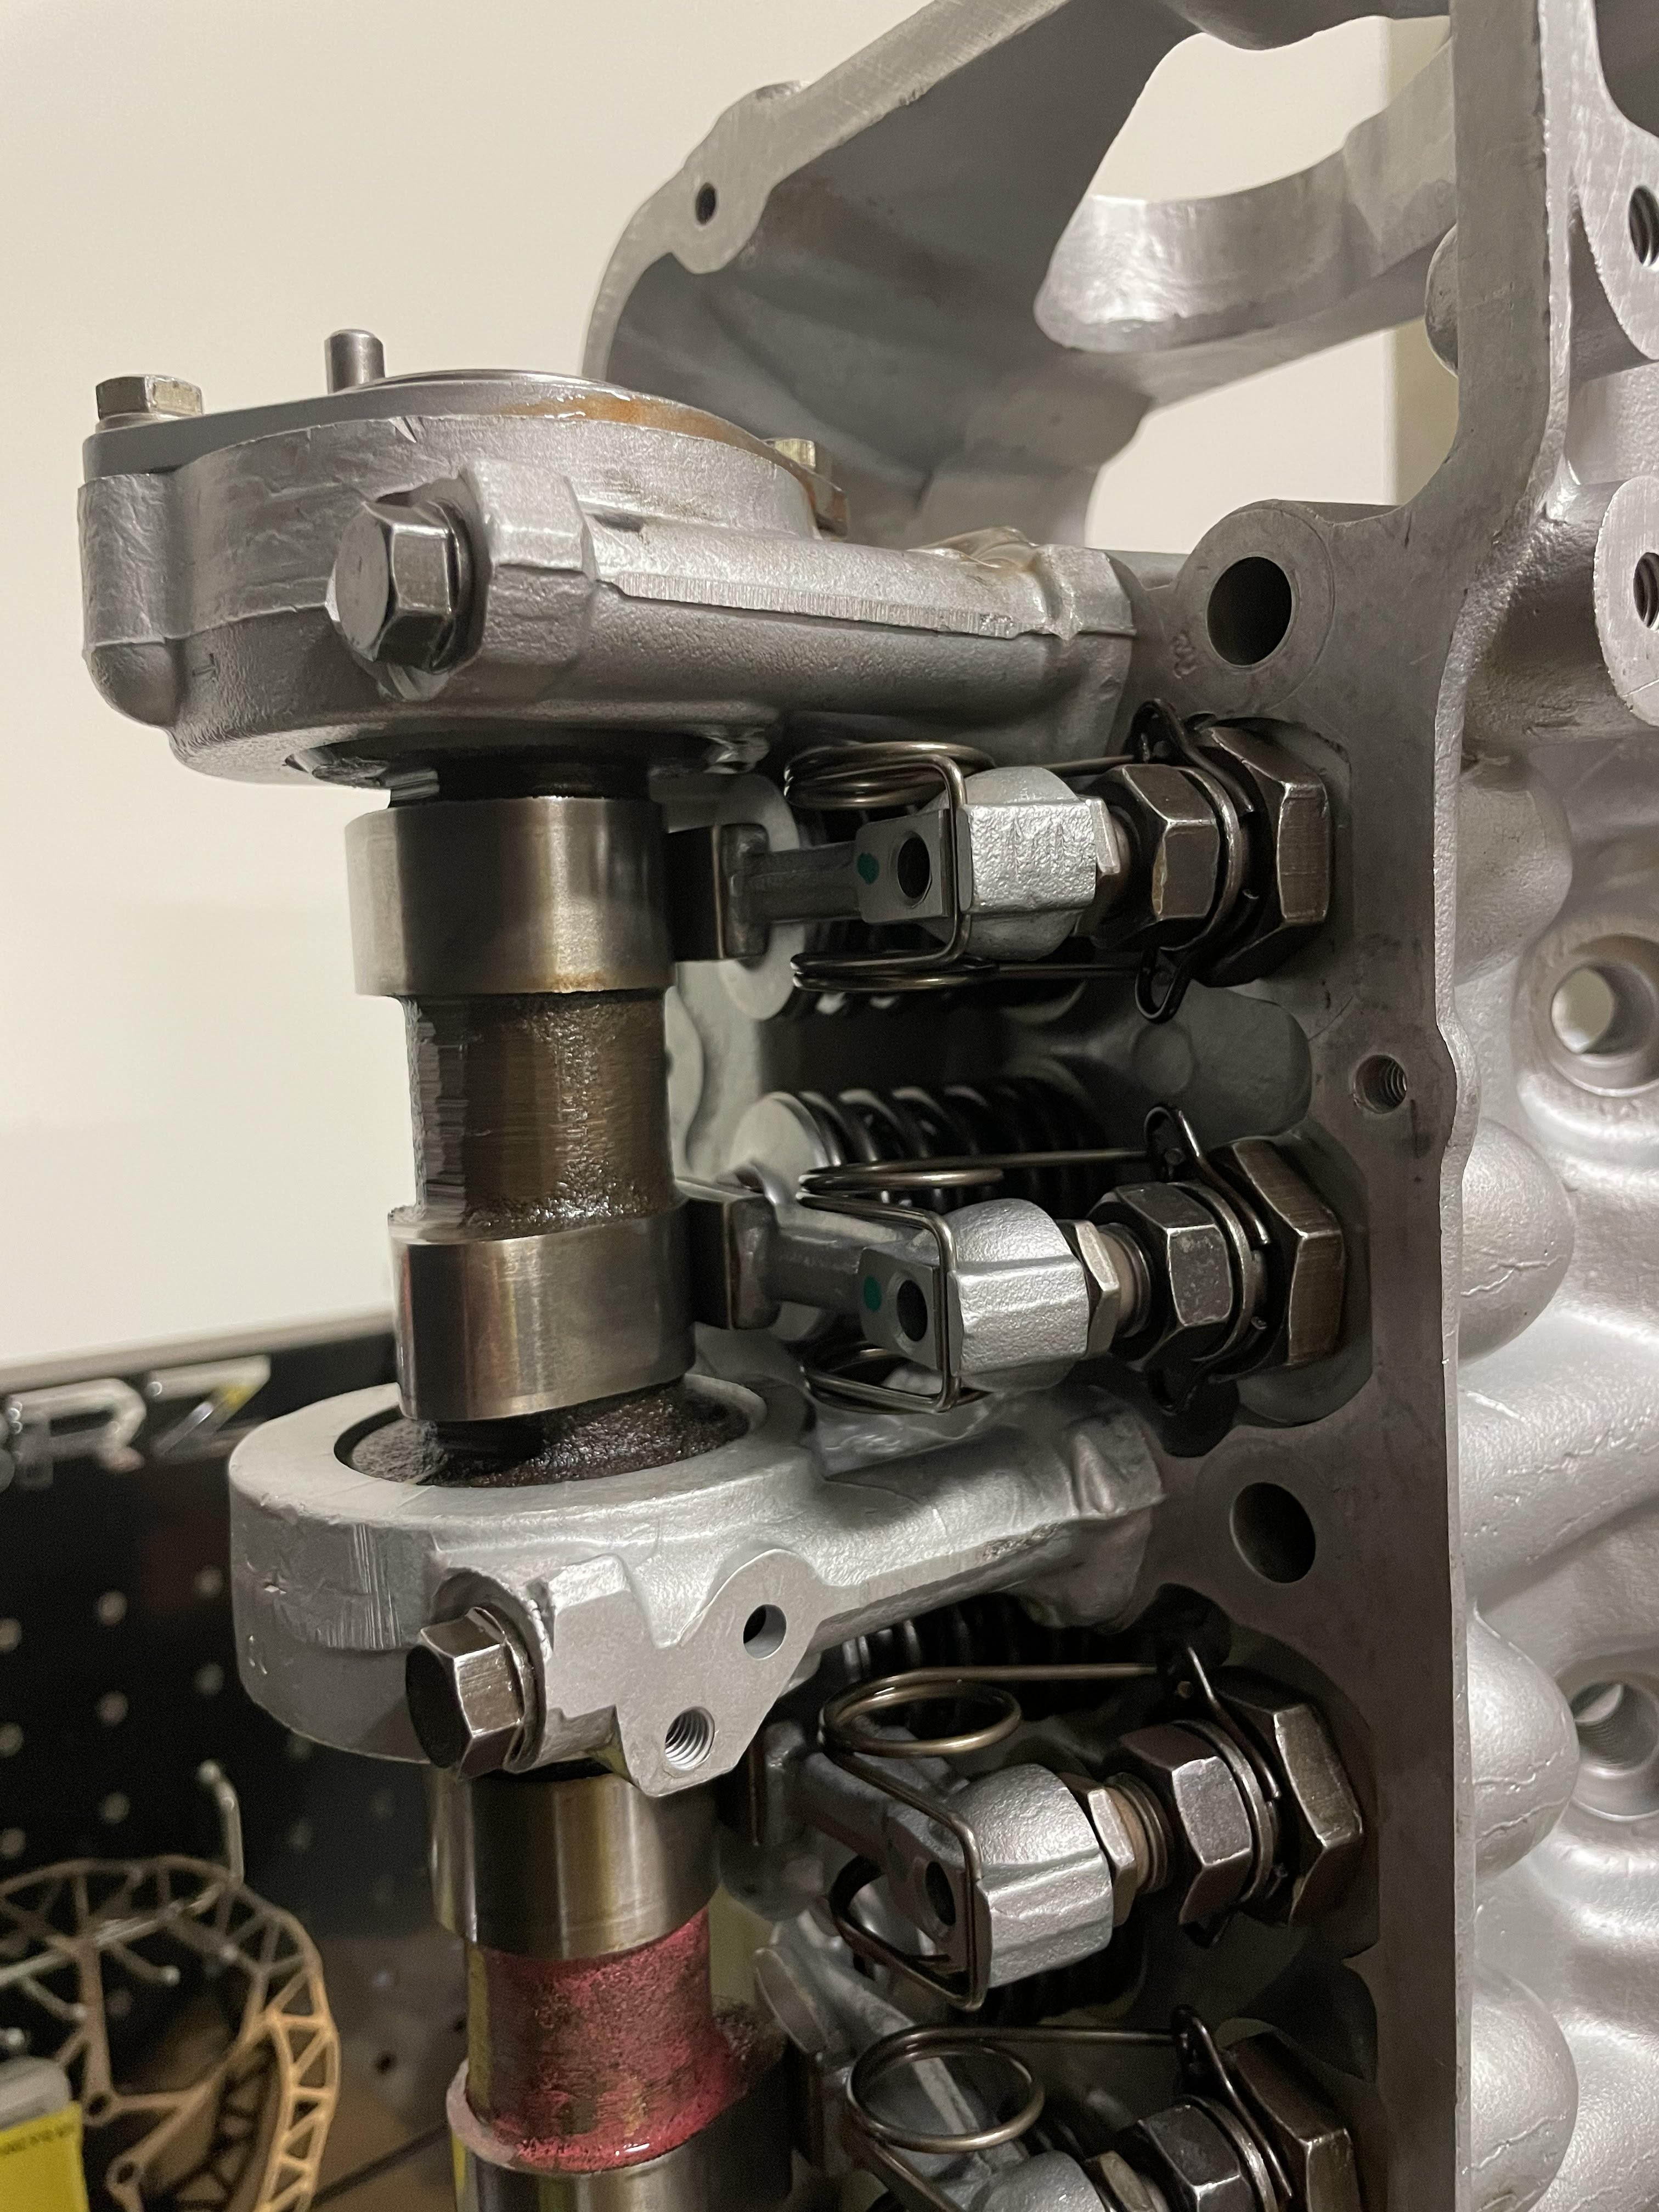
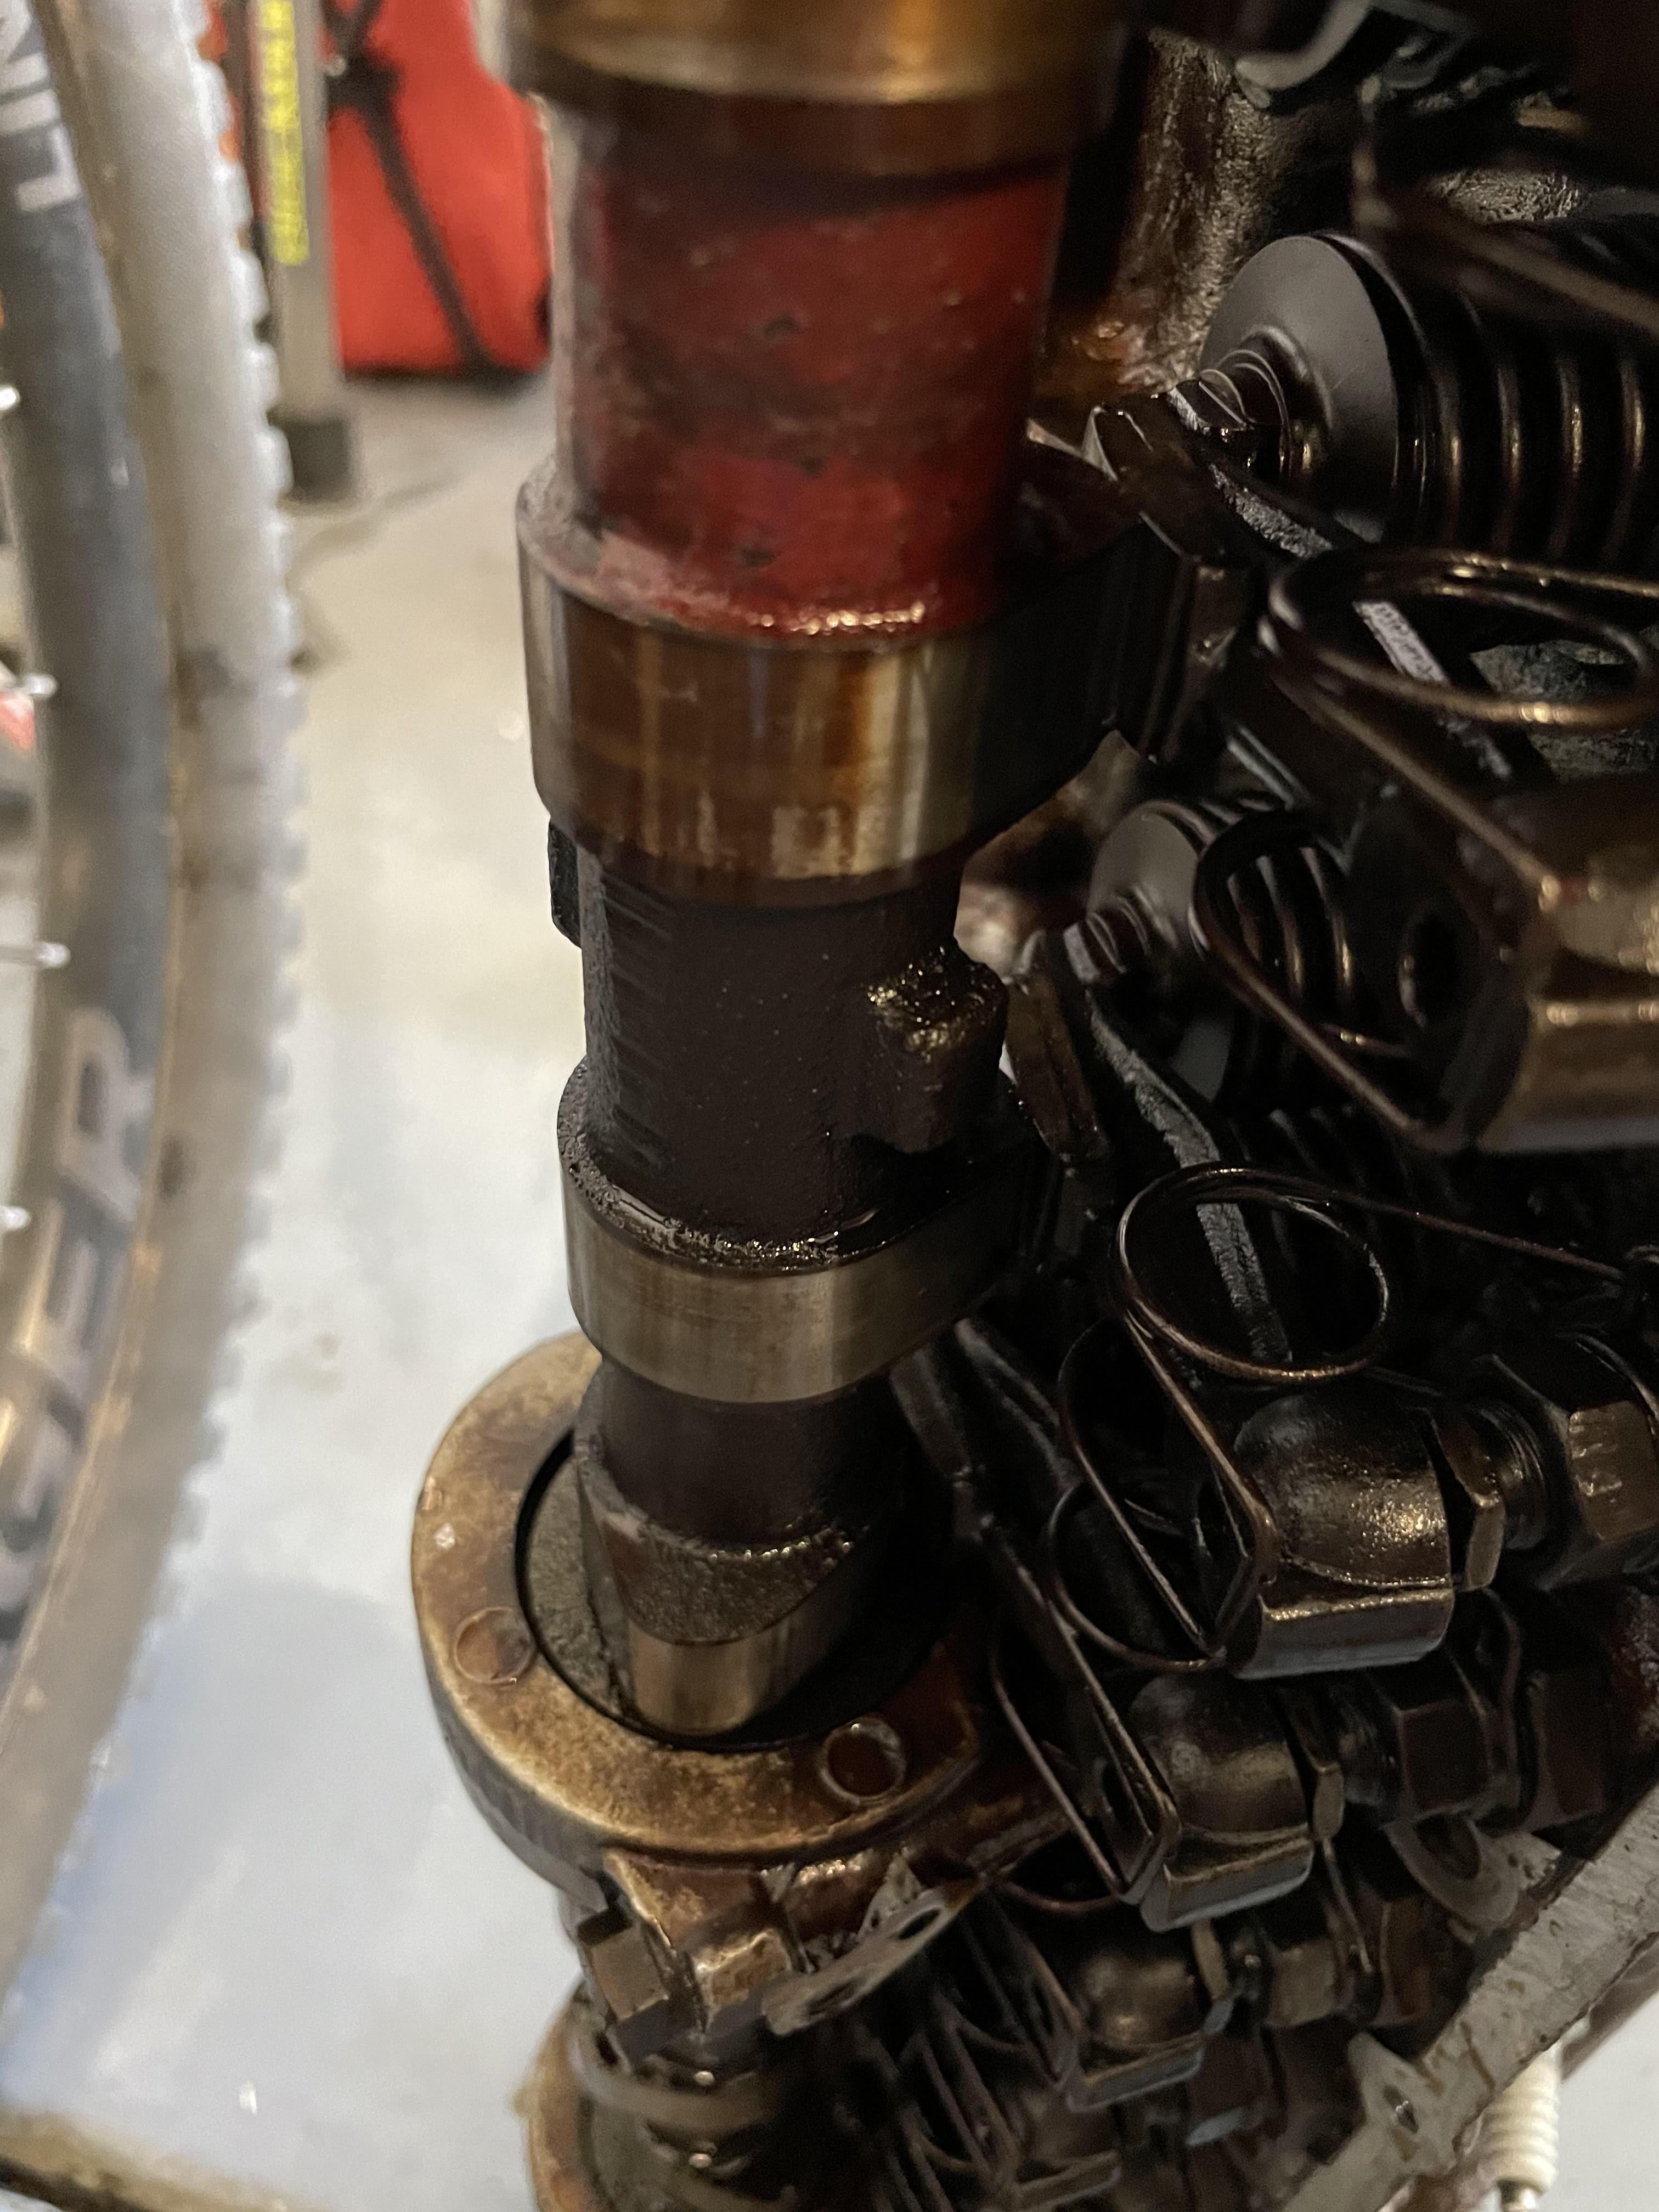
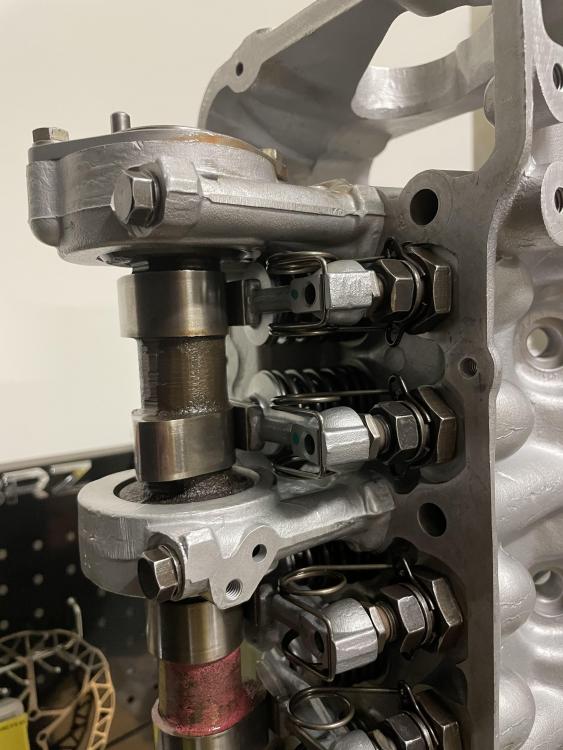
Exactly! I would be so bummed putting a fresh head on only to find out that the rings were also bad....Well since we're this far I may as well pull the block! It could use a deep clean anyway 🙂 Started tearing the head apart more today. Got the rockers and cam out. I'll need to get a spring compression tool to move forward. Planning to send off the cam for a stage 1 grind as well as the rockers to refinish. Darn EFI limits me on the cams! Also was able to start cutting some rust out of the floor pans. I think I'll get the big chunks out, weld in new plates, then POR15 the entire floor pan to tackle the deeper surface rust. I may also work on cleaning the intake manifold: Charcoal canister EGR BCDD Cold Star Valve I think we should still retain decent idle even with the above gone. Phoenix never gets cold. Main goal here is just to make everything look better.
-
Same! I think I will run them with some fresh rings and a deglaze. Overall compression was averaging around 90psi so I think its safe to do rings while im here. You got my hopes up 😄 I dont think it is base on the pictures. I did front, lobes, and rear.