hotsho111
Free Member
-
Joined
-
Last visited
-
Thanks Kickstand, and I still appreciate the video inline. The shortlist of products I've found are 3m Body Schutz 3M UnderSeal Rubberized Coating (8819) - this doesn't seem to be available in the states Wurth's Stone Guard Rusfre undercoating Domion Sure Seal Transtar Undercoating (4361) Sem undercoating KBS undercoating I'm sure there's a million more though. Going through my records I *did* manage to find the shop that did the restoration of my Datsun (in Spokane, WA, but I don't want to put them on blast). Unfortunately the shop owner retired in 2021 so I haven't been able to reach him.
-
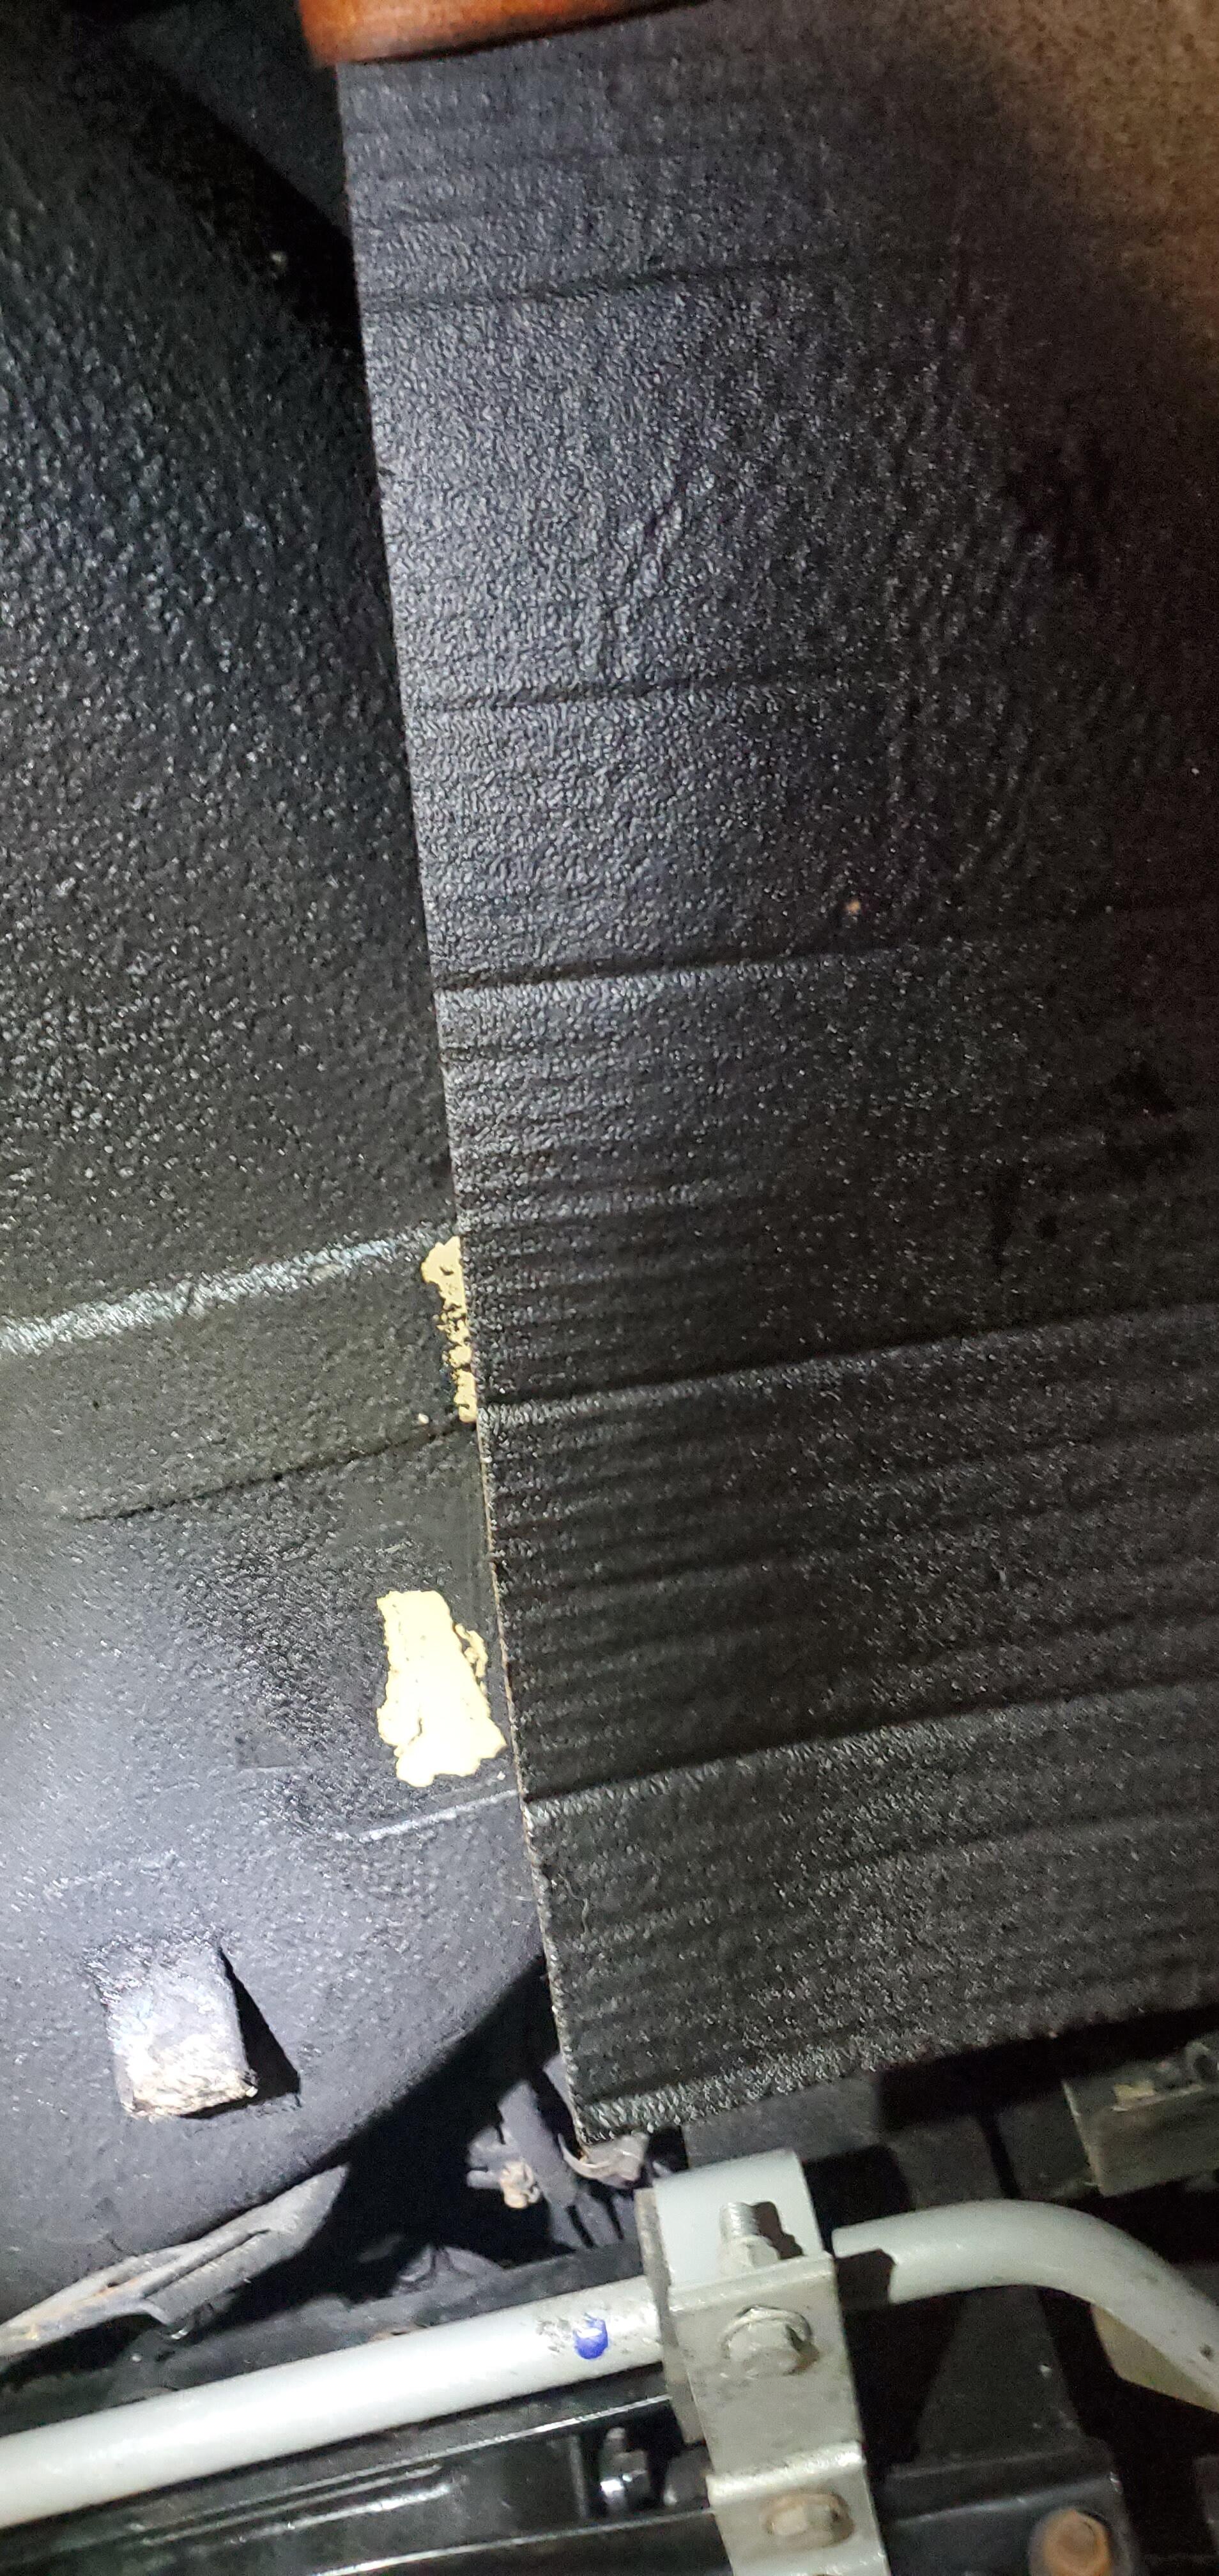
Will continue to post some updates as I continue through this as people sometimes PM about random threads. I did some test sprays on the spray can rubberized undercoating from SEM I got and while I like the finish, it's not nearly as close to the existing undercoating. SEM has instructions for a "textured" and "smooth" finish (really based on how far you spray a final light coat) and I tried both approaches. Here's a test piece I shot next to the existing undercoating. It doesn't come across quite so well in this picture, but the spray coating on the test piece is basically as thick as a coat of paint, where the undercoating on the car is significantly more thick. - like 1/16-1/8 of an inch in a few places. I have a feeling this was undercoated using an undercoating gun like this https://www.amazon.com/Astro-4538-Economy-Air-Undercoat I don't think it was 3m Schutz, and it seems to look close to 3M UnderSeal Rubberized Coating (8819) but I that might not be available in the states. I do have receipts from some of the body shops that worked on the vehicle during it's restoration, so I tried reaching out to any of them to see if they might know Otherwise, I might try and see if I can find an undercoating and try spraying it through and undercoating gun instead of a spray can.

-
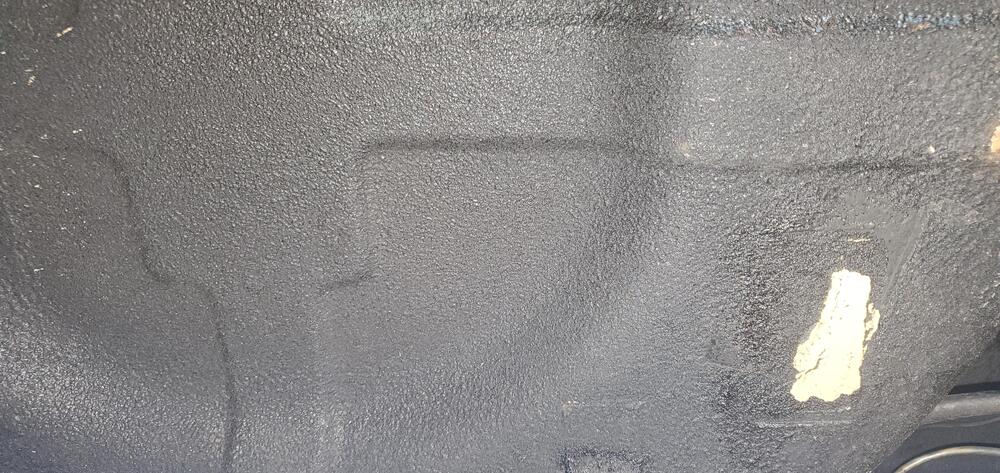
This isn't the best picture, but here's one of the undercoating in the rear wheel arch corner. I'm not sure it's the same stuff that's used on the flat surfaces.
-
Thanks! Circling back as I'm finally (jeeze) getting back to this. I ended up picking up some of the SEM rubberized undercoating (the regular and low VOC) versions but neither look particularly close: they are quite glossy and don't have much texture to them. The stuff on my car has a fairly pronounced texture, is pretty matte with a fairly grey hue (this could just be from time though) and doesn't seem to be completely dry to the touch. In the wheel arches there is dirt and such embedded in it I wonder if that's just gonna be challenging to match with a spray can.
-
@HusseinHolland The ones on my car are actually spade connectors with a rubber boot over them
-
That hose that's cracked was the same one causing my issues. I've got a slightly different plan for routing the hoses (basically bending them), but haven't gotten around to that yet. I will post pictures once that's done though I dropped the tank off at a shop to get refinished, and I'm not happy with the results so I'm going to be refinishing it myself, but the paint I want is out of stock. I think the difficulty with dropping the tank, or getting access to that hose in the back, kinda depends on how much slack you have in your lines. For me, the top/front hose with the odd bend in it made it so I couldn't drop the tank at all, and had to cut it (you can see it still attached in the earlier picture I posted).
-
Hey folks, I'm doing some work restoring the gas tank and have access to the area that would be blocked by the tank. The car was previously restored, and looks like they did an epoxy layer and then some rubberized undercoating. I want to do a few bits of minor repair and follow the same approach. I've been trying to see if I can match the rubberized undercoating but I'm not quite sure what was used. I don't think it's bed liner as it's not rock hard. I know it's a bit of a longshot, but figured I'd post a picture to see if anyone recognizes it. I thought it might have been 3m Schutz but after getting a closer look at how that lays down, I'm not sure it's that. I might pick up some Transtar 4363-F and 3m 08883 rubberized undercoating and see if one of those is close
-
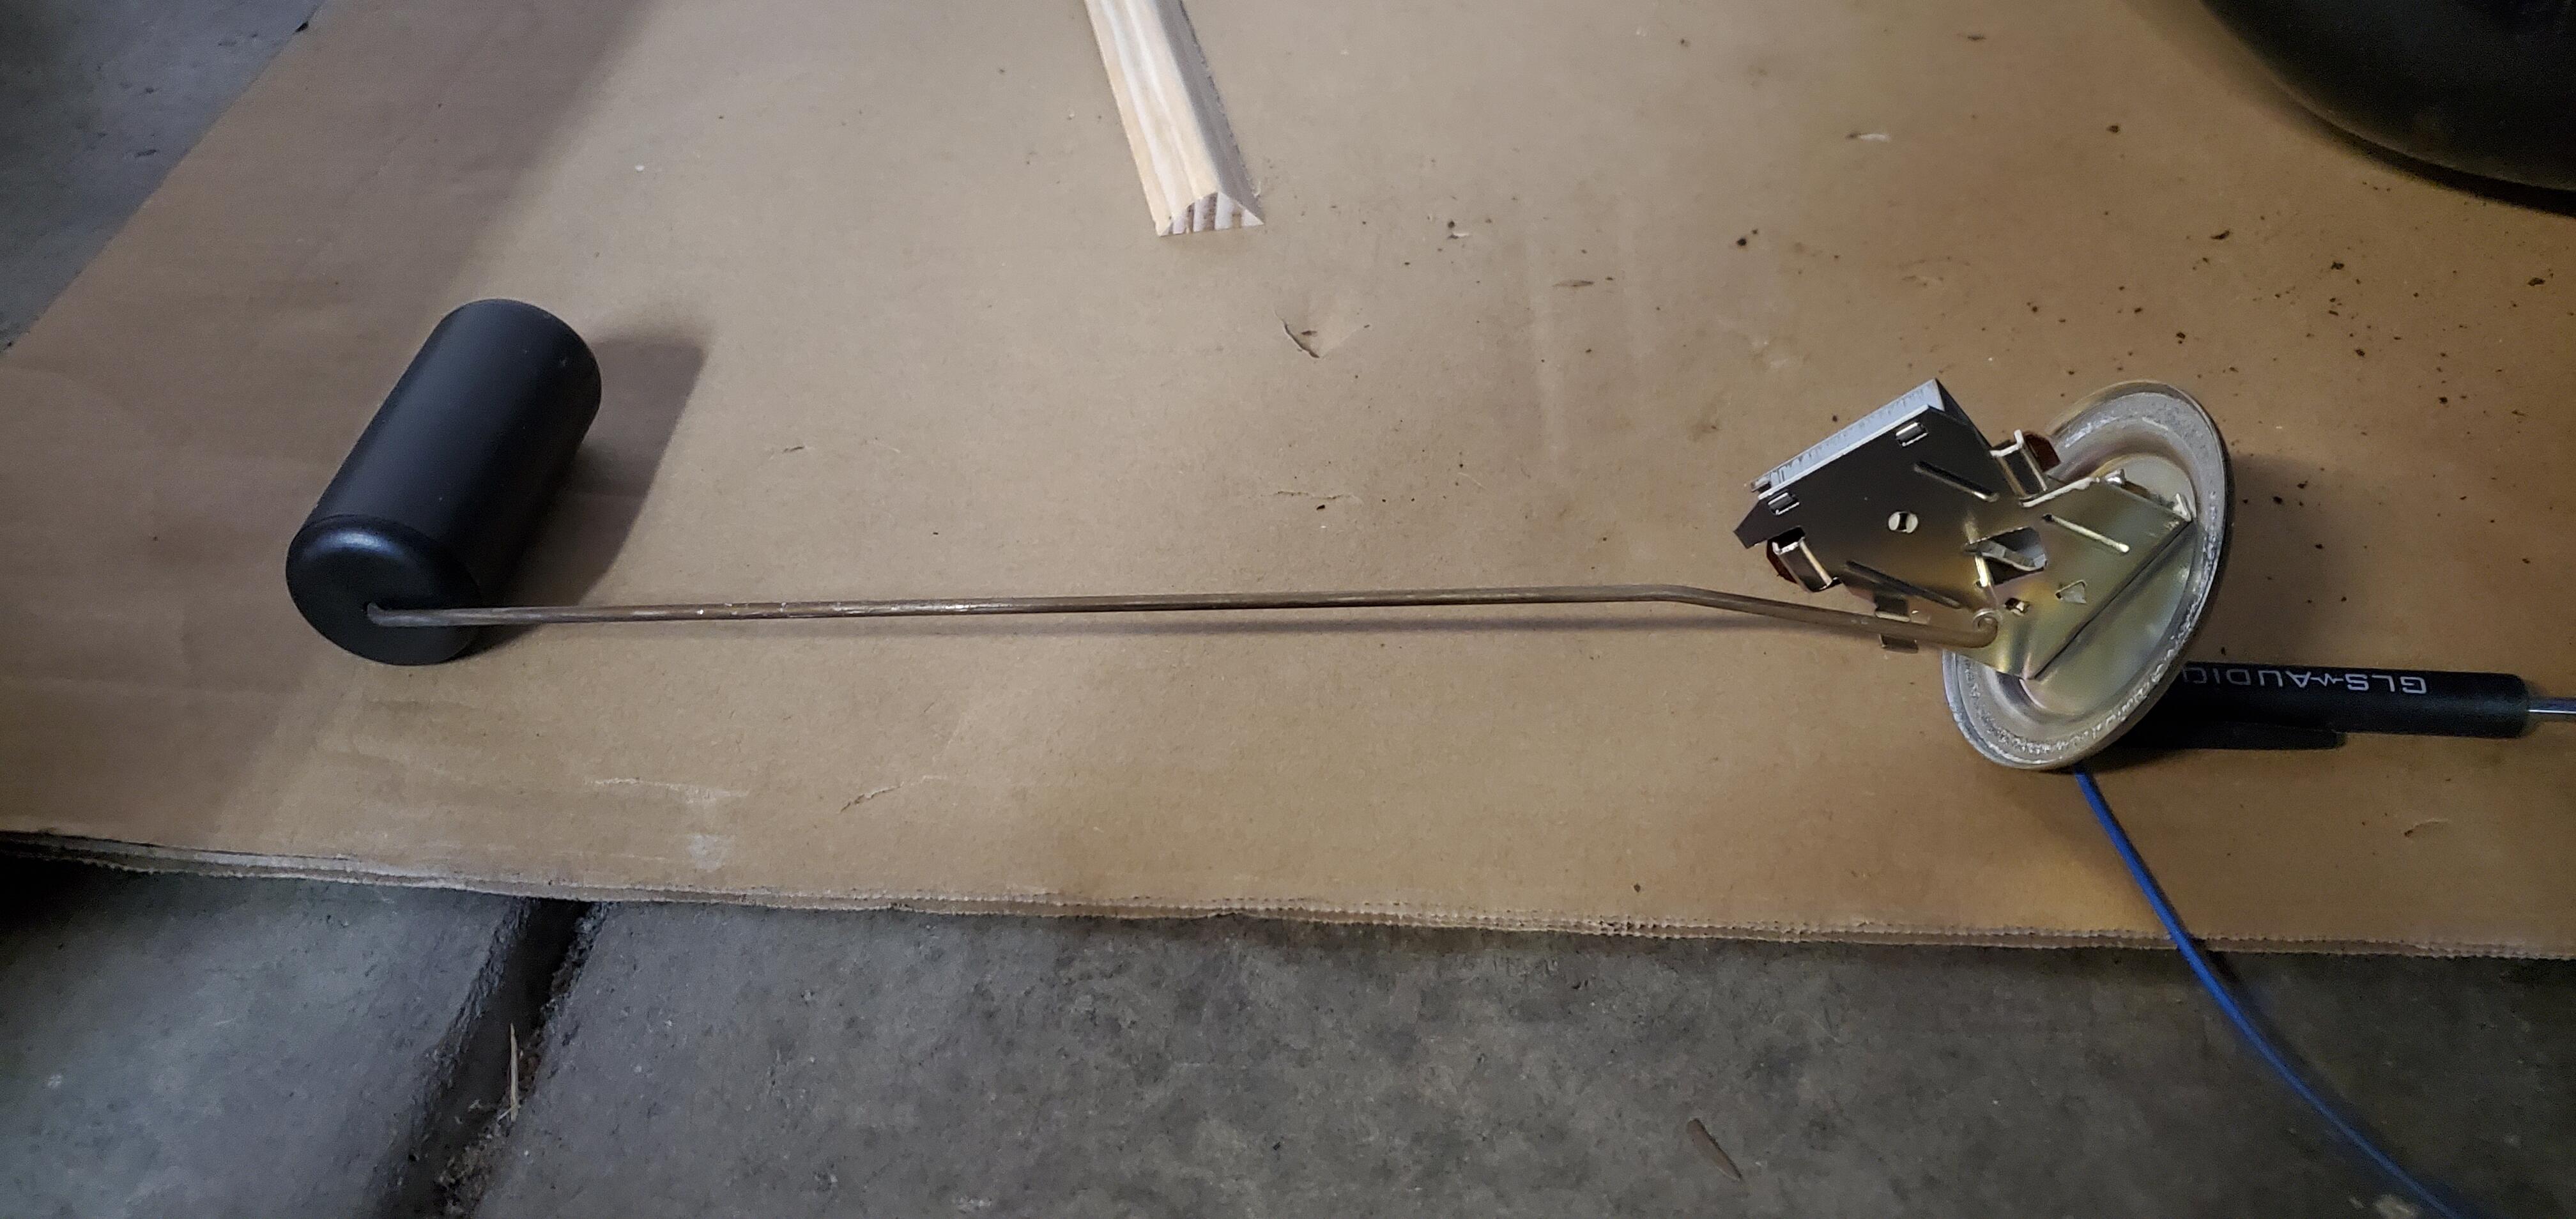
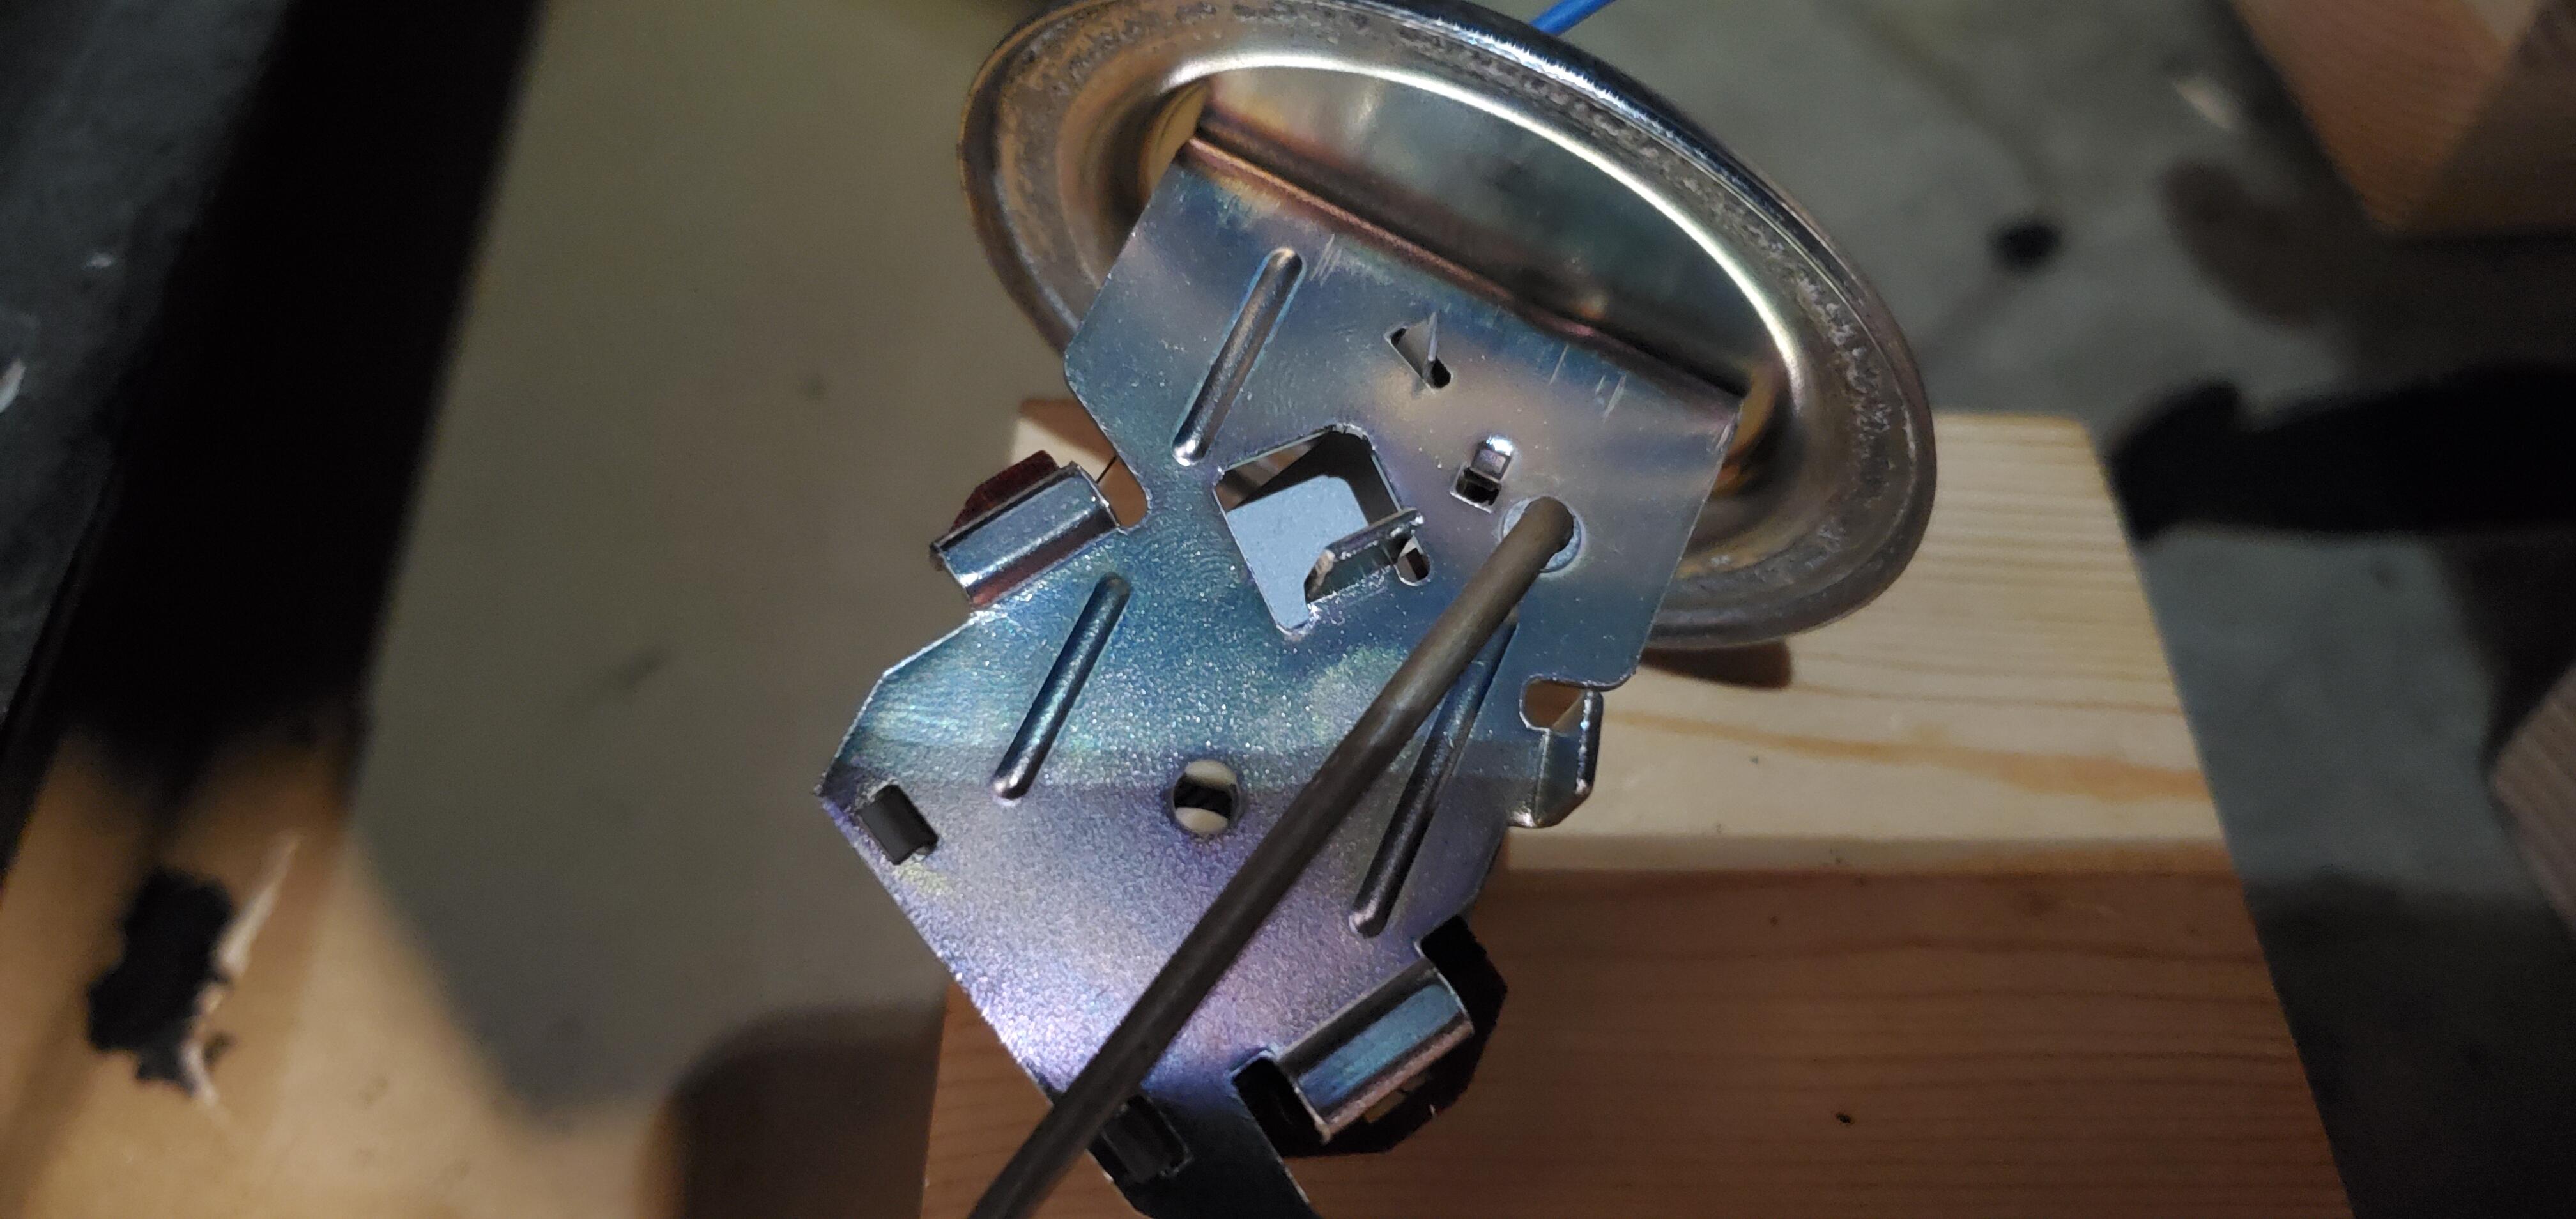
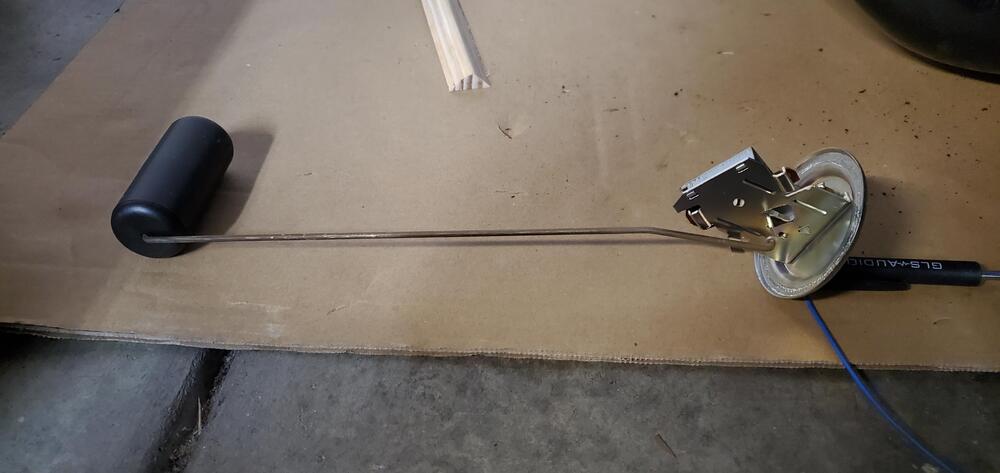
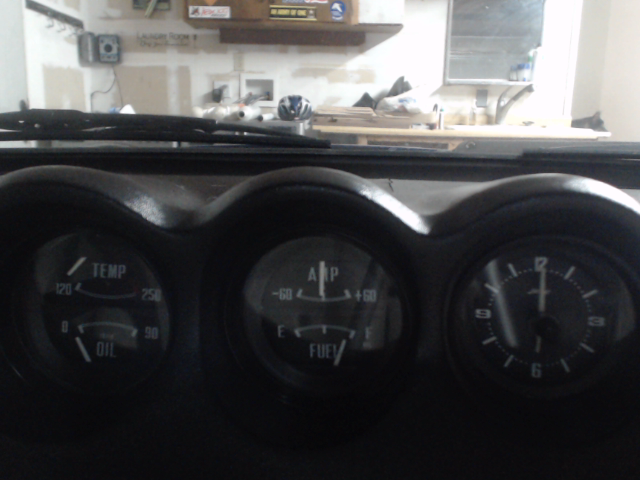
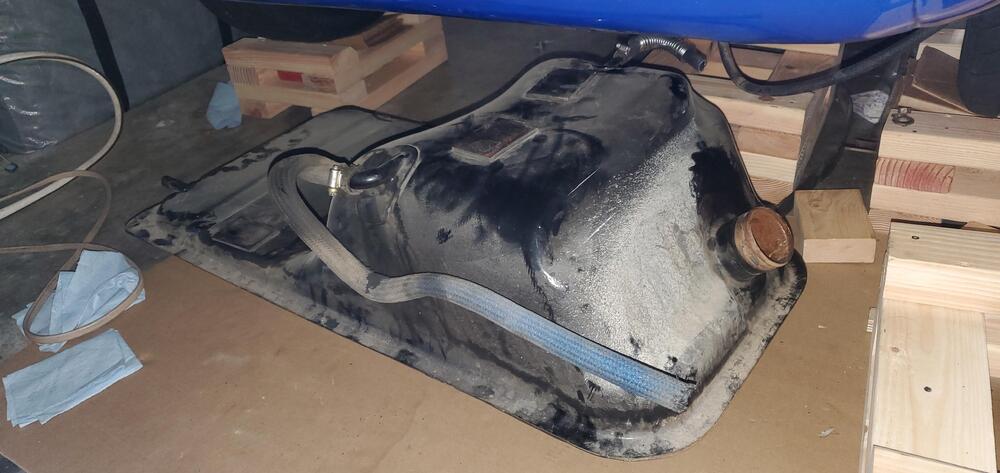
Figured I'd continue posting pictures on this journey. Took the time to adjust the fuel sending unit while I had slightly easier access to it: It actually works very similar to a toilet bowl float valve. There's an electromechanical connection, that moves up and down a set of progressive longer to shorter wires which adjusts the resistance, which is then used to determine the fuel level. There are 3 levels of adjustment: bending the float rod itself, bending the high/low tab stops, and unscrewing and adjusting the contact pad location. I ended up needing to adjust the tab stops (to allow a little more travel) and the contact. I tried adjusting the rod a bit, but not sure I actually made any difference. The tab stops: The eletromechanical slider with it's adjustment screw: Just gotta be mindful that you don't want it reading "Empty" when there's literally no fuel left. You want a little head room there. I had a janky setup with my webcam attached to my phone so I could see the fuel gauge while adjusting the sender, but it ended up working out extremely well. This was basically the setup I had: And the view from the camera: It looks like the tank was sealed in the past, but it looks a little questionable inside the tank, so I'm just going to refinish it.


-
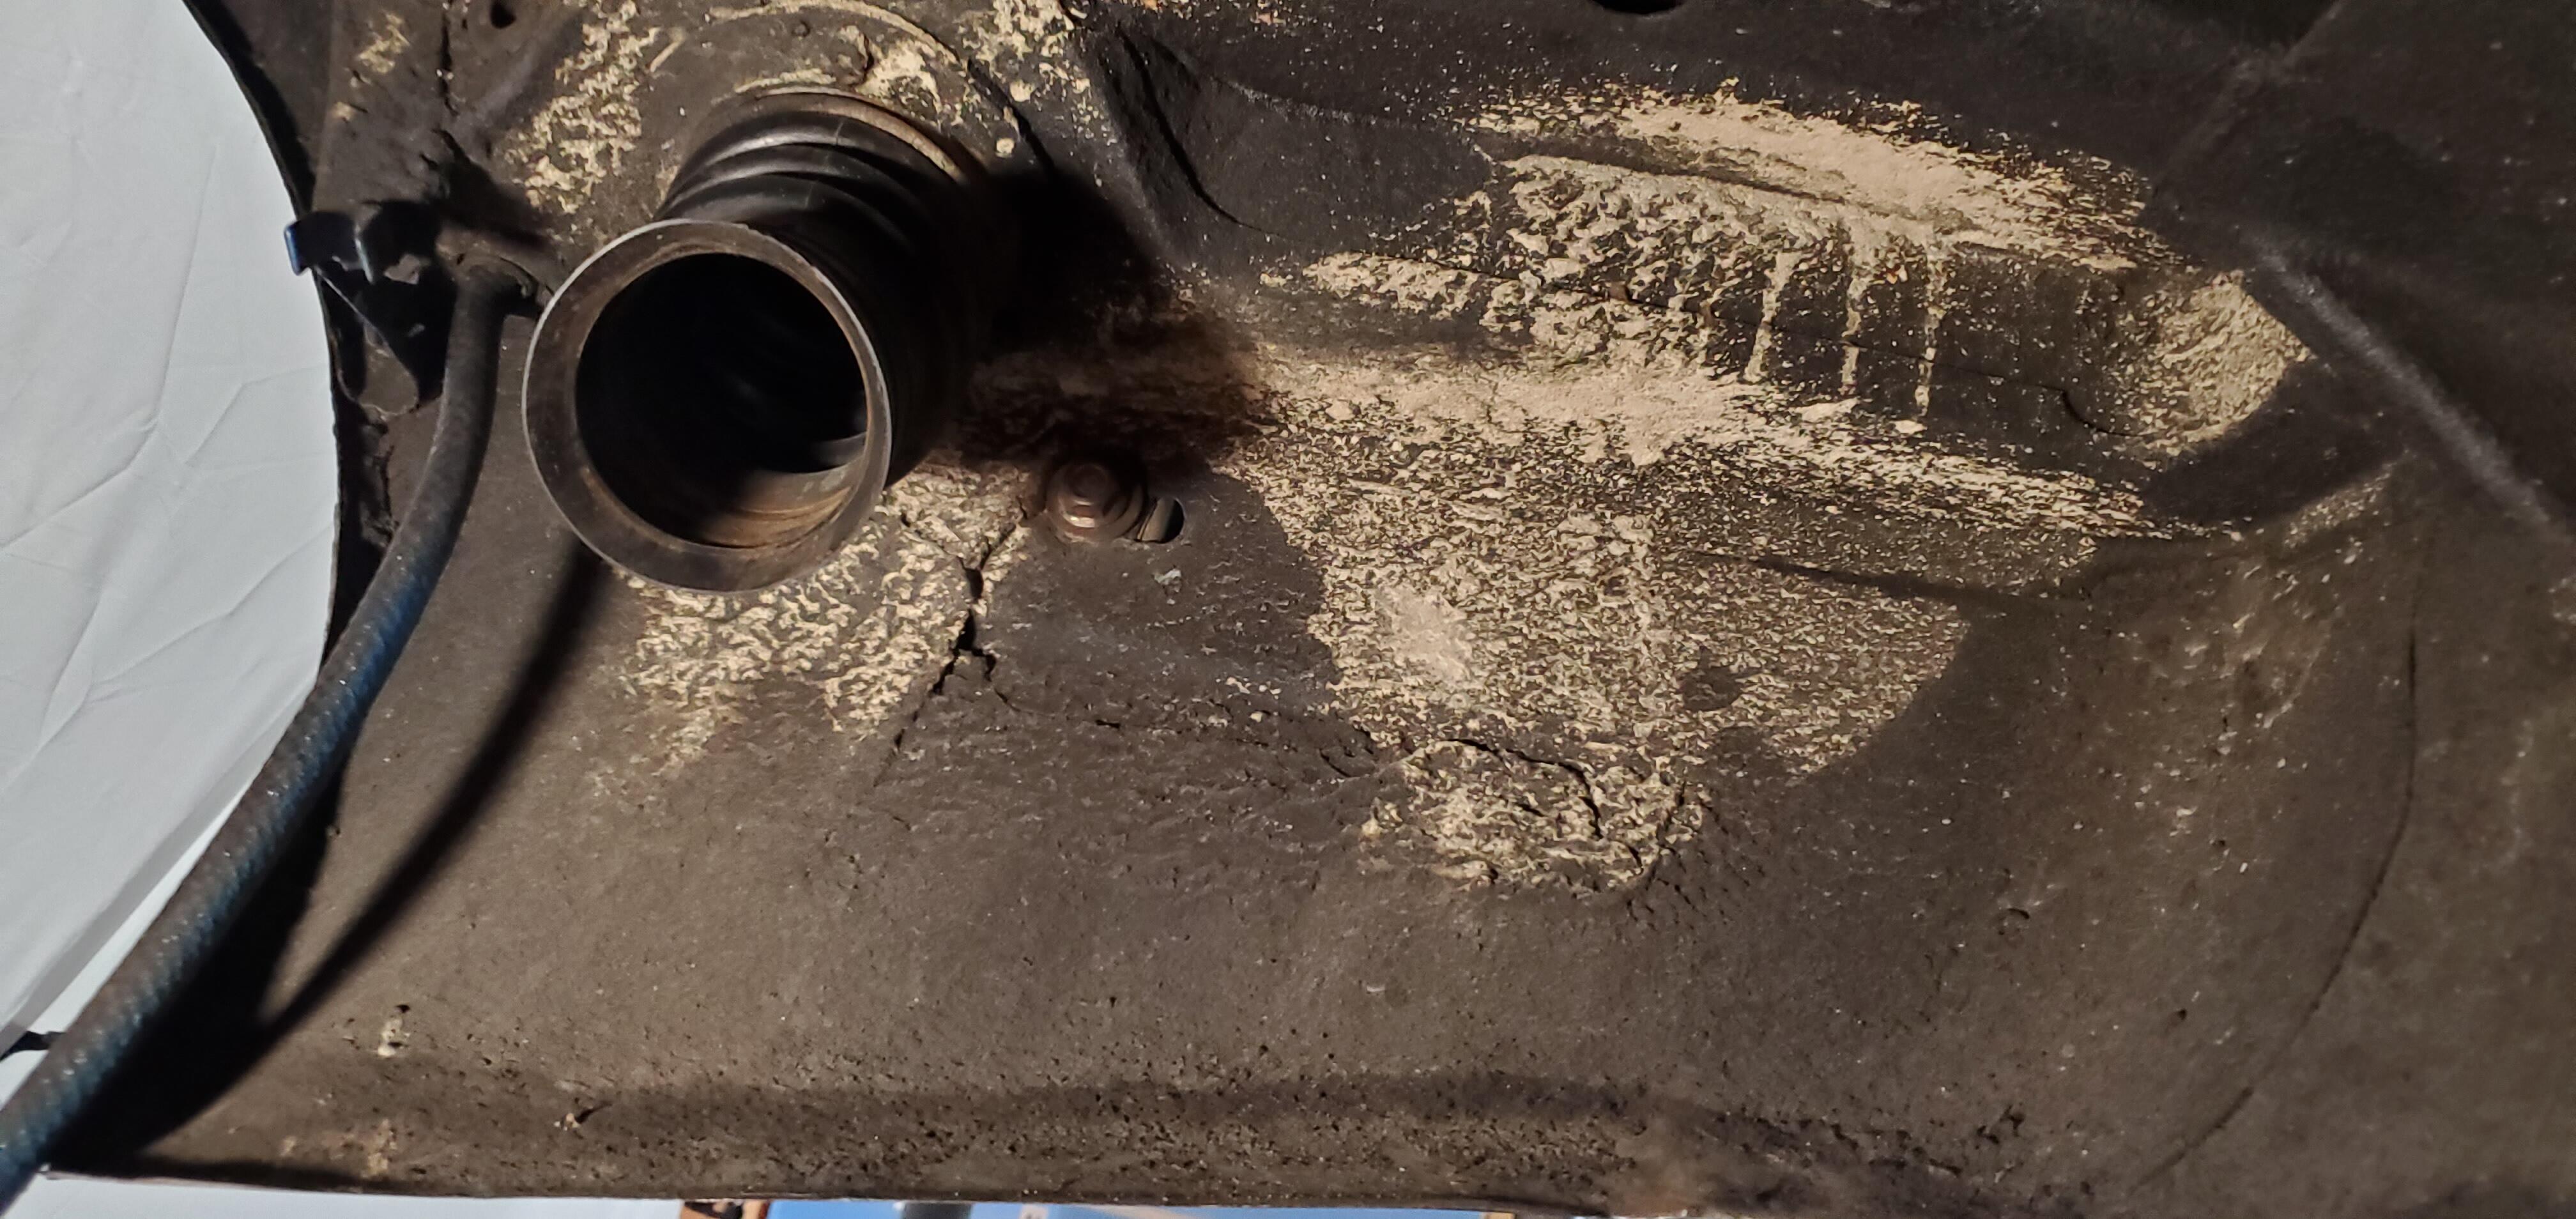
Had to use a little heat on the fuel filler neck to get it off, but managed to get the tank dropped. It looks like someone tried to coat the inside, but didn't do the best job and there's a bunch of rust in it so I'm probably going to just restore the whole thing while I'm at it. In other good news, poked around at calibrating the fuel level gauge and I think I'll be able to get that into a more accurate spot.
-
Making a separate post to ask this question. There is a gap in the frame that looks like it's for a fuel hose to go through. The hose that's run through that currently is the 3/8" hose that connects to the top of the fuel tank with the U shaped bend in it. To me, it seems to make more sense for the 5/16" hose from the fuel return rail to go through that hole, because that's more likely to stay attached to the car. I'm not sure what the expectation is for being able to drop the fuel tank with that hose running through that hole, because you can't access the fitting to remove the hose and the 5/16" evap line is *below* that line. It seems like that would make it way more difficult than it needs to be The 3/8" hose with the unicoil is the one running through the frame rail. The one underneath is the evap hose from the metal fuel rail Another angle the hose on the bottom is the hose from the fuel rail I found another thread that indicated that was the hose to go through there, but it's pretty inconvenient. They couldn't have done a worse job planning all these hoses for the tank haha.
-
Took way longer to get to this than I was hoping, but finally got this project underway. I've got some fuel hose on the way I found a complete tank kit from 240.life (https://240z.life/product/fuel-hose-kit-for-fuel-and-vapor-hoses/) but it was a bit more than I was hoping to spend, and most of the fuel lines in my car have been replaced with non-cloth braided ones so being period-correct wasn't too big of a concern. Referencing this post: I went about measuring all the hose sizes I'd need and then started looking for appropriate fuel hoses and came up with two options from Gates and Continental but basically the measurements I ended up with for each hose and size: 3/16 - not totally sure but I think a fuel return line 5/16 - 48" - line from the metal fuel return rail to the top of the evap tank. This is also the fuel supply line hose size 3/8 - 32" - top connector on the front of the tank (this is the one with the complicated bend and people just tend to by a repro hose) 1/2 - 80" - connector at the driver side rear of the tank (this is the easiest one to access) 5/8 - 51" - the "U-shaped" hose at the top rear of the tank. This looks like it was the original hose and it was cracked on mine so when I tried to fill the tank I ended up getting a leak out of this one 3/4 - 15" - connects from the evap tank to the fuel filler neck These aren't necessarily 100% accurate and leave a little headroom but some part numbers for the Gates and Continental hose: Continental (note these are numbers from larger rolls, but this was the PN where I could buy them by the foot - https://www.tdiaustralia.com/product/fuel-line-emission-control-hose/ has more info): 3/16 - 20027934 5/16 - 20027995 3/8 - 20028045 1/2 - 20028115 5/8 - 20028134 3/4 - 20028141 Gates: 3/16 - 27001 5/16 - 27003 3/8 - 27004 1/2 - 27006 5/8 - 27008 3/4 - 27010 I ended up going with contintental as it's s till made in the US. The hose should get in tomorrow so I spent the day removing the evap tank and disconnecting as many of the fuel hosts as I could from the tank. I'm going to do a little crafting to try and get the appropriate bends in the hose and will report back I have a feeling the inside of the tank is going to have some rust in it so I might need to deal with that but want to wait till it's fully trained so I can scope it.
-
I get mostly engine/exhaust sound and mine sounds like a burbly V8 due to the performance cam installed in the 80s I might actually try grabbing some 6x9's and see if I can put them behind the panels and see if that sounds good enough, and if I want something better I can at least swap them over to a custom box at the back. I think 6.5s might be too big and not sure if 5.25s would be a bit small.
-
Hey, I've got a 73 240z and after doing some spelunking it turns out the previous owner had the rear MSA speakerbox setup in the car, and at some point they removed it, and just left the speaker wire in the back. I want to install a pair of speakers in the back, and like the cleaner look of mounting them behind the interior panels with matching mounts on each side, similar to how the original speaker was mounted, but was curious if anyone had any experience on what the sound quality of the speaker behind the panel was like? I can't imagine it's particularly great, but wanted to check. If that doesn't work, I'll probably move forward with fabricating my own speaker box similar to the MSA setup. Thanks!
-
I took a look at both options (it's basically my winter project for my 240z). I initially was going through and finding the lengths and diameters of all the hoses (they aren't all the same which is super cool), and even looking into ways to get the weird bends that the top evap hoses need. My car is mostly original, but has some QOL improvements so I don't feel the need to get all original parts, and I've seen some full hose sets for ~200-300 I might investigate a little further. If I have some time to wrap up my research I can post the varies sizes, but no worries if someone beats me to it haha.
-
Oh shoot I misread Terrapins post. I'll reach out to them on FB