speedyblue
Free Member
-
Joined
-
Last visited
Everything posted by speedyblue
-
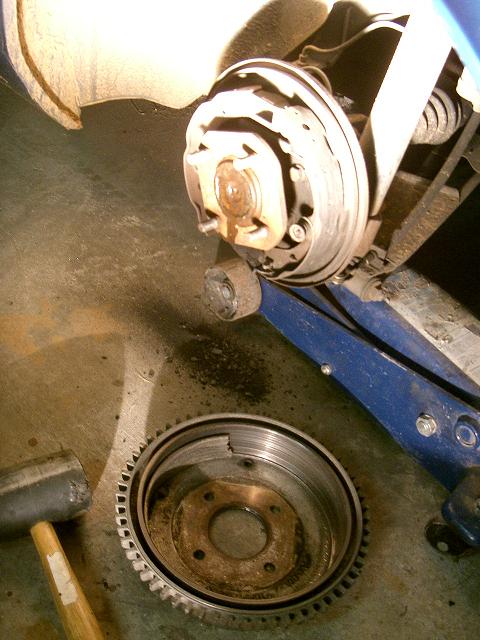
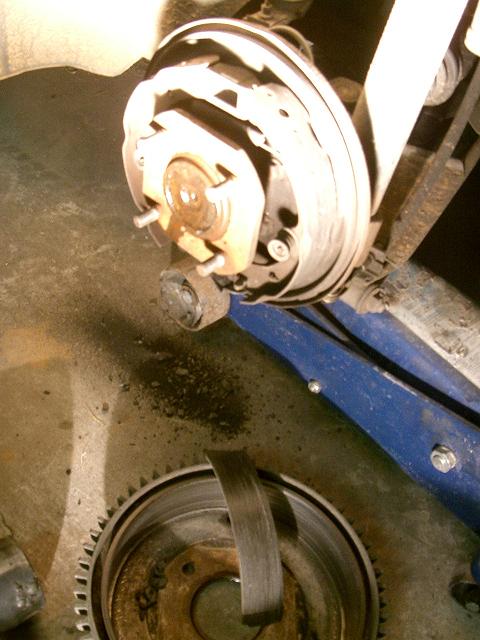
 After a careful drive with something strange definately going on, and after about half an hour plus of bashing with a rubber mallet, I got the drum off to find the problem. My drum brake linings had disintergrated. I have never replaced these things whilst i have had the car (8 years) and they still had plenty of meat on them, but it seems they have just bit the dust. So I guess it's time to replace them now... :tapemouth It stuffed the drum lining as well, so I'll have to get that machined too. Gee these cars are a money pit, that like the 4th thing I've had to fix in 8 years. but at least I got home safe. That could have been bad.

-
I don't know if it['s been mentioned yet, but there is an old 280z in the movie Friday after next, with Ice Cube. It's in the driveway of the delapidated house the thief is staying in.
-
Aussie260Z has got it right. The Phase 3 was the fastest aussie car, and the charger was the fastest accelerating aussie car, just pipping the Phase 3 down the quarter. The hideous yellow GTS commodore (limited edition thing with the big ricey rear wing) was the car that finally bettered the 1/4 mile time by pulling a 13.7 or something similar. Still, I think a 265 hemi with a set of tripple SU's would make a killer street car with fairly good driveability and economy. Get an alloy head for it and an alloy case supra box and it would weigh the same as the L6 engine/gearbox combo. Would definately need chassis reinforcing though for all the torque.
-
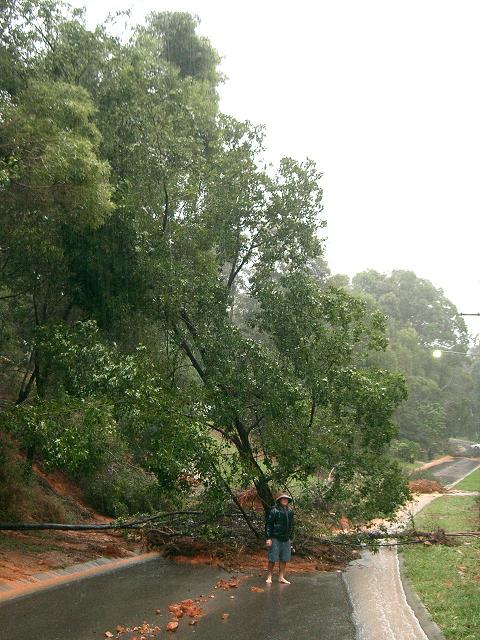
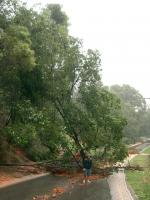
Yeah, it's been pretty solid, that's for sure. I've taken a heap of piccies of it around my place. There were 5 trees down on the road in a 50m stretch. One had slid down a hill, and then down the road a little and was right in the centre, still standing upright. Looked pretty funny. Lots of water. The Zed stayed in the garage (with the carpets out so it will dry out) and we chose the range rover to cruise about in. I even siliconed up the windscreen of the Zed last night in an effort to keep it dry inside. The rubber is cracking in the corners. Hopefully that's the last leak. :stupid: Too much rain.
-
Get onto one of the import mobs and have a chat to them. They are before 1988, so you can still bring them in from Japan. Them might come across one in their travels. The companies that bring over drift cars might find a nice one with a few mods already done.
-
You could use a smoke machine with some flexi pipe to make a stack of smoke wherever you want it. Would only work as a stationary shot though. I remember on one of those worlds worst drivers shows about people putting diesle in petrol engines and making a lot of smoke. Not something to try on a newer bike though. Any smoke bombs I know of are small and unstable at best.
-
I'd be interested to know what else you have.
-
One is slightly possible, but extremely difficult, the other is downright impossible. I bypassed mine because of the difficulties.
-
Do a search of the forums. I started a thread with a very similar name (possible 'spring availability in Oz') and found out a bit about what was on offer, and peoples opinions. It should help. Also, replace your shocks too. It makes a million times the difference. Check the other thread that's running. Good luck with it all. Scott
-
I got them from xshocks.com They use paypal for payment. Shox.com don't accept OZ credit cards, so payment is a pain with them. xshocks don't answer their emails though. I called them and found out what I wanted straight away after waiting about 2 weeks for no reply to the emails. They are in california. Shipping was resonable. They only ship by air. The set of 4 shocks cost me $450au delivered to my post office box.
-
I went the Tokico HP's. Got them from the US and they were cheaper than KYB's here, or anything else here for that matter. I also got Suspension Technique springs from the US, because they were a little stiffer than what's on offer over here. They did cost about $50 more than the kings all up I think. Only swapped the front so far though, so can't give a full opinion on them yet, but pretty happy so far.
-
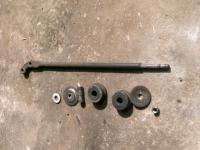
Hmm, mine went in without a hitch. I replaced mine with PU bushes and with all the grease on them, they slid straight into place. My bushes were exactly the same size as the originals, but blue. I took the whole rod out to replace them, so I don't know if this makes a difference. I still have the old rubber ones on teh floor in the garage, so I can measure them up if you want. This was for a 240Z though.
-
How did all this go?? Any luck?
-
I gotta get me one of them
-
Two opptions available. One, undo the big nut on the back of the stub axle and remove the stub axle. Two, grind off the backing plate once it is unbolted. Then you may have to also grind the caliper bracket to get it on. But the best option is remove the stub axle, and replace the bearings while it's apart. Who knows how old they may be.
-
Take it off the car, cut out the slots, then put a string accross the ends, like a big bow and arrow set. Make sure you measure how wide you want it to end up, or it still won't fit right. I think if it breaks it is pretty rough.
-
The radiator hangs about 1.5 inches. Lowest thing in font of the tyres, but still higher than the subframe. So you could bottom it out on a gutter if you aren't carefull. I've had no problems though. Rear brakes will adapt but you need the hard to find adapter plates. Search for R30 Skyline in these forums and there is a part number somewhere. The front calipers can be used with 300zx discs for a vented disk setup. The Diff can be used. The electric mirrors will fit, but the curve where it meets the door is slightly different and can be seen at close distances. Have fun with it. The power gain with the L28 is good.
-
I think prices were around $70-80 from Z shops around the place, but I got mine from Chloe at half the price. Check some of the US sources cause Chloe is no more.
-
The offset of the wheels will affect the size you can run. Zero offset and the tyre will rub on the guards if they are too big. I ran 235's all around and had to roll the rears. I'm now running nissan 6 spokes and the 235's fit on the back no worries (12.5mm offset), but on the front there is about 5mm from the tyre sidewall to the spring perch. If you add a set of G-flares, you could run some big rubber on the car with a zero offset wheel.
-
Import a 265 hemi (Chrysler) from Australia. 4.3l, 6cyl 300hp from the factory with tripple webbers. Heaps cheaper than a hi-tech Jap six, and too much torque for a light car in the wet.
-
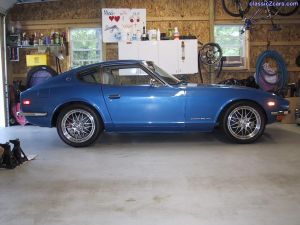 What size are the rims? They look good there. Your car is a very similar colour to mine, so it gives me ideas!!!
 -
-
Yep, know the feeling. Even the 2nd hand option is pricey. Lucky for me I only needed a few, but still cost a bit.
-
Are you talking about the Factory 280zx 6 spoke ones. I got wheel nuts 2nd hand from AllZparts. Cost $7-8 each, plus shipping, which wasn't much. Nissan wants $25 each for them, and they have to order in from Japan. Ridiculous!!
-
I like the look of the lotus ones. Might have to photoshop them on to the Z for a look. Don't like the 11mm offset though. My past 2 sets of wheels have been 0 offset (set of jellybeans) and 12.5mm (280zx 6 spokes) Having the extra 12mm really fills out the guards nicely. Currently my tires, whilst wide, don't quite fill it all out. But I guess I no longer have rubbing problems, so that is a positive.