Zs-ondabrain
Free Member
-
Joined
-
Last visited
Everything posted by Zs-ondabrain
-
 That guy is an arse and does'nt like ANYTHING American. The best short video he could make would be him being ran over by a Z, of any model. Dave.
 -
I don't think I have jumping spark in the cap, but then again, I don't have a clear cap to see thru. Everything seems to fire correctly. I actually DO melt spark plug tips, so I change plugs about 3 or 4 months. IF the only difference between the BP6ES and the 11's is gap size, I'll stick with the non 11's cause I have to regap to .065 anyways. As for the Carter P4070, get a regulator anyways. They are about $25 and a good secondary set-up just in case you get too much flow or pressure. Dave.
-
What is the difference between the BP6ES and the BP6ES 11 plugs? I have the MSD 6A, Mallory Unilte and the Promaster coil. But I use the regular BP6ES. what would changing to the 11's do for me and why. Dave. EDIT. Never mind. DUH. just read it.
-
When I got my new (to me) Webers, (40 DCOE 151's) they did'nt come with air horns. If anyone here has 6 or less short air horns for my Webers, I'd really apreciate it. I will pay you for them but I'm on a budget so please be nice. Contact me at wolfin32z@yahoo.com if you have some or all 6 to offer me. Thanks in advance, Dave.
-
I have the MSD 6A with the MSD tach adaptor. I also have the Mallory Unilite Distributor and the Mallory ProMaster Coil, which puts out about 60,000 volts. My gap is set at .065 because my spark can shoot over 6 inches of white lightning. I know for a fact that it'll shoot 6 inches cause it got me in the arm from 6" away and I thought I was gonna have a fricken heart attack!!! Just make sure you use nothing Less than NGK 6ES plugs. I have the stock L24 with E-88 head, stage 2 cam (480/274 grind) triple Webers (40DCOE 151's) and MSA Ceramic 6 into 1 header. Dave.
-
YES, the bushings fit into the copper plates then slide inbetween the chassis and the switch bodies. Simply put, The bushings just help isolate the copper terminals from grounding on the chassis body or the switch body. Dave.
-
STill need to put that other bushing into the other wire. The bushings are use to seperate the wiper fluid and wiper contacts. IE: when you push in on the fluid button on the combo switch, the fluid squirts and the wipers make a swipe or 2. Those bushings go on the blue wire and the black wire, where they bolt up to the switch body. Put the bushing thru the metal tab on the blue wire where it bolts to the C/S body, then put the metal box (Parking light and headlight switch) back on over the plastic bushing. Same thing on the other side, the bushing goes into the metal tab at the end of the black wire, then it slips between the wiper switch assembly and the big metal chassis. I'd show you exactly where it goes but my mom borrowed my digital camera. Try pushing the wiper fluid button and see what happens. you may not like the results. I just rebuilt two late 73' combo switches today, I know exactly where they go. One on each side of the white plastic plate. Dave.
-
That's fricken AWSOME. I watched it about 10 times then came back here to say THAT'S FRICKEN AWSOME!!!! I want that motor. period. sign me up, i'm in.
-
Moritz55, Your switches are Done, And while repairing them, I found out why no matter what you tried to do to make them work, would'nt have worked. The carrier plate that holds the 2 spring loaded plastic bullets, looked OK, but had a small finger missing. The finger or tab in question is 1 of 2 that keeps each bullet from falling out of the hole when you turn the parking lights on. So it would appear to be working but the first or second time you flip the switch, the bullet would fall out and no longer operate the switch. ALSO, one of the plastic bullets had a flat spot on it so I replaced it. The extra money you put in not only covered that but also the C/S and Parking light Metal housing. one of the tabs was broken off and another fell off in the removal of that housing. I tested and retested the switch, and everything works beautifully. I even got a 0.000 reading so it's as good as new. I also got rid of all the old burnt on grease and replaced it with new grease. They operate great, and not sluggish like they were. I tested it before the cleaning and they were pretty crudded up. The turn stalk kicks right back like new. I'll ship them out tomorrow morning along with Pete Houssler's switches, which were almost identical to yours (delayed wipers and all.) Dave.
-
OR....... Send the switches to me and I'll rebuild them both for only $40, for the pair. Arne is correct, The slide switch on your blinker assembly is most likely not making contact. I just went thru the same thing on my car. Jimmy Z is also correct in the fact that the plug on the right kick panel could need a nudge or 2. corrosion and grounds in the Z's are funny that way. If your interested in the service, email me at wolfin32zYahoo.com Dave.
-
Early 73' (3/73' and earlier (to late 69') will have a 2x6 plug. anything after 3/73' will be the 3x3 smaller plug.
-
I'm working on a set as today, so the tools will be out and ready for when your set shows up. I'll get on them ASAP and hopefully get you back on the road for some night driving. Dave.
-
I still make the 280ZX alternator adaptor plug (ZXP) for the 240Z's, if that's what ya mean. They are $15 and I'll give ya the rest of the info if you email me at wolfin32z@yahoo.com Here's the info page. http://1971.240z.home.comcast.net/extras/alt-adapt.html Dave.
-
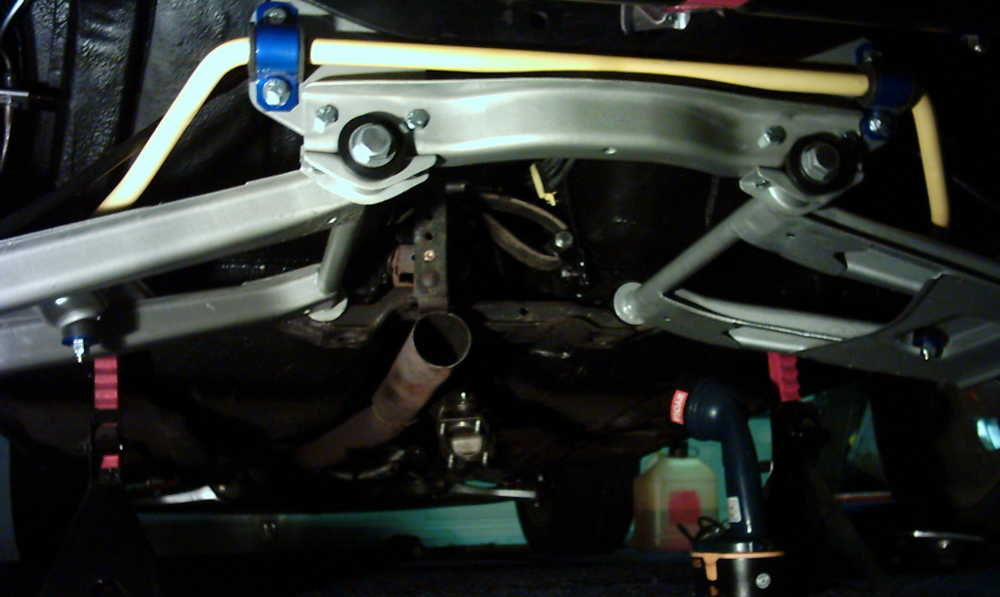
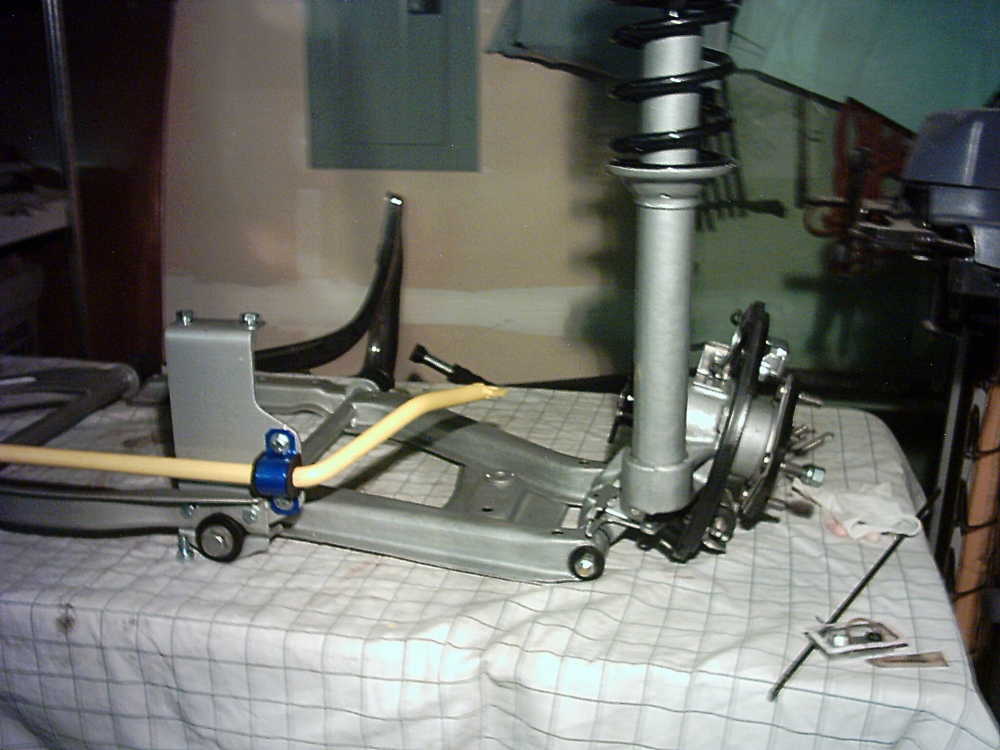
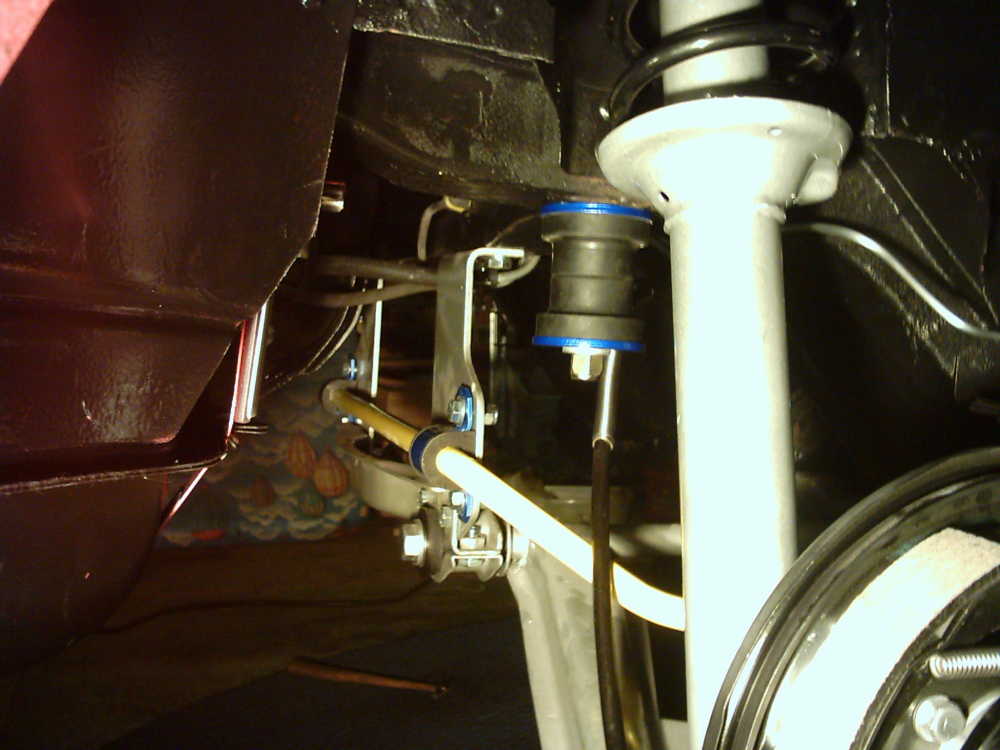
I have the same set-up in my 70' (8/70') and have been told that the body mount rear sway bar is better but that's on later models. I have the 19mm on the rear and the 23mm on the front, Energy Suspension urethane end links and mounts. Made all the difference in the world when I installed it. Love 'em!! Dave.


-
Try this link out, it has everything SU related that you EVER want to know. http://www.teglerizer.com/sucarbs/index.html Dave.
-
Here is a link that saved my life when it came to SU's. http://www.teglerizer.com/sucarbs/index.html The best one on that page is the 2nd one down (Blue square) with Tech Tip #6 in the square. It rocks when it comes to everything SU. Good luck, Dave. I also just realized how old this thread is
-
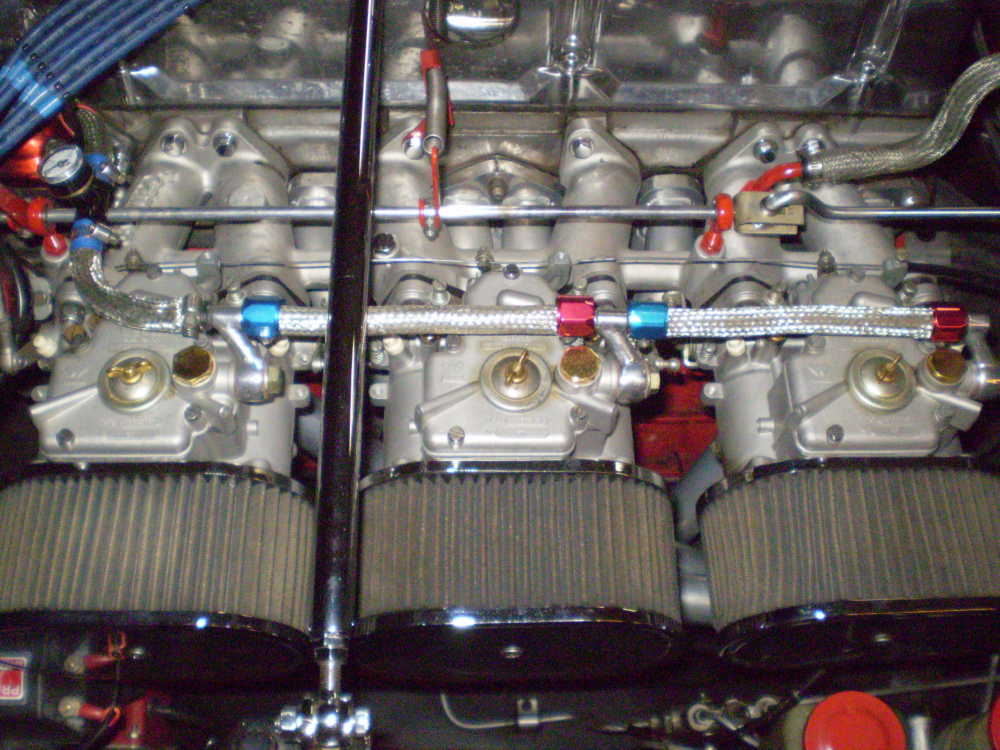
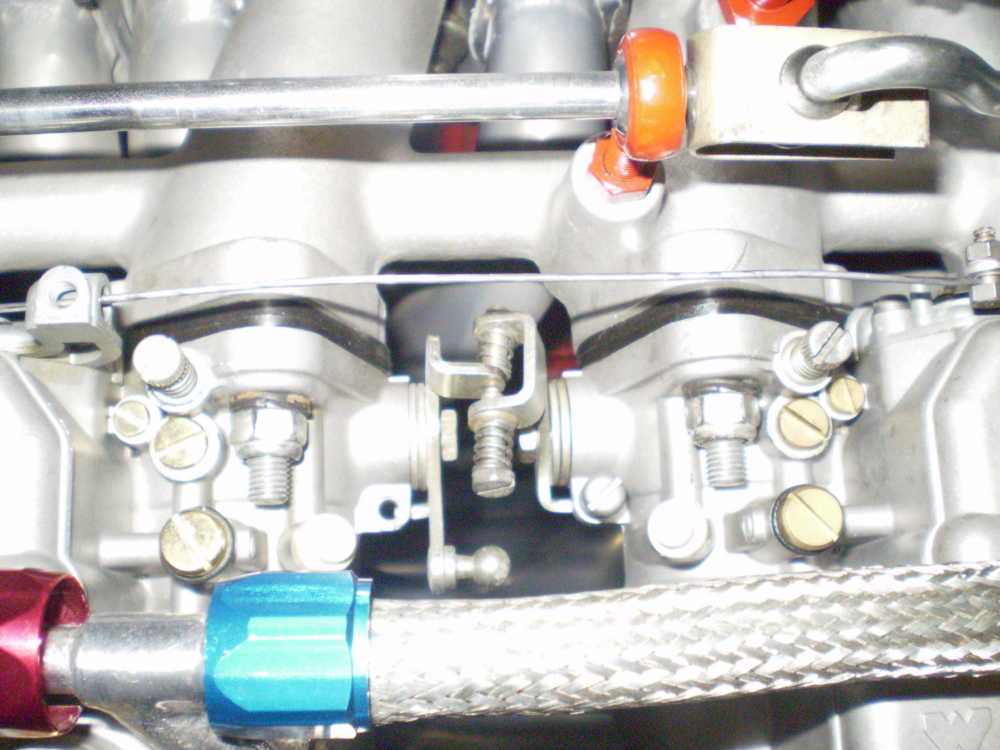
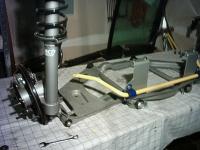
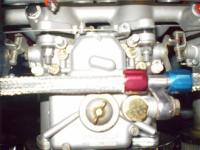
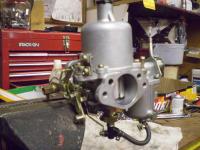
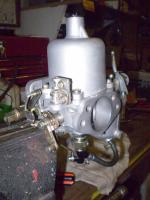
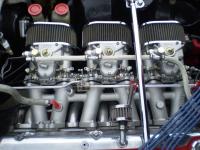
I just took these pics about 20 minutes ago, Showing the updated linkage and fuel supply. New Spectre regulator and meter. and some Spectre SS and anodized aluminum parts. Also shown is 1 of 2, 4-screw carbs that I am completely rebuilding to spec. When I am done, the carbs, Linkage and intake with balance tube will be completely rebuilt and look almost new. Like you see on Z Theropy. They will be a complete bolt on ready set and I'll sell them for $500 flat plus S/H. Probably about a week before I'm done. Dave.
-
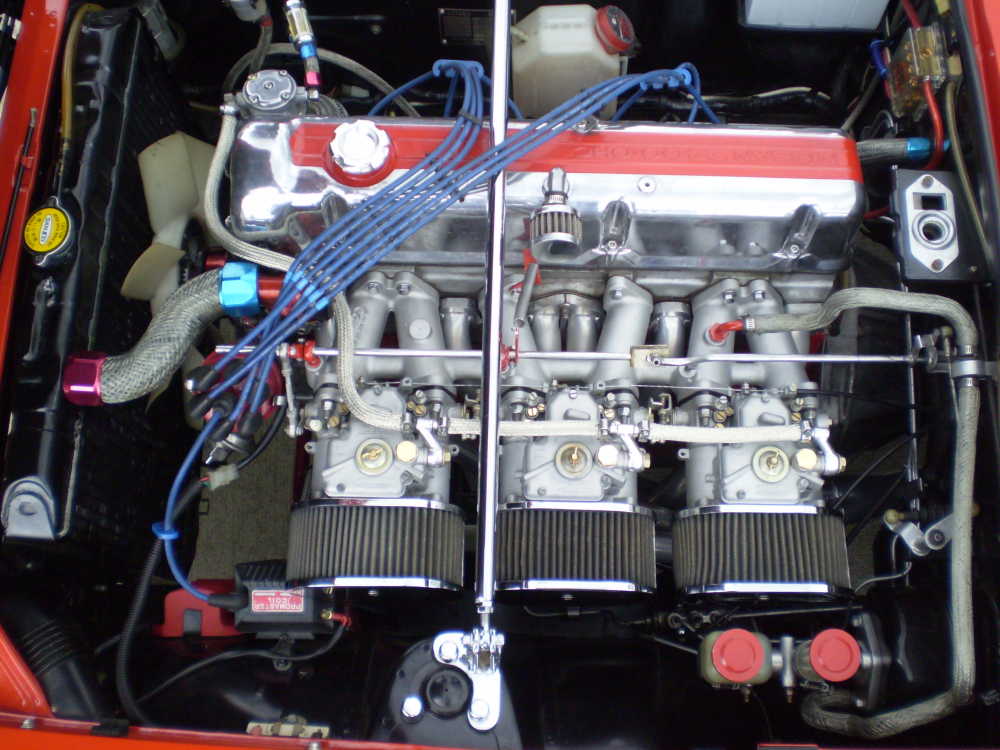
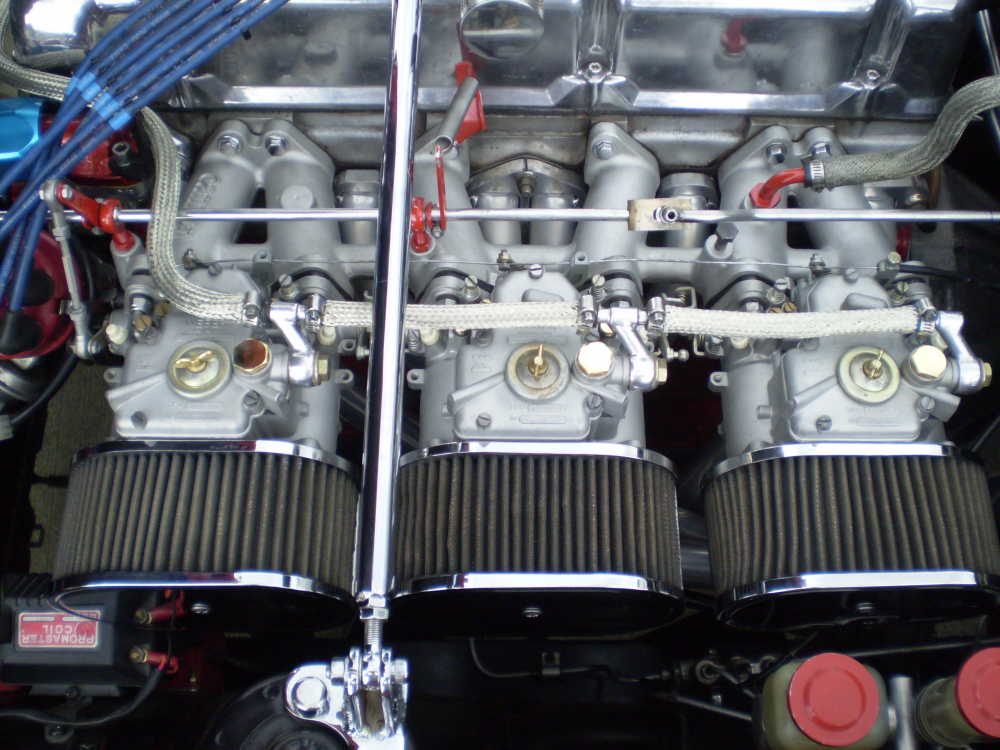
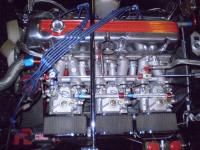
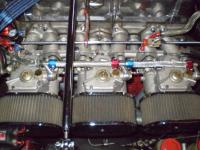
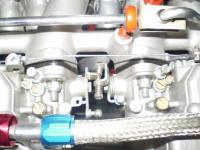
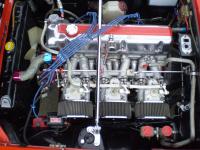
I got another question for ya. Why did you put springs on the linkage bar? Anti vibration or something else? I had to modify my linkage as well but it'll be hard for you to tell unless I point it out, which I won't do. I guess I got lucky with my carb connectors, I just use one push rod to move the front and the rest of them follow suit. Here are some pics but I don't have any good close ups yet. I'll post those later on. I've only had them for about 3 weeks and still need to tune them up better. Mine are 151's and the Weber book I bought does'nt cover 151's or 152's. SO I need the other tune up book just to find out what the white capped air bleed screws do. Unless someone here wants to link me to a page that covers tuning up a triple set of 40DCOE 151's. Nice set up though, I know I love mine. P.S. The pics below are from last week, I just installed an electric fuel pump, regulator and mini meter and also remodified the linkage cause I found the smaller linkage needed. Dave.

-
I figured it was the switch but it never hurts to refresh your grounds. Don't forget that I still do the C/S T/S service for $40. I rebuild what ya send me. $40 for each set (1-T/S switch and 1-combo switch) I promise to make them as new as possible. them send them back. It's what I do. Dave.
-
Took the words right out of my mouth Carl. I was just getting ready to write something similar about the Blue Bird and the Fairlady being the domestic name and being changed to 510 and 240Z for the US market for fear of rejection of such a feminette name. "The US market is more likely to accept things like Chevy 350 or Mustang 289 over a Bluebird or FairLady. But when you change it to 240Z or 510, the whole viewpoint changes. Similar to the 350Z or 240SX over the names Skyline or Sylvia." Read something like that in an import magazine. Kinda stuck in my head cause I've had to explain the same or similar question from other interested parties. Dave.
-
Double check the switch with an ohms meter. test the solder joints on top of the combo switch (green/white green/blue) there should be 0 ohm between them with the parking lights on and 0 ohms with the headlights on also. There are only 2 explanations for the parking lights dropping out when you turn on the headlights. 1) the switch is not making contact on the inside when the headlights are turned on. 2) the headlights are somehow drawing all the ground from the parking lights. Loosen and remove the ground wire screw/bolt near the frame, find a wire wheel dremmel bit or stiff wire brush, brush the hell out of the contact (ring terminal with 2) 10 gauge wires on it) and clean the area aound the screw/bolt hole. then rescrew/bolt it down, nice and tight. The headlight circuit is completely separte from any other circuit in the car. Therefore, it has to be a ground problem. I've checked 3 other diagrams and found NO particular ground points other than those I already pointed out earlier. The only other possible ground points would be where the dash is bolted to the inside of the car. Behind the radio is a "U" shaped bracket (bolted to the trans hump, that has 2 side brackets that attach to the dash. Check the bolts there and make sure they are tight, with a socket or wrench (10 MM). Hope this helps a little more, Dave.
-
Defenetly start with the grounds. Sometimes the headlights can draw too much ground from the parking lights. I know that sounds totally wrong and weird but hear me out. The front parking lights are grounded thru a single wire that connects to the larger gauge wire that bolts to the alternator and then to the body, on the frame below the battery. (across from the starter) The front side markers, parking lights and front turn signals as well as the Voltage regulator and underhood inspection light ALL use the same Small gauge ground wire. Every ground in the dash area uses the SAME 10 gauge wire (noted above as bolting to the body, just above the frame rail, near the starter) START HERE!!! Also look on the upper right side passenger kick panel for that same ground wire and check the connection there as well. The headlights use that ground wire to control the HI and LO beam. If the headlights draw too much from that ground wire because of a bad connection, the parking lights may suffer because of it. Check yer grounds and go from there. Also check the combo switch and the connector plug for proper connection. Good luck, Dave.
-
If at all possible, (I had the SAME exact problem 2 weeks ago) Use a LOOOONG 6-point box end wrench. Typically, a combo wrench is gonna be a 12 point but 6 is WAY better. 1) 6 point box end combo wrench, LONG 1) Brass hammer or sand filled DEAD-BLOW hammer (Like a rubber mallet but hard plastic filled with sand. 1) another long box wrench to attach to the first one for added torque 1) the kroil works beautifuly Good luck, Dave.
-
I've seen 6'2" guys in a roadster and the top had to be down. The seats should be able to be lowered or modified to accomidate but I'd have to look at one to really know. The Z's were actually designed for 5' 8" and taller American men. Thje 1600 you described should be at or above $2000 (area and owner vary the price.) Still $25,000 less than a 350Z. Got a picture of inside and out? Dave.
-
Couple things.. Got the magazine on Saturday (7/28) I do agree with those of you pointing out the fact that there are very few S30 Articles, And that things on the original Z's have slowed quite a bit. The previous magazine had GREAT articles on the S30's, especially the cover story on the gentleman with the 3 almost PERFECT Z's. LOVED it!!. But please keep this in mind, The magazine, though being available for Many years, is still in its "Infant" years. Your subscriptions and opinions are what will help the magazine become what you would like it to be. They don't have a million dollar backer throwing cash at them to do what the Subscribers want. They (NSM) do what they can, with what they have available. I do agree that there are PLENTY of early S30's out there to fill at least 2 Major articles per Issue, along with the project car. Between ClassicZcars and HybridZ, there are hundreds of FINISHED project cars that can fill the void, for years to come. If the Magazine asks for cars to cover, they will be overloaded with everything from True classic rebuilds to Hi-tech swaps in a classic updated car. Take mine for instance........ (not to put me in the spot light but as a simple biast suggestion) I have a beautiful engine Bay with Triple Webers (40-DCOE's) hand polished valve cover-fuel pump-and other aluminum items, Stage 2 cam, Mallory Unilite distributor, MSA Ceramic Coated 6-into-1 Header, 2 1/2" exhaust, MSD 6A, Mallory ProMaster Coil, Stainless Steel Braided Hoses everywhere, and many other stand out Items. I make and use the..... (HLH) Headlight relay Upgrade Harness. (PLH) Parking Light Upgrade Harness. (ZXP) 280ZX alternator upgrade Plug LED rear tail Light Conversion. LED Side Markers LED Dash Lights, Dome light and Map light. H4 Conversion Headlights Full Alarm System, Power Windows, Power Door Locks, Hidden Subwoofer Enclosure In The Wheel Well, 6) 2-way mid-range Speakers thru out the car, 2) 400 watt amps making 800 watts. Custom kick panel Speaker pods for 2) 6" 2-way speakers New paint, Toyota Brake conversion on the front, CUSTOM Cowl Induction Hood, XENON front Air Dam with driving lights in the vents. Custom front grill, BRE rear Spoiler molded into the rear hatch. Hatch lock inverted to the body and off the hatch. These are a FEW of the mods to my 70' 240Z. I love my car (like a brother should be loved) and I'll have it for the rest of my life, and I'm only 36. SO... in conclusion, The magazine is Great but Lacks in certain area's. It's called NISSAN SPORT, Not Datsun Sport. nuff said. Keep up the good work on the magazine. And for those who wish to cancel your subscriptions, You won't find another magazine with as many S30 articles (few though they may be) as NSM. But it's like they say, if you can do better, by all means, have at it. Take charge, not offence. Dave.