


Zs-ondabrain
Free Member
-
Joined
-
Last visited
Everything posted by Zs-ondabrain
-
 Arne hit it on the nose.... Don't go any higher than the original 20 Amp fuse. Doing so will cause the wires to heat up even more before the fuse blows. Resistance in the system causes heat, kinda like friction, friction causes heat, heat causes meltdowns, meltdowns cause fires, etc etc. before running it on high for too long, double check all the connections for corrosion or weak points, such as squeezing the female terminal so that the male is hard to put in. This assures a tighter fit and less resistance, hense no more blown fuses. Just keep extra fuses in the glovebox. This is all common knowledge that I'm sure you knew but I always go over it again to help those who are not in the know. Resistance is the major reason behind my headlight and parking light harness's. It's also why I have recently offered up the Combo and T/S switch service. http://www.classiczcars.com/forums/showthread.php?p=200711#post200711 Dave.
 -
This is a new sevice and I realize that it will take some time for people to realize the potential of it. I just wrote some info down about resistance in the "72 240 heater fan (honda mod) stopped running today... " thread that explains one of the major reasons behind this service. Just "bumpin" it back up there to keep ya informed. Dave.
-
If needed, I could always find a way to put a better one in or even MAKE one out of a fresh peice of brass from a scrap plate. Either way, I'll make it work. That's what I do.
-
I would make a new swivel plate if need be, springs can be replaced with new ones (luckily they still make those silly things) Ball bearing can also be replaced, I am ISO 9001 certified with a soldering Iron or at least I was 6 years ago but I get better with time. I will even replace wires and terminals if need be. Clean the crap off the rubber sleeve on the handle. or even repaint the rod if neccessary. I'll do the best I can on each and every one of the services. Dave.
-
Those are all fine and dandy but here's one more.... When you weld the holes, place a copper plate (available at most welding supply shops) behind the hole before you weld. The weld does not stick to the copper and the copper absorbs the heat. Make sure to spead out your welds, do a weld here, then over there, then come back over here, then go somewhere else. The heat has a lot less chance of warping the metal. take your time and you should be fine. Dave.
-
516 on the second try
-
Of coarse!! Each switch would be tagged with the owners name, then repaired using existing parts, or what ever is best for that particular switch. The only reason for a replacement part would be too much damage, deteriazation of the arm, clips, plastic etc. In which I would notify the owner of the problem and go from there. Dave.
-
Being as how my is red, there are way too many shades of red to perfectly match it. I found a color that is all but Dead on still off a smidge. My yellow Z was only painted 6 or 7 years ago and is a PPG corvette yellow. I found out after removing the side mirrors that the exposed paint, not under the mirror, was severly darker than that under the mirror. It was explained to me that UV darkening was a factor no matter what I did to protect it. Especially being such a bright color to start with and not having enough clearcoat on as a sheild. that's the best I can do for ya.
-
I always hear how expensive they are to replace and how they are always failing, do to too much amperage flowing thru them. That's one of the MAIN reasons that I started building the headlight and parking light harness's. I figure if I can offer a repair service at a fair price, to both me and the customer, that can help solve a major problem we all have, then why not offer it up. The harness's I build solve a lot of the present problems with the electrical systems in the 240Z's. Unfortunately, the PRE-existing problems are still there, waiting to fail, if they haven't already. If you are in need of service and don't feel comfortable doing it yourself, feel free to contact me on the issue. The service is available to all who need it and no one will be descriminated against. I will most like do the 260 and 280Z's as well. Dave.
-
Get rid of the dual point Dizzy. Go for the Pertronics, E12-80 ZX Dizzy, or the Mallory Unilite. A blaster 2 coil or similar coil would be a great improvement along with one of the prementioned dizzys. The dual point dizzy is a pain in the butt if you don't have both sets of points set identical. Any time you have an older dizzy, you take the chance of having a bad bearing which causes wobble and therefor your points don't fire off correctly. jm2c, Dave
-
Here's a proposition for ALL 240Z owners. If you send me your combo and T/S switches, I will rebuild them to the best of my abilities. I've done it plenty of times before and know what I'm doing. If you have extra parts you'd like to donate to the cause, feel free to send them in the same box. The more spare switch parts I have the better I can build your switches. Springs depress over time, the ball bearings get flat spots, the teeter plates get tracks in them and warp over time because of heat and stress. I've built over 10 sets (combo and T/S switches) and have not had to deal with ANY failures so far. I can't tell you how much the 10 sets get used but I haven't heard anything but praise. So if you're intersted in my service, Please contact me with your specific details and what you'd like done and we'll figure out a decent price. But for now, we'll say........1) you pay to ship them to me 2) I am charging $35 to rebuild both switches as a pair and $5 for return shipping unless you want another method of shipping. 3) I will offer U.S.P.S. (2-3 day) shipping to get them back to you ASAP unless you choose an alternate shipping method. 4) if you would like more than one set rebuilt for you, please send an additional $30 per set. (you save $5 per additional set) 5) I can also offer a discount or free shipping to those who send me a decent amount of spare switch parts. The more non-returnable spare parts I am sent, the more choices I have to pick the best parts to rebuild from. Let me know what ya think here (on this thread) and contact me with any other questions you have at wolfin32z@yahoo.com Dave.
-
And just remember Guys, when My headlight and parking light harness's are installed, the arcing between the contacts is severely minimized and switches last a lot longer. Here's a proposition for ALL 240Z owners. If you send me your combo and T/S switches, I will rebuild them to the best of my abilities. I've done it plenty of times before and know what I'm doing. If you have extra parts you'd like to donate to the cause, feel free to send them in the same box. The more spare switch parts I have the better I can build your switches. Springs depress over time, the ball bearings get flat spots, the teeter plates get tracks in them and warp over time because of heat and stress. I've built over 10 sets (combo and T/S switches) and have not had to deal with ANY failures so far. I can't tell you how much the 10 sets get used but I haven't heard anything but praise. So if you're intersted in my service, Please contact me with your specific details and what you'd like done and we'll figure out a decent price. But for now, we'll say........ 1) you pay to ship them to me 2) I am charging $35 to rebuild both switches as a pair and $5 for return shipping unless you want another method of shipping. 3) I will offer U.S.P.S. (2-3 day) shipping to get them back to you ASAP unless you choose an alternate shipping method. 4) if you would like more than one set rebuilt for you, please send an additional $30 per set. (you save $5 per additional set) 5) I can also offer a discount or free shipping to those who send me a decent amount of spare switch parts. The more non-returnable spare parts I am sent, the more choices I have to pick the best parts to rebuild from. Let me know what ya think here (on this thread) and contact me with any other questions you have at wolfin32z@yahoo.com Dave.
-
Most people don't experience that particular fuse blowing, so they don't normally know where it is. And another thing is the white plastic casing usually melts before the fuse has a chance to blow. Or at least in my experience. Dave.
-
That is fricken awsome, and I'm just the kinda guy to go thru with it. I get so much crap in the mail, it's not even funny TILL NOW!!! thanks for the post
-
Ianmonster lives in Renton and I live in Marysville, there are plenty of us around here, ya just gotta look, and as for your "message board" statement, could'nt be more opposite. we have a little of everything here, if you got a question, ask or look it up, you WILL find it here. welcome and enjoy, Dave
-
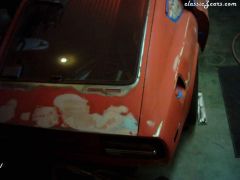 time for a new hatch, this one has had it.
 -
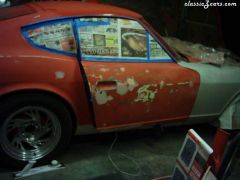 looks worse than it really is, that's a fresh thin layer of bondo, before I sanded it back off.
 -
I got an idea of what the problem is. Just remember that the 260Z did'nt have that much better wiring than the 240Z.. At the present time, you can have 12-13 volts in the battery with the car not running, but by the time that power goes thru all the old wiring, fusebox, switches and connectors, You've had a few volts drop off the circuit. Incandescent bulbs (stock glass filiment) use what ever power there is to light themselves. LED's use only the power given to them, if the set-up that I built for you does not get at least a good solid 12 volts, they will look weak. Solution, When the car is running at an idle or higher, the LED's will light up like a Chrismas tree on crack. I wired them the same as all the taillights that I convert. They can see as much as 15 volts before you harm them. I did that on purpose to keep them from blowing up and you having to send them back for a repair. So what I need to know is........ 1) how many volts is your battery putting out while the car is NOT running? 2) unplug the tail lights and measure the voltage going to the taillights at that plug. You should find a significant drop. Don't worry, it's typical of almost all Z cars. 3) start the car and run the same tests again. you'll find the voltage higher. 4) plug the lights back in and start the car. when the engine is off the idle, the lights should get pretty brite. Let me know the results as soon as you get them, Dave. P.S. you can test the tail lights by hard wiring them to the battery directly. Black is ground, red is brakes, and white is parking lights. E-mail me for some other info you'll need. wolfin32z@yahoo.com
-
Zack280Z, So with proper documentation you can have your Z re-registered as a 70', which we all know will put your car into another class and make it worth more to the correct buyer. It's my belief that any car that we know to be a 70' should be registered as such, not only for preservation of the species but to help the owners of those cars put their Z into the proper catagory. And of course make the car worth more money. Duh. JM2CW, Dave.
-
So here's my next question............... I've also noticed that my 8/70' 240Z does not have the holes in the body for the rear sway bar that mounts to the body. I had to instal the rear diff hangers that allow a rear sway bar to be hung near the back side of the diff. http://www.classiczcars.com/photopost/showphoto.php?photo=18804&cat=500&ppuser=4921 http://www.classiczcars.com/photopost/showphoto.php?photo=18678&cat=500&ppuser=4921 So the question is...... what date did Nissan start putting on the body mounted rear sway bar? And were the hangers that I am using made or designed by Nissan or BRE or what? USA MODELS ONLY (For clarity sake) Let's see where this one takes us. Dave. P.S. The site is not allowing me to upload pis at this time.
-
Rain, RAIN!!! you don't got rain. WEEEE got rain, wind storms. play the video here. Although it does'nt mention how bad it was all day yesterday. 80MPH winds, 800,000+ people without power, school closures, and lots of damage every where. http://www.king5.com/weather/ Anyways, I figured that was the culprite of your problems. and as for not getting the rest of the window crank off. try a few of these......... 1) break off as much of the handle as possible, with a pair of plyers or similar item. Pot metal does break easily and only likes to bend once before breaking. 2) once you have as much metal off the crank as possible, try a metal saw to open up a slot that can be pryed off of the crank itself. 3) Like Sblake01 said, I've never heard of them not coming off easy unless they were glued on or something. (which I have had to deal with) you'll have to break it off somehow and clean up for a new handle. WHITE LITHIUM GREASE IS OUR FRIEND!! Grease the inner tracks, gears. pivot points and anything else that is a friction point that may bind. I grease my tracks anytime I pull the door panel off for any reason. Good luck, Dave.
-
Well gentlemen, It seems that my little flick of the match has started a forest fire, of sorts. It's ok though because this is exactly what I was looking for...... I've always had questions as to what part came with what car. Most of you have answered so many questions that I've had for some time. And here's a run down of what my 8/70' has just to help fill in the blanks..... the obvious parts it had or still has like... dented steering wheel vented rear hatch 2 slots in the center column but only has a choke handle and the other slot is empty pull up to release seat belts (no buttons) cig. lighter to the right of the fuse box horizontal slots on the center dash vent speedo starts at 20 amp gauge is -45 to +45 120 to 250 temp 0 to 140 oil pressure empty hole above hazard switch vertical defrost lines on rear window chrome hangers in the upper quarter window area black plastic seat belt hangers on the seats It had the radio in it when I got the car but I think it was AM/FM did I miss anything? Dave.
-
yup, it never ends. (the learning thing, that is)
-
Thanks Arne, that was exactly what I was looking for. It took me a while to read it cause I was also explaining the whole theory of it to Leah (the wife). Reason for this was I was always trying to explain "roughly" the same thing to leah and other inquirers. Now I can just bring up the link and walk away as they read. thanks again, Dave.
-
The reason I ask is it seams to come up quite a bit. People asking me "if my Z is a series 1" and what is the build date etc etc. As far as I know, Series 1 is a 1970 model year Z. But I've also heard that "series 1" is all 240Z's in general. My Z has an 8/70' build date and has the typical hatch vents and quarter panel "240Z" emblems. it IS a series 1 but my yellow 10/70' 240Z has the same vents and quarter panel emblems. So what is the TRUE definition of "Series 1"??? Thanks for your well though out answers and opinions, Dave.