Zs-ondabrain
Free Member
-
Joined
-
Last visited
Everything posted by Zs-ondabrain
-
 $15 is a great price but the T-shirts are gonna cost ya. Maybe a Coffee cup with the fee. $20 sounds like a very reasonable price. $30 might include a T-shirt and a goodie bag $40 would be pushing it. Sound about right? Greg will likely be reading this, so simple suggestions are easier to read thru. Not sure if he'd wanna read the whole thread.
 -
I hope you mean "Something similar to those" cause those are 5-3/4" You need 7" And let this be a warning to those who are thinking about Diamond Cut lenses. THEY SUCK.!! A focused clean lens or Euro lens is best.
-
I think of it this way...... They normally don't charge for the event. So $15 per car would be $7500 more than normal. $20 per car or person would be $10,000 more than normal. So I'm thinking anything over $0 would be great for them. They normally foot the bill for all the amenaties that we nornally recieve. *NOTE* I Just spoke with Greg at MSA and he said that he'll post on this thread within the next few days to give us a heads up on what is in the works. He sounded like he loves the suggestion of a small fee to help cover the all around cost of the show (Has been as hi as $40K in previous years) MSA will have a General Meeting to discuss the event in about 10 days, and will post their findings here, so we can spread the word and to help shed some light on the subject. So please be patient as they try and figure this out..... Dave
-
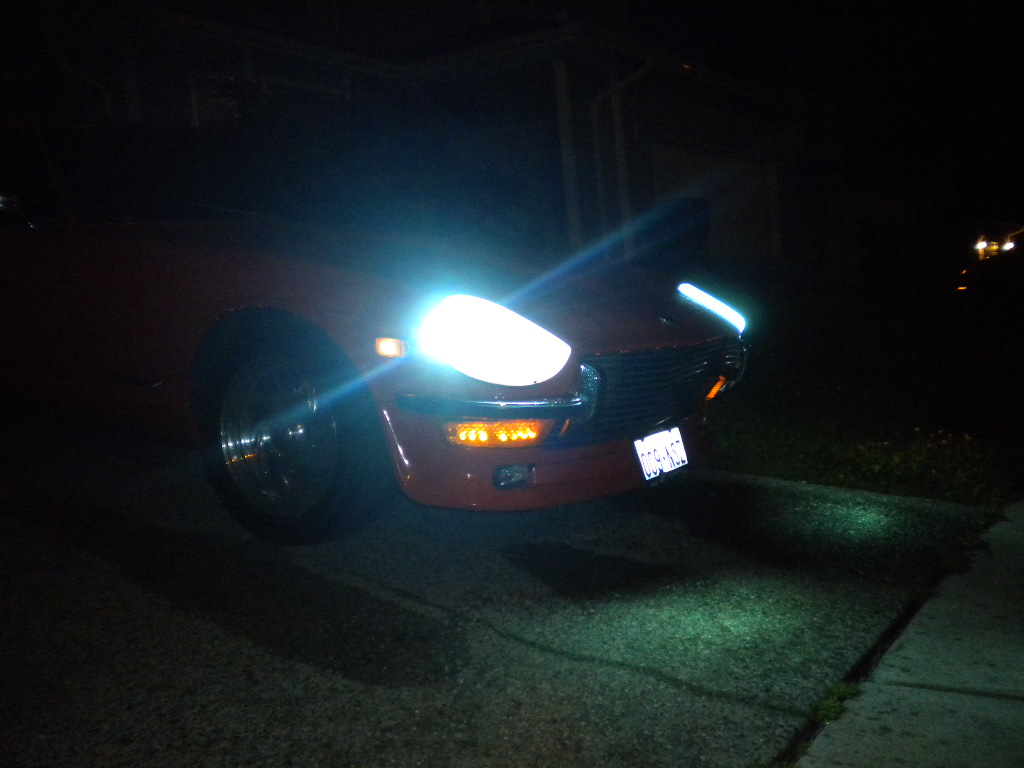
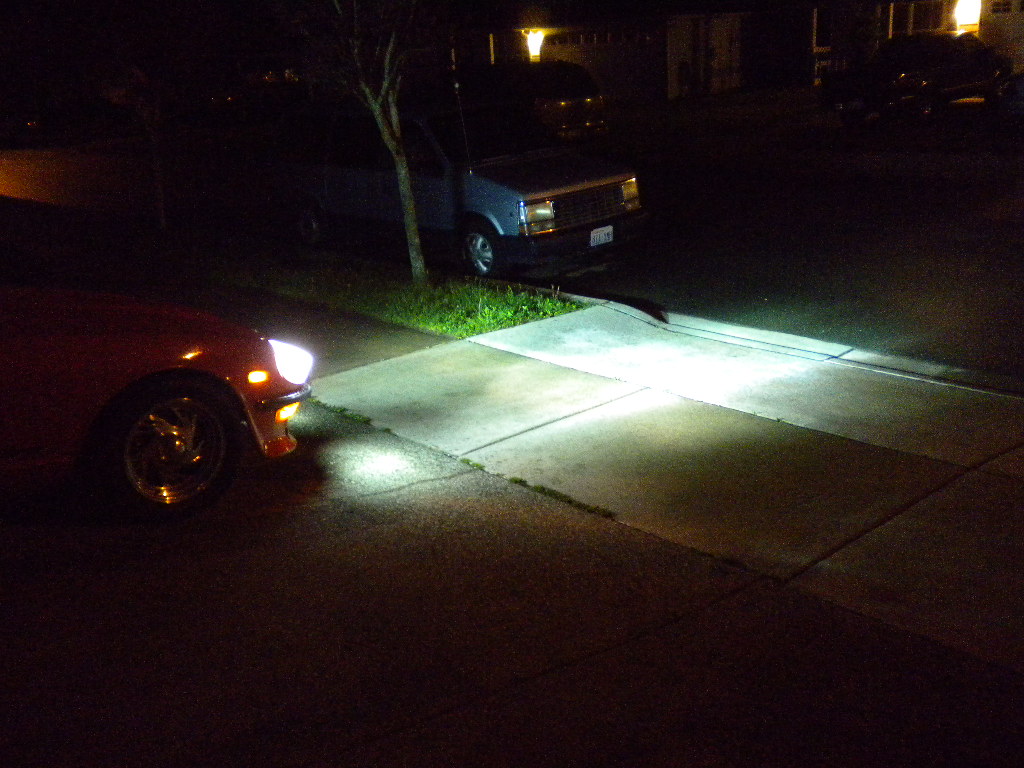
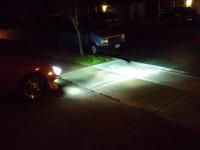
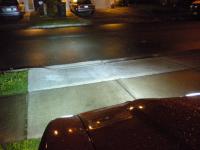
I'm running Hella's with H4 style 6000K Bixenon HID's with 35 watt Ballasts. Great fit, great Low Beam, Hi beam is Awesome. Very clean and it's said that HID bulbs last longer than standard H4's. Here's a couple pics.... Dave Car is on a downward sloped driveway, that's why the lights seem to be right in front, rather than further out in the road.

-
This question would obviously be for locals or those who show up and are willing to help during the 3 day event. ie: Clean-up, set-up, walking the perimeter with a bag for garbage, Cooking, Check-in, traffic control, etc, etc. These are just ideas that I'm throwing out there. But if MSA knew we were willing to donate time and pay to attend and show our cars...... You get the idea. Dave
-
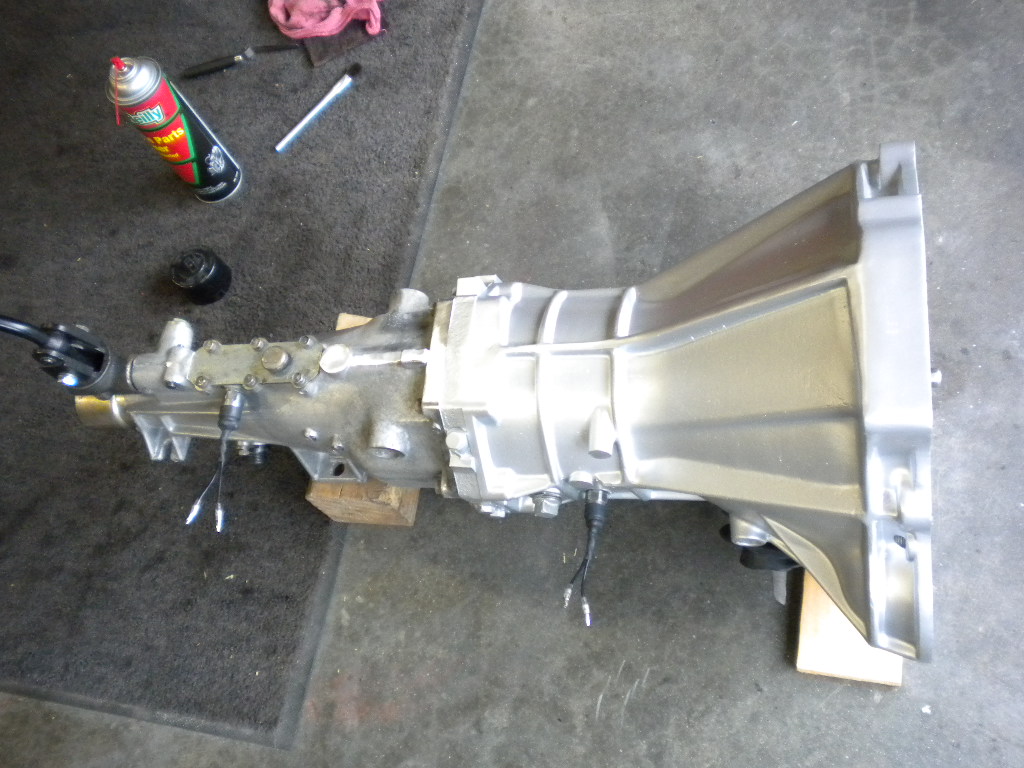
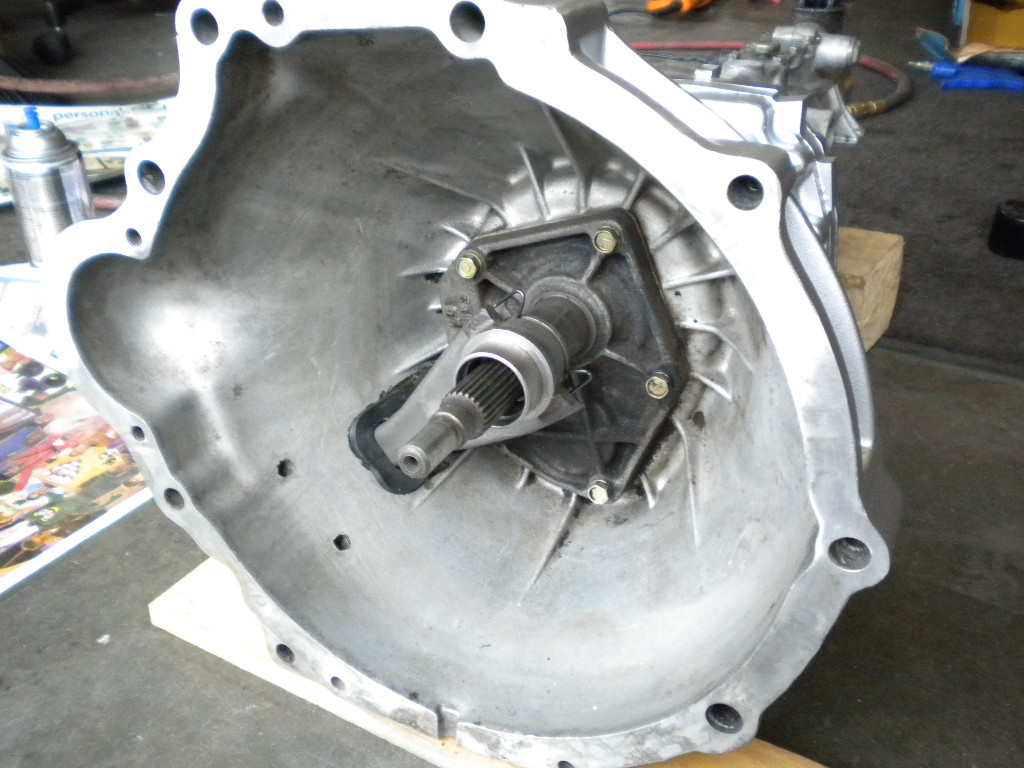
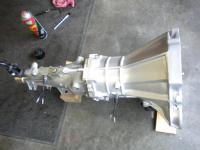
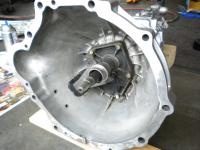
Speaking of which, I have tried to sell my Completely rebuilt 260Z 4-speed in our Classifieds, 2 times without a single call or email. Below you can see the Trans. All cleaned up and front half painted. I even cleaned and rewried the switches and put tubing and Heatshrink on them, so they'll never be an issue unless the internals go bad. Very clean and tight shifting. Even tighter with the MSA Short shift kit on it. Is $150 too much for a rebuilt tranny with short throw shifter? The damn shift kit costs $160.
-
I think donating time and resources would be a great idea. Maybe I or someone should talk to Greg and see what the rundown really is. I guess we should ask ourselves a few questions...... 1) If they asked for Volunteers, would you step up and donate your time? 2) If they were to charge a $15 Fee per person, to help cover costs of rentals, fees and whatever, would you have a problem paying that, if you knew this would help keep the show alive for future years to come.??? It's obviously free to onlookers and general public, and I have no porblem paying for any other car shows that I attend here in the North West. $15 would hardly be a scratch in the bucket for me considering the cost of Hotel, Gas, food, nick nacks and what ever else it takes to get from Marysville, WA. to Anaheim, CA. (2400 mile round trip) And if you consider $15 X an aprox 500 participants = $7500, That should easily cover some of their costs. If they know that people are willing to pay to attend, They're more likely to get the ball rolling and try harder to make it a success and a Definate event. Opinions?........ Dave
-
sounds like everyone needs to send a "letter of consideration" letting them know they need to keep on it and do the Big Show.
-
Ed, So after reading up on "Chili's" page, I noticed a lot of "Did" "Was" and other Past tence words that give the indication that she is no longer with us.... Is this true or is she just No longer racing or working on cars? I don't mean to pry but just a little confused. Congrats on the Feature in CC. That is awesome. Kinda immortalizes the shop and the Z for future readers. And you'll get the Z out to car guys that normally wouldn't take a second look at a Japanese Car. But since it'll be in their Muscle Car Magazine, they won't have a choice..... Mua ha ha ha :pirate: Dave
-
Inner. You need a smaller one on the outer. Too thick and the hatch won't close
-
ya, I told everyone that there was no way I was gonna do a 2400 mile round trip for a BBQ in another state. I need BBQ, the show, the dinner and events and especially the comradery of friends and customers, nationwide. We'll have to see what the budget brings as things have slowed WAY down around here. I think the 260Z project is gonna wipe me out financially but we'll see. I really wanna make it to Canby this year with the 260Z but that too will be a mystery until then. Dave
-
Ya, I saw that after I posted. My bad. I use a breaker bar on my diff to mustache bar nuts, just don't break the studs or diff. Like previously stated, some threadlock sounds good. Glad to hear it was a simple 0 $ fix.
-
Well, your son was what? 7 or 8 years old at the MSA Event in 08? So 2016 sounds about right. I knew it was coming, as we have spoke on FB but it's still a kick to the chest. You'll come around. It's in your blood Russell. You can't escape the call should it yells your name again. So step back, drive your 944T for a while, and it'll come to you, you'll miss the feel of a restored Z. And when the time comes, you'll know EXACTLY what you wanna do to the next one. And building it with your son will be memorable for both of you. Good Luck Rss, Dave
-
Do you have an R/T mount for the front of the diff? I have a new Powder coated (black) R/T with a new Urethane bump stop if you'd like to buy it. PM me if you're interested. If you're gonna be doing more ON/OFF throttle, then this would be ideal for your Z. It'll lock your diff down so it can't lift up and Thud against the diff strap. Use your breaker bar between the diff and the front crossmember to see if the rubber of the diff mount seperates... Dave
-
Thanks, I try. Here's some documentation on the grill.... Post Number 6. http://www.classiczcars.com/forums/showthread.php?t=28773 I used 1/8" x 3/4" aluminum slats, cut at the desired width of the front, V notched to bend at the right angle, and held together with C shaped aluminum stock. Cut slits to hold each fin, then drill holes in each to slide a bolt thru to hold it all together. Then custom brackets to hold the grill to the stock mounting points. Similar to the OEM grills Dave
-
you can clamp the softer hose and buy a brake line stopper from a specialty shop. It has 2 metal fingers that go on the hardline and has a rubber stopper that goes into the line to stop air from bleeding into the system and fluid from coming out. It'll make bleeding a little easier. Or there is this one from Matco Tools.....
-
19 out of 20 on the first try. Missed the "Symble is backwards" one.
-
Just watch for his 240Z parts ads on Craigslist. Just remember Port Orchard, Ken and 240Z parts.
-
This is the same "Type 1" air Dam but with air ducts..... http://www.thezstore.com/page/TZS/PROD/7AD1/50-1402 That rear spoiler was designed for More downforce. It's a taller BRE style. Not sure on the soot displacement though. Dave
-
NO. The relay and ground wire of the PLH bolt to the steering colum. There are 4 bolts holding the steering column to the underside of the dash. Bolt the relay and the ground wire to the bolt on the left side, closest to you. That's why the 2 wires are as long as they are. Then twist the 6 wires of the "T" connector into a "LOOP" and put the loop between the column and the ignition switch. As for the Tombstone, it goes on the other end of the plastic "U" shaped piece to keep the cable from coming off the plastic piece. If you don't have plastic, then the metal plate just goes over the cable part to keep it locked onto the spacer. Without it, the cable will not dissengage the chokes, it'll just stay ther when you push the handle forward. So it goes..... Spacer, plastic, cable into the plastic, metal plate (Tombstone) Sound right?
-
Welcome to the Club Brian. Try http://zccw.org/ The have some great organized event's and meetings. Not a lot of Wa. based clubs but hopefully a few other Washingtonians will ring in with more suggestions. Lot's of Oregon events in the spring and summer. Look up " Canby " or Driving Canby Fun 2010' We go every year, it's a great place to go and see and meet new Z people. Here's the latest new on it... http://www.datsunsnw.org/Canby11/index.htm Are you familiar with Ken in Port orchard. He lives off SE Mullenix Rd. off 16.?? he's a member and friend of mine. Dave
-
And almost identical. Just different materials. What specific air dam are you looking for?
-
Love to help but there are 3? I think? different choke handle assemblies thru the years. Anytime you ask a question on a specific model or part, please include what it pertains to. Year, model ect. Just trying to help but you gotta help us first. I just checked in the garage and I can't find my cable. But I recall it being pretty staight forward. 2 small screws hold the cable block to the handle assembly, and mine used a bolt and small nut to hold the cable and plastic "U" shaped piece to the handle. There may have been a space and small washer in there as well. This isn't likely helping you but if it feels wrong, it likely is. Just fiddle till ya get it right. It'll feel right. Dave
-
MSA typically has the Fiberglass air dams. And on a familiar note, the website listed above is using MSA's photo's for their own needs. I wonder if Greg knows about that? Oh ya, my avatar picture (to the left) is of my 70' with a Urethane air damn from MSA
-
Seriously? nobody's got this? Wow.... The Welting is the ribbed strip that attaches to the body. Your weatherstripping has seperated from the welting. There are metal clips inside the rubber welting that can be resqueezed for a better grip on the body. Original door weatherstripping consisted of 2 peices, The rubber weatherstripping and the welting (and still does, when you pay for original OEM weatherstripping) The rubber piece has a strip of thin rubber that lays over the metal of the body and the welting goes over that, to clamp it to the body. So in your case, since you won't likely be able to return it, Get yourself some rubber contact cement. Wipe the rubber and the welting down with a rag dampened with rubbing alcohol. After it's clean and dry, brush a thin film on both pieces, allowthem to dry and become slightly tacky, then press them together. Make sure it's aligned the way you want it, cause once it's on, it won't likely come apart without damage. The reproduction weatherstripping comes with the rubber and welting glued together. Dave