Zs-ondabrain
Community Member
-
Joined
-
Last visited
Everything posted by Zs-ondabrain
-
Yes, the 240Z connectors Are still available but unless they are crimped correctly and tight, they don't like to fit the larger red/white (high beam wire) very well. Ive actually done it to a few 280Z's but had to drill out the connector where the red/white was to go to make room for larger gauge wire. But again, a true Headlight upgrade harness will likely NEVER be removed, so going through the trouble of attaching weather-pack or 240Z style connectors, is Almost pointless.... Just my 2cents Dave
-
I make a "Hard-Wire" version but everyone complains about having to cut their connectors off. Everyone wants plug and play for ease of install but they'll never remove it..... clear as mud?? I make the late 74 to 76' 280Z HW-HLH for $120 shipped. The relays are easily replaced with auto parts store relays. Dave
-
The sooner somebody makes a matched set of 280Z Headlight connectors (Round, white, 4-position/3-wire connector) the sooner I can make Plug and play headlight upgrade harnesses for the 260/280Z's... Seems like A LOT of posts and most of it is confusing to those who don't know 12VDC systems.... Grab your inputs from the headlight connector in front of the radiator on the passenger (right) side. Red = power from fuse box and headlight switch Red/Black = Low beam (-) wire from Hi/Lo beam switch on the turn signal switch Red/White = High beam (-) wire from Hi/Lo beam switch on the turn signal switch Ground the Black or solid Red wire on each headlight pigtail, directly to the frame (clean the metal and bolt down the wire snug) on the engine harness right side plug.... red to pin #85 on both relays red/black to #86 on #1 relay red/white to #86 on #2 relay #30 on both relays gets fused power from the battery #87 on relay #1 to the red/black on the headlight pigtail of both headlights #87 on relay #2 to the red/white on both headlight pigtail on both headlights Like I said, if somebody can make the connectors AND find the 5mm?? male and female bullets (large bullet connectors on these plugs) then I can make P+P harnesses with no cutting, drilling or hurting the stock harness. Hope this helps for now.
-
JJ 24oz Here's all I have at the moment. See attachments. Dave 73 240Z fuel pump wiring.docx
-
Post #30, above has links to both MSA's tech page with the upgrades and the link for my website....
-
Post #30, above has links to both MSA's tech page with the upgrades and the link for my website.... *NOTE* To any of you who like to just send me orders or parts without getting ahold of me first... WE HAVE MOVED!!! The new address for orders or for switch services is now.... Datsun-240Z-Upgrades 5830 70th St NE Marysville, WA. 98270 And you can reach me at wolfin32z@yahoo.com with any questions or order info. As always, THANK YOU to all my past, present and future customers Dave
-
Just ground the black wire to the case, "E" is suggested but what ever works is fine. Captain Obvious beat me to the punch. Dave
-
here's my take on it. You mentioned "Replaced the flasher" but what did you replace it with? I would highly suggest an electronic turn signal flasher (EF32) it's a 2 pin HD flasher that doesn't require as much amperage to operate and is a more consistent flash from 9 to 15 volts. Play with the hazard switch. The turn signals go through it (IIRC) and can affect the output of the turn signal switch. Make sure you have a good strong 12 volts going to the turn signal flasher. Test your turn signals with the car running, even revving the motor over 1000 RPM's will give you a better, more realistic reading. Your switch is fine and it looks like you're lacking voltage somewhere before the switch or the output is being affected by the hazard. These are my best guesses. Let us know what you find, Dave
-
Did you fix the white and yellow wires from the alternator to the VR plug? Have you taken a reading from the alternator while it's idling? If so, what's the voltage? if you ran that 8ga wire from the alt. to the starter, and those 2 wires on the T-plug are good and functioning, then it should be charging. If it isn't, then the alternator is now in question. Squealing is typical of a low battery and the alternator tightening while charging at higher voltages. Charge the battery completely before testing the alternator at idle. This will tll you if the low battery was the issue.
-
The Diode is what keeps the alternator from back feeding to the ignition, and allows you to shut the car off. If your diode was bad, or installed backwards, then the car won't shut off. and 14.5 is perfect. Dave
-
Your new ZXP is on it's way. Dave
-
On the plus side, you can still use a 240Z ammeter (45 amp) when you use the 8ga jumper, as the amperage is diminished. So test the white/black and the yellow wires between the VR and alternator to eliminate them as a problem. Flip your fuse box over and inspect the underside to make sure the 2 large gauge wires (white and white/red) are still attached good and unmelted. Inspect the connections of those 2 into the dash harness and at the ammeter. Also check the passenger side upper kick area to make sure the White/red and the solid white as well as the solid black ground wire are all still good, connected tightly and not melted. Using the 8ga jumper will minimize the (+) and (-) movement of the ammeter when the lights and heater are turned on. Sodon't freak out, thinking it's broken. It's not. Dave
-
I'm the guy that makes the ZXP or Alternator adapter plug for MSA. If you took the ZXP apart and found the diode to be bad, then I will replace it for you, free of charge. (IM for details) The diode will fail in the event of a short and the other 2 leads are a simple jumper. Without reading every post, I'll tell you what I know about the charging system in the Series 1 240Z, as I own one and based most of my upgrades on the series 1. The W/B and Y wires in the T-plug go directly from the alternator to the VR plug. (VR = Voltage Regulator) The solid white on the VR plug ties into the white starter wire. The black is a ground The B/W is an ignition wire on the VR plug The white/Red goes from the alternator to the Ammeter, then from the other post on the ammeter to the fuse box, where it ties into the White battery wire that goes out to the starter. There should be a Black? fusible link from the white wire to the starter bolt. I think the series 1 is also supposed to have another fusible link between the alternator and the White/Red wire. Sounds like your plastic insulator on your ammeter finally overheated and failed, causing a direct to metal short, which would explain your smoke issue. Replace the Ammeter, fix any melted wires and finally, Run an 8 gauge jumper wire from the Alternator output bolt, to the Starter power bolt. This will give your battery direct charging from the alternator and minimize the high amperage from flowing through the ammeter. Your ammeter will not show as much movement but your battery will charge better and you'll still have full battery voltage available at the fuse box. I'd also suggest you upgrade your battery cables to no less than 4 gauge. Clean every connection at the battery and the ground wire that bolts to the fender, across from the starter. Dave
-
***UPDATE*** For those looking for pictures and diagrams on the Headlight Upgrade Harness (HLH) -OR- the Parking Light upgrade Harness (PLH) I have good and bad news I've started making and selling the harnesses for the Headlights and parking lights shortly after I posted this thread just over 10 years ago. They are readily available at Motorsport Auto in the link below, and NO, I do not make the fuse box's on that Technology page... MSA Technology Upgrades Page I stopped advertising on Classic Z Car Club because it went against the rules of selling the same items as one of the Site supporters. And the links to that were and always have been part of my Signature (below) I won't be updating or adding pictures on how to build the upgrades as it is bad business practice to shoot myself in the foot by showing you how to build the product that I feed my family with. So with that being said, Please feel free to ask questions and support the supporters of this website. You can find more info on my products at ...... Datsun 240Z Upgrades And please remember to donate when you can, spread the word on this great website and enjoy keeping the classics alive. Dave
-
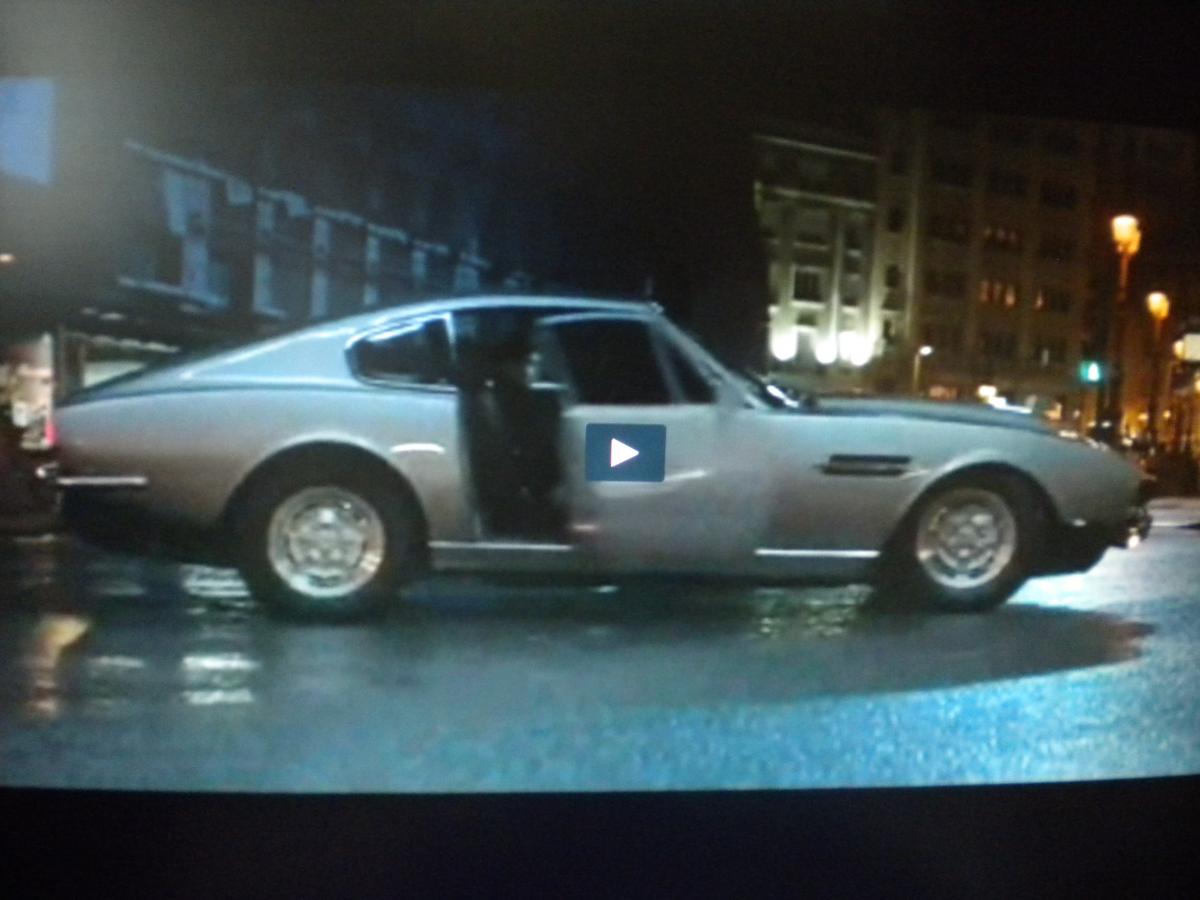
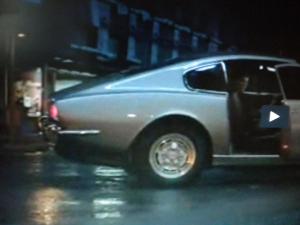
Just saw a new Gillette commercial and I swear that the silver car sliding in looks like a highly modified S30. I checked every DB online and cannot find a similar car. The body line on the rear half screams S30. Am I wrong or is it a modified S30.
-
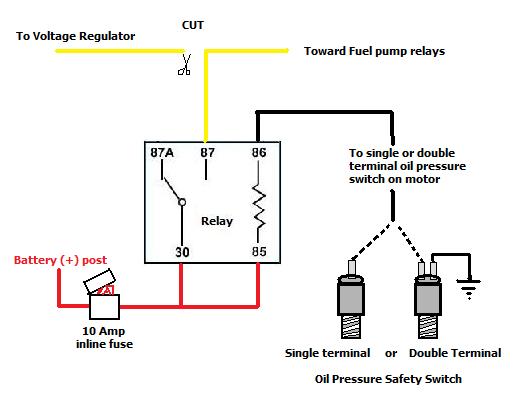
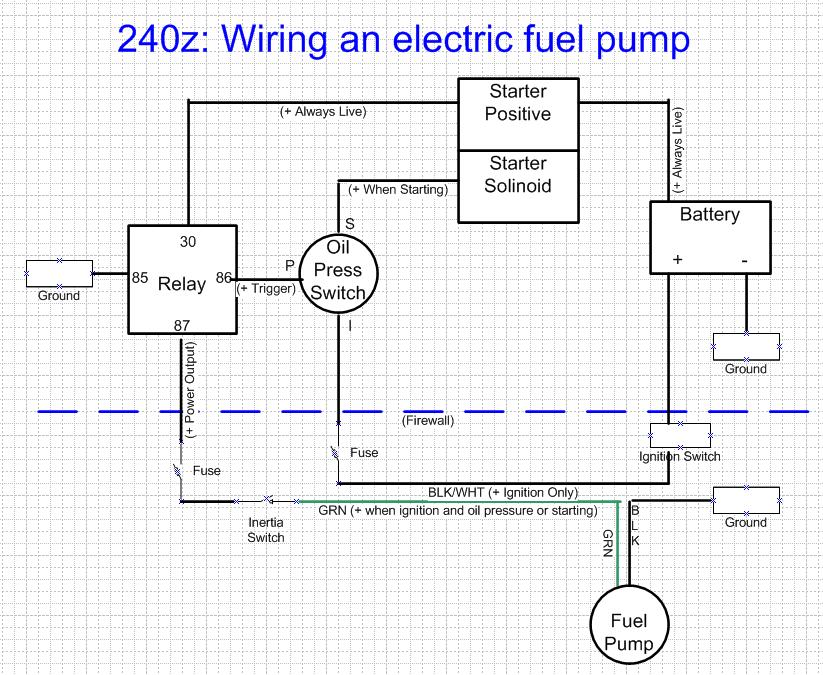
I'm trying to write a specific instruction sheet for the 73' 240Z ZX alternator conversion that will allow owners to correctly identify the yellow wire on the fuel pump relay pack, located on the passenger side kick panel, and how to cut it, connect to it and run it to an ignition point or oil pressure safety switch. What I need is a 73' 240Z owner to take a decent picture of the fuel pump relays, there location on the passenger side kick and a clear picture of the yellow wire, that is connected to the relay from the voltage regulator. Once I can show people where to locate the wire, I can show them how to wire it into a relay, a switch or Oil pressure safety switch to control the relay without draining the battery. The ZXP or ZX alternator adapter plug that I Still make and sell to MSA for sale through them, CAN be used on the 73's once the instructions are more clear to the average "I don't do electrical" 73' 240Z owners. So please post pictures of the fuel pump relay(s) and the yellow wire. I and everyone else will greatly appreciate it. Dave
-
Are you sure you're not thinking "wienerschnitzel"???
-
You're right..... Live and learn. You're better off emailing me if you have questions. If you end up needing your combo switch rebuilt, Let me know. Dave
-
**UPDATE** I still make all the upgrades you are interested in. Motorsport Auto is still a great Sponsor for the site and Typically has them in stock and ready for you to purchase. Please make sure you let them know that you saw the info for buying your upgrade HERE at CZCC!! They NOW carry The. 240Z Headlight Upgrade harness (HLH) 240Z 6-pin Parking light upgrade harness (6pin PLH) 240Z/260Z/280Z 9-pin Parking light upgrade harness (For the 73' -76' S30's with a 9-pin Combo switch connector and Intermittent wipers. (9pin PLH) 240Z Sidemarker Conversion Plugs (SCP) ZX alternator adapter plug for installing an 81' to 83' Internally regulated alternator into your 240Z. "NLA" The DZ-Start Push button Keyless ignition system (IS NO LONGER AVAILABLE!!!) All hand made by me and me alone, one piece at a time. If you have any questions on my products feel free to Call MSA or email me at wolfin32z@yahoo.com Thanks again to all my previous customers and future customers. You help support the site and my family. Dave
-
280ZX and yes, we saw that too. I told my wife "I know I'll be reading about that tomorrow on one of the Datsun pages or sites" and here it is.... **oops, looks like already Edited it**
-
To tell you the truth, I don't honestly know. I'm guessing you have the 6-pin connector on your combo switch (Headlight/parking light switch) so if your connector has the Green/blue wire in the center pin location, then the PLH or Parking light upgrade harness should be fine and function like normal. It should boost the output of the combo switch just after the switch, so you should be fine. Dave
-
I've sold about 10 Headlight upgrade harnesses to RHD owners. The install is the same in the engine bay but you'll need to mount the relay pack using a different OEM hole because there's no VR on the left side (Of which to use the mounting screws) All of the RHD owners claimed success in their install but none of them said anything about a passing button. As long as the harness is flipped, the input connector is plugged in on the left side (instead of the right) and the grounds are the same bolts, etc, etc, There shouldn't be an issue. I'm 99.99% positive that the output at the headlight plugs (in front of the radiator) should act the same, even with a passing button or switch) So I say go ahead and purchase the harness and install it. And please let me know if there's an issue and how the install goes. Dave
-
Well, I figure it this way, kill of one problem at a time until there are no more. If he can find a simple solution to the headlights, that leaves only 1 issue remaining and easier to figure it out... But I totally understand where you're coming from SteveJ
-
I'll be honest with ya, I haven't read all the posts and don't know what's been written so far. and with what you PM'd me, here's my guess(s) Check the fusible links, replace if needed and ACTUALLY test them. Make sure there's power to and from. You should have power at the white/red wire on the headlight switch and power going out (when the headlights are turned on) at the red wire. Double check ALL your grounds (below the battery, negative post to the firewall, ground on the alternator and most importantly, check the ground wire that goes Under the steering column from the headlight switch to the Turn signal switch. Squeeze the barrel of the bullet connector for a tight fit. Use a meter to make sure you have a good ground in the center pin on the white switch on the turn signal switch (Your Hi/Lo beam switch) And make sure you're getting ground to the outer wires with each click of the hi lo switch. Headlight wires are as follows..... Red/white is High Beam Red/black is Low beam Solid Red is the right headlight power Red/Yellow is the left headlight power Those colors are consistent from the connector at the turn signal switch, the fusebox splits the power wire and fuses both left and right headlight and those colors are the same all the way to the headlights. So check all your connections and make sure you didn't unplug the ground or any of the power wires at the switch, on the passenger side kick and in the engine bay. That's the best I can do for ya without any other info or reading 4 pages of opinions. Dave
-
The "False plug is the seperate connector that would plug into the engine harness on the passenger side headlight plug. It just keeps the dirt out of the open, un-used headlight plug on the engine harness. You got a 260Z, so don't worry about it. You can hard-wire it in if you choose to use it. The ground wire with the ring terminal on it goes to the solid red on the right side and red/yellow on the left side of the headlight harness that goes to the headlight. The white wire is the Hi beam and goes to the Red/White going to the headlight. The black is the low beam wire and goes to the red/black wire going to the headlight.