Zs-ondabrain
Free Member
-
Joined
-
Last visited
Everything posted by Zs-ondabrain
-
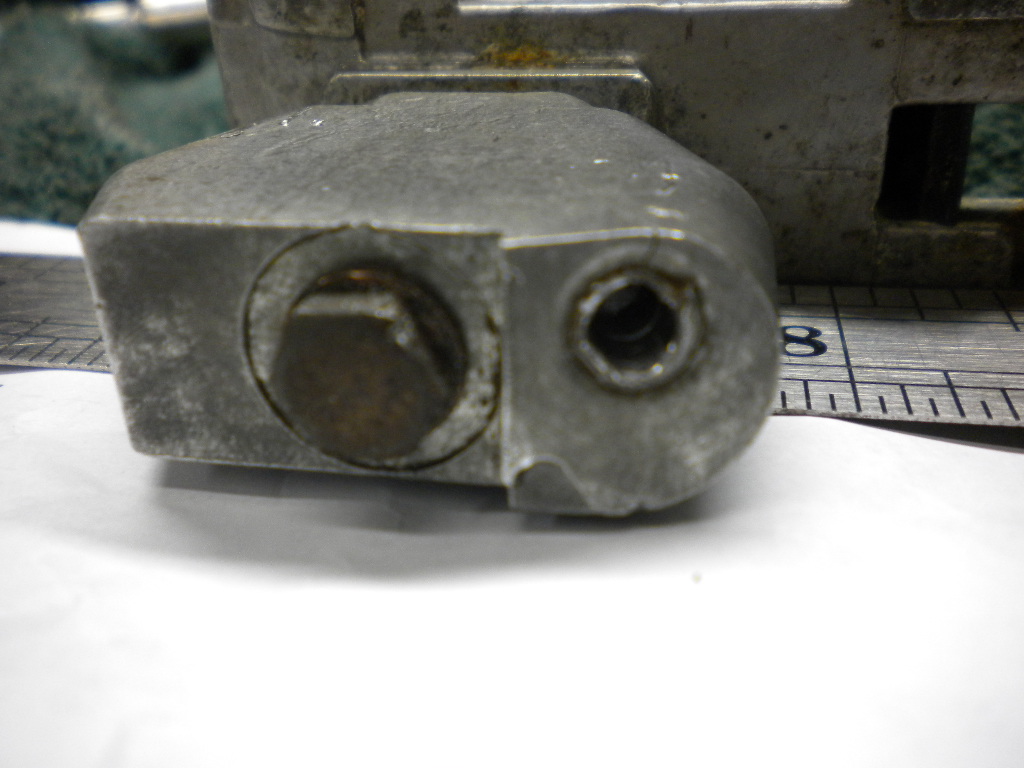
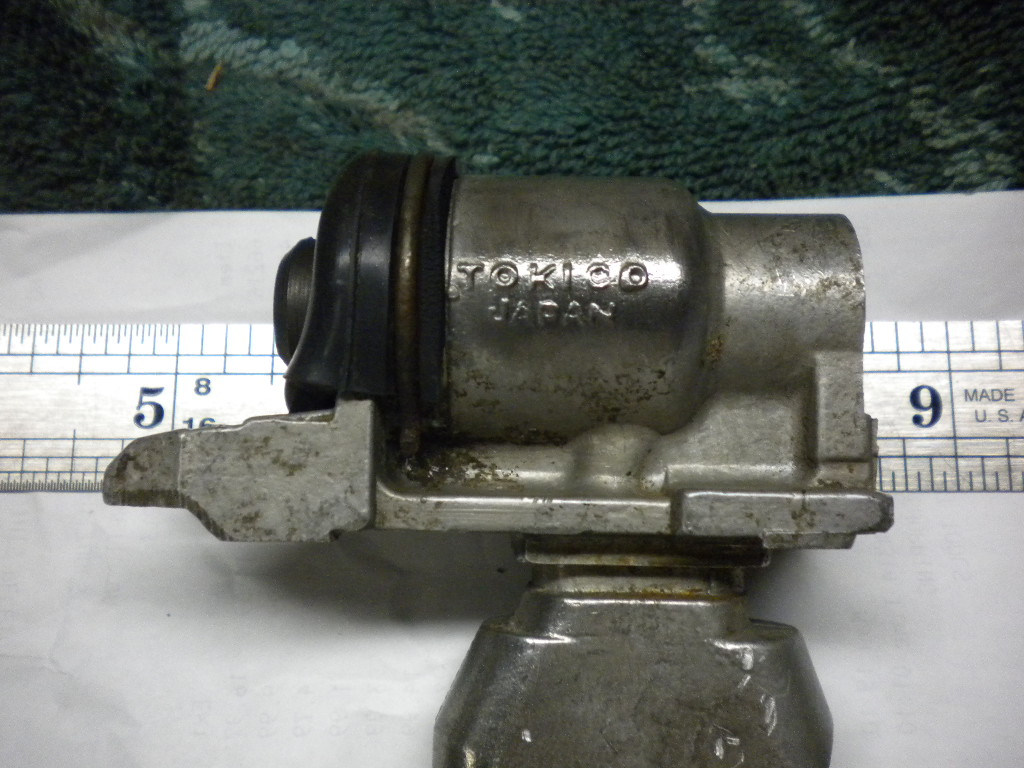
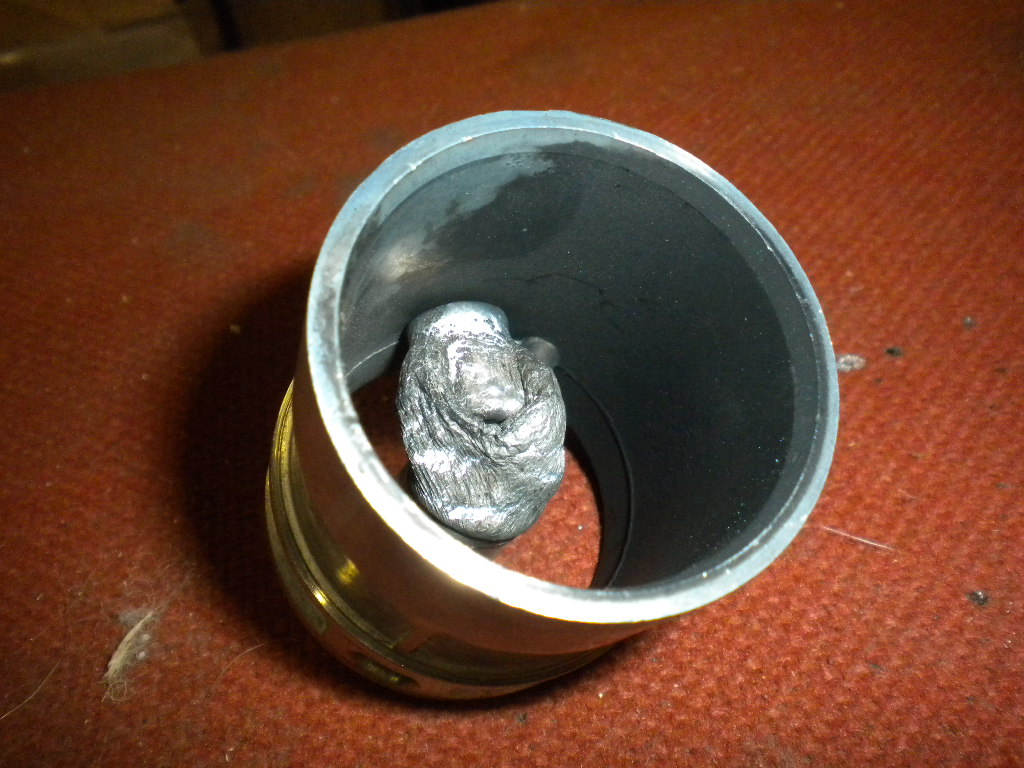
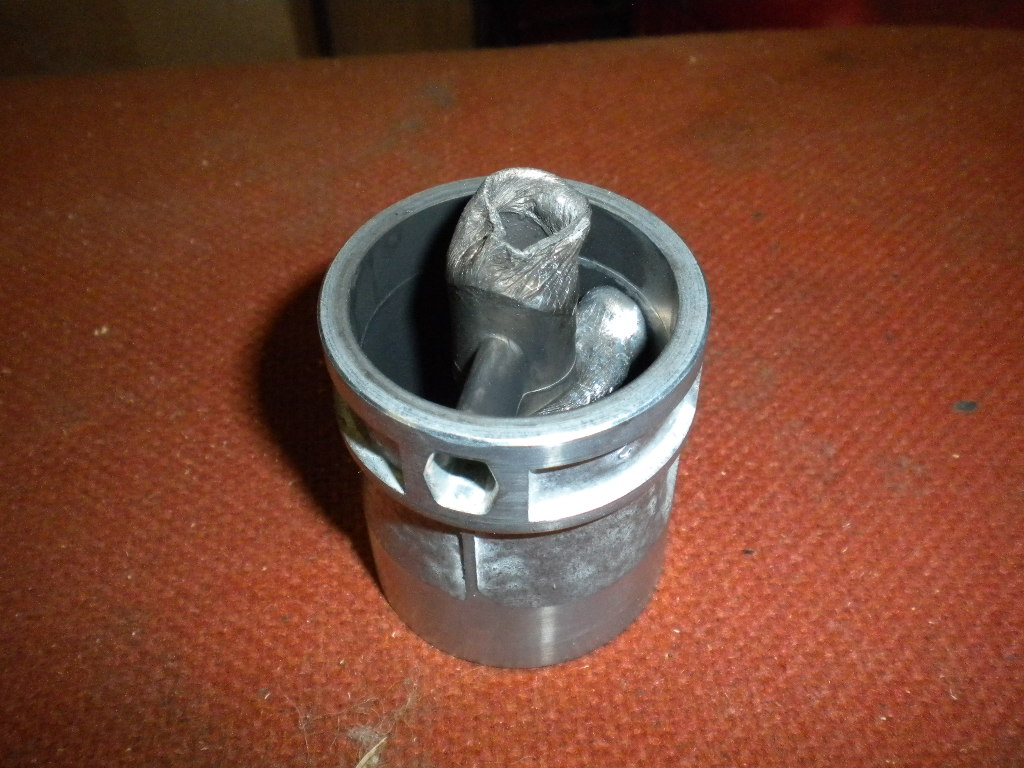
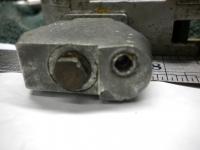
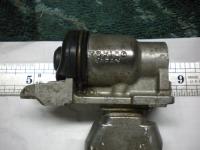
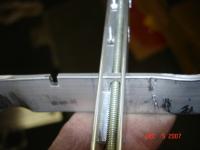
 I've looked every where and these things seem to be made of *Unabtanium* The Previous Owner of My New (to me) Green 12/71' 240Z BROKE the bleeders off the rear wheel brake cylinders. I actually found Stress cracks in the blocks from the bleeders being tightened too damn Hard. I can't even drill them out and seem to be screwed at this point...... If you have a spare set of the PRE-6/72 Rear Wheel Cylinders, PLEASE let me know what you'd like for them, if you'd like a Headlight Upgrade Harness for them or what. The car is in the air and stuck there till I get these situated. So Please look around your parts and see if you have a set of Left and Right early 72' brake Cylinders for me. You know I'd really appreciate it. Dave This is my ruined Right side cylinder. For comparison. You can see the stress crack near the bleeder hole in the 2nd picture. and a little on the 3rd pic.
-
It's actually pretty simple. My kit includes a new fused power wire that goes from the battery to the steering column. A relay is bolted to the underside of the column and #86 is grounded there. The green/white parking light output wire is tapped via a "T" connector. The switch side of that wire goes into #85 #30 from the relay goes to the other side of that wire (toward the dash- output) The fused power wire goes into the relays #87 So the switch now operates the relay, the relay is powered from the battery, the relay is controlled by a simple ground and the switch supplies the activation power. Simple. If you wanna do your own, just use a test light and find the green/blue (from the fusebox into the switch) and the green/white out of the switch to the lights. Dave
-
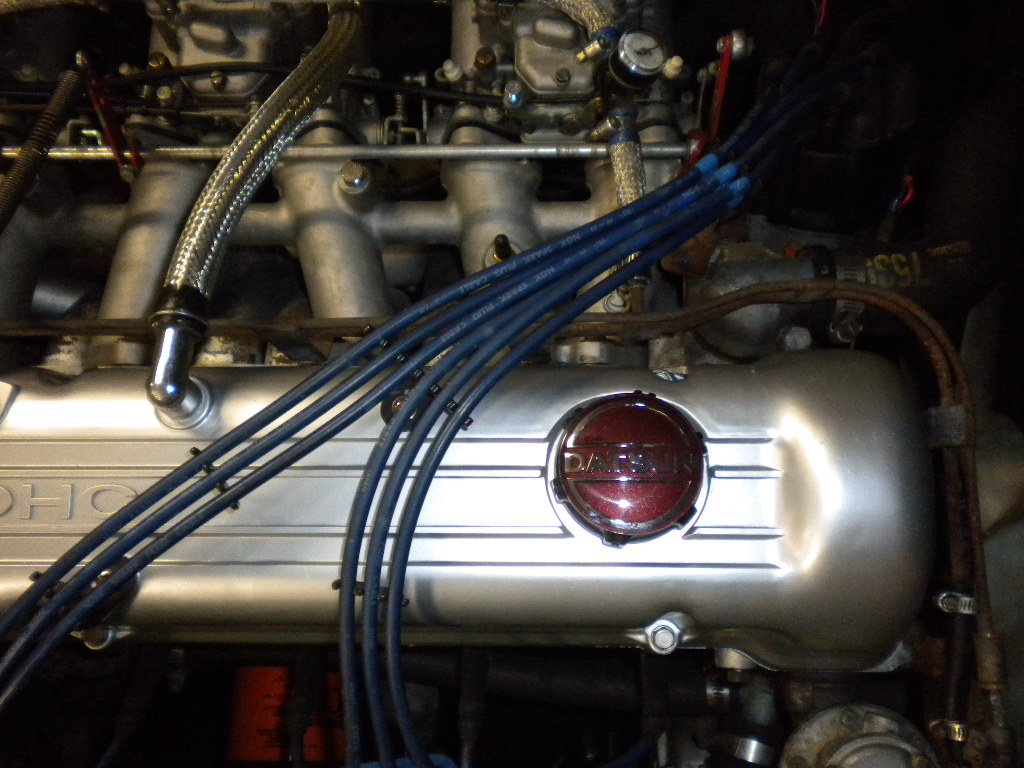
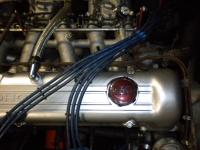
That Air Box Definately Stands out in that engine compartment. Couple reproduction stickers and you're good to go. Car looks awesome Gary. Love the color too. Dave
-
It's a blue wire with a White'ish clear inline fuse-holder. I think the fuse is a 10 or 15 amp. Start with the 10. if it blows over time, then go to the 15. Always best to start low and protect the circuit. Dave
-
That's AWESOME news John!! MSA Sent me 4 rears because they had no fronts in stock (I ordered 2 complete sets for both Z's) So per your info, I can just knock the spacers off the other 2 rears and turn them into fronts. So I can finsh the job in a day, not days or a week. Great news, Thank You. Now does anyone have a set of rear Cylinders for an Early 72'??? My Bleeders are broke off. Dave.
-
I ended up putting the items in this order......... Fuel tank, Electric Fuel Pump, Fuel filter before the Mechanical Pump, all 3 webers, fuel pressure Gauge, fuel Pressure Regulator, return hardline to tank.... The FPR is dialed in a *3* and the gauge shows about 4 pounds of pressure. So fuel pressure is no longer an issue. I'm half tempted to rip each carb off, one at a time, and completely tear each one down, boil the parts, scrub everything down and reassemble them when I'm positive that each and every part is exact, clean and dialed in to the truest sense of the phrase. But first I gotta get the new struts and springs in. ANYONE GOT A SET OF REAR BRAKE CYLINDERS FOR AN EARLY 72'???? Just need a set that the bleeders aren't broken off. The P.O. tightened the bleeders so damn hard that the aluminum block has stress cracks from being overtightened. ANYONE?? PLEASE!! Dave
-
That makes sense. And only the rears have the tube spacer? Correct? So the rears are taller? Just trying to lock it in my brain for future reference. Thanks John, Dave
-
Question..... If I throw my Tokico HP's in a pile. How do I tell front from rear. Which one is which? Anyone? Dave
-
Every once in a while, people send me donor plugs that they found in a junk yard. If you send me donor plugs, I can make you a plug and play Headlight upgrade harness. PM me or email me using my address below in the signature. $150 for the 280Z Plug and Play HLH. Dave
-
Maybe pull everything out and give it a good fuel douching or higher pressure Brake cleaner douche? Some of the screws feel gritty like sandy or something. Dave
-
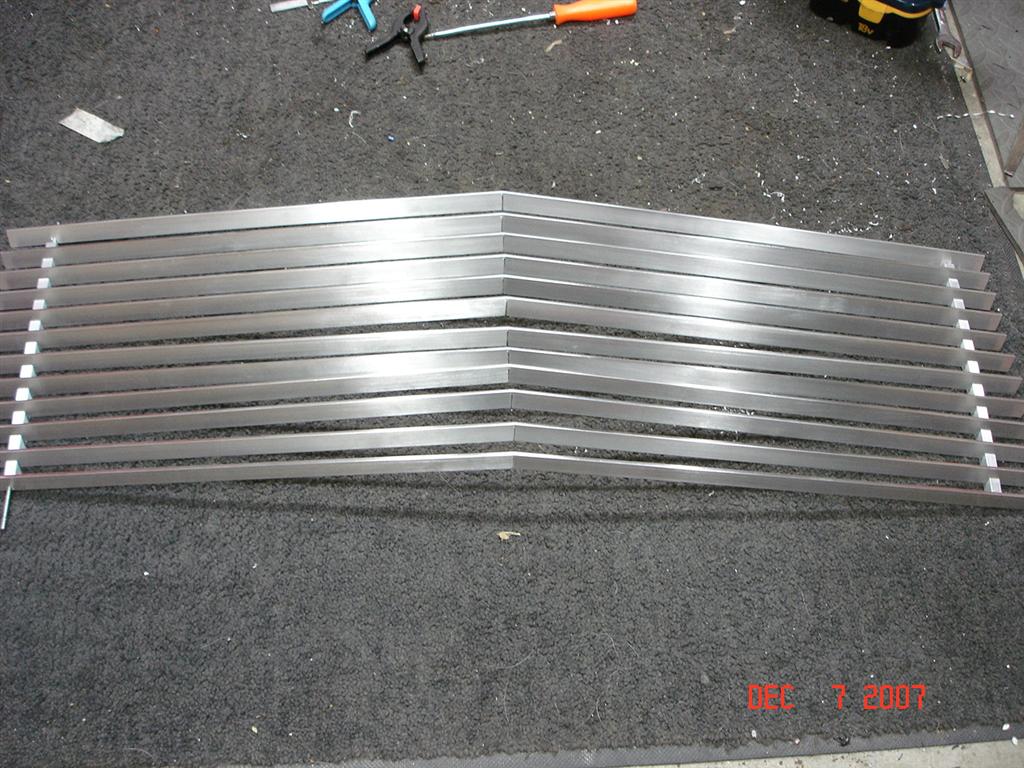
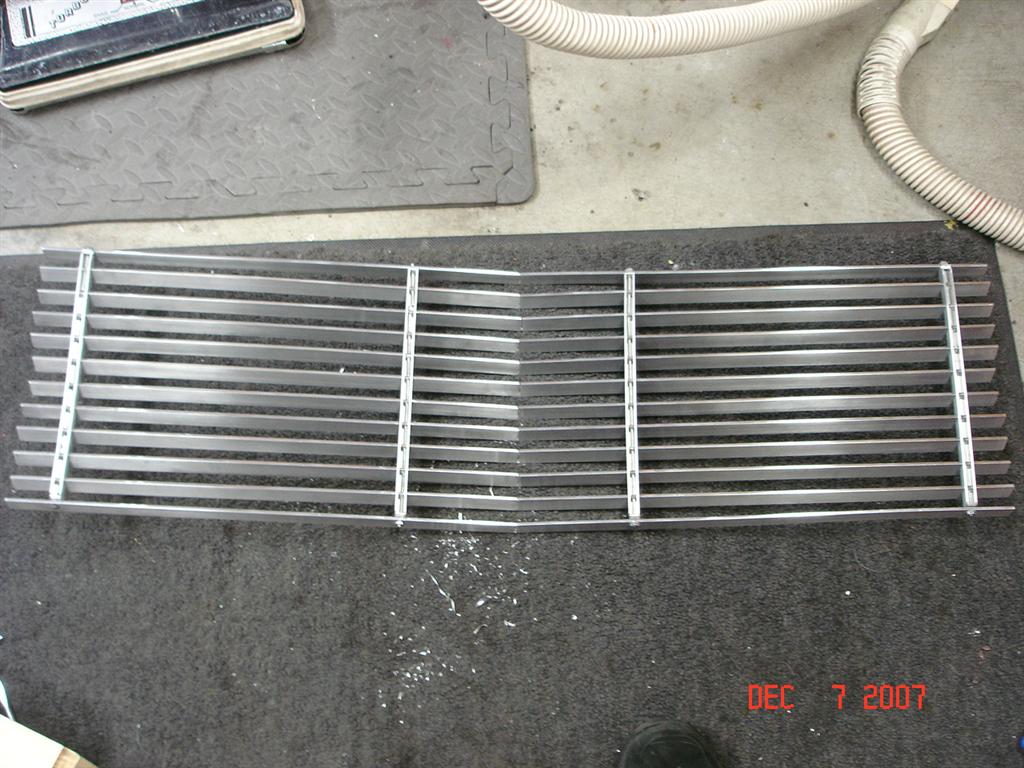
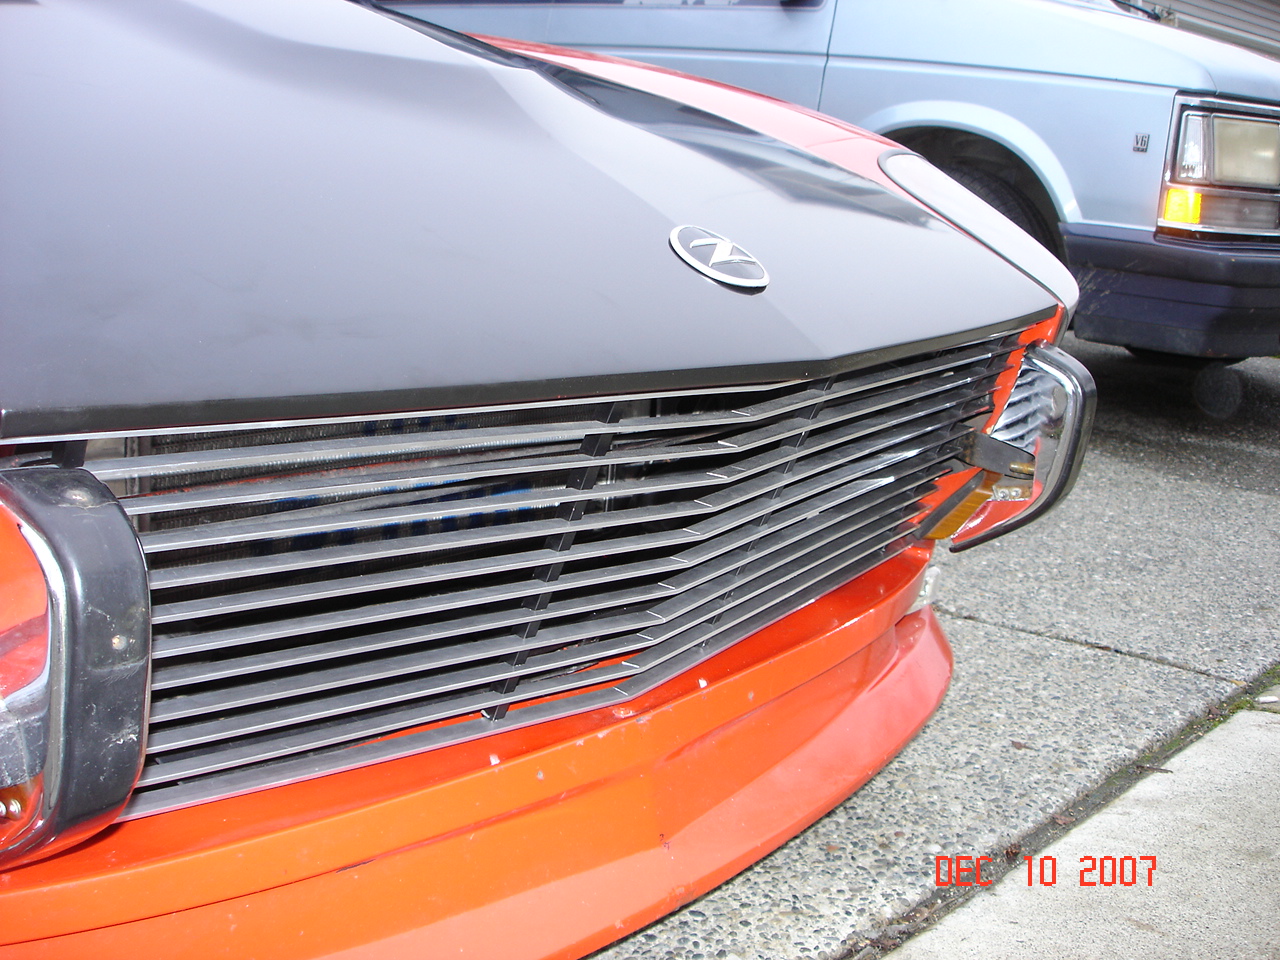
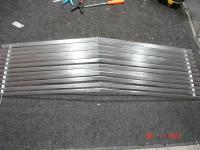
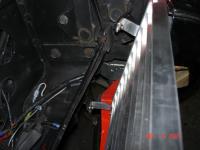
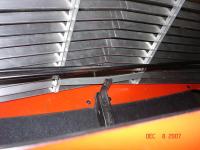
Screw it!! Make your own!!! Sorry, got excited. Won't happen again..... Yah right. Seriously though. Gonna take a little retro fitting but you can make the grill fit. Little cutting and bending and you're good to go. But should you decide to build your own. Have a blast. I got hit by a kid in a Mazda B2000 and he took out the Hood and the grill. I decided to make my own Full Length Aluminum slat grill. You can do chrome tubing, slats, thin metal sheets or what-ever. Have fun, Dave


-
Acceleration Jets are Clean, pulled each one, cleaned, blew them out and reinstalled. Move the butterfly's and they all squirt fuel out above the open butterfly's. #43 is a "Pump Spill" also known (by you) as a Bleed back. The part number is 79701.050 Ending in .050, I pulled mine and they are 50's as well. Plugged them off as instructed. There doesn't appear to be any other option than 50. So maybe plugging is a bad option??? Located at the bottom of the Float bowl, between the mains and the spring loaded Accel. Pump. Nothing else there so it must be the right part. I'll know more tomorrow after I mess with the idle. If I can't get it to run better, I'll yank the plugs and reinstal the Pump Spill / Bleed backs and see if that helps. My $700 worth of suspension parts show up tomorrow so I'll see what I can do before having to tear the car apart for a full 2 day rebuild (struts, springs, cleaning, etc. (front and rear) Dave
-
So I plugged the bleed back holes as suggested. (Set Screws w/ thread lock) Moved the FPR and gauge to the return line (near the man. pump. Backed off on the throttle screws (a smidge) The rich screws are at about 1.25 out from seated. Runs like crap again. So I got the throttle screws just barely pushing the throttle. Turned the rich screws in to 1 turn out. Idles better again but have a flat spot like there's no fuel when I hit or lightly press the pedal. Gonna widen the 45's to 50 on the idle jets, as I'm a light footer around town and run a lot of the time on the idle jets. Dave
-
I fuse mine near the relays because some people like to connect the power wire to the Alternator, starter or the battery. They of coarse have to Cut the wire to size when doing anything other than the battery, and this leaves the fuse holder in place and untouched. Gotta think like everyone else might, when building products that go all over the World. Dave
-
Awesome explanation Mike. I totally get it and can actually visualize what your saying. Thanks. Found out that my Bleed backs are 50's and should probably 0's My Idle jets are 45's Dave
-
Well said and no offence taken Ben. You've been a great help when no others could. Guessing isn't helping my situation. I'll check the bottom for plugs and get you those idle jet numbers. Did those 30's make it in the mail? Forgot to ask when I was on the phone with ya. I'll be in the garage for a bit and will text you the numbers asap. I don't understand how the regulator regulates on the return. SHouldn't it do it's job before the carbs? Weird. Thanks again, I'll also spend my off time reading my Weber book and follow that with a little L6 forum reading at HybridZ. Dave
-
The FPR is over by the fuel pump and fuel filter. What you're seeing is the FPG (gauge) to show me the amount of fuel pressure to make sure I'm not over doing it. 28's are too small but I have 30's on the way as we speak. But my main concern or question is the studdering. what would cause this. Sounds like a lopy Cam but it's not. Dave
-
I use a single 30 amp fuse just before the split into the relays. I use 30's because there are normally 2) 10 amp fuses but a lot of people (like me) have higher output bulbs (I use 90/100 H4's) You could probably use a 20 or 25 but 30 is good. Dave
-
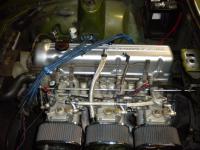
Just got the 40DCOE's up and running better this week. BIG Thanks to YetterBen in WI. He rocks. I used the stock dual fual rail outlets, #1 feeding the front 2 and #2 feeding the rear. Mr. Gasket 7psiI fuel pump at the rear, regulated by a Spectre Fuel Regulator at 4psi. and backed by a stock fuel pump. Spectre S.S. hose braiding kit and Fuel pressure guage (cute little thang ain't it?) Got serious idle and running issues though. Studdering like and idle jet (1 or 2 of 6) is clogged or barely pissing in the hole. From idle to 4Krpm and nuetral pedal (not accelerating or decelerating) has a jolting effect, like I'm tapping the gas pedal every other second. 140 mains 200 Air correctors 4.5 Aux Vent, 2 new ones for obvious reasons. 28 Chokes idle screws at about 1/2 to 3/4 turns out from closed throttle screws at about 1/2 turn out. Any thoughts? Please!! Thanks in advance, Dave.


-
As I speak from experience...... Run a single larger gauge power wire toward the relays. Fuse that wire either at the battery or near the relays. Split the power wire (1-10 gauge power wire, split into 2-12ga wires.) Ground the headlights seperately, Close to each headlight. No need to star ground these, no electrical noise issues. Just keep the grounds short and tight and clean. Been doing this for about 25 years now. Actually make a good living at it. So do what you want but K.I.S.S. Keep it Simple Stupid. Dave
-
I use a 6" spiral sewn pad on my bench grinder with Maguires Plastic polish. Most of my customers will agree that it leaves a beautiful shine on the lenses. Just keep it moist and keep it moving. I also use 600 grit wet-sand paper under running water to cut thru the crap and eliminate all the scratches of 40 years of time. Then the polish and reasemble. As for your Rod question. If I can't get the compression washer off without breaking the rod flush with the inner lens surface, I drill a 1/16" hole into the rod center, then screw in a very small screw with a washer. This expands the plastic rod to hold the rod in the hole and the screw also holds it in place. I doesn't matter what kind of glue or adhesive you use as long as it's Weather resistant, Light in color (white, yellow or clear) Dark colors will make the lens apear to be darker than it is. It you weren't able to remove the compression washer from the center pin without breaking it, then the glue will need to be compatible with the plastic of the lens AND the rear housing. Notice what a Bitch it is to remove the factory glue from the lens? But much easier from the rear housing?? Not a multi-purpose glue. I use a 2" long skinny machine screw. drill a hole thru the chrome strip, taper the sides of the screw head so it'll fit in the channel, glue the lens and bolt it down. A little low gloss Black paint on the head of the screw and people will likely never know it's even there. Dave
-
Glad to Help John. I got mine from the local Co-Op, they are great, greet you at the door, ask "How's your day going" and tell ya "Have a great Day" when you leave, and actually Mean it. Dave
-
Remove the pressure clip washer from the center pin in the rear of the taillight assembly's. BE CAREFULL as it will try to break the plastic rod. Run the Taillights under HOT water (Not Boiling) in the sink. The glue will soften and all you need to do is apply seperating pressure to lift the lens away from the body. Use a metal polish on the reflectors. Glue some tin foil onto the inside area of the reverse light for better light output.
-
Get that Air Box installed yet? Hope all is well and it was worth what you paid for it. Good to hear the car is up and making ya smile again, Dave
-
Thanks, now I gotta fix mine, Why you gotta make me work so early in the morning Arne? Thanks by the way for the quick info on the valves the other day. The damn intakes were at or below 6 and the exhaust's was right at 10. Almost a full turn out of correct. Good news is no more ticking and sounds great. Even the Webers are more tunable now. Dave