Zs-ondabrain
-
Posts
4,362 -
Joined
-
Last visited
-
Days Won
1
Content Type
Profiles
Knowledge Base
Zcar Wiki
Forums
Gallery
Events
Downloads
Store
Blogs
Collections
Classifieds
Everything posted by Zs-ondabrain
-
I think he's getting instant pedal as it's only doing a 3/4 engage, which means no dead pedal space. But being brain-dead last night I thought he replaced the Master, not the slave. If the slave had to be forced into place to instal it, then YES, the rod needs to be shaved or something, to allow full release on the fork. I really shouldn't respond to posts on 1 brain cell. Dave
-

Registration for Datsun Driving Canby Fun 2010 (Oregon) is now open.
Zs-ondabrain replied to Jcoop's topic in United States
Thanks Bruce, I'm super excited about the instal. Not only am I getting a killer set of Carbs but having it Proffesionally installed and tuned will make the whole trip worthwhile. I'm actually looking into another motor for the Red 70'. So if that works out, I'll have a more workable motor that will make things easier to tune the carbs on. We'll see though. The guy's gonna do a compression test on it and get back to me. $150 ain't to bad, eh? Dave -
ya, I realized how dumb my post was after I reread yours. DUH :stupid: Brain fart. :classic: So it's holding pressure and letting the clutch engage? Weird. I'd have to say "Iffy" master. Ususally the problem is just the oposite. Won't engage. Nothing Jambing the rod? Maybe using a spacer between the firewall and the clutch master would give you a little more rod travel? Kinda like shaving the od, but without damaging the rod, in case you swap it for another unit. It's late and my Family BBQ ran longer than expected, Brain dead and going to bed. Dave
-
Loosen the lock nut on the rod connected to the pedal inside the car. Twist the rod into or toward the pedal, away from the clutch master. This will allow a full engagment. Keep adjusting it till it's good for you. Then tighten the lock nut again. Also make sure you bleed the clutch master as you probably have an air pocket in there. Just did this on the green bean and all is better now.
-
I Just got ANOTHER 240Z, she's gonna kill me!!
Zs-ondabrain replied to Zs-ondabrain's topic in Open Discussions
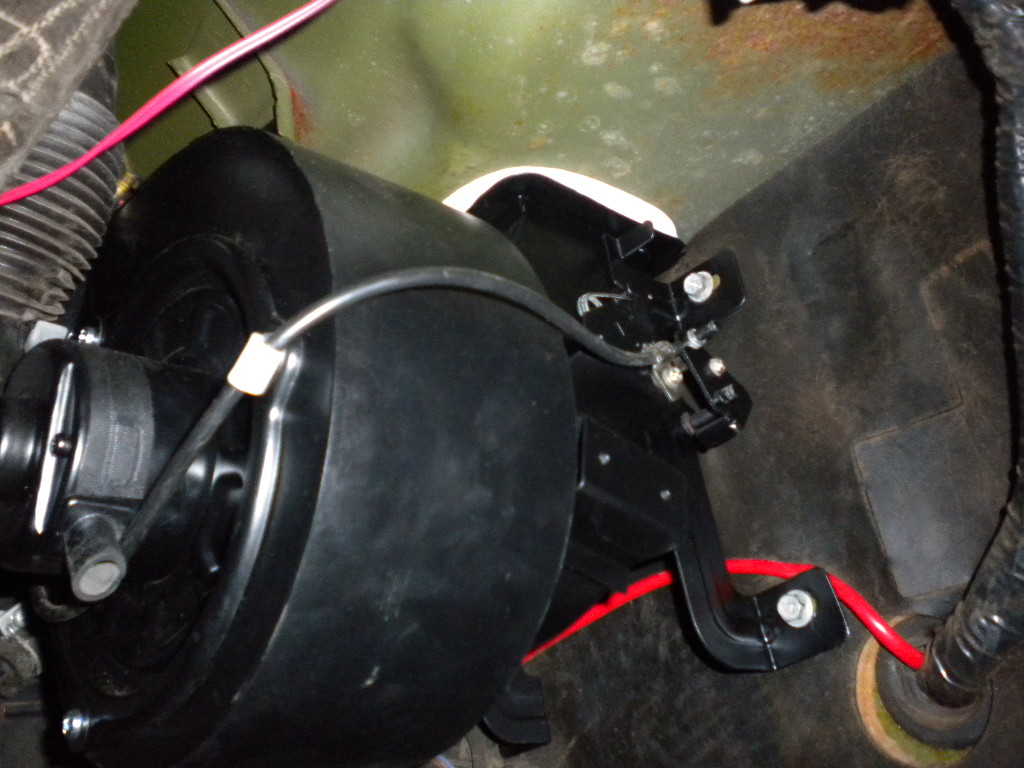
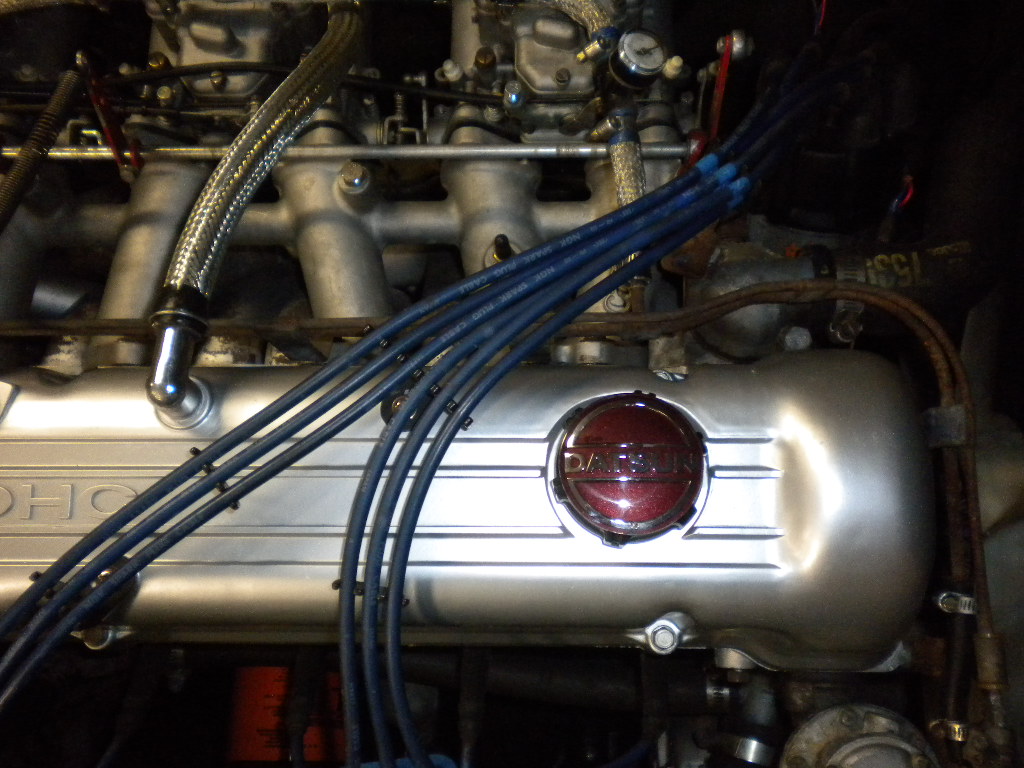
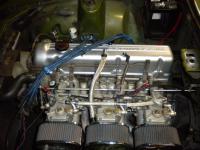
So it's been a while from the last post. Installed the new Honda Blower Motor after painting it and the blower housing. Fixed the heater controls and FLAP door, reglued the vinyl as it was hanging there. Cleaned and painted (Aluminum) an extra Valve cover I had sitting around. Adjusted the valves Properly, the were at 6 and 10 (should have been 8 and 10) Installed the painted valve cover and new Gasket Found a DATSUN Center cap and put it on the oil filler cap Installed the Triple Weber 40DCOE's Bought and installed 2 new Aux. Venturis (melted the other 2) Installed 140 mains and 200 Air Correctors (it had 120's and 170's) Found out I have 28mm chokes and should have 30 or 32mm chokes YetterBen is sending me 4 and I have to buy the other 2 next week. at $24 each. Messed with the timing a bit. Made a triple choke using the 2 stock choke cables. I used a heater control cable to attach the 3rd choke Installed the removed SU's onto the red 70" Z (runs much better) Installed a New Electric Fuel Pump, found the 2-wire connector near the fusebox and connected a fused connector to it. Works great. Installed a new Fuel Pressure Regulator. Set it at 4 pounds. Completely rebuilt the Bad Vaccum Booster. It had a pinky finger size hole in the diaphram. Fixed it with a 3M clear 2 sided adhesive tape. It's very flexible and rubbery, so I put a peice on each side of the tear, repainted the inside after dumping about 3 ounces of brake fluid out of it. Repainted the outside and put it all back together, The brakes are friggin AWESOME now. $180 my arse. Fixed it for about $2 in paint and rubber adhesive. Yeah ME... Lots to do but I also ordered a set of 4 TOKICO HP's And Eibach PR Lowering Springs. As well as a new set of Tokico's for the Red 70'Z. My KYB's are failing after 5 years of use. Dave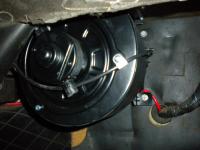


-
You know me and Leah would love to be there but not enough pre-warning. I'll call Roger tomorrow and wish him a happy Bday from the both of us. Just spoke with John Barth, he's looking for SU rebuild stuff, so I sent him towards Bruce. Hope you guys have a blast and the weather holds up for ya'll. Dave and Leah.
-
I bent the clips into as tight of a 90* as possible, marked the holes and drilled them, slid the staple (Paper-clip) thru, pressed on the staple (on the fuzzy side and used a pair of Needle-Nose to pull tight and keep pressure as I bent them inwards. Then I used a weird pair of C-clamp style vise-grips to get behind and give that extra little squeeze. I also used some rubber cement on both the strip and door panel, to minimize movement and vibration. I also used a Q-Tip to dab on a little clear coat on the staples to slow the rust down. As raw paper-clips are prone to rust. I would have taken pictures but I didn't have a Digital Camera until about 6 or 7 years ago. Does that help? Dave
-
I was givin new Fuzzy's and when I installed them, I opened the "Staple" things and some broke. So I used a large Paper clip, bent into the same shape, drilled out the holes in the Fuzzy and reinstalled like OEM. You can't tell that it's anything other than stock. Dave
-
Nissan used to throw those things on to counter ballance harmonic vibrations. or some crap like that. Though that one looks a little onthe tall side, compared to the others I've seen. Dave
-
I get "Error Recieving Arguments" when I try the link. Dave
-
Hey Tyler, Bite Me!! Dave
-
Almost every parts store will show the PH8A as the L-series filter, but it doesn't say it's an Only Ford item. I've been yelled at so many times about using Fram Filters, it's not funny anymore. So I guess I'll check out the Wix units. I've read every "Fram Failure" write-up out there. But Honestly, I've used Fram PH8A's on my red Z for 7 years and NEVER had a problem. A filter is NOT a Filter if it doesn't do it's job but I've personally not had an issue thus far. I'll try the WIX or Napa Gold and see if there is a difference. Not likely but I'll try anything once, twice if I like it.....
-
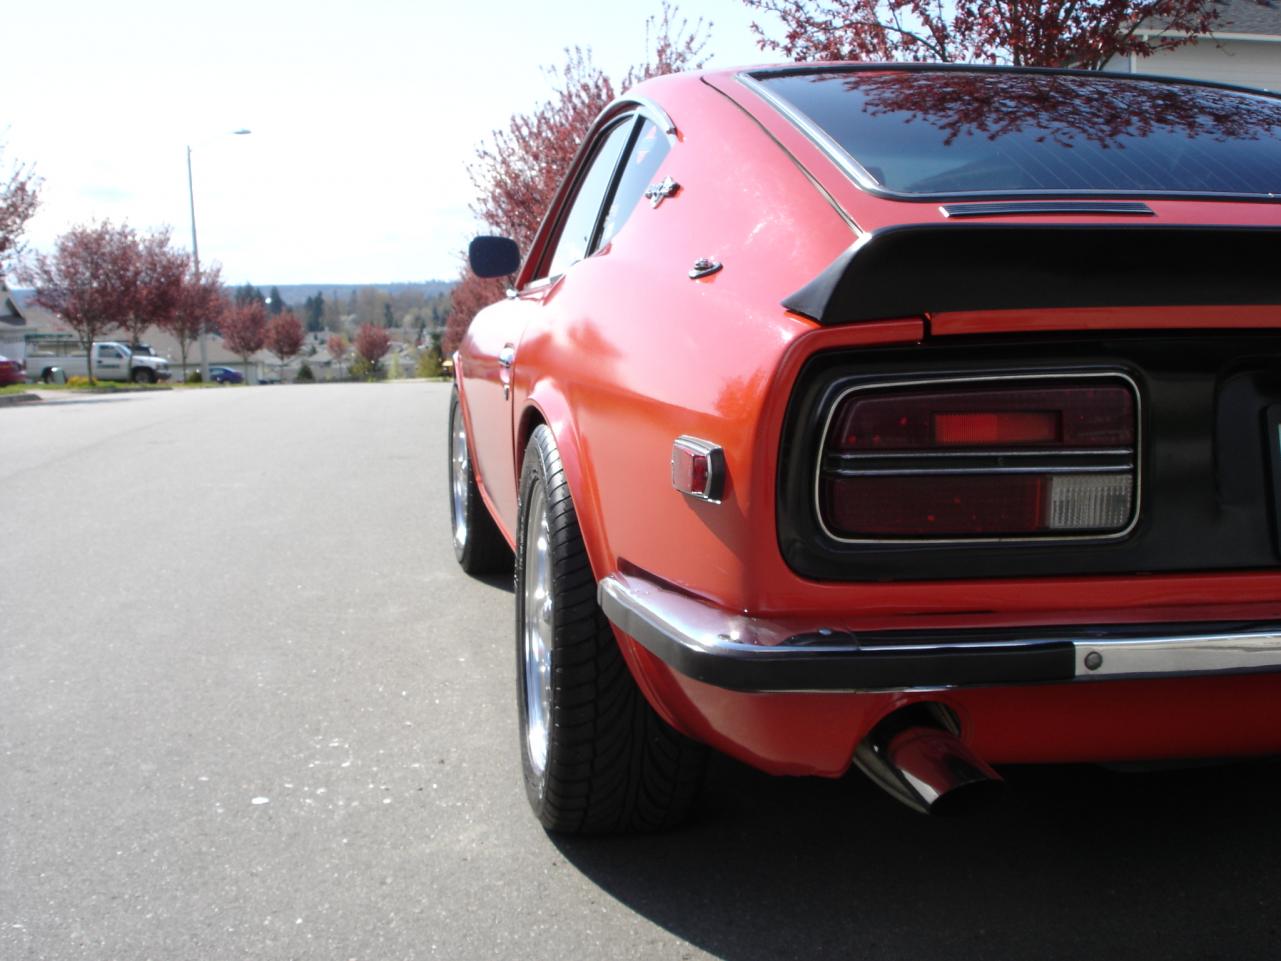
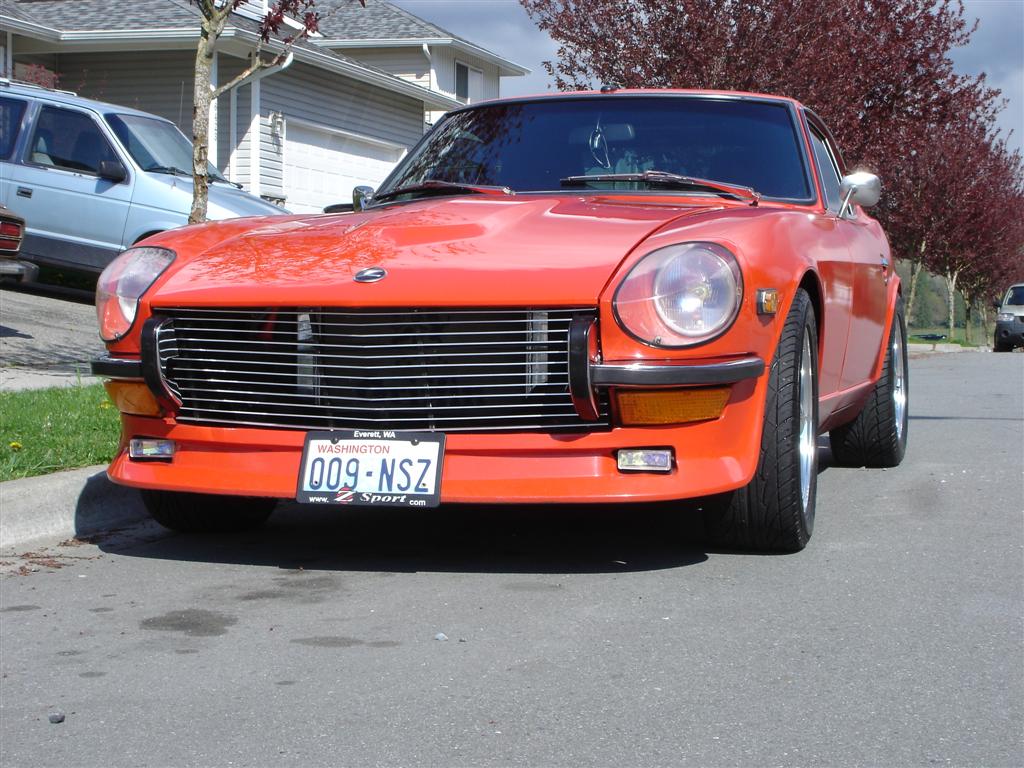
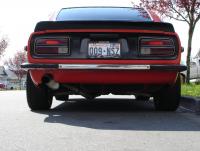
Just go with a 215 or 225/50R16. Fills the well, better sidewall for a smoother ride, wider foot print for better grip. I have Eibachs and KYB's (soon to be Tokico HP's) 225/50ZR16's And there's no rubbing, great grip, smooth ride and they fill the well without any issues. Dave Pics below show how they look, plenty of clearance without looking too small.


-
the missing seal will allow air to pass thru to the vents when driving or using the fan. Dave
-
Front or rear? Side bolts or the front and rear body mount bolts?? I think the bolts that hold the bracket to the body are (14mm head, 10mm dia. bolt, 20mm long) The sides are 30mm long, 8mm dia bolt with a 10 or 12mm head. working off memory and can't remember the thread size. (maybe 1.25 on the larger??)
-
Too late, they're on their way to me as we speak. Hey Ben, I'll let ya know how it turns out. Dave
-
if the smooth vibration in the pedal is while pressing down, your rotors mayneed to be turned or replaced. They may be warped. One sure way of telling if the booster is bad is to clamp it off with a hose clamp, run the motor, and rapidly press on the brake pedal, (press, release, press, release) if the RPM's hold steady, then the booster is bad. Release the clamp and try it again. If the RPM's raise and lower with each press, then the booster definately shop. Dave
-
easy enough, just glue it back on. I just did that EXACT thing today. I installed the Honda Blower motor after mediablasting the full blower assembly and painting it a Low Gloss Black. Also used an 11mm foam on the upper seal and 2mm foam between the blower housing and air intake box. Works Friggin Awesome!! Actually blew out some crap that has been in there forever. The old fan couldn't move that stuff. But the Honda motor definately did the trick. Also, just remove the housings top 10mm bolt and 3 firewall bolts, unclamp the door flat cable and unplug the 6-pin connector to drop the whole assembly down. Glue the peices back on and reassemble. Have fun. Dave
-
-
Are there ANY Weber techs or guys who know their way around 40DCOE's in Washington State? I'm not rich but could do some trade work, buy ya lunch, something. It's hard to get her to idle below 1100 and there's a flat spot on light throttle. It also lags at heavy throttle. Installing an electric fuel pump today to try and feed it better at higher RPM's but think the issue is elsewhere. Where should my timing be? Stock L24, 142,000 miles on her with stack of service records, E12-80 ignition, stock cam, 3-into-2 header with 2.5" exhaust. 170 Air Gap 120 Main choke? 150 and 85 F9? Anyone? Call me if you'd like. 360-631-0757 Cell Thanks in advance. Heading to the garage. Dave
-
I need everyones input on this one (Combo and T/S switches)
Zs-ondabrain replied to Zs-ondabrain's topic in Electrical
Damnit Sam, I was JUST in Auburn Yesterday. Had to go to "Carbs Unlimited" off 22nd and Auburn way? I could have brought you a switch. I have a couple (dozen? maybe?) I'll try and take a picture for you tomorrow. But check this thread for and late 73' switches, they are the SAME. Dave -
Sounds good to me. Wasn't sure to what extent you wanted to go. But tapping the bolt top of the strut should be fine. You're filling the hole with a bolt so itshouldn't be weak afterwards. Stock caps keep it looking stock and the screw will keep it snug. The rubber seal you instal afterwards will keep you fume free, until you discover the next leak. Dave
-
Holy Phucksticks Batman. Has anyone smacked Al yet? Up to your elbows in Z's as usual, eh Will? You see a projected finish date on his Z yet? Damn, Dave
-
Don't mean to sound rude but seriously, rethink the amount of work you're willing to put into it. I would Personally remove the best parts, gut it, Clean all the parts you remove and set them aside. Go find another 240Z that needs the parts you have. Buy it for cheap. Instal your nice clean parts, drive and be happy. See there, easy peasy, mac and cheesy. Good luck on what ever you decide. Dave
-
Welcome to "Brick Aerodynamics 101" Bricks aren't Aero anything, and neither is a Z. Sure, they're lightweight and HP is easy to add (Mind you, I didn't say Cheap) but that HP is needed to move the brick thru the wind. And that's why the fumes are a problem on 75% of our Z's. I would personally make some aluminum covers with rubber seals, to cover the Strut tops. Obviously, the stock caps won't clip in place anymore but maybe you can figure something out with them. Still love the car, Awesome job. Still can't believe I made the mistake of $6000 over 6 figures. Don't think I had my coffee yet that day. Dave