Zs-ondabrain
-
Posts
4,362 -
Joined
-
Last visited
-
Days Won
1
Content Type
Profiles
Knowledge Base
Zcar Wiki
Forums
Gallery
Events
Downloads
Store
Blogs
Collections
Classifieds
Everything posted by Zs-ondabrain
-

My 260Z build (Brake upgrades and Mods)
Zs-ondabrain replied to Zs-ondabrain's topic in Wheels & Brakes
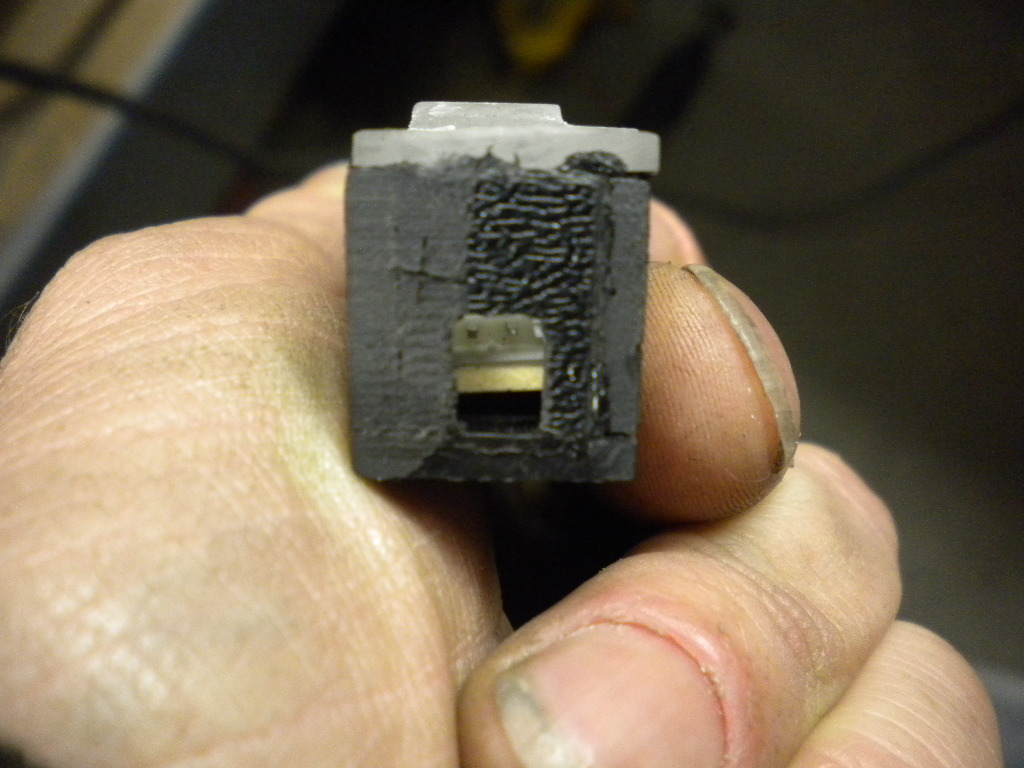
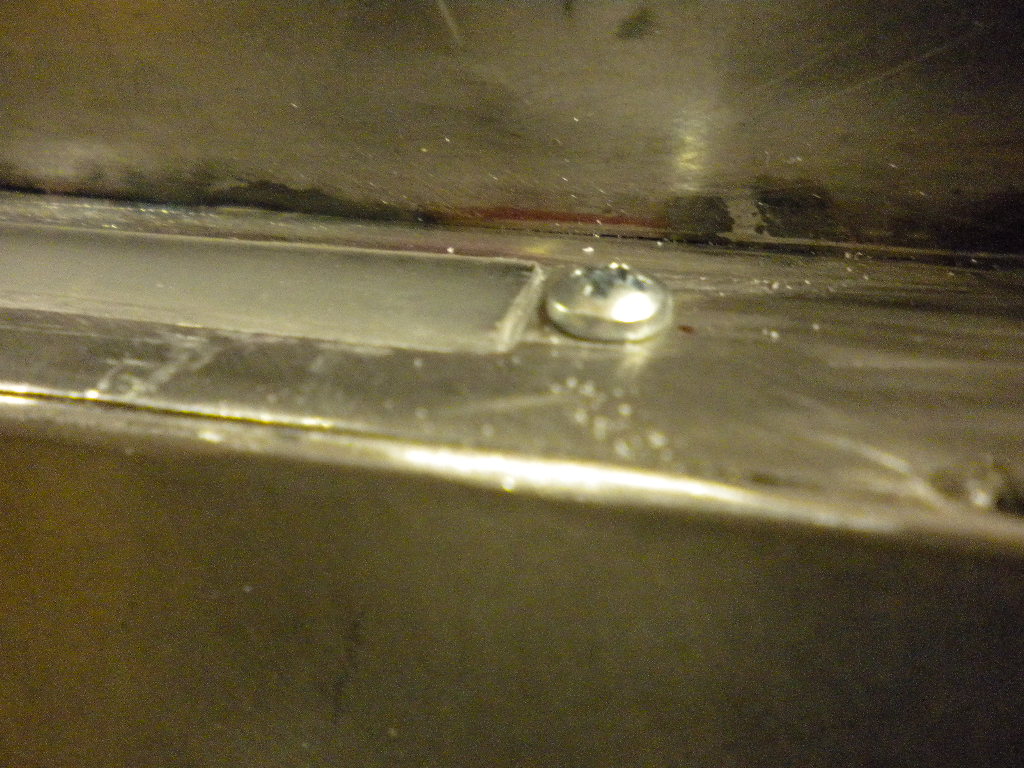
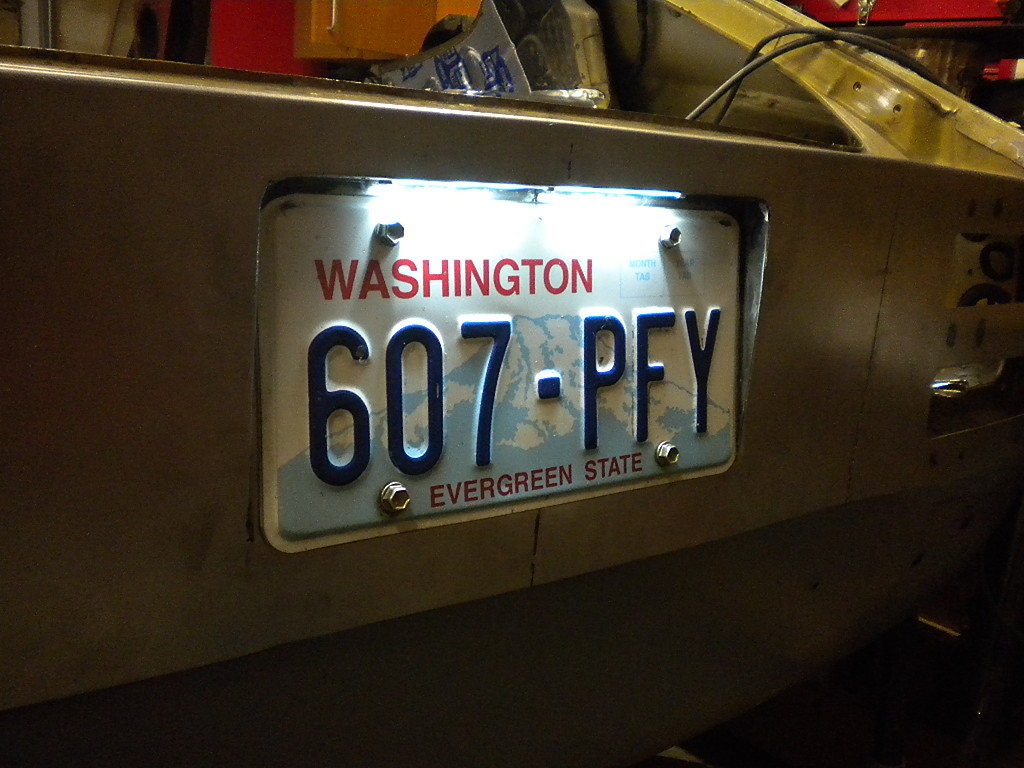
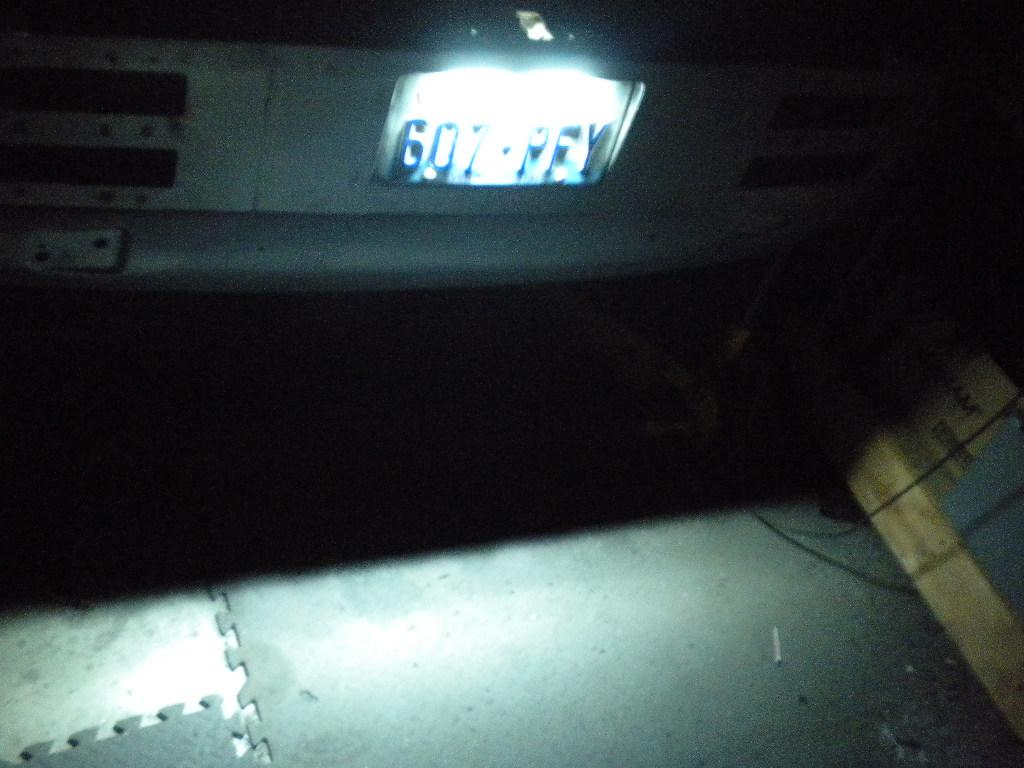
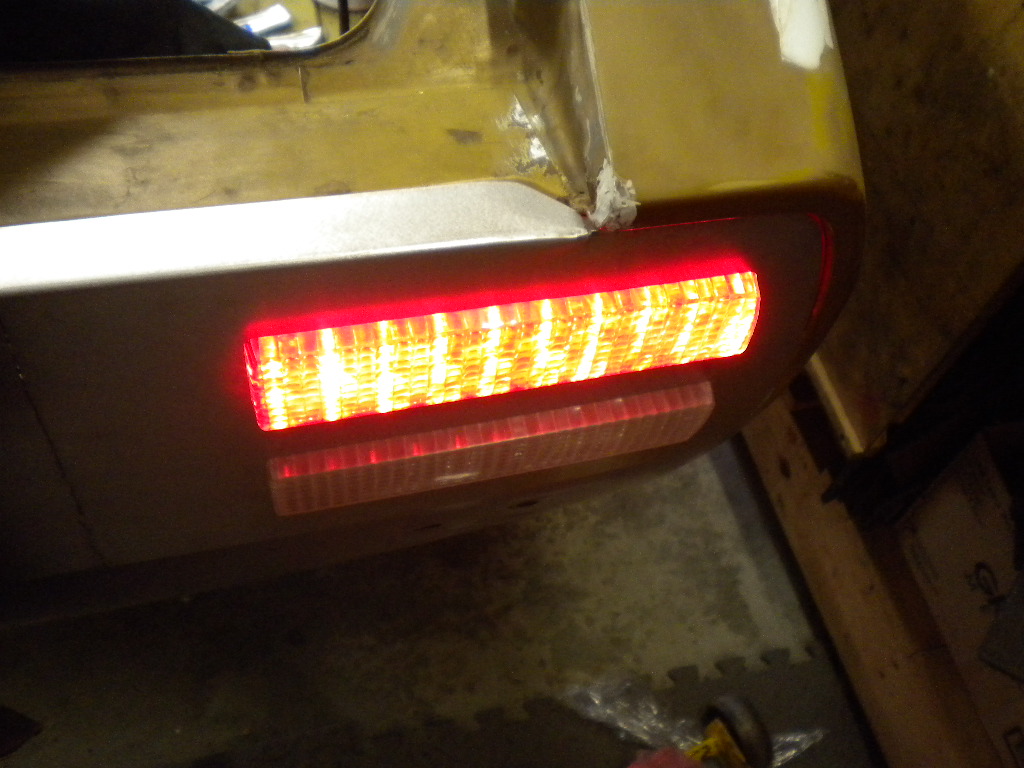
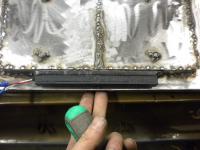
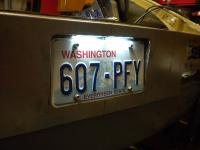
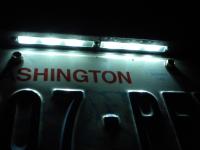
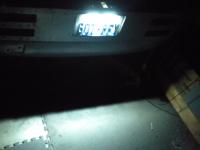
Finished up the License plate light today, as well as Arne's 3rd bake light, since I was working with LED's anyways. Ordered some LED's from www.superbrightleds.com that have 6 4 pin white LED's in a strip. Made a box out of 1/8" ABS plastic and 3/16" clear Plexiglass. Beveled the edges so the lens will sit flush in the cut out steel. Sealed it all off with thin adhesive foam and made it removable with 3 small screws. The last picture shows just how bright it really is, especially on the floor. (Lose your keys? let me back up for ya.) hehehe Now on to the reverse light, yah fun... I think I'll put it Under the license plate. Dave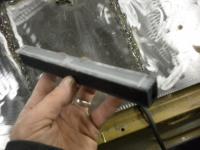


-
My 260Z build (Brake upgrades and Mods)
Zs-ondabrain replied to Zs-ondabrain's topic in Wheels & Brakes
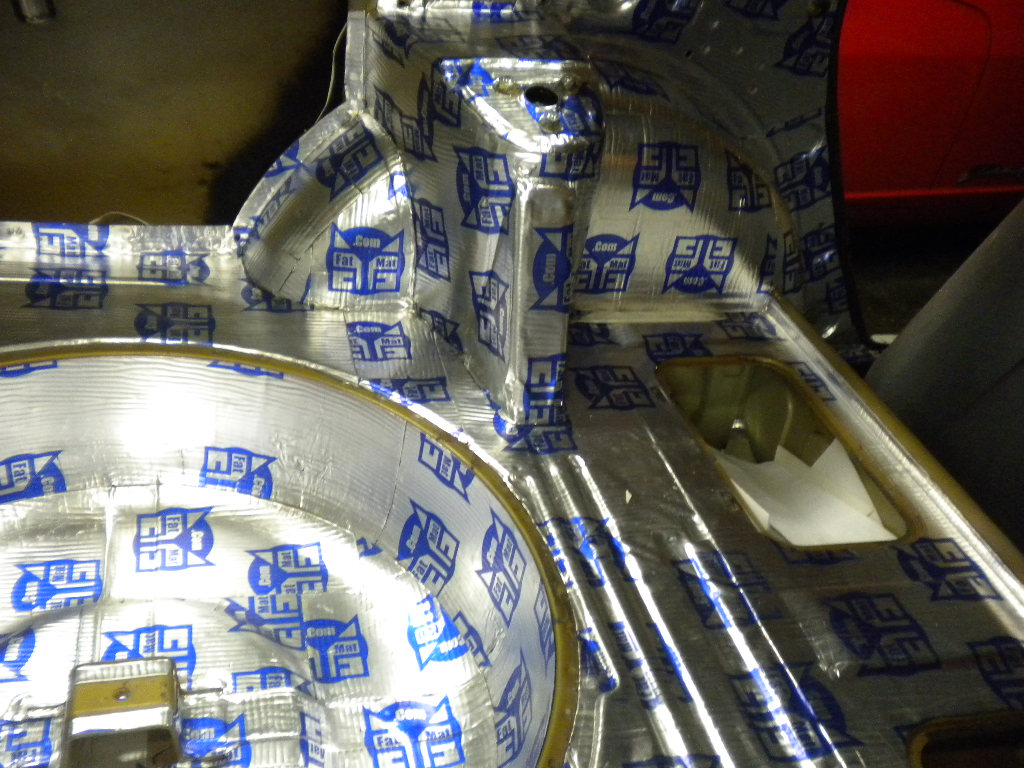
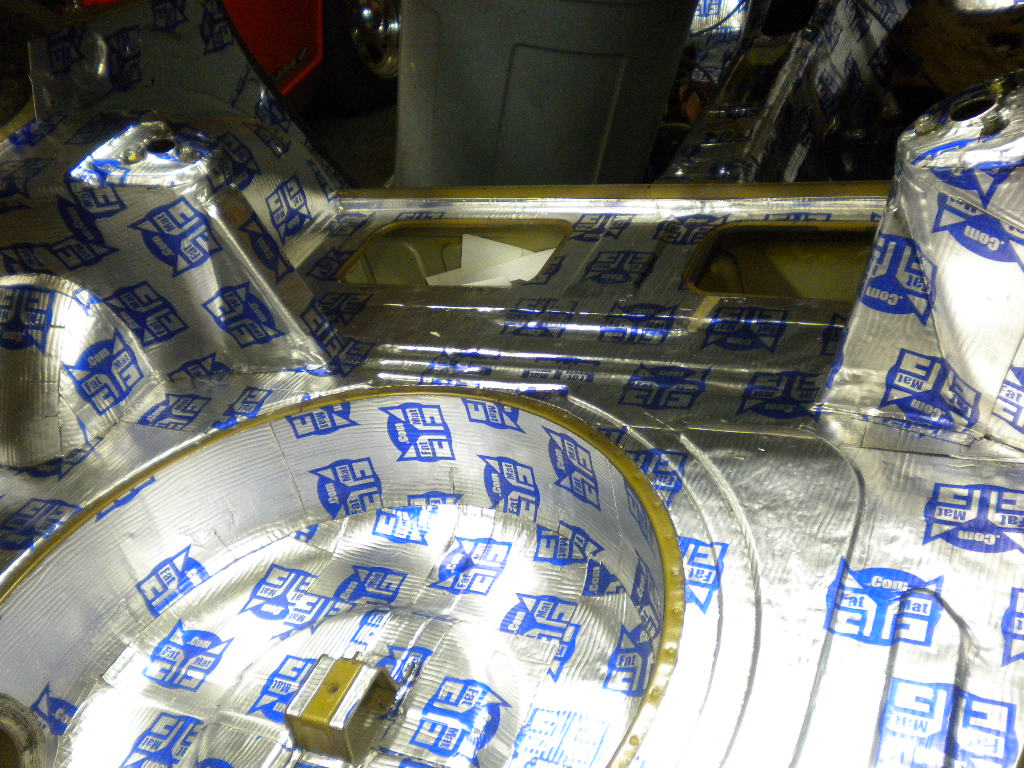
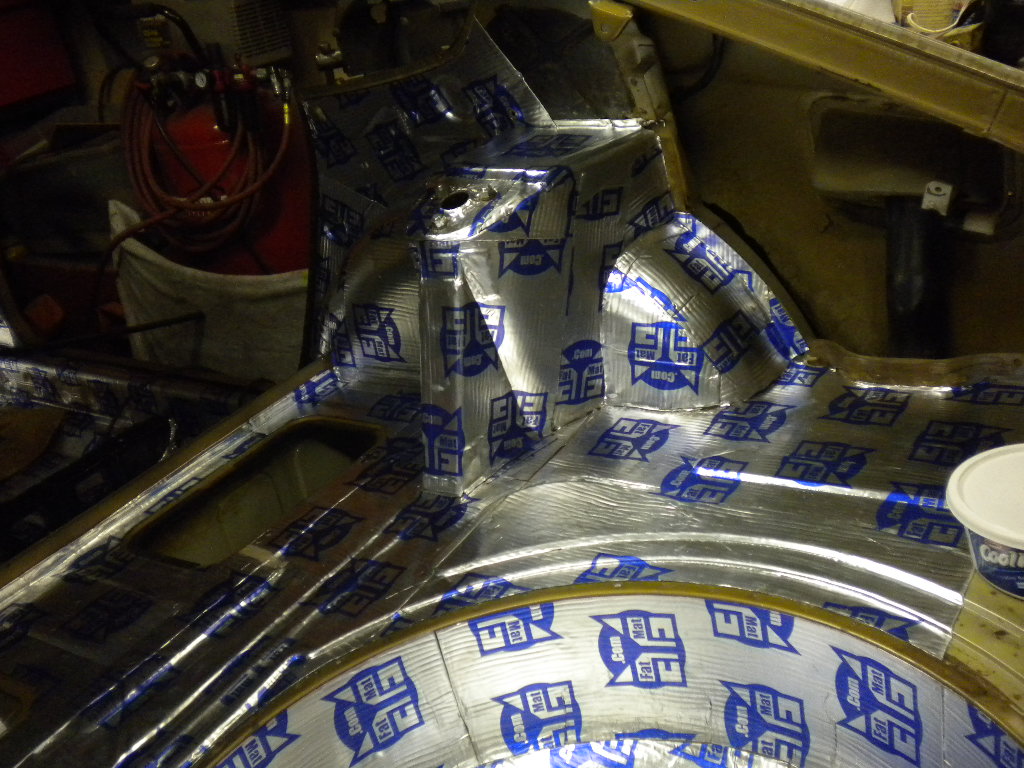
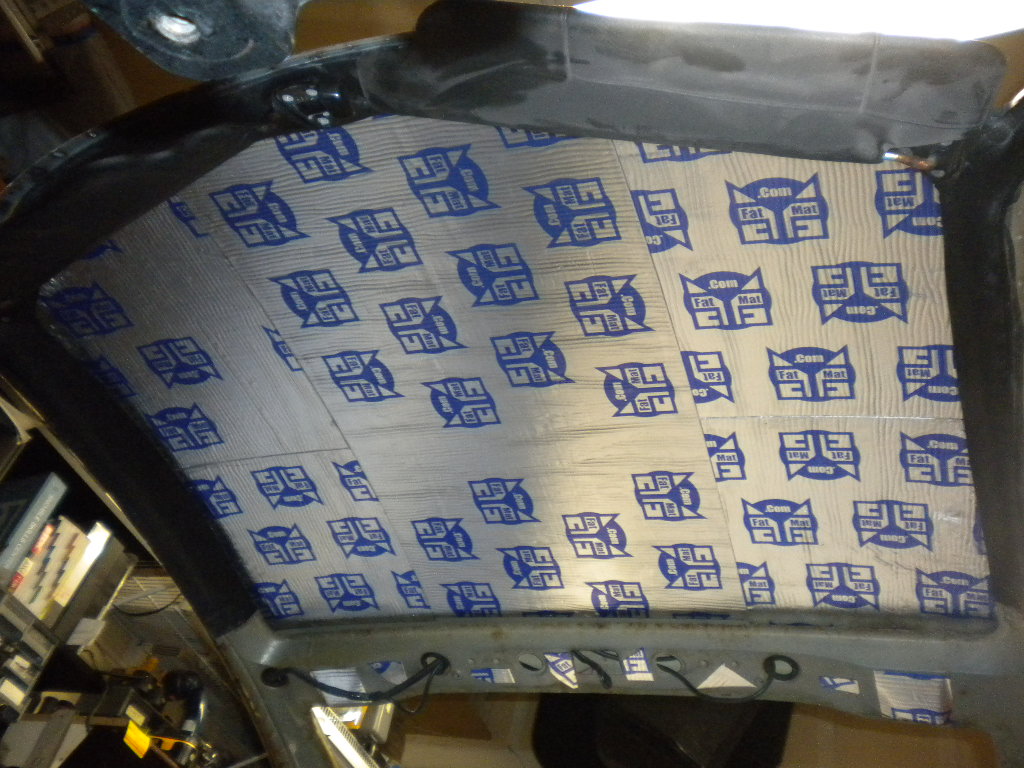
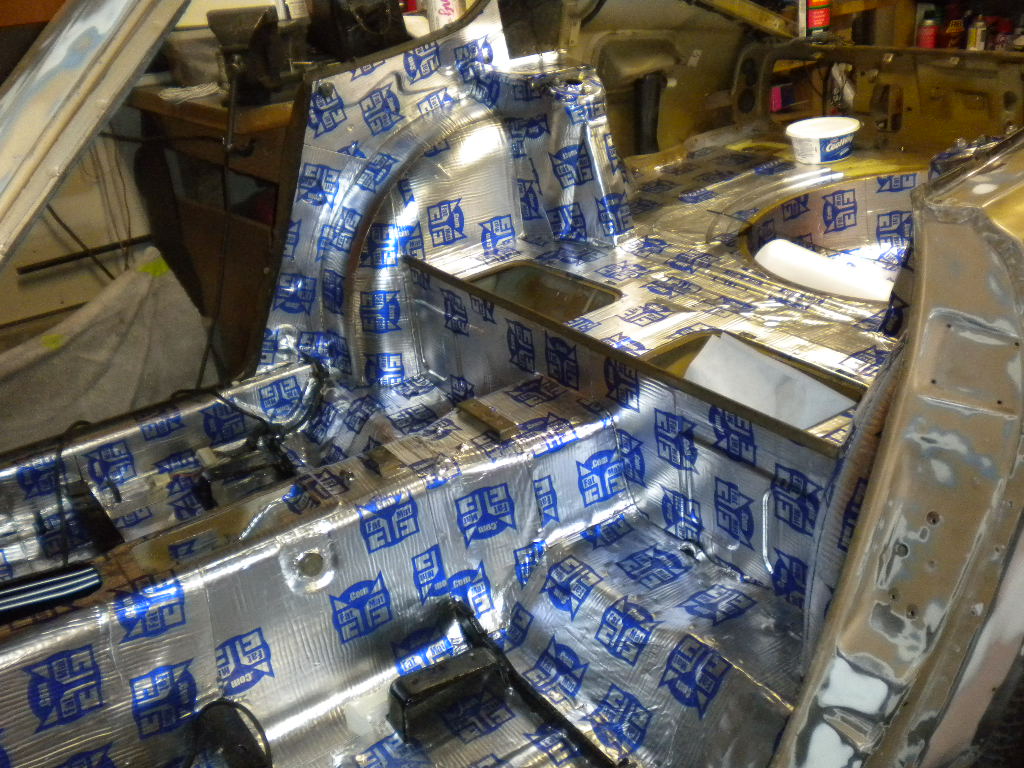
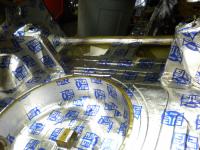
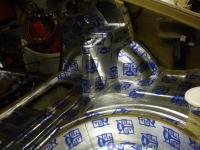
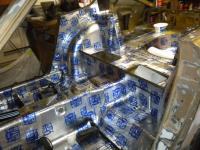
got a little more done today in between Arne's 3rd brake light and a few other jobs. The roof!!!, Spare well, inner dog legs up to the quarter windows and a few other spots. Kinda jumpin around so you'll see a few blank spots that'll be filled later, Not gonna do the quarter panels or rear tailgate panel till all the welding is done. Just seems easier that way. Dave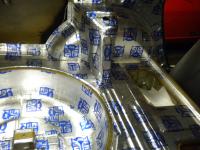

-
The bolt on shock absorber/bumper mounts are about 13 +/- pounds each for a total of 52+ pounds. That only leaves 22 pounds worth of bumpers and that's easy.
-
I beg to differ that one. I run the Mallory Unilite coupled with the MSD 6AL and the Mallory Promaster Coil. The lightning scar on my arm, from 6" away proves that 65KV can shoot 6" easy. On a 65 degree day at less than 200 feet above see level. Ask my wife what a grown man sounds like when he gets shocked like that. That's right, "A little girl" Dave
-
According to many a Z owner, That's my job!! Glad you found it. Dave
-
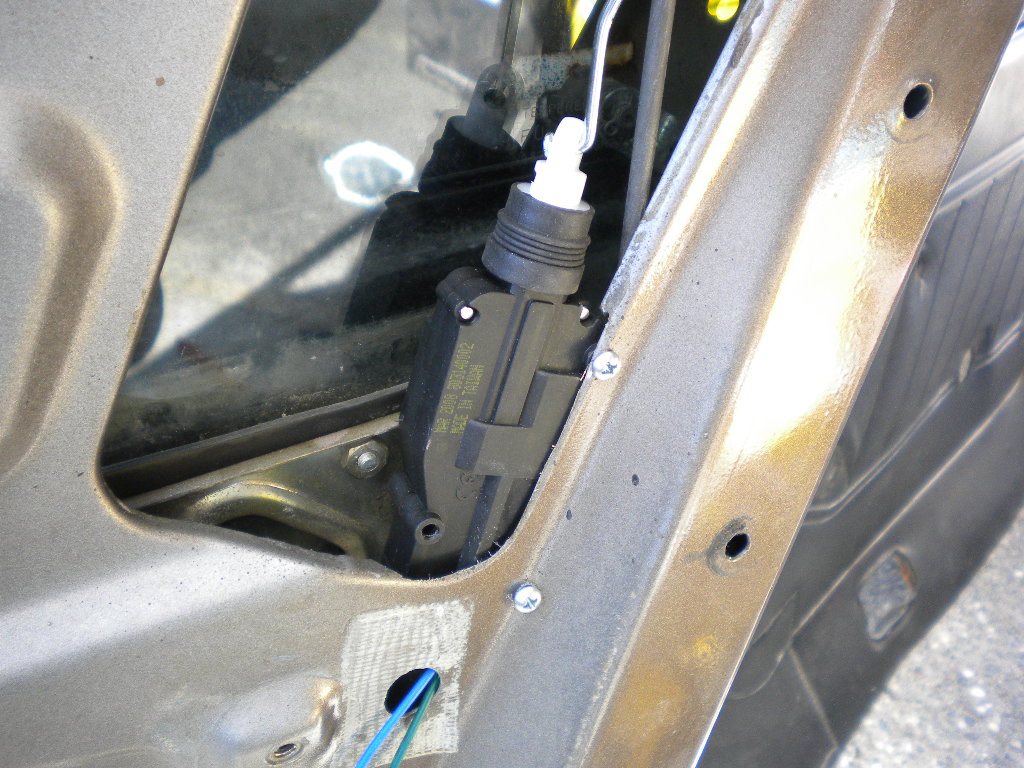
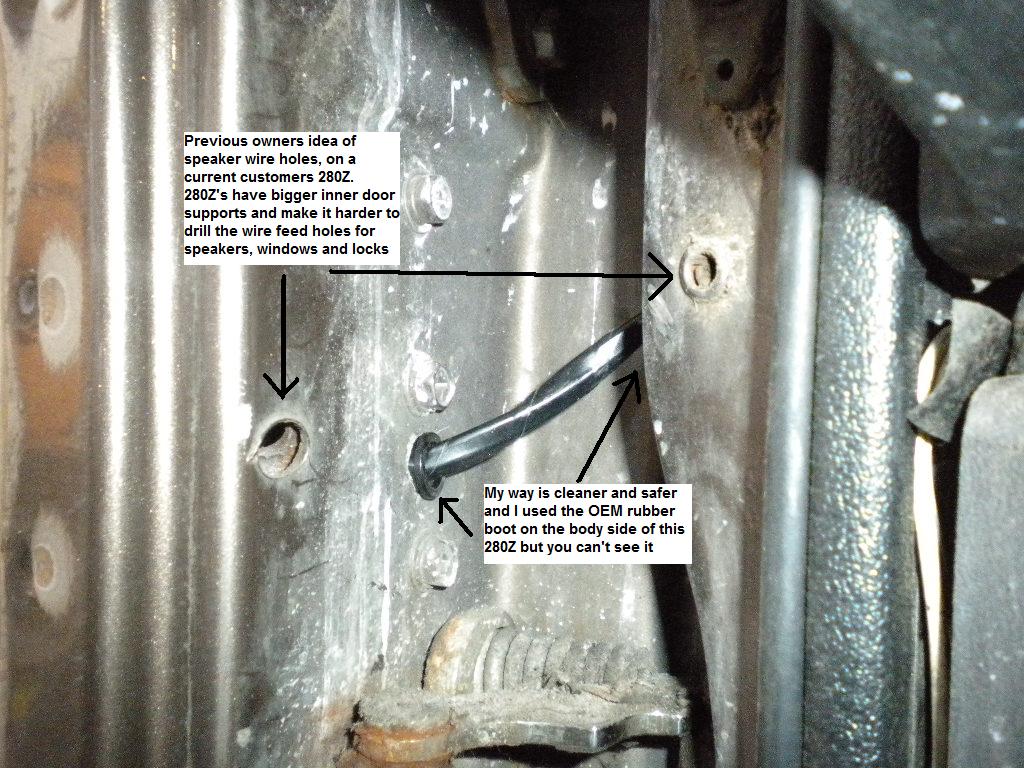
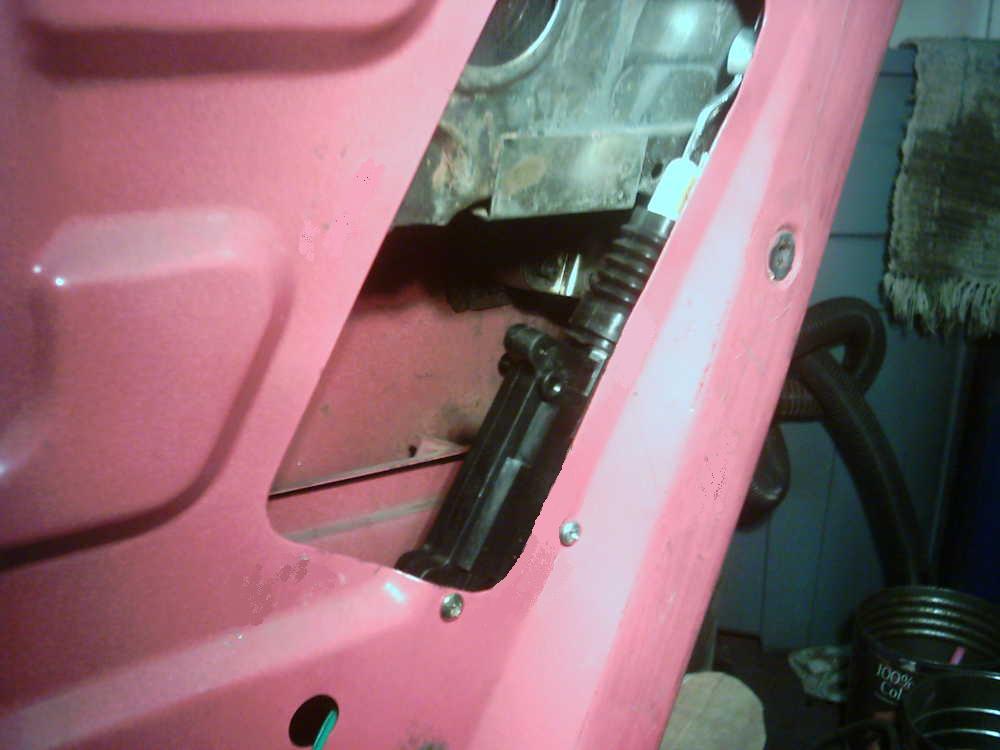
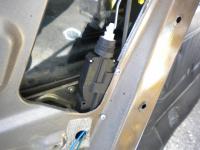
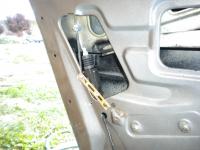
The drilling is the hardest part. I've done power door locks and power windows in over 20 Z's. You need a small drill to reach inside the door and drill from the inside out. 280Z's have an advantage of already having a small rubber grommet on the body, that will allow you to feed the wires into the car after the door is drilled and you instal a rubber or plastic grommet to protect the wires. Also, you'll likely find you have to grind a flat spot on your lock rod for the actuator's rod Clamp to attach to the lock rod. You can kinda see what I mean on the 2nd picture. Dave

-
My 260Z build (Brake upgrades and Mods)
Zs-ondabrain replied to Zs-ondabrain's topic in Wheels & Brakes
The LED's do take time. I have to make the plates, design and drill out the holes Just Right for an exact snug fit, sand down the face to remove the drill rash and glue on the Aluminum foil, cut the foil from each hole, load the LED's so the +/- poles are aligned for wiring correctly, bent cut and solder every LED, then wire them up for correct operation or design of that particular board. All this X 4, 2 turns and 2 stop/parking light. Cause I already had a brand new set of rotors for the 260Z and that made the non-vented rotor/caliper pair a pretty easy decision. go with what ya got. And the Vented rotor / caliper pair was more pricey. I'm on a budget and every dollar counts. Dave -
So I was right, Steve, you're correct as well but I can't remember the wire colors. but like I said, they plugged in wires, not knowing that they were intentionally unplugged. No big deal, you figured it out. I completely TORE OUT the interlock and rewired EVERYTHING. I'm in the middle of a complete ground up rebuild so I had that option available to me. Yours however, is a driver, mine is a spot on the garage floor. Dave
-
If they pulled the carpet, they probably thought that THEY unplugged the connections on the seat and the seatbelt. So they reconnected them for you, not knowing that this will cause the interlock to activate. Unplug the seatbelt connections and the drivers seat connection. This should allow the car to start. By the way, was the person starting the car "In the drivers seat" and was he buckled up with the seatbelt? If he wasn't buckled, and the connector is plugged in, it wouldn't start. Let us know what you find. Dave
-
Nope, just leave the R/T in, drop the crossmember with diff attached, unbolt the 2 nuts holding the diff to the mustache bar, slide the diff forward and out of the way of the bar and drop it down to do the bushings. Repeat steps in reverse for an easy instal. Done. Dave (if only it was as easy as typing.. )
-
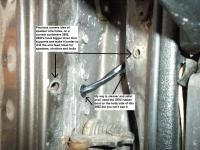
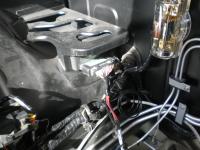
see if this makes sense.... The wire I'm pointing to is the black wire, NOT the white wire by the way.
-
NO!!! There is a MALE terminal on the same plate as the power wire on that solenoid. It is a small 1/4" tab that should have that black'ish wire attached to it. Connect power from the battery (Top pink circle) to the small 1/4" flat tab (terminal) I don't know what that green arrow is pointing at but it ain't the starter's activation terminal. Dave
-
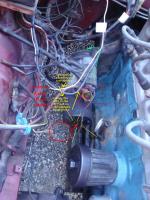
by the way, the 2 bullet connectors with sleeving on each wire, that are zip-tied to the battry cable.... Go to the Transmission. They are either reverse light wires or Nuetral safety switch wires for an automatic. You really need to figure out the rats nest you got there. You're just asking for trouble with all that hanging around. The Battery's Ground (neg) wire should have a large ring terminal and should be bolted to the starter's upper bolt, that holds the starter to the tranny. Or to the upper bolt that holds the tranny to the engine block. And also run a ground wire from the neg post clamp to the firewall. You got a lot of work ahead of you. But clean and seperate the mess before you even drive that car anymore. Please. Dave
-
touch a wire from the Top pink circle to the male terminal on the cylinoid. The starter engage wire is the small Black/yellow wire that plugs into the male tab on the starter cylinoid. That tab need juice from the battery's big bolt. When you connect the 2 pink circles, you're only running the starter motor, you're not engaging the cylinoid that moves the starter gear into the flywheel. Dave
-
My 260Z build (Brake upgrades and Mods)
Zs-ondabrain replied to Zs-ondabrain's topic in Wheels & Brakes
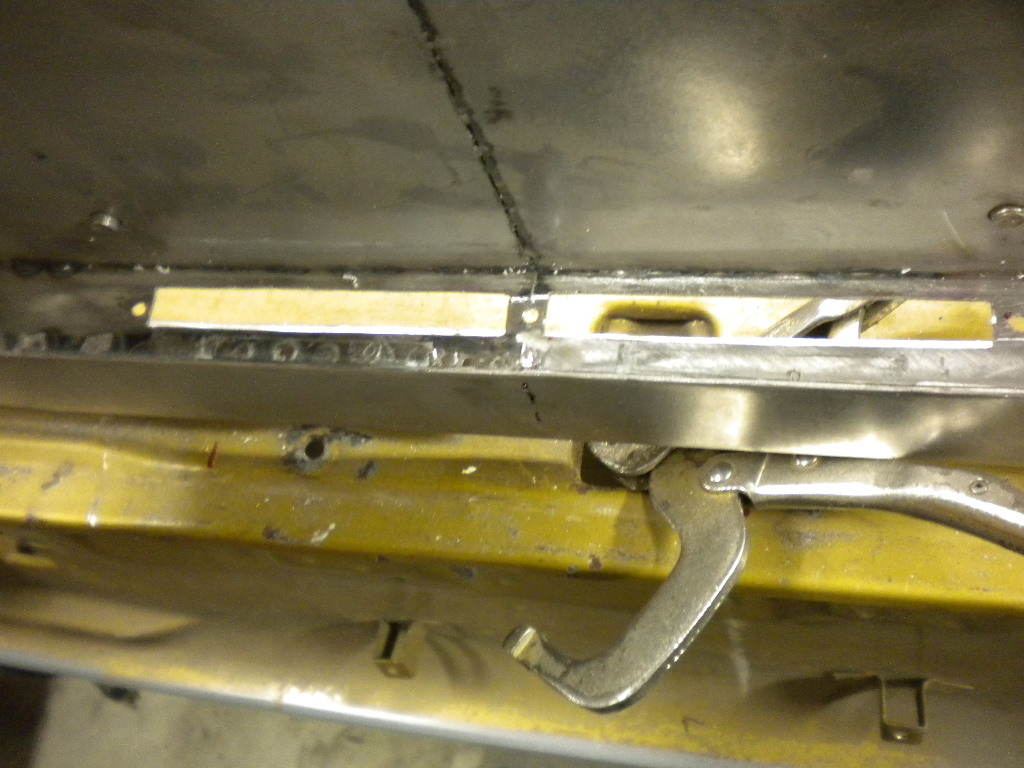
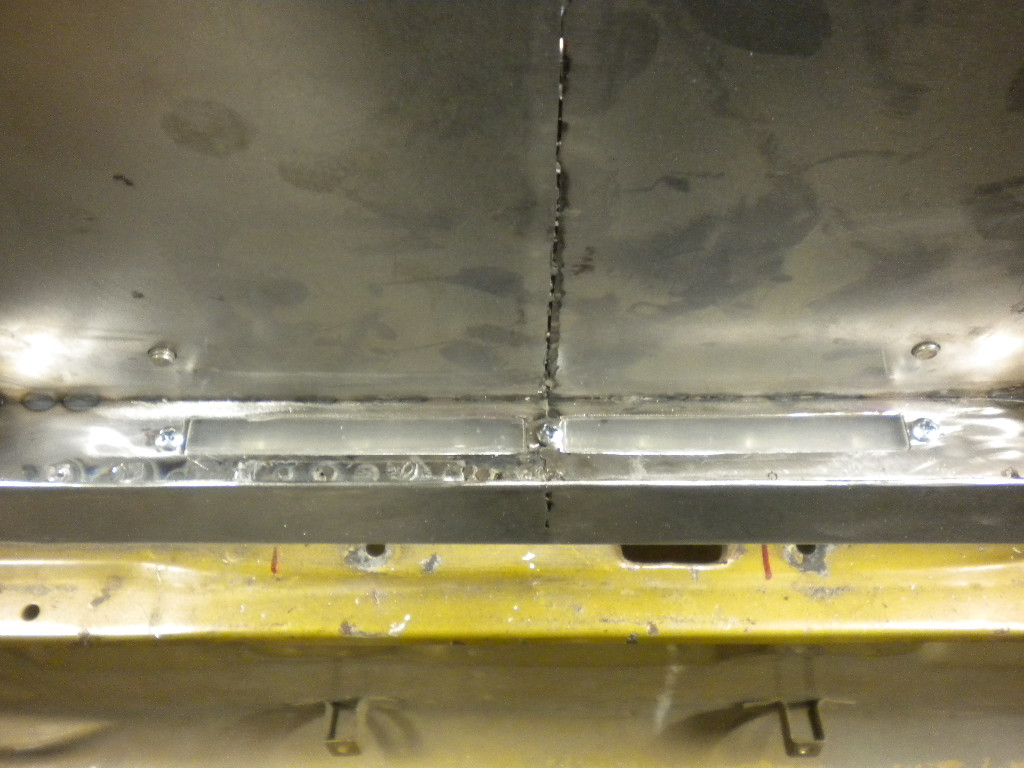
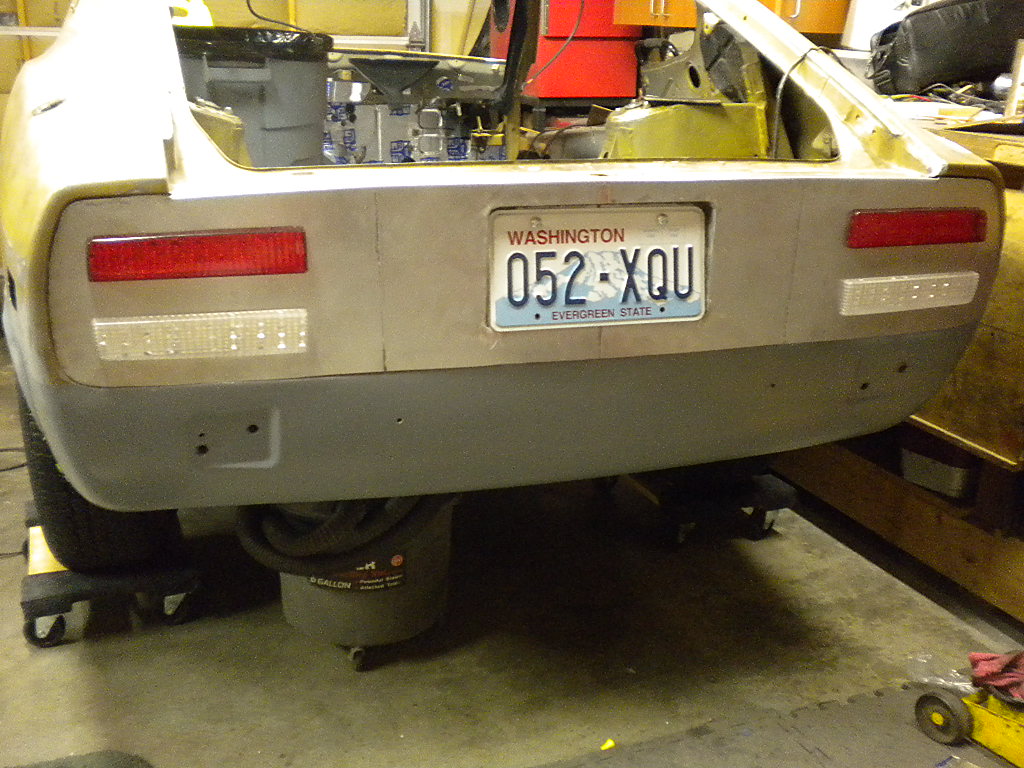
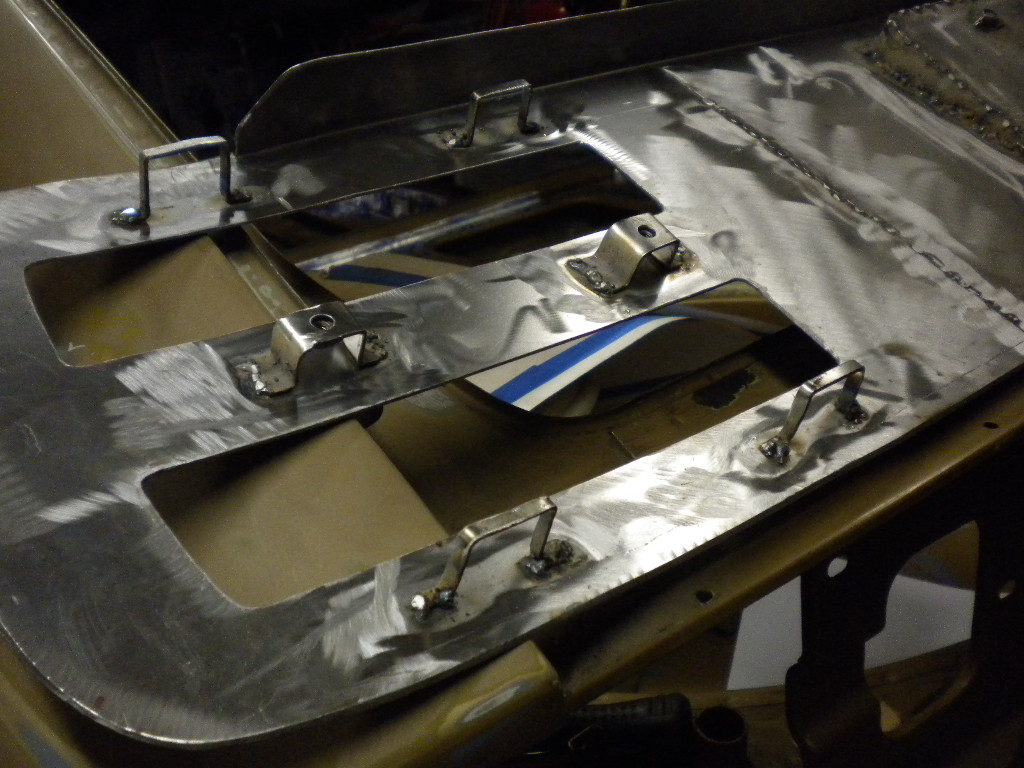
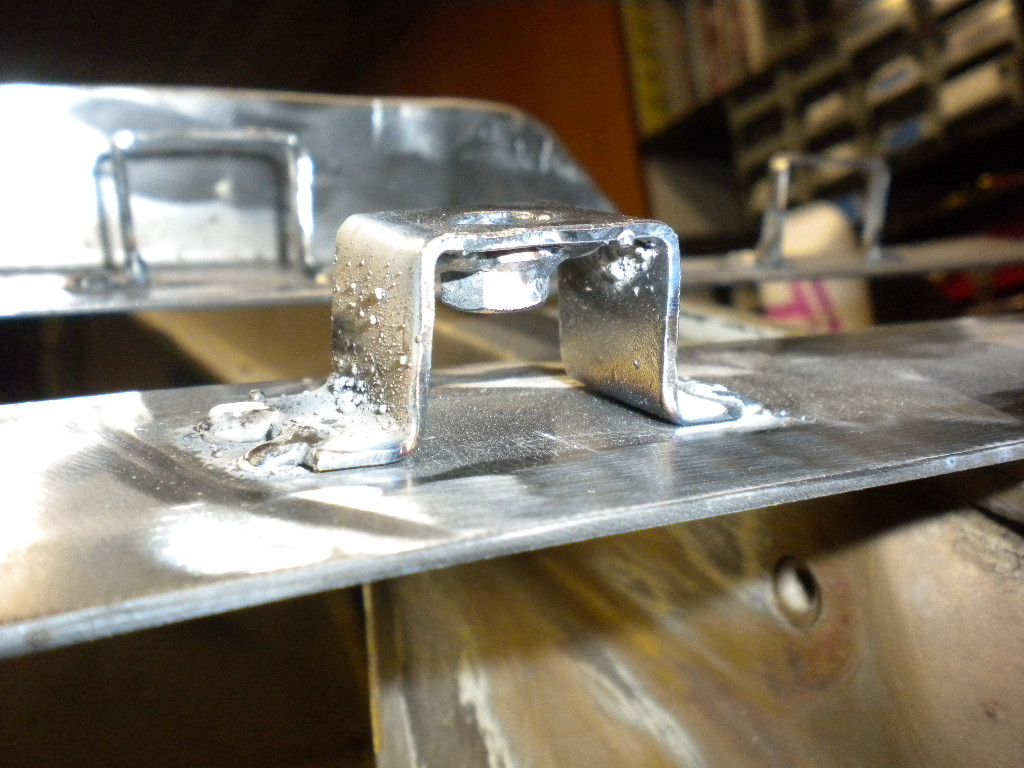
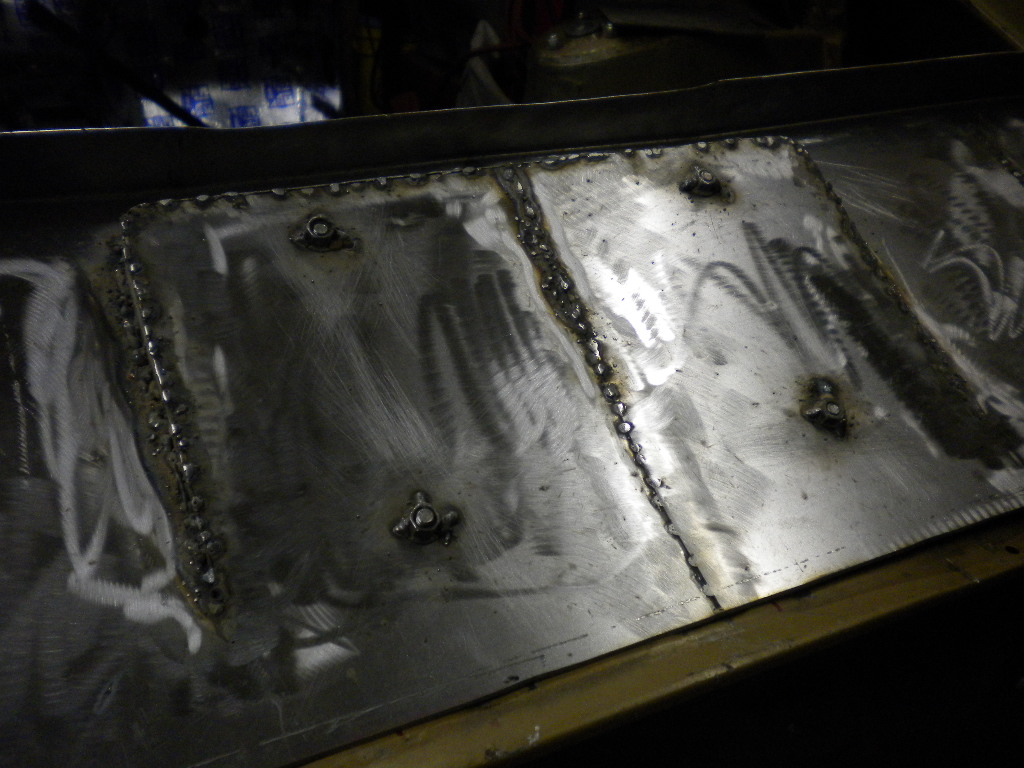
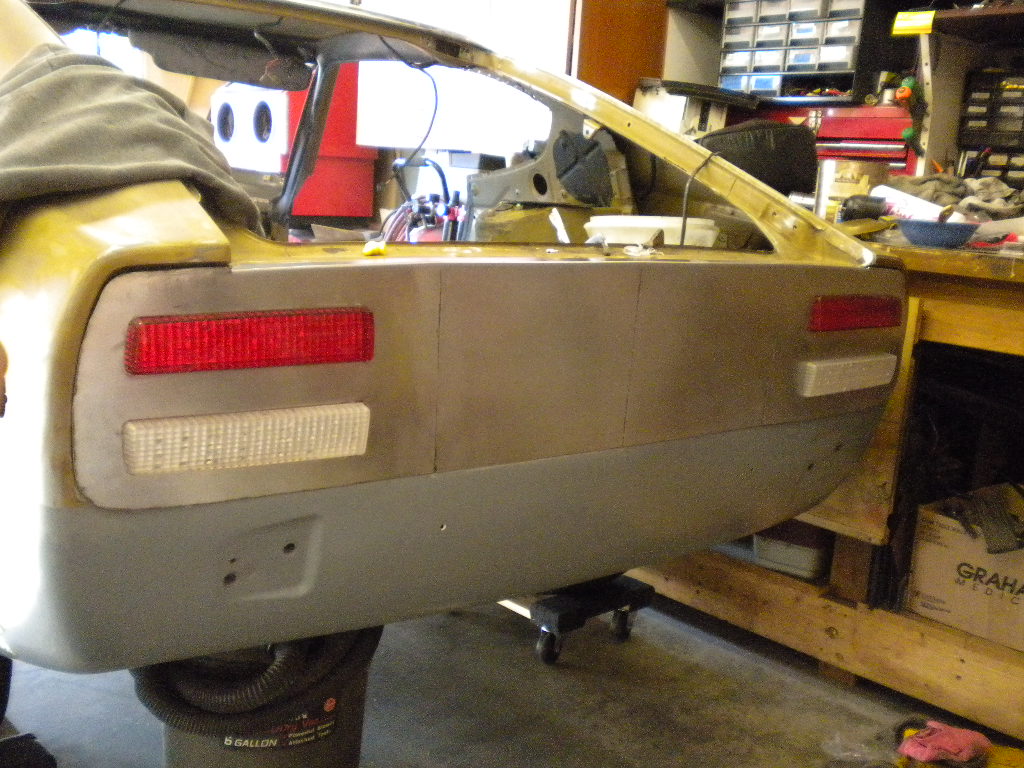
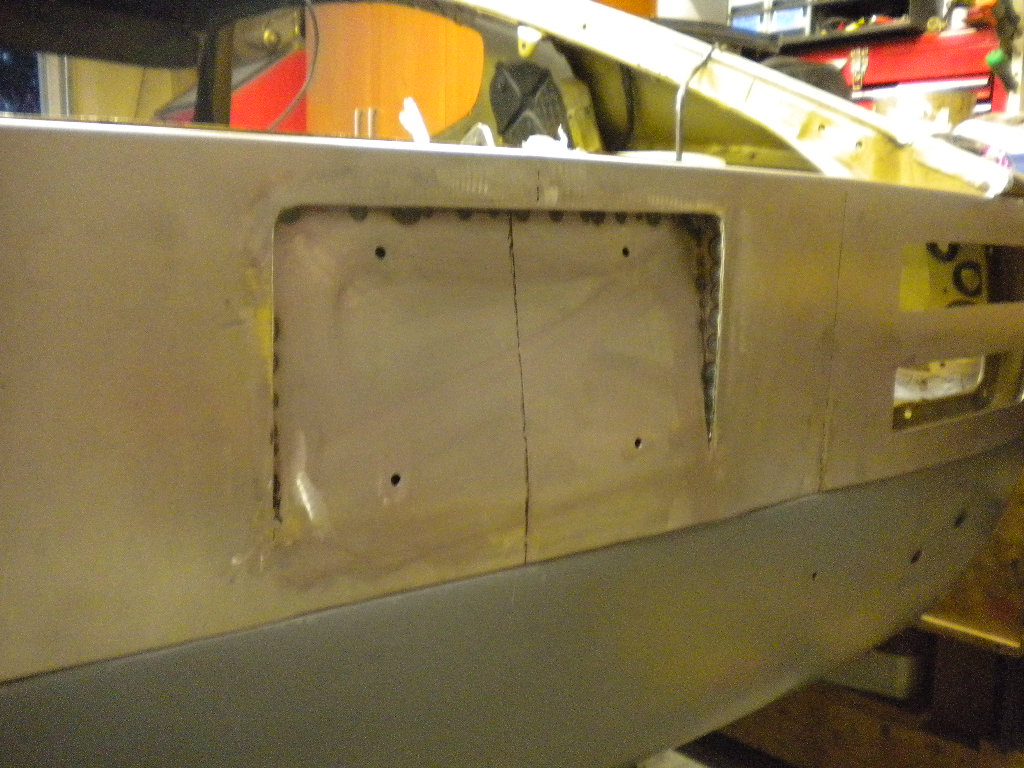
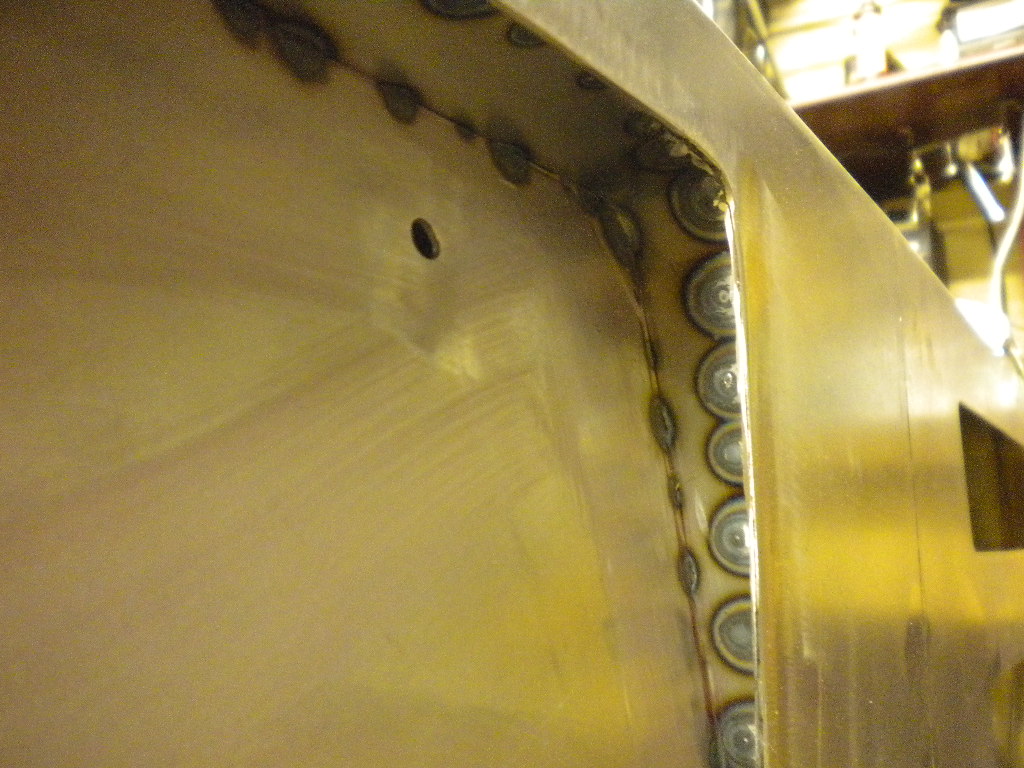
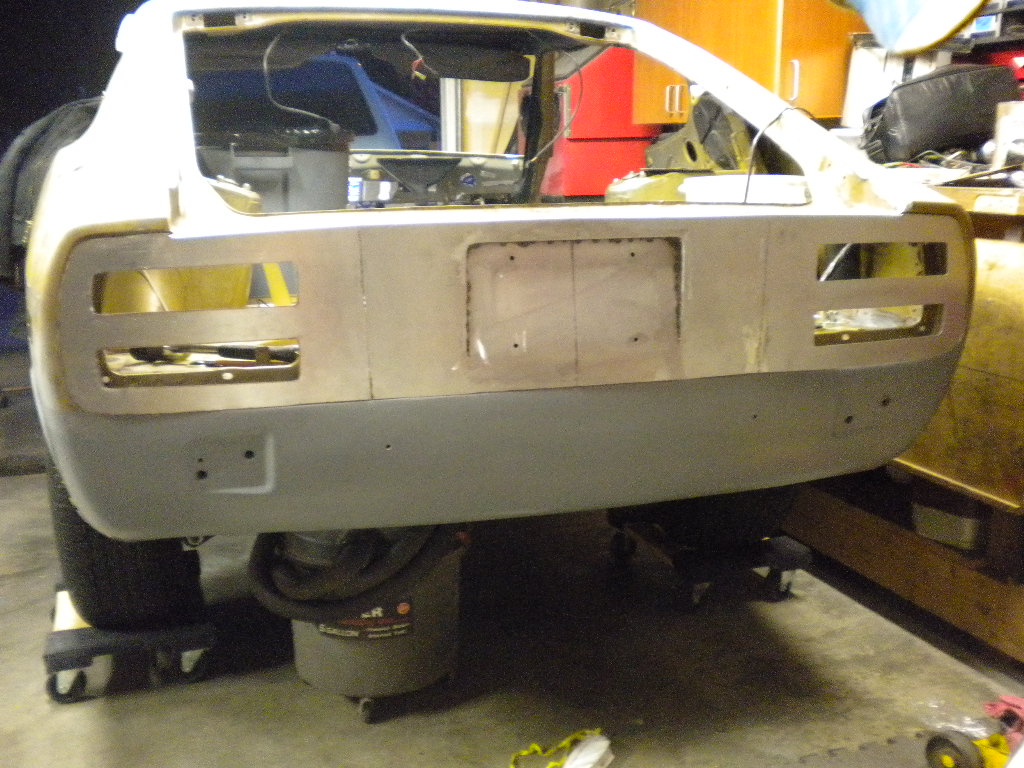
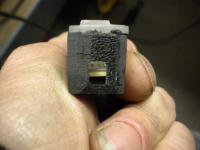
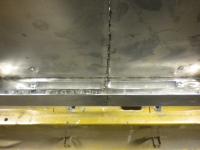
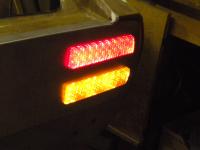
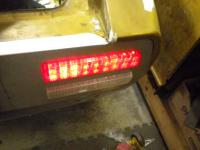
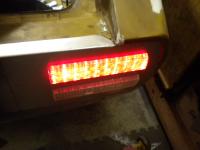
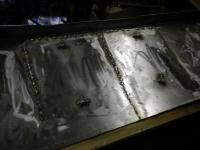
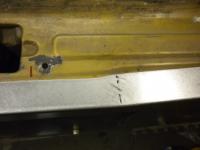
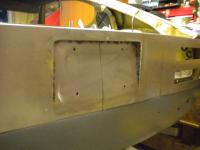
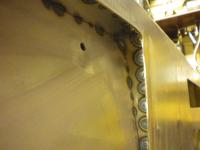
I felt the same after I saw it without the recess. I wanted to keep with a similar OEM look with the plate at a slight tilt and didn't stray from the stock lenses either. The Brake lights are actually the old turn signal lenses!! The old right side T/S is now the New left brake light (notice the lack of a reflector on either lens?? And on the plus side, the recess will allow me to do internal row of LED's and the frosty white lens will sit up under that lip, above the license plate, out of side until I turn on the parking lights. I also plan on the KlearZ clear front markers with Yellow LED's like the rears. Still finaggling the front bumper ("To be or Not to be"? That IS the question. Not in This lifetime. 1) The LED lens (96 Red LED's and 72 Yellow LED's, 36 resistors and 4 diodes) Took a while to make. 2) The Rear Plate is 18 gauge mild steel and a bitch to work with when all you have is cutting wheels, a 4" grinder, an air saw and a dremel with quick release cutting wheels and a POS Flux-core welder. 3) the rear of the Z's have a vertical droop and and inward slope. NOT an easy area to replicate under the currect tool conditions that I'm working with. I don't think I would do it for any less than $600 fully loaded cause this was a BIG pain in the butt. And I'm not even done with this one. I still gotta do the license plate light and the reverse light strip. AND figure out how to make all the lights servicable (removable and replacable) after it's all welded into place, glassed and painted. And I couldn't guarantee that each S30's rear section is the same, mm by mm (millimeter) But thanks for thinking its worthy of Reproduction And here's what I did today. You can see the holding brackets for the lenses, welded in nuts for the license plate bolts and welded nut brackets for the lens holding plates. Still much to do. Dave


-
My 260Z build (Brake upgrades and Mods)
Zs-ondabrain replied to Zs-ondabrain's topic in Wheels & Brakes
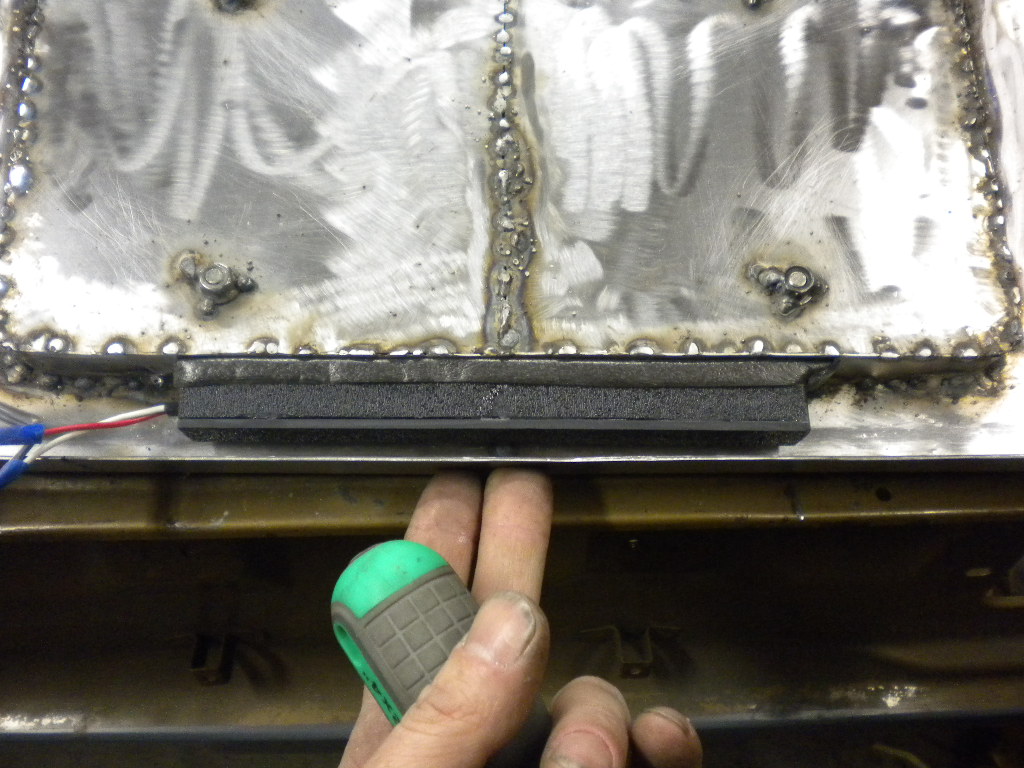
did a little more yesterday and I'm heading back out to finish the license plate recess. Dave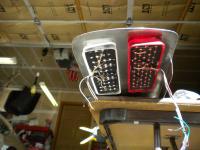


-
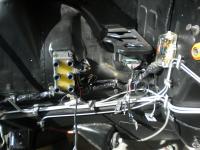
I've bolted the coilpack and the EDIS-6 to the body, made a small harness attaching the 2 together, and now I have to buy the 36-1 ring to weld to the crank pulley so I can mount the VR to the block for pickup, then run the sheilded cables and make it ready for the MJLJ-V4. Dave
-
The 44-PW22 also has a full Black replacement Mast for under $20. If you get bored enough, you can swap the chrome for black, every other week-end, just to mess with people.... http://www.amazon.com/Metra-Replacement-Replaces-aftermarket-motorized/dp/B0002IED62/ref=sr_1_1?s=automotive&ie=UTF8&qid=1266945292&sr=1-1
-
Metra 44-PW22 is a great replacement for the stock antenna. And on the plus side, it's fully automatic and sits lower on the car. Amazon has them as low as $38

-
I already PM's a responce but here it is again...... When I installed The R/T into the 70' 240Z, the 74' 260Z and Z_Tyler_Z's 76' 280Z, all I did was drop the 4 bolts on the front diff crossmember, Loosen the 2 large nuts on the Mustache bar (so the diff could drop down more) remove the 4 bolts on the Strap and remove that, The slid the R/T into place. Took a little bumping here and there to get the bolt holes lined up and bolted it in. Then I installed a bump stop in the 240Z and the GM Poly Mount into the 260Z and Tylers 280Z. Takes a little finagling but you'll get it. Dave
-
 It's Beautiful, great job!!
 -
Been covered, a lot, in the last few months. Great upgrade and praised by many. I made a run of 50 and they sold pretty damn fast. Mine has a notch in the corner for the fuel lines and Roostmonkey's didn't, only real difference. http://www.classiczcars.com/forums/showthread.php?t=36463 And here..... http://www.classiczcars.com/forums/showthread.php?t=35995
-
My 260Z build (Brake upgrades and Mods)
Zs-ondabrain replied to Zs-ondabrain's topic in Wheels & Brakes
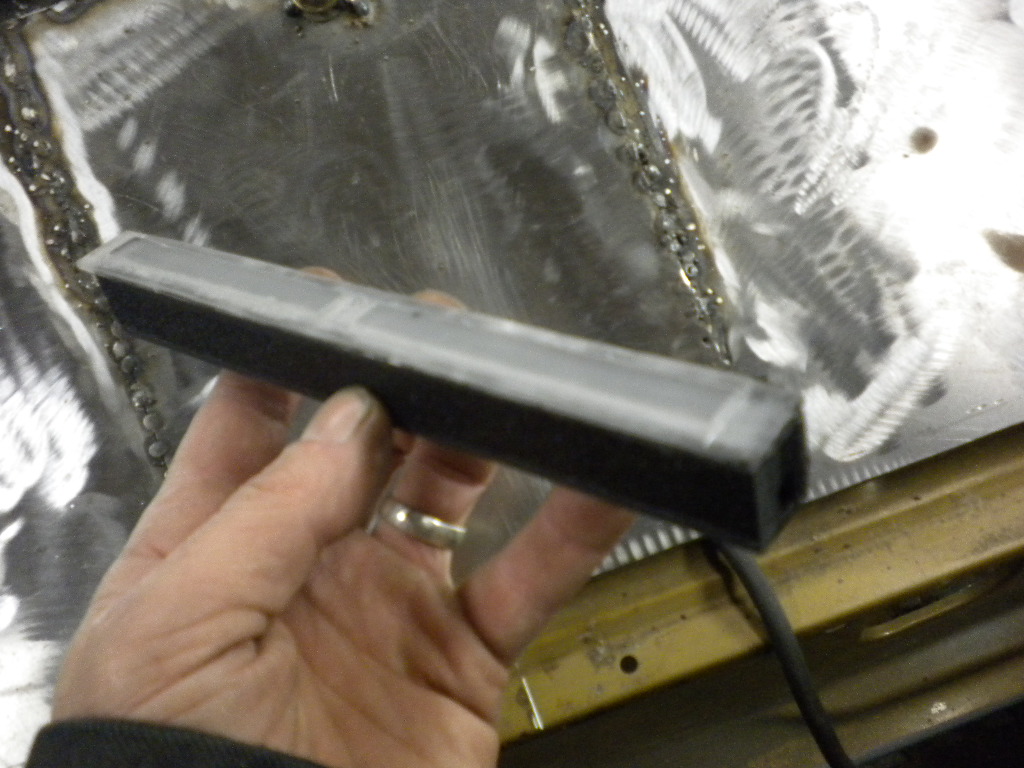
So I got one side done today, had to help the neighbor get his Subs working again (Crazy azz audio system w/ about 5000 watts) anyways, now I gotta figure out a gasket and mounting for the assemblies. Hell of a lot of filing and figuring for 4 small lenses. Dave -
Check with Roostmonkey on Hybriz. Mine sold pretty fast. Dave
-
You can repair the metal tabs with this.... http://www.autobarn.net/per21351.html or even better.......... http://www.amazon.com/Permatex-15067-Window-Defogger-Repair/dp/B000HBI9YQ/ref=sr_1_1?ie=UTF8&s=automotive&qid=1266775398&sr=8-1 It might be time for a new rear window seal. But you can also have your local glass company seal it up for a small fee. They would likely remove the window, clean the channel and the hatch lip, load the channels with a small amount of glass sealer and reinstal. Dave