Everything posted by Zs-ondabrain
-
One step improvements
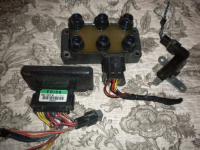
I found out that they are right down the road from me and wrote them. They responded with the old "Let's do Lunch" and I'm gonna see what they can do for me. I paid about $35 for all that was pictured. Wiring should be easy enough (for me) but now I have to decide whether I want to put the Coil pack on the firewall or across from the block, on the right strut tower area. The EDIS 6 is small enought to almost slip up under the fender area in front of the battery. Or even next to the coil pack. And for $161 + the $35 I already spend and the wiring and plug wires, I should be looking at a complete system (MegaJolt, coil pack, pick-up, EDIS6, wiring and plug wires) for under $220. I just need to get the 36/1 ring for the pick-up, weld it on the crank pully and make a custom bracket for the pick-up. Then I'll take it to they guys in Lynnwood and have them fine tune the system, etc, etc, get my window sticker and be on my way. Dave
-
One step improvements
Gread idea. I've been looking into the Ford V6 Coil-pack, EDIS6, MegaJolt ignition system from http://www.autosportlabs.com/ Less HP drop from the stock Dizzy, programmable Everything, works on FI and carb systems, etc, etc. This will go on the 260Z. Dave Here's what I have so far....
-
3rd brake light options?
Same angle. I was thinking about making a few for $65 each. It'll come with double stick tape pre-applied, Enough wire to easily tuck into the panels, all the way down to the left brake light, 2 T-Taps for the brake and ground wire, and bullet connectors up near the light. All you'll have to do is lay on your back, with your feet sticking out the hatch, line up the light to center and against the rubber seal, hold it there while you pull the tapes backing off and press into place. Then run the power wire to the left taillight and make the connections to the green wire on one of the top 2 bulbs and the black ground wire. Done. if you're interested, email me and let me know. And of coarse, shipping is included in the price. Dave
-
It lives!!!!!!!!!!!!!
Great, now you can drive it to Marysville and come visit us backwood folks... You're welcome anytime, just email me first. Dave
-
3rd brake light options?
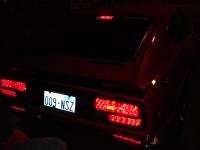
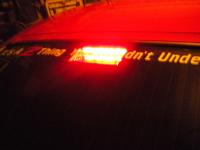
So I finished my 3rd brake light and installed it today. Bright enought to easily be seen thru my 20% tint, Correct angle and works like a charm. Dave
-
Clear front lenses Now available at KlearZ
This is what I did with the KLEARZ 260Z rear turn signal lenses, and plan to do the same for the fronts. I think having the sequencials in the front and rear should be a real head turner / crowd pleaser / safety item. http://video.cardomain.com/VideoPlayer.aspx?id=703536 I'll be getting the sequencers from tcpglobal.com
-
280z Running Rough
Come on guys, we need a little help on this one, BLAKE!!! hint hint He's gonna bring the car over on Saturday and we're gonna work together to try and figure this out. ANY TIPS from you FI guys would be great. I'm a carb guy and the best I can do is swap out his FI connectors for better ones, de-oxit the connectors and terminals, and listen for air leaks. Anyone? Please! Dave
-
Clear front lenses Now available at KlearZ
I stand corrected. But the more important part of the message was about the reproduction 240Z rear lenses.
-
Clear front lenses Now available at KlearZ
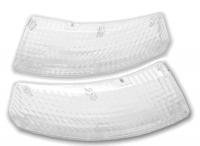
I guess I shouldn't say NOW AVAILABLE, as they are not up on the site yet, but.... So I got an Email from Jason at KlearZ today, stating that he is NOW making the Clear front marker/turn signal lenes for the 240Z's and early 260Z's. He said this....... "It took awhile but I finally got some 240z lenses into production. I have the front turn signals available in clear, smoke, red, amber etc. They are $90 a set plus shipping. If these sell well, I may consider doing the tails at a later time. If you wouldn't mind passing the word, I would appreciate it. If you have any questions, just let me know. I've attached a pic of the first set of turns I made. " So he says $90 a set, but I'm gonna hit him up on a possible group buy, and see what he says. They are NOT up on the site yet but that's a "Soon" item. And these will be AWESOME for my Yellow or Amber LED Conversions. I'm getting a set for the 260Z project. Dave.
-
3rd brake light options?
I'm working on an LED version as we speak. it's a double row of 5mm superbrite Red LED's 20 per row for a total of 40 LED's. It'll be at the proper angle and slide under the upper rubber lip of the inside of the hatch glass. It'll be an easy instal for later 240Z's with seperate brake and turn signals. But the earlier 240Z's, with brake and turn signals on the same wire will reguire a diode on each light, then into the 3rd brake light wire. Dave
-
Power wire getting hot just before fuse block, HELP
Just remember, My headlight upgrade harness is only $125 and will plug right into your 72'. It will also reduce the amperage required by the fusebox, and is likely causing some of your overheating wire issues. Dave
-
Retro Sound Install
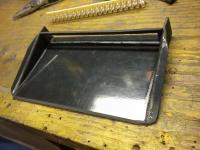
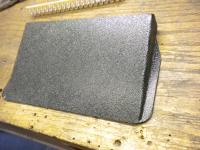
I still got plenty of that textured ABS if you need it Arne. Or who ever. Dave
-
Power wire getting hot just before fuse block, HELP
I would start with securing a much better connection. Heat is caused from resistance, resistance is caused from bad connections. If it's only warm only near the connection, then there lies the problem. Buy some De-Oxit and clean all the connections or replace the connector. You can also replace the wire if you feel it neccesary but make sure to follow the wire precisely before doing so. Some of those power wires are tied in with others, inside the harness. Use the same or slightly larger gauge wire. Dave
-
70,000 miles!
WOW Arne, add another 110,000 to that number and ya might almost catch up with my 70' Dave
-
260Z Roof Skin Graft (Thanks Arne)
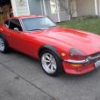
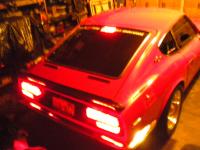
My 240Z is actually not Orange. But depending on the light, I can see where you might make the mistake. Anyways, It's a Modified "Chrystler Industrial Red" used on engine blocks back in the 70's, I believe. I took a paint sample (Dupli-Color, "DE 1632 Chrysler Industrial Red" Spray can sprayed on a piece of metal) to a paint shop in Everett, WA and told him I wanted "This color but brighter" He said "I can do that" So $100 later, I had a Half gallon of Brighter Orang'ish Red paint. But when I paint the 260Z, it'll be Racing Orange from KustomShop. ( http://www.tcpglobal.com/kustomshop/kspsb8604.aspx ) Hope that helps, Dave
-
What do you think about a print version "Tips, Tricks, and Mods" guide?
One thing I do is ....... Left click and drag over all the script and pics you want to print, Highlighting them. Then Right click on the highlighted area. then click on "Print Preview" When the screen comes up, click on the "As laid out on Screen" and change it to "As selected on screen" It should show Only what you highlighted. Then Print it out. I did this to make full pages of info for the "How To" on bypassing my Interlock system in the 260Z. FWIW Dave
-
72 240z turn signal stoped workining
Just unflatten it and remove the pin, then the handle comes right out. When you pull it out, there will be a brass looking, spring loaded bullet. Remove the spring and bullet before painting, then regrease with some sil-glide (silicone grease) and grease the tip as well, after painting. I use good old fashioned rubbing alcohol to clean the rubber handle. Stick a larger (#2) phillips screwdriver in the end and rub or twist it in an alcohol moistened rag. Then buff it out on a dry towel. Dave
-
72 240z turn signal stoped workining
There are 2 styles of hold pins, that hold the arm to the slide bracket. One is a split pin, that can be pounded out and replaced when done painting. The other is a Pinched end pin, That needs to be squeezed round. I use a pair on Needlenose and put the pin all the way to the neck and slowly squeeze it till it's round enough to be pounded out. Then when your ready to reassemble, pound it back in and use a punch to flatten it again. Dave
-
New interior light door switch not working
One is the dome light and the other 2 are for the interlock/buzzer operation. Found that out on my 260Z as I am replacing both switches with aftermarker ones. And I also completely removed the interlock, therefore bypassing the 2 wires. Dave
-
aluminum radiator question
The Z's heads ARE affected, some more than others. Bad grounds are a major cause of this. My E31 went to crap because the PO had bad wiring. After replacing the head, I made a custom ground wire kit and stopped the problem. If you ever tear off the water inlet from the head, look inside the head and you'll likely see deteriation due to electrolisis. I had to replace the front cover as well, after I sprung a leak from the backside of the cover. It was spraying a steady stream of coolant into the oil pan, I thought I had a bad head gasket. Replaced the head and the head gasket, only to find the problem was still there. It was the front cover. Dave
-
R-T diff mount Group Buy
Now you're making me wanna instal my second one into the 240Z. The 260Z won't see pavement for another few months.
-
engine dies when i pull out dipstick
Better question, Why would you pull the dipstick WHILE the engine is runnig?? You can't get a proper measurement unless the engine has sat, not running, for at least 5 minutes. Or am I confused? Dave
-
240Z sidemarker to turnsignal conversions available
No Problem, glad you're happy with it. That reminds me, I gotta redo the relays on my SCP set-up. Relays because I have LED sidemarkers. Happy driving, Dave
-
Wire size???
Save the links to your FAVORITES list on your computer. Also Save the diagrams and stuff or just print them out for use in the garage or where ever you do your best work Dave
-
Wire size???
Also, Check with http://www.crc2onlinecatalog.com/Index_Main_Frame.htm for terminals and connectors. If you call, ask for Teresa, she's great to work with but have your part numbers, quantity, and prices handy. It's helps her do her job better and will speed up the process. I also use http://vintageconnections.com/mail_order_form.htm They are great for the 3, 6, and 9 pin connectors under the steering column cover. Dave


