Zs-ondabrain
Free Member
-
Joined
-
Last visited
Everything posted by Zs-ondabrain
-
 YEAH!!! Good to hear you figured it out. You'll find that alot of diagnostics on the Z's is like shooting in the dark. Every once in a while, you hit the mark. Dave
 -
I tore into a 7/70' engine harness a while back and measured every wire, and noted the length, color, guage, type of terminal (Male/Female/ring/bullet etc) and what type of connector (plastic) that it goes into and it's location on said plug. It's written in a form that I can understand so here's a few clues.. LM6P is a Large Male 4 pin plastic connector which has male terminals FQD is a Female Quick Disconnect (opposite of a Male terminal) FB is a Female Bullet (open socket for a male bullet shaped terminal) MB is a Male Bullet (this and above are used on sidemarkers, condensors etc) You get the idea. Use it for wire gauges, lengths, whatever you want. Good luck, Dave 7 of 70 engine harness wiring.doc plugs for harness (Small).bmp
-
The Parking light circuit, that the PLH helps, consists of the front markers, all 4 sidemarkers, dash lights and the taillights. Basically, Everything that normally comes on with the first click of the combo switch. So that explains the dash, tail and front lights. Disconnect the combo switch and reinsert the fuse. If it blows, then the problem is between the fusebox and the connector for the combo switch. Short line and easily traced. If the fuse does not blow, then the problem is obviously elsewhere. Disconnect the Front markers (3-wire connector in front of the radiator) and try the fuse again, with the combo switch plugged in. If the fuse does not blow (with the combo switch plugged in and the front markers unplugged) the problem is now narrowed down to the front markers. Start checking for grounded wires, bad bulbs or sockets. or maybe a inproperly installed SCP. Try those few things and report back. Dave
-
Everything on this project is "On a budget" So when I considered Bonding agent VS Good Ol' fashioned welding, the choice was easy. Welder was in the shop, wallet was empty, no real dispute there. I also looked at "Metal Fill"?? or "All Metal"?? an aluminum based filler (bondo) for filling the cracks and such but it was $30 a quart or $100 a gallon, so that was a No Go. And the Dura Glass was also expensive. So I'm gonna mix up some polyester resin with a bunch of cut up fiberglass in the mix, to fill the cracks, Versus doing Lead Work. I'm also gonna do the same thing for the Shaved door handles on the doors. I cut out the door handle area's and welded in some formed steel plates, and will fill the low spots with the resin/glass mix. I WON'T use bondo on the doors and roof corners. Too much risk of cracking, shrinking etc. KEN, Thanks again for the roof. I myself, am a registered Donor so I totally hear ya. I've bared witness to your Doctoral skills of getting the right parts to the people in need. Too bad Real Doctors don't work that way. I'm gonna do some more work on the roof and hatch today so I should be able to report back tonight. Dave
-
If you do that, your Torsion bar will not bolt up correctly and your strut will at an offset angle. Don't do it, plain and simple. Dave
-
And I love that about your systems. The ability to UPGRADE is one of your key selling points. My car is kinda the same way.... Classic car but Upgraded with Power everything, stereo, lights, suspension, wheels, etc etc. Still looks like a classic but Retro-Fitted with all the goodies, just like your stereos. Dave
-
I hear ya there. But I'll wait on the Home Stereo Build for when the kids move out. They like to blast the current Home audio system and try and blow my Home speakers up. So I keep the big stereo system under lock and key in the Z. Don't get me wrong, I love the Original look. Just not in my personal Z's. Either way, it's gotta have Music. Dave
-
Actually, they are 2-wire systems, but that is the problem. If you want true stereo sound, you'll need to run an additional set of wires to the rear for a second speaker on the right side of the rear. Sorry for cutting it but your statement was a little confusing. The Retro Sound Units are great for those hard to find and fill radio holes in classics of days gone by. I myself am a Full Stereo System kinda guy (800 watts 2) subs and 6) speakers in my 240Z) But these are great for the guys looking to keep that Original look of a 2 knob radio. Dave
-
Ya, so far........ Got a little ways to go, finish the welds and gringing, fill the cracks and prime it. I'm almost thinking I should have put the headliner on while the roof was off the car. But then again, I'd like to do the Dynamat on the metal first. Thanks again for the inspiration. I almost hurt myself, patting my own back yesterday. Dave
-
-
Oh, by the way, it HAS been done to a 240Z, a few times. http://forums.hybridz.org/showthread.php?t=132837 Dave
-
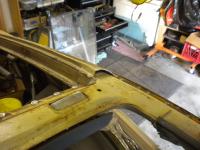
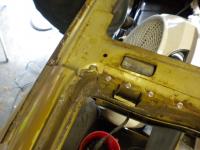
Jon, Took a couple extra for ya. They're at the bottom. So I got back out there today and ground down the spot welds, cleaned all the rust and sprayed the exposed metal with weldable primer. Then I fitted the skin to the shell and aligned the front window area first, clamped it down then moved along the sides, which I might add, dropped right inplace. I only had to shave 1/8" off the rear of the panel and they corners dropped in place. More to come after I grind the welds, smooth it out and primer it. Dave

-
Jack, Your R/T mount will go out first thing in the morning. Thanks for your Order.
-
only weighs 1900 pounds. He lost like 600 pounds when he swapped out the batteries for Lithium cells. 11.5 in the quarter mile.
-
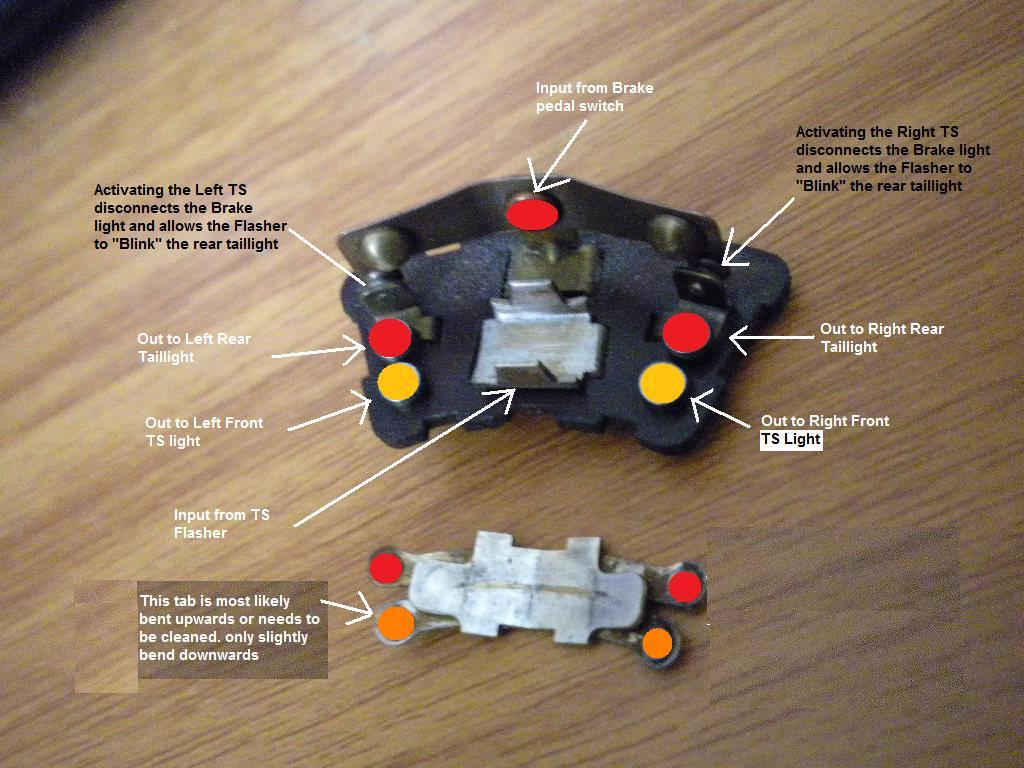
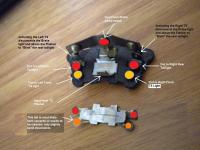
The front turn signals and dash signal lights are connected together, where as the rear turn signals are also brake lights. If they weren't seperated like they are, the dash lights would come on every time you hit the brakes. Now on to the problem.... You've made so many left turns that you've bent the front left tab inside the switch. If you'd like to take it apart and fix it, use the diagram below to help guide you as to which one is bent. Give it a slight downward bend towards the contact. NOT TOO FAR or the turn signal will stay on all the time. While it's apart, use a very small dab of di-electric grease on the ball bearing's slide area, after you clean the old crap off. Then use some more dielectric grease to hold the ball bearing to the spring while you re-assemble the switch. ONLY bend the small outer tabs out a little to dissasemble the switch, so they don't break off. Dave
-
GreenZZZ, Yup, but it helps to be a Surgeon on the side. Ken, I'll keep that in mind when I do the fill work. Thanks. I should be able to get some work done today, after the shopping and other (Honey Do) things are over with. I'm gonna try and get the grinding done and spray the weldable primer. After that's dry, I'll start aligning everything and notch the new skin to line up just right. I'll be back, Dave
-
-
-
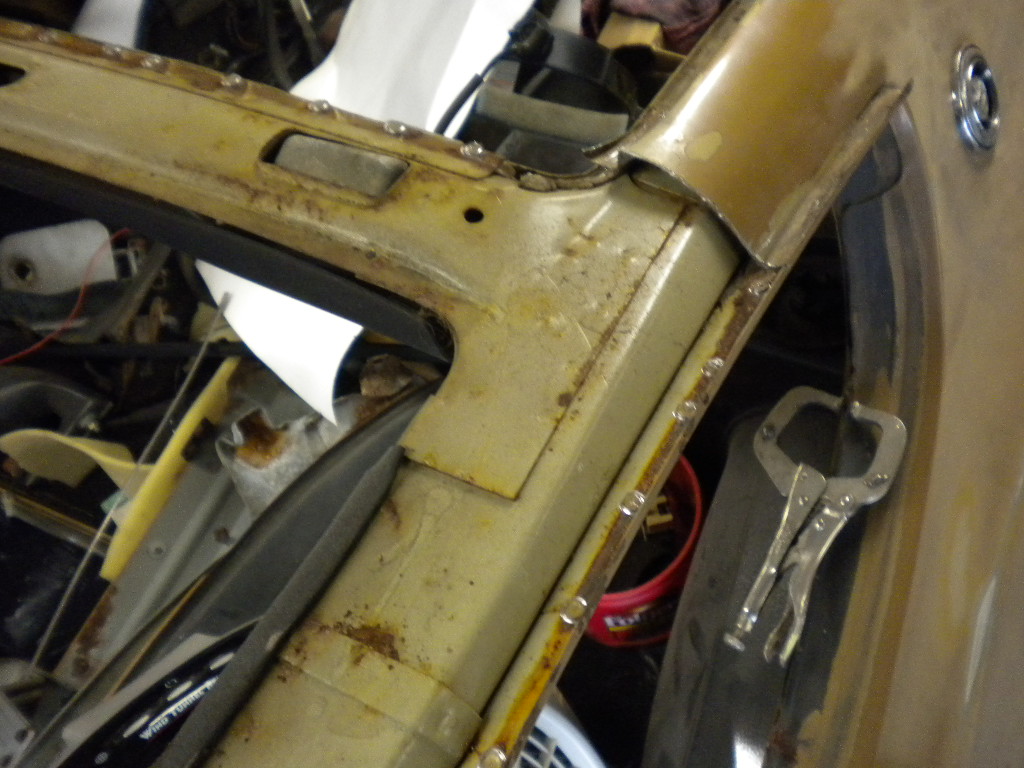
So after receiving my 260Z from the P.O.S. I mean P.O. I found that the roof had been walked on by his neighbor kids. And besides the dents that I did'nt feel confident about fixing myself, it also had it's own fare share of rust, on both sides. So as the title says, Thanks Arne. As his thread on his reroof (skin graft) has given me the confidence to do my own Z in the same manner. And thanks to Ken in Port Orchard (NWZFAN) for the Donor roof from another 260Z. So now that Christmas is over, I decided it was time to get back to work. I bought a panel stand at Harbor Freight Tools for for a mere $15 and I'm loving it. I drilled all the way thru each spot weld on the donor roof and peeled the skin away like Anthony Hopkins in a horror flick. Then I flipped it over and cleaned the adhesive off. Pounded the edges true and set it aside to be primered before welding it to the 260Z. Then I started in on the 260Z. Except this time I used a spot weld cutting bit. Drilled a couple spots out then used a heavy gauge scraper to seperate the metals and keep tension on the welds, so they would "Pop up" as soon as the weld cutter cleared the first skin. This kept me from accidentally cutting thru both sheets. (I learned the hard way on the first spot weld) I'll add more to this thread as soon as I grind the spot welds clean, spray weldable primer on those and clean up the surface rust. Just need to figure out if I'm gonna re-Lead or fill the rear seams with fiberglass. Seams like FG would be the better way to go. I got time, we'll see.
-
What? No mention of all the work I'll likely be doing on your 280Z, Tyler? Like power windows, headlight upgrade, etc, etc.? Just shovelin the crap T. you should be used to that by now. Dave
-
The hazard should be on your center console, below the radio. Start by disconnecting the brake light and test everything without the brake wires connected. That will tell you if the brakes are the real problem. Then follow the brake wires, looking for any shorts or crossed wires along the way. Also inspect the hazard switch (when you find it) for shorts, bad smells or obvious signs of damage.
-
For the 70'.... clean her up and continue to use her for a daily driver when it's decent outside. Maybe a set of new retractable seat belts, as Leah isn't as enthused about the 4 point harness's as she first let on. Maybe a new set of carpets for the front. For the 74'.... Reskin the roof (thanks Arne) Finish the body work and get her painted Dual fan set-up on the new aluminum radiator, new custom grill and bumper set-up with full LED compliment around the car. Start on the custom interior (install the new carpet, find some new'ish seats, purchase and instal the double din Pioneer DVD/NAV touch-screen deck, 6 speakers in custom made pods and panels, dual 12" Low-profile subs, 1000 watts from 2 amps, etc, etc. Tires and wheels (Rota RB 17x8's and 17x9's with 245/45's and 265/45's with my ZG Flares. Finish the doors and other electronic do-dads (Electric windows, door pops (shaved door handles) Hatch pop, full alarm with Maxima Push start, Auto-Meter Ultra lite guages *full cluster* Anybody got $8K to get me started on the right track? Dave
-
E, I don't think he has a sense of humor. I've read a few of his posts that seem to be insulting of drab. There's always one out there. Dave
-
Well, I've tried repeatedly to reach ConchZ, Tarmac and Powerglide, to NO avail. So I have 2 R/T mounts available to any and all who thought they missed out. Their loss is your gain. Contact me at wolfin32z@yahoo.com or see page #1 of this thread for ordering info. Once again, I HAVE 2 AVAILABLE AS OF 12/29/09 Dave.
-
And I would have explained that, had you inquired about anything LED, dealing with turn signals. Thanks for being on top of that Curtis. My brain slips every so often when doing write-ups. Dave