Zs-ondabrain
Free Member
-
Joined
-
Last visited
Everything posted by Zs-ondabrain
-
 That's totally Cheating, But I like the way you think... I got 5 kids here, think I can get them to show the "Circled Items" to grandma?
 -
With it jacked up, put the wheel back on and try the side to side movement. This will tell you if the bearing are also going out. Your splines that lock the hub to the axle sound worn. You can try and tighten the nut more and see if that helps but once they are worn, that's about it, time to replace. This usually happens from a long period of the hub being loose against the axle shaft. When people put these back together, they don't always put the required 150 or 200 Foot pounds of torque on the nut. This results in worn parts and your now needed replacement parts. Ask around for a good hub and see if the newer hub is tight or if you also need to replace the stub axle as well. No time like the present to replace or repack your wheel bearings. Good luck, Dave
-
That's Crazy talk. I can't imagine a Woman of your brains and Beauty not being wanted around here. I know some of us can get out of hand with dumb comments of a female nature, but you have much to offer in the Z world. We'd be stupid to Jepardize that. Welcome back, I know I missed ya. Dave
-
Reducing the amperage thru the ssystem can also help in this case. Follow NissanMans advice and pulling and cleaning bulbs and sockets, and the fuse/bulb test. But, you can also upgrade to an Electronic Flasher. The stock flashers are thermal and require resistance to operate. The electronic flashers use a circuit board and flash electronicly and require much less amperage to operate. They are about $12, hook a ground wire to the (-) terminal and I think the white wire is the + and green is the Load? And on a different note...... BARBIE!! Where the heck ya been? and How Ya been? Long time no see. What happened to your 73'? You're Lookin good, I quess thing DO get better with age. eh? Dave
-
Thanks Arne, My computer was doing 20 updates today and I couldn't get anything to work quickly. Was anyone else having trouble getting anything done on CZCC today? Also, DiseaZd and SSuspect, Got your orders and payments today. I also updated your Status on post #65 Thanks again Arne,Guy and Tim, Dve
-
OK, I've updated and added your names to the list. Haven't heard back from nahurry, Phred or pbarcher yet. Just need to know if money is on the way or not, that's all. This is going great so far. I just spoke with The Metal guy and he said the Final design is set in stone and being made as we speak. He also said I should be able to pick up at least half the order by Monday or Tuesday. Here's what he sent me. Dave White wolf wire works bracket#2[1].pdf
-
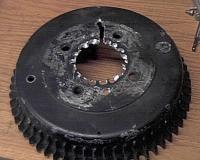
When I first rebuilt th 240Z, The drums insisted on NOT coming off. Guess I showed that drum who was boss, huh? Dave Didn't have a torch, but I sure as hell had a sharp drill bit on my 18Volt drill
-
Use a torch on the outer drums flat spots (around and between the studs) but not on the center. Heating the aluminum drum should help expand it to clear the center hub peice. Typically, the steel and aluminum weld themselves together with rust and corrosion. Sometimes the heat and some sharp blows can loosen the hold. Is the drumm loose and won't come off because it's catching on the pads? Or is the drum solid on the hub as if being held by rust? One of those answers will help us help you. Dave
-
Some of this will be :stupid: obvious so consider it a "Check list" Inspect the vaccum hose from the intake's ballance tube, to the firewall, then from that valve to the big vac booster behind the master cylinder. You can also pull both end off and test that valve on the firewall, air should only go toward the motor and not towards the vac booster. Replace if bad. Pads are cheap and easy to instal. Bleed the hell out of all 4 corners. Once the brakes are bled and the fluid is topped off, try the brakes again. Master Vac Boosters can and do go out. You can also check the push rod on the backside of the pedal. Use a 12mm? open end wrench and crack it loose. Spin the rod clock-wise so the rod goes towards the booster, but make sure the rod still has enough teeth on the pedal bracket to not fall off, then retighten. Look for leaks around the Master Cylinder (MC) and the firewall behind the booster. might be time for a new MC. They're pretty cheap (around $30 or $40) and cheaper if you use your old resevoirs on the new MC. Just clean the hell out of them before swapping them out. You can also adjust the outer rod of the booster into the MC but make sure they are Just Touching each other. You can gauge this by using some thick grease on the end of the rod and see how smooshed the grease is when you pull the MC back off. Hope this helps, at least a little. Dave
-
SteveE and GreenZZZ, I got your order in today and updated post #65. Thanks guys. Scotts Pearl... Like the guys said, Yes. And the bump stop is on post #52 and here's the Jegs page on it... Click this.. P/N 9-9101R or B Bump Stop and they're only $9 +S/H ol'red70, Thank you. Dave
-
If you wanna come out to Marysville, I got a set or 2 you can have. Near exit 200 off I-5 Dave
-
Here's a whole page of P/N's for ya. I think the Tie rod ends and ball joints are the same P/N? not sure and can't remember. http://energysuspension.com/search-result.html?make=24&model=386&year=1971
-
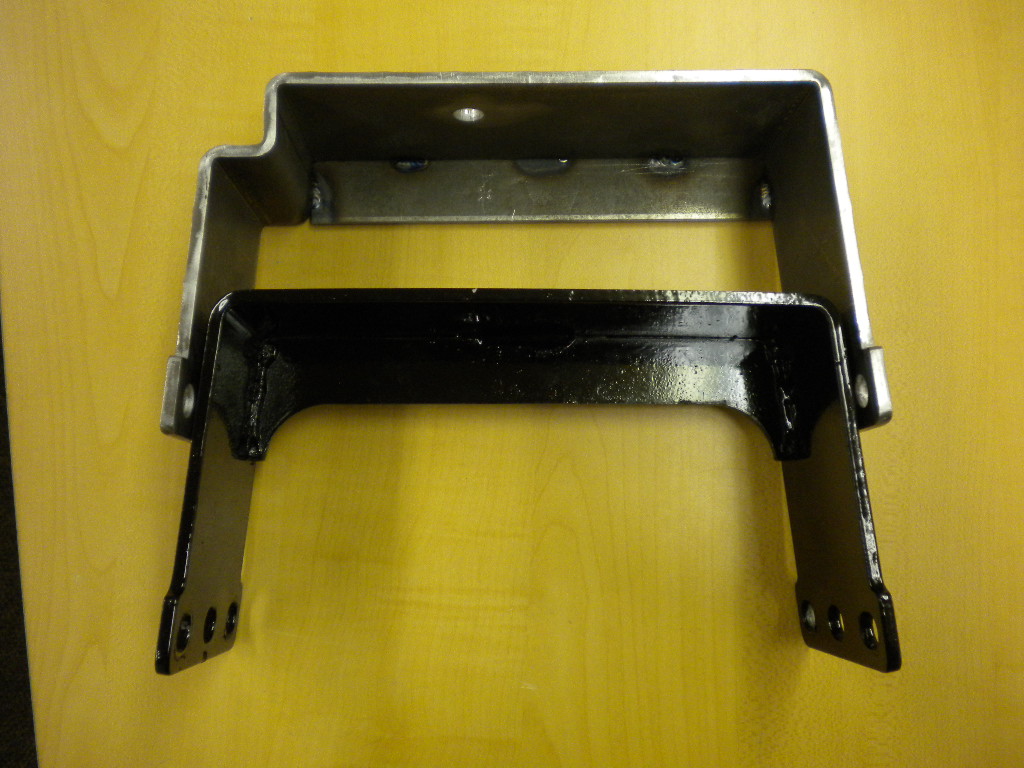
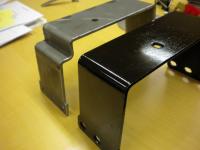
wow, and that's just the Prototype. He said the actual peices will have bigger and longer welds, ovaled holes for a less tolerant S30 (they're not all exactly the same) and a few other details. If you like that one, you'll love the final product. I'll put ya down for one Andy. Thanks man, Dave
-
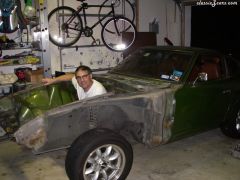 ya look like fred flintstone.... hahaha
 -
Hey Phred, Sorry bout that, you're on the list now. Had a brain-fart Dave
-
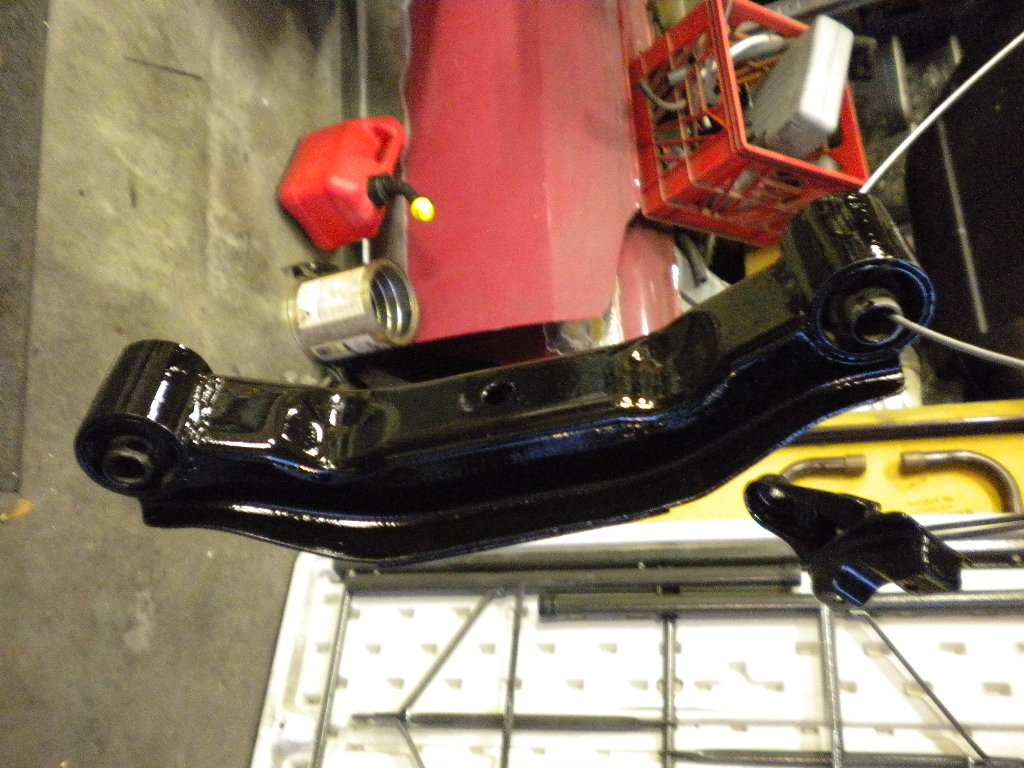
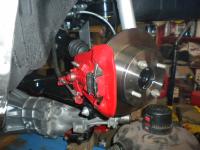
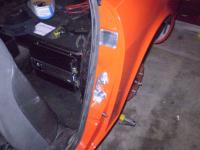
That's a crossmember for a transmission. 260Z and 280Z I believe. You can see it on my trans, under the caliper in the 2nd picture. Dave
-
Just checked the mail. Got 5 more orders in and updated the names and status on Post #65. Thanks again guys. The New pictures of the Prototype are on Post #78 Dave
-
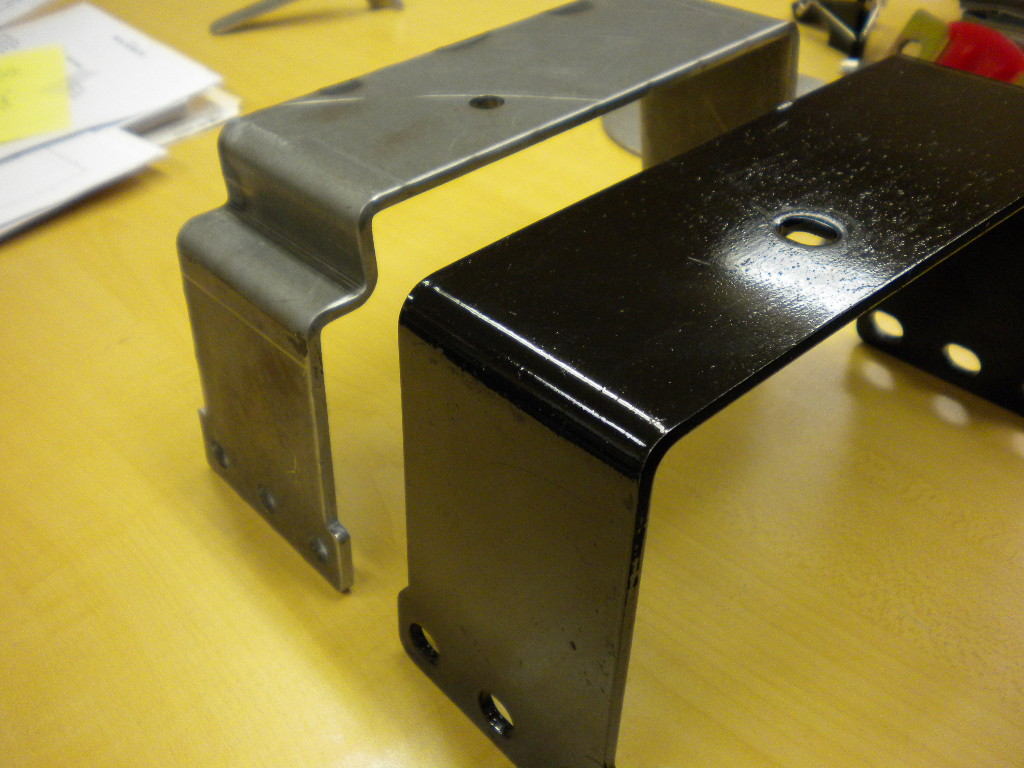
Absolutely Not. This is 3/16" steel. I can't imagine any 400HP or less motor bending this at all. The back plate is also welded on the sides and top. And if by some weird chance it did bend, I'd like to know what the hell is under the hood. I think you'd snap an axle, U-joint or something else before that would happen. Good question though, Dave
-
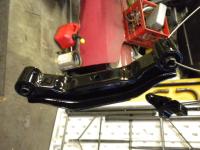
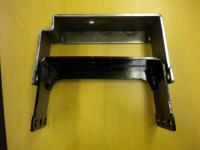
Just got back from the shop and measured up the new Mount. Brought it home and did a quick instal and everything is great. The pictures below if of the prototype but the production unit will have the oblong holes like the original. Also, back plate will be inset 1/4" like the original. It cleared the brake likes easily but as stated before, the fuel line bracket might need to be moved a few inches forward. But this will also allow you to retain the clamp and not have to remove it, just slide it forward. All new names were added and a few were updated. Here ya go. Dave

-
Just an FYI, I ordered 50 to be made. So if you don't see 50 names on post #65, then they are still available. Peter, you're on the list. Thanks guys. Dave
-
Looks good but make sure you tuck those wires before you're done. Or is that an Obvious thing? If you want, repost this in the Review section or on the Combo turn signal service thread. http://www.classiczcars.com/forums/showthread.php?t=24304 Keep us updated. Dave
-
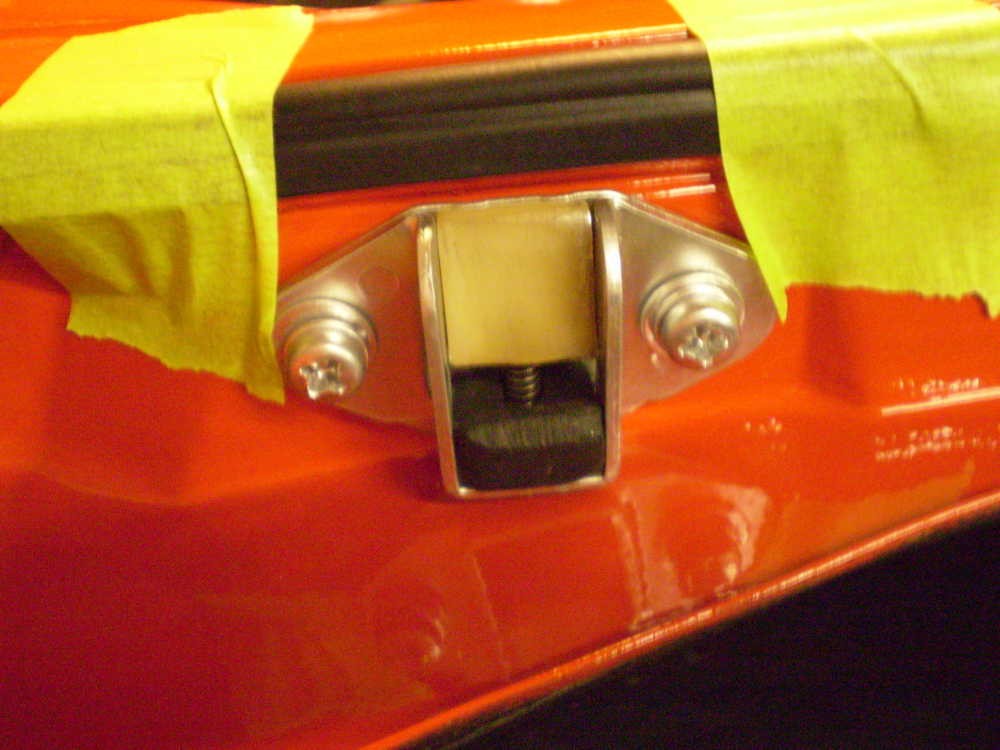
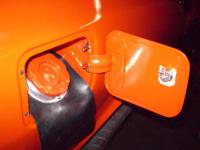
The fuel filler ring and the fuel doors lock clip, the hatch stopper and the doors lock clasp were all plated with the Tin-Zinc plating kit. Then polished with a soft cotton towel or a light metal polish. Sorry bout the other post, he just gets on my nerves. Eric ESTRADA sunglasses and dresses like Magnum P.I.... What-ever. Dave

-
No... Really Tom? After buying 3 sticks, you'd think I already knew that. DUH! Seriously? should I go back and write "Tin-Zinc Alloy" every where that I wrote Zinc? what are you trying to say? It's the same damn thing. Same kit you inquired about. Sorry to sound snippy, but I (we) already knew that it's a tin/zinc alloy. and when you order The kit, you should get EXTRA Tin-Zinc Alloy peices. Better? Going to bed, apparently my anti-grumpy pills are wearing off. Dave
-
IIRC, the long shaft goes on the Pass side and the shorter shaft goes on the Drivers side, as the ring gear is on the DS of the diff. So the longer would need to be on the PS of the diff. I have CV's in my 8/70 with my R200 diff. I just replaced the pass. side CV because of a ripped boot (from the end link bolt) And the shaft seemed long. The 83' turbo FSM should tell you the right answer. Anyone? Dave PS. If anyone buys a replacement from Schucks / O'Rileys, you'll need to grind the 1/4" lip off near the input shaft, as it hits the outer casing and doesn't allow full insertion until you do. ALSO, only the Passenger side (longer input shaft) is available. Apparently, the DS shaft is NLA. ?
-
As always, Thanks for the Rave Reviews. If you guys keep doing that, The fall from my pedastool will be a long one. Thanks guys. On to business..... If all the people that said they mailed an order last week truly did so, My mail carrier is gonna have quite the bundle for me tomorrow. I'll update with each peice of mail with an "Order and Payment Received" next to your name. I'll also keep updating names and status on post # 114 on page 12. bajcsi, SSuspect and =Enigma=, you're on. Thanks again guys, Dave