Zs-ondabrain
Free Member
-
Joined
-
Last visited
Everything posted by Zs-ondabrain
-
 yup, same problem here. I needed to adjust the screw on the booster to basically touch the MC as soon as the pedal was pressed lightly. I also adjusted the rod on the pedal to my own liking. Much better now, Dave.
 -
Pick-a-parts that allow you to pull your own parts probably won't charge more than $50 for that. They can't warranty the bearing and seals. $75 tops. unless it's an LSD diff. If the seals and bearings are bad, it's basically scrap metal until you spend big bucks on the rebuild.
-
The Hazzard switch is definately connected to the turn signals. The hazard switch makes the turn signals flash. If the hazard switch is weak or worn, this will effect the turn signals. Maybe just one of them or even all four corners. The dimmer switch is ONLY on the dash lights circuit, which is connected to the parking light circuit. The dimmer has NOTHING to do with the rest of the parking light circuit. If the dimmer seams to effect the turn signals, then a related ground is the likely culprit. A related ground is a ground wire that is used by more than one circuit. Dave.
-
But on a good note, he has a bigger motor for it "for a bump in power over the 600" I'm afraid that if you litterally "BUMP it" it will fall into a heap of rusty crap, right where it stands. But at least the 4 new tires will hold up against that "Bump" I'd give him $10 to see him throw it in the Dump. Dave.
-
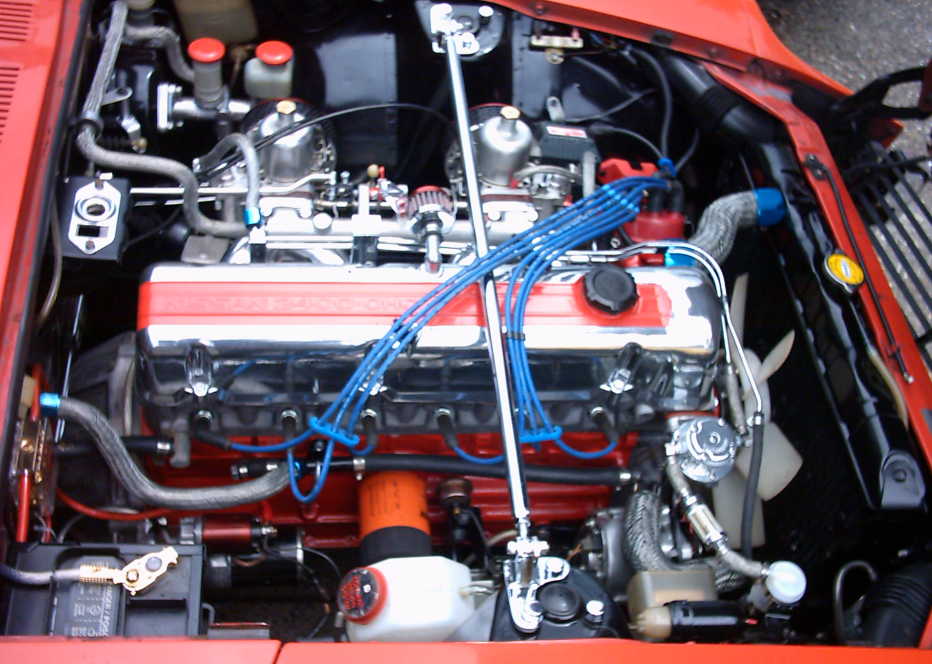
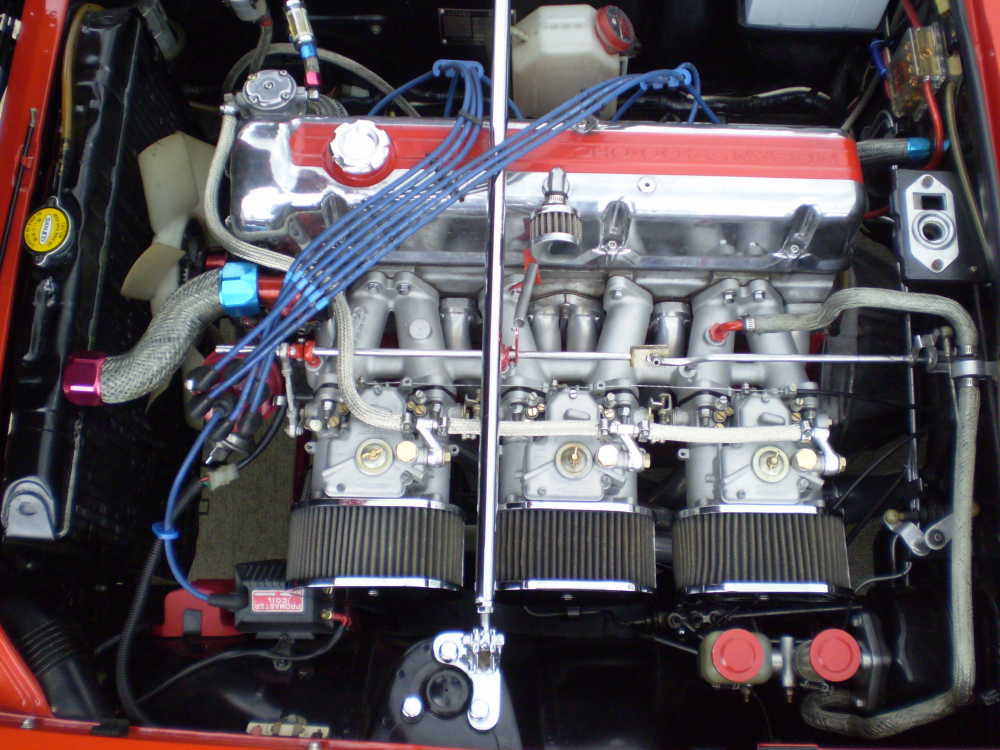
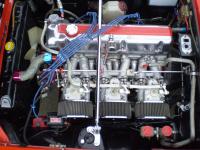
About 6 years........ Give or take a few years.....:stupid: In the pics below, you'll see the old color and the new color. Took a few days cause the longblock was still in there when I did it. First two are of the old Second two are of the finished bay The third is of the new Triples in the same bay. All the bling was basically "A little here and a little there" with no real set time limit or measurable hours. Dave


-
Yup, I'm cheap........... Or I know how to do what needs to be done for as little as possible. The $200 is a basic starting point. You can also use aircraft stripper, available in a spray can, then wash all the crap away. Takes about 3 cans @ $8. each. Then use a bottle of Marine clean to degrease and clean everything after rubbing everything down with the ScotchBrite Pads. Wash that off, dry everything with compresses air and a clean towel, then spray all metal with the Metal ready. ~~~~~~~~~~~~~~~~~~~~~~~~~~~~~~~~~~~~~~~~~~~~~~~~~ Paint stripper $24 Marine Clean 12oz bottle w/ spray attachment $12, gets you 2 bottles because you delute it 1 to 1. Metal Ready $12 for a 20oz w/ spray attachment. A little goes a long way, keep the metal surface wet with misting for about 20 minutes then wash it all off and repeat the drying process. Then Primer Then Paint and (clear coat if you want) Spot media blaster is only $15 at Harbor Freight and 30lbs of media (aluminum oxide) is $30 And the media recycles into the bag so the price per job just went down, big time. I can make it look awesome and stay that way for just over $100. Period. If I had money to blow, I would still take the route I just wrote. Yup, I'm cheap, but my work and craftsmanship speak for themselves. MLAW7.. Do what ever works for you, that's why you asked for options. Have a great week, Dave.
-
oops.........
-
$200............. Figure everything into the equation. I would POR15 the frame rails and under the battery. POR15 cost about $60 a quart and you'll onkly need about 4 or 5 ounces and that can is about $30. Sand paper to knock off the scale paint and rust $1 per sheet Many grit styles. Red ScotchBrite pad to rough up the good solid painted areas. $2 per pad Degreaser for the ares that recieved oil from the motor and such (I'd use Brake cleaner as it leaves less residue than most other degreasers. Metal Ready from POR15 is about $12 a bottle and is great for exposed metal. It's a Phosphoric Acid etcher. Make sure to use Anti-Seize on EVERY threaded nut and bolt. EVERY one of them. Green Masking tape is about $6.00 a roll for 1" wide. 1) roll should suffice. Primer can be anything from basic spray on Primer to a more Profesional 2-Part Epoxy Primer can that you break the seal, shake it, then spray it on. $$ not sure but more likely about $20 or more a can and one should do it. Read the can to find out the coverage of each can. Spray can paint like Duplicolor is used more offen than you think, With fantastic results. about $7 a can after tax. about 4 or 5 cans for a good 3 coats from the firewall to the front bumper. If I get a chance to do the same on the 260Z this winter, I'll tape off the tranny well about 5 or 6 inches back. Engine bay color to the tape and new Undercoating from the tape to the diff. A little more work but it'll pay off in the end. Less noise, less rust, etc, etc. Plus the satin black color of the undercoating will make the engine bay and tranny look even better. I guess it all comes down to what extant you're willing to go to make it look decent or fricken awesome. Take this for example......
-
I used the Ford Semi-Gloss black and the Chrystler Industrial Red. Both are Duplicolor Colors and readily available at the Auto Parts stores. I can't find the Part numbers online but it should'nt be a problem at the store. The Red is a hi-temp engine paint and the same color that my cars exterior color was modeled after. I had the paint shop mix it up and brighten it a little with some yellow and orange. No clear coats, just sprayed on as is. Dave.
-
I don't personally condone the Sony Explode series, they are too crispy and the bass responce is not as nice as the Other speakers I mentioned, but to each his own. When I mentioned the Infinity, I forgot to say it's the Reference series (kind of a Champagne Color. The Kappa Series are better but you'll pay much more for them. The Kappa's accept a lot more power and are more of a PRO series for high Wattage systems. The Infinity Reference Series will work nicely with stock deck power (10 watts or more) But just remember that most speakers have an RMS rating and were made to run at that wattage or more on an average basis. If the speaker says 10 to 125 watts, You should run no less than that 10 watts. RMS ratings on an Amplifier is a basic Average that the amp puts out, at a standard listening volume. Hope that defines the answer a little better, Dave.
-
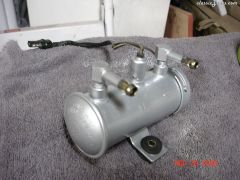 Fuel pump cleaned and painted. 2/74' 260Z pump
 -
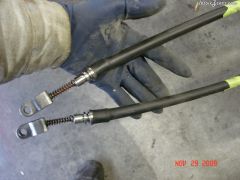 E-brake cables all cleaned up and ready for install
 -
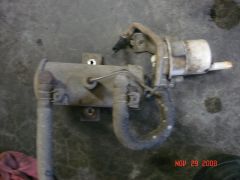 Fuel pump before cleaning and painting.
 -
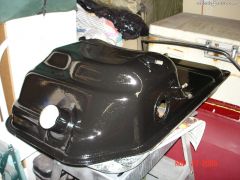
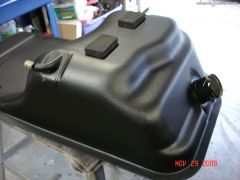 Fuel tank all done with POR 15 and New undersoating to stop the rust and quiet the tank a little
 -
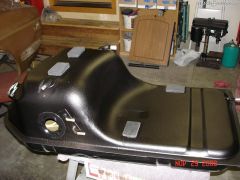 Fuel tank all done with POR 15 and New undersoating to stop the rust and quiet the tank a little
 -
I really like Infinty 6x9's as well as Polk Audio. They are fare priced and sound really good. Don't forget to soundproof the rear quarters whenever possible. And throw a peice or two of SP in the rear hatch. Lots of noise back there and you might as well finish the job in the rear. Dave.
-
My vin is RLS30-25342 and the build date is 2/74. So if I had to take a shot in the dark, I'd say your build date is about 3 or 4 of 74' Most likely 3/74'
-
That's what happens when you have too much money and not enough time. I'm doing a ground up rebuild (suspension rebuild w/ full Urethane kit, wheels and tires, body rust removal and paint, full lighting upgrades, full stereo/media system instal, electrical upgrades like power windows-locks-hatch pop-hidden door switchs, carpet, full weatherstripping kit, etc, etc...... And I don't plan on spending any more than $7 or $8 grand. It helps that I know almost every aspect of the build and am totally capable of doing 95% of the work myself. All this and I hope to keep with the 6 month plan and have her on the road by April'ish... Dave. You can keep up with my progress by clicking the 74' 260Z link in my Signature.
-
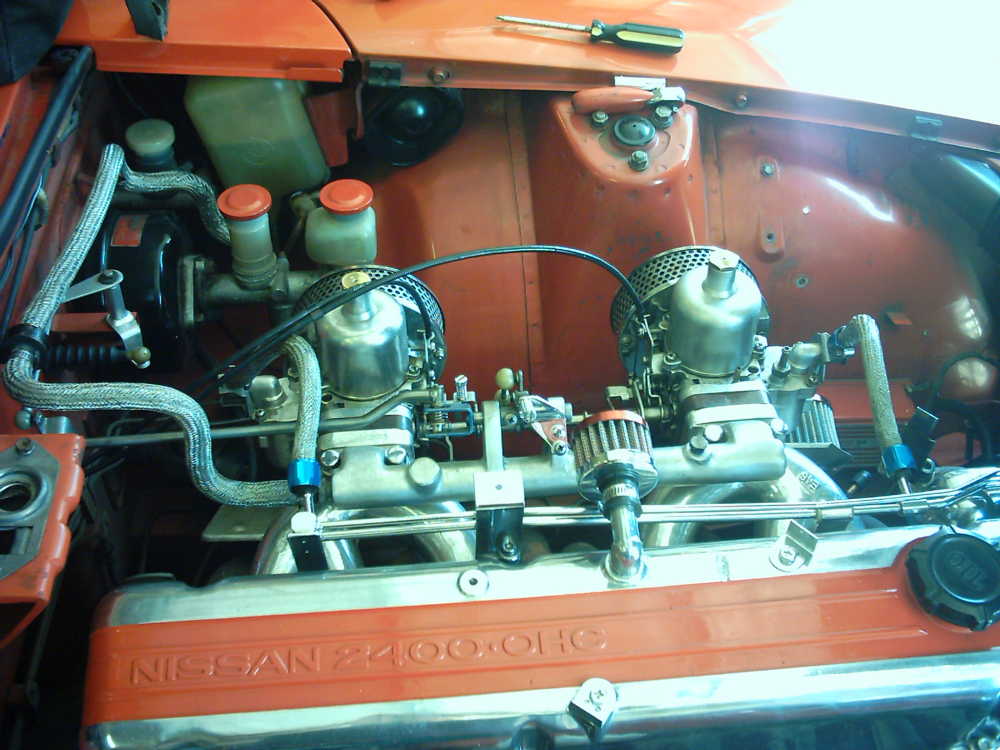
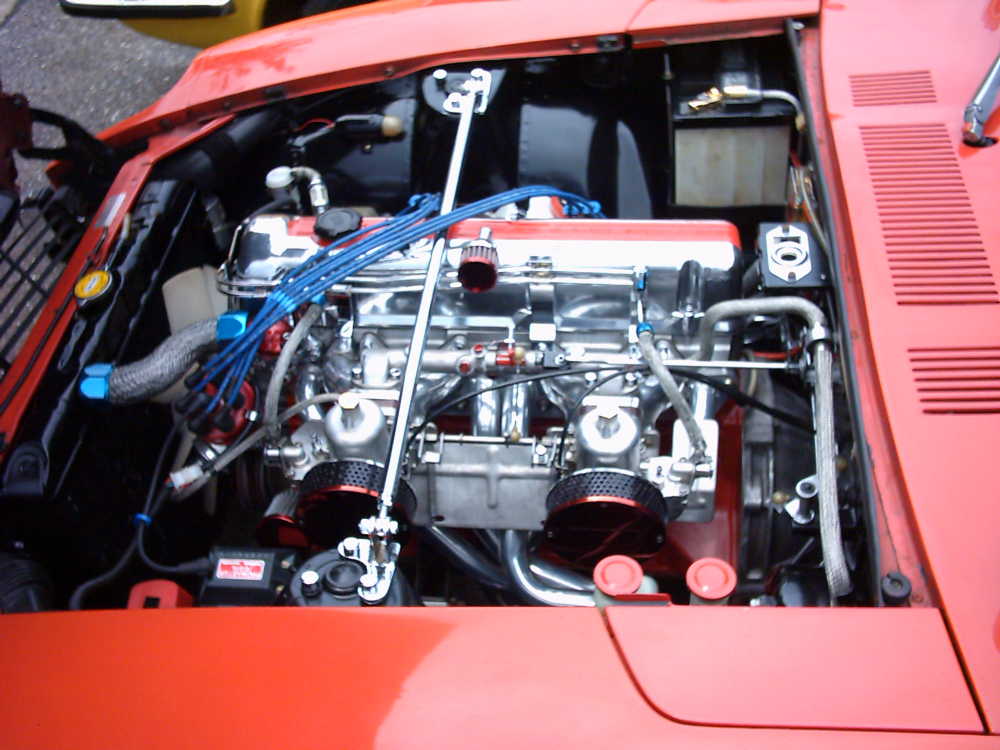
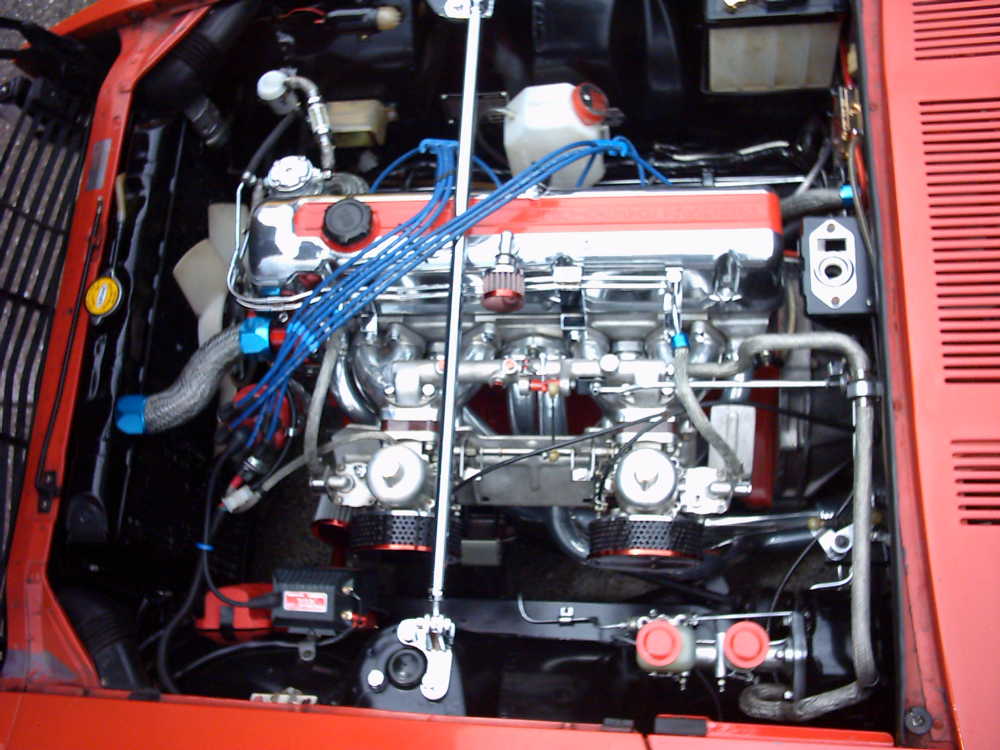
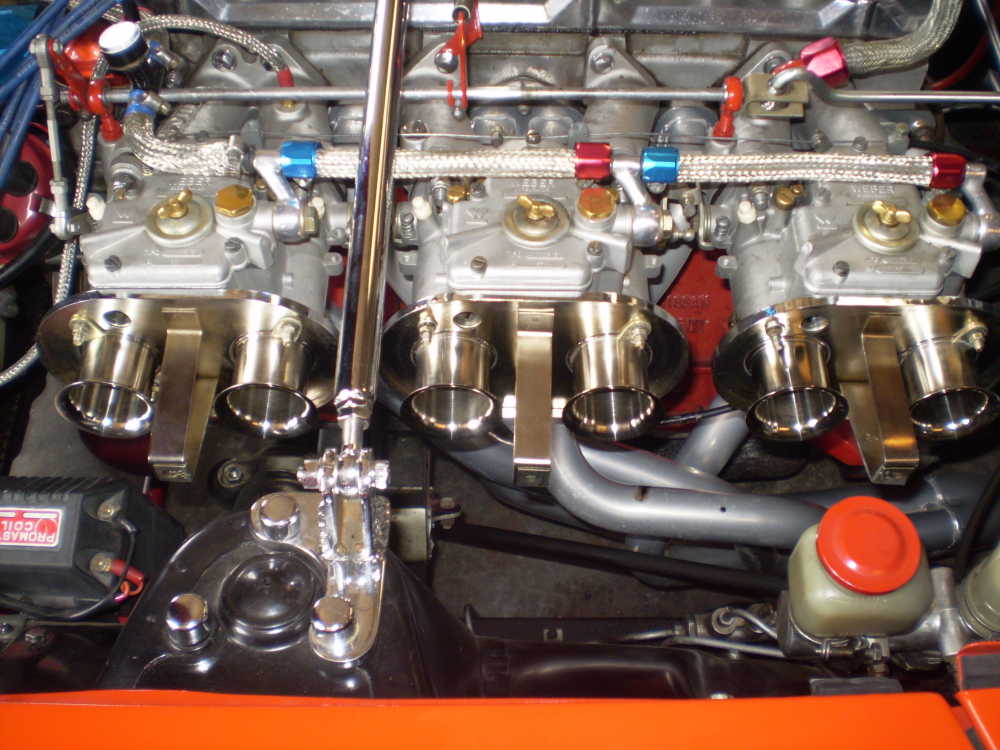
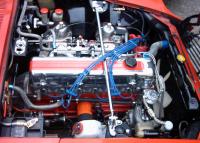
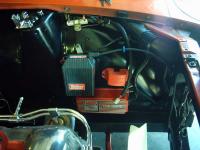
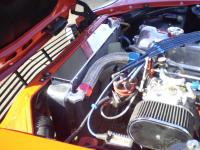
Thank you. Much blood has been spillt on that battlefield. All polished with sweat and tears. And a lot of help from Dupli-Color (Ford low gloss black and Chrystler industrial red on the block) I figure that with a heat sheild, the coil could be rubber mounted to the block and the MSD 6A and the Tach adaptor can come inside the car or near the washer fluid bottle area, hidden or out of site. Here's what it looks like on a good day. Dave. Before the triples webers,.....After the triples........No filter shot


-
Very nice job. It seems like Arne's car has Inspired many a paint job.
-
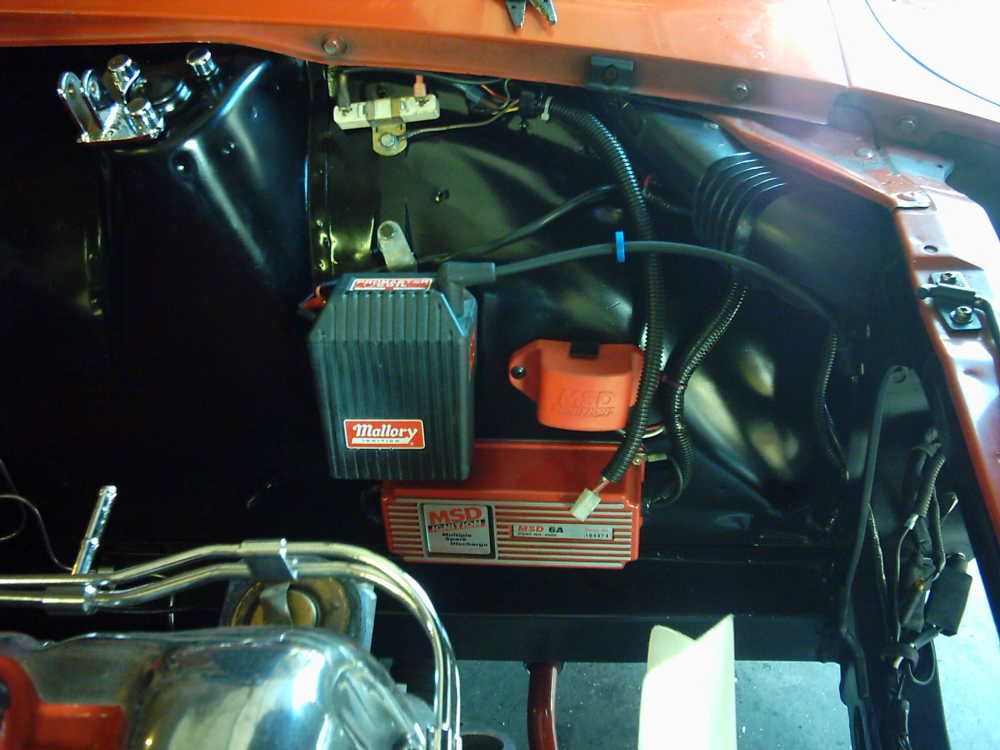
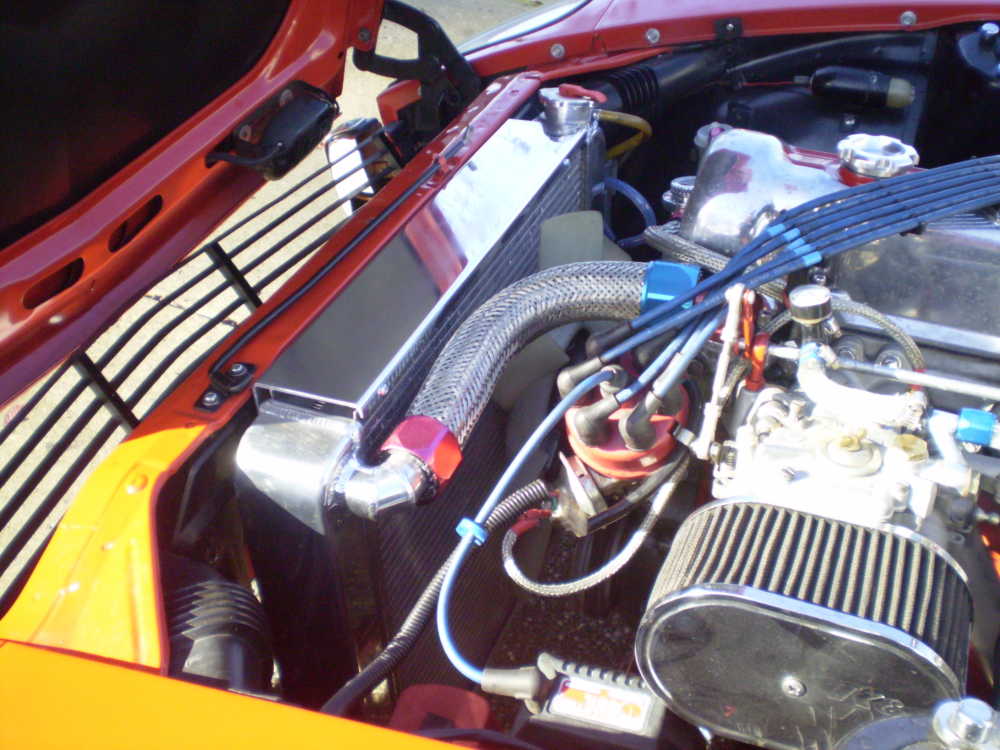
That's what I thought but wanted to know for sure. I love the idea but was always worried about heating up the coil because of the header heat. Here's what I'm working with, and can't do what you did. But maybe try something similar on the 260Z while it's under construction. Dave.
-
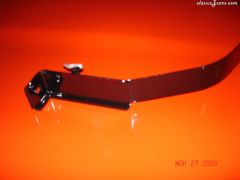 Tank strap looks new after media blasting, grinding and POR15.
 -
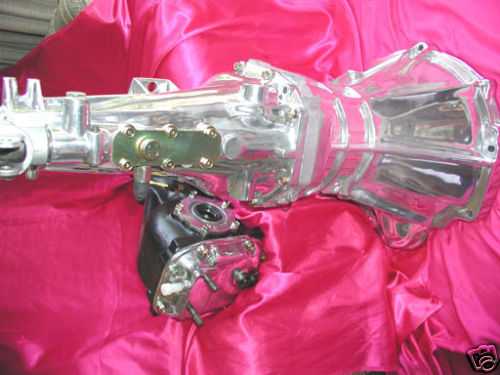
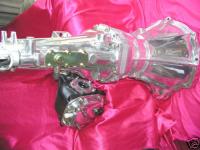
 One half shaft all ready to be installed after painting
 -
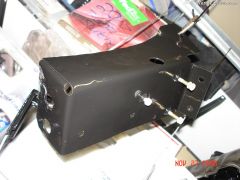 Fuel pump bracket all straightened out, media blasted and POR15'd
 -
 Top half of tank POR15'd and ready to do the other side.