


Zs-ondabrain
Free Member
-
Joined
-
Last visited
Everything posted by Zs-ondabrain
-
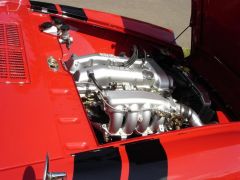
 I know this may sound dumb but, did you get the nuts or bolts on the exhaust manifold that have a large washer overlapping the intake flange? And just remember that heat and gooo tend to Glue the intake to the head. Also, on the new set-up in the second picture, that vaccum tube that goes from the #1 carb to the balance tube is suppost to go to the Distributor for vaccum advance. And don't forget to cap off the ballance tube aftr you remove the hose from it. And yes, there are a lot less parts on a clean set-up, compared to the Flat-top set-up. All those emmisions tubes and crap are unneeded for a 35+ year old car. Unless you're going for that "Concorse" look. Also, if you';re gonna go with a newer set-up and toss that old crap, toss the exhaust manifold for a new Header. You'll love the look and sound, not to mention a couple extra Horse Power. Dave
 -
And not one of you mentioned ELECTRICAL. So let me say electrical, electrical, electrical.. Non of the upgrades will matter if the electrical or Ignition system sucks. Don't get me wrong, I'm not knocking any advice, just pointing out the obvious. The headwork, intake and exhaust upgrades are awesome but you need Spark and lots of it. Make sure to stick with NGK plugs and wires. I'd suggest an infra-red / optical ignition system. It will stay true at higher RPM's and not peeter out or float like points do. It's more expensive but I'd go with a Mallory Unilite Distributor. Great solid distributor that's right up there with the other top names in Datsun Upgrades (Rebello, Tokico, Eiback, MSA and Weber) And on top of that distributor, you can go with an MSD 6A to multiply that spark and a Mallory Promaster Coil to increase that spark. I have this set-up in my Z and my NGK BP6ES plugs are gapped at 0.70 This set-up throws a 6+ inch white hot spark that'll make you think you're having a fricken heart attack. Take my word for it, it hurt, a lot. And I could go with a full 0.10 gap if I wanted. Look into different options, or cheaper ones but Do Not Skip the ignition system. And increase the size of your stock battery cables to no less than 4 gauge and make sure the ground points are optimum. Dave.
-
It's been a while since I added to this thread so I thought I'd Bump it up to let the readers know that everything still works great. Never blown a fuse, no issues with the wiring between the body and doors, still nice and quiet and strong. I've been asked 3 times this month about "Power windows" so I figured an update was in order and this bring it closer to the front page when people search for info on the subject. Dave.
-
It's a large gauge (12 ga?) red/ white wire and it splits near the right headlight.
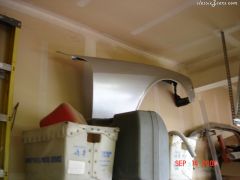 I think this is the final color. I sprayed it with Dupli-Color T191 Ultra Silver. I think it's a GM color but I don't care, I like it. Especially compared to the other silvers I looked at.
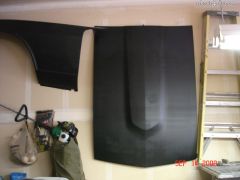 Black primer after the Icing and more block sanding.
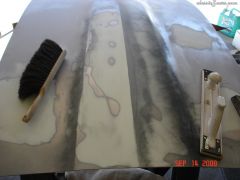 This hood was F%&$ked up. Nothing sand-blasting and a whole lot of pounding and block sanding can't fix. still has minor issues but it'll pass for now.
First.. The stock alternator only put out 40 amps, max. The ZX internally regulated alternator puts out 60 Amps, Max. That's 15 to 20 amps more than stock. That's the 15 to 20+ increase that you're seeing. No big mystery there. DeesZ, you can't check the VR because it's now internal. good suggestion though, on a stock 240z alternator, not the case here. If the stereo system is fairly new to the Z, don't dismiss it. If it's a large system like mine (800 watts) a newer battery and larger power wires are almost Required. I personally run 2 gauge battery wires from the battery to the distribution block and to the ground. From there, I run 4 gauge to the starter and to the amps. GROUNDING cables are more important than most people think. Great connections from the battery to the block, frame and ground cable on the engine harness are VERY important. I would personally enlarge the cables, upgrade the battery, refresh the grounds (clean them and make sure they are bolted down properly). THEN.... Loosen the ground terminal on the battery, remove it from the battery. wait 1 minute, make sure the doors are closed and everything is off, then slowly bring the terminal close to the battery post. Watch for even the smallest spark upon touching the terminal to the battery. If you see a spark, something is on and you need to address it. Use the old "process of elimination" by disconnecting electrical items and retest with each removal. You can also use a volt meter between the battery and the disconnected battery ground terminal. just remember that the internal clock and memory on your stereo has a very small draw and should be ignored. Make sure the stereo and amp(s) (if any) are well grounded and powered with the proper size power wires. Back to the original question. The ammeter will fluctuate more than before due to the increased amperage. Think of the ammeter as a mid-valve. If power is being drawn from the battery side, the meter will swing to the positive and if you're drawing from the fusebox, your needle will swing to the negative. Hope some of this clears things up a bit. just another 2 cents in the pot. Dave.
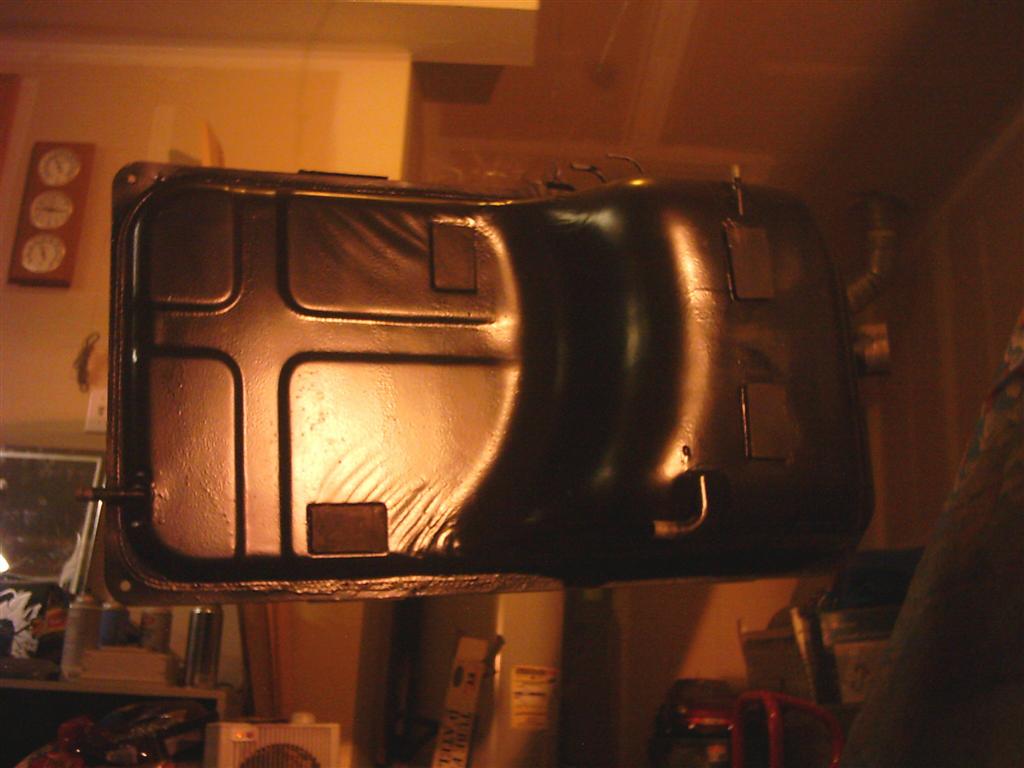
I went with a Satin black. I primed the tank with black primer then coated the whole thing with Dupli-color Professional Undercoating. Then I painted the straps to match the Z's top coat.
This hood was F%&$ked up. Nothing sand-blasting and a whole lot of pounding and block sanding can't fix. still has minor issues but it'll pass for now.
First.. The stock alternator only put out 40 amps, max. The ZX internally regulated alternator puts out 60 Amps, Max. That's 15 to 20 amps more than stock. That's the 15 to 20+ increase that you're seeing. No big mystery there. DeesZ, you can't check the VR because it's now internal. good suggestion though, on a stock 240z alternator, not the case here. If the stereo system is fairly new to the Z, don't dismiss it. If it's a large system like mine (800 watts) a newer battery and larger power wires are almost Required. I personally run 2 gauge battery wires from the battery to the distribution block and to the ground. From there, I run 4 gauge to the starter and to the amps. GROUNDING cables are more important than most people think. Great connections from the battery to the block, frame and ground cable on the engine harness are VERY important. I would personally enlarge the cables, upgrade the battery, refresh the grounds (clean them and make sure they are bolted down properly). THEN.... Loosen the ground terminal on the battery, remove it from the battery. wait 1 minute, make sure the doors are closed and everything is off, then slowly bring the terminal close to the battery post. Watch for even the smallest spark upon touching the terminal to the battery. If you see a spark, something is on and you need to address it. Use the old "process of elimination" by disconnecting electrical items and retest with each removal. You can also use a volt meter between the battery and the disconnected battery ground terminal. just remember that the internal clock and memory on your stereo has a very small draw and should be ignored. Make sure the stereo and amp(s) (if any) are well grounded and powered with the proper size power wires. Back to the original question. The ammeter will fluctuate more than before due to the increased amperage. Think of the ammeter as a mid-valve. If power is being drawn from the battery side, the meter will swing to the positive and if you're drawing from the fusebox, your needle will swing to the negative. Hope some of this clears things up a bit. just another 2 cents in the pot. Dave.
I went with a Satin black. I primed the tank with black primer then coated the whole thing with Dupli-color Professional Undercoating. Then I painted the straps to match the Z's top coat.
 Also not in the movies, but.... On Saturday Night Live, in the 80's?? They did a "MR. Bill" skit where Mr. Bill is placed in his travel Trailer and Mr. Hand says "we're gonna go for a little ride" Much to Mr. Bills dismay. Mr. Hand ties a rope to the trailer and the next scene is a 280Z doing doughnuts in the parking lot with the trailer attached and the playdough dog is being drug behing the trailer as well. It was a short movie but it was a Z and on TV. so does it count? Of coarse it does. Dave.
Anyone else besides Jeff and his friend, and me and leah? If I'm gonna wait for a ferry for up to 3 hours, in 90 degree heat, it'd be nice to know that I'll know some people who will be there, when we Finally get there. What sucks is that it's a 25 minute drive, as the crow flies, but it'll take Hours after waiting for 2 ferries and riding them, driving the whole length of 525 and finally putting (Driving slowly) thru town to avoid a ticket. I need a break from building upgrades and it'll be nice to spend a whole day with my two favorite Ladies (Leah and the Z). So like I first said..... Anyone else??
So I'll bring up the subject again, Being as how it's only a day away. Me and Leah will show up on Saturday for the day only. So all who are going or making an appearence, please chime in now. Hope to see as many as possible on Saturday, Finally got my "FairLady Z" emblems from MSA and installed them last night. JFYI Dave.
That's when you say " If you're gonna give me a ticket, then just do it. But don't pull me over then Insult me AND my car" Basically, Don't make me take my seatbelt off, you would'nt like me Outside my Z"
Sorry bout that guys, #86 is correct. just click on the Bitmap image on the first post. http://www.classiczcars.com/forums/attachment.php?attachmentid=21025&d=1198483165 Also, TARMAC, I sent a picture of the correct Relay info to your Regular email. 20/30 or 30/40 amp relay 5-pin SPDT Dave.
Sounds great. But if you have a Points distributor, that would explain your 5500rpm wall. They are most likely floating at that RPM. Easily fixed with an infra red or electronic distributor. Lots of info on those set-ups here at CZCC. I personally run a Mallory Unilite Dist. with an MSD 6A and Mallory Promaster coil and my plugs are gapped at about 0.070 instead of 0.032. I can easily run her up to 7000RPM and the only kicker is vibration from an old unballanced motor at that high of an RPM. Nothing a good rebuild and ballance won't fix. Also look into More fuel at Hi RPM's. You're on the right track, just a few things here and there and you're good to go. Dave.
And those has been posted and discussed to death. Not saying we don't like them but basically "Been there, done that" Many many times.
Also not in the movies, but.... On Saturday Night Live, in the 80's?? They did a "MR. Bill" skit where Mr. Bill is placed in his travel Trailer and Mr. Hand says "we're gonna go for a little ride" Much to Mr. Bills dismay. Mr. Hand ties a rope to the trailer and the next scene is a 280Z doing doughnuts in the parking lot with the trailer attached and the playdough dog is being drug behing the trailer as well. It was a short movie but it was a Z and on TV. so does it count? Of coarse it does. Dave.
Anyone else besides Jeff and his friend, and me and leah? If I'm gonna wait for a ferry for up to 3 hours, in 90 degree heat, it'd be nice to know that I'll know some people who will be there, when we Finally get there. What sucks is that it's a 25 minute drive, as the crow flies, but it'll take Hours after waiting for 2 ferries and riding them, driving the whole length of 525 and finally putting (Driving slowly) thru town to avoid a ticket. I need a break from building upgrades and it'll be nice to spend a whole day with my two favorite Ladies (Leah and the Z). So like I first said..... Anyone else??
So I'll bring up the subject again, Being as how it's only a day away. Me and Leah will show up on Saturday for the day only. So all who are going or making an appearence, please chime in now. Hope to see as many as possible on Saturday, Finally got my "FairLady Z" emblems from MSA and installed them last night. JFYI Dave.
That's when you say " If you're gonna give me a ticket, then just do it. But don't pull me over then Insult me AND my car" Basically, Don't make me take my seatbelt off, you would'nt like me Outside my Z"
Sorry bout that guys, #86 is correct. just click on the Bitmap image on the first post. http://www.classiczcars.com/forums/attachment.php?attachmentid=21025&d=1198483165 Also, TARMAC, I sent a picture of the correct Relay info to your Regular email. 20/30 or 30/40 amp relay 5-pin SPDT Dave.
Sounds great. But if you have a Points distributor, that would explain your 5500rpm wall. They are most likely floating at that RPM. Easily fixed with an infra red or electronic distributor. Lots of info on those set-ups here at CZCC. I personally run a Mallory Unilite Dist. with an MSD 6A and Mallory Promaster coil and my plugs are gapped at about 0.070 instead of 0.032. I can easily run her up to 7000RPM and the only kicker is vibration from an old unballanced motor at that high of an RPM. Nothing a good rebuild and ballance won't fix. Also look into More fuel at Hi RPM's. You're on the right track, just a few things here and there and you're good to go. Dave.
And those has been posted and discussed to death. Not saying we don't like them but basically "Been there, done that" Many many times.
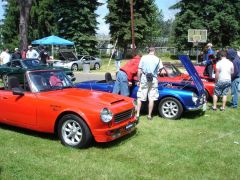
 I did'nt catch a name as it was a late arrival and non-registered car. Maybe the Canby Host or one of it's members would have a clue. The whole Roadster was well assembled and looked as good as the engine compartment.
Retard your timing by 3 degrees and try it again.
Sounds like you're missing the ground wire at the switch or the ground wire isn't plugged into the correct connector. If you find it is the switch, I build completely rebuilt sets for $175 and warrantee my work. You won't find that on Ebay. You should have one positive and 2 negatives at the headlight plug. Switch off=all three are grounds. Switch on= one positive and one neg. until you flip the Hi/Lo switch Check the white Hi/Lo switch for a ground on the center terminal. If no ground, check for loose wires use an ohms meter to see if the switch is working. Let me know if you need a set of rebuilt switches. Dave wolfin32z@yahoo.com
The new ST part number is 60135 for the 240z's and early 260Z's and 60145 for the late 260Z'z (8/74') to 1978' I too did a search and found nothing other than the above info.
Thanks you again to all who have added pics and info. I'm almost at a point where I can start making switch sets apon requests. I'll be throwing sets into the Classified section Whenever possible. They are completely rebuilt and the best damn deal you're gonna find for the money. Besides, I Warrantee my work, try and find that on Ebay. There is currently a set of EARLY switches in the Classifieds. (late 69 to early or mid 71') Let me know what you think and if you have any special requests. Thanks again guys, Dave.
I did'nt catch a name as it was a late arrival and non-registered car. Maybe the Canby Host or one of it's members would have a clue. The whole Roadster was well assembled and looked as good as the engine compartment.
Retard your timing by 3 degrees and try it again.
Sounds like you're missing the ground wire at the switch or the ground wire isn't plugged into the correct connector. If you find it is the switch, I build completely rebuilt sets for $175 and warrantee my work. You won't find that on Ebay. You should have one positive and 2 negatives at the headlight plug. Switch off=all three are grounds. Switch on= one positive and one neg. until you flip the Hi/Lo switch Check the white Hi/Lo switch for a ground on the center terminal. If no ground, check for loose wires use an ohms meter to see if the switch is working. Let me know if you need a set of rebuilt switches. Dave wolfin32z@yahoo.com
The new ST part number is 60135 for the 240z's and early 260Z's and 60145 for the late 260Z'z (8/74') to 1978' I too did a search and found nothing other than the above info.
Thanks you again to all who have added pics and info. I'm almost at a point where I can start making switch sets apon requests. I'll be throwing sets into the Classified section Whenever possible. They are completely rebuilt and the best damn deal you're gonna find for the money. Besides, I Warrantee my work, try and find that on Ebay. There is currently a set of EARLY switches in the Classifieds. (late 69 to early or mid 71') Let me know what you think and if you have any special requests. Thanks again guys, Dave.

Important Information
By using this site, you agree to our Privacy Policy and Guidelines. We have placed cookies on your device to help make this website better. You can adjust your cookie settings, otherwise we'll assume you're okay to continue.